Embed Size (px)
Citation preview

Work Safe, Work Smart Lesson 3: Preventing Workplace Injuries and Illnesses3.1
Description:Students are introduced to theABC’s of preventing workplaceinjuries or illnesses. They thenbrainstorm ways to apply theABC prevention strategies toexample hazards. They alsodiscuss the reasons workerschoose to take risks in theworkplace, even when they knowhazards are present.
Learner Outcomes:Students will be able to do thefollowing:
1. Describe three strategiesused to prevent workplaceinjuries or illnesses.
2. List examples within eachprevention strategy.
3. Identify the pros and cons oftaking risks in the work-place.
4. Perceive that workplaceinjuries or illnesses can beprevented.
5. Identify the attitudes thathelp a person remain safe inthe workplace.
F a c t :
Fifty-one percent of
teens injured at work
reported receiving no
safety training and
eighteen percent re-
ported that no supervi-
sor was present at the
time of their injury.1
Key Concepts:1. Most workplace injuries and
illnesses can be avoided bytaking the right preventativesteps.
2. Three main ways to preventworkplace injuries or ill-nesses are represented bythe letters ABC:
• Administration
• Building barriers
• Communication
3. The best way to preventworkplace injuries is todesign engineering controls(part of Building barriers),such as shields, guards, etc.This strategy is the bestprevention strategy becauseit does not depend on peoplemaking safe choices everytime. You change the envi-ronment, which is easier tocontrol and more reliablethan people.
LESSON
3 Preventing WorkplaceInjuries and IllnessesPreventing WorkplaceInjuries and Illnesses
KEY TO SYMBOLS:
OVERHEADS
HANDOUTS
SUPPLIES
NOTABLE
FACTS
TEACHER
TIPS

Lesson 3: Preventing Workplace Injuries and Illnesses Work Safe, Work Smart3.2
MaterialsNeeded:❑ Overhead 1.1 (from
each class period,Lesson 1 and 2)
❑ Overheads 3.1-3.5❑ “ABC Prevention
Strategies” fact sheet❑ “Hazard Prevention
Worksheet”❑ Chalkboard or easel❑ “Material Safety Data
Sheet”❑ “Material Safety Data
Sheet Questions andKey”
❑ Bottle of ammoniacleaner
Preparation Needed:1. Review the “ABC Prevention Strategies” fact sheet, so you are familiar
with the three main prevention strategies and the examples of each.You may want to make class sets of these fact sheets rather thanindividual sets.
2. Review the “Workplace Safety Attitude Survey” (distributed to stu-dents at the end of Lesson 2), so you are familiar with these attitudestatements.
3. Think through the costs and benefits of different safety measures.
4. Make copies of the “Material Safety Data Sheet” (MSDS). You maywant to make class copies or put this form on an overhead. The ammo-nia cleaner is a concrete example of a chemical with an MSDS.
Directions:
The ABC’s of Injury Prevention (25 minutes)1. Give each student a copy of the “ABC Prevention Strategies” fact sheet.
Explain:This fact sheet outlines three basic ways to prevent inju-ries or illnesses in the workplace. These three ways arerepresented by the letters A, B, and C.
Allow students about five minutes to read through the fact sheet.
2. Show Overhead 3.1. Review each strategy using Overheads 3.2, 3.3,and 3.4.
3. Explain:Since it is easier and more reliable to change the workplacethan the worker, the most important prevention strategieswill be those that involve engineering controls (part ofBuilding barriers). Employers should apply these strate-gies first.
For example, if workers often get burns when makingfrench fries in a hot oil fryer, you could teach workers adifferent way to handle the equipment. To prevent burns,however, people would have to apply this training everytime they worked with the fryer.
“ABC PREVENTION
STRATEGIES” HANDOUT
OVERHEADS 3.1-3.4

Work Safe, Work Smart Lesson 3: Preventing Workplace Injuries and Illnesses3.3
It would be better to build a barrier, like a shield thatprevents oil from splattering on workers. The shield wouldalways be in place, so you wouldn’t have to depend onworkers doing something correctly to keep themselves safe.The shield does the work. The workers don’t have to. Thatmethod is the safest way to design a workplace.
Distribute the “Hazard Prevention Worksheet” to the students. Allowstudents time to read the handout. Select several of the hazards listedto review with the students. Allow the opportunity for students topractice the ABC’s of prevention by talking through the classificationprocess.
4. In order to further practice the ABC’s of prevention, draw three col-umns on the chalkboard or easel. Label them “Administration,” “Build-ing Barriers,” and “Communication.” Say:Let’s work through some hazard situations to show how wemay apply the three ways of preventing injuries or ill-nesses.
5. Show Overhead 1.1, which partially was filled out by this class duringLesson 1. Say:Let’s take one of the injuries or illnesses we identifiedduring our first session. First, what are the hazards thatcaused each of these injuries or illnesses?
Write students’ answers in the right-hand column on the overhead.Select one of the hazards from the right-hand column. Ask:Using the ABC’s of prevention, how could we prevent inju-ries or illnesses from this hazard? Since building barriersis the best prevention, let’s begin with “Building barriers.”What kind of engineering controls could be built to protectworkers?
Write barrier strategies for this hazard on the chalkboard. A variety ofhazards are used as examples below. The following are some possibleanswers:
Building barriers:
Engineering Controls• Build a shield on application equipment to reduce exposure to
fertilizer.• Purchase equipment with guards around moving parts.• Install seat belts and rollover protection equipment (ROPS) on
tractors.• Install nonslip flooring.• Store chemicals in a locked cabinet.• Install vents to get rid of smoke.
HAZARD PREVENTION
WORKSHEET
OVERHEAD 1.1
Lesson 3: Preventing Workplace Injuries and Illnesses Work Safe, Work Smart3.4
Personal Protective Equipment• Use protective gear such as gloves, respirators, and safety clothing.• Wear gloves when using cleaning products.
7. Fill in the “Administration” and the “Communication” examples aswell. The following are some possible answers for each column:
Administration:
Administration involves the rules and procedures put in place toprotect workers. Most administrative activities will be done by youremployer or supervisor.• Set up procedures stating where and how cleaning products should
be stored.• Require that everyone working in a noisy area wear earplugs.• Limit the amount of time each person spends typing.• Allow no food in the work area.• Set a time limit for how long workers must wait before going into a
field after it has been sprayed with pesticides.• Set an age limit for working with an auger.
Communication:
• Train workers to apply pesticides safely.• Teach people about the potential health problems caused by
contact with human blood.• Train people to store and dispose of cleaning products safely.• Post safety reminders on bulletin boards and in hallways and areas
frequented by the workers.
8. Go through a number of hazards discussed by students in the firstlesson using this ABC process.
9. Explain:Last session we identified hazards in a workplace. Once ahazard has been identified, we can take steps to prevent itfrom injuring someone by using the ABC’s.
Some preventative actions, such as setting up rules andprocedures, are your employer’s responsibility. But if yousee a hazard in the workplace, you can bring the hazard tothe attention of your employer.
Most employers encourage their workers to identify work-place hazards. Some even offer bonuses for employees whocome up with good safety ideas. Be aware that some em-ployers try to save money or time by allowing their employ-ees to work in unsafe situations. All workers have the rightto a safe workplace.

Work Safe, Work Smart Lesson 3: Preventing Workplace Injuries and Illnesses3.5
Understanding A Material Safety Data Sheet(10 minutes)
1. Hold up a bottle of ammonia. Ask:How many of you use ammonia or some type of cleaner atwork? What are the potential hazards of using a productsuch as this? How can you find out?
2. Explain:Your employer should always tell you the hazards in yourworkplace. If you are working with chemicals such asammonia, they should also provide you with a form called aMaterial Safety Data Sheet.
Give each student a “Material Safety Data Sheet” or display theoverhead.
An MSDS form, as they are called, lists all the hazardsrelated to using a particular chemical. This MSDS form isfor an ammonia cleaner. This form tells you what thechemical is made of, what the health effects from beingexposed to this chemical could be, and how to store anddispose of the chemical.
You can see, just by looking at this form, that it’s not easyto read. But if you read carefully, it tells you what thehealth concerns are with using ammonia.
3. Read questions from the “Material Safety Data Sheet Questions andKey” out loud to the group. Then have students locate the answers onthe MSDS form. Use the key to check students’ answers. Ask as manyquestions as time or interest permits.
4. Explain:If you are ever in a work situation in which you are usingchemicals, be sure to ask for an MSDS form and have youremployer explain it to you.
Working around hazardous chemicals is very serious. Youmay not feel the effects right away. Health problems maypresent themselves later in life. Some of the immediateeffects of working with hazardous chemicals are fatigue,headaches, and sleep disturbances. Some effects that showup later may be cancers, memory problems, birth defects,and sterility.
“MATERIAL SAFETY DATA SHEET”
“MATERIAL SAFETY DATA SHEET
QUESTIONS AND KEY”
TEACHER TIP:Ask your schoolcustodian forexamples of
MSDS forms forchemical products
used at yourschool. Share
these forms withstudents.

Lesson 3: Preventing Workplace Injuries and Illnesses Work Safe, Work Smart3.6
5. Explain:Information on an MSDS may be complicated. If you haveany questions, be sure to ask your employer. Your employeris required by law to share this information with you.
Analyzing Workplace Attitudes (15 minutes)Note: The purpose of this discussion is not to persuade students to yourpoint of view but to help them discover for themselves what their own levelof acceptable risk in the workplace is.
Even if students come to a conclusion that you do not agree with, it isimportant to give students that freedom in this discussion. Do not take anargumentative stance. Your role is to facilitate discussion.
1. Ask:Even if an employer does everything they can to preventwork injuries and illnesses, people still become injuredwhile working. Why do you think that is?
(Possible answers: A worker may not recognize that something is ahazard; even if workers recognize a hazard, they may still continueworking around that hazard without using the prevention strategies.)
2. Ask:Why might a person work around hazards without settingup prevention measures?
Look over the workplace safety attitude survey from Lesson 2 youfilled out before class. Discuss some of the attitude statements and howthose attitudes may affect health.
(Possible answers: Prevention is uncomfortable; busyness and rushing;concern over what the boss or other workers may think; underestimat-ing the danger; not knowing how to fix the danger; habit.)
3. Ask:People sometimes take risks with things they know arehazards. Can you name some things you or other people do,even though they may be risky?
(Possible answers: Drive fast; smoke; boat without wearing a life jacket;ride a motorcycle without a helmet; drink and drive.)
4. Ask:Can you name some things you or other people would notdo, because they are too risky?
(Possible answers: Jumping out of a plane without a parachute; racingacross railroad tracks right in front of a train.)

Work Safe, Work Smart Lesson 3: Preventing Workplace Injuries and Illnesses3.7
How do you decide how much of a risk you are willing totake? How do you know where to draw the line?
5. Explain:Each of us has to weigh the costs and benefits of being safeor taking a risk. We have to decide what balance betweenthese two things is acceptable to us.
Let’s take the situation of whether to install a guard on apiece of equipment. A guard is a device that prevents you(usually your hand) from getting caught in moving equip-ment. What are the benefits for you of taking this safetymeasure?
6. Show Overhead 3.5. Write “machine guard” in the “Safety Measures”column. Write the benefits that students describe in the second col-umn.
(Possible answers: Won’t lose an arm or finger; won’t lose your job due toinjury; you can work fast without worrying; don’t feel as stressed.)
7. Ask:What are the costs to you in having the machine guard inplace? Write these in the third column.
(Possible answers: It may be inconvenient; it may slow you down; it maytake more effort to work around it; the chances of you getting hurt mayseem so small, it seems like a waste of time.)
Looking at these benefits and costs, how would you weighthe two? Would you leave the machine guard on or take itoff? Would you be willing to risk losing your arm, for ex-ample, if you thought you could work faster?
(Again, allow students to give an honest, serious answer. Do not try toargue with them.)
8. Work through several examples of safety measures. Discuss the ben-efits and costs of each measure. Other possible examples could includenot wearing hearing protection or not using gloves while using clean-ing products.
(Possible answers: Benefits of hearing protection: don’t lose hearing;protect ears from having reduced hearing. Costs of hearing protection:can’t hear other people; can’t listen for other hazards or machinery thatsounds wrong; they are hot; they hurt your ears.)
(Possible answers: Benefits of wearing gloves with cleaning products:protect skin from chemicals; hands don’t dry out, get chapped, or dirty;can work with a chemical longer; can clean harder. Costs of wearinggloves with cleaning products: hard to grab objects with them; hot; workmay take longer; other people may think you are overly concerned.)
OVERHEAD 3.5

Lesson 3: Preventing Workplace Injuries and Illnesses Work Safe, Work Smart3.8
9. Explain:When you enter the work world, you take on a new level ofresponsibility for yourself and your coworkers.
We are often tempted to go for the short-term convenienceof taking a risk rather than the long-term benefits of beingsafe. But that choice can sometimes lead to long-terminjuries or illnesses.
Preventing injuries or illnesses is a two-step process. First,identify the hazard. Second, apply the ABC’s to reduce riskand prevent injury. Tomorrow, we will have the opportunityto further practice this two-step process.
10. Have each student turn in their completed “Workplace Safety AttitudeSurvey.” They will be graded on turning in the survey and not on theiranswers, since the answers are students’ opinions.
11. Say (only if students have individual copies of fact sheets):Remember to bring all your fact sheets to class next time,including the one you received today.
12. Before the session is over, have students check off tasks on their“Performance Criteria and Checklist.”
Taking It Home:No homework assigned for this class session. Remind students to bring alltheir fact sheets to the next class session (unless you have provided onlyclassroom sets).
Footnote:1 Massachusetts Department of Public Health. 2012. “Preventing Injuries to Working Teens.”
http://www.mass.gov/eohhs/docs/dph/occupational-health/teen-surveillance-update-12.pdf
Work Safe, Work Smart Lesson 3: Preventing Workplace Injuries and Illnesses3.9
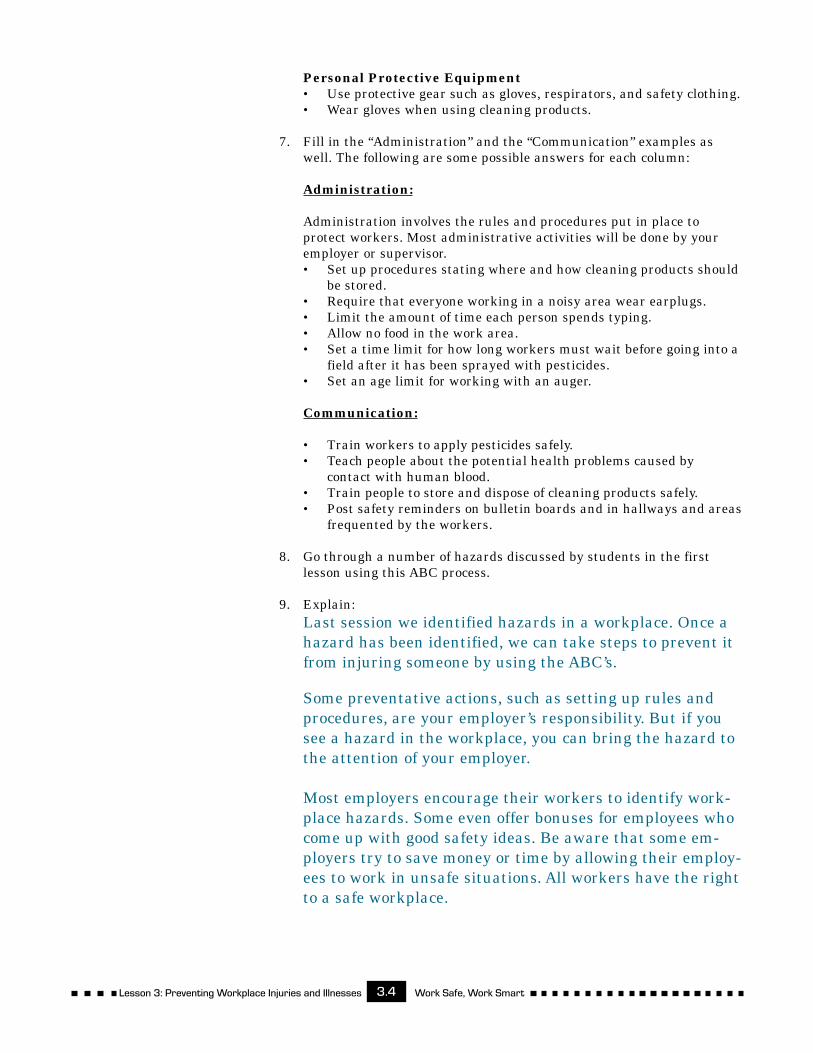
Overhead 3.1
The ABC’s of Injury and IllnessPrevention
Administration
Building barriers
Communication

Lesson 3: Preventing Workplace Injuries and Illnesses Work Safe, Work Smart3.10
Overhead 3.2
Administration
Rules and procedures putin place by an employer to limitworkers’ exposures to hazards
• Require people torotate jobs
• Regulate people’s workloadsand exposure
• Require protective gearor practices

Work Safe, Work Smart Lesson 3: Preventing Workplace Injuries and Illnesses3.11
Overhead 3.3
Building barriers• Engineering Controls
Protecting an employee byputting a barrier between aperson and the hazard
—Shields—Guards—Ventilation—Removal of the hazard—Locked cabinets
• Protective equipment—Earplugs—Masks—Gloves—Respirators—Boots

Lesson 3: Preventing Workplace Injuries and Illnesses Work Safe, Work Smart3.12
Overhead 3.4
CommunicationTraining and information providedto workers, so they understandwhat hazards are in the work-place and how to avoid them
• Teach people aboutpotential hazards
• Train them to do theirjobs safely
• Tell people who to talk towhen they have questionsabout worker safety

Work Safe, Work Smart Lesson 3: Preventing Workplace Injuries and Illnesses3.13
Overhead 3.5
Safety Measures Benefits Costs

Lesson 3: Preventing Workplace Injuries and Illnesses Work Safe, Work Smart3.14
ABC Prevention StrategiesOnce workplace hazards have been identified, strategies can be used to prevent these hazards from causinginjuries or illnesses. Three main prevention strategies are listed below. They are easily remembered bythinking of the letters ABC. Most often, the employer will use these strategies to make the workplace safe.Workers can also suggest these strategies to their employers. Once these strategies are in place, workersshould use them.
Prevention Strategies Examples
Administration
Definition: The rules andprocedures put in place by anemployer to limit workers'exposures to hazards.
• Establishing a rule that requires workers to wear personal protectiveequipment, such as gloves, goggles, or respirators.
• Requiring people to rotate jobs, so a worker is only exposed to ahazard for a short time.
• Disciplining workers, if they remove protective guards on machinery.
• Setting a rule that workers should not lift more than a certain weight.
• Establishing a rule that requires workers to wash their hands afterworking with hospital patients.
Building barriers
Definition: Creating a physi-cal barrier between a hazardand a worker by the followingmeans:
• Removing the hazard.
• Putting space between theworker and the hazard.
• Putting a physical objectbetween the hazard andthe worker.
Engineering Controls (removing the hazard or changing equipment toeliminate the hazard):
• Using less toxic cleaners or pesticides (removing the hazard fromthe workplace).
• Installing ventilation to remove toxic gases or smoke.• Using machines that require two hands to start, so both hands are
out of the way.• Properly storing hazardous chemicals in a locked cabinet.• Keeping controls a safe distance from the hazard (e.g., x-ray
machines).
Guards and Shields:• Putting shields or guards in front of dangerous equipment (e.g.,
saws or augers).
Personal Protective Equipment:• Wearing personal protective equipment such as hard hats, steel-toed
boots, gloves, hearing protection, respirators, goggles, and faceshields.
Communication
Definition: Training andinformation provided toworkers, so they understandwhat hazards are found inthe workplace and how toavoid them.
• Requiring safety training for all workers.• Providing each employee with a written safety manual.• Giving copies of Material Safety Data Sheets to workers. These
sheets give hazard information about chemicals that workers may beusing.
• Notifying an employer when equipment is not functioning properly.• Establishing a safety committee which includes workers.

Work Safe, Work Smart Lesson 3: Preventing Workplace Injuries and Illnesses3.15
HeavyBoxes
Hazard Prevention Worksheet
The following are examples of ways the ABC’s of prevention may be used to prevent injuries or illnesses fromdifferent hazards.
Hazard Administration Building Barriers Communication
1. Require heavy boxesto be stored on middleshelves.
2. Limit the amount ofweight a person isallowed to carry.
1. Store boxes close to where theyneed to be carried.
2. Move heavy boxes with a forklift.
3. Replace heavy boxes withsmaller, lighter boxes.
1. Train workers tocarry heavyobjects correctly.
CashRegister
1. Require at least twoemployees to be inthe store at all times.
1. Install bulletproof glass aroundthe cash register.
2. Store most of the money in asafe, for which only security(and not even the manager)knows the combination.
1. Show workers howto transfer moneyfrom the cashregister to a safe.
2. Teach workerswhat to do inemergencies.
CleaningProducts
1. Develop cleaningprocedures thatprotect the worker.
1. Use the least toxic cleaningproducts possible.
2. Use protective equipment (e.g.,gloves, mask).
3. Store cleaning products in acabinet away from workers.
1. Train employeesto use cleaningproducts correctly.
Lawn-mower
1. Set procedures forusing the mower.
1. Use machines that automati-cally turn off when the handlegrip is released.
2. Install guards on all rotatingequipment, with which employ-ees may come into contact.
3. Provide protective equipment(e.g., steel-toed shoes, earplugs,gloves).
1. Train employeesto recognize andavoid unsafeconditions associ-ated with operat-ing lawn mowers.
IndoorPaint
1. Rotate work when-ever possible, soworkers spend lesstime around toxicfumes.
2. Require workers totake breaks.
1. Open windows and doors toallow ventilation.
2. Use the least toxic paintspossible.
3. Provide protective equipment(e.g., respirators).
1. Train workers towork with paintsin the safest waypossible.

Lesson 3: Preventing Workplace Injuries and Illnesses Work Safe, Work Smart3.16
Hazard Prevention Worksheet (continued)
Hazard Administration Building Barriers Communication
OutdoorWork
1. Provide shaded restareas.
2. Rotate workers tominimize exposureto sun.
1. Wear protective creams toavoid exposure to ultravioletlight.
2. Wear broad-brimmed hats thatshade head, neck, face, andears.
3. Provide drinking water.
1. Teach workersabout the hazardsassociated withsun exposure.
DeepFryer
1. Require employeesto allow oil to coolbefore cleaning thefryer.
2. Require employeetraining before use.
1. Set up shields, so workers donot come into contact withsplattered hot oil.
2. Provide protective equipmentfor workers.
3. Purchase a fryer that is easierto use and clean.
1. Train workers toproperly use andclean the fryer.
HumanInfections
1. Require workers towash their handsafter contactingcontaminatedmaterials.
2. Set up proceduresfor proper disposalof contaminatedmaterials.
1. Use needles that do not re-quire recapping.
2. Provide protective equipment(e.g., gloves, masks).
3. Provide infectious wastecontainers.
4. Provide clothing different fromregular street clothes.
5. Provide proper ventilation anddisinfection of work areas.
1. Train workers toproperly workwith infectedpersons and wasteproducts.
PowerAuger
1. Require use of safetyguards whenever themachine is operated.
2. Set up procedures forproper use of a powerauger.
1. Provide protective guards onthe power auger.
2. Set controls at a distance fromthe power auger.
3. Set up controls so a person hasto use both hands to start theauger.
1. Train workers toproperly use theauger.

Work Safe, Work Smart Lesson 3: Preventing Workplace Injuries and Illnesses3.17
Material Safety Data Sheet24 Hour Emergency Telephone:ACME Chemical: 1-800-XXX-XXXX
Ammonia Solution, Strong
MSDS Number: A5472 --- Effective Date: 10/01/2010 Supercedes 05-2000
1. Product Identification Synonyms: Ammonia Aqueous; Aqua Ammonia. CAS No.: Not applicable to mixtures. Molecular Weight: Not applicable to mixtures. Chemical Formula: Not applicable to mixtures. Product Codes: 9724, 9726
2. Composition/Information on Ingredients
Ingredient CAS No. Percent Hazardous
Ammonia 7664-41-7 27 - 31% YesWater 7732-18-5 69 - 73% No
3. Hazards Identification
Emergency OverviewPOISON! DANGER! CORROSIVE ALKALINE SOLUTION. CAUSESBURNS TO ANY AREA OF CONTACT. HARMFUL IF SWALLOWED,INHALED OR ABSORBED THROUGH SKIN.
J. T. Baker SAF-T-DATA(tm) Ratings (Provided here for your convenience) ----------------------------------------------------------------------------------------------------------- Health Rating: 3 - Severe (Poison) Flammability Rating: 1 - Slight Reactivity Rating: 2 - Moderate Contact Rating: 3 - Severe (Corrosive) Lab Protective Equip: GOGGLES & SHIELD; LAB COAT & APRON; VENT HOOD; PROPER GLOVES Storage Color Code: White Stripe (Store Separately) -----------------------------------------------------------------------------------------------------------
Potential Health Effects ----------------------------------
Ammonia is very alkaline and reacts corrosively with all body tissues.
Inhalation: Corrosive. Extremely destructive to tissues of the mucous membranes and upper respiratory tract. Symptoms may include burning sensation, coughing, wheezing, laryngitis, shortness of breath, headache, nausea and vomiting. Inhalation may be fatal as a result of

Lesson 3: Preventing Workplace Injuries and Illnesses Work Safe, Work Smart3.18
(Material Safety Data Sheet, continued)
spasm inflammation and edema of the larynx and bronchi, chemical pneumonitis and pulmonary edema.
Ingestion: Corrosive. Swallowing can cause severe burns of the mouth, throat, and stomach, leading to death. Can cause sore throat, vomiting, diarrhea.
Skin Contact: Dermal contact with alkaline corrosives may produce pain, redness, severe irritation or full thickness burns. May be absorbed through the skin with possible systemic effects.
Eye Contact: Corrosive. Can cause blurred vision, redness, pain, severe tissue burns and eye damage. Eye exposure may result in temporary or permanent blindness.
Chronic Exposure: Prolonged or repeated skin exposure may cause dermatitis. Prolonged or repeated exposure may cause eye, liver, kidney, or lung damage.
Aggravation of Pre-existing Conditions: No information found.
4. First Aid Measures
Inhalation: Remove to fresh air. If not breathing, give artificial respiration. If breathing is difficult, give oxygen. Get medical attention immediately.
Ingestion: If swallowed, DO NOT INDUCE VOMITING. Give large quantities of water. Never give anything by mouth to an unconscious person. Get medical attention immediately.
Skin Contact: Immediately flush skin with plenty of water for at least 15 minutes while removing contaminated clothing and shoes. Get medical attention immediately. Wash clothing before reuse. Thoroughly clean shoes before reuse.
Eye Contact: Immediately flush eyes with plenty of water for at least 15 minutes, lifting lower and upper eyelids occasionally. Get medical attention immediately.
Note to Physician: DO NOT induce emesis, perform gastric lavage or attempt neutralization after ingestion. Dilution with milk or water may be of benefit. Endoscopic evaluation may be required.

Work Safe, Work Smart Lesson 3: Preventing Workplace Injuries and Illnesses3.19
(Material Safety Data Sheet, continued)
5. Exposure Controls/Personal Protection
Airborne Exposure Limits: For Ammonia: —OSHA Permissible Exposure Limit (PEL) - 50 ppm (TWA) —ACGIH Threshold Limit Value (TLV) - 25 ppm (TWA), 35 ppm (STEL).
Ventilation System:A system of local and/or general exhaust is recommended to keepemployee exposures below the Airborne Exposure Limits. Local exhaustventilation is generally preferred because it can control the emissionsof the contaminant at its source, preventing dispersion of it into thegeneral work area. Please refer to the ACGIH document, IndustrialVentilation, A Manual of Recommended Practices, most recent edition,for details.
Personal Respirators (NIOSH Approved):If the exposure limit is exceeded, a full facepiece respiratorwith an ammonia/methylamine cartridge may be worn up to 50 times theexposure limit or the maximum use concentration specified by theappropriate regulatory agency or respirator supplier, whichever islowest. For emergencies or instances where the exposure levels are notknown, use a full-facepiece positive-pressure, air-suppliedrespirator. WARNING: Air purifying respirators do not protect workersin oxygen-deficient atmospheres.
Skin Protection:Wear impervious protective clothing, including boots, gloves, labcoat, apron or coveralls, as appropriate, to prevent skin contact.
Eye Protection:Use chemical safety goggles and/or a full face shield wheresplashing is possible. Maintain eye wash fountain and quick-drenchfacilities in work area.

Lesson 3: Preventing Workplace Injuries and Illnesses Work Safe, Work Smart3.20
Work Safe, Work Smart Lesson 3: Preventing Workplace Injuries and Illnesses3.21
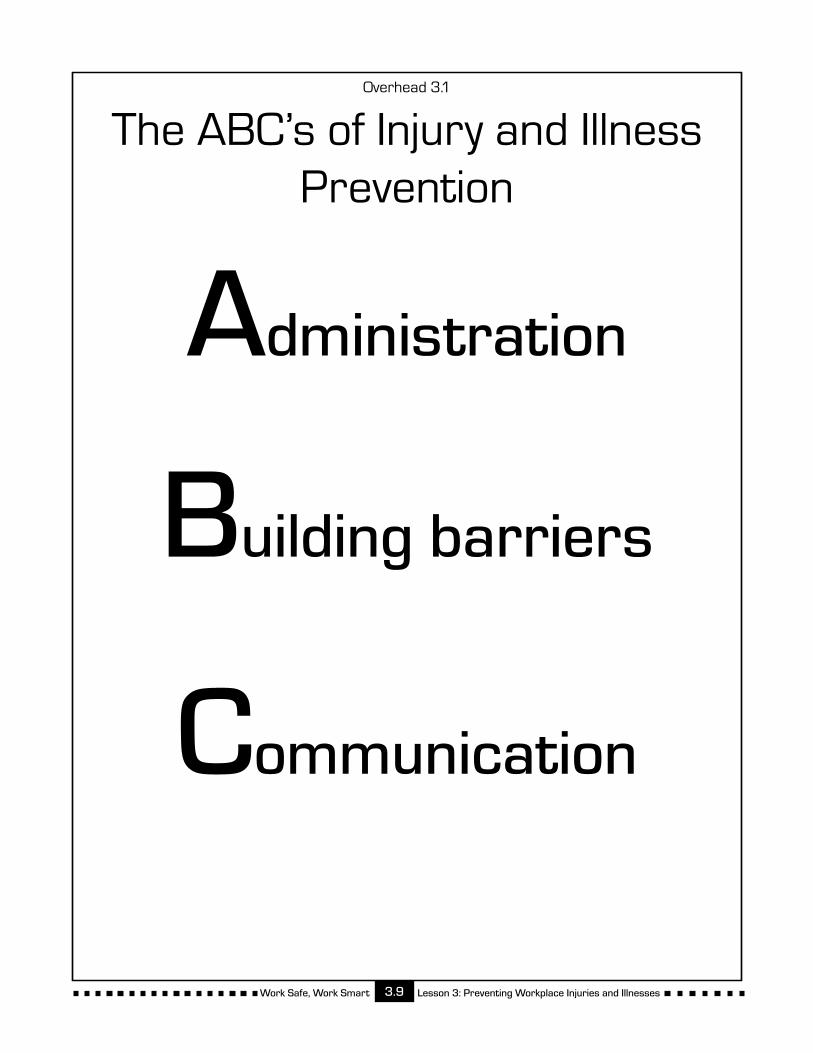
Material Safety Data Sheet Questions and Key
1. What chemical is this MSDS for?
Strong Ammonia SolutionThis chemical is common ammonia cleaner found in most grocery stores.
2. What are the ingredients that make up this chemical?
Ammonia and water
3. What “warning words” would you find on the chemical’s label (see Section 3 of the MSDS)?
POISON! DANGER! CORROSIVE ALKALINE SOLUTION. CAUSES BURNS TO ANY AREA OFCONTACT. HARMFUL IF SWALLOWED, INHALED OR ABSORBED THROUGH SKIN.
4. Is this chemical . . . (Fill in the words listed in the MSDS Section 3)
Flammable: slightlyCorrosive: severelyReactive when mixed with other chemicals: moderately
5. What protective equipment should you wear when using this chemical?
Goggles and shield; lab coat & apron; vent hood; proper gloves
6. What would happen to you if you ingested this chemical?
Swallowing could cause severe burns of the mouth, throat, and stomach, leading to death. Ingestion couldalso cause sore throat, vomiting, and diarrhea.
7. What would happen if this chemical came into contact with your skin or eyes?
May produce pain, redness, severe irritation or full thickness burns. May be absorbed through the skinwith possible systemic effects. May cause blurred vision, redness, pain, severe tissue burns and eye dam-age. Eye exposure may result in temporary or permanent blindness.
8. What would happen to you if you were exposed to this chemical over a long period of time (chronicexposure)?
Prolonged exposure may cause dermatitis. Prolonged or repeated exposure may also cause eye, liver,kidney, or lung damage.
9. What are some first aid measures you should take if the chemical is inhaled?
Remove to fresh air. If not breathing, give artificial respiration. If breathing is difficult, give oxygen. Getmedical attention immediately.
10. What do you think is the purpose of a MSDS?


![NIOSH Alert: Preventing Deaths, Injuries, and Illnesses of ... · 2001]. However, information from national surveys indicates that only one-third of work- related injuries are seen](https://img.dokumen.tips/doc/110x75/6045ad407b230b01a871007f/niosh-alert-preventing-deaths-injuries-and-illnesses-of-2001-however-information.jpg)