Embed Size (px)
Citation preview

App Tutorial

• Download the Korail app from the App Store (ios) or Google Play Store (android)
• Type Korail and it should be the first one displayed
Step 1

• Click “승차권예매”
Step 2

Menu Info
Date and Time
Departure StaFon
Arrival StaFon
# of people
Confirm BuJon

Date and Time
Step 3
-‐ Click the Date and Time secFon and choose your departure Fme.

Date and Time -‐ Choose the date on the leN.
-‐ Choose the Fme on the right.
-‐ Click 확인 to confirm.
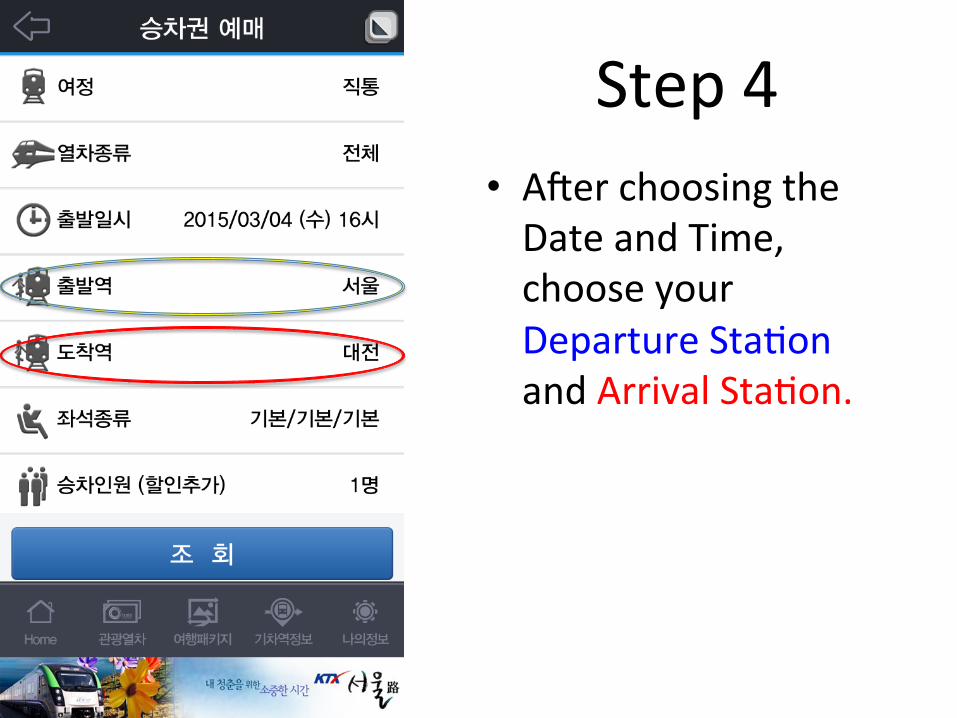
• ANer choosing the Date and Time, choose your Departure StaFon and Arrival StaFon.
Step 4

Sta1on Selec1on -‐ Scroll and search for your staFons
-‐ You can use the search bar (only Korean)
-‐ Or use the blue side bar for quick access to alphabeFcal lisFngs

• Now choose the number of people you’re buying Fckets for.
• If you’re only buying 1 Fcket, you can skip this step.
Step 5 (opFonal)

# of Tickets
# of Adult Tickets
-‐ Click on the number “1” then choose the number of Fckets you would like to purchase.
-‐ If you are only buying 1 Fcket then you can just skip this step.

• Choose the number of Fckets you want to buy
• Click the Back Arrow buJon on the top leN corner of the screen.
DO NOT CLICK 취소. It means to cancel.

Once everything seems okay, click 조 회 to conFnue.
Step 6
• This page just gives a brief summary
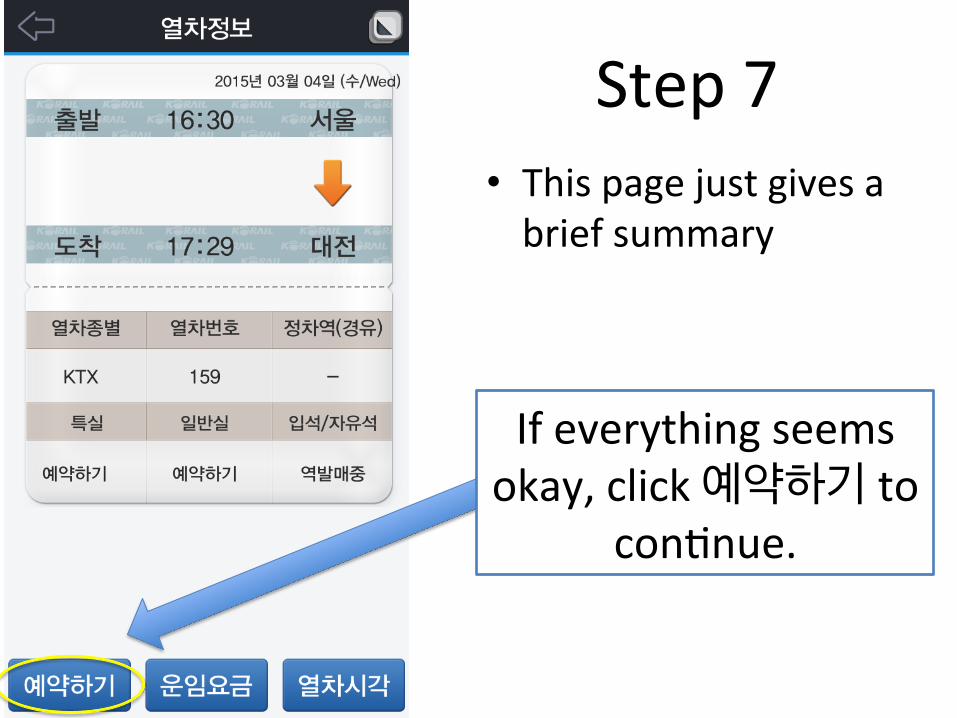
Step 7
If everything seems okay, click 예약하기 to
conFnue.
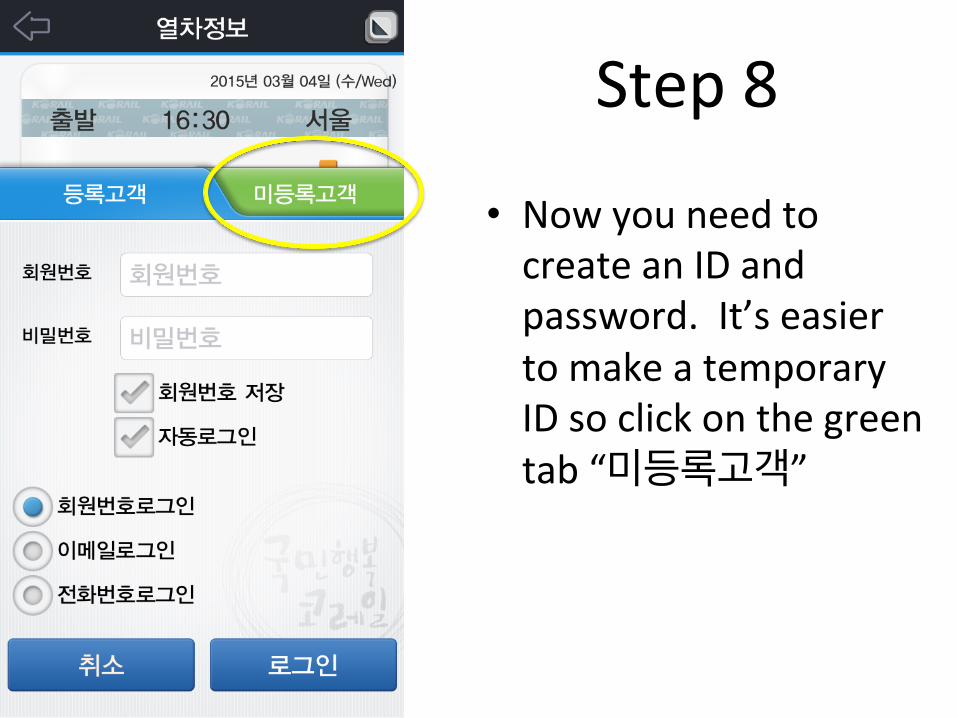
• Now you need to create an ID and password. It’s easier to make a temporary ID so click on the green tab “미등록고객”
Step 8
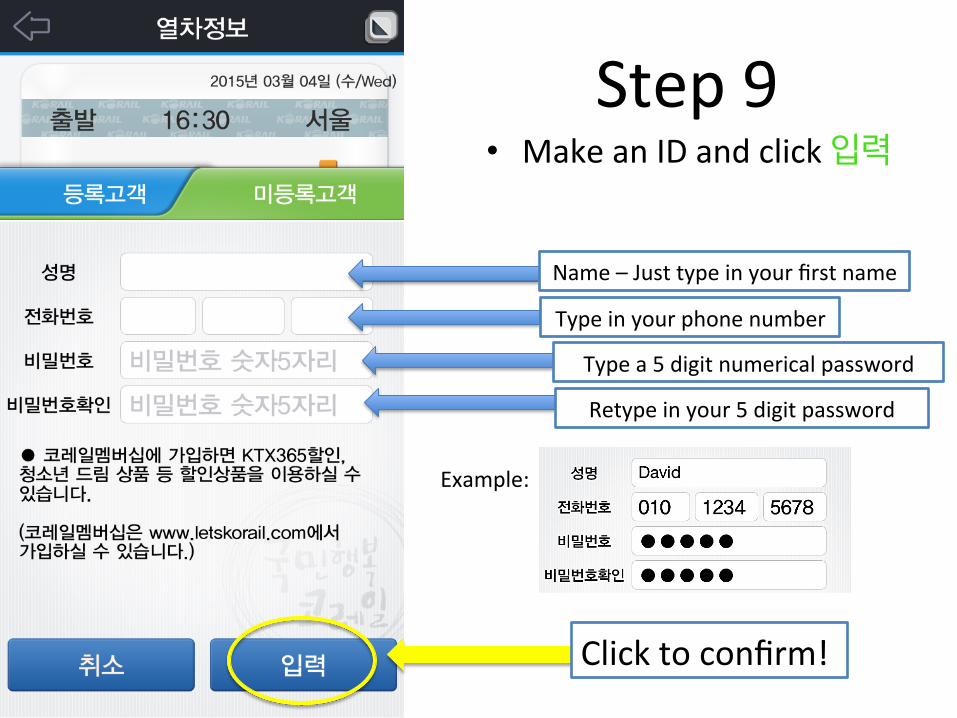
• Make an ID and click 입력 Step 9
Name – Just type in your first name
Type in your phone number
Type a 5 digit numerical password
Retype in your 5 digit password
Click to confirm!
Example:

• Now choose the type of seat you would like to use.
• Note: The standing Fcket doesn’t seem to be purchasable via app. If you want standing, you may have to purchase it at the staFon.
Step 10
1st Class
Standard
Standing

• Once you have chosen the seat type, click 좌석선택 to manually choose your seat.
• If you don’t care, just click 예약 to have your seat chosen automaFcally. (skip to Step 13)
Step 11
Select Seats AutomaFc

Step 12 Select Cart Number
Select Seat Numbers -‐ Column A and D are window
seats -‐ Red numbers -‐ facing toward
the same direcFon as where the train is going.
-‐ Blue numbers -‐ you’ll be facing backwards relaFve to the trains direcFon.
-‐ Greyed out numbers – seat unavailable.

Step 13
Once you have selected your cart and seats, click 예악 to conFnue.

Just click 확인 to conFnue.
Step 14

Step 15 This is just a summary. Make sure to check for any errors. If everything is okay, click 발권.

• Click this to enter in your card informaFon.
Step 16

Step 17 Card Number
ExpiraFon Date (Month/Year)
First 2 digits of your pin number
First 6 digits of your ARC number
Click 입력완료 to confirm your purchase. Restart

• Click 확인 and you’ll see your Fcket!
• If you bought more than 1 Fcket, just swipe to the leN and you’ll see the rest.
• I HIGHLY recommend taking a screenshot of each Fcket every Fme! The app can someFmes be buggy.
Step 18

Have a fun 1me travelling!