Embed Size (px)
Citation preview

User Instructions - Please keep for future reference
User Instructions - Please keep for future reference
Kimera Steel Chimenea
Produced in PRC for La Hacienda LtdHangar 27, Site C, Aston Down Airfield, Nr Stroud, Glos, GL6 8HR, UK
www.lahacienda.co.uk
Tools listTools required (not included)
IMPORTANT! – Carefully remove any packaging before use, but retain the safety instructions. These instructions form part of the product. Please take note of all of the safety warnings listed in these instructions.Please read these instructions in their entirety and retain them for future reference. These instructions should be stored with the product. This product is for domestic use ONLY and should not be used commercially or for contract purposes.Failure to adhere to these instructions could result in property damage, personal injury or death.
56254V1.0

2
Care and safe use guidelines
WARNINGS - CAUTION!• This product is intended FOR OUTDOOR USE ONLY.• NEVER leave a burning fire unattended.• FIRE HAZARD – Hot embers may emit while in use.• WARNING! - DO NOT use petrol, white spirit, lighter fluid, alcohol or other similar chemicals to light a fire as a rapid increase in temperature could damage the Chimenea.• This product is ONLY suitable for use with untreated wood, logs or La Hacienda Heat Logs.• DO NOT use this Chimenea on decking or any other flammable surfaces such as dry grass, wood chips, leaves or decorative bark.• This product is NOT intended for cooking or heating food.• Ensure that the Chimenea is positioned at least 2 metres away from flammable items.• DO NOT handle or move the Chimenea whilst alight as it will be hot.• ALWAYS USE safety tool provided and heat resistant gloves when in use as the unit will will be hot.• ALWAYS keep children and pets at a safe distance from the Chimenea when in use.
CARE & USE• Ensure that the Chimenea is positioned on a permanent flat, level, heat resistant non-flammable surface away from flammable items.• Ensure Chimenea has a minimum of 2m overhead clearance and has a minimum of 2m clearance from other surrounding items.• Decide on the location as above. The assembled Chimenea is heavy and it is therefore recommended the unit is not moved once positioned and must not be moved whilst in use. If it is necessary to move it once cooled, please use 2 persons to lift (do not drag) Chimenea across the floor.• The unit may be left outside all year if a suitable Chimenea cover is used to help protect it from bad weather.• As this model is made from steel, the surface will age and develop surface rust as soon as it is exposed to the natural weather elements and also from first use. This is to be expected; this does not affect use and is not a product fault. Please see below instructions on how to refresh the paint finish if desired.• To help reduce surface rust, rub the Chimenea with an oily rag after each use.• For safety reasons, always inspect your Chimenea prior to use for signs of fatigue and damage and replace your model as and when necessary.• Always use heat resistant gloves during use and when adding fuel.
HOW TO USE• This product is only suitable for use with untreated wood, logs or La Hacienda Heat Logs.• Do not overload with fuel, only one or two logs is sufficient.• To start the fire with wood, use paper and kindling and a few small logs.• Always use heat resistant gloves when adding fuel and repositioning the door as the unit will become very hot.• Always ensure that fuel does NOT protrude from the front opening of the Chimenea.
EXTINGUISHING • To extinguish unit – stop adding fuel and allow fire to die or douse with sand. DO NOT use water as this may damage the Chimenea.
STORAGE• When not in use, and if stored outside, cover the Chimenea once completely cooled with a suitable Chimenea Cover.• Remove loose paint and rust with a wire brush when needed and re-paint using La Hacienda High Temperature Paint.

Parts list
3
5 (1x)1 (1x)
2 (1x)
3 (1x)
4 (1x)
A
1
2
4
3
5
WARNING! - DO NOT over tighten bolts; only tighten with moderate pressure to avoid damaging the bolts or components of the Chimenea.
Prior to Assembly: Read the instructions carefully. Check all parts against the parts list. Carry out assembly on a soft surface to avoid scratching the paint. Please retain this information for future reference. For ease of assembly only loosely tighten bolts and then tighten fully when assembly is complete.
Assembly diagram
A (4x)
Assembly Instructions
4
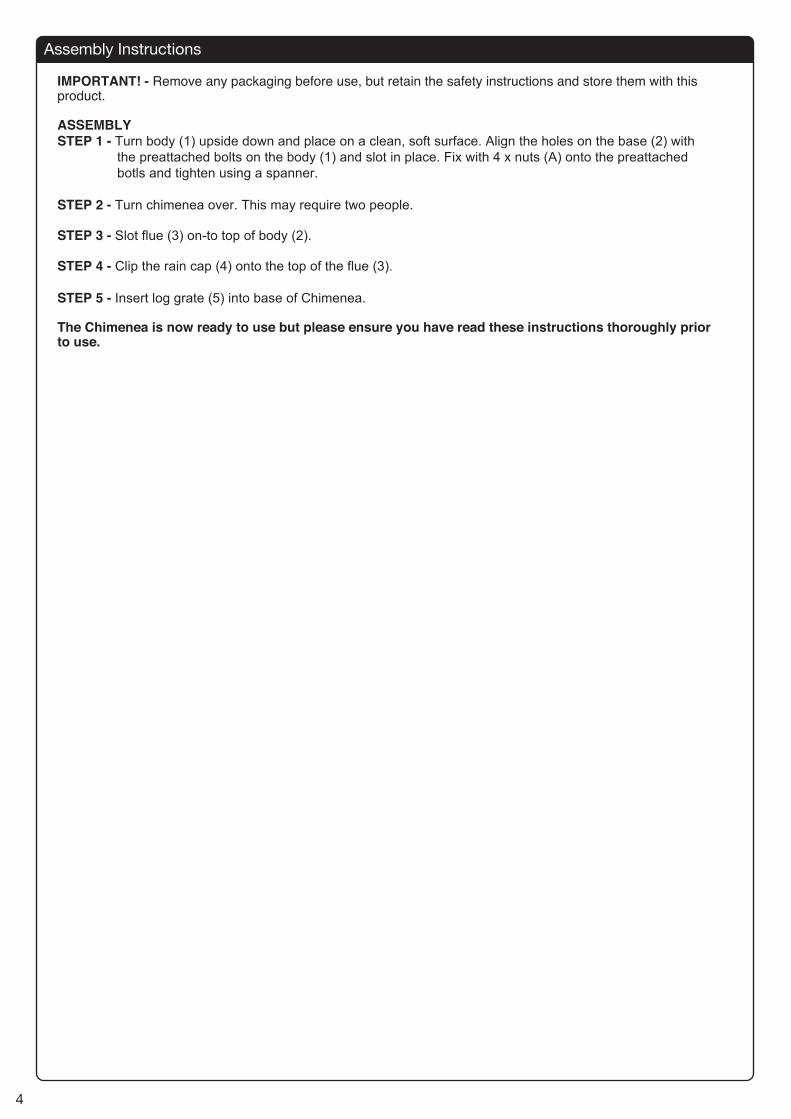
IMPORTANT! - Remove any packaging before use, but retain the safety instructions and store them with this product.
ASSEMBLYSTEP 1 - Turn body (1) upside down and place on a clean, soft surface. Align the holes on the base (2) with the preattached bolts on the body (1) and slot in place. Fix with 4 x nuts (A) onto the preattached botls and tighten using a spanner.
STEP 2 - Turn chimenea over. This may require two people.
STEP 3 - Slot flue (3) on-to top of body (2).
STEP 4 - Clip the rain cap (4) onto the top of the flue (3).
STEP 5 - Insert log grate (5) into base of Chimenea. The Chimenea is now ready to use but please ensure you have read these instructions thoroughly prior to use.