Embed Size (px)
Citation preview

Amigurumi Hands
I'm writing up a pattern at the moment which requires hands. I've been asked before how Imake hands with fingers for my amigurumis and, seeing as all the photos have already beentaken, I thought it would be a good idea to do a pattern/tutorial for a small hand. This willhopefully be a starting point for you to make hands to match your own toys.
I first came across ami fingers when I was making Alicia Ramirez's Nibbler. This pattern iswhere it all started for me when it comes to designing amigurumis. I learnt so many thingsfrom it - hands, crocheting around a chain, feet, shaping … plus it makes a perfect Nibbler. Iuse the same technique Alicia Ramirez uses in the Nibbler Pattern to make hands for my toys- the fingers are made first, crocheted together then you shape the hand and do even roundsto finish the arm.
Sharon Ojala from Amigurumi to Go has an excellent video tutorial on amigurumi hands. Shemakes the arm and hand first and then crochets the fingers. I recommend taking a look at thisas well and seeing which technique suits your needs better.
I'm a cartoon fan so I like to do a 4-fingered hand, but I've also included a pattern for a five-fingered hand.
Amigurumi Hands
SizeUsing a 3.0mm hook and DK/8ply yarn this pattern will give you a 4cm/1.6in
Terminology***This pattern is written using US crochet terminology***Rnd - Roundsc – Single crochetsc2tog – Single crochet two stitches together.
Kim Lapsley Crochets: Amigurumi Hands http://kimlapsley.blogspot.com.au/2013/07/amigurumi-hands.html
1 of 6 21/5/18, 11:08 pm
st – Stitch. This term covers ch, sc, hdc, sl st and other stitches used in crochet.
Make a ring – The starting point for crocheting in a spiral. Use which ever method you prefer.* * - Repeat the instructions between the asterisks as directed.( ) – The number of stitches that should be in a completed round are placed in brackets at theend of that round’s instructions.
Instructions
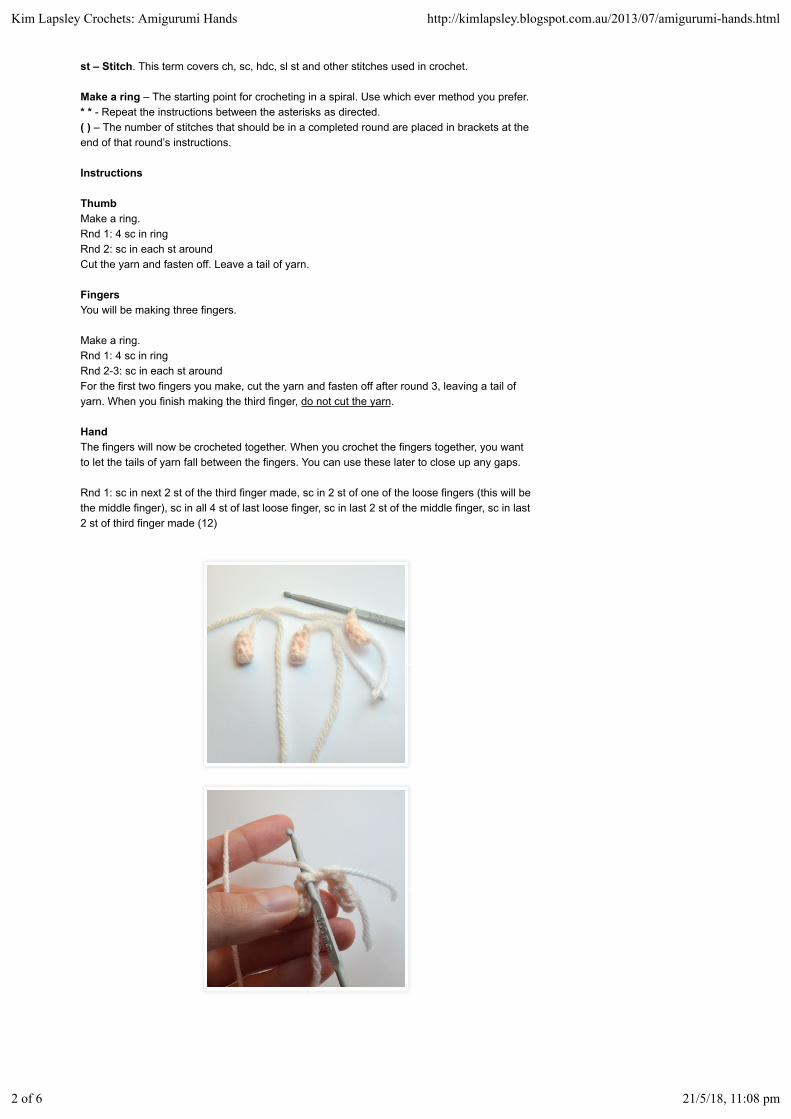
ThumbMake a ring.Rnd 1: 4 sc in ringRnd 2: sc in each st aroundCut the yarn and fasten off. Leave a tail of yarn.
FingersYou will be making three fingers.
Make a ring.Rnd 1: 4 sc in ringRnd 2-3: sc in each st aroundFor the first two fingers you make, cut the yarn and fasten off after round 3, leaving a tail ofyarn. When you finish making the third finger, do not cut the yarn.
HandThe fingers will now be crocheted together. When you crochet the fingers together, you wantto let the tails of yarn fall between the fingers. You can use these later to close up any gaps.
Rnd 1: sc in next 2 st of the third finger made, sc in 2 st of one of the loose fingers (this will bethe middle finger), sc in all 4 st of last loose finger, sc in last 2 st of the middle finger, sc in last2 st of third finger made (12)
Kim Lapsley Crochets: Amigurumi Hands http://kimlapsley.blogspot.com.au/2013/07/amigurumi-hands.html
2 of 6 21/5/18, 11:08 pm
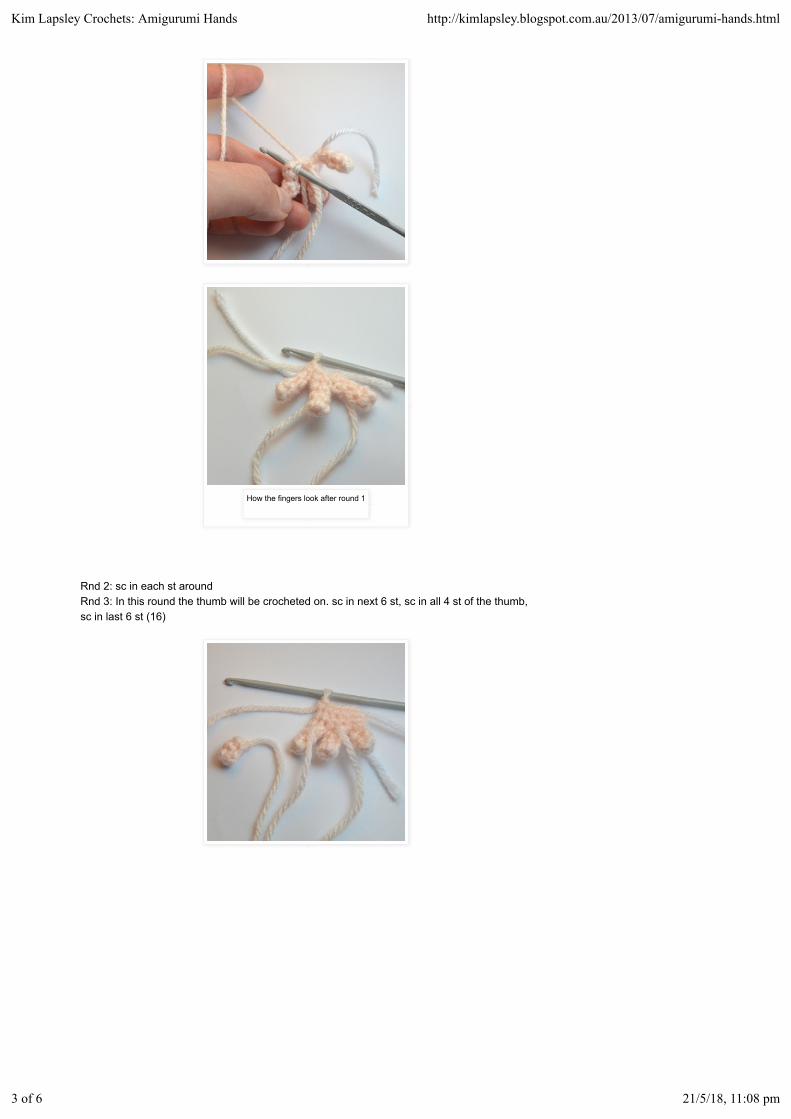
Rnd 2: sc in each st aroundRnd 3: In this round the thumb will be crocheted on. sc in next 6 st, sc in all 4 st of the thumb,sc in last 6 st (16)
How the fingers look after round 1
Kim Lapsley Crochets: Amigurumi Hands http://kimlapsley.blogspot.com.au/2013/07/amigurumi-hands.html
3 of 6 21/5/18, 11:08 pm
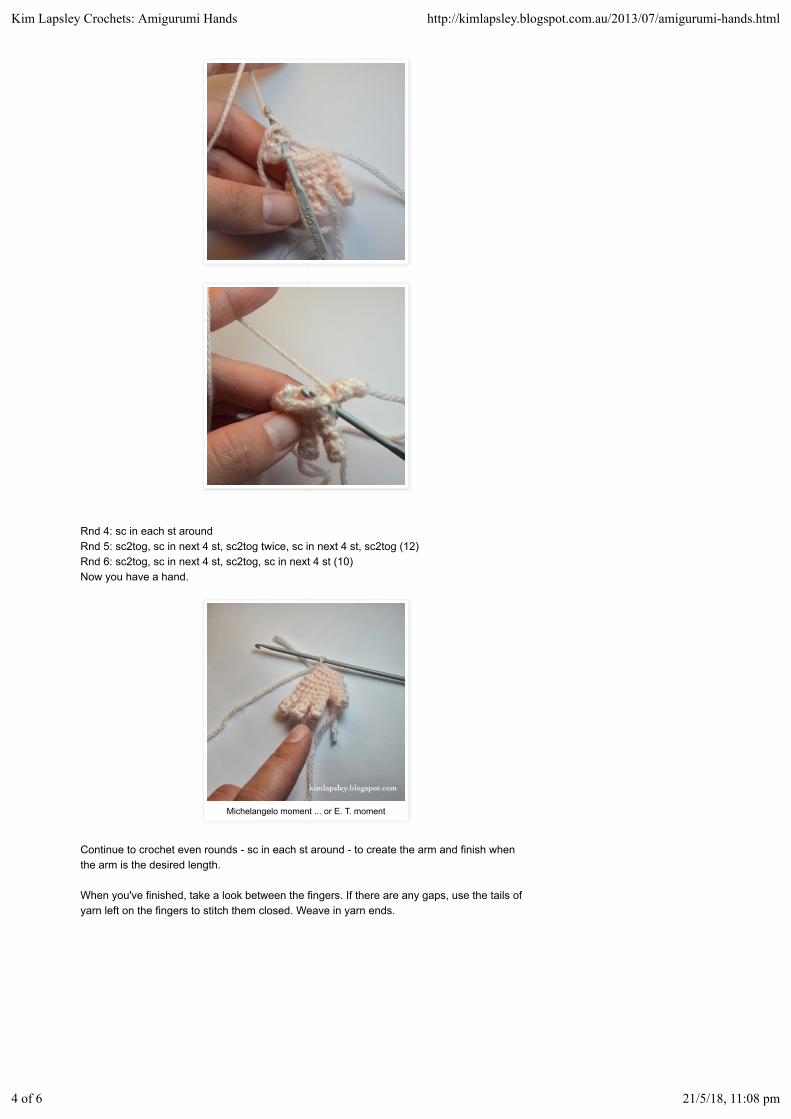
Rnd 4: sc in each st aroundRnd 5: sc2tog, sc in next 4 st, sc2tog twice, sc in next 4 st, sc2tog (12)Rnd 6: sc2tog, sc in next 4 st, sc2tog, sc in next 4 st (10)Now you have a hand.
Continue to crochet even rounds - sc in each st around - to create the arm and finish whenthe arm is the desired length.
When you've finished, take a look between the fingers. If there are any gaps, use the tails ofyarn left on the fingers to stitch them closed. Weave in yarn ends.
Michelangelo moment ... or E. T. moment
Kim Lapsley Crochets: Amigurumi Hands http://kimlapsley.blogspot.com.au/2013/07/amigurumi-hands.html
4 of 6 21/5/18, 11:08 pm
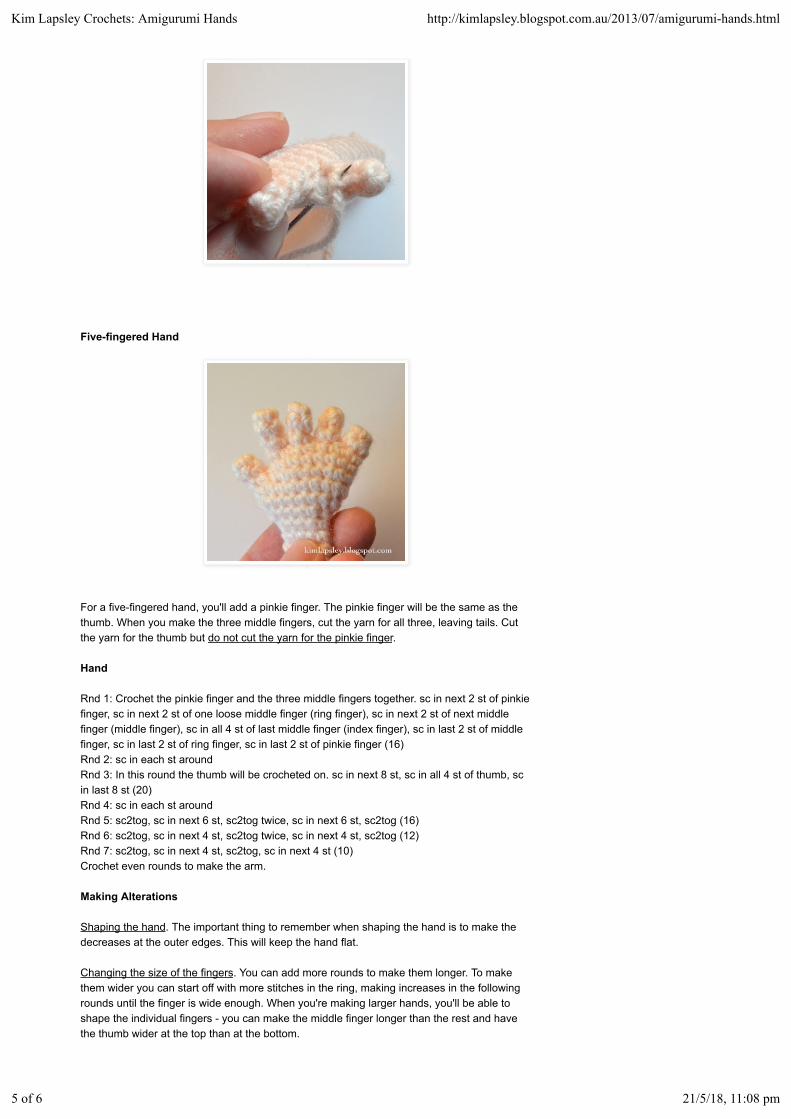
Five-fingered Hand
For a five-fingered hand, you'll add a pinkie finger. The pinkie finger will be the same as thethumb. When you make the three middle fingers, cut the yarn for all three, leaving tails. Cutthe yarn for the thumb but do not cut the yarn for the pinkie finger.
Hand
Rnd 1: Crochet the pinkie finger and the three middle fingers together. sc in next 2 st of pinkiefinger, sc in next 2 st of one loose middle finger (ring finger), sc in next 2 st of next middlefinger (middle finger), sc in all 4 st of last middle finger (index finger), sc in last 2 st of middlefinger, sc in last 2 st of ring finger, sc in last 2 st of pinkie finger (16)Rnd 2: sc in each st aroundRnd 3: In this round the thumb will be crocheted on. sc in next 8 st, sc in all 4 st of thumb, scin last 8 st (20)Rnd 4: sc in each st aroundRnd 5: sc2tog, sc in next 6 st, sc2tog twice, sc in next 6 st, sc2tog (16)Rnd 6: sc2tog, sc in next 4 st, sc2tog twice, sc in next 4 st, sc2tog (12)Rnd 7: sc2tog, sc in next 4 st, sc2tog, sc in next 4 st (10)Crochet even rounds to make the arm.
Making Alterations
Shaping the hand. The important thing to remember when shaping the hand is to make thedecreases at the outer edges. This will keep the hand flat.
Changing the size of the fingers. You can add more rounds to make them longer. To makethem wider you can start off with more stitches in the ring, making increases in the followingrounds until the finger is wide enough. When you're making larger hands, you'll be able toshape the individual fingers - you can make the middle finger longer than the rest and havethe thumb wider at the top than at the bottom.
Kim Lapsley Crochets: Amigurumi Hands http://kimlapsley.blogspot.com.au/2013/07/amigurumi-hands.html
5 of 6 21/5/18, 11:08 pm

ChristmasKangaroo
Ruby GloomPattern
Ghost Mouse Darwin
Okay that's it. If I've left anything out or if you have any questions, let me know. I hope youfound it helpful.
Copyright © Kim Lapsley 2013
You might also like:
Linkwithin
Kim Lapsley Crochets: Amigurumi Hands http://kimlapsley.blogspot.com.au/2013/07/amigurumi-hands.html
6 of 6 21/5/18, 11:08 pm