Embed Size (px)
Citation preview
Keyboard Input, Output Formatting, Strings
So far we have “hard coded” all values we want directly in our code. For example, in the
twix calorie calculator we input the number of calories, height, weight, and age directly
as variables in our program. It would be nice to be able to run our program, have it ask
the user to enter their age, weight, and height, then calculate the number of twix bars to
eat. This makes the program much more general and functional with easily-changed
values instead of having to change the values in the program, recompile it, and then re-
run the program.
To input data from the keyboard we use the Scanner class. Here is an example:
import java.util.Scanner;
class ScannerTest
{
public static void main(String[] argv)
{
int i;
float f;
double d;
Scanner keyboard = new Scanner(System.in);
System.out.println("Enter an integer. ");
i = keyboard.nextInt();
System.out.println("You entered: " + i);
System.out.println("Enter a double. ");
d = keyboard.nextDouble();
System.out.println("You entered: " + d);
System.out.println("Enter a float. ");
f = keyboard.nextFloat();
System.out.println("You entered: " + f);
// Now sum up all three things entered as a double
d = d + (double) f + (double) i;
System.out.println("The sum of all three is: " + d);
}
}
We start with the “import java.util.Scanner” which gives us access to the
code library containing the Scanner class, which allows us to input data from the
keyboard. This line should be near the top of the file.
Inside the main method the line “Scanner keyboard = new Scanner(System.in);” creates a
Scanner object that takes System.in as a parameter, which refers to input from the
keyboard. This is basically defining a variable with a data type of “Scanner” and the
name of the variable is “keyboard”. We could have used a different name.
With the keyboard variable we can now use the nextInt(), nextDouble(), or nextFloat()
methods to return numbers of those particular data types typed from the keyboard. A
method is a name for a group of code that performs some specific task – in this case, it
reads in whatever is typed “next” as a double, integer, float, etc. This method is defined
for you as part of the Java language. Later we will see that we can write our own
methods.
Here is the output for a sample run:
Enter an integer.
5
You entered: 5
Enter a double.
2.412
You entered: 2.412
Enter a float.
3.14
You entered: 3.14 // Note roundoff errors below!
The sum of all three is: 10.552000104904174
Formatted Output
So far we have been using System.out.println to output all of our messages. This method
outputs whatever is inside the parentheses and then adds a newline (future output goes to
the next line).
If you don’t want output to go to the next line then use System.out.print instead of
System.out.println. For example:
System.out.print("The Seawolf mascot's name is ");
System.out.println("Spirit");
Outputs: The Seawolf mascot's name is Spirit
You can use combinations print() and println() to control how you output different
variables.
You have probably noticed that when you output floating point numbers you are often
getting more decimal places than you really want. In an earlier example, the output was
10.552000104904174 but you might want to only output it as 10.55. An easy way to do
this is to use the printf() method which allows you to format your output.
Here is an example that shows a few format specifiers, one to print an integer, an integer
in a field of 5 spaces, and a floating point number with 2 digits after the decimal point:

int num1, num2;
double num3;
num1 = 1;
num2 = 9;
num3 = 5.58831;
System.out.printf("An integer:%d\nAn integer in 5 spaces:%5d\nA
floating point number with 2 decimal places:%.2f\n",num1,num2,num3);
Output: An integer:1
An integer in 5 spaces: 9
A floating point number with 2 decimal places:5.59
The % symbol is used in the printf statement as placeholders to substitute values that are
specified after the string.
In this case “%d” is a placeholder for the first argument to come after the string which is
the variable num1. “%d” stands for an integer, so it will output as an integer the value in
num1.
“%5d” is the next placeholder and it means to output an integer, but do so in a field of 5
characters. You can use this if you want to make columns of numbers line up nicely, for
example, to make a table. In this case it matches up with the second argument, which is
the value stored in num2.
“%.2f” is the next placeholder and it means to output a floating point number with 2
places after the decimal point. It matches up with the third argument, which is the value
stored in num3. Note that the number is rounded up when it is printed out.
There are more format specifiers the next most common one is %s which is a placeholder
for a String – see the book for details.
Class Example – Seconds to Hours, Minutes, and Seconds
Write a program that inputs some number of seconds and outputs how many hours,
minutes and seconds it is. For example, 3661 seconds is 1 hour, 1 minute, and 1 second.
122 seconds is 0 hours, 2 minutes, 2 seconds.
What algorithm solves our problems?
To write our solution what variables do we need and what data types?
Use the printf method to output the results.

Introduction to the NetBeans IDE
This document is a brief introduction to writing and compiling a program using the
NetBeans Integrated Development Environment (IDE). An IDE is a program that
automates and makes easier many tasks that programmers would otherwise have to
perform themselves. While many IDEs exist for Java, we will focus only on the
NetBeans IDE because at the time of this writing it is free and contains many powerful
features.
Installation
The Engineering Lab and NSB 204 already have NetBeans installed. If you plan to work
exclusively from the lab, then you can skip this section. If you plan to install NetBeans
on your own machine, your system should meet these recommended specifications:
Disk space: 1 GB free space
Memory: 1 GB RAM
Processor: 1.4 Ghz Pentium III processor or better
Operating Systems: Mac OS X, Windows, Linux
You can download NetBeans from http://www.netbeans.org. There are numerous
download options, e.g. including web development, database, etc. The “Java SE” version
is sufficient for purposes of this class.
The NetBeans IDE is a big file --- a minimum of around 50 MB. After you have
downloaded the file, double-click the file to install the software.
Starting NetBeans
In the following screens I am assuming that you are running Windows and NetBeans 6.9.
Some details are different if using a Mac or Linux machine but the overall process is the
same. After you have installed NetBeans, double-click on the icon to get started:
NetBeans will take a while to start up. After NetBeans has started it should bring up the
main window that looks something like this:
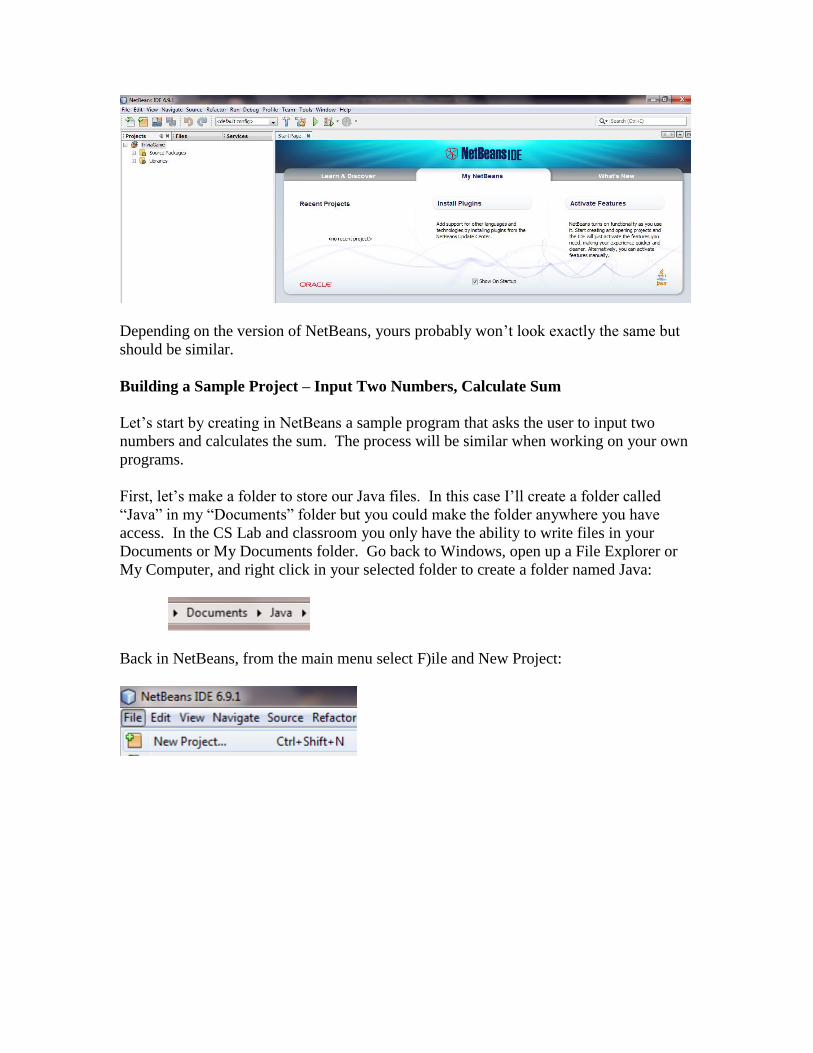
Depending on the version of NetBeans, yours probably won’t look exactly the same but
should be similar.
Building a Sample Project – Input Two Numbers, Calculate Sum
Let’s start by creating in NetBeans a sample program that asks the user to input two
numbers and calculates the sum. The process will be similar when working on your own
programs.
First, let’s make a folder to store our Java files. In this case I’ll create a folder called
“Java” in my “Documents” folder but you could make the folder anywhere you have
access. In the CS Lab and classroom you only have the ability to write files in your
Documents or My Documents folder. Go back to Windows, open up a File Explorer or
My Computer, and right click in your selected folder to create a folder named Java:
Back in NetBeans, from the main menu select F)ile and New Project:

Choose “Java” for the category and “Java Application” for the project and click Next:
On the next screen NetBeans will ask what you would like to name your project and
where you would like to create it. Give it the name of “AddNumbers” and you can leave
the other defaults.

Normally you would be giving this a project name indicative of your homework, e.g.
“Homework1” or such.
Click on Finish and NetBeans will create your project.
In the upper left corner of the screen is a Projects tab. The “AddNumbers” project we
just created should now be listed as a project. NetBeans will create a program for you
with the main method
This will create a new Java class called “Main” and the default template creates the main
method for you. Don’t worry about the package stuff, we will discuss that later.
We can now start typing in the code:

As you type, notice that NetBeans does useful things for you, like have a pop-up of
possible choices when typing a period, color coding, underlining where it detects errors,
etc.
To compile and run your program click on the green triangle “Play” button:
Enter your input in the window near the bottom of the screen:

Congratulations, you have just created your first project in NetBeans! You should follow
a similar process when working on programs assigned as homework.
If you are going to turn in your project then the easiest way is to locate the project folder
in the file explorer (in this example, “AddNumbers” located in “Documents/Java”) and
then compress the entire folder into a zip file. You can make a zip file by right-clicking
on the entire folder and selecting “Send To” and “Compressed Zip Folder”. You can then
send the zip file. Note that in the future some instructors may only want your java
source files (.java located in the src subdirectory). Sending the entire project folder
includes NetBeans gunk that some may not care for if they don’t use NetBeans.
If you want to copy your project from one computer to another then copy the entire
project folder to the other computer (e.g. using a flash drive).
For those that do have NetBeans though, compressing the whole folder is much easier
because it includes the NetBeans project and other meta-data used to create the project.
If you want to work on the project at a later date, simply restart NetBeans and all of your
files will be visible if you are using the same computer. If you have copied the folder to
another computer then use “Open Project” from the “File” menu to open the project. If
you start to work on many files you may wish to delete some of the .class files or copy
out old folders that you no longer use. In particular, the .class files can take up a lot of
space.
We have only touched on the basics of using NetBeans here; feel free to explore on your
own the many other options that are available. In particular, you may notice that
NetBeans will detect many errors as you are typing them. This can be quite helpful in
avoiding many common problems.
Later we will look at using NetBeans debugging tools which are quite helpful in tracking
down mysterious runtime errors.
NetBeans vs. DrJava or TextPad?
As you can see NetBeans offers a lot more features than writing your programs in DrJava
and directly compiling them. However, it also has a lot more baggage if you only want
to edit, compile, and run a short program. For small programs I tend to prefer the direct
editor/compile approach. However for larger programs with many files or classes an IDE
like NetBeans is the superior way to go.

Inputting Strings
Reading input from the keyboard for strings is almost the same as inputting numbers,
except there is a pitfall when reading an entire line vs. reading a single number or word.
To read in a single word (surrounded by whitespace, i.e. spaces, tabs, carriage returns,
etc.) use the next() method:
public static void main(String[] argv)
{
int i;
String s;
Scanner keyboard = new Scanner(System.in);
System.out.println("Enter an integer. ");
i = keyboard.nextInt();
System.out.println("You entered: " + i);
System.out.println("Enter a word. ");
s = keyboard.next();
System.out.println("Your word was: " + s);
}
This program reads in an integer, prints it out, then reads in a word and prints it out.
For example:
Enter an integer.
5
You entered: 5
Enter a word.
coffee
Your word was: coffee
If you enter more than one word note that the next() method ONLY reads the next word:
Enter an integer.
5
You entered: 5
Enter a word.
need more coffee
Your word was: need
To read a whole line we can use the method nextLine():
public static void main(String[] argv)
{
int i;
String s;
Scanner keyboard = new Scanner(System.in);
System.out.println("Enter an integer. ");
i = keyboard.nextInt();
System.out.println("You entered: " + i);
System.out.println("Enter a line of text. ");
s = keyboard.nextLine();
System.out.println("Your line was: " + s);
}
You would probably expect it to behave like the first program, but the program
immediately ends without prompting you to enter a line of text. The reason is because
the nextLine() method behaves a little differently than the other methods.
Java interprets its input as a stream of characters. When you press the enter key, a
newline character is inserted into the stream. Let’s say that you are giving the input of
“50” for the integer and “hello” for the text. Java sees this input as:
The \n is a single character for newline.
When we execute: i = keyboard.nextInt();
Java reads the 50 and advances its input buffer to reference the next character in the
stream, the \n:
If we execute: s = keyboard.next(); (or nextInt() or nextDouble, etc.)
then Java will skip any whitespace characters looking for a word that is surrounded by
whitespace. You can test this by entering leading spaces, newlines, tabs, etc. They will
all be skipped and Java will return back only the word you enter.
50\nhello\n
next character to read
50\nhello\n
next character to read

However, if we execute: s = keyboard.nextLine();
then Java will stop until it hits a newline character, and consume it. It just so happens
that the next whitespace is the \n so we end up with:
And the string s contains a blank string.
The solution? Use an extra nextLine() after reading an int or word to skip the whitespace
character if you want to later read in an entire line:
public static void main(String[] argv)
{
int i;
String s;
Scanner keyboard = new Scanner(System.in);
System.out.println("Enter an integer. ");
i = keyboard.nextInt();
System.out.println("You entered: " + i);
keyboard.nextLine(); // Skip \n character
System.out.println("Enter a line of text. ");
s = keyboard.nextLine();
System.out.println("Your line was: " + s);
}
Working with Strings
The String type is actually a class, as opposed to a primitive data type like int’s or char’s.
As a class, this means that the String type stores both data and methods. The methods
perform various operations on the string data that it holds.
Concatenation: The “+” operator, when applied to numbers, performs addition.
However, when applied to strings, this concatenates two strings together. For example:
String s1 = "hello";
String s2;
s2 = s1 + "there";
System.out.println(s2);
50\nhello\n
next character to read

This code fragment will output “hellothere”. Notice there is no space that is added. If we
want to explicitly add a space, we must put one there:
s2 = s1 + " there";
Concatenation will convert any other data types in the expression into strings. For
example:
s2 = s1 + " " + 100;
System.out.println(s2);
This will output “hello 100”. What Java really does is take the number 100 and turn it
into a string before concatenating it with s1.
String Methods
Once we have set a string variable to something, there are many methods we can invoke
to manipulate that string. Here are listed a few methods. To invoke them, use the name
of the string variable followed by a “.” and the method name. Here is a list of methods,
assuming the String variable we are working with is named “s1”:
Method Description Example length() Returns the length of
the string object
String s = “hello”;
int x;
x = s.length(); // x = 5
equals(String s2) Returns true if s1 = s2,
false otherwise
String s1 = “hello”;
String s2 = “hello”;
if (s1.equals(s2)) then … // TRUE
equalsIgnoreCase(String s2) Returns true if s1 = s2
ignoring case, false
otherwise
See above
toLowerCase() Returns a converted
string to lowercase
String s1 = “HeLlO”;
String s2;
s2 = s1.toLowerCase();
System.out.println(s2); // “hello”
System.out.println(s1); // “HeLlO”
toUpperCase() Returns a converted
string to uppercase
See above
trim() Returns a string with
same characters but
leading and trailing
whitespace removed
String s1 = “ hi “;
s1 = s1.trim(); // s1 = “hi”
charAt(int pos) Returns the character
at position pos; pos
starts from 0
String s1 = “hello”;
System.out.println(s1.charAt(0)); // h
System.out.println(s1.charAt(4)); // o
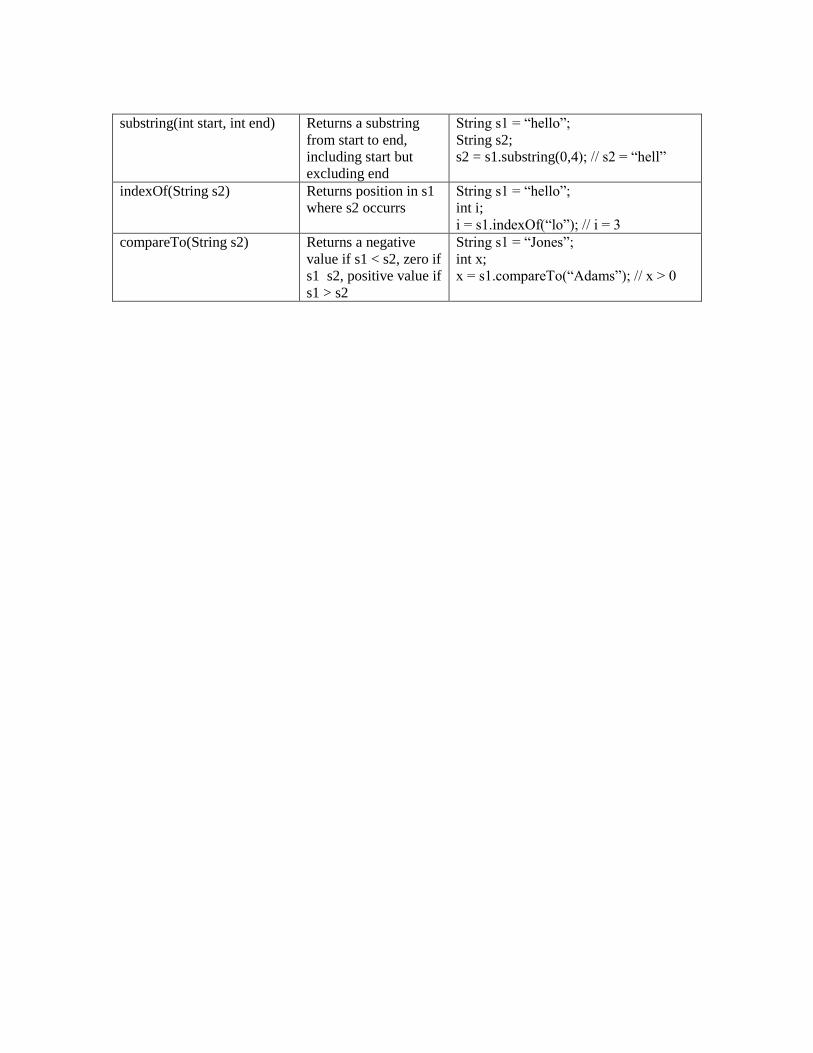
substring(int start, int end) Returns a substring
from start to end,
including start but
excluding end
String s1 = “hello”;
String s2;
s2 = s1.substring(0,4); // s2 = “hell”
indexOf(String s2) Returns position in s1
where s2 occurrs
String s1 = “hello”;
int i;
i = s1.indexOf(“lo”); // i = 3
compareTo(String s2) Returns a negative
value if s1 < s2, zero if
s1 s2, positive value if
s1 > s2
String s1 = “Jones”;
int x;
x = s1.compareTo(“Adams”); // x > 0