Embed Size (px)
DESCRIPTION
JQuery Tutorial (www.w3schools.com). For more ebooks please visit www.ebooktutorials.blogspot.in
Citation preview

jQuery Tutorial www.ebooktutorial.blogspot.in
Content downloaded from www.w3schools.com. All © Reserved to www.w3schools.com
[Pick the date]
Content Downloaded from www.w3schools.com
Created by www.ebooktutorials.blogspot.in
Content
jQuery Tutorial
jQuery HOME
jQuery Intro
jQuery Get Started
jQuery Syntax
jQuery Selectors
jQuery Events
jQuery Effects
jQuery Hide/Show
jQuery Fade
jQuery Slide
jQuery Animate
jQuery stop()
jQuery Callback
jQuery Chaining
jQuery HTML
jQuery Get
jQuery Set
jQuery Add
jQuery Remove
jQuery CSS Classes
jQuery css()
jQuery Dimensions
jQuery Traversing
jQuery Traversing
jQuery Ancestors
jQuery Descendants
jQuery Siblings
jQuery Filtering

Content Downloaded from www.w3schools.com
Created by www.ebooktutorials.blogspot.in
jQuery Tutorial
jQuery greatly simplifies JavaScript programming.
jQuery is easy to learn.
jQuery is a JavaScript Library.
Example
$(document).ready(function(){
$("p").click(function(){ $(this).hide(); });
});

Content Downloaded from www.w3schools.com
Created by www.ebooktutorials.blogspot.in
jQuery Introduction
The purpose of jQuery is to make it much easier to use JavaScript on your website.
What You Should Already Know
Before you start studying jQuery, you should have a basic knowledge of:
HTML
CSS JavaScript
If you want to study these subjects first, find the tutorials on our Home page.
What is jQuery?
jQuery is a lightweight, "write less, do more", JavaScript library.
The purpose of jQuery is to make it much easier to use JavaScript on your
website.
jQuery takes a lot of common tasks that require many lines of JavaScript code to accomplish, and wraps them into methods that you can call with a single line of code.
jQuery also simplifies a lot of the complicated things from JavaScript, like
AJAX calls and DOM manipulation.
The jQuery library contains the following features:
HTML/DOM manipulation CSS manipulation
HTML event methods Effects and animations AJAX
Utilities
Tip: In addition, jQuery has plugins for almost any task out there.
Why jQuery?
There are lots of other JavaScript frameworks out there, but jQuery seems to be the most popular, and also the most extendable.
Many of the biggest companies on the Web use jQuery, such as:
Google Microsoft IBM
Netflix

Content Downloaded from www.w3schools.com
Created by www.ebooktutorials.blogspot.in
jQuery Get Started
Adding jQuery to Your Web Pages
There are several ways to start using jQuery on your web site. You can:
Download the jQuery library from jQuery.com Include jQuery from a CDN, like Google
Downloading jQuery
There are two versions of jQuery available for downloading:
Production version - this is for your live website because it has been
minified and compressed Development version - this is for testing and development (uncompressed
and readable code)
Both versions can be downloaded from jQuery.com.
The jQuery library is a single JavaScript file, and you reference it with the HTML <script> tag (notice that the <script> tag should be inside the <head> section):
<head>
<script src="jquery-1.11.2.min.js"></script> </head>
Tip: Place the downloaded file in the same directory as the pages where you
wish to use it.
Do you wonder why we do not have type="text/javascript" inside the <script> tag?
This is not required in HTML5. JavaScript is the default scripting language in HTML5 and in all modern browsers!
jQuery CDN
If you don't want to download and host jQuery yourself, you can include it from
a CDN (Content Delivery Network).
Both Google and Microsoft host jQuery.
To use jQuery from Google or Microsoft, use one of the following:
Google CDN:
<head> <script
src="http://ajax.googleapis.com/ajax/libs/jquery/1.11.2/jquery.min.js"></script> </head>

Content Downloaded from www.w3schools.com
Created by www.ebooktutorials.blogspot.in
Microsoft CDN: <head>
<script src="http://ajax.aspnetcdn.com/ajax/jQuery/jquery-1.11.2.min.js"></script>
</head>
One big advantage of using the hosted jQuery from Google or Microsoft:
Many users already have downloaded jQuery from Google or Microsoft when
visiting another site. As a result, it will be loaded from cache when they visit your site, which leads to faster loading time. Also, most CDN's will make sure that once a user requests a file from it, it will be served from the server closest
to them, which also leads to faster loading time.
Content Downloaded from www.w3schools.com
Created by www.ebooktutorials.blogspot.in
jQuery Syntax
With jQuery you select (query) HTML elements and perform "actions" on them.
jQuery Syntax
The jQuery syntax is tailor made for selecting HTML elements and performing
some action on the element(s).
Basic syntax is: $(selector).action()
A $ sign to define/access jQuery
A (selector) to "query (or find)" HTML elements
A jQuery action() to be performed on the element(s)
Examples:
$(this).hide() - hides the current element.
$("p").hide() - hides all <p> elements.
$(".test").hide() - hides all elements with class="test".
$("#test").hide() - hides the element with id="test".
Are you familiar with CSS selectors?
jQuery uses CSS syntax to select elements. You will learn more about the
selector syntax in the next chapter of this tutorial.
The Document Ready Event
You might have noticed that all jQuery methods in our examples, are inside a
document ready event:
$(document).ready(function(){
// jQuery methods go here...
});
This is to prevent any jQuery code from running before the document is
finished loading (is ready).
It is good practice to wait for the document to be fully loaded and ready before
working with it. This also allows you to have your JavaScript code before the
body of your document, in the head section.
Here are some examples of actions that can fail if methods are run before the
document is fully loaded:
Trying to hide an element that is not created yet
Trying to get the size of an image that is not loaded yet
Tip: The jQuery team has also created an even shorter method for the
document ready event:
$(function(){
// jQuery methods go here...
});
Content Downloaded from www.w3schools.com
Created by www.ebooktutorials.blogspot.in
jQuery Selectors
jQuery selectors are one of the most important parts of the jQuery library.
jQuery Selectors
jQuery selectors allow you to select and manipulate HTML element(s).
jQuery selectors are used to "find" (or select) HTML elements based on their id,
classes, types, attributes, values of attributes and much more. It's based on the
existing CSS Selectors, and in addition, it has some own custom selectors.
All selectors in jQuery start with the dollar sign and parentheses: $().
The element Selector
The jQuery element selector selects elements based on the element name.
You can select all <p> elements on a page like this:
$("p")
Example
When a user clicks on a button, all <p> elements will be hidden:
Example
$(document).ready(function(){
$("button").click(function(){
$("p").hide();
});
});
The #id Selector
The jQuery #id selector uses the id attribute of an HTML tag to find the specific
element.
An id should be unique within a page, so you should use the #id selector when you
want to find a single, unique element.
To find an element with a specific id, write a hash character, followed by the id of
the HTML element:
$("#test")
Example
When a user clicks on a button, the element with id="test" will be hidden:
Example
$(document).ready(function(){
$("button").click(function(){
$("#test").hide();
});
});

Content Downloaded from www.w3schools.com
Created by www.ebooktutorials.blogspot.in
The .class Selector
The jQuery class selector finds elements with a specific class.
To find elements with a specific class, write a period character, followed by the
name of the class:
$(".test")
Example
When a user clicks on a button, the elements with class="test" will be hidden:
Example
$(document).ready(function(){
$("button").click(function(){
$(".test").hide();
});
});
More Examples of jQuery Selectors Syntax Description Example
$("*") Selects all elements Try it
$(this) Selects the current HTML element Try it
$("p.intro") Selects all <p> elements with class="intro" Try it
$("p:first") Selects the first <p> element Try it
$("ul li:first") Selects the first <li> element of the first <ul> Try it
$("ul li:first-child") Selects the first <li> element of every <ul> Try it
$("[href]") Selects all elements with an href attribute Try it
$("a[target='_blank']") Selects all <a> elements with a target attribute value equal to "_blank"
Try it
$("a[target!='_blank']") Selects all <a> elements with a target attribute value NOT equal to "_blank"
Try it
$(":button") Selects all <button> elements and <input> elements of type="button"
Try it
$("tr:even") Selects all even <tr> elements Try it
$("tr:odd") Selects all odd <tr> elements Try it
Functions In a Separate File
If your website contains a lot of pages, and you want your jQuery functions to be
easy to maintain, you can put your jQuery functions in a separate .js file.
When we demonstrate jQuery in this tutorial, the functions are added directly into
the <head> section. However, sometimes it is preferable to place them in a
separate file, like this (use the src attribute to refer to the .js file):
Example
<head>
<script src="http://ajax.googleapis.com/ajax/libs/jquery/1.11.2/jquery.min.js">
</script>
<script src="my_jquery_functions.js"></script>
</head>
Content Downloaded from www.w3schools.com
Created by www.ebooktutorials.blogspot.in
jQuery Event Methods
jQuery is tailor-made to respond to events in an HTML page.
What are Events?
All the different visitor's actions that a web page can respond to are called
events.
An event represents the precise moment when something happens.
Examples:
moving a mouse over an element
selecting a radio button
clicking on an element
The term "fires" is often used with events. Example: "The keypress event fires
the moment you press a key".
Here are some common DOM events:
Mouse Events Keyboard Events Form Events Document/Window Events
click keypress submit load
dblclick keydown change resize
mouseenter keyup focus scroll
mouseleave blur unload
jQuery Syntax For Event Methods
In jQuery, most DOM events have an equivalent jQuery method.
To assign a click event to all paragraphs on a page, you can do this:
$("p").click();
The next step is to define what should happen when the event fires. You must
pass a function to the event:
$("p").click(function(){
// action goes here!!
});
Commonly Used jQuery Event Methods
$(document).ready()
The $(document).ready() method allows us to execute a function when the
document is fully loaded. This event is already explained in the jQuery
Syntax chapter.
click()
The click() method attaches an event handler function to an HTML element.
The function is executed when the user clicks on the HTML element.
The following example says: When a click event fires on a <p> element; hide the
current <p> element:
Content Downloaded from www.w3schools.com
Created by www.ebooktutorials.blogspot.in
Example
$("p").click(function(){ $(this).hide();
});
dblclick()
The dblclick() method attaches an event handler function to an HTML element.
The function is executed when the user double-clicks on the HTML element:
Example
$("p").dblclick(function(){ $(this).hide();
});
mouseenter()
The mouseenter() method attaches an event handler function to an HTML
element.
The function is executed when the mouse pointer enters the HTML element:
Example
$("#p1").mouseenter(function(){ alert("You entered p1!");
});
mouseleave()
The mouseleave() method attaches an event handler function to an HTML
element.
The function is executed when the mouse pointer leaves the HTML element:
Example
$("#p1").mouseleave(function(){
alert("Bye! You now leave p1!"); });
mousedown()
The mousedown() method attaches an event handler function to an HTML
element.
The function is executed, when the left mouse button is pressed down, while
the mouse is over the HTML element:
Example
$("#p1").mousedown(function(){ alert("Mouse down over p1!");
});
mouseup()
The mouseup() method attaches an event handler function to an HTML
element.
The function is executed, when the left mouse button is released, while the
mouse is over the HTML element:

Content Downloaded from www.w3schools.com
Created by www.ebooktutorials.blogspot.in
Example
$("#p1").mouseup(function(){ alert("Mouse up over p1!");
});
hover()
The hover() method takes two functions and is a combination of the
mouseenter() and mouseleave() methods.
The first function is executed when the mouse enters the HTML element, and
the second function is executed when the mouse leaves the HTML element:
Example
$("#p1").hover(function(){
alert("You entered p1!"); },
function(){ alert("Bye! You now leave p1!"); });
focus()
The focus() method attaches an event handler function to an HTML form field.
The function is executed when the form field gets focus:
Example
$("input").focus(function(){
$(this).css("background-color", "#cccccc"); });
blur()
The blur() method attaches an event handler function to an HTML form field.
The function is executed when the form field loses focus:
Example
$("input").blur(function(){ $(this).css("background-color", "#ffffff"); });

Content Downloaded from www.w3schools.com
Created by www.ebooktutorials.blogspot.in
jQuery Effects - Hide and Show
jQuery hide() and show()
With jQuery, you can hide and show HTML elements with the hide() and show()
methods:
Example
$("#hide").click(function(){ $("p").hide(); }); $("#show").click(function(){ $("p").show(); });
Syntax:
$(selector).hide(speed,callback);
$(selector).show(speed,callback);
The optional speed parameter specifies the speed of the hiding/showing, and
can take the following values: "slow", "fast", or milliseconds.
The optional callback parameter is a function to be executed after the hide() or
show() method completes (you will learn more about callback functions in a
later chapter).
The following example demonstrates the speed parameter with hide():
Example
$("button").click(function(){ $("p").hide(1000); });
jQuery toggle()
With jQuery, you can toggle between the hide() and show() methods with the
toggle() method.
Shown elements are hidden and hidden elements are shown:
Example
$("button").click(function(){ $("p").toggle(); });
Syntax:
$(selector).toggle(speed,callback);
The optional speed parameter can take the following values: "slow", "fast", or
milliseconds.
The optional callback parameter is a function to be executed after toggle()
completes.
Content Downloaded from www.w3schools.com
Created by www.ebooktutorials.blogspot.in
Example:
<!DOCTYPE html>
<html>
<head>
<script src="http://ajax.googleapis.com/ajax/libs/jquery/1.11.2/jquery.min.js"></script>
<script>
$(document).ready(function(){
$("#hide").click(function(){
$("p").hide();
});
$("#show").click(function(){
$("p").show();
});
});
</script>
</head>
<body>
<p>If you click on the "Hide" button, I will disappear.</p>
<button id="hide">Hide</button>
<button id="show">Show</button>
</body>
</html>

Content Downloaded from www.w3schools.com
Created by www.ebooktutorials.blogspot.in
jQuery Effects – Fading
jQuery Fading Methods
With jQuery you can fade an element in and out of visibility.
jQuery has the following fade methods:
fadeIn()
fadeOut()
fadeToggle()
fadeTo()
jQuery fadeIn() Method
The jQuery fadeIn() method is used to fade in a hidden element.
Syntax:
$(selector).fadeIn(speed,callback);
The optional speed parameter specifies the duration of the effect. It can take
the following values: "slow", "fast", or milliseconds.
The optional callback parameter is a function to be executed after the fading
completes.
The following example demonstrates the fadeIn() method with different
parameters:
Example
$("button").click(function(){ $("#div1").fadeIn(); $("#div2").fadeIn("slow"); $("#div3").fadeIn(3000); });
jQuery fadeOut() Method
The jQuery fadeOut() method is used to fade out a visible element.
Syntax:
$(selector).fadeOut(speed,callback);
The optional speed parameter specifies the duration of the effect. It can take
the following values: "slow", "fast", or milliseconds.
The optional callback parameter is a function to be executed after the fading
completes.
The following example demonstrates the fadeOut() method with different
parameters:
Example
$("button").click(function(){ $("#div1").fadeOut(); $("#div2").fadeOut("slow"); $("#div3").fadeOut(3000); });

Content Downloaded from www.w3schools.com
Created by www.ebooktutorials.blogspot.in
jQuery fadeToggle() Method
The jQuery fadeToggle() method toggles between the fadeIn() and fadeOut()
methods.
If the elements are faded out, fadeToggle() will fade them in.
If the elements are faded in, fadeToggle() will fade them out.
Syntax:
$(selector).fadeToggle(speed,callback);
The optional speed parameter specifies the duration of the effect. It can take
the following values: "slow", "fast", or milliseconds.
The optional callback parameter is a function to be executed after the fading
completes.
The following example demonstrates the fadeToggle() method with different
parameters:
Example
$("button").click(function(){ $("#div1").fadeToggle(); $("#div2").fadeToggle("slow"); $("#div3").fadeToggle(3000); });
jQuery fadeTo() Method
The jQuery fadeTo() method allows fading to a given opacity (value between 0
and 1).
Syntax:
$(selector).fadeTo(speed,opacity,callback);
The required speed parameter specifies the duration of the effect. It can take
the following values: "slow", "fast", or milliseconds.
The required opacity parameter in the fadeTo() method specifies fading to a
given opacity (value between 0 and 1).
The optional callback parameter is a function to be executed after the function
completes.
The following example demonstrates the fadeTo() method with different
parameters:
Example
$("button").click(function(){ $("#div1").fadeTo("slow", 0.15); $("#div2").fadeTo("slow", 0.4); $("#div3").fadeTo("slow", 0.7); });

Content Downloaded from www.w3schools.com
Created by www.ebooktutorials.blogspot.in
Example:
<!DOCTYPE html>
<html>
<head>
<script
src="http://ajax.googleapis.com/ajax/libs/jquery/1.11.2/jquery.min.js"></scri
pt>
<script>
$(document).ready(function(){
$("button").click(function(){
$("#div1").fadeIn();
$("#div2").fadeIn("slow");
$("#div3").fadeIn(3000);
});
});
</script>
</head>
<body>
<p>Demonstrate fadeIn() with different parameters.</p>
<button>Click to fade in boxes</button><br><br>
<div id="div1" style="width:80px;height:80px;display:none;background-
color:red;"></div><br>
<div id="div2" style="width:80px;height:80px;display:none;background-
color:green;"></div><br>
<div id="div3" style="width:80px;height:80px;display:none;background-
color:blue;"></div>
</body>
</html>

Content Downloaded from www.w3schools.com
Created by www.ebooktutorials.blogspot.in
jQuery Effects – Sliding
jQuery Sliding Methods
With jQuery you can create a sliding effect on elements.
jQuery has the following slide methods:
slideDown()
slideUp()
slideToggle()
jQuery slideDown() Method
The jQuery slideDown() method is used to slide down an element.
Syntax:
$(selector).slideDown(speed,callback);
The optional speed parameter specifies the duration of the effect. It can take
the following values: "slow", "fast", or milliseconds.
The optional callback parameter is a function to be executed after the sliding
completes.
The following example demonstrates the slideDown() method:
Example
$("#flip").click(function(){ $("#panel").slideDown(); });
jQuery slideUp() Method
The jQuery slideUp() method is used to slide up an element.
Syntax:
$(selector).slideUp(speed,callback);
The optional speed parameter specifies the duration of the effect. It can take
the following values: "slow", "fast", or milliseconds.
The optional callback parameter is a function to be executed after the sliding
completes.
The following example demonstrates the slideUp() method:
Example
$("#flip").click(function(){ $("#panel").slideUp(); });
Content Downloaded from www.w3schools.com
Created by www.ebooktutorials.blogspot.in
jQuery slideToggle() Method
The jQuery slideToggle() method toggles between the slideDown() and slideUp()
methods.
If the elements have been slid down, slideToggle() will slide them up.
If the elements have been slid up, slideToggle() will slide them down.
$(selector).slideToggle(speed,callback);
The optional speed parameter can take the following values: "slow", "fast",
milliseconds.
The optional callback parameter is a function to be executed after the sliding
completes.
The following example demonstrates the slideToggle() method:
Example
$("#flip").click(function(){ $("#panel").slideToggle(); });
Example:
<!DOCTYPE html> <html> <head> <script src="http://ajax.googleapis.com/ajax/libs/jquery/1.11.2/jquery.min.js"></script> <script> $(document).ready(function(){ $("#flip").click(function(){ $("#panel").slideDown("slow"); }); }); </script> <style> #panel, #flip { padding: 5px; text-align: center; background-color: #e5eecc; border: solid 1px #c3c3c3; } #panel { padding: 50px; display: none; } </style> </head> <body> <div id="flip">Click to slide down panel</div> <div id="panel">Hello world!</div> </body> </html>

Content Downloaded from www.w3schools.com
Created by www.ebooktutorials.blogspot.in
jQuery Effects – Animation
jQuery Animations - The animate() Method
The jQuery animate() method is used to create custom animations.
Syntax:
$(selector).animate({params},speed,callback);
The required params parameter defines the CSS properties to be animated.
The optional speed parameter specifies the duration of the effect. It can take
the following values: "slow", "fast", or milliseconds.
The optional callback parameter is a function to be executed after the
animation completes.
The following example demonstrates a simple use of the animate() method; it
moves a <div> element to the right, until it has reached a left property of
250px:
Example
$("button").click(function(){ $("div").animate({left: '250px'}); });
By default, all HTML elements have a static position, and cannot be moved.
To manipulate the position, remember to first set the CSS position property of
the element to relative, fixed, or absolute!
jQuery animate() - Manipulate Multiple Properties
Notice that multiple properties can be animated at the same time:
Example
$("button").click(function(){ $("div").animate({ left: '250px', opacity: '0.5', height: '150px', width: '150px' }); });
Is it possible to manipulate ALL CSS properties with the animate()
method?
Yes, almost! However, there is one important thing to remember: all property
names must be camel-cased when used with the animate() method: You will
need to write paddingLeft instead of padding-left, marginRight instead of
margin-right, and so on.
Also, color animation is not included in the core jQuery library.
If you want to animate color, you need to download the Color Animations
plugin from jQuery.com.

Content Downloaded from www.w3schools.com
Created by www.ebooktutorials.blogspot.in
jQuery animate() - Using Relative Values
It is also possible to define relative values (the value is then relative to the
element's current value). This is done by putting += or -= in front of the value:
Example
$("button").click(function(){ $("div").animate({ left: '250px', height: '+=150px', width: '+=150px' }); });
jQuery animate() - Using Pre-defined Values
You can even specify a property's animation value as "show", "hide", or "toggle":
Example
$("button").click(function(){ $("div").animate({ height: 'toggle' }); });
jQuery animate() - Uses Queue Functionality
By default, jQuery comes with queue functionality for animations.
This means that if you write multiple animate() calls after each other, jQuery
creates an "internal" queue with these method calls. Then it runs the animate
calls ONE by ONE.
So, if you want to perform different animations after each other, we take
advantage of the queue functionality:
Example 1
$("button").click(function(){ var div = $("div"); div.animate({height: '300px', opacity: '0.4'}, "slow"); div.animate({width: '300px', opacity: '0.8'}, "slow"); div.animate({height: '100px', opacity: '0.4'}, "slow"); div.animate({width: '100px', opacity: '0.8'}, "slow"); });
The example below first moves the <div> element to the right, and then
increases the font size of the text:
Example 2
$("button").click(function(){ var div = $("div"); div.animate({left: '100px'}, "slow"); div.animate({fontSize: '3em'}, "slow"); });

Content Downloaded from www.w3schools.com
Created by www.ebooktutorials.blogspot.in
Example:
<!DOCTYPE html>
<html>
<head>
<script
src="http://ajax.googleapis.com/ajax/libs/jquery/1.11.2/jquery.min.js"></scri
pt>
<script>
$(document).ready(function(){
$("button").click(function(){
var div = $("div");
div.animate({left: '100px'}, "slow");
div.animate({fontSize: '3em'}, "slow");
});
});
</script>
</head>
<body>
<button>Start Animation</button>
<p>By default, all HTML elements have a static position, and cannot be moved.
To manipulate the position, remember to first set the CSS position property
of the element to relative, fixed, or absolute!</p>
<div
style="background:#98bf21;height:100px;width:200px;position:absolute;">HELLO<
/div>
</body>
</html>
Content Downloaded from www.w3schools.com
Created by www.ebooktutorials.blogspot.in
jQuery Stop Animations
jQuery stop() Method
The jQuery stop() method is used to stop an animation or effect before it is
finished.
The stop() method works for all jQuery effect functions, including sliding, fading
and custom animations.
Syntax:
$(selector).stop(stopAll,goToEnd);
The optional stopAll parameter specifies whether also the animation queue
should be cleared or not. Default is false, which means that only the active
animation will be stopped, allowing any queued animations to be performed
afterwards.
The optional goToEnd parameter specifies whether or not to complete the
current animation immediately. Default is false.
So, by default, the stop() method kills the current animation being performed
on the selected element.
The following example demonstrates the stop() method, with no parameters:
Example
$("#stop").click(function(){ $("#panel").stop(); });
Content Downloaded from www.w3schools.com
Created by www.ebooktutorials.blogspot.in
Example
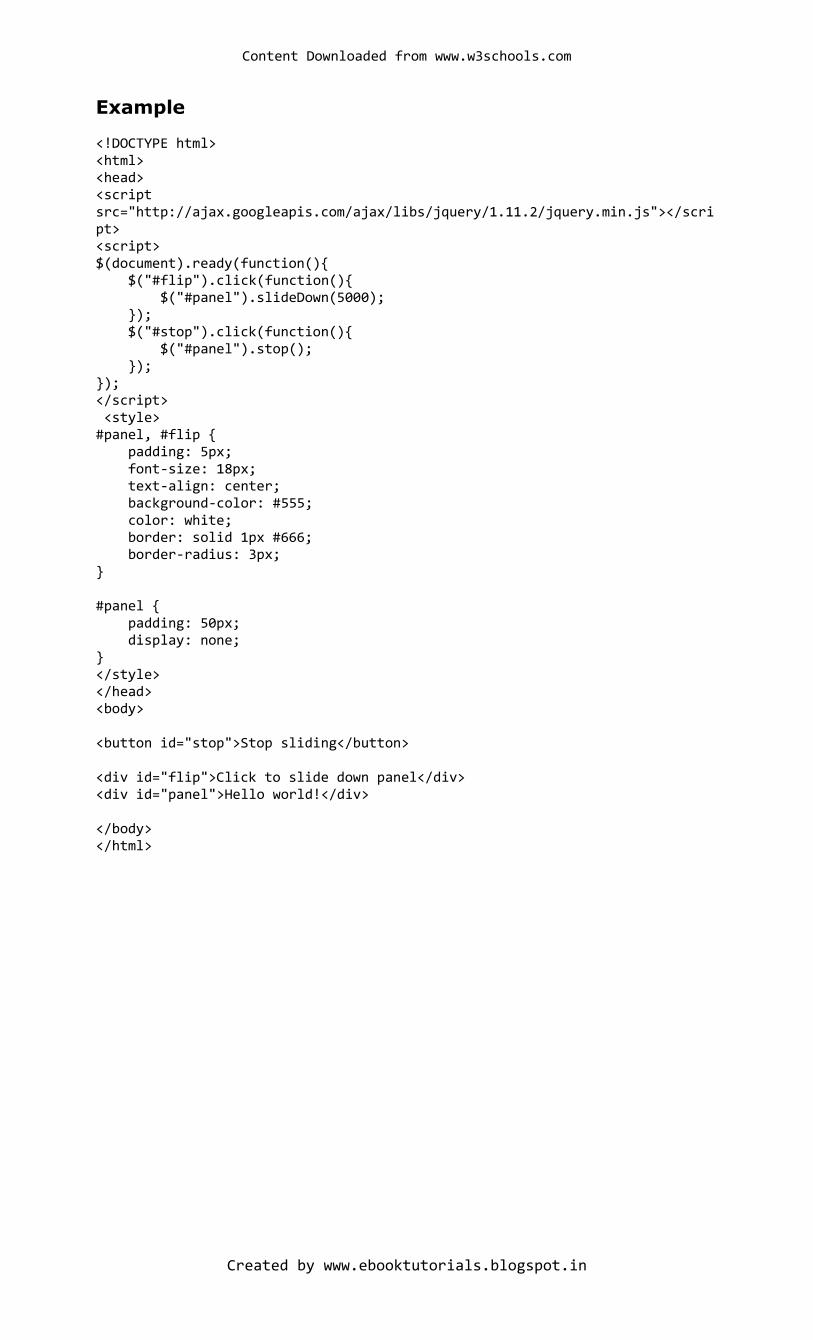
<!DOCTYPE html> <html> <head> <script src="http://ajax.googleapis.com/ajax/libs/jquery/1.11.2/jquery.min.js"></script> <script> $(document).ready(function(){ $("#flip").click(function(){ $("#panel").slideDown(5000); }); $("#stop").click(function(){ $("#panel").stop(); }); }); </script> <style> #panel, #flip { padding: 5px; font-size: 18px; text-align: center; background-color: #555; color: white; border: solid 1px #666; border-radius: 3px; } #panel { padding: 50px; display: none; } </style> </head> <body> <button id="stop">Stop sliding</button> <div id="flip">Click to slide down panel</div> <div id="panel">Hello world!</div> </body> </html>

Content Downloaded from www.w3schools.com
Created by www.ebooktutorials.blogspot.in
jQuery Callback Functions
A callback function is executed after the current effect is 100% finished.
jQuery Callback Functions
JavaScript statements are executed line by line. However, with effects, the next
line of code can be run even though the effect is not finished. This can create
errors.
To prevent this, you can create a callback function.
A callback function is executed after the current effect is finished.
Typical syntax: $(selector).hide(speed,callback);
Examples
The example below has a callback parameter that is a function that will be
executed after the hide effect is completed:
Example with Callback
$("button").click(function(){ $("p").hide("slow", function(){ alert("The paragraph is now hidden"); }); });
The example below has no callback parameter, and the alert box will be
displayed before the hide effect is completed:
Example without Callback
$("button").click(function(){ $("p").hide(1000); alert("The paragraph is now hidden"); });

Content Downloaded from www.w3schools.com
Created by www.ebooktutorials.blogspot.in
jQuery – Chaining
With jQuery, you can chain together actions/methods.
Chaining allows us to run multiple jQuery methods (on the same element) within a single statement.
jQuery Method Chaining
Until now we have been writing jQuery statements one at a time (one after the
other).
However, there is a technique called chaining, that allows us to run multiple
jQuery commands, one after the other, on the same element(s).
Tip: This way, browsers do not have to find the same element(s) more than
once.
To chain an action, you simply append the action to the previous action.
The following example chains together the css(), slideUp(), and slideDown()
methods. The "p1" element first changes to red, then it slides up, and then it
slides down:
Example
$("#p1").css("color", "red").slideUp(2000).slideDown(2000);
We could also have added more method calls if needed.
Tip: When chaining, the line of code could become quite long. However, jQuery
is not very strict on the syntax; you can format it like you want, including line
breaks and indentations.
This also works just fine:
Example
$("#p1").css("color", "red") .slideUp(2000) .slideDown(2000);
jQuery throws away extra whitespace and executes the lines above as one long
line of code.

Content Downloaded from www.w3schools.com
Created by www.ebooktutorials.blogspot.in
Example
<!DOCTYPE html> <html> <head> <script src="http://ajax.googleapis.com/ajax/libs/jquery/1.11.2/jquery.min.js"></script> <script> $(document).ready(function(){ $("button").click(function(){ $("#p1").css("color", "red") .slideUp(2000) .slideDown(2000); }); }); </script> </head> <body> <p id="p1">jQuery is fun!!</p> <button>Click me</button> </body> </html>

Content Downloaded from www.w3schools.com
Created by www.ebooktutorials.blogspot.in
jQuery - Get Content and Attributes
jQuery contains powerful methods for changing and manipulating HTML elements and attributes.
jQuery DOM Manipulation
One very important part of jQuery is the possibility to manipulate the DOM.
jQuery comes with a bunch of DOM related methods that make it easy to
access and manipulate elements and attributes.
DOM = Document Object Model
The DOM defines a standard for accessing HTML and XML documents:
"The W3C Document Object Model (DOM) is a platform and language-neutral
interface that allows programs and scripts to dynamically access and update the
content, structure, and style of a document."
Get Content - text(), html(), and val()
Three simple, but useful, jQuery methods for DOM manipulation are:
text() - Sets or returns the text content of selected elements
html() - Sets or returns the content of selected elements (including HTML
markup)
val() - Sets or returns the value of form fields
The following example demonstrates how to get content with the jQuery text()
and html() methods:
Example
$("#btn1").click(function(){ alert("Text: " + $("#test").text()); }); $("#btn2").click(function(){ alert("HTML: " + $("#test").html()); });
The following example demonstrates how to get the value of an input field with
the jQuery val() method:
Example
$("#btn1").click(function(){ alert("Value: " + $("#test").val()); });
Get Attributes - attr()
The jQuery attr() method is used to get attribute values.
The following example demonstrates how to get the value of the href attribute
in a link:

Content Downloaded from www.w3schools.com
Created by www.ebooktutorials.blogspot.in
Example
$("button").click(function(){ alert($("#w3s").attr("href")); });
Example
<!DOCTYPE html> <html> <head> <script src="http://ajax.googleapis.com/ajax/libs/jquery/1.11.2/jquery.min.js"></script> <script> $(document).ready(function(){ $("button").click(function(){ alert("Value: " + $("#test").val()); }); }); </script> </head> <body> <p>Name: <input type="text" id="test" value="Mickey Mouse"></p> <button>Show Value</button> </body> </html>
Content Downloaded from www.w3schools.com
Created by www.ebooktutorials.blogspot.in
jQuery - Set Content and Attributes
Set Content - text(), html(), and val()
We will use the same three methods from the previous page to set content:
text() - Sets or returns the text content of selected elements
html() - Sets or returns the content of selected elements (including HTML
markup)
val() - Sets or returns the value of form fields
The following example demonstrates how to set content with the jQuery text(),
html(), and val() methods:
Example
$("#btn1").click(function(){ $("#test1").text("Hello world!"); }); $("#btn2").click(function(){ $("#test2").html("<b>Hello world!</b>"); }); $("#btn3").click(function(){ $("#test3").val("Dolly Duck"); });
A Callback Function for text(), html(), and val()
All of the three jQuery methods above: text(), html(), and val(), also come with a
callback function. The callback function has two parameters: the index of the
current element in the list of elements selected and the original (old) value. You
then return the string you wish to use as the new value from the function.
The following example demonstrates text() and html() with a callback function:
Example
$("#btn1").click(function(){ $("#test1").text(function(i, origText){ return "Old text: " + origText + " New text: Hello world! (index: " + i + ")"; }); }); $("#btn2").click(function(){ $("#test2").html(function(i, origText){ return "Old html: " + origText + " New html: Hello <b>world!</b> (index: " + i + ")"; }); });
Set Attributes - attr()
The jQuery attr() method is also used to set/change attribute values.
The following example demonstrates how to change (set) the value of the href
attribute in a link:

Content Downloaded from www.w3schools.com
Created by www.ebooktutorials.blogspot.in
Example
$("button").click(function(){ $("#w3s").attr("href", "http://www.w3schools.com/jquery"); });
The attr() method also allows you to set multiple attributes at the same time.
The following example demonstrates how to set both the href and title
attributes at the same time:
Example
$("button").click(function(){ $("#w3s").attr({ "href" : "http://www.w3schools.com/jquery", "title" : "W3Schools jQuery Tutorial" }); });
A Callback Function for attr()
The jQuery method attr(), also come with a callback function. The callback
function has two parameters: the index of the current element in the list of
elements selected and the original (old) attribute value. You then return the
string you wish to use as the new attribute value from the function.
The following example demonstrates attr() with a callback function:
Example
$("button").click(function(){ $("#w3s").attr("href", function(i, origValue){ return origValue + "/jquery"; }); });
Example
<!DOCTYPE html> <html> <head><script src="http://ajax.googleapis.com/ajax/libs/jquery/1.11.2/jquery.min.js"></script> <script> $(document).ready(function(){ $("#btn1").click(function(){ $("#test1").text("Hello world!"); }); $("#btn2").click(function(){ $("#test2").html("<b>Hello world!</b>"); }); $("#btn3").click(function(){ $("#test3").val("Dolly Duck"); }); }); </script></head> <body> <p id="test1">This is a paragraph.</p> <p id="test2">This is another paragraph.</p> <p>Input field: <input type="text" id="test3" value="Mickey Mouse"></p> <button id="btn1">Set Text</button> <button id="btn2">Set HTML</button> <button id="btn3">Set Value</button> </body></html>

Content Downloaded from www.w3schools.com
Created by www.ebooktutorials.blogspot.in
jQuery - Add Elements
With jQuery, it is easy to add new elements/content.
Add New HTML Content
We will look at four jQuery methods that are used to add new content:
append() - Inserts content at the end of the selected elements
prepend() - Inserts content at the beginning of the selected elements
after() - Inserts content after the selected elements
before() - Inserts content before the selected elements
jQuery append() Method
The jQuery append() method inserts content AT THE END of the selected HTML
elements.
Example
$("p").append("Some appended text.");
jQuery prepend() Method
The jQuery prepend() method inserts content AT THE BEGINNING of the
selected HTML elements.
Example
$("p").prepend("Some prepended text.");
Add Several New Elements With append() and prepend()
In both examples above, we have only inserted some text/HTML at the
beginning/end of the selected HTML elements.
However, both the append() and prepend() methods can take an infinite
number of new elements as parameters. The new elements can be generated
with text/HTML (like we have done in the examples above), with jQuery, or with
JavaScript code and DOM elements.
In the following example, we create several new elements. The elements are
created with text/HTML, jQuery, and JavaScript/DOM. Then we append the
new elements to the text with the append() method (this would have worked for
prepend() too) :
Example
function appendText() { var txt1 = "<p>Text.</p>"; // Create element with HTML var txt2 = $("<p></p>").text("Text."); // Create with jQuery var txt3 = document.createElement("p"); // Create with DOM txt3.innerHTML = "Text."; $("p").append(txt1, txt2, txt3); // Append the new elements }

Content Downloaded from www.w3schools.com
Created by www.ebooktutorials.blogspot.in
jQuery after() and before() Methods
The jQuery after() method inserts content AFTER the selected HTML elements.
The jQuery before() method inserts content BEFORE the selected HTML
elements.
Example
$("img").after("Some text after"); $("img").before("Some text before");
Add Several New Elements With after() and before()
Also, both the after() and before() methods can take an infinite number of new
elements as parameters. The new elements can be generated with text/HTML
(like we have done in the example above), with jQuery, or with JavaScript code
and DOM elements.
In the following example, we create several new elements. The elements are
created with text/HTML, jQuery, and JavaScript/DOM. Then we insert the new
elements to the text with the after() method (this would have worked for before()
too) :
Example
function afterText() { var txt1 = "<b>I </b>"; // Create element with HTML var txt2 = $("<i></i>").text("love "); // Create with jQuery var txt3 = document.createElement("b"); // Create with DOM txt3.innerHTML = "jQuery!"; $("img").after(txt1, txt2, txt3); // Insert new elements after img }
Example <!DOCTYPE html> <html> <head><script src="http://ajax.googleapis.com/ajax/libs/jquery/1.11.2/jquery.min.js"></script> <script> $(document).ready(function(){ $("#btn1").click(function(){ $("p").prepend("<b>Prepended text</b>. "); }); $("#btn2").click(function(){ $("ol").prepend("<li>Prepended item</li>"); }); }); </script></head> <body> <p>This is a paragraph.</p> <p>This is another paragraph.</p> <ol> <li>List item 1</li> <li>List item 2</li> <li>List item 3</li> </ol> <button id="btn1">Prepend text</button> <button id="btn2">Prepend list item</button> </body></html>

Content Downloaded from www.w3schools.com
Created by www.ebooktutorials.blogspot.in
Example <!DOCTYPE html> <html> <head> <script src="http://ajax.googleapis.com/ajax/libs/jquery/1.11.2/jquery.min.js"></script> <script> function afterText() { var txt1 = "<b>I </b>"; // Create element with HTML var txt2 = $("<i></i>").text("love "); // Create with jQuery var txt3 = document.createElement("b"); // Create with DOM txt3.innerHTML = "jQuery!"; $("img").after(txt1, txt2, txt3); // Insert new elements after img } </script> </head> <body> <img src="/images/w3jquery.gif" alt="jQuery" width="100" height="140"> <p>Click the button to insert text after the image.</p> <button onclick="afterText()">Insert after</button> </body> </html>
Example <!DOCTYPE html> <html> <head> <script src="http://ajax.googleapis.com/ajax/libs/jquery/1.11.2/jquery.min.js"></script> <script> $(document).ready(function(){ $("#btn1").click(function(){ $("img").before("<b>Before</b>"); }); $("#btn2").click(function(){ $("img").after("<i>After</i>"); }); }); </script> </head> <body> <img src="/images/w3jquery.gif" alt="jQuery" width="100" height="140"><br><br> <button id="btn1">Insert before</button> <button id="btn2">Insert after</button> </body> </html>

Content Downloaded from www.w3schools.com
Created by www.ebooktutorials.blogspot.in
jQuery - Remove Elements
With jQuery, it is easy to remove existing HTML elements.
Remove Elements/Content
To remove elements and content, there are mainly two jQuery methods:
remove() - Removes the selected element (and its child elements)
empty() - Removes the child elements from the selected element
jQuery remove() Method
The jQuery remove() method removes the selected element(s) and its child
elements.
Example
$("#div1").remove();
jQuery empty() Method
The jQuery empty() method removes the child elements of the selected
element(s).
Example
$("#div1").empty();
Filter the Elements to be Removed
The jQuery remove() method also accepts one parameter, which allows you to
filter the elements to be removed.
The parameter can be any of the jQuery selector syntaxes.
The following example removes all <p> elements with class="italic":
Example
$("p").remove(".italic");
Example <!DOCTYPE html> <html><head> <script src="http://ajax.googleapis.com/ajax/libs/jquery/1.11.2/jquery.min.js"></script> <script> $(document).ready(function(){ $("button").click(function(){ $("#div1").remove(); }); }); </script></head> <body> <div id="div1" style="height:100px;width:300px;border:1px solid black;background-color:yellow;"> This is some text in the div. <p>This is a paragraph in the div.</p> <p>This is another paragraph in the div.</p> </div><br> <button>Remove div element</button> </body></html>

Content Downloaded from www.w3schools.com
Created by www.ebooktutorials.blogspot.in
jQuery - Get and Set CSS Classes
jQuery Manipulating CSS
jQuery has several methods for CSS manipulation. We will look at the following
methods:
addClass() - Adds one or more classes to the selected elements
removeClass() - Removes one or more classes from the selected elements
toggleClass() - Toggles between adding/removing classes from the
selected elements
css() - Sets or returns the style attribute
Example Stylesheet
The following stylesheet will be used for all the examples on this page:
.important {
font-weight: bold;
font-size: xx-large;
}
.blue {
color: blue;
}
jQuery addClass() Method
The following example shows how to add class attributes to different elements.
Of course you can select multiple elements, when adding classes:
Example
$("button").click(function(){ $("h1, h2, p").addClass("blue"); $("div").addClass("important"); });
You can also specify multiple classes within the addClass() method:
Example
$("button").click(function(){ $("#div1").addClass("important blue"); });
jQuery removeClass() Method
The following example shows how to remove a specific class attribute from
different elements:
Example
$("button").click(function(){ $("h1, h2, p").removeClass("blue"); });

Content Downloaded from www.w3schools.com
Created by www.ebooktutorials.blogspot.in
jQuery toggleClass() Method
The following example will show how to use the jQuery toggleClass() method.
This method toggles between adding/removing classes from the selected
elements:
Example
$("button").click(function(){ $("h1, h2, p").toggleClass("blue"); });
Example
<!DOCTYPE html> <html> <head> <script src="http://ajax.googleapis.com/ajax/libs/jquery/1.11.2/jquery.min.js"></script> <script> $(document).ready(function(){ $("button").click(function(){ $("h1, h2, p").toggleClass("blue"); }); }); </script> <style> .blue { color: blue; } </style> </head> <body> <h1>Heading 1</h1> <h2>Heading 2</h2> <p>This is a paragraph.</p> <p>This is another paragraph.</p> <button>Toggle class</button> </body> </html>

Content Downloaded from www.w3schools.com
Created by www.ebooktutorials.blogspot.in
jQuery - css() Method
jQuery css() Method
The css() method sets or returns one or more style properties for the selected
elements.
Return a CSS Property
To return the value of a specified CSS property, use the following syntax:
css("propertyname");
The following example will return the background-color value of the FIRST
matched element:
Example
$("p").css("background-color");
Set a CSS Property
To set a specified CSS property, use the following syntax:
css("propertyname","value");
The following example will set the background-color value for ALL matched
elements:
Example
$("p").css("background-color", "yellow");
Set Multiple CSS Properties
To set multiple CSS properties, use the following syntax:
css({"propertyname":"value","propertyname":"value",...});
The following example will set a background-color and a font-size for ALL
matched elements:
Example
$("p").css({"background-color": "yellow", "font-size": "200%"});
Content Downloaded from www.w3schools.com
Created by www.ebooktutorials.blogspot.in
Example
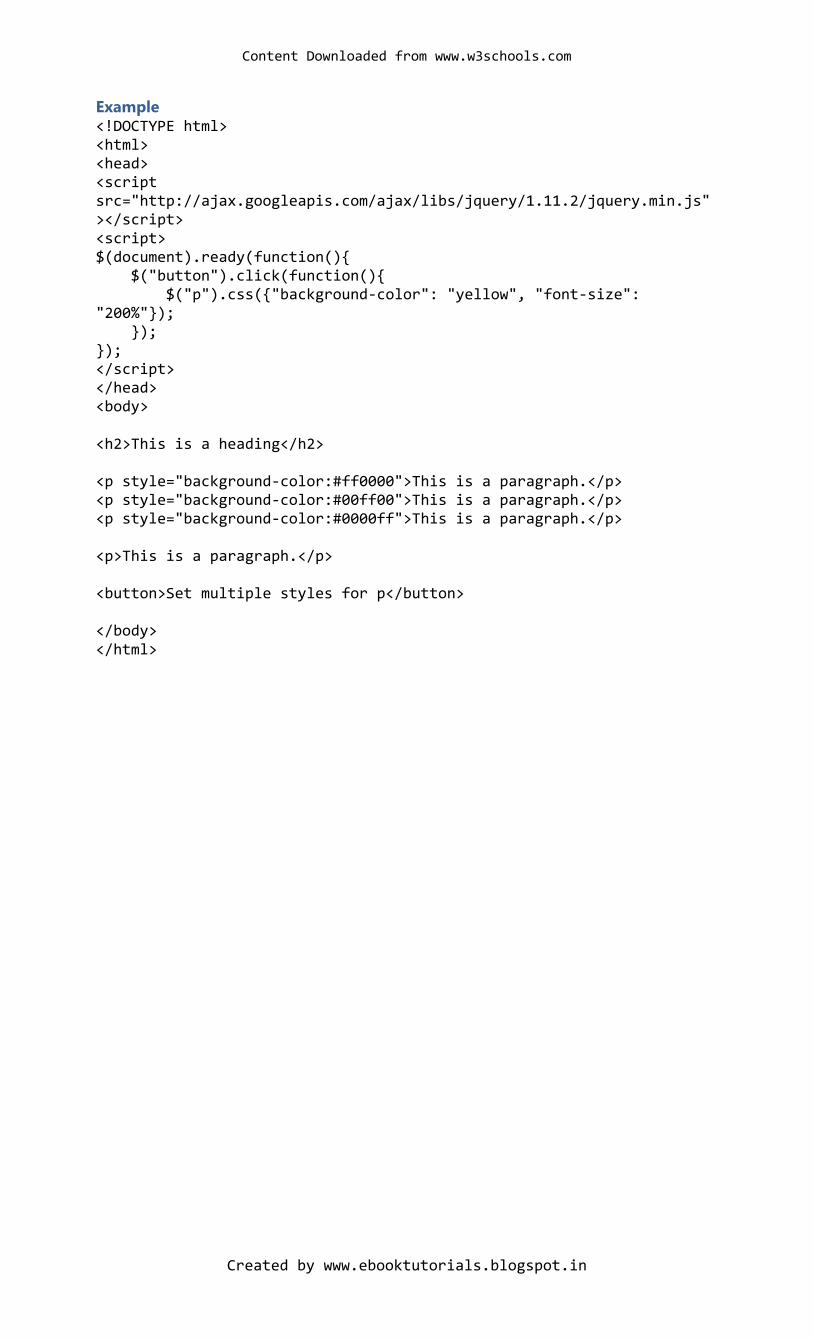
<!DOCTYPE html> <html> <head> <script src="http://ajax.googleapis.com/ajax/libs/jquery/1.11.2/jquery.min.js"></script> <script> $(document).ready(function(){ $("button").click(function(){ $("p").css({"background-color": "yellow", "font-size": "200%"}); }); }); </script> </head> <body> <h2>This is a heading</h2> <p style="background-color:#ff0000">This is a paragraph.</p> <p style="background-color:#00ff00">This is a paragraph.</p> <p style="background-color:#0000ff">This is a paragraph.</p> <p>This is a paragraph.</p> <button>Set multiple styles for p</button> </body> </html>

Content Downloaded from www.w3schools.com
Created by www.ebooktutorials.blogspot.in
jQuery - Dimensions
With jQuery, it is easy to work with the dimensions of elements and browser window.
jQuery Dimension Methods
jQuery has several important methods for working with dimensions:
width()
height()
innerWidth()
innerHeight()
outerWidth()
outerHeight()
jQuery Dimensions
jQuery width() and height() Methods
The width() method sets or returns the width of an element (includes NO
padding, border, or margin).
The height() method sets or returns the height of an element (includes NO
padding, border, or margin).
The following example returns the width and height of a specified <div>
element:
Example
$("button").click(function(){ var txt = ""; txt += "Width: " + $("#div1").width() + "</br>"; txt += "Height: " + $("#div1").height(); $("#div1").html(txt); });

Content Downloaded from www.w3schools.com
Created by www.ebooktutorials.blogspot.in
jQuery innerWidth() and innerHeight() Methods
The innerWidth() method returns the width of an element (includes padding).
The innerHeight() method returns the height of an element (includes padding).
The following example returns the inner-width/height of a specified <div>
element:
Example
$("button").click(function(){ var txt = ""; txt += "Inner width: " + $("#div1").innerWidth() + "</br>"; txt += "Inner height: " + $("#div1").innerHeight(); $("#div1").html(txt); });
jQuery outerWidth() and outerHeight() Methods
The outerWidth() method returns the width of an element (includes padding
and border).
The outerHeight() method returns the height of an element (includes padding
and border).
The following example returns the outer-width/height of a specified <div>
element:
Example
$("button").click(function(){ var txt = ""; txt += "Outer width: " + $("#div1").outerWidth() + "</br>"; txt += "Outer height: " + $("#div1").outerHeight(); $("#div1").html(txt); });
The outerWidth(true) method returns the width of an element (includes padding, border, and margin).
The outerHeight(true) method returns the height of an element (includes
padding, border, and margin).
Example
$("button").click(function(){ var txt = ""; txt += "Outer width (+margin): " + $("#div1").outerWidth(true) + "</br>"; txt += "Outer height (+margin): " + $("#div1").outerHeight(true); $("#div1").html(txt); });
jQuery More width() and height()
The following example returns the width and height of the document (the HTML
document) and window (the browser viewport):

Content Downloaded from www.w3schools.com
Created by www.ebooktutorials.blogspot.in
Example
$("button").click(function(){ var txt = ""; txt += "Document width/height: " + $(document).width(); txt += "x" + $(document).height() + "\n"; txt += "Window width/height: " + $(window).width(); txt += "x" + $(window).height(); alert(txt); });
The following example sets the width and height of a specified <div> element:
Example
$("button").click(function(){ $("#div1").width(500).height(500); });
Example
<!DOCTYPE html> <html> <head> <script src="http://ajax.googleapis.com/ajax/libs/jquery/1.11.2/jquery.min.js"></script> <script> $(document).ready(function(){ $("button").click(function(){ var txt = ""; txt += "Document width/height: " + $(document).width(); txt += "x" + $(document).height() + "\n"; txt += "Window width/height: " + $(window).width(); txt += "x" + $(window).height(); alert(txt); }); }); </script> </head> <body> <button>Display dimensions of document and window</button> </body> </html>

Content Downloaded from www.w3schools.com
Created by www.ebooktutorials.blogspot.in
jQuery Traversing
What is Traversing?
jQuery traversing, which means "move through", are used to "find" (or select)
HTML elements based on their relation to other elements. Start with one
selection and move through that selection until you reach the elements you
desire.
The image below illustrates a family tree. With jQuery traversing, you can
easily move up (ancestors), down (descendants) and sideways (siblings) in the
family tree, starting from the selected (current) element. This movement is
called traversing - or moving through - the DOM.
Illustration explained:
The <div> element is the parent of <ul>, and an ancestor of everything
inside of it
The <ul> element is the parent of both <li> elements, and a child of
<div>
The left <li> element is the parent of <span>, child of <ul> and
a descendant of <div>
The <span> element is a child of the left <li> and a descendant of <ul>
and <div>
The two <li> elements are siblings (they share the same parent)
The right <li> element is the parent of <b>, child of <ul> and
a descendant of <div>
The <b> element is a child of the right <li> and a descendant of <ul>
and <div>
An ancestor is a parent, grandparent, great-grandparent, and so on.
A descendant is a child, grandchild, great-grandchild, and so on.
Siblings share the same parent.
Traversing the DOM
jQuery provides a variety of methods that allows us to traverse the DOM.
The largest category of traversal methods are tree-traversal.
The next chapters will show us how to travel up, down and sideways in the
DOM tree.

Content Downloaded from www.w3schools.com
Created by www.ebooktutorials.blogspot.in
jQuery Traversing – Ancestors
An ancestor is a parent, grandparent, great-grandparent, and so on.
With jQuery you can traverse up the DOM tree to find ancestors of an element.
Traversing Up the DOM Tree Three useful jQuery methods for traversing up the DOM tree are:
parent()
parents()
parentsUntil()
jQuery parent() Method
The parent() method returns the direct parent element of the selected element.
This method only traverse a single level up the DOM tree.
The following example returns the direct parent element of each <span>
elements:
Example
$(document).ready(function(){ $("span").parent(); });
jQuery parents() Method
The parents() method returns all ancestor elements of the selected element, all
the way up to the document's root element (<html>).
The following example returns all ancestors of all <span> elements:
Example
$(document).ready(function(){ $("span").parents(); });
You can also use an optional parameter to filter the search for ancestors.
The following example returns all ancestors of all <span> elements that are
<ul> elements:
Example
$(document).ready(function(){ $("span").parents("ul"); });
jQuery parentsUntil() Method
The parentsUntil() method returns all ancestor elements between two given
arguments.
The following example returns all ancestor elements between a <span> and a
<div> element:
Example
$(document).ready(function(){ $("span").parentsUntil("div"); });

Content Downloaded from www.w3schools.com
Created by www.ebooktutorials.blogspot.in
Example
<!DOCTYPE html>
<html>
<head>
<style>
.ancestors * {
display: block;
border: 2px solid lightgrey;
color: lightgrey;
padding: 5px;
margin: 15px;
}
</style>
<script src="http://ajax.googleapis.com/ajax/libs/jquery/1.11.2/jquery.min.js"></script>
<script>
$(document).ready(function(){
$("span").parents().css({"color": "red", "border": "2px solid red"});
});
</script>
</head>
<body class="ancestors">body (great-great-grandparent)
<div style="width:500px;">div (great-grandparent)
<ul>ul (grandparent)
<li>li (direct parent)
<span>span</span>
</li>
</ul>
</div>
</body>
<!-- The outer red border, before the body element, is the html element (also an ancestor) -->
</html>
Content Downloaded from www.w3schools.com
Created by www.ebooktutorials.blogspot.in
jQuery Traversing - Descendants
A descendant is a child, grandchild, great-grandchild, and so on.
With jQuery you can traverse down the DOM tree to find descendants of an
element.
Traversing Down the DOM Tree
Two useful jQuery methods for traversing down the DOM tree are:
children()
find()
jQuery children() Method
The children() method returns all direct children of the selected element.
This method only traverse a single level down the DOM tree.
The following example returns all elements that are direct children of each
<div> elements:
Example
$(document).ready(function(){ $("div").children(); });
You can also use an optional parameter to filter the search for children.
The following example returns all <p> elements with the class name "1", that
are direct children of <div>:
Example
$(document).ready(function(){ $("div").children("p.1"); });
jQuery find() Method
The find() method returns descendant elements of the selected element, all the
way down to the last descendant.
The following example returns all <span> elements that are descendants of
<div>:
Example
$(document).ready(function(){ $("div").find("span"); });
The following example returns all descendants of <div>:
Example
$(document).ready(function(){ $("div").find("*"); });

Content Downloaded from www.w3schools.com
Created by www.ebooktutorials.blogspot.in
Example <!DOCTYPE html> <html> <head> <style> .descendants * { display: block; border: 2px solid lightgrey; color: lightgrey; padding: 5px; margin: 15px; } </style> <script src="http://ajax.googleapis.com/ajax/libs/jquery/1.11.2/jquery.min.js"></script> <script> $(document).ready(function(){ $("div").find("span").css({"color": "red", "border": "2px solid red"}); }); </script> </head> <body> <div class="descendants" style="width:500px;">div (current element) <p>p (child) <span>span (grandchild)</span> </p> <p>p (child) <span>span (grandchild)</span> </p> </div> </body> </html>

Content Downloaded from www.w3schools.com
Created by www.ebooktutorials.blogspot.in
jQuery Traversing – Siblings
Siblings share the same parent.
With jQuery you can traverse sideways in the DOM tree to find siblings of an element.
Traversing Sideways in The DOM Tree
There are many useful jQuery methods for traversing sideways in the DOM tree:
siblings()
next()
nextAll()
nextUntil()
prev()
prevAll()
prevUntil()
jQuery siblings() Method
The siblings() method returns all sibling elements of the selected element.
The following example returns all sibling elements of <h2>:
Example
$(document).ready(function(){ $("h2").siblings(); });
You can also use an optional parameter to filter the search for siblings.
The following example returns all sibling elements of <h2> that are <p> elements:
Example
$(document).ready(function(){ $("h2").siblings("p"); });
jQuery next() Method
The next() method returns the next sibling element of the selected element.
The following example returns the next sibling of <h2>:
Example
$(document).ready(function(){ $("h2").next(); });
jQuery nextAll() Method
The nextAll() method returns all next sibling elements of the selected element.
The following example returns all next sibling elements of <h2>:
Example
$(document).ready(function(){ $("h2").nextAll(); });

Content Downloaded from www.w3schools.com
Created by www.ebooktutorials.blogspot.in
jQuery nextUntil() Method
The nextUntil() method returns all next sibling elements between two given arguments.
The following example returns all sibling elements between a <h2> and a <h6>
element:
Example
$(document).ready(function(){ $("h2").nextUntil("h6"); });
Example 1
<!DOCTYPE html> <html> <head> <script src="http://ajax.googleapis.com/ajax/libs/jquery/1.11.2/jquery.min.js"></script> <script> $(document).ready(function(){ $("p").filter(".intro").css("background-color", "yellow"); }); </script> </head> <body> <h1>Welcome to My Homepage</h1> <p>My name is Donald.</p> <p class="intro">I live in Duckburg.</p> <p class="intro">I love Duckburg.</p> <p>My best friend is Mickey.</p> </body> </html>
Example 2
<!DOCTYPE html> <html> <head> <script src="http://ajax.googleapis.com/ajax/libs/jquery/1.11.2/jquery.min.js"></script> <script> $(document).ready(function(){ $("p").eq(1).css("background-color", "yellow"); }); </script> </head> <body> <h1>Welcome to My Homepage</h1> <p>My name is Donald (index 0).</p> <p>Donald Duck (index 1).</p> <p>I live in Duckburg (index 2).</p> <p>My best friend is Mickey (index 3).</p> </body> </html>

Content Downloaded from www.w3schools.com
Created by www.ebooktutorials.blogspot.in
jQuery Traversing – Filtering
Narrow Down The Search For Elements
The three most basic filtering methods are first(), last() and eq(), which allow you to
select a specific element based on its position in a group of elements.
Other filtering methods, like filter() and not() allow you to select elements that match,
or do not match, a certain criteria.
jQuery first() Method
The first() method returns the first element of the selected elements.
The following example selects the first <p> element inside the first <div> element:
Example
$(document).ready(function(){ $("div p").first(); });
jQuery last() Method
The last() method returns the last element of the selected elements.
The following example selects the last <p> element inside the last <div> element:
Example
$(document).ready(function(){ $("div p").last(); });
jQuery eq() method
The eq() method returns an element with a specific index number of the selected
elements.
The index numbers start at 0, so the first element will have the index number 0 and
not 1. The following example selects the second <p> element (index number 1):
Example
$(document).ready(function(){ $("p").eq(1); });
jQuery filter() Method
The filter() method lets you specify a criteria. Elements that do not match the criteria
are removed from the selection, and those that match will be returned.
The following example returns all <p> elements with class name "intro":
Example
$(document).ready(function(){ $("p").filter(".intro"); });
Content Downloaded from www.w3schools.com
Created by www.ebooktutorials.blogspot.in
jQuery not() Method
The not() method returns all elements that do not match the criteria.
Tip: The not() method is the opposite of filter().
The following example returns all <p> elements that do not have class name "intro":
Example
$(document).ready(function(){ $("p").not(".intro"); });
Example
<!DOCTYPE html> <html> <head> <script src="http://ajax.googleapis.com/ajax/libs/jquery/1.11.2/jquery.min.js"></script> <script> $(document).ready(function(){ $("div p").first().css("background-color", "yellow");
$("div p").last().css("background-color", "yellow"); }); </script> </head> <body> <h1>Welcome to My Homepage</h1> <p>This is the first paragraph in body.</p> <div style="border: 1px solid black;"> <p>This is the first paragraph in a div.</p> <p>This is the last paragraph in a div.</p> </div><br> <div style="border: 1px solid black;"> <p>This is the first paragraph in another div.</p> <p>This is the last paragraph in another div.</p> </div> <p>This is the last paragraph in body.</p> </body> </html>


![(jQuery Fundamentals) Fundamentos de jQuery191.13.234.92/.../Arquivos/LPA/JQuery/apostilas/apostila-jquery-br.pdf · Fundamentos de jQuery (jQuery Fundamentals) Rebecca Murphey []](https://img.dokumen.tips/doc/110x75/6077fbbcb4f4d25f0363d510/jquery-fundamentals-fundamentos-de-jquery1911323492arquivoslpajqueryapostilasapostila-jquery-brpdf.jpg)