Embed Size (px)
Citation preview

Joy Marie FoustFebruary 2011

What is Noodletools?:
• Plan their research process• Analyze their sources• Take notes without plagiarizing• Check for errors• Organize information • Create a thesis statement• Share their work• Get teacher feedback
Noodletools is a note taking software that helps students:

What is Noodletools?:
• Available from home or school
• Stored online
• Useful for multiple grade levels
• Applicable to all subjects
Noodletools is:

Why use Noodletools?
“Students have access to so much content,
but they have trouble identifying useful sources
and organizing their information.
With Noodletools, my students have the
opportunity to examine the validity of a
source, categorize the information that they
encounter, and receive feedback from me
whether they are on-campus or at home.”
- Ryan Liese, World History I
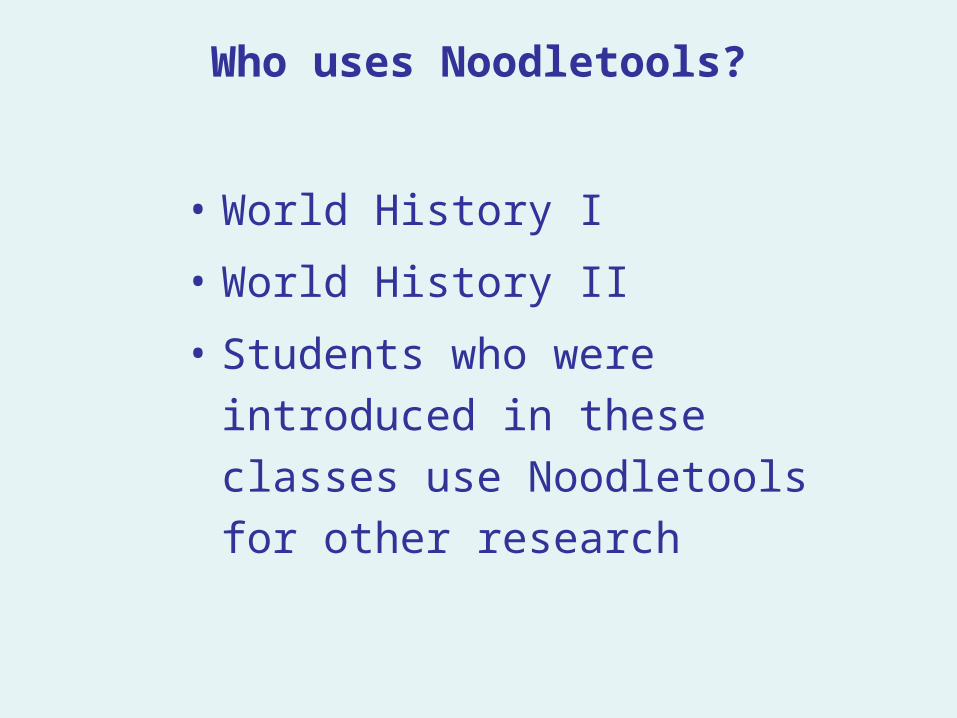
Who uses Noodletools?
• World History I
• World History II
• Students who were introduced in
these classes use Noodletools for
other research

You will learn how to:
• Access NoodleTools• Create a profile• Start a project• Add a source• Make a notecard• Form an outline• Organize your notecards• Share your bibliography and notecards
Use the links above to jump to a section.

Accessing NoodleTools
NoodleTools can be accessed from Destiny or www.Noodletools.com/login .

Creating a profile
Start by creating a Personal ID.
You’ll be able to use this to reach your work at school or home.
Creating a profile
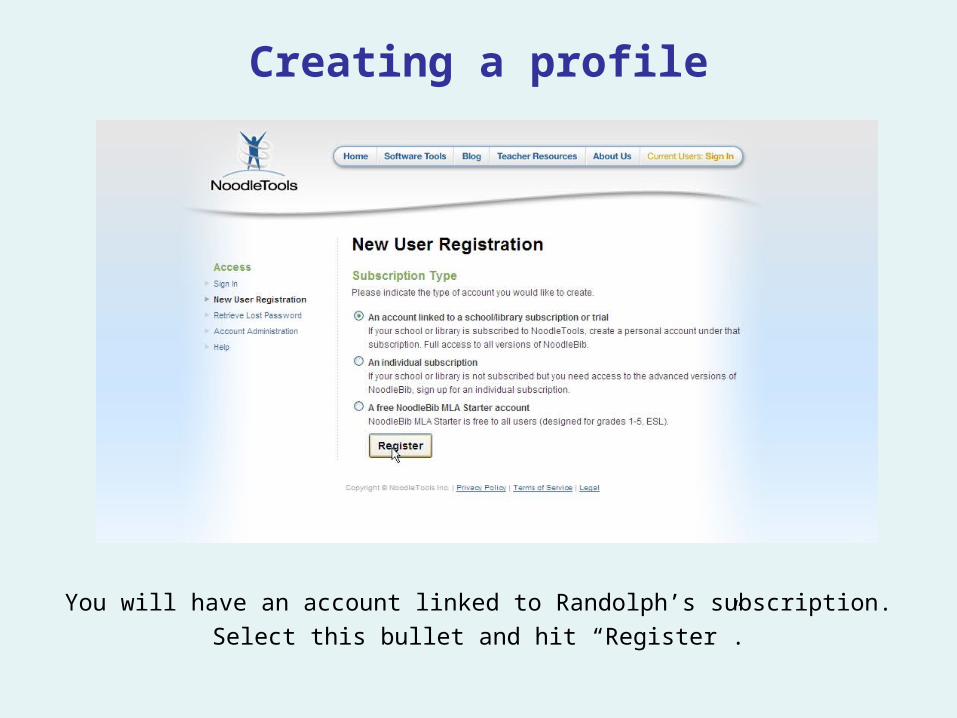
You will have an account linked to Randolph’s subscription.
Select this bullet and hit “Register”.

Creating a profile
You will need to put in Randolph’s information.
Our School Username: randolph
Our School Password: raiders
Creating a profile
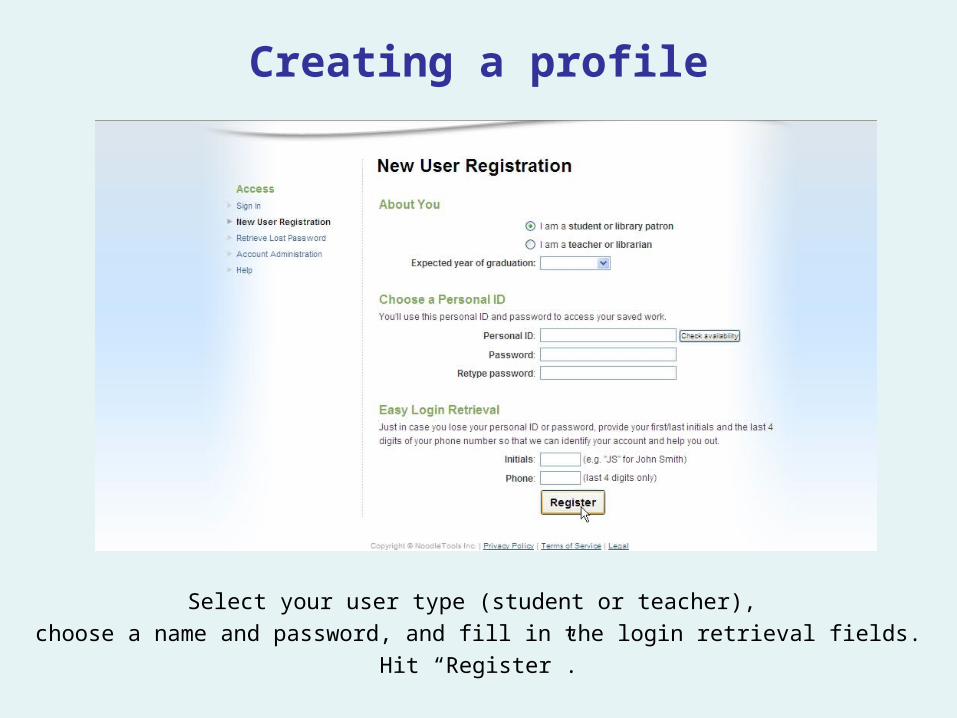
Select your user type (student or teacher),
choose a name and password, and fill in the login retrieval fields.
Hit “Register”.

Starting a new project
When starting a project or paper, you will need to make a new list.
Click “Create a New List.”

Starting a new project
Select the appropriate level of MLA. Name your project.Click “Create List”.

Starting a new project
Use your Dashboard to start the research process and plan your project. You can type in a research question, thesis statement,
steps you need to take and deadlines.
Adding a source
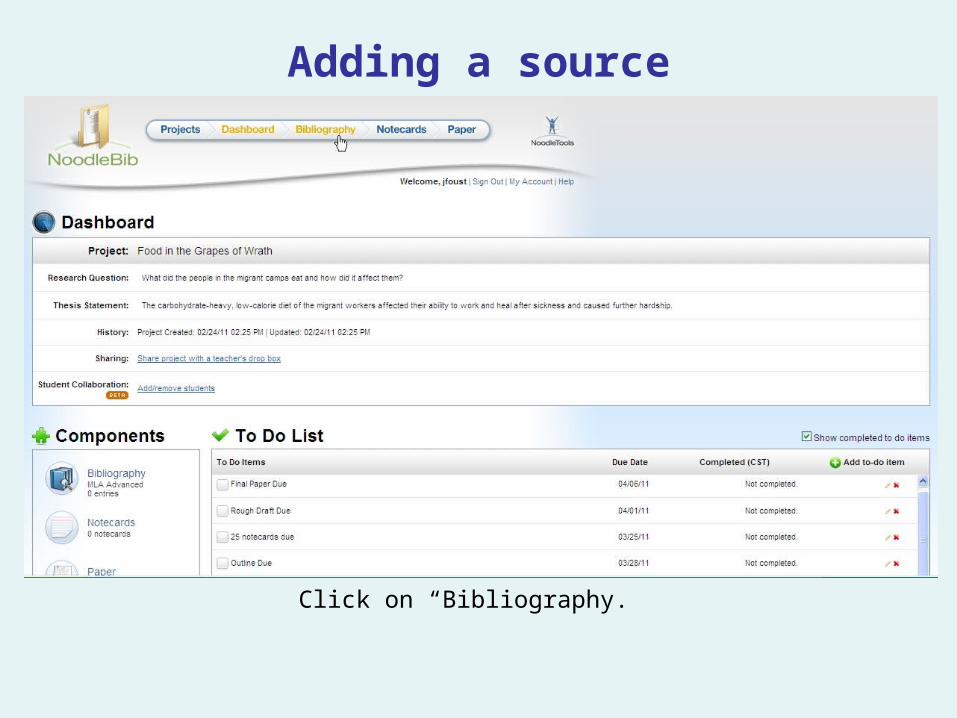
Click on “Bibliography.”

Adding a source
Use the drop-down menu to select your source type.
Once you have selected the format from a list, click “Create Citation”.
If you are not sure, don’t worry.A series of questions will help you determine that you have selected the right citation type.
Adding a source
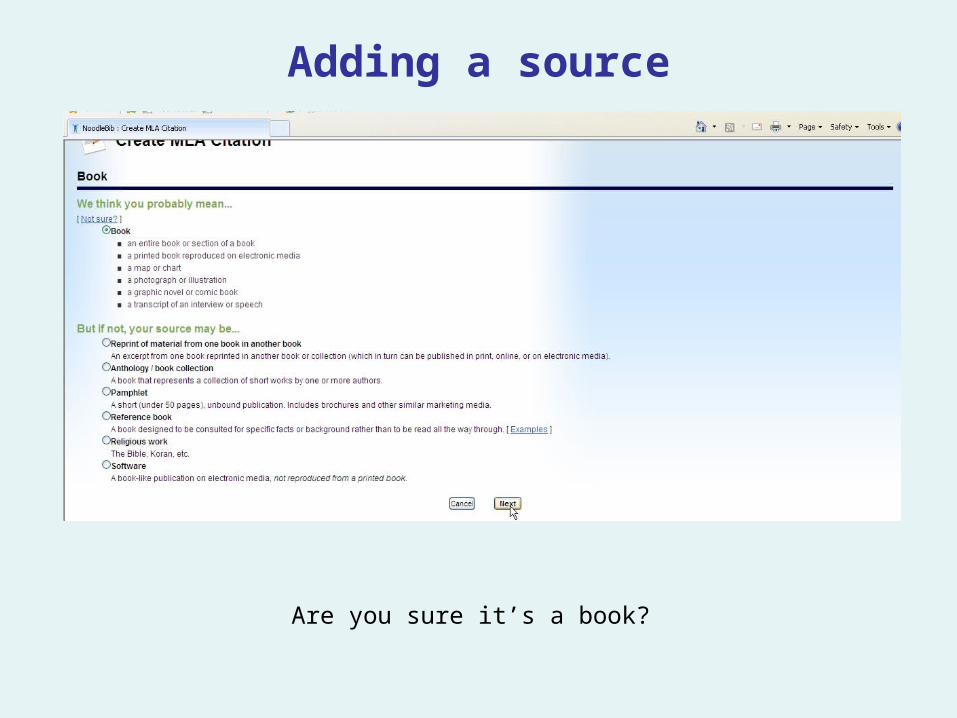
Are you sure it’s a book?

Adding a source
What kind of book?

Adding a source
The whole book or just a part?(What did I tell you about the questions?)

Adding a sourceNow, simply fill in as many fields as you can.
You may not have something in every box. It’s ok!
When adding authors, click the “Add” button after each.If you are making an annotated bibliography, fill in the annotation field.
Click “Generate Citation.”
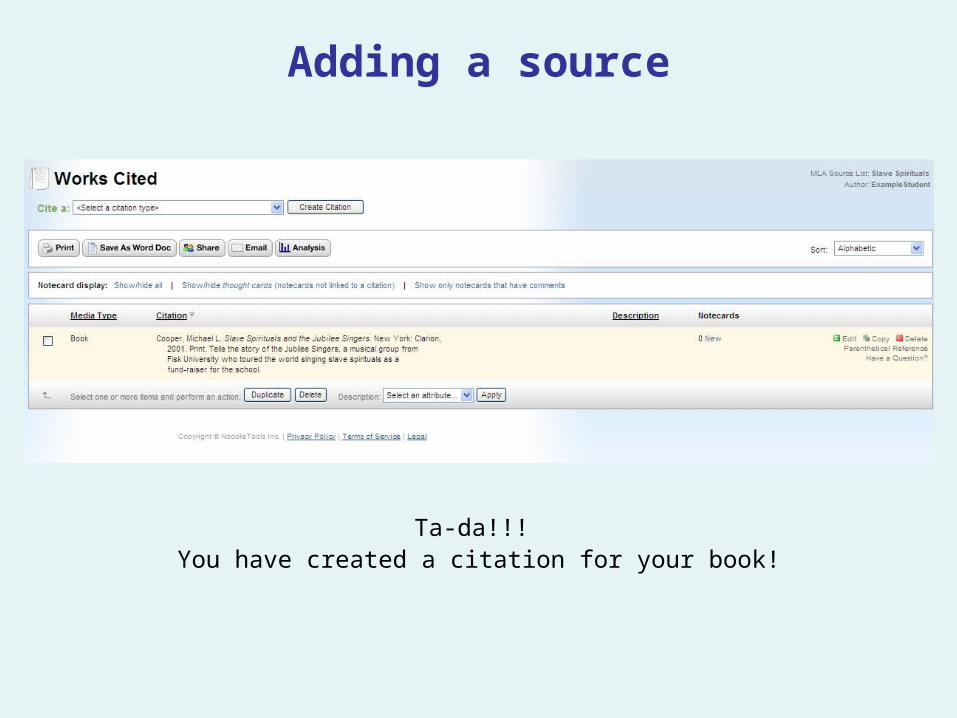
Adding a source
Ta-da!!! You have created a citation for your book!

Making a notecard
To make a notecard, click the “Notecards” tab at the top of the page.

Making a notecardThis is your Notecard Tabletop.
You will be able to use it to organize and arrange your notes.
Click “New Notecard” on the left side of the Tabletop.

Making a note card
Name your card.Choose the source from those in your bibliography.
Include the pages. You can also add tags
which will make it easier to find cards on the same topic in the future.
A box will pop-up.

Making a note card
The first is for Direct Quotation This can be cut and paste from online sources or written exactly as printed from books.
The second is Paraphrase. Say it in your own words.
The third is My Ideas. Why did you take this note? What questions does it generate?
You’ll see that there are three different spaces for notes. These help you avoid plagiarism.

Making a note card
Hit Save.Your notecard is now in the “New Notecards” box
at the corner of your Tabletop. Click on it and pull it onto your tabletop.

Forming an outlineTo the right of your Notecard Tabletop
is a place to form your outline.
Double-click on ‘Topic’ to rename it.
Do the same to rename the Subtopic.
To add another subtopic,highlight the topic and click the
green “+” button.

Forming an outline
You can reorder items by highlighting the item you wish to move and
clicking the up or down button.
You can also turn topics into subtopics
by highlighting them and clicking the move right button.

Organizing your notecards
To create a pile, drag and drop one notecard on top of the other.
A “New Pile” pop-up will appear. Name your new pile.

Organizing your notecards
To add tags to notecards, highlight the card by clicking on it.
Then click “Tags” and choose to add color,
visual clues or tags to the notecard.

Organizing your notecards
You can also add your notecards to your outline by dragging them to the topic or subtopic to which the belong.
The small checkmark on the left of the card lets you know it has been added.

Sharing your bibliography and notecardsStudents can share their work with teachers
who can comment on each student’s progress and offer suggestions.
To share, simply check the box next to your project
and click “Share” at the bottom of the box.

Sharing your bibliography and notecards
Type your name and the Class Name assigned by the teacher into the appropriate boxes.
(This needs to be written exactly as you teacher told you.)
Click “Share.”
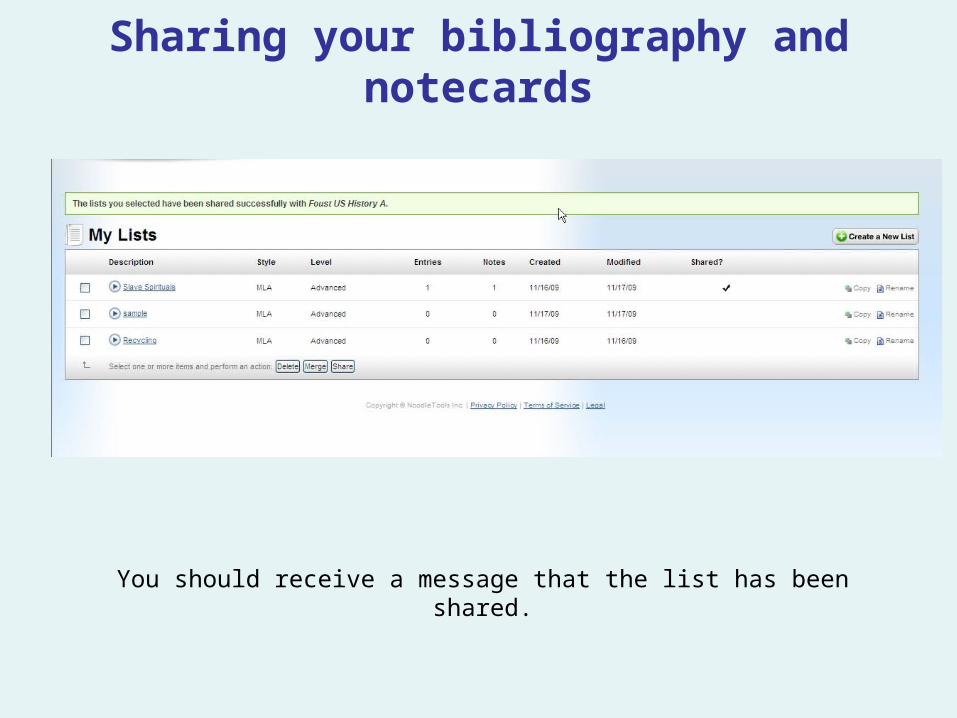
Sharing your bibliography and notecards
You should receive a message that the list has been shared.


![Using NoodleTools€¦ · Using NoodleTools Miss Ronan & Ms. Toledo * Fall 2016. NoodleTools “is an online … platform [that helps students]... evaluate information, build accurate](https://img.dokumen.tips/doc/110x75/5fcc3ac3dfb6e257c85248da/using-using-noodletools-miss-ronan-ms-toledo-fall-2016-noodletools-aoeis.jpg)