Embed Size (px)
Citation preview
Notes
*iPS Cells Handling and Storage Instructions
*iPSCs created by Cellular Dynamics International and distributed
by the Coriell Institute for Medical Research for the California Institute for Regenerative Medicine
08 Fall
Restrictions and Liabilities This document might contain references to third-party sources of information, hardware or software, products or services and/or third-party websites (collectively the “Third-Party Information”).CIRM does not control, and is not responsible for, any Third-Party Information, including, without limitation the content, accuracy, copyright compliance, compatibility, performance, trustworthiness, legality, decency, links, or any other aspect of Third-Party Information. The inclusion of Third-Party Information in this document does not imply endorsement of the Third-Party Information or the third party in any way.
Conditions of Use CIRM iPS Cells are for life science research use only and subject to use restrictions. You are responsible for understanding and performing the protocols described within. CIRM does not guarantee any results you may achieve. These protocols are provided as CDI recommendations based on its use and experience with CDI reprogrammed iPS Cells.
Origin CIRM iPS Cells are manufactured in the United States of America by CDI.
Table of Contents
Table of Contents .................................................................................................... i
Before You Begin .................................................................................................... ii
Chapter 1. Introduction .......................................................................................... 1 Components Supplied by Coriell .............................................................................. 2 Required Equipment and Consumables ................................................................... 2 Technical Support and Training ................................................................................ 3 Xxxx iPS Cells ......................................................................................................... 3 Workflow Diagram .................................................................................................... 4
Chapter 2. Handling and Storage .......................................................................... 5
Chapter 3. Culturing CIRM iPS Cells in mTeSR1 ................................................. 6 Preparing Matrigel Aliquots ...................................................................................... 6 Preparing the 6-well Cell Culture Plate ..................................................................... 6 Preparing mTeSR1 ................................................................................................... 7 Preparing mTeSR1 + H1152 .................................................................................... 7 Thawing iPS Cells into mTeSR1 ............................................................................... 7 Plating iPS Cells into a Pre-coated 6-well Cell Culture Plate ................................... 8
Chapter 4. Culturing CIRM iPS Cells in Essential 8 Medium (Xeno-free Conditions) .............................................................................................................. 9 Preparing the 6-well Cell Culture Plate ..................................................................... 9 Preparing Essential 8 Medium .................................................................................. 9 Preparing Complete Essential 8 + H1152 Medium ................................................... 9 Thawing iPS Cells into Complete Essential 8 Medium ............................................. 9 Plating iPS Cells into a Pre-coated 6-well Cell Culture Plate ................................. 10

ii
Notes
Before You Begin
• Immediately transfer the frozen vials to liquid nitrogen storage.
• Read this entire iPS Cells Handling and Storage Instructions before handling or using the iPS Cells.
• Xxxx iPS Cells are for life science research use only.
• A safety data sheet (SDS) for dimethyl sulfoxide (DMSO), in which iPS Cells are frozen, is available. Only technically qualified individuals experienced in handling DMSO and human biological materials should access, use, or handle the iPS Cells.

Notes
1
Chapter 1. Introduction
CIRM iPS Cells are induced pluripotent stem cells reprogrammed from adult somatic cells using episomal methodology by Cellular Dynamics International. These cells were derived from CIRM tissue collector-provided donor samples.

2
Notes
Components Supplied by Coriell
Item Catalog Number
iPS Cells*
Certificate of Analysis
Certificate of Origin If required for shipping purposes
* Certificate of analysis are provided on line at catalog.coriell.org associated with each cell line available.
Required Equipment and Consumables Item Vendor Catalog Number
Equipment
37°C Water Bath Multiple Vendors
Biological Safety Cabinet with UV Lamp Multiple Vendors
Cell Culture Incubator Multiple Vendors
Liquid Nitrogen Storage Unit Multiple Vendors
Pipettors Multiple Vendors
Tabletop Centrifuge Multiple Vendors
Consumables
15 ml Centrifuge Tubes Multiple Vendors
6-well Cell Culture Plates Nunc 140675
Dulbecco’s Modified Eagle Medium:Nutrient Mixture F-12 (DMEM/F-12)
Life Technologies 11330-032
Dulbecco’s Phosphate Buffered Saline without Ca2+ and Mg2+ (D-PBS)
Life Technologies 14190-144
Essential 8 Medium* Life Technologies A1517001
Growth Factor Reduced Corning Matrigel Matrix (Matrigel)*
Corning 354230
**Rho Kinase Inhibitor, H1152 EMD Scientific 555550
mTeSR1* StemCell Technologies 05857
Pipettes Multiple Vendors
Sterile Tissue Culture Grade ddH20 Multiple Vendors
Vitronectin* Life Technologies A14700
CIRM iPS Cells can be maintained in two different cell culture conditions: (1) Essential 8 Medium and vitronectin or (2) mTeSR1 and Matrigel. Order the cecessary components accordingly.
**Rho Kinase inhibitor must be used for recovery or cell will not recover well.
Notes
3
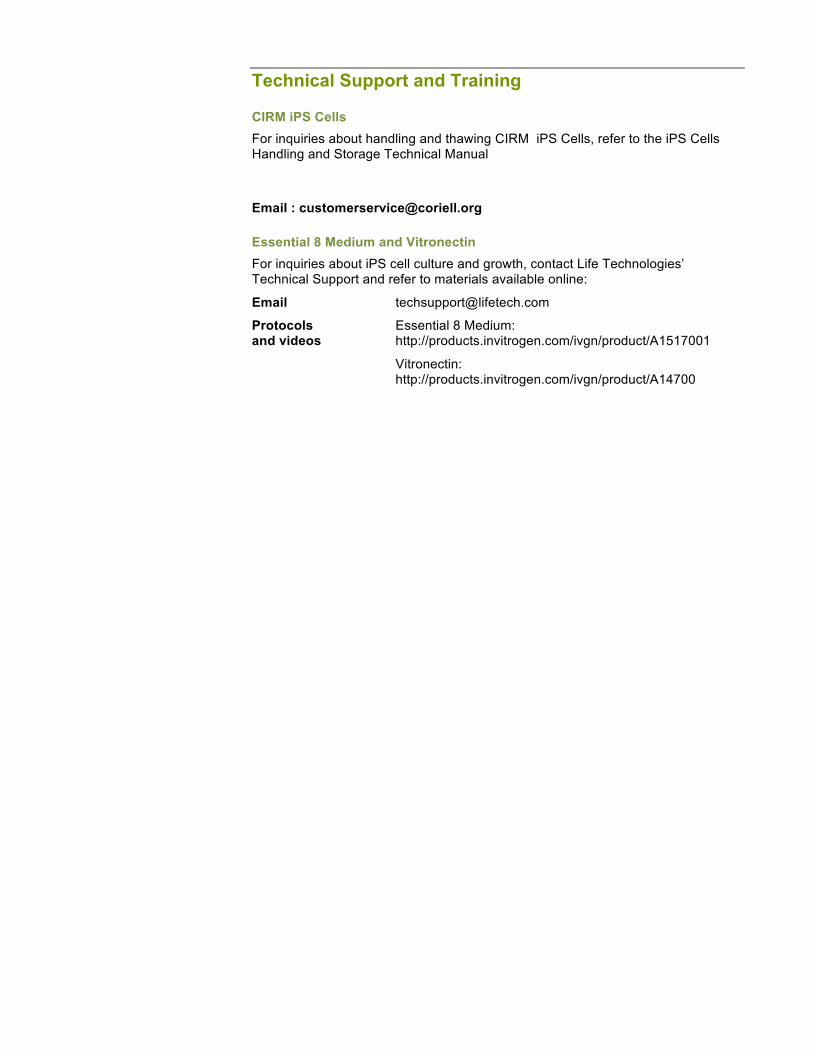
Technical Support and Training
CIRM iPS Cells For inquiries about handling and thawing CIRM iPS Cells, refer to the iPS Cells Handling and Storage Technical Manual
Email : [email protected]
Essential 8 Medium and Vitronectin For inquiries about iPS cell culture and growth, contact Life Technologies’ Technical Support and refer to materials available online:
Email [email protected]
Protocols Essential 8 Medium: and videos http://products.invitrogen.com/ivgn/product/A1517001
Vitronectin: http://products.invitrogen.com/ivgn/product/A14700
4
Notes
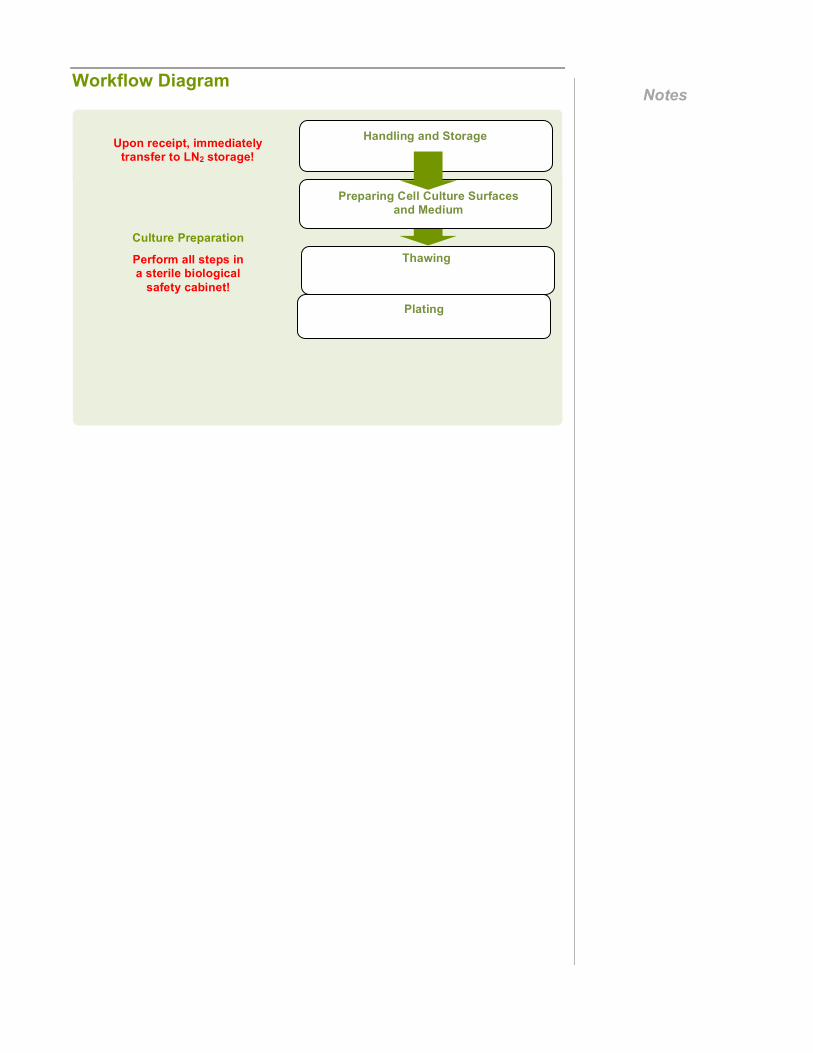
Workflow Diagram
Upon receipt, immediately transfer to LN2 storage!
Culture Preparation
Perform all steps in a sterile biological
safety cabinet!
Handling and Storage
Thawing
Plating
Preparing Cell Culture Surfaces and Medium
Notes
5
Chapter 2. Handling and Storage
iPS Cells are provided as cryopreserved single-cell suspensions in 1.5 ml cryovials. Upon receipt, directly transfer the cryobox containing iPS Cells to the vapor phase of a liquid nitrogen cell storage dewar. CIRM strongly recommends transferring the entire cryobox into the storage rack to avoid transferring individual vials.
It is critical to maintain cryopreserved iPS Cells at a stable temperature. Minimize exposure of cryopreserved iPS Cells to ambient temperature when transferring vials to liquid nitrogen storage.
6
Notes
Chapter 3. Culturing CIRM iPS Cells in mTeSR1
CIRM recommends plating iPS Cells into cell culture plates that are pre-coated with Matrigel and used in conjunction with mTeSR1.
The following sections detail preparing Matrigel and mTeSR1 and thawing iPS Cells using these reagents.
Preparing Matrigel Aliquots 1. Place a sterile box of 200 µl pipette tips and a sterile container of 1.5 ml tubes
into -20°C overnight.
2. Thaw a bottle of Matrigel on ice at 4°C overnight.
3. Calculate the volume of Matrigel required to aliquot 1 mg/tube, the amount required to coat a 6-well cell culture plate.
Note: Each lot of Matrigel has a different concentration. Perform the calculation each time a new lot of Matrigel is used.
𝑉𝑜𝑙𝑢𝑚𝑒 𝑝𝑒𝑟 𝑇𝑢𝑏𝑒 = 1 𝑚𝑔/𝑡𝑢𝑏𝑒
𝐶𝑜𝑛𝑐𝑒𝑛𝑡𝑟𝑎𝑡𝑖𝑜𝑛 𝑜𝑓 𝑀𝑎𝑡𝑟𝑖𝑔𝑒𝑙
For example, the calculation for a lot of Matrigel with a concentration of 13.841 mg/ml:
𝑉𝑜𝑙𝑢𝑚𝑒 𝑝𝑒𝑟 𝑇𝑢𝑏𝑒 = 1 𝑚𝑔/𝑡𝑢𝑏𝑒3.841 𝑚𝑔/𝑚𝑙
= 0.072 𝑚𝑙
4. Transfer the Matrigel, -20o C sterile pipette tips, and -20o C sterile 1.5 ml tubes to an ice bucket just before use. Spray the ice bucket thoroughly with 70% ethanol and place in a biological safety cabinet.
5. Aliquot the calculated volume of Matrigel into 1.5 ml tubes, switching tips when the Matrigel begins to clog the tip and/or the measurement becomes inaccurate. Place the tubes on ice as they are filled.
6. Store aliquots at -20°C for up to 1 year.
Preparing the 6-well Cell Culture Plate 1. Add 6 ml of ice-cold DMEM/F-12 to a 15 ml conical tube.
2. Remove an aliquot of Matrigel from -20°C.
3. Immediately add 1 ml of the DMEM/F-12 to the aliquot and mix using a 1 ml pipettor, gently pipette up and down. Transfer the Matrigel solution to the 15 ml conical containing ice-cold DMEM/F-12 and mix to achieve a final volume of 6 ml at a concentration of 0.167 mg/ml (1 mg/6 ml).
4. Add 1 ml (0.017 mg/cm2)/well of Matrigel solution to a 6-well cell culture plate.
It is critical to perform all subsequent steps in a sterile biological safety cabinet.
It is essential to perform this step on ice. Matrigel will solidify at room temperature.

Notes
7
5. Incubate at room temperature for at least 1 hour before plating Xxxx iPS Cells.
Note: If necessary, wrap the plate in aluminum foil and store at 4°C for up to 1 week. Incubate plates for 1 hour at room temperature before use.
Preparing mTeSR1 Prepare the mTESR1 according to the manufacturer’s protocol.
Note: If necessary, store mTESR1 at 4°C for up to 2 weeks.
Preparing mTeSR1 + H1152 1. Prepare a 100 µM stock solution of H1152 in sterile tissue culture grade ddH20
according to the manufacturer’s protocol.
2. Prepare the MTeSR1 + 1 µM H1152 in a 50 ml centrifuge tube by diluting 0.1 ml of 100µM H1152 in 10 ml of MTeSR1.
3. Filter the MTeSR1 + 1 µM H1152 using a 0.2 µm filter.
Note: If necessary, store the 50 ml centrifuge tube containing MTeSR1 + 1 µM H1152 at 4°C, protected from light, for up to 1 week.
Thawing iPS Cells into mTeSR1 Maintain iPS Cells in liquid nitrogen until immediately before thawing to ensure maximal performance of the cells. Completing the following steps in a time-efficient manner facilitates optimal iPS Cells viability and performance.
Note: CIRM does not recommend thawing more than 1 vial at one time.
Note: The following protocol yields 1 well of a 6-well cell culture plate.
1. Before thawing the iPS Cells, warm the mTESR1 and mTeSR1 + H1152 to room temperature, spray with 70% ethanol, and place in a biological safety cabinet.
2. Remove the iPS Cells cryovial from the liquid nitrogen storage tank.
Note: If necessary, place cryovials on dry ice for up to 10 minutes before thawing.
3. Immerse the cryovial in a 37°C water bath (avoid submerging the cap) and gently swirl.
4. Immediately remove the cryovial from the water bath when only a small piece of frozen material remains (approximately 3 - 5 minutes).
5. Upon removal from the water bath, spray the cryovial with 70% ethanol, wipe dry, and place in a biological safety cabinet.
6. Carefully uncap the cryovial to minimize aspirate as a result of pressure in the vial.
7. Gently transfer the iPS cells cryovials content drop-wise into a sterile 15 mL centrifuge tube using a 1 ml pipettor.
8. Rinse the empty cryovial with 1 ml of additional room temperature mTESR1 to recover any residual cells. Transfer the 1 ml of mTESR1 rinse from the cryovial drop-wise to the 15 ml centrifuge tube containing the iPS Cells in suspension.
9. Slowly add 8 mL of room temperature mTESR, bringing the total volume to 10mL.
8
Notes
10. Concentrate the cells by centrifuging at 200 x g for 4 minutes.
11. Being careful not to disturb the pellet, aspirate the supernatant to just above the cell pellet.
12. Using a 5 ml serological pipette, gently resuspend the cell pellet in 2.5 ml mTeSR1 + H1152.
Plating iPS Cells into a Pre-coated 6-well Cell Culture Plate 1. Aspirate the Matrigel from 1 well of a pre-coated 6-well cell culture plate.
2. Immediately add the 2.5 ml cell suspension to the well.
3. Evenly distribute the cells by shaking the plate back and forth then side to side.
4. Culture iPS cells in a cell culture incubator at 37°C, 5% CO2 for 24 hours.
5. 24 hours post plating, aspirate the media and replace with 2.5 mL mTESR1.
6. Maintain the cells according to the manufacturer’s protocol for mTESR1.
Notes
9
Chapter 4. Culturing CIRM iPS Cells in Essential 8 Medium (Xeno-free Conditions)
CIRM recommends plating iPS Cells into cell culture plates that are pre-coated with vitronectin and used in conjunction with Essential 8 Medium.
The following sections detail preparing vitronectin and Essential 8 Medium and thawing Xxxx iPS Cells using these reagents.
Preparing the 6-well Cell Culture Plate 1. Dilute the vitronectin in D-PBS to 5 µg/ml according to the manufacturer’s
protocol.
2. Add 1 ml (0.5 µg/cm2)/well of vitronectin solution to a 6-well cell culture plate.
3. Incubate at room temperature for at least 1 hour before plating the iPS Cells.
Note: If necessary, wrap plates in laboratory film and store at 4°C for up to 1 week. Incubate plates for 1 hour at room temperature before use.
Preparing Essential 8 Medium Prepare the Complete Essential 8 Medium according to the manufacturer’s protocol.
Note: If necessary, store Complete Essential 8 Medium at 4°C for up to 2 weeks.
Preparing Complete Essential 8 + H1152 Medium 1. Prepare a 100 µM stock solution of H1152 in sterile tissue culture grade ddH20
according to the manufacturer’s protocol.
2. Prepare the Complete Essential 8 + 1 µM H1152 medium in a 50 ml centrifuge tube by diluting 0.1 ml of 100µM H1152 in 10 ml of Complete Essential 8 Medium.
3. Filter the Complete Essential 8 + 1 µM H1152 medium using a 0.2 µm filter.
Note: If necessary, store the 50 ml centrifuge tube containing Complete Essential 8 + 1 µM H1152 medium at 4°C, protected from light, for up to 1 week.
Thawing iPS Cells into Complete Essential 8 Medium Maintain iPS Cells in liquid nitrogen until immediately before thawing to ensure maximal performance of the cells. Completing the following steps in a time-efficient manner facilitates optimal iPS Cells viability and performance.
Note: CIRM does not recommend thawing more than 1 vial at one time.
Note: The following protocol yields 1 well of a 6-well cell culture plate.
1. Before thawing the iPS Cells, warm the Complete Essential 8 Medium and Complete Essential 8 + H1152 medium to room temperature, spray with 70% ethanol, and place in a biological safety cabinet.
2. Remove the frozen iPS Cells cryovial from the liquid nitrogen storage tank.

10
Notes
Note: If necessary, cryovials can be placed on dry ice for up to 10 minutes before thawing.
3. Immerse the cryovial in a 37°C water bath (avoid submerging the cap) and gently swirl. Remove the cryovial from the water bath when only a small piece of frozen material remains (approximately 2-3 minutes).
4. Immediately remove from the water bath, spray the cryovial with 70% ethanol, wipe dry, and place in a biological safety cabinet.
5. Carefully uncap the cryovial to minimize aspirate as a result of pressure in the vial.
6. Gently transfer the iPS cells cryovials content drop-wise into a sterile 15 mL centrifuge tube using a 1 ml pipettor.
7. Rinse the empty cryovial with 1 ml of additional room temperature Essential 8 to recover any residual cells. Transfer the 1 ml of Essential 8 rinse from the cryovial drop-wise to the 15 ml centrifuge tube containing the iPS Cells in suspension.
8. Add 8 mL room temperature Complete Essential 8 Medium, bringing the total volume to 10mL with additional
9. Concentrate the cells by centrifuging at 200 x g for 4 minutes.
10. Being careful not to disturb the pellet, aspirate the supernatant to just above the cell pellet.
11. Gently resuspend the cell pellet in 2.5 ml of Complete Essential 8 + H1152 medium using a 5 mL serological pipette.
Plating iPS Cells into a Pre-coated 6-well Cell Culture Plate 1. Aspirate the vitronectin from 1 well of a pre-coated 6-well cell culture plate.
2. Immediately add the 2.5 ml of cell suspension to the well.
3. Evenly distribute the cells by shaking the plate back and forth then side to side.
4. Incubate in a cell culture incubator at 37°C, 5% CO2 for 24 hours.
5. 24 hours post-plating iPS cells, aspirate the spent media and replace with 2.5 mL of Complete Essential 8 Medium.
6. Maintain the cells according to the manufacturer’s protocol for Complete Essential 8 Medium.