Embed Size (px)
Citation preview

IntroducingSilverlight 1.1by Todd Anglin
Copyright © 2007 O'Reilly Media, Inc.
ISBN: 9780596515836
Released: October 2, 2007
In this Short Cut, we'll take a close lookat Silverlight 1.1 and bring clarity to thisbleeding-edge technology. First we'lltake a broad look at the new concept ofRich Internet Applications and how Sil-verlight fits into that picture. Then we'llexamine how you work with Silverlight1.1, highlighting tools, concepts, andcode that you will need to build these in-teractive applications. Finally, we'll takea practical look at using Silverlight 1.1to build a custom control, pulling all ofthe concepts and tools together.
Join ASP.NET Master and Telerik ChiefTechnical Evangelist Todd Anglin andthe Telerik Team as they guide you tounderstanding Silverlight 1.1.
Contents
Understanding Silverlight 1.1 ......... 2What Is Silverlight 1.1? ................... 7An Overview of Rich InternetApplications ................................... 9Working with Silverlight 1.1 ......... 13Building Applications withSilverlight 1.1 ............................... 60Conclusions ................................. 75Resources .................................... 75
Find more at shortcuts.oreilly.com
Understanding Silverlight 1.1Even though Silverlight 1.0 has now been released, many developers are awaitingthe arrival of Silverlight 1.1 before taking a serious look at this new technology.Silverlight 1.1 will add the .NET dimension to Microsoft's new Rich Internet Ap-plication platform, enabling the global community of .NET developers to applytheir VB, C#, and other CLR language skills to writing Silverlight applications. Butthere's no need to wait; you can take Silverlight for a test drive today.
Before we can begin to understand Silverlight 1.1, we first need to understandSilverlight in general. As Microsoft succinctly puts it, "Silverlight is a cross-browser,cross-platform plug-in developed by Microsoft for delivering the next generationof .NET-based media experiences and Rich Internet Applications (RIAs) for theWeb." But where did it come from and how does it compare to other new tech-nologies like WPF? In this section, we'll review the history of the Silverlight projectand compare Silverlight 1.1 to Silverlight 1.0 and WPF to gain a clear understand-ing of this new rich client framework.
The Short History of SilverlightMicrosoft unveiled Silverlight for the first time in late 2005 at PDC 2005. At thetime, it was introduced as Windows Presentation Foundation Everywhere (WPF/E), a subset of WPF technology that would work across platforms, delivered bythe browser.
Almost a year later Microsoft released the first Silverlight CTP to the public. TheDecember 2006 CTP version of Silverlight was very basic, enabling only JavaScriptand XAML declarations to develop Silverlight applications. The February CTPimproved upon the December release and for the first time started to attract seriousattention from the Microsoft developer community. It added many new features,such as keyboard input (KeyUp/KeyDown), mouse cursor support, simple textmetrics, and a unique full-screen mode. The February CTP in many ways kickedoff the Silverlight buzz, with tutorials, articles, and even third-party frameworksall building on this early preview.
Despite the new popularity, many developers were still skeptical that Silverlighthad any real potential. With only simple support for JavaScript and XAML, de-velopers viewed Silverlight as a basic solution for media applications on the Weband much too weak to challenge perennial cross-browser plug-ins like Flash. Thencame MIX07.
On April 30th, at MIX07 in Las Vegas, Microsoft announced two new versions ofits Silverlight technology (in addition to the new "Silverlight" name): Silverlight 1.0beta and Silverlight 1.1 alpha. The beta was an expected update to the February
Introducing Silverlight 1.1 2

CTP that had been around for a while, but the real excitement revolved aroundthe 1.1 alpha announcement. Microsoft revealed that the 1.1 alpha version of Sil-verlight would enable Silverlight development using the .NET Framework, and itwould sport a flexible programming model that supports C#, VB, AJAX ASP.NET,and many other CLR languages. Finally, the future of Silverlight was revealed,and .NET developers truly began to recognize the power of programming client-side applications with .NET.
In addition to the excitement generated by the .NET announcement at MIX, theofficial "Silverlight" name shocked many people after a series of clever Microsoftcode names (like Avalon and Indigo) succumbed to W*F product names by theirrelease (such as Windows Communications Foundation, Windows WorkflowFoundation, and Windows Presentation Foundation). For developers, Silverlightwas a welcome change to the bland names that seemed to be dominating Microsoftdevelopment products. Furthering the cleverness of the name, all client files inSilverlight have the "AG" prefix, which is the atomic symbol for silver.
In the time that has passed since MIX, Microsoft has continued to develop andpromote Silverlight. Silverlight 1.0, now available as an official release, has changedlittle since the MIX conference, and Silverlight 1.1 has definitely stolen much ofthe Silverlight press. Unfortunately, at the time of this writing Microsoft has yet tofinalize the features, available .NET classes, or release date for Silverlight 1.1. Fornow, all Silverlight 1.1 work is being done on refreshed alpha bits, but a beta willlikely be available around the end of the year or early 2008.
Comparing Silverlight 1.0 and Silverlight 1.1There are two Silverlight versions (so far), the first of which was recently releasedin September 2007:
• Silverlight 1.0: The freshmen Silverlight version is limited to running JavaScriptonly in the browser and it lacks any built-in UI controls. To achieve data inputwith Silverlight 1.0, the browser's native UI controls must be overlaid on topof the Silverlight Canvas. Silverlight 1.0 also lacks any concept of a controlmodel, but some third-party developers have built frameworks on top of Sil-verlight 1.0 that reduce this shortcoming. Support for data formats is alsolimited, with native support for POX (plain old XML) and JSON only. Silver-light 1.0 is focused on delivering rich media experiences and paving the wayfor widespread distribution of the auto-updating Silverlight plug-in.
• Silverlight 1.1: The second iteration of Silverlight will be very different from itspredecessor. It will offer a flexible programming model that supports C#, VB,IronPython, and IronRuby (among other languages). The added support
Introducing Silverlight 1.1 3

for .NET programming in Silverlight 1.1 will make it much easier for exist-ing .NET developers to write Silverlight applications, and it will make it easierto integrate Silverlight with existing web applications. At the time of this writ-ing, Microsoft has not announced when Silverlight 1.1 will ship.
Both Silverlight versions will have a number of similarities, including:
• Fast media capabilities thanks to a powerful new rendering engine (originallycodenamed "Jolt"). This engine will enable high-quality audio and video to beeasily delivered to all major browsers including Internet Explorer, Apple Safari,and Mozilla Firefox running on Mac OS X or Microsoft Windows.
• Silverlight supports playback of VC-1 video content across all supportedbrowsers without requiring the Windows Media Player ActiveX control orWindows Media browser plug-ins.
• Silverlight provides a graphics system similar to WPF that integrates multime-dia, graphics, animations, and interactivity into a single runtime. XAML, orExtensible Application Markup Language, can be used to create the vectorgraphics and animations used in Silverlight apps.
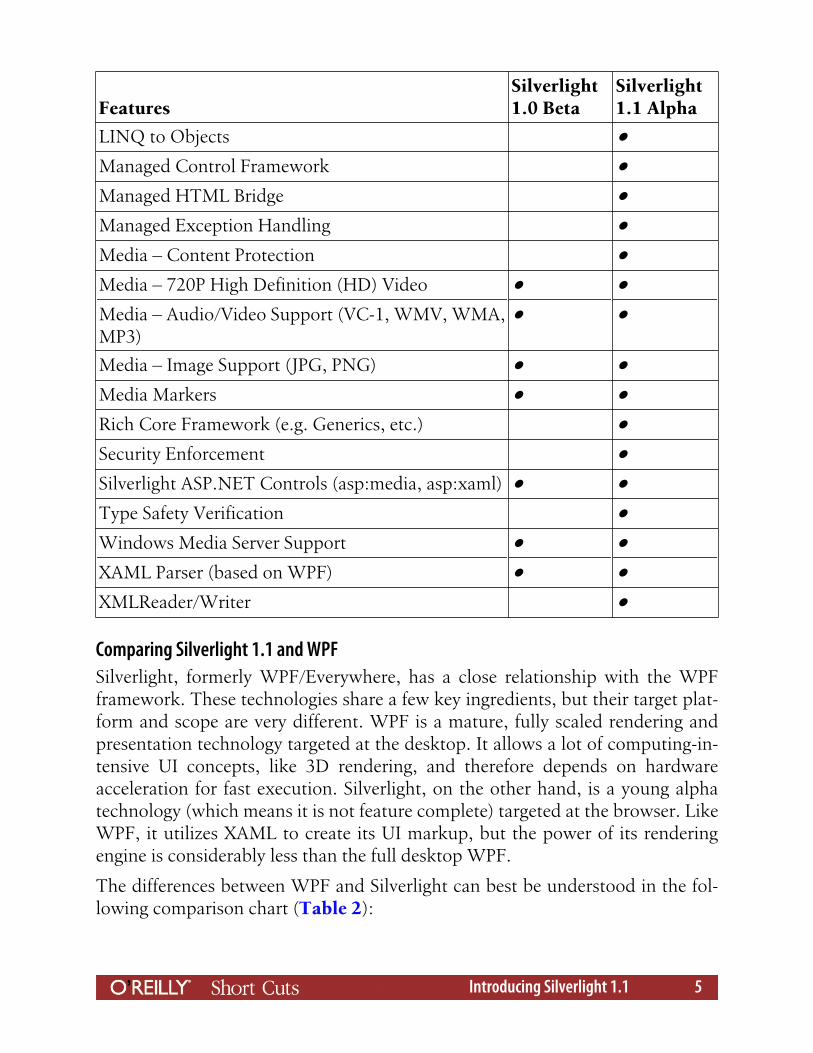
The Features Matrix below (Table 1) provides an overview of which runtime isrequired to use specific features in Silverlight applications.
Table 1. Silverlight Runtimes Feature Matrix
FeaturesSilverlight1.0 Beta
Silverlight1.1 Alpha
2D Vector Animation/Graphics ● ●AJAX Support ● ●Cross-Browser (Firefox, IE, Safari) ● ●Cross-Platform (Windows, Mac) ● ●Framework Languages (VB, C#, IronRuby, IronPy-thon)
●
HTML DOM Integration ● ●HTTP Networking ● ●Isolated Storage ●JavaScript Support ● ●JSON Web Services ●
Introducing Silverlight 1.1 4
FeaturesSilverlight1.0 Beta
Silverlight1.1 Alpha
LINQ to Objects ●Managed Control Framework ●Managed HTML Bridge ●Managed Exception Handling ●Media – Content Protection ●Media – 720P High Definition (HD) Video ● ●Media – Audio/Video Support (VC-1, WMV, WMA,MP3)
● ●
Media – Image Support (JPG, PNG) ● ●Media Markers ● ●Rich Core Framework (e.g. Generics, etc.) ●Security Enforcement ●Silverlight ASP.NET Controls (asp:media, asp:xaml) ● ●Type Safety Verification ●Windows Media Server Support ● ●XAML Parser (based on WPF) ● ●XMLReader/Writer ●
Comparing Silverlight 1.1 and WPFSilverlight, formerly WPF/Everywhere, has a close relationship with the WPFframework. These technologies share a few key ingredients, but their target plat-form and scope are very different. WPF is a mature, fully scaled rendering andpresentation technology targeted at the desktop. It allows a lot of computing-in-tensive UI concepts, like 3D rendering, and therefore depends on hardwareacceleration for fast execution. Silverlight, on the other hand, is a young alphatechnology (which means it is not feature complete) targeted at the browser. LikeWPF, it utilizes XAML to create its UI markup, but the power of its renderingengine is considerably less than the full desktop WPF.
The differences between WPF and Silverlight can best be understood in the fol-lowing comparison chart (Table 2):
Introducing Silverlight 1.1 5
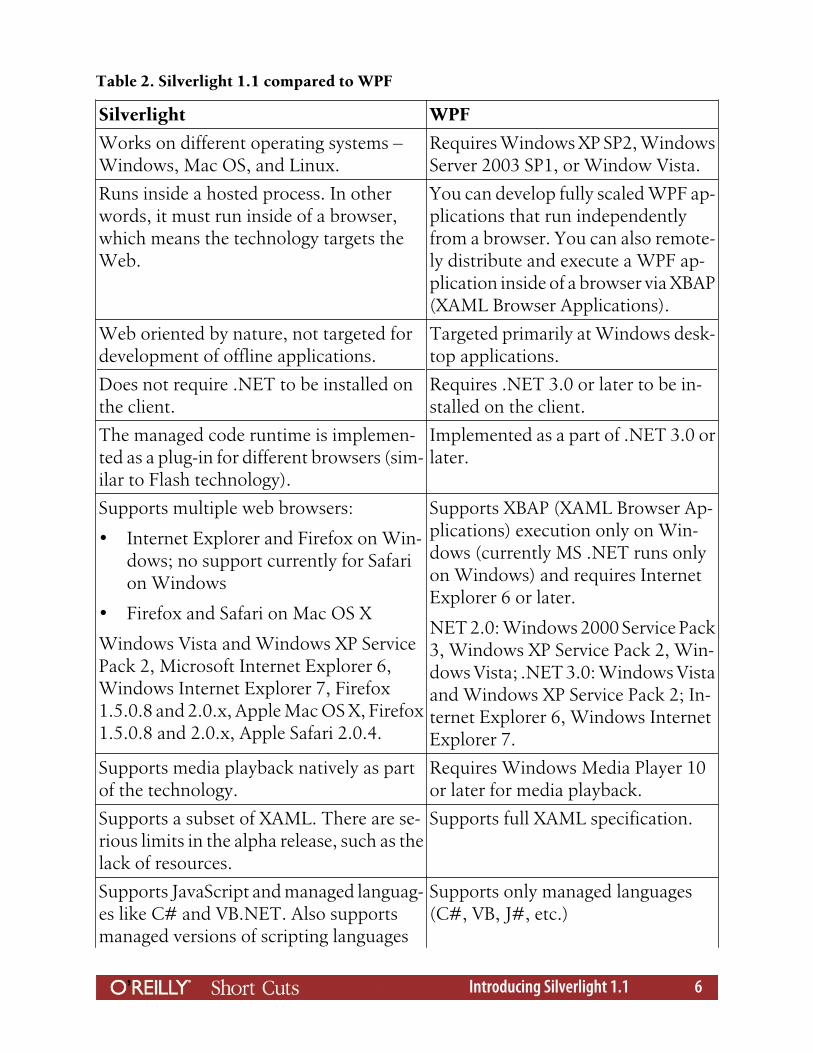
Table 2. Silverlight 1.1 compared to WPF
Silverlight WPF
Works on different operating systems –Windows, Mac OS, and Linux.
Requires Windows XP SP2, WindowsServer 2003 SP1, or Window Vista.
Runs inside a hosted process. In otherwords, it must run inside of a browser,which means the technology targets theWeb.
You can develop fully scaled WPF ap-plications that run independentlyfrom a browser. You can also remote-ly distribute and execute a WPF ap-plication inside of a browser via XBAP(XAML Browser Applications).
Web oriented by nature, not targeted fordevelopment of offline applications.
Targeted primarily at Windows desk-top applications.
Does not require .NET to be installed onthe client.
Requires .NET 3.0 or later to be in-stalled on the client.
The managed code runtime is implemen-ted as a plug-in for different browsers (sim-ilar to Flash technology).
Implemented as a part of .NET 3.0 orlater.
Supports multiple web browsers:
• Internet Explorer and Firefox on Win-dows; no support currently for Safarion Windows
• Firefox and Safari on Mac OS X
Windows Vista and Windows XP ServicePack 2, Microsoft Internet Explorer 6,Windows Internet Explorer 7, Firefox1.5.0.8 and 2.0.x, Apple Mac OS X, Firefox1.5.0.8 and 2.0.x, Apple Safari 2.0.4.
Supports XBAP (XAML Browser Ap-plications) execution only on Win-dows (currently MS .NET runs onlyon Windows) and requires InternetExplorer 6 or later.
NET 2.0: Windows 2000 Service Pack3, Windows XP Service Pack 2, Win-dows Vista; .NET 3.0: Windows Vistaand Windows XP Service Pack 2; In-ternet Explorer 6, Windows InternetExplorer 7.
Supports media playback natively as partof the technology.
Requires Windows Media Player 10or later for media playback.
Supports a subset of XAML. There are se-rious limits in the alpha release, such as thelack of resources.
Supports full XAML specification.
Supports JavaScript and managed languag-es like C# and VB.NET. Also supportsmanaged versions of scripting languages
Supports only managed languages(C#, VB, J#, etc.)
Introducing Silverlight 1.1 6
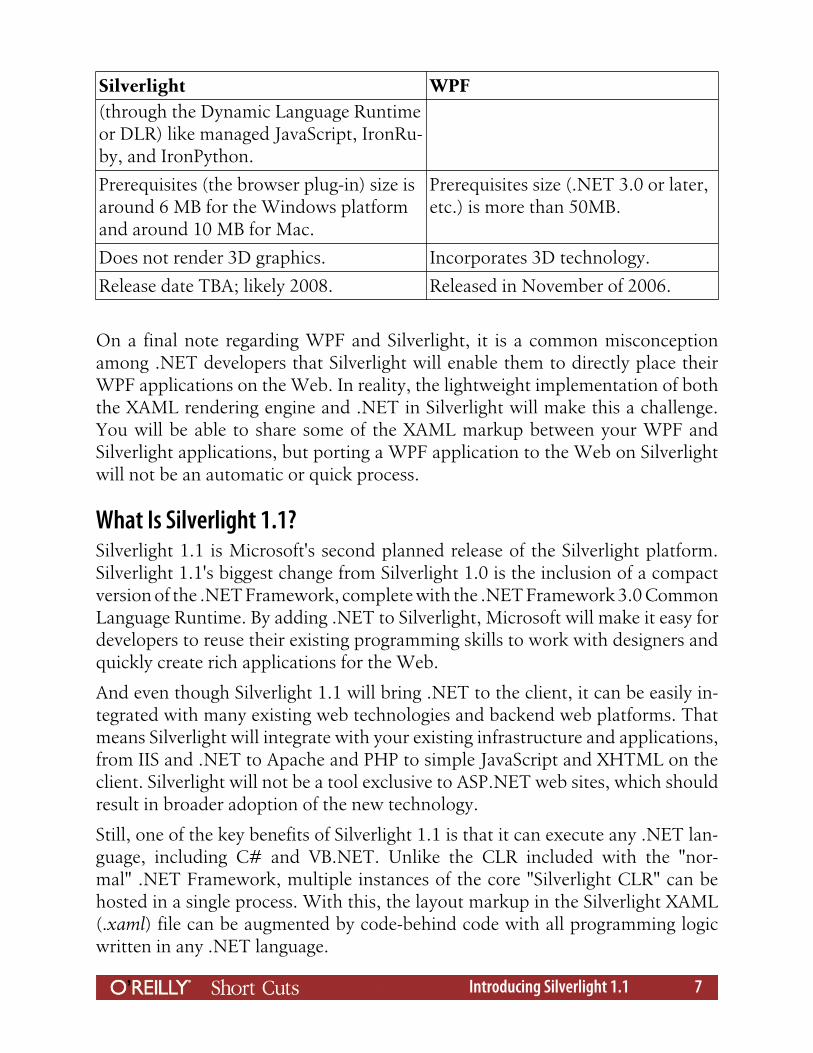
Silverlight WPF(through the Dynamic Language Runtimeor DLR) like managed JavaScript, IronRu-by, and IronPython.
Prerequisites (the browser plug-in) size isaround 6 MB for the Windows platformand around 10 MB for Mac.
Prerequisites size (.NET 3.0 or later,etc.) is more than 50MB.
Does not render 3D graphics. Incorporates 3D technology.
Release date TBA; likely 2008. Released in November of 2006.
On a final note regarding WPF and Silverlight, it is a common misconceptionamong .NET developers that Silverlight will enable them to directly place theirWPF applications on the Web. In reality, the lightweight implementation of boththe XAML rendering engine and .NET in Silverlight will make this a challenge.You will be able to share some of the XAML markup between your WPF andSilverlight applications, but porting a WPF application to the Web on Silverlightwill not be an automatic or quick process.
What Is Silverlight 1.1?Silverlight 1.1 is Microsoft's second planned release of the Silverlight platform.Silverlight 1.1's biggest change from Silverlight 1.0 is the inclusion of a compactversion of the .NET Framework, complete with the .NET Framework 3.0 CommonLanguage Runtime. By adding .NET to Silverlight, Microsoft will make it easy fordevelopers to reuse their existing programming skills to work with designers andquickly create rich applications for the Web.
And even though Silverlight 1.1 will bring .NET to the client, it can be easily in-tegrated with many existing web technologies and backend web platforms. Thatmeans Silverlight will integrate with your existing infrastructure and applications,from IIS and .NET to Apache and PHP to simple JavaScript and XHTML on theclient. Silverlight will not be a tool exclusive to ASP.NET web sites, which shouldresult in broader adoption of the new technology.
Still, one of the key benefits of Silverlight 1.1 is that it can execute any .NET lan-guage, including C# and VB.NET. Unlike the CLR included with the "nor-mal" .NET Framework, multiple instances of the core "Silverlight CLR" can behosted in a single process. With this, the layout markup in the Silverlight XAML(.xaml) file can be augmented by code-behind code with all programming logicwritten in any .NET language.
Introducing Silverlight 1.1 7
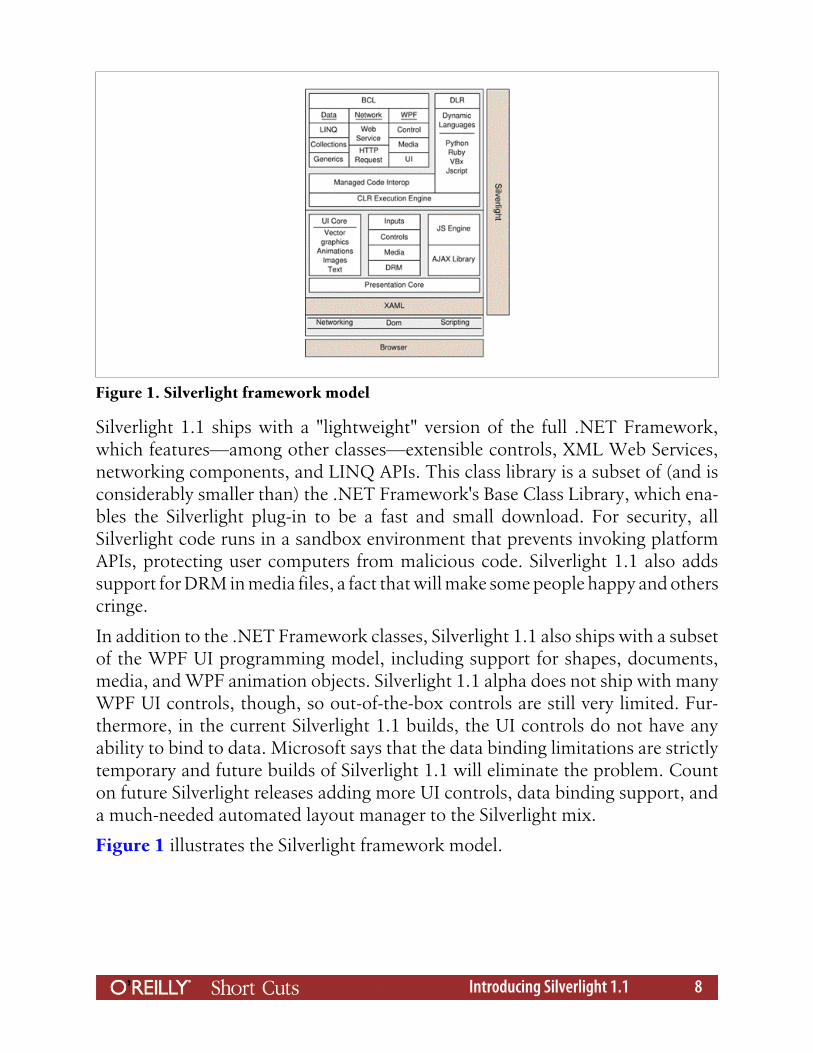
Silverlight 1.1 ships with a "lightweight" version of the full .NET Framework,which features—among other classes—extensible controls, XML Web Services,networking components, and LINQ APIs. This class library is a subset of (and isconsiderably smaller than) the .NET Framework's Base Class Library, which ena-bles the Silverlight plug-in to be a fast and small download. For security, allSilverlight code runs in a sandbox environment that prevents invoking platformAPIs, protecting user computers from malicious code. Silverlight 1.1 also addssupport for DRM in media files, a fact that will make some people happy and otherscringe.
In addition to the .NET Framework classes, Silverlight 1.1 also ships with a subsetof the WPF UI programming model, including support for shapes, documents,media, and WPF animation objects. Silverlight 1.1 alpha does not ship with manyWPF UI controls, though, so out-of-the-box controls are still very limited. Fur-thermore, in the current Silverlight 1.1 builds, the UI controls do not have anyability to bind to data. Microsoft says that the data binding limitations are strictlytemporary and future builds of Silverlight 1.1 will eliminate the problem. Counton future Silverlight releases adding more UI controls, data binding support, anda much-needed automated layout manager to the Silverlight mix.
Figure 1 illustrates the Silverlight framework model.
Figure 1. Silverlight framework model
Introducing Silverlight 1.1 8
An Overview of Rich Internet ApplicationsWe have mentioned "Rich Internet Applications" a few times so far in the contextof Silverlight, but what exactly is a "RIA" web application? And why would youwant to adopt the RIA model for your own web development?
RIAs are web applications that have the features and functionality of traditionaldesktop applications. RIAs typically transfer the processing necessary for the userinterface to the web client but keep the bulk of the data processing (such as main-taining the state of the program, the data, etc.) on the application server.
Traditional web applications center all activity on a client-server architecture,where a thin client (the web browser) interacts with a powerful server. Under thissystem, all processing is done on the server and the client is used only to displaystatic HTML content. The biggest drawback with this system is that all interactionwith the application must pass through the server. That means data must be sentto the server, the server must respond, and then the page must be reloaded on theclient with the server's response. By moving more of this processing to client-sidetechnology that can execute instructions on the client's computer, RIAs can cir-cumvent this slow, synchronous loop for many user interactions.
Benefits of Rich Internet ApplicationsOne of the primary benefits of Rich Internet Applications is that they can offeruser-interface behaviors that are not obtainable using only the HTML controlsavailable in standard browser-based web applications. With a RIA platform, webapplications are no longer limited by what the browser can do. Rather, they canimplement any user interaction that the new RIA platform can support, such asdrag-and-drop behaviors, smooth animations, and client-side calculations. Whilesome of these interactions are possible without a RIA platform, the RIA approachis typically much more responsive and consistent across platforms.
The benefits of RIAs are not strictly looks, though. Using a client engine can alsoproduce other performance benefits:
• Client/server balance. RIAs shift the balance of computing resources for webapplications from the server to the client. This frees up resources on the webserver, enabling the same server hardware to handle more concurrent user ses-sions. On the flip side, it requires that your users have computers that arepowerful enough to execute complex client-side code, which generally is nota problem in this day and age.
• Asynchronous communication. The RIA client engine can interact with theserver asynchronously—that is, without waiting for the user to perform an in-
Introducing Silverlight 1.1 9
terface action like clicking on a button or link. This feature enables RIAdesigners to move data between the user's PC and the server without makingthe user wait for the transfer to finish, similar to what Ajax is doing on the Webtoday.
• Network efficiency. Network traffic may also be significantly reduced in a RIAbecause an application-specific client engine can be more intelligent than astandard web browser when deciding what data needs to be exchanged withservers. Transferring less data for each interaction can speed up individual re-quests and responses, in turn reducing overall network load. Use of asynchro-nous prefetching techniques, however, can neutralize or even reverse thispotential benefit. Because code cannot anticipate exactly what every user willdo next, pre-fetching extra data, not all of which is actually needed by manyusers, is common.
Shortcomings of Rich Internet ApplicationsWhile Rich Internet Applications offer some compelling advantages over currentapproaches to web development, there are a number of drawbacks that plague thetechnology—not the least of which is the requirement for a browser plug-in tofunction (in most cases). Among the more serious drawbacks of RIAs are:
• Sandbox. Because RIAs run within a sandbox, they have restricted access tosystem resources. If users modify their systems or have reduced permissionsthat alter a RIA's ability to access system resources, RIAs may fail to operatecorrectly.
• Disabled scripting. RIAs usually require JavaScript or another scripting lan-guage to operate on the client. If the user has disabled active scripting in hisbrowser, the RIA may not function properly, if at all.
• Script download time. Although it does not always have to be installed, theadditional client-side intelligence (or client engine) of RIA applications needsto be delivered by the server to the client. While much of this is usually auto-matically cached, it needs to be transferred at least once. Depending on the sizeand type of delivery, client engine download time may be unpleasantly long,especially for users with slower Internet connections. Some RIA developers canlessen the impact of this delay by compressing scripts and by staging deliveryover multiple pages of an application. For client engines that require a plug-into be installed, this is not an option.
Introducing Silverlight 1.1 10
• Loss of visibility to search engines. Search engines may not be able to index thetext content of RIA applications. This can be a major problem for web appli-cations that depend on search engine visibility for their success.
• Dependence on an Internet connection. While the ideal network-enabled re-placement for a desktop application would allow users to be "occasionallyconnected," wandering in and out of hotspots or from office to office, todaythe typical RIA requires network connectivity.
RIA TechnologiesMicrosoft's Silverlight is certainly one of the newest entries in the RIA space, butit is not the only show in town. There are a number of platforms on the marketthat enable developers to create RIA applications, including the perennial favorite,Adobe Flash. Some of the top RIA platforms available today are:
• Microsoft Silverlight: Plug-in-based Microsoft technology is going head-to-head with other browser plug-in RIAs like Adobe Flash Player. Silverlightprovides a rich graphics and animation display via XAML integration, and italso includes support for multimedia and HTML interaction. With version 1.1,the .NET framework will be included, enabling client-side programming withmanaged languages like C#. Like Adobe Flash Player, Silverlight code runs ina sandbox without direct access to platform APIs for security.
• Adobe Flash Player and Adobe Flex: Another way to build Rich Internet Ap-plications—and probably the most popular to date—is Adobe Flash Player.These technologies are cross-platform and quite powerful for creating rich cli-ent-side interactions. Adobe Flex provides the option to create Flash UIs bycompiling MXML, an XML-based interface description language. But perhapsthe largest advantage of the Flash RIA platform is the install base of the plug-in, which at last count is installed on 98 percent of the world's computers.
• AJAX Frameworks: Ajax, or Asynchronous JavaScript and XML (orXmlHttpRequest), is a script-based RIA approach. JavaScript is the program-ming language with which Ajax calls are made, and the XmlHttpRequest browserobject enables the asynchronous communication with the server. Data re-trieved using this technique is commonly formatted using XML, though it isnot a requirement. Ajax has quickly risen in popularity since it is supported byall modern browsers without requiring additional plug-ins. Like other RIAs,though, it is not well suited for search engine optimization or handling clientsthat have disabled client-side scripts.
• Adobe® AIR™: Adobe AIR (Adobe Integrated Runtime), previously code-named Adobe "Apollo," is a cross-operating system runtime that allows web
Introducing Silverlight 1.1 11
application developers to use their existing web development skills with RIAtechnologies (such as Flash/Flex, JavaScript/Ajax, and HTML) to build anddeploy RIAs to the desktop. While not entirely RIA, this technology is closelyrelated to rich applications technology since it targets the same developers.
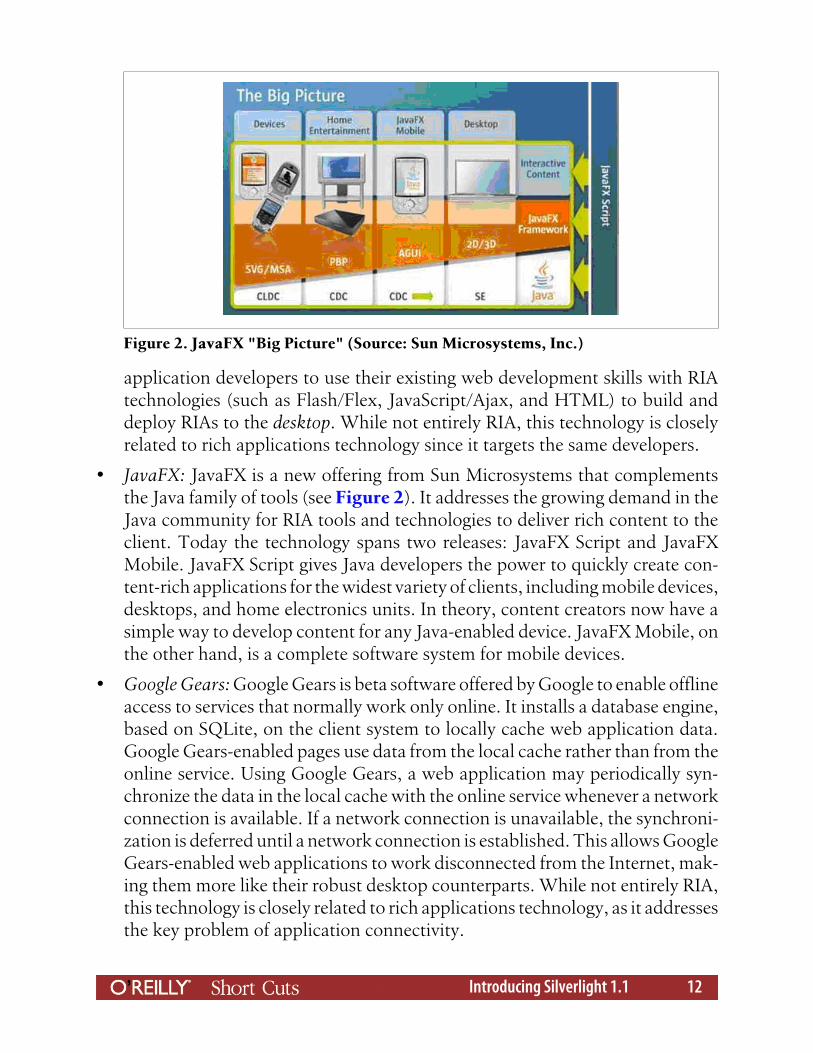
• JavaFX: JavaFX is a new offering from Sun Microsystems that complementsthe Java family of tools (see Figure 2). It addresses the growing demand in theJava community for RIA tools and technologies to deliver rich content to theclient. Today the technology spans two releases: JavaFX Script and JavaFXMobile. JavaFX Script gives Java developers the power to quickly create con-tent-rich applications for the widest variety of clients, including mobile devices,desktops, and home electronics units. In theory, content creators now have asimple way to develop content for any Java-enabled device. JavaFX Mobile, onthe other hand, is a complete software system for mobile devices.
• Google Gears: Google Gears is beta software offered by Google to enable offlineaccess to services that normally work only online. It installs a database engine,based on SQLite, on the client system to locally cache web application data.Google Gears-enabled pages use data from the local cache rather than from theonline service. Using Google Gears, a web application may periodically syn-chronize the data in the local cache with the online service whenever a networkconnection is available. If a network connection is unavailable, the synchroni-zation is deferred until a network connection is established. This allows GoogleGears-enabled web applications to work disconnected from the Internet, mak-ing them more like their robust desktop counterparts. While not entirely RIA,this technology is closely related to rich applications technology, as it addressesthe key problem of application connectivity.
Figure 2. JavaFX "Big Picture" (Source: Sun Microsystems, Inc.)
Introducing Silverlight 1.1 12
Working with Silverlight 1.1Now that Silverlight 1.1 is well understood and the differences between it andSilverlight 1.0 and WPF are clear, we need to dive deeper into the framework. Inthis section, we'll look at the inner workings of Silverlight 1.1, first reviewing thetools that have been designed to work with Silverlight, then reviewing the Silver-light design model, and finishing with a look at the Silverlight development model.
ToolsThe next-generation tools being created by Microsoft have Silverlight developmentin mind. From the Expression products on the design side that make XAML editinga breeze to the new Visual Studio 2008 Silverlight integration, Microsoft is doingeverything it can to make it easy for developers to adopt their new RIA framework.For many developers, these tools are already part of their normal developmentworkflow, which is another key benefit Silverlight offers over traditional compet-itors like Flash.
Tools for Designers: Microsoft Expression BlendThe Expression suite of products is a relatively new offering from Microsoft, sothese tools are less likely to exist in current workflows than their developmentcounterparts. The Expression products were first introduced under codenameslike "Acrylic," "Quartz," and "Sparkle" in September 2005, but since then Microsofthas made it clear that it is serious about creating tools for designers that rival long-time leader Adobe (which has acquired Macromedia since the Expression toolswere originally introduced). Led by industry veteran Forest Key, who has previ-ously worked for both Industrial Light and Magic and Adobe Systems, Microsoftdefinitely has the ability to deliver powerful new products that integrate seamlesslyinto the XAML/Silverlight workflow.
Microsoft Expression Blend, previously Expression Interactive Designer, previ-ously codenamed Sparkle, is a collaboration tool for visually creating and editingXAML files. It is primarily used for designing interactions and animations; Ex-pression Design is Microsoft's product designed for actually creating the visualassets that you animate in Blend. Everything created in Blend can be viewed andedited directly in Visual Studio 2008, so it is the perfect tool for enabling collabo-ration between developers and designers.
Like Visual Studio, Blend works with projects that can contain any number of filesand visual assets. Blend is used primarily to edit.xaml files, enabling you to use avast array of tools to manipulate XAML assets on a canvas. Any changes you maketo a project in Blend—whether it's changing an existing file or adding a new XAMLfile—are instantly available in Visual Studio. Developers can even open the same
Introducing Silverlight 1.1 13
project in Visual Studio that designers use in Blend, completely eliminating thefriction that usually exists between designer projects and developer projects.
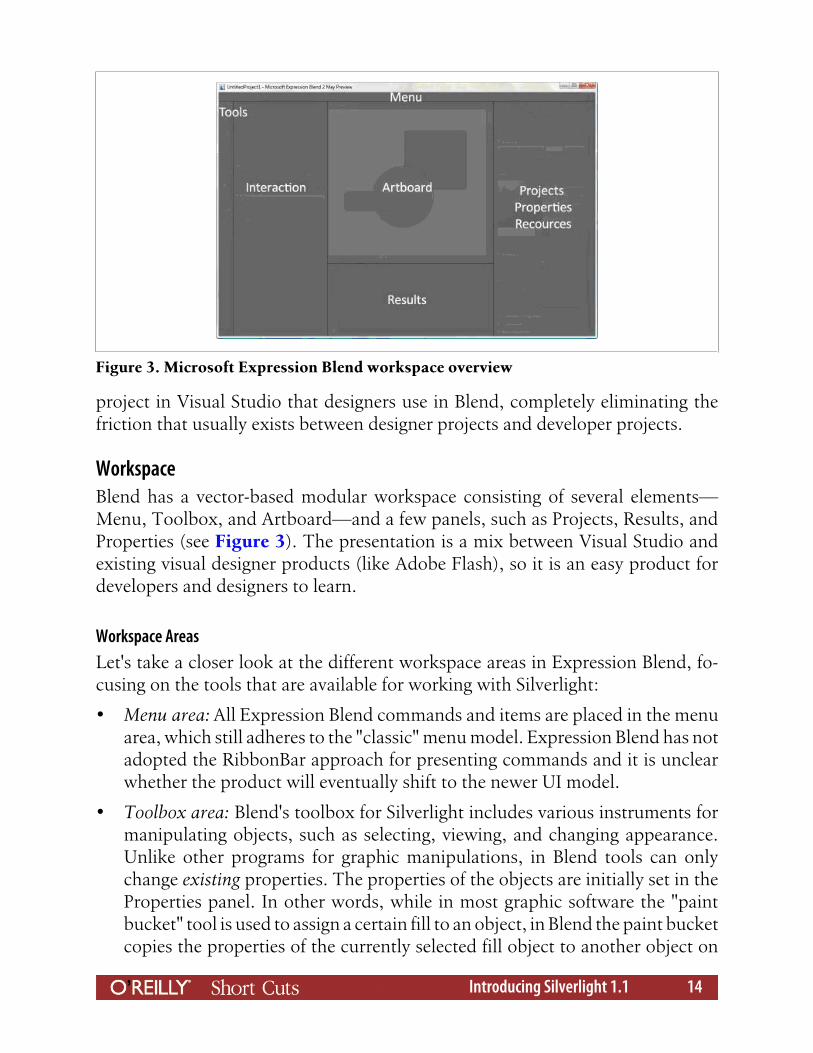
WorkspaceBlend has a vector-based modular workspace consisting of several elements—Menu, Toolbox, and Artboard—and a few panels, such as Projects, Results, andProperties (see Figure 3). The presentation is a mix between Visual Studio andexisting visual designer products (like Adobe Flash), so it is an easy product fordevelopers and designers to learn.
Workspace AreasLet's take a closer look at the different workspace areas in Expression Blend, fo-cusing on the tools that are available for working with Silverlight:
• Menu area: All Expression Blend commands and items are placed in the menuarea, which still adheres to the "classic" menu model. Expression Blend has notadopted the RibbonBar approach for presenting commands and it is unclearwhether the product will eventually shift to the newer UI model.
• Toolbox area: Blend's toolbox for Silverlight includes various instruments formanipulating objects, such as selecting, viewing, and changing appearance.Unlike other programs for graphic manipulations, in Blend tools can onlychange existing properties. The properties of the objects are initially set in theProperties panel. In other words, while in most graphic software the "paintbucket" tool is used to assign a certain fill to an object, in Blend the paint bucketcopies the properties of the currently selected fill object to another object on
Figure 3. Microsoft Expression Blend workspace overview
Introducing Silverlight 1.1 14
the artboard. This affects all properties—the fill, the stroke, and the opacitymask—and is a key difference between Blend and "normal" design products.
• Interaction panel: This panel handles all animation, interaction, and layoutproperties. Using these tools, you can easily add motion and interaction to yourXAML. The artboard is where the XAML is visually displayed on the Canvas,so any layout changes you make or animations you apply can be seen live inthat area.
• Results panel: To help you debug your XAML files, the results panel showsoutput and errors in the XAML code. This concept is much more familiar todevelopers than designers, so this feature is more likely to be used by developersthat find themselves working in Blend.
• Projects panel: The Projects panel allows you to organize and manage the filesin your project. This interface is virtually identical to its counterpart in VisualStudio, so it should be very familiar to developers. Also familiar to developersis the Properties panel, which gives you complete control over the visual ap-pearance of an object.
• Resources panel: This panel is the place where available resources for the projectare stored. Unfortunately, in the May CTP of Blend, you cannot create resour-ces for Silverlight. This is a problem that will likely be addressed in a futureupdate to the Blend product.
When a XAML file is opened in Blend, it is displayed in a separate window on theBlend artboard. Each window has two views: Design View and XAML View. Theability to switch between Design and XAML View helps you check the results ofyour code writing or see what code is generated when you create things visually.This is another very developer-oriented feature that is unique to the Blend graphicsprogram, made possible by the open, XML-based markup that is used to defineXAML objects.
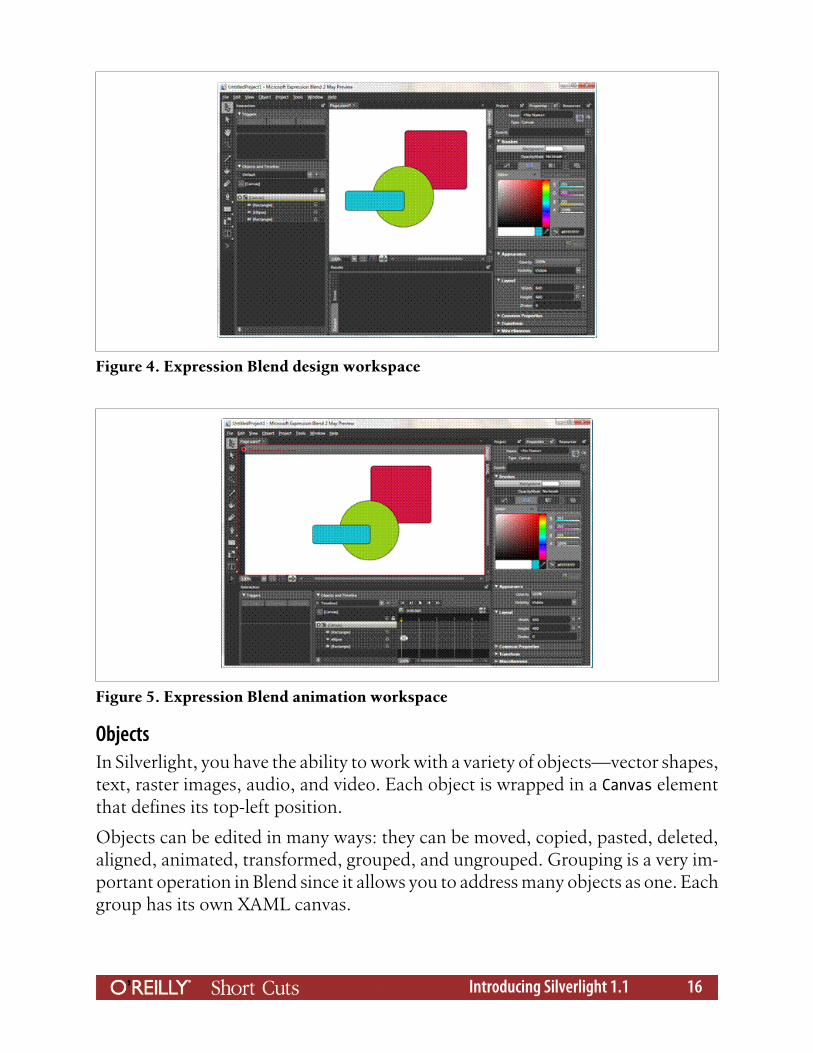
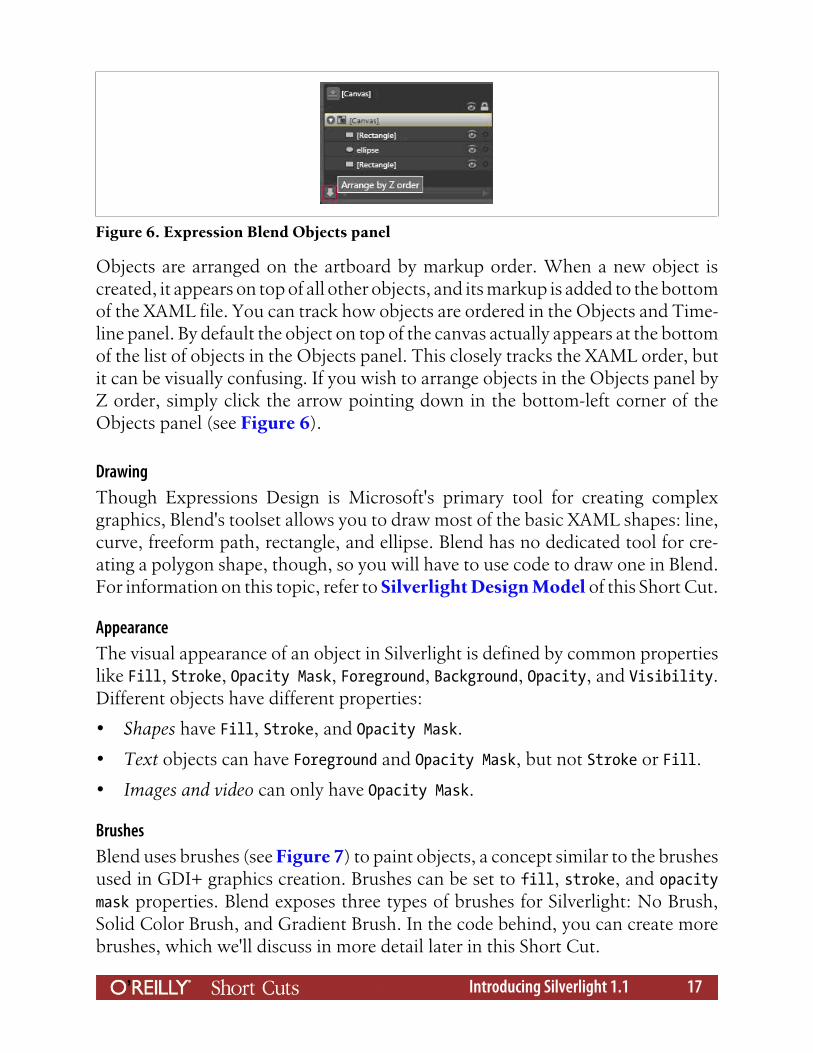
Blend also has two predefined workspaces: Design Workspace (shortcut key F6)and Animation Workspace (shortcut key F7). The main difference between thetwo is that in the animation workspace, the Objects and Timeline panel positionshorizontally to accommodate the timeline. There are a few additional shortcutsthat make navigating the Blend workspace a breeze. If you need more artboardspace for your project, you can quickly decrease the tools and panels size fromTools > Options > Workspace Zoom. Also, familiar to Adobe users, you can usethe Tab key to toggle the visibility of all workspace panels. Figure 4 illustrates thedesign workspace; Figure 5 shows the animation workspace.
Introducing Silverlight 1.1 15
ObjectsIn Silverlight, you have the ability to work with a variety of objects—vector shapes,text, raster images, audio, and video. Each object is wrapped in a Canvas elementthat defines its top-left position.
Objects can be edited in many ways: they can be moved, copied, pasted, deleted,aligned, animated, transformed, grouped, and ungrouped. Grouping is a very im-portant operation in Blend since it allows you to address many objects as one. Eachgroup has its own XAML canvas.
Figure 4. Expression Blend design workspace
Figure 5. Expression Blend animation workspace
Introducing Silverlight 1.1 16
Objects are arranged on the artboard by markup order. When a new object iscreated, it appears on top of all other objects, and its markup is added to the bottomof the XAML file. You can track how objects are ordered in the Objects and Time-line panel. By default the object on top of the canvas actually appears at the bottomof the list of objects in the Objects panel. This closely tracks the XAML order, butit can be visually confusing. If you wish to arrange objects in the Objects panel byZ order, simply click the arrow pointing down in the bottom-left corner of theObjects panel (see Figure 6).
DrawingThough Expressions Design is Microsoft's primary tool for creating complexgraphics, Blend's toolset allows you to draw most of the basic XAML shapes: line,curve, freeform path, rectangle, and ellipse. Blend has no dedicated tool for cre-ating a polygon shape, though, so you will have to use code to draw one in Blend.For information on this topic, refer to Silverlight Design Model of this Short Cut.
AppearanceThe visual appearance of an object in Silverlight is defined by common propertieslike Fill, Stroke, Opacity Mask, Foreground, Background, Opacity, and Visibility.Different objects have different properties:
• Shapes have Fill, Stroke, and Opacity Mask.
• Text objects can have Foreground and Opacity Mask, but not Stroke or Fill.
• Images and video can only have Opacity Mask.
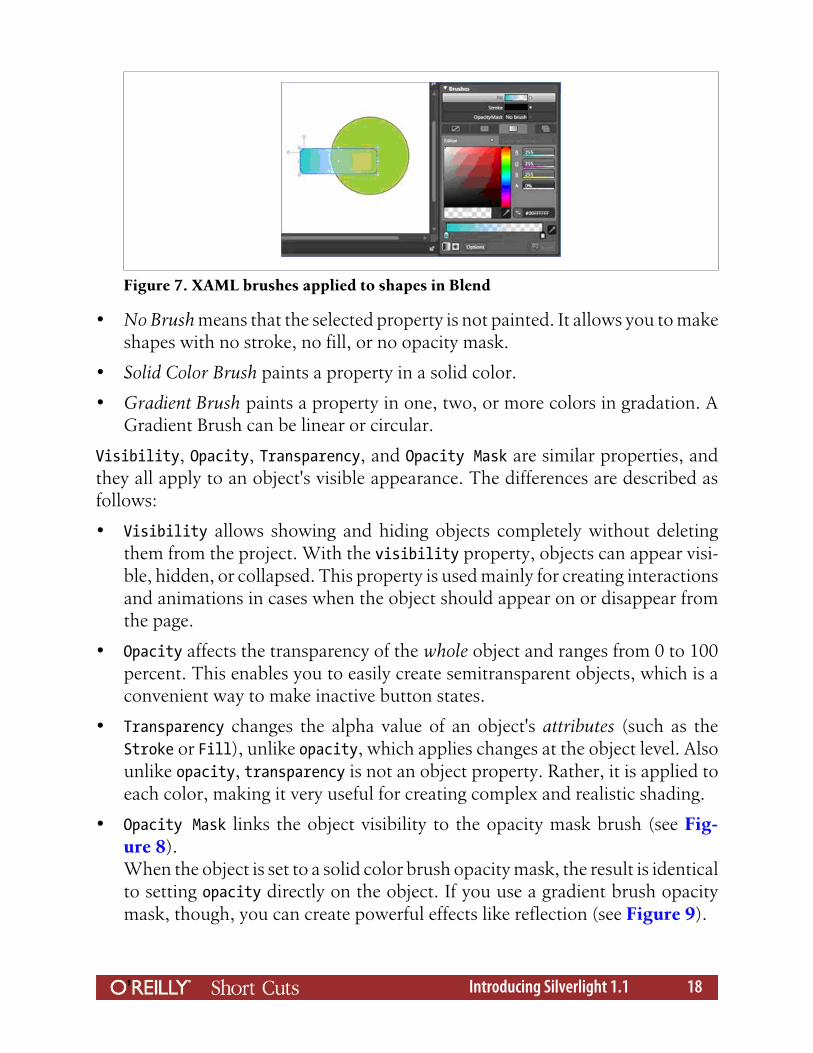
BrushesBlend uses brushes (see Figure 7) to paint objects, a concept similar to the brushesused in GDI+ graphics creation. Brushes can be set to fill, stroke, and opacitymask properties. Blend exposes three types of brushes for Silverlight: No Brush,Solid Color Brush, and Gradient Brush. In the code behind, you can create morebrushes, which we'll discuss in more detail later in this Short Cut.
Figure 6. Expression Blend Objects panel
Introducing Silverlight 1.1 17
• No Brush means that the selected property is not painted. It allows you to makeshapes with no stroke, no fill, or no opacity mask.
• Solid Color Brush paints a property in a solid color.
• Gradient Brush paints a property in one, two, or more colors in gradation. AGradient Brush can be linear or circular.
Visibility, Opacity, Transparency, and Opacity Mask are similar properties, andthey all apply to an object's visible appearance. The differences are described asfollows:
• Visibility allows showing and hiding objects completely without deletingthem from the project. With the visibility property, objects can appear visi-ble, hidden, or collapsed. This property is used mainly for creating interactionsand animations in cases when the object should appear on or disappear fromthe page.
• Opacity affects the transparency of the whole object and ranges from 0 to 100percent. This enables you to easily create semitransparent objects, which is aconvenient way to make inactive button states.
• Transparency changes the alpha value of an object's attributes (such as theStroke or Fill), unlike opacity, which applies changes at the object level. Alsounlike opacity, transparency is not an object property. Rather, it is applied toeach color, making it very useful for creating complex and realistic shading.
• Opacity Mask links the object visibility to the opacity mask brush (see Fig-ure 8).When the object is set to a solid color brush opacity mask, the result is identicalto setting opacity directly on the object. If you use a gradient brush opacitymask, though, you can create powerful effects like reflection (see Figure 9).
Figure 7. XAML brushes applied to shapes in Blend
Introducing Silverlight 1.1 18

Modifying and Transforming ObjectsIn Blend, you can translate, scale, rotate, skew, and flip objects by using the Se-lection Tool or by using the Transform Category (Figure 10) under theProperties panel.
• Translating an object means changing the object's position along the X and Yaxes. This is different from moving the object on the artboard using the selec-tion tool, which changes the position of the object relative to its parent canvasby Top and Left values. To translate an object, you should change the X and Yvalues in the Transform panel.
Figure 8. Opacity masks applied to shapes in Blend
Figure 9. Opacity masks used to create reflections in Blend
Figure 10. Transform panel in Expression Blend
Introducing Silverlight 1.1 19
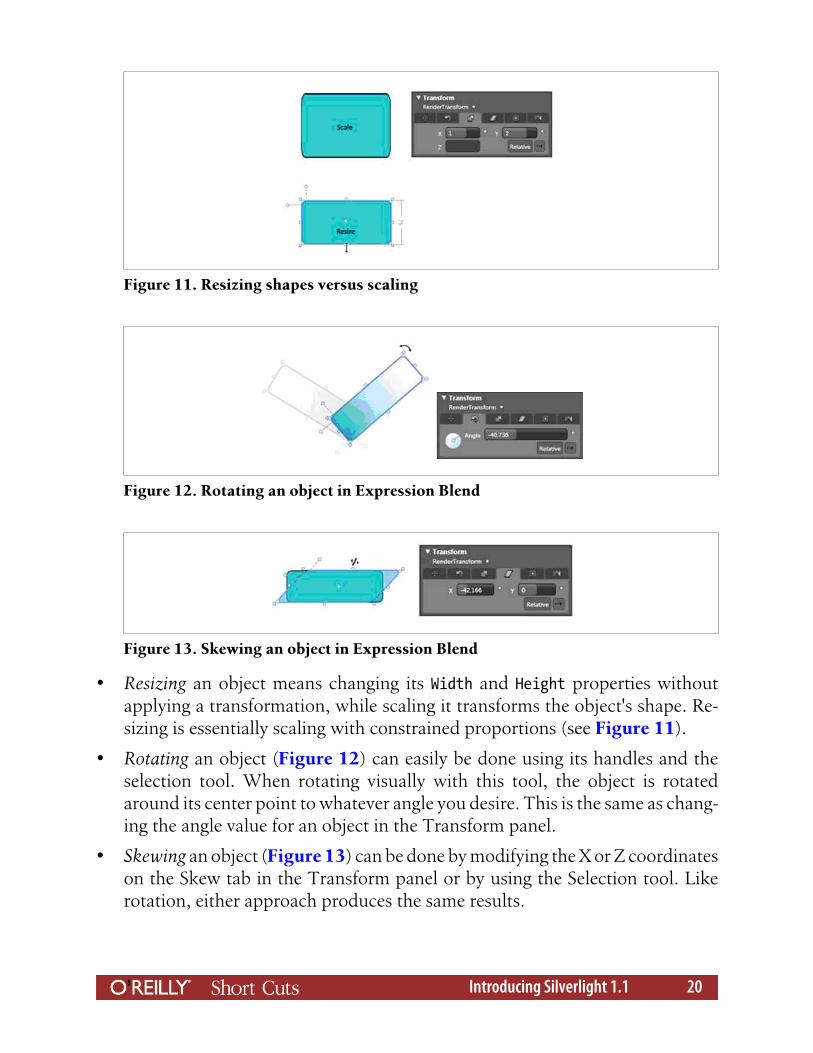
• Resizing an object means changing its Width and Height properties withoutapplying a transformation, while scaling it transforms the object's shape. Re-sizing is essentially scaling with constrained proportions (see Figure 11).
• Rotating an object (Figure 12) can easily be done using its handles and theselection tool. When rotating visually with this tool, the object is rotatedaround its center point to whatever angle you desire. This is the same as chang-ing the angle value for an object in the Transform panel.
• Skewing an object (Figure 13) can be done by modifying the X or Z coordinateson the Skew tab in the Transform panel or by using the Selection tool. Likerotation, either approach produces the same results.
Figure 11. Resizing shapes versus scaling
Figure 12. Rotating an object in Expression Blend
Figure 13. Skewing an object in Expression Blend
Introducing Silverlight 1.1 20
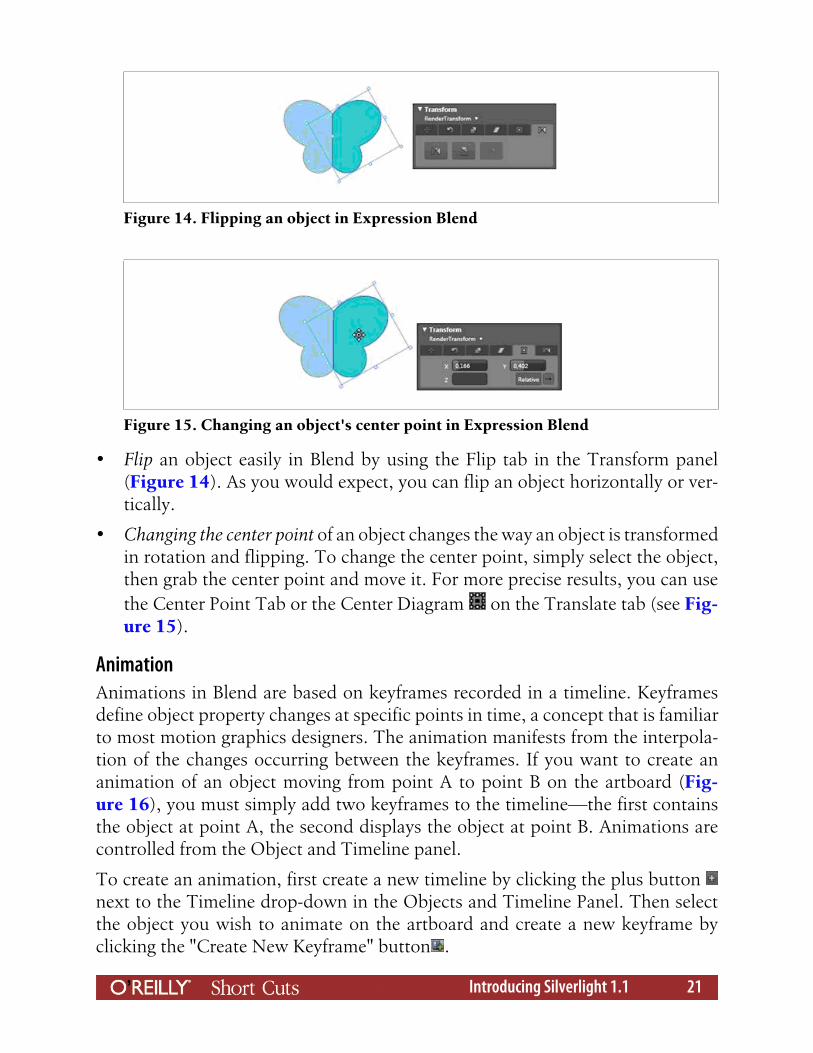
• Flip an object easily in Blend by using the Flip tab in the Transform panel(Figure 14). As you would expect, you can flip an object horizontally or ver-tically.
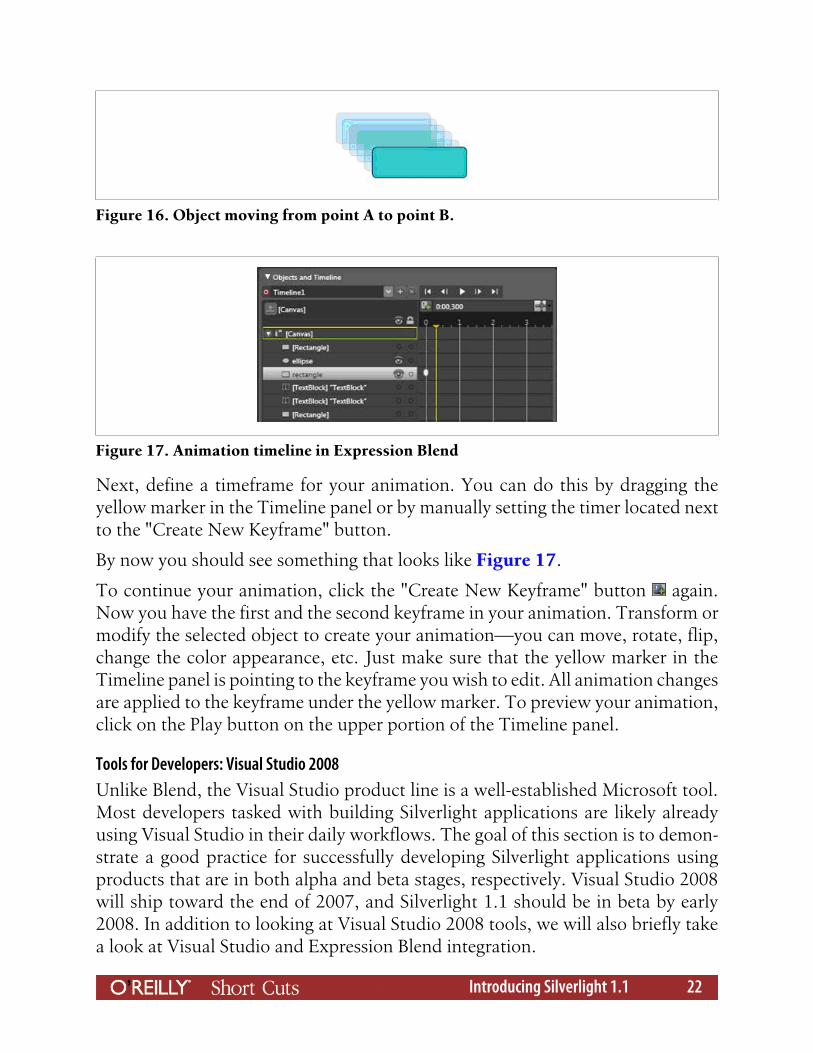
• Changing the center point of an object changes the way an object is transformedin rotation and flipping. To change the center point, simply select the object,then grab the center point and move it. For more precise results, you can usethe Center Point Tab or the Center Diagram on the Translate tab (see Fig-ure 15).
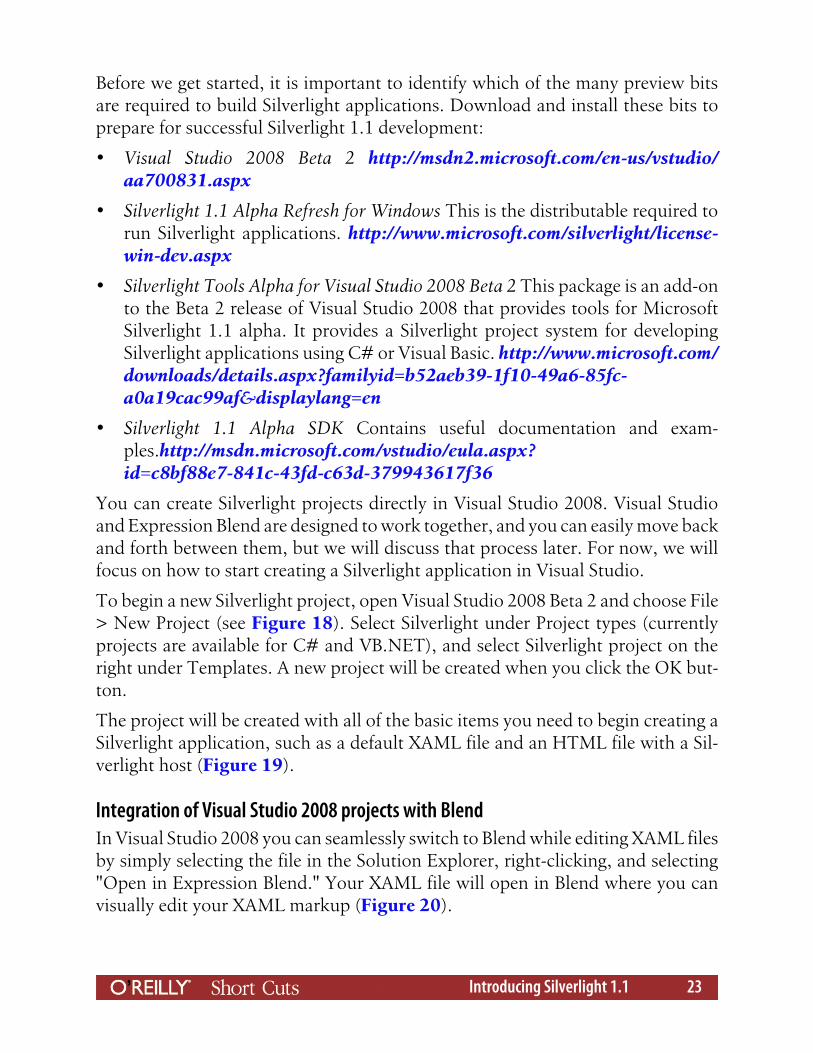
AnimationAnimations in Blend are based on keyframes recorded in a timeline. Keyframesdefine object property changes at specific points in time, a concept that is familiarto most motion graphics designers. The animation manifests from the interpola-tion of the changes occurring between the keyframes. If you want to create ananimation of an object moving from point A to point B on the artboard (Fig-ure 16), you must simply add two keyframes to the timeline—the first containsthe object at point A, the second displays the object at point B. Animations arecontrolled from the Object and Timeline panel.
To create an animation, first create a new timeline by clicking the plus button next to the Timeline drop-down in the Objects and Timeline Panel. Then selectthe object you wish to animate on the artboard and create a new keyframe byclicking the "Create New Keyframe" button .
Figure 14. Flipping an object in Expression Blend
Figure 15. Changing an object's center point in Expression Blend
Introducing Silverlight 1.1 21
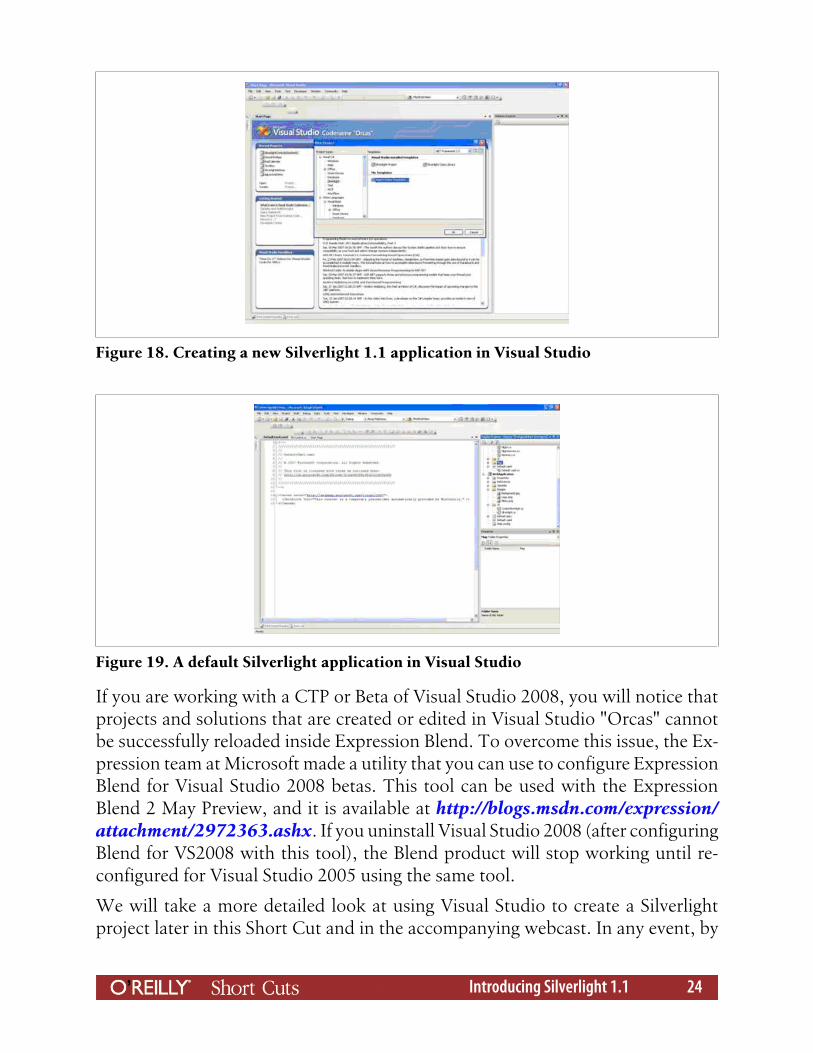
Next, define a timeframe for your animation. You can do this by dragging theyellow marker in the Timeline panel or by manually setting the timer located nextto the "Create New Keyframe" button.
By now you should see something that looks like Figure 17.
To continue your animation, click the "Create New Keyframe" button again.Now you have the first and the second keyframe in your animation. Transform ormodify the selected object to create your animation—you can move, rotate, flip,change the color appearance, etc. Just make sure that the yellow marker in theTimeline panel is pointing to the keyframe you wish to edit. All animation changesare applied to the keyframe under the yellow marker. To preview your animation,click on the Play button on the upper portion of the Timeline panel.
Tools for Developers: Visual Studio 2008Unlike Blend, the Visual Studio product line is a well-established Microsoft tool.Most developers tasked with building Silverlight applications are likely alreadyusing Visual Studio in their daily workflows. The goal of this section is to demon-strate a good practice for successfully developing Silverlight applications usingproducts that are in both alpha and beta stages, respectively. Visual Studio 2008will ship toward the end of 2007, and Silverlight 1.1 should be in beta by early2008. In addition to looking at Visual Studio 2008 tools, we will also briefly takea look at Visual Studio and Expression Blend integration.
Figure 16. Object moving from point A to point B.
Figure 17. Animation timeline in Expression Blend
Introducing Silverlight 1.1 22
Before we get started, it is important to identify which of the many preview bitsare required to build Silverlight applications. Download and install these bits toprepare for successful Silverlight 1.1 development:
• Visual Studio 2008 Beta 2 http://msdn2.microsoft.com/en-us/vstudio/aa700831.aspx
• Silverlight 1.1 Alpha Refresh for Windows This is the distributable required torun Silverlight applications. http://www.microsoft.com/silverlight/license-win-dev.aspx
• Silverlight Tools Alpha for Visual Studio 2008 Beta 2 This package is an add-onto the Beta 2 release of Visual Studio 2008 that provides tools for MicrosoftSilverlight 1.1 alpha. It provides a Silverlight project system for developingSilverlight applications using C# or Visual Basic. http://www.microsoft.com/downloads/details.aspx?familyid=b52aeb39-1f10-49a6-85fc-a0a19cac99af&displaylang=en
• Silverlight 1.1 Alpha SDK Contains useful documentation and exam-ples.http://msdn.microsoft.com/vstudio/eula.aspx?id=c8bf88e7-841c-43fd-c63d-379943617f36
You can create Silverlight projects directly in Visual Studio 2008. Visual Studioand Expression Blend are designed to work together, and you can easily move backand forth between them, but we will discuss that process later. For now, we willfocus on how to start creating a Silverlight application in Visual Studio.
To begin a new Silverlight project, open Visual Studio 2008 Beta 2 and choose File> New Project (see Figure 18). Select Silverlight under Project types (currentlyprojects are available for C# and VB.NET), and select Silverlight project on theright under Templates. A new project will be created when you click the OK but-ton.
The project will be created with all of the basic items you need to begin creating aSilverlight application, such as a default XAML file and an HTML file with a Sil-verlight host (Figure 19).
Integration of Visual Studio 2008 projects with BlendIn Visual Studio 2008 you can seamlessly switch to Blend while editing XAML filesby simply selecting the file in the Solution Explorer, right-clicking, and selecting"Open in Expression Blend." Your XAML file will open in Blend where you canvisually edit your XAML markup (Figure 20).
Introducing Silverlight 1.1 23
If you are working with a CTP or Beta of Visual Studio 2008, you will notice thatprojects and solutions that are created or edited in Visual Studio "Orcas" cannotbe successfully reloaded inside Expression Blend. To overcome this issue, the Ex-pression team at Microsoft made a utility that you can use to configure ExpressionBlend for Visual Studio 2008 betas. This tool can be used with the ExpressionBlend 2 May Preview, and it is available at http://blogs.msdn.com/expression/attachment/2972363.ashx. If you uninstall Visual Studio 2008 (after configuringBlend for VS2008 with this tool), the Blend product will stop working until re-configured for Visual Studio 2005 using the same tool.
We will take a more detailed look at using Visual Studio to create a Silverlightproject later in this Short Cut and in the accompanying webcast. In any event, by
Figure 18. Creating a new Silverlight 1.1 application in Visual Studio
Figure 19. A default Silverlight application in Visual Studio
Introducing Silverlight 1.1 24
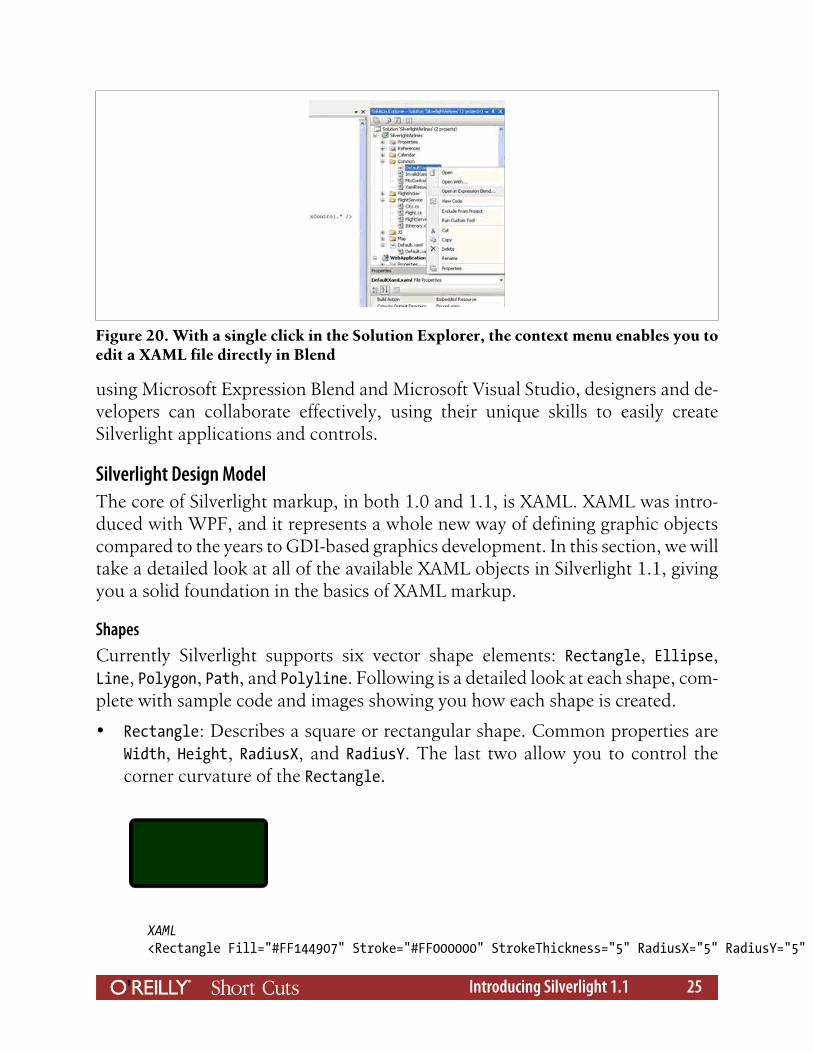
using Microsoft Expression Blend and Microsoft Visual Studio, designers and de-velopers can collaborate effectively, using their unique skills to easily createSilverlight applications and controls.
Silverlight Design ModelThe core of Silverlight markup, in both 1.0 and 1.1, is XAML. XAML was intro-duced with WPF, and it represents a whole new way of defining graphic objectscompared to the years to GDI-based graphics development. In this section, we willtake a detailed look at all of the available XAML objects in Silverlight 1.1, givingyou a solid foundation in the basics of XAML markup.
ShapesCurrently Silverlight supports six vector shape elements: Rectangle, Ellipse,Line, Polygon, Path, and Polyline. Following is a detailed look at each shape, com-plete with sample code and images showing you how each shape is created.
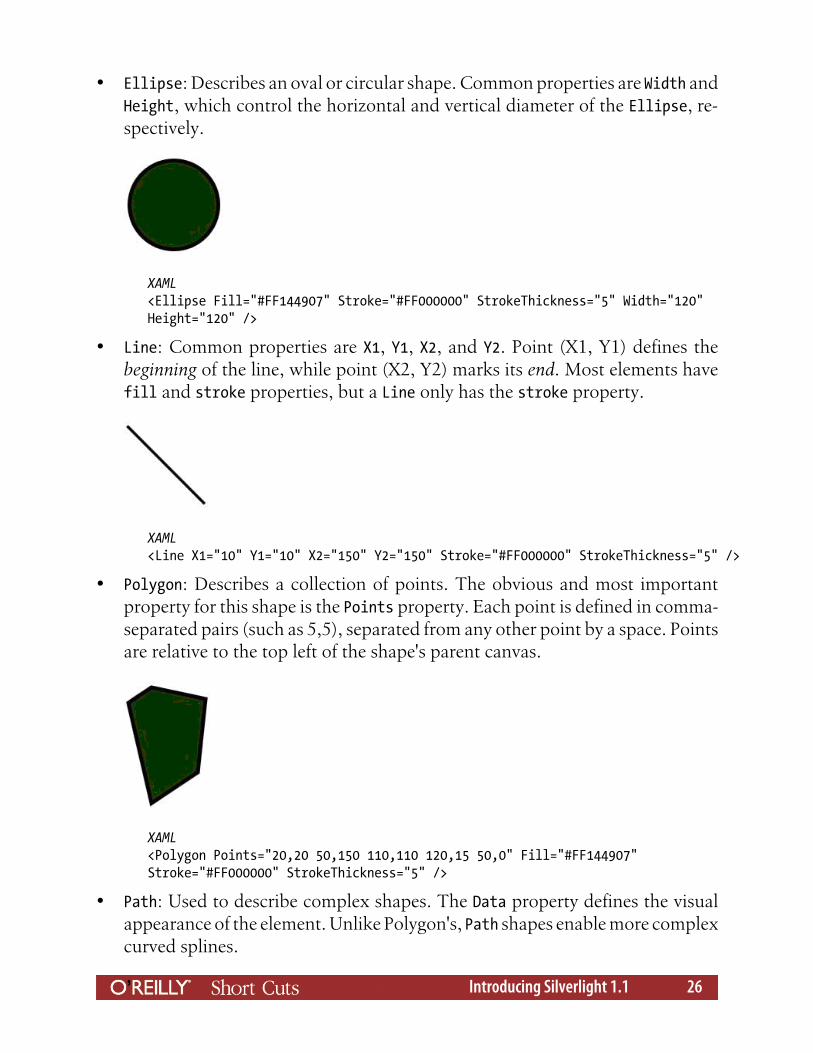
• Rectangle: Describes a square or rectangular shape. Common properties areWidth, Height, RadiusX, and RadiusY. The last two allow you to control thecorner curvature of the Rectangle.
XAML<Rectangle Fill="#FF144907" Stroke="#FF000000" StrokeThickness="5" RadiusX="5" RadiusY="5" Width="180" Height="90" />
Figure 20. With a single click in the Solution Explorer, the context menu enables you toedit a XAML file directly in Blend
Introducing Silverlight 1.1 25
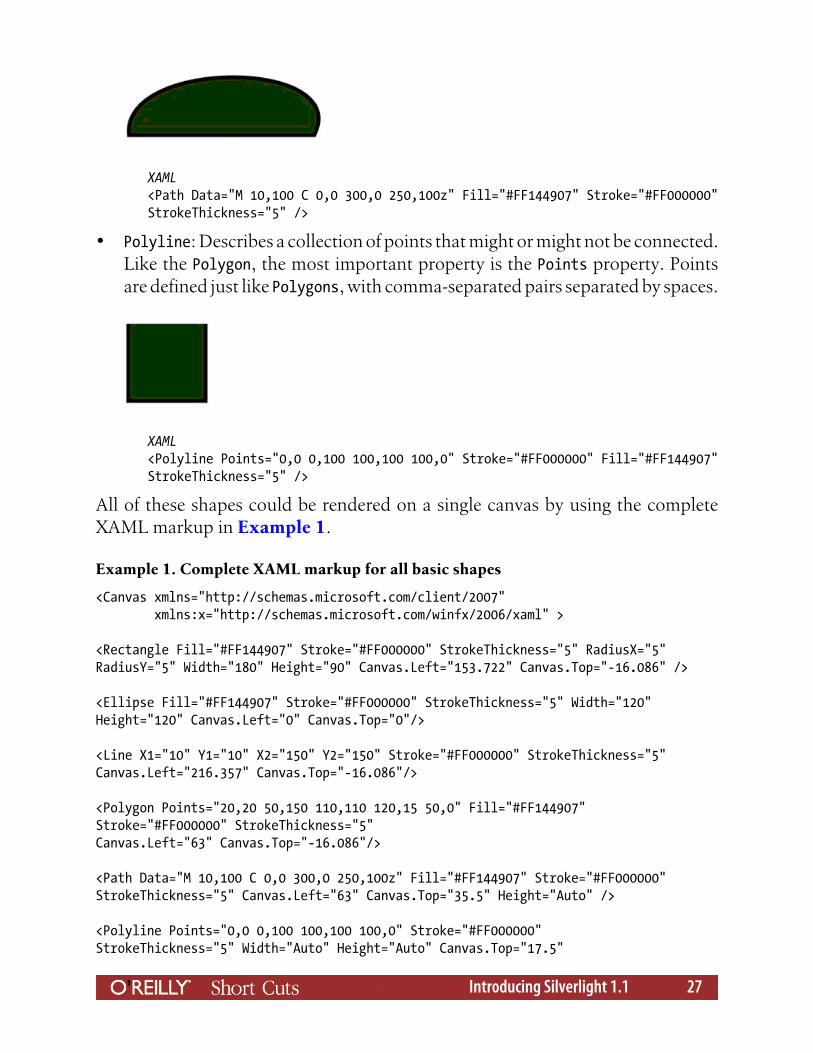
• Ellipse: Describes an oval or circular shape. Common properties are Width andHeight, which control the horizontal and vertical diameter of the Ellipse, re-spectively.
XAML<Ellipse Fill="#FF144907" Stroke="#FF000000" StrokeThickness="5" Width="120"Height="120" />
• Line: Common properties are X1, Y1, X2, and Y2. Point (X1, Y1) defines thebeginning of the line, while point (X2, Y2) marks its end. Most elements havefill and stroke properties, but a Line only has the stroke property.
XAML<Line X1="10" Y1="10" X2="150" Y2="150" Stroke="#FF000000" StrokeThickness="5" />
• Polygon: Describes a collection of points. The obvious and most importantproperty for this shape is the Points property. Each point is defined in comma-separated pairs (such as 5,5), separated from any other point by a space. Pointsare relative to the top left of the shape's parent canvas.
XAML<Polygon Points="20,20 50,150 110,110 120,15 50,0" Fill="#FF144907"Stroke="#FF000000" StrokeThickness="5" />
• Path: Used to describe complex shapes. The Data property defines the visualappearance of the element. Unlike Polygon's, Path shapes enable more complexcurved splines.
Introducing Silverlight 1.1 26
XAML<Path Data="M 10,100 C 0,0 300,0 250,100z" Fill="#FF144907" Stroke="#FF000000"StrokeThickness="5" />
• Polyline: Describes a collection of points that might or might not be connected.Like the Polygon, the most important property is the Points property. Pointsare defined just like Polygons, with comma-separated pairs separated by spaces.
XAML<Polyline Points="0,0 0,100 100,100 100,0" Stroke="#FF000000" Fill="#FF144907"StrokeThickness="5" />
All of these shapes could be rendered on a single canvas by using the completeXAML markup in Example 1.
Example 1. Complete XAML markup for all basic shapes
<Canvas xmlns="http://schemas.microsoft.com/client/2007" xmlns:x="http://schemas.microsoft.com/winfx/2006/xaml" >
<Rectangle Fill="#FF144907" Stroke="#FF000000" StrokeThickness="5" RadiusX="5"RadiusY="5" Width="180" Height="90" Canvas.Left="153.722" Canvas.Top="-16.086" />
<Ellipse Fill="#FF144907" Stroke="#FF000000" StrokeThickness="5" Width="120"Height="120" Canvas.Left="0" Canvas.Top="0"/>
<Line X1="10" Y1="10" X2="150" Y2="150" Stroke="#FF000000" StrokeThickness="5"Canvas.Left="216.357" Canvas.Top="-16.086"/>
<Polygon Points="20,20 50,150 110,110 120,15 50,0" Fill="#FF144907"Stroke="#FF000000" StrokeThickness="5"Canvas.Left="63" Canvas.Top="-16.086"/>
<Path Data="M 10,100 C 0,0 300,0 250,100z" Fill="#FF144907" Stroke="#FF000000"StrokeThickness="5" Canvas.Left="63" Canvas.Top="35.5" Height="Auto" />
<Polyline Points="0,0 0,100 100,100 100,0" Stroke="#FF000000"StrokeThickness="5" Width="Auto" Height="Auto" Canvas.Top="17.5"
Introducing Silverlight 1.1 27
Canvas.Left="66.857"/>
</Canvas>
BrushesNow that you understand the basic shape elements available to Silverlight, it isimportant to understand how to style the objects. In this section we will take adetailed look at Brushes that enable you to manipulate the Fill, Stroke, andOpacity Mask properties on an object, thus improving an element's visual appear-ance. Currently Silverlight supports five brushes: SolidColorBrush, LinearGradientBrush, RadialGradientBrush, ImageBrush, and VideoBrush.
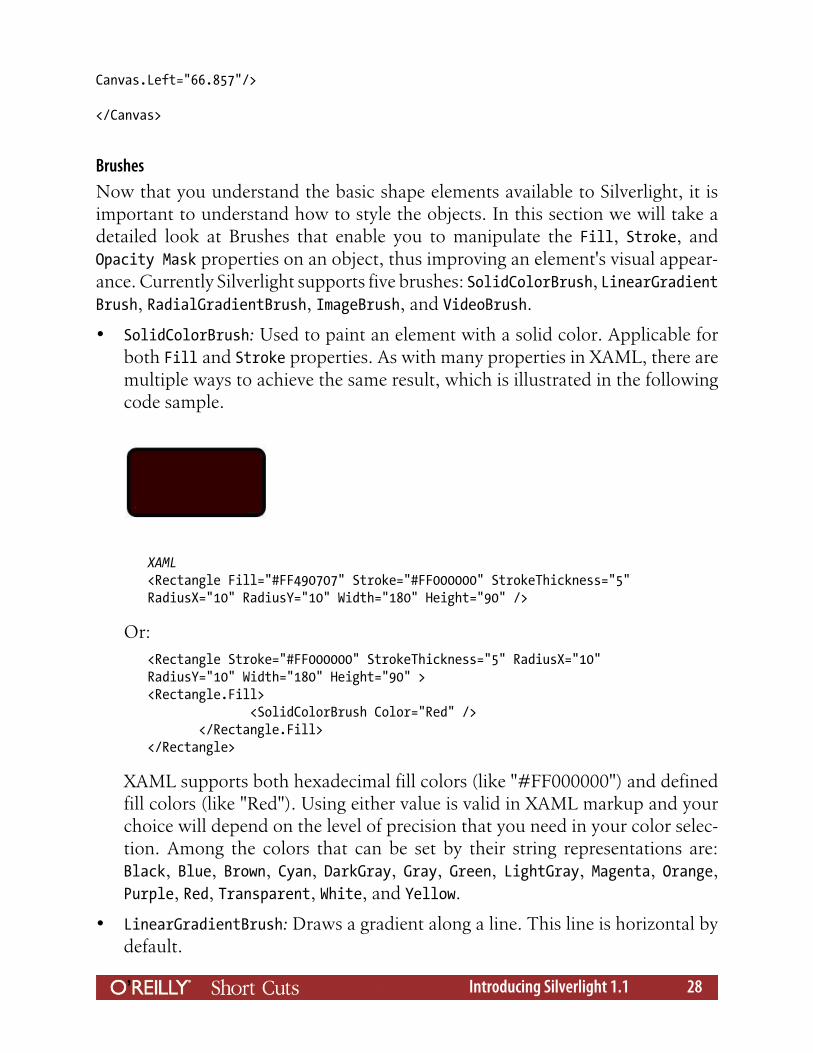
• SolidColorBrush: Used to paint an element with a solid color. Applicable forboth Fill and Stroke properties. As with many properties in XAML, there aremultiple ways to achieve the same result, which is illustrated in the followingcode sample.
XAML<Rectangle Fill="#FF490707" Stroke="#FF000000" StrokeThickness="5"RadiusX="10" RadiusY="10" Width="180" Height="90" />
Or:<Rectangle Stroke="#FF000000" StrokeThickness="5" RadiusX="10"RadiusY="10" Width="180" Height="90" ><Rectangle.Fill> <SolidColorBrush Color="Red" /> </Rectangle.Fill></Rectangle>
XAML supports both hexadecimal fill colors (like "#FF000000") and definedfill colors (like "Red"). Using either value is valid in XAML markup and yourchoice will depend on the level of precision that you need in your color selec-tion. Among the colors that can be set by their string representations are:Black, Blue, Brown, Cyan, DarkGray, Gray, Green, LightGray, Magenta, Orange,Purple, Red, Transparent, White, and Yellow.
• LinearGradientBrush: Draws a gradient along a line. This line is horizontal bydefault.
Introducing Silverlight 1.1 28

XAML<Rectangle Width="200" Height="100" Stroke="Black"> <Rectangle.Fill> <LinearGradientBrush> <GradientStop Color="Orange" Offset="0.0" /> <GradientStop Color="Red" Offset="0.20" /> <GradientStop Color="Blue" Offset="0.40" /> <GradientStop Color="SkyBlue" Offset="0.60" /> <GradientStop Color="Green" Offset="0.80" /> <GradientStop Color="LimeGreen" Offset="1" /> </LinearGradientBrush></Rectangle.Fill></Rectangle>
Using the StartPoint and EndPoint properties, you can change the position ofthe line.
<LinearGradientBrush StartPoint="0,0" EndPoint="1,0">, willproduce the following effect.
• RadialGradientBrush: Draws a gradient along a circle. Customizing the gradi-ent can be done by setting the GradientOrigin, Center, RadiusX, and RadiusYproperties.
XAML<Rectangle Width="200" Height="100" Canvas.Left="25" Canvas.Top="200"> <Rectangle.Fill> <RadialGradientBrush GradientOrigin="0.5,0.5" RadiusX="0.5" RadiusY="0.5"> <GradientStop Color="Yellow" Offset="0.0" /> <GradientStop Color="Orange" Offset="0.5" /> <GradientStop Color="Red" Offset="1.0" />
Introducing Silverlight 1.1 29
</RadialGradientBrush> </Rectangle.Fill></Rectangle>
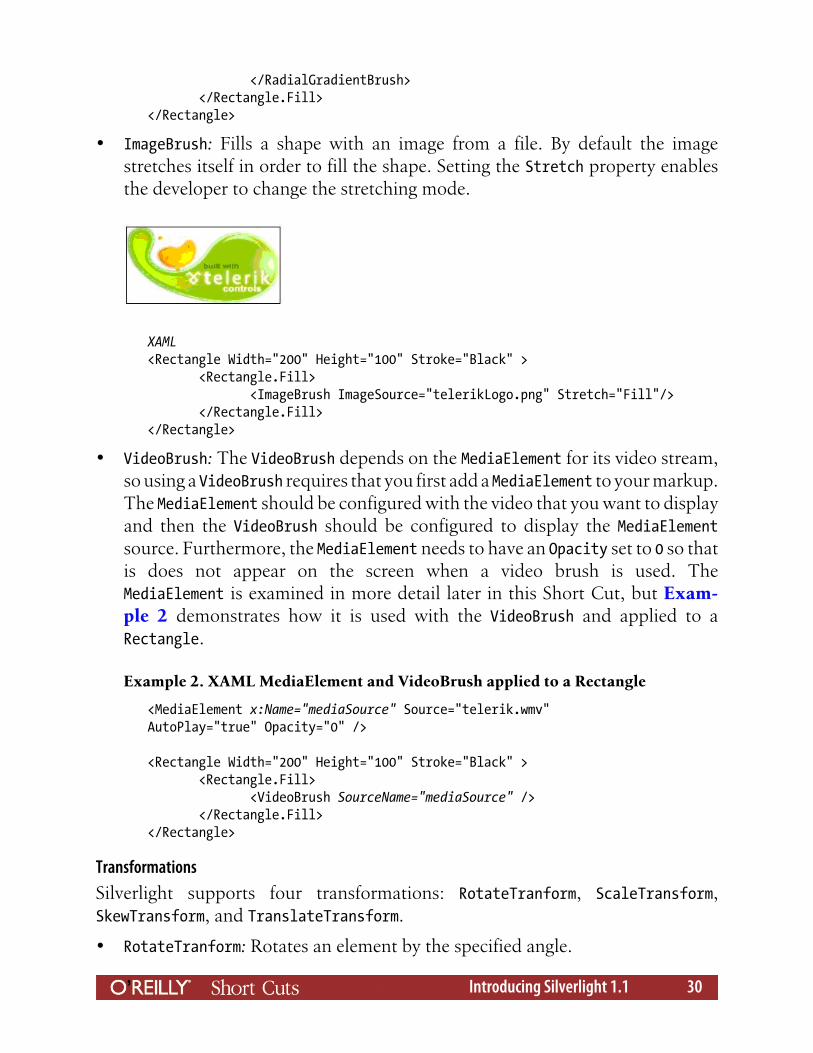
• ImageBrush: Fills a shape with an image from a file. By default the imagestretches itself in order to fill the shape. Setting the Stretch property enablesthe developer to change the stretching mode.
XAML<Rectangle Width="200" Height="100" Stroke="Black" > <Rectangle.Fill> <ImageBrush ImageSource="telerikLogo.png" Stretch="Fill"/> </Rectangle.Fill></Rectangle>
• VideoBrush: The VideoBrush depends on the MediaElement for its video stream,so using a VideoBrush requires that you first add a MediaElement to your markup.The MediaElement should be configured with the video that you want to displayand then the VideoBrush should be configured to display the MediaElementsource. Furthermore, the MediaElement needs to have an Opacity set to 0 so thatis does not appear on the screen when a video brush is used. TheMediaElement is examined in more detail later in this Short Cut, but Exam-ple 2 demonstrates how it is used with the VideoBrush and applied to aRectangle.
Example 2. XAML MediaElement and VideoBrush applied to a Rectangle
<MediaElement x:Name="mediaSource" Source="telerik.wmv"AutoPlay="true" Opacity="0" />
<Rectangle Width="200" Height="100" Stroke="Black" > <Rectangle.Fill> <VideoBrush SourceName="mediaSource" /> </Rectangle.Fill></Rectangle>
TransformationsSilverlight supports four transformations: RotateTranform, ScaleTransform,SkewTransform, and TranslateTransform.
• RotateTranform: Rotates an element by the specified angle.
Introducing Silverlight 1.1 30
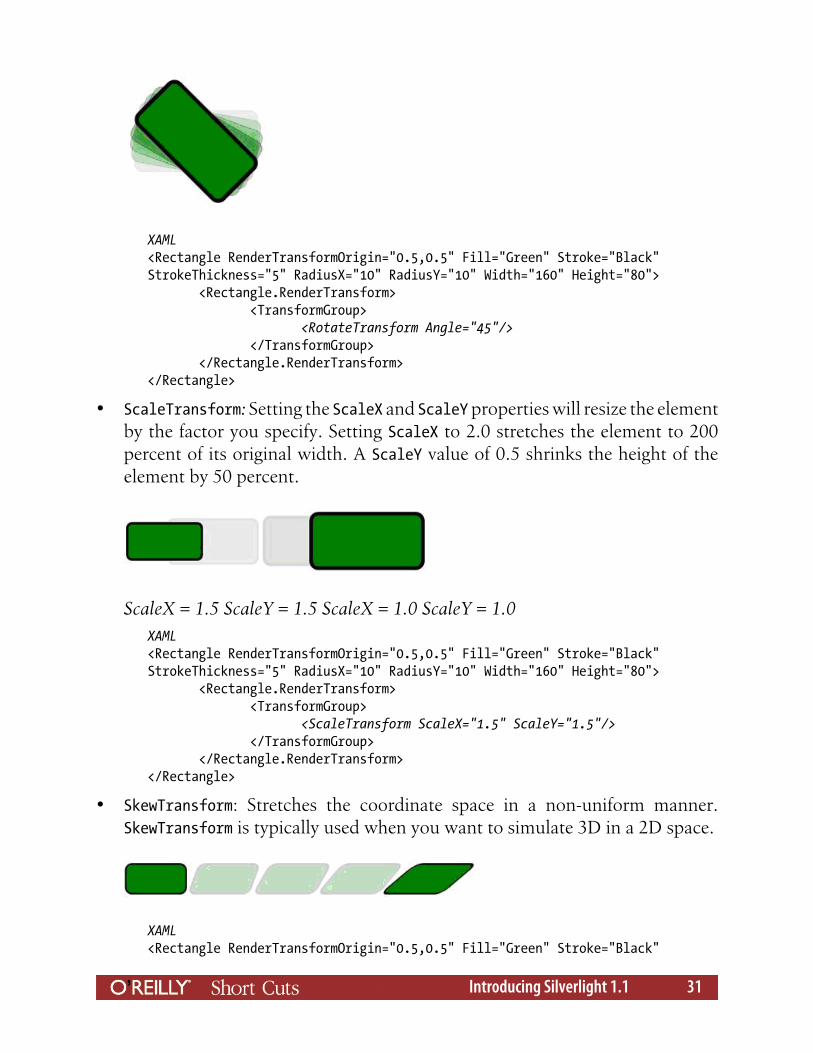
XAML<Rectangle RenderTransformOrigin="0.5,0.5" Fill="Green" Stroke="Black"StrokeThickness="5" RadiusX="10" RadiusY="10" Width="160" Height="80"> <Rectangle.RenderTransform> <TransformGroup> <RotateTransform Angle="45"/> </TransformGroup> </Rectangle.RenderTransform></Rectangle>
• ScaleTransform: Setting the ScaleX and ScaleY properties will resize the elementby the factor you specify. Setting ScaleX to 2.0 stretches the element to 200percent of its original width. A ScaleY value of 0.5 shrinks the height of theelement by 50 percent.
ScaleX = 1.5 ScaleY = 1.5 ScaleX = 1.0 ScaleY = 1.0XAML<Rectangle RenderTransformOrigin="0.5,0.5" Fill="Green" Stroke="Black"StrokeThickness="5" RadiusX="10" RadiusY="10" Width="160" Height="80"> <Rectangle.RenderTransform> <TransformGroup> <ScaleTransform ScaleX="1.5" ScaleY="1.5"/> </TransformGroup> </Rectangle.RenderTransform></Rectangle>
• SkewTransform: Stretches the coordinate space in a non-uniform manner.SkewTransform is typically used when you want to simulate 3D in a 2D space.
XAML<Rectangle RenderTransformOrigin="0.5,0.5" Fill="Green" Stroke="Black"
Introducing Silverlight 1.1 31

StrokeThickness="2.5" RadiusX="10" RadiusY="10" Width="100" Height="50"> <Rectangle.RenderTransform> <TransformGroup> <SkewTransform AngleX="-50" AngleY="0"/> </TransformGroup> </Rectangle.RenderTransform></Rectangle>
• TranslateTransform: Very useful for moving objects. Use the X property of theTranslateTransform to specify the amount, in pixels, to move the element alongthe X-axis. Use the Y property to specify the amount, in pixels, to move theelement along the Y-axis.
X = 250, Y = 50XAML<Rectangle RenderTransformOrigin="0.5,0.5" Fill="Green" Stroke="Black"StrokeThickness="5" RadiusX="10" RadiusY="10" Width="160" Height="80"> <Rectangle.RenderTransform> <TransformGroup> <TranslateTransform X="250" Y="50"/> </TransformGroup> </Rectangle.RenderTransform></Rectangle>
Text, Image, and Media• TextBlock: Text in Silverlight is usually displayed by using a lightweight control
called TextBlock.
XAML<TextBlock Text="Hi, I am a TextBlock!" />
Common TextBlock properties are Width, Height, Text, FontFamily, FontSize,Foreground, and TextWrapping.
Introducing Silverlight 1.1 32
XAML<TextBlock Width="150" Height="100" TextWrapping="Wrap" FontFamily="Verdana"FontSize="22" Text="Hi, I am a TextBlock!" />
Setting the TextBlock property can also be done in the following way:XAML<TextBlock>Hi, I am a TextBlock</TextBlock>
• Image: Images in Silverlight are displayed using the Image control. For this con-trol to work, all you need to specify is the source image. One of the keylimitations of the Image control, though, is that it supports only JPEG and PNGimages. It is unclear if this limitation will be addressed in future updates to thecontrol.
XAML<Image Source="telerikLogo.png" />
Some of the more important properties of the Image control are Width, Height,Source, and Stretch. By default the Stretch property is set to Uniform. Thismeans that the image will be resized according to the size of the Image control.
XAML<Image Width="100" Height="50" Source="telerikLogo.png"/>
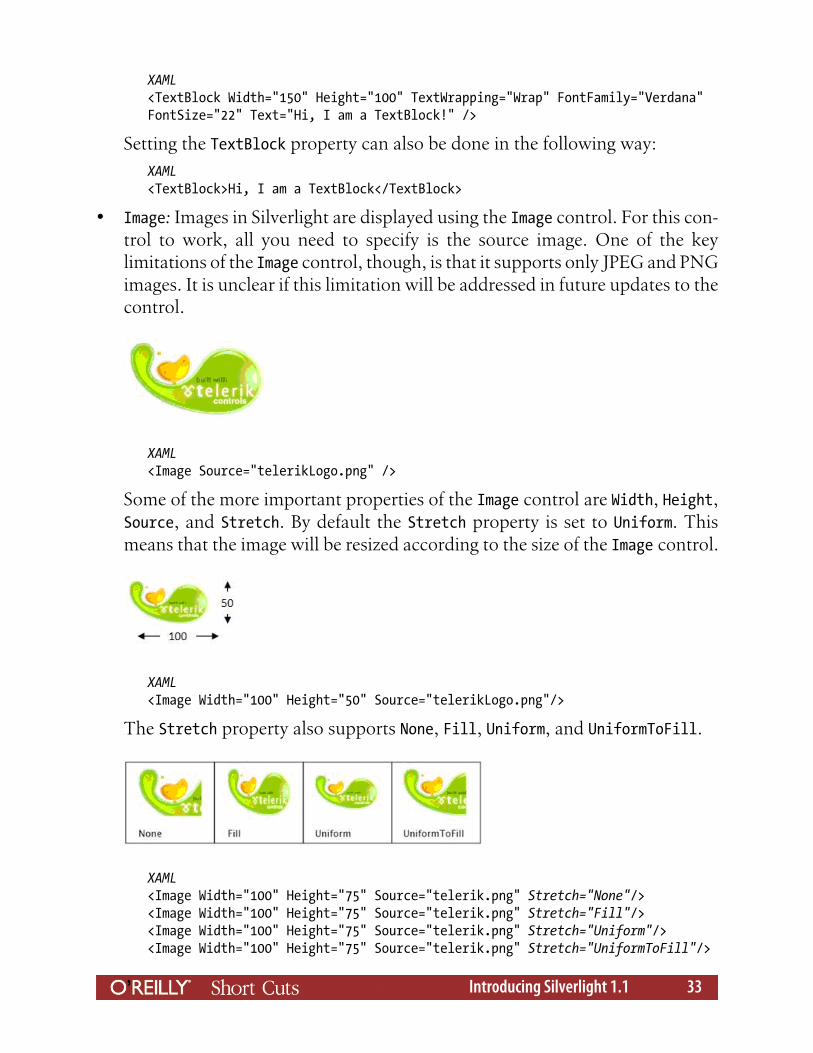
The Stretch property also supports None, Fill, Uniform, and UniformToFill.
XAML<Image Width="100" Height="75" Source="telerik.png" Stretch="None"/><Image Width="100" Height="75" Source="telerik.png" Stretch="Fill"/><Image Width="100" Height="75" Source="telerik.png" Stretch="Uniform"/><Image Width="100" Height="75" Source="telerik.png" Stretch="UniformToFill"/>
Introducing Silverlight 1.1 33

• MediaElement: Displaying audio or video in Silverlight is done by using theMediaElement control. Like the Image control, all you have to set is the Sourceproperty of the control.
XAML<MediaElement Source="telerik.wmv"/>
Some of the more important properties of the MediaElement control are Width,Height, Source, Stretch, and Volume. By default the Stretch property is set toUniform, but just as with the Image control, this property can be changed. If avideo file is used as a source, it will be automatically resized according to thesize of the MediaElement control.
The MediaElement currently supports video and audio formats listed in Table 3.
Table 3. MediaElement supported file types
Video Audio
WMV1: Windows Media Video 7 WMA 7: Windows Media Audio7
WMV2: Windows Media Video 8 WMA 8: Windows Media Audio8
WMV3: Windows Media Video 9 WMA 9: Windows Media Audio9
WMVA: Windows Media Video Advanced Pro-file, non-VC-1
MP3: ISO/MPEG Layer-3
WMVC1: Windows Media Video AdvancedProfile, VC-1
MediaElements also support playlists in the form of Advanced Stream Redirector(ASX) files. Such files typically have an .asx, .wax, .wvx, .wmx, or .wpl extension.
AnimationsAnimation timelines are represented in XAML by a Storyboard element. In orderto access the animation in your code behind file, you need to put the animationinside the <Canvas.Resources></Canvas.Resources> tag. You can access the Story
Introducing Silverlight 1.1 34
board in code via its name, which is specified in the x:Name attribute (such asx:Name="Timeline1"). Some of the most important attributes of an animation arex:Name, BeginTime, Storyboard.TargetName, Storyboard.TargetProperty, KeyTime,and Value. Let's look at each of these critical properties in detail:
• BeginTime: Shows the exact time the animation begins. It can be any valid timespan value (hours/minutes/seconds).
XAMLBeginTime="00:02:00"
• Storyboard.TargetName: Specifies the name of the XAML element that is goingto be animated. The name of the XAML element is, again, set by the x:Nameattribute.
XAML<Rectangle x:Name="rectangle1" ... ></Rectangle>
Storyboard.TargetName="rectangle1"
• Storyboard.TargetProperty: Specifies the transformation that is going to beapplied. In Example 3, we use the TranslateTransform transformation in orderto move the rectangle 110 pixels (Value="110") to the right (TranslateTransform.X) in a matter of 1 second (KeyTime="00:00:01").
Example 3. Using XAML to animate a rectangle
<Canvas.Resources> <Storyboard x:Name="Timeline1"> <DoubleAnimationUsingKeyFrames BeginTime="00:00:00"Storyboard.TargetName="rectangle" Storyboard.TargetProperty="(UIElement.RenderTransform).(TransformGroup.Children)[0].(TranslateTransform.X)"> <SplineDoubleKeyFrame KeyTime="00:00:00" Value="0"/> <SplineDoubleKeyFrame KeyTime="00:00:01" Value="110"/> </DoubleAnimationUsingKeyFrames> </Storyboard></Canvas.Resources>
<Rectangle x:Name="rectangle" Fill="Green" Stroke="Black" StrokeThickness="5"RadiusX="5" RadiusY="5" Width="180" Height="90" RenderTransformOrigin="0.5,0.5" > <Rectangle.RenderTransform> <TransformGroup> <TranslateTransform X="0" Y="0"/> </TransformGroup> </Rectangle.RenderTransform></Rectangle>
Introducing Silverlight 1.1 35
Silverlight 1.1 Development ModelBy this point, you should have a clear understanding of the basic building blocksthat are used in Silverlight programming. You've seen how Microsoft is creatingnew graphics tools and enhancing existing development tools to make Silverlightdevelopment easy for both designers and developers. Now we'll start putting theseindividual blocks together and take a broader look at the Silverlight developmentmodel.
Hosting Silverlight in HTMLWhen a user visits a page that uses Silverlight for the first time, the Silverlight plug-in is installed in the user's browser (if the user allows it) and the necessary Silverlightruntime files are deployed. With the runtime installed on the client, Silverlightapplications eliminate any functional dependency on a specific server-side tech-nology (such as PHP, ASP, or JSP). That means Silverlight applications can behosted in any page type that renders valid HTML markup to the browser.
To use the Silverlight plug-in in your web page, you will need the following files:
• Silverlight.js: This JavaScript file is provided and supported by Microsoft anddefines the createObject and createObjectEx methods that you call to instan-tiate the Silverlight control in an HTML page. It also provides code to handlethe client user experience if the Silverlight plug-in is not installed or if the ver-sion is older than required. You host this file on your site (or deploy it to theclient), but you typically do not modify its existing methods. You could addmethods and code to this file that are specific to your application, but modifi-cations are not supported by Microsoft.
• Xaml file (page.xaml, for example): This file contains the application XAMLdeclaration. This XAML file is referenced by the createSilverlight or createSilverlightEx method calls contained in the Silverlight.js file. It defines the UIthat will appear as the Silverlight content. The root element tag includes atminimum xmlns definitions that are required for a working Silverlight-basedapplication. Canvasis the typical root element because it provides the widestsupport for UI composition. If your Silverlight-based application uses managedcode for event handling, the root element should include an x:Class attribute,which enables you to reference handlers that are defined in your managed codefrom XAML.
• Code behind file (page.xaml.(cs/vb))This file contains the managed code that will be executed by the plug-in on theclient. This is one of the major changes in Silverlight 1.1; Silverlight 1.0 doesnot support code behind execution.
Introducing Silverlight 1.1 36
To instantiate the Silverlight plug-in, a few basic steps are required, several ofwhich are new to the Silverlight 1.1 alpha refresh:
1. Reference the Silverlight.js file in the head section of the html page:HTML<head> <script type="text/javascript" src="Silverlight.js"></script></head>
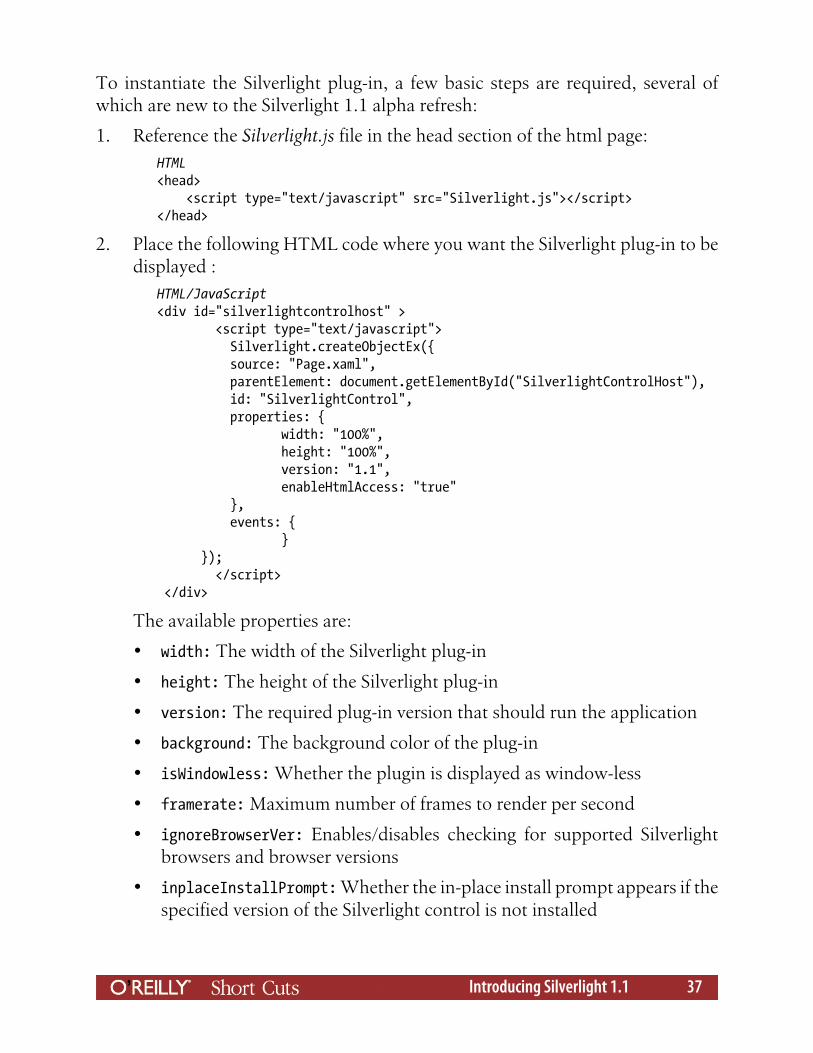
2. Place the following HTML code where you want the Silverlight plug-in to bedisplayed :
HTML/JavaScript<div id="silverlightcontrolhost" > <script type="text/javascript"> Silverlight.createObjectEx({ source: "Page.xaml", parentElement: document.getElementById("SilverlightControlHost"), id: "SilverlightControl", properties: { width: "100%", height: "100%", version: "1.1", enableHtmlAccess: "true" }, events: { } }); </script> </div>
The available properties are:
• width: The width of the Silverlight plug-in
• height: The height of the Silverlight plug-in
• version: The required plug-in version that should run the application
• background: The background color of the plug-in
• isWindowless: Whether the plugin is displayed as window-less
• framerate: Maximum number of frames to render per second
• ignoreBrowserVer: Enables/disables checking for supported Silverlightbrowsers and browser versions
• inplaceInstallPrompt: Whether the in-place install prompt appears if thespecified version of the Silverlight control is not installed
Introducing Silverlight 1.1 37
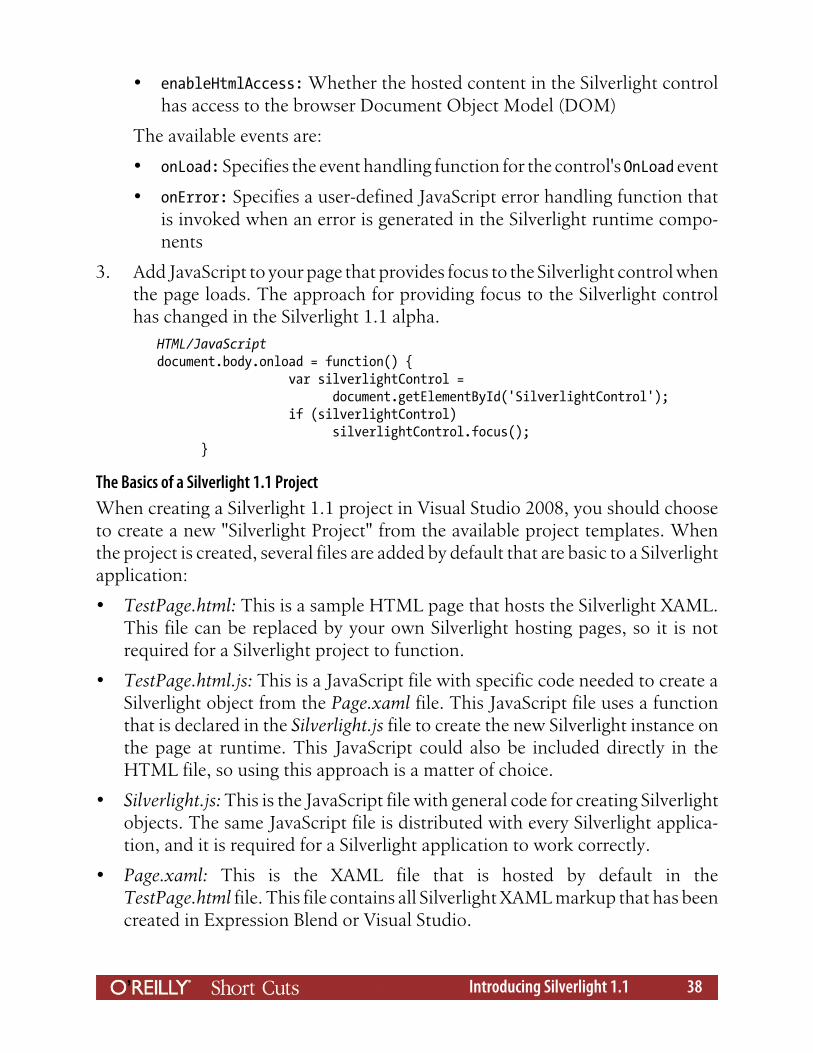
• enableHtmlAccess: Whether the hosted content in the Silverlight controlhas access to the browser Document Object Model (DOM)
The available events are:
• onLoad: Specifies the event handling function for the control's OnLoad event
• onError: Specifies a user-defined JavaScript error handling function thatis invoked when an error is generated in the Silverlight runtime compo-nents
3. Add JavaScript to your page that provides focus to the Silverlight control whenthe page loads. The approach for providing focus to the Silverlight controlhas changed in the Silverlight 1.1 alpha.
HTML/JavaScriptdocument.body.onload = function() { var silverlightControl = document.getElementById('SilverlightControl'); if (silverlightControl) silverlightControl.focus(); }
The Basics of a Silverlight 1.1 ProjectWhen creating a Silverlight 1.1 project in Visual Studio 2008, you should chooseto create a new "Silverlight Project" from the available project templates. Whenthe project is created, several files are added by default that are basic to a Silverlightapplication:
• TestPage.html: This is a sample HTML page that hosts the Silverlight XAML.This file can be replaced by your own Silverlight hosting pages, so it is notrequired for a Silverlight project to function.
• TestPage.html.js: This is a JavaScript file with specific code needed to create aSilverlight object from the Page.xaml file. This JavaScript file uses a functionthat is declared in the Silverlight.js file to create the new Silverlight instance onthe page at runtime. This JavaScript could also be included directly in theHTML file, so using this approach is a matter of choice.
• Silverlight.js: This is the JavaScript file with general code for creating Silverlightobjects. The same JavaScript file is distributed with every Silverlight applica-tion, and it is required for a Silverlight application to work correctly.
• Page.xaml: This is the XAML file that is hosted by default in theTestPage.html file. This file contains all Silverlight XAML markup that has beencreated in Expression Blend or Visual Studio.
Introducing Silverlight 1.1 38
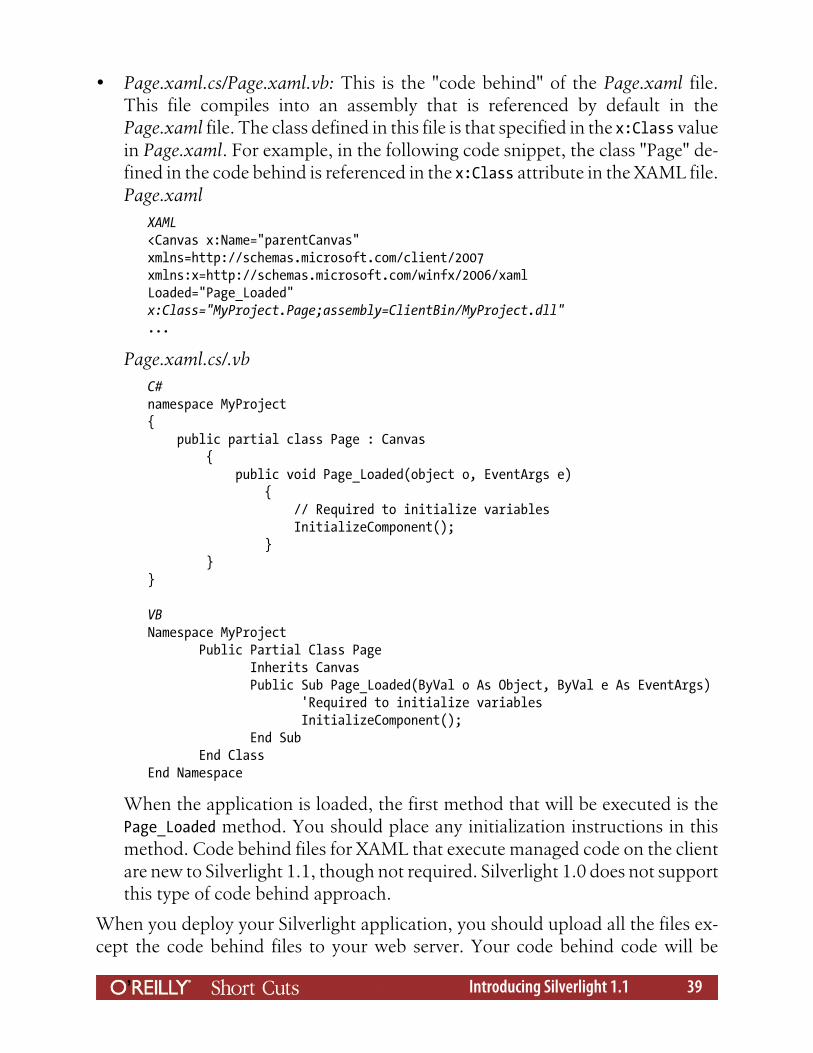
• Page.xaml.cs/Page.xaml.vb: This is the "code behind" of the Page.xaml file.This file compiles into an assembly that is referenced by default in thePage.xaml file. The class defined in this file is that specified in the x:Class valuein Page.xaml. For example, in the following code snippet, the class "Page" de-fined in the code behind is referenced in the x:Class attribute in the XAML file.Page.xaml
XAML<Canvas x:Name="parentCanvas"xmlns=http://schemas.microsoft.com/client/2007xmlns:x=http://schemas.microsoft.com/winfx/2006/xamlLoaded="Page_Loaded"x:Class="MyProject.Page;assembly=ClientBin/MyProject.dll"...
Page.xaml.cs/.vbC#namespace MyProject{ public partial class Page : Canvas { public void Page_Loaded(object o, EventArgs e) { // Required to initialize variables InitializeComponent(); } }}
VBNamespace MyProject Public Partial Class Page Inherits Canvas Public Sub Page_Loaded(ByVal o As Object, ByVal e As EventArgs) 'Required to initialize variables InitializeComponent(); End Sub End ClassEnd Namespace
When the application is loaded, the first method that will be executed is thePage_Loaded method. You should place any initialization instructions in thismethod. Code behind files for XAML that execute managed code on the clientare new to Silverlight 1.1, though not required. Silverlight 1.0 does not supportthis type of code behind approach.
When you deploy your Silverlight application, you should upload all the files ex-cept the code behind files to your web server. Your code behind code will be
Introducing Silverlight 1.1 39
compiled into a single assembly that is usually located in the ClientBin directory.Upload this instead of the code behind files when you deploy your application.
Silverlight ObjectsIn this section, we'll look at how you interact with the Silverlight objects that areloaded on the page.
Accessing elements and setting propertiesIn order to access an element from the XAML in your code behind file, you needto set the x:Name property of the element.XAML<Rectangle x:Name="rectangle" Fill="Green" Stroke="Black" Width="100" Height="25" />
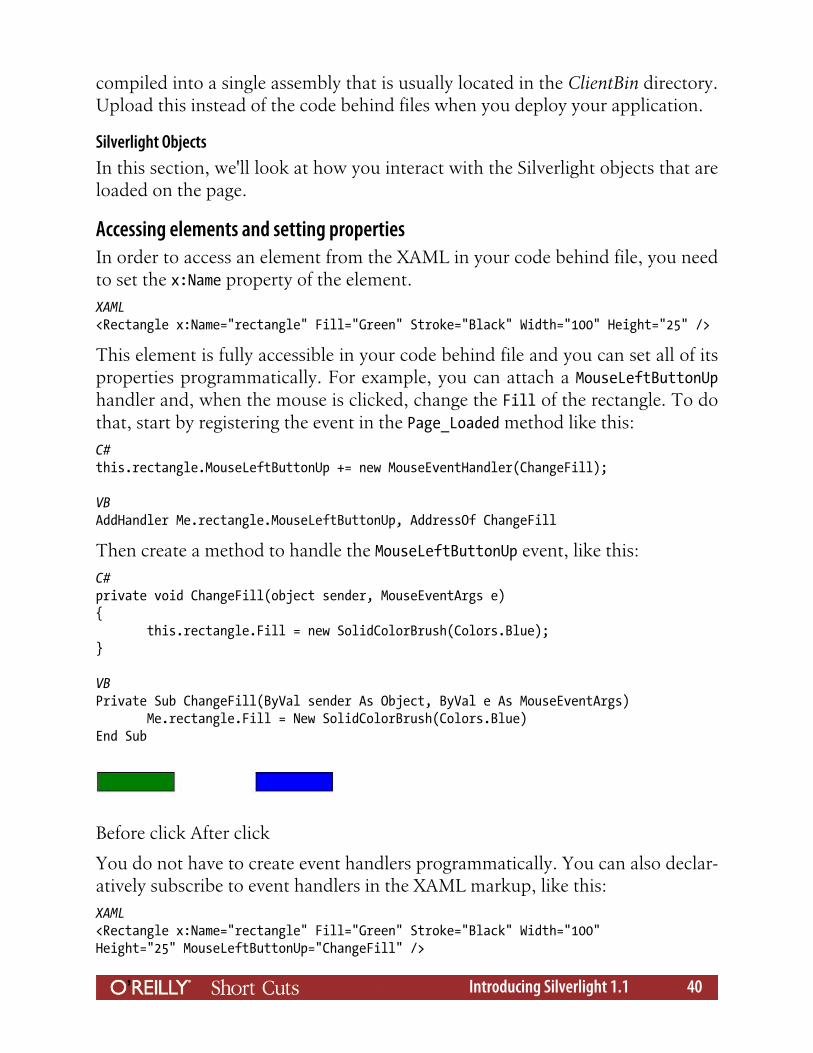
This element is fully accessible in your code behind file and you can set all of itsproperties programmatically. For example, you can attach a MouseLeftButtonUphandler and, when the mouse is clicked, change the Fill of the rectangle. To dothat, start by registering the event in the Page_Loaded method like this:C#this.rectangle.MouseLeftButtonUp += new MouseEventHandler(ChangeFill);
VBAddHandler Me.rectangle.MouseLeftButtonUp, AddressOf ChangeFill
Then create a method to handle the MouseLeftButtonUp event, like this:C#private void ChangeFill(object sender, MouseEventArgs e){ this.rectangle.Fill = new SolidColorBrush(Colors.Blue);}
VBPrivate Sub ChangeFill(ByVal sender As Object, ByVal e As MouseEventArgs) Me.rectangle.Fill = New SolidColorBrush(Colors.Blue)End Sub
Before click After click
You do not have to create event handlers programmatically. You can also declar-atively subscribe to event handlers in the XAML markup, like this:XAML<Rectangle x:Name="rectangle" Fill="Green" Stroke="Black" Width="100"Height="25" MouseLeftButtonUp="ChangeFill" />
Introducing Silverlight 1.1 40

As with the programmatic approach, you have to create a ChangeFill method inthe code behind file to handle the MouseLeftButtonUp event. If you are unsure whichmethods or properties are available for a specific object, Visual Studio's IntelliSense(Figure 21) will help you quickly determine which ones are supported.
Create new element programmaticallyEverything that can be done in the XAML file can also be done in the code behind.What makes XAML powerful is that the markup model is the same as the objectmodel. In fact, XAML is unique from many markup languages in that it directlyrepresents the instantiation of managed objects.XAML<TextBlock FontSize="20" Text="Hi, I am a TextBlock!" />
C#TextBlock txtBlock = new TextBlock();txtBlock.FontSize = 20;txtBlock.Text = "Hi, I am a TextBlock!";
VBDim txtBlock As New TextBlock()txtBlock.FontSize = 20txtBlock.Text = "Hi, I am a TextBlock!"
One extra line is necessary in the programmatic approach to render theTextBlock on the page, though. You need to add the newly created TextBlock tothe Children collection of the Canvas it is in—in our case, the root Canvas. So im-mediately after setting the TextBlock's Text property, add:
Figure 21. XAML object IntelliSense in Visual Studio 2008
Introducing Silverlight 1.1 41
C#this.Children.Add(txtBlock);
VBMe.Children.Add(txtBlock)
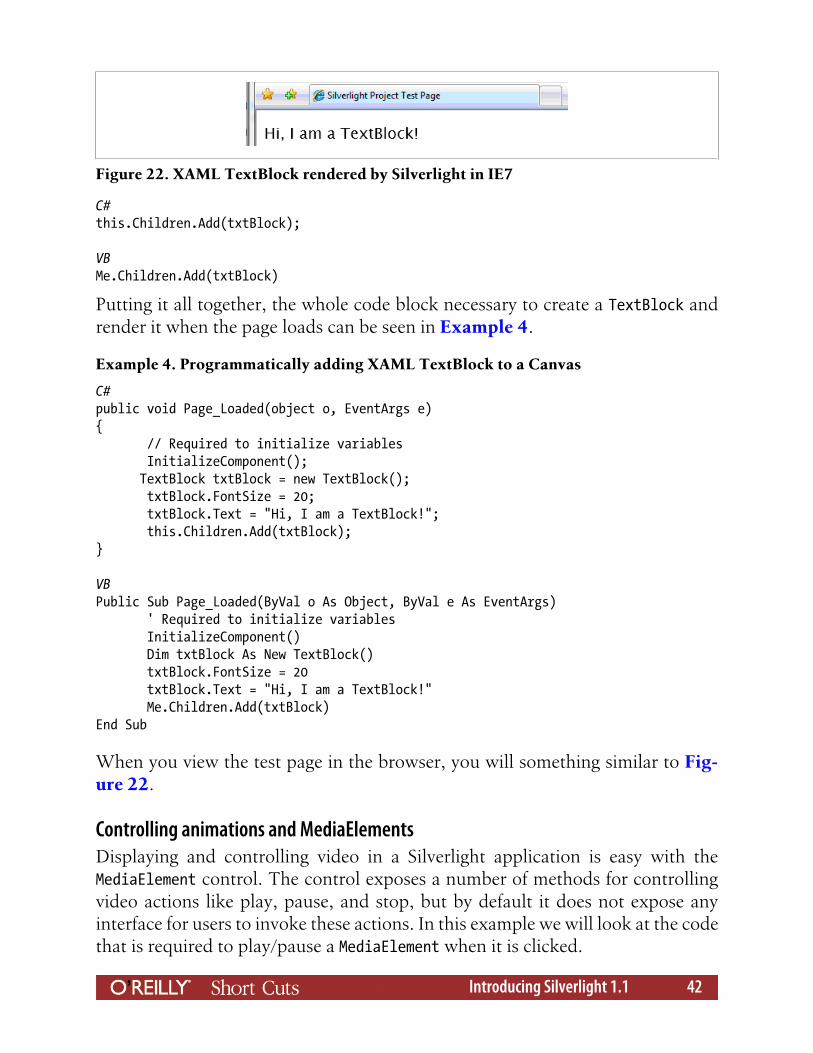
Putting it all together, the whole code block necessary to create a TextBlock andrender it when the page loads can be seen in Example 4.
Example 4. Programmatically adding XAML TextBlock to a Canvas
C#public void Page_Loaded(object o, EventArgs e){ // Required to initialize variables InitializeComponent(); TextBlock txtBlock = new TextBlock(); txtBlock.FontSize = 20; txtBlock.Text = "Hi, I am a TextBlock!"; this.Children.Add(txtBlock);}
VBPublic Sub Page_Loaded(ByVal o As Object, ByVal e As EventArgs) ' Required to initialize variables InitializeComponent() Dim txtBlock As New TextBlock() txtBlock.FontSize = 20 txtBlock.Text = "Hi, I am a TextBlock!" Me.Children.Add(txtBlock)End Sub
When you view the test page in the browser, you will something similar to Fig-ure 22.
Controlling animations and MediaElementsDisplaying and controlling video in a Silverlight application is easy with theMediaElement control. The control exposes a number of methods for controllingvideo actions like play, pause, and stop, but by default it does not expose anyinterface for users to invoke these actions. In this example we will look at the codethat is required to play/pause a MediaElement when it is clicked.
Figure 22. XAML TextBlock rendered by Silverlight in IE7
Introducing Silverlight 1.1 42
1. To begin, create a MediaElement, set its Source property to a video file, andattach a MouseLeftButtonUp event handler. The MediaElement can be createddeclaratively in the XAML code or programmatically in the code behind file.
XAML<MediaElement x:Name="mediaElement" Source="telerik.wmv" AutoPlay="True"MouseLeftButtonUp="PlayPauseVideo" />
Or:C#public void Page_Loaded(object o, EventArgs e){ // Required to initialize variables InitializeComponent(); MediaElement mediaElement = new MediaElement(); mediaElement.SetValue<string>(MediaElement.SourceProperty, "telerik.wmv"); mediaElement.AutoPlay = true; this.Children.Add(mediaElement);
mediaElement.MouseLeftButtonUp += new MouseEventHandler(PlayPauseVideo);}
VBPublic Sub Page_Loaded(ByVal o As Object, ByVal e As EventArgs) ' Required to initialize variables InitializeComponent() Dim mediaElement As New MediaElement() mediaElement.SetValue(Of String)(MediaElement.SourceProperty, "telerik.wmv") mediaElement.AutoPlay = True Me.Children.Add(mediaElement)
AddHandler mediaElement.MouseLeftButtonUp, AddressOf PlayPauseVideoEnd Sub
2. The only other step required is to create a method to handle the MouseLeftButtonUp event. This event will handle the mouse click, and pause or play thevideo depending on its current state.
C#private void PlayPauseVideo(object sender, MouseEventArgs e){ switch (mediaElement.CurrentState) { case "Playing": mediaElement.Pause(); break; case "Paused": mediaElement.Play(); break; }
Introducing Silverlight 1.1 43

}
VBPrivate Sub PlayPauseVideo(ByVal sender As Object, ByVal e As MouseEventArgs) Select Case mediaElement.CurrentState Case "Playing" mediaElement.Pause() Case "Paused" mediaElement.Play() End SelectEnd Sub
The concept behind controlling animations is similar. In the following example,the animation starts as soon as the page loads. It displays an ellipse that movesfrom one position to another along the X-axis.
1. Begin this test by creating an ellipse to animate. Since the ellipse's movementwill be animated, a Translate transformation will be used to create the mo-tion.
XAML<Ellipse x:Name="ellipse" RenderTransformOrigin="0.5,0.5" Fill="Green"Stroke="Black" Width="60" Height="60" Canvas.Left="0" Canvas.Top="0"MouseLeftButtonUp="PlayAnimation"> <Ellipse.RenderTransform> <TransformGroup> <TranslateTransform X="0" Y="0"/> </TransformGroup> </Ellipse.RenderTransform></Ellipse>
2. Next, create the animation and set Storyboard.TargetName="ellipse". Thiswill instruct the animation actions to target the ellipse control. Place the ani-mation inside Canvas.Resources so that it can be controlled from code.
XAML<Canvas.Resources> <Storyboard x:Name="EllipseAnimation"> <DoubleAnimationUsingKeyFrames BeginTime="00:00:00" Storyboard.TargetName="ellipse" Storyboard.TargetProperty="(UIElement.RenderTransform).(TransformGroup.Children)[0].(TranslateTransform.X)"> <SplineDoubleKeyFrame KeyTime="00:00:01" Value="300"/> </DoubleAnimationUsingKeyFrames> </Storyboard></Canvas.Resources>
3. Finllay, create a method to play the animation when the ellipse is clicked. Wespecified the name of this event in the MouseLeftButtonUp property in theXAML markup.
Introducing Silverlight 1.1 44
C#private void PlayAnimation(object sender, MouseEventArgs e){ this.EllipseAnimation.Begin();}
VBPrivate Sub PlayAnimation(ByVal sender As Object, ByVal e As MouseEventArgs) Me.EllipseAnimation.Begin()End Sub
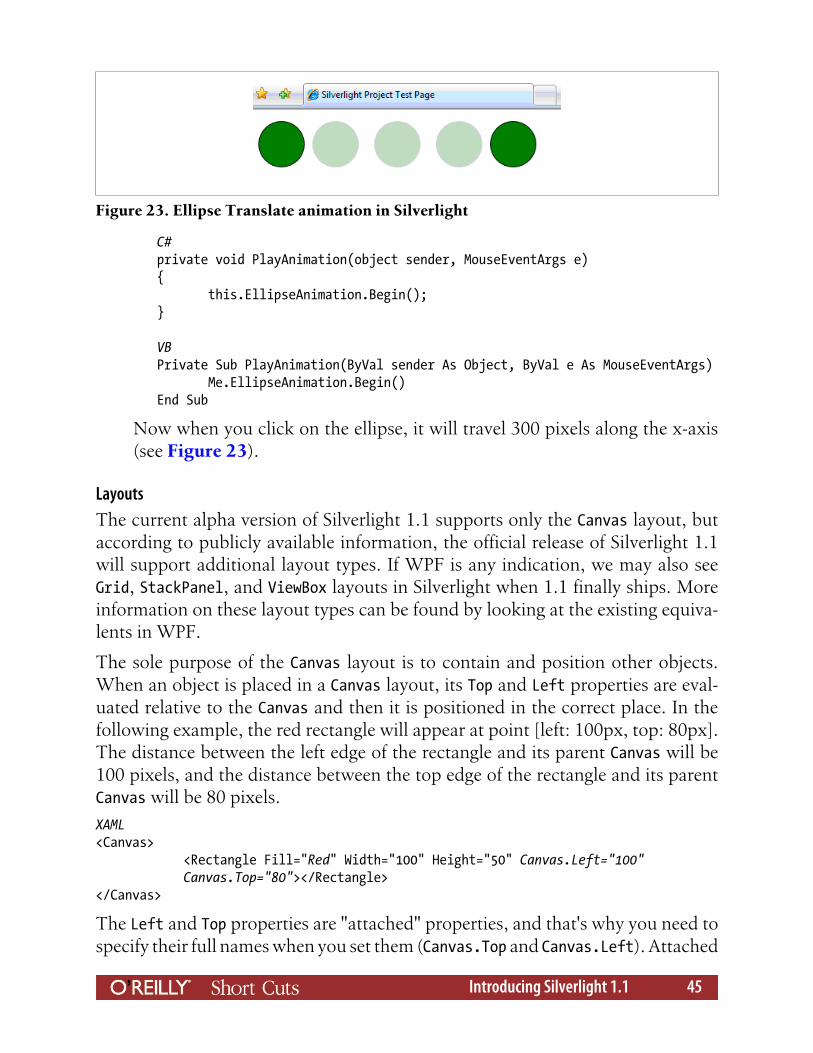
Now when you click on the ellipse, it will travel 300 pixels along the x-axis(see Figure 23).
LayoutsThe current alpha version of Silverlight 1.1 supports only the Canvas layout, butaccording to publicly available information, the official release of Silverlight 1.1will support additional layout types. If WPF is any indication, we may also seeGrid, StackPanel, and ViewBox layouts in Silverlight when 1.1 finally ships. Moreinformation on these layout types can be found by looking at the existing equiva-lents in WPF.
The sole purpose of the Canvas layout is to contain and position other objects.When an object is placed in a Canvas layout, its Top and Left properties are eval-uated relative to the Canvas and then it is positioned in the correct place. In thefollowing example, the red rectangle will appear at point [left: 100px, top: 80px].The distance between the left edge of the rectangle and its parent Canvas will be100 pixels, and the distance between the top edge of the rectangle and its parentCanvas will be 80 pixels.XAML<Canvas> <Rectangle Fill="Red" Width="100" Height="50" Canvas.Left="100" Canvas.Top="80"></Rectangle></Canvas>
The Left and Top properties are "attached" properties, and that's why you need tospecify their full names when you set them (Canvas.Top and Canvas.Left). Attached
Figure 23. Ellipse Translate animation in Silverlight
Introducing Silverlight 1.1 45
properties were developed to support the flexible layout system in WPF, and theyenable you to set properties relative to an object's parent, even if the propertiesdon't directly exist in a control's class.
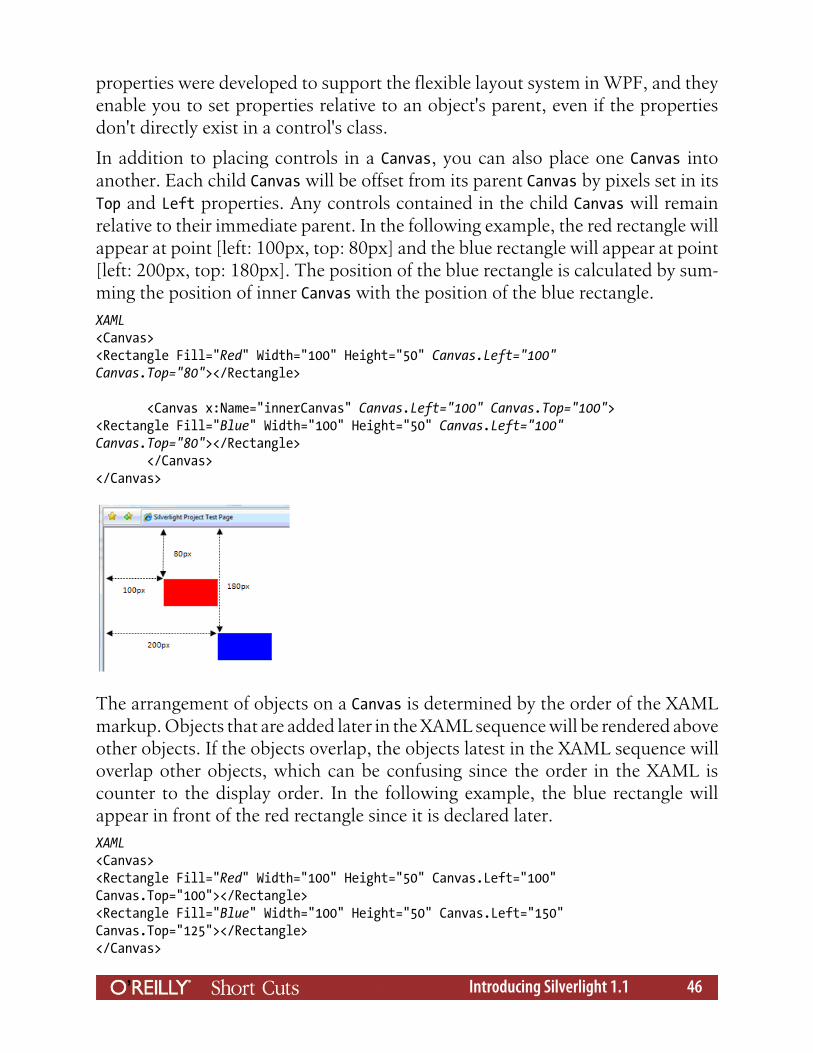
In addition to placing controls in a Canvas, you can also place one Canvas intoanother. Each child Canvas will be offset from its parent Canvas by pixels set in itsTop and Left properties. Any controls contained in the child Canvas will remainrelative to their immediate parent. In the following example, the red rectangle willappear at point [left: 100px, top: 80px] and the blue rectangle will appear at point[left: 200px, top: 180px]. The position of the blue rectangle is calculated by sum-ming the position of inner Canvas with the position of the blue rectangle.XAML<Canvas><Rectangle Fill="Red" Width="100" Height="50" Canvas.Left="100"Canvas.Top="80"></Rectangle>
<Canvas x:Name="innerCanvas" Canvas.Left="100" Canvas.Top="100"><Rectangle Fill="Blue" Width="100" Height="50" Canvas.Left="100"Canvas.Top="80"></Rectangle> </Canvas></Canvas>
The arrangement of objects on a Canvas is determined by the order of the XAMLmarkup. Objects that are added later in the XAML sequence will be rendered aboveother objects. If the objects overlap, the objects latest in the XAML sequence willoverlap other objects, which can be confusing since the order in the XAML iscounter to the display order. In the following example, the blue rectangle willappear in front of the red rectangle since it is declared later.XAML<Canvas><Rectangle Fill="Red" Width="100" Height="50" Canvas.Left="100"Canvas.Top="100"></Rectangle><Rectangle Fill="Blue" Width="100" Height="50" Canvas.Left="150"Canvas.Top="125"></Rectangle></Canvas>
Introducing Silverlight 1.1 46

The default order can be changed, though, by specifying the Canvas.ZIndex prop-erty. Objects with a higher ZIndex property will appear in front of objects with alower ZIndex property. In the same example, if we set the Canvas.ZIndex propertyof the red rectangle to 1, it will appear in front of the blue rectangle because theblue rectangle will have the default ZIndex value of 0.XAML<Canvas><Rectangle Fill="Red" Width="100" Height="50" Canvas.Left="100" Canvas.Top="100"Canvas.ZIndex="1"></Rectangle><Rectangle Fill="Blue" Width="100" Height="50" Canvas.Left="150"Canvas.Top="125"></Rectangle></Canvas>
Event ModelAs we've seen in other sections in this Short Cut, Silverlight enables you to attachevent handlers to object events programmatically or declaratively. If you opt forprogrammatic event attaching, the best place to attach an event handler to anexisting object is in the Page_Loaded method. For example, if you have the followingrectangle declared in your XAML:XAML<Rectangle x:Name="redRectangle" Fill="Red"
Introducing Silverlight 1.1 47

Width="100" Height="50" Canvas.Left="100"Canvas.Top="100></Rectangle>
You can attach an event handler to the MouseLeftButtonDown event of the rectanglein the Page_Loaded method programmatically with the following code:C#public void Page_Loaded(object o, EventArgs e){ // Required to initialize variables InitializeComponent(); this.redRectangle.MouseLeftButtonDown += new MouseEventHandler(redRectangle_MouseLeftButtonDown);}
void redRectangle_MouseLeftButtonDown(object sender, MouseEventArgs e){ // Here you could place your custom code which will be executed // when the user clicks over the rectangle.}
VBPublic Sub Page_Loaded(ByVal o As Object, ByVal e As EventArgs) ' Required to initialize variables InitializeComponent() AddHandler Me.redRectangle.MouseLeftButtonDown, AddressOf redRectangle_MouseLeftButtonDownEnd Sub
Sub redRectangle_MouseLeftButtonDown(ByVal sender As Object,ByVal e As MouseEventArgs) ' Here you could place your custom code which will be executed ' when the user clicks over the rectangle.End Sub
You can also attach event handlers declaratively in the XAML, like this:XAML<Rectangle x:Name="redRectangle" Fill="Red" Width="100" Height="50"Canvas.Left="100" Canvas.Top="100"MouseLeftButtonDown="redRectangle_MouseLeftButtonDown"></Rectangle>
If you attach an event declaratively, you do not need to add any code in thePage_Loaded method. The event will automatically be wired up to the method namethat you supply, requiring only that you create the method to handle the event.
Depending on the Silverlight objects that you use, different events will be availablefor you to handle. For example the Canvas, TextBlock, and Rectangle objects pro-vide the following events:
• Loaded: Fires when the object is initially loaded
Introducing Silverlight 1.1 48
• MouseEnter: Fires when the mouse is over the object
• MouseLeave: Fires when the mouse is no longer over the object
• MouseLeftButtonDown: Fires when an object is clicked
• MouseLeftButtonUp: Fires when an object click is released
• MouseMove: Fires when the mouse is moving over the object
Meanwhile, the MediaElement object provides these events:
• BufferingProgressChanged: Fires when the buffering progress of theMediaElement changes
• CurrentStateChanged: Fires when the state of the MediaElement changes
• MarkerReached: Fires when a media marker is reached
• MediaEnded: Fires when the media has finished playing
• MediaFailed: Fires when there is an error playing the media
• MediaOpened: Fires when the media is initially opened
Other events like KeyDown, KeyUp, GotFocus, and LostFocus can only be defined forthe root Canvas and will not be fired by inner Canvases. That means you must definea KeyDown event on the root Canvas if you want to collect keyboard input from usersof a Silverlight application. Events can be attached to the root Canvas in the XAMLmarkup like this:XAML<Canvas x:Name="parentCanvas"xmlns=http://schemas.microsoft.com/client/2007xmlns:x=http://schemas.microsoft.com/winfx/2006/xamlLoaded="Page_Loaded"KeyDown="Page_KeyDown"...
C#void Page_KeyDown(object sender, KeyboardEventArgs e){ // Here you could place your custom code which will be executed // when the user presses any key.}
VBSub Page_KeyDown(ByVal sender As Object, ByVal e As KeyboardEventArgs) ' Here you could place your custom code which will be executed ' when the user presses any key.End Sub
Introducing Silverlight 1.1 49
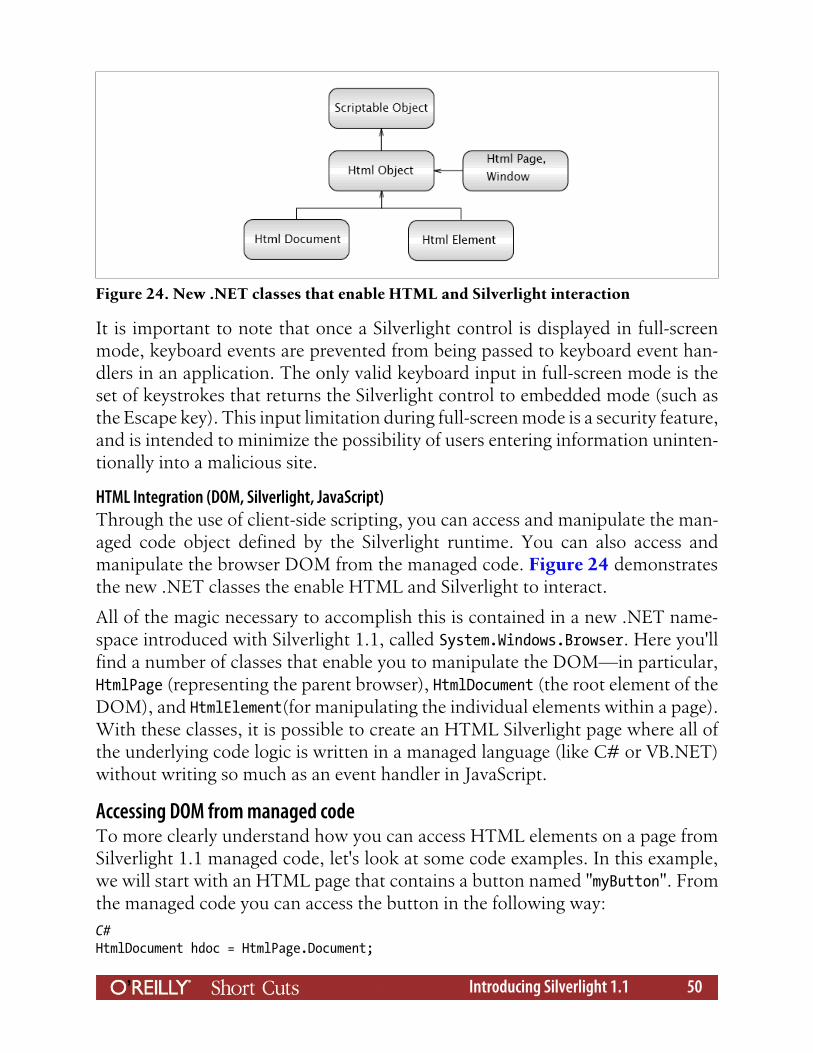
It is important to note that once a Silverlight control is displayed in full-screenmode, keyboard events are prevented from being passed to keyboard event han-dlers in an application. The only valid keyboard input in full-screen mode is theset of keystrokes that returns the Silverlight control to embedded mode (such asthe Escape key). This input limitation during full-screen mode is a security feature,and is intended to minimize the possibility of users entering information uninten-tionally into a malicious site.
HTML Integration (DOM, Silverlight, JavaScript)Through the use of client-side scripting, you can access and manipulate the man-aged code object defined by the Silverlight runtime. You can also access andmanipulate the browser DOM from the managed code. Figure 24 demonstratesthe new .NET classes the enable HTML and Silverlight to interact.
All of the magic necessary to accomplish this is contained in a new .NET name-space introduced with Silverlight 1.1, called System.Windows.Browser. Here you'llfind a number of classes that enable you to manipulate the DOM—in particular,HtmlPage (representing the parent browser), HtmlDocument (the root element of theDOM), and HtmlElement(for manipulating the individual elements within a page).With these classes, it is possible to create an HTML Silverlight page where all ofthe underlying code logic is written in a managed language (like C# or VB.NET)without writing so much as an event handler in JavaScript.
Accessing DOM from managed codeTo more clearly understand how you can access HTML elements on a page fromSilverlight 1.1 managed code, let's look at some code examples. In this example,we will start with an HTML page that contains a button named "myButton". Fromthe managed code you can access the button in the following way:C#HtmlDocument hdoc = HtmlPage.Document;
Figure 24. New .NET classes that enable HTML and Silverlight interaction
Introducing Silverlight 1.1 50
HtmlElement myButton = hdoc.GetElementByID("myButton");
VBDim hdoc As HtmlDocument = HtmlPage.DocumentDim myButton As HtmlElement = hdoc.GetElementByID("myButton")
With a reference to the button in the code behind, we can now attach an event tothe button using the following code:C#myButton.AttachEvent("onclick", new EventHandler<HtmlEventArgs>(this.OnMyButtonClick));
public void OnMyButtonClick (object sender, HtmlEventArgs args){// handle the button click}
VBmyButton.AttachEvent("onclick", New EventHandler(Of HtmlEventArgs)(Me.OnMyButtonClick))
Public Sub OnMyButtonClick(ByVal sender As Object, ByVal args As HtmlEventArgs) ' handle the button clickEnd Sub
With the same reference, we can also get and set property values on the HTMLbutton, like this:C#myButton.SetProperty("value", "My Value");string myButtonValue = myButton.GetProperty <string>("value");myButton.SetStyleProperty("color", ""#000066");
VBmyButton.SetProperty("value", "My Value")Dim myButtonValue As String = myButton.GetProperty(Of String)("value")myButton.SetStyleProperty(color, "#000066")
Finally, we can even manipulate the HTML page, redirecting users to a new pagewith this simple Silverlight code:C#HtmlPage.Navigate("http://www.silverlight.net");
VBHtmlPage.Navigate("http://www.silverlight.net")
Accessing managed code from DOMOn the other side of the coin is accessing managed code from the DOM. This abilitygives client-side scripts access to the extensive library of .NET Framework features
Introducing Silverlight 1.1 51
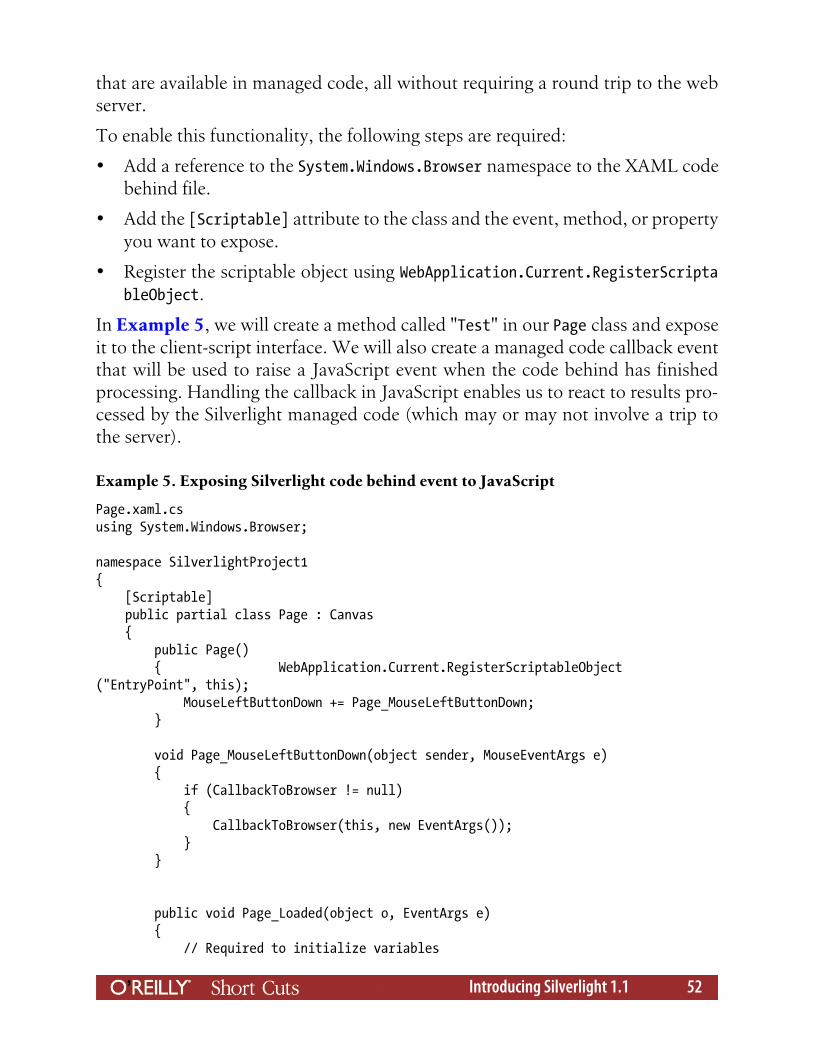
that are available in managed code, all without requiring a round trip to the webserver.
To enable this functionality, the following steps are required:
• Add a reference to the System.Windows.Browser namespace to the XAML codebehind file.
• Add the [Scriptable] attribute to the class and the event, method, or propertyyou want to expose.
• Register the scriptable object using WebApplication.Current.RegisterScriptableObject.
In Example 5, we will create a method called "Test" in our Page class and exposeit to the client-script interface. We will also create a managed code callback eventthat will be used to raise a JavaScript event when the code behind has finishedprocessing. Handling the callback in JavaScript enables us to react to results pro-cessed by the Silverlight managed code (which may or may not involve a trip tothe server).
Example 5. Exposing Silverlight code behind event to JavaScript
Page.xaml.csusing System.Windows.Browser;
namespace SilverlightProject1{ [Scriptable] public partial class Page : Canvas { public Page() { WebApplication.Current.RegisterScriptableObject("EntryPoint", this); MouseLeftButtonDown += Page_MouseLeftButtonDown; }
void Page_MouseLeftButtonDown(object sender, MouseEventArgs e) { if (CallbackToBrowser != null) { CallbackToBrowser(this, new EventArgs()); } }
public void Page_Loaded(object o, EventArgs e) { // Required to initialize variables
Introducing Silverlight 1.1 52
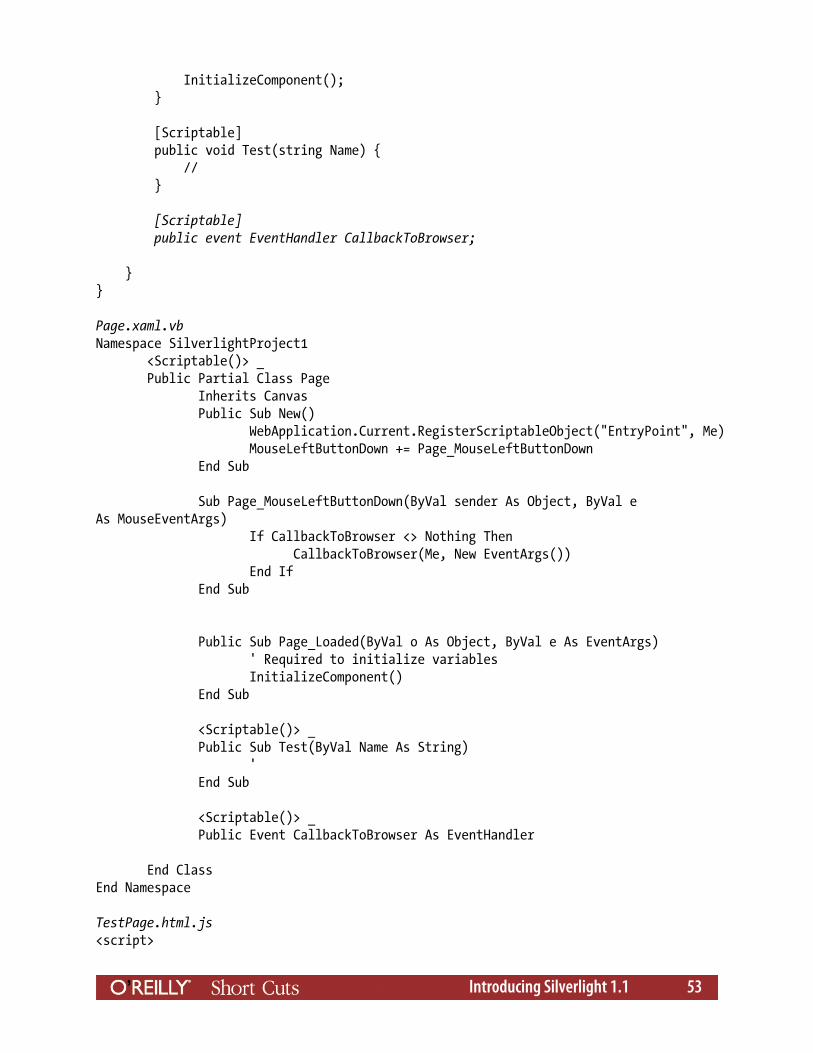
InitializeComponent(); }
[Scriptable] public void Test(string Name) { // }
[Scriptable] public event EventHandler CallbackToBrowser;
}}
Page.xaml.vbNamespace SilverlightProject1 <Scriptable()> _ Public Partial Class Page Inherits Canvas Public Sub New() WebApplication.Current.RegisterScriptableObject("EntryPoint", Me) MouseLeftButtonDown += Page_MouseLeftButtonDown End Sub
Sub Page_MouseLeftButtonDown(ByVal sender As Object, ByVal eAs MouseEventArgs) If CallbackToBrowser <> Nothing Then CallbackToBrowser(Me, New EventArgs()) End If End Sub
Public Sub Page_Loaded(ByVal o As Object, ByVal e As EventArgs) ' Required to initialize variables InitializeComponent() End Sub
<Scriptable()> _ Public Sub Test(ByVal Name As String) ' End Sub
<Scriptable()> _ Public Event CallbackToBrowser As EventHandler
End ClassEnd Namespace
TestPage.html.js<script>
Introducing Silverlight 1.1 53
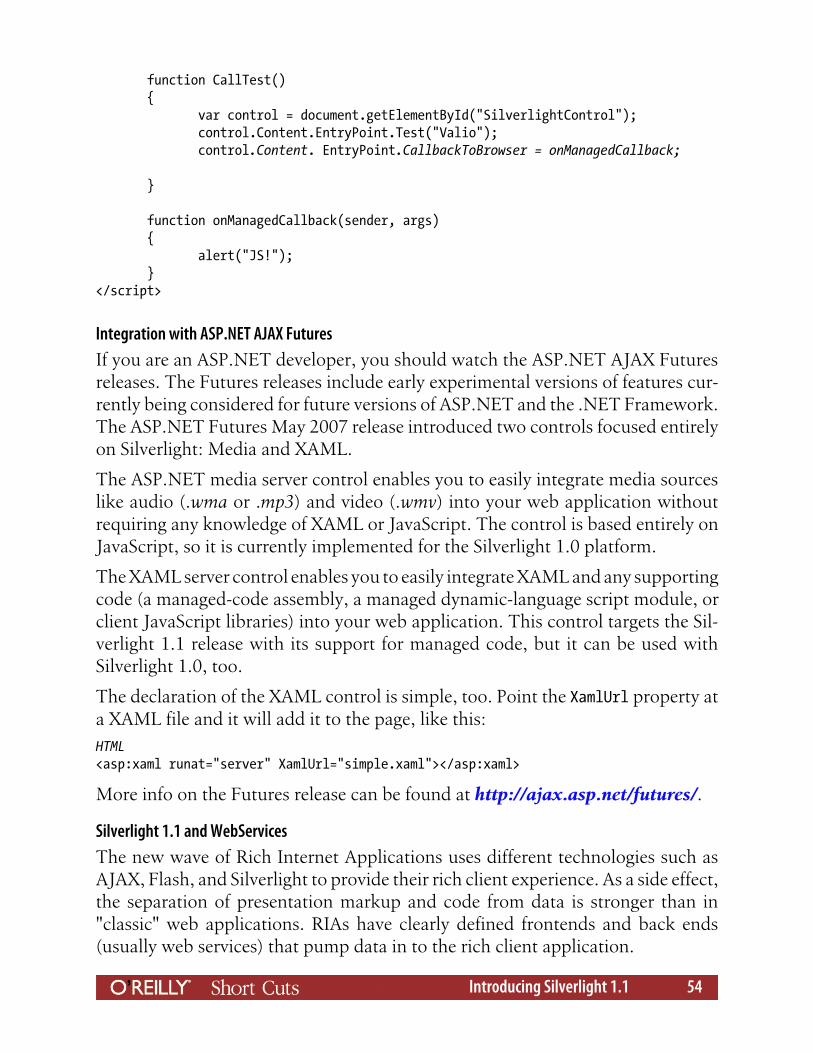
function CallTest() { var control = document.getElementById("SilverlightControl"); control.Content.EntryPoint.Test("Valio"); control.Content. EntryPoint.CallbackToBrowser = onManagedCallback;
}
function onManagedCallback(sender, args) { alert("JS!"); }</script>
Integration with ASP.NET AJAX FuturesIf you are an ASP.NET developer, you should watch the ASP.NET AJAX Futuresreleases. The Futures releases include early experimental versions of features cur-rently being considered for future versions of ASP.NET and the .NET Framework.The ASP.NET Futures May 2007 release introduced two controls focused entirelyon Silverlight: Media and XAML.
The ASP.NET media server control enables you to easily integrate media sourceslike audio (.wma or .mp3) and video (.wmv) into your web application withoutrequiring any knowledge of XAML or JavaScript. The control is based entirely onJavaScript, so it is currently implemented for the Silverlight 1.0 platform.
The XAML server control enables you to easily integrate XAML and any supportingcode (a managed-code assembly, a managed dynamic-language script module, orclient JavaScript libraries) into your web application. This control targets the Sil-verlight 1.1 release with its support for managed code, but it can be used withSilverlight 1.0, too.
The declaration of the XAML control is simple, too. Point the XamlUrl property ata XAML file and it will add it to the page, like this:HTML<asp:xaml runat="server" XamlUrl="simple.xaml"></asp:xaml>
More info on the Futures release can be found at http://ajax.asp.net/futures/.
Silverlight 1.1 and WebServicesThe new wave of Rich Internet Applications uses different technologies such asAJAX, Flash, and Silverlight to provide their rich client experience. As a side effect,the separation of presentation markup and code from data is stronger than in"classic" web applications. RIAs have clearly defined frontends and back ends(usually web services) that pump data in to the rich client application.
Introducing Silverlight 1.1 54
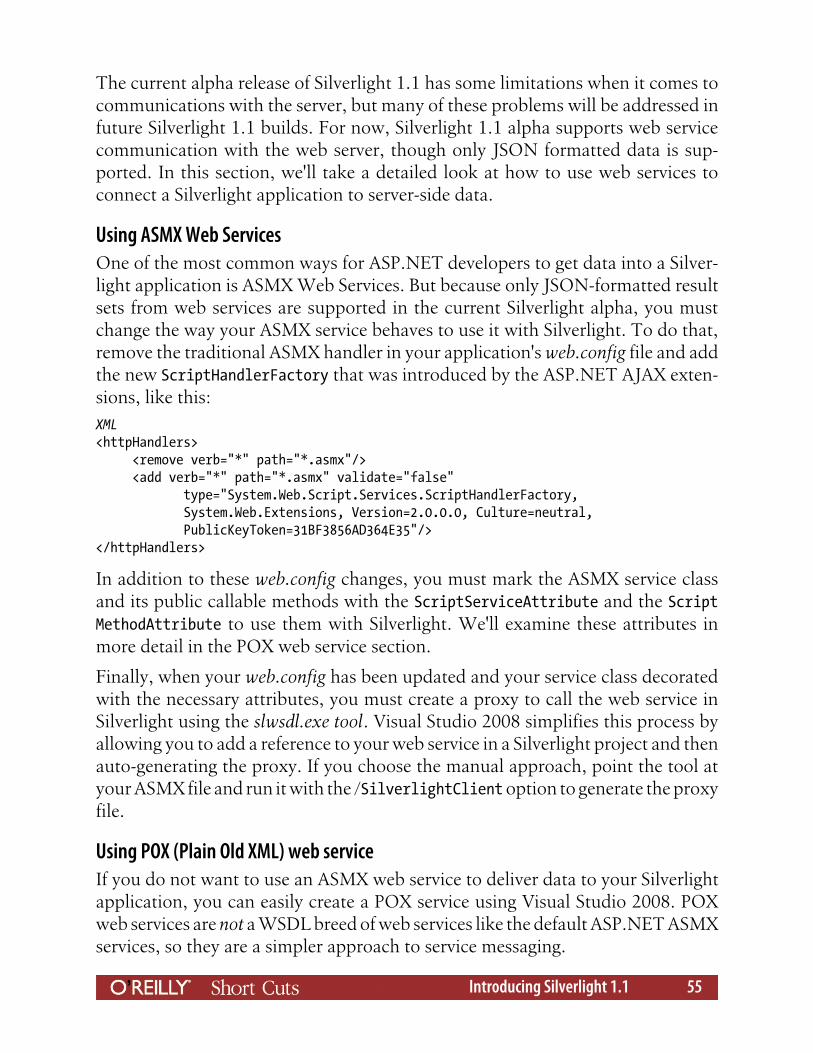
The current alpha release of Silverlight 1.1 has some limitations when it comes tocommunications with the server, but many of these problems will be addressed infuture Silverlight 1.1 builds. For now, Silverlight 1.1 alpha supports web servicecommunication with the web server, though only JSON formatted data is sup-ported. In this section, we'll take a detailed look at how to use web services toconnect a Silverlight application to server-side data.
Using ASMX Web ServicesOne of the most common ways for ASP.NET developers to get data into a Silver-light application is ASMX Web Services. But because only JSON-formatted resultsets from web services are supported in the current Silverlight alpha, you mustchange the way your ASMX service behaves to use it with Silverlight. To do that,remove the traditional ASMX handler in your application's web.config file and addthe new ScriptHandlerFactory that was introduced by the ASP.NET AJAX exten-sions, like this:XML<httpHandlers> <remove verb="*" path="*.asmx"/> <add verb="*" path="*.asmx" validate="false" type="System.Web.Script.Services.ScriptHandlerFactory, System.Web.Extensions, Version=2.0.0.0, Culture=neutral, PublicKeyToken=31BF3856AD364E35"/></httpHandlers>
In addition to these web.config changes, you must mark the ASMX service classand its public callable methods with the ScriptServiceAttribute and the ScriptMethodAttribute to use them with Silverlight. We'll examine these attributes inmore detail in the POX web service section.
Finally, when your web.config has been updated and your service class decoratedwith the necessary attributes, you must create a proxy to call the web service inSilverlight using the slwsdl.exe tool. Visual Studio 2008 simplifies this process byallowing you to add a reference to your web service in a Silverlight project and thenauto-generating the proxy. If you choose the manual approach, point the tool atyour ASMX file and run it with the /SilverlightClient option to generate the proxyfile.
Using POX (Plain Old XML) web serviceIf you do not want to use an ASMX web service to deliver data to your Silverlightapplication, you can easily create a POX service using Visual Studio 2008. POXweb services are not a WSDL breed of web services like the default ASP.NET ASMXservices, so they are a simpler approach to service messaging.
Introducing Silverlight 1.1 55
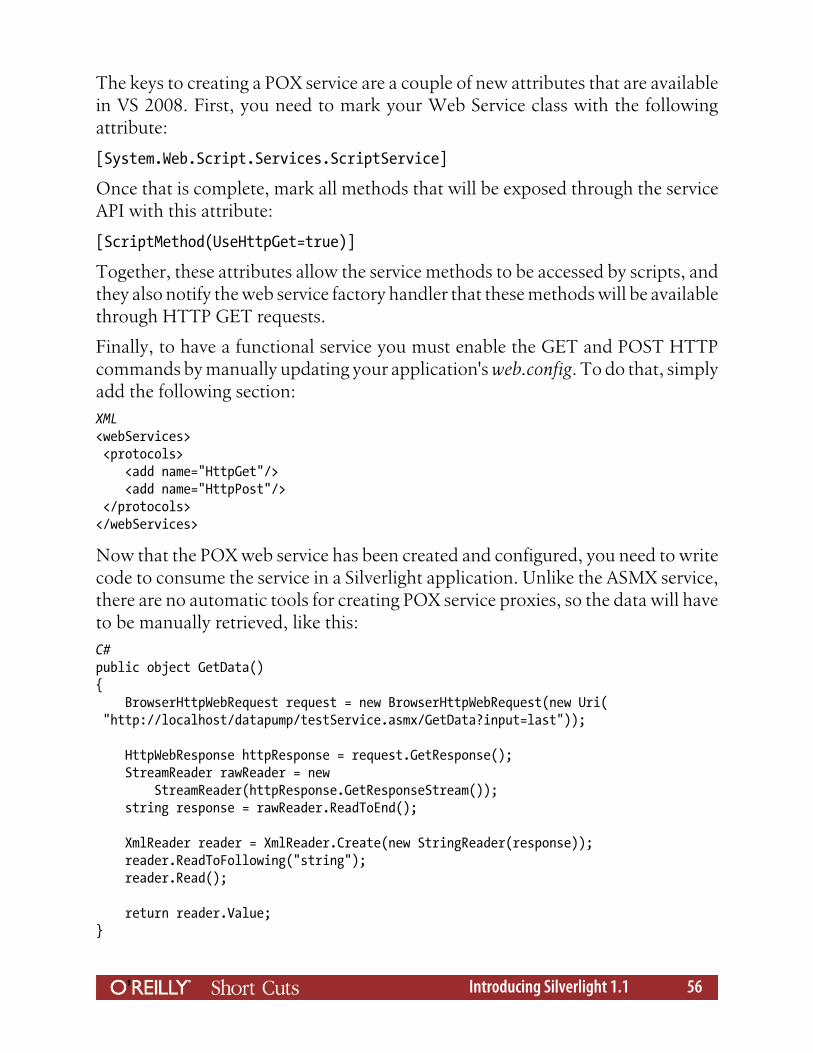
The keys to creating a POX service are a couple of new attributes that are availablein VS 2008. First, you need to mark your Web Service class with the followingattribute:
[System.Web.Script.Services.ScriptService]
Once that is complete, mark all methods that will be exposed through the serviceAPI with this attribute:
[ScriptMethod(UseHttpGet=true)]
Together, these attributes allow the service methods to be accessed by scripts, andthey also notify the web service factory handler that these methods will be availablethrough HTTP GET requests.
Finally, to have a functional service you must enable the GET and POST HTTPcommands by manually updating your application's web.config. To do that, simplyadd the following section:XML<webServices> <protocols> <add name="HttpGet"/> <add name="HttpPost"/> </protocols></webServices>
Now that the POX web service has been created and configured, you need to writecode to consume the service in a Silverlight application. Unlike the ASMX service,there are no automatic tools for creating POX service proxies, so the data will haveto be manually retrieved, like this:C#public object GetData(){ BrowserHttpWebRequest request = new BrowserHttpWebRequest(new Uri( "http://localhost/datapump/testService.asmx/GetData?input=last"));
HttpWebResponse httpResponse = request.GetResponse(); StreamReader rawReader = new StreamReader(httpResponse.GetResponseStream()); string response = rawReader.ReadToEnd();
XmlReader reader = XmlReader.Create(new StringReader(response)); reader.ReadToFollowing("string"); reader.Read();
return reader.Value;}
Introducing Silverlight 1.1 56
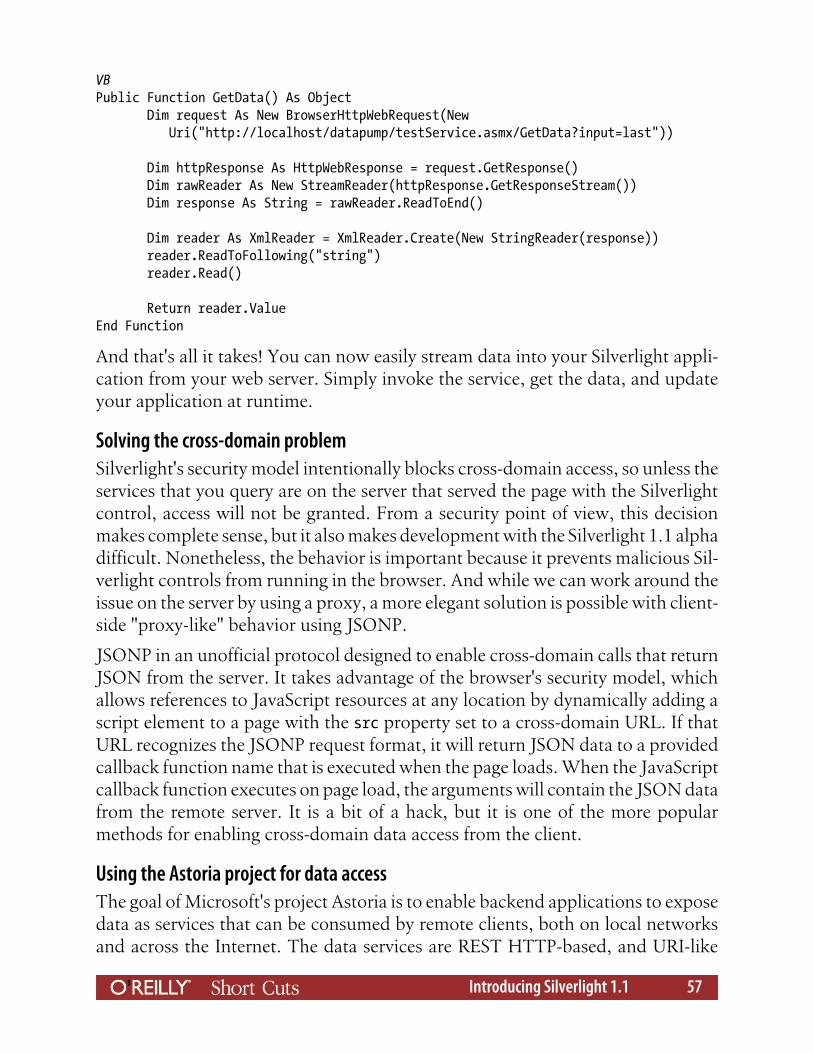
VBPublic Function GetData() As Object Dim request As New BrowserHttpWebRequest(New Uri("http://localhost/datapump/testService.asmx/GetData?input=last"))
Dim httpResponse As HttpWebResponse = request.GetResponse() Dim rawReader As New StreamReader(httpResponse.GetResponseStream()) Dim response As String = rawReader.ReadToEnd()
Dim reader As XmlReader = XmlReader.Create(New StringReader(response)) reader.ReadToFollowing("string") reader.Read()
Return reader.ValueEnd Function
And that's all it takes! You can now easily stream data into your Silverlight appli-cation from your web server. Simply invoke the service, get the data, and updateyour application at runtime.
Solving the cross-domain problemSilverlight's security model intentionally blocks cross-domain access, so unless theservices that you query are on the server that served the page with the Silverlightcontrol, access will not be granted. From a security point of view, this decisionmakes complete sense, but it also makes development with the Silverlight 1.1 alphadifficult. Nonetheless, the behavior is important because it prevents malicious Sil-verlight controls from running in the browser. And while we can work around theissue on the server by using a proxy, a more elegant solution is possible with client-side "proxy-like" behavior using JSONP.
JSONP in an unofficial protocol designed to enable cross-domain calls that returnJSON from the server. It takes advantage of the browser's security model, whichallows references to JavaScript resources at any location by dynamically adding ascript element to a page with the src property set to a cross-domain URL. If thatURL recognizes the JSONP request format, it will return JSON data to a providedcallback function name that is executed when the page loads. When the JavaScriptcallback function executes on page load, the arguments will contain the JSON datafrom the remote server. It is a bit of a hack, but it is one of the more popularmethods for enabling cross-domain data access from the client.
Using the Astoria project for data accessThe goal of Microsoft's project Astoria is to enable backend applications to exposedata as services that can be consumed by remote clients, both on local networksand across the Internet. The data services are REST HTTP-based, and URI-like
Introducing Silverlight 1.1 57
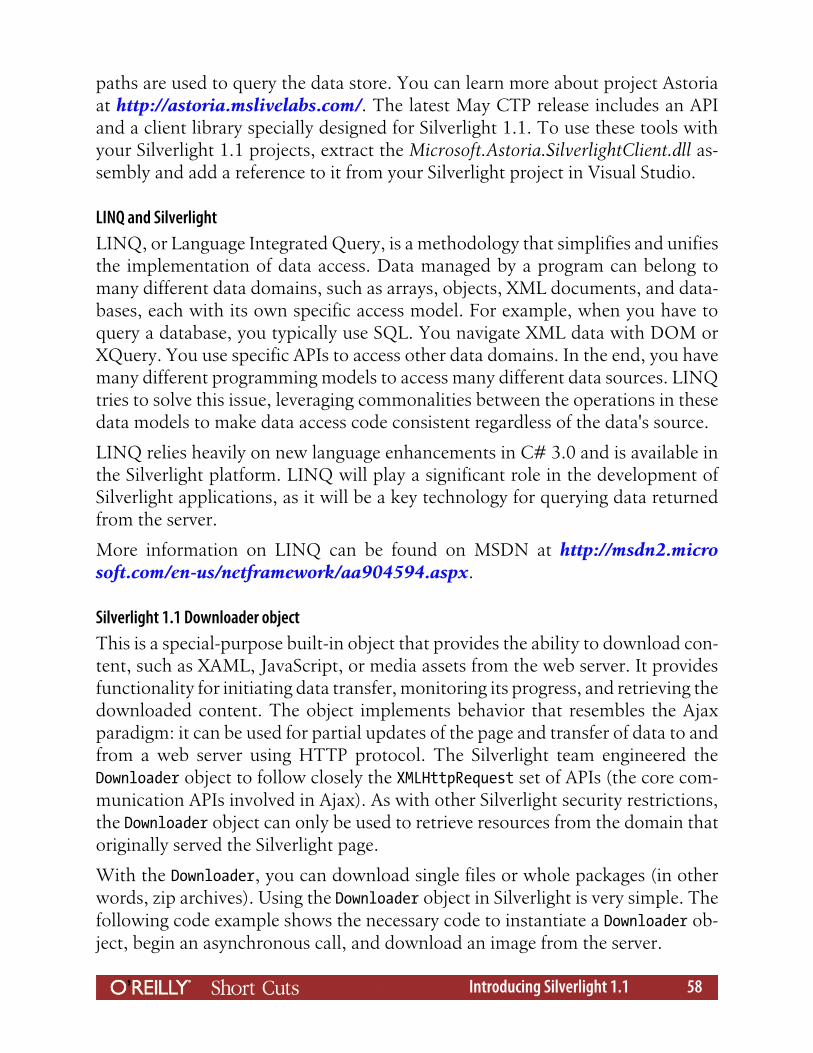
paths are used to query the data store. You can learn more about project Astoriaat http://astoria.mslivelabs.com/. The latest May CTP release includes an APIand a client library specially designed for Silverlight 1.1. To use these tools withyour Silverlight 1.1 projects, extract the Microsoft.Astoria.SilverlightClient.dll as-sembly and add a reference to it from your Silverlight project in Visual Studio.
LINQ and SilverlightLINQ, or Language Integrated Query, is a methodology that simplifies and unifiesthe implementation of data access. Data managed by a program can belong tomany different data domains, such as arrays, objects, XML documents, and data-bases, each with its own specific access model. For example, when you have toquery a database, you typically use SQL. You navigate XML data with DOM orXQuery. You use specific APIs to access other data domains. In the end, you havemany different programming models to access many different data sources. LINQtries to solve this issue, leveraging commonalities between the operations in thesedata models to make data access code consistent regardless of the data's source.
LINQ relies heavily on new language enhancements in C# 3.0 and is available inthe Silverlight platform. LINQ will play a significant role in the development ofSilverlight applications, as it will be a key technology for querying data returnedfrom the server.
More information on LINQ can be found on MSDN at http://msdn2.microsoft.com/en-us/netframework/aa904594.aspx.
Silverlight 1.1 Downloader objectThis is a special-purpose built-in object that provides the ability to download con-tent, such as XAML, JavaScript, or media assets from the web server. It providesfunctionality for initiating data transfer, monitoring its progress, and retrieving thedownloaded content. The object implements behavior that resembles the Ajaxparadigm: it can be used for partial updates of the page and transfer of data to andfrom a web server using HTTP protocol. The Silverlight team engineered theDownloader object to follow closely the XMLHttpRequest set of APIs (the core com-munication APIs involved in Ajax). As with other Silverlight security restrictions,the Downloader object can only be used to retrieve resources from the domain thatoriginally served the Silverlight page.
With the Downloader, you can download single files or whole packages (in otherwords, zip archives). Using the Downloader object in Silverlight is very simple. Thefollowing code example shows the necessary code to instantiate a Downloader ob-ject, begin an asynchronous call, and download an image from the server.
Introducing Silverlight 1.1 58
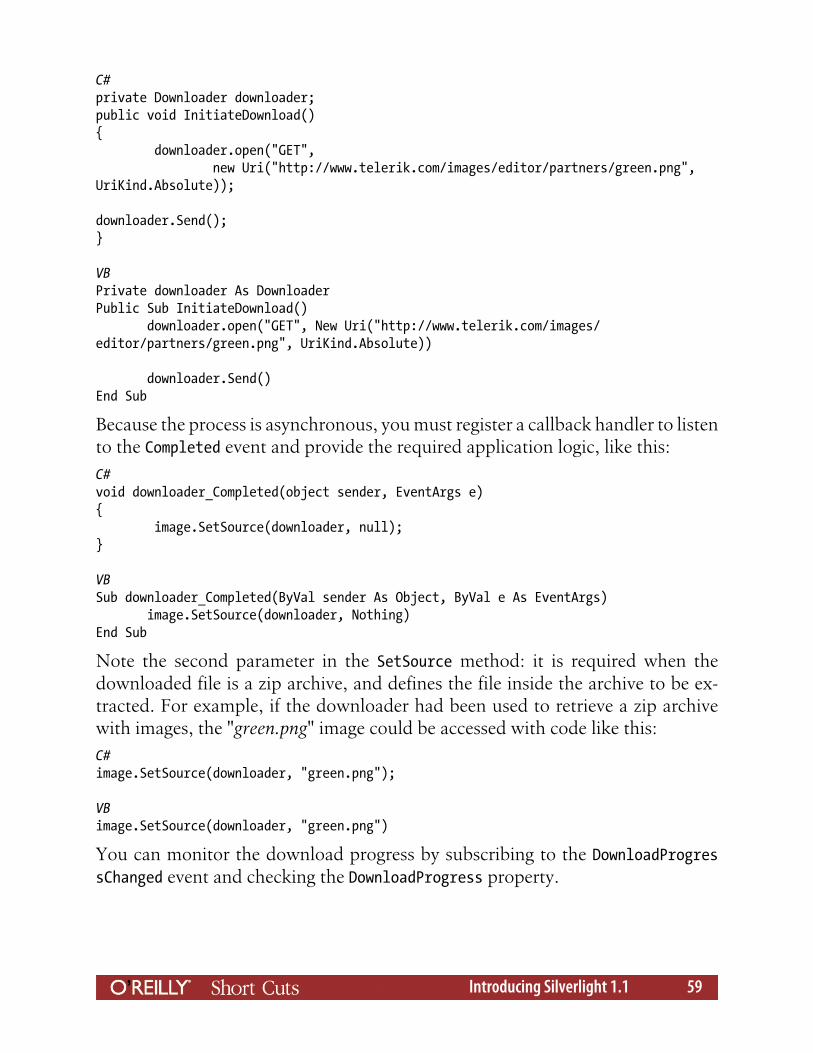
C#private Downloader downloader;public void InitiateDownload(){ downloader.open("GET", new Uri("http://www.telerik.com/images/editor/partners/green.png",UriKind.Absolute));
downloader.Send();}
VBPrivate downloader As DownloaderPublic Sub InitiateDownload() downloader.open("GET", New Uri("http://www.telerik.com/images/editor/partners/green.png", UriKind.Absolute))
downloader.Send()End Sub
Because the process is asynchronous, you must register a callback handler to listento the Completed event and provide the required application logic, like this:C#void downloader_Completed(object sender, EventArgs e){ image.SetSource(downloader, null);}
VBSub downloader_Completed(ByVal sender As Object, ByVal e As EventArgs) image.SetSource(downloader, Nothing)End Sub
Note the second parameter in the SetSource method: it is required when thedownloaded file is a zip archive, and defines the file inside the archive to be ex-tracted. For example, if the downloader had been used to retrieve a zip archivewith images, the "green.png" image could be accessed with code like this:C#image.SetSource(downloader, "green.png");
VBimage.SetSource(downloader, "green.png")
You can monitor the download progress by subscribing to the DownloadProgressChanged event and checking the DownloadProgress property.
Introducing Silverlight 1.1 59
Building Applications with Silverlight 1.1Now it is time to pull all of the concepts, code samples, and Silverlight 1.1 ideastogether to build a sample Silverlight application. In this section, two sample Sil-verlight controls will be built that can be used in any Silverlight 1.1 application: acustom button control and an upload control. These controls will illustrate theconcepts covered in this Short Cut and provide more insight into the Silverlightapplication development process.
Custom Silverlight 1.1 Button ControlCreating a custom Silverlight control involves two basic tasks—defining the visualappearance of the control and providing it with functionality. The UI is primarilydefined in XAML markup and the object model is primarily defined in code. Eachcustom control is described by its API (Application Programming Interface), whichexposes public properties, data fields, and events.
The general structure of a custom Silverlight control is a XAML file and a codebehind file contained in a Silverlight User Control project.
Every custom Silverlight control must inherit from the .NET Control class, illus-trated in Figure 25.
Our XAML file will contain one Rectangle that will determine the boundaries ofthe control and one TextBlock that will serve as a text holder. The XAML markupfor the control can be seen in Example 6.
Example 6. Button control XAML markup
<Canvas xmlns="http://schemas.microsoft.com/client/2007" xmlns:x="http://schemas.microsoft.com/winfx/2006/xaml" Width="100" Height="50" Background="Transparent" Cursor="Hand" >
<Rectangle x:Name="buttonBackground" Width="100" Height="50" Fill="Green" Stroke="Black" StrokeThickness="2" RadiusX="10" RadiusY="10"
Introducing Silverlight 1.1 60
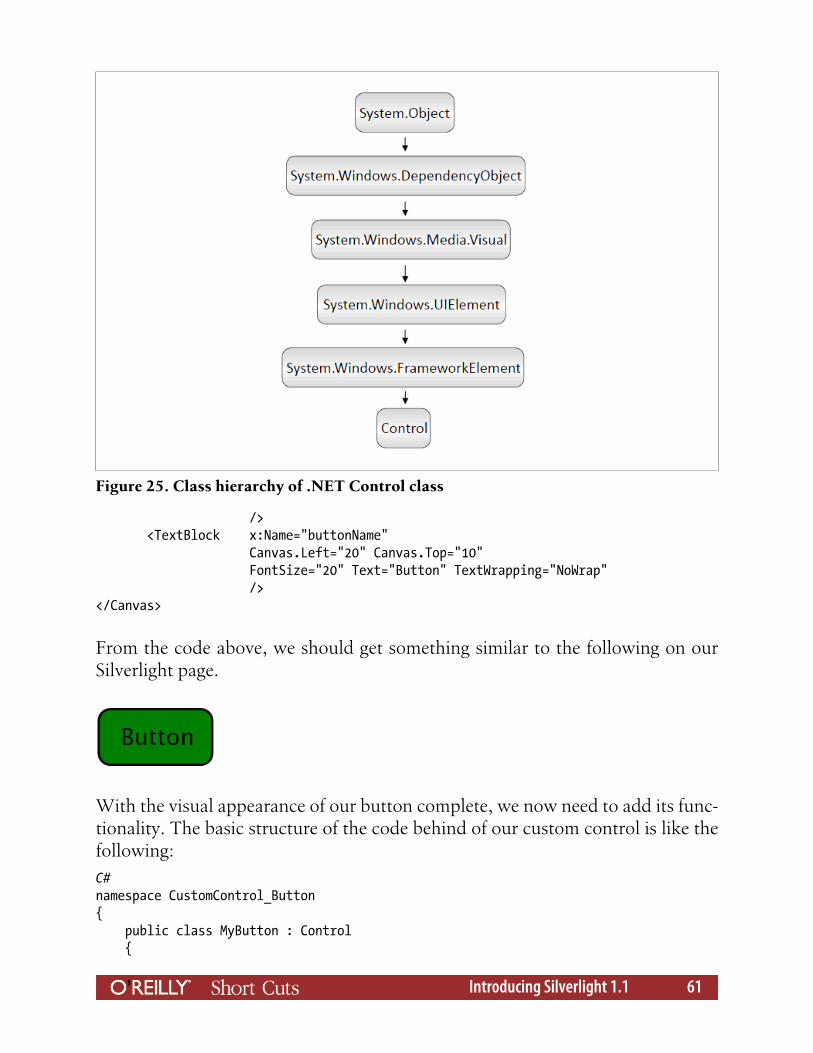
/> <TextBlock x:Name="buttonName" Canvas.Left="20" Canvas.Top="10" FontSize="20" Text="Button" TextWrapping="NoWrap" /></Canvas>
From the code above, we should get something similar to the following on ourSilverlight page.
With the visual appearance of our button complete, we now need to add its func-tionality. The basic structure of the code behind of our custom control is like thefollowing:C#namespace CustomControl_Button{ public class MyButton : Control {
Figure 25. Class hierarchy of .NET Control class
Introducing Silverlight 1.1 61

private Canvas root; // root canvas that holds all the xaml elements public MyButton() { //read button's visual appearance fron MyButton.xaml System.IO.Stream s = this.GetType().Assembly.GetManifestResourceStream("CustomControl_Button.MyButton.xaml"); this.root = (Canvas)this.InitializeFromXaml(new System.IO.StreamReader(s).ReadToEnd()); } }}
VBNamespace CustomControl_Button Public Class MyButton Inherits Control Private root As Canvas ' root canvas that holds all the xaml elements Public Sub New() 'read button's visual appearance fron MyButton.xaml Dim s As System.IO.Stream = Me.[GetType]().Assembly.GetManifestResourceStream("CustomControl_Button.MyButton.xaml") Me.root = CType(Me.InitializeFromXaml(New System.IO.StreamReader(s).ReadToEnd()), Canvas) End Sub End ClassEnd Namespace
Summarized in few words, our code uses a Stream object that reads the entireXAML file and assigns it to a Canvas object. In addition to this code, though, wewill also need a couple more data fields—a Rectangle object and a TextBlock object.C#private Rectangle buttonBackground; // background rectangleprivate TextBlock buttonText; // button's textprivate const int leftIndent = 12; // the space between the last // character of the button's text // and the right border
public event MouseEventHandler Click; // mouse click event handler
VBPrivate buttonBackground As Rectangle ' background rectanglePrivate buttonText As TextBlock ' button's textPrivate Const leftIndent As Integer = 12 ' the space between the last ' character of the button's text ' and the right borderPublic Event Click As MouseEventHandler ' mouse click event handler
Introducing Silverlight 1.1 62
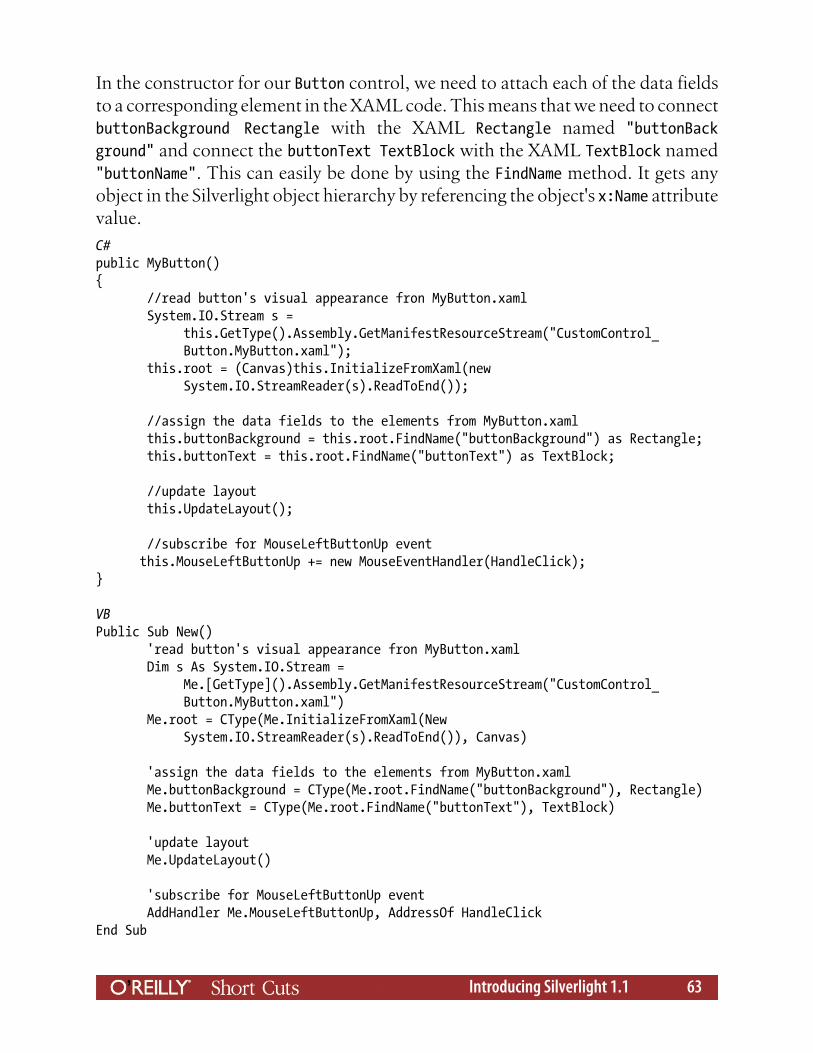
In the constructor for our Button control, we need to attach each of the data fieldsto a corresponding element in the XAML code. This means that we need to connectbuttonBackground Rectangle with the XAML Rectangle named "buttonBackground" and connect the buttonText TextBlock with the XAML TextBlock named"buttonName". This can easily be done by using the FindName method. It gets anyobject in the Silverlight object hierarchy by referencing the object's x:Name attributevalue.C#public MyButton(){ //read button's visual appearance fron MyButton.xaml System.IO.Stream s = this.GetType().Assembly.GetManifestResourceStream("CustomControl_ Button.MyButton.xaml"); this.root = (Canvas)this.InitializeFromXaml(new System.IO.StreamReader(s).ReadToEnd());
//assign the data fields to the elements from MyButton.xaml this.buttonBackground = this.root.FindName("buttonBackground") as Rectangle; this.buttonText = this.root.FindName("buttonText") as TextBlock;
//update layout this.UpdateLayout();
//subscribe for MouseLeftButtonUp event this.MouseLeftButtonUp += new MouseEventHandler(HandleClick);}
VBPublic Sub New() 'read button's visual appearance fron MyButton.xaml Dim s As System.IO.Stream = Me.[GetType]().Assembly.GetManifestResourceStream("CustomControl_ Button.MyButton.xaml") Me.root = CType(Me.InitializeFromXaml(New System.IO.StreamReader(s).ReadToEnd()), Canvas)
'assign the data fields to the elements from MyButton.xaml Me.buttonBackground = CType(Me.root.FindName("buttonBackground"), Rectangle) Me.buttonText = CType(Me.root.FindName("buttonText"), TextBlock)
'update layout Me.UpdateLayout()
'subscribe for MouseLeftButtonUp event AddHandler Me.MouseLeftButtonUp, AddressOf HandleClickEnd Sub
Introducing Silverlight 1.1 63
Each custom control needs to expose an API in order to serve any real purpose.For this example, we want to be able to change the text and the color of the button.To do this, we will expose two properties: a Text property and a BackColor prop-erty. The Text property will be used to set the text of the button and theBackColor property will be used to set the background color of the button. On ageneral note, it is important to remember when building custom controls or classesthat every public property, field, and event is considered to be part of the API. Forthat reason, be careful when choosing what to make public in your controls orclasses, as bad APIs can lead to unexpected results.C#//property to set/get button's textpublic String Text{ get { return this.buttonText.Text; } set { this.buttonText.Text = value; this.UpdateLayout(); }}//property to set/get button's backgroundpublic SolidColorBrush BackColor{ get { return (SolidColorBrush)this.buttonBackground.Fill; } set { this.buttonBackground.Fill = (SolidColorBrush)value; }}
VB'property to set/get button's textPublic Property Text() As String Get Return Me.buttonText.Text End Get Set Me.buttonText.Text = value Me.UpdateLayout() End SetEnd Property
Introducing Silverlight 1.1 64
'property to set/get button's backgroundPublic Property BackColor() As SolidColorBrush Get Return DirectCast(Me.buttonBackground.Fill, SolidColorBrush) End Get Set Me.buttonBackground.Fill = DirectCast(value, SolidColorBrush) End SetEnd Property
Unfortunately, Silverlight cannot detect when significant changes have occurredin the control's state, so we need to provide a method that will update the contentafter a change has occurred. To handle that, we will create an UpdateLayout methodthat updates our control's appearance.C#private void UpdateLayout(){ //adjust root's and background's width according //to the button's text width this.root.Width = this.buttonText.ActualWidth + leftIndent; this.buttonBackground.Width = this.buttonText.ActualWidth + leftIndent;
//place the text in the middle of the button this.buttonText.SetValue<double>(Canvas.LeftProperty,(this.root.Width / 2) - (this.buttonText.ActualWidth / 2));}
VBPrivate Sub UpdateLayout() 'adjust root's and background's width according 'to the button's text width Me.root.Width = Me.buttonText.ActualWidth + leftIndent Me.buttonBackground.Width = Me.buttonText.ActualWidth + leftIndent
'place the text in the middle of the button Me.buttonText.SetValue(Of Double)(Canvas.LeftProperty, (Me.root.Width / 2)- (Me.buttonText.ActualWidth / 2))End Sub
Also, we need to provide an implementation of the HandleClick method, like this:C#private void HandleClick(object sender, MouseEventArgs e){ if (this.Click != null) { this.Click(this, null); }}
Introducing Silverlight 1.1 65
VBPrivate Sub HandleClick(ByVal sender As Object, ByVal e As MouseEventArgs) If Me.Click <> Nothing Then Me.Click(Me, Nothing) End IfEnd Sub
In order to use the button though, some changes need to be made to thePage.xaml in our Silverlight application. First, we need to register a namespacethat will later be used to access the button in code. Placing the following line rightabove the Canvas' Width property will handle that:XAMLxmlns:mycontrol="clr-namespace:CustomControl_Button;assembly=ClientBin/CustomControl_Button.dll"
Now the button is ready to be used. To add the button to a Silverlight page, insertthe following lines inside the root Canvas of the Page.xaml file.XAML<mycontrol:MyButton x:Name="mybutton" Text="I am a button" BackColor="Gray"Click="ChangeLayout" />
You can then reference the button in the code behind file of Page.xaml, like this:C# (Page.xaml.cs)private void ChangeLayout(object sender, MouseEventArgs e){ this.mybutton.Text = "I was clicked"; this.mybutton.BackColor = new SolidColorBrush(Colors.Red);}
VB (Page.xaml.vb)Private Sub ChangeLayout(ByVal sender As Object, ByVal e As MouseEventArgs) Me.mybutton.Text = "I was clicked" Me.mybutton.BackColor = New SolidColorBrush(Colors.Red)End Sub
Instead of adding our custom button to the page in our XAML code, it is alsopossible to add it to the page programmatically. Using the techniques examinedearlier in this Short Cut for standard Silverlight objects, we can add our custombutton to the page using code in Example 7.
Example 7. Adding custom button to XAML Canvas programmatically
C# (Page.xaml.cs)public void Page_Loaded(object o, EventArgs e){ // Required to initialize variables InitializeComponent(); MyButton button = new MyButton();
Introducing Silverlight 1.1 66
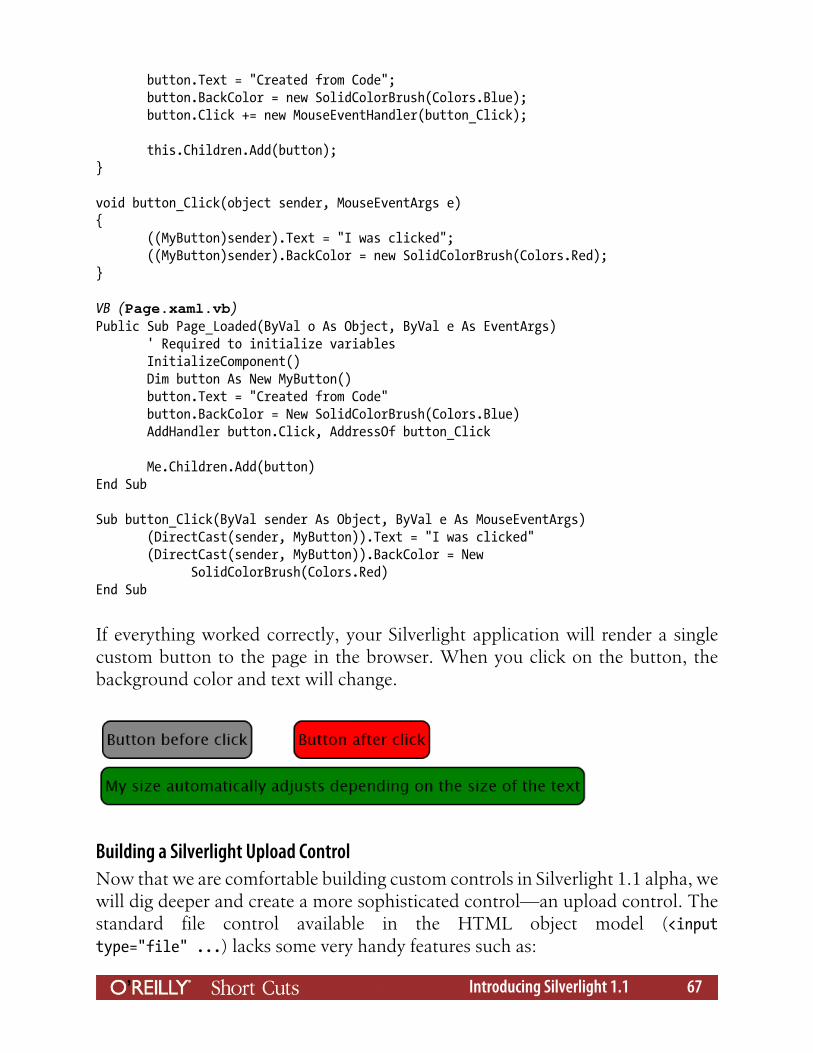
button.Text = "Created from Code"; button.BackColor = new SolidColorBrush(Colors.Blue); button.Click += new MouseEventHandler(button_Click);
this.Children.Add(button);}
void button_Click(object sender, MouseEventArgs e){ ((MyButton)sender).Text = "I was clicked"; ((MyButton)sender).BackColor = new SolidColorBrush(Colors.Red);}
VB (Page.xaml.vb)Public Sub Page_Loaded(ByVal o As Object, ByVal e As EventArgs) ' Required to initialize variables InitializeComponent() Dim button As New MyButton() button.Text = "Created from Code" button.BackColor = New SolidColorBrush(Colors.Blue) AddHandler button.Click, AddressOf button_Click
Me.Children.Add(button)End Sub
Sub button_Click(ByVal sender As Object, ByVal e As MouseEventArgs) (DirectCast(sender, MyButton)).Text = "I was clicked" (DirectCast(sender, MyButton)).BackColor = New SolidColorBrush(Colors.Red)End Sub
If everything worked correctly, your Silverlight application will render a singlecustom button to the page in the browser. When you click on the button, thebackground color and text will change.
Building a Silverlight Upload ControlNow that we are comfortable building custom controls in Silverlight 1.1 alpha, wewill dig deeper and create a more sophisticated control—an upload control. Thestandard file control available in the HTML object model (<inputtype="file" ...) lacks some very handy features such as:
Introducing Silverlight 1.1 67
• Multiple file selection
• Asynchronous upload
• File size validation on the client
In Silverlight, there is OpenFileDialog class that provides you with more advancedfunctionality and can help deliver some of the above features.
Before we begin building our control, let's take a broad look at the steps that needto be completed. First, there should be a module that allows a user to select filesfrom the filesystem. Then the selected files need to be read, validated, and postedto the server. On the server there needs to be an HTTP Handler that saves theposted files to a specific location (it could be a filesystem or database).
Since Silverlight lives on the client, you cannot implement the server-side handlerin Silverlight code. The other two modules that take care of selecting and uploadingthe files can be easily implemented, though, so that's what our control will focuson completing. For this example, these two modules will be called FileSelectorand FileUploader.
Implementing the FileSelector module is very easy with Silverlight 1.1. The onlything we need to do is use the System.Windows.Controls.OpenFileDialog controland configure it to our needs. Some of the major properties this class exposes are:
• Filter: Specifies the extensions filter which should be used in the file dialog.
• EnableMultipleSelection: Indicates whether multiple file selection is allowed.
• Title: Title of the file dialog window.
This object should be very familiar to Windows Forms developers. ASP.NET de-velopers may not be used to accessing files this way, but the process is standard inWinForms. To implement the OpenFileDialog in our Silverlight upload control,we'll use code like this:C#OpenFileDialog fileDialog = new OpenFileDialog();fileDialog.EnableMultipleSelection = true;fileDialog.Filter = "Picture Files (*.jpg; *.png)|*.jpg; *.png";fileDialog.Title = "Please choose files to upload!";
if (fileDialog.ShowDialog() == DialogResult.OK){ foreach (FileDialogFileInfo file in fileDialog.SelectedFiles) { // process the selected files Stream stream = file.OpenRead();
Introducing Silverlight 1.1 68

}}
VBDim fileDialog As New OpenFileDialog()fileDialog.EnableMultipleSelection = TruefileDialog.Filter = "Picture Files (*.jpg; *.png)|*.jpg; *.png"fileDialog.Title = "Please choose files to upload!"
If fileDialog.ShowDialog() = DialogResult.OK Then For Each file As FileDialogFileInfo In fileDialog.SelectedFiles ' process the selected files Dim stream As Stream = file.OpenRead() NextEnd If
Implementing the FileUploader module requires a little more work than theFileSelector module, but the process remains relatively simple. To get the uploa-ded file data to the server, we will make use of theSystem.Windows.Browser.Net.BrowserHttpWebRequest. This is the class that is usedto create asynchronous requests to a remote server in Silverlight 1.1. As we'vementioned previously, cross-server requests are not possible in the current alpharelease, but there are plans for enabling such requests in the near future.
Configuration and usage of the BrowserHttpWebRequest class is quite simple. Toinstantiate the class and upload our file data, we'll use the code outlined in Ex-ample 8.
Example 8. Uploading data from Silverlight to the server using BrowserHttpWebRequest
C#// configure the request (serviceUrl is the url of the http handler.// See below for explanation)HttpWebRequest request = new BrowserHttpWebRequest(serviceUrl);request.Method = "POST";
// the logic for chunk file uploadbyte[] buffer = new byte[bufferSize];int bytesRead = stream.Read(buffer, 0, bufferSize);string encodedData = Convert.ToBase64String(buffer, 0, bytesRead);
// configure the streamStreamWriter writer = new StreamWriter(request.GetRequestStream());writer.Write(String.Format("f={0}\np={1}\nd={2}", fileName, position, encodedData));writer.Flush();
// post to the server
Introducing Silverlight 1.1 69

request.BeginGetResponse(new AsyncCallback(OnResponse), null);
private void OnResponse(IAsyncResult asyncResult){ // on response - check the status code HttpWebResponse response = request.EndGetResponse(asyncResult);
if (response.StatusCode != HttpStatusCode.OK) { throw new WebException(); }
response.Close(); request = null;}
VB' configure the request (serviceUrl is the url of the http handler.' See below for explanation)Dim request As HttpWebRequest = New BrowserHttpWebRequest(serviceUrl)request.Method = "POST"
' the logic for chunk file uploadDim buffer As Byte() = New Byte(bufferSize) {}Dim bytesRead As Integer = stream.Read(buffer, 0, bufferSize)Dim encodedData As String = Convert.ToBase64String(buffer, 0, bytesRead)
' configure the streamDim writer As New StreamWriter(request.GetRequestStream())writer.Write([String].Format("f={0}" & Chr(10) & "p={1}" & Chr(10) & "d={2}", fileName, position, encodedData))writer.Flush()
' post to the serverrequest.BeginGetResponse(New AsyncCallback(OnResponse), Nothing)
Private Sub OnResponse(ByVal asyncResult As IAsyncResult) ' on response - check the status code Dim response As HttpWebResponse = request.EndGetResponse(asyncResult)
If response.StatusCode <> HttpStatusCode.OK Then Throw New WebException() End If
response.Close() request = NothingEnd Sub
Introducing Silverlight 1.1 70

The nice thing about using StreamWriter is that you can actually upload the filein chunks, which is perfect for optimizing memory usage on the server (especiallywhen big files are uploaded).
We mentioned previously that our Silverlight upload control could only handlethe selection of files and uploading of data to the server. We will need one lastmodule, implemented as an HTTP Handler, running on the server to receive theuploaded data and save it on the server. While this is not part of the Silverlightcontrol, we will provide some basic steps for creating the Handler and using it withthe Silverlight uploader.
Our Handler needs to accept the incoming data stream from the Silverlight appli-cation and save it to a file on server. Example 9 shows code for a very simpleimplementation of the HTTP Handler that takes the posted stream and writes itinto a file.
Example 9. ASP.NET HTTP Handler to receive upload data from Silverlight
C#using System;using System.IO;using System.Web;using System.Web.UI;using System.Web.SessionState;using System.Diagnostics;
namespace Telerik.Silverlight.UI{ public class RadUploadHandler : IHttpHandler {
public bool IsReusable { get { return false; } }
public void ProcessRequest(HttpContext context) { string fileName = null; long position = 0; byte[] buffer = null;
using (StreamReader reader = new StreamReader(context.Request.InputStream)) {
Introducing Silverlight 1.1 71
string body = reader.ReadToEnd(); string[] parts = body.Split('\n');
for (int i = 0; i < parts.Length; i++) { char key = parts[i][0]; string value = parts[i].Substring(2);
switch (key) { case 'f': fileName = value; break; case 'p': position = Convert.ToInt64(value); break; case 'd': buffer = Convert.FromBase64String(value); break; default: throw new InvalidDataException(); } } }
using (FileStream stream = File.OpenWrite(GetPath(context, fileName))) { stream.Position = position; stream.Write(buffer, 0, buffer.Length); } }
private string GetPath(HttpContext context, string fileName) { return context.Server.MapPath("~/Uploads/" + Path.GetFileName(fileName)); } }}
VBImports SystemImports System.IOImports System.WebImports System.Web.UIImports System.Web.SessionStateImports System.Diagnostics
Namespace Telerik.Silverlight.UI
Introducing Silverlight 1.1 72

Public Class RadUploadHandler Implements IHttpHandler
Public ReadOnly Property IsReusable() As Boolean Get Return False End Get End Property
Public Sub ProcessRequest(ByVal context As HttpContext) Dim fileName As String = Nothing Dim position As Long = 0 Dim buffer As Byte() = Nothing
Using reader As New StreamReader(context.Request.InputStream)
Dim body As String = reader.ReadToEnd() Dim parts As String() = body.Split(Chr(10))
Dim i As Integer = 0 While i < parts.Length Dim key As Char = parts(i)(0) Dim value As String = parts(i).Substring(2)
Select Case key Case "f"C fileName = value Case "p"C position = Convert.ToInt64(value) Case "d"C buffer = Convert.FromBase64String(value) Case Else Throw New InvalidDataException() End Select
i += 1 End While End Using
Using stream As FileStream = File.OpenWrite( GetPath(context, fileName)) stream.Position = position stream.Write(buffer, 0, buffer.Length) End Using End Sub
Private Function GetPath(ByVal context As HttpContext, ByVal fileName As String) As String
Introducing Silverlight 1.1 73
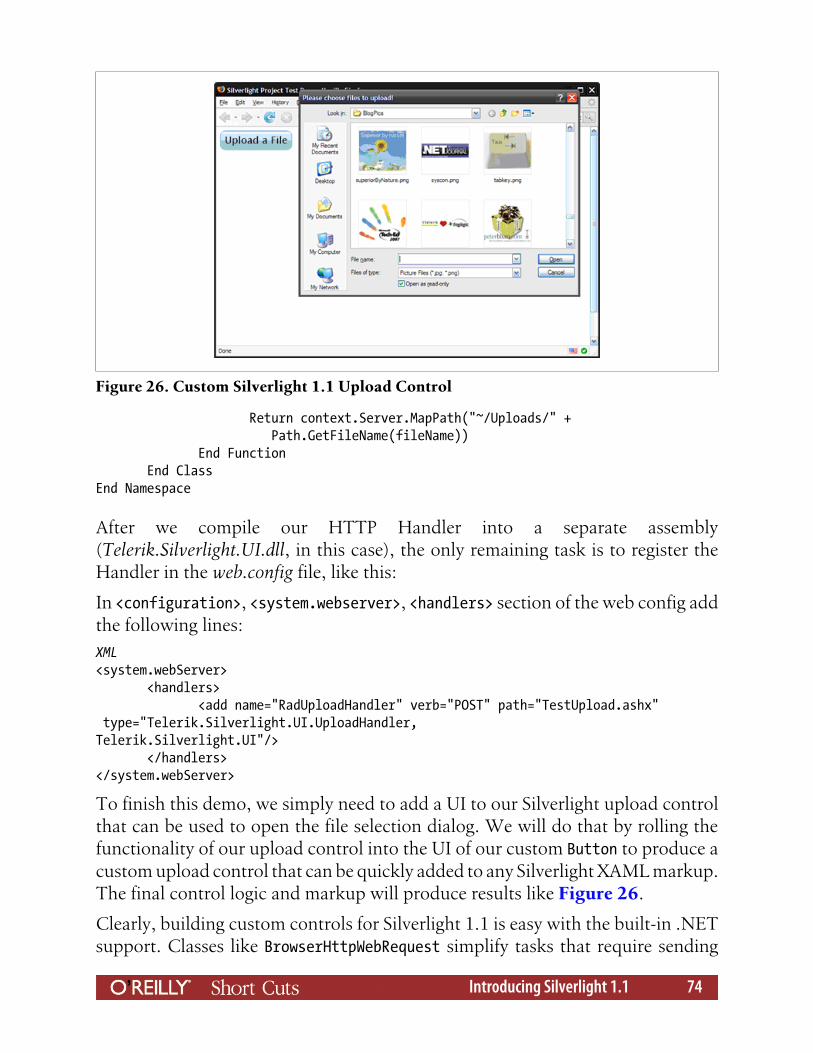
Return context.Server.MapPath("~/Uploads/" + Path.GetFileName(fileName)) End Function End ClassEnd Namespace
After we compile our HTTP Handler into a separate assembly(Telerik.Silverlight.UI.dll, in this case), the only remaining task is to register theHandler in the web.config file, like this:
In <configuration>, <system.webserver>, <handlers> section of the web config addthe following lines:XML<system.webServer> <handlers> <add name="RadUploadHandler" verb="POST" path="TestUpload.ashx" type="Telerik.Silverlight.UI.UploadHandler,Telerik.Silverlight.UI"/> </handlers></system.webServer>
To finish this demo, we simply need to add a UI to our Silverlight upload controlthat can be used to open the file selection dialog. We will do that by rolling thefunctionality of our upload control into the UI of our custom Button to produce acustom upload control that can be quickly added to any Silverlight XAML markup.The final control logic and markup will produce results like Figure 26.
Clearly, building custom controls for Silverlight 1.1 is easy with the built-in .NETsupport. Classes like BrowserHttpWebRequest simplify tasks that require sending
Figure 26. Custom Silverlight 1.1 Upload Control
Introducing Silverlight 1.1 74
data to the web server, and Visual Studio 2008 provides all of the tools and Intel-liSense required to make programming in the new framework easy.
ConclusionsSilverlight 1.1 is going to open up a whole new world for .NET developers. Fallingsomewhere between traditional Windows programming and web programming,Silverlight will attract developers from both disciplines and create a convergenceof ideas that has never been experienced in the .NET community.
In its current alpha state, Silverlight 1.1 certainly has a number of issues to address.From cross domain resource access to a more robust control model, there is noshortage of major issues that make it difficult to do full scale development withSilverlight 1.1 at the time of this writing. On top of that, Silverlight 1.1 is notfeature-complete. It is easy to forget that this is an alpha build with all of the focuson beta products like Silverlight 1.0 and Visual Studio 2008, but make no mistake—this is an alpha and we can expect many changes before it's released.
One thing is certain: when Silverlight 1.1 is released, it will create new opportu-nities for .NET developers to use their skills to create Rich Internet Applicationswith unprecedented efficiency. And now you are prepared. This Short Cut hasnavigated you through the alpha territory, showing you the ins and outs of Silver-light 1.1 with plenty of examples along the way. Whether you adopt Silverlight 1.1when it arrives or not, you now understand it.
ResourcesThis Short Cut has taken you through many aspects of the current Silverlight 1.1alpha, but in no way does it cover the breadth of the available knowledge on thetopic. Excellent Internet resources exist for developers looking to learn more aboutSilverlight, and among our favorite resources are the following sites and blogs:
Links• http://silverlight.net
• http://www.microsoft.com/silverlight/
• http://www.telerik.com/silverlight
Blogs• http://blogs.msdn.com/mharsh/default.aspx
• http://weblogs.asp.net/scottgu/
• http://silverlight.net/blogs/JesseLiberty
Introducing Silverlight 1.1 75

• http://adamkinney.com
• http://blogs.msdn.com/tims/
• http://geekswithblogs.net/WynApseTechnicalMusings/Default.aspx
• http://telerikwatch.com
Special ThanksSpecial thanks to Valentin Stoychev, Dimitar Kapitanov, Kiril Stanoev, Irina Pali-chorova, Nikolay Nedev, and Hristo Kosev from the Telerik Silverlight Team fortheir major contributions to this book. Additional thanks to Microsoft evangelistsAdam Kinney and Jesse Liberty for reviewing this Short Cut and providing theirvaluable feedback.
Introducing Silverlight 1.1 76


![[MS-SLXV-2010]: Silverlight XAML Vocabulary …download.microsoft.com/download/0/a/6/0a6f7755-9af5-448b-907d... · [MS-XAML] specification enables each application that uses Xaml](https://img.dokumen.tips/doc/110x75/5b43d8907f8b9af5798c4386/ms-slxv-2010-silverlight-xaml-vocabulary-ms-xaml-specification-enables.jpg)

![Index [link.springer.com]978-1-4302-2382-5/1.pdfIndex SYMBOLS and numbers ... creating hosted Silverlight project, 12—17 ... binding, element-to-element, XAML, 56—58 Binding class](https://img.dokumen.tips/doc/110x75/5b34ddd67f8b9ae1108eae34/index-link-978-1-4302-2382-51pdfindex-symbols-and-numbers-creating-hosted.jpg)


![[MS-XAML] - download.microsoft.comMS-XAML].pdf · [MS-XAML]: Xaml Object Mapping Specification 2006 Intellectual Property Rights Notice for Open Specifications Documentation Technical](https://img.dokumen.tips/doc/110x75/5b43c9677f8b9a80388c1fba/ms-xaml-ms-xamlpdf-ms-xaml-xaml-object-mapping-specification-2006-intellectual.jpg)


![[MS-SLXV]: Silverlight XAML Vocabulary Specification 2008](https://img.dokumen.tips/doc/110x75/577d39661a28ab3a6b99a7b5/ms-slxv-silverlight-xaml-vocabulary-specification-2008.jpg)