Embed Size (px)
Citation preview

INSTRUCTION MANUAL
HALOGEN BINOCULAR INDIRECT
OPHTHALMOSCOPE IO-
SMALL PUPIL
NEITZ INSTRUMENTS CO., LTD.
International Division
2013.08

- 1 - HALOGEN BINOCULAR INDIRECT OPHTHALMOSCOPE IO- SMALL PUPIL
Thank you for purchasing the NEITZ Halogen Binocular Indirect Ophthalmoscope IO- Small
Pupil (hereafter called as IO-). Before use, please read this Instruction manual to your safety,
and keep it handy for future reference.
TABLE OF CONTENTS
1. Safety Precautions 1.1. Common Precautions ....................................................................................................... 3
1.2. Precautions to Power Supply Part..................................................................................... 4
2. Item Check List
2.1. IO- with Power Supply Unit PSU-3.................................................................................. 6
2.2. IO- with Battery Pack BP-Li ............................................................................................ 7
3. Nomenclature
3.1. IO- Main Body with Head Band Unit .............................................................................. 8
3.2. Power Supply Unit PSU-3
3.2.1. Table-Top Model ................................................................................................... 8
3.2.2. Wall Mounting Model ............................................................................................. 9
3.3. Lithium Ion Battery Pack BP-Li ........................................................................................ 9
4. Operation Method
For Customer Purchased IO- With Power Supply Unit PSU-3 4.1. The Preparation
4.1.1. Power Supply Unit PSU-3 Desk-Top Model.......................................................... 10
4.1.2. Power Supply Unit PSU-3 Wall Mounting Model .................................................. 10
4.1.3. How to Connect IO- to the Power supply Unit .................................................... 11
4.1.4. How to Wear IO- ................................................................................................ 11
4.1.5. Adjustment of Eyepiece Position .......................................................................... 11
4.1.6. Adjustment of Pupillary Distance .......................................................................... 12
4.2. The Observation
4.2.1. How to Adjust the Illumination Brightness ............................................................ 12
4.2.2. How to Change the Illumination Field .................................................................. 12
4.2.3. Selecting of Filter................................................................................................. 12
4.2.4. Observation Method ............................................................................................ 12
For customer purchased IO- with Lithium Ion Battery Pack BP-Li 4.1. The Preparation
4.1.1. Lithium Ion Battery Pack BP-Li ............................................................................. 15
4.1.2. How to Connect IO- to the Lithium Ion Battery Pack BP-Li ................................. 16
4.1.3. Charging the Battery ............................................................................................ 17
4.1.4. How to Attach / Detach the Battery ...................................................................... 17
4.1.5. How to Connect / Disconnect the Battery ........................................................... 17

- 2 - HALOGEN BINOCULAR INDIRECT OPHTHALMOSCOPE IO- SMALL PUPIL
4.1.6. How to turn on the IO- ........................................................................................ 18
4.1.7. How to wear the IO- ........................................................................................... 18
4.1.8. Adjustment of Eyepiece Position .......................................................................... 18
4.1.9. Adjustment of Pupillary Distance .......................................................................... 19
4.2. The Observation
4.2.1. How to adjust the Illumination Brightness ............................................................ 19
4.2.2. How to change the Illumination Field ................................................................... 19
4.2.3. Selecting of Filter................................................................................................. 19
4.2.4. Observation Method ............................................................................................ 19
5. Maintenance
5.1. IO- Main Body
5.1.1. Cleaning .............................................................................................................. 22
5.1.2. How to exchange the Bulb ................................................................................... 22
5.1.3. Storage ................................................................................................................ 22
5.1.4 Safekeeping and Transportation ........................................................................... 23
5.1.5 Disposal ............................................................................................................... 23
5.2. Power Supply Unit PSU-3
5.2.1. Cleaning .............................................................................................................. 23
5.2.2. Storage ................................................................................................................ 23
5.2.3. Safekeeping and Transportation .......................................................................... 23
5.2.4. Disposal ............................................................................................................... 23
5.3. Lithium Ion Battery Pack BP-Li
5.3.1. Cleaning .............................................................................................................. 23
5.3.2. Storage ................................................................................................................ 23
5.3.3. Safekeeping and Transportation .......................................................................... 23
5.3.4. Disposal ............................................................................................................... 23
6. Troubleshooting
6.1. IO- Main Body .............................................................................................................. 24
6.2. Power Supply Unit PSU-3 .............................................................................................. 24
6.3. Lithium Ion Battery Pack BP-Li ....................................................................................... 25
7. Technical Specifications
7.1. IO- Main Body with Head band unit ............................................................................... 26
7.2. Power Supply Unit PSU-3 ................................................................................................ 26
7.3. Lithium Ion Battery Pack BP-Li ........................................................................................ 26
7.4. Carrying Case .................................................................................................................. 27
7.5. Standard Accessories ...................................................................................................... 27
7.6. Option .............................................................................................................................. 28
8. Technical Support and Contact Information 28

- 3 - HALOGEN BINOCULAR INDIRECT OPHTHALMOSCOPE IO- SMALL PUPIL
1. SAFETY PRECAUTIONS
This instruction manual uses a variety of common symbols and icons to assist you in proper
handling and usage of this product, and to warn you of potential hazards to yourself and others.
These symbols and icons and their significance are described below.
For customers in Europe
The “CE” mark indicates that this product complies with the European requirements for
safety, health, environment and customer protection. CE-mark products are for sale in
Europe.
The symbol indicates that this product is not to be discarded with normal household waste
in European Union.
1.1. COMMON PRECAUTIONS
WARNING The time of illuminating to eyes must be minimal and do not exceed 1 minute with
each eye. Otherwise it may damage your eyes.
Do not irradiate an illumination more than required. Otherwise it may damage your
eyes.
Do not use it near the source of flammable gas such as propane gas or the gasoline
and mine dust. Otherwise it may cause a fire ignition and an explosion.
Do not leave in the place where a small children can touch. Otherwise it may cause
injury and swallow the small parts by mistake.
Do not cover it with cloth or bedclothes. Otherwise it may cause a fire ignition and an
injury.
WARNING Improper handling may cause death or serious injury.
CAUTION Improper handling may cause damage or physical loss.
Symbols for prohibited action Symbols for instructing action
Disassembly prohibited
Prohibited Mandatory Wet hand prohibited

- 4 - HALOGEN BINOCULAR INDIRECT OPHTHALMOSCOPE IO- SMALL PUPIL
CAUTION
Do not use it with other AC adapter or battery pack than a standard included in this set. Otherwise, it may cause an electric shock or trouble.
Do not use the battery pack with unstable condition or as dangled. Otherwise, it may cause a damage and an injury.
Do not use in extremely humid place, nor where the water hangs. Otherwise, it may cause an electric shock or trouble.
Do not let short-circuit between terminals, and do not touch terminals with finger. Otherwise, it may cause an electric shock or trouble.
Do not sterilize. It may cause an injury or trouble.
Do not apply a strong impact and do not hurl it. Otherwise, it may cause a damage and an injury.
Do not touch with wet hand. Otherwise, you may get an electric shock.
Never attempt to disassemble or modify it, as this may result in an electrical shock, fire ignition or an injury.
Unplug from outlet if not use for a long period or during the cleaning. Otherwise, it causes an electric shock, fire ignition and a damage.
Charge the battery or confirm an electric power amount, beforehand. Otherwise, it causes nonuse or interruption.
In case screws loosens, fasten it tightly again. Otherwise, it may cause destruction and injury.
Stop using and disconnect when a malfunction is found such as stink or smoke. Otherwise, it may cause an injury and a fire ignition.
1.2. PRECAUTIONS TO POWER SOURCE PART
WARNING Do not use in extremely humid nor salty place, nor where the water hangs.
Otherwise it may cause an electric shock.
Do not use near the source of flammable gas such as propane gas or the gasoline and mine dust. Otherwise it may cause a fire ignition and an explosion.
Do not use the power source cord and accessories other than in the original set. Otherwise it may cause a fire ignition and a trouble.
Do not use with a power source plug with dust and foreign matter. Otherwise it may cause a fire ignition.
Do not use with damaged cords. Otherwise it may cause an electric shock and a fire ignition.
Arrange the electric wiring tidy. Otherwise, it may cause destruction of device and tumbling of user and an injury.

- 5 - HALOGEN BINOCULAR INDIRECT OPHTHALMOSCOPE IO- SMALL PUPIL
Do not insert foreign matter from the gap of the main body. Otherwise it may cause a fire ignition and a trouble.
Do not touch the cord, outlet and the device with wet hand. Otherwise you may get an electric shock.
Unplug from outlet if not use for a long period or during the cleaning. Otherwise, you may get an electric shock, or it may cause a fire ignition and a trouble.
Unplug from outlet promptly when water or liquid entered. Otherwise, you may get an electric shock, or it may cause a fire ignition and a trouble.
Do not touch the metal parts of the plug with any other metal material when the plug is inserted in an outlet. Plug surely. Otherwise, you may get an electric shock and it may cause a fire ignition.
When pull the plug from an outlet, please hold the plug and do not pull a cord. Otherwise it may cause the damage to the cord, an electric shock or a fire ignition.
CAUTION
Do not use under direct sunlight or harmful light. Otherwise this device may get heated and cause the trouble.
When cleaning do not use volatile solvents such as thinner nor polishing powder nor boiling water. Otherwise it may cause a deformation and a damage.
Be sure to use an original packing box during the movement and transportation. Otherwise, it may cause a deformation and a trouble.

- 6 - HALOGEN BINOCULAR INDIRECT OPHTHALMOSCOPE IO- SMALL PUPIL
2. ITEM CHECK LIST
Depending on the Power supply device and Set number, the set component is different. Please
check that all items and accessories are present. If any items are missing or damaged, please
contact your dealer.
2.1. IO- WITH POWER SUPPLY UNIT PSU-3
SET NUMBERS
ITEMS
SET
1
SET
2
SET
2T
SET
3
SET
4
IO-α Main Body with Head Band Unit
1 1 1 1 1
Power Transformer PSU-3T with AC Adapter (Table-top Model)
- - 1 - -
Power Transformer PSU-3K with AC Adapter (Wall mounting Model)
- 1 - 1 1
Wall mounting Fitting Set
Installation Screw- 1 pc.
- 1 - 1 1
Tapping screw- 3 pcs.
Screw- 2 pcs.
Wall mounting Plate- 1 pc.
Transformer mount Plate-1 pc.
Spare Light Bulb
- - 1 - 1
Teaching Mirror
- - - - 1
Hanger C
- 1 - 1 1
Scleral depressor
- - - - 1
Detachment Chart
- - - - 1
Carrying Case
- - - 1 1
Aspheric Lens OPTIONAL
Desk Stand
OPTIONAL

- 7 - HALOGEN BINOCULAR INDIRECT OPHTHALMOSCOPE IO- SMALL PUPIL
2.2. IO- WITH BATTERY PACK BP-LI
SET NUMBERS
ITEMS
SET 1 SET 2 SET 3 SET 4
IO-α Main Body and Head Band Unit
1 1 1 1
Battery Pack BP-Li
- 1 1 1
Lithium Ion Rechargeable Battery
- 1 1 1
Recharger
- 1 1 1
AC Adapter
- 1 1 1
Extension Cord
- 1 1 1
Head Band Hook
- 1 1 1
Belt Hook
- 1 1 1
Strap
- 1 1 1
Tying Ring
- 1 1 1
Spare Light Bulb
- - 1
Teaching Mirror
- - - 1
Scleral depressor
- - - 1
Detachment Chart
- - - 1
Carrying Case
- - 1 1
Aspheric Lens OPTIONAL
Desk Stand
OPTIONAL

- 8 - HALOGEN BINOCULAR INDIRECT OPHTHALMOSCOPE IO- SMALL PUPIL
1. Main Body
2. Power Supply Switch
3. Pilot Lamp
4. Brightness Adjustment Knob
5. DC Jack
6. Receptacle
7. Rubber Foot
8. Name Plate
9. Installation Screw Hole
1. Lamp House
2. Lamp House Cord
3. Lamp House Plug
4. Filter Change Lever
5. Aperture Change Lever
6. Illumination Angle Adjustment Knob
7. Observation Angle Adjustment Knob
8. Cover Glass
9. Slit for Setting Teaching Mirror
10. Pupillary Distance Adjustment Lever
11. Eyepiece
3. NOMENCLATURE
3.1. IO- MAIN BODY WITH HEAD BAND UNIT
3.2. POWER SUPPLY UNIT PSU-3
3.2.1 Table-Top Model
12. Overband
13. Optic part Fixing Knob
14. Overband Stopper
15. Overband Fixing Knob
16. Back Head band
17. Cover
18. Back Head Band Fixing Knob
19. Head band
20. Head band Fixing Knob
21. Forehead Pad
22. Cord Clip

- 9 - HALOGEN BINOCULAR INDIRECT OPHTHALMOSCOPE IO- SMALL PUPIL
1 - Main Body, 2 - Power Supply Switch, 3 - Pilot Lamp, 4 - Brightness Adjustment Knob,
5 - DC Jack, 6 - Receptacle, 7- Rubber Foot, 8 - Name Plate, 9 - Installation Screw Hole
10 - Hanger Installation Hole, 11 - Transformer Mount Plate, 12 - Screw, 13 - Wall mounting
plate, 14 - Tapping Screw, 15 - Installation screw, 16 – Hanger C.
Set for Wall Mounting
3.2.2. Wall Mounting Model
3.3. LITHIUM ION BATTERY PACK BP-LI
1– Duel Ring for Strap, 2 – Belt Hook Fixed hole, 3 – Main Body, 4 – Stopper, 5 – Receptacle,
6 – Stopper, 7 – Brightness Adjustment Knob, 8 – Residual Quantity Light Lamp, 9 – Lithium
Ion Rechargeable Battery, 10 – Recharger, 11 – AC Adapter, 12 – Extension Cord, 13 – Head
Band Hook, 14 – Belt hook, 15 – Strap, 16 – Tying Ring.

- 10
- HALOGEN BINOCULAR INDIRECT OPHTHALMOSCOPE IO- SMALL PUPIL
4. OPERATION METHOD
FOR CUSTOMER PURCHASED IO- WITH POWER SUPPLY UNIT PSU-3
4.1. THE PREPARATION
4.1.1 Power Supply Unit PSU-3 Desk-Top Model
Put Power supply unit PSU-3 in the appropriate place before use.
4.1.2. Power Supply Unit PSU-3 Wall Mounting model
1. Please fix the Transformer Mount Plate(11)to the back side of Transformer using the Screws
(12)。
2. Wall Mounting Plate (13) should be fitted with Tapping Screws (14)。
3. Please hang the transformer on the wall and fix with Installation Screw (15).
4. Finally insert Hanger C (16) to the Hanger Installation Hole (10).

- 11
- HALOGEN BINOCULAR INDIRECT OPHTHALMOSCOPE IO- SMALL PUPIL
Switching ON and OFF by the Hanger is a
temporary function. When you do not use it for
a long time please turn off it by Power Supply
Switch.
4.1.3. How to Connect IO- to the Power Supply Unit
1. Insert the Lamp House Plug (3) of the IO- into the
Receptacle (6) of PSU-3 until stop.
2. Then insert DC plug of the AC adapter into the DC
Jack (5) of PSU-3 and Power supply plug into an
outlet.
3. Push the Power Supply Switch button from OFF (○
seal) to ON (┃ seal) after turning the Brightness
Adjustment Knob (4) left to minimizing the brightness.
The Pilot Lamp (3) turns on, and the device is ready.
In the case of Hanger use:
1. The power switch of connected IO- turned off when
you hang it on the Hanger C, and the Illumination turns
off too.
2. Power switch turns on when you take it off the hanger,
and illumination turns on.
4.1.4. How to wear IO-
1. Please loosen the Back Head Band Fixing Knob (18)
and wear the Headband, to adjust your forehead to
Forehead pad.
2. In the position which was the most stable to the head,
fasten the Back Head band fixation knob (18). It would
be more stable if position the Headband deeply as
shown in the figure.
3. Adjust the depth with turning the top Head band
fixation knob to become a good position.
4.1.5. Adjustment of Eyepiece Position
1. Holding the Optic part in one hand and loosen the Optic part Fixing Knob (13).
2. Adjust the position of the Eyepiece with moving forward and backward, up and down, and
changing the angle to get best viewing.
3. Tighten the Fixing Knob (13) to fix the position.

- 12
- HALOGEN BINOCULAR INDIRECT OPHTHALMOSCOPE IO- SMALL PUPIL
4.1.6. Adjustment of Pupillary Distance
1. Rotate the Observation Angle Adjustment Knob (7) which located in both side, toward Large
Circle Mark.
2. Place a target such as your thumb etc. to front about 400 mm of the Optic part.
3. Slide the Pupillary Distance Adjustment Lever (10) as for the target become the center of
eyesight when viewing it with one-eye alternately.
4.2. THE OBSERVATION
4.2.1 How to Adjust the Illumination Brightness
Adjust the brightness turning the Brightness Adjustment Knob (4) of PSU-3 clockwise.
4.2.2 How to Change the Illumination Field
Choose a necessary Illumination Field with rotating the Aperture Change Lever (5). Three kinds of
Illumination Filed Diameter can be adjusted.
・ SMALL mark: D 19 mm
・ MEDIUM mark: D 50 mm
・ LARGE mark: D 80 mm
4.2.3. Selecting of Filter
Select a necessary filter with rotating the Filter change lever (4). Three kinds of filter: UV, Red-free
and Cobalt Blue can be selected.
・ WHITE mark: UV filter
Normally use at this position. Cutting ultraviolet rays while keeping the original color.
・ GREEN mark: Red-free filter
Darker vessels and high contrast can be obtained.
・ BLUE Mark: Cobalt Blue filter
Use for examination using fluorescein.
4.2.4. Observation Method
Holding Aspheric Lens (option product) in one hand and let illumination light in the pupillary
area of patient’s eye. The position will be stable if you attach an empty finger having an
Aspheric Lens to the face of the patient.
Then gradually move the lens away from the eye, the best position for clear observation can
be found.
Use properly by the pupil diameter.

- 13
- HALOGEN BINOCULAR INDIRECT OPHTHALMOSCOPE IO- SMALL PUPIL
Observation in Large Pupil→
Rotate Illumination Angle Adjustment Knob and
Observation Angle Adjustment Knob toward
upper side. The illumination light goes away
from observation light and observation angle
becomes large. The observation is easy, and
the binocular vision is in a good condition.
←Observation in Small Pupil
Rotate Illumination angle adjustment knob and
Observation angle adjustment knob toward
under side. The illumination light moves close
to the observation light and then the
observation angle becomes small.
Observation in Horizontal Flat Pupil→
Rotate Illumination angle adjustment knob
toward under side and the Observation angle
adjustment knob toward upper side. The
illumination light moves close to the
observation light and then the observation
angle becomes large.
←Observation in Vertical Flat Pupil
Rotate Illumination angle adjustment knob toward
upper side and the Observation angle adjustment
knob toward under side. The illumination light
moves away from the observation light and then the
observation angle becomes small.

- 14
- HALOGEN BINOCULAR INDIRECT OPHTHALMOSCOPE IO- SMALL PUPIL
Observe Peripheral of the Fundus
Observe target sclera while pressing by using Scleral depressor.
Sharing of Fundus Image→
Insert Teaching mirror to the Slit for the
Teaching mirror. Then the same image which
the examiner observes can be seen from the
side of the mirror. The Teaching Mirror can
be inserted in a both side of the Optic part.
When detaching, pull out the mirror by
pressing upper and down part.
The distance between patient’s eye and aspheric lens differ according to the diopter (D) of
the aspheric lens.
Choice of the aspheric lens
Bright and high magnification, but limited field of view…………. + 14 ~ 16 D
Normal observation………………………………………………… + 20 D
Dark and low magnification, but wide field of view………………. + 28 ~ 30 D
Dirty lens is interfere the fundus observation, therefore wipe well with dried soft cloth before
using.

- 15
- HALOGEN BINOCULAR INDIRECT OPHTHALMOSCOPE IO- SMALL PUPIL
4. OPERATION METHOD
FOR CUSTOMER PURCHASED IO- WITH POWER SUPPLY UNIT
LITHIUM ION BATTERY PACK BP-Li
4.1. THE PREPARATION
4.1.1. Lithium Ion Battery Pack BP-Li
Preparation is depending on how to wear the Battery Pack. Please check the Table and find the
suitable part.
How you wear the Battery Pack Preparation
Putting on the desk or in a pocket. It is not necessary to set any accessories to the
Battery Pack.
Suspending from your neck. Attach a Neck Strap to the
Dual ring on the top of Battery
Pack.
Please see Pic. 1
Hanging on to your belt etc. Fix a Belt hook to the Main
body of Battery pack with an
attached Screw. Tighten well.
Please see Pic. 2
Attaching to the Head Band Unit of
IO-.
Fix a Headband hook to the
Main body of Battery pack with
an attached screw. Tighten
well.
Please see pic.3
PIC. 1
PIC. 2

- 16
- HALOGEN BINOCULAR INDIRECT OPHTHALMOSCOPE IO- SMALL PUPIL
Pic. 3
4.1.2. How to Connect IO- to the Lithium Ion Battery Pack BP-Li
Connection is depending on how to wear the Battery Pack.
Using the Battery Pack as attached to the top of Head Band Unit of IO-
Attach the Battery pack to the Head
Band Fixing Knob (20) on the top of
Head band Unit of IO-.
Insert U-shaped part of Head Band
Hook to Adjustment Knob from the
back firmly to the end as shown with
arrow.
Make sure that the Hook does not
have rattling.
Using the Battery Pack as carrying or wearing with Strap or hanging on the belt
Connect IO- via included Extension
cord (12) to the Battery pack
Put Tying Ring to the Adjustment
Knob in the back of the Head Band
and fix the Extension Cord (12) with
the Ring.

- 17
- HALOGEN BINOCULAR INDIRECT OPHTHALMOSCOPE IO- SMALL PUPIL
4.1.3 Charging the Battery
1. Place the Battery charger in the flat, stable
place such as the top of the desk.
2. Insert DC Plug of AC Adapter to the
Battery charger’s input jack.
3. Insert the Power supply plug of AC adapter
to the outlet. When plugging, the Pilot lamp
(POWER) turns RED on.
4. Set the Battery to the Battery charger like
sliding as shown in picture. If the battery is
set correctly the Pilot Lamp (CHARGE)
turns ORANGE on.
The color of CHARGE Lamp changed by the conditions of charging as following.
Lamp Color Charging condition
ORANGE Charging
GREEN Charge complete (takes 2 hours)
ORANGE and BLINKING Irregular charging
It is possible to use the battery that charged by then before lamp turns GREEN on. There is no
trouble to recharge repeatedly the Battery additionally.
4.1.4. How to Attach / Detach the Battery
Insert the Battery diagonally with the terminal side forwarded to
the Battery Pack Main Unit. When the battery inserted properly,
the Stopper (6) completely returns to the original position with a
sound and maintains the Battery. Please refer the picture.
It is not possible to insert the battery in wrong direction. Please
do not insert it by force.
Detach the Battery after removing the Stopper, push the Eject
Knob to the direction of ▲ mark.
4.1.5. How to Connect / Disconnect the Cord
Connect Lamp House Plug (3) to the Receptacle (5) by picking
a rubber part of the Plug up with the finger. There is only one
connecting position and by turning a rubber part slightly you can
find the proper position easily. When properly connected, a
metal ring is locked by with the click.
Metal Ring
Rubber
Cover
Stopper

- 18
- HALOGEN BINOCULAR INDIRECT OPHTHALMOSCOPE IO- SMALL PUPIL
To take off a cord, please pick up a metal ring and just pull it up backwards.
4.1.6. How to turn on / off the IO-
After all preparations are completed, rotate the Brightness Adjustment Knob (7) of Battery Pack
then the Illumination of IO- is lit. The Brightness Adjustment Knob can operate On-Off and if turn
it clockwise the intensity of illumination increases.
The residual quantity light changes according to remaining capacity of Battery.
Pilot Lamp Color Remaining capacity of Battery
GREEN Fully charged or sufficiently
ORANGE Became around 10-15% of full charged battery
RED Became less than 10% of full charged battery
Remaining capacity of Battery is depending on the Battery condition or usage. We recommend to
charge the Battery immediately when Pilot Lamp is turned on by ORANGE or RED.
4.1.7. How to Wear IO-
1. Please loosen the Back Head Band Fixing Knob (18)
and wear the Headband, to adjust your forehead to
Forehead pad.
2. In the position which was the most stable to the head,
fasten the Back Head band fixation knob (18). It would
be more stable if position the Headband deeply as
shown in the figure.
3. Adjust the depth with turning the top Head band fixation
knob to become a good position.
4.1.8. Adjustment of Eyepiece Position
1. Holding the Optic part in one hand and loosen the Optic
part Fixing Knob (13).
2. Adjust the position of the Eyepiece with moving forward
and backward, up and down, and changing the angle to
get best viewing.
3. Tighten the Fixing Knob (13) to fix the position.
The metal ring does not come off by twist. Do not twist rubber part, it may damage the
connection.

- 19
- HALOGEN BINOCULAR INDIRECT OPHTHALMOSCOPE IO- SMALL PUPIL
4.1.9. Adjustment of Pupillary Distance
1. Rotate the Observation Angle Adjustment Knob (7) which located in both side, toward Large
Circle Mark.
2. Place a target such as your thumb etc. to front about 400 mm of the Optic part.
3. Slide the Pupillary Distance Adjustment Lever (10) as for the target become the center of
eyesight when viewing it with one-eye alternately.
4.2. THE OBSERVATION
4.2.1 How to Adjust the Illumination Brightness
To adjust the brightness turning the Brightness Adjustment Knob (4) of PSU-3 clockwise.
4.2.2 How to Change the Illumination Field
Choose a necessary Illumination Field with rotating the Aperture Change Lever (5). You can
choose one out of three kinds of Illumination Filed Diameter.
・ SMALL mark: D 19 mm
・ MEDIUM mark: D 50 mm
・ LARGE mark: D 80 mm
4.3.3. Selecting of Filter
Select a necessary filter with rotating the Filter change lever (4). You can select from three kinds
of filter: UV, Red-free and Cobalt Blue.
・ WHITE mark: UV filter
Normally use at this position. Cutting ultraviolet rays while keeping the original color.
・ GREEN mark: Red-free filter
Darker vessels and high contrast can be obtained.
・ BLUE Mark: Cobalt Blue filter
Use for examination using fluorescein.
4.2.4. Observation Method
Holding Aspheric Lens (option product) in one hand and let illumination light in the pupillary
area of patient’s eye. The position will be stable if you attach an empty finger having an
Aspheric Lens to the face of the patient.
Then gradually move the lens away from the eye, the best position for clear observation can
be found.
Use properly by the pupil diameter.

- 20
- HALOGEN BINOCULAR INDIRECT OPHTHALMOSCOPE IO- SMALL PUPIL
Observation in Large Pupil→
Rotate Illumination Angle Adjustment Knob and
Observation Angle Adjustment Knob toward
upper side. The illumination light goes away from
observation light and observation angle becomes
large. The observation is easy, and the binocular
vision is in a good condition.
←Observation in Small Pupil
Rotate Illumination angle adjustment knob and
Observation angle adjustment knob toward
under side. The illumination light moves close
to the observation light and then the
observation angle becomes small.
Observation in Horizontal Flat Pupil→
Rotate Illumination angle adjustment knob toward
under side and the Observation angle adjustment
knob toward upper side. The illumination light
moves close to the observation light and then the
observation angle becomes large.
←Observation in Vertical Flat Pupil
Rotate Illumination angle adjustment knob toward
upper side and the Observation angle adjustment
knob toward under side. The illumination light moves
away from the observation light and then the
observation angle becomes small.

- 21
- HALOGEN BINOCULAR INDIRECT OPHTHALMOSCOPE IO- SMALL PUPIL
Observe Peripheral of the Fundus
Observe target sclera while pressing by using scleral depressor.
Sharing of Fundus Image→
Insert Teaching mirror to the Slit for the
Teaching mirror. Then the same image which
the examiner observes can be seen from the
side of the mirror. The Teaching Mirror can
be inserted in a both side of the Optic part.
When detaching, pull out the mirror by
pressing upper and down part.
The distance between patient’s eye and aspheric lens differ according to the diopter (D) of
the aspheric lens.
Choice of the aspheric lens
Bright and high magnification, but limited field of view…………. + 14 ~ 16 D
Normal observation………………………………………………… + 20 D
Dark and low magnification, but wide field of view………………. + 28 ~ 30 D
Dirty lens is interfere the fundus observation, therefore wipe well with dried soft cloth before
using.

- 22
- HALOGEN BINOCULAR INDIRECT OPHTHALMOSCOPE IO- SMALL PUPIL
5. MAINTENANCE
5.1. IO- MAIN BODY
5.1.1. CLEANING
Lens part and cover glass
Please wipe dirt off with soft cloth tenderly. If you cannot remove stains, please use the commercial
glass lens cleaner. Do not touch lens with a bare finger at any time and always keep lens clean.
Terminal parts
Wipe the terminal parts with cotton swabs.
Other parts
Wipe with dry cloth or wipe with soft cloth slightly moistened with much diluted natural detergent
and dry afterwards.
Forehead Pad
It is removable and washable. Use neutral detergent and gently wash is recommended.
5.1.2. HOW TO EXCHANGE THE BULB
1. Make sure that the Power switch is off.
2. Pull up the Lamp House (1) by pushing the indent part which are in the right and left side of it
with something like a stick as shown in the picture.
3. Pull out the old Bulb from Lamp House.
4. Insert the new one.
5.1.3. STORAGE
・ Operating temperature range: from 10 C to 40 C (50 F to 104 F)
・ Storage temperature range: from -20 C to 60 C (-4 F to 140 F)

- 23
- HALOGEN BINOCULAR INDIRECT OPHTHALMOSCOPE IO- SMALL PUPIL
5.1.4. SAFEKEEPING AND TRANSPORTATION
Keep it in an original case and avoid any pressure or impact.
5.1.5. DISPOSAL
Dispose it according to local garbage rules.
5.2. POWER SUPPLY UNIT PSU-3
5.2.1. CLEANING
Main Body
Please wipe with soft cloth tenderly. If you cannot remove stains, please use the commercial glass
lens cleaner. Do not touch lens with a bare finger at any time and always keep lens clean.
Terminal parts
Wipe the terminal parts with cotton swabs.
5.2.2. STORAGE
・ Operating temperature range: from 10 C to 40 C (50 F to 104 F)
・ Storage temperature range: from -20 C to 60 C (-4 F to 140 F)
5.2.3. SAFEKEEPING AND TRANSPORTATION
Keep it in an original case and avoid any pressure or impact.
5.2.4. DISPOSAL
Dispose it according to local garbage rules.
5.3. LITHIUM ION BATTERY PACK BP-LI
5.3.1. CLEANING
Main Body
Please wipe with soft cloth tenderly. If you cannot remove stains, please use the commercial glass
lens cleaner. Do not touch lens with a bare finger at any time and always keep lens clean.
Terminal parts
Wipe the terminal parts with cotton swabs.
5.3.2. STORAGE
・ Operating temperature range: from 10 C to 40 C (50 F to 104 F)
・ Storage temperature range: from -20 C to 60 C (-4 F to 140 F)
5.3.3. SAFEKEEPING AND TRANSPORTATION
Keep it in an original case and avoid any pressure or impact.
5.3.4. DISPOSAL
Dispose it according to local garbage rules.

- 24
- HALOGEN BINOCULAR INDIRECT OPHTHALMOSCOPE IO- SMALL PUPIL
6. TROUBLESHOOTING
Please check the following contents when not working properly. If the problem is not solved, stop
use and please contact the dealer immediately. Contact information is available in the end.
6.1. IO- MAIN BODY
Problem Possible Causes Solution
Illumination is not
turned on.
・ Cord are not properly connected.
・ DC plug is not inserted.
・ Battery pack is not charged.
・
→ Please connect right.
→ Insert it.
→ Please charge the battery.
Illumination is dark
and blinks.
・ Choose a dimming filter.
・ Residual quantity turns red.
→ Please try to change the
filter.
→ Please charge.
Even full charged, not
usable long
・ Lifetime of battery is over.
→ Please ask your distributor
to exchange it.
An Illumination field is
uneven and occurs
shadow.
・ The cover glass is not clean nor
cleared?
・ The position of filter or diaphragm is not
proper.
→ Please clean.
→ Change the position until it
clicks.
An image fades
during the observation
・ Eyepieces and an observation mouth
dirty or not cleared.
・ Aspheric lens is dirty.
→ Please clean.
→ Please clean.
6.2. POWER SUPPLY UNIT PSU-3
Problem Possible Causes Solution
A pilot lamp does not
turn on
・ Not connected to an outlet.
・ Not connected to DC Jack.
・ An AC adapter is not connected.
・ Power switch is not turned on.
In case of hanger use
・ Hanger is down by various reasons.
→ Please connect.
→ Please connect.
→ Please connect.
→ Please turn on.
→ Reposition the hanger
back to the normal
position.
The IO- series does
not turn on
・ Power supply plug of the IO series is not
inserted in a receptacle.
→ Please insert.

- 25
- HALOGEN BINOCULAR INDIRECT OPHTHALMOSCOPE IO- SMALL PUPIL
6.3. LITHIUM ION BATTERY PACK BP-LI
Problem Possible Causes Solution
While charging
POWER light is not
on
・ Power supply plug is not inserted in a
power supply outlet.
・ DC plug of the AC adapter is not connected
to Jack of the battery charger.
→ Please insert.
→ Please connect.
CHARGE light is not
on (No charge)
・ Battery is not a proper.
・ Terminals of the battery is dirty or not
cleared?
→ Check the battery.
→ Please clean.
CHARGE light blinks ・ Check the same points described in
“CHARGE light is not on".
・ Reinstall the battery
→ Try again.
When attach, detach the battery
The battery is not
inserted to the Battery
Pack Main body.
・ Direction of battery is not correct.
・ Install battery to the battery pack while cord
is not disconnected.
・ The aperture of the battery is not cleared or
terminals is deformed.
→ Check direction.
→ Disconnect the cord.
→ Check and remove.
In Operation
A residual quantity
light does not turn on
・ No charge
・ Terminals of the battery is not clean or
cleared?
・ The main body of battery pack is not clean
or cleared?
→ Charge the batteries.
→ Please clean.
→ Remove and clean.
An instrument
connected to the
Battery Pack does not
turn on
・ Not connect to the proper product.
・ Glitch of the product or blow-out of the bulb.
・ Lamp House Cord is not connected to the
Battery pack.
→ Check the instrument.
→ Please check.
→ Please connect.
Even a residual
quantity light is green,
but not usable for a
long time
・ Battery lifetime is over.
→ Exchange the battery.
- 26
- HALOGEN BINOCULAR INDIRECT OPHTHALMOSCOPE IO- SMALL PUPIL
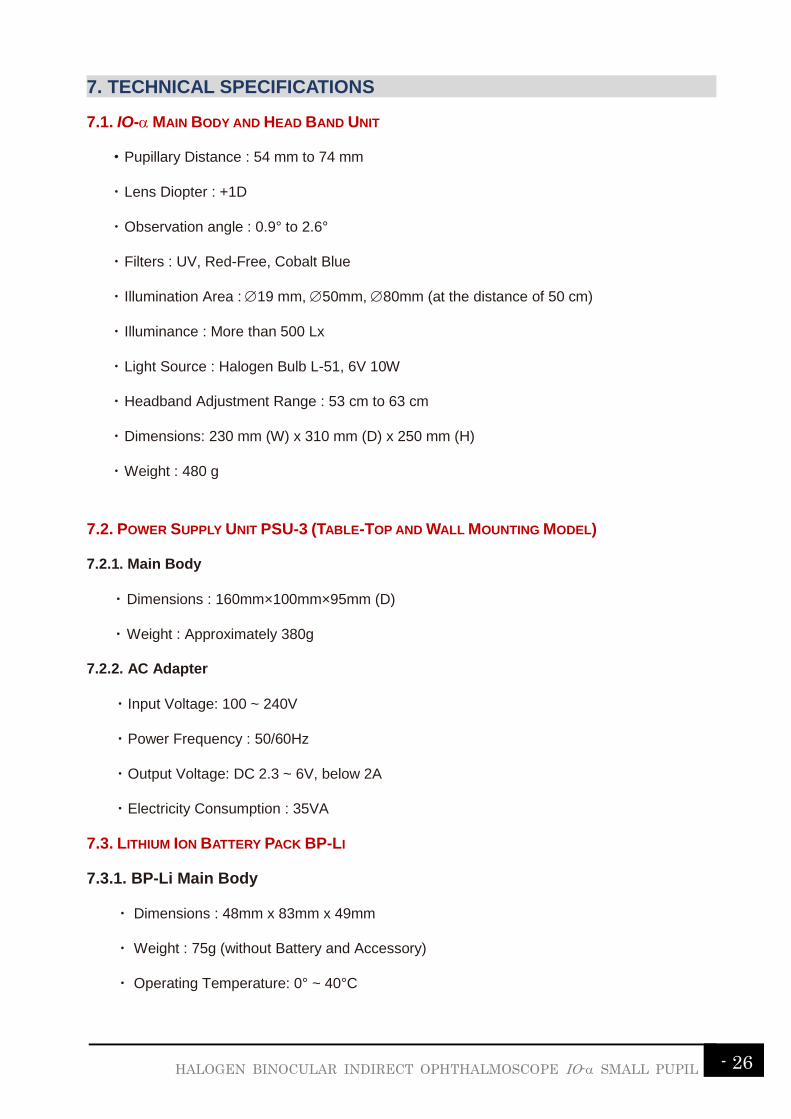
7. TECHNICAL SPECIFICATIONS
7.1. IO- MAIN BODY AND HEAD BAND UNIT
・ Pupillary Distance : 54 mm to 74 mm
・ Lens Diopter : +1D
・ Observation angle : 0.9° to 2.6°
・ Filters : UV, Red-Free, Cobalt Blue
・ Illumination Area :19 mm, 50mm, 80mm (at the distance of 50 cm)
・ Illuminance : More than 500 Lx
・ Light Source : Halogen Bulb L-51, 6V 10W
・ Headband Adjustment Range : 53 cm to 63 cm
・ Dimensions: 230 mm (W) x 310 mm (D) x 250 mm (H)
・ Weight : 480 g
7.2. POWER SUPPLY UNIT PSU-3 (TABLE-TOP AND WALL MOUNTING MODEL)
7.2.1. Main Body
・ Dimensions : 160mm×100mm×95mm (D)
・ Weight : Approximately 380g
7.2.2. AC Adapter
・ Input Voltage: 100 ~ 240V
・ Power Frequency : 50/60Hz
・ Output Voltage: DC 2.3 ~ 6V, below 2A
・ Electricity Consumption : 35VA
7.3. LITHIUM ION BATTERY PACK BP-LI
7.3.1. BP-Li Main Body
・ Dimensions : 48mm x 83mm x 49mm
・ Weight : 75g (without Battery and Accessory)
・ Operating Temperature: 0° ~ 40°C

- 27
- HALOGEN BINOCULAR INDIRECT OPHTHALMOSCOPE IO- SMALL PUPIL
・ Storage Temperature: ‐20° ~ 60°C
・ Applied Standard : IEC60601-1-2 : 2004
7.3.2. Lithium Ion Rechargeable Battery 2400RS
・ Dimension : 39mm x 72 mm x 21mm
・ Weight : 108g
・ Capacity : 2400mAh (Capable to operate IO-α for approximately 80min.)
・ Output Voltage : DC 7.4V
7.3.3. Battery Charger
・ Dimensions : 62mm x 120mm x 25mm
・ Weight : 110g
・ Input Voltage: 12VDC 1A
7.3.4. AC Adapter
・ Input Voltage : 100V ~ 240VAC
・ Power Frequency : 50 ~ 60Hz
・ Output Voltage: 12VDC 1.25A
7.3.5. Package
・ Dimensions : 310mm x 190mm x 90mm
・ Total Weight : Approximately 800g
7.4. CARRYING CASE
・ Dimensions : 460mm×320mm×150mm
・ Weight: Approximately 4600g (including IO-, PSU-3 and Standard Accessories)
7.5. STANDARD ACCESSORIES
・ Scleral Depressor
・ Teaching Mirror
・ Detachment Chart
・ Spare Bulb

- 28
- HALOGEN BINOCULAR INDIRECT OPHTHALMOSCOPE IO- SMALL PUPIL
7.6. OPTION
7.5.1. Aspheric Lens
・ Diopter : 20D
・ Magnification: 3.08 times
・ Visual Field: 60°
7.5.2. Desk stand
・ Height: 32 cm
・ Base: 18 cm x 18 cm
8. TECHNICAL SUPPORT AND CONTACT INFORMATION
Please contact the following address if you have any questions or need technical support. Our
phone customer support is available from 9:15 am to 5:40 pm Monday to Friday (local time in
Japan).
NEITZ INSTRUMENTS CO., LTD.
36-13 Wakamatsu-Cho, Shinjuku-Ku, Tokyo 162-0056, JAPAN
Tel.: (+81) 03-3204-2068
Fax: (+81) 03-3204-2069
E-mail: [email protected]
URL: www.neitz-ophthalmic.com