Embed Size (px)
Citation preview
Ocularis
OnSSI S2 Control Service Ocularis to NetBox Add-On
Installation & Configuration Guide
© 2019 On-Net Surveillance Systems Inc.

OnSSI S2 Control Service Installation & Configuration Guide
2
On-Net Surveillance Systems, Inc.
One Blue Hill Plaza, 7th Floor, PO Box 1555 Pearl River, NY 10965
Phone: (845) 732-7900 | Fax: (845) 732-7999 www.onssi.com
S2 Security Corporation One Speen St. Suite 300 Framingham, MA 01701
S2 Support: 508 663-2505 www.s2sys.com
Ocularis-NetBox 5.6.49.1
00001302019-0959-5.6.49.1
Legal Notice
This product manual is intended for general information purposes only, and due care has been taken in its preparation.
Any risk arising from the use of this information rests with the recipient, and nothing herein should be construed as constituting any kind of warranty.
© 2002-2019 On-Net Surveillance Systems, Inc. All rights reserved. OnSSI and the ‘Eye’ logo are registered trademarks of On-Net Surveillance Systems, Inc. Ocularis, Ocularis Client, Ocularis Client Lite, Ocularis Video Synopsis, NetEVS, NetDVMS, NetDVR, ProSight, NetGuard, NetGuard-EVS, NetSwitcher, NetMatrix, NetCentral, NetTransact, NetPDA and NetCell are trademarks of On-Net Surveillance Systems, Inc. All other trademarks are property of their respective owners.
On-Net Surveillance Systems, Inc. reserves the right to change product specifications without prior notice.
US patent # 8390684 B2 for Ocularis Client
Patents Applied For in the U.S. and Abroad
OnSSI S2 Control Service Installation & Configuration Guide
3
Table of Contents
Introduction .................................................................................................................................................. 5
Getting Started with S2 NetBox and OnSSI Ocularis ..................................................................................... 5
Prerequisites ............................................................................................................................................. 5
Review S2 NetBox Manuals ...................................................................................................................... 5
Review OnSSI Ocularis Manuals ................................................................................................................ 5
S2 NetBox System Description ...................................................................................................................... 6
Ocularis System Description ......................................................................................................................... 7
Requirements for OnSSI S2 Control Service.................................................................................................. 8
Hardware .................................................................................................................................................. 8
Software .................................................................................................................................................... 8
Licenses ..................................................................................................................................................... 8
Security ..................................................................................................................................................... 9
Microsoft Internet Explorer - Configuration ............................................................................................. 9
Configuring Events in Ocularis that S2 NetBox Will Use ......................................................................... 10
OnSSI S2 Control Service Install Process ..................................................................................................... 11
Prerequisites ........................................................................................................................................... 11
Install the OnSSI S2 Control Service ........................................................................................................ 11
Install Certificate on Ocularis Base / Media Server system ........................................................................ 15
OnSSI S2 Control Configuration .................................................................................................................. 21
Ocularis Server Connection Settings ....................................................................................................... 21
Settings.................................................................................................................................................... 22
Service Control ........................................................................................................................................ 22
View Log .................................................................................................................................................. 22
Configure Ocularis Base in S2 NetBox – System Administration ................................................................ 23
Video in S2 NetBox – Ocularis Base / Media Server System ....................................................................... 26
Install Heimdall.cab to access live video from Ocularis .......................................................................... 26
Verify live video from the S2 NetBox interface ...................................................................................... 27
Video in S2 NetBox – Standalone System ................................................................................................... 28
OnSSI S2 Control Service Installation & Configuration Guide
4
Install the Self Signed Certificate ............................................................................................................ 28
Install Heimdall.cab to access live video from Ocularis .......................................................................... 28
Verify live video from the S2 NetBox interface ...................................................................................... 28
Additional Setup.......................................................................................................................................... 29
Setup and verify Video Motion Detection (VMD) from Ocularis ............................................................ 29
Setup and verify video recording actions from S2 NetBox ..................................................................... 29
Setup and verify PTZ actions from S2 NetBox ........................................................................................ 29
Setup and verify preset actions from S2 NetBox .................................................................................... 29
Miscellany ................................................................................................................................................... 30
Appendix on Network Port Setup ........................................................................................................... 30
Contact Information .................................................................................................................................... 31
On-Net Surveillance Systems (OnSSI) ..................................................................................................... 31

OnSSI S2 Control Service Installation & Configuration Guide
5
Introduction This manual provides detailed instructions for installing and configuring the Ocularis to NetBox Add-On to receive OnSSI Ocularis into S2 NetBox. This assumes you have working knowledge of S2 NetBox and OnSSI Ocularis.
This is document is specifically for:
• S2 NetBox (v4.9.08 and Software Revision: 81956) • OnSSI Ocularis 5.6 (v5.6.0.341) • OnSSI S2 Control Service Installer 5.6.exe • OnSSI Auga ActiveX Installer 5.6.exe
The majority of the testing was completed on Windows Server 2008 R2 and Windows 10 using Microsoft Internet Explorer 11.
Getting Started with S2 NetBox and OnSSI Ocularis
Prerequisites
• Ocularis requires Message Queuing (MSMQ). Ensure this is installed on the Server and Client systems.
Review S2 NetBox Manuals
• Review the S2 NetBox documentation:
• Check S2 NetBox web page for all documentation.
• Check Hardware and Software requirements.
Review OnSSI Ocularis Manuals
• Review the OnSSI Ocularis documentation:
• Ocularis Installation and Licensing Guide
• Ocularis Administration User Manual
• Ocularis Client User Manual
Once all S2 NetBox and Ocularis components are installed, please synchronize the date and time for all systems being used.

OnSSI S2 Control Service Installation & Configuration Guide
6
S2 NetBox System Description S2 NetBox is a full-featured, web-based access control and event monitoring system.
• Web Interface - Delivers browser-based, unified system management and administration. • Video Integration - Works with OnSSI Ocularis video management system.
OnSSI S2 Control Service Installation & Configuration Guide
7
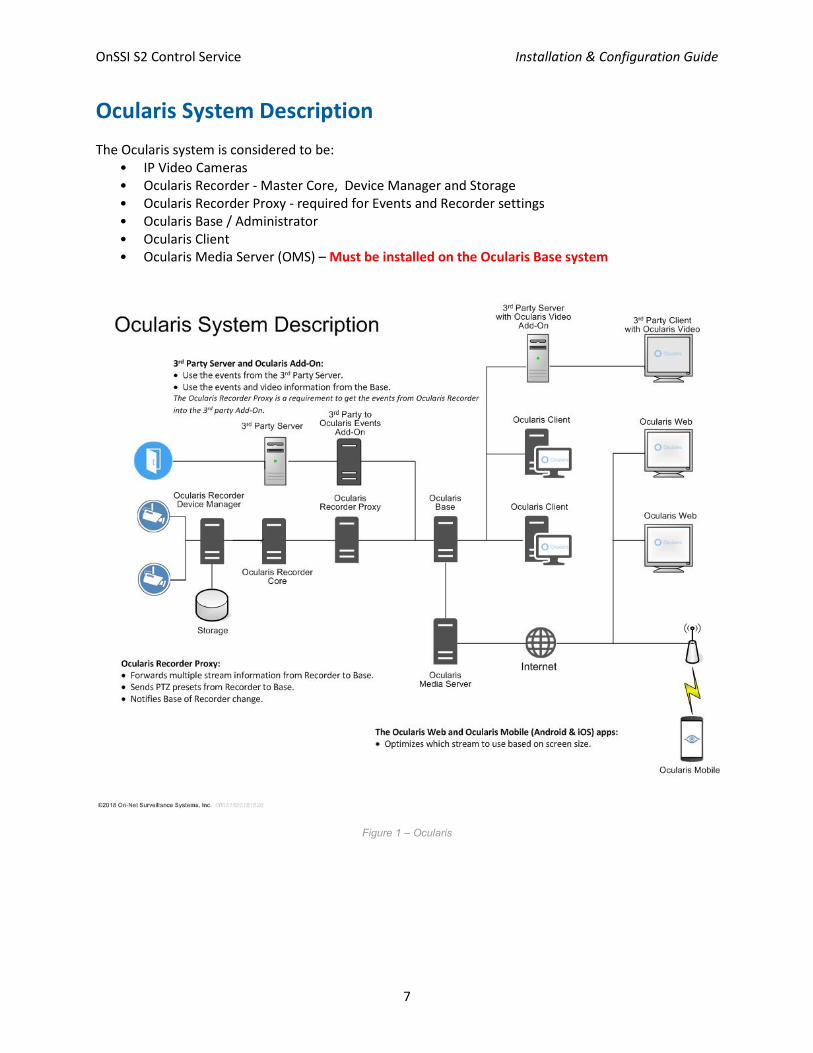
Ocularis System Description The Ocularis system is considered to be:
• IP Video Cameras • Ocularis Recorder - Master Core, Device Manager and Storage • Ocularis Recorder Proxy - required for Events and Recorder settings • Ocularis Base / Administrator • Ocularis Client • Ocularis Media Server (OMS) – Must be installed on the Ocularis Base system
Figure 1 – Ocularis

OnSSI S2 Control Service Installation & Configuration Guide
8
Requirements for OnSSI S2 Control Service
The hardware, software, and licenses required for your OnSSI S2 Control Service are listed below.
In addition to those items it will be necessary for you to have:
• Direct access to the Ocularis Base Server machine.
• Login user name and password to the S2 Network Controller with setup privileges.
Hardware
At this release the OnSSI S2 Control Service is tested to work with the following devices:
• S2 NetBox: Software Version: 4.9.08 and Software Revision: 81956 or higher is required to use the OnSSI S2 Control Service described below.
• PC with Windows 10: An administrative account on the PC is required in order to install software.
• Large Disk Drive: The OnSSI web site at http://www.OnSSI.com has online calculators to assist you in estimating the disk capacity you will need for both the server and storage. The variables to be considered in selecting drive capacities include: number of cameras, frames per second, image size and resolution, days of storage required, and the number of recording hours per day.
Software
• OnSSI
• Ocularis Base Server
• Ocularis Media Server (must be installed on Ocularis Base system)
• Ocularis Administrator
• Ocularis Recorder Proxy
• Ocularis Recorder
• OnSSI S2 Control Service: This is the Add-On. This service handles communications between the OnSSI Ocularis Base Server and the S2 NetBox. This service creates its own event log and will add itself to the Windows Firewall.
• Web Browser: Microsoft Internet Explorer 11 or above is needed because of the use of an ActiveX component.
Licenses
S2 VMS license file: In new systems, this feature is already enabled. To verify this, select Support/Utility : About and look for the line “VMS” in the list of licenses.
To order the Video Management System feature for an existing system, select Support/Utility : About, create a screen capture of the About page, and email the screen capture to [email protected], along with a purchase order for the VMS product you want to add. S2 Security

OnSSI S2 Control Service Installation & Configuration Guide
9
will send you a Product Key and Activation key that are tied to the system license identifier. Once you have received these keys, select Setup : Site Settings : Software License, enter the keys into the appropriate boxes, read and accept the terms of the license agreement, and then click Apply.
Security
The web page portion of the integration uses an ActiveX control via HTTP protocol. For security purposes the web browser which accesses the Video Viewer/ ActiveX control should only be used in a LAN or through a VPN if connecting remotely.
Microsoft Internet Explorer - Configuration
Cross Domain Resourcing Sharing is required to connect and provide video from the Ocularis Media Server if systems are not on the same domain. A setting in Microsoft Internet Explorer will allow IE to access data sources across domains.
Figure 2 – Microsoft Internet Explorer Configuration – Access data sources across domains

OnSSI S2 Control Service Installation & Configuration Guide
10
Configuring Events in Ocularis that S2 NetBox Will Use
To ensure that the necessary events are available in S2 NetBox, the Ocularis events need to be set up. The Ocularis Recorder Proxy will only report events of interest for the Ocularis system. Therefore, we need to ensure that the necessary events wanted in S2 NetBox are configured correctly.
• Server Side Motion Detection (Full Frame) • Camera Online • Camera Offline - Initial
OnSSI S2 Control Service Installation & Configuration Guide
11
OnSSI S2 Control Service Install Process
Prerequisites
Note: The generated Self Signed Certificate OnSSI.pem file is copied into C:\Program Files\OnSSI\Ocularis Media Server. This directory needs the Read Only attribute unchecked to ensure this file is properly copied.
Install the OnSSI S2 Control Service
1. This Add-On must be installed on the Ocularis Base / Media Server system.
Note: A reboot of the Ocularis Base / Media Server system is required at the end of this install step.
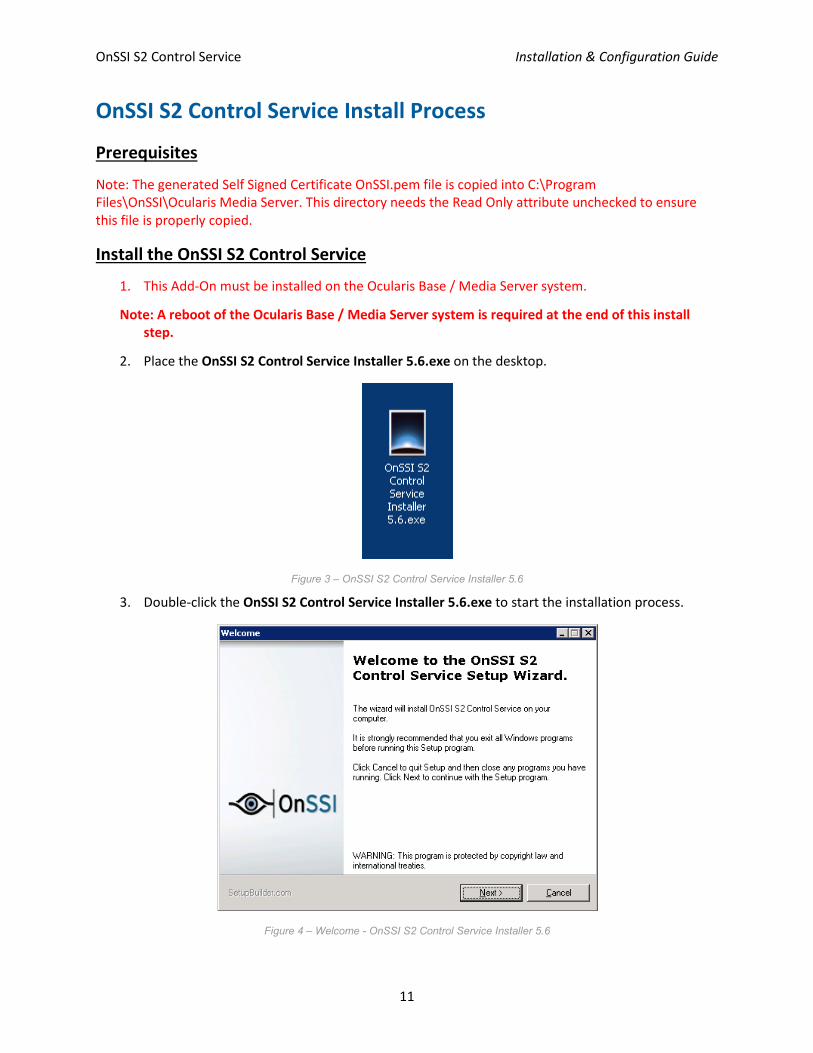
2. Place the OnSSI S2 Control Service Installer 5.6.exe on the desktop.
Figure 3 – OnSSI S2 Control Service Installer 5.6
3. Double-click the OnSSI S2 Control Service Installer 5.6.exe to start the installation process.
Figure 4 – Welcome - OnSSI S2 Control Service Installer 5.6

OnSSI S2 Control Service Installation & Configuration Guide
12
4. Click the Next > button.
Figure 5 – Select Destination Folder - OnSSI S2 Control Service Installer 5.6
5. Select where to install, use the default location (C:\Program Files\OnSSI\S2 Control Service) or Change... button to browse or enter another location for the installation files. Use the < Back button if changes are needed. Click Next > to continue.
Figure 6 – Ready to Install - OnSSI S2 Control Service Installer 5.6
6. Review the information, use the < Back button if changes are needed.
Click Next > to continue.
OnSSI S2 Control Service Installation & Configuration Guide
13
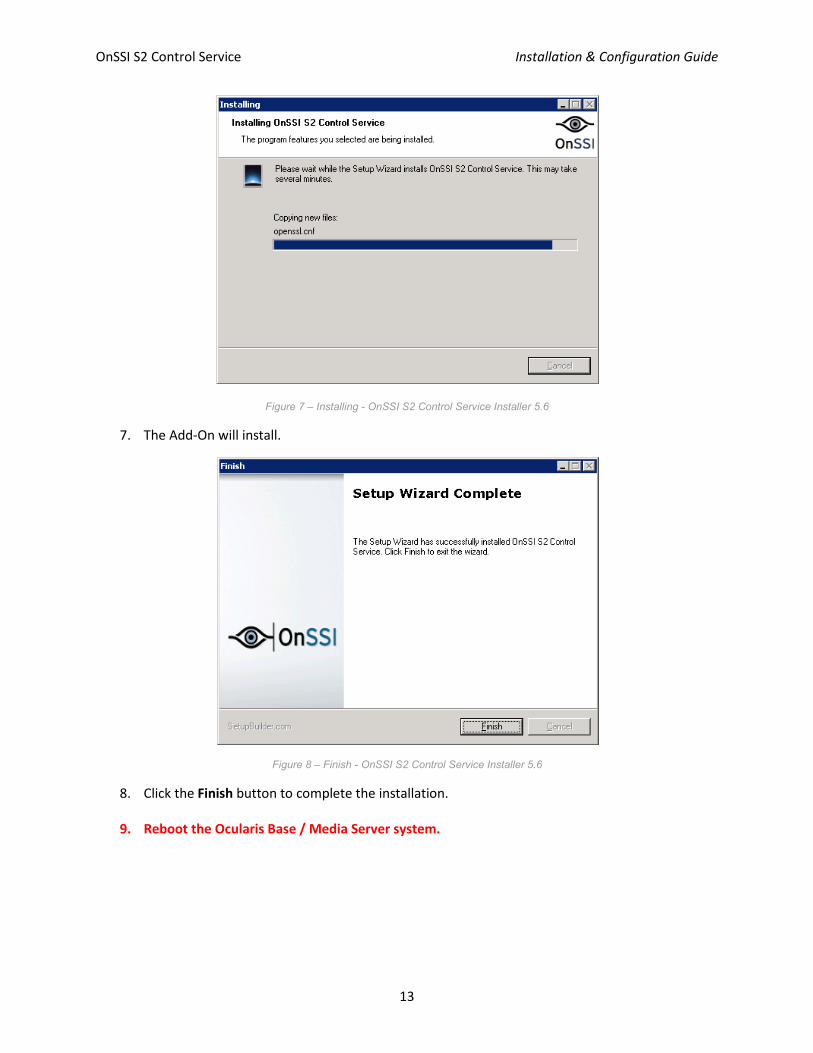
Figure 7 – Installing - OnSSI S2 Control Service Installer 5.6
7. The Add-On will install.
Figure 8 – Finish - OnSSI S2 Control Service Installer 5.6
8. Click the Finish button to complete the installation.
9. Reboot the Ocularis Base / Media Server system.

OnSSI S2 Control Service Installation & Configuration Guide
14
The Add-On components are installed at the following location by default:
C:\Program Files\OnSSI\S2 Control Service
The critical pieces of the Add-On are:
• runConfig.bat – to launch configuration
• OnSSI.pem – generated Self Signed Certificate with IP Address of OMS that is copied to C:\Program Files\OnSSI\Ocularis Media Server\OcularisMediaServer
The operational log files are:
• PostInstaller.log • Uninst_OnSSI S2 Control Service.log
In the rare occurrence that Tech Support assistance is required, these files will be requested.
The Ocularis components are installed at the following location by default:
C:\Program Files\Common Files\OnSSI
• Heimdall.dll – Ocularis Video Engine (v5.6.0.339)
C:\Program Files\OnSSI\Ocularis Media Server\OcularisMediaServer
• OnSSI.pem – generated Self Signed Certificate with IP Address of OMS
C:\Program Files\OnSSI\Ocularis Media Server\OcularisMediaServer\html\ActiveX
• Heimdall.cab – Ocularis Cabinet file needed to display Ocularis Video on the S2 NetBox web page.

OnSSI S2 Control Service Installation & Configuration Guide
15
Install Certificate on Ocularis Base / Media Server system Note: To be able to receive Ocularis video in the S2 NetBox – System Administration there is a need to install a Self Signed Certificate. This certificate (OnSSI.pem) is located on the Ocularis Base / Media Server system.
Figure 9 – OC Web – Desktop icon
1. Using Microsoft Internet Explorer on the Ocularis Base / Media Server system double-click the OC Web desktop icon to launch the Ocularis Web Client.
2. The message “There is a problem with this website’s security certificate.” will be displayed.
The security certificate presented by this website was issued for a different website's address.
Click Continue to this website (not recommended).
3. The message “There is a problem with this website’s security certificate.” will be displayed. The security certificate presented by this website was issued for a different website's address. The security certificate presented by this website was not issued by a trusted certificate authority. Click Continue to this website (not recommended).
4. The Ocularis Web Client log-in dialog will appear. Take note of the Certificate error noted on the address bar.
Figure 10 – Ocularis Web Client - Login
Click Certificate error to launch the Certificate Invalid dialog.

OnSSI S2 Control Service Installation & Configuration Guide
16
Figure 11 – Certificate Invalid
Click View certificates to launch the Certificates dialog.
5. A Certificate dialog opens. Note the Issued to and Issued by contain the IP Address of the Ocularis Base / Media Server system.
Figure 12 – Certificate
6. Click the Install Certificate… button.
OnSSI S2 Control Service Installation & Configuration Guide
17
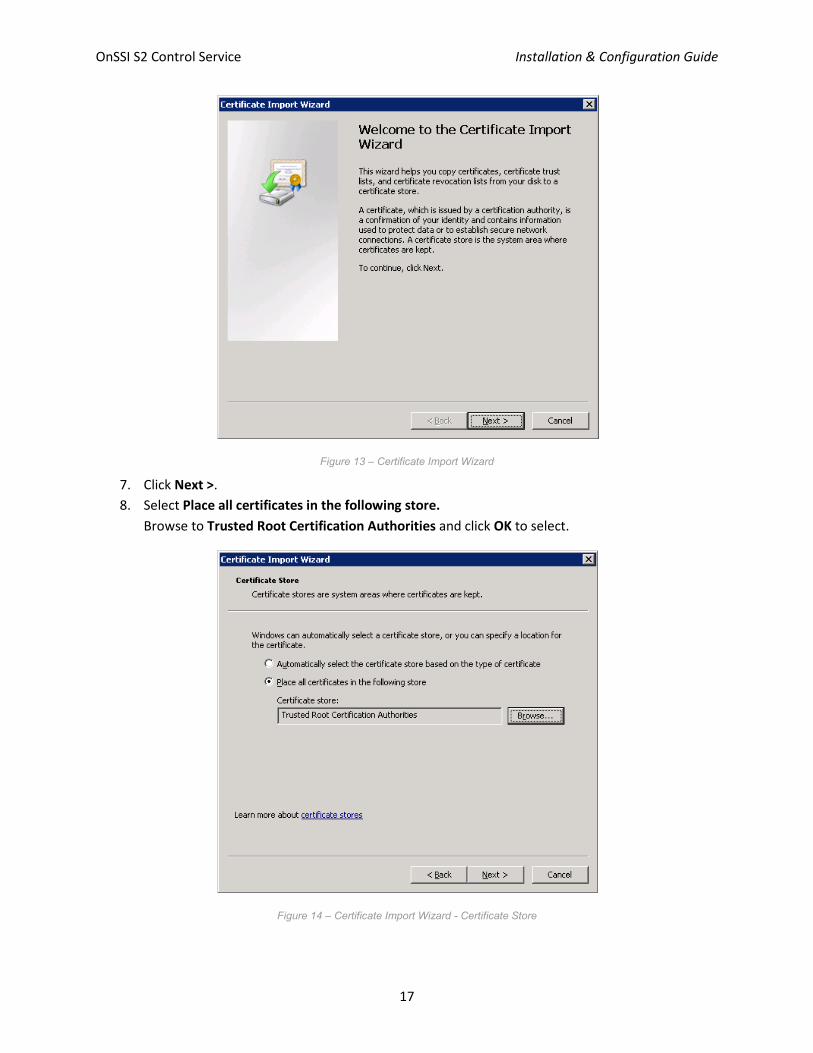
Figure 13 – Certificate Import Wizard
7. Click Next >. 8. Select Place all certificates in the following store.
Browse to Trusted Root Certification Authorities and click OK to select.
Figure 14 – Certificate Import Wizard - Certificate Store
OnSSI S2 Control Service Installation & Configuration Guide
18
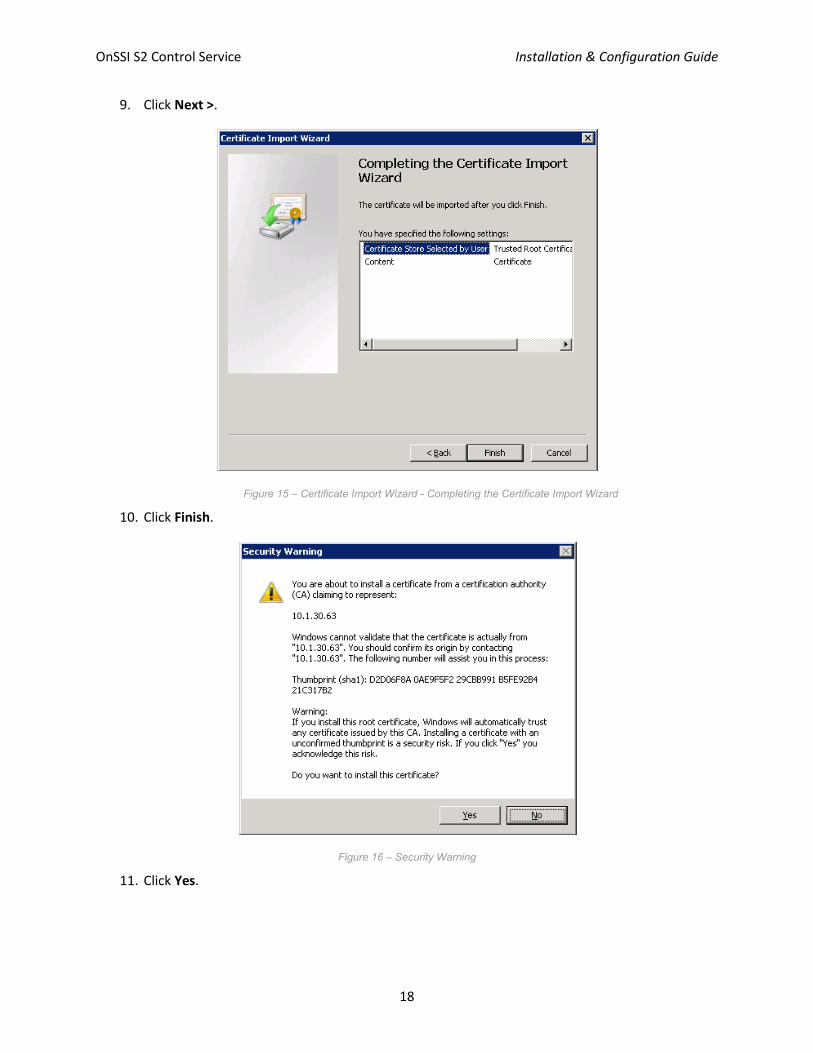
9. Click Next >.
Figure 15 – Certificate Import Wizard - Completing the Certificate Import Wizard
10. Click Finish.
Figure 16 – Security Warning
11. Click Yes.

OnSSI S2 Control Service Installation & Configuration Guide
19
Figure 17 – Certificate Import Wizard - Successful
12. Click OK.
Figure 18 – Certificate – Import Complete
13. Click OK to close Certificate dialog.

OnSSI S2 Control Service Installation & Configuration Guide
20
14. Verify the Certificate was installed.
Figure 19 – Certificates – Verify Certificate
15. Close the Microsoft Internet Explorer on the Ocularis Base / Media Server system.
16. As a check to ensure Ocularis video appears on the Ocularis Base / Media Server system double-click the OC Web desktop icon to launch the Ocularis Web Client. Using Microsoft Internet Explorer Log in to the Ocularis Web Client, select a camera, verify Ocularis video is accurate.

OnSSI S2 Control Service Installation & Configuration Guide
21
OnSSI S2 Control Configuration
Figure 20 – OnSSI S2 Control Config
1. On the Ocularis Base / Media Server system double-click on the OnSSI S2 Control Config icon to start the configuration process (runConfig.bat).
Figure 21 – OnSSI S2 Control Service configuration dialog
Ocularis Server Connection Settings
1. Ocularis Server Username is admin by default. If needed change accordingly. 2. Ocularis Server Password is admin by default. If needed change accordingly. 3. Enter the Ocularis Server IP address, this is the address of the OMS. 4. Ocularis Server Port is 80 by default. If needed change accordingly.

OnSSI S2 Control Service Installation & Configuration Guide
22
Settings
1. Click Save to save the Ocularis Server Connection Settings. This will also restart the service.
Service Control
1. Click Start to start the service. 2. Click Stop to stop the service.
View Log
1. Click the View Log button to observe log entries. This can be useful in the rare case a problem arises.
Figure 22 – OnSSI S2 Control Service configuration dialog – Service Started
2. Service Control shows as Started. 3. Click OK to close the dialog.

OnSSI S2 Control Service Installation & Configuration Guide
23
Configure Ocularis Base in S2 NetBox – System Administration 1. Using Microsoft Internet Explorer on the Ocularis Base / Media Server system, log into the
S2 NetBox using the S2 NetBox – System Administration web interface.
2. Select Configuration : Video : NVRs : Configure OnSSI NVR.
Figure 23 – Configure OnSSI NVR – initial dialog
3. Enter the IP address of the Ocularis Base / Media Server system in the NVR IP Address field.
4. Replace the entries in the Engine Username and Engine Password fields (which default to "Name" and "Pass," respectively) with the secure username and password you established for Ocularis Base / Media Server system.
5. Replace the entries in the Image Server Username and Image Server Password fields (which default to "S2NetBox" and "NetBox," respectively) with the secure username and password you established for Ocularis Base / Media Server system.
NOTE: The username and passwords you enter here must exactly match the username and password you established in the Ocularis Base / Media Server system. The name and password are case sensitive.
6. Click the Check Connection button. Operation in progress… is shown.
Figure 24 – Configure OnSSI NVR – Message from webpage – This OnSSI server can be configured…
7. Click OK.
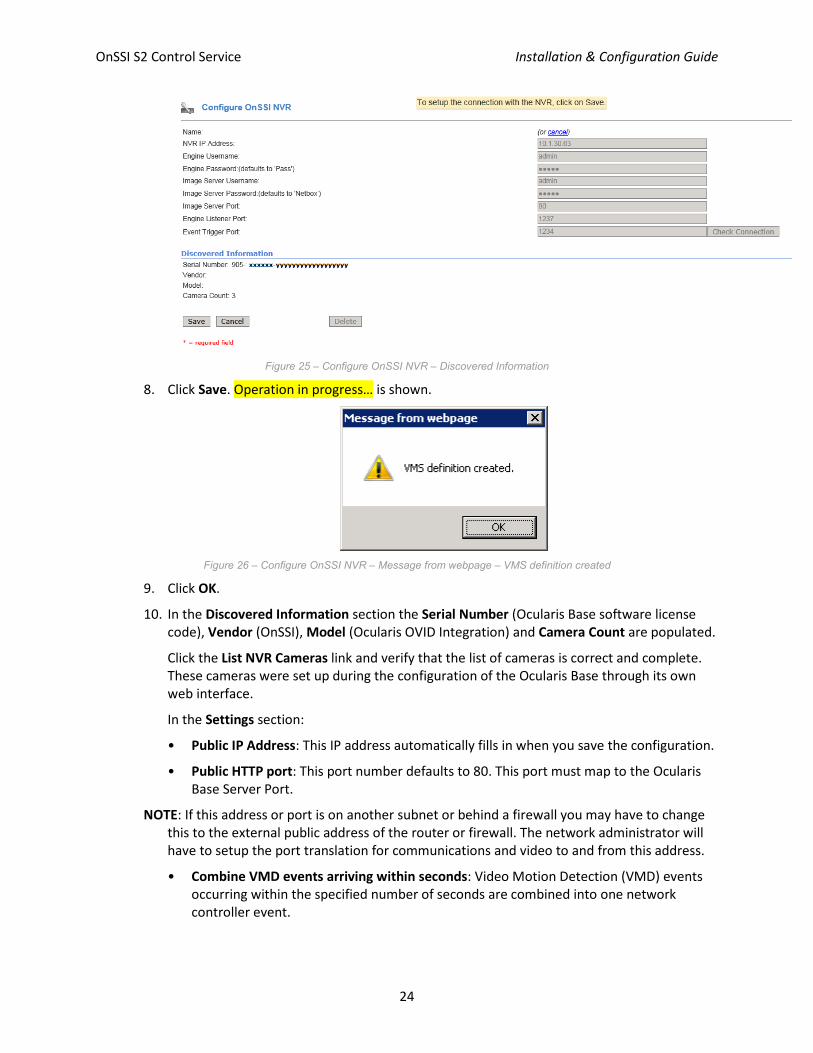
In the Discovered Information section that appears, the Serial Number and Camera Count are filled in automatically. The Serial Number is the Ocularis Base software license code.
OnSSI S2 Control Service Installation & Configuration Guide
24
Figure 25 – Configure OnSSI NVR – Discovered Information
8. Click Save. Operation in progress… is shown.
Figure 26 – Configure OnSSI NVR – Message from webpage – VMS definition created
9. Click OK.
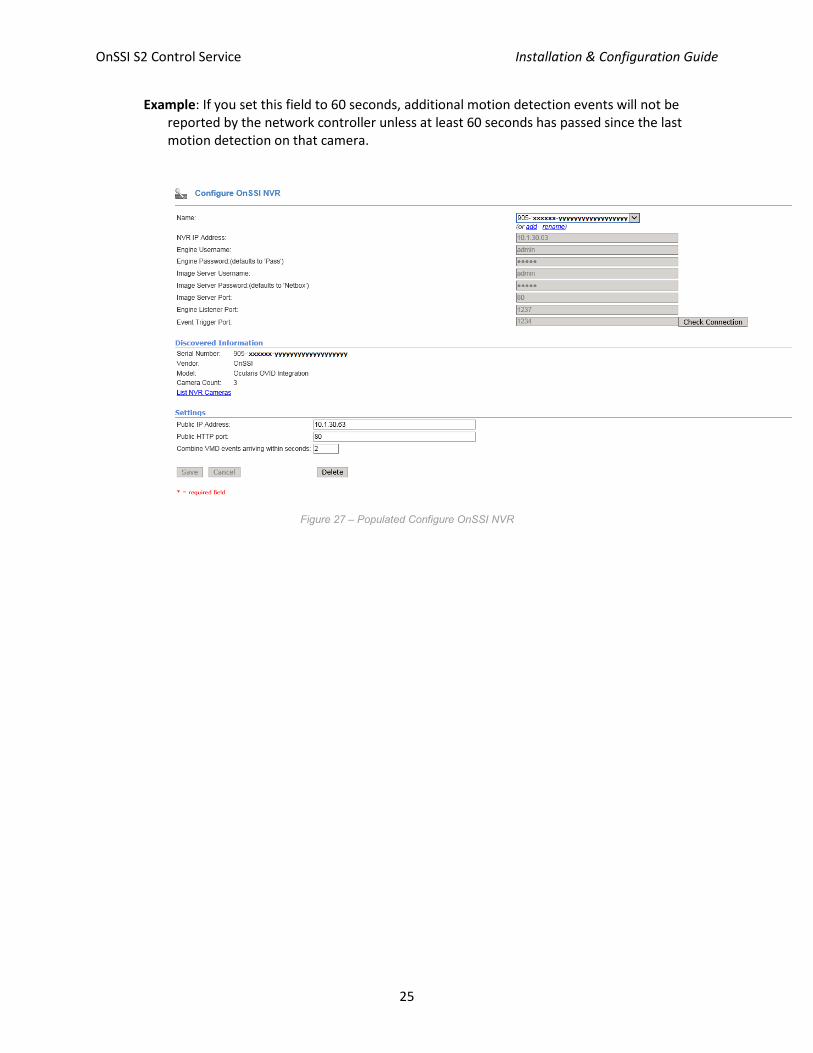
10. In the Discovered Information section the Serial Number (Ocularis Base software license code), Vendor (OnSSI), Model (Ocularis OVID Integration) and Camera Count are populated.
Click the List NVR Cameras link and verify that the list of cameras is correct and complete. These cameras were set up during the configuration of the Ocularis Base through its own web interface.
In the Settings section:
• Public IP Address: This IP address automatically fills in when you save the configuration.
• Public HTTP port: This port number defaults to 80. This port must map to the Ocularis Base Server Port.
NOTE: If this address or port is on another subnet or behind a firewall you may have to change this to the external public address of the router or firewall. The network administrator will have to setup the port translation for communications and video to and from this address.
• Combine VMD events arriving within seconds: Video Motion Detection (VMD) events occurring within the specified number of seconds are combined into one network controller event.
OnSSI S2 Control Service Installation & Configuration Guide
25
Example: If you set this field to 60 seconds, additional motion detection events will not be reported by the network controller unless at least 60 seconds has passed since the last motion detection on that camera.
Figure 27 – Populated Configure OnSSI NVR

OnSSI S2 Control Service Installation & Configuration Guide
26
Video in S2 NetBox – Ocularis Base / Media Server System
Install Heimdall.cab to access live video from Ocularis
1. Using Microsoft Internet Explorer on the Ocularis Base / Media Server system, log into the S2 NetBox using the S2 NetBox – System Administration web interface.
2. Select Monitor : Cameras.
3. Click an individual camera to select it. The camera pane for that individual camera is launched.
4. The first time may take some time to download and install the Heimdall.cab file from the Ocularis Base / Media Server system.
You will be prompted to install the Heimdall.cab file. This is required.
Figure 28 – Install the Add-On from OnSSI
5. Click Install.
NOTE: If the system that connects to the S2 NetBox does not have internet access, the OnSSI Auga ActiveX Installer 5.6 will have to be executed on that system to register the ActiveX control.
6. You will see a Security Warning message in the control when it connects to the Ocularis Base / Media Server system.
Figure 29 – Security Warning
7. Click Install.
8. Wait for the download and installation of Heimdall.cab to complete. The Video Stream pane will show black with the Ocularis logo.
9. Exit from the S2 NetBox – System Administration web interface by closing the Microsoft Internet Explorer session.

OnSSI S2 Control Service Installation & Configuration Guide
27
Verify live video from the S2 NetBox interface
1. Using Microsoft Internet Explorer on the Ocularis Base / Media Server system, log into the S2 NetBox using the S2 NetBox – System Administration web interface.
2. Video Stream pane is present with the default camera selected. Verify live video is present.
Figure 30 – Video Stream – Live Video
OnSSI S2 Control Service Installation & Configuration Guide
28
Video in S2 NetBox – Standalone System
Install the Self Signed Certificate
Note: To be able to receive Ocularis video in the S2 NetBox – System Administration there is a need to install a Self Signed Certificate. This certificate (OnSSI.pem) is located on the Ocularis Base / Media Server system.
1. Repeat the previous steps to install the certificate on the standalone system. Use Microsoft Internet Explorer on the standalone system access the Ocularis Web Client.
Install Heimdall.cab to access live video from Ocularis
1. Repeat the previous steps to install the Heimdall.cab on the standalone system.
Note: The first time may take some time to download and install the Heimdall.cab file from the Ocularis Base / Media Server system.
Verify live video from the S2 NetBox interface
1. Using Microsoft Internet Explorer log into the S2 NetBox using the S2 NetBox – System Administration web interface.
2. Video Stream pane is present with the default camera selected. Verify live video is present.
OnSSI S2 Control Service Installation & Configuration Guide
29
Additional Setup
Setup and verify Video Motion Detection (VMD) from Ocularis
1. Ensure that you have configured VMD events on the Ocularis Recorder and Ocularis Base / Media Server system. You can set the field of motion and sensitivity per camera.
2. Using Microsoft Internet Explorer, log into the S2 NetBox using the S2 NetBox – System Administration web interface.
3. Select Configuration : Alarms : Events and define an S2 event.
4. Select Configuration : Alarms : Virtual Inputs and assign your S2 event to an Ocularis connected camera Video Motion Event. Make sure the Virtual Input is Always Armed or using a currently active time specification. Also verify that both the Virtual Input and the Video Motion Event are Enabled.
5. Select Monitor : Monitoring Desktop and create motion on that camera.
6. Verify that your S2 event was triggered.
Setup and verify video recording actions from S2 NetBox
1. Using Microsoft Internet Explorer, log into the S2 NetBox using the S2 NetBox – System Administration web interface.
2. Select Configuration : Alarms : Events and define an S2 event with a Record Video action. Be sure to select an Ocularis connected camera.
3. Assign a trigger to this record video event. You can select Configuration : Alarms : Inputs and assign the event to the Off-normal Event, or you can select Configuration : Access Control : Portals and assign the event to the System-wide : Held state of a portal.
4. Select Monitor : Monitoring Desktop and trigger the event.
5. Verify that the event was triggered and click the video icon to view the recorded video.
Setup and verify PTZ actions from S2 NetBox
1. Using Microsoft Internet Explorer, log into the S2 NetBox using the S2 NetBox – System Administration web interface.
2. Select PTZ camera.
3. Move the camera with PTZ commands. Verify that the PTZ move was triggered.
Setup and verify preset actions from S2 NetBox
1. Using Microsoft Internet Explorer, log into the S2 NetBox using the S2 NetBox – System Administration web interface.
2. Select PTZ camera with configured presets.
3. Move the camera with preset commands. Verify that the preset move was triggered.

OnSSI S2 Control Service Installation & Configuration Guide
30
Miscellany
Appendix on Network Port Setup
The OnSSI S2 Control Service software installed above adds itself to the list of applications allowed to open ports on the Firewall.
• Port 3010 is opened by the OnSSI S2 Control Service software for the S2 NetBox to initiate configuration communications to and from the Ocularis Base Server, as well as to send commands to the Ocularis SDK to control cameras.
• Port 80 must be open for the Ocularis Base Server.
NOTE: If you change this port, you will have to change the Image Server Port default on the Configure OnSSI NVR page of the security application, as noted in the procedure above.
If the S2 NetBox and the Ocularis Media Server are on different subnets then routers and firewalls need the following ports open:
• Open port 3010 on the router in front of the Ocularis Base Server for the S2 NetBox to initiate configuration communications to the Ocularis Base Server, as well as to send commands to the Ocularis SDK such as, “start/stop recording” and “move to preset.”
• Open port 3010 on the router in front of the S2 NetBox for the Ocularis Base Server to report video motion events to the S2 NetBox.
• Open port 80 on the router in front of the Ocularis Base Server for the browser to pull a video feed from the Ocularis Base Server. If you changed this port you will have to open the port you specified there.
If the Ocularis Base Server is behind a NAT router, the S2 NetBox must also be behind that same NAT router.
OnSSI S2 Control Service Installation & Configuration Guide
31
Contact Information
On-Net Surveillance Systems (OnSSI)
One Blue Plaza
7th Floor
P.O. Box 1555
Pearl River, NY 10965
Website: www.onssi.com
General: [email protected] 845.732.7900
Fax: 845.732.7999
Sales Support: [email protected] 845.732.7900 x 1
PreSales Support [email protected] 845.732.7900 x 2
Technical Support: [email protected] 845.732.7979
Training: [email protected] 845.732.7900 x 4
Marketing: [email protected] 845.732.7900 x 5


![Ocularis Presentation 0908[2]](https://img.dokumen.tips/doc/110x75/554b4a9bb4c905b5378b5393/ocularis-presentation-09082.jpg)