Embed Size (px)
Citation preview


i
Index A. Features .................................................................................... 1
B. Specifications ............................................................................ 2
C. Product Appearance ................................................................. 3
D. Product Dimensions .................................................................. 4
E. Installation Instructions.............................................................. 5
F. Start / Stop Recording ............................................................... 6
G. Playback ................................................................................... 8
1. Onsite Playback .................................................................... 8
2. Playback On PC Client ........................................................ 10
H. Recording Set Up .................................................................... 13
I. Snapshop ................................................................................ 15
J. SD Card Formatting ................................................................ 15
K. Firmware Upgrade Operating Steps ....................................... 19

1
A. Features 1. Suitable for all personal vehicles, taxi, buses, trucks and etc. 2. Easy to install and compact size to prevent blocking the
driver's view. 3. Video record on outside driving conditions and audio record
inside the vehicle simultaneously. 4. 2.9mm lens, apx. 120 degrees viewing angle. 5. Image data is securely stored on Micro-SDHC Card, and
sudden disconnection from unexpected shock is completely prevented.
6. Simply Plug-n-Play. 7. Date/Time can be shown on the display. 8. Quick search on ALL event log. 9. Precisely recorded driving event to the very last second right
before the power is cutoff. 10. G-sensor and Image data are recorded and playable on client
software. 11. Provide G-sensor activates when system detects a strong
shock. Emergency recording starts automatically and the data is securely saved and cannot be overwritten.
12. User-friendly client software. 13. Multiple recording formats and recording frames per second
(FPS) selections. 14. Built-in synchronous single-channel microphone. 15. AV connection from the main unit to the LCD displays for onsite
playback and operates with an IR remote controller. 16. Special recording format. No built-in lithium battery required
and may sustain exposing under the sunlight for a period of time without causing explosion.
17. Use extraordinary compression engine with data files unmodified to construct the best recorder. A well built machine with sophisticated compression engine to protect valuable data.
18. Without any electromagnetic radiation or any electromagnetic interference, the car will not interfere with GPS or wireless devices. No electromagnetic radiation leaked out or electromagnetic interference to any electronic devices.

2
B. Specifications Items Specification
System NTSC/PAL
Chipset H.264 compression chipset
Sensor VGA CMOS Sensor
View Angel 2.9mm lens apx. 120 degrees viewing angle.
Voltage 5V±5%; 400mA
Operating Temp -10℃~ +70 ℃ (Inside vehicle)
Storage DeviceSilicon Power or Transcend Micro SDHC card Class 6 or above, (min capacity 4G or above)
Recording Frame
640x480 auto-cycling record , highest 30fps(NTSC) / 25fps(PAL)
Content Date, video, voice, G-sensor data.
Recording Format
Specific format for player software.
MicrophoneBuilt-in synchronous single-channel microphone.
Microphone on/off, adjustable setting via player or remote controller.
Time Setting Time setting on micro SD card via player.
Input / Output Device
(a)TV-Out (1 Vp-p composite video output,75 ohms)
(b) red light: recording
(c) green light: Power.
(d) emergency button
G-Sensor built-in Internal 3D G-Sensor
Accessories
(a) Driver CD (b) 5V cigarette Power adapter (c) Remote controller (d) AV output cable (e) User manual
(f) Card reader (g)SD Card (optional)
Important Notice
(a) SD card must be formatted by client software first to be used properly.
(b) Machine must be installed in the area that windshield wipers can be reached.
(c) Time zone must setup on client software in order to display correctly.
(d) Independent partition storage space reserved for emergency recording data which cannot be overwritten by normal cycling data.
(e) 80MB is reserved for other data storage purpose and it is normal PC detecting this much space.
(f) Switchable video signal: NTSC and PAL on SETUP page on client software.

3
C. Product Appearance
Front View
Back View
Side View
Lens
DC5V
AV output
MICRO SD card
Normal recording
Power light
Emergency button

4
D. Product Dimensions
unit:mm

5
E. Installation Instructions
Make the bracket facing upward. Assemble the suction discs and
insert Micro SD card.
Set up the machine in a proper
position. Tilt to adjust the viewing angle.
Connect the power cable. Plug in the cigarette adapter,
Connect the power cable.
The green indicator will light up. Flashing red light: recording in
progress.
6
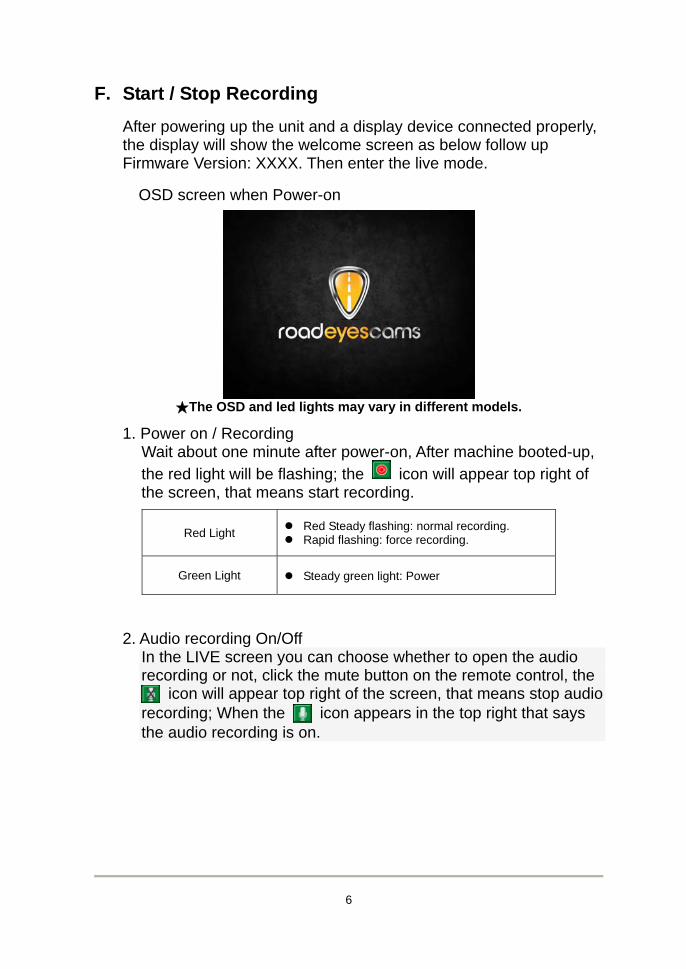
F. Start / Stop Recording
After powering up the unit and a display device connected properly, the display will show the welcome screen as below follow up Firmware Version: XXXX. Then enter the live mode.
OSD screen when Power-on
★The OSD and led lights may vary in different models.
1. Power on / Recording Wait about one minute after power-on, After machine booted-up, the red light will be flashing; the icon will appear top right of the screen, that means start recording.
Red Light Red Steady flashing: normal recording. Rapid flashing: force recording.
Green Light Steady green light: Power
2. Audio recording On/Off In the LIVE screen you can choose whether to open the audio recording or not, click the mute button on the remote control, the
icon will appear top right of the screen, that means stop audio recording; When the icon appears in the top right that says the audio recording is on.

7
3. G-Sensor
When the icon appears in the top right of LIVE screen, it means that no G-Sensor or no abnormal signal; when the icon appears in the top right it means compulsory recording
button is pressed, enable enforced recording; when the icon appears in the top right that says G-Sensor detected abnormal vibration, enable enforced recording.
4. Turn Off/Stop Recording Power off to stop recording. The memory card is safe to remove from the unit and play the saved data.

8
G. Playback Two operating methods: Onsite playback with remote controller and playback via client software on PC.
1. Onsite Playback
Operating with Remote Control.
a. Description of Remote Controller as below.
Key Icon Function Description
arrow key Upward file selection, enter password.
arrow key Downward file selection, enter password.
arrow key Left file selection, enter password.
arrow key Right file selection, enter password.
Enter key Confirm file to display & password.
Menu key Display close, show firmware version.
Mute key Volume On/Off.
Play key Enter into playback page and playback
files.
Fast Forward key
Fast forward.
Back Forward key
Rewind.
Pause key Pause.
Stop key Stop and return to menu.
Mode key Language change during playback or
index page.
Playback key Enter/Exit playback page.
Enforced
recording key
Can be operate manually, to keep and
lock the file be covered by others.
b. Description of password operation in playback menu
Log-in password to onsite playback menu (shown as below figure)

9
i. Choose to enter log-in page, choose to key-in
password, select to next step. After log-in password, choose to enter playback page.
ii. While exiting playback page, select to go back to LIVE view.
★ If there is no password setup for software of PC client,
select to enter menu of playback page directly. ★ The first password string is shown as * for protection of
host info. After key-in the first password and move forward to next one.
c. Operating description of playback page
i. Use to move and highlight the file you wish to view.
ii. Use to move to next playback page. iii. After selecting the desired file to playback, press to
enter playback. iv. Press to pause. Press to resume playback mode. v. Press to exit and back to playback page.
★ Select to exit playback page and enter into LIVE view.

10
2. Playback On PC Client
Q:How to playback file of SD card after recording? Ans:Please follow the following instructions to playback records.
Press and pop out the SD card. Remove the card from the machine.
Insert the SDHC card into the card
reader (please make sure the direction is correct).
Connect the card reader to the USB slot on PC.
(5) Read folder of memory card; or backup data to path of PC client “C:\BlackBox folder”.
(6) Select file to display: execute CarBox2.exe , refer to
below figure, push Play button ; select memory card
or select “Open documentation” , choose files of memory card or hard disk to display. Click Pause button
to pause display while the file is on playback.
★Auto installation of CarBox2 software should be installed first and then execute software operation.

11
Player i. Viewer Interface
ii. Description for icons of viewer
Detail Figure Info Functions
X: Horizontal G Value for left and right sides of driving vehicle.
Y: Horizontal G Value for front and back sides of driving vehicle.
Z: Floating G Value of driving vehicle.
Timing Bar.
Selection of playback Speed.
G-Sensor
Display speed & setting
Volume Setting
Back to Menu
Menu Setting

12
Volume adjustment.
Previous File Play previous file.
Previous Frame Previous frame (freeze-frame).
Playback Key Playback records.
Pause Pause play files.
Stop Stop play files.
Play Play files/records.
Next Frame Next frame (freeze frame).
Next File Select next file to play.
Open File Backup files.
Option Setting Setting detail functions.
Open Folder Select folder & file.
Snapshot Take a photo from recording data.
SD Card Setting Format SD Card, Language and Version setting..

13
H. Recording Set Up 1. Insert micro SD card to card reader of PC client before setting.
2. Option setting of software shown below.
Detail Figure Info Functions
1. Password: encrypt micro SD card for prevention of getting any info. The string of password is limited as 15 characters. ★Please confirm case and record password setting to avoid forgetting.
14
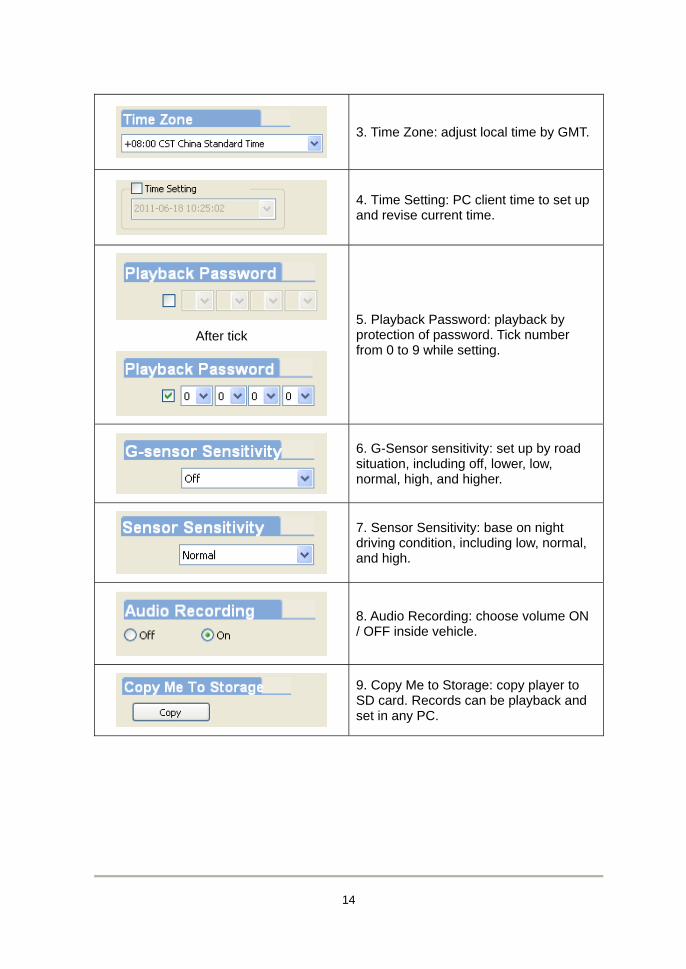
3. Time Zone: adjust local time by GMT.
4. Time Setting: PC client time to set up and revise current time.
After tick
5. Playback Password: playback by protection of password. Tick number from 0 to 9 while setting.
6. G-Sensor sensitivity: set up by road situation, including off, lower, low, normal, high, and higher.
7. Sensor Sensitivity: base on night driving condition, including low, normal, and high.
8. Audio Recording: choose volume ON / OFF inside vehicle.
9. Copy Me to Storage: copy player to SD card. Records can be playback and set in any PC.

15
I. Snapshop
Q: How to use the snapshot function to get the picture from playback file on micro SD card?
Ans: While playback the recorded file of SD card, click the icon then snapshot the image and save into your PC. Default message box is shown by snapshot folder of CarBox2.exe.
J. SD Card Formatting
Two ways to format the SD card, format and restore. Q: When should you「format」or「restore」the SD CARD? Ans:
1.「Format」SD card: When you use the SD card for the very first time or a brand new card, you should format it in order to use it correctly.
2.「Restore」SD card: When you have backup the recorded files into PC and want to use the SDHC card for other purposes, you have to restore it first so it can be used correctly.

16
Please follow the steps below: 1. Insert the SD card into card reader, then insert card reader to
USB slot in PC side (refer to the charts)
Notice
1
Before formatting SD memory card, please ensure to unlock it first.
2
If the card is unlocked but still cannot be formatted, this might be caused by Window Vista / 7 security restrictions. Please run the program as Administrator to prevent from this problem.
2. Execute the player “CarBox2.exe” into main page (refer to the charts below).
3. Format procedures:
(1) Click icon to into the screen as below.

17
(2) Select the location of SD card.
(3) 「format」or「restore」the SD card.
(3.1)「format」SD card (3.1.1) Click「Format」button, click「yes」to start
formatting on the pop-up dialog window.
(3.1.2) Pop-up the format finished dialog window.
(3.1.3) Click「OK」and re-insert the SD card to do relative setting.
★The original settings are completely eliminated after formatting the SD card. The SD card must reset the relevant settings. Otherwise it operates abnormally.
(3.2) 「restore」SD card (3.2.1) Click「restore」button and it will pop-up the
dialog window, click「yes」to start restoring.
(3.2.2) System will show up「Restore this disk」dialog window.

18
(3.2.3) Check the quick format and click "Start" to
format. After formatting is complete please click "OK", then "Close" dialog window.
(3.2.4) Click "OK" to finish restore SD card.
★After completion, you can use the memory card for other purposes.

19
K. Firmware Upgrade Operating Steps
Please follow the steps to upgrade: 1. Put the memory card into computer, using old version player to
backup the important file to computer, then shut down the old version player and start firmware upgrade procedures.
2. Insert the memory card into the card reader, Connect the card reader with the PC. Click the new version player, to open player main menu
3. Using format tool in new version player, select location of the memory card.

20
Clear all data in memory to Avoid incompatibility caused by not properly stored records after formatting.The memory card will automatically exit Windows sector after formatting completed.
4. Remove the memory card from the card reader and re-insert it.
(After formatting, the remaining capacity will show 80MB)
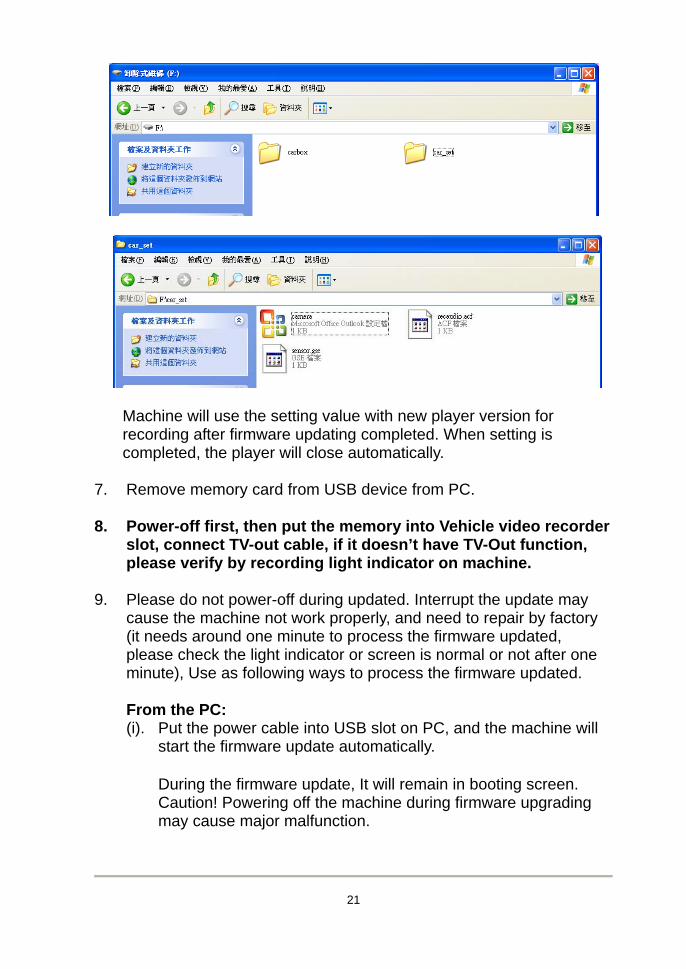
5. Extracted carbox.rar to memory card. or unzip to the PC, and
then copy the carbox folder to memory card. 』『 memory card under the carbox root folder contains all the update files (Do not delete any file.)
6. Open the new version of the Player software, in the 『open file』 select the memory card sector, go to 『setup page』 to
start setting, after click 『Save』button, it will produce car_set folder in the root of the memory card, car_set folder containing the relevant configuration file (Do not delete any file.)
21
Machine will use the setting value with new player version for recording after firmware updating completed. When setting is completed, the player will close automatically.
7. Remove memory card from USB device from PC.
8. Power-off first, then put the memory into Vehicle video recorder
slot, connect TV-out cable, if it doesn’t have TV-Out function, please verify by recording light indicator on machine.
9. Please do not power-off during updated. Interrupt the update may cause the machine not work properly, and need to repair by factory (it needs around one minute to process the firmware updated, please check the light indicator or screen is normal or not after one minute), Use as following ways to process the firmware updated. From the PC: (i). Put the power cable into USB slot on PC, and the machine will
start the firmware update automatically.
During the firmware update, It will remain in booting screen. Caution! Powering off the machine during firmware upgrading may cause major malfunction.

22
After firmware update, please reboot the Machine manually to complete the update. P.S after finished updated, When turn on the vehicle video recorder, it will appear firmware version number
, then enter the live recording screen (remark: version number will be changed of each firmware updated.)
From vehicle: (ii). Put the power cable into USB slot on PC, and the machine will
start the firmware update automatically.
During the firmware update, It will remain in booting screen. Caution! Powering off the machine during firmware upgrading may cause major malfunction. Start vehicle engine, wait until the power steadily, then plug-in the power to vehicle video recorder, please do not stop engine during updating. t will remain in following screens. Caution! Powering off the machine during firmware upgrading may cause major malfunction.
After firmware update, please reboot the Machine manually to complete the update.
P.S after finished updated, when turn on the vehicle video recorder, it will appear firmware version number , then enter the live recording screen (remark: version number will be changed of each firmware updated.)
10. After finished, it will enter recording status, it can be used normally.