Embed Size (px)
Citation preview
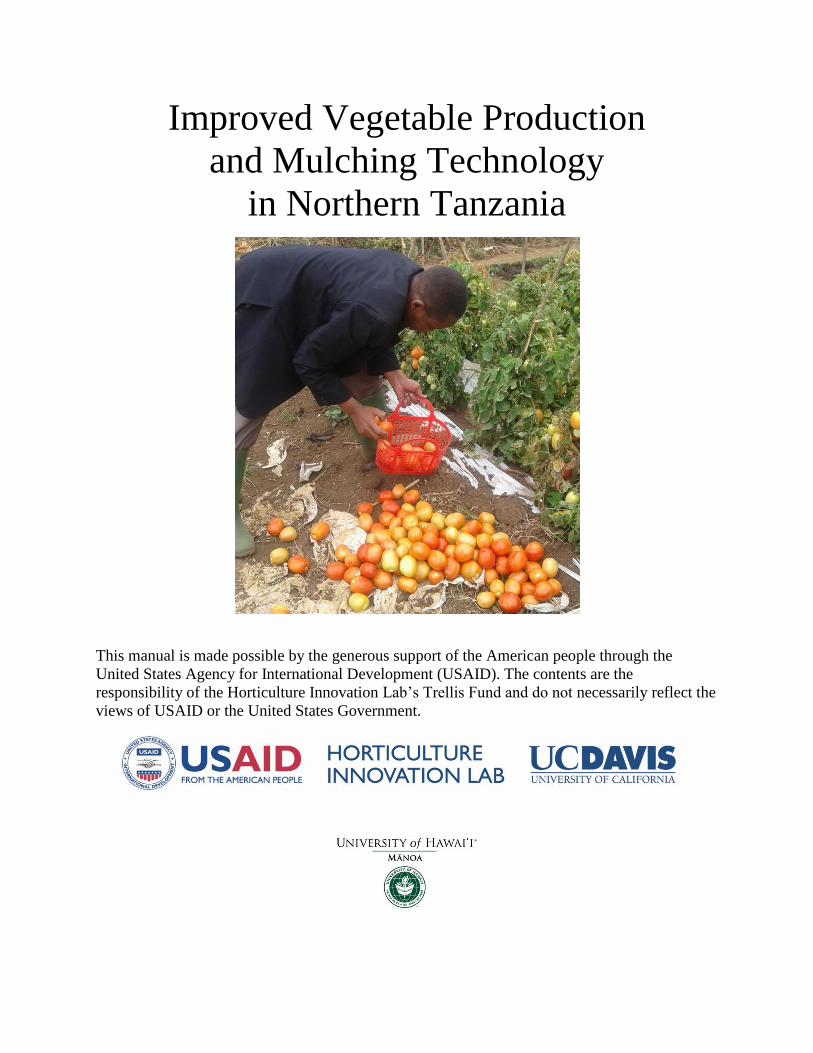
Improved Vegetable Production
and Mulching Technology
in Northern Tanzania
This manual is made possible by the generous support of the American people through the
United States Agency for International Development (USAID). The contents are the
responsibility of the Horticulture Innovation Lab’s Trellis Fund and do not necessarily reflect the
views of USAID or the United States Government.

2
Table of Contents
Introduction……………………………………………………………...3
Importance and Overview of Vegetable Production…………………….4
Vegetable Seed Acquisition……………………………………………..5
Seedling Nursery Establishment and Management……………………..6
Sowing Seeds…………………………………………………………..11
Transplanting of Seedlings…………………………………………….15
Use of Mulching Technology………………………………………….17
Weed Management…………………………………………………….21
Fertilizer Management…………………………………………………24
Irrigation Management…………………………………………………27
Harvesting and Handling of Vegetables……………………………….30
References……………………………………………………………...33

3
Introduction
The purpose of this manual is to aid Tanzanian farmers on improved practices in vegetable
production. The goal is to improve malnutrition in the Arumeru district, specifically for children
under five years of age, through increased consumption of micronutrient-rich vegetables. This
manual is being developed for use with the Promotion of Mulching Technology in Vegetable
Production, Adaptation to Climate Change and Malnutrition Alleviation in Northern Tanzania.
Project, where farmer motivators and farmers will be trained on improving vegetable production
and mulch use in farming systems. Three vegetables are being focused on in this training manual;
Tomato-variety Tanya, African Eggplant variety DB3 and African Nightshade – local variety.
Objectives
After reading this training manual you will be able to:
Understand the importance of increasing vegetable production in Northern Tanzania
Properly acquire, sow, and transplant vegetable seedlings
Understand and use mulching technology
Properly manage weeds, diseases, insects, fertilizer and irrigation
Properly harvest and handle vegetables

4
Importance and Overview of Vegetable Production
Nutrition Tanzania has a high rate of malnutrition for some micronutrients. 43% of children suffered from
Vitamin A deficiency in 2013 and 37% of women in reproductive age suffered from anemia.
Vegetables are a primary source of micronutrients. The consumption of tomato, eggplant, and
nightshade can increase the level of Vitamin A, Iron, and Zinc as well as other micronutrients in
the body.
Economics
Vegetables are often more profitable for farmers, usually they
Have higher market prices by weight
Have a good supply/demand ratio
Can be sold in areas where vegetables aren’t frequently grown
grow quicker than grain crops and can produce more, faster
Uses
Vegetables have many uses. The following three vegetables of focus can be prepared in the
following ways
Fresh consumption
Canning
Pickling
Dehydrating
Fermenting
All of the options aside from fresh consumption will extend the shelf life and safety of storing
vegetables long term and will be discussed in the postharvest section. Cooking of these
vegetables will reduce the availability of some types of nutrients but is necessary when
vegetables need to be cooked.

5
Vegetable Seed Acquisition
Introduction
Starting with the right vegetable seed is very important. The type of plant that grows is based off
of what variety the plant is. Plants are selected for good traits, like high yield and pest resistance.
The only way to keep these traits is to produce seeds very carefully.
Starting with quality seed ensures:
Lower seeding rate, money saved
Higher germination rate
Vigorous seeds
Uniform fields
Better pest and disease resistance
More production
Uniform harvesting times
More tolerant plants
Certified Seed
Certification assures that the seed is of a certain variety and will have those traits and that the seed
itself is clean. Without certification, there is no guarantee that you are getting the plant that you
wanted. Even with certification, seeds can sometimes be the wrong type. It is important to always
get a receipt with the type of seed you bought, how much, the price, and when you bought it. Keep
the receipt along with the seed packet in your records. If you find that the seeds grow to be the
wrong plant, you may be able to get a refund or reparations for lost profit.
Farmer to Farmer and Community-Based Seed Production
Some seeds can be produced by farmers at/to lower costs. These seeds must be produced with
care in order to ensure quality seed is produced. Plants for seed production are grown slightly
different than plants grown for vegetable production, and have several important concepts
You must...
Start with the right variety
Ensure only healthy plants are kept for seed harvesting
Ensure pollination occurs only by that variety
Harvest at the right time for seed maturity
Process the seed
Starting with the right variety is essential. Each seed must be of the right selection because if one
plant is not the right type, it can pollinate other plants and ruin the purity of the following seeds.

6
Seedling Nursery Establishment and Management
Introduction
Seeds can be an expensive to purchase and a majority of farmers choose to produce their own
seed or trade with other farmers for seed. It is important to produce high quality seedlings for
vegetable production. The price and value of hybrid seeds makes it important to make optimum
use. Good seedling nursery management starts with good planning.
Assessment of Farm Resources for Seedling Nursery
In order to properly manage a seedling nursery, you need to (1) do a proper assessment of a
farm’s resources, and (2) plan, organize, and monitor the nursery activities.
Proper Assessment involves
1. Determine Resources through a mapping process
2. Evaluate the present status, the goal, and determine steps
1. Mapping Process: Mapping can include
All crop fields
All structures
Roads and paths
Forests, bush, and natural lands
Areas with livestock and wildlife
Access to water
Hills and valleys
Evaluating the status
1. Does your land have the space to have a seedling nursery?
2. Where is the Optimal location?
3. What are the features that are most important to seedlings production?
4. How big does the nursery need to be?
Appropriate Seedling Nursery Conditions
Exposure to sun all day
Close proximity to water source
Not close to wildlife or livestock
Not close to current agricultural fields

7
Nursery Planning Exercise
You can use this guide to map out your land, its resources, and determine the most appropriate
location. Having a map of your land to look at will help you in other situations as well.
Determining How large the nursery needs to be
You will need to assess
1. The number of seedlings you need to grow.
2. The spacing for seedling density.
3. If you want to do crop rotation or leave the seed bed fallow.
4. What type of seed production you want.
An example would be…
1. I need to grow 50 tomatoes, 50 eggplants, and 50 nightshades
2. They need to be 2 inches apart as seedlings
3. I don’t want crop rotation
4. I want to grow them in trays
I want to grow my seedlings in trays because I can keep them off the ground, they are easy to
transport, and they will be consistent. I need to determine the right tray for the seedling spacing,
and this will determine the tray size and number of cells in the tray. I can determine how many
trays I need. I need space for 150 seedlings at around 2 inch spacing. Once I find the number of
trays I need I will determine their square foot space and determine how much total area I need
for my nursery.
One very important part of nursery production in planning for the future. It is always wise to
leave space free around your nursery to allow for the expansion. I may make a lot of money on
my vegetables and want to increase my seedling production to 300 seedlings the next year.
Types of Seedling Nurseries
There are several types of seedling nursery systems
Seedbeds: Flatbed, raised bed, sunken bed
Trays
Seedbeds can either be raised, soil level, or sunken. The general shape of seed beds is 1 meter
wide by several meters long depending on your need. The walls of raised and sunken beds can
either be just tamped soil, logs, rocks, or planed wood. Seedbeds are good for large number of
seedlings. They also conserve more moisture.
Trays come in many sizes and cell numbers. For tomatoes, eggplants, and nightshade a large cell
size would be best. The larger the cell size the less cells so a tray with around 33 cells will be a
good option for starting seeds. Pots can also be made from rolled banana or large broadleaf plants

8
or be made from plastic bags. Trays are good because the roots are not as damaged during
transplant, and they are moved easily. They can also be grown off the ground.
Soil for seedling germination should be fine and uniform, well aerated, loose and free of insects,
diseases and weed seeds. Seedbed soils should be well tilled with as fine of soil as possible.
Compost should be incorporated into the soil, and the soil should be raked to a level surface. Soil
in Trays is normally artificially made from peat moss, perlite and vermiculite. These mixes can be
expensive and hard to find so homemade soil mixes can be made depending on farm resources.
One potting medium option is soil: sand: compost: rice hulls or straw dust in a 1:1:1:1 ratio
Protecting Seedlings
Seedlings mostly need protection from the following threats
1. Grazing by animals
2. Too much sun
3. Heavy Rainfall, hail
4. Wind
There are several ways to protect seeds based on the problem
1. Grow seeds off of the ground, build a fence or enclosure around seeds, including for birds
2. Use shade cloth, or leaves from palm trees, bamboo, or grass
3. Use shade cloth, plastic, or leaves to stop heavy rainfall or hail or move seeds
4. Use plants or built structures as wind breaks
Water Management
Seedlings are very sensitive to too much or too little water. Water can be applied several ways
based on if seeds are in trays or seedbeds.
Tray Seedbed
flooding Flooding
Overhead irrigation
Overhead irrigation
Drip irrigation
Overhead irrigation can cause disease problems because the leaves and stems of the seedlings get
wet and can get infected. The splashing water also causes diseases to spread. Flooding can cause
diseases to spread through the soil, but only if disease is present. Drip irrigation is the most
expensive to set up but uses the least amount of water and causes the least diseases issues.
Overhead irrigation is the most common way small scale growers will produce seedlings. During
and after germination soil should be constantly moist but well drained. Standing water will cause
diseases. Letting soil dry down will cause stunted seeds and seed death. In both trays and seedbeds,

9
the outer edges will normally dry out quicker from exposure to sun and wind, so these must be
watered heavier than the middle.
Water quality is overlooked often. Water should be from a clean source, with no salts or other
chemicals in it. Water containing chlorine can be used for flooding irrigation.
Fertilizer Management
Fertilization for seedlings is different than that of regular plants. Seedlings need much less
fertilization that a larger plant. Too much fertilizer could damage the seedling. A simple
recommendation would be to apply one bucket (20 liter) of well decomposed organic farm yard
manure in every 1 square meter. Observe seedlings as they grow and if leaves are pale yellow,
apply a solution of NPK (5g/L) 1 week after germination. Note that; fertile soils may not require
fertilizer application. If compost is used to grow seedlings only supplemental potassium and
nitrogen are generally required. Fertilizer can be applied in the irrigation water or as dry fertilizer.
The type of fertilizer will have instruction for fertilizer rates for seeds.
Crop Rotation
Crop rotation should be practiced in seed bed production. This often means extra space needs to
be constructed in order to allow for either other crops to be grown or to allow the seed bed to be
fallow. Crop rotation requires that crops from the same plant family cannot be grown in the same
area that they have been grown in the last three years. African Eggplant, Tomato, and African
Nightshade are all in the nightshade family. These plants cannot be used in the same seed bed for
3 years under the requirements of crop rotation. This allows for diseases to the specific plants to
die off before reintroduction. This means that at least four seed beds are required to grow using
crop rotation. Crop rotation is not necessary in tray production.

10
Keeping Records
Keeping records is a useful way to build information about your specific farm. A seedbed history
sheet can be used to keep track of that seedbed. An example of one for one year is below.
Seedbed
O-Organic
T-Transitional
C-Conventional
Size
Crops
Sowing
Date
Inputs Input
Date of Use
- Rate of Use
Expected
Yield
Actual
yield
1
O
1mx5m
Tomato
seedlings 10/21
Cow
manure
Lime
10/17 5 lb
150
seedlings
129
seedlings
Mulch
2 O 1mx5m Fallow
None
3 C 1mx5m Rice
seedlings 10/21
Potassium
nitrate 11/03
14kg/100L
Every
week
500
seedlings
512
seedlings
4
O 1mx5m
Onion
seedlings
Cow
manure
1/15
5 lb
150
seedlings
100
seedlings
The records can be written out but should include when and what you sow, what inputs you
include, and how much yield you get. This record should be kept along with a journal of daily
activities that will help you keep track of when you did certain tasks and can inform future
decisions.

11
Sowing Seeds
Using a Schedule
Using a schedule to determine when you need to sow seeds to get harvest at a specific time is
important. Using the time to harvest information on plants will help you determine when to sow
seeds. It is easy to determine when you want to harvest and work backwards from there. The
following is the times for each specific plant
African nightshade: 4-6 weeks from sowing to transplant, 40-60 days from transplant to first
harvest.
African eggplant: 4-6 weeks from sowing to transplant, 60-90 days to first harvest of fruit.
Tomato- 4-6 weeks from sowing to transplant, and 60-80 days from transplant to first harvest
Knowing these times, you can schedule based on how much time from seed to assumed first
harvest. If you time your seed sowing and transplanting properly, you can begin harvesting a
new crop as soon as the last crop harvest is ending.
A schedule example and template are available in the appendix of the manual.
Germination Test
Knowing your germination rate in very important. Bad quality seeds and seeds not stored
correctly or stored for too long can have very low germination. To test your germination rate,
you need to use at least 20 seeds, and can use as many as 200.
1. Moisten a towel, or rag. The lay out the towel or rag on pan or dish that can hold some
water but is flat.
2. Place your seeds in rows on the moist towel or rag.
3. Cover the seeds with another wet towel or rag.
4. Place another dish or pan over the seeds to stop water loss
5. Place the germinating seeds in a place out of direct sun. African nightshade needs light to
germinate so the container should be clear
6. Check the towel each day for moisture and rewet it if necessary, start checking seeds after
7 days and up to 14 days after the start of the test.
7. Count the number of seeds germinated
8. Calculate your germination percentage

12
To calculate your germination percentage, you divide the number of germinated seeds by the
total number of seeds sowed and multiply by 100.
(germinated seeds/total seeds sowed) x 100
Example: I sowed 50 seeds to check germination. 39 of the seeds germinated at 14 days.
I divide 39 by 50 and multiply by 100
(39/50) = .78 then I multiply .78 x 100 = 78%
My Germination rate is 78%. I know now that only around 78% of my seeds will germinate and I
will have to plant extra seeds to make up for that.
To find out how many extra seeds I need I just divide the number of seeds I want by the
germination percentage
I want to have 100 seedlings.
I divide 100 by .78 (100/.78) and get 128.2 or 129 seedlings. I now know I need to sow 129 or
more seedlings to guarantee I have 100 germinate.
Sterilization
If you are using soils for trays or pots or if you are using seed beds the soil should be sterilized
before sowing seeds. The soil may have pests or diseases that could destroy the whole crop if not
sterilized. One easy method to sterilize uses the sun.
Step 1. Wet the seed bed or soil pile to be sterilized
Step 2. Cover the soil with one whole plastic sheet with no holes. Cover the edges of the sheet
with soil to keep it air tight
Step 3. Wait 3-4 weeks and remove the plastic sheets. After 2 days you can work the soil to
prepare it for planting.
This sterilization uses the sun’s energy to heat up the soil to a point that kills pests and diseases.
Chemicals can also be used to sterilize soils but should be avoided if possible. They are
expensive and bad for the health of humans and the environment.

13
Seed Preparation and Sowing for Tomato, Eggplant, and Nightshade
Tomato, Eggplant, and Nightshade seeds do not need any preparation before seed sowing. Seeds
should be planted at a 1 centimeter depth in either trays, pots or seed beds. If sowing in seed
beds, create 1 cm deep furrows in the soil running lengthwise along the seed bed, and sow the
seeds 5 cm apart in a line inside of the furrows. Furrows should be 10 cm apart from each other.
Water in seeds immediately after sowing.
Remember to follow all of the precautions in protecting seedlings in the Nursery Management
section.
Common Problems in Seedling Production
Seedlings suffer from several common problems that cause them to die or lose vigor. The most
common and their controls are outlined below.
Decayed seedlings at soil also called damping off- Young seedlings may develop a discolored
lesion near the soil due to infection of a fungus. To prevent this, make sure soil and trays are
sterilized. Use good draining soil media, and do not overwater seedlings. If chemical means are
necessary, use a fungicide 1-2 times during the seedling stage. Spray the seedlings with fungicides
such as Ridomyl, or Bayleton. Remove and burry the affected seedlings from the beds immediately
otherwise spread will be more.
Stunted seedlings- This can be caused by low fertility or root problems. If seedlings look purple
they may have a phosphorous deficiency, and phosphorous needs to be applied. If seedlings are
yellow they may have a nitrogen deficiency and nitrogen needs to be applied. Chemical and salt
damage can cause stunting too, only use clean soil and don’t use bad water.
Wilting seedlings- Seedlings may need water or may have root damage from chemical, salts, or
fungus. If it is not from lack of water, it may be excess water and irrigation should be reduced.
Burnt leaves- Seedling are either getting too much sunlight or were in contact with a chemical
that can hurt them. Do not apply fertilizer directly to leaves and do not use chemical sprays close
to seedlings. If it is sunlight, supply shade structures.
Additional Disease and insect management
Adaptation of plant protection measures in the nursery against the incidence of insect pest and
diseases is very important task to get the healthy seedlings. The following are some of diseases
and insects affecting seedlings in the nursery which need to be controlled.
Leaf miner
It is very small sized insect enter in the leaves from margin side and move from one place to other
by eating the chlorophyll. Initially the infected part of the leaves become brown and later on dry.

14
Control
Spray 4% neem seed kernal extract on the plants (crush 40 g of neem seed kernal, add some
water and allow them for overnight. In the morning filter the extract and make up the
volume of Liter).
Spray with any other available insecticides.
Raising of virus free seedlings
Leaf curl is a white fly transmitted viral disease, infestation starts from seedling stage and continue
till harvest of the crop. The disease is specially seen in the tomato and causes great loss of the crop.
The leaves of affected plants show curling, mottling, rolling puckering etc. It can be controlled by
the following ways:
Cover the seed bed after seed sowing by insect proof nets or dry grass.
Remove the infected plants if any in the field and burry in soil or burn.
In this way the raised seedlings will be healthy and free from viral diseases.
Weed control
Timely weeding in the seedling nursery is very important to get healthy seedling. Weeding in a
seed bed demands a gentler approach than normal vegetable beds. Weeds are very fragile with
small root systems. If there are weeds in the seed bed, remove them manually either by hand or by
hand hoe. Do not use large tools and disturb the soil as little as possible. Do not use a hand hoe
within a few inches of the seedling. Soil disturbance could easily cause the seedling to fall over.

15
Transplanting of Seedlings
Timing
Timing is essential for seedling transplanting. Seedlings must be mature enough to transplant.
For tomatoes this is when they have 4 to 5 true leaves and are about 12-15 cm long. For
nightshade and eggplant this is when they have 4 to 7 true leaves and are 10-15 cm.
Hardening off
To better prepare seedlings for transplant they need to be hardened off. To harden off, you
should reduce the water supply and remove the shade structure to allow the seeds to receive full
sun.
Field Preparation
Before transplanting, fields should be tilled to work the soil and destroy weeds. Having soil that is
Any remaining weeds should be removed. If you have the resources, applying compost to the soil
will be beneficial. A few hours before transplanting the soil should be wet. You can either time
this with a rain or water it using irrigation water. Transplanting should occur in the morning or
evening to avoid hot daytime temperatures. Weather should be fair with no strong winds or heavy
rain in the forecast. Newly transplanted seedlings are easily destroyed.
Transplanting
If seedlings are in pots or trays they can simply be removed. If the seedlings are in seed beds they
should be dug up carefully while keeping a large portion of the root ball intact. Damaging roots
will cause the plants to get transplant shock easier and die or lose vigor. To avoid this, get as many
roots as possible, especially those furthest from the seedling. Dig all the way around the seedling
before digging the shovel directly under it and lifting gently. Seedlings can be collected in a bin
or wheelbarrow before moving but must be kept moist and in the shade. Dig a hole twice the size
of the root ball at the right planting distance.
For tomato that is 35 cm x 100 cm
African Eggplant is 30 cm x 30 cm up to 75 cm by 75 cm
African Nightshade is 30 cm x 100 cm
Place the seedlings into the hole so that the level of the root ball is slightly higher than the soil,
as the root ball and soil will settle. Make sure when planting that no soil is pushed up against the
stems of the seedlings. Immediately water in the seedlings.

16
Direct Seeding
Some vegetables should be directly seeded into the fields. For the specified crops, only Eggplant
is recommended. Tomato and Nightshade can be direct seeded but it is not recommended. It is not
the best practice to direct seed because of the danger of lower germination the difficulty to protect
the seedlings because of the spacing and you will need to sow extra seeds and thin them raising
costs and labor. You can direct seed underneath another crop to provide shelter, but it will increase
hand weeding labor to make sure you keep down weeds while not damaging the seedling.

17
Mulching Technology
Benefits of Mulching
Mulching may be the single best practice for long term improvement
Mulch can…
Conserve soil water, you will have to water less and the plant will not dry out as easily.
Reduce weeds, mulch will smother weed competing for water, sunlight, and nutrients
Provide nutrients directly, mulch breaks down and supplies nutrients needed by plants
Add soil organic matter, which improves soil health
Reduces soil temperature, this will save water, and make the soil healthier in the tropics
Prevent soil contact with the plant, this will prevent getting diseases and pest on plants
Problems Related to Mulching Improperly
Problems can occur from improper mulching. Mulching too thick, in inappropriate locations, and
using un-composted mulch can…
Cause too much extra soil moisture
Be a place for pests and diseases
Can temporarily stop nutrients from being available
Mulch Types
Mulch comes in many forms. Mulches can be made from any plant material produced on farm,
and can be combined with manures, composts, and biochar to improve nutrient contents and
other properties. Living plants can be used in place of mulches and companion crops can take
that concept one step further. Straw mulch and plastic mulch are of focus in the training program
related to this manual.
Mulch and compost from plant material can provide different nutrients but needs to have green
tender tissue with woody tissue to allow for a proper carbon to nitrogen ratio for soil animal life
to use it. This mulch will probably not be enough to supply all nutrients a plat needs. Mulch can
be cheaply produced on farm. Research in Tanzania has shown that mulch can increase plant
yields when used with water and without water.

18
Plant based mulch sources can be made from
Weeds or cover crops
Unused crop tissue after harvest (do not mulch crops with un-composted material from
the same crop for example do not mulch tomato with fresh tomato tissue)
Grasses
Pruning from trees and hedges
Plant waste from household or processing
Manures can add those necessary nutrients, but it needs to be balanced with plant material to
avoid nutrient toxicity. Manures also need to be carefully used. They should be buried at least a
month before planting or fully composted at high temperatures to kill off diseases.
Living mulches and companion plants are beneficial because they can supply green material for
composting or supply an additional crop. For example, the three specific plants being discussed
can be grown with beans, or potatoes. Beans would help increase nitrogen content in the soil if
the plant is tilled in after harvest. Cover crops and companion plants are expensive and labor
intense to establish if the plant material is purchased.
Plastic Mulch
Plastic mulching is the least labor involved but gives the least benefits in terms of soil health.
Plastic mulch is also the most expensive mulching especially with drip irrigation installed. Plastic
restricts water from entering the soil, Plastic prevents nutrients and organic matter from entering
the soil, and it prevents gas exchange. Plastic can also heat the soil and harm plants. If used
correctly though, plastic mulch can be a great tool. Using plastic mulch with crop rotation, using
compost or mulch underneath the plastic, and irrigating using drip tubes beneath can give you the
best results with much less effort than regular mulching. Crop rotation and fallow fields is essential
in plastic mulching. White colored plastic mulch is the best color to use in the tropics. It increases
light reflection and can actually decrease soil temperatures. The light that is reflected from this
mulch will also disrupt insects.
Some important considerations when using plastic mulch…
Plastic width must be wider than the width of the planting bed.
Irrigation needs to be installed under the plastic, or innovatively supplied above.
Plastic needs to be anchored down by soil on the sides. The plastic also needs to be very
tight and not loose on the ground.
Fertilizer needs to be applied before plastic is installed.
Plastic should be removed, and soil should be left fallow before reusing plastic for long
term soil health.

19
Installation of plastic mulch involves these steps:
1. Prepare soil by tilling and working in fertilizer, manure, and organic matter.
2. Install drip irrigation if necessary.
3. Move soil from the sides of the planting row at the width of the plastic sheet
4. Roll the plastic sheet over the row
5. Begin to lay the plastic sheet tight along the bed as you push the soil over the edges of the
sheet.
6. Prepare holes in the plastic sheet for transplanting.
Straw Mulch
Straw mulch can be available for use in Northern Tanzania. Straw can be applied up to 8 inches
thick in the field. The mulch should not be applied directly up to the plant stem. The thicker the
mulch is, the greater its ability to control water loss and weeds, but the potential for diseases and
pest issues increases. For this reason, straw needs to be sourced from disease and weed free
material and shouldn’t be sitting in the field or where it can be invaded by pests before application.
Straw mulch also has a very high carbon to nitrogen ratio and will not supply much nutrients to
the soil. Straw mulch can be best used if supplied with other green waste and manures. Dried corn
residue and animal manure are good combinations with straw mulch.
Composting Process
Composting mulches can help kill pests and diseases. Also, by breaking down the plant material,
nutrients become more available for plants and the compost is closer to being a fertilizer. To
compost you must get the organic material up to certain temperatures and you will need time to let
the compost break down. The composting process requires microbes, oxygen, moisture, and
organic matter. Organic matter needs to be balanced at a 1 to 1 ratio of brown waste to green waste.
For examples, the same amount of wood and grass clippings needs to be mixed in order to compost
well. Applying nitrogen fertilizer or manure will help make the process faster.
The steps are:
1. Prepare the pile of compost by mixing all materials evenly into a pile, adding water to
ensure the pile is moist but not soaking wet. The pile can be as long as you want it and
from 1 meter to 2 meters tall and wide. Moisten the pile as needed if it dries out
2. Every two to four weeks turn the pile.
3. Repeat every two to four weeks for three months.
Good compost will be brown and dark in color with no large pieces of recognizable plant
material.

20
Sterilizing Mulch
Mulches and composts can be sterilized before use to ensure that there is less pests and diseases
in them. Sterilize mulch and compost much like you do with soil
Step 1. Wet the mulch to be sterilized
Step 2. Cover the mulch with one whole plastic sheet with no holes. Cover the edges of the sheet
with soil to keep it air tight
Step 3. Wait 3-4 weeks and remove the plastic sheets. You can begin working with the mulch
immediately.
The mulch must stay moist during sterilization. If it gets too dry during this process it can get too
hot and catch on fire. For this reason, completely soak the mulch and check to make sure it is wet
throughout the sterilization.

21
Weed Management
Overview
Unwanted weeds in the field compete with plants for light, nutrients, and water. These weeds
also harbor pests and diseases. Weeds can also be parasitic or poisonous to crops. These
problems will result in lower crop yields. For example, tomatoes have more severe blossom end
rot in fields with many weeds compared to those fields with no weeds. Weeds also make it more
difficult to assess crops and work in fields.
Weed seeds are usually very long lived and germinate and grow much quicker than crops. The
speed at which weeds grow is what makes them so competitive. Weeding is one of the most
labor-intensive parts of growing a farm. Controlling weeds is essential to good crop growth.
Understanding how and when to weed to waste the least time and labor is very important.
Weed Classifications
Weeds are classified between broadleaves and grasses, and between annuals, biennials, and
perennials. These differences are important because they are based on life cycles of the plants
and the type of growth they have. They ultimately determine the type of control you would use.
Annuals are very fast growing and spread easily by seed and have short lifespans. These will be a
problem in freshly tilled fields. Biennials live two years. Their first year is growth and their
second year is flowering and producing seed. Perennials are persistent over longer periods of
time and grow much slower but usually have extensive means of reproduction in the soil and can
be difficult to get rid of.
Broadleaf weeds are all those that are not grasses. They can grow from many points on the plant
and are usually able to be hand pulled with more ease than grasses and can be mowed down or
hoed more easily. Grasses have their growth points very close to the ground, they can be difficult
to control with pulling, and cannot be destroyed by mowing and can survive hoeing.
Weed Control
Weeds can be controlled by:
Hand pulling- Hand pulling is the most labor-intensive method to pull weeds but can be
accurate and not damage crops. Hand pulling also has the least cost up front but can waste
time labor that could be used more usefully in other tasks.
Hand cultivating the soil- Hand cultivating is much faster than hand pulling weeds. It
involves purchasing or making a tool, like a hoe, wheel hoe. This is a cheap method that is
faster but less accurate than hand weeding. It also can leave some weeds alive that will
regrow. But it is the best method for a grower with a low budget.

22
Machine cultivating soil- Using a small tractor or farm animal to till the rows between the
crops can be faster than the two methods above but is less accurate cannot get weeds in the
rows and is destructive and an expensive purchase for tools.
Mulching- Mulching should be used in conjunction with other methods to keep weeds
down.
Using cover crops- Growing cover crops in between crops is a good method to keep weeds
down during fallow periods. Cover crops compete with weeds but do not seed in and
compete with cash crops later.
Chemical control- chemical controls can be used to control weeds with the least amount of
effort. Chemicals are dangerous for the farmer and the environment and are expensive but
will lower labor hours dramatically. Chemicals can also easily damage crops if misapplied.
Herbicide drift on windy days is a common source of crop failure. Chemicals can be applied
before transplanting seedlings to prevent emergence of weeds or can be sprayed to kill all
weeds before planting or sprayed during crop growth.
Timing and Methods of Weed Control for Most Efficient Use of Labor
Weeding takes up a great deal of labor hours. Planning and timing weeding activities can reduce
the amount of weeding that must be done, and still getting good crop yield with weeds present.
Some methods can reduce weed issues.
Crop Rotation- Rotating crops can reduce certain types of weeds. For example, some weeds that
grow easily in tomatoes will be smothered by beans if planted densely. So, rotating to growing
beans before and after tomatoes, eggplants, or nightshade will reduce weeds common in those
plants. Also planting very dense crops like a grain crop will reduce weeds. If you plant these before
growing the three discussed crops you can then use the unused leaves of the dense crop as a mulch
in the field to reduce weed emergence.
Being weed free before transplanting- Weeds should always be destroyed before transplanting.
Tilling several weeks before planting, then hoeing the soil again just before planting can reduce
weed emergence. Then a plastic or organic mulch should be applied to reduce weed emergence.
Using a pre-emergence herbicide can successfully control weed germination as well.
Weeding in early stages- The first 4 to 8 weeks in tomatoes and nightshades and 8-10 weeks in
eggplants is the most important time to keep weeds down. If weed control is focused on this time
of the crops growth, weeding can be reduced in later stages and the farmer can work on other
important tasks. It should be noted that weeds can still harbor pests and diseases, and some weed
control should occur if they are severe. For example, late emerging weeds will not compete with
tall tomatoes but will reduce air flow and cause fungal diseases.

23
Controlling weeds before they seed- Weeds should not be allowed to flower and go to seed. By
preventing this, annual weeds will lose their seed populations in the soil and less weed emergence
will occur. If weeds cannot be controlled right away, the most important consideration is to destroy
them before they go to seed.
Irrigation and fertilizer use- Irrigation and fertilizer use should be as localized as possible to the
crop. So, if weed control is an issue, band or basal fertilizing and irrigation will be helpful. Broadly
spreading fertilizer and water will only promote weeds.
Health and Labor Issues Related to Weeding
Weeding can be very damaging to a person’s body. It takes hundreds of hours to weed one hectare
for just one crop rotation. Reducing the amount of time a person is in the stooping position while
weeding will lead to a longer happier life with less back pain. The person will also be able to do
more with a healthy body. Weeding with proper posture, bending the legs and squatting are good
practices for weeding by hand. Using tool that allow a person to stand up straighter while
controlling weeds will also help. Finally, the proper use of herbicides will greatly reduce the need
to weed. Herbicides used infrequently and correctly will improve the farmer’s life substantially.
They usually cost much less when considering labor hours and will leave hundreds of hours free
that would be taken up by weeding.

24
Fertilizer Management
Intensive agriculture that reuses the same land constantly for crop growth will require fertilization.
Especially in the tropics where nutrients are leached very easily. Plants require a number of
nutrients to grow properly, most of them they take from the soil using their root systems. These
soils need to be present in the soil and available in a form plants can take up. Certain soil properties
can cause these nutrients to be unavailable.
pH
Soil pH is one of these properties. pH is a measure of a specific soil element, Hydrogen, and this
determines how available some nutrients are. The important take away is that pH needs to be in a
certain range in order for plants to grow correctly. For the three crops discussed that range is a pH
of 6 to a pH of 6.5. pH can be measured easily with a pH meter. Communities of farmers can
purchase a pH meter and share it, write a grant to get a pH meter or ask agricultural extension
organizations to provide one.
Soluble Salts
Soluble salts in the soil can destroy plants roots and make water unavailable. Salts get into the soil
by irrigating with water that has salts in them, contaminating the soil with salts, and applying too
much chemicals over time. Soluble salts can be measured just like pH, very easily with a pH/EC
meter. Keeping soluble salts out of your irrigation water, and not using too much fertilizer will
keeps soluble salts down in the field.
Fertilizer Formulas
Fertilizers generally have a formula listed as N-P-K. This is the percentage of nitrogen,
phosphorous and potassium found in the fertilizer. A 10-10-10 fertilizer will have 10% of each
nutrient in the fertilizer. A 22 kg bag will have 2.2 kg of each nutrient. Other nutrients will also be
listed in percentage points if the fertilizer has them.
Fertilizer Need Analysis Through Soil Testing
Soil testing is one way to better plan fertilizer management. Because fertilizers are expensive and
over-fertilizing can be harmful to plants and the environment, you should do soil sampling when
it is available.

25
Soil sampling is an easy process
1. Small soil samples are collected throughout the fields. About a handful of soil is
collected.
2. These soil samples are mixed together in a bucket.
3. Two handfuls of this mixed soil can be taken to a place for soil sampling if there is a
place available. This often costs money. The analysis will tell you how much percentage
of each nutrient you will have in your soil.
This is the best way to determine how much fertilizer you need.
Fertilizer Requirements
If soil samples are not available or too expensive, there are general guidelines for how much
fertilizer to add for each crop. These are guidelines based off of plant need without having done
soil tests. They can be adjusted based on how crops respond after one year.
Tomato- Compost at a rate of 20 tons per hectare is recommended. Tomato fertilization is well
understood. For a determinant tomato like ‘Tanya’ the following table gives exact fertilization
recommendations. Calcium and Magnesium are important nutrients because tomatoes need these
in good concentrations for fruit to ripen properly.
Time Nitrogen Phosphorous Potassium Calcium Magnesium
Pre-planting 45 kg/ha 50 kg/ha 50 kg/ ha 0 kg/ha 0 kg/ha
Week 0-6
growth
45 kg/ha 18 kg/ha 50 kg/ha 10 kg/ha 8 kg/ha
Week 6-12
Flower and
fruiting
45 kg/ha 18 kg/ha 100 kg/ha 70 kg/ha 13 kg/ha
Week 12-18 45 kg/ha 12 kg/ha 100 kg/ha 55 kg/ha 3 kg/ha
Total 180 kg/ha 98 kg/ha 300 kg/ha 135 kg/ha 24 kg/ha
This may not be a possible schedule to follow. It is also recommending very high rates of
fertilizer that may be too expensive. An easier Schedule to follow would be applying an NPK
fertilizer with double the potassium (1:1:2 NPK) at a rate of 60 kg N per hectare once before
planting and then once again after 20 days. And at 40 days reapply and also apply the
recommended rates of Calcium and Magnesium.
Eggplant-Compost at a rate of 20 tons per hectare is recommended. A 10-10-20 NPK fertilizer
can be used at 200 kg a hectare at 20, 40, and 60 days after transplanting.
Nightshade-Compost at a rate of 5 tons per hectare is recommended. If manure is not available,
an NPK fertilizer can be used to supply nitrogen at a rate of 60 kg N per hectare and reapplied
after 2-3 leaf harvests.

26
Organic Matter as a Source for Fertilizer Management
Composts, and manures are a good source of nutrients as well as using legume crops. Legume
crops use a special relationship with bacteria to bring nitrogen into the soil. The amount of fertilizer
provided by composts manures and legume crops depends on many factors. In general, though
beans and peas can supply up to 32 kg N a hectare of nitrogen and alfalfa can provide 44 to 54 kg
N a hectare. Manures and composts are highly variable in nutrient ranges but have much lower
concentrations of necessary nutrients, normally less than 5%. So, 22 kg of compost would only
have between 220-880 grams of nitrogen in it. They are also more slowly released so these should
be applied at least 3 weeks before planting and need to be incorporated into the soil for best effect.
Application Methods
Fertilizers can be applied in a number of ways:
Incorporated into soil- This method is good for fertilizer that could wash or blow away
and is more available to plants. This method is good for composts and manures.
Broadcast on surface- Fertilizer is spread by throwing fertilizer uniformly through the
whole field by hand or with a fertilizer spreader. Least accurate but fastest.
Basal application- fertilizer is applied to a very small area near the base of the crop. The
most accurate method but most time consuming.
Band applied-Fertilizer is applied in a line along the rows, more accurate than
broadcasting but less accurate that basal applications and is also in the middle in time
consumption.
Foliar- Soluble fertilizer is sprayed onto the plants, very fast acting. Good for Iron
applications. Cannot be applied during the day and can cause tissue burn. This involves
expensive equipment.
Fertigation- Soluble fertilizer is added to irrigation water. Requires irrigation equipment.

27
Irrigation Management
In tropical and subtropical climates plants lose water very quickly. Vegetable crops are plants
that use large amounts of water and it is essential to keep crops well-watered to achieve expected
yields. Plants absorb water through their roots and this water moves carries nutrients from the
soil and throughout other parts of the plants. The water is lost mainly during the day through
pores in the plant’s tissue. This loss is increased by wind and greater amount of sunshine. In
short, vegetables need a constant supply of soil moisture throughout their lifecycle to have the
greatest yields.
Drought stress during the seedling stage can stunt plants, delay fruiting, and reduce yields.
During flowering water stress can cause flowers to drop, and fruit will not develop. During fruit
development, drought stress can cause vegetables to crack. Drought stress should be a major
concern in the dry season.
On the other end, too much soil moisture can harm plants as well. Waterlogged soils can kill
roots, cause disease issues, cause too much growth in plants, reduce the flavor of vegetables, and
reduce yield. Waterlogged soils should be a concern in the rainy season.
Critical Period of Water Use
As discussed before, plants need near constant soil moisture, specific plants have critical periods
of water use, where it is more important that they have enough soil moisture at these periods. For
tomatoes and eggplants, water is most important during flowering, fruit set, and fruit
enlargement. Nightshades need uniform water throughout their development if being grown for
foliage. For a short period after harvesting foliage, water can be reduced in nightshade because
of the reduced amount of leaves and stems. Once new growth begins to develop though, regular
irrigation should occur.
Soil Water Holding Capacity
A soil’s ability to retain water is called its water holding capacity. This depends on the soil’s
properties, how much clay, sand, and organic matter it has, as well as management practices.
Increasing water holding capacity is important in areas of low rainfall and for dry seasons.
Improving soil water holding capacity starts with adding organic matter. Organic matter binds
soil particles together to create stable soil particles. These stable particles create pore space in the
soil that allows water to be held better than in there is mostly clay or mostly sand. Organic matter
also increases infiltration rates of water in clay soils so less water runs off on the surface of the
soil before entering the root zone. In sandy soils, organic matter helps retain more water where it
would normally move through the sand and away from roots quickly.
Reducing tilling can also improve a soils water holding capacity. Tilling breaks up soil particles
and can reduce soil organic matter. Using machines that till with less disturbance and tilling less
of the field can reduce soil degradation. There are low disturbance till systems that use discs to

28
till within the rows where crops will be planted. Instead of turning soil upside down, these tillers
make grooves in the soil that allows you to incorporate organic matter and fertilizers while
leaving the soil intact. This is proven to increase water holding capacity.
There are also no till systems. Using cover crops during fallow periods can use their roots to
break up soils much like tilling. These cover crops can then be cut down and very minimal soil
disturbance can be used to plant
Reducing Water Loss There are several more methods to manage water
Soil bed type- Raised soil beds will have reduced soil moisture because they are higher
up than the soil level and exposed to more sunlight and air movement. These can be
useful during periods of high rain. Sunken beds do the opposite, they act as sinks of water
and are less exposed to sun and air movement. These sunken beds can be useful in dry
seasons. These beds are also easy to flood with water for irrigation.
Shade structures- Shade cloth is useful for seedlings and young plants. It reduces the
amount of sun that causes plants to lose more moisture and can also reduce air
movement. Shade cloth should only be used on young plants because it will also reduce
growth
Wind breaks- Tall plants and structures will reduce wind near the fields. This will reduce
water loss.
Mulch- Mulch will lower soil temperatures and physically prevent water from
evaporating from the soil. Mulch also breaks down into organic matter which increases
soil water holding capacity.
Irrigation
When rainfall is not providing enough water, irrigation will need to occur. When possible,
irrigation should only occur in the morning before the sun is at a high point in the sky. This
ensures that plants have enough water during the day, water does not evaporate quickly before
entering the soil, and leaves do not stay wet over night or during periods of high sunshine. Water
present on leaves over-night can lead to disease, and water on leaves when there is full sun can
lead to burnt foliage.
There are several methods of irrigation:
Surface- Water is used to flood the surface of the soil or furrows are used to flow water
down the rows of crops. Both require less labor to develop if there is a source of surface
water. Flooding can easily spread diseases and will disturb surface mulches if they are
moved easily. This method is also not good for plastic mulches, or for areas with uneven
slopes. Furrow irrigation is more accurate than flooding, can be used when there is more
slope, and can be used with plastic mulches. Furrow irrigation often leads to less uniformity

29
in irrigation though. The front of the furrow and furrows closest to the water source obtain
more water.
Sprinkler- Sprinkler irrigation is a common way to water large areas more uniformly.
Sprinklers cost money, and wet plant tissue which is harmful if done during sunny days
and at night. Sprinklers often also have to be moved around by hand, and much water is
lost to evaporation.
Drip- Drip irrigation is a water efficient method, uses very low pressure, and is an accurate
way to irrigate. If affordable drip irrigation is a good method. Tubes are laid along planting
rows. These tubes have small holes that allow a small amount of water to drip from them.
These holes can be lined up directly next to the crop. This allows the crop to get most of
the water and reduces water for weeds. This irrigation can be expensive and has labor
attached at the front end of the crop’s life. Plastic tape tubing can be buried, is much lower
cost, but will not last as long as heavy-duty tubing.
Water Source
Water should be sourced from a clean source. Water should not contain chemicals, salts, or
sewage. If water is being sourced from a river, knowing what the upstream conditions are will be
helpful. Is there a factory, city, or large farm upstream? Finding out what inputs are going into
your water source is essential. If an upstream source is polluting waters taking action against this
should be a primary concern. Polluted water can damage crops and make humans sick. Make
sure the water source for plants is as pure as possible.
Drainage
Drainage may be necessary especially if crops are being surface irrigated or during rainy
seasons. In the tropics, open ditches are the only effective means of drainage. These ditches
should run along the field plots to a downhill collection site. If this area becomes swampy, using
water loving crops like taro and wetland rice in these areas can provide an extra crop.

30
Harvesting and Handling of Vegetables
When to Harvest
The three specific plants have general days to harvest and maturity indexes to help determine if
fruit is ripe. They are outlined below.
When to Harvest ‘Tanya’ Tomato African Eggplant African Nightshade
Days to harvest from
transplanting
60-80 60-90 40-60 for leaves
Maturity indexes For unripe- Oblong in
shape, flesh is hard,
yellowish at top of
fruit
For Ripe- 50% to
100% red
For unripe-
Yellowish, light
green to green
For ripe- orange to
red
Shoots and leaves are
mature. Plant should
not be flowering.
For fruits- Black,
hard fleshed fruit
Days to harvest are guidelines on when to start checking for maturity indexes and are not meant
to be strict times. Crops may take more or less time to mature.
Harvesting Techniques
Harvesting should occur in early morning or in the evening to avoid hot and humid days from
damaging freshly harvested crops.
Tomato- ‘Tanya’ Tomato can be harvested every day to two days when fruit maturity
occurs. Tanya Tomato is determinate and will not continue to grow so harvest season is
short. Tomatoes can be plucked from the plant by hand and placed in harvesting
containers.
African Eggplant- Can be harvested every 2 weeks for up to 7 months. Eggplants will
continue to produce. Eggplants should be cut with a clean blade just above the fruit at the
stem and placed in harvesting containers.
African Nightshade- Can be harvested every week to two weeks 6-8 times for one plant.
Main shoots and side shoots should be plucked while leaving at least 5 cm of stem left to
produce more new shoots. At the end of the season the whole plant can be pulled at the
root and processed. If clean water is available, the harvested stems should be immediately
placed in cool water.

31
Factors Affecting Deterioration
The fruit begins to deteriorate as soon as it is picked. The fruit’s “breathing” through pores and
wounds causes water loss, and releases a compound called ethylene that signals other fruits to
begin deteriorating as well.
The problem of deterioration is affected by several environmental factors:
Temperature- Fruits deteriorate at higher temperatures. This make them more active in
deterioration and also is a better temperature for diseases that destroy ripe fruits.
Humidity- Humidity is generally good for lengthening storage time of fruits. Moisture in
the air slows water loss in vegetables and leaves. Standing water on the surface of the
vegetable though can cause decay. Increasing air humidity while keeping fruits relatively
free of standing water is the goal
Sunlight- Sunlight promotes decay and all vegetables should be kept out of the sun.
Sanitation- A dirty storage environment can make it easy for diseases to be present.
Cleaning out debris and sanitizing with food safe cleaning products should be a regular
practice.
Crop Handling After Harvest
Crops should be harvested in the early morning or in the evening. Harvested crop should
immediately be moved to the shade.
Dumping and Cleaning- Dumping produce into a bin filled with clean water is an excellent way
to dump fruit in the packing house. This reduces damage and can immediately begin to clean
fruit. Chorine can be used in the water to clean fruits.
Sorting and Packing- Vegetables should be sorted for damaged and bad vegetables. Sizing fruit
is optional but worthwhile as some larger fruits can be of higher price. Separating fruits by size is
only important if they are sold as individual prices. Fruits must be dried of wash water before
packing. Packaging can be reusable bins, bags, or cardboard boxes. Bags are a bad choice
because they can lead to damage during transport.
Storage
The three specific vegetables should be stored indoors away from farm animals and pests that
would eat them. Storage houses should be regularly cleaned of debris and sanitized. Storage houses
should be as secure as possible from rodents. Vegetables should be stored off of the ground with
preventative measures for rodents. The storage house can be used to reduce temperature and
increase humidity.

32
There are several homemade and cheap inventions to increase the efficacy of storage houses. Straw
storage houses and evaporative cooling- Storage houses can be built with straw walls and ceilings,
theses can then be moistened using a hose or by placing a bucket that slowly releases water at the
top of the structure. This water will evaporate from the straw and lower temperatures around the
vegetables and increase humidity.
Storage houses with living roof- Storage houses can be built directly under the canopy of trees.
This has the same effect of evaporative cooling, but no water application is necessary.
Using ventilation-Building a storage shed with a ventilation system that has air flow from the
outside and underground to be brought up underneath. The air moving underground will be cooled
and will bring storage room temperatures down.
High Altitude cooling- If the farm is close enough and it is worthwhile to transport vegetables,
high altitudes will have much cooler temperatures. If produce needs to be stored for a long period,
this may be a viable method for some farmers.
Conclusion
Three vegetable varieties have been selected as potential solutions to malnutrition issues in the
Arumeru district of Tanzania. These vegetables also have the potential to increase farmer profits.
Good farming practices begins with acquiring the correct seed. New varieties are more productive
and easier to grow than old varieties. Sowing, transplanting, weeding, mulching, fertilizing,
irrigating, harvesting, and storing these fruits all require specific considerations and activities.
These subjects were reviewed in brief in this manual and training guide and are crop specific to
these three crops. This manual can be used to inform growers on the general basics of vegetable
production from seed to marketable product.

33
References: Anderson, W. 1983. Weed Science: Principles. St. Paul MN: West Publishing Co.
AVRDC. 1990. Vegetable production training manual. Asian Vegetable Research and
Development Center. AVRDC Publication No. 90-328. Shanhua, Tainan.
De Putter, H., M. van Koesveld, and C. de Visser. 2007. Overview of the Vegetable Sector in
Tanzania. AfriVeg Report 1.
DIPR. 2017 Nutrition Country Profile United Republic of Tanzania. Development Initiatives
Poverty Research Ltd. Retreived from https://globalnutritionreport.org/nutrition-
profiles/africa/eastern-africa/united-republic-tanzania/
DOA, Forest and Fisheries. 2013. African Nightshade: Production Guidelines. DOAFS: Pretoria
Everaarts, A., H. de Putter, and W. Amon. 2011. A survey of field vegetable production in
Tanzania: Recommendations for improvement. Wageningen UR, Afriveg Project no.
32.500.713.11. Retreived from http://edepot.wur.nl/195026
FAO. 2015. Training Manual for Organic Agriculture. Retrieved from
https://resources.peopleinneed.cz/documents/242-fao-training-manual-for-organic-
agriculture.pdf
Gicheru, P. 1994. Effects of residue mulch and tillage on soil moisture conservation. Soil
Technology, 7(3), 209-220.
Gicheru, P., C. Gachene, J. Mbuvi, and E. Mare. 2004. Effects of soil management practices and
tillage systems on surface soil water conservation and crust formation on a sandy loam in semi-
arid Kenya. Soil and Tillage Research, 75(2), 173-184.
Havlin, J., S. Tisdale, W. Nelson, and J. Beaton. 2014. Soil Fertility and Fertilizers-An
Introduction to Nutrient Management, 8th Ed. Saddle River, NJ: Pearson Education Inc.
John, R. G., L. Mulungu, C. Ishengoma, S. Reuben, S. Msolla, A. Maerere, P. Njau, G.
Ashimogo, T. Tiisekwa, and T. Mvena. 2005. Effect of Organic Mulch Types on Common
Biotic, Abiotic Factors and Components of Yield in Determinate and Indeterminate Tomato
(Lycopersicon esculentum Mill) Commercial Cultivars. Asian Journal of Plant Sciences. 4.
Lin, L., Y. Hsiao, and C. Kuo. 2009. Discovering indigenous treasures: Promising indigenous
vegetables from around the world. AVRDC Publication No. 09-720. AVRDC. Taiwan: The
World Vegetable Center.
Lin, L., G. Luther, and H. Peter. 2015. Raising Healthy Tomato Seedlings. Asian Vegetable
Research and Development Center. AVRDC Publication No. 15-795. Shanhua, Tainan.

34
Msogoya, T., and D. Mamiro. 2016. Effect of improved tomato cultivars on productivity and
profitability in Morogoro region, Tanzania. Journal of Animal & Plant Sciences. 30(3), 4774-
4780.
Ojiewo, C. 2013. Good Agricultural Practices for African Nightshade Production in Sub-Saharan
Africa. Proceedings of a Technical Consultation Workshop Held in Arusha, Tanzania, 7-8
December 2009. Belgium: ISHS.
Swiader, J., and G. Whitaker. 2002. Producing Vegetable Crops. 5th Ed. Danville, IL: Interstate.
Wafula, E., C. Franz, S. Rohn, M. Huch, M. Mathara, and B. Trierweiler. 2016. Fermentation of
African indigenous leafy vegetables. African Journal of Horticultural Science, 9, 1–13.
Weinberger, K., and J. Msuya. 2004. Indigenous vegetables in Tanzania. Significance and
prospects. Technical bulletin no. 31. AVRDC publication 04-600.
Wilkinson, K., T. Landis, D. Haase, B. Daley, and R. Dumrose. 2014. Tropical Nursery Manual:
A Guide to Starting and Operating a Nursery for Native and Traditional Plants. USDA Forest
Service Agriculture Handbook 732. USDA: Washington, DC.