Embed Size (px)
Citation preview
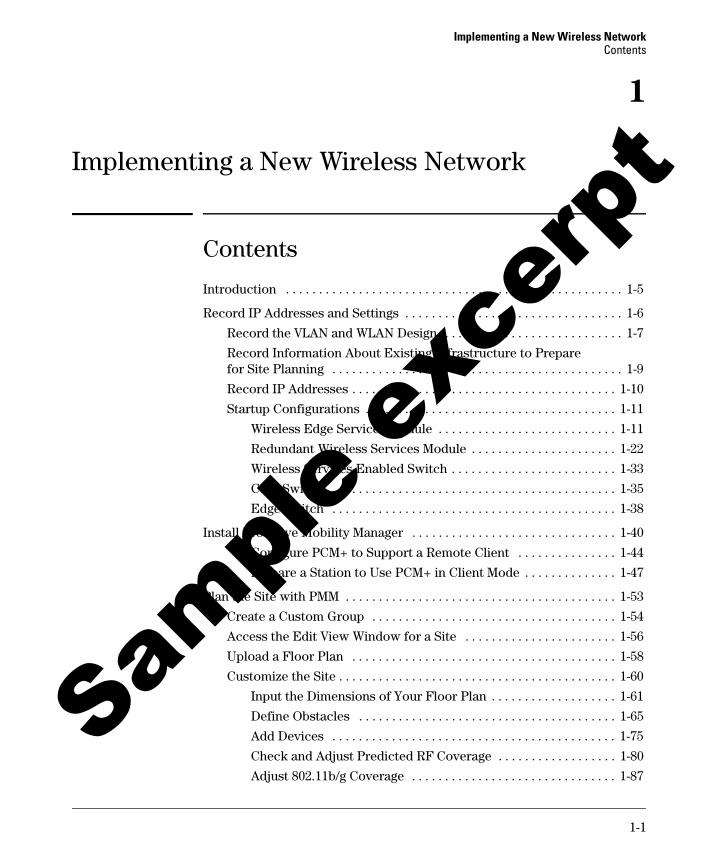
Implementing a New Wireless NetworkContents
1
Implementing a New Wireless Network
Contents
Introduction . . . . . . . . . . . . . . . . . . . . . . . . . . . . . . . . . . . . . . . . . . . . . . . . . . . 1-5
Record IP Addresses and Settings . . . . . . . . . . . . . . . . . . . . . . . . . . . . . . . . . 1-6
Record the VLAN and WLAN Design . . . . . . . . . . . . . . . . . . . . . . . . . . . 1-7
Record Information About Existing Infrastructure to Prepare for Site Planning . . . . . . . . . . . . . . . . . . . . . . . . . . . . . . . . . . . . . . . . . . . . 1-9
Record IP Addresses . . . . . . . . . . . . . . . . . . . . . . . . . . . . . . . . . . . . . . . . 1-10
Startup Configurations . . . . . . . . . . . . . . . . . . . . . . . . . . . . . . . . . . . . . . 1-11
Wireless Edge Services Module . . . . . . . . . . . . . . . . . . . . . . . . . . . 1-11
Redundant Wireless Services Module . . . . . . . . . . . . . . . . . . . . . . 1-22
Wireless Services-Enabled Switch . . . . . . . . . . . . . . . . . . . . . . . . . 1-33
Core Switch . . . . . . . . . . . . . . . . . . . . . . . . . . . . . . . . . . . . . . . . . . . . 1-35
Edge Switch . . . . . . . . . . . . . . . . . . . . . . . . . . . . . . . . . . . . . . . . . . . 1-38
Install ProCurve Mobility Manager . . . . . . . . . . . . . . . . . . . . . . . . . . . . . . . 1-40
Configure PCM+ to Support a Remote Client . . . . . . . . . . . . . . . 1-44
Prepare a Station to Use PCM+ in Client Mode . . . . . . . . . . . . . . 1-47
Plan the Site with PMM . . . . . . . . . . . . . . . . . . . . . . . . . . . . . . . . . . . . . . . . . 1-53
Create a Custom Group . . . . . . . . . . . . . . . . . . . . . . . . . . . . . . . . . . . . . 1-54
Access the Edit View Window for a Site . . . . . . . . . . . . . . . . . . . . . . . 1-56
Upload a Floor Plan . . . . . . . . . . . . . . . . . . . . . . . . . . . . . . . . . . . . . . . . 1-58
Customize the Site . . . . . . . . . . . . . . . . . . . . . . . . . . . . . . . . . . . . . . . . . . 1-60
Input the Dimensions of Your Floor Plan . . . . . . . . . . . . . . . . . . . 1-61
Define Obstacles . . . . . . . . . . . . . . . . . . . . . . . . . . . . . . . . . . . . . . . 1-65
Add Devices . . . . . . . . . . . . . . . . . . . . . . . . . . . . . . . . . . . . . . . . . . . 1-75
Check and Adjust Predicted RF Coverage . . . . . . . . . . . . . . . . . . 1-80
Adjust 802.11b/g Coverage . . . . . . . . . . . . . . . . . . . . . . . . . . . . . . . 1-87
Sampl
e ex
cerp
t
1-1

Implementing a New Wireless NetworkContents
Check 802.11a Coverage . . . . . . . . . . . . . . . . . . . . . . . . . . . . . . . . 1-104
Adjust 802.11a Coverage . . . . . . . . . . . . . . . . . . . . . . . . . . . . . . . . 1-105
Set Friendly Names . . . . . . . . . . . . . . . . . . . . . . . . . . . . . . . . . . . . 1-107
Select the Channels . . . . . . . . . . . . . . . . . . . . . . . . . . . . . . . . . . . . 1-110
Generate the Wireless Device Planner Report . . . . . . . . . . . . . . 1-121
Create a Backup Copy of Your Site . . . . . . . . . . . . . . . . . . . . . . . 1-125
Install and Configure the Wireless Edge Services Module . . . . . . . . . . . 1-126
Install the Wireless Edge Services Module . . . . . . . . . . . . . . . . . . . . 1-126
Configure Initial Settings on the Wireless Edge Services Module . . . . . . . . . . . . . . . . . . . . . . . . . . . . . . . . . . . . . . . . . . . . . . . . . . 1-126
Set the Wireless Module’s IP Address in the CLI . . . . . . . . . . . . 1-127
Add VLANs to the Wireless Module Uplink Port . . . . . . . . . . . . 1-129
Access the Wireless Module Web Browser Interface . . . . . . . . 1-131
Set the Country Code . . . . . . . . . . . . . . . . . . . . . . . . . . . . . . . . . . . 1-133
Change Passwords . . . . . . . . . . . . . . . . . . . . . . . . . . . . . . . . . . . . . 1-135
Configure SNMP Settings . . . . . . . . . . . . . . . . . . . . . . . . . . . . . . . 1-137
Set the Time . . . . . . . . . . . . . . . . . . . . . . . . . . . . . . . . . . . . . . . . . . 1-149
Install a Certificate for HTTPS . . . . . . . . . . . . . . . . . . . . . . . . . . . . . . 1-153
Install a Certificate Purchased from a Third-Party CA . . . . . . . 1-153
Install a Certificate Issued by a Windows Certification Authority . . . . . . . . . . . . . . . . . . . . . . . . . . . . . . . . . . . . . . . . . . . . . 1-172
Configure the Trustpoint for the Wireless Module HTTPS Server . . . . . . . . . . . . . . . . . . . . . . . . . . . . . . . . . . . . . . . . . 1-200
Install and Adopt RPs . . . . . . . . . . . . . . . . . . . . . . . . . . . . . . . . . . . . . . . . . . 1-202
Install the RPs . . . . . . . . . . . . . . . . . . . . . . . . . . . . . . . . . . . . . . . . . . . . 1-202
Install RP Licenses . . . . . . . . . . . . . . . . . . . . . . . . . . . . . . . . . . . . . . . . 1-206
Establish the Radio Port VLAN . . . . . . . . . . . . . . . . . . . . . . . . . . . . . . 1-211
Verify That RPs Are Adopted . . . . . . . . . . . . . . . . . . . . . . . . . . . . . . . . 1-212
Manage the Wireless Edge Services Module and RPs With PMM . . . . . 1-213
Discover the Devices in PCM+ . . . . . . . . . . . . . . . . . . . . . . . . . . . . . . 1-214
Add a Wireless Module and RPs to the Location Manually . . . . . . . 1-219
Add Wireless Modules and RPs to the Location Using the Group Member Wizard . . . . . . . . . . . . . . . . . . . . . . . . . . . . . . . . . . 1-223
1-2

Implementing a New Wireless NetworkContents
Configure WLANs . . . . . . . . . . . . . . . . . . . . . . . . . . . . . . . . . . . . . . . . . . . . . 1-232
Configure WLANs with PMM . . . . . . . . . . . . . . . . . . . . . . . . . . . . . . . . 1-232
Secure a WLAN with 802.1X with WPA/WPA2 . . . . . . . . . . . . . . 1-235
Secure a WLAN with WPA-PSK . . . . . . . . . . . . . . . . . . . . . . . . . . 1-239
Enable WLANs in PMM . . . . . . . . . . . . . . . . . . . . . . . . . . . . . . . . . 1-242
Configure Fast Roaming on the Wireless Module . . . . . . . . . . . 1-246
Configure WLANs in the Wireless Module Web Browser Interface . . . . . . . . . . . . . . . . . . . . . . . . . . . . . . . . . . . . . . . . . . . . . . . . . 1-249
Secure a WLAN with Web-Auth . . . . . . . . . . . . . . . . . . . . . . . . . . 1-250
Secure a WLAN with MAC-Auth . . . . . . . . . . . . . . . . . . . . . . . . . . 1-275
Enable WLANs . . . . . . . . . . . . . . . . . . . . . . . . . . . . . . . . . . . . . . . . 1-279
Implement Your Site Plan with the Deployment Tool . . . . . . . . . . . . . . . 1-281
Add Managed Devices to the Site . . . . . . . . . . . . . . . . . . . . . . . . . . . . 1-281
Configure Radio Descriptions . . . . . . . . . . . . . . . . . . . . . . . . . . . . . . . 1-291
Add Policies for Wireless Access in IAS and IDM . . . . . . . . . . . . . . . . . . 1-297
Add Wireless Modules as RADIUS Clients on IAS . . . . . . . . . . . . . . 1-298
Verify That IAS Remote Access Policies Allow Wireless Access . . . . . . . . . . . . . . . . . . . . . . . . . . . . . . . . . . . . . . . . . . . . . . . . . . . 1-301
Check Conditions in the IAS Remote Access Policies . . . . . . . 1-301
Check Authentication Methods in IAS Remote Access Policies . . . . . . . . . . . . . . . . . . . . . . . . . . . . . . . . . . . . . . . . . . . . . . 1-304
Create a Remote Access Policy for Computer Authentication . . . . 1-310
Check the IDM Configuration . . . . . . . . . . . . . . . . . . . . . . . . . . . . . . . 1-320
Verify Existing Policies Control Wireless Access for Existing Users . . . . . . . . . . . . . . . . . . . . . . . . . . . . . . . . . . . . . . . . . 1-321
Verify Existing Policies Control New Wireless Users . . . . . . . . 1-331
Create New APG Rules for Wireless Access for Existing Users . . . . . . . . . . . . . . . . . . . . . . . . . . . . . . . . . . . . . . . . . . . . . . . . 1-341
Create New APGs for New Wireless Users . . . . . . . . . . . . . . . . . 1-361
Create an APG for Domain Computers . . . . . . . . . . . . . . . . . . . . 1-381
Create Routed VLANs . . . . . . . . . . . . . . . . . . . . . . . . . . . . . . . . . . . . . . . . . 1-385
Design the Routed VLAN . . . . . . . . . . . . . . . . . . . . . . . . . . . . . . . . . . . 1-385
Configure Layer 3 Services on the Wireless Module . . . . . . . . . . . . 1-386
Configure a VLAN Interface on the Wireless Module . . . . . . . . 1-386
Enable IP Routing . . . . . . . . . . . . . . . . . . . . . . . . . . . . . . . . . . . . . 1-389
Configure DHCP Services . . . . . . . . . . . . . . . . . . . . . . . . . . . . . . . 1-391
1-3

Implementing a New Wireless NetworkContents
Configure NAT . . . . . . . . . . . . . . . . . . . . . . . . . . . . . . . . . . . . . . . . . . . . 1-395
Create a Standard ACL for NAT . . . . . . . . . . . . . . . . . . . . . . . . . . 1-395
Configure the Dynamic NAT Definition . . . . . . . . . . . . . . . . . . . 1-400
Define the NAT Inside Interface . . . . . . . . . . . . . . . . . . . . . . . . . 1-403
Configure ACLs to Control Wireless Users . . . . . . . . . . . . . . . . . . . . 1-405
Create an Extended ACL . . . . . . . . . . . . . . . . . . . . . . . . . . . . . . . . 1-406
Create ACL Rules . . . . . . . . . . . . . . . . . . . . . . . . . . . . . . . . . . . . . . 1-408
Apply the ACL to an Interface . . . . . . . . . . . . . . . . . . . . . . . . . . . 1-430
Enable Layer 3 Roaming . . . . . . . . . . . . . . . . . . . . . . . . . . . . . . . . . . . . . . . 1-433
Disable Dynamic VLAN Assignment on Layer 3 Mobility WLANs . . . . . . . . . . . . . . . . . . . . . . . . . . . . . . . . . . . . . . . . . . . . . . . . . . 1-434
Configure Layer 3 Mobility Settings . . . . . . . . . . . . . . . . . . . . . . . . . . 1-437
Specify Layer 3 Mobility Peers . . . . . . . . . . . . . . . . . . . . . . . . . . . . . . 1-438
Enable Layer 3 Mobility . . . . . . . . . . . . . . . . . . . . . . . . . . . . . . . . . . . . 1-440
Implement Additional Layers Security . . . . . . . . . . . . . . . . . . . . . . . . . . . 1-441
Extend ProCurve NIM to Wireless Network . . . . . . . . . . . . . . . . . . . 1-442
Add Wireless Devices to Custom Groups . . . . . . . . . . . . . . . . . . 1-442
Plan Appropriate Actions for the Wireless Network . . . . . . . . . 1-443
Station Intrusion Detection . . . . . . . . . . . . . . . . . . . . . . . . . . . . . . . . . 1-454
Neighbor AP Detection . . . . . . . . . . . . . . . . . . . . . . . . . . . . . . . . . . . . . 1-458
Use AP Detection in PMM . . . . . . . . . . . . . . . . . . . . . . . . . . . . . . . 1-458
Configure AP Detection on an Individual Wireless Module . . . 1-463
MAC Lockout . . . . . . . . . . . . . . . . . . . . . . . . . . . . . . . . . . . . . . . . . . . . . 1-468
Configure MAC Lockout with PMM . . . . . . . . . . . . . . . . . . . . . . . 1-468
Configure MAC Lockout on an Individual Wireless Module . . 1-471
Provide High Availability . . . . . . . . . . . . . . . . . . . . . . . . . . . . . . . . . . . . . . . 1-479
Self-Healing . . . . . . . . . . . . . . . . . . . . . . . . . . . . . . . . . . . . . . . . . . . . . . 1-479
Configure Neighbor Recovery . . . . . . . . . . . . . . . . . . . . . . . . . . . 1-480
Redundancy Groups . . . . . . . . . . . . . . . . . . . . . . . . . . . . . . . . . . . . . . . 1-489
Configure Initial Settings on the Redundant Module . . . . . . . . 1-489
Configure Redundancy Group Settings . . . . . . . . . . . . . . . . . . . . 1-490
Control Which RPs Are Adopted By Each Wireless Module . . . . . . . . . . . . . . . . . . . . . . . . . . . . . . . . . . . . . . . . . . . . . . . 1-495
Copy the Wireless Module Configuration to the Redundant Module . . . . . . . . . . . . . . . . . . . . . . . . . . . . . . . . . . . . . . . . . . . . . . . 1-503
Reset the RPs . . . . . . . . . . . . . . . . . . . . . . . . . . . . . . . . . . . . . . . . . 1-508
1-4

Implementing a New Wireless NetworkContents
Prepare Wireless Endpoints . . . . . . . . . . . . . . . . . . . . . . . . . . . . . . . . . . . . 1-511
Prepare Endpoints to Connect to a WLAN that Enforces WPA/WPA2-PSK . . . . . . . . . . . . . . . . . . . . . . . . . . . . . . . . . . . . . . . . . . 1-512
Prepare Endpoints to Connect to a WLAN that Enforces WPA/WPA2 with 802.1X . . . . . . . . . . . . . . . . . . . . . . . . . . . . . . . . . . . . 1-514
Join the Endpoints to the Domain . . . . . . . . . . . . . . . . . . . . . . . . 1-514
Check and Install Certificates . . . . . . . . . . . . . . . . . . . . . . . . . . . 1-516
Configure the Wireless Client Utility . . . . . . . . . . . . . . . . . . . . . . 1-530
Test the Implementation . . . . . . . . . . . . . . . . . . . . . . . . . . . . . . . . . . . . . . . 1-534
Test an WLAN that Enforces WPA/WPA2 with 802.1X Authentication with IAS and IDM . . . . . . . . . . . . . . . . . . . . . . . . . . . . 1-534
Create Test Users . . . . . . . . . . . . . . . . . . . . . . . . . . . . . . . . . . . . . . 1-534
Grant Test Users Administrator Rights to the Endpoint . . . . . . . . . . . . . . . . . . . . . . . . . . . . . . . . . . . . . . . . . . . . . 1-535
Test the Connection . . . . . . . . . . . . . . . . . . . . . . . . . . . . . . . . . . . . 1-537
Test an WLAN that Enforces Web-Auth with IAS and IDM . . . . . . . . . . 1-544
1-5
Implementing a New Wireless NetworkInstall ProCurve Mobility Manager
aaa port-access authenticator active
aaa port-access A2-A24,B1-B24,C1-C24,D9-D24,E1-E24
aaa accounting network start-stop radius
radius-server host 10.1.1.133
Install ProCurve Mobility Manager
ProCurve Mobility Manager (PMM) is a plug-in to ProCurve Manager Plus (PCM+), which, it is assumed in this example implementation, already runs in your network. It is also assumed that ProCurve Identity Driven Manager (IDM) is already installed, as is ProCurve Network Immunity Manager (NIM), if desired.
You must install PMM on the same server that runs PCM+. Server requirements are listed in Table 1-6.
Table 1-6. Requirements for a Server to Run PCM+/PMM
To install PMM on a server that already runs PCM+, follow these steps:
1. Launch the installation executable (is included on the PMM CD). The InstallAnywhere progress window is displayed; then the ProCurve Manager Installation Wizard is displayed.
Property Requirements for 50 to 250 Managed Devices
Requirements for 250 to 2000 Managed Devices
Processor 3 GHz Pentium 4 or equivalent Intel Xeon or equivalent
RAM 2 GB 4 GB
Disk space 40 GB free space 80 GB free space
NIC Gigabit Gigabit
OS Windows 2003 Server Windows 2003 Server
1-41
Implementing a New Wireless NetworkInstall ProCurve Mobility Manager
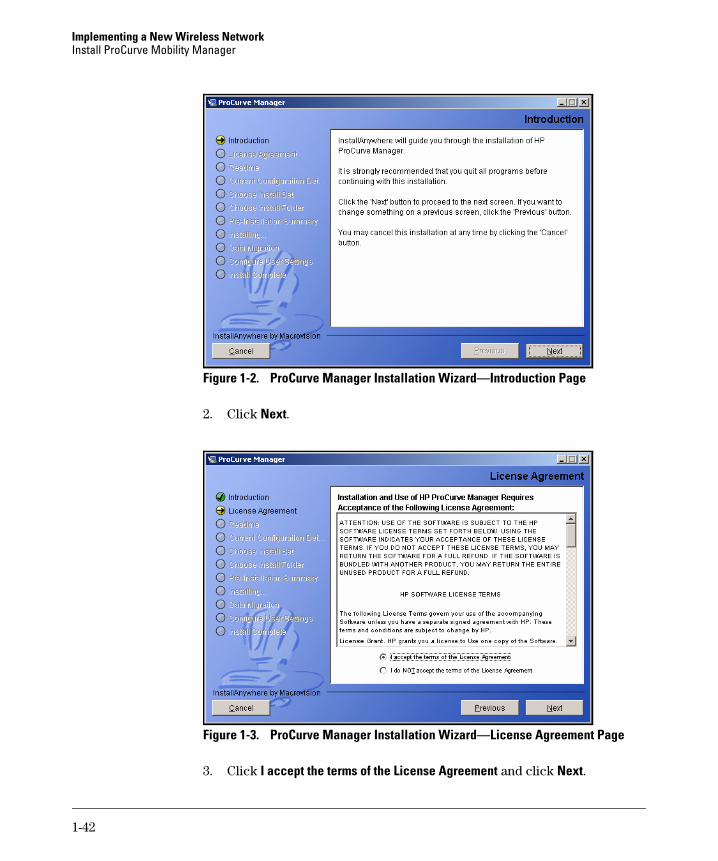
Figure 1-2. ProCurve Manager Installation Wizard—Introduction Page
2. Click Next.
Figure 1-3. ProCurve Manager Installation Wizard—License Agreement Page
3. Click I accept the terms of the License Agreement and click Next.
1-42
Implementing a New Wireless NetworkInstall ProCurve Mobility Manager
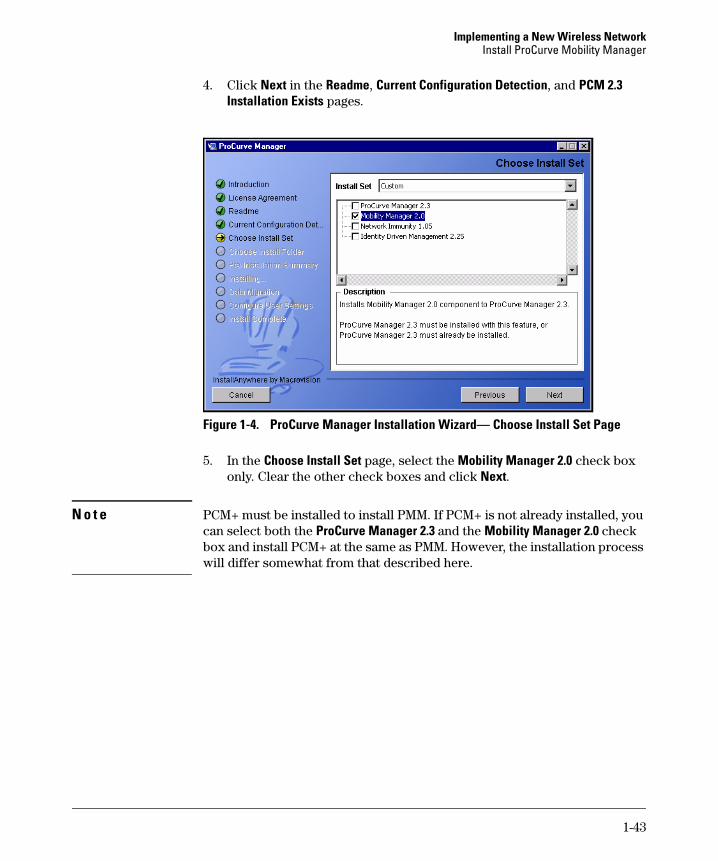
4. Click Next in the Readme, Current Configuration Detection, and PCM 2.3 Installation Exists pages.
Figure 1-4. ProCurve Manager Installation Wizard— Choose Install Set Page
5. In the Choose Install Set page, select the Mobility Manager 2.0 check box only. Clear the other check boxes and click Next.
N o t e PCM+ must be installed to install PMM. If PCM+ is not already installed, you can select both the ProCurve Manager 2.3 and the Mobility Manager 2.0 check box and install PCM+ at the same as PMM. However, the installation process will differ somewhat from that described here.
1-43

Implementing a New Wireless NetworkInstall ProCurve Mobility Manager
Figure 1-5. ProCurve Manager Installation Wizard—Important Upgrade Information Page
6. Read the upgrade information and click Next.
Figure 1-6. ProCurve Manager Installation Wizard—Pre-Installation Summary Page
1-44

Implementing a New Wireless NetworkInstall ProCurve Mobility Manager
7. Click Install.
8. Wait while PMM installs. When the installation is complete, the page in Figure 1-7 is displayed.
Figure 1-7. ProCurve Manager Installation Wizard—Install Complete Page
9. Click Done.
Configure PCM+ to Support a Remote Client
When you install PCM+, both the server and client functions are installed on the computer. You can also install the client function on any number of other computers that have access to the server. You might install the PCM+ client on a remote station, which you will have with you at the wireless installation site so that you can take advantage of PMM’s features onsite.
Before installing the PCM+ client on a remote station, you must first configure the server to allow access from each new remote client station. (For more information about the using remote client stations with PCM, see the Pro-
Curve Manager Network Administrator’s Guide.)
10. On the server that is running PCM+, navigate to C:\Program Files\Hewl-
ett-Packard\PNM\server\config\ and open the access.txt file with any text-based editor. The file will be empty the first time you open it.
1-45
Implementing a New Wireless NetworkInstall ProCurve Mobility Manager
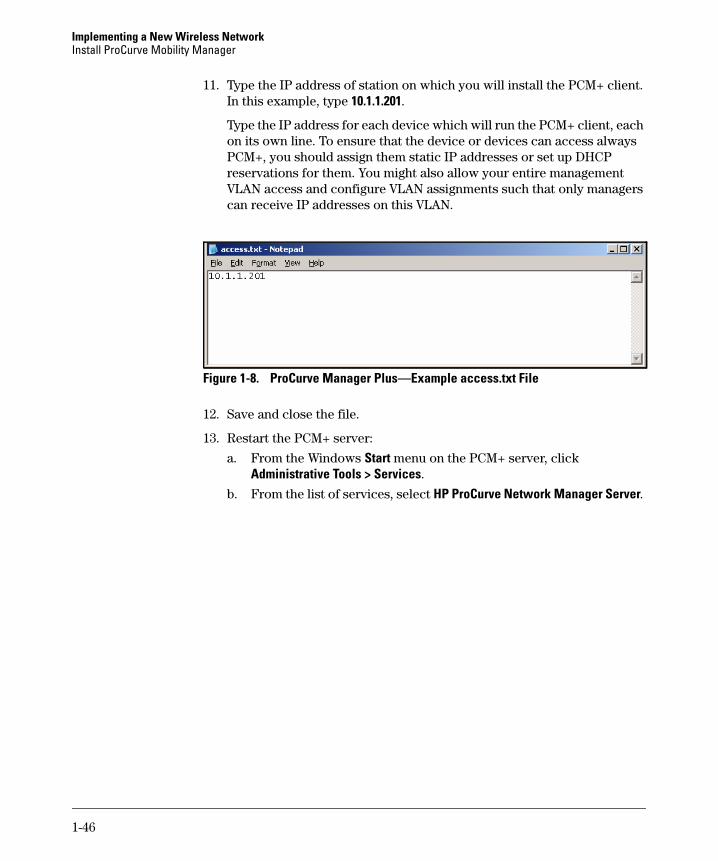
11. Type the IP address of station on which you will install the PCM+ client. In this example, type 10.1.1.201.
Type the IP address for each device which will run the PCM+ client, each on its own line. To ensure that the device or devices can access always PCM+, you should assign them static IP addresses or set up DHCP reservations for them. You might also allow your entire management VLAN access and configure VLAN assignments such that only managers can receive IP addresses on this VLAN.
Figure 1-8. ProCurve Manager Plus—Example access.txt File
12. Save and close the file.
13. Restart the PCM+ server:
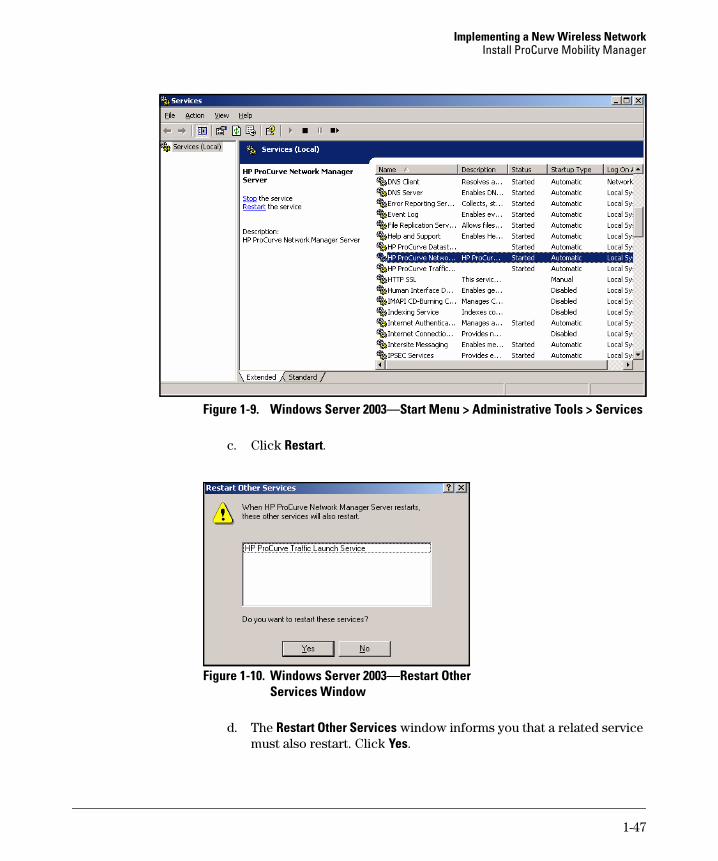
a. From the Windows Start menu on the PCM+ server, click Administrative Tools > Services.
b. From the list of services, select HP ProCurve Network Manager Server.
1-46
Implementing a New Wireless NetworkInstall ProCurve Mobility Manager
Figure 1-9. Windows Server 2003—Start Menu > Administrative Tools > Services
c. Click Restart.
Figure 1-10. Windows Server 2003—Restart Other Services Window
d. The Restart Other Services window informs you that a related service must also restart. Click Yes.
1-47
Implementing a New Wireless NetworkInstall ProCurve Mobility Manager
Figure 1-11. Windows Server 2003—Service Control Window
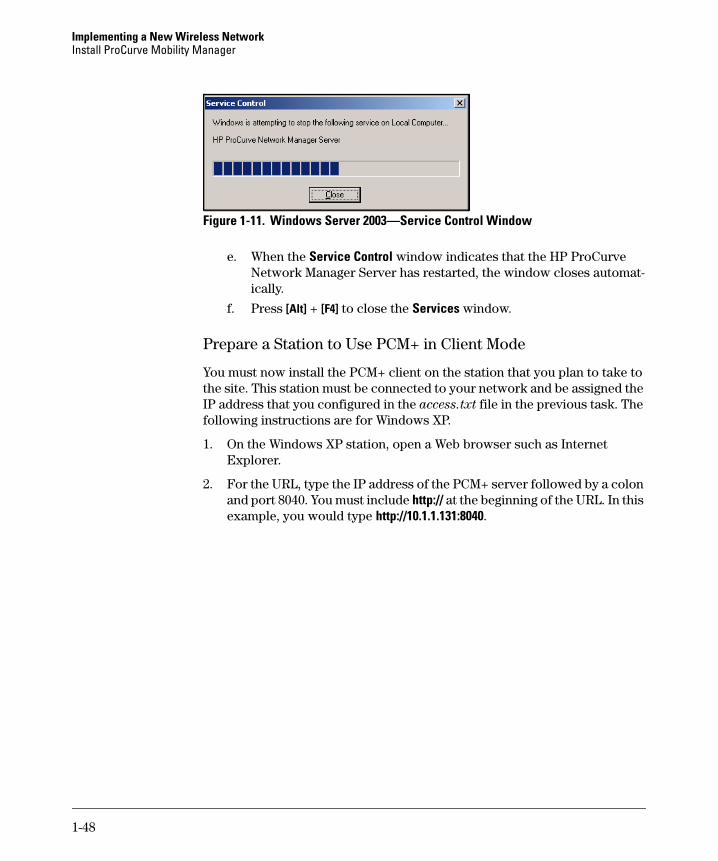
e. When the Service Control window indicates that the HP ProCurve Network Manager Server has restarted, the window closes automat-ically.
f. Press [Alt] + [F4] to close the Services window.
Prepare a Station to Use PCM+ in Client Mode
You must now install the PCM+ client on the station that you plan to take to the site. This station must be connected to your network and be assigned the IP address that you configured in the access.txt file in the previous task. The following instructions are for Windows XP.
1. On the Windows XP station, open a Web browser such as Internet Explorer.
2. For the URL, type the IP address of the PCM+ server followed by a colon and port 8040. You must include http:// at the beginning of the URL. In this example, you would type http://10.1.1.131:8040.
1-48

Implementing a New Wireless NetworkInstall ProCurve Mobility Manager
Figure 1-12. ProCurve Manager Plus—Download Window (http://<PCM+ IP address>:8040)
3. Click Download the PCM Remote Client.
1-49

Implementing a New Wireless NetworkInstall ProCurve Mobility Manager
Figure 1-13. ProCurve Manager Plus Client Window
4. Click Download Installer for Windows.
If your browser prompts you, allow ActiveX and Java to run.
5. Save the install.exe file on the station.
6. When the file has downloaded, double-click it to start the installation. The ProCurve Manager Remote Client Install Wizard is launched.
1-50
Implementing a New Wireless NetworkInstall ProCurve Mobility Manager
Figure 1-14. ProCurve Manager Remote Client Install Wizard—Introduction Page
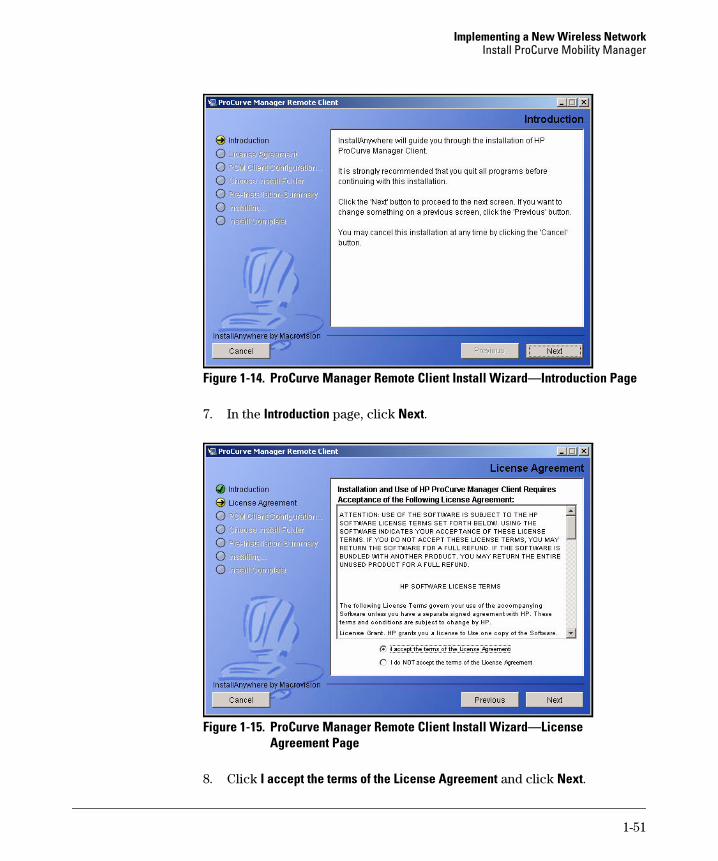
7. In the Introduction page, click Next.
Figure 1-15. ProCurve Manager Remote Client Install Wizard—License Agreement Page
8. Click I accept the terms of the License Agreement and click Next.
1-51

Implementing a New Wireless NetworkInstall ProCurve Mobility Manager
9. Click Next in the PCM Client Configuration Detection page. If more than one page is displayed, click Next again.
Figure 1-16. ProCurve Manager Remote Client Install Wizard—Choose Install Folder Page
10. Choose the installation folder for the client. Click Choose to browse the file directory. In this example, accept the default, C:\Program Files\Hewlett-Packard\PNM.
11. Click Next.
1-52

Implementing a New Wireless NetworkInstall ProCurve Mobility Manager
Figure 1-17. ProCurve Manager Remote Client Install Wizard—Pre-Installation Summary Page
12. Click Install.
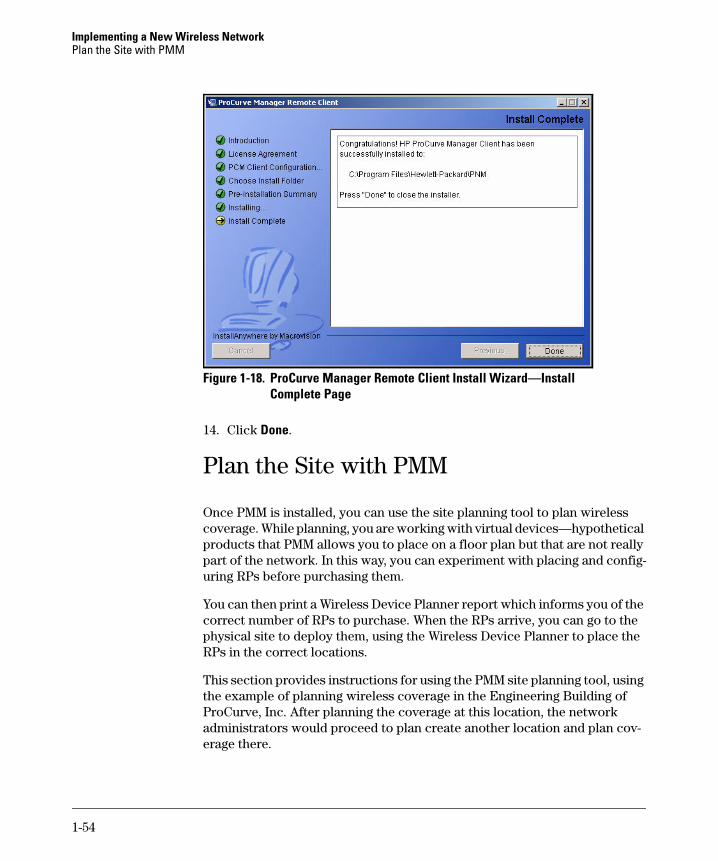
13. Wait while PMM installs. When the installation is complete, the page in Figure 1-18 is displayed.
1-53
Implementing a New Wireless NetworkPlan the Site with PMM
Figure 1-18. ProCurve Manager Remote Client Install Wizard—Install Complete Page
14. Click Done.
Plan the Site with PMM
Once PMM is installed, you can use the site planning tool to plan wireless coverage. While planning, you are working with virtual devices—hypothetical products that PMM allows you to place on a floor plan but that are not really part of the network. In this way, you can experiment with placing and config-uring RPs before purchasing them.
You can then print a Wireless Device Planner report which informs you of the correct number of RPs to purchase. When the RPs arrive, you can go to the physical site to deploy them, using the Wireless Device Planner to place the RPs in the correct locations.
This section provides instructions for using the PMM site planning tool, using the example of planning wireless coverage in the Engineering Building of ProCurve, Inc. After planning the coverage at this location, the network administrators would proceed to plan create another location and plan cov-erage there.
1-54