Embed Size (px)
Citation preview
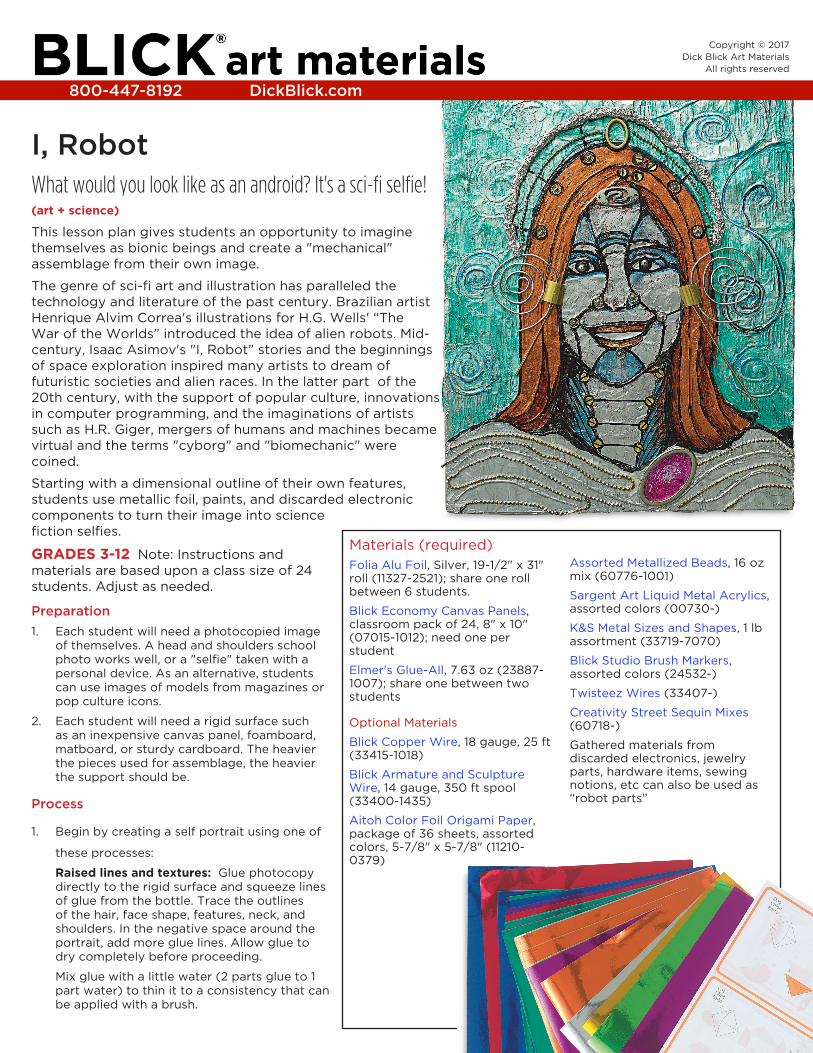
I, Robot What would you look like as an android? It's a sci-fi selfie!(art + science)
This lesson plan gives students an opportunity to imagine themselves as bionic beings and create a "mechanical" assemblage from their own image.
The genre of sci-fi art and illustration has paralleled the technology and literature of the past century. Brazilian artist Henrique Alvim Correa's illustrations for H.G. Wells' “The War of the Worlds” introduced the idea of alien robots. Mid-century, Isaac Asimov's "I, Robot” stories and the beginnings of space exploration inspired many artists to dream of futuristic societies and alien races. In the latter part of the 20th century, with the support of popular culture, innovations in computer programming, and the imaginations of artists such as H.R. Giger, mergers of humans and machines became virtual and the terms "cyborg" and "biomechanic" were coined.
Starting with a dimensional outline of their own features, students use metallic foil, paints, and discarded electronic components to turn their image into science fiction selfies.
GRADES 3-12 Note: Instructions and materials are based upon a class size of 24 students. Adjust as needed.
Preparation
1. Each student will need a photocopied image of themselves. A head and shoulders school photo works well, or a "selfie" taken with a personal device. As an alternative, students can use images of models from magazines or pop culture icons.
2. Each student will need a rigid surface such as an inexpensive canvas panel, foamboard, matboard, or sturdy cardboard. The heavier the pieces used for assemblage, the heavier the support should be.
Process
1. Begin by creating a self portrait using one of
these processes:
Raised lines and textures: Glue photocopy directly to the rigid surface and squeeze lines of glue from the bottle. Trace the outlines of the hair, face shape, features, neck, and shoulders. In the negative space around the portrait, add more glue lines. Allow glue to dry completely before proceeding.
Mix glue with a little water (2 parts glue to 1 part water) to thin it to a consistency that can be applied with a brush.
Copyright © 2017Dick Blick Art Materials
All rights reserved
800-447-8192 DickBlick.com
Materials (required)Folia Alu Foil, Silver, 19-1/2" x 31" roll (11327-2521); share one roll between 6 students.
Blick Economy Canvas Panels, classroom pack of 24, 8" x 10" (07015-1012); need one per student
Elmer's Glue-All, 7.63 oz (23887-1007); share one between two students
Optional Materials
Blick Copper Wire, 18 gauge, 25 ft (33415-1018)
Blick Armature and Sculpture Wire, 14 gauge, 350 ft spool (33400-1435)
Aitoh Color Foil Origami Paper, package of 36 sheets, assorted colors, 5-7/8" x 5-7/8" (11210-0379)
Assorted Metallized Beads, 16 oz mix (60776-1001)
Sargent Art Liquid Metal Acrylics, assorted colors (00730-)
K&S Metal Sizes and Shapes, 1 lb assortment (33719-7070)
Blick Studio Brush Markers, assorted colors (24532-)
Twisteez Wires (33407-)
Creativity Street Sequin Mixes (60718-)
Gathered materials from discarded electronics, jewelry parts, hardware items, sewing notions, etc can also be used as “robot parts”

Cover the surface, including the portrait area, with a coat of glue and lay foil over the glue. Beginning in the center of the piece, press the foil tightly over the surface with fingers. Use a rounded tool (such as a clay tool or the handle of a paintbrush) to push the foil against the glue lines so they are clearly visible.
Embossed lines: Begin by gluing foil to rigid surface. Alternately, foil pieces can be cut slightly larger and wrapped around the edges of the surface.
Place photocopy over the foil. Secure with a small piece of tape to make sure the copy doesnt move.
Trace over the main features of the photo with a ball point pen, using enough pressure so that lines emboss into the foil below. Remove photocopy before proceeding.
3. Design an assemblage using gathered materials. Wires, sewing notions, hardware, and old jewelry parts work well. Colorful foil paper, tooling foil, metallic paint, or permanent markers are great for adding some color.
A push pin may be used to create holes in the surface to guide wires through.
If available, discarded electronic equipment such as outdated cell phones, old computers, and radios are a perfect source for "robot" parts. Carefully disassemble wires, circuits, chips, transistors, etc., and glue into place.
Metal components such as old jewelry parts, hardware items, sewing notions, etc, can also be useful for robot parts.
National Core Arts Standards - Visual Arts
Creating Anchor Standard 2: Organize and develop artistic ideas and work.
Connecting Anchor Standard 11: Relate artistic ideas and works with societal, cultural, and historical context to deepen understanding.
Step 2: Cover with aluminum foil and press around glue lines so features are easily visible.
Step 3: Use a variety of materials to make "robot parts" — metallic papers and paints, jewelry and hardware, repurposed electronic elements. Glue items to the aluminum foil surface.
Step 1: Glue a photocopied portrait onto a rigid surface. Trace the features with glue lines. Alternately, secure foil to surface first and trace features with a pen to emboss the lines.
2.800-447-8192 DickBlick.com