Embed Size (px)
Citation preview

Original instructions
6/20
OPERATOR'S MANUAL
OMR25PXENG.620
HYDRAULIC HAMMERRAMMER R25P
OPERATION. . . . . . . . . . . . . . . . . . . . . . . . . . . 31. Introduction . . . . . . . . . . . . . . . . . . . . . . 42. Safety and environmental instructions. . 103. Safety section . . . . . . . . . . . . . . . . . . . . 324. Safety during operation. . . . . . . . . . . . . 445. Transportation, storage and setting up . 516. Hammer installation and removal. . . . . 547. Operation . . . . . . . . . . . . . . . . . . . . . . . 58
LUBRICATION . . . . . . . . . . . . . . . . . . . . . . . . 771. Greasing the hammer . . . . . . . . . . . . . . 782. Hydraulic oil. . . . . . . . . . . . . . . . . . . . . 84
MAINTENANCE . . . . . . . . . . . . . . . . . . . . . . . 851. Routine maintenance . . . . . . . . . . . . . . 862. Releasing pressure from the hammer. . . 893. Checking pressure in
the low pressure accumulator. . . . . . . . 904. Recharging the
low pressure accumulator. . . . . . . . . . . 955. Changing the tool . . . . . . . . . . . . . . . . . 996. Changing the lower tool bushing . . . . 1047. Troubleshooting . . . . . . . . . . . . . . . . . 105
SPECIFICATIONS . . . . . . . . . . . . . . . . . . . . . 1111. Hammer specifications . . . . . . . . . . . . 1122. Tool specifications . . . . . . . . . . . . . . . 1163. CE mark and
EC Declaration of Conformity . . . . . . 117
Operation - Page 3COPYRIGHT © 2020 SANDVIK MINING AND CONSTRUCTION OY
R25P
OPERATION
COPYRIGHT © 2020 SANDVIK MINING AND CONSTRUCTION OYPage 4 - Operation
Introduction R25P
1. INTRODUCTION
1.1 THIS MANUAL
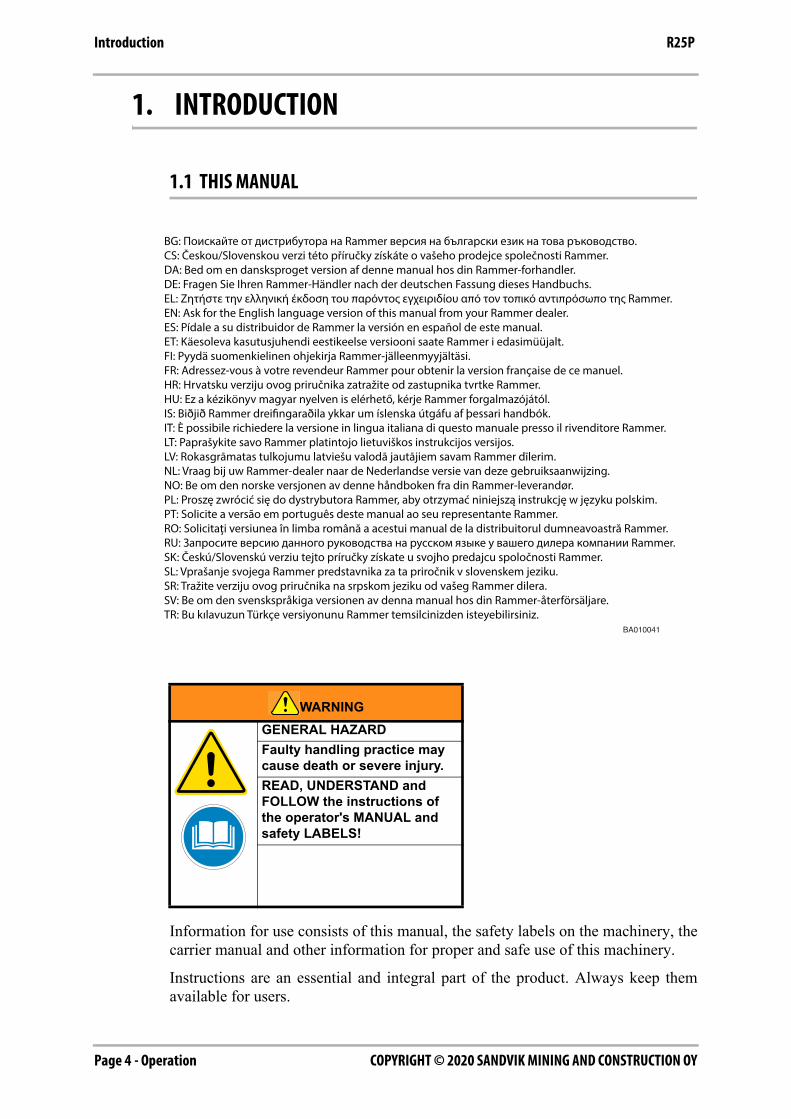
Information for use consists of this manual, the safety labels on the machinery, thecarrier manual and other information for proper and safe use of this machinery.
Instructions are an essential and integral part of the product. Always keep themavailable for users.
WARNINGGENERAL HAZARDFaulty handling practice may cause death or severe injury.READ, UNDERSTAND and FOLLOW the instructions of the operator's MANUAL and safety LABELS!
BA010041
BG: Поискайте от дистрибутора на Rammer версия на български език на това ръководство.CS: Českou/Slovenskou verzi této příručky získáte o vašeho prodejce společnosti Rammer.DA: Bed om en dansksproget version af denne manual hos din Rammer-forhandler.DE: Fragen Sie Ihren Rammer-Händler nach der deutschen Fassung dieses Handbuchs.EL: Ζητήστε την ελληνική έκδοση του παρόντος εγχειριδίου από τον τοπικό αντιπρόσωπο της Rammer.EN: Ask for the English language version of this manual from your Rammer dealer.ES: Pídale a su distribuidor de Rammer la versión en español de este manual.ET: Käesoleva kasutusjuhendi eestikeelse versiooni saate Rammer i edasimüüjalt.FI: Pyydä suomenkielinen ohjekirja Rammer-jälleenmyyjältäsi.FR: Adressez-vous à votre revendeur Rammer pour obtenir la version française de ce manuel.HR: Hrvatsku verziju ovog priručnika zatražite od zastupnika tvrtke Rammer.HU: Ez a kézikönyv magyar nyelven is elérhető, kérje Rammer forgalmazójától.IS: Biðjið Rammer dreifingaraðila ykkar um íslenska útgáfu af þessari handbók.IT: È possibile richiedere la versione in lingua italiana di questo manuale presso il rivenditore Rammer.LT: Paprašykite savo Rammer platintojo lietuviškos instrukcijos versijos.LV: Rokasgrāmatas tulkojumu latviešu valodā jautājiem savam Rammer dīlerim.NL: Vraag bij uw Rammer-dealer naar de Nederlandse versie van deze gebruiksaanwijzing.NO: Be om den norske versjonen av denne håndboken fra din Rammer-leverandør.PL: Proszę zwrócić się do dystrybutora Rammer, aby otrzymać niniejszą instrukcję w języku polskim.PT: Solicite a versão em português deste manual ao seu representante Rammer.RO: Solicitaţi versiunea în limba română a acestui manual de la distribuitorul dumneavoastră Rammer.RU: Запросите версию данного руководства на русском языке у вашего дилера компании Rammer.SK: Českú/Slovenskú verziu tejto príručky získate u svojho predajcu spoločnosti Rammer.SL: Vprašanje svojega Rammer predstavnika za ta priročnik v slovenskem jeziku.SR: Tražite verziju ovog priručnika na srpskom jeziku od vašeg Rammer dilera.SV: Be om den svenskspråkiga versionen av denna manual hos din Rammer-återförsäljare.TR: Bu kılavuzun Türkçe versiyonunu Rammer temsilcinizden isteyebilirsiniz.
Operation - Page 5COPYRIGHT © 2020 SANDVIK MINING AND CONSTRUCTION OY
IntroductionR25P
Store this manual in the operator's compartment in the literature holder or seat backliterature storage area for easy user access at any time.
Keep all information for use clean and in good condition. If necessary, ask for atranslation of information for use.
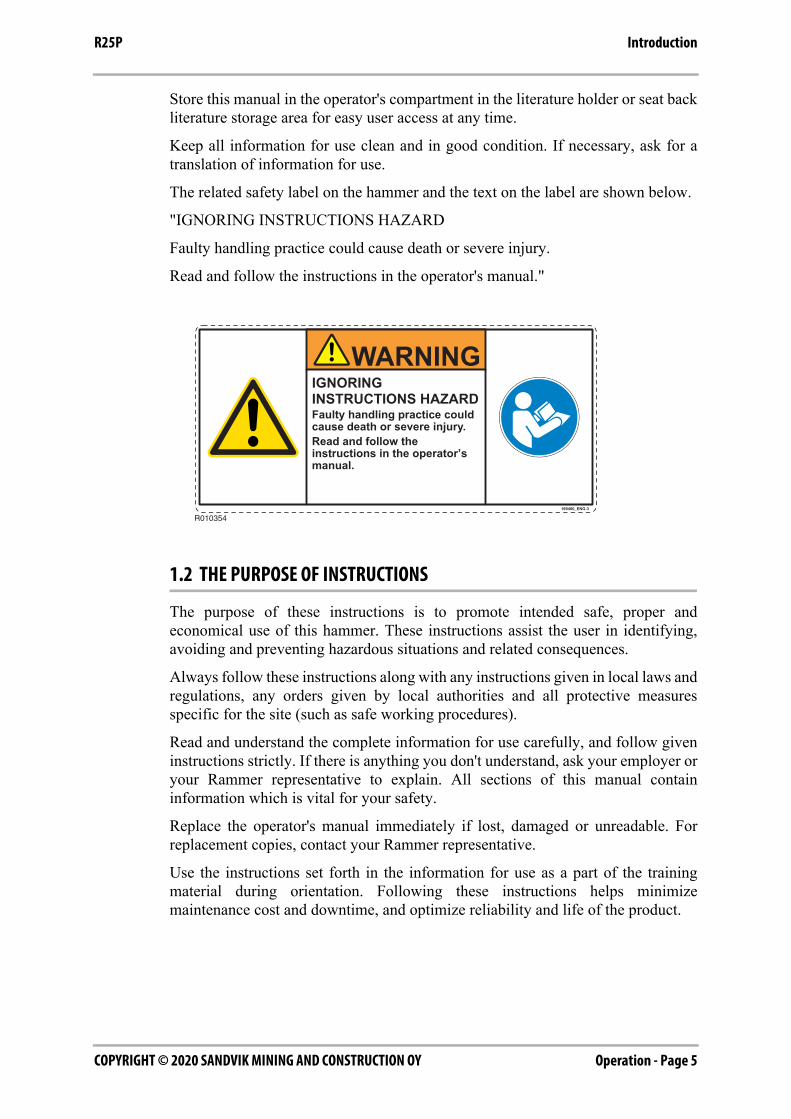
The related safety label on the hammer and the text on the label are shown below.
"IGNORING INSTRUCTIONS HAZARD
Faulty handling practice could cause death or severe injury.
Read and follow the instructions in the operator's manual."
1.2 THE PURPOSE OF INSTRUCTIONS
The purpose of these instructions is to promote intended safe, proper andeconomical use of this hammer. These instructions assist the user in identifying,avoiding and preventing hazardous situations and related consequences.
Always follow these instructions along with any instructions given in local laws andregulations, any orders given by local authorities and all protective measuresspecific for the site (such as safe working procedures).
Read and understand the complete information for use carefully, and follow giveninstructions strictly. If there is anything you don't understand, ask your employer oryour Rammer representative to explain. All sections of this manual containinformation which is vital for your safety.
Replace the operator's manual immediately if lost, damaged or unreadable. Forreplacement copies, contact your Rammer representative.
Use the instructions set forth in the information for use as a part of the trainingmaterial during orientation. Following these instructions helps minimizemaintenance cost and downtime, and optimize reliability and life of the product.
R010354
IGNORINGINSTRUCTIONS HAZARDFaulty handling practice couldcause death or severe injury.Read and follow theinstructions in the operator’smanual.
WARNING
169400_ENG-3
COPYRIGHT © 2020 SANDVIK MINING AND CONSTRUCTION OYPage 6 - Operation
Introduction R25P
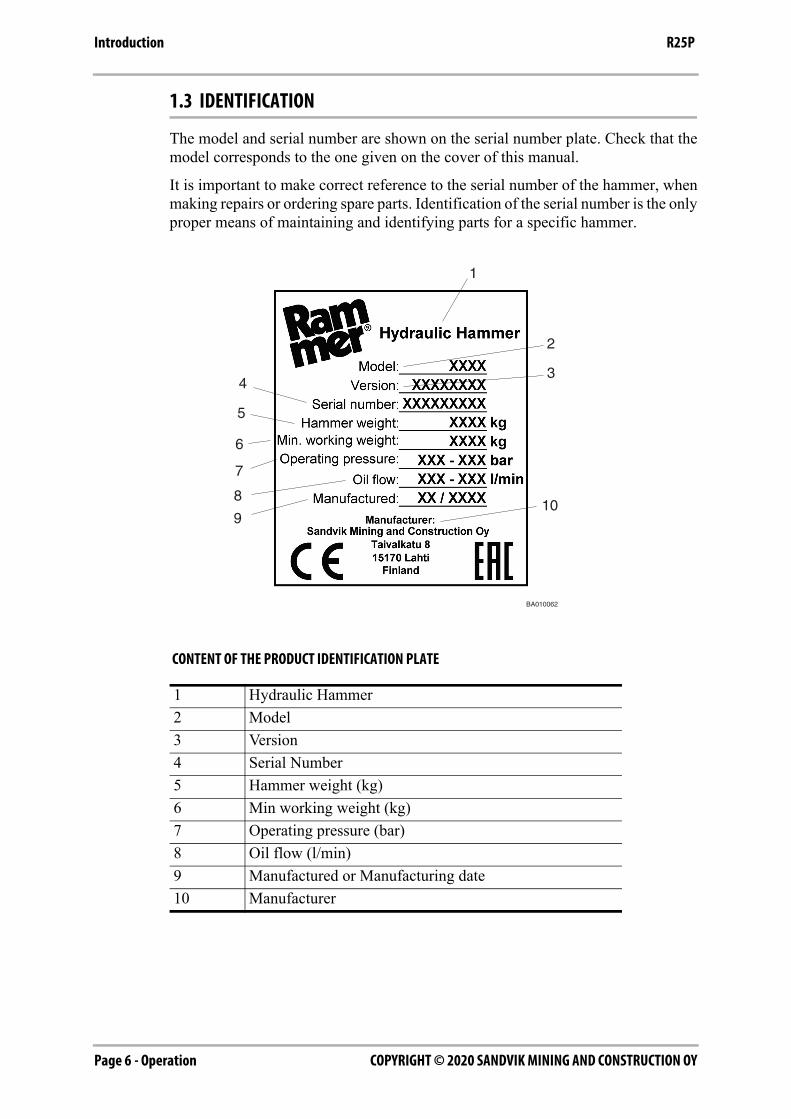
1.3 IDENTIFICATION
The model and serial number are shown on the serial number plate. Check that themodel corresponds to the one given on the cover of this manual.
It is important to make correct reference to the serial number of the hammer, whenmaking repairs or ordering spare parts. Identification of the serial number is the onlyproper means of maintaining and identifying parts for a specific hammer.
CONTENT OF THE PRODUCT IDENTIFICATION PLATE
1 Hydraulic Hammer2 Model3 Version4 Serial Number5 Hammer weight (kg)6 Min working weight (kg)7 Operating pressure (bar)8 Oil flow (l/min)9 Manufactured or Manufacturing date10 Manufacturer
BA010062
1
2
34
5
6
7
8
910
Operation - Page 7COPYRIGHT © 2020 SANDVIK MINING AND CONSTRUCTION OY
IntroductionR25P
1.4 MANUFACTURER
This hydraulic hammer has been manufactured by:
Sandvik Mining and Construction Oy, Breakers Lahti, Taivalkatu 8, FI - 15170Lahti, Finland.
For maintenance and service of this hydraulic hammer contact your nearestRammer representative. Dealer and distributor information may be found atwww.rammer.com.
1.5 CE MARK AND EC DECLARATION OF CONFORMITY
The CE mark is located on the serial number plate of the hammer. See “CE markand EC Declaration of Conformity” on page 117.
1.6 VALIDITY OF MANUAL
This manual contains safety information, operation instructions, transportationinformation, lubrication information and maintenance information in accordancewith the hydraulic hammer design at the time it was delivered from factory.
This manual, and especially its safety information as well as the EC declaration ofconformity and statement of compliance, are valid only, if no unauthorized changesto the product are made.
Some illustrations in this publication show details that can be different from yourhammer. Guards and covers may have been removed for illustrative purposes.
Continuing improvement and advancement of product design may have causedchanges to your hammer, which are not included in this publication.
Whenever a question arises regarding your hammer, or this manual, please consultyour dealer for the latest available information.
1.7 COPYRIGHT NOTICE
This publication is copyright of Sandvik Mining and Construction Oy, BreakersLahti, Finland.
© Sandvik Mining and Construction Oy, Breakers Lahti, Finland 2018.
It must not be copied, reproduced, or otherwise made available in full or in part toany third party without our prior written consent.
All Rights Reserved.
COPYRIGHT © 2020 SANDVIK MINING AND CONSTRUCTION OYPage 8 - Operation
Introduction R25P
Operation - Page 9COPYRIGHT © 2020 SANDVIK MINING AND CONSTRUCTION OY
IntroductionR25P
1.8 DEFINITIONS
Hammer - the product described in this manual.
Tool - the wear part which is in direct contact with the rock.
Carrier - the base machine, onto which the hammer is mounted, and which suppliesthe operating power and controls, with which the hammer is operated.
This Manual - this one complete book, which contains vital information fortransportation, handling and storage as well as installation, operation andmaintenance of the hammer.
Safety Label - label applied on the hammer advising on protective measures for themost severe risks.
Information for Use - the information in this manual, the safety labels on hammerand other information on, for example, the delivery package. This providesprotective measures and advice on proper methods for transportation, installation,operation and maintenance of the hammer.
Intended Use - use of this hammer in accordance with the instructions provided ininformation for use.
Prohibited Use - any use of this hammer, which is not intended use. Especially theuse which is specifically prohibited in information for use.
Reasonably Foreseeable Misuse - use of the hammer in a way not intended, butwhich may result from readily predictable human behaviour.
User - any person handling the hammer, whether it be transportation, installation,operation, scheduled maintenance, scrapping or other.
Harm - physical injury or damage to health. This is always in relationship to people,not to equipment or property.
Hazard - potential source of harm.
Risk - the combination of the probability of occurrence of harm and the severity ofthat harm.
Protective Measure - the measure intended to achieve risk reduction. The protectivemeasures are implemented by the designer where possible, and by the user, wheredesign measures are not sufficient for safe operation.
Protective measures for the user are given in the information for use.
User Obligations - protective measures, which must be taken by the user based onthe information for use.
Hazard Zone - any space around the hammer or the carrier, in which a person canbe exposed to a hazard.
Bystander - any person in hazard zone, who is not handling the hammer.
Real Time Hazard Analysis (RTHA) - review of site before starting to work, inorder to identify potential hazards that could impact users, bystanders orenvironment.
COPYRIGHT © 2020 SANDVIK MINING AND CONSTRUCTION OYPage 10 - Operation
Safety and environmental instructions R25P
2. SAFETY AND ENVIRONMENTAL INSTRUCTIONSSafety is the result of attitude. Proper attitude includes:
- Realize the hazards related to what you do, whether it be operation ormaintenance. Don't ever take hazards lightly.
- Follow all local laws and regulations. Leave special work to the specialist.
Special conditions, such as radioactive, asbestos, chemical, poisonous orbiological hazard environment require unconditional use of hazard specificmethods and protective measures.
- Read, understand and follow the instructions of this manual! Read, understandand follow the instructions of carrier manual! If this language version is notproper, ask for a translation of this manual.
- Communicate! Tell other people what you are about to do, so that they do notplace you or themselves at risk. Installation or other maintenance related workmust never be done alone.
Always keep people informed of what you are doing when and where. Keepmobile phone always at hand. Advise site manager, when you leave site.
Agree with your colleagues on site on the use of hand signals. Do not assumeany knowledge of signals.
- Wear approved PPE (approved safety boots, approved safety gloves, approvedsafety glasses, approved ear protection, approved hard hat). If your PPE is notfunctioning properly, get new PPE equipment. Only operate the product whenin fit condition. Beware of sharp edges of parts.
- Common sense is the most important part of safety in standard hammerapplications.
Operation - Page 11COPYRIGHT © 2020 SANDVIK MINING AND CONSTRUCTION OY
Safety and environmental instructionsR25P
2.1 SAFETY LABELS
This section includes explanations of safety symbols and labels used on the hammerand in information for use.
SIGNAL WORDS
The following signal words and symbols are used to identify safety messages inthese instructions:
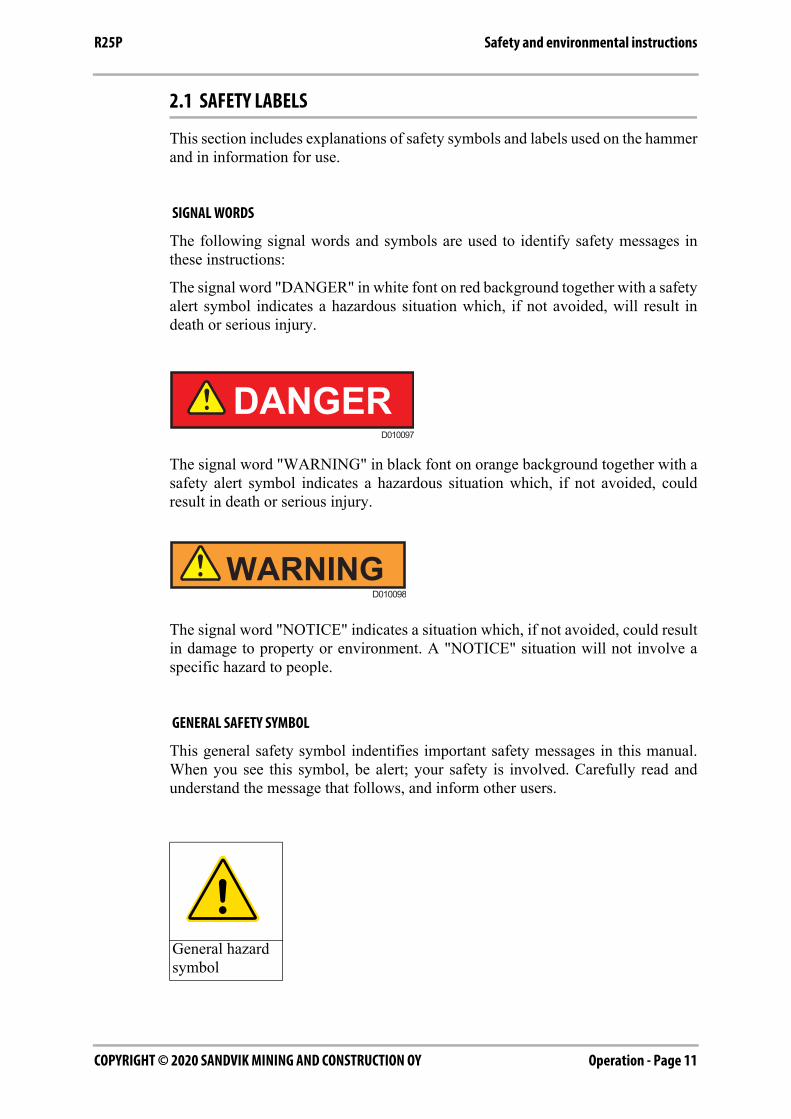
The signal word "DANGER" in white font on red background together with a safetyalert symbol indicates a hazardous situation which, if not avoided, will result indeath or serious injury.
The signal word "WARNING" in black font on orange background together with asafety alert symbol indicates a hazardous situation which, if not avoided, couldresult in death or serious injury.
The signal word "NOTICE" indicates a situation which, if not avoided, could resultin damage to property or environment. A "NOTICE" situation will not involve aspecific hazard to people.
GENERAL SAFETY SYMBOL
This general safety symbol indentifies important safety messages in this manual.When you see this symbol, be alert; your safety is involved. Carefully read andunderstand the message that follows, and inform other users.
General hazard symbol
D010097
D010098
COPYRIGHT © 2020 SANDVIK MINING AND CONSTRUCTION OYPage 12 - Operation
Safety and environmental instructions R25P
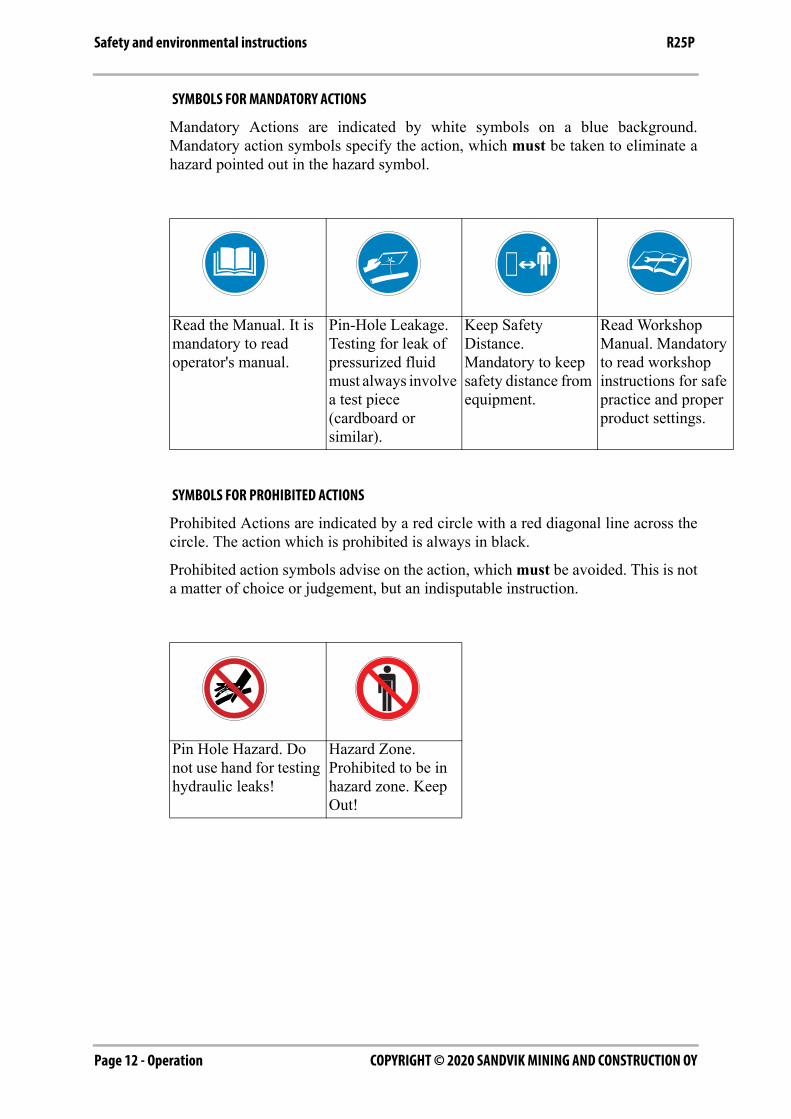
SYMBOLS FOR MANDATORY ACTIONS
Mandatory Actions are indicated by white symbols on a blue background.Mandatory action symbols specify the action, which must be taken to eliminate ahazard pointed out in the hazard symbol.
SYMBOLS FOR PROHIBITED ACTIONS
Prohibited Actions are indicated by a red circle with a red diagonal line across thecircle. The action which is prohibited is always in black.
Prohibited action symbols advise on the action, which must be avoided. This is nota matter of choice or judgement, but an indisputable instruction.
Read the Manual. It is mandatory to read operator's manual.
Pin-Hole Leakage. Testing for leak of pressurized fluid must always involve a test piece (cardboard or similar).
Keep Safety Distance. Mandatory to keep safety distance from equipment.
Read Workshop Manual. Mandatory to read workshop instructions for safe practice and proper product settings.
Pin Hole Hazard. Do not use hand for testing hydraulic leaks!
Hazard Zone. Prohibited to be in hazard zone. Keep Out!
Operation - Page 13COPYRIGHT © 2020 SANDVIK MINING AND CONSTRUCTION OY
Safety and environmental instructionsR25P
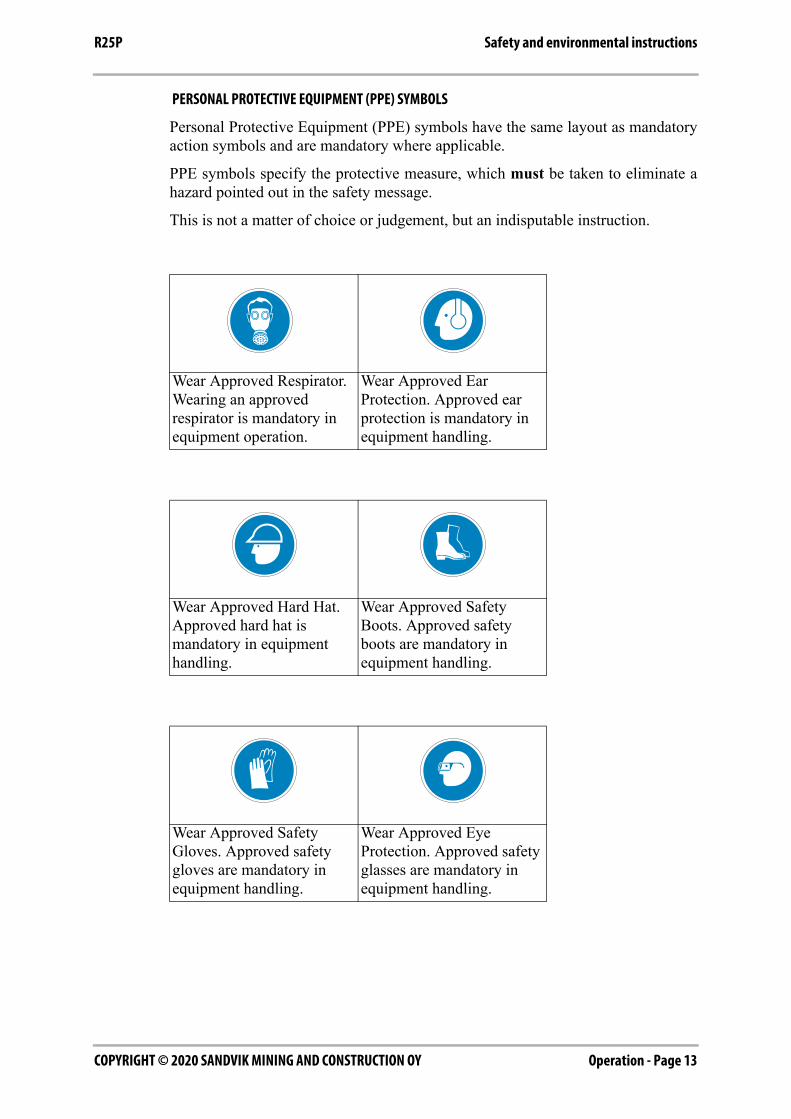
PERSONAL PROTECTIVE EQUIPMENT (PPE) SYMBOLS
Personal Protective Equipment (PPE) symbols have the same layout as mandatoryaction symbols and are mandatory where applicable.
PPE symbols specify the protective measure, which must be taken to eliminate ahazard pointed out in the safety message.
This is not a matter of choice or judgement, but an indisputable instruction.
Wear Approved Respirator. Wearing an approved respirator is mandatory in equipment operation.
Wear Approved Ear Protection. Approved ear protection is mandatory in equipment handling.
Wear Approved Hard Hat. Approved hard hat is mandatory in equipment handling.
Wear Approved Safety Boots. Approved safety boots are mandatory in equipment handling.
Wear Approved Safety Gloves. Approved safety gloves are mandatory in equipment handling.
Wear Approved Eye Protection. Approved safety glasses are mandatory in equipment handling.
COPYRIGHT © 2020 SANDVIK MINING AND CONSTRUCTION OYPage 14 - Operation
Safety and environmental instructions R25P
Operation - Page 15COPYRIGHT © 2020 SANDVIK MINING AND CONSTRUCTION OY
Safety and environmental instructionsR25P
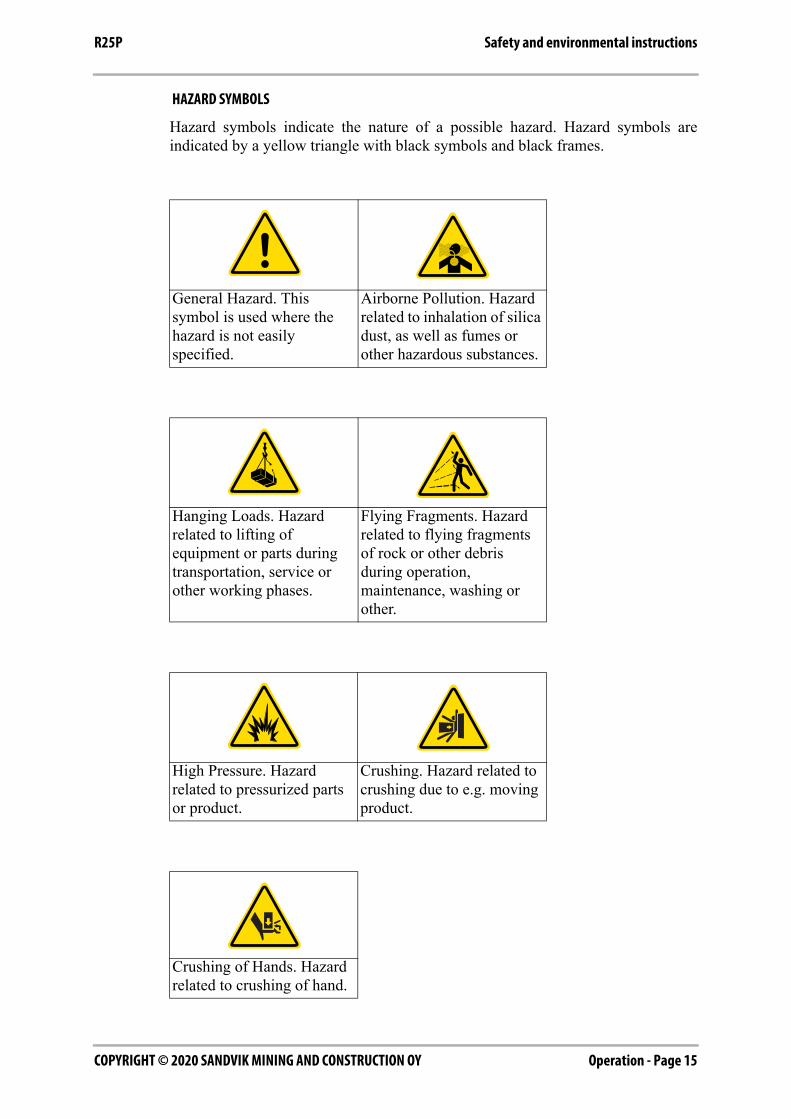
HAZARD SYMBOLS
Hazard symbols indicate the nature of a possible hazard. Hazard symbols areindicated by a yellow triangle with black symbols and black frames.
General Hazard. This symbol is used where the hazard is not easily specified.
Airborne Pollution. Hazard related to inhalation of silica dust, as well as fumes or other hazardous substances.
Hanging Loads. Hazard related to lifting of equipment or parts during transportation, service or other working phases.
Flying Fragments. Hazard related to flying fragments of rock or other debris during operation, maintenance, washing or other.
High Pressure. Hazard related to pressurized parts or product.
Crushing. Hazard related to crushing due to e.g. moving product.
Crushing of Hands. Hazard related to crushing of hand.
COPYRIGHT © 2020 SANDVIK MINING AND CONSTRUCTION OYPage 16 - Operation
Safety and environmental instructions R25P
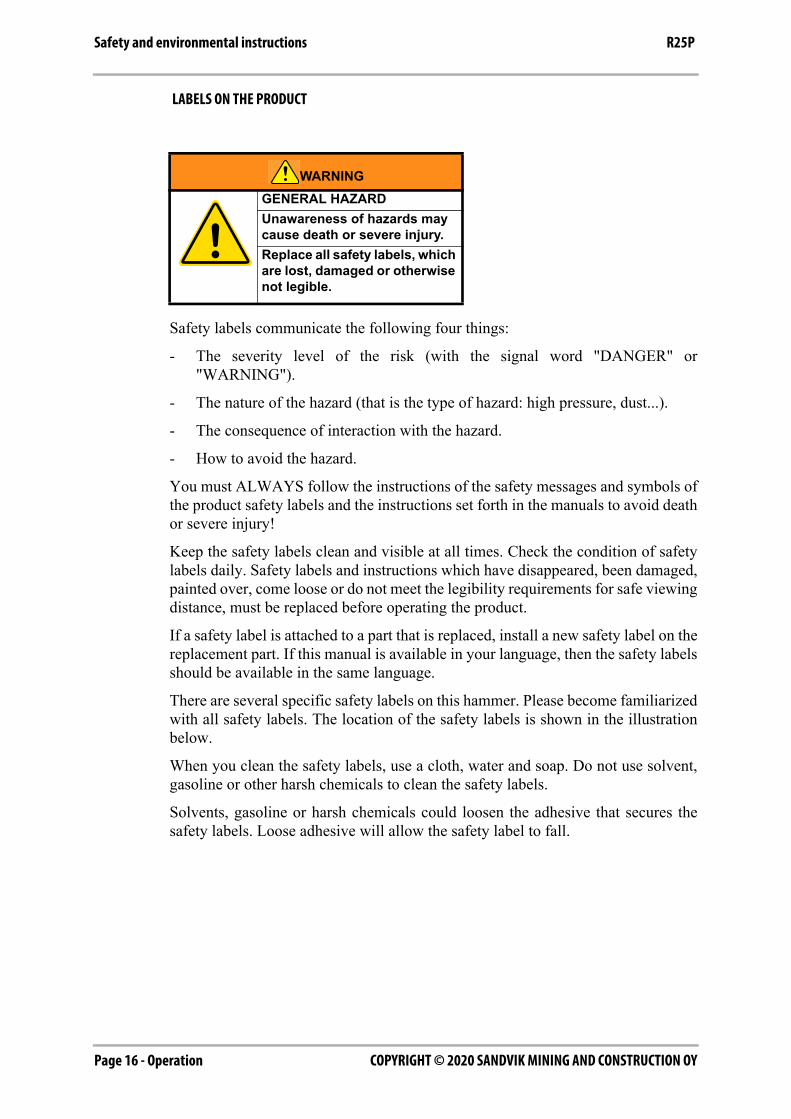
LABELS ON THE PRODUCT
Safety labels communicate the following four things:
- The severity level of the risk (with the signal word "DANGER" or"WARNING").
- The nature of the hazard (that is the type of hazard: high pressure, dust...).
- The consequence of interaction with the hazard.
- How to avoid the hazard.
You must ALWAYS follow the instructions of the safety messages and symbols ofthe product safety labels and the instructions set forth in the manuals to avoid deathor severe injury!
Keep the safety labels clean and visible at all times. Check the condition of safetylabels daily. Safety labels and instructions which have disappeared, been damaged,painted over, come loose or do not meet the legibility requirements for safe viewingdistance, must be replaced before operating the product.
If a safety label is attached to a part that is replaced, install a new safety label on thereplacement part. If this manual is available in your language, then the safety labelsshould be available in the same language.
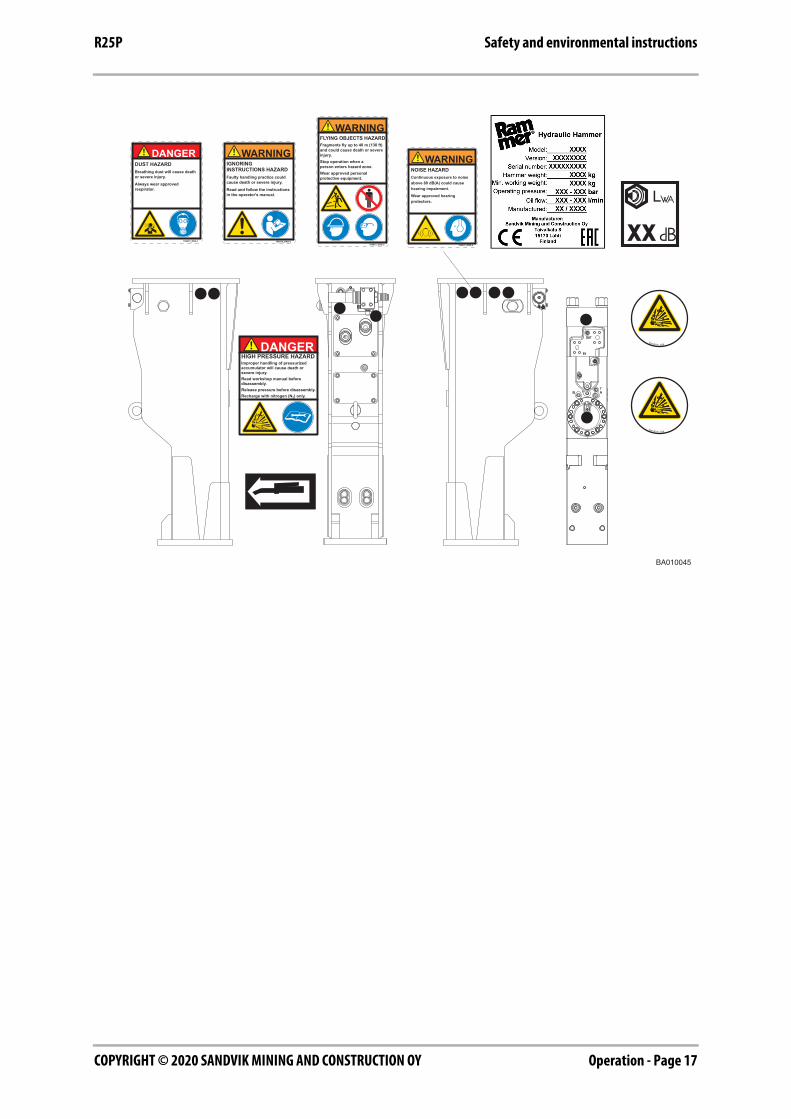
There are several specific safety labels on this hammer. Please become familiarizedwith all safety labels. The location of the safety labels is shown in the illustrationbelow.
When you clean the safety labels, use a cloth, water and soap. Do not use solvent,gasoline or other harsh chemicals to clean the safety labels.
Solvents, gasoline or harsh chemicals could loosen the adhesive that secures thesafety labels. Loose adhesive will allow the safety label to fall.
WARNINGGENERAL HAZARDUnawareness of hazards may cause death or severe injury.Replace all safety labels, which are lost, damaged or otherwise not legible.
Operation - Page 17COPYRIGHT © 2020 SANDVIK MINING AND CONSTRUCTION OY
Safety and environmental instructionsR25P
BA010045
Sandvik 168
Sandvik 168
IGNORINGINSTRUCTIONS HAZARDFaulty handling practice couldcause death or severe injury.
Read and follow the instructionsin the operator's manual.
WARNING
169410_ENG-3
DUST HAZARDBreathing dust will cause deathor severe injury.
Always wear approvedrespirator.
DANGER
169410_ENG-1
FLYING OBJECTS HAZARDFragments fly up to 40 m (130 ft)and could cause death or severeinjury.Stop operation when aperson enters hazard zone.Wear approved personalprotective equipment.
WARNING
169410_ENG-2
NOISE HAZARDContinuous exposure to noiseabove 80 dB(A) could causehearing impairment.
Wear approved hearingprotectors.
WARNING
169410_ENG-4
HIGH PRESSURE HAZARDImproper handling of pressurizedaccumulator will cause death or severe injury.Read workshop manual beforedisassembly.Release pressure before disassembly.Recharge with nitrogen (N2) only.
DANGER

COPYRIGHT © 2020 SANDVIK MINING AND CONSTRUCTION OYPage 18 - Operation
Safety and environmental instructions R25P
Operation - Page 19COPYRIGHT © 2020 SANDVIK MINING AND CONSTRUCTION OY
Safety and environmental instructionsR25P
2.2 USER OBLIGATIONS
The safe use of a product depends on, among other things, a combination of designand construction measures taken by the manufacturer, skills of operators andprotective measures taken by the user.
It is important to pass the information for use on to any subsequent user of thishammer.
Rammer prohibits, in connection with the access to the hammer, the consumption,possession and distribution of:
- intoxicants and narcotics
- any kind of legal or illegal drugs
- items which are in conjunction with any of these
- firearms and unapproved explosives
Safety information covers transport, installation, use, settings, operation, cleaning,troubleshooting, maintenance and disposal of machinery. Safe working proceduresare needed for each phase.
In case you need more detailed instructions, do not hesitate to contact your Rammerrepresentative.
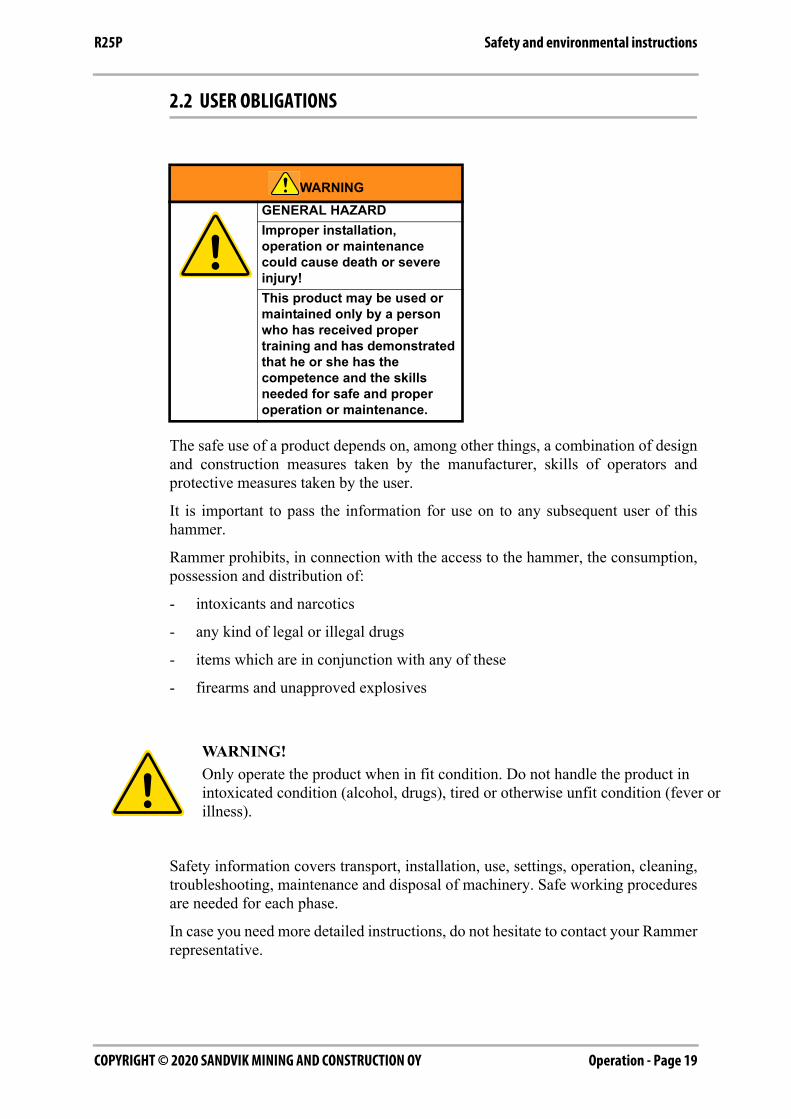
WARNINGGENERAL HAZARDImproper installation, operation or maintenance could cause death or severe injury!This product may be used or maintained only by a person who has received proper training and has demonstrated that he or she has the competence and the skills needed for safe and proper operation or maintenance.
WARNING!Only operate the product when in fit condition. Do not handle the product in intoxicated condition (alcohol, drugs), tired or otherwise unfit condition (fever or illness).
COPYRIGHT © 2020 SANDVIK MINING AND CONSTRUCTION OYPage 20 - Operation
Safety and environmental instructions R25P
Protective measures, which must be taken by the user, based on the information foruse:
- Use of personal protective equipment (PPE).
- Provision and use of additional safeguards.
Use vertical steel bars, separate plastic net or plastic window for operator cabprotection.
- Regular training on site safety and safe working procedures.
Other particular issues which should be known to the user are:
- Site organization and supervision.
- Workplace safety, including safe working procedures.
- Permit-to-work systems.
All near-miss incidents and accidents must be reported to Rammer without delay,where a Rammer hammer has been involved.
The following safety guidelines apply for each person working with the hammer orin the vicinity of the hammer:
- Every single person is responsible for their own safety and for the safety of heror his colleagues.
- In case of violation of any safety guidelines or regulations, every single personis responsible to warn the others and the responsible supervisor.
MANAGING WORK-RELATED HAZARDS
All mechanical equipment can be hazardous if handled without due care or correctmaintenance. Most accidents involving equipment handling are caused by failure toobserve basic safety rules or precautions.
Because it is impossible to anticipate every possible circumstance that mightinvolve a potential hazard, the warnings in this manual and on the equipment are notall inclusive.
Safety is not just a matter of responding to the warnings. All the time you areworking with your attachment you must pay attention to the hazards there might beand how to avoid them.
WARNING!Authorized spare parts are listed on a spare parts list. Use of non-authorized spare parts may cause an uncontrolled risk to user health and is thus prohibited.
Operation - Page 21COPYRIGHT © 2020 SANDVIK MINING AND CONSTRUCTION OY
Safety and environmental instructionsR25P
The user must always perform a local risk assessment before starting a task. Thisassessment, also known as a Real Time Hazard Analysis, ensures that the user stopsand thinks about what she or he is going to do before starting to work:
- Perform Real Time Hazard Analysis on site at least daily before starting up.Determine escape route for emergency situation.
- Identify potential hazards that could impact you, your colleague, theenvironment, your product and/or work method while you are performing thetask.
- Assess the risks and implement the actions needed to eliminate or reduce therisk.
- Make sure that you do not damage or make the product unsafe by the methodof operation or maintenance you choose.
Review site before using the hammer. Heavy load of equipment or vibration ofhammer work may cause structures (walls, roofing, bridges, floors) to collapse.Keep yourself and bystanders out of hazard zone.
Only competent persons may carry out operation and other tasks. The employermust:
- Provide training and orientation.
- Validate training methods.
- Verify competence and skills.
- Monitor and evaluate user performance regularly.
WORKSHOP SERVICE
Workshop service (disassembly/assembly) of this hammer should be performed bytrained and authorized personnel. Please consult your nearest Rammer dealer ordistributor for further information.
WARNING!This hammer may be operated or maintained only by a person who has received proper training and has demonstrated that he or she has the skills needed for safe and proper operation or maintenance.
WARNING!This hammer is for professional use only. Especially in equipment rental applications the renting company must make sure that the user has demonstrated the necessary skills and knowledge for safe and proper operation and maintenance of both carrier and hammer.
COPYRIGHT © 2020 SANDVIK MINING AND CONSTRUCTION OYPage 22 - Operation
Safety and environmental instructions R25P
NATIONAL SAFETY REGULATIONS
It is the responsibility of the user to follow national safety regulations at all time.Special care should be given to dust, noise and vibration related regulation.
Ignorance is no excuse for not following national law. Familiarize yourself with thenational safety legislation.
SITE SPECIFIC SAFETY REGULATIONS
Site specific regulations must not contradict national safety regulations. Sitespecific regulations should address issues like transportation of product orequipment, access to site, personal protective equipment (PPE) and working hours.
Site specific regulations should also cover the case of an incident occurring: whatto do, who to contact and other questions.
Site specific regulations must be followed at all time in the same way as nationalsafety regulations.
PERIODIC SAFETY INSPECTIONS
It is important to thoroughly inspect the product before use, to make sure it is safeto operate. Look for defects and damage before any operation so that problems canbe reported and fixed.
The operator is responsible to:
- Check the product in accordance with the requirements of the operator's manualbefore, during and after use and operation.
- Safety features, such as labels, safeguards and others should be checkedfrequently and repaired immediately, if damaged.
Respiratory silica dust is a hazard, which requires special attention. Regularly cleanyour working environment properly to minimize the dust level in the air.
PERIODIC MAINTENANCE
Periodic maintenance is an essential procedure to ensure and maintain safety andperformance of the product. Follow given instructions for maintenance andinspection of the product.
Regular inspections are especially important where hydraulic hoses are concerned.
NOTICE! Poor quality of hydraulic oil, lack of lubrication or too wideclearance between tool and tool bushing may destroy internal parts of theproduct.
Operation - Page 23COPYRIGHT © 2020 SANDVIK MINING AND CONSTRUCTION OY
Safety and environmental instructionsR25P
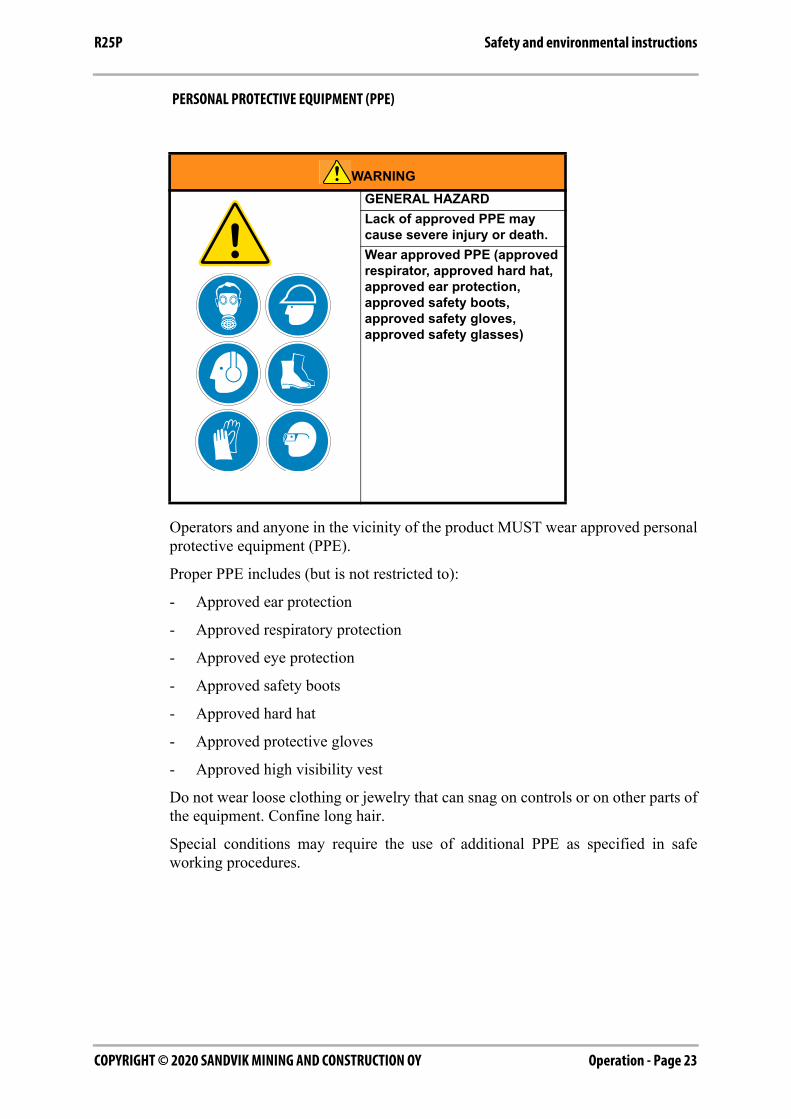
PERSONAL PROTECTIVE EQUIPMENT (PPE)
Operators and anyone in the vicinity of the product MUST wear approved personalprotective equipment (PPE).
Proper PPE includes (but is not restricted to):
- Approved ear protection
- Approved respiratory protection
- Approved eye protection
- Approved safety boots
- Approved hard hat
- Approved protective gloves
- Approved high visibility vest
Do not wear loose clothing or jewelry that can snag on controls or on other parts ofthe equipment. Confine long hair.
Special conditions may require the use of additional PPE as specified in safeworking procedures.
WARNINGGENERAL HAZARDLack of approved PPE may cause severe injury or death.Wear approved PPE (approved respirator, approved hard hat, approved ear protection, approved safety boots, approved safety gloves, approved safety glasses)

COPYRIGHT © 2020 SANDVIK MINING AND CONSTRUCTION OYPage 24 - Operation
Safety and environmental instructions R25P
Operation - Page 25COPYRIGHT © 2020 SANDVIK MINING AND CONSTRUCTION OY
Safety and environmental instructionsR25P
2.3 INTENDED USE
Intended use of machinery
This hydraulic hammer is to be used as an attachment on a carrier in demolition,trenching, quarrying or mining applications.
Designed environmental conditions
This hammer is designed to operate in standard environmental conditions with thefollowing restrictions:
- The ambient temperature for use of hammer is -20 °C ... +80 °C.
- WARNING! Use of hammer in explosive atmosphere (gasoline fumes, coaldust...) is strictly prohibited. The tool in contact with the material to be brokenwill create sparks, which could ignite an explosive atmosphere.
Properties of the materials to be processed
This hammer reduces the fragment size of concrete, rock, hard or frozen ground,asphalt, metallurgical slag or similar material and has been designed exclusively forthis application.
Under such special conditions, methods and precautions must be reviewed in co-operation with the local and national authorities. Operation may only commencewhen approval has been granted.
WARNING!Special conditions with, for example, radioactive, asbestos, chemical, poison or biological hazards require unconditional use of hazard specific methods and protective measures.
COPYRIGHT © 2020 SANDVIK MINING AND CONSTRUCTION OYPage 26 - Operation
Safety and environmental instructions R25P
Prohibited use of machinery
Any use of this hammer not permitted as intended use, outside the designedenvironmental conditions or on unsuitable materials to be processed, is prohibited.
Use of this hammer is specifically prohibited if:
- Operator has not read and understood this manual.
- Operator has not read and understood operator's manual for the carrier.
- A safety feature of the equipment is defeated for whatever reason.
- Operator has not performed Real Time Hazard Analysis (RTHA) of the site andis not aware of escape route for emergency situation.
- Operator is without proper and approved personal protective equipment.
- People are in hazard zone of hammer.
- Hammer is outside the technical limits as described in the technicalspecification. This applies especially to carrier weight, hydraulic oil pressureand oil flow.
WARNING!Hammer or lifting eye on hammer must not be used to lift external loads.
WARNING!Hammer must not be used in intoxicated condition (alcohol, drugs), when tired or when otherwise in unfit condition (fever or illness).
Operation - Page 27COPYRIGHT © 2020 SANDVIK MINING AND CONSTRUCTION OY
Safety and environmental instructionsR25P
Foreseeable misuse
Foreseeable misuse may be due to carelessness or to pressure to keep productrunning at any time.
Reasonably foreseeable misuse is extremely likely to cause considerable damage topeople or property. Examples of such behavior are:
- Operating the product outside limits of use: Do not use the product on carrierwith insufficient lifting capacity! Do not operate the product under water! Donot operate the product outside other limits of use.
- Always perform site and equipment inspection before operation (RTHA).
- Non-professional operation: Do not operate equipment without proper training.Do not operate, if you are not in fit condition.
- Operating broken equipment: NOTICE! Stop immediately, when youobserve failure on structures or hydraulic leak!
Foreseeable misuse is not an acceptable excuse to cause considerable damageto equipment, environment or people.
Liability
Rammer will not accept any liability for injury to personnel or damage to equipmentcaused by unauthorized use, negligence of user obligations or unauthorizedmodification of this hammer.

COPYRIGHT © 2020 SANDVIK MINING AND CONSTRUCTION OYPage 28 - Operation
Safety and environmental instructions R25P
Operation - Page 29COPYRIGHT © 2020 SANDVIK MINING AND CONSTRUCTION OY
Safety and environmental instructionsR25P
2.4 MODIFICATIONS AND CORRECTIONS TO THE PRODUCT
All modifications and corrections not authorized in the maintenance manuals orwhich may affect the maintenance, operation, safety, and availability of the productneed to be approved in writing by the manufacturer before implementation.Approval requires a careful risk assessment, taking into consideration the knownrisks and any new risks that the modifications may cause.
Changes and modifications without proper risk assessment, elimination orreduction of risk and without appropriate safety measures may lead to death, seriouspersonal injuries or damage to property.
Unauthorized modifications may add additional weight to the equipment. This mayaffect stability during lifting and stability of the carrier. Unauthorized modificationsmay disable safety features and must not be applied.
If modifications and corrections that affect the maintenance, operation, safety, andusability of the product are made without the written permission of themanufacturer, the manufacturer is not responsible for any incidents resulting indeath, injury, or property damage brought about by such modifications andcorrections.
Should you consider a modification or correction necessary, please ask your localdealer to contact the manufacturing and design team of the equipment.
If a modification or correction as described above has been implemented withoutthe manufacturing factory's permission, its effect on warranty liability will beconsidered case-by-case. Thus, a warranty application may be rejected altogether.
COPYRIGHT © 2020 SANDVIK MINING AND CONSTRUCTION OYPage 30 - Operation
Safety and environmental instructions R25P
2.5 HAZARD ZONE
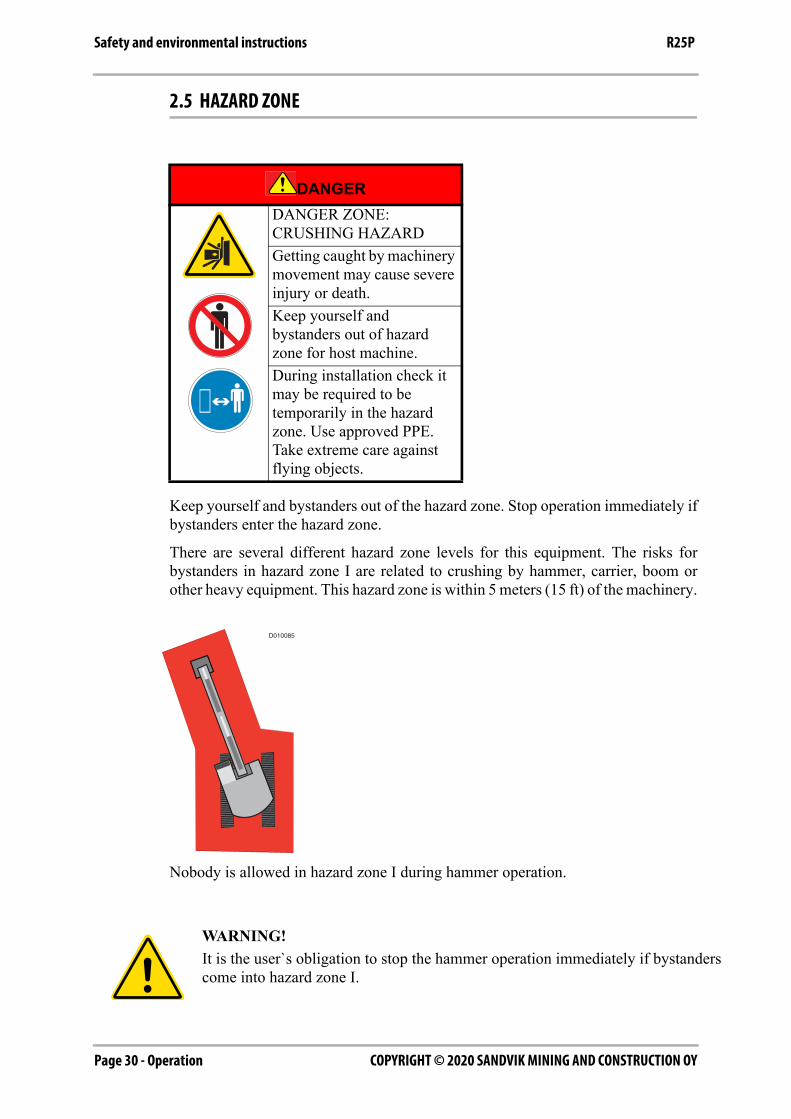
Keep yourself and bystanders out of the hazard zone. Stop operation immediately ifbystanders enter the hazard zone.
There are several different hazard zone levels for this equipment. The risks forbystanders in hazard zone I are related to crushing by hammer, carrier, boom orother heavy equipment. This hazard zone is within 5 meters (15 ft) of the machinery.
Nobody is allowed in hazard zone I during hammer operation.
DANGERDANGER ZONE: CRUSHING HAZARDGetting caught by machinery movement may cause severe injury or death.Keep yourself and bystanders out of hazard zone for host machine.During installation check it may be required to be temporarily in the hazard zone. Use approved PPE. Take extreme care against flying objects.
WARNING!It is the user`s obligation to stop the hammer operation immediately if bystanders come into hazard zone I.
D010085
Operation - Page 31COPYRIGHT © 2020 SANDVIK MINING AND CONSTRUCTION OY
Safety and environmental instructionsR25P
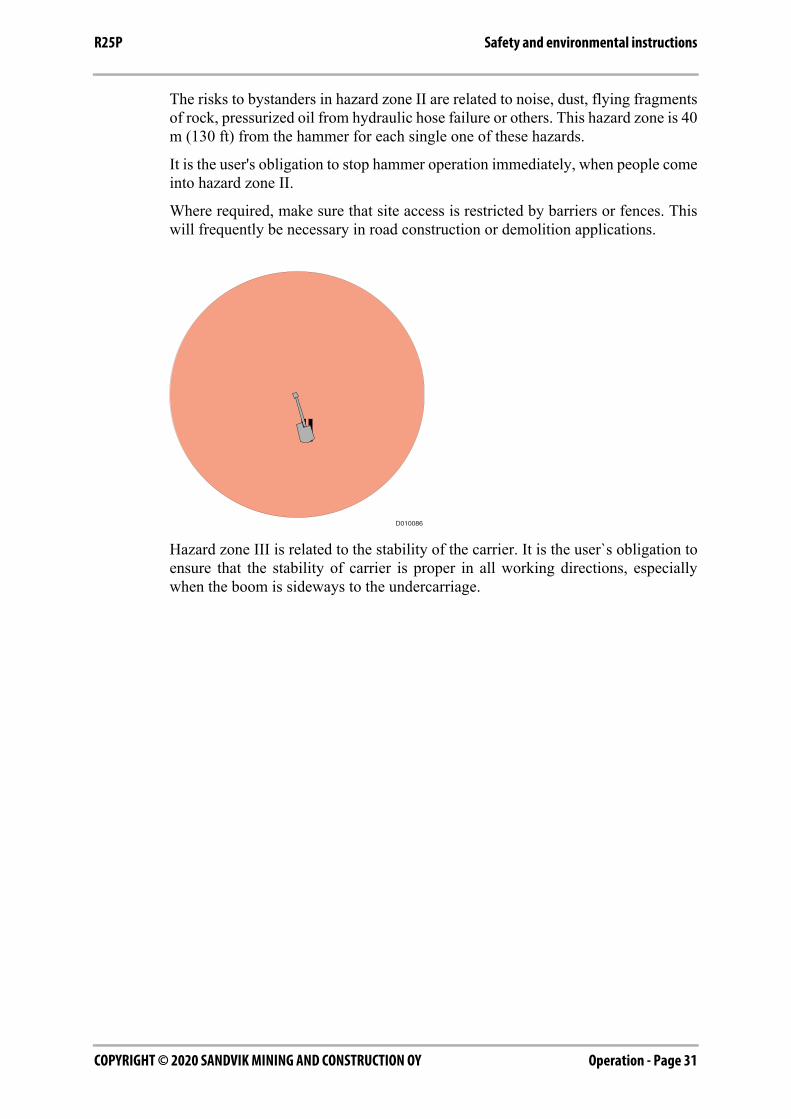
The risks to bystanders in hazard zone II are related to noise, dust, flying fragmentsof rock, pressurized oil from hydraulic hose failure or others. This hazard zone is 40m (130 ft) from the hammer for each single one of these hazards.
It is the user's obligation to stop hammer operation immediately, when people comeinto hazard zone II.
Where required, make sure that site access is restricted by barriers or fences. Thiswill frequently be necessary in road construction or demolition applications.
Hazard zone III is related to the stability of the carrier. It is the user`s obligation toensure that the stability of carrier is proper in all working directions, especiallywhen the boom is sideways to the undercarriage.
D010086
COPYRIGHT © 2020 SANDVIK MINING AND CONSTRUCTION OYPage 32 - Operation
Safety section R25P
3. SAFETY SECTIONThis safety section explains the work related risks and gives instructions for properprotective measures against hazards, which may occur on any site.
Read and understand the protective measures listed in this safety section beforeusing the hammer.
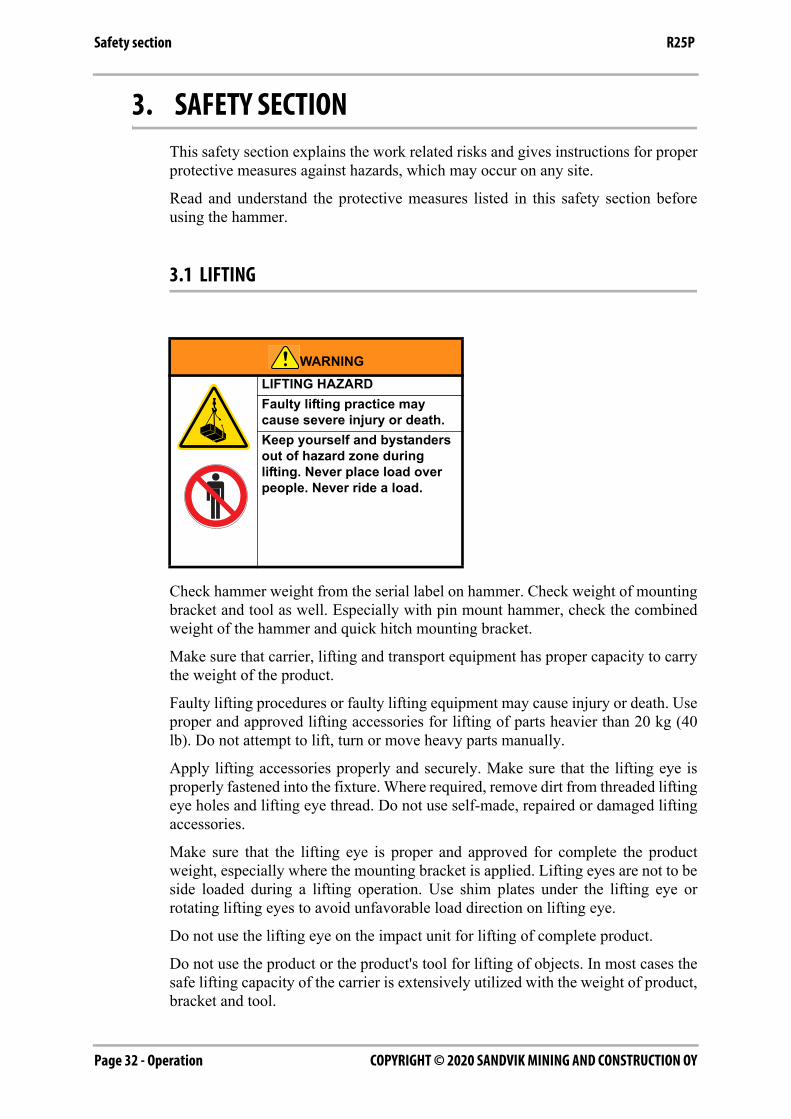
3.1 LIFTING
Check hammer weight from the serial label on hammer. Check weight of mountingbracket and tool as well. Especially with pin mount hammer, check the combinedweight of the hammer and quick hitch mounting bracket.
Make sure that carrier, lifting and transport equipment has proper capacity to carrythe weight of the product.
Faulty lifting procedures or faulty lifting equipment may cause injury or death. Useproper and approved lifting accessories for lifting of parts heavier than 20 kg (40lb). Do not attempt to lift, turn or move heavy parts manually.
Apply lifting accessories properly and securely. Make sure that the lifting eye isproperly fastened into the fixture. Where required, remove dirt from threaded liftingeye holes and lifting eye thread. Do not use self-made, repaired or damaged liftingaccessories.
Make sure that the lifting eye is proper and approved for complete the productweight, especially where the mounting bracket is applied. Lifting eyes are not to beside loaded during a lifting operation. Use shim plates under the lifting eye orrotating lifting eyes to avoid unfavorable load direction on lifting eye.
Do not use the lifting eye on the impact unit for lifting of complete product.
Do not use the product or the product's tool for lifting of objects. In most cases thesafe lifting capacity of the carrier is extensively utilized with the weight of product,bracket and tool.
WARNINGLIFTING HAZARDFaulty lifting practice may cause severe injury or death.Keep yourself and bystanders out of hazard zone during lifting. Never place load over people. Never ride a load.
Operation - Page 33COPYRIGHT © 2020 SANDVIK MINING AND CONSTRUCTION OY
Safety sectionR25P
Safety instructions for lifting
Below are some common safety instructions concerning lifting operations. Inaddition to this, always observe the national standards for machines and lifting-tackles strictly. Note that the list below is not all inclusive. Always ensure that theprocedure you choose is safe for yourself and bystanders.
- Do not lift load over people. Allow nobody to go under the hoisted load.
- Do not lift people and never ride the hoisted load.
- Avoid side pull of the load. Make sure you take up the slack slowly. Start andstop carefully.
- Lift load a few centimeters and verify it before proceeding. Make sure the loadis well balanced. Check for any loose items.
- Never leave the suspended load unattended. Maintain load control at all times.
- Never lift a load heavier than the rated capacity.
- Inspect all lifting equipment before use. Do not use twisted or damaged liftingequipment. Protect the lifting equipment from sharp corners.
- Obey all local safety instructions.
3.2 PACKING, TRANSPORTATION AND STORAGE
Stay clear of hot surfaces. Wear approved PPE.
Use proper and approved lifting accessories for lifting of parts heavier than 20 kg(40 lb). Do not attempt to lift, turn or move heavy parts manually. A sudden changeof balance may result in unexpected movement of equipment.
Check hammer weight from the serial label on hammer. Check weight of themounting bracket and tool as well. Especially with pin mount hammer, check thecombined weight of the hammer and quick hitch mounting bracket.
Make sure that the carrier, the lifting- and the transport equipment have propercapacity to carry the weight of the product.
During transport, secure other parts, such as hoses, tools and tool box properly, sothat these cannot move uncontrolled.
Secure the product properly during transportation and storage. Follow propertransportation practices. Short term storage in horizontal position only.
Store the product horizontally on level ground, which is able to support the load.Store and transport the product on pallet with proper load capacity. Do not stackproducts or pallets with products on top of each other.
COPYRIGHT © 2020 SANDVIK MINING AND CONSTRUCTION OYPage 34 - Operation
Safety section R25P
3.3 PRESSURIZED GAS IN ACCUMULATOR
Before for example an air freight, as well as before any workshop service of thehammer, depressurize the accumulator.
Use only nitrogen (N2) for recharging the accumulators. The use of other gas maycause accumulators to explode. Failure to comply can result in serious injury ordeath.
The accumulator charging device does not have any pressure relief valve. Shut gasthe bottle valve when the gauge shows the correct charging pressure.
Do not disassemble the hammer before releasing gas pressure from theaccumulators and oil pressure from the hammer. Failure to comply could result inserious injury or death.
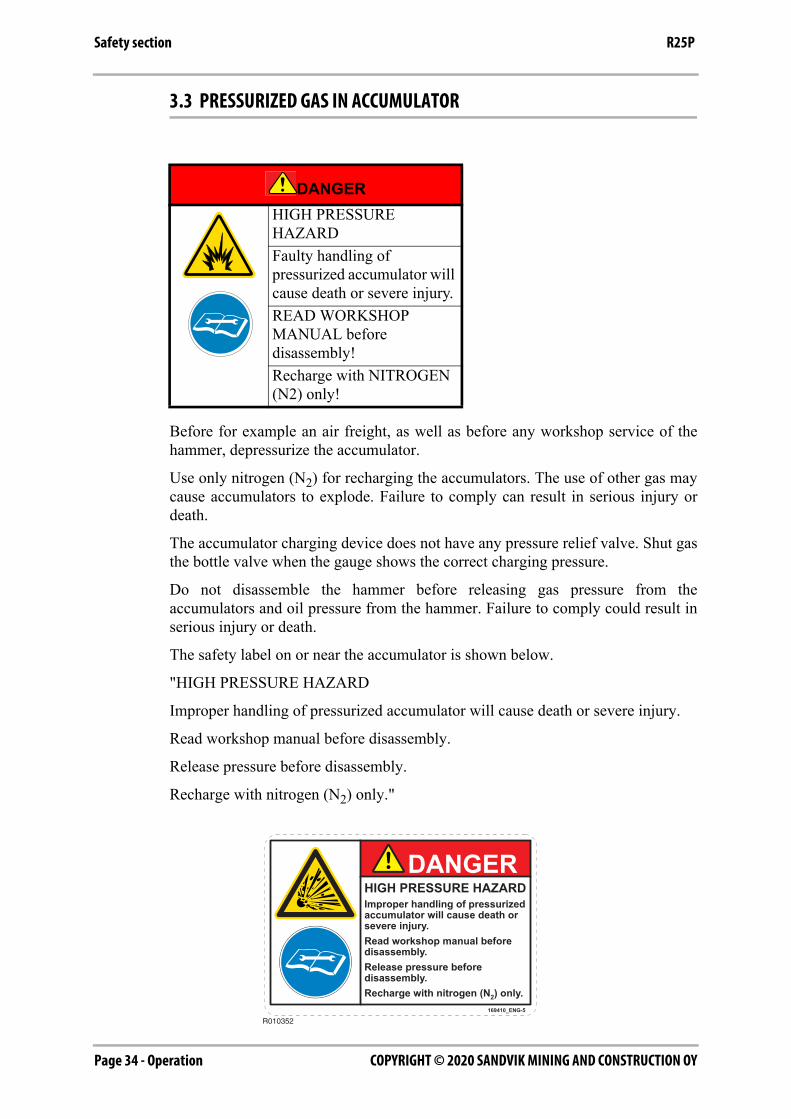
The safety label on or near the accumulator is shown below.
"HIGH PRESSURE HAZARD
Improper handling of pressurized accumulator will cause death or severe injury.
Read workshop manual before disassembly.
Release pressure before disassembly.
Recharge with nitrogen (N2) only."
DANGERHIGH PRESSURE HAZARDFaulty handling of pressurized accumulator will cause death or severe injury.READ WORKSHOP MANUAL before disassembly!Recharge with NITROGEN (N2) only!
R010352
DANGERHIGH PRESSURE HAZARDImproper handling of pressurizedaccumulator will cause death or severe injury.Read workshop manual beforedisassembly.Release pressure beforedisassembly.Recharge with nitrogen (N2) only.
169410_ENG-5
Operation - Page 35COPYRIGHT © 2020 SANDVIK MINING AND CONSTRUCTION OY
Safety sectionR25P
3.4 CRUSHING PREVENTION AND CUTTING PREVENTION
Never mount or dismount the hammer to or from the carrier with the hammer invertical position and supported by tool in ground only. The 'breaking' action of thetool will make even relatively hard ground extremely unstable.
Make sure that the carrier is able to properly support the load of the product in alldirections and in all working situations. Stability is an issue especially in long reachapplications.
Support the product properly when you perform work beneath the product. Do notdepend on the hydraulic cylinders in order to support the product. A product can fallif a control lever is moved or if a hydraulic line breaks. Also, a product can fall if ahydraulic cylinder drifts.
Whenever there are hammer control linkages, the clearance in the linkage areachanges with movement of the hammer.
Stay clear of all rotating parts and all moving parts. Unless you are instructedotherwise, never attempt adjustments while the machine is moving or while theengine is running.
During storage and transportation make sure that the load is secured in a properway. Use proper pallets and make sure the ground is able to support the load.
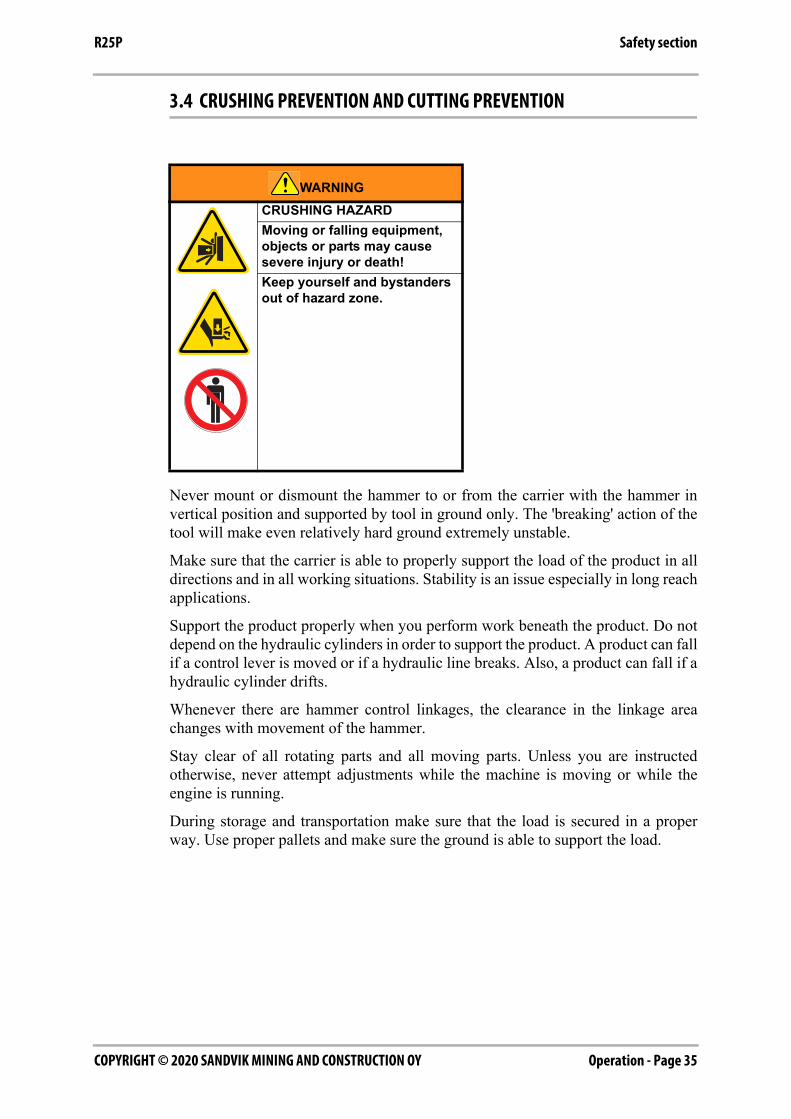
WARNINGCRUSHING HAZARDMoving or falling equipment, objects or parts may cause severe injury or death!Keep yourself and bystanders out of hazard zone.
COPYRIGHT © 2020 SANDVIK MINING AND CONSTRUCTION OYPage 36 - Operation
Safety section R25P
3.5 REMOVAL FROM PACKAGE AND INSTALLATION
Clean ice, snow, water, oil or grease spills from the floor to prevent slipping,tripping or falling. Use approved safety boots. Dispose properly (recycle) of spill oiland grease. Make sure that lighting conditions are good enough to allow for safeworking.
Use proper and approved lifting accessories for lifting of parts heavier than 20 kg(40 lb). Do not attempt to lift, turn or move heavy parts manually. A sudden changeof balance may result in unexpected movement of equipment.
Visually check that all parts and bolts of the hammer are in place. Check thehammer weight from the serial label on hammer. Check weight of the mountingbracket and tool as well.
Sudden movement of parts, which were stuck, but become loose may causecrushing of body parts. Beware of sharp edges of parts. Beware of noise frompneumatic or other tools. Wear approved PPE.
Make sure that the carrier, lifting and transport equipment has proper capacity tocarry the weight of the product.
Secure the product properly during transportation. Follow proper transportationpractice. Secure the product properly during installation. Always keep the productin horizontal position, while mounting to carrier!
Agree with your colleagues on site on the use of hand signals. Do not assume anyknowledge of signals.
Place the carrier on stable, level ground before starting any installation, service ormaintenance on equipment. Do not climb on the product. There is always hazardzone around the product. Use proper working platform for safe access. Whereworking platforms are used, make sure to place them on level and stable ground.
During installation check it may be required to be temporarily in the hazardzone of the product. Use approved PPE. Take extreme care against flyingobjects.
Flying fragments are an extreme hazard, while driving in the tool retaining pinor other pins. Use approved eye protection. Use proper tools. Use approvedPPE.
Check the tool retaining pins on a regular basis. Check the tightness of the bracketbolts on a regular basis.
Place the boom in a proper position to allow for ergonomic way of connectinghoses. Check hose ends for proper connection on a regular basis. Use only suitablebolts with proper capacity for mounting of product
Always check the hammer function and installation outdoors. Stop the engine, whenuse is not required. Make sure that proper ventilation of exhaust gases is available,when the engine is running.
Check the mounting pin locking mechanism on the carrier for the pin mountedhammer or mounting bracket for a bracket mounted hammer on a regular basis.
Operation - Page 37COPYRIGHT © 2020 SANDVIK MINING AND CONSTRUCTION OY
Safety sectionR25P
3.6 BEFORE USE AND NEW USERS
Secure the product properly during transportation. Follow proper transportationpractice. Make sure that carrier, lifting and transport equipment has proper capacityto carry the weight of the product.
Place the carrier on stable, level ground before starting any installation, service ormaintenance on the product. Do not climb on the product. There is always a hazardzone around the product. Use a proper working platform for safe access. Whereworking platforms are used, make sure to place this on level and stable ground.
Keep yourself and bystanders out of the hazard zone of the carrier.
Beware of heavy vibration! Do not touch a vibrating hammer or pulsating hoses.Vibration makes it extremely difficult to take off hands. Use a plastic spiral overhoses to protect against pinhole leaks. Use cardboard to check on a pinhole leak.Wear proper PPE.
Visually check that all parts and bolts of the product are in place. Check the toolretaining pins on a regular basis. Check the tightness of the bracket bolts on aregular basis.
Flying fragments are an extreme hazard, while driving in the tool retaining pinor other pins. Use approved eye protection. Use proper tools. Use approvedPPE.
Place the boom in proper position to allow for an ergonomic way of connecting thehoses. Check the hose ends for proper connection on a regular basis. Use onlysuitable bolts with proper capacity for the mounting of the product.
Always check the hammer function and installation outdoors. Stop the engine, whenuse is not required. Make sure that proper ventilation of exhaust gases is available,when the engine is running.
Check the mounting pin locking mechanism on the carrier for a pin mountedhammer or the mounting bracket for a bracket mounted hammer on a regular basis.
Clear all obstacles that are in the path of the machine. Beware of hazards such aswires and ditches.
Check the stability of the level where you are working. Falling down a level withcarrier will cause severe injury or death.
Know the width of your equipment in order to maintain proper clearance when youoperate the equipment near fences or near boundary obstacles.
Be aware of high voltage power lines and power cables that are buried. If themachine comes in contact with these hazards, serious injury or death may occurfrom electrocution.
Be aware of water and sewage pipelines that are buried.
COPYRIGHT © 2020 SANDVIK MINING AND CONSTRUCTION OYPage 38 - Operation
Safety section R25P
3.7 OPERATION
Make sure that the lighting conditions are good enough to allow for safe working.Move carefully on site to avoid tripping, slipping or falling. Use approved safetyboots.
Secure the product properly during transportation. Follow proper transportationpractice. Store and transport the product on pallet with proper load capacity. Makesure that carrier, lifting and transport equipment has proper capacity to carry theweight of the product. The product or the lifting eye on the product must not be usedto lift external loads.
Place the carrier on a stable, level ground before starting any installation, service ormaintenance on the product. Do not climb on the product. There is always a hazardzone around the product. Use proper working platform for safe access. If you use aworking platform, make sure to place this on level and stable ground.
Perform Real Time Hazard Analysis on site at least daily before starting up.Determine an escape route for emergency situations. Agree with your colleagues onsite on the use of hand signals. Do not assume any knowledge of signals.
Always keep people informed of what you are doing when and where. Keep amobile phone always at hand. Inform the site manager, when you leave the site.
Keep yourself and bystanders out of hazard zone for the carrier.
With tractor backhoe loader, do not ever drive while boom and hammer are outsidewheel width sideways. Driving with the hammer in this 'transport' position maycause severe damage to pedestrians or passing cars.
Use of hammer in explosive atmosphere (gasoline fumes, coal dust...) is strictlyprohibited.
Beware of heavy vibration! Do not touch a vibrating hammer or pulsating hoses.Vibration makes it extremely difficult to take off hands. Use a plastic spiral overhoses to protect against pinhole leaks. Use cardboard to check on a pinhole leak.Stay clear from hot surfaces. Wear proper PPE.
Extended exposure to whole body vibration may damage your health. Installsuitable seating in cab. Rammer strongly recommends to use hammer only oncarriers equipped with ROPS/FOPS.
Visually check that all parts and bolts of the product are in place. Check the toolretaining pins on a regular basis. Check the tightness of the bracket bolts on aregular basis.
Flying fragments are an extreme hazard, while driving in the tool retaining pinor other pins. Use approved eye protection. Use proper tools. Use approvedPPE.
Stop the engine, when use is not required. Make sure that proper ventilation ofexhaust gases is available, when engine is running.
Check the mounting pin locking mechanism on the carrier to pin mounted hammeror a mounting bracket for the bracket mounted hammer on a regular basis.
Operation - Page 39COPYRIGHT © 2020 SANDVIK MINING AND CONSTRUCTION OY
Safety sectionR25P
Respiratory Silica Dust will cause severe injury or death. Always wear anapproved respirator.
Use vertical steel bars, a separate plastic net or a plastic window for operator cabprotection. Use an air conditioned cab in high temperature applications(metallurgical or similar) as well as at high ambient temperature. In high reach orsimilar bad ergonomy applications, rest tense muscles at regular intervals.
This product is for professional use only. Special conditions, such as radioactive,asbestos, chemical, poisonous or biological hazard environment requireunconditional use of hazard specific methods and protective measures.
3.8 TRAPPED PRESSURE IN HYDRAULIC SYSTEM
Unreleased trapped pressure can cause sudden machine movement or attachmentmovement. Use caution if you disconnect hydraulic lines or fittings. High pressureoil that is released can cause a hose to whip. High pressure oil that is released cancause oil to spray. Oil may be hot after prolonged operation.
If you use a lubrication system, make sure to relieve all pressure before any lines,fittings or related items are disconnected.
Before disconnecting or connecting hydraulic hoses, stop the carrier engine andoperate controls to release pressure trapped in the hoses.
Pressure can be trapped in the hydraulic circuit long after the engine has beenstopped. The pressure can cause hydraulic fluid or items such as pipe plugs toescape rapidly if the pressure is not relieved correctly.
Wait at least 10 minutes to ensure that the pressure has been relieved from thesystem before disconnecting any hoses, pipes or other components. Failure tocomply could result in a serious injury or death.
3.9 HOT SUBSTANCES
Hot oil and hot components can cause personal injury. Do not allow hot oil tocontact the skin. Also, do not allow hot components to contact the skin.
Relieve all pressure in the air system, in the hydraulic system, or in the lubricationsystem before any lines, fittings or related items are disconnected.
Metal parts, such as valves or body parts may have the same temperature as thehydraulic oil.
The working end of the tool may get extremely hot during operation. Make sure thetool has had time to cool down before starting to handle it.
COPYRIGHT © 2020 SANDVIK MINING AND CONSTRUCTION OYPage 40 - Operation
Safety section R25P
3.10 CONTAINING FLUID SPILLAGE
Ensure that fluids are contained during performance of inspection, maintenance,testing, adjusting and repair of the equipment. Prepare to collect the fluid withsuitable containers before opening any compartment or disassembling anycomponent containing fluids.
Use tools and equipment that are suitable for containing and collecting fluids.
Improperly disposing of waste can threaten the environment. Always use leakproofcontainers when you drain fluids. Do not pour waste onto the ground, down a drain,or into any source of water.
Obey all local regulations for the disposal of liquids.
3.11 CLEANING AND SERVICE
Replace all damaged, lost or otherwise illegible safety labels.
Clean ice, snow, water, oil or grease spills from the floor to prevent slipping,tripping or falling. Use approved safety boots. Dispose properly (recycle) of spill oiland grease.
Do not climb on the product. There is always a hazard zone around the product. Useproper working platform for safe access.
Beware of heavy vibration! Do not touch a vibrating hammer or pulsating hoses.Vibration makes it extremely difficult to take off hands. Use a plastic spiral overhoses to protect against pinhole leaks. Use cardboard to check on a pinhole leak.Stay clear from hot surfaces. Wear proper PPE.
Wait for hydraulic oil inside the hammer to cool down, before disassembly orservice. Oil inside the hammer may be extremely hot. Do not handle hydraulic hoses(connect/disconnect) while oil is hot. Use approved PPE.
Flying fragments are an extreme hazard, while driving in the tool retaining pinor other pins. Use approved eye protection. Use proper tools. Use approvedPPE.
Plug pressure and return line before washing the product, to prevent water and dirtfrom entering into the product.
Pressurized air and/or water can cause debris and/or hot water to be blown out. Thiscan result in personal injury.
When pressurized air and/or pressure water is used for cleaning, wear protectiveclothing, protective shoes, and eye protection. Eye protection includes safetyglasses or a protective face shield.
The maximum air pressure for cleaning purposes must be below 205 kPa (30 psi).The maximum water pressure for cleaning purposes must be below 275 kPa (40psi).
Operation - Page 41COPYRIGHT © 2020 SANDVIK MINING AND CONSTRUCTION OY
Safety sectionR25P
3.12 FIELD REPAIR
Place carrier on stable, level ground before starting any installation, service ormaintenance on the product. Release internal pressure from hammer andaccumulator before service, disassembly or scrapping. Charge accumulator withnitrogen only! Use approved PPE.
Do not attempt to lift, turn or move heavy parts manually. A sudden change ofbalance may result in unexpected movement of equipment.
While changing the tool, make sure not to leave fingers, hands or other body partsbetween the tool and the ground or the product. Stay clear from hot surfaces. Wearapproved PPE.
Secure the product properly during field service. Always keep the product inhorizontal position! Beware of unexpected boom movement. Do not climb on theproduct. There is always a hazard zone around the product. Use proper workingplatform for safe access.
Flying fragments are extreme hazard, while driving in tool retaining or otherpins. Use approved eye protection. Use proper tools. Use approved PPE.
Attach a "Do Not Operate" warning tag or a similar warning tag to the start switchor to the controls before you service the equipment or before you repair theequipment.
Unless you are instructed otherwise, never attempt adjustments while the machineis moving or while the engine is running. Stay clear of all rotating parts and allmoving parts.
Before welding on the hammer while it is mounted on the carrier, disconnect thecarrier alternator and battery. Note that welding on hammer tools will render themuseless.
Use all cleaning solutions with care. Never put maintenance fluids into glasscontainers. Drain all liquids into a suitable container.
COPYRIGHT © 2020 SANDVIK MINING AND CONSTRUCTION OYPage 42 - Operation
Safety section R25P
3.13 DISMOUNTING
Make sure that carrier, lifting and transport equipment have proper capacity to carrythe weight of the product.
Keep yourself and bystanders out of hazard zone during lifting. Never place loadover people. Never ride a load. Do not use self-made, repaired or damaged liftingaccessories. Apply lifting accessories properly and securely. Secure the productproperly during transportation. Follow proper transportation practice.
While changing the tool, make sure not to leave fingers, hands or other body partsbetween the tool and the ground or the product.
Oil inside the hammer may be extremely hot. Do not handle hydraulic hoses(connect/disconnect) while oil is hot. Stay clear from hot surfaces. Use approvedPPE.
Secure the product properly during field service. Always keep the product inhorizontal position! Beware of unexpected boom movement. Do not climb on theproduct. There is always a hazard zone around the product. Use proper workingplatform for safe access.
3.14 WORKSHOP SERVICE
Workshop service must be performed at a trained and Rammer approved workshop.Non-professional service is a severe risk for the staff performing the service. Non-professional service is a safety risk for the operator as well, with a high risk ofmaterial damage, which may become extremely expensive.
3.15 SCRAPPING
While removing the tool, make sure not to leave fingers, hands or other body partsbetween the tool and the ground or the product.
Release the internal pressure from the hammer and the accumulator before service,disassembly or scrapping. Drain the hydraulic hammer of fluids before scrapping.Use approved PPE.
Plastic (wear plates, foam rubber...) and rubber (seals, vibration dampeningelements, plugs) parts should be deposited at dump. Do not burn.
Obey all local regulations in the disposal of liquids.
Improperly disposal of waste can threaten the environment. Always use leakproofcontainers when you drain fluids. Do not pour waste onto the ground, down a drain,or into any source of water.
Recycle all metal parts of the product as standard scrap recycling.
Operation - Page 43COPYRIGHT © 2020 SANDVIK MINING AND CONSTRUCTION OY
Safety sectionR25P
3.16 FLAMMABLE LIQUIDS
All fuels, most lubricants, and some coolant mixtures are flammable.
Flammable fluids that, are leaking or spilled onto hot surfaces or onto electricalcomponents can cause a fire. Fire may cause personal injury and property damage.
Remove all flammable materials such as fuel, oil, and debris from the hammer. Donot allow any flammable materials to accumulate on the hammer.
Store fuels and lubricants in properly marked containers away from unauthorizedpersons. Store oily rags and any flammable materials in protective containers. Donot smoke in areas that are used for storing flammable materials.
Do not operate the product near any flame.
Do not weld on lines or on tanks that contain flammable fluids. Do not flame cutlines or tanks that contain flammable fluid. Clean any such lines or tanks thoroughlywith a non-flammable solvent prior to welding or flame cutting.
COPYRIGHT © 2020 SANDVIK MINING AND CONSTRUCTION OYPage 44 - Operation
Safety during operation R25P
4. SAFETY DURING OPERATION
4.1 PROPER OPERATING PRACTICE
Only operate the hammer while you are in the seat of the carrier. The seat belt mustbe fastened while you operate the carrier. Only operate the controls while the engineis running. Wear protective glasses while you operate the carrier and while youoperate the hammer.
While you operate the hammer slowly in an open area, check for proper operationof all controls and all protective devices. Before you move the carrier, ensure thatno one will be endangered.
Carry the hammer low to the ground. Do not go close to the edge of a cliff, anexcavation, or an overhang.
Maintain control of the carrier while you operate the hammer. Operating theequipment beyond its design limits can cause damage to people or equipment.
Know the maximum operating dimensions of your carrier when the hammer isinstalled.
Ensure that there is adequate clearance between the tool and any stationary objectswhen you are maneuvering the machine.
Know the appropriate work site hand signals and the personnel that are authorizedto give the hand signals. Confirm your understanding of the signs with the otherpersonnel before starting. Accept hand signals from one person only.
Do not allow unauthorized personnel on the equipment.
During operation, the tip of the tool may get extremely hot. Do not operate thehammer near flammable liquids.
Operation - Page 45COPYRIGHT © 2020 SANDVIK MINING AND CONSTRUCTION OY
Safety during operationR25P
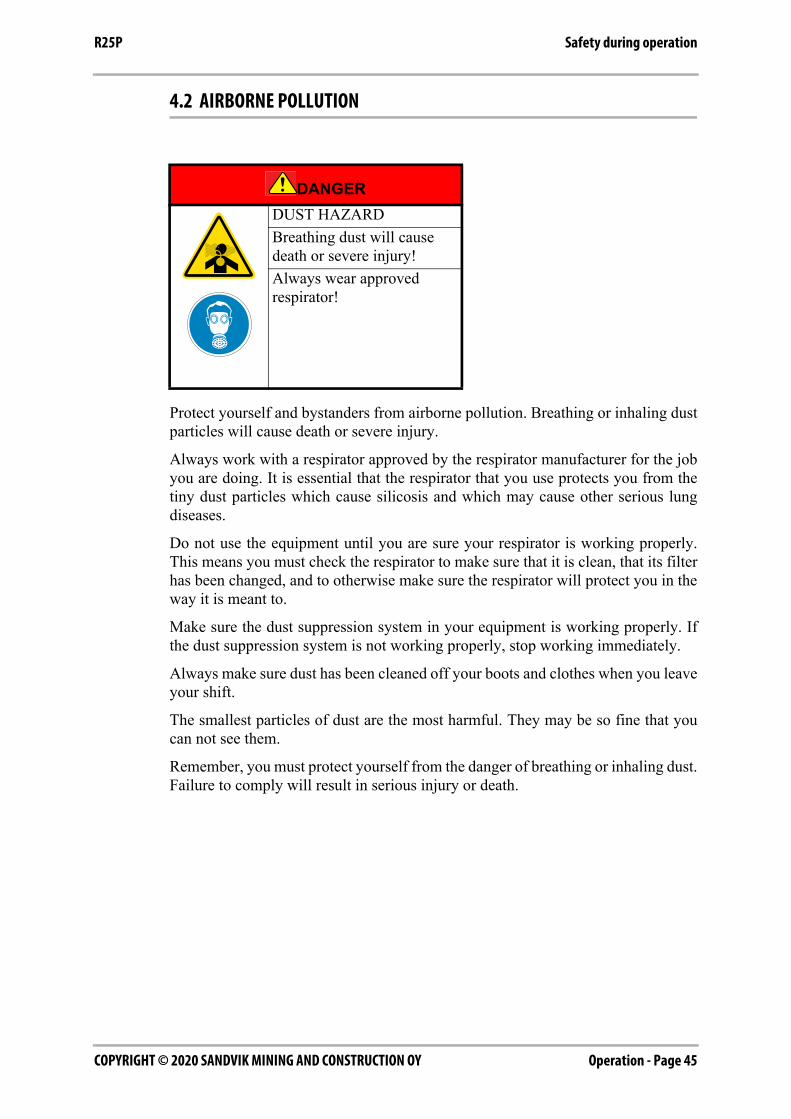
4.2 AIRBORNE POLLUTION
Protect yourself and bystanders from airborne pollution. Breathing or inhaling dustparticles will cause death or severe injury.
Always work with a respirator approved by the respirator manufacturer for the jobyou are doing. It is essential that the respirator that you use protects you from thetiny dust particles which cause silicosis and which may cause other serious lungdiseases.
Do not use the equipment until you are sure your respirator is working properly.This means you must check the respirator to make sure that it is clean, that its filterhas been changed, and to otherwise make sure the respirator will protect you in theway it is meant to.
Make sure the dust suppression system in your equipment is working properly. Ifthe dust suppression system is not working properly, stop working immediately.
Always make sure dust has been cleaned off your boots and clothes when you leaveyour shift.
The smallest particles of dust are the most harmful. They may be so fine that youcan not see them.
Remember, you must protect yourself from the danger of breathing or inhaling dust.Failure to comply will result in serious injury or death.
DANGERDUST HAZARDBreathing dust will cause death or severe injury!Always wear approved respirator!
COPYRIGHT © 2020 SANDVIK MINING AND CONSTRUCTION OYPage 46 - Operation
Safety during operation R25P
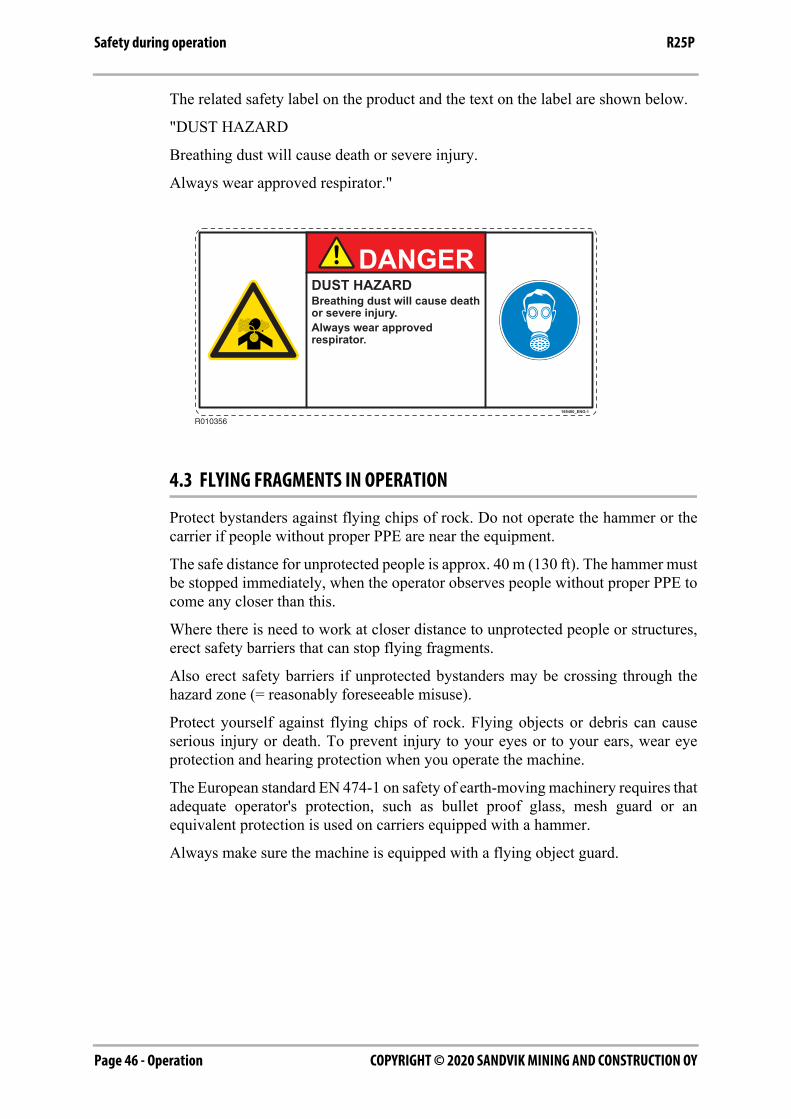
The related safety label on the product and the text on the label are shown below.
"DUST HAZARD
Breathing dust will cause death or severe injury.
Always wear approved respirator."
4.3 FLYING FRAGMENTS IN OPERATION
Protect bystanders against flying chips of rock. Do not operate the hammer or thecarrier if people without proper PPE are near the equipment.
The safe distance for unprotected people is approx. 40 m (130 ft). The hammer mustbe stopped immediately, when the operator observes people without proper PPE tocome any closer than this.
Where there is need to work at closer distance to unprotected people or structures,erect safety barriers that can stop flying fragments.
Also erect safety barriers if unprotected bystanders may be crossing through thehazard zone (= reasonably foreseeable misuse).
Protect yourself against flying chips of rock. Flying objects or debris can causeserious injury or death. To prevent injury to your eyes or to your ears, wear eyeprotection and hearing protection when you operate the machine.
The European standard EN 474-1 on safety of earth-moving machinery requires thatadequate operator's protection, such as bullet proof glass, mesh guard or anequivalent protection is used on carriers equipped with a hammer.
Always make sure the machine is equipped with a flying object guard.
R010356
DUST HAZARDBreathing dust will cause deathor severe injury.Always wear approvedrespirator.
DANGER
169400_ENG-1
Operation - Page 47COPYRIGHT © 2020 SANDVIK MINING AND CONSTRUCTION OY
Safety during operationR25P
When measuring hammer operating pressure, you are working in the hammer'shazard zone. Stay clear of moving equipment. Use proper PPE. Failure to complycould result in serious injury or death.
"FLYING OBJECTS HAZARD
The safety label on the product is shown below:
Fragments fly up to 40 m (130 ft) and could cause death or severe injury.
Stop operation when a person enters hazard zone.
Wear approved personal protective equipment."
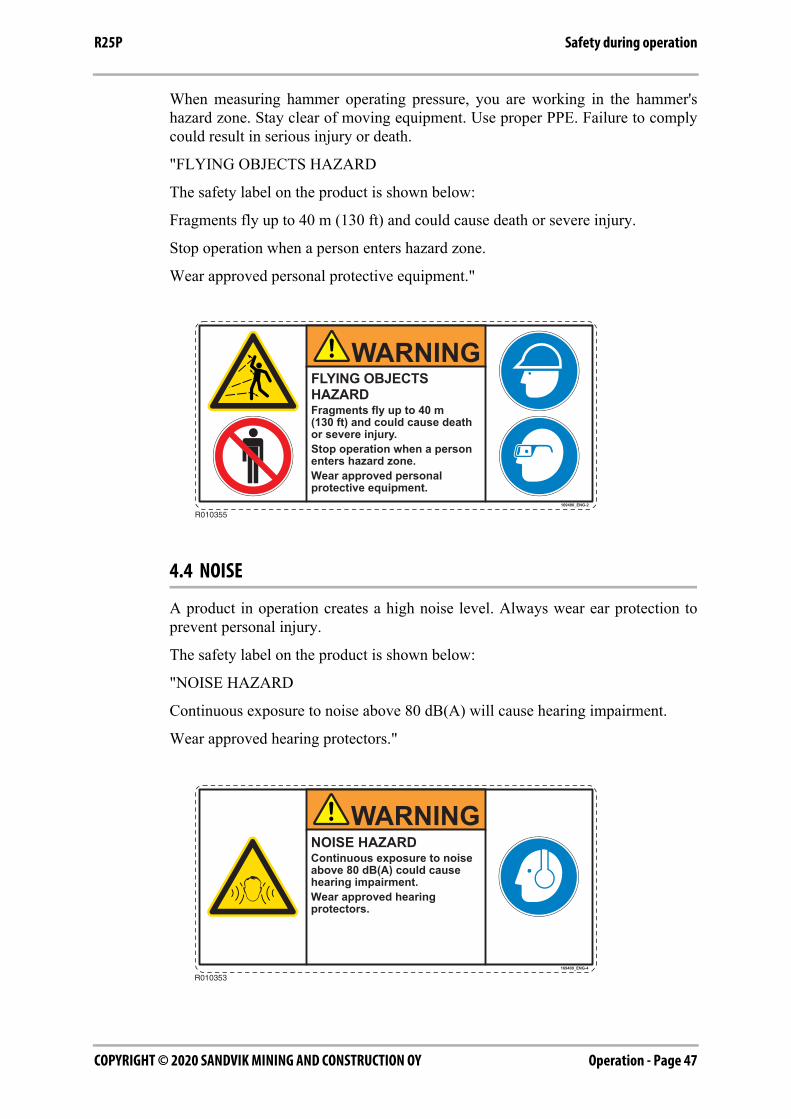
4.4 NOISE
A product in operation creates a high noise level. Always wear ear protection toprevent personal injury.
The safety label on the product is shown below:
"NOISE HAZARD
Continuous exposure to noise above 80 dB(A) will cause hearing impairment.
Wear approved hearing protectors."
R010355
FLYING OBJECTSHAZARDFragments fly up to 40 m(130 ft) and could cause deathor severe injury.Stop operation when a personenters hazard zone.Wear approved personalprotective equipment.
WARNING
169400_ENG-2
R010353
NOISE HAZARDContinuous exposure to noiseabove 80 dB(A) could causehearing impairment.Wear approved hearingprotectors.
WARNING
169400_ENG-4
COPYRIGHT © 2020 SANDVIK MINING AND CONSTRUCTION OYPage 48 - Operation
Safety during operation R25P
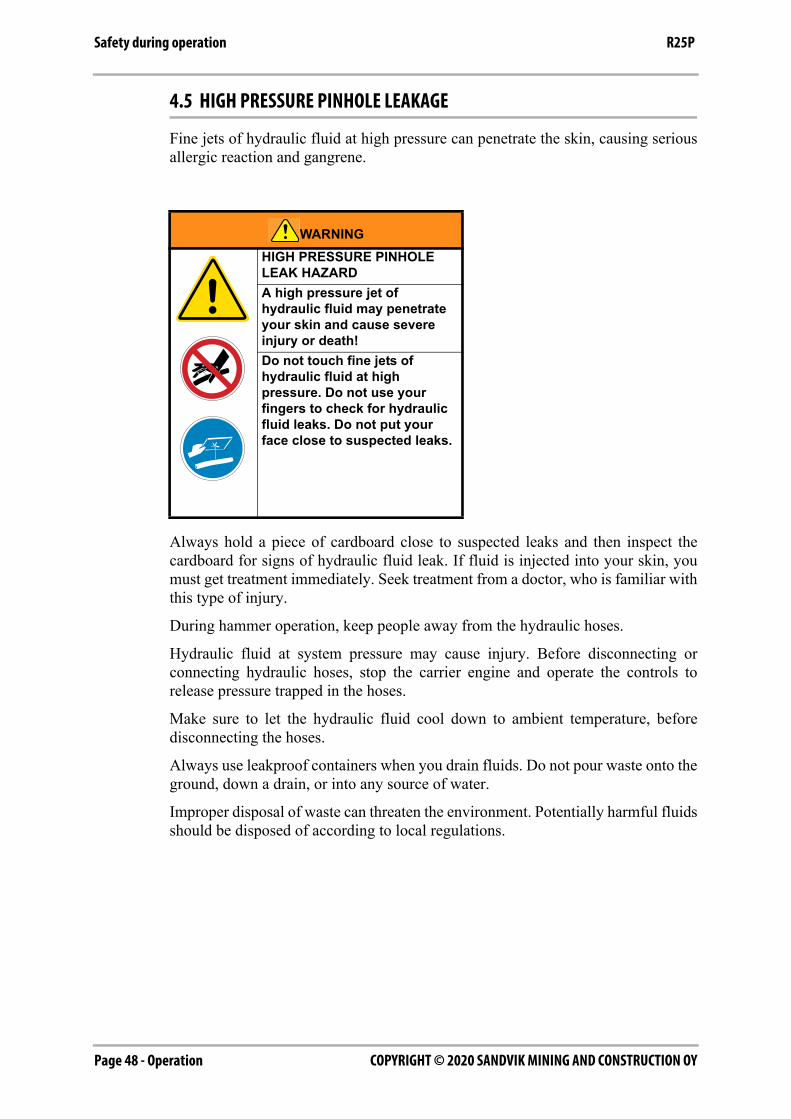
4.5 HIGH PRESSURE PINHOLE LEAKAGE
Fine jets of hydraulic fluid at high pressure can penetrate the skin, causing seriousallergic reaction and gangrene.
Always hold a piece of cardboard close to suspected leaks and then inspect thecardboard for signs of hydraulic fluid leak. If fluid is injected into your skin, youmust get treatment immediately. Seek treatment from a doctor, who is familiar withthis type of injury.
During hammer operation, keep people away from the hydraulic hoses.
Hydraulic fluid at system pressure may cause injury. Before disconnecting orconnecting hydraulic hoses, stop the carrier engine and operate the controls torelease pressure trapped in the hoses.
Make sure to let the hydraulic fluid cool down to ambient temperature, beforedisconnecting the hoses.
Always use leakproof containers when you drain fluids. Do not pour waste onto theground, down a drain, or into any source of water.
Improper disposal of waste can threaten the environment. Potentially harmful fluidsshould be disposed of according to local regulations.
WARNINGHIGH PRESSURE PINHOLE LEAK HAZARDA high pressure jet of hydraulic fluid may penetrate your skin and cause severe injury or death!Do not touch fine jets of hydraulic fluid at high pressure. Do not use your fingers to check for hydraulic fluid leaks. Do not put your face close to suspected leaks.
Operation - Page 49COPYRIGHT © 2020 SANDVIK MINING AND CONSTRUCTION OY
Safety during operationR25P
4.6 ASBESTOS, RADIOACTIVE OR POISONOUS APPLICATIONS
Protect yourself and bystanders from asbestos, radioactive or poisonous airbornepollution.
Stop immediately working on the site, when you suspect that asbestos, radioactiveor poisonous material is on the site unexpectedly. Advise the site supervisor andauthorities on your findings.
If you are aware of asbestos, radioactive or poisonous material on site, follow alllocal laws and regulations for this application. Use gas masks and other properpersonal protective equipment.
Use proper personal protective equipment, including pressurized suits. It is essentialthat you protect yourself and people in your surrounding from the tiny dust particleswhich cause asbestosis and other serious lung diseases. Do not use the product untilyou are sure the respirators are working properly. This means you must check therespirator to make sure that it is clean, that its filter has been changed, and tootherwise make sure the respirator will protect in the way it is meant to.
Rammer equipment and replacement parts that are shipped from Rammer areasbestos free. Rammer recommends the use of only genuine Rammer replacementparts. Use the following guidelines when you handle any replacement parts thatcontain asbestos or when you handle asbestos debris.
Equipment components which may contain asbestos fibers are brake pads, brakebands, lining material, clutch plates, and some gaskets. The asbestos that is used inthese components is usually bound in a resin or sealed in some way. Normalhandling is not hazardous.
D010100

COPYRIGHT © 2020 SANDVIK MINING AND CONSTRUCTION OYPage 50 - Operation
Safety during operation R25P
If dust that may contain asbestos is present, follow the basic guidelines below:
- Never use compressed air for cleaning.
- Avoid brushing materials that contain asbestos.
- Avoid grinding materials that contain asbestos.
- Use a wet method in order to clean up asbestos materials.
- Use exhaust ventilation on permanent machining jobs.
- Wear an approved respirator if there is no other way to control the dust.
- Comply with applicable rules and regulations for the work place. In the UnitedStates, use Occupational Safety and Health Administration (OSHA)requirements.
- Obey environmental regulations for the disposal of asbestos.
- Stay away from areas that might have asbestos particles in the air.
- Dispose of waste properly.
Failure to comply will result in serious injury or death.
Operation - Page 51COPYRIGHT © 2020 SANDVIK MINING AND CONSTRUCTION OY
Transportation, storage and setting upR25P
5. TRANSPORTATION, STORAGE AND SETTING UP
5.1 TRANSPORT POSITION
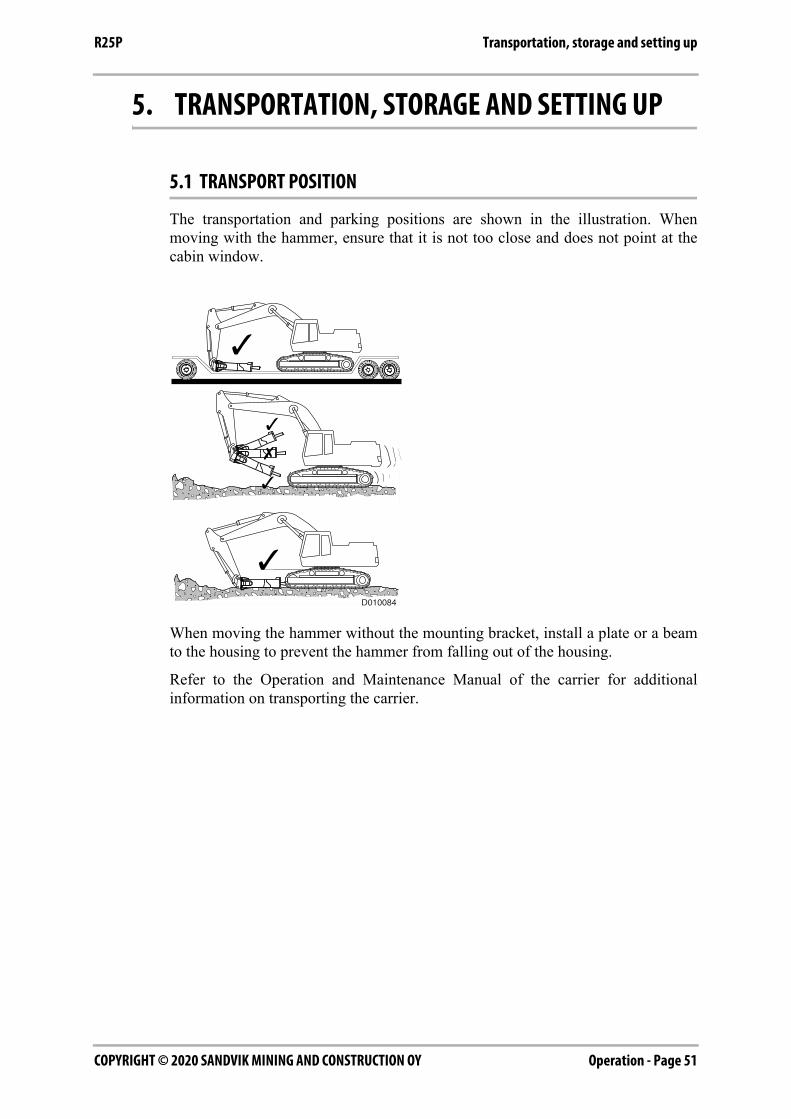
The transportation and parking positions are shown in the illustration. Whenmoving with the hammer, ensure that it is not too close and does not point at thecabin window.
When moving the hammer without the mounting bracket, install a plate or a beamto the housing to prevent the hammer from falling out of the housing.
Refer to the Operation and Maintenance Manual of the carrier for additionalinformation on transporting the carrier.
D010084
COPYRIGHT © 2020 SANDVIK MINING AND CONSTRUCTION OYPage 52 - Operation
Transportation, storage and setting up R25P
5.2 STORAGE
Observe the following points when the hammer is stored. In this way the vital partsof the attachment are protected from rust and the machine is ready to be installedwhenever necessary.
- Make sure the storage area is dry.
- Remove the tool from the hydraulic hammer.
- Protect the lower end of the piston, the tool and the tool bushings well withgrease everywhere within the hydraulic hammer.
- Seal the connections with clean plugs to prevent oil leakage and dirt fromgetting into couplings.
- Store the product in the vertical position.
- Make sure the product cannot fall.
Operation - Page 53COPYRIGHT © 2020 SANDVIK MINING AND CONSTRUCTION OY
Transportation, storage and setting upR25P
5.3 SETTING UP
Verify that the hammer is compatible with the carrier. Consult your Rammer dealerfor more information.
Verify that all parts you have specified are delivered.
Verify that the mounting bracket (standard or quick hitch) is the correct mountingbracket for the carrier and the product.
Verify that the oil hoses are specified for maximum pressure relief setting.
If the carrier is equipped with a quick hitch mounting bracket, consult the operatingmanual of the quick hitch bracket before you attempt to mount the product.
- An excessively heavy bracket may increase the weight of the attachment morethan the lifting capacity of the carrier allows.
- A too light bracket may not be able to support the product properly.
- Faulty bracket geometry may lead to contact and cause expensive damage to theboom cylinders.
Mount or dismount the hammer to or from the boom only while the hammer is in ahorizontal position. If the hammer is in a standing position, it may fall over due toinsufficient support from ground or due to sudden movement of the boom.
Tighten the bracket bolts to the proper torque value.
When measuring hammer operating pressure, you are in the hammer's hazard zone.Stay clear of moving equipment. Use proper PPE. Failure to comply could result inserious injury or death.
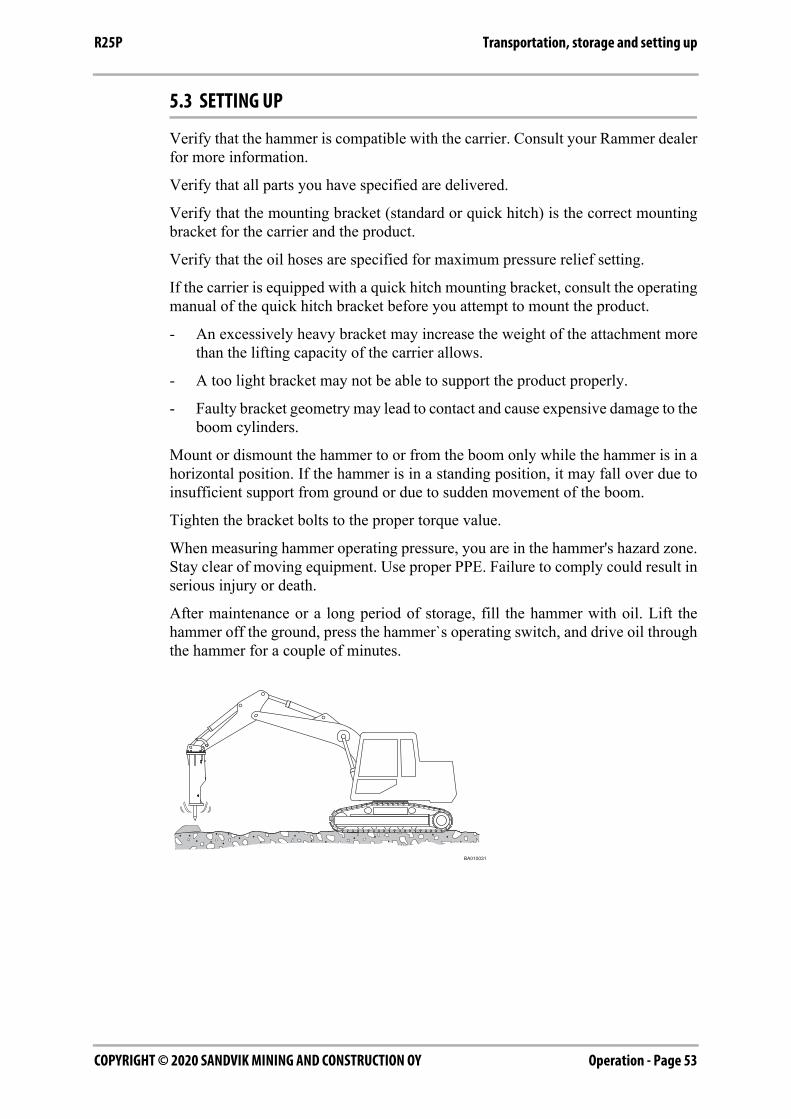
After maintenance or a long period of storage, fill the hammer with oil. Lift thehammer off the ground, press the hammer`s operating switch, and drive oil throughthe hammer for a couple of minutes.
BA010031
COPYRIGHT © 2020 SANDVIK MINING AND CONSTRUCTION OYPage 54 - Operation
Hammer installation and removal R25P
6. HAMMER INSTALLATION AND REMOVAL
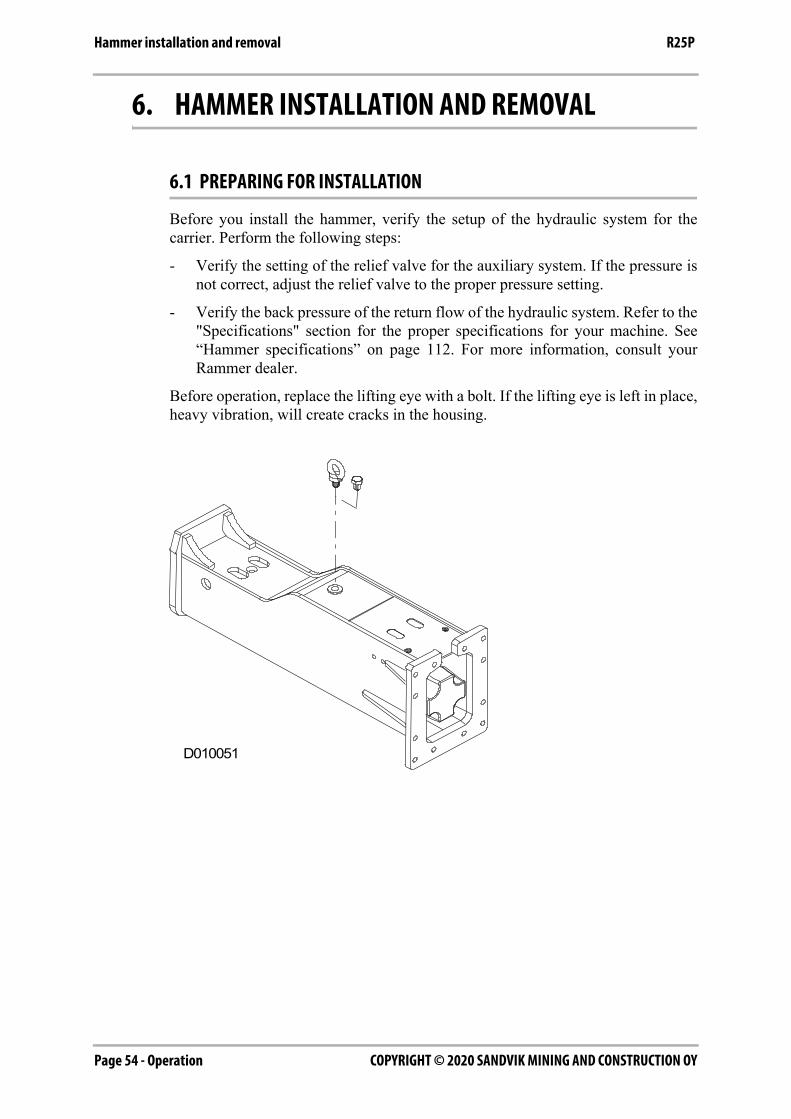
6.1 PREPARING FOR INSTALLATION
Before you install the hammer, verify the setup of the hydraulic system for thecarrier. Perform the following steps:
- Verify the setting of the relief valve for the auxiliary system. If the pressure isnot correct, adjust the relief valve to the proper pressure setting.
- Verify the back pressure of the return flow of the hydraulic system. Refer to the"Specifications" section for the proper specifications for your machine. See“Hammer specifications” on page 112. For more information, consult yourRammer dealer.
Before operation, replace the lifting eye with a bolt. If the lifting eye is left in place,heavy vibration, will create cracks in the housing.
D010051

Operation - Page 55COPYRIGHT © 2020 SANDVIK MINING AND CONSTRUCTION OY
Hammer installation and removalR25P
6.2 INSTALLING THE HAMMER
1. Move the carrier to the hammer, taking care not to hit any bystanders.
2. Lower the boom carefully towards the hammer.
Do not place yourself or other people under the hammer or the boom at anytime. Sudden, unexpected movements of the boom may crush your limbs.
3. Mount the hammer on the boom. Take care not to get hit by pins or links.
4. Tighten the bracket bolts to the proper torque value.
5. Remove protective caps. Connect the hoses. Make sure you collect all oil in aproper container and dispose of it properly.
WARNING!Never install the hammer to the carrier or remove it from the carrier by yourself. These tasks require more than one person.
WARNING!Secure the hammer from falling down in any direction when handling it. Check that the lifting capacity of the hoist you are using is sufficient for the job.
BA010030
OUTIN
COPYRIGHT © 2020 SANDVIK MINING AND CONSTRUCTION OYPage 56 - Operation
Hammer installation and removal R25P
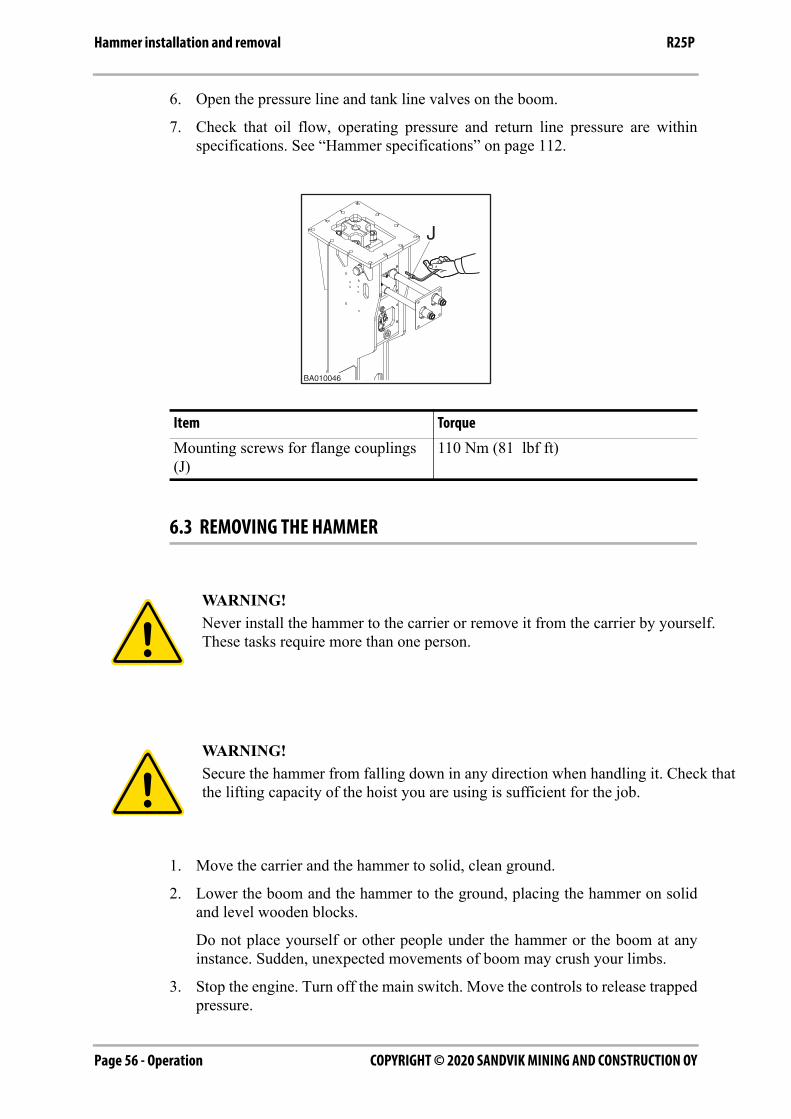
6. Open the pressure line and tank line valves on the boom.
7. Check that oil flow, operating pressure and return line pressure are withinspecifications. See “Hammer specifications” on page 112.
6.3 REMOVING THE HAMMER
1. Move the carrier and the hammer to solid, clean ground.
2. Lower the boom and the hammer to the ground, placing the hammer on solidand level wooden blocks.
Do not place yourself or other people under the hammer or the boom at anyinstance. Sudden, unexpected movements of boom may crush your limbs.
3. Stop the engine. Turn off the main switch. Move the controls to release trappedpressure.
Item Torque
Mounting screws for flange couplings (J)
110 Nm (81 lbf ft)
WARNING!Never install the hammer to the carrier or remove it from the carrier by yourself. These tasks require more than one person.
WARNING!Secure the hammer from falling down in any direction when handling it. Check that the lifting capacity of the hoist you are using is sufficient for the job.
BA010046
J
Operation - Page 57COPYRIGHT © 2020 SANDVIK MINING AND CONSTRUCTION OY
Hammer installation and removalR25P
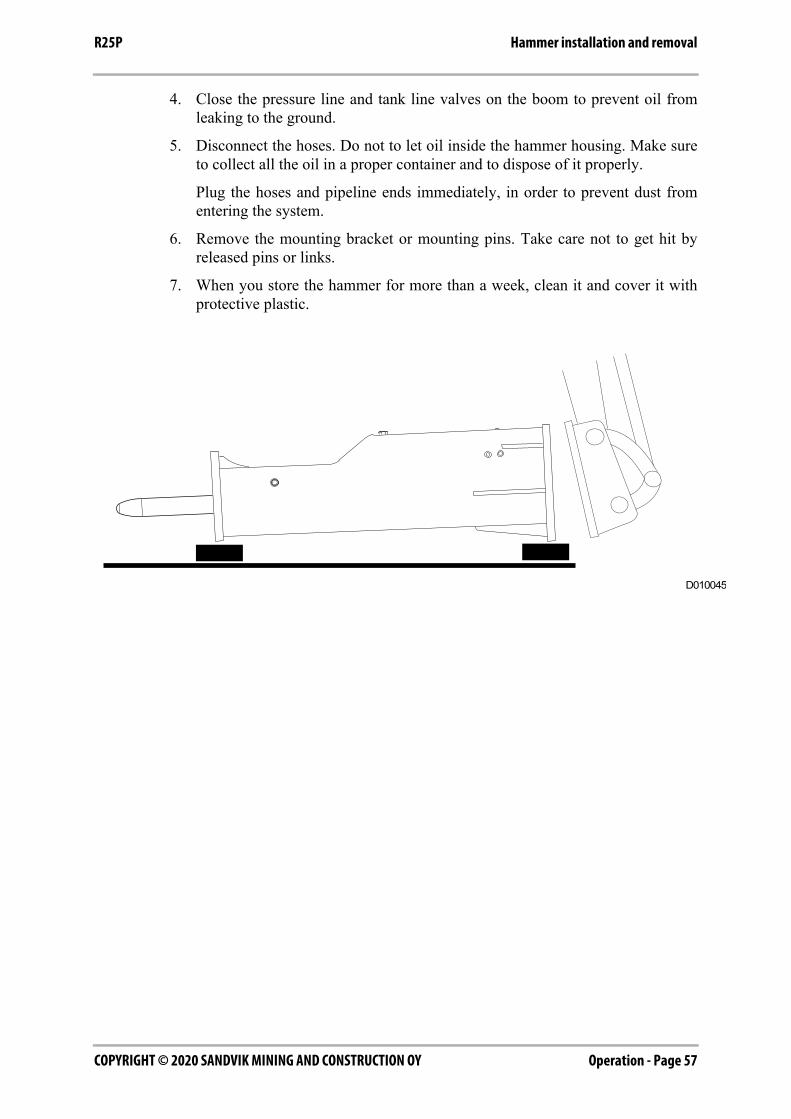
4. Close the pressure line and tank line valves on the boom to prevent oil fromleaking to the ground.
5. Disconnect the hoses. Do not to let oil inside the hammer housing. Make sureto collect all the oil in a proper container and to dispose of it properly.
Plug the hoses and pipeline ends immediately, in order to prevent dust fromentering the system.
6. Remove the mounting bracket or mounting pins. Take care not to get hit byreleased pins or links.
7. When you store the hammer for more than a week, clean it and cover it withprotective plastic.
D010045
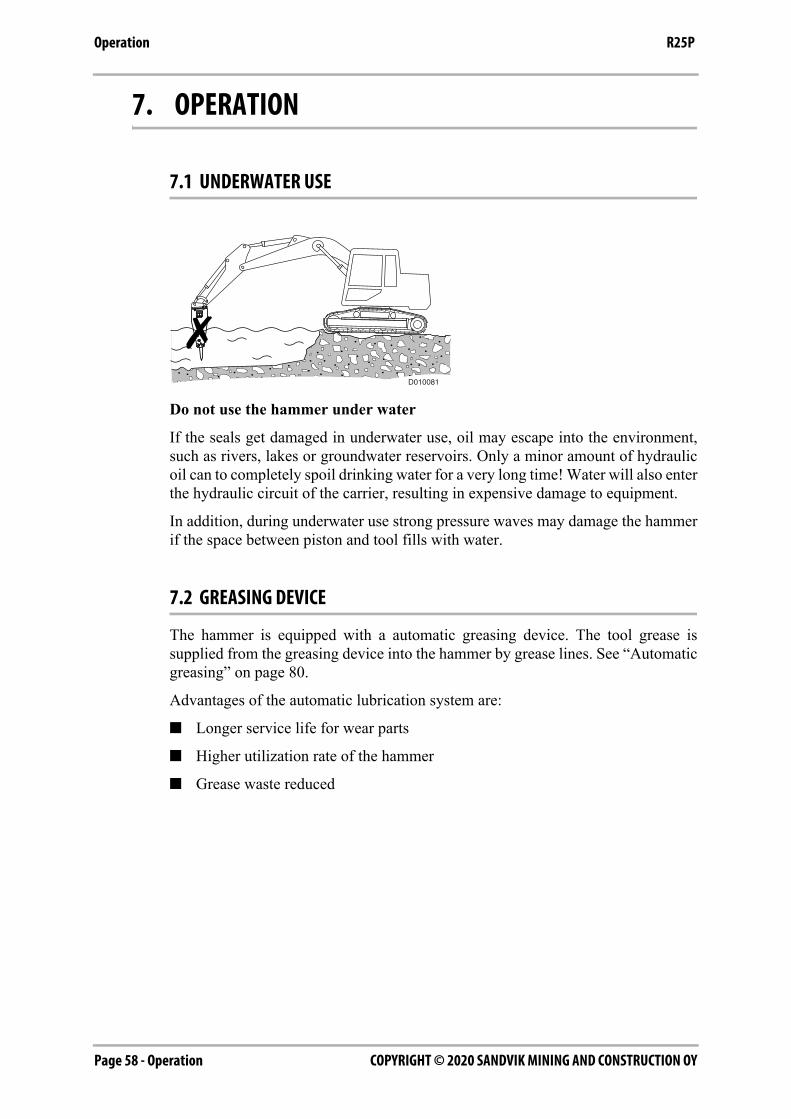
COPYRIGHT © 2020 SANDVIK MINING AND CONSTRUCTION OYPage 58 - Operation
Operation R25P
7. OPERATION
7.1 UNDERWATER USE
Do not use the hammer under water
If the seals get damaged in underwater use, oil may escape into the environment,such as rivers, lakes or groundwater reservoirs. Only a minor amount of hydraulicoil can to completely spoil drinking water for a very long time! Water will also enterthe hydraulic circuit of the carrier, resulting in expensive damage to equipment.
In addition, during underwater use strong pressure waves may damage the hammerif the space between piston and tool fills with water.
7.2 GREASING DEVICE
The hammer is equipped with a automatic greasing device. The tool grease issupplied from the greasing device into the hammer by grease lines. See “Automaticgreasing” on page 80.
Advantages of the automatic lubrication system are:
■ Longer service life for wear parts
■ Higher utilization rate of the hammer
■ Grease waste reduced
D010081

Operation - Page 59COPYRIGHT © 2020 SANDVIK MINING AND CONSTRUCTION OY
OperationR25P
7.3 SERVICE INDICATOR
The Ramdata II service indicator system is designed to help the hammer operatorsand service personnel get information about the service interval status, servicehistory and accumulated working history of a hammer. See “Checking the serviceinterval status” on page 60.
Possible operations with the Ramdata II device
■ Checking the service interval status
BA010058
Ramdata II device
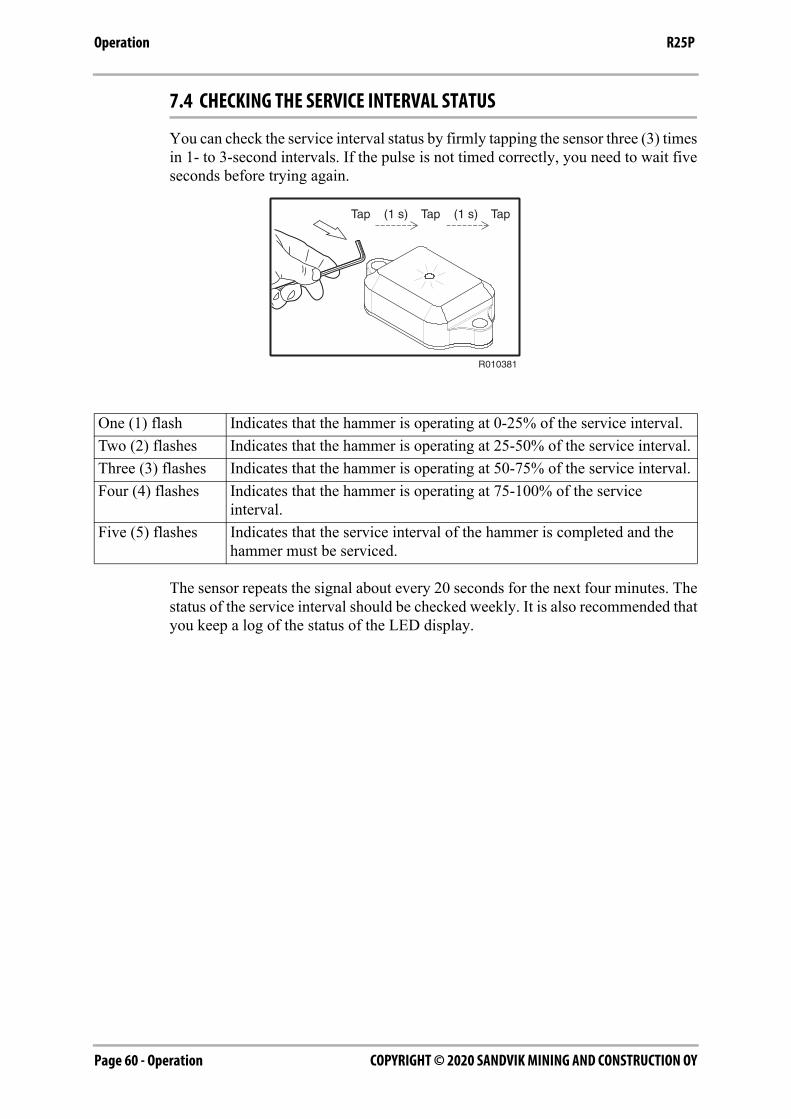
COPYRIGHT © 2020 SANDVIK MINING AND CONSTRUCTION OYPage 60 - Operation
Operation R25P
7.4 CHECKING THE SERVICE INTERVAL STATUS
You can check the service interval status by firmly tapping the sensor three (3) timesin 1- to 3-second intervals. If the pulse is not timed correctly, you need to wait fiveseconds before trying again.
The sensor repeats the signal about every 20 seconds for the next four minutes. Thestatus of the service interval should be checked weekly. It is also recommended thatyou keep a log of the status of the LED display.
One (1) flash Indicates that the hammer is operating at 0-25% of the service interval.Two (2) flashes Indicates that the hammer is operating at 25-50% of the service interval.Three (3) flashes Indicates that the hammer is operating at 50-75% of the service interval.Four (4) flashes Indicates that the hammer is operating at 75-100% of the service
interval.Five (5) flashes Indicates that the service interval of the hammer is completed and the
hammer must be serviced.
Tap (1 s) Tap (1 s) Tap
R010381

Operation - Page 61COPYRIGHT © 2020 SANDVIK MINING AND CONSTRUCTION OY
OperationR25P
7.5 RD3 REMOTE MONITORING DEVICE
RD3 is a hammer-mounted device that enables remote monitoring of hammer units.During hammer operation, RD3 collects and transmits operating and locationinformation. This information is available through an online service and can beused, for example, to view hammer work history, manage service schedules,optimize hammer performance, plan operator training and conduct fleetmanagement.
For more information, contact your local Rammer dealer.
Note: See “RD3 and data privacy” on page 118.
WARNING!Warning! RD3 contains a SIM card to enable remote connections and an encased lithium metal battery. Both items are regulated for air transport. Consult your forwarder about any restrictions for air freight.
WARNING!Warning! Lithium is a highly flammable substance. Store damaged lithium batteries in a fire proof container. Never transport a damaged or unprotected lithium battery. Follow local laws and regulations on proper disposal of damaged lithium batteries.
WARNING!Warning! Inhalation, skin contact and eye contact can occur when the battery is opened. Upon exposure to internal contents, the corrosive fumes will be very irritating to the skin, eyes and mucous membranes. Overexposure can cause symptoms of non-fibrotic lung injury and membrane irritation.
RD3
BA010073
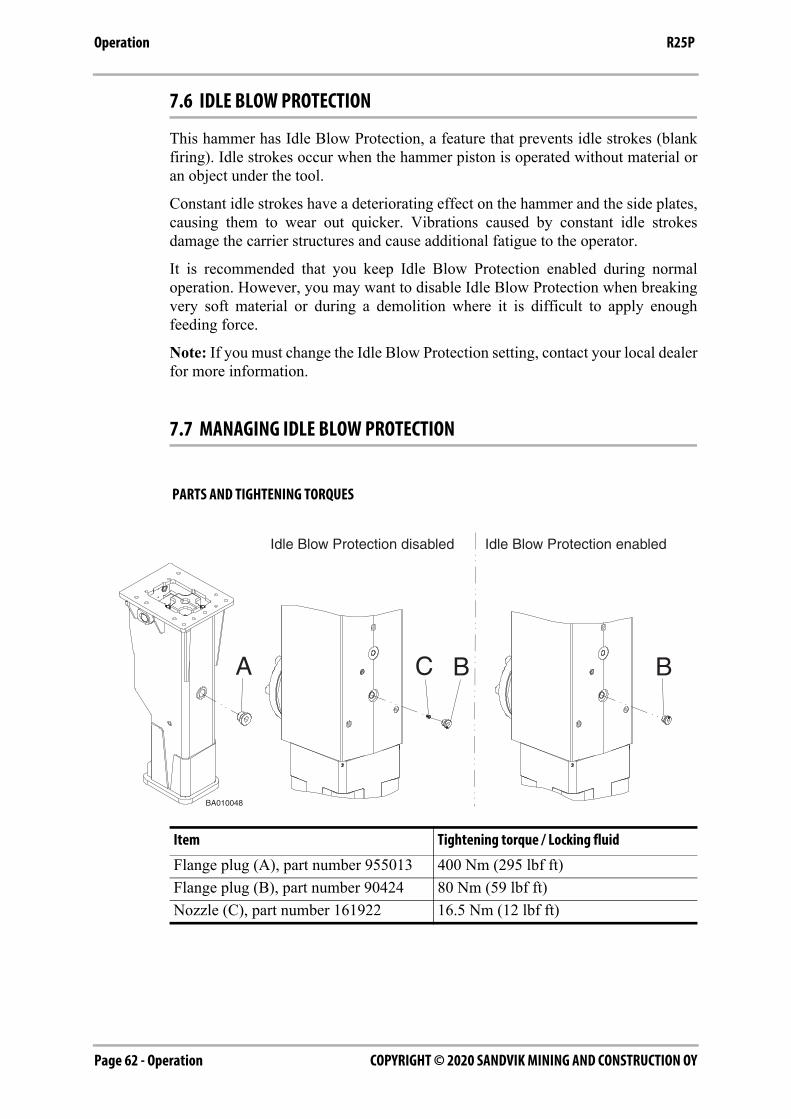
COPYRIGHT © 2020 SANDVIK MINING AND CONSTRUCTION OYPage 62 - Operation
Operation R25P
7.6 IDLE BLOW PROTECTION
This hammer has Idle Blow Protection, a feature that prevents idle strokes (blankfiring). Idle strokes occur when the hammer piston is operated without material oran object under the tool.
Constant idle strokes have a deteriorating effect on the hammer and the side plates,causing them to wear out quicker. Vibrations caused by constant idle strokesdamage the carrier structures and cause additional fatigue to the operator.
It is recommended that you keep Idle Blow Protection enabled during normaloperation. However, you may want to disable Idle Blow Protection when breakingvery soft material or during a demolition where it is difficult to apply enoughfeeding force.
Note: If you must change the Idle Blow Protection setting, contact your local dealerfor more information.
7.7 MANAGING IDLE BLOW PROTECTION
PARTS AND TIGHTENING TORQUES
Item Tightening torque / Locking fluid
Flange plug (A), part number 955013 400 Nm (295 lbf ft)Flange plug (B), part number 90424 80 Nm (59 lbf ft)Nozzle (C), part number 161922 16.5 Nm (12 lbf ft)
B BC
Idle Blow Protection disabled
BA010048
Idle Blow Protection enabled
A
Operation - Page 63COPYRIGHT © 2020 SANDVIK MINING AND CONSTRUCTION OY
OperationR25P
DISABLING IDLE BLOW PROTECTION
Warning! The hydraulic pressure inside the hammer must always be releasedbefore removing any of the plugs or valves. Read the instructions on releasingthe hydraulic pressure from the hammer. See “Releasing pressure from thehammer” on page 89.
Follow these instructions to disable Idle Blow Protection.
1. Remove flange plug (A) from the housing.
2. Remove flange plug (B) from the cylinder.
3. Install nozzle (C) in the cylinder.
4. Install flange plug (B) in the cylinder.
5. Install flange plug (A) to the housing.
ENABLING IDLE BLOW PROTECTION
Warning! The hydraulic pressure inside the hammer must always be releasedbefore removing any of the plugs or valves. Read the instructions on releasingthe hydraulic pressure from the hammer. See “Releasing pressure from thehammer” on page 89.
Follow these instructions to enable Idle Blow Protection.
1. Remove flange plug (A) from the housing.
2. Remove flange plug (B) and nozzle (C) from the cylinder.
3. Install flange plug (B) in the cylinder.
4. Install flange plug (A) to the housing.

COPYRIGHT © 2020 SANDVIK MINING AND CONSTRUCTION OYPage 64 - Operation
Operation R25P
7.8 BLANK FIRING
Stop the hammer the moment the subject material is broken. Operating the hammerpiston without material under the tool is called blank firing.
Excessive prying of the tool may prevent contact between the piston and the tooland also cause blank firing. A sign of this is when hammer recoil sound becomesextremely rapid during operation.
Blank firing will destroy major components of the hammer, starting from the tooland the tool retaining pin. Continuous blank firing will destroy the front head, thepiston and the tie rods.
Rammer considers this a faulty operation technique that is not covered by warranty.
7.9 PENETRATIVE BREAKING
In penetrative breaking, a moil tool or a chisel tool is forced inside the material.Penetrative breaking is more effective in the following materials: soft material,layered material, plastic material, and low abrasive material. Hammers with ahigher rate of impact (BPM) are ideal for penetrative breaking.
7.10 IMPACT BREAKING
With impact breaking, the material is broken by transferring very strong mechanicalstress waves from the tool into the material. Impact breaking is most effective inhard, brittle and very abrasive materials. The high impact energy of the bighammers makes them ideal for impact breaking. The use of a chisel tool in hardmaterial will cause the sharp edge to wear very quickly.
Operation - Page 65COPYRIGHT © 2020 SANDVIK MINING AND CONSTRUCTION OY
OperationR25P
7.11 OPERATING TECHNIQUES
Only use the hydraulic hammer to break rocks, concrete, and other hard objects.Before you start the hydraulic hammer, place the carrier on a level, stable surface.If the carrier must be placed on a slope or on a rough surface, be careful during theoperation.
Never operate the hydraulic hammer when you cannot see the hydraulic hammer.Always position the carrier so that you can see the hydraulic hammer and the areaof work.
NOTICE: Do not use the dropping force of the hydraulic hammer to break rocks orother hard objects. This will cause high vibration level to operator and causestructural damage to the hammer and carrier. Rammer considers this a faultyoperation technique that is not covered by warranty.
NOTICE: Do not use the sides or back of the hydraulic hammer to move rocks orother hard objects. Doing this can cause damage not only to the hammer but also tothe stick or boom cylinder.
NOTICE: Do not operate the hammer with any of the cylinders fully retracted orextended. Doing this can cause structural damage to the carrier, resulting in reducedmachine life.
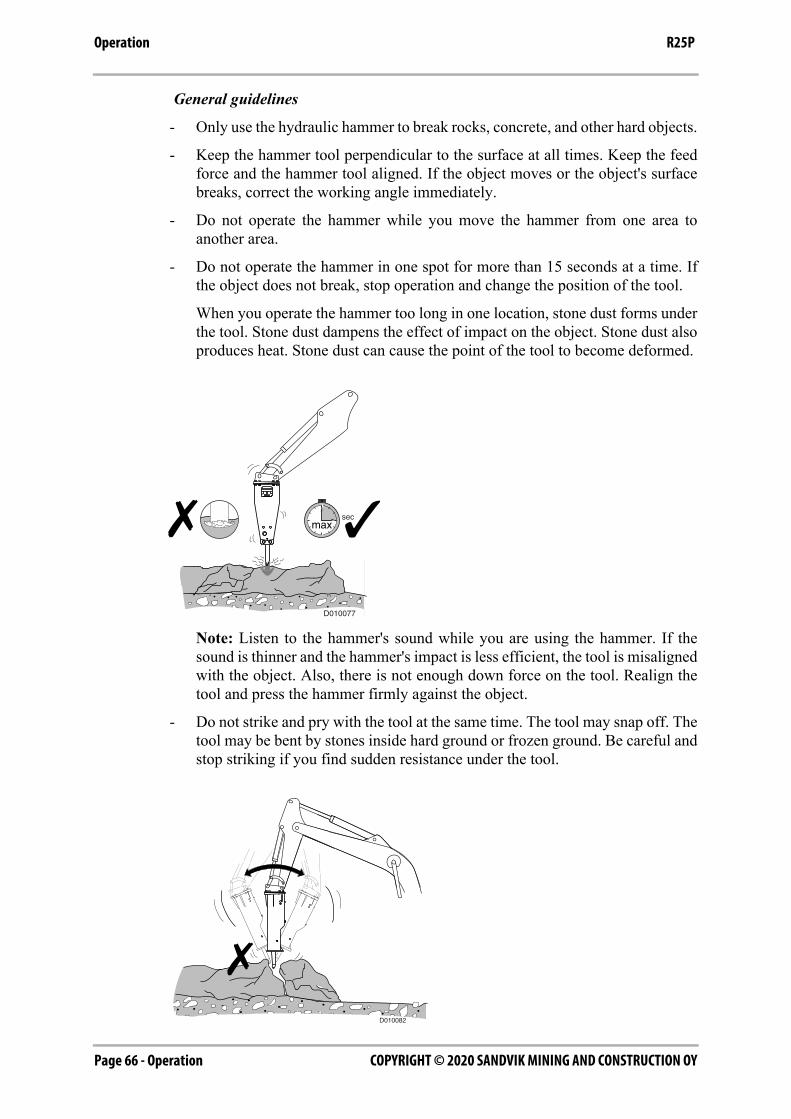
COPYRIGHT © 2020 SANDVIK MINING AND CONSTRUCTION OYPage 66 - Operation
Operation R25P
General guidelines
- Only use the hydraulic hammer to break rocks, concrete, and other hard objects.
- Keep the hammer tool perpendicular to the surface at all times. Keep the feedforce and the hammer tool aligned. If the object moves or the object's surfacebreaks, correct the working angle immediately.
- Do not operate the hammer while you move the hammer from one area toanother area.
- Do not operate the hammer in one spot for more than 15 seconds at a time. Ifthe object does not break, stop operation and change the position of the tool.
When you operate the hammer too long in one location, stone dust forms underthe tool. Stone dust dampens the effect of impact on the object. Stone dust alsoproduces heat. Stone dust can cause the point of the tool to become deformed.
Note: Listen to the hammer's sound while you are using the hammer. If thesound is thinner and the hammer's impact is less efficient, the tool is misalignedwith the object. Also, there is not enough down force on the tool. Realign thetool and press the hammer firmly against the object.
- Do not strike and pry with the tool at the same time. The tool may snap off. Thetool may be bent by stones inside hard ground or frozen ground. Be careful andstop striking if you find sudden resistance under the tool.
sec
D010082
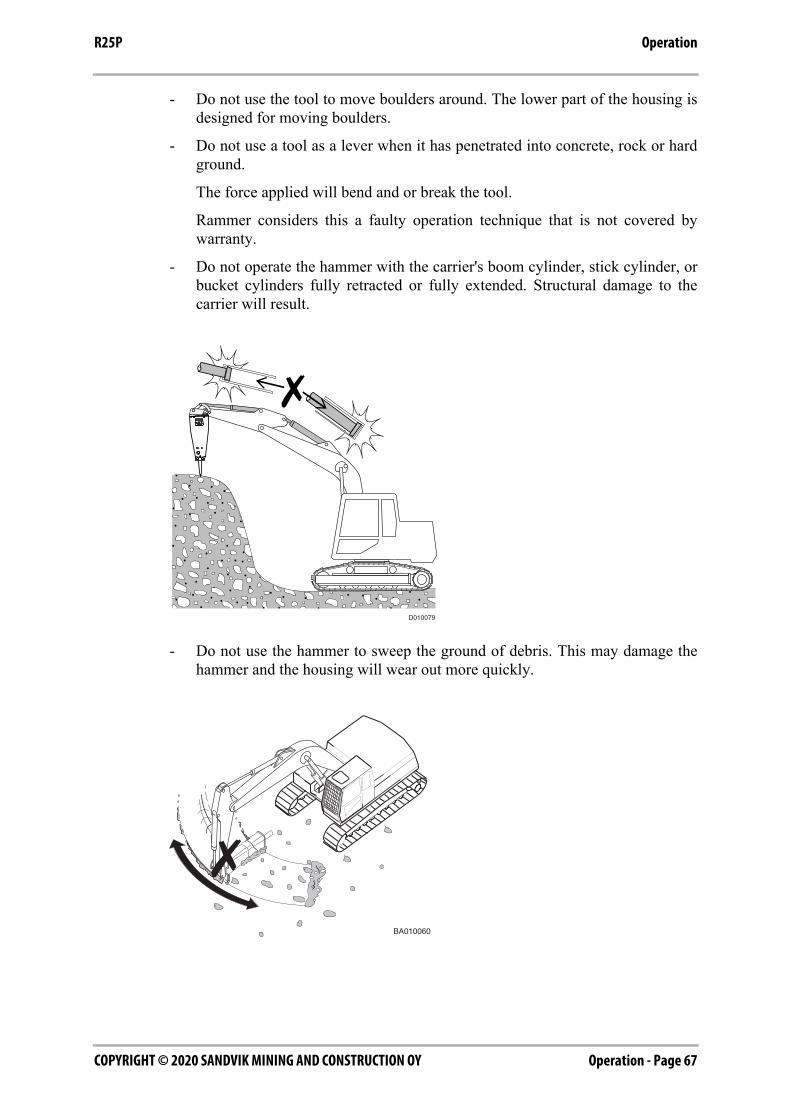
Operation - Page 67COPYRIGHT © 2020 SANDVIK MINING AND CONSTRUCTION OY
OperationR25P
- Do not use the tool to move boulders around. The lower part of the housing isdesigned for moving boulders.
- Do not use a tool as a lever when it has penetrated into concrete, rock or hardground.
The force applied will bend and or break the tool.
Rammer considers this a faulty operation technique that is not covered bywarranty.
- Do not operate the hammer with the carrier's boom cylinder, stick cylinder, orbucket cylinders fully retracted or fully extended. Structural damage to thecarrier will result.
- Do not use the hammer to sweep the ground of debris. This may damage thehammer and the housing will wear out more quickly.
D010079
BA010060
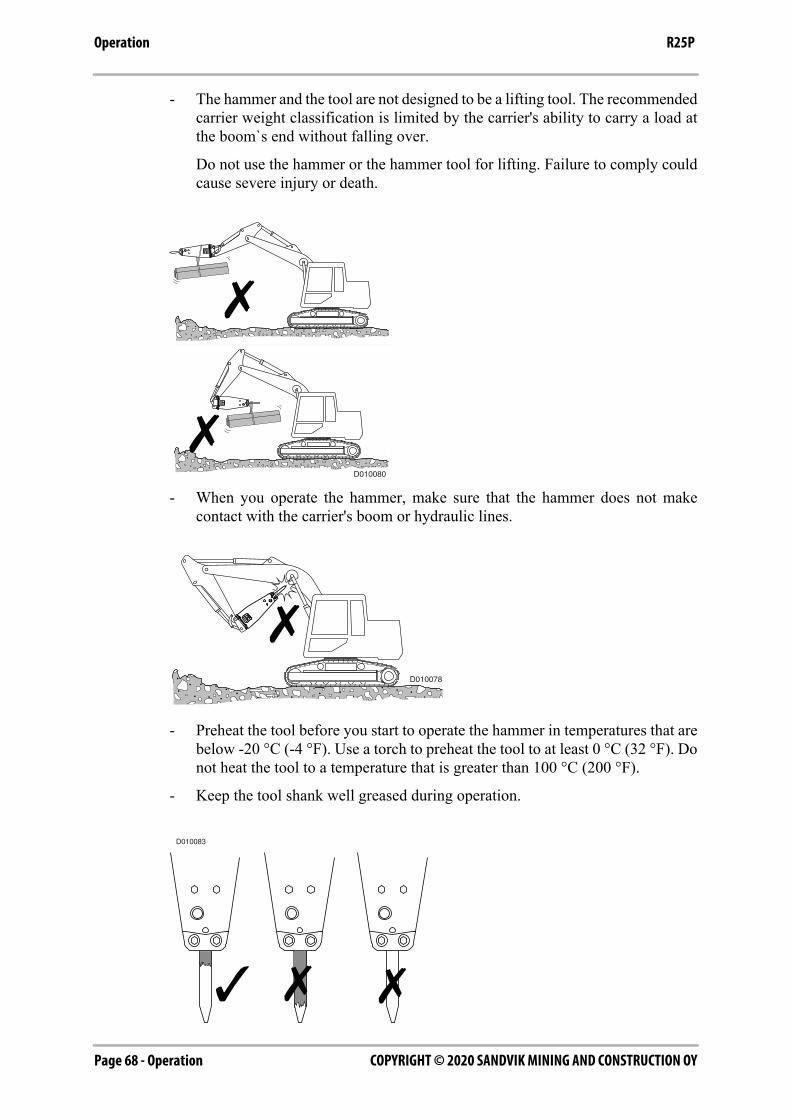
COPYRIGHT © 2020 SANDVIK MINING AND CONSTRUCTION OYPage 68 - Operation
Operation R25P
- The hammer and the tool are not designed to be a lifting tool. The recommendedcarrier weight classification is limited by the carrier's ability to carry a load atthe boom`s end without falling over.
Do not use the hammer or the hammer tool for lifting. Failure to comply couldcause severe injury or death.
- When you operate the hammer, make sure that the hammer does not makecontact with the carrier's boom or hydraulic lines.
- Preheat the tool before you start to operate the hammer in temperatures that arebelow -20 °C (-4 °F). Use a torch to preheat the tool to at least 0 °C (32 °F). Donot heat the tool to a temperature that is greater than 100 °C (200 °F).
- Keep the tool shank well greased during operation.
D010080
D010078
D010083
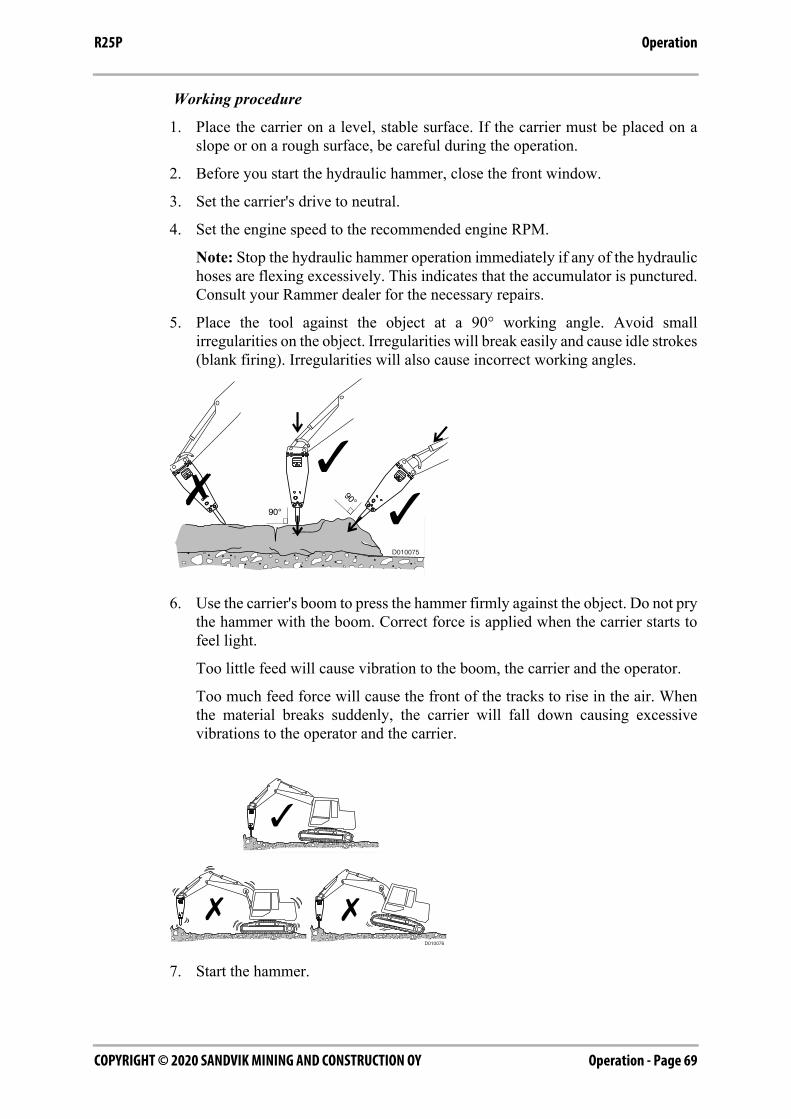
Operation - Page 69COPYRIGHT © 2020 SANDVIK MINING AND CONSTRUCTION OY
OperationR25P
Working procedure
1. Place the carrier on a level, stable surface. If the carrier must be placed on aslope or on a rough surface, be careful during the operation.
2. Before you start the hydraulic hammer, close the front window.
3. Set the carrier's drive to neutral.
4. Set the engine speed to the recommended engine RPM.
Note: Stop the hydraulic hammer operation immediately if any of the hydraulichoses are flexing excessively. This indicates that the accumulator is punctured.Consult your Rammer dealer for the necessary repairs.
5. Place the tool against the object at a 90° working angle. Avoid smallirregularities on the object. Irregularities will break easily and cause idle strokes(blank firing). Irregularities will also cause incorrect working angles.
6. Use the carrier's boom to press the hammer firmly against the object. Do not prythe hammer with the boom. Correct force is applied when the carrier starts tofeel light.
Too little feed will cause vibration to the boom, the carrier and the operator.
Too much feed force will cause the front of the tracks to rise in the air. Whenthe material breaks suddenly, the carrier will fall down causing excessivevibrations to the operator and the carrier.
7. Start the hammer.
D010075
D010076
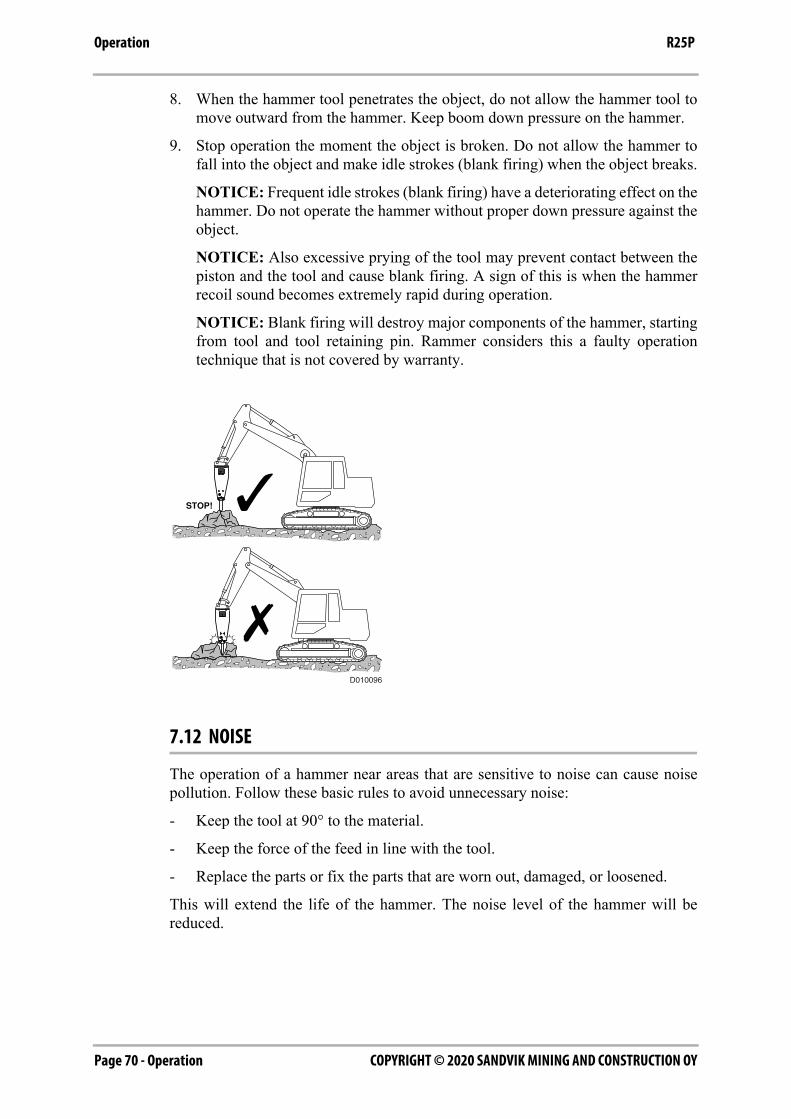
COPYRIGHT © 2020 SANDVIK MINING AND CONSTRUCTION OYPage 70 - Operation
Operation R25P
8. When the hammer tool penetrates the object, do not allow the hammer tool tomove outward from the hammer. Keep boom down pressure on the hammer.
9. Stop operation the moment the object is broken. Do not allow the hammer tofall into the object and make idle strokes (blank firing) when the object breaks.
NOTICE: Frequent idle strokes (blank firing) have a deteriorating effect on thehammer. Do not operate the hammer without proper down pressure against theobject.
NOTICE: Also excessive prying of the tool may prevent contact between thepiston and the tool and cause blank firing. A sign of this is when the hammerrecoil sound becomes extremely rapid during operation.
NOTICE: Blank firing will destroy major components of the hammer, startingfrom tool and tool retaining pin. Rammer considers this a faulty operationtechnique that is not covered by warranty.
7.12 NOISE
The operation of a hammer near areas that are sensitive to noise can cause noisepollution. Follow these basic rules to avoid unnecessary noise:
- Keep the tool at 90° to the material.
- Keep the force of the feed in line with the tool.
- Replace the parts or fix the parts that are worn out, damaged, or loosened.
This will extend the life of the hammer. The noise level of the hammer will bereduced.
D010096
Operation - Page 71COPYRIGHT © 2020 SANDVIK MINING AND CONSTRUCTION OY
OperationR25P
7.13 OPERATING TEMPERATURE RANGE
The recommended operating temperature range is -20 °C to +80 °C (-4 °F to +176 °F).
If the ambient temperature is below -20 °C (-4 °F), preheat the hammer and the toolbefore you start to operate the hammer. Warm up the hydraulic oil of the excavatorto 30 °C ... 40 °C (80 °F ... 105 °F). This allows you to avoid breaking themembrane, and the tool. These components will remain warm during operation ofthe hammer.
When the hydraulic oil temperature exceeds 80 °C (176 °F), you may add anauxiliary oil cooler. When you operate the hammer at temperatures above 80 °C(176 °F), the life of the seals will be reduced.
When you operate the hammer in ambient temperatures above 30 °C (86 °F), youcan use an oil with higher viscosity. The use of oil with higher viscosity can improvethe life of the hammer when you operate the hammer in high ambient temperatures.
Refer to the Owner's Manual of the carrier for more information.
7.14 PROPER FEED FORCE
Push the hammer firmly down. Too little feed will cause vibration to the boom, thecarrier and the operator.
Too much feed force will cause the front of the tracks to rise in the air. When thematerial breaks suddenly, the carrier will fall down causing excessive vibrations tothe operator and the carrier.
7.15 ALIGNMENT OF THE TOOL
NOTICE: Apply feed force along the axis of the tool, and not at an angle to thematerial. Operating with a tilted tool will cause heavy seizure and premature failureof the tool and the piston. Rammer considers this a faulty operation technique thatis not covered by warranty.
Move the hammer carefully towards the rock. Dropping the hammer will cause ahigh vibration to the operator and cause damage to the hammer and host machine.
COPYRIGHT © 2020 SANDVIK MINING AND CONSTRUCTION OYPage 72 - Operation
Operation R25P
7.16 OPERATION PRECAUTIONS
NOTICE: Do not operate the hammer continuously in one place. The tip of the toolwill heat, get soft and wear extremely fast. Rammer considers this a faulty operationtechnique that is not covered by warranty.
NOTICE: Do not operate the hammer at more than fifty percent (50%) enginespeed. Raising the engine speed more than necessary does not increase hammerforce. With high engine speed, hydraulic oil temperature will rise and internalcomponents will be damaged.
Always begin breaking the material at an edge, trying to remove reasonably sizedpieces. This is the most efficient way to operate the hammer.
Warm up the hydraulic oil of the carrier to 30 °C ... 40 °C (80 °F ... 105 °F) beforehammer operation, especially during winter time.
7.17 STOPPING OPERATION
Before leaving the carrier, always lower the boom so that the carrier is stable. Neverleave the machine with the engine running.
Always engage the parking brakes before leaving the controls.
Stop operation immediately if the hoses of the hammer vibrate excessively.
Stop operation immediately if hydraulic oil is visible along the tool shaft (sealfailure).
Hose vibration and seal failure call for immediate disassembly and repair of thehammer. If this happens, contact your nearest Rammer workshop.

Operation - Page 73COPYRIGHT © 2020 SANDVIK MINING AND CONSTRUCTION OY
OperationR25P
7.18 BENDING THE TOOL
Do not use the tool to move boulders around. The lower part of the housing isdesigned for moving boulders.
Do not use the tool as a lever, when it has penetrated into concrete, rock or hardground. The force applied will bend and or break the tool. Rammer considers this afaulty operation technique that is not covered by warranty.
7.19 NEVER USE HAMMER OR TOOL FOR LIFTING
The hammer and the tool are not designed to be a lifting tool. The recommendedcarrier weight classification is limited by the carrier's ability to carry a load at endof the boom without falling over.
Never use the hammer or the tool to lift loads.
Failure to comply can cause severe injury or death.
D010048
D010050
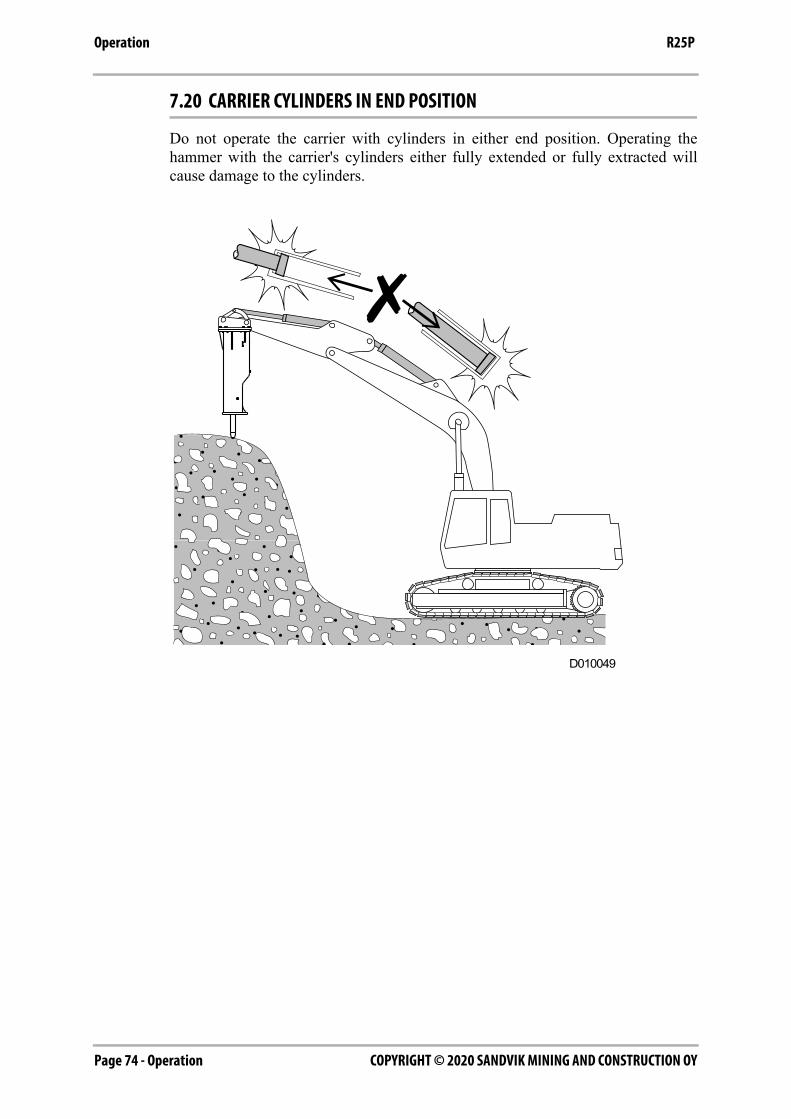
COPYRIGHT © 2020 SANDVIK MINING AND CONSTRUCTION OYPage 74 - Operation
Operation R25P
7.20 CARRIER CYLINDERS IN END POSITION
Do not operate the carrier with cylinders in either end position. Operating thehammer with the carrier's cylinders either fully extended or fully extracted willcause damage to the cylinders.
D010049
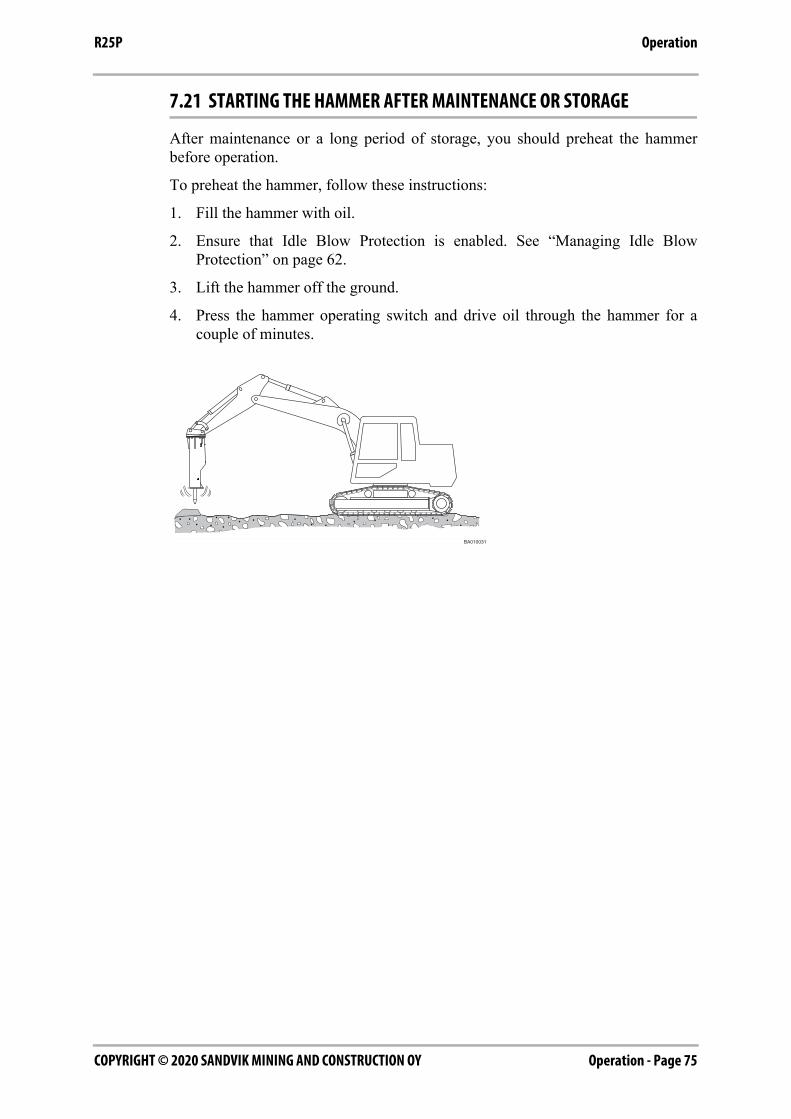
Operation - Page 75COPYRIGHT © 2020 SANDVIK MINING AND CONSTRUCTION OY
OperationR25P
7.21 STARTING THE HAMMER AFTER MAINTENANCE OR STORAGE
After maintenance or a long period of storage, you should preheat the hammerbefore operation.
To preheat the hammer, follow these instructions:
1. Fill the hammer with oil.
2. Ensure that Idle Blow Protection is enabled. See “Managing Idle BlowProtection” on page 62.
3. Lift the hammer off the ground.
4. Press the hammer operating switch and drive oil through the hammer for acouple of minutes.
BA010031
COPYRIGHT © 2020 SANDVIK MINING AND CONSTRUCTION OYPage 76 - Operation
Operation R25P
Lubrication - Page 77COPYRIGHT © 2020 SANDVIK MINING AND CONSTRUCTION OY
R25P
LUBRICATION
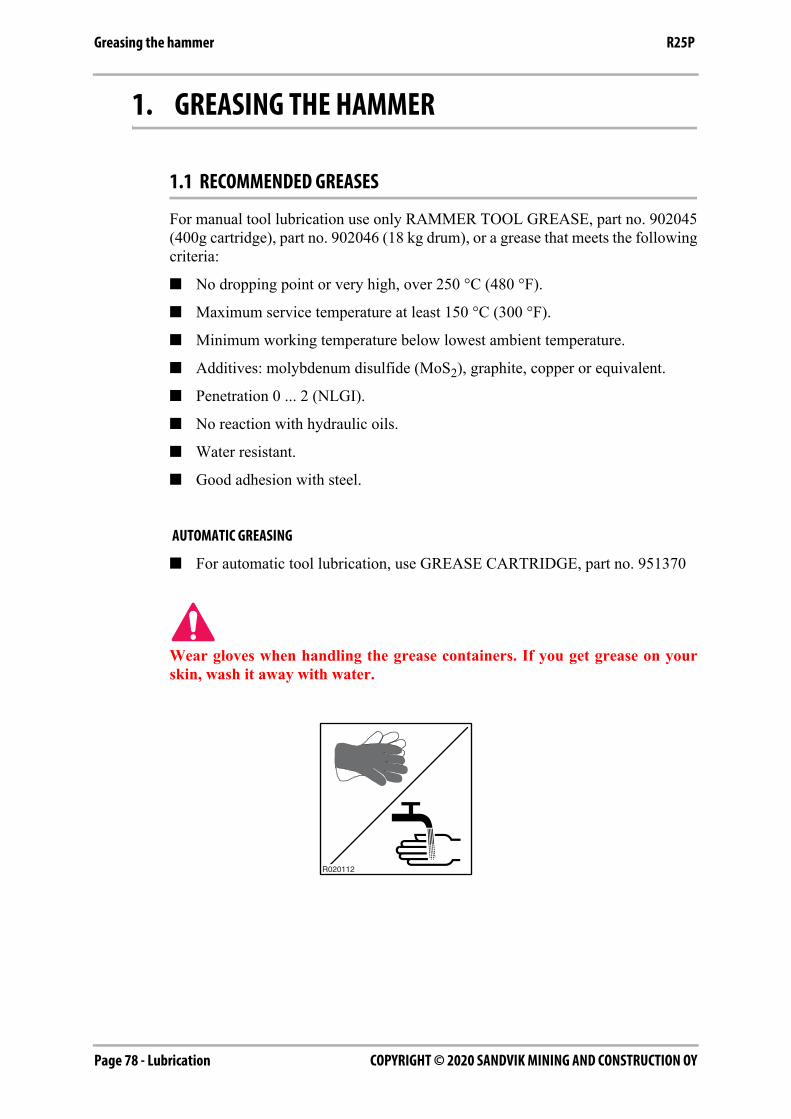
COPYRIGHT © 2020 SANDVIK MINING AND CONSTRUCTION OYPage 78 - Lubrication
Greasing the hammer R25P
1. GREASING THE HAMMER
1.1 RECOMMENDED GREASES
For manual tool lubrication use only RAMMER TOOL GREASE, part no. 902045(400g cartridge), part no. 902046 (18 kg drum), or a grease that meets the followingcriteria:
■ No dropping point or very high, over 250 °C (480 °F).
■ Maximum service temperature at least 150 °C (300 °F).
■ Minimum working temperature below lowest ambient temperature.
■ Additives: molybdenum disulfide (MoS2), graphite, copper or equivalent.
■ Penetration 0 ... 2 (NLGI).
■ No reaction with hydraulic oils.
■ Water resistant.
■ Good adhesion with steel.
AUTOMATIC GREASING
■ For automatic tool lubrication, use GREASE CARTRIDGE, part no. 951370
Wear gloves when handling the grease containers. If you get grease on yourskin, wash it away with water.
R020112
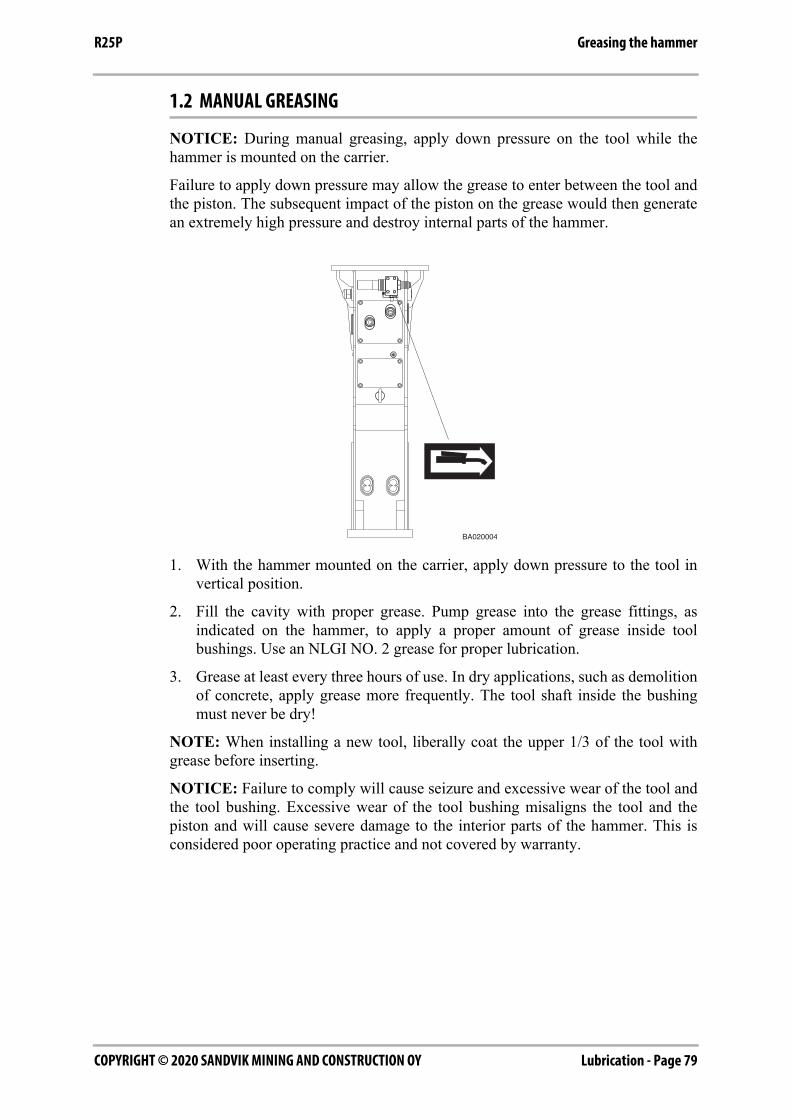
Lubrication - Page 79COPYRIGHT © 2020 SANDVIK MINING AND CONSTRUCTION OY
Greasing the hammerR25P
1.2 MANUAL GREASING
NOTICE: During manual greasing, apply down pressure on the tool while thehammer is mounted on the carrier.
Failure to apply down pressure may allow the grease to enter between the tool andthe piston. The subsequent impact of the piston on the grease would then generatean extremely high pressure and destroy internal parts of the hammer.
1. With the hammer mounted on the carrier, apply down pressure to the tool invertical position.
2. Fill the cavity with proper grease. Pump grease into the grease fittings, asindicated on the hammer, to apply a proper amount of grease inside toolbushings. Use an NLGI NO. 2 grease for proper lubrication.
3. Grease at least every three hours of use. In dry applications, such as demolitionof concrete, apply grease more frequently. The tool shaft inside the bushingmust never be dry!
NOTE: When installing a new tool, liberally coat the upper 1/3 of the tool withgrease before inserting.
NOTICE: Failure to comply will cause seizure and excessive wear of the tool andthe tool bushing. Excessive wear of the tool bushing misaligns the tool and thepiston and will cause severe damage to the interior parts of the hammer. This isconsidered poor operating practice and not covered by warranty.
BA020004
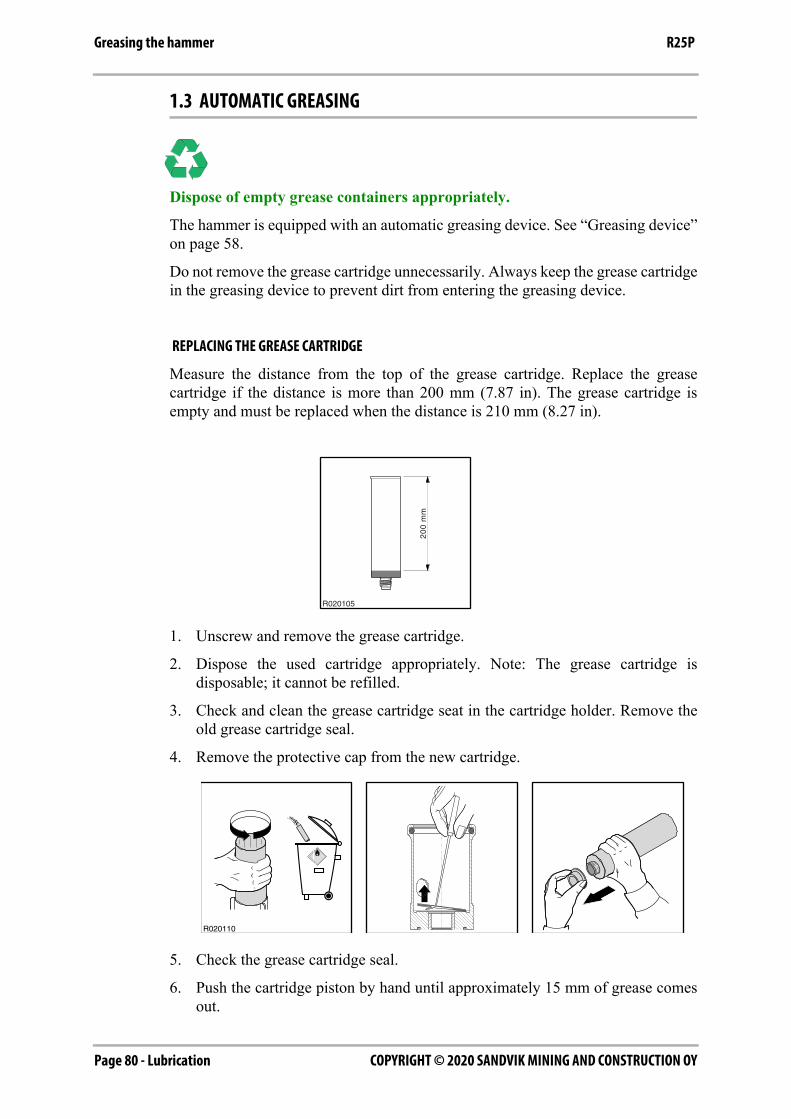
COPYRIGHT © 2020 SANDVIK MINING AND CONSTRUCTION OYPage 80 - Lubrication
Greasing the hammer R25P
1.3 AUTOMATIC GREASING
Dispose of empty grease containers appropriately.
The hammer is equipped with an automatic greasing device. See “Greasing device”on page 58.
Do not remove the grease cartridge unnecessarily. Always keep the grease cartridgein the greasing device to prevent dirt from entering the greasing device.
REPLACING THE GREASE CARTRIDGE
Measure the distance from the top of the grease cartridge. Replace the greasecartridge if the distance is more than 200 mm (7.87 in). The grease cartridge isempty and must be replaced when the distance is 210 mm (8.27 in).
1. Unscrew and remove the grease cartridge.
2. Dispose the used cartridge appropriately. Note: The grease cartridge isdisposable; it cannot be refilled.
3. Check and clean the grease cartridge seat in the cartridge holder. Remove theold grease cartridge seal.
4. Remove the protective cap from the new cartridge.
5. Check the grease cartridge seal.
6. Push the cartridge piston by hand until approximately 15 mm of grease comesout.
R020105
20
0 m
m
R020110
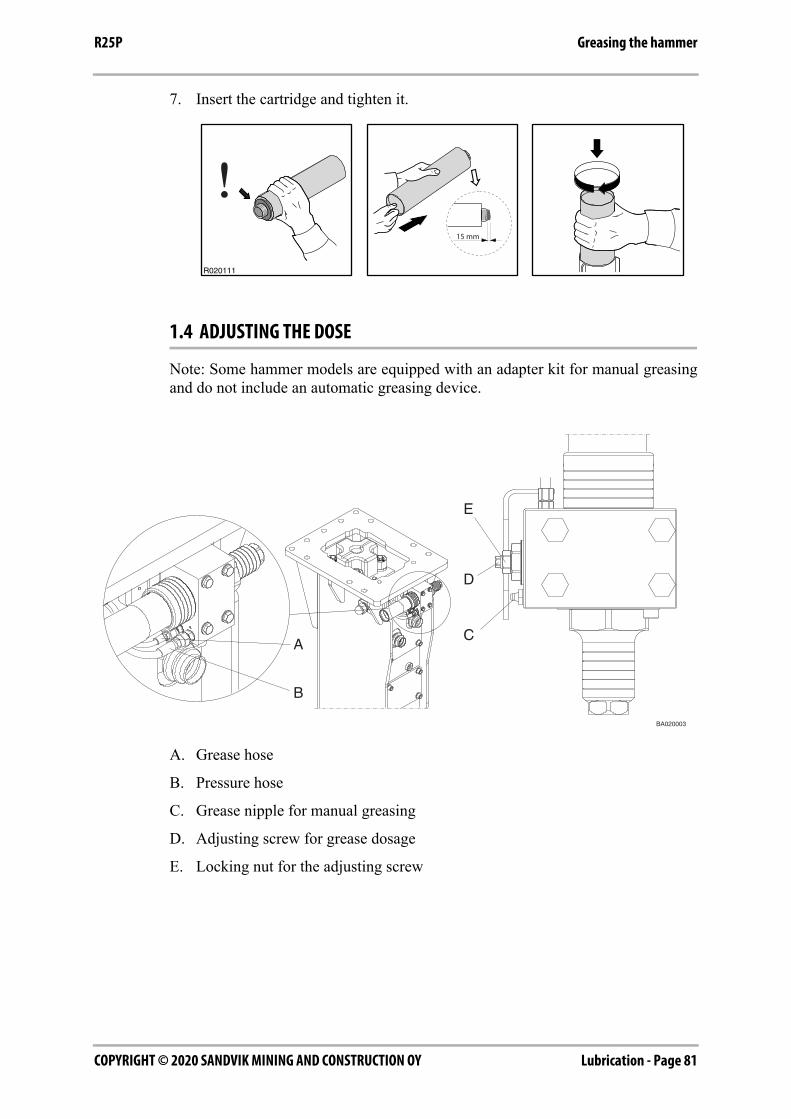
Lubrication - Page 81COPYRIGHT © 2020 SANDVIK MINING AND CONSTRUCTION OY
Greasing the hammerR25P
7. Insert the cartridge and tighten it.
1.4 ADJUSTING THE DOSE
Note: Some hammer models are equipped with an adapter kit for manual greasingand do not include an automatic greasing device.
A. Grease hose
B. Pressure hose
C. Grease nipple for manual greasing
D. Adjusting screw for grease dosage
E. Locking nut for the adjusting screw
R020111
BA020003
A
B
E
D
C
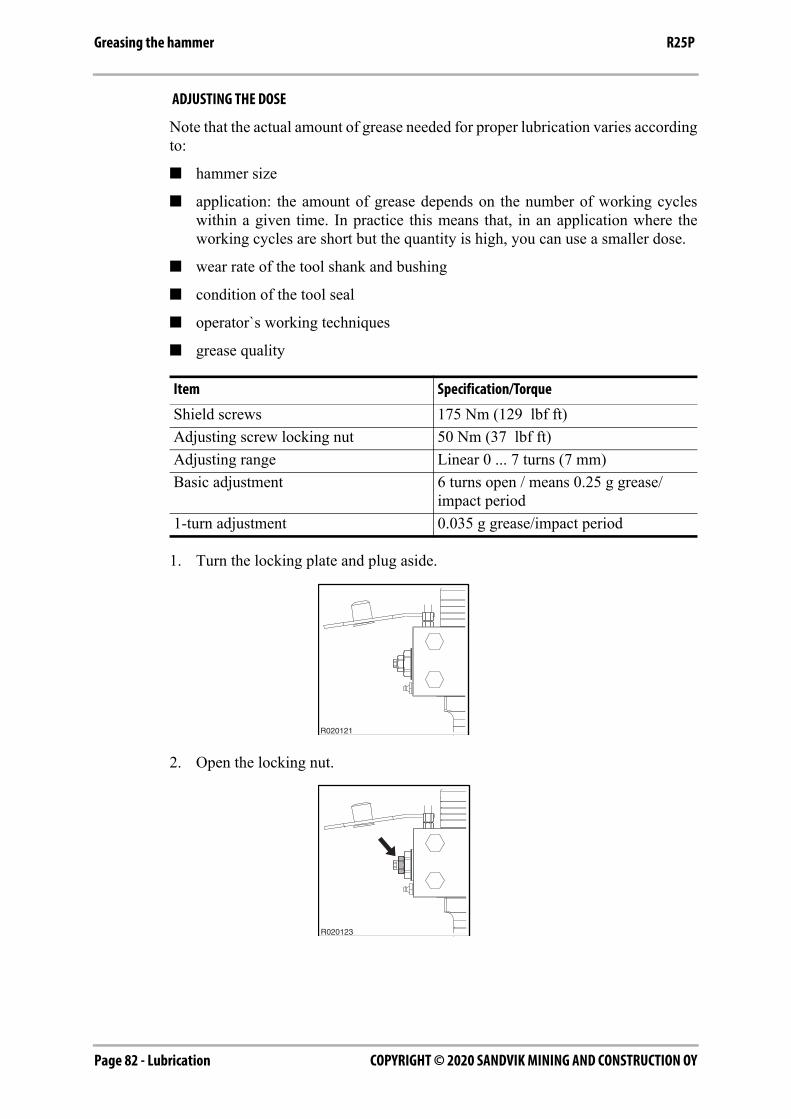
COPYRIGHT © 2020 SANDVIK MINING AND CONSTRUCTION OYPage 82 - Lubrication
Greasing the hammer R25P
ADJUSTING THE DOSE
Note that the actual amount of grease needed for proper lubrication varies accordingto:
■ hammer size
■ application: the amount of grease depends on the number of working cycleswithin a given time. In practice this means that, in an application where theworking cycles are short but the quantity is high, you can use a smaller dose.
■ wear rate of the tool shank and bushing
■ condition of the tool seal
■ operator`s working techniques
■ grease quality
1. Turn the locking plate and plug aside.
2. Open the locking nut.
Item Specification/Torque
Shield screws 175 Nm (129 lbf ft)Adjusting screw locking nut 50 Nm (37 lbf ft)Adjusting range Linear 0 ... 7 turns (7 mm)Basic adjustment 6 turns open / means 0.25 g grease/
impact period1-turn adjustment 0.035 g grease/impact period
R020121
R020123
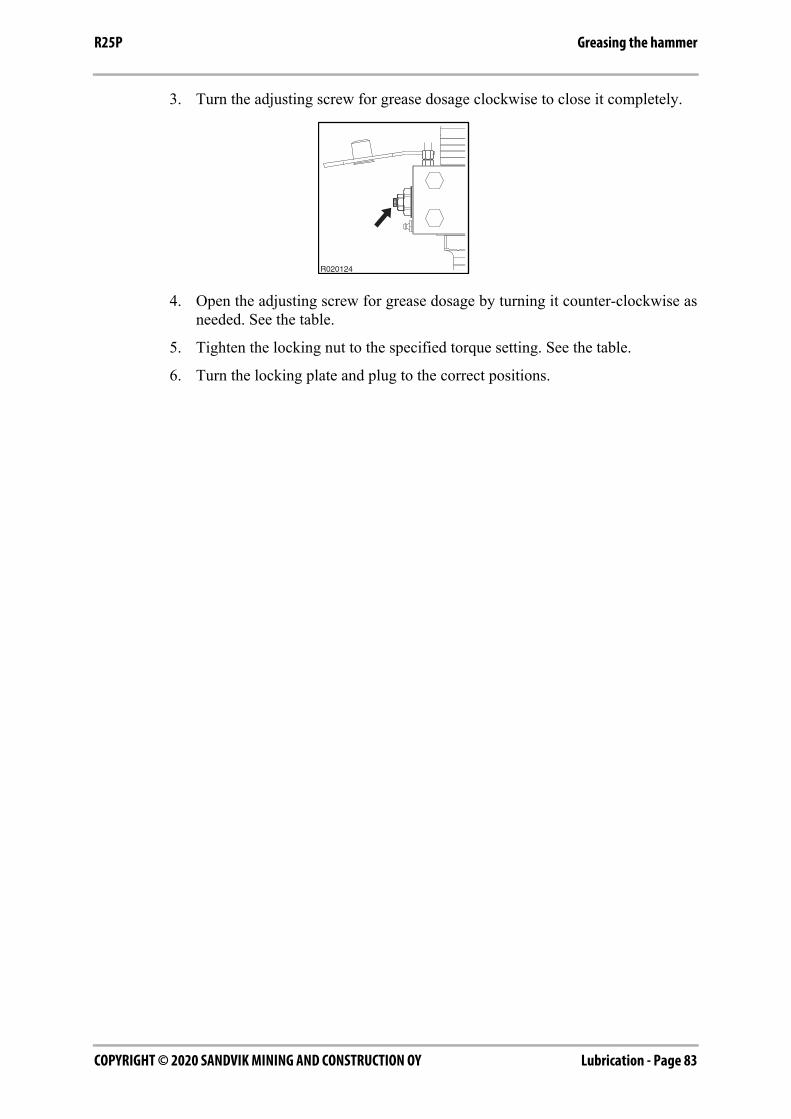
Lubrication - Page 83COPYRIGHT © 2020 SANDVIK MINING AND CONSTRUCTION OY
Greasing the hammerR25P
3. Turn the adjusting screw for grease dosage clockwise to close it completely.
4. Open the adjusting screw for grease dosage by turning it counter-clockwise asneeded. See the table.
5. Tighten the locking nut to the specified torque setting. See the table.
6. Turn the locking plate and plug to the correct positions.
R020124
COPYRIGHT © 2020 SANDVIK MINING AND CONSTRUCTION OYPage 84 - Lubrication
Hydraulic oil R25P
2. HYDRAULIC OILIt is essential that the viscosity of the oil at operating temperature is withinspecifications. The correct oil viscosity is a guarantee for proper lubricationproperties between the piston and the cylinder. Poor viscosity will cause the pistonand the cylinder to seize and leads a total failure of hammer internal parts.
For more information see the Operation and Maintenance Manual of the carrier.
Bear in mind that:
- Hydraulic oil degrades quickly in hammer applications and must be replacedmore frequently than in digging applications.
- The operating temperature of the hydraulic oil may vary considerably insummer and in winter.
- The plastic parts of the carrier and the hammer, such as seals, have a limit to thetemperature at which they perform properly.
Only operate the hammer within the oil temperature range given inspecifications.
If the temperature has a tendency to rise above allowed level, reduce heatbuildup. The easiest way to do this is to install larger diameter pressure andreturn lines on the carrier.
If this is not sufficient, install an additional cooler.
NOTE: The warranty will not apply if the seals are miscolored due tooverheating.
- Contaminated oil is as dangerous as low viscosity oil. Contaminated oil willalso damage the hydraulic pump of the carrier.
Consult your carrier manufacturer on proper filter change intervals and oilchange intervals. Follow the instructions and procedures given.
A rule of thumb for special hydraulic fluids, any fluid suitable for the carrier willbe suitable for your Rammer hammer. Rammer recommends consulting with yourRammer dealer about changing the hydraulic fluid.
The hammers are test run at the factory with standard hydraulic oil and will havesmall quantities of oil inside.
Consult your carrier manufacturer for the proper quality requirements (purity,oxidation, moisture) of the hydraulic fluids, whether it be special fluids or hydraulicoil.
Maintenance - Page 85COPYRIGHT © 2020 SANDVIK MINING AND CONSTRUCTION OY
R25P
MAINTENANCE
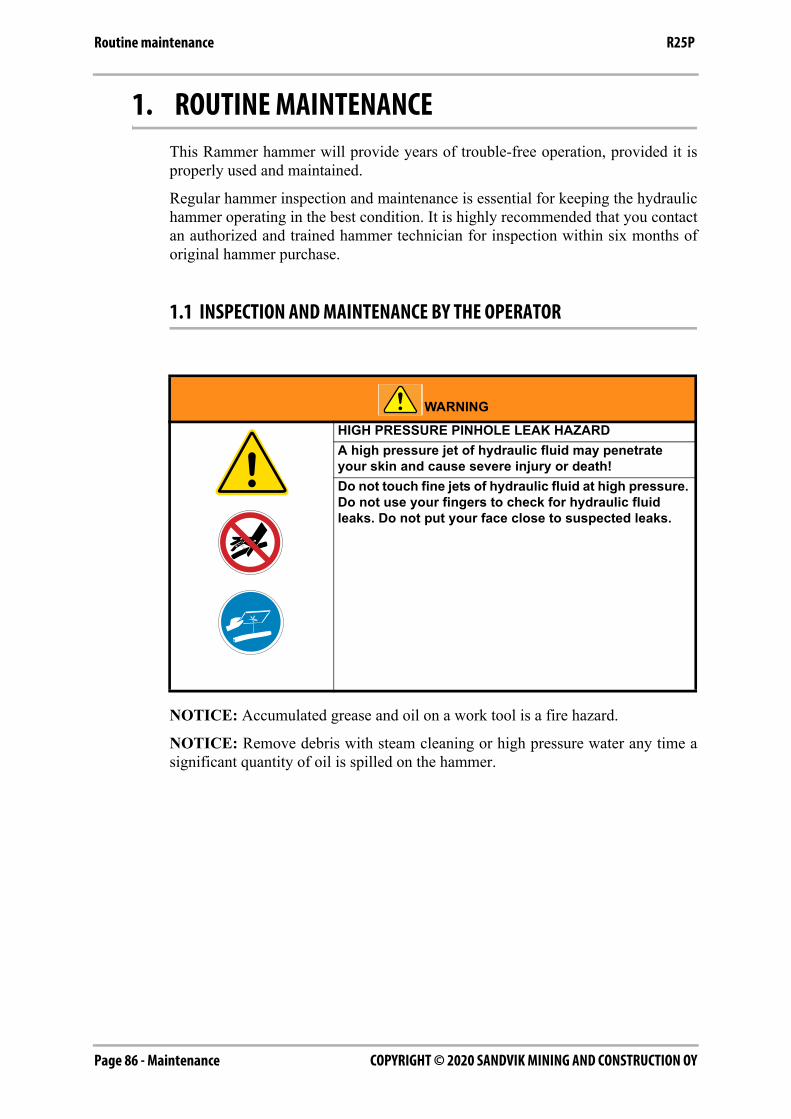
COPYRIGHT © 2020 SANDVIK MINING AND CONSTRUCTION OYPage 86 - Maintenance
Routine maintenance R25P
1. ROUTINE MAINTENANCEThis Rammer hammer will provide years of trouble-free operation, provided it isproperly used and maintained.
Regular hammer inspection and maintenance is essential for keeping the hydraulichammer operating in the best condition. It is highly recommended that you contactan authorized and trained hammer technician for inspection within six months oforiginal hammer purchase.
1.1 INSPECTION AND MAINTENANCE BY THE OPERATOR
NOTICE: Accumulated grease and oil on a work tool is a fire hazard.
NOTICE: Remove debris with steam cleaning or high pressure water any time asignificant quantity of oil is spilled on the hammer.
WARNINGHIGH PRESSURE PINHOLE LEAK HAZARDA high pressure jet of hydraulic fluid may penetrate your skin and cause severe injury or death! Do not touch fine jets of hydraulic fluid at high pressure. Do not use your fingers to check for hydraulic fluid leaks. Do not put your face close to suspected leaks.
Maintenance - Page 87COPYRIGHT © 2020 SANDVIK MINING AND CONSTRUCTION OY
Routine maintenanceR25P
Before starting the hammer, be sure to inspect the hammer as follows:
- Tighten all loose bolts, nuts and fasteners to proper torque. Replace damaged ormissing ones.
Inspect the bracket mounting bolts, tie rods and accumulator bolts.
- Tighten loose hose and pipe fittings.
Inspect for visible damage to hoses and leakages on hoses and pipes. Check alsothe hydraulic flanges for proper torque.
Inspect the pipes for the hammer and the oil hoses. If you are using a greasingdevice, check that as well.
- Hammer oil leaks.
Inspect the connections of the back head and the cylinder.
If leakage occurs at hydraulic hose connections, tighten or replace the fittings.
Other leakages require workshop service. Do not operate the hammer until ithas been serviced, as this will cause expensive damage to the internal parts(piston, cylinder).
- Inspect the tool and bushing for abnormal wear and cracks.
Replace the tool when it is worn out.
Inspect the lower tool bushing for wear and replace if required.
Rammer strongly recommends the use of original tools, which are designed tobe compatible with internal hammer parts. This is one important means forachieving long service life of the hammer.
- If the hammer is equipped with an automatic greasing device, check that thegrease cartridge is not empty. Replace if necessary.
- If the hammer is equipped with an adapter kit for manual greasing, grease thetool each day at startup. Afterwards add 10 pumps every 3 hours using themanual grease pump.
- Inspect the hydraulic oil level and the degree of contamination.
Too little oil may cause an oil heating problem. Contaminated oil will destroythe carrier pump. Follow the instructions of the carrier manufacturer.
- Inspect the hammer body and housing for missing rubber plugs. Replace wheremissing.
- Check the overall condition of the hammer and the hydraulic system.
Perform all repairs before the hammer is put into service.
- Check safety signs and labels. Replace them when they are damaged, missing,or unreadable.
COPYRIGHT © 2020 SANDVIK MINING AND CONSTRUCTION OYPage 88 - Maintenance
Routine maintenance R25P
1.2 INSPECTION AND MAINTENANCE BY THE DEALER
Note: The time intervals refer to the carrier hours while the attachment is installed.
EVERY 600 HOURS OR ONCE A YEAR
This service is recommended to be done by your local dealer after 600 operatinghours or at least once a year. Neglecting the annual service can cause severe damageto the hammer.
Your local dealer will reseal the hammer, replace the accumulator membranes andreplace safety decals as needed. Contact your local dealer for more informationabout annual servicing.
During this maintenance you should do the following tasks.
■ Check all hydraulic connections.
■ Check that the hydraulic hoses do not rub against anything in any boomposition.
■ Replace and inspect the hydraulic oil filters of the carrier.
Maintenance - Page 89COPYRIGHT © 2020 SANDVIK MINING AND CONSTRUCTION OY
Releasing pressure from the hammerR25P
2. RELEASING PRESSURE FROM THE HAMMER
1. Stop the carrier engine.
2. Operate the boom and hammer controls to release any pressure trapped insidethe hoses.
3. Wait 10 minutes for the oil pressure to drop inside the hammer.
4. Close hammer inlet and outlet lines. If you use quick couplers, thedisconnection automatically closes the hammer lines. If the hammer lineincludes ball valves, make sure that they are closed.
WARNING!The hydraulic pressure inside the hammer must always be released before making any adjustments or repairs when the hammer is connected to the carrier. There may also be pressurized oil trapped inside the hammer even if the hammer is disconnected from the carrier. Release the hydraulic pressure according to the following instructions before opening any plugs or valve covers.
WARNING!This procedure does not release the pressure from the pressure accumulators! Read the instructions for the accumulator before disassembling the hammer.
WARNING!When you are checking or releasing the pressure from the pressure accumulators, use safety glasses and gloves. There might be oil in the accumulator and oil can spray out with the gas.

COPYRIGHT © 2020 SANDVIK MINING AND CONSTRUCTION OYPage 90 - Maintenance
Checking pressure in the low pressure accumulator R25P
3. CHECKING PRESSURE IN THE LOW PRESSUREACCUMULATOR
LOCATION OF ACCUMULATORS
The hammer has two accumulators, a high pressure accumulator and a low pressureaccumulator (A).
The high pressure accumulator is positioned on the side of the hammer and the lowpressure accumulator (A) is inside the back head.
The high pressure accumulator may only be recharged at an authorized workshopwith proper equipment.
The low pressure accumulator (A) is a piston type accumulator and needsrecharging based on specification.
BA030151
A
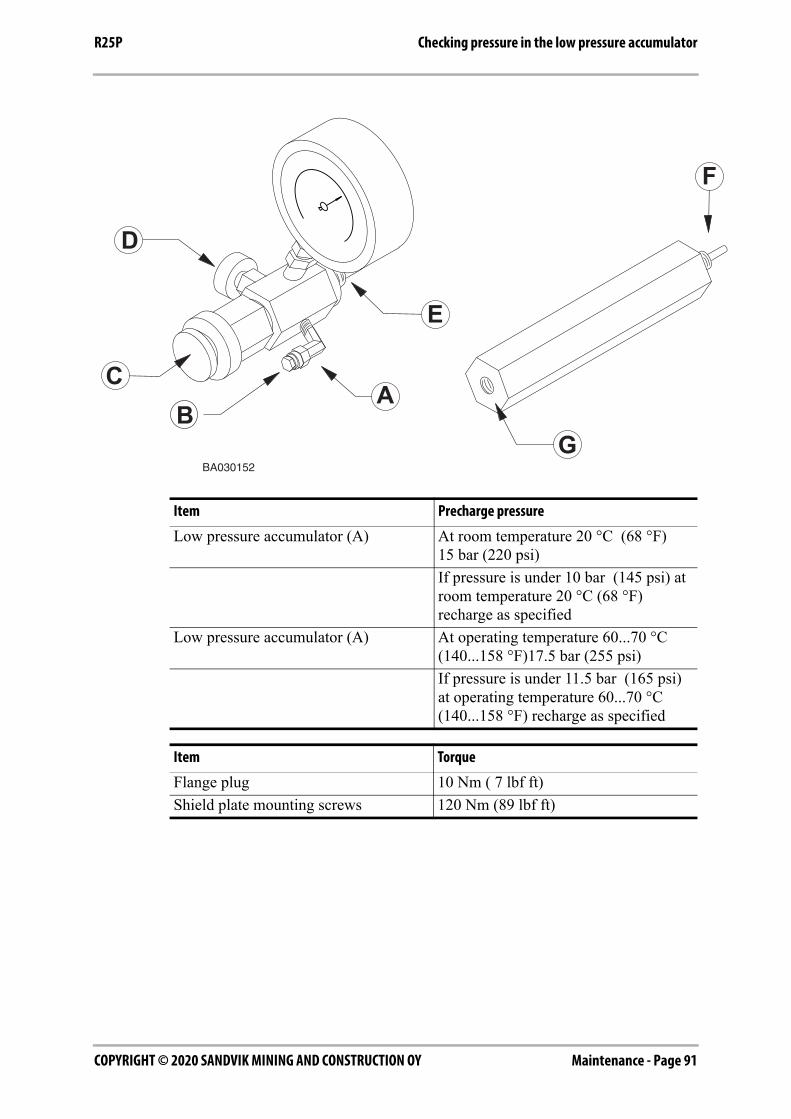
Maintenance - Page 91COPYRIGHT © 2020 SANDVIK MINING AND CONSTRUCTION OY
Checking pressure in the low pressure accumulatorR25P
Item Precharge pressure
Low pressure accumulator (A) At room temperature 20 °C (68 °F)15 bar (220 psi)If pressure is under 10 bar (145 psi) at room temperature 20 °C (68 °F) recharge as specified
Low pressure accumulator (A) At operating temperature 60...70 °C (140...158 °F)17.5 bar (255 psi)If pressure is under 11.5 bar (165 psi) at operating temperature 60...70 °C (140...158 °F) recharge as specified
Item Torque
Flange plug 10 Nm ( 7 lbf ft)Shield plate mounting screws 120 Nm (89 lbf ft)
BA030152
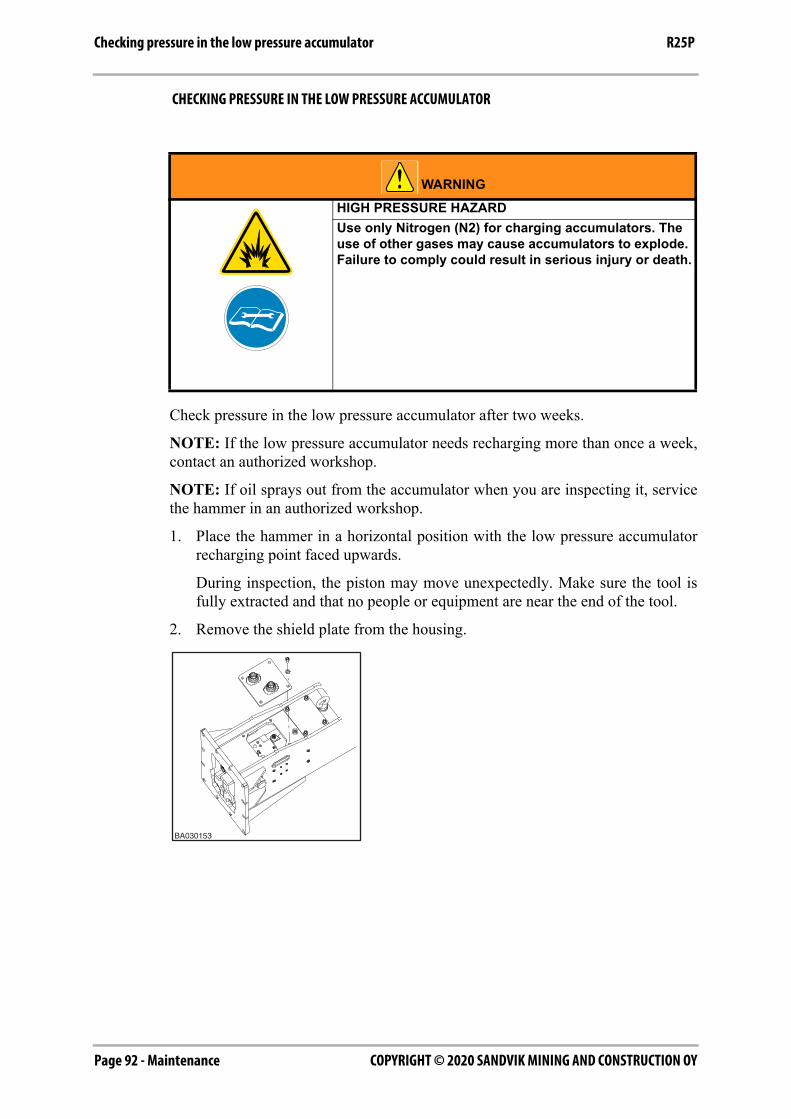
COPYRIGHT © 2020 SANDVIK MINING AND CONSTRUCTION OYPage 92 - Maintenance
Checking pressure in the low pressure accumulator R25P
CHECKING PRESSURE IN THE LOW PRESSURE ACCUMULATOR
Check pressure in the low pressure accumulator after two weeks.
NOTE: If the low pressure accumulator needs recharging more than once a week,contact an authorized workshop.
NOTE: If oil sprays out from the accumulator when you are inspecting it, servicethe hammer in an authorized workshop.
1. Place the hammer in a horizontal position with the low pressure accumulatorrecharging point faced upwards.
During inspection, the piston may move unexpectedly. Make sure the tool isfully extracted and that no people or equipment are near the end of the tool.
2. Remove the shield plate from the housing.
WARNINGHIGH PRESSURE HAZARDUse only Nitrogen (N2) for charging accumulators. The use of other gases may cause accumulators to explode. Failure to comply could result in serious injury or death.
BA030153

Maintenance - Page 93COPYRIGHT © 2020 SANDVIK MINING AND CONSTRUCTION OY
Checking pressure in the low pressure accumulatorR25P
3. Remove the flange plug from the filling plug on the hammer with an Allen key.
4. Install the cap (B) to the charging device.
5. Pull the handle (C) out and leave it in this position. Close the discharge valve(D) on the charging device by turning the knob.
6. Tighten the recharge valve to the filling plug on the hammer from (E). If therecharge valve does not easily fit to the hammer, first connect the adapter by oneend (F) to the hammer and then connect the recharge valve (E) to other end ofthe adapter (G).
7. Push in the handle (C) on the charging device. Observe the pressure gaugereading on the charging device. If the pressure in the accumulator is not tospecification, recharge it so that it is correct.
D030004
D030005
COPYRIGHT © 2020 SANDVIK MINING AND CONSTRUCTION OYPage 94 - Maintenance
Checking pressure in the low pressure accumulator R25P
8. Pull out the handle (C) on the charging device.
9. Open the discharge valve (D) on the charging device by turning the knob.
10. Remove the recharging device from the hammer.
11. Install the flange plug on the filling plug, making sure that no dirt enters thevalve. Tighten the flange plug with an Allen key to specified torque.
12. Install the shield plate to the housing and tighten the mounting screws to thespecified torque.
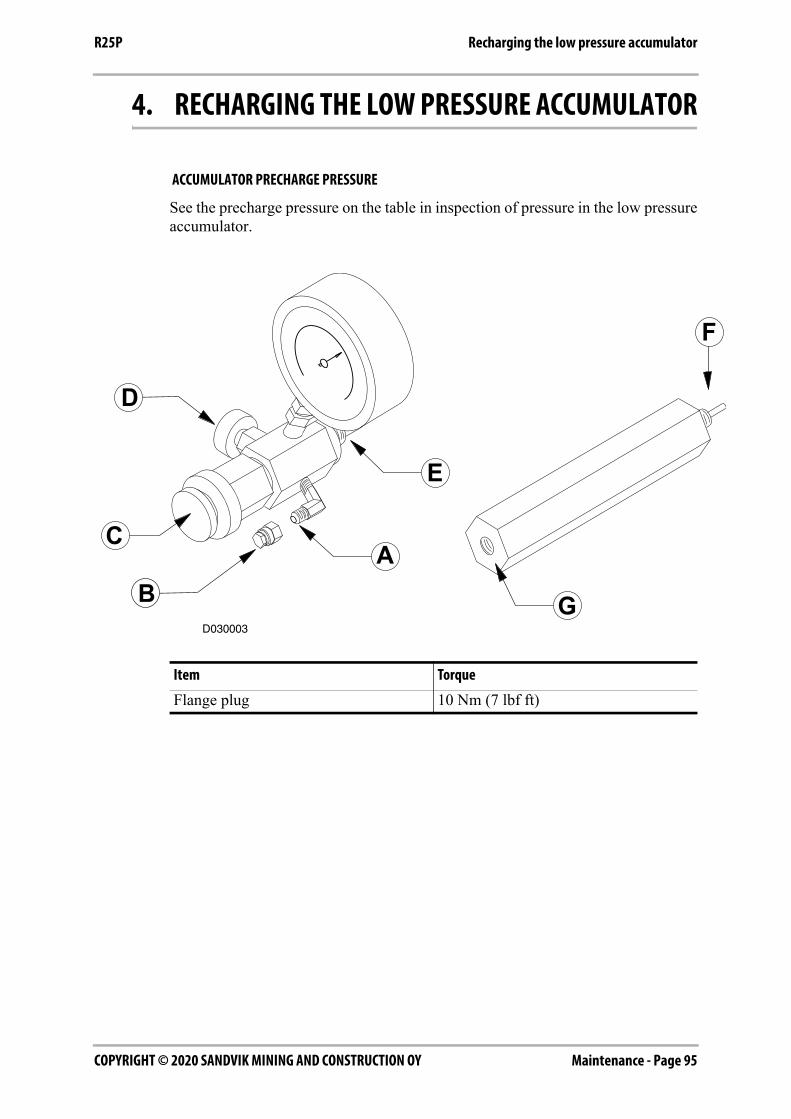
Maintenance - Page 95COPYRIGHT © 2020 SANDVIK MINING AND CONSTRUCTION OY
Recharging the low pressure accumulatorR25P
4. RECHARGING THE LOW PRESSURE ACCUMULATOR
ACCUMULATOR PRECHARGE PRESSURE
See the precharge pressure on the table in inspection of pressure in the low pressureaccumulator.
Item Torque
Flange plug 10 Nm (7 lbf ft)
D030003
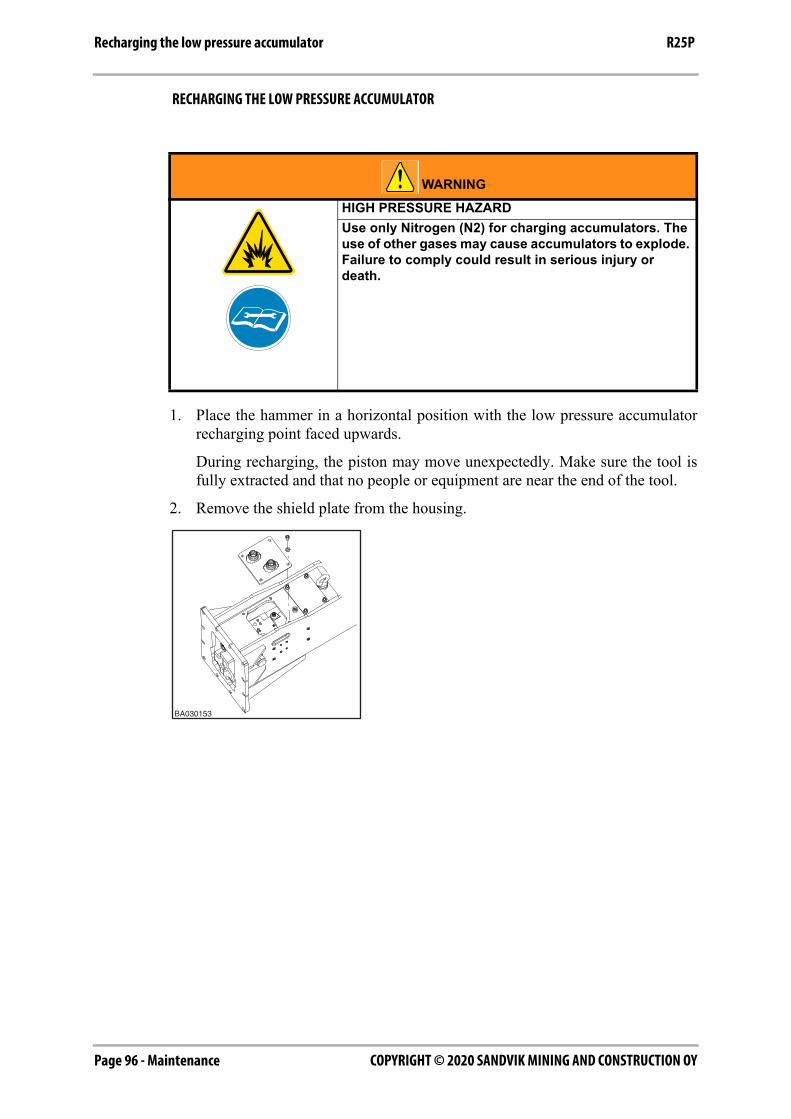
COPYRIGHT © 2020 SANDVIK MINING AND CONSTRUCTION OYPage 96 - Maintenance
Recharging the low pressure accumulator R25P
RECHARGING THE LOW PRESSURE ACCUMULATOR
1. Place the hammer in a horizontal position with the low pressure accumulatorrecharging point faced upwards.
During recharging, the piston may move unexpectedly. Make sure the tool isfully extracted and that no people or equipment are near the end of the tool.
2. Remove the shield plate from the housing.
WARNINGHIGH PRESSURE HAZARDUse only Nitrogen (N2) for charging accumulators. The use of other gases may cause accumulators to explode. Failure to comply could result in serious injury or death.
BA030153
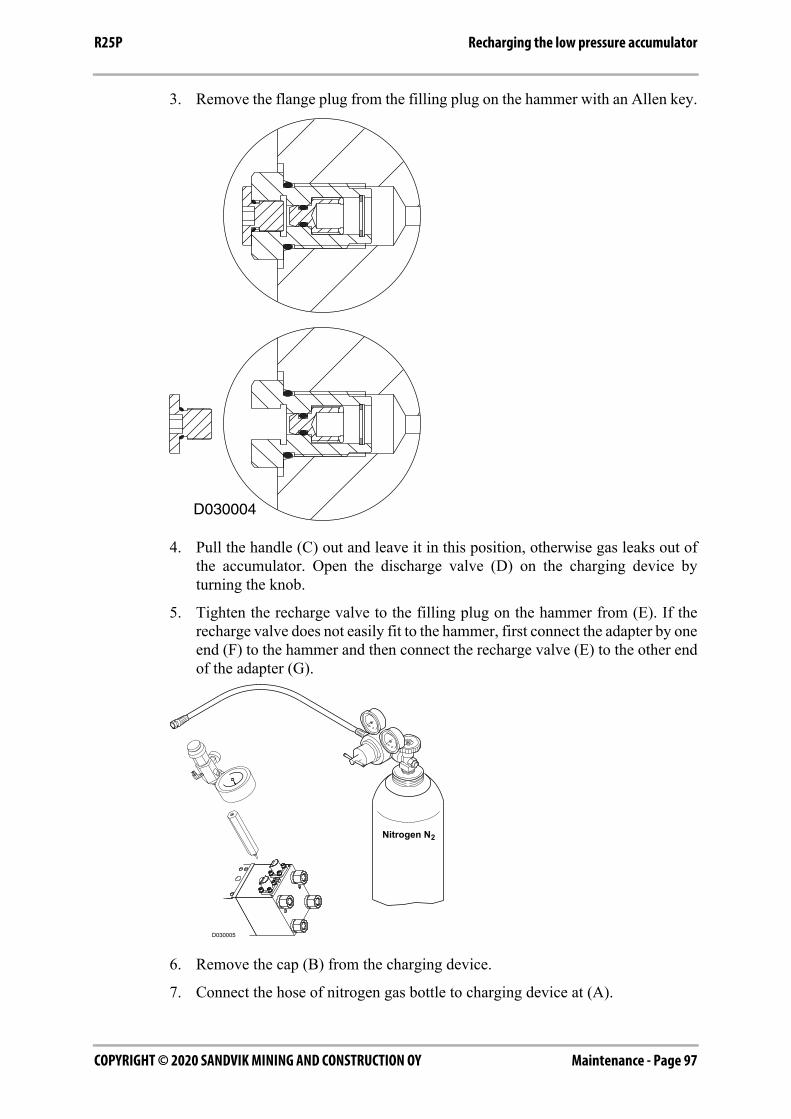
Maintenance - Page 97COPYRIGHT © 2020 SANDVIK MINING AND CONSTRUCTION OY
Recharging the low pressure accumulatorR25P
3. Remove the flange plug from the filling plug on the hammer with an Allen key.
4. Pull the handle (C) out and leave it in this position, otherwise gas leaks out ofthe accumulator. Open the discharge valve (D) on the charging device byturning the knob.
5. Tighten the recharge valve to the filling plug on the hammer from (E). If therecharge valve does not easily fit to the hammer, first connect the adapter by oneend (F) to the hammer and then connect the recharge valve (E) to the other endof the adapter (G).
6. Remove the cap (B) from the charging device.
7. Connect the hose of nitrogen gas bottle to charging device at (A).
D030004
D030005
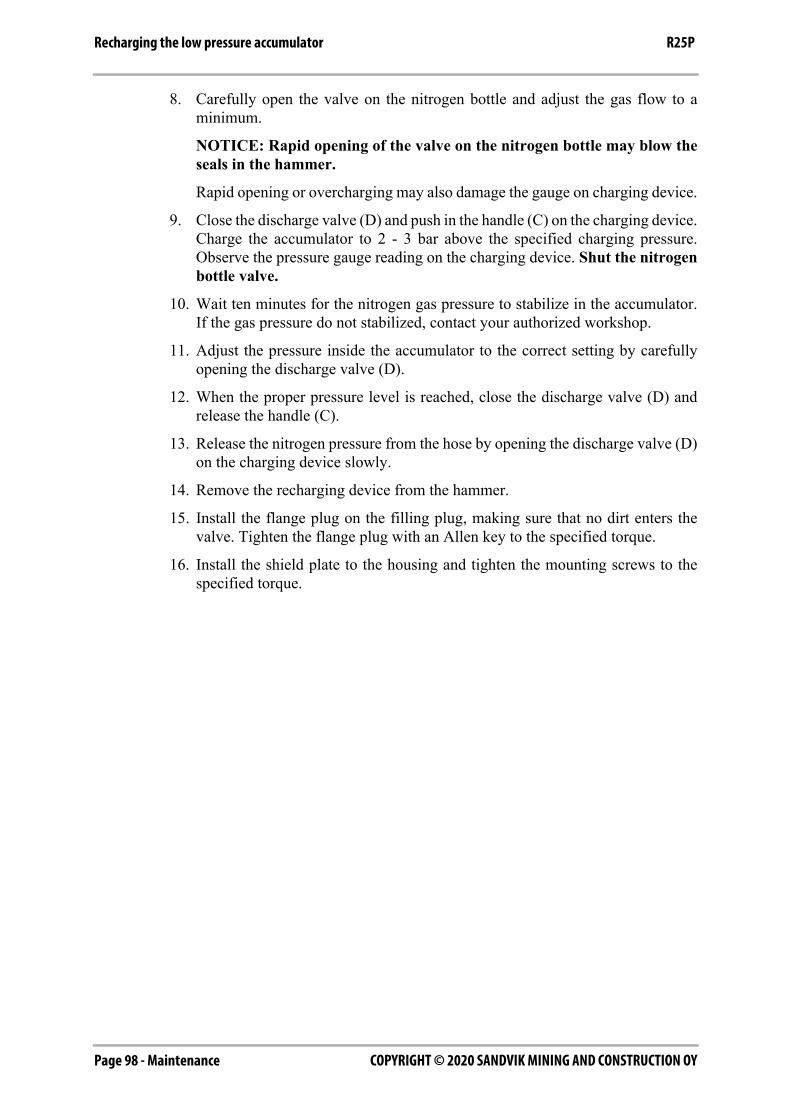
COPYRIGHT © 2020 SANDVIK MINING AND CONSTRUCTION OYPage 98 - Maintenance
Recharging the low pressure accumulator R25P
8. Carefully open the valve on the nitrogen bottle and adjust the gas flow to aminimum.
NOTICE: Rapid opening of the valve on the nitrogen bottle may blow theseals in the hammer.
Rapid opening or overcharging may also damage the gauge on charging device.
9. Close the discharge valve (D) and push in the handle (C) on the charging device.Charge the accumulator to 2 - 3 bar above the specified charging pressure.Observe the pressure gauge reading on the charging device. Shut the nitrogenbottle valve.
10. Wait ten minutes for the nitrogen gas pressure to stabilize in the accumulator.If the gas pressure do not stabilized, contact your authorized workshop.
11. Adjust the pressure inside the accumulator to the correct setting by carefullyopening the discharge valve (D).
12. When the proper pressure level is reached, close the discharge valve (D) andrelease the handle (C).
13. Release the nitrogen pressure from the hose by opening the discharge valve (D)on the charging device slowly.
14. Remove the recharging device from the hammer.
15. Install the flange plug on the filling plug, making sure that no dirt enters thevalve. Tighten the flange plug with an Allen key to the specified torque.
16. Install the shield plate to the housing and tighten the mounting screws to thespecified torque.
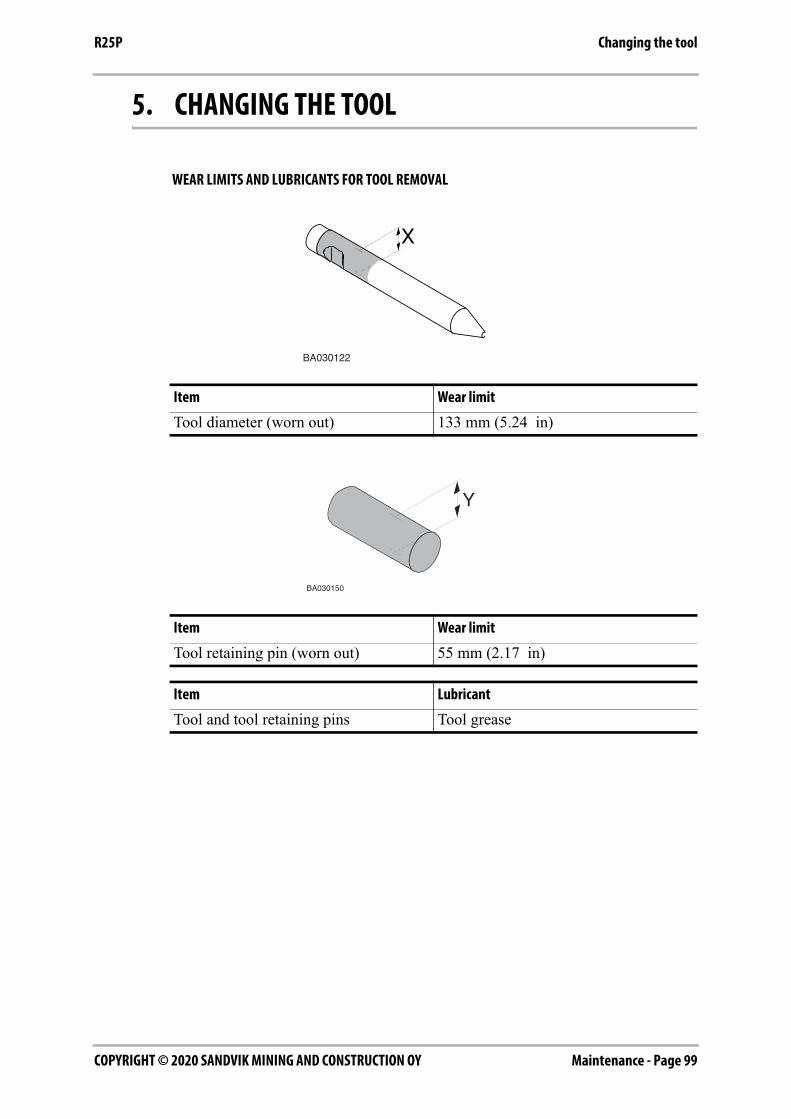
Maintenance - Page 99COPYRIGHT © 2020 SANDVIK MINING AND CONSTRUCTION OY
Changing the toolR25P
5. CHANGING THE TOOL
WEAR LIMITS AND LUBRICANTS FOR TOOL REMOVAL
Item Wear limit
Tool diameter (worn out) 133 mm (5.24 in)
Item Wear limit
Tool retaining pin (worn out) 55 mm (2.17 in)
Item Lubricant
Tool and tool retaining pins Tool grease
BA030122
BA030150
Y
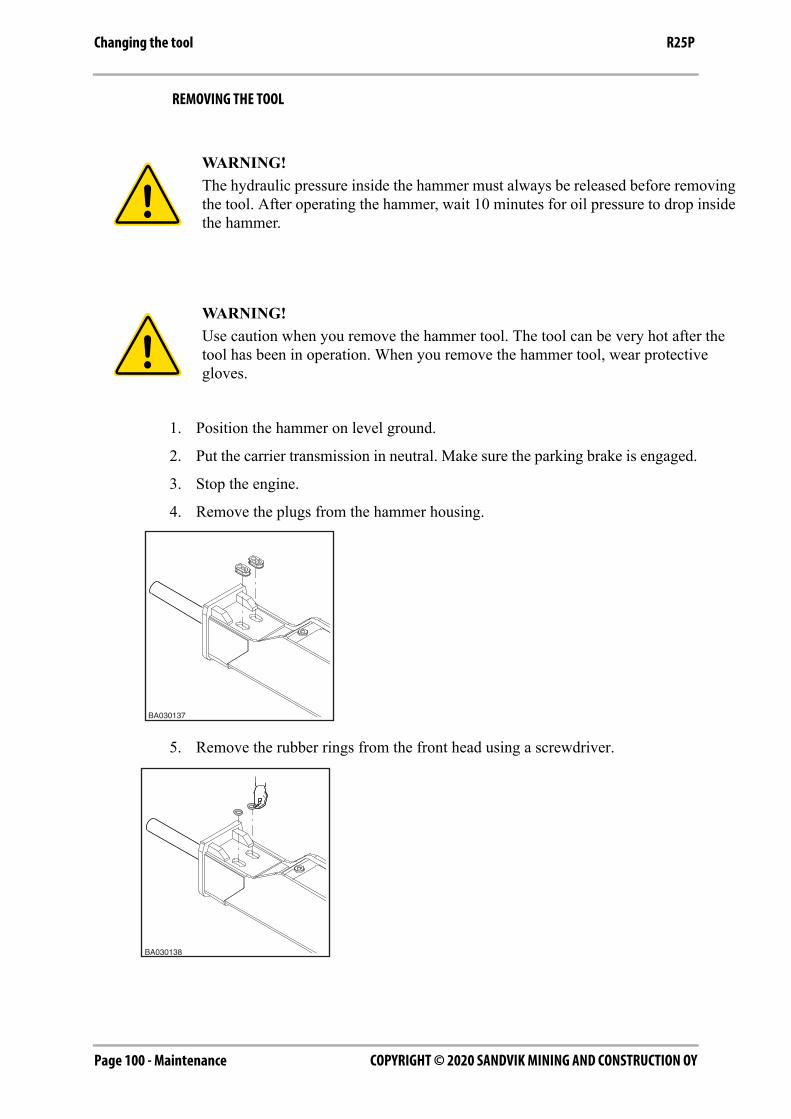
COPYRIGHT © 2020 SANDVIK MINING AND CONSTRUCTION OYPage 100 - Maintenance
Changing the tool R25P
REMOVING THE TOOL
1. Position the hammer on level ground.
2. Put the carrier transmission in neutral. Make sure the parking brake is engaged.
3. Stop the engine.
4. Remove the plugs from the hammer housing.
5. Remove the rubber rings from the front head using a screwdriver.
WARNING!The hydraulic pressure inside the hammer must always be released before removing the tool. After operating the hammer, wait 10 minutes for oil pressure to drop inside the hammer.
WARNING!Use caution when you remove the hammer tool. The tool can be very hot after the tool has been in operation. When you remove the hammer tool, wear protective gloves.
BA030137
BA030138
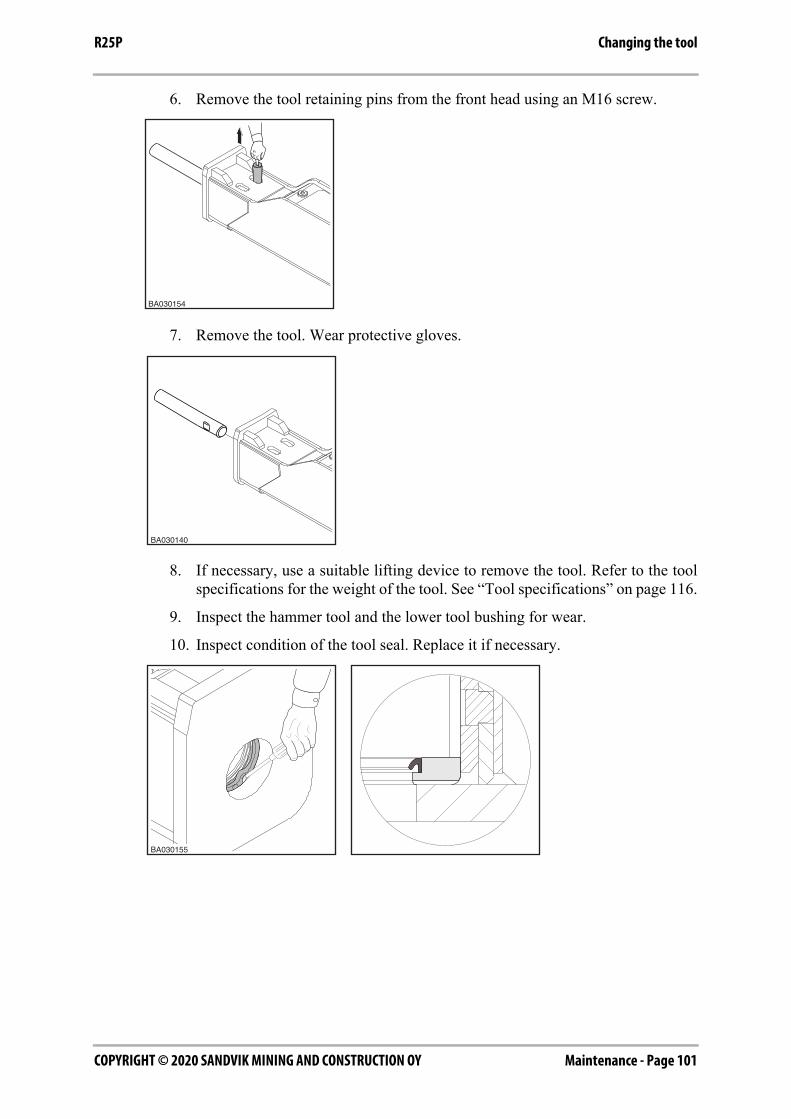
Maintenance - Page 101COPYRIGHT © 2020 SANDVIK MINING AND CONSTRUCTION OY
Changing the toolR25P
6. Remove the tool retaining pins from the front head using an M16 screw.
7. Remove the tool. Wear protective gloves.
8. If necessary, use a suitable lifting device to remove the tool. Refer to the toolspecifications for the weight of the tool. See “Tool specifications” on page 116.
9. Inspect the hammer tool and the lower tool bushing for wear.
10. Inspect condition of the tool seal. Replace it if necessary.
BA030154
BA030140
BA030155
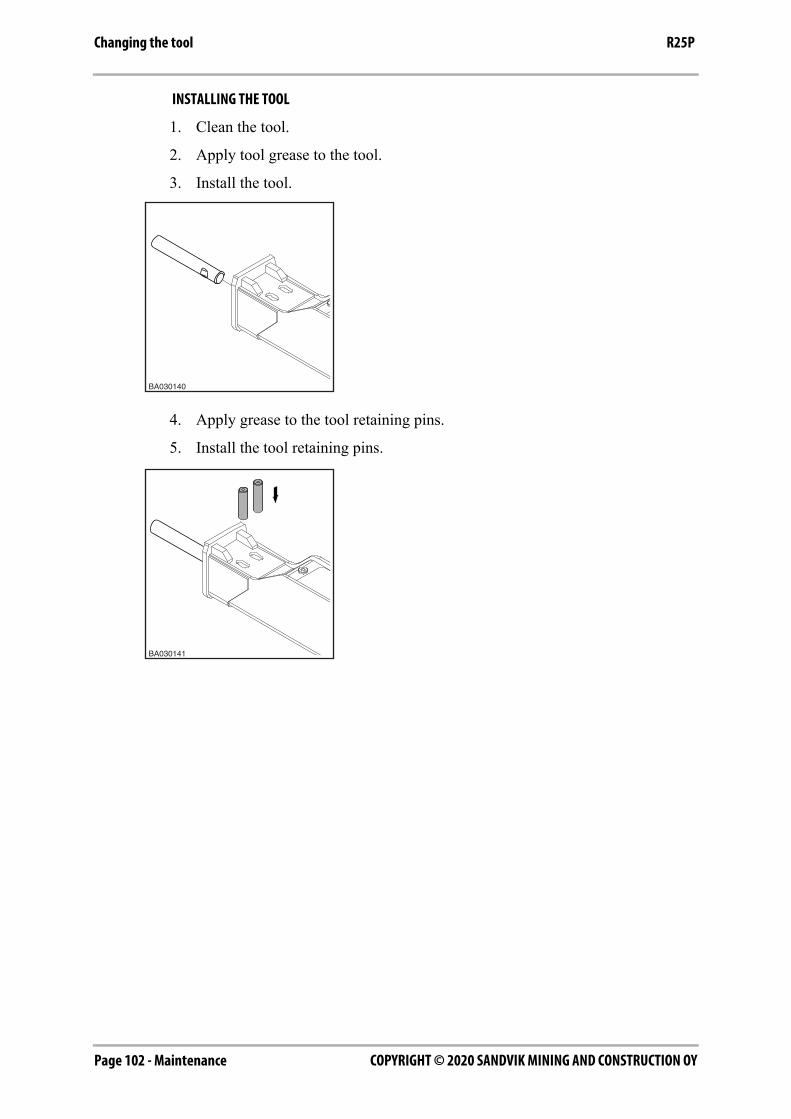
COPYRIGHT © 2020 SANDVIK MINING AND CONSTRUCTION OYPage 102 - Maintenance
Changing the tool R25P
INSTALLING THE TOOL
1. Clean the tool.
2. Apply tool grease to the tool.
3. Install the tool.
4. Apply grease to the tool retaining pins.
5. Install the tool retaining pins.
BA030140
BA030141
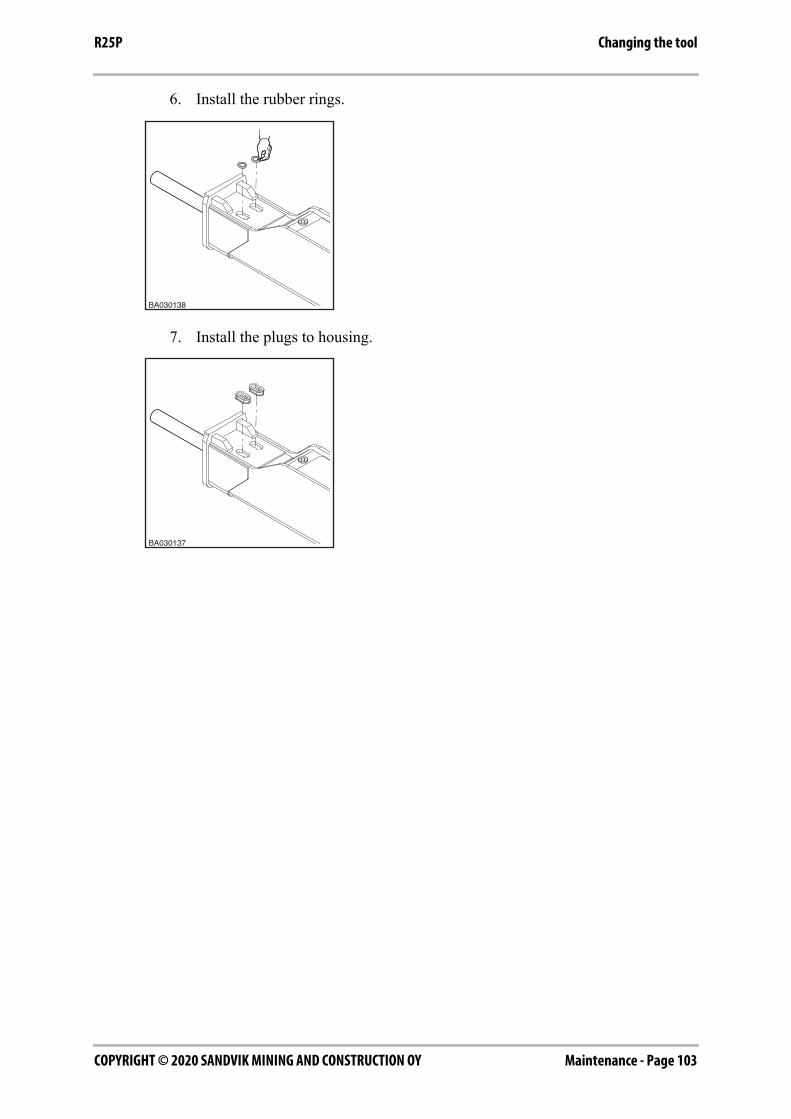
Maintenance - Page 103COPYRIGHT © 2020 SANDVIK MINING AND CONSTRUCTION OY
Changing the toolR25P
6. Install the rubber rings.
7. Install the plugs to housing.
BA030138
BA030137
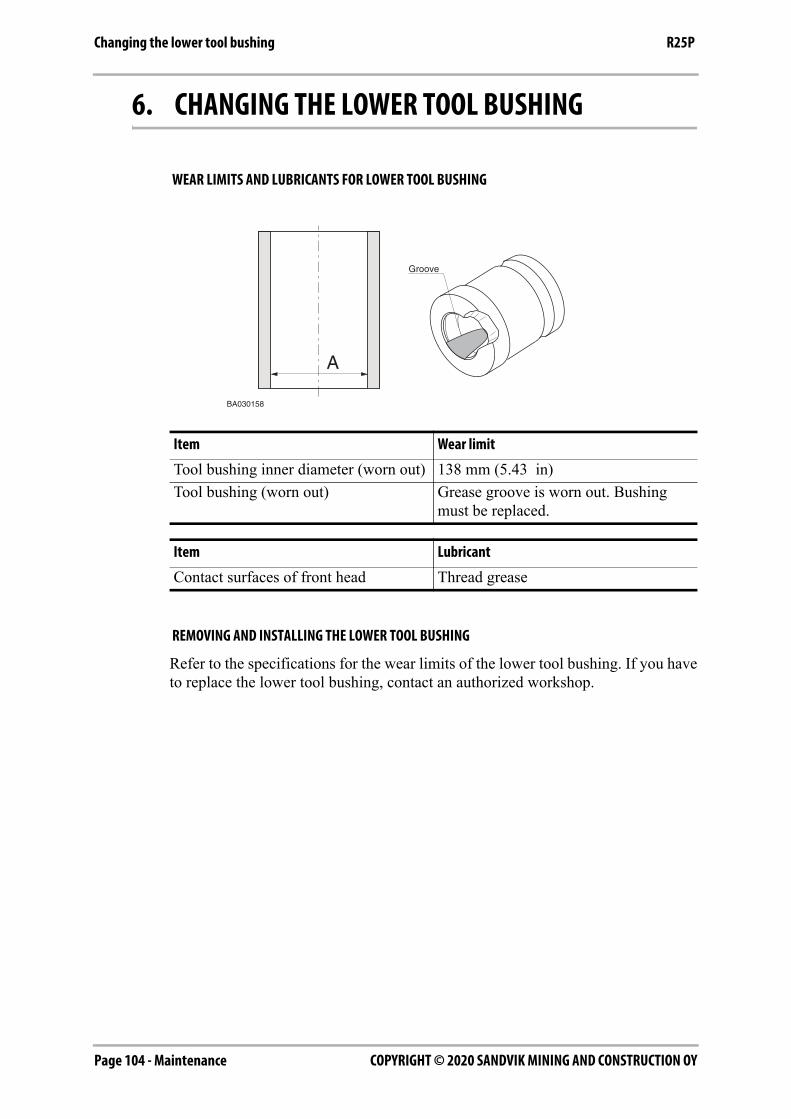
COPYRIGHT © 2020 SANDVIK MINING AND CONSTRUCTION OYPage 104 - Maintenance
Changing the lower tool bushing R25P
6. CHANGING THE LOWER TOOL BUSHING
WEAR LIMITS AND LUBRICANTS FOR LOWER TOOL BUSHING
REMOVING AND INSTALLING THE LOWER TOOL BUSHING
Refer to the specifications for the wear limits of the lower tool bushing. If you haveto replace the lower tool bushing, contact an authorized workshop.
Item Wear limit
Tool bushing inner diameter (worn out) 138 mm (5.43 in)Tool bushing (worn out) Grease groove is worn out. Bushing
must be replaced.
Item Lubricant
Contact surfaces of front head Thread grease
BA030158
A
Groove
Maintenance - Page 105COPYRIGHT © 2020 SANDVIK MINING AND CONSTRUCTION OY
TroubleshootingR25P
7. TROUBLESHOOTING
7.1 THE HAMMER DOES NOT START
PRESSURE OR RETURN LINES CLOSEDCheck the operation of the quick couplings in the hammer line. Open the hammerline ball valves if closed.
PRESSURE AND RETURN HOSES INSTALLED BACKWARDSSwap the pressure and return hoses.
GREASE BETWEEN PISTON AND TOOL CONTACT AREARemove the tool and wipe excessive grease off.
HAMMER CONTROL VALVE DOES NOT OPENWhen operating the hammer control valve, check that the pressure line pulsates (thisindicates the hammer control valve is opening). If the valve does not work, checkthe means of operation: mechanical connections, pilot pressure or electrical control.
RELIEF VALVE IN HYDRAULIC CIRCUIT OPENS AT A LOW PRESSURE. HAMMER OPERATING PRESSUREIS NOT REACHEDCheck the installation. Check the relief valve operation. Adjust the relief valve inhydraulic circuit. Measure the high pressure in the hammer inlet line.
EXCESSIVE BACK PRESSURE IN RETURN LINECheck the installation. Check the size of the return line.
LEAKAGE FROM PRESSURE TO RETURN IN THE CARRIER HYDRAULIC CIRCUITCheck the installation. Check the pump and the other hydraulic components.
FAILURE IN HAMMER VALVE OPERATIONService the hammer at the authorized service shop.
TOO HIGH PRECHARGE PRESSURE OF THE GAS PISTON ACCUMULATORCheck the precharge pressure and adjust it to a correct value. If oil sprays out fromthe accumulator, service the hammer at the authorized service shop.
PISTON FAILUREService the hammer at the authorized service shop.
COPYRIGHT © 2020 SANDVIK MINING AND CONSTRUCTION OYPage 106 - Maintenance
Troubleshooting R25P
7.2 THE HAMMER OPERATES IRREGULARLY BUT THE BLOW HAS FULLPOWER
NOT ENOUGH FEED FORCE FROM EXCAVATORRefer to the correct working methods.
RELIEF VALVE IN HYDRAULIC CIRCUIT OPENS AT A LOW PRESSURE. HAMMER OPERATING PRESSUREIS NOT REACHEDCheck the installation. Check the relief valve operation. Adjust the relief valve inhydraulic circuit. Measure the high pressure in the hammer inlet line.
FAILURE IN HAMMER VALVE OPERATIONService the hammer at the authorized service shop.
7.3 THE HAMMER OPERATES IRREGULARLY AND BLOW HAS NO POWER
THE WORKING METHOD IS NOT CORRECTRefer to the correct working methods.
RELIEF VALVE IN HYDRAULIC CIRCUIT OPENS AT A LOW PRESSURE. HAMMER OPERATING PRESSUREIS NOT REACHEDCheck the installation. Check the relief valve operation. Adjust the relief valve inhydraulic circuit. Measure the high pressure in the hammer inlet line.
GAS PRESSURE IN THE GAS PISTON ACCUMULATOR TOO LOWCheck the pressure and fill the gas piston accumulator the correct prefill pressure.
PRESSURE LOSS IN PRESSURE ACCUMULATORService the hammer at the authorized service shop.
FAILURE IN HAMMER VALVE OPERATIONService the hammer at the authorized service shop.
Maintenance - Page 107COPYRIGHT © 2020 SANDVIK MINING AND CONSTRUCTION OY
TroubleshootingR25P
7.4 IMPACT RATE SLOWS DOWN
OIL HAS OVERHEATED (OVER +80 °C/+176 °F)Check for a fault in the oil cooling system or an internal leak in the hammer. Checkthe hydraulic circuit of the carrier. Check the line size. Assemble an extra oil cooler.
HYDRAULIC OIL VISCOSITY TOO LOWCheck the hydraulic oil.
EXCESSIVE BACK PRESSURE IN RETURN LINECheck the installation. Check the size of the return line.
RELIEF VALVE IN HYDRAULIC CIRCUIT OPENS AT A LOW PRESSURE. HAMMER OPERATING PRESSUREIS NOT REACHEDCheck the installation. Check the relief valve operation. Adjust the relief valve inhydraulic circuit. Measure the high pressure in the hammer inlet line.
LEAKAGE FROM PRESSURE TO RETURN IN THE CARRIER HYDRAULIC CIRCUITCheck the installation.
GAS PRESSURE IN THE GAS PISTON ACCUMULATOR TOO LOW OR TOO HIGHCheck the pressure and fill the gas piston accumulator the correct prefill pressure.
PRESSURE LOSS IN PRESSURE ACCUMULATORService the hammer at the authorized service shop.
FAILURE IN HAMMER VALVE OPERATIONService the hammer at the authorized service shop.
7.5 OIL OVERHEATS
APPLICATION NOT CORRECT FOR HAMMERRefer to the recommended use and the correct working methods.
THE CARRIER OIL COOLER IS DIRTYCheck and clean the oil cooler.
COOLING CAPACITY OF THE CARRIER OIL COOLER IS TOO SMALLAssemble an extra oil cooler.
RELIEF VALVE IN HYDRAULIC CIRCUIT OPENS AT A LOW PRESSURE. HAMMER OPERATING PRESSUREIS NOT REACHEDCheck the installation. Check the relief valve operation. Adjust the relief valve inhydraulic circuit. Measure the high pressure in the hammer inlet line.
HYDRAULIC OIL VISCOSITY TOO LOWCheck hydraulic oil.
COPYRIGHT © 2020 SANDVIK MINING AND CONSTRUCTION OYPage 108 - Maintenance
Troubleshooting R25P
LEAKAGE FROM PRESSURE TO RETURN IN THE CARRIER HYDRAULIC CIRCUITCheck the installation. Check the pump and the other hydraulic components.
INTERNAL OIL LEAK IN THE HAMMERService the hammer at the authorized service shop.
EXCESSIVE BACK PRESSURE IN RETURN LINECheck the installation.
7.6 RECURRENT TOOL FAILURE
APPLICATION NOT CORRECT FOR HAMMERRefer to the recommended use and the correct working methods.
ROUGH OPERATING PRACTICESRefer to the recommended use and the correct working methods.
TOOL DOES NOT GET ENOUGH LUBRICANTRefer to the recommended use and the correct working methods.
TOOL TOO LONGUse the shortest tool possible. Refer to the recommended use and the correctworking methods.
RAPID WEAR OF TOOLRefer to the recommended use and the correct working methods.
7.7 AUTOMATIC GREASING DEVICE PROBLEMS
UPPER OR LOWER TOOL BUSHING DOES NOT GET ENOUGH LUBRICANT
■ Cold conditions. Apply grease from grease gun to grease nipples.
■ Doser adjusting is wrong for the application. Readjust the doser. See “Adjustingthe dose” on page 81.
■ Blockage in the greasing device. Contact your local dealer for moreinformation.
UPPER OR LOWER TOOL BUSHING GETS TOO MUCH LUBRICANT
■ Doser adjustment is wrong for the application. Readjust the doser. See“Adjusting the dose” on page 81.
■ Leak in the doser. Replace the doser. Contact your local dealer for moreinformation.
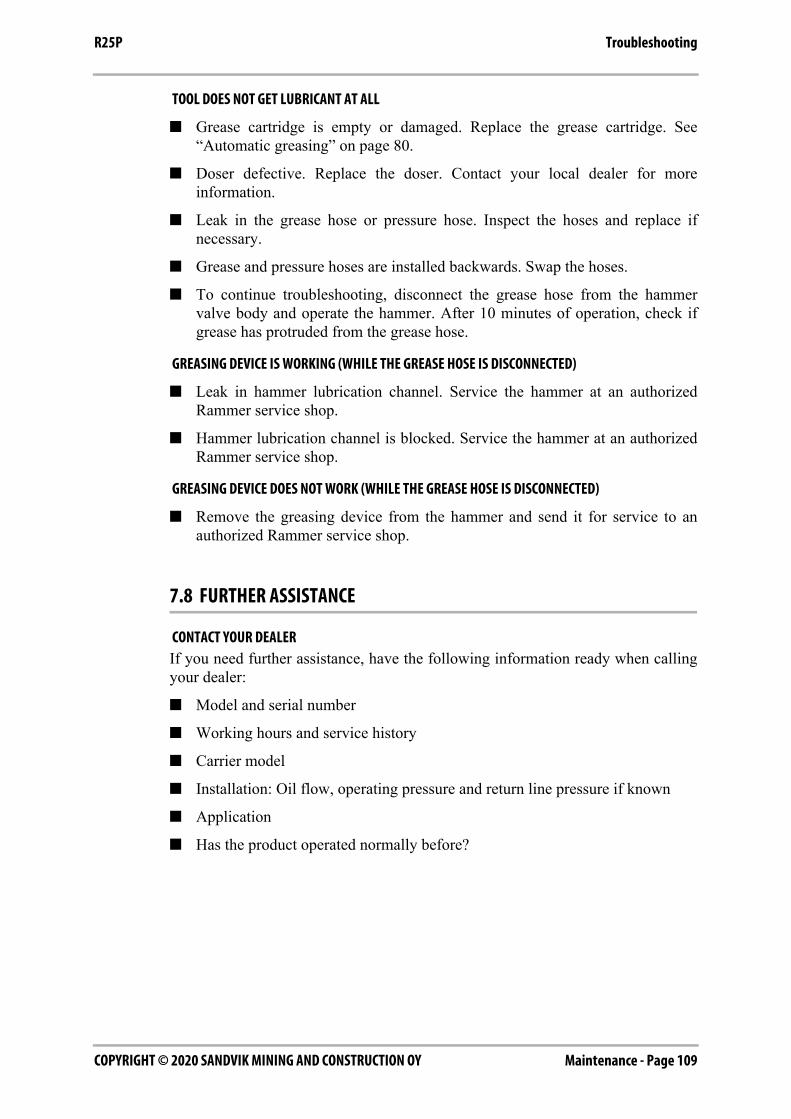
Maintenance - Page 109COPYRIGHT © 2020 SANDVIK MINING AND CONSTRUCTION OY
TroubleshootingR25P
TOOL DOES NOT GET LUBRICANT AT ALL
■ Grease cartridge is empty or damaged. Replace the grease cartridge. See“Automatic greasing” on page 80.
■ Doser defective. Replace the doser. Contact your local dealer for moreinformation.
■ Leak in the grease hose or pressure hose. Inspect the hoses and replace ifnecessary.
■ Grease and pressure hoses are installed backwards. Swap the hoses.
■ To continue troubleshooting, disconnect the grease hose from the hammervalve body and operate the hammer. After 10 minutes of operation, check ifgrease has protruded from the grease hose.
GREASING DEVICE IS WORKING (WHILE THE GREASE HOSE IS DISCONNECTED)
■ Leak in hammer lubrication channel. Service the hammer at an authorizedRammer service shop.
■ Hammer lubrication channel is blocked. Service the hammer at an authorizedRammer service shop.
GREASING DEVICE DOES NOT WORK (WHILE THE GREASE HOSE IS DISCONNECTED)
■ Remove the greasing device from the hammer and send it for service to anauthorized Rammer service shop.
7.8 FURTHER ASSISTANCE
CONTACT YOUR DEALERIf you need further assistance, have the following information ready when callingyour dealer:
■ Model and serial number
■ Working hours and service history
■ Carrier model
■ Installation: Oil flow, operating pressure and return line pressure if known
■ Application
■ Has the product operated normally before?
COPYRIGHT © 2020 SANDVIK MINING AND CONSTRUCTION OYPage 110 - Maintenance
Troubleshooting R25P
Specifications - Page 111COPYRIGHT © 2020 SANDVIK MINING AND CONSTRUCTION OY
R25P
SPECIFICATIONS
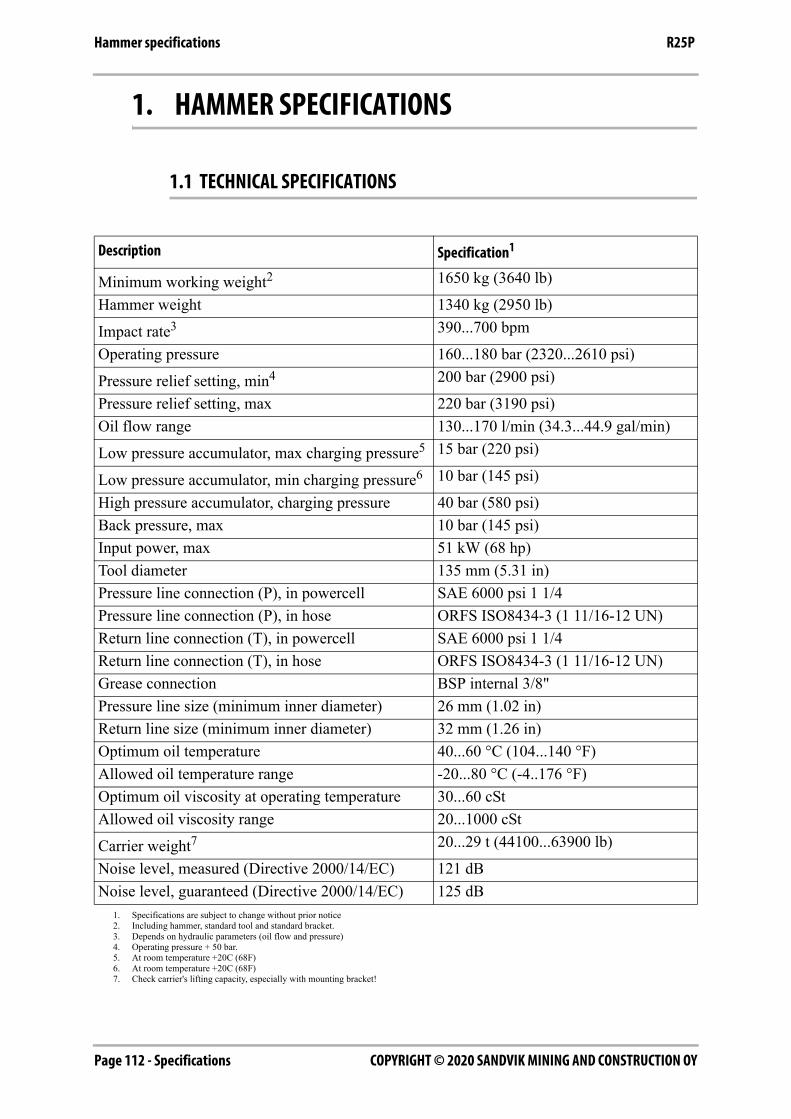
COPYRIGHT © 2020 SANDVIK MINING AND CONSTRUCTION OYPage 112 - Specifications
Hammer specifications R25P
1. HAMMER SPECIFICATIONS
1.1 TECHNICAL SPECIFICATIONS
Description Specification1
1. Specifications are subject to change without prior notice
Minimum working weight2
2. Including hammer, standard tool and standard bracket.
1650 kg (3640 lb)Hammer weight 1340 kg (2950 lb)
Impact rate3
3. Depends on hydraulic parameters (oil flow and pressure)
390...700 bpmOperating pressure 160...180 bar (2320...2610 psi)
Pressure relief setting, min4
4. Operating pressure + 50 bar.
200 bar (2900 psi)Pressure relief setting, max 220 bar (3190 psi)Oil flow range 130...170 l/min (34.3...44.9 gal/min)Low pressure accumulator, max charging pressure5
5. At room temperature +20C (68F)
15 bar (220 psi)
Low pressure accumulator, min charging pressure6
6. At room temperature +20C (68F)
10 bar (145 psi)
High pressure accumulator, charging pressure 40 bar (580 psi)Back pressure, max 10 bar (145 psi)Input power, max 51 kW (68 hp)Tool diameter 135 mm (5.31 in)Pressure line connection (P), in powercell SAE 6000 psi 1 1/4Pressure line connection (P), in hose ORFS ISO8434-3 (1 11/16-12 UN)Return line connection (T), in powercell SAE 6000 psi 1 1/4Return line connection (T), in hose ORFS ISO8434-3 (1 11/16-12 UN)Grease connection BSP internal 3/8"Pressure line size (minimum inner diameter) 26 mm (1.02 in)Return line size (minimum inner diameter) 32 mm (1.26 in)Optimum oil temperature 40...60 °C (104...140 °F)Allowed oil temperature range -20...80 °C (-4..176 °F)Optimum oil viscosity at operating temperature 30...60 cStAllowed oil viscosity range 20...1000 cSt
Carrier weight7
7. Check carrier's lifting capacity, especially with mounting bracket!
20...29 t (44100...63900 lb)Noise level, measured (Directive 2000/14/EC) 121 dBNoise level, guaranteed (Directive 2000/14/EC) 125 dB
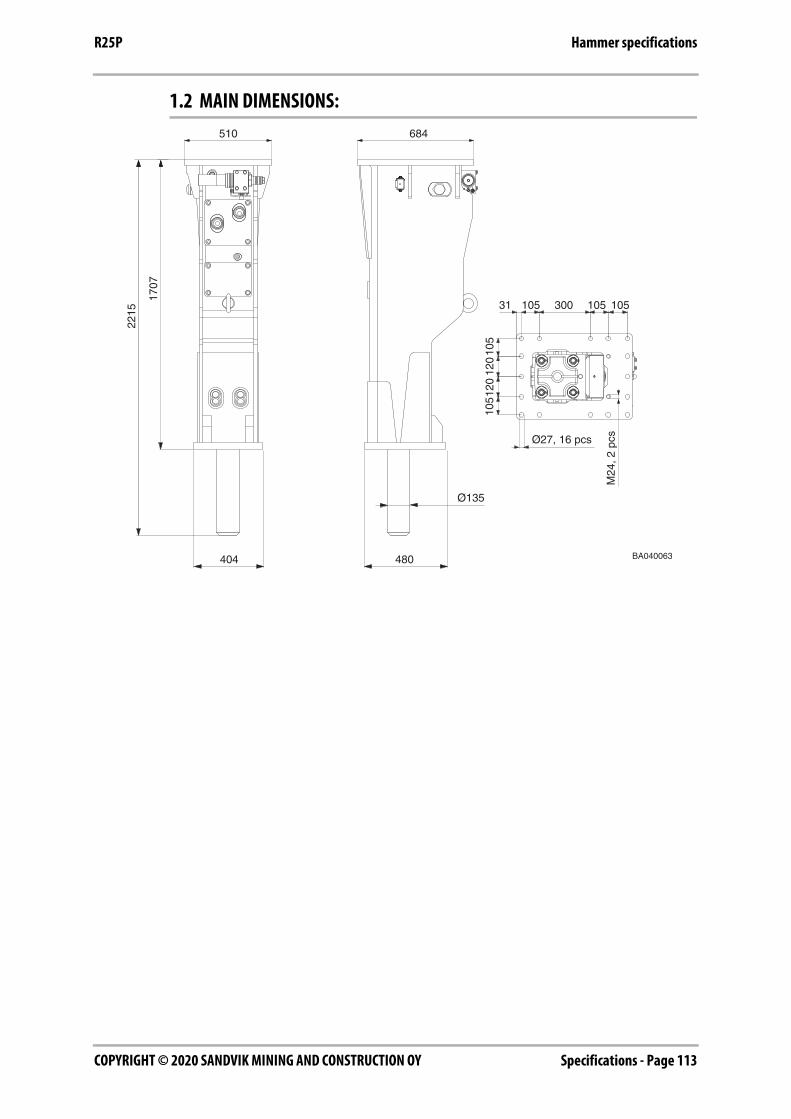
Specifications - Page 113COPYRIGHT © 2020 SANDVIK MINING AND CONSTRUCTION OY
Hammer specificationsR25P
1.2 MAIN DIMENSIONS: 22
15
1707
510 684
404 480
Ø135
BA040063
Ø27, 16 pcs
M24
, 2 p
cs
300105 10531
120
120
105
105
105
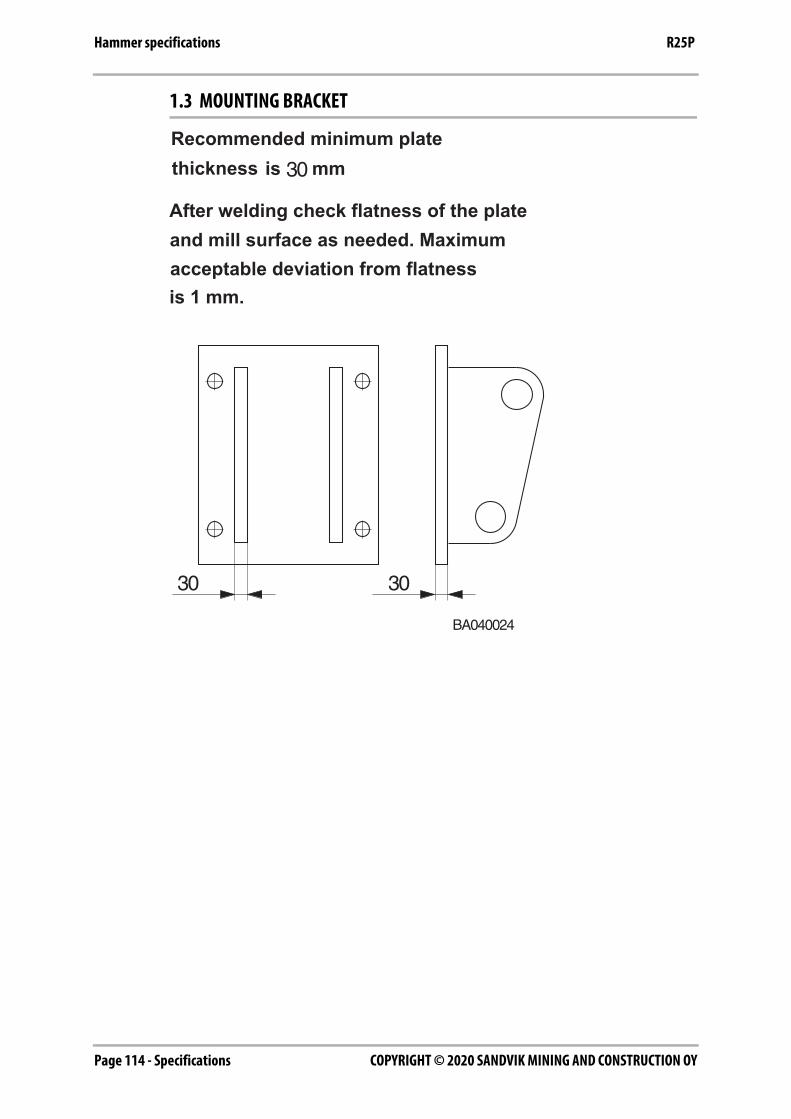
COPYRIGHT © 2020 SANDVIK MINING AND CONSTRUCTION OYPage 114 - Specifications
Hammer specifications R25P
1.3 MOUNTING BRACKET
BA040024
3030
30
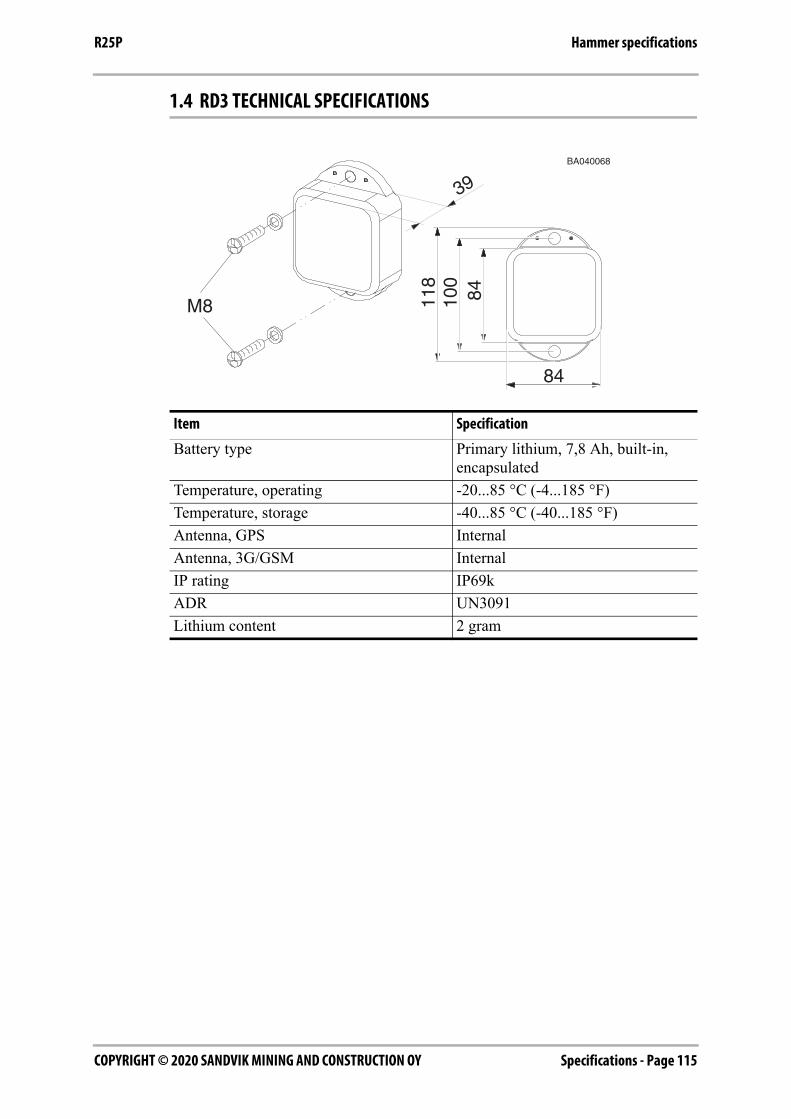
Specifications - Page 115COPYRIGHT © 2020 SANDVIK MINING AND CONSTRUCTION OY
Hammer specificationsR25P
1.4 RD3 TECHNICAL SPECIFICATIONS
Item Specification
Battery type Primary lithium, 7,8 Ah, built-in, encapsulated
Temperature, operating -20...85 °C (-4...185 °F)Temperature, storage -40...85 °C (-40...185 °F)Antenna, GPS InternalAntenna, 3G/GSM InternalIP rating IP69kADR UN3091Lithium content 2 gram
BA040068
M8 100
118
84
84
39
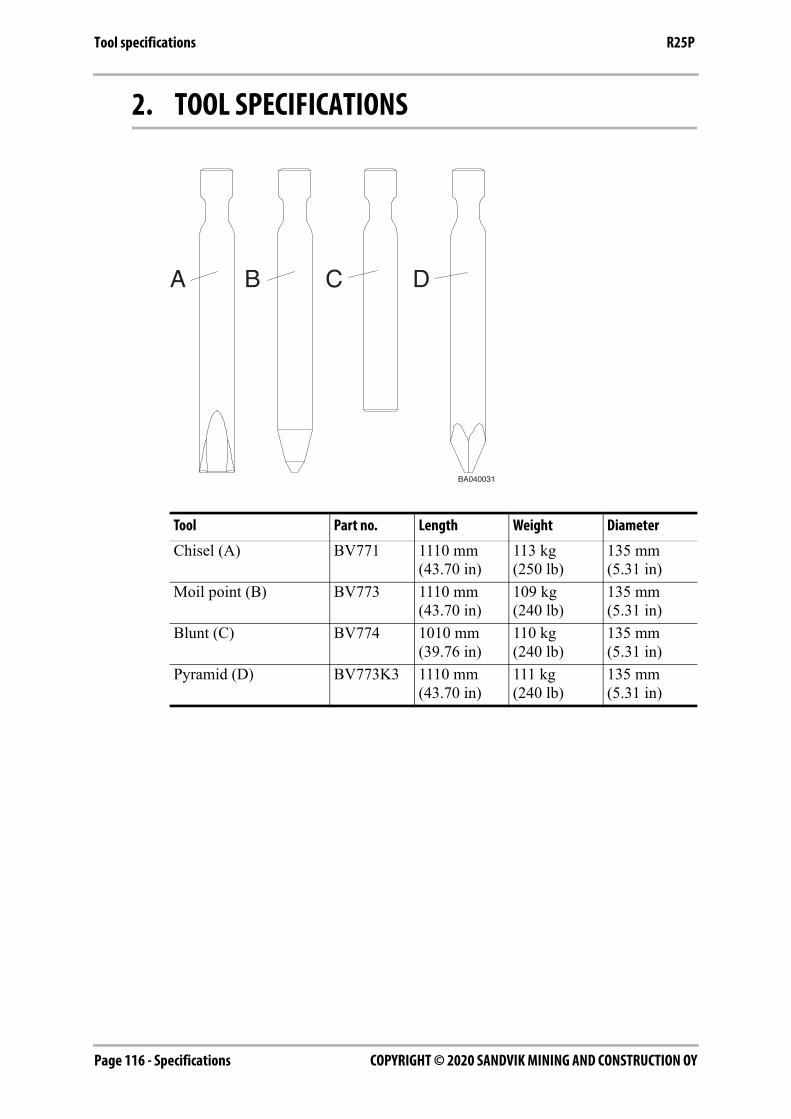
COPYRIGHT © 2020 SANDVIK MINING AND CONSTRUCTION OYPage 116 - Specifications
Tool specifications R25P
2. TOOL SPECIFICATIONS
Tool Part no. Length Weight Diameter
Chisel (A) BV771 1110 mm (43.70 in)
113 kg (250 lb)
135 mm (5.31 in)
Moil point (B) BV773 1110 mm (43.70 in)
109 kg(240 lb)
135 mm (5.31 in)
Blunt (C) BV774 1010 mm (39.76 in)
110 kg (240 lb)
135 mm (5.31 in)
Pyramid (D) BV773K3 1110 mm (43.70 in)
111 kg (240 lb)
135 mm (5.31 in)
A B C D
BA040031
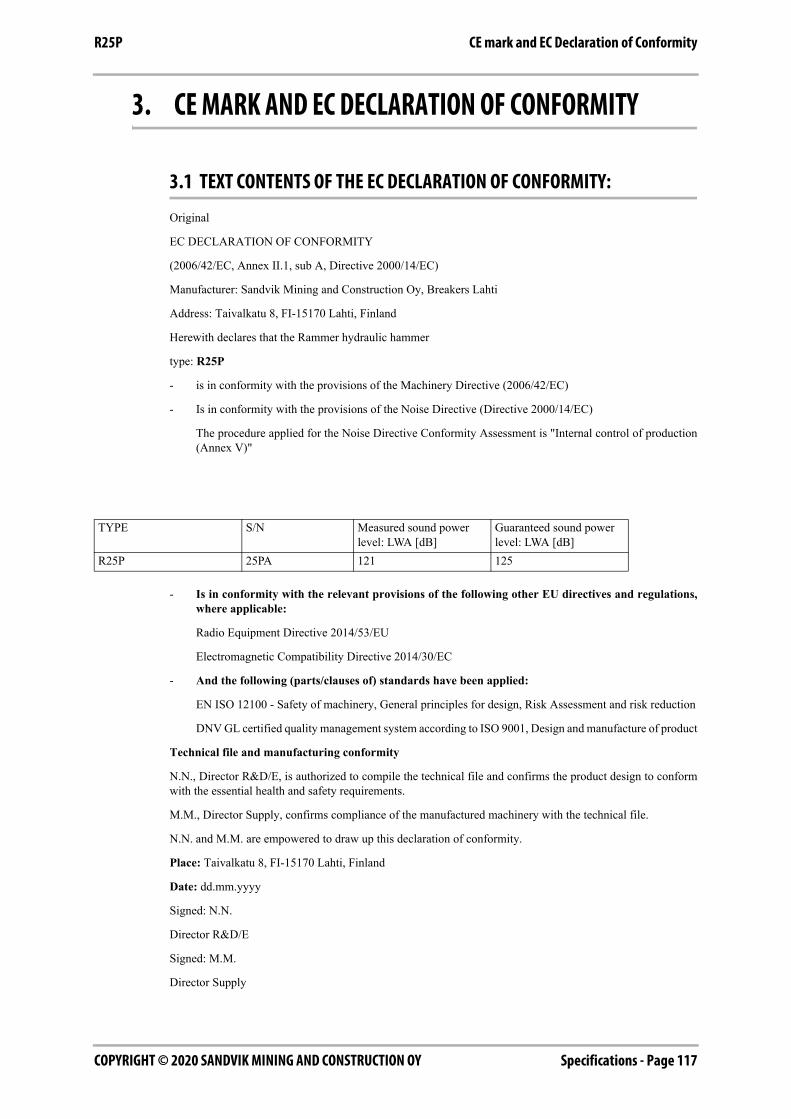
Specifications - Page 117COPYRIGHT © 2020 SANDVIK MINING AND CONSTRUCTION OY
CE mark and EC Declaration of ConformityR25P
3. CE MARK AND EC DECLARATION OF CONFORMITY
3.1 TEXT CONTENTS OF THE EC DECLARATION OF CONFORMITY:
Original
EC DECLARATION OF CONFORMITY
(2006/42/EC, Annex II.1, sub A, Directive 2000/14/EC)
Manufacturer: Sandvik Mining and Construction Oy, Breakers Lahti
Address: Taivalkatu 8, FI-15170 Lahti, Finland
Herewith declares that the Rammer hydraulic hammer
type: R25P
- is in conformity with the provisions of the Machinery Directive (2006/42/EC)
- Is in conformity with the provisions of the Noise Directive (Directive 2000/14/EC)
The procedure applied for the Noise Directive Conformity Assessment is "Internal control of production(Annex V)"
- Is in conformity with the relevant provisions of the following other EU directives and regulations,where applicable:
Radio Equipment Directive 2014/53/EU
Electromagnetic Compatibility Directive 2014/30/EC
- And the following (parts/clauses of) standards have been applied:
EN ISO 12100 - Safety of machinery, General principles for design, Risk Assessment and risk reduction
DNV GL certified quality management system according to ISO 9001, Design and manufacture of product
Technical file and manufacturing conformity
N.N., Director R&D/E, is authorized to compile the technical file and confirms the product design to conformwith the essential health and safety requirements.
M.M., Director Supply, confirms compliance of the manufactured machinery with the technical file.
N.N. and M.M. are empowered to draw up this declaration of conformity.
Place: Taivalkatu 8, FI-15170 Lahti, Finland
Date: dd.mm.yyyy
Signed: N.N.
Director R&D/E
Signed: M.M.
Director Supply
TYPE S/N Measured sound power level: LWA [dB]
Guaranteed sound power level: LWA [dB]
R25P 25PA 121 125
COPYRIGHT © 2020 SANDVIK MINING AND CONSTRUCTION OYPage 118 - Specifications
CE mark and EC Declaration of Conformity R25P
3.2 RD3 AND DATA PRIVACY
Important notice: This R25P
Hereinafter referred to as the "Product", is equipped with a remote monitoring service device which collectslocation data and data of usage of the Product (including remote monitoring hardware and software installed,connected, and activated by Sandvik at the factory or otherwise) in order for Sandvik to (i) provide you andSandvik's distributor/sub-distributor(s) involved in the sale of the Product ("Distributors") with the availabilityto Product data via a web managed (or similar) subscription service received following online acceptance ofwww.myhammersfleet.rocktechnology.sandvik/ web portal terms and conditions ("Equipment MonitoringService"); and (ii) to collect information from the Product in order to monitor the performance, reliability andto track the Product's operational efficiency as well as develop the data. Sandvik reserves the right to anonymizeand/or aggregate any data which is created, generated, derived or produced by Sandvik in the EquipmentMonitoring Service or otherwise created through the use of the Equipment Monitoring Service, such data neverto contain any personal data with the meaning given in the General Data Protection Regulation ((EU) 2016/679),into a new set of data. By using the Product, you consent and agree that Sandvik may generate, collect, record,upload, store, analyse and process standard industry information and data relating to the activity and conditionof the Product, including but not limited to location, engine, percussion and /or transmission hours. You agreeand acknowledge that Sandvik may use as well as disclose such data to its affiliates or other members withinthe Sandvik Group, its Distributors and to third parties providing services to the Sandvik Group for optimizingthe schedule of its services and parts deliveries and for improving its customer support and/or for any internalpurposes, including but not limited to product development, business and marketing analyses and improvementof its products' performance and availability. In the event you wish to withdraw your consent to collect, storeand process such data, please request Sandvik in writing to stop collecting and processing such data. A separatethree (3) months' advance notice is needed per each unit of Product and shall state at least (i) the serial numberof the Product and (ii) the end date of your consent. Please note that if you decide to withdraw your consent, itmay affect the validity of the agreements in connection with Product and may lead to the termination of anagreement in accordance with the terms and conditions of the agreement (including but not limited tomaintenance agreements and extended warranty agreements). For more information and in order to monitoryour own Product, please visit the following web page: www.myhammersfleet.rocktechnology.sandvik/.

Page 119COPYRIGHT © 2020 SANDVIK MINING AND CONSTRUCTION OY

®
Sandvik Mining and Construction Oy, Breakers LahtiTaivalkatu 8, P.O. Box 165, FI-15101 Lahti, Finland
Phone Int. +358 205 44 151, Telefax Int. +358 205 44 150www.rammer.com
9-24-14140-45-212-10512-24-14140-30-68-280