Embed Size (px)
Citation preview

HQ WebConnect Manual
Requirements
Installation
Overview
User Options
Lookup
Tables
Reports
Customers
Employees
Work Orders
Time Slips
Pay Out
Invoices
A/R


Table of Contents
iii
Imp: 06/01/2017
Contents
1. Introduction
1.1 System Requirements ................................................................................................................... 1-1
1.2 Installation
1.3 Setting up your paycheck printer for printing pay stubs ............................................................. 1-2
1.4 Setting up your ticket printer ....................................................................................................... 1-2
2. User Options
2.1 Getting Started ............................................................................................................................. 2-1
2.2 User Options ................................................................................................................................ 2-1
3. Prospects
3.1 Managing Prospects .................................................................................................................... 3-1
3.2 Reports ......................................................................................................................................... 3-1
4. Customer Main Window
4.1 Adding a New Customer .............................................................................................................. 4-1
5. The Employee Window
5.1 Accessing the Employee Window ................................................................................................. 5-1
5.2 The Employee Window ................................................................................................................. 5-1
6. Work Orders
6.1 Accessing the Work Order Window ............................................................................................. 6-1
6.2 The Work Order Window ............................................................................................................. 6-2
6.3 Window Links ............................................................................................................................... 6-2
6.4 Adding a New Work Order .......................................................................................................... 6-2
7. Create – Print Time Slips Window
7.1 Accessing the Create – Print Time Slips Window ....................................................................... 7-1
7.2 Time Slip Window ........................................................................................................................ 7-1
7.3 Create and Printing Time Slips ................................................................................................... 7-3
7.4 Weekly Customer Dispatch Schedule........................................................................................... 7-4

Table of Contents
iv
Imp: 06/01/2017
8. The Employee Job Site Assignment – Quick Pay Window
8.1 The Customer Column ................................................................................................................ 8-1
8.2 The Job Site Column .................................................................................................................... 8-1
8.3 The Work Order Column ............................................................................................................. 8-1
8.4 The Time Slip Column .................................................................................................................. 8-1
8.5 The Employee Column ................................................................................................................. 8-1
8.6 The Hours Column ....................................................................................................................... 8-2
8.7 The Pay Frequency Column......................................................................................................... 8-2
8.8 The Report To Column ................................................................................................................. 8-2
8.9 The Report Time Column ............................................................................................................. 8-2
8.10 The Paycheck Column................................................................................................................ 8-2
8.11 The Invoice Column ................................................................................................................... 8-2
8.12 Quickly Paying an Employee ..................................................................................................... 8-2
9. Using the Employee Hours Entry – Batch Pay Window
9.1 All Unpaid Filter
9.2 Time Slip Filter ............................................................................................................................ 9-1
9.2 Work Order Filter ........................................................................................................................ 9-1
9.3 Employee Filter ............................................................................................................................ 9-1
9.4 Employee Hours Filter ................................................................................................................. 9-1
9.5 Filtered Results ............................................................................................................................ 9-1
9.6 Printing Payroll Stubs.................................................................................................................. 9-1
9.7 Funding the Payroll ......................................................................................................................9.1
10. Reports
10.1 Management Reports .............................................................................................................. 10-1
10.2 Customer Reports..................................................................................................................... 10-1
10.3 Customers – Invoices Reports .................................................................................................. 10-1
10.4 Customers – Account Receivable Reports ............................................................................... 10-2
10.5 Employee Reports .................................................................................................................... 10-2
10.6 Work Order Reports ................................................................................................................. 10-2
10.7 Time Slips Reports ................................................................................................................... 10-2
10.8 Paycheck Reports ................................................................................................................... 10-15
10.9 Franchise Reports .................................................................................................................. 10-17
11 Billing and Invoicing
11.1 Scanning of Time Tickets ......................................................................................................... 11-1
11-2 Invoicing Procedures ............................................................................................................... 11-2

HQ WebConnect Manual Overview
i
Imp: 06/01/2017
HQ WebConnect Overview
HQ WebConnect is Hire Quest’s proprietary software specifically
designed for the Trojan Labor and Acrux Staffing franchise models.
This application uses a multi-document interface similar to Microsoft
Word or Excel in that you have one main window that contains
menu items, toolbars and other windows.
Although it is a windows application where you typically have to use
your mouse a lot, we have made it keyboard friendly so that you can
quickly enter in information.
When you first look at the application, you’ll notice that there are 3
major items (Figure 1):
1. The Main menu bar at top.
2. The Search and Edit Tool Bar docked on the left
hand side
3. The Navigation Menu displaying a flowchart of daily
operational functions
The Search and Edit and the Navigation window provide easy
logical access to all your daily operational functions. You can easily
hide them by toggling the View menu items (Figure 2).
Every operational function can also be accessed through the Main
Menu bar items as well. In addition to the operational menu items,
we have support type menus such as Window, where you can
access any of the currently opened or minimized windows. If you are
new to Windows-based applications, beware of keeping too many
windows open and always close windows that you aren’t using. It
can sometimes be confusing when the window you are looking for
gets buried beneath other windows.
One important thing to understand is you’re your data resides on a
server at HqWebConnect communicates to this database over the
internet using SSL 128-bit security so all you need is an internet
connection. Although it will run using a dial-up modem, a cable
modem, DSL, or T1 broad band internet connection is strongly
recommended. You also must have all service packs for your
Microsoft operating system installed, especially the .Net Framework,
before you install HQ WebConnect.
Figure 1
Figure 2

HQ WebConnect Manual Overview
ii
Imp: 06/01/2017
Page Intentionally Blank

HQ WebConnect Manual Introduction
1-1
Imp: 06/01/2017
1. Introduction
1.1 System Requirements
1.1.1. Broadband access to the internet (a DSL, cable modem or T1).
We DO NOT recommend a dial-up connection as your primary
connection to the internet although it is not a bad idea to have one
for a backup connection. HQ WebConnect will run very slow on dial-
up and is barely tolerable in a production environment.
1.1.2. A Pentium 4 class CPU with at least 500 MB RAM is
recommended. The operating system should be Window XP
Professional (not the Home edition) and you need to make sure it
has all the latest service packs installed, including the .Net
Framework, which is required to install HQ WebConnect.
1.1.3. A login and password from Hire Quest.
1.1.4. (1) Okidata 320 Turbo dot matrix printer for time slips.
1.1.5. (1) Laser or ink jet printer to print pay stubs.
1.2 Installation
1.2.1 Installation by CD
1.2.1.1 HQWebConnectSetup.msi – double click this file on the
installation CD to install HQ WebConnect.
1.2.1.2 Windows Live Messenger- double click this file to install
software to be connect to Hire Quest Support via the internet and
instant messaging.
1.2.2 Installation by Download
1.2.2.1 Go to corporate.hqwebconnect.com
1.2.2.2 Log into the internal use website using the same credentials
as HQWebConnect.
1.2.2.3 Go to the downloads tab and click on HQWebConnect
1.2.2.4 After the download completes locate the
HQWebConnectSetup.msi – double click this file to install HQ
WebConnect.
1.2.3 Installing Updates
1.2.3.1 Once released by Hire Quest, updates will installed
automatically upon logging into the system.
1.3 Setting up your Paycheck Printer for printing pay stubs.
1.3.1. Use the installation CD that came with the printer to install it
onto the computer.
1.3.2. Go to the Start menu, Control Panel then open the Printers
and Faxes window.
1.3.3. With the mouse, right click on the printer name that was just
installed and choose "Rename."
1.3.4. Type "Paycheck" for the new name. Note: capitalization
affects the name of a printer. Make sure the printer is now called
Paycheck with a capital "P" and a lower case "aycheck".
1.3.5. If HQ WebConnect is open, close it. Log back in and print a
check to compare all information including bank routing and
account numbers and name printed correctly on the paycheck.
1.4 Setting up your Ticket Printer
1.4.1. Go to the Start menu, Control Panel. Open the Printers and
Faxes window. Click on Add a Printer.
a. Click “Next”
b. Select “Local Printer Attached to this computer”
and Uncheck “Automatically Detect and Install my
Plug and Play” then “ Next”
c. Select to use “LPT1” port and then “Next”
d. Select the manufacturer of your printer in the left
column, and then the model of your printer in the
right column. (Okidata and Okidata 320 Turbo D
(IBM) will be typical)
e. Select “Keep Existing Driver” and then “Next”
f. Printer Name type: “Ticket” exactly and select “No” for
the default printer and then “Next”
g. Then select “Next” “Next” “Finish”.

HQ WebConnect Manual Introduction
1-2
Imp: 06/01/2017
1.4.2. The next thing we have to do is set up the paper sizes for the
print driver:
a. Select/Highlight the “Ticket” printer driver from the
Printers and Faxes dialogue then go to the File- Server
Properties menu item. Check the “Create a new
form” checkbox and type exactly “Custom 8.5x4” as the Form
Name. In the Form Description area below, enter a Width of
“8.50in” and a Height of “4.00in” and leave everything else as
defaulted. After that, click the “Save Form” command button.
1.4.3. The following are OkiData Printer settings for your
information only. In order to change any of the settings first hold
down both the shift and Menu buttons until the word "Menu" lights
up. Then press the LF/Group button. One setting will print on paper.
If it does not say the correct setting, press the Set button
continuously until it says the correct one. (Ex. the Printer Control
should be set on the Epson FX setting, see all suggested settings
below).
Printer Control Emulation Mode EPSON FX
Font Print Mode Utility
Symbol Sets Character Set Set I
Rear Feed Line Spacing 6 LPI
Bottom Feed Line Spacing 6 LPI
Top Feed Line Spacing 6 LPI
Set-Up Graphics Uni-directional
Parallel I/F I-Prime Buffer Print

HQ WebConnect Manual User Options
2-1
Imp: 06/01/2017
2. User Options
2.1 Getting Started
2.1.1 Set up your User Option outlined below before attempting any
daily operation in HQ WebConnect. This is Located in the File/User
Options menu. There are 6 tabs that you need to look at and set up
that are login sensitive. Different user logins will require set up also.
2.2 User Options Window
2.2.1 The General Tab: Allows you to set your default area code for
new phone numbers.
2.2.2 On the Customer Tab: Select your customer comp code states.
You must select you comp code state(s) before entering new
customers. This is login sensitive so different logins will have to set
this up as well. Figure 4b
2.2.3 The Employee Tab: allows you to set a default Skill Code. If you
select “Gen-Labor” as a default skill-code for when adding new
employees. All of your employees will be imported with “Gen-
Labor” as a skill-code.
2.2.4 Work Order Tab: allows you to set a default skill code and set
default equipment requirements for new work orders. If you select
“Gen-Labor” as a default skill-code for when adding new Work
Orders. All of your Work Orders will be imported with “Gen-Labor” as
a skill-code.
2.2.5 Time Slips Tab: Allows you to set the default to create one time
slip for each employee. Checking this option will default the
corresponding checkboxes to True on the Work Order’s Work Dates
tab and the Create- Print Time Slips window. By being checked it
will create one time slip for each employee required on customer’s
Work Order.
2.2.6 Paychecks Tab: Allows you to set HQ WebConnect to
automatically refresh employees at JobSites / QuickPay Window.
Figure 4a
Figure 4b

HQ WebConnect Manual User Options
2-2
Imp: 06/01/2017
HQ WebConnect Manual Prospects
3-1
Imp: 06/01/2017
3.1 Managing Prospects
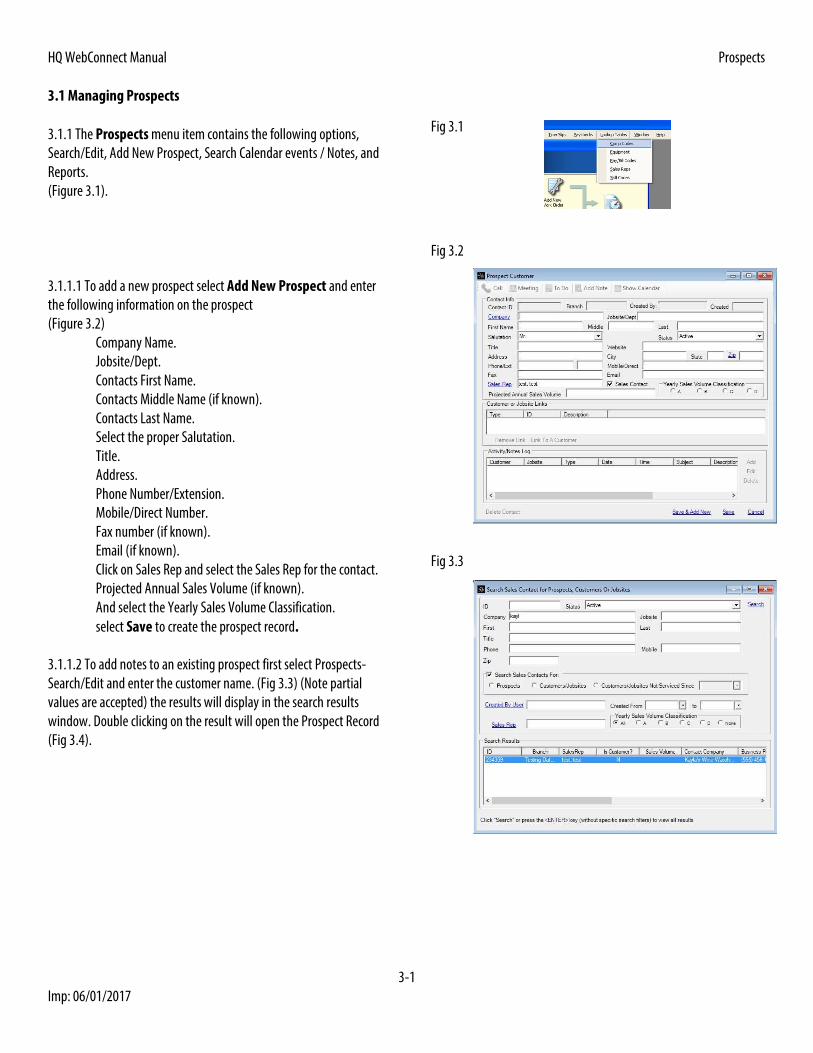
3.1.1 The Prospects menu item contains the following options,
Search/Edit, Add New Prospect, Search Calendar events / Notes, and
Reports.
(Figure 3.1).
3.1.1.1 To add a new prospect select Add New Prospect and enter
the following information on the prospect
(Figure 3.2)
Company Name.
Jobsite/Dept.
Contacts First Name.
Contacts Middle Name (if known).
Contacts Last Name.
Select the proper Salutation.
Title.
Address.
Phone Number/Extension.
Mobile/Direct Number.
Fax number (if known).
Email (if known).
Click on Sales Rep and select the Sales Rep for the contact.
Projected Annual Sales Volume (if known).
And select the Yearly Sales Volume Classification.
select Save to create the prospect record.
3.1.1.2 To add notes to an existing prospect first select Prospects-
Search/Edit and enter the customer name. (Fig 3.3) (Note partial
values are accepted) the results will display in the search results
window. Double clicking on the result will open the Prospect Record
(Fig 3.4).
Fig 3.1
Fig 3.2
Fig 3.3

HQ WebConnect Manual Prospects
3-2
Imp: 06/01/2017
3.1.1.3 To enter a note into the prospect record under the
Activity/Notes Log click on add on the lower right side of the frame.
The New Calendar Event window will open up. (Fig 3.5)
3.1.1.4 In the New Calendar Event window select the event type in
the lower left hand portion of the window. Your choices for event
type will be Personal Visit, Phone Call, Mailer/E-mail/Fax and Note.
Select which ever type best fits the note you want to make. Then
enter the following;
Regarding: What the event was regarding (
Description: Any pertinent details about the event.
Outcome: Select the appropriate outcome for the event if
applicable. Your choices are Completed, Rescheduled,
Canceled.
Comments: Enter any additional comments here.
3.1.1.5 Once all information has been entered select SAVE and close
the close the New Calendar Event window.
3.2 Reports
3.2.1 There are two reports available for prospect management the
All/New prospects report and the Calendar Events/Notes Report.
3.2.1.1 The All/New prospects report allows you to see either all new
prospects added during a specific date range or by selecting the
“Show All Contacts” box, all contacts added during the desired date
range. (Fig 3.6)
3.2.1.2 The report will open in the viewer and display the search
results. (Fig 3.7)
Fig 3.4
Fig 3.5
Fig 3.6
Fig 3.7

HQ WebConnect Manual Prospects
3-3
Imp: 06/01/2017

HQ WebConnect Manual Prospects
3-4
Imp: 06/01/2017
3.2.1.3 The Calendar Events/Notes Report all Calendar Events/Notes
for the selected date range. You can also look up Events/Notes by
user or event type. (Fig 3.8)
3.2.1.4 The report will open in the viewer and display the search
results. (Fig 3.9)
Fig 3.8
Fig 3.9

HQ WebConnect Manual Prospects
3-5
Imp: 06/01/2017
Intentionally Blank for Printing.

HQ WebConnect Manual Customers
4-1
Imp: 06/01/2017
4. Customer Main Window
4.1 Adding a New Customer
4.1.1. From the top menu select the Customer/Add New Customer
menu item.
4.1.2. Enter all fields on the General Info tab. If you do not see any
comp codes to choose from in the “Comp Code” dropdown then you
need to add your comp code states in the File/User Options menu
item. Comp codes get applied when an employee gets paid.
4.1.3. Click the “Save” link at the bottom right of the screen. This will
make the other tabs visible.
Go to the Job Sites tab. Every customer has at least one job site for
itself. Double-click a row to open up the job site window or hi-light
the row and click the “Edit” link. It is important to note that in this
system, customers can have more than one job site. Add additional
job sites here by clicking the “Add” link to the right of the grid.
DO NOT add new customers to add additional jobsites if the
customer already exists in the system.

HQ WebConnect Manual Customers
4-2
Imp: 06/01/2017
4.1.4. In the Job Site window, the Site Name field is defaulted to the
customer Name field in the General Info tab. The Comp Code is
defaulted to the same comp code on the General Info Tab. Job Sites
can have a different comp code from the main customer record;
however, this change must be made by Hire Quest. The job site
address that is entered here will print on the invoice.
a. The “PO # Required” checkbox forces the user to enter a PO# for
each invoice before billing.
b. The “Non-Variable / Variable” selection is for the Affordable Care
Act (ACA). Is is important when creating a new Job Site that this is
properly selected before the first person is assigned to the Job Site.
New Job Sites default to Non-Variable which means all employees
assigned to that site are immediately eligible for ACA. If the Job Site
is Variable, then the employees become eligible after working a
specific number of hours.
c. The contacts window allows you to enter and manage contacts for
the Job Site.
d. The Activity/Notes Log, allows you to make various notes relating
to sales and customer service activity.
e. The “Requires Certified Payroll Reporting” checkbox at the bottom
left of the Job Site window. Check this box if this customer’s job site
requires government certified payroll reporting.
4.1.5. On the Billing Info tab, you can change the billing address if it
is different from the physical address of the customer.
Note: there is a checkbox to insert information “same as Physical
Address.”
4.1.6 A Pay/Bill code must be assigned prior to paying the first
employee, it can be assigned to the to the entire customer or it can
also be job site specific.
4.1.7 At the bottom left of the tab, you will see an “Invoice Type”
dropdown. Select the type of invoice to be sent to the customer,
either detailed or summarized.
4.1.8 You will also see the “Invoicing Method” dropdown, select
either Mailed or Electronic delivery. If selecting electronic a billing
Email is required.
4.1.9 At the bottom right side of the tab you will see check boxes for
“Charge Late Fee On Statement”, “Charge Credit Card Fee” and
“Print larger time slips with invoices”. Charge Late Fee On
Statement” and “Charge Credit Card Fee” are checked by default.
4.1.10. Click the “Save” at the bottom right of the Customer window
after entering or changing any information

HQ WebConnect Manual Customers
4-3
Imp: 06/01/2017

HQ WebConnect Manual Customers
4-4
Imp: 06/01/2017
4.1.11. The DNR tab is for designating employees who are not to
return to this customer for future work. You can also note the reason
in a text box. Entering an employee here will cause an error message
to display if you add them for this customer work orders or time
slips.
4.1.12. The Salesman Commissions tab if for entering sales person’s
commissions for the customer. All commissions are job site specific.

HQ WebConnect Manual Customers
4-5
Imp: 06/01/2017
4.1.13. The Files tab is where all documents related to the customer
are uploaded to the customer record, these include the customer
application, rate agreements and any other pertinent documents.
4.1.14. The COI tab is where you will find a Certificates of Insurance
for the customer.
4.1.15There is a “Create Work Order” link at the bottom right of the
Customer window. If you get a call from a customer who wants to
place an order and you are not sure if they are in the system, you can
search for the customer, open their Customer window to verify the
data then quickly create a work order for them by clicking the link.

HQ WebConnect Manual Customers
4-6
Imp: 06/01/2017

HQ WebConnect Manual Employees
5-1
Imp. 06/01/2017
5. The Employee Window
5.1 The Employee Window is accessed through the Search/Edit
menu item under the Employees menu or by clicking on the
employee’s icon on the quick access bar.
5.1.1. Search/Edit – used for searching, viewing, or editing an
employee.
5.2 Employee Window
Clicking either menu item opens the Employee Window which
contains the following tabs with their related data fields:
1. General Info Tab
2. Payroll Tab
3. Additional Info
4. Files
5.2.1 General Info Tab
5.2.1.1 The General Info tab is where the employee’s basic
information can be found such as Employee ID, Name, Address,
Phone Numbers, Race, Gender, Employment Status and associated
dates as well as their E-Verification Status.
5.2.1.2 In the lower left hand corner is the “Add This Employee to
the Availability List” selection. This open the employee availability
window and allows you to add the employee to the employee
availability list for the date you select. The availability list is accessed
from the left hand menu.
5.2.2. Payroll Info Tab
5.2.2.1 The Payroll Info Tab is where the employees tax and
deduction information is displayed.
5.2.2.2 To change an employee’s tax withholding have them
complete a W-4 Employee's Withholding Allowance Certificate and
add the new information into the employee record by selection
“add” next to the Tax Info section.
5.2.2.3 The Recurring Deductions sections show and entered
recurring deductions, these are typically Tax Liens, Support Orders
and Court Ordered Restitutions. To see the details of the deduction
simply double click on the deduction and the deduction information
window will open. If you click on the Deduction Order PDF you will
see the document that directed the recurring deduction.
5.2.2.4 The “Paycard” and “Direct Deposit” radio buttons allow you
to toggle between the two payroll elections. Simply enter the
required information for the employee’s choice of payroll type.

HQ WebConnect Manual Employees
5-2
Imp. 06/01/2017

HQ WebConnect Manual Employees
5-3
Imp. 06/01/2017
5.2.3 Additional Info Tab
5.2.3.1 The Additional Info Tab includes sections for employee skills,
entering Do Not Return (DNR) customers and making general
employee notes.
5.2.3.2 Any skills the employee entered during the onboarding
process will show in the skills section. You can add or delete skills as
required using the Add or delete options.
5.2.3.3 The DNR Customers section will show all customers and
jobsites for which a DNR entry has been made. You can add, edit or
delete entries as necessary.
5.2.3.4 the notes section is for making any pertinent employee note
for future reference. You can add, view or delete entries as
necessary.
5.2.4 Files Tab
5.2.4.1 The files tab is for uploading any document to the employee
record for retention such as I-9 supporting documentation, resumes,
Certifications and licenses etc.
5.2.5 In the Employee Window along the bottom we have:
1. “Delete Employee” link. Clicking this link will delete an
employee.
2. “Checklist” link. Clicking this link will open the
employee checklist.
3. “Employee Work History” link. Clicking this link will run
an
Employee Work History Report.
4. “Employee Info” link. Clicking this link will open a
window to print
general information about the employee.
5. “Save” link will save any changes to the employee
record made.
6. “Close” link will close the employee record.

HQ WebConnect Manual Work Orders
6-1
Imp: 06/01/2017
6. Work Orders
6.1 The Work Order Window is accessed through the following menu
items under the Work Order menu:
6.1.1 Search/Edit – used for searching, viewing, editing or deleing a
work order. It should be noted that you cannot delete work orders
that are closed.
6.1.2 Add New Work Order – used for adding work orders
6.1.3 You can also create work orders either by clicking the Create
Work Order link in the Customers Window after searching or adding
a customer/jobsite.
6.1.4 Clicking either menu item opens the Work Order Window
which contains the following tabs and their related data entry/data
editable elements:
A. General Info tab
B. Workers/Time Slips tab
6.2 Work Order Window
6.2.1 The General Info tab Shows the information from the customer
order either entered directly into the system over the phone or
entered from the physical Work Order form filled out at some earlier
time. Once a work order is entered into the system, it will eventually
contain several time slips that span the start and end dates of the
order. Everything entered on the General Info tab is carried all the
way through to the time slip creation process. It’s a template for
time slips.

HQ WebConnect Manual Work Orders
6-2
Imp: 06/01/2017
6.2.2 Work Dates-Time Slips tab When you save the “General Info”
tab, you are taken to this tab. You will notice that the Work Dates
(scheduled employees) grid is pre-populated based on the data
entered from the “General Information” tab. It only happens once
after a work order is saved for the first time. The Time Slips grid
populates as Time Slips are created.
6.3 Window Links
6.3.1 The Delete Work Order link deletes the work order from the
system.
6.3.2 The Update Customer/Job Site link allows you to change the
customer or job site as required.
6.3.3 The Add New link allows you to add a new work order
6.4 Adding a New Work Order
6.4.1 Either click the “Add New Work Order” on the Daily Operations
Navigation Window or click the Work Orders/Add New Work Order
menu item.
6.4.2 Enter all the fields on the General Info tab:
6.4.2.1 The cursor will be in the wider text box to the right of the
Customer ID text box. Type in the first few letters of a customer’s
name and hit the ENTER KEY. This will bring up the customer
window filtered with the results. Arrow up and down the list and
either double click the desired customer or hit the ENTER KEY again.
Either will close the Customer Search window and populate the
selected customer on to the work order.
6.4.2.2 If the customer has only one job site, it will default as the Job
Site ID. If there is more than one job site, you must click the “Job Site
ID” link and select a job site.
6.4.2.3 When you select a Starting date, it will automatically change
the Ending date to the start date. Changing the Ending date will give
a date range for the work order. If you select a date range, the
“Days” checkboxes are enabled to pick certain days within the date
range. If you choose a day that is outside of the date range, it will
ignore that day. If you do not select days, it will create work orders
for everyday in the selected date range. Remember that work orders
can be entered for future dates beyond the current week.

HQ WebConnect Manual Work Orders
6-3
Imp: 06/01/2017
6.4.2.4 Directions will already have data in it if you’ve entered that
information at the Customer Job Site window as explained earlier.
6.4.2.5 Enter the rest of the information on the General Info tab
Including the Equipment Requirements.
6.4.2.6 The work order defaults to create the time slips
automatically by checking the auto create time slips box.
6.4.5.7 After Adding Equipment Requirements save the work order
by clicking on the “Save” link at the bottom right of the Work Order
window. This will make the Work Dates – Time Slips tab visible. You
can stop here.

HQ WebConnect Manual Work Orders
6-4
Imp: 06/01/2017

HQ WebConnect Manual Time Slips
7-1
Imp: 06/01/2017
7. Create- Print Time Slips Window
7.1 Clicking on the Create- Print Time Slips link, will open the
Create- Print Time Slips Window in the Available Work Orders tab
and show any work orders with time slips not already created.
7.1.1 Select the work order you with to create time slips for or
choose “Select All” in the lower left hand corner of the window
7.1.2 Click on “Create Time Slips” to create the time slips.
7.2 Time Slip Window
7.2.1 The Time Slips tab will show all unprinted time slips.
7.2.3 Choose either “Select All” or “Select Unprinted” to choose
which time slips to print.
7.2.4 Then choose “Print Selected Time Slips” to print all unprinted
time slips.

HQ WebConnect Manual Time Slips
7-2
Imp: 06/01/2017
7.3 Creating and Printing Time Slips
7.3.1 Time Slips – time slips are directly related to work order
records whether created manually or from the Dispatch Process Note
that deleting a time slip releases the requirement that created it so
another time slip can be created from it.
7.3.2 This window is used to print unprinted time slips from open
work orders. You will typically perform this operation when you are
ready to create-print all time slips for dispatch for the following day.
Click the link in the Navigation window to open it. It is also
accessible from the Weekly Customer Dispatch Schedule window by
clicking the weekday link as explained earlier.
7.3.3 Choose a date from the “Select a Work Date” dropdown and it
will populate the Available Work Orders and Time Slips tabs for that
selected date.
7.3.4 Right clicking a row in the Available Work Orders tab will give
you the following options:
a) Export Contents – see the Search-Print Paychecks
section.
b) Open Work Date (scheduled employees) tab of the work
order.
c) Open Work Order general info tab.
7.3.5 Click the “Select All” link if you want to batch create time slips
from all work orders for that date or you can checkbox the ones you
want.
7.3.6 Clicking the “Create Time Slips” link will create the time slips
and all the available work orders you selected should disappear from
the Available Work Orders tab.
7.3.7 If you look at the Time Slips tab you will see all the time slips
created from all the work orders you previously selected.
7.3.8 Right clicking a row in the Time Slips tab will give you the
following options:
a) Export Contents – see the Search-Print Paychecks
b) Open Time Slip
c) Open Work Order
7.3.9 Click the “Select All” link if you want to batch print all time for
that date or you can checkbox the ones you want to print.
7.3.10 At this point you are ready to physically dispatch time slips to
your employees whenever you want.
7.3.11 Remember that you can still “pencil in” employees to the
printed time slips and add them to the time slip in the system later
on in the Employee Job Site Assignment – Quick Pay link on the
Navigation window.

HQ WebConnect Manual Time Slips
7-3
Imp: 06/01/2017
7.4 Weekly Customer Dispatch Schedule
7.4.1 After you add work orders, you can click the “Weekly Customer
Dispatch Schedule” from the Navigation window. It gives you a
“bird’s eye view” on how many employees along with skill codes
that are going out to customers throughout the week. There are the
following links in this window:
a) Work Order – clicking this link opens the Work Order
window
b) Skill – this opens the Work Date (scheduled employees)
window. The window will be disabled if a time slip was
already created from a Work Date (scheduled employees)
record.
c) Weekday – this opens the Create-Print Time Slips
window filtered to the date of the weekday you selected.
You should use the Create-Print Time Slips window to
batch create and print time slips from open work orders.
More will be explained about this window later.
7.4.2 You will also notice the RSA columns.
R – Number of employees required on a work order or the
Work Date (scheduled employees) window.
S – Number of employees scheduled to print on a time
slip. This value comes from the Scheduled Employees grid
from the Work Date (scheduled employees) window. This
value will be zero if you “pencil in” the employees on
printed time slips at dispatch. c)
A – Number of employees assigned to a time slip.

HQWebConnect Manual Paychecks
8-1
Imp: 06/01/2017
8. The Employee Job Site Assignment- Quick Pay Window
8. The Employee Job Site Assignment – QuickPay Window is you primary window
for daily operations. The screen is laid out in a table format with the following
columns;
8.1. The customer column, lists the customers to be serviced that day. By clicking
on the customer title, you can sort the column alphabetically. Quick Pays default
sort is alphabetically by customer. Clicking on the customer name you will open
the customer record window.
8.2. The Job Site column lists the name of the job site. Below the name a link is
provided for obtaining directions from the office to the address of the job site.
8.3 The Work Order column lists the work order number and the skill code
assigned to the work order. Clicking on the work order number will open the work
order window.
8.4 The Time Slip column lists the time slip number and if applicable the purchase
order or reference number associated with the time slip.
8.4.1 If the time slip column says “Scheduled” – this means that the time slip has
not been created yet. Clicking link opens the Work Date (scheduled employees)
window. You can create a time slip from this window as well by clicking the
“Create Time Slip” link.
8.4.2 If the time slip column has a Time Slip Number – this type of link shows up
after you have created a time slip from a Work Date (scheduled employees)
record. Clicking the link opens the time slip. You can pay all employees on a time
slip from here. You can also create repeat time slips by clicking the “Repeat Time
Slip” link.
8.5. The employee column displays the name of the employee(s) assigned to the
time slip or a not assigned link. In addition, there will be a link to pay the
employee via the batch pay window. If the employee has not been issued and
paycard and is not on direct deposit a “No Paycard Assigned” note will also show
up under the employee name. The quick pay screen can be sorted by this column
by clicking on the column title. This will order the column alphabetically.
8.5.1 The “Not Assigned” link opens the Employee Hours window. The cursor will
be in the wider text box beside the Employee ID text box. You can enter the first
couple of letters of the employee’s last name and it will display the Employee
Search window filtered with your results. To select the desired employee, you can
double-click the row or make sure the row is hi-lighted and hit the ENTER KEY.
Either closes the Employee Search window and brings the selection back to the
Employee Hours window.
8.5.2 The Employee Name link displays when an employee is assigned to a work
order, his or her name will be displayed as a link to open the Employee Hours.
When you open it, the cursor will be in the Reg. Hours text box so you can enter
hours worked for that employee. You can enter Daily Deductions that include: Car
Pool, Cash Advance, Equipment, Lunch, you can view Recurring Deductions by
clicking the Recurring Deductions tab from the Employee Window, and You can
also enter Misc. Pay: i.e. Driver Pay, Per Diem, Prevailing Reimbursement etc.
HQWebConnect Manual Paychecks
8-2
Imp: 06/01/2017
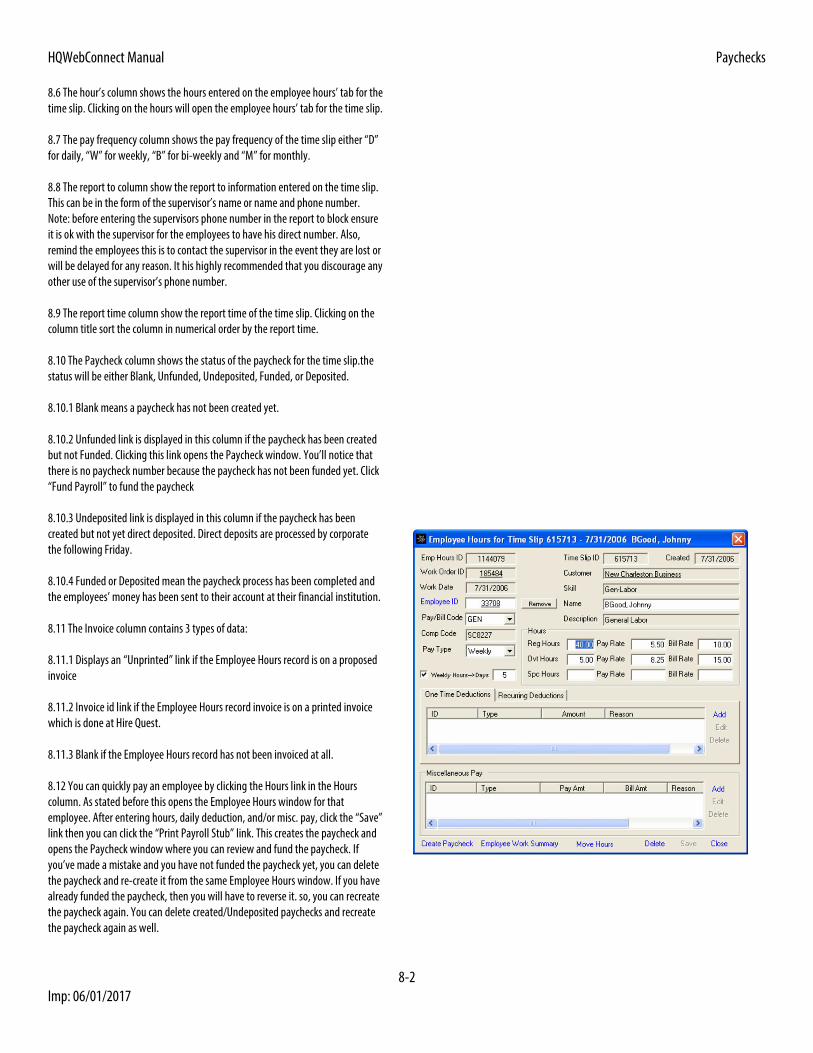
8.6 The hour’s column shows the hours entered on the employee hours’ tab for the
time slip. Clicking on the hours will open the employee hours’ tab for the time slip.
8.7 The pay frequency column shows the pay frequency of the time slip either “D”
for daily, “W” for weekly, “B” for bi-weekly and “M” for monthly.
8.8 The report to column show the report to information entered on the time slip.
This can be in the form of the supervisor’s name or name and phone number.
Note: before entering the supervisors phone number in the report to block ensure
it is ok with the supervisor for the employees to have his direct number. Also,
remind the employees this is to contact the supervisor in the event they are lost or
will be delayed for any reason. It his highly recommended that you discourage any
other use of the supervisor’s phone number.
8.9 The report time column show the report time of the time slip. Clicking on the
column title sort the column in numerical order by the report time.
8.10 The Paycheck column shows the status of the paycheck for the time slip.the
status will be either Blank, Unfunded, Undeposited, Funded, or Deposited.
8.10.1 Blank means a paycheck has not been created yet.
8.10.2 Unfunded link is displayed in this column if the paycheck has been created
but not Funded. Clicking this link opens the Paycheck window. You’ll notice that
there is no paycheck number because the paycheck has not been funded yet. Click
“Fund Payroll” to fund the paycheck
8.10.3 Undeposited link is displayed in this column if the paycheck has been
created but not yet direct deposited. Direct deposits are processed by corporate
the following Friday.
8.10.4 Funded or Deposited mean the paycheck process has been completed and
the employees’ money has been sent to their account at their financial institution.
8.11 The Invoice column contains 3 types of data:
8.11.1 Displays an “Unprinted” link if the Employee Hours record is on a proposed
invoice
8.11.2 Invoice id link if the Employee Hours record invoice is on a printed invoice
which is done at Hire Quest.
8.11.3 Blank if the Employee Hours record has not been invoiced at all.
8.12 You can quickly pay an employee by clicking the Hours link in the Hours
column. As stated before this opens the Employee Hours window for that
employee. After entering hours, daily deduction, and/or misc. pay, click the “Save”
link then you can click the “Print Payroll Stub” link. This creates the paycheck and
opens the Paycheck window where you can review and fund the paycheck. If
you’ve made a mistake and you have not funded the paycheck yet, you can delete
the paycheck and re-create it from the same Employee Hours window. If you have
already funded the paycheck, then you will have to reverse it. so, you can recreate
the paycheck again. You can delete created/Undeposited paychecks and recreate
the paycheck again as well.

HQWebConnect Manual Vendors
9-1
Imp: 06/01/2017
9. Using the Employee Hours Entry-Batch Pay Window
9.1. Clicking this link on the Navigation window opens the Create
Payroll Funding Batches window. This window is used create Payroll
Funding for more than one employee at a time, typically for group
time slips. You will notice an Hours Filter dropdown located at the
top left of the form and it contains the following filters:
9.2 Time Slip – this is the default selection when group time slips
are turned in, all the Employee Hours records on the time slip will be
returned in the grid.
9.3 Work Order - this a good selection to use if you print one time
slip per employee especially when all the employees on a work order
come back at the same time from a customer’s job site. You can just
enter the work order number on the first employees time slip and all
the employees at that jobsite will be returned in the grid.
9.4 Employee – this will return all the open Employee Hours records
for an employee, in case someone comes in at the end of the week
to get paid and they have two or more daily pay time slips.
9.5 If Employee Hours information from the Employee Job Site
Assignment – Quick Pay window, you will see those hours in the
“Reg. Hours” Column on the grid. You can also open the Employee
Hours window by right clicking a row and selecting Open Employee
Hours. Once the Employee Hours window is open, you can
enter/save the hours, daily deductions, misc. pay like you usually
would. Instead of creating the Payroll Funding right away, save and
close the Employee Hours window and right-click the next
employee’s hours you want to enter.
9.6 After you have entered in all the employees’ hours, you click the
“Select All” link at the bottom left. Doing this will put a check in all
the Hours ID checkboxes. Or click the checkboxes manually. After
selecting which employee hours, you want to batch pay, click the
“Print Payroll Stubs” link located to the right of the Check Date
dropdown at the top of the window. The employee hours you
selected will disappear from the grid if the Payroll Funding batch
creation was successful (i.e. no taxes left out, etc.).
9.7 The Payroll Funding Batch window should be open where you
can double click any row in the grid to open an employee’s Payroll
Funding for a final inspection. If the Payroll Funding batch creation
was unsuccessful, the Payroll Funding Batch window will open
showing the Errors tab displaying messages of whatever error
occurred. Otherwise fund the checks by selecting them then clicking
the “Print Payroll Stubs” link. Remember that

HQWebConnect Manual Vendors
9-2
Imp: 06/01/2017

HQWebConnect Manual Vendors
9-3
Imp: 06/01/2017
Intentionally Blank for Printing.
HQWebConnect Manual Reports
10-1
Imp: 06/01/2017
10. Reports
10.1 Management Reports
10.1.1 Proposed Settlement Report*
10.1.1.1 Displays a proposed settlement when given date ranges for
the settlement period and the payroll funding period. Used by the
franchise owner to estimate settlement amounts on an ongoing
basis. Invoices must be printed to reflect in total amounts.
10.1.2 Weekly Proposed Settlement Report*
10.1.2.1 Displays a proposed settlement for franchisees that are on
the weekly settlement payment program for a given date range.
Used by the franchise owner to estimate settlement amounts on an
ongoing basis. Invoices must be printed to reflect in total amounts.
10.1.3 Weekly Proposed Settlement Payroll Details*
10.1.3.1 Displays all payroll information for a given week of invoices,
including all Accrued Payroll Expenses for checks created outside of
invoice week for the invoice week. Used by the franchise owner to
determine the Accrued Payroll Expense line item of the weekly
settlement statement.
10.1.4 Branch Directory Report
10.1.4.1 Displays a branch directory of all Trojan Labor and Acrux
Staffing Offices Used to get contact information for other offices and
to provide to customers working in multiple areas.
10.1.5 Global Customers Report*
10.1.5.1 Displays Customer information for all customers in HQ
WebConnect. Organized by Customer Name. This report can be used
as a sales tool to find potential leads in your territory that have used
our services elsewhere.
10.1.6 Continuing Fee Credit Request Report
10.1.6.1 Is used to apply for low margin royalty credits.
10.1.7 Expense Report
10.1.7.1 The Expense Report shows all expenses charged to a
franchise by Hire Quest LLC during the period selected.
*These reports are only available at a Franchise Owner Level.

HQWebConnect Manual Reports
10-2
Imp: 06/01/2017

HQWebConnect Manual Reports
10-3
Imp: 06/01/2017
10.2 Customer Reports
10.2.1 Sales Commission Report
10.2.1.1Displays commissions based on all printed invoices for
customers with an assigned salesman id for a given date range
broken out by salesman This report can be used to calculate a sales
rep’s commissions for payroll each pay period.
10.2.2 Personal Sales Commission Report
10.2.2.1 Displays a personal Sales Commission report for the user
logged in.
10.2.3 Sales Reps Quota Report
10.2.3.1 Shows the sales activity numbers for a the sales
representatives for a specific time period.
10.2.4 Sales Reps Ranking Report
10.2.4.1 Shows the total gross sales numbers for all sales
representatives in order from largest to smallest for the branch.
10.2.5 A/R Ageing By Sales Rep
10.2.5.1 Displays an Accounts Receivable Ageing report for the
selected sales representative.
10.2.6Work History/Random Employee By Customer
10.2.6.1 Displays employee hours for a given customer (and jobsite)
grouped by employee id for a given date range. Provided to the
customer to show hours worked by specific employees
10.2.7 All/New Customers Report
10.2.7.1 Displays all customers in a report format with contact
addresses and phone numbers and date added fields. To be used for
a quick reference when the computer may be down or to use in mass
mailings to all customers.
10.2.8 New Customer with Comp Codes report
10.2.8.1 Shows the workers compensation codes assigned to new
customers within the date range.
10.2.9 New Customer/Jobsite Report
10.2.9.1 Displays all New Customers and New Jobsites (for existing
customers) in a contact format. Can be used to write thank you
correspondence, verify salesmen ids, and identify customers who
need to be NTOed.

HQWebConnect Manual Reports
10-4
Imp: 06/01/2017

HQWebConnect Manual Reports
10-5
Imp: 06/01/2017
10.2.10 Jobsite Variable Status Report
10.2.10.1 Shows the variable/non-variable status of all jobsites
added during the date range selected.
10.2.11 Customer Jobsite Activity Report
10.2.11.1 The Customer Jobsite Activity Report shows all customers
and jobsite with last activity dates during the selected period.
10.2.12 Overdue NTO Report
10.2.12.1 The Overdue NTO Report list all customers and jobsites
with activity and billing for which the NTO’s are overdue.
10.2.13 Customer Inactivity Report
10.2.13.1 Displays all customers that have no activity since a given
date. This report can help generate sales contacts for customers that
have not used services in a while.
10.2.14 Customer DNR Employee Report
10.2.14.1 Displays all employees with DNR (Do not returns) for each
customer. May be used to print a list of employees that the customer
does not want to return to the job along with any notes made.
10.2.15 Customer Sales Ranking Report
10.2.15.1 Displays a list of customers’ ranking total sales for a given
date range. This can be used for customer appreciation, identifying
biggest accounts.
10.2.16 Customer Pay Bill Codes Excel Export
10.2.16.1 The Customer Pay Bill Codes Excel Export shows all pay
and bill codes assigned to a selected customer along with the pay
rates, bill rates, markup and margin.
10.2.17 Customer Employees Work Summary
10.2.17.1 The Customer Employees Work Summary shows all
employees who worked for a specific customer with the hours
worked, first and last work date during a selected date range. The
report can be run for all customers by leaving the customer and
jobsite blank.
10.2.18 New Job Sites Report
10.2.18.1 The New Job Sites Report shows all jobsites added during
the selected time frame.
10.2.19 Potential Lien Report

HQWebConnect Manual Reports
10-6
Imp: 06/01/2017

HQWebConnect Manual Reports
10-7
Imp: 06/01/2017
10.2.19.1 The Potential Lien Report shows any customer and jobsite
for which the branch should consider placing a lien on the property.
10.2.20 Daily Activity Report
10.2.20.1 The Daily Activity Report shows all funded payroll
transaction. to the date range selected, displaying the Jobsite, Work
Date, Check Date, Employee Name, Total hours, Pay Amount, Bill
Amount, if an adjustment to the payroll has been made during
billing and the Margin percentage or if NO BILLING had occurred.
Additionally any item where the check date is greater than 11 days
after the work date will be listed in bold.
10.2.21 Employee Deductions By Customer
10.2.21.1 The Employee Deductions By Customer report shows all
deductions by employee for the selected customer. Note you must
select at least a customer id for the report to run.
10.2.22 Customer Files
10.2.22.1 The Customer Files report shows the customer files that
have been uploaded to the customer record during a selected date
range such as application, credit info, Jobsite Survey etc.
10.3 Customers - Invoices
10.3.1 Proposed Payroll Billing Report.
10.3.1.1 The Proposed Payroll Billing Report shows all customers
and jobsites for which there is a work order and time slips
generated. If the employees have been paid the number of hours
will be indicated along with all the other payroll information.
10.3.2 Proposed Invoices Report
10.3.2.1 The Proposed Invoices Report will show the detail
information for all invoices created for the selected dates by invoice
number.
10.3.3 Unviewed Invoices Report
10.3.3.1 The Unviewed Invoices Report shows all electronic invoices
the have not been viewed by the customer on the customer web
portal.
10.3.4 Printed Invoices Report
10.3.4.1 The Printed Invoices Report will show the detail
information for all invoices printed for the selected dates by invoice
number.
10.3.5 Branch Invoice Totals Report

HQWebConnect Manual Reports
10-8
Imp: 06/01/2017

HQWebConnect Manual Reports
10-9
Imp: 06/01/2017
10.3.5.1 The Branch Invoice Totals Report shows the total amount of
all invoices in the selected date range
10.4 Customers - Accounts Receivable
10.4.1 A/R Ageing Report
10.4.1.1 The A/R Ageing Report shows all outstanding invoices by
customer and jobsite sorted from oldest to newest and shows where
the receivable is on a time line between 0 and 84 days
10.4.2 A/R Ageing Report by Franchise
10.4.2.1 The A/R Ageing Report by Franchise shows all outstanding
invoices by customer and jobsite sorted from oldest to newest and
shows where the receivable is on a time line between 0 and 84 days
for the Franchise
10.4.3 Dead Invoices Report
10.4.3.1 The Dead Invoices Report shows all outstanding invoices by
customer and jobsite sorted from oldest to newest for invoices that
are dead.
10.4.4 Cash Receipts Report
10.4.1 The Cash Receipts Report shows all payment received during
the selected date range and invoices to which it was applied and in
what amount.
10.4.5 Franchise Interest Fee Report
10.4.5.1 The Franchise Interest Fee Report shows the detail of the
interest charged on overdue accounts.
10.4.6 Customer Statement Report
10.4.6.1 The Customer Statement Report creates a statement for
each customer with outstanding invoices showing a total balance
owed.
10.4.7 Unapplied Case Receipts Report
10.4.7.1 The Unapplied Case Receipts Report shows all cash receipts
by customer which have not been applied to any invoice
10.5 Employee Reports
10.5.1 Work History By Employee
10.5.1.1 Displays all employee hours for a given employee for a
given date range. Allows you to see all customers that an employee
has worked at over a certain time frame.
10.5.2 Monthly Employee Anniversary Report

HQWebConnect Manual Reports
10-10
Imp: 06/01/2017

HQWebConnect Manual Reports
10-11
Imp: 06/01/2017
10.5.2.1 Displays all employees with a hire date in the month
selected showing date of hire, last activity and anniversary date.
10.5.3 Employee Transfers Report
10.5.3.1 Displays all employees transferred into the branch during
the date range selected.
10.5.4 New Hire Report
10.5.4.1 Displays all new hires for a given date range. Can be used to
track recruiting efforts effectiveness.
10.5.5 New Hire Checklist Report
10.5.5.1 Display the new hires during the selected time frame and
the document that have been completed on the employee’s
checklist in the employee record.
10.5.6 All Employees Report (Mailing)
10.5.6.1 Displays Employee General Information in report format.
Can be run for one or all employees. Can be used to mail information
to employees.
10.5.7 Monthly Employee Birthday Report
10.5.7.1 Displays all Employees who have birthdays in a selected
month. Can be used to as a reference to celebrate active employee’s
birthdays.
10.5.8 Employee SSN Change history
10.5.8.1 Display all employees who’s SSN has changed during the
date range selected showing the old and new SSN and who made
the change.
10.5.9 Employee Comp Claims Notes Report
10.5.9.1 Shows the notes on workers compensation claims with a
reminder or due date after the selected date.
10.5.10 Workers Comp Notes Report By Claim Date
10.5.10.1 Displays all worker’s compensation claim notes made
during the selected date range.
10.5 11 Employee Comp Claims In-House Checks Report
10.5.11.1 Display the amount of all Workers Compensation claims
paid by In-House check vice being submitted to the insurance
carrier.
10.5.12 Employee Wage Summary

HQWebConnect Manual Reports
10-12
Imp: 06/01/2017
HQWebConnect Manual Reports
10-13
Imp: 06/01/2017
10.5.12.1 Displays a breakdown of all wages earned during the
selected date range.
10.5.13 Onboarding I-9 Status
10.5.13.1 Display all employees who need to have action taken on
their I-9.
10.5.14 ACA Estimates Report
10.5.14.1 Display a list of employees who may become eligible for
ACA based on their estimated yearly hours worked.
10.5.15 ACA eligible Employees
10.5.15.1 Displays a list of employees who are eligible for ACA who
are pending a response.
10.5.16 First Data Paycards Assigned
10.5.16.1 Displays a list of all First Data Paycards Assigned during
the date range selected and who they were assigned by.
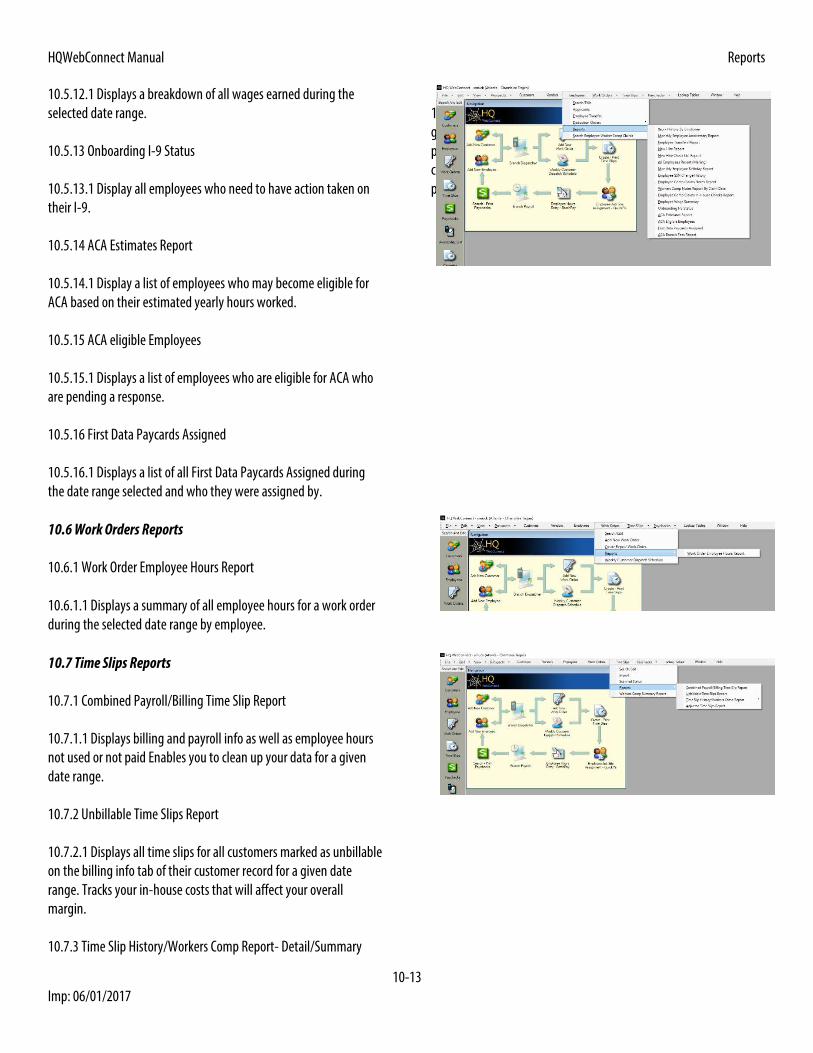
10.6 Work Orders Reports
10.6.1 Work Order Employee Hours Report
10.6.1.1 Displays a summary of all employee hours for a work order
during the selected date range by employee.
10.7 Time Slips Reports
10.7.1 Combined Payroll/Billing Time Slip Report
10.7.1.1 Displays billing and payroll info as well as employee hours
not used or not paid Enables you to clean up your data for a given
date range.
10.7.2 Unbillable Time Slips Report
10.7.2.1 Displays all time slips for all customers marked as unbillable
on the billing info tab of their customer record for a given date
range. Tracks your in-house costs that will affect your overall
margin.
10.7.3 Time Slip History/Workers Comp Report- Detail/Summary
10.7.3.1 Summary report displays all current customers within a
given date range: hours, payroll, comp code, and workers comp.
premium. Detail shows each time slip and the cost for worker’s
comp associated with it. Shows gross payroll, comp rates, and comp
premiums for each comp code.

HQWebConnect Manual Reports
10-14
Imp: 06/01/2017

HQWebConnect Manual Reports
10-15
Imp: 06/01/2017
10.8 Paycheck Reports
10.8.1 Check Register
10.8.1.1 Displays all checks including vendor checks and employee
paychecks Used for bank reconciliations
10.8.2 Periodic Payroll Register
10.8.2.1 Displays all paychecks for each employee
10.8.3 Periodic Payroll Register by Employee
10.8.3.1 Displays all paychecks for a selected employee. Click
Employee ID link to search for an employee. You can also see all
voided checks for an employee. An employee earnings history report
to provide to the employee or to an agency requesting the
information
10.8.4 Summary Payroll Register
10.8.4.1 Displays a condensed version of the payroll register.
10.8.5 Direct Deposit Report
10.8.5.1 Displays all employees who are on direct deposit who have
a deposit pending for the selected deposit date.
10.8.6 Paycheck Deduction Report
10.8.6.1 Displays all deductions taken out of paychecks for a given
date range. Tracks deductions made for a period of time.
10.8.7 Employee Hours Deduction Report
10.8.7.1 Displays a summary of all payroll deductions by deduction
type for the date range selected. I can also be run for a specific
deduction type if desired.
10.8.8 Misc. Pay Report
10.8.8.1 Shows all misc. pay from paychecks for a given date range.
Tracks all misc. pay made for a given period of time.
10.8.9 GL Summary Report
10.8.9.1 Displays the GL Summary (Net Payroll) for a given date
range. Calculates all payroll expenses to help control margins.
10.8.10 Certified Payroll Report
10.8.10.1 Creates the report that customers may require for certified
payroll. Enter in a Payroll Number (corresponds to a week number
ranging 1-52) and a week start date to display certified payroll for a
week. May enter a Customer ID to show this report at an individual

HQWebConnect Manual Reports
10-16
Imp: 06/01/2017

HQWebConnect Manual Reports
10-17
Imp: 06/01/2017
customer level or leave it blank to prink all certified payroll reports
for a given week. A report for customers identified as requiring
certified payroll ready to print, sign, and include with invoicing each
week.
10.8.11 Overtime Report
10.8.11.1 Displays all employees that have worked greater than a
given number of hours for a given date range. Helps identify
employees who are near overtime status. Running this report near
the end of the week can reduce unbillable overtime costs
dramatically.
10.8.12 Employee W2s Report
10.8.12.1 Displays the information required to print the employees
W-2 on the company provided forms. (note: the employer of record
is Hire Quest LLC)
10.9 Franchise Reports
10.9.1 Franchise All Customer Report
10.9.1.1 Displays all customers for the franchise in a report format
with contact addresses and phone numbers and date added fields.
To be used for a quick reference when the computer may be down or
to use in mass mailings to all customers.
10.9.2 Franchise All Customer Jobsites Report
10.9.2.1 Displays all customers and job sites for the franchise in a
report format with contact addresses and phone numbers and date
added fields. To be used for a quick reference when the computer
may be down or to use in mass mailings to all customers.
10.9.3 Franchise New Customer Jobsites Report
10.9.3.1 Displays all New Jobsites in a contact format. Can be used to
verify Address, sales person and comp code.
10.9.4 Franchise Proposed Payroll Billing Report
10.9.4.1 The Franchise Proposed Payroll Billing Report displays all
customers and jobsites for which there is a work order and time slips
generated for the whole franchise. If the employees have been paid
the number of hours will be indicated along with all the other
payroll information.
10.9.5 Franchise Sales Activity Report
10.9.5.1 The Franchise Sales Activity Report shows all sales activity
for the sales reps broken down by branch for the selected date
range.
10.9.6 Franchise Sales Summary Commission Report

HQWebConnect Manual Reports
10-18
Imp: 06/01/2017

HQWebConnect Manual Reports
10-19
Imp: 06/01/2017
10.9.6.1 The Franchise Sales Summary Commission Report shows
the number of customers billed, hours billed and amount billed by
sales representative by branch.
10.9.7 Franchise Sales Commission Report
10.9.7.1 Details the sales commissions by sales representative
broken down by branch for the selected date range.
10.9.8 Franchise In-House Expense Report
10.9.8.1 The Franchise In-House Expense Report shows the in-house
expenses such as driver pay, car pool, cash advances etc. broken
down by branch for the date range selected.
10.9.9 Franchise RMIP (Risk Management Incentive Program) Report
10.9.9.1 The Franchise RMIP Report shows the total paid, reserves,
incurred costs, premium and a RMIP amount and can be used to
estimate possible RMIP annually.
10.9.10 Franchise A/R Ageing Report
10.9.10.1 The Franchise A/R Ageing Report shows all outstanding
invoices by customer and jobsite sorted from oldest to newest and
shows where the receivable is on a time line between 0 and 84 days
for the franchise.
10.9.11 Franchise A/R Ageing Report by Sales Rep
10.9.11.1The Franchise A/R Ageing Report by Sales Rep shows all
outstanding invoices by customer and jobsite sorted from oldest to
newest and shows where the receivable is on a time line between 0
and 84 days for the franchise. Grouped by sales representative.
10.9.12 Franchise Jobsite Variable Status Report
10.9.12.1 Shows the variable/non-variable status of all jobsites
added during the date range selected for each franchise location.

HQWebConnect Manual Invoicing and Billing
11-1
Imp: 06/01/2017
11. Billing and Invoicing
11.1 Scanning of Time Tickets
11.1.1 Scanning of the time tickets or time sheets should be done daily,
if possible. This ensures you have collected all tickets when beginning
the billing process the next Monday. The following are the instructions
of scanning a time ticket/time sheet:
11.1.2 Once all docs have scanned, from HQ Webconnect select:
“Time Slips”
“Import”
“Set Path” (select the place where you saved your scanned
tickets)
11.1.3 Your tickets will begin importing. Once imported, ensure time
slip ID is correct with the image by clicking “View Image.” If so, enter
the hours from the ticket into the hour’s box and if ticket is signed,
check the “Signed” box.
11.1.4 If you have one time slip for multiple time slip ID’s, click
“MULTI”. You will then see the figure 11.2 Select the Customer that the
time slip applies to, the work start and work end dates. Click “Search”
and a list should show up in the left box. You should then choose the
time slip ID’s that you want in the Left Block. The Middle Block will
show the employees on the time slips you selected in the left box. The
Right box will show the Time slips you have selected. You will then
need to put in the hours for each of those time slips. Once they are all
filled out, click OK, it will show you a message saying “you selected
__number__ of time slips totaling __number__ of hours, is
this ok?” Select “Yes”. Then, Click “OK” at the bottom.
11.1.5 If the time sheet is a custom time sheet (sheet other than a ticket
with a time slip number) check the box that says “Custom Time Slip.”
If that custom time sheet contains multiple employees that are
associated with different time slip numbers you can choose to have only
1 image present for all those specific time ticket #’s when the invoice is
printed. Do so by unchecking “Print with Invoice” on all employees
on custom slip except one; otherwise, in the instance of 15 employees
on 1 custom time sheet, the computer may create 15 copies of that one-
time sheet when the invoice is generated.
11.1.6 Once hours are entered and all signed boxes are checked, click
“Upload” at bottom right of the screen. If file uploaded successfully, it
will permanently be stored in HQ.
11.1.7 These procedures should be followed with every ticket for every
day of the billing week.
NOTE, it will save you tons of time if your ticket printer has a
good ribbon for the QR code to be properly read. Additionally,
you should ensure there is proper alignment of the print. The
QR code needs to be in between the 2 blue lines for it to be read
by the scanner

HQWebConnect Manual Invoicing and Billing
11-2
Imp: 06/01/2017
Figure 11.2

HQWebConnect Manual Invoicing and Billing
11-3
Imp: 06/01/2017
11.2 Invoicing Procedures
11.2.1 The first step in the billing process is to review the Proposed
Payroll Billing Report. Go to “Customers”, “Invoices”, “Proposed
Payroll Billing Report” and then enter the from and to dates for the
previous week.
11.2.2 Review the report and ensure your Pay Rates, Bill Rates and
Margins are all correct. Make any corrections as necessary before
invoicing. Save this report to use during Invoicing.
11.2.3 The next step is to check the Scanned Status of your time slips,
this can be done
by selecting “Time Slips”, “Scanned Status”, enter the start and end
dates for the previous week and select search the status of all tickets
will be displayed. If you select “Hide Scanned before searching, only
those tickets that need to be scanned will be displayed.
11.2.4 Upon completion of scanning all tickets, it’s now time to create
the proposed invoices.

HQWebConnect Manual Invoicing and Billing
11-4
Imp: 06/01/2017

HQWebConnect Manual Invoicing and Billing
11-5
Imp: 06/01/2017
11.2.5 From the top of the main menu, select “Customers,
“Invoices,” then “Create Proposed Invoices.”
11.2.6 Invoices are created by Customer and By Job Site. Use the
Proposed Payroll Billing Report to determine which customers and Job
Sites need to be invoiced.
11.2.7 For each customer in the report, type in the customer id of the
customer to bill. If there are specific job sites, click the blue job site link,
select the appropriate site then click “Get Hours.” Your unbilled time
slips for that customer and job site will be displayed.
11.2.8 All time slips with hours will now show so select all slips that are
to be billed by individually checking each or click “Select All” at the
bottom left of the page. At this point, add total hours on physical
tickets with a calculator to ensure those hours match with selected
hours on screen. If there is overtime hours check to ensure that the
hours are billable and adjust accordingly.
11.2.9 If hours or are incorrect or unbillable, right click the appropriate
time ticket and select “Adjust Billing Hours.” Make necessary hours
or bill rate adjustments in the pre-invoice adjustment row. In the
reasoning box, type in why you made the adjustment. Click “Ok.”
11.2.10 Once you are satisfied with the billable hours, select “Create
Proposed Invoices.”
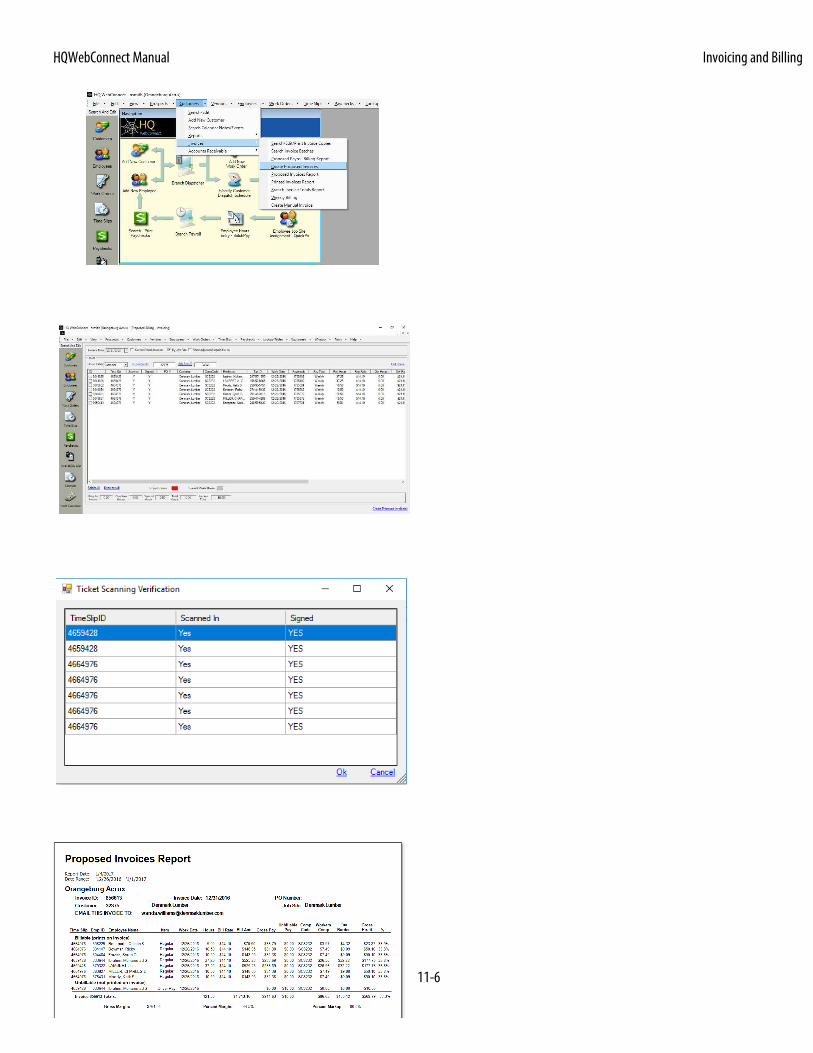
11.2.11 The Ticket Scanning Verification page will now be displayed
and will show all tickets that were just billed and whether each was
scanned in and had a verified signature.
11.2.12 If any section says no, you can’t proceed. Go back and repeat
the scanning ticket and adding processes sections as stated above.
Once again, select “Create Proposed Invoices” and continue to the
ticket scanning verification page. If all is now scanned and signed,
select “Ok.”
11.2.13 Once all invoices have been created verify correctness, by
reviewing the Proposed Invoices Report.
11.2.14 Choose “Customers,” “Invoices,” then “Proposed Invoices
Report.” Select the appropriate date parameters (previous Monday
through Sunday) to print a screen copy of the invoices report. There are
3 items to check in this process:
Item (ensuring regular/overtime is correct)
Bill Rate (charging proper rates to customers)
Profit Margin % (ensuring margins are exact, if not,
understanding why they aren’t)
HQWebConnect Manual Invoicing and Billing
11-6
Imp: 06/01/2017

HQWebConnect Manual Invoicing and Billing
11-7
Imp: 06/01/2017
11.2.15 Once the Proposed Invoices Report has been a reviewed, select
“Customer,” “Invoices,” then “Weekly Billing.” All invoices you
just created will appear on the screen.
11.2.16 Begin by ensuring the start and end dates are correct. Next,
glance through each created invoice to ensure all detailed information
is correct. If the invoice is highlighted in red there is a difference
between the invoiced hours and the hours invoiced.
11.2.17 Click on the highlighted invoice and the right click over the line
and select “Open Details”. This will show you any time slips that need
correction. By selecting the time slip and right clicking you can open the
time slip and determine where the error is.
11.2.18 Once all invoices are verified, click “Select All” and “Save” and
the proposed invoices will be created. Additionally, this step allows the
billing department at corporate to have knowledge of the completion
of the branch billing process.
11.2.19 Upon your completion of the verification HQ Webconnect will
then send notification to the billing department that your invoices are
ready to be checked and printed!

HQWebConnect Manual Invoicing and Billing
11-8
Imp: 06/01/2017