Embed Size (px)
Citation preview

Using the Kintana Workbench
Version 5.0.0Publication Number: UsingWorkbench-0603A

Kintana, Inc. and all its licensors retain all ownership rights to the software programs and related documentation offered by Kintana. Use of Kintana’s software is governed by the license agreement accompanying such Kintana software. The Kintana software code is a confidential trade secret of Kintana and you may not attempt to decipher or decompile Kintana software or knowingly allow others to do so. Information necessary to achieve the interoperability of the Kintana software with other programs may be obtained from Kintana upon request. The Kintana software and its documentation may not be sublicensed and may not be transferred without the prior written consent of Kintana.
Your right to copy Kintana software and this documentation is limited by copyright law. Making unauthorized copies, adaptations, or compilation works (except for archival purposes or as an essential step in the utilization of the program in conjunction with certain equipment) is prohibited and constitutes a punishable violation of the law.
THIS DOCUMENTATION IS PROVIDED “AS IS” WITHOUT WARRANTY OF ANY KIND. IN NO EVENT SHALL KINTANA BE LIABLE FOR ANY LOSS OF PROFITS, LOSS OF BUSINESS, LOSS OF USE OR DATA, INTERRUPTION OF BUSINESS, OR FOR INDIRECT, SPECIAL, INCIDENTAL, OR CONSEQUENTIAL DAMAGES OF ANY KIND, ARISING FROM ANY ERROR IN THIS DOCUMENTATION.
Kintana may revise this documentation from time to time without notice.
Copyright © 1997, 1998, 1999, 2000, 2001, 2002, 2003 Kintana, Incorporated. All rights reserved.
Kintana, Kintana Deliver, Kintana Create, Kintana Drive, Kintana Dashboard, Kintana Accelerator, Kintana Demand Management (DM), Kintana Portfolio Management (PFM), Kintana Program Management Office (PMO), Kintana Enterprise Change Management (ECM), Object*Migrator, GL*Migrator and the Kintana logo are trademarks of Kintana, Incorporated. All other products or brand names mentioned in this document are the property of their respective owners.
Kintana Version 5.0.0
© Kintana, Incorporated 1997 - 2003All rights reserved. Printed in USA
Kintana, Inc.1314 Chesapeake Terrace, Sunnyvale, California 94089
Telephone: (408) 543-4400Fax: (408) 752-8460
http://www.kintana.com
ContentsUsing the Kintana Workbench
Chapter 1Introduction .................................................................................................................. 1
Users Who Should Read This Guide .....................................................................................2Licensing and Functionality ..............................................................................................2
How to Use This Guide ........................................................................................................2
Browser Considerations .......................................................................................................3Netscape 7 and the Kintana Workbench...........................................................................3Pop-Up Blockers..............................................................................................................3Java Plug-In Defaulting Issues...........................................................................................3
Additional Resources ...........................................................................................................5Kintana Documentation..............................................................................................5
Kintana Business Application Guides....................................................................5User Guides ........................................................................................................6Kintana Application Reference Guides..................................................................6Kintana Instance Administration Guides ...............................................................7External System Integration Guides: .....................................................................7Kintana Solution Guides ......................................................................................7Kintana Accelerator Guides .................................................................................7
Kintana Services ........................................................................................................8Kintana Education .....................................................................................................8Kintana Support ........................................................................................................8
Chapter 2Navigating Screens..................................................................................................... 11
Screen Groups and Screens ...............................................................................................11Kintana Create Screen Group ........................................................................................14
Reports ...................................................................................................................15DSS Reports ............................................................................................................15Contacts .................................................................................................................15Request Types..........................................................................................................15Request Header Types..............................................................................................16
Kintana Drive Screen Group ..........................................................................................16Projects ...................................................................................................................17Reports ...................................................................................................................18DSS Reports ............................................................................................................18
Kintana 1
Project Templates.....................................................................................................18Calendars ...............................................................................................................18
Kintana Deliver Screen Group ........................................................................................18Packages ................................................................................................................20Reports ...................................................................................................................20DSS Reports ............................................................................................................20Releases..................................................................................................................20Environment Refresh ................................................................................................20Object Types ...........................................................................................................21
Dashboard Screen Group ..............................................................................................21Portlet .....................................................................................................................22
Environments Screen Group ...........................................................................................22Environments...........................................................................................................23Environment Groups ................................................................................................24
Configuration Screen Group ..........................................................................................24Workflows ..............................................................................................................26Validations .............................................................................................................26User Data ...............................................................................................................27Special Commands..................................................................................................27Notification Templates .............................................................................................27Report Types ...........................................................................................................27
Sys Admin Screen Group...............................................................................................28Users ......................................................................................................................28License....................................................................................................................29Security Groups.......................................................................................................29Server Tools ............................................................................................................29
Menu Navigation ..............................................................................................................30
Chapter 3Navigating Detail Windows ........................................................................................ 31
Navigating Between Detail Windows .................................................................................31Searching for Entities and Using Advanced Searches .......................................................34
Query Tab ..............................................................................................................35Advanced Query ...............................................................................................36
Results Tab..............................................................................................................37Saved Queries ..............................................................................................................38
Saving a Query.......................................................................................................38Using a Saved Query ..............................................................................................39Deleting a Saved Query ...........................................................................................39
Entity-Dependent Menus ....................................................................................................39Request Type Menu .......................................................................................................39Project Menu.................................................................................................................40Package Menu ..............................................................................................................41Distribution Menu..........................................................................................................41Environment Menu ........................................................................................................42
Kintana2

Notification Templates Menu ..........................................................................................42
Chapter 4Workbench Settings .................................................................................................... 43
User Profiles......................................................................................................................43User Profiles Window - General Tab...............................................................................43User Profiles Window - Workflow Status Tab...................................................................44User Profiles Window - Package Tab ..............................................................................45
Regional Settings...............................................................................................................46
Server Settings ..................................................................................................................47
Appendix AField Formats .............................................................................................................. 49
Text Areas/Text Fields ........................................................................................................49
Auto-Complete Lists ............................................................................................................50Multi-Select Auto-Complete List.......................................................................................51
Drop Down List ..................................................................................................................54
Check Boxes ......................................................................................................................55
Radio Buttons.....................................................................................................................55
Dates.................................................................................................................................55
Arrows ..............................................................................................................................56
Lists ...................................................................................................................................57
Kintana 3

Kintana4

Using the Kintana Workbench
Chapter
Introduction
The Kintana Product Suite features two interfaces: the Kintana interface and the Kintana Workbench interface. The Kintana interface uses HTML and Javascript to provide users with access to many key areas of functionality. The Kintana interface lets users of each product in the suite perform common tasks without requiring a Power License.
The Kintana Workbench is a Java applet designed to help Kintana Administrators, product configuration experts, and Power Users to perform advanced configuring and processing tasks, such as creating entities (like Request Types, Object Types, and Workflows). The Kintana Workbench can also query detailed information on a specific entity, such as a particular Package. Most entities within the Kintana Product Suite can be accessed through the Workbench.
The Workbench is used to:
• Create and configure Kintana entities such as Request Types, Object Types, and Workflows.
• Define Environments for your distribution and deployment processes.
• Configure field validations and logic.
• Create Project plans in Kintana Drive.
• Set user access and security through licensing and entity configuration.
• Create custom Reports and synchronize them with the Reporting Meta Layer.
• Manage your Kintana instances using the Migrator Object Types.
Introduction 1

Using the Kintana Workbench
Users Who Should Read This GuideThis guide is intended for the following sets of users:
• Users who configure the Kintana application for:
o Request resolution
o Distribution and deployment
o Other Workflow-based systems
• Users who create and manage Projects
• Users who create and process Packages
• Users who create and manage Releases
• Users who configure and maintain portlets
• Users who maintain Kintana instances along with user setup and screen access
• Users who maintain the Kintana database, server and web server
• Users who maintain LDAP and any other third-party integration
Licensing and FunctionalityOnly users with a Power license can access the Kintana Workbench. If you need access to the Kintana Workbench, contact your Kintana Instance Administrator.
How to Use This GuideThis guide will help you to better understand and navigate through the Kintana Workbench interface. This document contains the following chapters:
• Navigating Screens — Explains navigation between screen groups in the Kintana Workbench, as well as navigation using the NAVIGATE menu.
• Navigating Detail Windows — Gives the details on navigating to specific detail windows in the Kintana Workbench. Entity-dependent menus like the REQUEST TYPE and DISTRIBUTION menus are also discussed.
2 Introduction
Using the Kintana Workbench
• Workbench Settings — Explains the regional and other settings for the Kintana Workbench that can be configured on a per-user basis.
• Field Formats — Discusses each field format in the Kintana Workbench and how it is used, such as auto-complete fields, text areas, and drop down lists.
Browser ConsiderationsThe following browser-specific issues may impact your use of the Workbench:
• Netscape 7 and the Kintana Workbench
• Pop-Up Blockers
• Java Plug-In Defaulting Issues
Netscape 7 and the Kintana WorkbenchIf you are using Netscape 7, ensure that the COMPARE THE PAGE IN THE CACHE TO THE PAGE ON THE NETWORK setting is not set to NEVER. If it is set to NEVER, the Kintana Workbench will not open.
This setting can be reached from the PREFERENCES dialog in the ADVANCED -> CACHE settings.
Pop-Up BlockersIf you have installed a pop-up blocker on your web browser, you will not be able to open the Kintana Workbench, nor will auto-complete lists in the Kintana interface function.
Java Plug-In Defaulting IssuesUsers of the Kintana Workbench may run into issues resulting from the Java Plug-In setting itself as the default JVM for their browser.
• The Kintana Workbench may throw a “class not found” exception error.
This document assumes the user has access to all screen groups and screens. See "Kintana Security Model" for more detailed information on users and screen access.
Introduction 3

Using the Kintana Workbench
• The user may have other applications requiring different versions of the Java Plug-In.
To resolve these issues, remove the default browser associations for all versions of the Java Plug-In.
1. Open your Windows Control Panel and find the Java Plug-In icon. Each Plug-in version will have a icon, but by opening them and inspecting the ABOUT tab you can readily identify the newly installed Java Plugin 1.4.1_02.
2. Click the BROWSER tab and uncheck the default browser associations.
3. After you apply the changes, your other applications will be able to use their desired version of the Java Plug-in and the Workbench will function properly.
4 Introduction
Using the Kintana Workbench
Additional ResourcesKintana provides the following additional resources to help you successfully implement, configure, maintain and fully utilize your Kintana installation:
• Kintana Documentation
• Kintana Services
• Kintana Education
• Kintana Support
Kintana DocumentationKintana product documentation is linked from the Kintana Library page. This page is accessed by:
• Selecting HELP > KINTANA LIBRARY from the Kintana Workbench menu.
• Selecting HELP > CONTENTS AND INDEX from the menu bar on the HTML interface. You can then click the KINTANA LIBRARY link to load the full list of product documents.
Kintana organizes their documents into a number of user-based categories. The following section defines the document categories and lists the documents currently available in each category.
• Kintana Business Application Guides
• User Guides
• Kintana Application Reference Guides
• Kintana Instance Administration Guides
• External System Integration Guides:
• Kintana Solution Guides
• Kintana Accelerator Guides
Kintana Business Application Guides
Provides instructions for modeling your business processes in Kintana. These documents contain process overviews, implementation instructions, and detailed examples.
Introduction 5

Using the Kintana Workbench
• Configuring a Request Resolution System (Create)
• Configuring a Deployment and Distribution System (Deliver)
• Configuring a Release Management System
• Configuring the Kintana Dashboard
• Managing Your Resources with Kintana
• Kintana Reports
User Guides
Provides end-user instructions for using the Kintana products. These documents contain comprehensive processing instructions.
• Processing Packages (Deliver) User Guide
• Processing Requests (Create) User Guide
• Processing Projects (Drive) User Guide
• Navigating the Kintana Workbench:Provides an overview of using the Kintana Workbench
• Navigating Kintana:Provides an overview of using the Kintana (HTML) interface
Kintana Application Reference Guides
Provides detailed reference information on other screen groups in the Kintana Workbench. Also provides overviews of Kintana’s command usage and security model.
• Reference: Using Commands in Kintana
• Reference: Kintana Security Model
• Workbench Reference: Deliver
• Workbench Reference: Configuration
• Workbench Reference: Create
• Workbench Reference: Dashboard
6 Introduction
Using the Kintana Workbench
• Workbench Reference: Sys Admin
• Workbench Reference: Drive
• Workbench Reference: Environments
Kintana Instance Administration Guides
Provides instructions for administrating the Kintana instances at your site. These documents include information on user licensing and archiving your Kintana configuration data.
• Kintana Migration
• Kintana Licensing and Security Model
External System Integration Guides:
Provides information on how to use Kintana’s open interface (API) to access data in other systems. Also discusses Kintana’s Reporting meta-layer which can be used by third party reporting tools to access and report on Kintana data.
• Kintana Open Interface
Kintana Solution Guides
Provides information on how to configure and use functionality associated with the Kintana Solutions. Each Kintana Solution provides a User Guide for instructions on end-use and a Configuration Guide for instructions on installing and configuring the Solution.
Kintana Accelerator Guides
Provides information on how to configure and use the functionality associated with each Kintana Accelerator. Kintana Accelerator documents are only provided to customers who have purchased a site-license for that Accelerator.
Introduction 7

Using the Kintana Workbench
Kintana ServicesKintana is a strategic partner to its clients, assisting them in all aspects of implementing a Kintana technology chain - from pilot project to full implementation, education, project turnover, and ongoing support. Our Total Services Model tailors solution and service delivery to specific customer needs, while drawing on our own knowledgebank and best practices repository. Learn more about Kintana Services from our Web site:
http://www.kintana.com/services/services.shtml
Kintana EducationKintana has created a complete product training curriculum to help you achieve optimal results from your Kintana applications. Learn more about our Education offering from our Web site:
http://www.kintana.com/services/education/index.shtml
Kintana SupportKintana provides web-based interactive support for all products in the Kintana product suite via Contori.
http://www.contori.com
Login to Contori to enter and track your support issue through our quick and easy resolution system. To log in to Contori you will need a valid email address at your company and a password that will be set by you when you register at Contori.
Kintana provides documentation updates in the Download Center section of the Kintana Web site (http://www.kintana.com/support/download/download_center.htm).
A username and password is required to access the Download Center. These were given to your Kintana administrator at the time of product purchase. Contact your administrator for information on Kintana documentation or software updates.
8 Introduction

Using the Kintana Workbench
Introduction 9

Using the Kintana Workbench
10 Introduction

Using the Kintana Workbench
Chapter
Navigating Screens
This chapter describes the different ways of navigating between the screens and screen groups in the Kintana Workbench. See the following sections for more detailed information:
• Screen Groups and Screens
• Menu Navigation
Screen Groups and ScreensKintana administration and configuration is performed in the Kintana Workbench by accessing the functions available in the various screen groups. The CONFIGURATION and SYS ADMIN screen groups, which appear as tabs located on the left side of the application, provide features which are common across all Kintana products. Functions inside the Kintana DELIVER, Kintana DRIVE, and Kintana CREATE screen groups are specific to their respective products. The Kintana DASHBOARD screen group lets the Kintana Administrator create custom Portlets.
Each screen group contains a sets of screens, which consist of an entity workbench window and any number of detail windows. Screens are represented as icons below the screen groups, and perform end-user as well as configuration functions. Figure 2-1 illustrates a screen group, screen, workbench window, and detail window.
In the Kintana Create screen group, the Reports screen allows users to create and submit Reports, while the Request Types screen is used to create and configure Request Types.
Navigating Screens 11

Using the Kintana Workbench
Figure 2-1 Screen Group, Screen, Workbench Window, and Detail Window
Clicking on a screen group opens a different set of screens.
Create Screen Group
Request Types screen
Request TypeWorkbench
Request TypeDetail Window
12 Navigating Screens

Using the Kintana Workbench
Figure 2-2 Different Screen Groups and Screens
The following sections discuss each screen group in more detail:
• Kintana Create Screen Group
• Kintana Drive Screen Group
• Kintana Deliver Screen Group
• Dashboard Screen Group
Drive Screen Group Create Screen Group
Create ScreensDrive Screens
Depending on your level of access to the system, certain screen groups or screens may not be available to you. This guide discusses all available screen groups and screens.
Navigating Screens 13
Using the Kintana Workbench
• Environments Screen Group
• Configuration Screen Group
• Sys Admin Screen Group
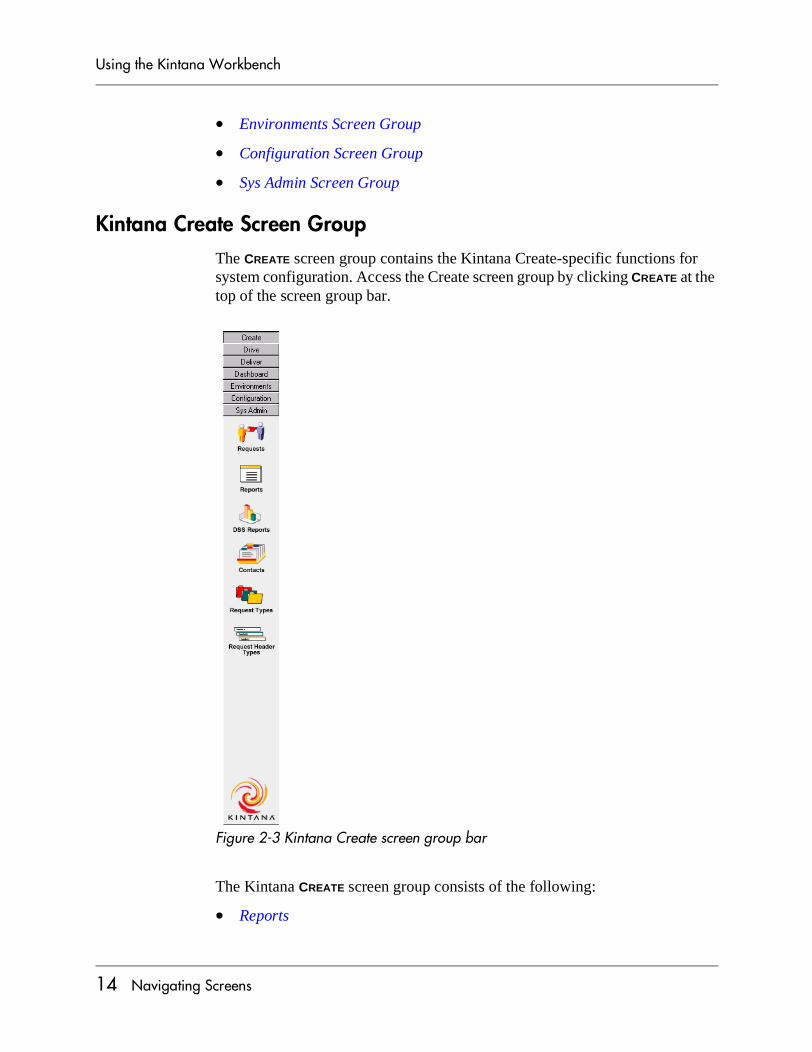
Kintana Create Screen GroupThe CREATE screen group contains the Kintana Create-specific functions for system configuration. Access the Create screen group by clicking CREATE at the top of the screen group bar.
Figure 2-3 Kintana Create screen group bar
The Kintana CREATE screen group consists of the following:
• Reports
14 Navigating Screens

Using the Kintana Workbench
• DSS Reports
• Contacts
• Request Types
• Request Header Types
ReportsThe REPORTS WORKBENCH window is used to run standard and custom Kintana Create reports. These include reports regarding system set-up, specific configurations, as well as end user reports such as Request Details or Contact Details.
For more detailed information on running reports, see "Processing Requests".
DSS ReportsSimilar to the REPORTS screen, this function is used to run and view end user Decision Support System (DSS) graphical reports.
For more detailed information on running reports, see "Processing Requests".
ContactsThe CONTACTS WORKBENCH window is used to quickly generate new contacts as well as edit existing contact information. Standard information is collected in the CONTACT window, such as LAST NAME and PHONE NUMBER. The CONTACT window can also be configured to capture additional information by using the User Data functionality.
For more information on the Contacts interface, see "Create Workbench Reference".
Request TypesA Request Type is a type of template that defines the nature of a Request in Kintana Create. A few of the available system Request Types are Bug, Enhancement Request, and Patch Request. The fields that appear when a Request is generated are based on the Request Type. The base install of Kintana Create includes default Request Types which can be customized. Custom Request Types can also be created from scratch. Additionally, the Request Type is used to determine the default Workflow through which a Request will be routed.
For more detailed information on setting up Request Types, see "Configuring a Request Resolution System".
Navigating Screens 15

Using the Kintana Workbench
Request Header TypesSimilar to the REQUEST TYPES screen, the REQUEST HEADER TYPES screen enables Request Headers to be changed to have one of several header field configurations. Request Header Types are used to customize which header fields appear, as well as the layout of these fields.
For more detailed information on setting up Request Header Types, see "Configuring a Request Resolution System".
Kintana Drive Screen GroupThe Kintana DRIVE screen group contains the project management functions for Kintana Drive, as well as the Kintana Drive-specific functions for system configuration. Access the Kintana DRIVE screen group by clicking DRIVE at the top of the screen group bar.
16 Navigating Screens

Using the Kintana Workbench
Figure 2-4 Kintana Drive screen group bar
The Kintana DRIVE screen group consists of the following:
• Projects
• Reports
• DSS Reports
• Project Templates
• Calendars
ProjectsThe Project is the fundamental entity of Kintana Drive. The PROJECT screen contains all of the information that is normally required to manage a Project.
Navigating Screens 17
Using the Kintana Workbench
For more detailed information on Projects, see "Working with Projects".
ReportsUse the REPORTS WORKBENCH window to run standard and custom Kintana Drive reports. These include reports regarding system set-up, specific configurations, and end user reports such as Project Details.
For more detailed information on running reports, see "Working with Projects".
DSS ReportsSimilar to the REPORTS WORKBENCH, the DSS REPORTS WORKBENCH provides the ability to run and view end user Decision Support System (DSS) graphical reports.
For more detailed information on running reports, see "Working with Projects".
Project TemplatesProject Templates are reusable collections of Project parameters and processes that can be applied to any Project. This allows project managers to rapidly create customized project plans. The PROJECT TEMPLATE screen captures basic Project Template information. This information helps to create reusable Project structures and hierarchies.
For more detailed information on working with Project Templates, see "Working with Projects".
CalendarsThe CALENDAR WORKBENCH is an area where project managers can record company and individual working and non-working days. This information is then used by the scheduling engine to aid in determining project start and finish dates.
For more detailed information on setting up calendars, see "Working with Projects".
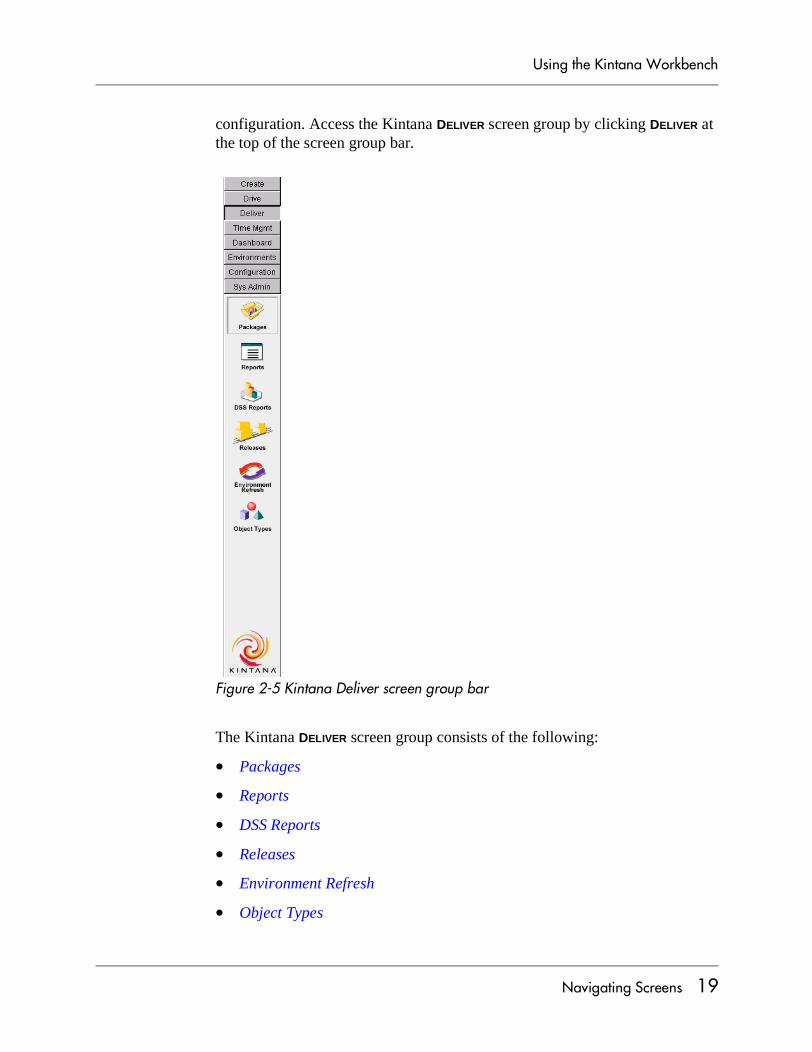
Kintana Deliver Screen GroupThe DELIVER screen group contains both the end user functions for Kintana Deliver as well as the Kintana Deliver-specific functions for system
18 Navigating Screens
Using the Kintana Workbench
configuration. Access the Kintana DELIVER screen group by clicking DELIVER at the top of the screen group bar.
Figure 2-5 Kintana Deliver screen group bar
The Kintana DELIVER screen group consists of the following:
• Packages
• Reports
• DSS Reports
• Releases
• Environment Refresh
• Object Types
Navigating Screens 19
Using the Kintana Workbench
PackagesThe Package is the fundamental entity of Kintana Deliver. The Package contains all of the information needed to process the Package, including the Package Type, priority, and status. The Package also contains a list of all objects to be tracked and/or migrated as the Package moves through the Workflow. Each object is included on a separate Package Line. While each Line can be acted upon separately, the group of Package Lines and objects represents a logical unit that should move and be tracked together. The processing of a Package and Package Lines can vary greatly depending upon the Workflow specified for that Package.
For more detailed information on working with Packages, see "Processing Packages".
ReportsThe REPORTS WORKBENCH window is used to run standard and custom Kintana Deliver reports. These include reports regarding system set-up, specific configurations, and end user reports such as Package Details or Object Migration History.
For more detailed information on running reports, see"Processing Packages".
DSS ReportsSimilar to the REPORTS WORKBENCH, the DSS REPORTS WORKBENCH is used to run and view end user Decision Support System (DSS) graphical reports.
For more detailed information on running reports, see "Processing Packages".
ReleasesUsing the RELEASE screen, Kintana Deliver users can manage and control changes to eBusiness environments by grouping them in scheduled releases. Releases codify best practices and easily manage complex Package dependencies.
For more detailed information on working with Releases, see"Configuring a Release Management System".
Environment RefreshDuring the course of day-to-day application management activity, specific software changes are migrated to various instances in a controlled manner using Kintana Deliver. Kintana Deliver maintains an audit trail of all this activity, providing clear visibility to all the changes for each environment.
20 Navigating Screens

Using the Kintana Workbench
However, there are situations when it is necessary to “refresh” an environment, essentially replacing that environment with a physical copy of another environment.
Following a physical refresh, Kintana Deliver has the ability to update its audit history and its in-process Packages. This update is performed through the ENVIRONMENT REFRESH screen.
For more detailed information on using the Environment Refresh functionality, see "Deliver Workbench Reference".
Object TypesThe OBJECT TYPES screen can be used to define the different types of entities to be controlled and migrated. Object Types are user-configurable. Every Object Type has a unique set of fields that determines the information it requires, as well as any additional information it may accept. Each Object Type can also have associated Commands which determine its behavior as it moves from one Environment, or Environment Group, to another. Commands are used to define what a migration means for each type of Object.
For more information on working with Object Types, see the "Configuring a Deployment System in Kintana" Business Application Guide.
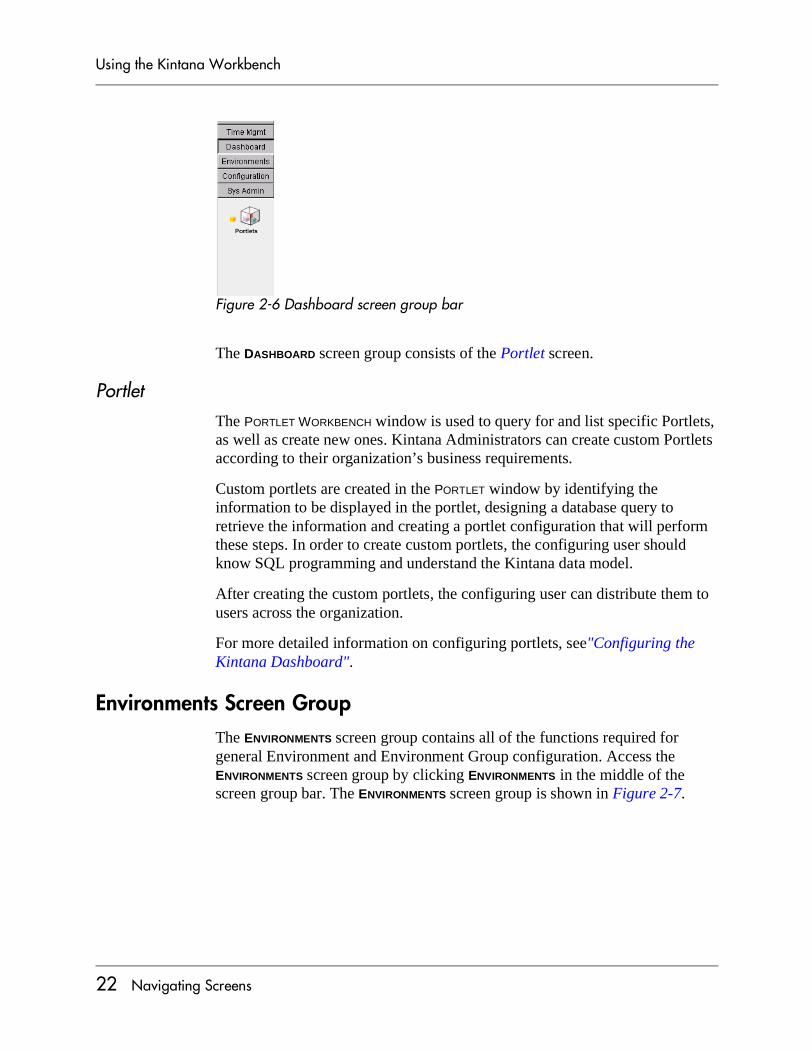
Dashboard Screen GroupThe DASHBOARD screen group contains all of the functions required for creating custom Portlets. Access the DASHBOARD screen group by clicking DASHBOARD in the middle of the screen group bar. The DASHBOARD screen group is shown in Figure 2-6.
A File Object Type might only require the copying of a file while a Database Script Object Type might require both the copying of a file, as well as executing it against the destination database.
Navigating Screens 21
Using the Kintana Workbench
Figure 2-6 Dashboard screen group bar
The DASHBOARD screen group consists of the Portlet screen.
PortletThe PORTLET WORKBENCH window is used to query for and list specific Portlets, as well as create new ones. Kintana Administrators can create custom Portlets according to their organization’s business requirements.
Custom portlets are created in the PORTLET window by identifying the information to be displayed in the portlet, designing a database query to retrieve the information and creating a portlet configuration that will perform these steps. In order to create custom portlets, the configuring user should know SQL programming and understand the Kintana data model.
After creating the custom portlets, the configuring user can distribute them to users across the organization.
For more detailed information on configuring portlets, see"Configuring the Kintana Dashboard".
Environments Screen GroupThe ENVIRONMENTS screen group contains all of the functions required for general Environment and Environment Group configuration. Access the ENVIRONMENTS screen group by clicking ENVIRONMENTS in the middle of the screen group bar. The ENVIRONMENTS screen group is shown in Figure 2-7.
22 Navigating Screens

Using the Kintana Workbench
Figure 2-7 Environments screen group bar
The Kintana ENVIRONMENTS screen group consists of the following:
• Environments
• Environment Groups
EnvironmentsThe ENVIRONMENT screen is used to create and maintain Environments. A Kintana Environment is comprised of a unique combination of server, client, database, and file system information which represents one logical group. Environments are typically used in distribution and deployment systems. For example, the DEV Environment specifies the machines and database that represent the Development instance in the enterprise.
A particular machine may be referenced by more than one Environment. For example, the same UNIX machine might hold the databases for two different Environments, one used for Development and the other for Quality Control.
The Environment server is the main host machine for the Environment. This machine may be of any platform type: UNIX, Windows NT, etc. Typically, the server is a UNIX machine that houses both the application files and the database for this environment.
The Environment client is the remote client machine for the specified Environment. The client is typically defined when users are performing multi-platform development in a client/server environment (some development is done on UNIX, and some on Windows NT). The client may correspond to a file server that stores client code accessed by users.
Navigating Screens 23
Using the Kintana Workbench
For more detailed information on working with Environments, see the "Configuring a Deployment System in Kintana" Business Application Guide or the "Environment Workbench Reference" Application Reference Guide.
Environment GroupsThe ENVIRONMENT GROUPS screen is used to create and maintain Environment Groups. Environment Groups define a set of Kintana Environments that can be referenced as the Sources or Destinations for object migrations. Environment Groups are designed to facilitate the migration of objects to multiple Environments. A Source Environment Group and Destination Environment Group can be specified when configuring a Workflow Execution step.
For more detailed information on working with Environment Groups, see the "Configuring a Deployment System in Kintana" Business Application Guide or the "Environment Workbench Reference" Application Reference Guide.
Configuration Screen GroupThe CONFIGURATION screen group contains all of the functions required for general system configurations of the Kintana Product Suite. Access the CONFIGURATION screen group by clicking CONFIGURATION near the top of the screen group bar.
The terms ‘server’ and ‘client’ are defined very specifically for Kintana Deliver Environments.
24 Navigating Screens

Using the Kintana Workbench
Figure 2-8 Configuration screen group bar
The Kintana CONFIGURATION screen group consists of the following:
• Workflows
• Validations
• User Data
• Special Commands
• Notification Templates
• Report Types
Navigating Screens 25
Using the Kintana Workbench
WorkflowsThe WORKFLOW screen is used to create and maintain Workflows that can potentially be used by all Kintana products. A Workflow consists of a logical series of steps that defines a business process. Business process routing is configurable with the Kintana Product Suite, handling virtually any situation. This allows an organization to generate Workflows to automate existing processes, rather than forcing users to adopt a new set of processes to perform their work.
• For more detailed information on configuring Workflows for Request resolution, see the "Configuring a Request Resolution System" Business Application Guide.
• For more detailed information on configuring Workflows for software deployment and distribution, see the"Configuring a Deployment System in Kintana" Business Application Guide.
• For more detailed information on configuring Workflows for Release Management, see the "Configuring a Release Management System" Business Application Guide.
ValidationsThe VALIDATIONS screen is used to create and maintain Validations in the Kintana system. Validations determine the acceptable values that may be used in user-defined custom fields, such as those found in Request Types, Workflow Steps and Object Types. Validations enforce data integrity by ensuring that the proper information is entered in a field before it is saved to a database. For example, Validations can be used to ensure that no textual information is entered into a numeric field, or that valid dates are entered into a date field.
More complex Validations can be used to verify such information as whether or not a user assigned to a task is a valid Kintana user. These Validations can be based on values returned from a database query or the execution of a system command.
• For more detailed information on configuring Validations for Request resolution, see the "Configuring a Request Resolution System" Business Application Guide.
• For more detailed information on configuring Validations for software deployment and distribution, see the "Configuring a Deployment System in Kintana" Business Application Guide.
26 Navigating Screens
Using the Kintana Workbench
User DataEvery entity (Workflow, Package, Environment, etc.) in the Kintana Product Suite comes with a set of standard fields. Every entity also has the flexibility to hold additional information specific to business processes. The USER DATA screen provides the ability to create fields to capture this additional information.
For more detailed information on configuring User Data, see the User Data chapter in "Configuring a Request Resolution System" or "Configuring a Deployment System in Kintana".
Special CommandsThe SPECIAL COMMANDS screen is used to create and maintain Special Commands. Special Commands are commands with variable parameters used in Object Types, Report Types, and Request Types command steps to perform a variety of functions such as copying files between Environments and establishing connections to Environments for remote command execution. The Kintana Product Suite includes two types of Special Commands:
1. Predefined Special Commands - These commands are read-only and are denoted by the naming convention ‘ksc_command_name’
2. User Defined Special Commands - These commands are defined by the user and denoted by the naming convention ‘sc_command_name’
For more detailed information on configuring and using Special Commands, see "Using Commands and Tokens".
Notification TemplatesNotifications are sent out by Kintana products to let users know the status of a Package, Request, or Project. Notification Templates can be defined for standard messages that may be required on multiple Workflow steps. The NOTIFICATION TEMPLATES screen is used to create and maintain these Templates.
Fore more detailed information on configuring Notification Templates, see "Configuration Workbench Reference".
Report TypesReport Types define the standard or custom reports defined within the Kintana Product Suite. These reports are configurable and can be run by both the administrators and the end users to show information in the system. The reports are run from the Reports or DSS Reports screen and produce textual
Navigating Screens 27
Using the Kintana Workbench
and graphic reports that are viewable through a Web browser. The REPORT TYPES screen is used to create and maintain Report Types.
For more detailed information on working with Report Types, see "Kintana Reports".
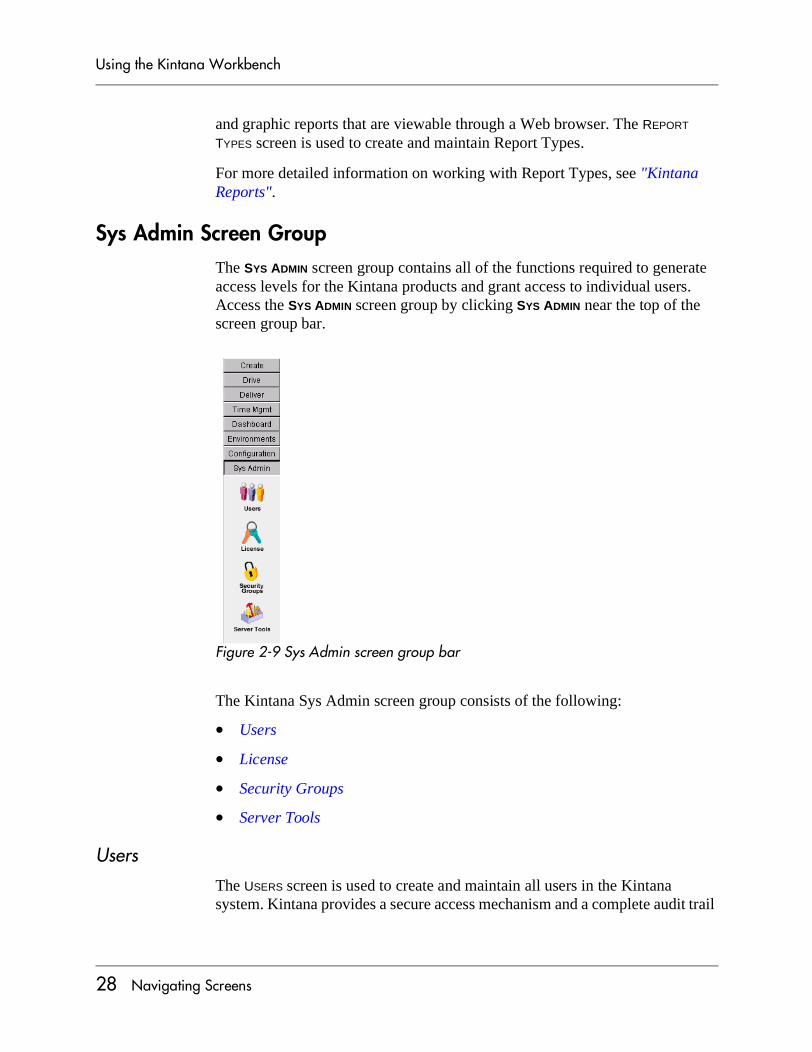
Sys Admin Screen GroupThe SYS ADMIN screen group contains all of the functions required to generate access levels for the Kintana products and grant access to individual users. Access the SYS ADMIN screen group by clicking SYS ADMIN near the top of the screen group bar.
Figure 2-9 Sys Admin screen group bar
The Kintana Sys Admin screen group consists of the following:
• Users
• License
• Security Groups
• Server Tools
UsersThe USERS screen is used to create and maintain all users in the Kintana system. Kintana provides a secure access mechanism and a complete audit trail
28 Navigating Screens

Using the Kintana Workbench
of activity. Each user definition contains essential information about the user, including the user’s email address, start and end dates, the applications for which the user is authorized, and the security groups to which the user belongs.
For more detailed information on creating and working with users, see the “Users and Licensing” Instance Administration Guide.
LicenseThe License Administration window provides a means of assigning licenses to multiple users at once, or modifying the license assignments to already-licensed users.
Security GroupsThe SECURITY GROUPS screen is used to create and maintain Security GRoups. Security Groups provide a means of grouping users together into Workflow access levels. Security Groups are granted access to appropriate steps on an individual Workflow basis. For example, in a sample Workflow DEV->TEST->PROD, the ‘Developers’ security group might be given access to migrate objects to TEST, but not be given access to migrate objects to PROD. Only the ‘Config. Management’ group might be allowed to affect the production instance. Additionally, Security Groups can be used to limit the entities a group of users can modify or create (however, if a user has access to a given product, they can always view all data for that product).
• For more detailed information on working with Security Groups, see "Kintana Security Model".
Server ToolsThe SERVER TOOLS screen provides the ability to view the technical status of the Kintana application server. This screen offers a series of queries against the Kintana server to give information such as connected users and number of database sessions. This screen is primarily for the system administrator to view application activity and trouble-shoot connection problems.
For more detailed information on working with Server Tools, see "Kintana System Administration Guide".
Navigating Screens 29
Using the Kintana Workbench
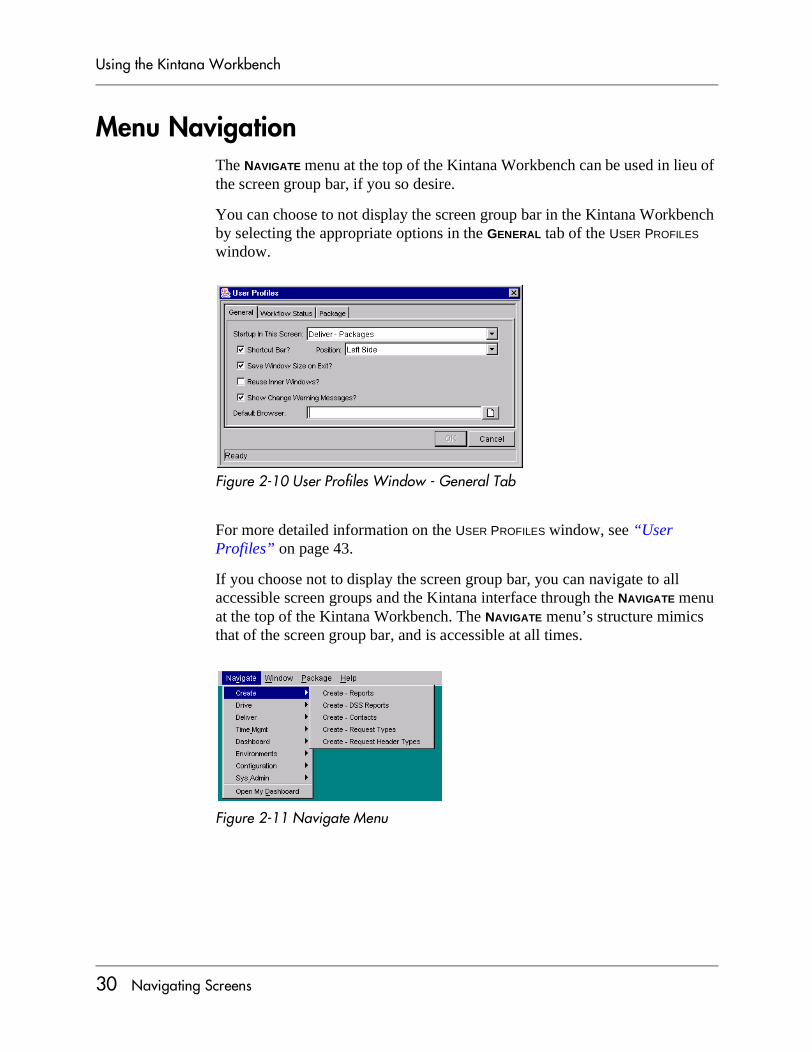
Menu NavigationThe NAVIGATE menu at the top of the Kintana Workbench can be used in lieu of the screen group bar, if you so desire.
You can choose to not display the screen group bar in the Kintana Workbench by selecting the appropriate options in the GENERAL tab of the USER PROFILES window.
Figure 2-10 User Profiles Window - General Tab
For more detailed information on the USER PROFILES window, see “User Profiles” on page 43.
If you choose not to display the screen group bar, you can navigate to all accessible screen groups and the Kintana interface through the NAVIGATE menu at the top of the Kintana Workbench. The NAVIGATE menu’s structure mimics that of the screen group bar, and is accessible at all times.
Figure 2-11 Navigate Menu
30 Navigating Screens
Using the Kintana Workbench
Chapter
Navigating Detail Windows
This chapter describes the different ways of navigating between detail windows in the Kintana Workbench, including discussion of the workbench windows and window buttons. Several Kintana entities also feature additional configuration options accessible from entity-dependent menus at the top of the Workbench; these menus are also discussed. See the following sections for more detailed information:
• Navigating Between Detail Windows
• Entity-Dependent Menus
Navigating Between Detail WindowsScreens in Kintana are reached by clicking their icons in the screen group bar. They typically consist of an entity workbench window and any combination of detail windows.
Examples of entities with workbench windows include:
• Request Types
• Request Header Types
• Projects
• Portlets
• Object Types
• Environments
• User Data
• Validations
Navigating Detail Windows 31
Using the Kintana Workbench
Figure 3-1 Screen Group, Screen, Workbench Window, and Detail Window
Detail windows are reached through the entity workbench window, which consists of a QUERY tab and a RESULTS tab. Figure 3-2 illustrates how to navigate to the detail window for an existing entity from a workbench window.
Create Screen Group
Request Types screen
Request TypeWorkbench
Request TypeDetail Window
32 Navigating Detail Windows

Using the Kintana Workbench
Figure 3-2 Navigating to a detail window
If multiple detail windows have been opened, they can be accessed using the buttons at the bottom of the Workbench.
Request Type WorkbenchQuery Tab
Request Type WorkbenchResults Tab
Request Type Detail Window (Bug)
1. Enter searchcriteria and clickList to see matchingresults.
2. Select the desiredentity and clickOpen to view details.
3. Detail windowopens.
Navigating Detail Windows 33

Using the Kintana Workbench
Figure 3-3 Navigating between multiple open detail windows
For more detailed information on searching for entities, see “Searching for Entities and Using Advanced Searches” on page 34.
For more detailed information on the specific fields in each entity workbench window’s QUERY tab, consult the appropriate Kintana Application Reference Guide for the screen group in question.
Searching for Entities and Using Advanced SearchesThe entity workbench window provides an interface for users to search for a specific entity, such as a Package or Request Header Type. These entities are selected by entering search criteria in the QUERY tab of the workbench, which then returns the matching records in the RESULTS tab of the workbench. The entity workbench window cannot be closed, only minimized.
To search for an entity, you can enter criteria in any combination into the fields in the QUERY tab. Clicking LIST will search for all records that match your
Click to access workbench or detail windows
34 Navigating Detail Windows
Using the Kintana Workbench
criteria and report the results in the RESULTS tab. See the following topics for more detailed information:
• Query Tab
• Results Tab
Query TabThe QUERY tab of a given workbench includes all of the fields that can be used to search for an entity. For example, the Request Type Workbench QUERY tab includes fields that are included in a Request Type.
Figure 3-4 Request Query Tab
Each workbench has one field used to query the primary name for the entity. When searching for the name of an entity, the value entered in the field is case insensitive and can be a partial value. For example, entering “test” in the Request Type Name field returns Request Types with names like ‘TEST Project’ and ‘Testing Case Project.’
The QUERY tab also accepts a wildcard character (“%”) when searching on the entity’s name. This matches against any characters. For example, if you want to query all Request Types with “ample” in their name, you could search by “%ample”. This query returns Request Types with names like ‘Request Type Example’ and ‘Sample Request Type’.
Some workbenches also have a MAX ROWS field. This field limits the number of rows returned by a query. For example, as shown in Figure 3-4, regardless of the total results in the system that match the query parameters, no more than 200 rows will be returned. Decrease the number of maximum rows to yield faster queries.
Navigating Detail Windows 35
Using the Kintana Workbench
Advanced Query
To perform an advanced query, click the ADVANCED tab on the workbench window. This lets you set up custom lists of inclusions and exclusions in your database search. You can set up new conditions, edit a standing condition, enable, disable, and delete individual parts of your advanced query. A search is first done on the information in the query. Whatever results are processed from the simple query are passed through your advanced query.
To create new criteria for an advanced query:
1. Click NEW.
2. In the ADVANCED QUERY window, choose a field from the auto-complete field.
3. Select the condition from the CONDITION drop down list and enter a value to use as the benchmark for your search in the VALUE field.
4. Click ADD to add this logic to your list of parameters.
The list of results will run through each logic on your list, and everything that matches ALL of your logic is displayed. If zero matches are constantly being returned, try being less strict by disabling or removing some of the criteria.
Descriptions of the Boolean operators available in the CONDITION drop down list are shown below.
• LIKE looks for close matches of your value to the contents of the selected field.
• NOT LIKE looks for contents in the selected field that are not close matches to your value field.
• EQUAL TO looks for an exact match of your value to the contents of the selected field.
• NOT EQUAL TO will return all results that are not an exact match of your value to the contents of the selected field.
To use only the advanced query, make sure to leave the simple query tab blank.
36 Navigating Detail Windows

Using the Kintana Workbench
• IS NULL will return all instances in which the selected field is blank.
• IS NOT NULL will return all instances in which the selected field is not blank.
• GREATER THAN looks for a numerical value in excess of the value entered in the Value field.
• LESS THAN looks for a numerical value below the value entered in the Value field.
• GREATER THAN EQUAL TO looks for a numerical value in excess or the same as the value entered in the Value field.
• LESS THAN EQUAL TO looks for a numerical value below or the same as the value entered in the Value field.
Results TabThe RESULTS tab is automatically displayed when a query is submitted by clicking LIST. The RESULTS tab displays all of the records that match the query criteria, along with key data fields for each entity. The results can be sorted on any of the fields by clicking the column header. In the RESULTS tab, you can select any of the returned records (or a range of records) for viewing, copying or modifying.
From the RESULTS tab, the user can proceed to view detailed information on the desired entity (for example, Request Header Type). Select the result and click OPEN to proceed to that entity’s detail window. Click on a record to select it, or use Ctrl-click (press Ctrl while clicking the mouse) to select multiple distinct records. You can also use Shift-click (press Shift key while clicking the mouse) to select a range of records.
The RESULTS tab also provides buttons for executing other common Kintana tasks. From the RESULTS tab, users can also create NEW records, COPY or DELETE existing items, or re-run the query by clicking REFRESH. A sample RESULTS tab is shown in Figure 3-5.
Navigating Detail Windows 37

Using the Kintana Workbench
Figure 3-5 Results Tab
Saved QueriesSaved queries provide a quick method for performing standard, reoccurring searches.
Saving a QueryTo save a search query:
1. Enter the search parameters for your query in the appropriate fields.
2. Click SAVE QUERY. The SAVE QUERY window opens.
3. Enter a unique query name and click SAVE to save the search parameters.
Once the query is saved, you can select the saved query name from the QUERY drop down list at any time.
Each day you query all the Packages that have been assigned in the last day. These query parameters can be saved to avoid entering the same parameters every day.
38 Navigating Detail Windows

Using the Kintana Workbench
Using a Saved QueryTo use a saved search query:
1. Select the saved query name from the QUERY drop down list.
2. Click LIST. The search is run with the saved parameters of your query.
Deleting a Saved QueryTo delete a saved query, choose it from the QUERY drop down list and then select FILE -> DELETE <QUERY NAME> from the menu.
Entity-Dependent MenusCertain Kintana entities have extra configuration or processing options that are accessed through their own menus, which appear at the top of the Kintana Workbench. The menu becomes accessible once the entity’s screen is selected.
The following sections discuss each entity that has such a menu:
• Request Type Menu
• Project Menu
• Package Menu
• Distribution Menu
• Environment Menu
• Notification Templates Menu
Request Type MenuThe REQUEST TYPE menu contains the options described in Table 3-1:
The user that created the saved query is the only user with access to use that saved query.
Navigating Detail Windows 39
Using the Kintana Workbench
Project MenuThe PROJECT menu contains the options described in Table 3-2:
Table 3-1. Request Type Menu Options
Option Description
Request Header Setup Sets a global default Request Header Type and Workflow for any new Request Types. A newly-created Request Type will associate the Request Header Type specified unless a new one is chosen, and any Requests created from that Request Type will use the Workflow specified, unless a different Workflow is indicated in the Request Type RULES tab.
Request Type Category Setup Opens the Request Type Category Validation, enabling users with the proper access to add new values.
Table 3-2. Project Menu Options
Option Description
Import from Microsoft Project Begins the process of importing a Project from Microsoft Project.
Export to Microsoft Project Enabled only when a Project is open, this option begins the process of exporting the open Project to Microsoft Project.
Project History Setup Opens the Project History Setup window, which sets the attributes of Projects that are captured in Transaction Histories. Settings configured in this window apply to all Projects in Drive.
Copy Project URL Enabled only when a Project is open, this option copies the URL of the Project in the Kintana interface to the computer’s clipboard. The URL opens the Project in the Kintana interface.
Copy Project URL (Workbench)
Enabled only when a Project is open, this option copies the URL of the Project in the Kintana Workbench interface to the computer’s clipboard. The URL opens the Project in the Kintana Workbench interface.
40 Navigating Detail Windows
Using the Kintana Workbench
Package MenuThe PACKAGE menu contains the options described in Table 3-3:
Distribution MenuEnabled when the Releases screen group has been clicked, the DISTRIBUTION menu contains the options described in Table 3-4:
Convert Project to Template Enabled only when a Project is open, this option opens the Convert Project to Template window, which controls the conversion of the open Project to a Template.
Table 3-2. Project Menu Options
Option Description
Table 3-3. Package Menu Options
Option Description
Cancel Package Line Enabled only when a Package Line within a Package is selected, this option cancels a Package Line from processing.
Submit Package Enabled only when an un-submitted Package is open, this option submits the Package.
New Package Group Opens the Package and Request Groups Validation, enabling users with the proper access to add new values.
Merge Enabled only when two or more Packages have been selected from the RESULTS tab of the Package Workbench window, this option opens the Merge Package window. This window controls the merging of several Packages into one.
Table 3-4. Distribution Menu Options
Option Description
Cancel Distribution Enabled only when a Distribution is open from the DISTRIBUTION tab of a Release, this option cancels the open Distribution.
Navigating Detail Windows 41
Using the Kintana Workbench
Environment MenuThe ENVIRONMENT menu contains the options described in Table 3-5:
Notification Templates MenuThe NOTIFICATION TEMPLATES menu contains the following option:
• INTERVALS — Opens the NOTIFICATION INTERVALS window, which allows users to add or modify intervals for the sending of Notifications.
Submit Distribution Enabled only when an un-submitted Distribution is open, this option submits the Distribution.
Table 3-4. Distribution Menu Options
Option Description
Table 3-5. Environment Menu Options
Option Description
Update Base Paths Opens the Update Base Paths window, which updates all base paths for the open Environments.
Update Password Opens the Update Environments Password window, which updates all passwords for the open Environment’s hosts.
42 Navigating Detail Windows

Using the Kintana Workbench
Chapter
Workbench Settings
Certain user-specific settings can be configured from the Workbench EDIT menu. These settings break down into the following categories, each with its own window:
• User Profiles
• Regional Settings
• Server Settings
User ProfilesThe USER PROFILES window configures the way certain Kintana Workbench features function for a particular user. These user profiles are set on a per-user basis. Changes to your user profile will not affect other users’ Workbench settings.
Open the USER PROFILES window by selecting Edit -> User Profiles from the menu at the top of the Kintana Workbench. The USER PROFILES window has three tabs:
• User Profiles Window - General Tab
• User Profiles Window - Workflow Status Tab
• User Profiles Window - Package Tab
User Profiles Window - General TabThe GENERAL tab of the USER PROFILES window controls common settings for the Kintana Workbench.
Workbench Settings 43

Using the Kintana Workbench
Figure 4-1 User Profiles Window - General Tab
User Profiles Window - Workflow Status TabThe WORKFLOW STATUS tab of the USER PROFILES window controls settings for the display of Workflows based on the status of their steps.
Table 4-1. User Profile Window - General Tab
Fields Description
STARTUP IN THIS SCREEN
Determines which Kintana Product Suite screen group is the first one you see when you log into the application.
SHORTCUT BAR?
Determines whether or not the shortcut bar is shown. If you do not show it you must navigate between screens using the NAVIGATE menu.
POSITION If the shortcut bar is shown, determines which side of the Kintana Product Suite window it appears on.
SAVE WINDOW SIZE ON EXIT?
Saves the size of the entire Kintana Workbench window when you exit the application. The window retains its size when you log back into the application.
REUSE INNER WINDOWS?
Determines whether or not you can have multiple windows open at once. If this field is unchecked, you can only select and open one detail window for each entity from its workbench.
SHOW CHANGE WARNING MESSAGES?
Determines whether or not you receive warning messages when you are attempting to change the entities (such as Project Templates).
DEFAULT BROWSER
Determines which browser is used to view attachments and URLs.
44 Workbench Settings

Using the Kintana Workbench
Figure 4-2 User Profiles Window - Workflow Status Tab
When SHOW ALL WORKFLOW STEPS is selected in the Workflow Steps drop down list, no options are available.
When SPECIFY STEPS TO SHOW is selected, you can choose whether to show traversed steps, and also whether to hide immediate and condition steps that are not in progress.
User Profiles Window - Package TabThe PACKAGE tab of the USER PROFILES window controls settings for the display of cancelled Package Lines.
Figure 4-3 User Profiles Window - Package Tab
To hide cancelled Package Lines, check the HIDE CANCELLED PACKAGE LINES box.
Workbench Settings 45
Using the Kintana Workbench
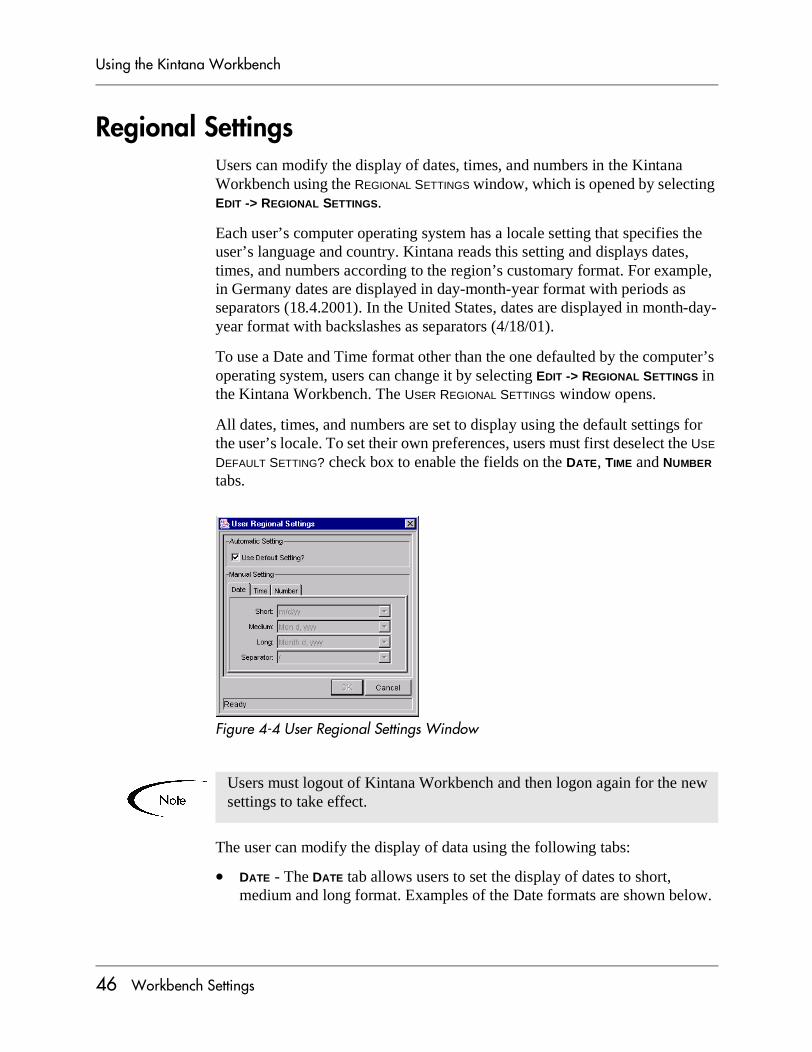
Regional SettingsUsers can modify the display of dates, times, and numbers in the Kintana Workbench using the REGIONAL SETTINGS window, which is opened by selecting EDIT -> REGIONAL SETTINGS.
Each user’s computer operating system has a locale setting that specifies the user’s language and country. Kintana reads this setting and displays dates, times, and numbers according to the region’s customary format. For example, in Germany dates are displayed in day-month-year format with periods as separators (18.4.2001). In the United States, dates are displayed in month-day-year format with backslashes as separators (4/18/01).
To use a Date and Time format other than the one defaulted by the computer’s operating system, users can change it by selecting EDIT -> REGIONAL SETTINGS in the Kintana Workbench. The USER REGIONAL SETTINGS window opens.
All dates, times, and numbers are set to display using the default settings for the user’s locale. To set their own preferences, users must first deselect the USE DEFAULT SETTING? check box to enable the fields on the DATE, TIME and NUMBER tabs.
Figure 4-4 User Regional Settings Window
The user can modify the display of data using the following tabs:
• DATE - The DATE tab allows users to set the display of dates to short, medium and long format. Examples of the Date formats are shown below.
Users must logout of Kintana Workbench and then logon again for the new settings to take effect.
46 Workbench Settings
Using the Kintana Workbench
o Short - m/d/yy
o Medium - dd-Mon-yy
o Long - Month d, yyyy
Users can also specify the characters used to separate days, months, and years. Formats and delimiters are updateable through drop down lists.
• TIME - The TIME tab allows users to set the display of times in either 12 or 24-hour format. User can also specify AM and PM symbols and the character used to separate hours, minutes, and seconds. Format, symbols, and delimiters are updateable through drop down lists.
• NUMBER - The NUMBER tab allows users to configure which characters are used to denote decimals (either a period or a comma). Users can also define the grouping of digits, the symbol used to group them, and the sign used to mark percentages. Decimal markers, digit groupings and symbols, and percentage signs are updateable through drop down lists.
Click OK to save any settings for date, time, and number display. These settings are saved in each user’s personal profile, and are not editable by any other user.
Server SettingsThe Server Settings configure how much information is logged by the Kintana server while you are running the application. This log information is used to analyze performance issues and gather information while the application is in use.
In general, you should not change any of these settings unless you are specifically asked to do so by the Kintana System Administrator at your site.
Workbench Settings 47

Using the Kintana Workbench
Figure 4-5 Server Settings Window
48 Workbench Settings
Using the Kintana Workbench
Appendix
Field Formats
The Kintana Workbench interface features a number of standard interface components. These components are discussed in the following sections:
• Text Areas/Text Fields
• Auto-Complete Lists
• Drop Down List
• Check Boxes
• Radio Buttons
• Dates
• Arrows
• Lists
For detailed information on altering the look and feel of these fields, consult the Validations appendix in "Configuring a Request Resolution System" or "Configuring a Deployment System in Kintana".
Text Areas/Text FieldsText areas and text fields are generic entry fields. Text fields are displayed on a single line, while text areas are displayed on multiple lines using a scroll bar if necessary. Text fields can be pre-configured to only accept certain types of data, such as pure text or numbers. You cannot type a non-conforming value
The field labels for required fields are always marked with a red asterisk.
49

Using the Kintana Workbench
into a text field or text area. For example, if you try to type the letter ‘A’ into a numeric field, the character is not accepted.
Figure A-1 Text Area
Auto-Complete ListsAuto-complete lists are used for fields that must be validated against a list of pre-defined values. When you type a partial value into an auto-complete field (as shown in Figure A-2) and press the tab key, an auto-complete list opens. The auto-complete list (as shown in Figure A-3) shows all of the pre-defined values that match the partial value. You can also access the auto-complete list by clicking on the icon located in the field.
Figure A-2 Auto-Complete Field
Figure A-3 Auto-Complete List
For example, if you type “m” into the Assigned To field in the Request screen, a list of all the users whose username starts with “m” appears. If the partial value you enter matches exactly one value from the list, the list value is
50

Using the Kintana Workbench
automatically entered in the field. If no values match the partial value you entered, the full list is returned.
If you want to see the full list of values that are not limited by a partial value, you can either type “%” into the field and press the Tab key, or you can click on the auto-complete icon on the right side of the field. In either case, the auto-complete dialog opens showing the full list of possible values.
The auto-complete component can be configured to provide a warning when the number of rows returned from a search will exceed a certain amount. For example, assume that you have 2000 entries in a CONTACT auto-complete list. When you click on the CONTACT auto-complete list (without limiting the search), Kintana displays a warning message:
You can then either:
• Click YES to load all of the rows into the auto-complete list.
• Click NO to abort the auto-complete search.
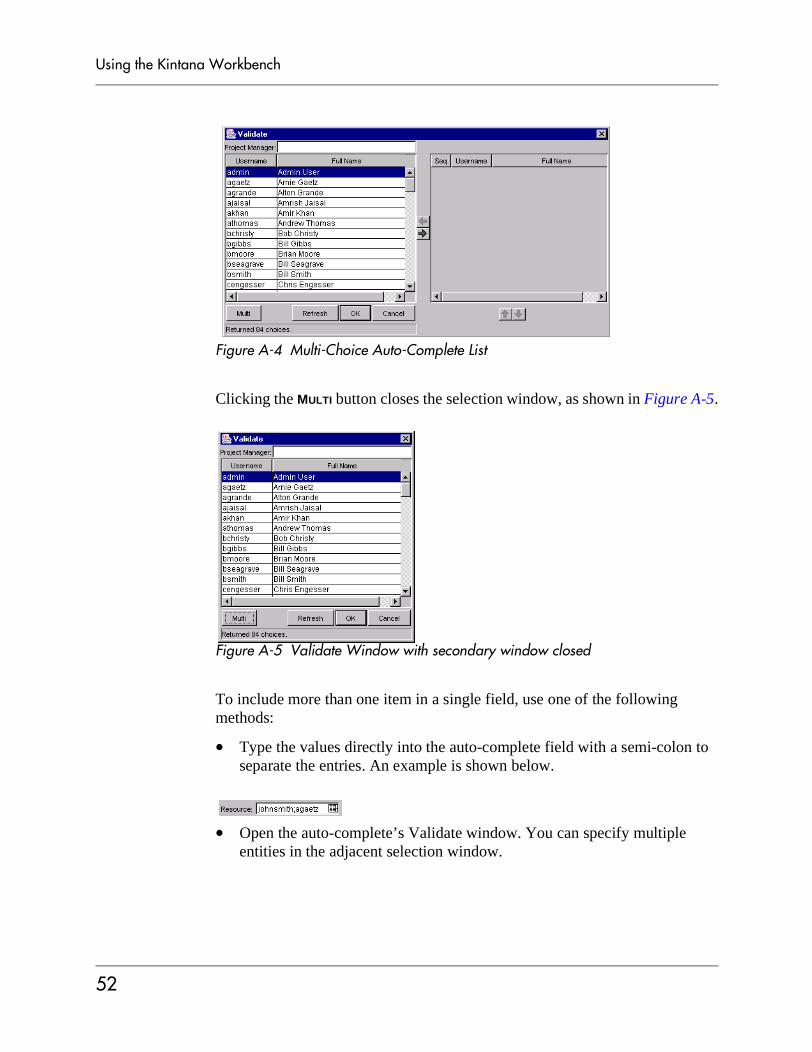
Multi-Select Auto-Complete ListSome auto-complete lists can be configured to hold multiple values. This functionality is enabled through the multi-choice auto-complete list component. When the auto-complete’s Validate window opens, it displays an adjacent selection window. This is shown in Figure A-4.
If no value is typed into the auto-complete field and you try to tab out of the field, the auto-complete dialog will not open, even if the field is required. If you try to navigate out of the field using the mouse, the field will not be validated. If you leave the field without using the tab key, the field will be validated when you try to save your changes.
51
Using the Kintana Workbench
Figure A-4 Multi-Choice Auto-Complete List
Clicking the MULTI button closes the selection window, as shown in Figure A-5.
Figure A-5 Validate Window with secondary window closed
To include more than one item in a single field, use one of the following methods:
• Type the values directly into the auto-complete field with a semi-colon to separate the entries. An example is shown below.
• Open the auto-complete’s Validate window. You can specify multiple entities in the adjacent selection window.
52

Using the Kintana Workbench
Select the desired entity and click the RIGHT arrow button to move the entity to the selection window. Repeat the process to add additional entities. To remove an entity from the selection window, select that entity and click the LEFT arrow button . Move multiple entities by using Shift + click for adjacent entities or Ctrl + click for non-adjacent entities.
Move an item up or down in the selection window by selecting the entity and clicking the UP or DOWN arrows .
Click OK to accept the multiple selections. This closes the Validate window and the selected entities appear in a semi-colon delimited list in the field for which the multi-choice auto-complete list was used.
53

Using the Kintana Workbench
Drop Down ListDrop down lists feature a pull-down list of valid values. Fields are selected by clicking on the field and using the mouse to make your choice. You can also tab into the field and use the up and down arrow keys, or you can tab into the field and type the first letter of the targeted choice.
Figure A-6 Drop Down List
If the right-hand selection window is closed, you can select multiple items directly. (You can also close this window by clicking MULTI.) Simply select the items in the list and click OK.
The Validate window closes and all of the selected items appear in the auto-complete field.
54
Using the Kintana Workbench
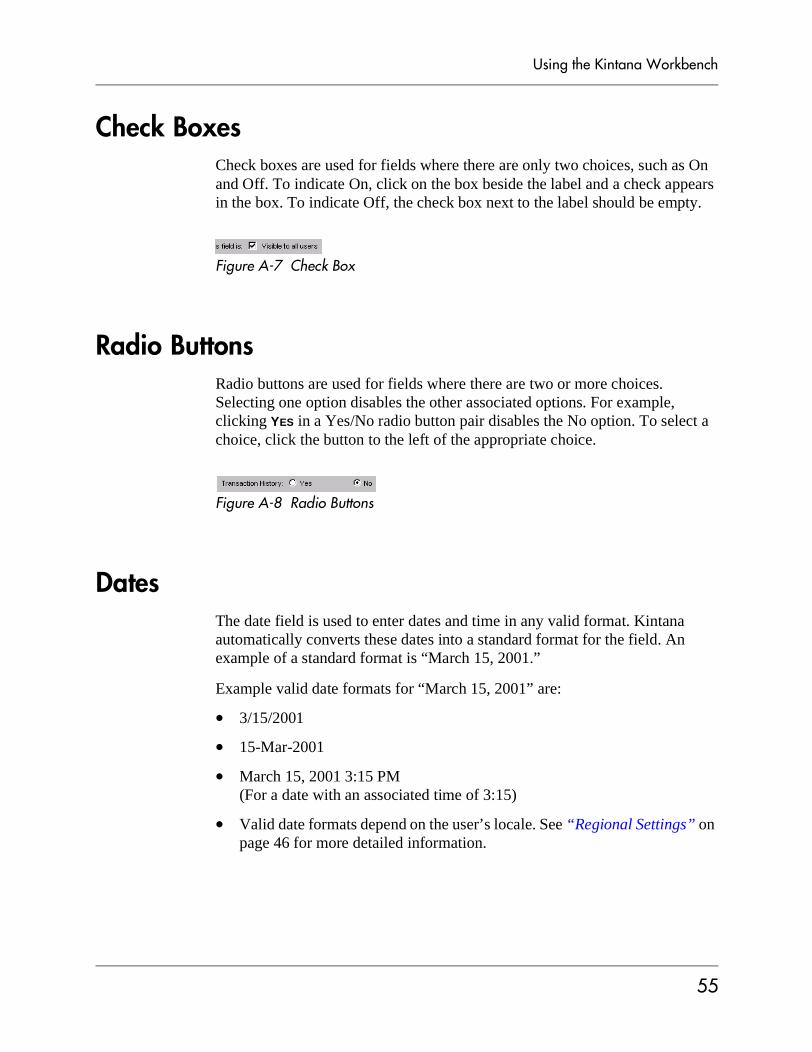
Check BoxesCheck boxes are used for fields where there are only two choices, such as On and Off. To indicate On, click on the box beside the label and a check appears in the box. To indicate Off, the check box next to the label should be empty.
Figure A-7 Check Box
Radio ButtonsRadio buttons are used for fields where there are two or more choices. Selecting one option disables the other associated options. For example, clicking YES in a Yes/No radio button pair disables the No option. To select a choice, click the button to the left of the appropriate choice.
Figure A-8 Radio Buttons
DatesThe date field is used to enter dates and time in any valid format. Kintana automatically converts these dates into a standard format for the field. An example of a standard format is “March 15, 2001.”
Example valid date formats for “March 15, 2001” are:
• 3/15/2001
• 15-Mar-2001
• March 15, 2001 3:15 PM(For a date with an associated time of 3:15)
• Valid date formats depend on the user’s locale. See “Regional Settings” on page 46 for more detailed information.
55
Using the Kintana Workbench
Figure A-9 Date Field
Clicking the date field calendar icon will open a date selection window which allows the user to populate the date field by selecting a date from a calendar. The date selection window shows dates, time, or both, depending on the source of the field.
Figure A-10 Date Selection Window
Display of dates, times, and numbers can be altered. See “Regional Settings” on page 46 for more detailed information.
ArrowsArrows are used to move an item from an unlinked (inactive) state to a linked (active) state. Figure A-11 displays arrows that can be used to move items to a linked state.
Date fields must be entered using a valid date (time) format. If a user enters an invalid date format, a message appears showing sample valid date entries in order to assist the user. If the field also accepts time entries and an invalid format is entered, a message appears showing sample valid date and time entries.
56
Using the Kintana Workbench
Figure A-11 Link Arrows
ListsLists are used throughout Kintana to display multiple records with multiple items. A sample list is shown in Figure A-12.
Figure A-12 Sample Multi-Column List
Click on a column heading to sort the list by the column heading. Resize columns by centering the cursor on the lines between adjoining headings. When the cursor changes to a double headed arrow, click and drag the bar to the required position. To switch the columns, hold down the mouse button on a column header and drag it to the desired location. Any changes you make to the list are temporary and revert to the default format the next time you log into Kintana.
57

Using the Kintana Workbench
58
Index
Index
Symbols% Query 35
AAdditional Resources
Kintana documentation 5Kintana education 8Kintana services 8Kintana support 8
Advanced ConfigurationGuides 5
Advanced Query 36boolean operators 36
Arrow 56Auto-Complete
list 50lists 50multi-choice 51
BBrowser Considerations 3
java plug-in defaulting 3Netscape 7 3pop-up blockers 3
CCalendar 56Check Boxes
in Workbench 55
Configurationnotification templates 27report types 27screen group 24special commands 27user data 27validations 26workflows 26
Ddashboard 21Date 46Dates 55Default Browser 44Detail Windows 31Distribution Menu 41Documentation 5Drop Down List 54
EEntity Workbench Window
query tab 35results tab 37using 34
Entity-Dependent Menus 39distribution 41environment 42notification templates 42package 41project 40request type 39
Env Refresh 21Environment Menu 42Environments
environment groups 24environments 23screen group 22
FField
arrow 56auto-complete 50check box 55date 55drop down 54list 57radio button 55text 49text area 49
GGeneral Tab 43
JJava Plug-In
defaulting issues 3multiple versions 3
KKintana Create
Kintana I-1
Index
contacts 15DSS reports 15reports 15request header types 16request types 15screen group 14
Kintana Dashboardportlet icon 22screen group 21
Kintana DeliverDSS reports 20environment refresh 20object types 21packages 20releases 20reports 20screen group 18
Kintana Drivecalendars 18DSS reports 18project templates 18projects 17reports 18screen group 16
LList
drop down 54Lists 57
MMax Rows Field 35Menu
navigate 44Menu Navigation 30
entity-dependent menus39
Menusentity-dependent 39
Multi-Choice Auto-Complete51
NNavigating Detail Windows
31Netscape 3Notification Templates Menu
42Number 47
PPackage Menu 41Package Tab 45Pop-Up Blockers 3Position 44Project Menu 40
QQuery
saved 38
RRadio Buttons 55Regional Settings 46Regional Settings Window 46Request Type Menu 39Reuse Inner Windows 44
SSave Window Size on Exit 44Saved Queries 38Screen Groups 11, 21
configuration 24create 14deliver 18drive 16Environments 22sys admin 28
Screens 11Server Settings 47Shortcut Bar 44Show Change Warning Mes-
sages 44Startup in this Screen 44Sys Admin
license 29screen group 28security groups 29server tools 29users 28
System Tools 29
TTime 47
UUser Profiles Window 43
general tab 43package tab 45workflow status tab 44
User Regional Settings Win-dow 46
Kintana I-2
Index
WWorkbench
browser considerations 3Workbench Settings 43Workflow Status Tab 44
Kintana I-3

Index
Kintana I-4