Embed Size (px)
Citation preview

Roof Trusses
How to safely install
Step-by-step guidance on the safe installation of roof trusses on new build housing developments of masonry construction.
Version 2 October 2017

Installing trussed rafters requires specific construction skills which involve working at height and handling dynamically unstable materials.
A full site-specific risk assessment must be undertaken before any work commences.
Where contractors require assistance to develop and record such a risk assessment and the safe methods of operation to mitigate these risks, our safety partner Paramount Safety Systems will be happy to help.
You can contact Paramount using the details provided below.
The installation of trussed rafters should only be undertaken by suitably experienced and qualified personnel, such as those with a Level 2 Diploma in Site Carpentry.
All images in this guide are for illustrative purposes only. The recommendations given are supplied in good faith but without liability. Their use shall be entirely at the risk of the user.
01295 275 205
Trilogy HouseThorpe WayBanburyOxonOX16 4SP
• Check and read all assembly drawings and information provided by the truss supplier
• Ensure all personal protective equipment (PPE) is worn and correctly fitted
• Ensure scaffolding is in place and signed off
• A safe working platform within the structure is strongly recommended
• Ensure hop-ups and scaffolding edge protection are in place
• After reading the truss layout drawings, identify the easiest starting point using the simplest roof of trusses
Before you beginStaying safe
Foreword
01. Preparing the working area
02. Bracing the truss pack
03. Releasing the trusses
04. Finishing installation
p. 04
p. 05
p. 06
p. 09
Contents
4
Step 1
Step 2
Step 3
Step 4
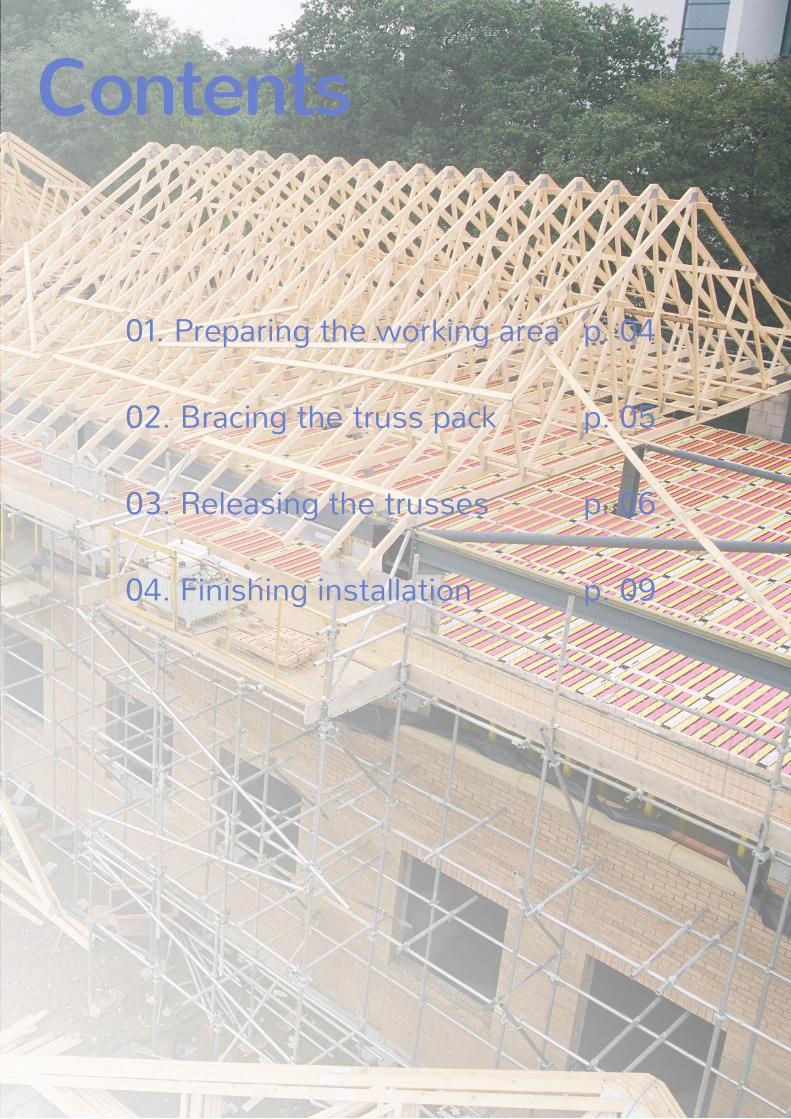
Erect table lifts at both gable ends. Ensure the scaffold is constructed in accordance with a design drawing based on engineers’ calculations to safely support the anticipated loads for this site. For further information on truss weights and sizes, contact your trussed rafter supplier.
Fix C16 structural grade timber (100mm x 50mm) to standards.
Use transom clips to secure the timber.
Mark out the wall plate to show the truss location.
01 Preparing the working areaFollow these steps to prepare the working area for receiving the roof trusses.

5
Step 1
Step 2
Step 3
Step 4
Crane lift the truss pack onto the wall plate.
Screw fix a C16 structural grade timber (150mm x 50mm) length to the face of the truss pack.
Nail fix two timber braces from the horizontal timber on the table lift to the timber length screwed to the truss face.
Use two nails per brace as shown.
Individually nail fix the trusses within the truss pack using a timber length. This will allow the trusses to be released individually when required.
Stagger the nail fixings as shown. This will prevent the brace from splitting.
02 Bracing the truss packOnce your working area is prepared and safe, you’re ready to crane in and brace the truss pack.
6
Step 1
Step 2
Step 3
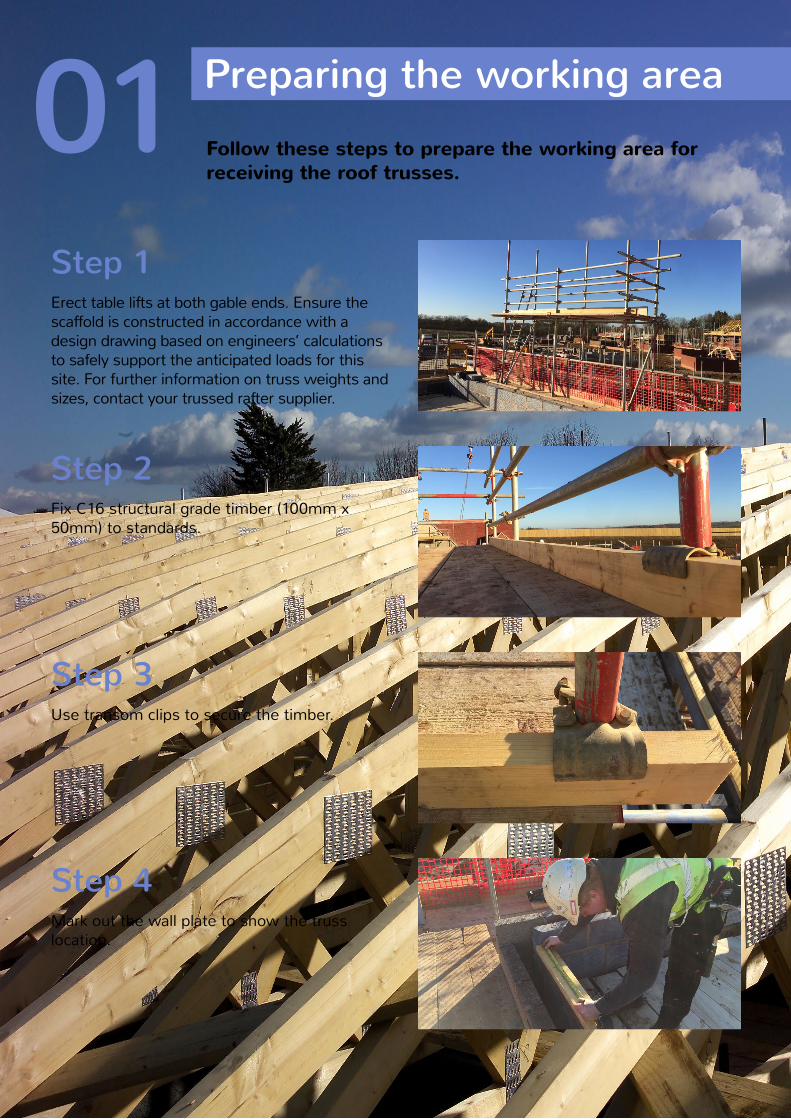
Cut the banding and release the first truss. Carry the truss to the opposite end of the roof.
Align the truss to the marks you made on the wall plate. You can nail fix the truss into position using either method one (opposite) or method two (below right).
Level and nail fix both sides of the truss with a brace fixed to the structural timber on the adjacent table lift.
Method 1
Method 2 – Fix truss to wall plate using truss clip
03 Releasing the trussesThe trusses have been lifted and braced. Now you can release them for installation.
7
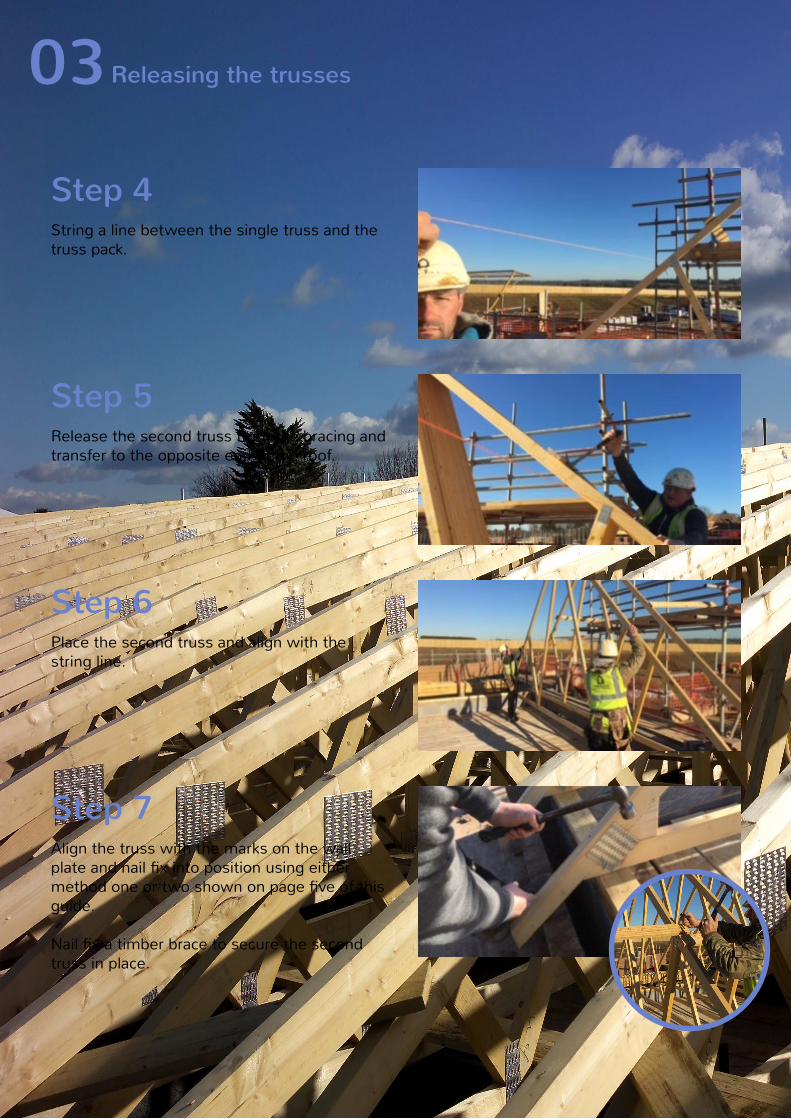
Step 4
Step 5
Step 7
Step 6
String a line between the single truss and the truss pack.
Release the second truss from the bracing and transfer to the opposite end of the roof.
Align the truss with the marks on the wall plate and nail fix into position using either method one or two shown on page five of this guide.
Nail fix a timber brace to secure the second truss in place.
Place the second truss and align with the string line.
03Releasing the trusses

8
Step 8
Step 9
The third and fourth trusses are installed by repeating the previous steps.
When the third and fourth trusses are in position, nail fix a diagonal brace to the trusses on each side of the roof.
Continue to spread the trusses and fix by repeating the process until the roof is fully spread.
03Releasing the trusses

9
Step 1
Step 2
Step 3
Fix lower bracing as per the roof detail.
To allow high-level bracing to be fixed without injury, install safe and secure temporary access.
Fix all high-level bracing as per the roof detail. Fix restraint straps where necessary.
04 Follow these final steps to ensure the trusses are braced correctly and safely.
Finishing installation

Visit our website for more information:
tra.org.uk
The Building Centre26 Store Street
LondonWC1E 7BT
T: 020 3205 0032E: [email protected]