Embed Size (px)
Citation preview
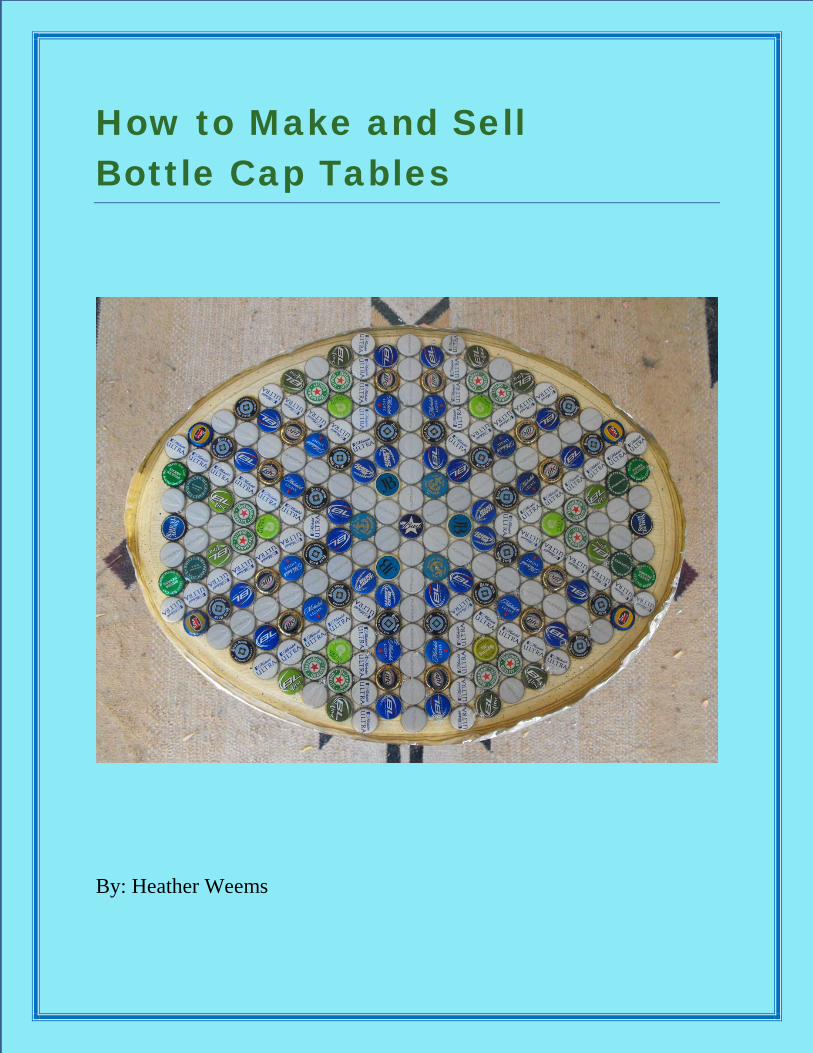
How to Make and Sell Bottle Cap Tables
By: Heather Weems


Table of Contents iii
Table of Contents Table of Contents ........................................................................................................................... iii Introduction .................................................................................................................................... iv
Chapter 1: Gathering Supplies .......................................................................................................................... 1
Supply List .................................................................................................................................. 3
Chapter 2: Designing and Gluing your Table ................................................................................................... 5
Organizing Your Caps ................................................................................................................ 7
Creating Your Design ................................................................................................................. 8
Gluing Your Caps ..................................................................................................................... 11
Chapter 3: Putting a Resin Top on Your Table .............................................................................................. 13
Preparing Your Table for Resin ................................................................................................ 15
Preparing Your Resin ............................................................................................................ 16
Pouring the Resin and Finishing Your Table ............................................................................ 17
Pouring .................................................................................................................................. 17
Finishing the Resin ............................................................................................................... 18
Chapter 4: Selling Your New Table ............................................................................................................... 21
Pricing Your Table .................................................................................................................... 23
Finding a Place to Sell Your Table ........................................................................................... 23
Index ............................................................................................................................................. 25

iv How to Make and Sell Bottle Cap Tables
Introduction If you are a college student who likes to drink beer and make money, but don’t want to work a full time job, this manual is for you. I got started selling bottle cap tables about a year ago, and it has become a great way to make extra money. You can make several mistakes in this lengthy craft, but I promise to show you all the tricks I know to help you through this process. Then I will show you how you can make some money from the table (if you don’t just want to keep it for yourself) when you are done. If I had a manual like this one when I started, I would have avoided several mistakes in the beginning and would have made more money.

Chapter 1: Gathering Supplies
Figure 1: Image of supplies needed to decorate your table This chapter will show you the supplies you will need and how to find them.

2 How to Make and Sell Bottle Cap Tables
Figure 1: Supplies you need for your table
Figure 2: Supplies you need for your resin

Chapter 1: Gathering Supplies 3
Supply List Table- You can use any size or shape you choose. The best places for you to find inexpensive
tables are garage sales, and thrift stores such as Goodwill.
Bottle caps- If you plan on making a design in your table, you will need several hundred caps before you begin. You should find a bar in town that serves lots of bottled beer and talk to the bartender about getting their bottle caps. Most are very friendly and willing to help you but, if they aren’t, just find another bar. DO NOT try to get all of the caps by drinking the beers yourself. You won’t be able to make the table for months that way.
Pliers- You should use small pliers for this project. If you don’t have them, you can find them at any hardware store.
Storage bags- You can use any bags or bowls you choose. I suggest you use clear bags
because it makes the sorting process much easier when you have lots of different kinds of caps.
Adhesive- If you have any adhesive then you are set. If not, you should buy Gorilla glue,
Super glue, or a hot glue gun for this project.
Foil- You will need a good amount of foil so make sure you have close to a full roll when you start.
Resin- You can find resin at your local Home Depot. I used Parks brand Super Glaze. You
can also find it online at a much lower cost. I suggest you buy at least two boxes of the quart size because it does not go very far.
Duct tape- You should have a full roll of duct tape when you start, just in case.
Containers- Make sure you have two large containers that could hold about a gallon each.
You should use containers you don’t mind getting very messy. Also, do not use a container that you use for food.
Stirring utensil- Any utensil you have that isn’t for food will work for this.
Paper Towels
Sheet- It would be better to use a queen if you have one but anything larger than your table
will work.
Computer


Chapter 1: Gathering Supplies 5
Chapter 2: Designing and Gluing your Table
Figure 3: Completed table design This chapter will show you how to organize your caps, design your table, and glue the caps down.


Chapter 2: Designing and Gluing Your Table 7
Organizing Your Caps 1. Gather all of your caps you’ve collected. 2. Rinse any dirty caps. 3. Dump all the caps in a pile on the floor as seen in Figure 4.
Figure 4: Pile of caps for sorting
4. Sort the caps however you’d like. I sort the caps by color and brand. This is a long part of the process so be patient. You can do it!
Figure 5: Caps after sorting

8 How to Make and Sell Bottle Cap Tables
Creating Your Design 1. Create a design. You should start playing with the caps if you don’t already have a design in
mind. Playing with patterns and color schemes is how I have created all of my tables. There are a few basic ways to start the design. You can just throw a bunch of random caps together shown in Figure 6. This is by far the
fastest way you can do this part.
Figure 6: Random cap design
You can start with one cap in the center and add a different color to each layer around it
like Figure 7.
Figure 7: Flower cap design

Chapter 2: Designing and Gluing Your Table 9
You can make a cap structure and fill it in with color like in Figure 8. If you want your caps to be close together, you have to use a hexagon pattern as shown in the previous examples. Otherwise, you will have blank spaces on your table.
Figure 8: Basic structure for pattern
2. Once you figure out the pattern you want to use, start filling it in like in Figure 9.
Figure 9: Partially filled in pattern

10 How to Make and Sell Bottle Cap Tables
3. You can use the pliers to fix and slightly bent caps as you can see in Figure 10.
Figure 10: Using pliers to fix a bent cap
4. Continue filling in until you are satisfied. Remember- You can get the whole basic shape on your table then start switching colors
until you find the right combination. It doesn’t have to be perfect the first time.
Figure 11: Table with almost complete design

Chapter 2: Designing and Gluing Your Table 11
Figure 12: Completed table design
Gluing Your Caps
1. Center your caps so none are falling off the edge. 2. You should start with the center cap and glue the caps in the order shown in Figure 13. Make sure you get a thin layer of glue around the base of each cap before securing it. Place the caps as close as they will fit to the center cap. Check that the vertical and horizontal lines in your pattern are straight as you glue. This
will help ensure a cleaner design. You can line the caps up by pattern also, if you’d like a cleaner design.
Example: Rotate every Bud Light so they are facing the same direction or following the directions of the lines in your pattern.
Figure 13: Pattern to follow when gluing

12 How to Make and Sell Bottle Cap Tables
Figure 14: Gluing starting with the center cap
3. When you are done gluing, let your table sit for about an hour, or until the caps on the edge
feel secure.
Figure 15: Table after gluing is complete

Chapter 2: Designing and Gluing Your Table 13
Chapter 3: Putting a Resin Top on Your Table
Figure 16: Table with drying resin In this chapter you will learn how to work with resin and cover your table with it.


Chapter 3: Putting a Resin Top on Your Table 15
Preparing Your Table for Resin You can skip this entire chapter if you are putting a glass top on your table.
1. Pull a length of foil long enough to wrap around the rim of your entire table. 2. Fold it in half.
Figure 17: Folded foil
3. Wrap the folded foil around the edge of your table. Keep your foil as straight as possible, any creases or cracks will imprint in the resin.
4. Secure the foil with duct tape as shown in Figure 18.
Figure 18: Secured foil rim
16 How to Make and Sell Bottle Cap Tables
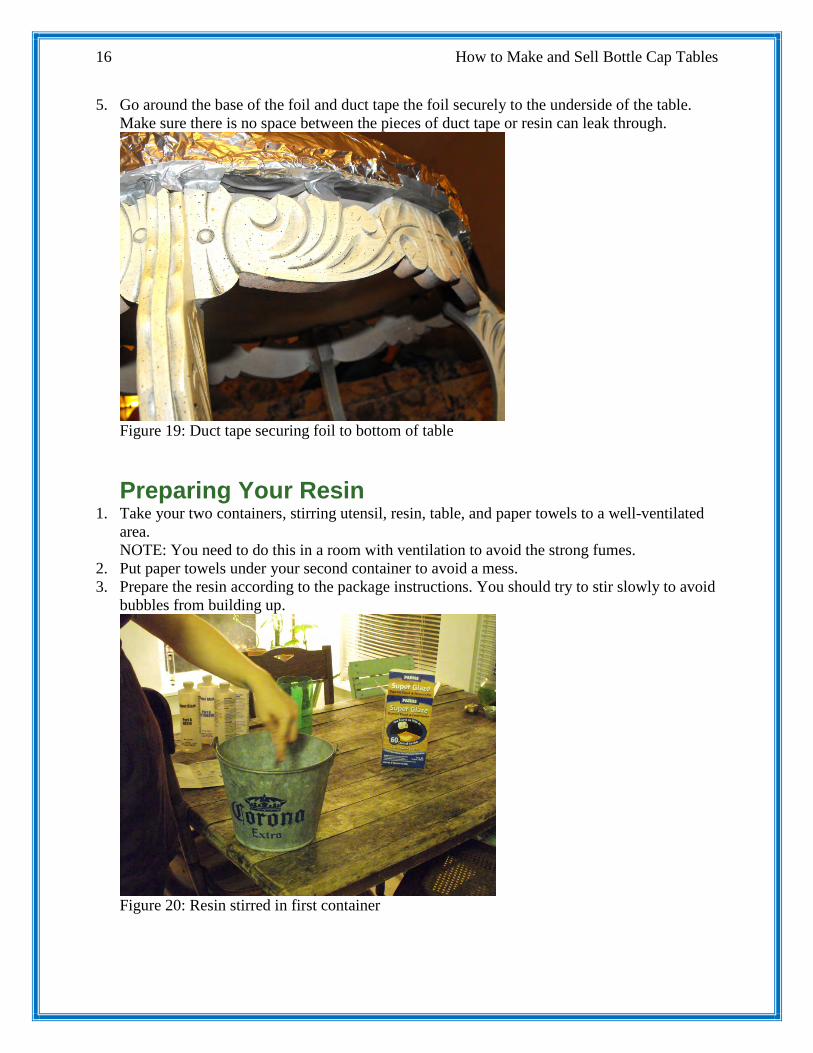
5. Go around the base of the foil and duct tape the foil securely to the underside of the table. Make sure there is no space between the pieces of duct tape or resin can leak through.
Figure 19: Duct tape securing foil to bottom of table
Preparing Your Resin 1. Take your two containers, stirring utensil, resin, table, and paper towels to a well-ventilated
area. NOTE: You need to do this in a room with ventilation to avoid the strong fumes.
2. Put paper towels under your second container to avoid a mess. 3. Prepare the resin according to the package instructions. You should try to stir slowly to avoid
bubbles from building up.
Figure 20: Resin stirred in first container

Chapter 3: Putting a Resin Top on Your Table 17
Figure 21: Resin stirred in second container
Pouring the Resin and Finishing Your Table
Pouring 1. Pour the resin onto the tabletop as shown in Figure 22. The slower you pour the fewer bubbles you will end up having.
Figure 22: Pouring the resin on the table
2. Pull your stirring utensil across the surface of the table to pop any bubbles that may appear
like I do in Figure 23. 3. Continue popping bubbles for about ten minutes or until you haven’t seen one for a while.

18 How to Make and Sell Bottle Cap Tables
Figure 23: Getting the bubbles out
Finishing the Resin 1. Cover your table with a sheet if it is outside like I do in Figure 24. You should make sure
nothing is touching the surface of the table or it will not come off after drying.
Figure 24: Table covered with sheet
2. Wait for twelve hours 3. Reveal your masterpiece the next day.

Chapter 3: Putting a Resin Top on Your Table 19
4. Remove the foil from the edges like in Figure 25.
Figure 25: Removing the foil from the table
5. Use your razor blade to remove any foil that sticks to the resin and to remove any bumps
around the lip of the table like I do in figure 26. CAUTION: You should be careful while using the razor blade to avoid serious cuts.
Figure 26: Cutting the resin lip off the table

20 How to Make and Sell Bottle Cap Tables
6. Enjoy your completed table.
Figure 27: Completed table
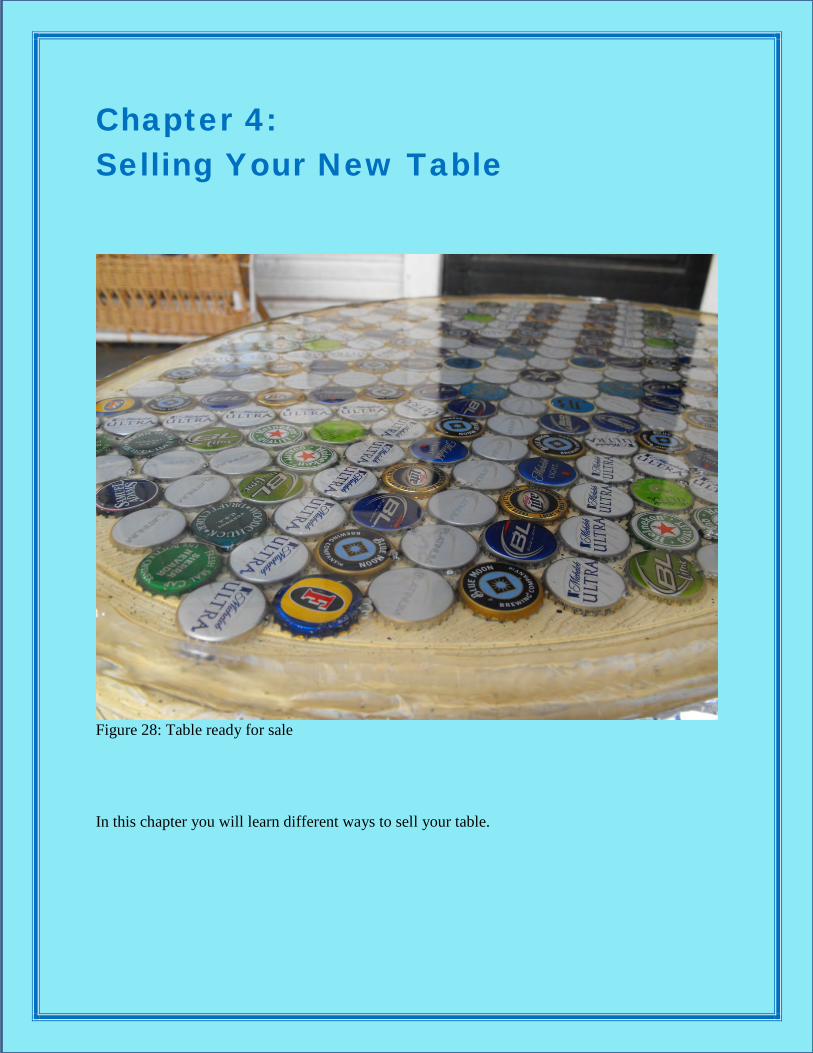
Chapter 4: Selling Your New Table
Figure 28: Table ready for sale In this chapter you will learn different ways to sell your table.


Chapter 4: Selling Your New Table 23
Pricing Your Table You make the ultimate call for the price to charge but I will give you some steps to figure out a good range.
1. Add up the costs of everything you spent on the table. (Don’t include the cost of beers you
drank, that’d be silly.) 2. Estimate how much time you spent on the table. 3. Give yourself a decent hourly rate. 4. Include all in the total.
Finding a Place to Sell Your Table There are many different ways you could sell your table but these are the best I have used.
Coffee Shop- You can talk to a coffee shop owner about displaying your work. Many local
coffee shops will sell work for local artists for a commission. Craigslist- You can use this site to sell your table locally. You will need to be flexible on
your price and make your asking price slightly higher to help with bargaining. Etsy- You would have to pay for an account with this site. This is a plus because you will be
able charge more on this site since the site is considered high quality.
Figure 29: Image of Craigslist and Etsy sites
I hope this manual was helpful and good luck on your craft adventure!


Index 25
Index bubbles, 17, 18 caps, 3, 5, 7, 8, 9, 10, 11, 12 design, 3, 5, 8, 10, 11 foil, 3, 15, 16, 19 gluing, 11, 12
pattern, 9, 11 pliers, 3, 10 resin, 2, 3, 13, 15, 16, 17, 19 sell, 21, 23 Supplies, iii, 1, 2


![Untitled-1 [housewares.blob.core.windows.net] · Joint Bucket With & Without Cover PC Bucket With & Without Cover ... Bottle Opener v Wine Bottle Opener Bar Tray Bottle O ener Bottle](https://img.dokumen.tips/doc/110x75/5f23f7ea2c1cae654f25efdf/untitled-1-joint-bucket-with-without-cover-pc-bucket-with-without.jpg)