Embed Size (px)
Citation preview

NOS TOOLKIT
DRIVING THE FUTURE
HOW TO GUIDE

2 | NOS Toolkit – How To Guide
1 About this “How To” Guide
The purpose of this “How To” Guide is to provide practical and useful instructions and suggestions for how to use the HR tools and resources included in the NOS Toolkit in the workplace. Each tool and resource has been developed using the NOS for Commercial Vehicle Operator as a foundation. Every workplace is encouraged to not only use the resources in the toolkit, but also develop additional resources and tools that address the specific and unique needs of each workplace.
The NOS for Commercial Vehicle Operator Toolkit includes the following resources:
• NOS for Commercial Vehicle Operator• Essential Skills Profile for Commercial Vehicle
Operator• Entry-Level Curriculum Framework• Driver Learning Record• On-Road Skills Demonstration
• On-Road Skills Demonstration DriverPreparation Guide
• Off-Road Skills Demonstration• Coupling and Uncoupling Training Guide
• Workplace Performance Evaluation
This “How To” Guide provides potential and suggested ways to successfully use each resource in workplaces ranging in size and type. Please note that the suggested approaches within the guide represent merely a snapshot of the many ways that the National Occupational Standard for Commercial Vehicle Operator can be used to support positive and effective HR practices. It is encouraged that each workplace adapt, modify and create resources that fit their immediate and pressing HR needs.
For more information, contact:
Trucking HR Canada 104-720 Belfast RoadOttawa, K1G 0Z5Phone: 613-244-4800 Email: [email protected]: http://www.truckinghr.com/

NOS Toolkit – How To Guide | 3
2 NOS Toolkit Resources
The following graphic represents potential points along the Driver Learning Continuum (including Entry-Level Training Phase; Onboarding Phase; and Continuous Competency Development Phase) when the Toolkit resources can be used
National Occupational
NOS for Commercial Vehicle OperatorEssential Skills Profile Commercial Vehicle Operator
Standards ToolkitOccupational Level Driver
Off-Road Skills DemonstrationOn-Road Skills Demonstration
Workplace Performance Evaluation
Commercial Driver License
Coupling and Uncoupling Training GuideDriver Training Record
New Driver
Entry-Level CurriculumFramework
Applicable for All Phases of Learning & Development
Entry Level Training Phase
Onboarding Initiation Apprenticeship Phase
Continuous Competency Phase

4 | NOS Toolkit – How To Guide
NOS for Commercial Vehicle Operator
Resource
Potential Users: All Stakeholders Type of Driver: All Drivers Learning Phase: All Learning Phases
The NOS for Commercial Vehicle Operator is a validated framework of the skills, knowledge and abilities that are required of the majority of competent, safe and efficient commercial vehicle operators (truck drivers) working across Canada. The NOS have been developed for the industry, by the industry. As such, the NOS can serve as a foundation for numerous HR tools and resources to support enhanced learning and development of the driver workforce.
All of the resources within the NOS Toolkit have been developed using the NOS for Commercial Vehicle Operator as a foundation. However, the resources that have been developed are only a small sampling of the variety of tools, resources and programs that can be developed using the skills, knowledge and competencies included in the NOS.
There are many stakeholders in the industry who can benefit from resources grounded in the NOS competencies:
Small, Medium and Large Carriers:• Developing Career Ads and Job Descriptions for Drivers
Clearly defined job descriptions and career ads support many fleet activities, including:• Recruiting: Job candidates can pre-screen themselves before applying for a job, while recruiters have a
tool to compare different applicants.• Training: Any gaps in required skills are easily identified, ensuring training programs can be focused and
effective.• Orientation: Newly hired employees have a clear understanding of what they will be expected to do.• Performance Reviews: Clearly defined and measurable skills can be used to measure an employee’s
progress and performance.• Legal defenses: Clear job descriptions can help to demonstrate due diligence around hiring practices.
The NOS for Commercial Vehicle Operator (Truck Driver) describes the job more clearly than ever before. It defines the core knowledge, skills and abilities that are demonstrated by drivers on a daily basis. This information can be used to refine job descriptions and related career ads.
Trucking HR Canada has developed a practical resource that provides strategies and steps for developing career ads and job descriptions that highlight driving as a skilled occupation. Check out THRC’s resource “Describe and Deliver: Secrets to the Careers Ads and Job Descriptions that will Attract Workers You Need” https://truckinghr.com/sites/default/files/Describe_and_Deliver.pdf
Provincial/Territorial Trucking Associations:• Developing ongoing professional development resources and supports
Provincial and territorial trucking associations are dedicated to providing support and guidance for their members in the area of HR development, particularly in the area in professional skills development. The NOS can serve as a foundation for developing additional resources and tools (that may be delivered at the carrier and/or the association level) to address key HR needs and interests of association members.
1

NOS Toolkit – How To Guide | 5
Certifying Bodies and/or Government Ministries:• Informing certification and/or occupational registration frameworks
The NOS for Commercial Vehicle Operator defines the core competencies (i.e. skills, knowledge and abilities) that are typically developed early in a driver’s career. In the NOS, competencies are presented as Knowledge, Tasks and Subtasks. The NOS contains ‘entry-level’ competencies as well as ‘occupational-level’ competencies:
• Entry-level: the competencies that drivers acquire BEFORE attaining their Commercial Driver’s License (CDL).
• Occupational-Level: the competencies that drivers acquire AFTER attaining their Commercial Driver’s License (CDL).
The Entry-Level competencies form the foundation of what skills, knowledge and abilities need to be taught in pre-CDL training programs to prepare learners for their CDL assessment. Occupational-Level competencies define what skills, knowledge and abilities the driver must learn/develop after attaining their license to become a fully proficient driver. The Occupational-Level competencies are learned on-the-job.
In the future, the industry may opt to consider developing a certification program for Commercial Vehicle Operators. The goal of such a certification program would be to raise the level of professionalism of the driving occupation to increase the recruitment and retention of new drivers in the industry. Professional Driver certification would help to increase the recognition and appreciation of professional driving as an occupation. To effectively change the perception and recognition of professional driving as a skilled occupation, formal documentation of training is an absolute must-have. The NOS provides the basis for the development of training resources and training records that can serve as concrete evidence of the use of high-level skills and knowledge by Professional Drivers, as well as of the formalized learning continuum and training path that is followed by drivers to become proficient in the occupation.
While certification may not be an immediate/short-term goal for the industry, the enhanced use of (and importance placed upon) HR best practices in the industry will warrant future conversations regarding the potential for certification. Should certification be considered in the future, the occupational-level competencies (i.e., the post-CDL skills, knowledge and abilities learned on the job) within the NOS will serve as the basis of certification requirements. Such a certification would provide recognition of the skills and abilities of competent professional drivers and provide a career goal beyond licensing.

6 | NOS Toolkit – How To Guide
Essential Skills Profile for Commercial Vehicle Operator
Resource
Potential Users: All Stakeholders Type of Driver: All Drivers Learning Phase: All Learning Phases
The Essential Skills Profile for Commercial Vehicle Operator (Truck Driver) describes how workers in the occupation use each of the nine essential skills: reading, document use, writing, numeracy, oral communication, thinking, digital technology, working with others and continuous learning.
These nine essential skills are seen as “building blocks” because people build on them to learn all other skills. They are needed for work, learning and life, and allow people to grow with their jobs and adapt to changes in the workplace. The essential skills profile describes the skills that commercial vehicle operators (truck drivers) need, as well as the level of complexity required to perform their jobs successfully.
Essential skills profiles are an important source of information in building a workforce that includes all kinds of skilled workers. The profiles have many purposes and can influence workers and learners in different ways, while helping prepare them for success at work. They can be used directly with individuals, and can also help build research, standards and curriculum. For example:
• Course, training and curriculum developers use the profiles to create learning programs, tools and activities to prepare people for work;
• Researchers use the profiles to study work, literacy (i.e., reading, writing, document use and numeracy) and skill levels in Canada, and evaluate how teaching and learning opportunities relate to the essential skills required in the workplace;
• Trainers and teachers use the profiles to help youth and adults understand how their learning applies to different occupations;
• Guidance and career counsellors use the profiles to give advice on career options and learning plans;• Employers use the profiles to develop or choose the right kind of training for their employees and/or
create job advertisements, interview questions and job evaluations;• Parents, mentors and advisors use the profiles to help students plan for their futures; and• Job-seekers, workers and learners use the profiles to understand how their own skills measure up to
those needed in different occupations.
The Essential Skills Profile for Commercial Vehicle Operator (Truck Driver) describes how drivers use each of the key essential skills. The profile includes:
• a brief description of the occupation;• examples of tasks that illustrate how each essential skill is applied; and,• complexity ratings that indicate the level of difficulty of the example tasks.
2

NOS Toolkit – How To Guide | 7
Entry-Level Curriculum Framework
Resource
Potential Users: Governments, Training Institutions, Carriers Type of Driver: Entry-Level Driver Learning Phase: Entry-Level Learning Phase
To be successful, an entry-level driver training program needs to prepare students for employment in today’s trucking workforce, and be anticipatory in nature, to prepare students for emerging trends within the industry. There are a number of resources that curriculum developers can use to inform entry-level driver education programs, one of these resources being the entry-level curriculum framework based on the NOS for Commercial Vehicle Operator (Truck Driver).
The Entry-Level Curriculum Framework serves as a foundational document for the curriculum and the learning outcomes for training delivered to individuals aspiring to enter the occupation of a commercial vehicle operator (truck driver). This framework is aligned with the National Occupational Standard (NOS) for Commercial Vehicle Operator (truck driver). The overall purpose of this curriculum framework is to provide consistent training within entry-level programs. Consistency of training is important when training a mobile workforce. The use of a curriculum framework helps to ensure that driver training programs from coast-to-coast are all meeting the minimum, benchmark standards for effective training.
The curriculum framework assumes that the individual being taught will begin with only automobile driving experience. The curriculum concludes by preparing the learner to successfully challenge the government examinations to obtain a commercial class of driver license (CDL), and provides a base of competency that enables the individual to begin employment within the occupational field.
The NOS can be a valuable tool throughout the curriculum development process including:
• Developing New Entry-Level Training Programs • Assessing Existing Entry-Level Training Programs
Developing New Entry-Level Driver Training Programs Successful entry-level training programs will prepare students for employment in Canada’s trucking and transportation workforce. The curriculum framework outlines the skills and knowledge that students need to acquire in the entry-level training phase to prepare them to successfully obtain a commercial driver’s license (CDL).
• The Framework can serve as one of many reference documents used by curriculum developers to develop learning goals, learning objectives, and program evaluation tools.
• Following the initial development or revision of an entry-level training program, the course content can be evaluated using the Framework to determine if all skills, knowledge and abilities required of capable entry-level drivers are being addressed in the program.
• If a curriculum developer is responsible for developing a course for a particular subject area, he or she may review the relevant learning outcomes (and associated competencies) within the Framework to identify the skills, knowledge and abilities required for this subject area.
• When engaging an expert/consultant to develop in-house educational programs, training sessions or resources (e.g., individual courses), an organization may use the Framework to inform the expert/consultant of the minimum skills, knowledge and abilities that must be included in the programs or resources.
3

8 | NOS Toolkit – How To Guide
Assessing Existing Entry-Level Driver Training Programs There are several public and private training institutions across the country that provide entry-level training for commercial vehicle operators. To ensure that current training programs and curriculum are adequately preparing students for their commercial licensing assessments as well as entry into the workforce, the curriculum framework can be used to conduct a training gap analysis. A training gap analysis is a way for institutions to compare their current curriculum (including course objectives and course outcomes) with a national standard to identify areas that may not be addressed in their current program offering. Assessing existing training programs against the curriculum framework helps to ensure that students are receiving the most comprehensive training possible and that training is consistent across training deliverers as well as geographical regions.
There are several ways in which the Entry-Level Curriculum Framework can be used when assessing program curricula, such as:
• When a training institution/department is conducting their full program review, the Framework can be referenced to ensure that the program covers all Learning Outcomes (and corresponding competencies). The Entry-Level Training Curriculum can serve as a benchmark for current practice which the training program strives to meet and exceed.
• Following the development of curricula for a course, the Framework can be used for review and evaluation. For example, curriculum developers can first align their program outcomes with the learning outcomes presented in the Framework. Next, they can compare the skills, knowledge and abilities contained in the relevant sections of the Framework with their curricula to determine if they have met or exceeded the required skills, knowledge and abilities for the competencies and learning outcomes within their curricula.

NOS Toolkit – How To Guide | 9
Driver Learning Record
Resource
Potential Users: Employers Type of Driver: Entry-Level Driver Learning Phase: Entry-Level and Onboarding Learning Phases
The Driver Learning Record is a tool that can be used to monitor and document the on-the-job skills development of a new driver following the attainment of a Commercial Driver’s License (CDL). Ideally, new drivers are assigned to a senior driver/mentor who is deemed to have the knowledge and skill required to demonstrate the proper performance of the skills and assess the driver’s performance of the competencies as they are performed. The Driver Learning Record is an ongoing assessment tool that is used to determine the strengths and abilities of the driver as well as the skill areas that require additional attention, training and development.
Using the Driver Learning Record The learning record is a valuable tool for documenting the skills development of new drivers and is similar in nature and purpose to ‘training log books’ or ‘Blue Books’ used in the apprenticeship system. The Sections within the learning record outline the skills, knowledge and abilities that drivers are expected to learn and develop as they progress through the initiation/orientation phase of learning.
The new driver and the assessor (e.g. senior driver, coach/mentor/assessor, trainer) each have responsibilities associated with the Driver Learning Record.
Driver Responsibilities:• To always have the learning record with him/her to allow the senior driver/mentor the opportunity to
provide sign-off when competencies are performed.
Senior Driver/Assessor Responsibility:• To objectively provide assessment of the performance of competencies in the spirit of enhancing the
skills and knowledge of the driver. • To routinely assess and observe their student driver on a regular basis to provide real-time sign-offs
(i.e. the learning record should not be completed at one sitting).
The learning record is cumulative in nature, meaning that assessment of the various competencies should take place throughout the initiation/orientation phase. By the end of the entry-level learning period, all competencies should be signed off at the ‘Competent’ level.
4

10 | NOS Toolkit – How To Guide
On-Road Skills Demonstration
Resource
Potential Users: Employers Type of Driver: All Drivers Learning Phase: Onboarding and Continuous Competency Development Phases
The On-Road Skills Demonstration resource supports the consistent and objective evaluation of driving competencies. Demonstration and evaluation of the skills contained in this resource establishes or confirms the level of proficiency of an individual driver. This resource is suitable for use in a training environment to aid in the development of proficiency, and is also suitable for confirmation of on-road skills after training.
The skills demonstration can be completed in one evaluation or in stages, depending on the level of driver being assessed and the overall purpose of the assessment. For each demonstration item, the driver is responsible for performing the task in the presence of an assigned evaluator. This demonstration includes specific maneuvers and tasks that can be performed in actual workplace settings or on a pre-determined route.
The On-Road Skills Demonstration may be used to assess varying levels of drivers (i.e., entry-level vs. experienced drivers) and for different purposes (i.e., training and development vs. assessment of competency).
Assessing Entry-Level Drivers The On-Road Skills Demonstration can be used as a training and development tool during the on-boarding/orientation/initiation phase for new drivers. In the training setting, the evaluator will typically be a driver trainer, coach or mentor who has been assigned to the new driver. For training and development purposes, the various maneuvers presented in the resource may be assessed at various intervals within the training period to track competence and skills development, or all maneuvers can be tested according to a pre-planned route.
In the case of training and development, the evaluator may provide direction and coaching to the new driver to enhance performance, correct errors and enhance understanding. The results of each assessment can serve as a starting point for professional development goals and further training throughout the initiation phase.
Assessing Experienced Drivers The On-Road Skills Demonstration can also be used as an ongoing professional development tool to verify the skills and competencies of experienced drivers. In the professional development setting, the evaluator may be a supervisor, senior driver or third-party driver. When assessing the performance of experienced drivers across the various maneuvers according to a pre-planned route, the evaluator will observe without providing any direction or coaching.
The results of the assessment of experienced driver performance of on-road skills will help to identify driver strengths and opportunities for refresher training and additional skills development. Using the on-road skills demonstration to assess experienced drivers fosters an organizational culture of continuous learning and skills development.
5

NOS Toolkit – How To Guide | 11
STEP 1: Developing a driving evaluation route
To ensure the most effective on-road skills demonstration, the evaluator should develop and follow a predetermined route. The evaluation route should provide adequate opportunities to evaluate a driver’s skill on each of the maneuvers being tested. In cases when a shorter time is necessary, a route should still offer a minimum number of each of the skills being evaluated. As a general rule, the route distance should not be less than 30 kilometers and this minimum distance should be increased as necessary to include opportunity for all of the driving maneuvers.
When developing an evaluation route, the evaluator should identify specific places where each of the driving maneuvers can be evaluated. This will allow the evaluator to focus separately on the particular skills being assessed. It is helpful to keep the maneuvers far enough apart to give the evaluator time to mark the evaluation form and to provide the driver with instructions.
Recommended Minimum Elements of the Driving Evaluation Route:
• 12 intersections with traffic control signals• 2 uncontrolled intersections • 4 left turns• 4 right turns• 8 lane changes • 4 curves• 15 km of expressway driving (if applicable)• 2 expressway entries (if applicable) • 2 expressway exits (if applicable)• 1 circular intersection • 1 roadside stop • One railway crossing (if applicable)
Sample driving evaluation route plan:
km Location Instruction to driver Evaluate
0 Terminal on Branch St. Exit terminal right turn n/a north-bound on Branch St.
.6 Intersection of Branch St. and Cross Furth Ave. Check driver action crossing Furth Ave. unmarked intersection – Stop signs on Furth Ave. only
1.1 Intersection of Branch St. and Cross Miller Rd. Traffic lights – Stop or drive Miller Rd. through intersection, depends on lights
1.3 Intersection of Branch St. and Turn right onto County Rd. Traffic lights – Stop or drive County Rd. through intersection Right turn maneuver
1.4 County Rd. east of Branch St. Continue on County Rd. Road widens to two lanes move to right lane as road widens
1.8 County Rd. east of Branch St. Lane change to the left lane Lane change
Using the On-Road Skills Demonstration in the Workplace There are 3 steps to using the On-Road Skills Demonstration Resource:

12 | NOS Toolkit – How To Guide
STEP 2: Conducting the On-Road Skills Demonstration
During the on-road skills demonstration, the evaluator is required to provide the driver with clear instructions and evaluate the driver’s performance of specific driving maneuvers.
Tips for Instructing Drivers
• Give clear audible directions to the driver at the appropriate times. Watch the driver and try to give directions only when they can pay full attention.
• Accommodate the driver’s ability to understand the directions and speak slowly if needed. Directions should be given with enough time prior to the maneuver that the driver can ask the evaluator to repeat or clarify the direction.
• Try to determine whether the driver is familiar with the area and alter how directions are given depending upon the driver’s response and comfort level.
• First tell the driver where to do something then tell them what to do. • For example: “at the next intersection, turn right,” and “at the traffic light, turn left.”• Directions can be combined. • For example: “immediately after you complete your right turn, you will turn left on the first road
to your left.” • For example, “when it is safe to do so, move one lane to the left; then, at the next traffic light, turn left,”• Avoid using of slang when giving directions. Avoid using the word “right” to answer a question. Instead
use the word “correct” to provide a positive response.
Tips for Evaluating Specific Driving Maneuvers
• Conducting an evaluation of a person’s driving skills involves breaking down typical driving activities into many detailed sub-tasks. It requires a specific approach to be taken by the evaluator as most driving maneuvers are fluid actions with many tasks being done at once. An evaluator needs to be able to look for the detailed sub-tasks to be able to effectively evaluate a driver’s skill and to identify where driving can be improved.
• The driving route also needs to be divided into stages where certain skills are applied and evaluated, while less attention is being paid by the evaluator at other things that the driver may be doing. Experience is necessary to be able to effectively shift attention to the specific tasks at the appropriate times.
Terminating a Driving EvaluationThere may be situations where a driving evaluation should be terminated before completion of all driving maneuvers. When a driver is clearly demonstrating a skill level below what is required, or when violation of any safety regulation occurs, continuing the evaluation is unnecessary and in some cases, dangerous. In extreme situations, it may be necessary for the evaluator to take over the driving duties.

NOS Toolkit – How To Guide | 13
STEP 3: Scoring the Driver
Because the on-road skills demonstration can be used as a training and development tool for drivers with varying levels of skills, the scoring of the demonstration is situation-specific. Companies may opt to set target ‘scores’ for each classification of driver (e.g. new driver, novice driver, experienced driver) to identify how many errors (major or minor offences) the driver is allotted. To be an effective skills development tool, the on-road skills demonstration should be used to identify areas that require more training and instruction. This demonstration should be a starting point for further instruction and professional development.
Supplementary Resource
On-Road Skills Demonstration Driver Preparation Guide
To reduce assessment anxiety and to support adequate preparation, we have developed an “On-Road Skills Demonstration Driver Preparation Guide” to outline the key driving competencies that will be assessed and provide instruction and context required for proper skills performance.

14 | NOS Toolkit – How To Guide
Off-Road Skills Demonstration
Resource 6
Potential Users: Employers Type of Driver: All Drivers Learning Phase: Onboarding and Continuous Competency Development Phases
The Off-Road Skills Demonstration resource supports the consistent and objective evaluation of driver competencies. Demonstration and evaluation of the skills contained in this resource establishes or confirms the level of proficiency of an individual driver. This resource is suitable for use in a training environment to aid in the development of proficiency, and is also suitable for confirmation of skills after training.
The skills demonstration can be completed in one evaluation or in stages, depending on the level of driver being assessed and the overall purpose of the assessment. For each demonstration item, the driver is responsible for performing the task in the presence of an assigned evaluator. This demonstration includes specific maneuvers and tasks that can be performed in actual workplace settings or on a pre-determined layout that simulates conditions that are like those of an actual workplace.
The Off-Road Skills Demonstration may be used to assess varying levels of drivers (i.e., entry-level vs. experienced drivers) and for different purposes (i.e., training and development vs. assessment of competency).
Assessing Entry-Level Drivers
The Off-Road Skills Demonstration can be used as a training and development tool during the on-boarding/orientation/initiation phase for new drivers. In the training setting, the evaluator will typically be a driver trainer, coach or mentor who has been assigned to the new driver. For training and development purposes, the various maneuvers presented in the resource may be assessed at various intervals within the training period to track competence and skills development.
In the case of training and development, the evaluator may provide direction and coaching to the new driver to enhance performance, correct errors and enhance understanding. The results of each assessment can serve as a starting point for professional development goals and further training throughout the initiation phase.
Assessing Experienced Drivers
The Off-Road Skills Demonstration can also be used as an ongoing professional development tool to verify the skills and competencies of experienced drivers. In the professional development setting, the evaluator may be a supervisor, senior driver or third-party driver. When assessing the performance of experienced drivers across the various maneuvers, the evaluator will observe without providing any direction or coaching.
The results of the assessment of experienced drivers’ performance of off-road skills will help to identify driver strengths and opportunities for refresher training and additional skills development. Using the off-road skills demonstration to assess experienced drivers fosters an organizational culture of continuous learning and skills development.

NOS Toolkit – How To Guide | 15
Scoring Drivers
Because the off-road skills demonstration can be used as a training and development tool for drivers with varying levels of skills, the scoring of the assessment is situation-specific. Companies may opt to set target ‘scores’ for each classification of driver (e.g. new driver, novice driver, experienced driver) to identify how many errors (major or minor offences) the driver is allotted. To be an effective skills development tool, the off-road skills demonstration should be used to identify areas that require more training and instruction. This demonstration should be a starting point for further instruction and professional development.
Supplementary Resource
Coupling and Uncoupling a Tractor-Trailer Training Guide
Tasks 9 and 10 within the Off-Road Skills Demonstration require the performance of Coupling and Uncoupling a Tractor-Trailer (respectively). To supplement the evaluation charts (which outline the Tasks, Driver Actions and Errors) that the evaluators use to complete the assessment, we have developed a training guide.
The “Coupling and Uncoupling a Tractor-Trailer Training Guide” provides industry-approved step-by-step procedures (and diagrams) of the sequential steps required to both Couple and Uncouple a Tractor Trailer. Carriers may choose to use the resource as a teaching tool for entry-level drivers that complements the evaluation framework for these tasks within the Off-Road Skills Demonstration resource.

16 | NOS Toolkit – How To Guide
Workplace Performance Evaluation
Resource 7
Potential Users: Employers Type of Driver: All Drivers Learning Phase: Onboarding and Continuous Competency Development Phases
The purpose of the performance evaluation is to allow supervisors to assess the competency (i.e. the skills and knowledge) of commercial vehicle operators under their supervision. A performance evaluation can be completed for every driver in a fleet, regardless of the driver’s experience level. For example, new drivers can be assessed during on-boarding training when they are just learning many of the skills required for the job. Experienced drivers can also be assessed to affirm their competency and to identify areas for development and improvement. Performance Evaluations can be conducted before, during or after the completion of learning/training and as part of periodic human resource management efforts.
The performance evaluation can be conducted by an individual(s) who directly supervises the driver. This individual(s) will vary depending on the experience and skill level of the driver being assessed. During the initial training and onboarding phase, a driver trainer or coach/mentor/assessor may conduct the evaluation; a driver supervisor or manager may conduct a performance evaluation of an experienced driver as part of an annual review process. Regardless of who conducts the evaluation, the process remains the same.
Using the Performance Evaluation in the Workplace
There are 3 steps to using the Performance Evaluation tool:
STEP 1: Define workplace ratings for each competency/ performance criterion.
Prior to conducting any evaluation of worker performance, the supervisory staff can rate each element of competency/performance that will be used to score the individual. These ratings must represent the realities of the workplace where the individual is employed. The individual’s score will be compared to the workplace rating. The criteria used to rate each element of competency/performance are shown below.
0 1 2 3 4
Not relevant or Occasionally Required element Required element Critical element required in the required, of the job function, of the job function, of the job function, workplace not important low importance moderate high importance importance

NOS Toolkit – How To Guide | 17
STEP 2: Define workplace target for each performance evaluation element
An overall target rating for each element of the performance evaluation must also be established. To develop the workplace target, the ratings for each competency/performance criterion should be added and then averaged.
The workplace target for each performance evaluation element will vary depending on the experience level of the driver. For example, the workplace target(s) for new drivers will likely be lower than the target(s) set for experienced drivers. This difference in target ratings considers the level of skills development and experience of drivers along the learning continuum. Each workplace can develop expected workplace targets for various driver levels.
STEP 3: Assess the driver’s performance
Each driver must be given a score for each competency/performance criterion based on his/her performance of the particular task. The scoring may be determined by one assessor or by consensus among several assessors who have direct interaction with the driver. The criteria used to score each element of competency/performance are shown below.
1 2 3 4
Novice Functional Competent Master
Individual appreciates Individual has Individual has Individual has the value and need for partially acquired fully acquired mastered the competency the competency the competency the competency
Implication: Implication: Implication: Implication: Significant further Support and Completes work Able to development is needed, guidance are tasks independently mentor others tasks cannot be still needed performed
After assigning a score for each competency/performance criterion, an overall score for each competency element can be determined by totaling all ratings and determining the individual’s average score. The average score can then be compared to the workplace average score to determine if the individual is meeting, exceeding or falling short of workplace expectations.

18 | NOS Toolkit – How To Guide
STEP 4: Determine Required Action(s)
By comparing the driver score with the workplace target for each performance element, the assessor can determine if the driver is meeting, exceeding or falling short of the expected performance of the performance element. The result of this assessment will determine the actions that are required. Actions may include providing a reward for excellent performance, incentivizing enhanced performance or identifying the need for remedial action such as enhanced training or learning opportunities.
It is important to note that the Performance Evaluation is meant to be a positive tool that is used to identify areas for improvement and development to enhance the safety and efficiency of drivers.

TRAINING TOOL
DRIVING THE FUTURE
ESSENTIAL SKILLS
PROFILECOMMERCIAL
VEHICLE OPERATOR (TRUCK DRIVER)

2 | ESSENTIAL SKILLS PROFILE Commercial Vehicle Operator (Truck Driver) | TRAINING TOOL
While the National Occupational Standard outlines the technical skill requirements for the
occupation of Commercial Vehicle Operator (Truck Driver), the Essential Skills Profile
outlines the foundational skills (e.g., numeracy, writing) that enable job incumbents to
perform job-related technical skills.
1Essential Skills
Profile

TRAINING TOOL | ESSENTIAL SKILLS PROFILE Commercial Vehicle Operator (Truck Driver) | 3
Introduction Commercial Vehicle Operators (Truck Drivers) operate heavy trucks to transport goods and materials over urban, interurban, provincial and international routes. They are employed by transportation companies, manufacturing and distribution companies, moving companies or they may be self-employed.
The most important Essential Skills for Commercial Vehicle Operators (Truck Drivers) are: • Document Use• Problem Solving• Job Task Planning and Organizing
It should be noted that the profile provides examples of essential skills usage for the entire spectrum of drivers. Notice should be taken of the Typical Task Complexity Rating(s) indicated in the introduction of each essential skill.
National Occupational Classification: 7511 – Truck Drivers
To effectively perform the tasks outlined in the National Occupational Standard, Commercial Vehicle Operators (Truck Drivers) require:
• proficient Reading Text skill to locate and interpret information written in memos, manuals, industrymagazines, legislation, regulations and codes, etc.;
• high-level Document Use skill to interpret road maps, tables, Bills of Lading and schematic drawings;
• proficient Writing skill to complete routine forms;
• proficient Numeracy skill to use various math applications relating to money, scheduling or budgeting and accounting, data analysis and measurement and calculation;
• proficient Oral Communication skill to interact professionally with co-workers, customers, colleaguesand fellow drivers;
• strong Problem-Solving skill to respond to unforeseen circumstances and to troubleshoot problemsrelating to people and equipment;
• high-level Decision Making skill, especially with respect to safety and customer service;
• sound judgment in Critical Thinking to assess, judge and evaluate situations and conditions for safetyand efficiency;
• high-level Job Task Planning and Organizing skill for trip planning and other tasks in which planning is linked to efficiency;
• a good Memory as it contributes to efficiency;
• proficiency in Finding Information from various sources, such as people and documents;
• proficiency in Working with Others (i.e., team work) to achieve common goals;
• proficiency in Digital Technology to use computer-controlled equipment and various software;
• strong Continuous Learning skill to stay abreast of new information (e.g., policies, procedures,regulations).

4 | ESSENTIAL SKILLS PROFILE Commercial Vehicle Operator (Truck Driver) | TRAINING TOOL
2COMMERCIAL VEHICLE
OPERATOR(TRUCK DRIVER)

TRAINING TOOL | ESSENTIAL SKILLS PROFILE Commercial Vehicle Operator (Truck Driver) | 5
Commercial Vehicle Operators:
n read handwritten notes and comments written in logbooks and on forms from co-workers, customers and supervisors. For example, they read comments about mechanical irregularities in vehicle inspection forms. They read brief instructions about deliveries in trip manifests and work orders. They read notes from co-workers about traffic delays and poor road conditions. (1)
n read Safety Data Sheets (SDS) for chemicals and hazardous substances prior to use to confirm proper handling and usage to prevent physical injury and harm. (2)
n may read handbooks with special procedures, such as those for border crossings. (2)
n read written instructions from supervisors, dispatchers, workplace staff to obtain information about work requirements for their shifts. (2)
n read brief reports. For example, they read transport route risk assessment reports to learn about hazards and delays on trip routes and to follow instructions to avoid unsafe conditions and procedures to complete tasks. (2)
n read waybills, packing lists and delivery documents to verify cargo contents and shipment instructions. (2)
n read trucking magazines and trade publications to stay abreast of industry trends and regulations, and to learn about new transportation products, equipment, supplies and regulations. (2)
A Reading Text
The typical text reading tasks of Commercial Vehicle Operators are at Complexity Levels 1 to 2. Their most complex text reading tasks are at Complexity Levels 3 and 4.
n may read moving van contracts which outline the hourly tariff, details of the load and the responsibilities of the company and of the customer. (2)
n read licenses and operating permits to identify the terms and conditions granted to the holder. For example, they read to learn about requirements such as those for placement of signals and lights and to understand restrictions, such as load limits. (3)
n read policies and procedures. For example, they read their organizations’ procedures for health and safety to apply them to specific situations such as accidents, injuries, and hazard identification and containment. (3)
n read a wide variety of manuals and guides to ensure safe and efficient operation of equipment and completion of tasks. For example, they may read air brake manuals in the event that minor repairs are required during a trip. (3)
n read transportation codes, regulations, city by-laws, other federal, provincial and municipal legislation, and updates to ensure that they follow specified procedures so that driving practices and trip routes are compliant. For example, they read provincial Traffic Acts and municipal by-laws to ensure that their trip routes and parking locations are compliant with restrictions. (4)

6 | ESSENTIAL SKILLS PROFILE Commercial Vehicle Operator (Truck Driver) | TRAINING TOOL
Reading Profile
Purpose for Reading
Type of Text To scan for specific To skim for overall To read the full To read the full text information/ meaning, to get text to understand to critique or to To locate the ‘gist’. or to learn. evaluate. information.
Forms 3 3 3
Labels 3 3
Notes, Letters, Memos 3 3 3
Manuals, 3 3 3 Specifications, Regulations
Reports, Books, 3 Journals

TRAINING TOOL | ESSENTIAL SKILLS PROFILE Commercial Vehicle Operator (Truck Driver) | 7
The typical document use tasks of Commercial Vehicle Operators are at Complexity Levels 1 to 2. Their most com-plex document use tasks are at Complexity Levels 2 and 3.
B Document Use
Commercial Vehicle Operators:
n scan placards, labels and signs for a variety of data. For example, they scan placards for dangerous goods to find information about cargo. They scan road signs to locate highway information such as distances, locations and directions. They read labels on safety equipment such as flares and fire extinguishers to locate expiration dates and to observe hazard symbols and warning and caution phrases. (1)
n locate data and other relevant information in sketches of routes completed by other drivers, such as construction zones, hazardous areas for parking and manoeuvering. (1)
n scan vehicle registration and insurance forms to verify coverage is up-to-date. (1)
n refer to scale tickets at weighing stations to get the weight of the axles before leaving the check point. (1)
n fill in drivers’ checklists, verifying the safety of various parts of the truck. (1)
n locate and retrieve data from various tables, schedules and other table-like text. For example, they locate departure and arrival times on ferry schedules. They locate information about the composition and health hazard of chemical products on Safety Data Sheets (SDS) and other technical data sheets. They may locate product codes, names, quantities and delivery times on inventory sheets. They locate highway routes on schedules, such as those for high loads. They locate properties of chemicals and the correct hazard placards to display in tables for Transportation of Dangerous Goods. They refer to fuel tables that indicate the average fuel consumption over a specified number of kilometres. (2)
n locate data and other information on forms. For example, they scan bill of ladings to locate details about cargo such as type and description of products, quantities, class, weights and classification numbers. (2)
n locate data and other information on road maps. For example, they refer to city and provincial maps to locate routes, distances and other features such as types of road, toll bridges and ferries on maps. (3)
n refer to assembly drawings for air brakes when studying for licencing exams or when completing minor repairs during a trip. (3)
n may interpret schematic drawings. For example, they scan schematics for the electrical system to locate and replace broken fuses. (3)
n may read US customs forms to establish whether there are any restrictions on transporting a particular product. (3)

8 | ESSENTIAL SKILLS PROFILE Commercial Vehicle Operator (Truck Driver) | TRAINING TOOL
Other Document Use Tasks
n complete loading manifests and company bills of lading.
n fill in forms to explain why shipments cannot be unloaded if there has been a mix-up in delivery instructions.
n complete drivers’ logs, stating date, destination and driving and resting periods.
n may create sketches to illustrate the angle of impact during an accident to include in vehicle damage or accident reports.
n enter data and information in tables. For example, they enter dates, distances, fuel use and fuel efficiency in fuel consumption logs.
n complete forms. For example, they complete licence and permit application forms. They complete daily pre and post trip inspection reports. They complete route risk assessment forms.
Document Use Profile
n read signs, labels or lists.
n complete forms by marking check boxes, recording numerical information or entering words, phrases, sentences or text of a paragraph or more.
n read completed forms containing check boxes, numerical entries, phrases, addresses, sentences or text of a paragraph or more.
n read tables, schedules or other table-like text.
n enter information on tables, schedules or other table-like text.
n plot information on graphs (e.g., line, pie, and bar).
n obtain specific information from graphs or charts.
n recognize common angles such as 15, 30, 45 or 90 degrees
n interpret information on graphs or charts.
n interpret scale drawings (e.g. blueprints or maps)
n read assembly drawings (e.g., those found in service and parts manuals).
n read schematic drawings (e.g. electrical schematics)
n make sketches
n obtain information from sketches, pictures or icons

TRAINING TOOL | ESSENTIAL SKILLS PROFILE Commercial Vehicle Operator (Truck Driver) | 9
The typical writing tasks of Commercial Vehicle Operators are at Complexity Levels 1 to 2. Their most complex writing tasks are at Complexity Levels 2 and 3.
C Writing
Commercial Vehicle Operators:
n may write notes to other drivers with instructions on where to take the next load. (1)
n write comments in notebooks and logbooks to record information about events and discussions that occurred throughout the day. For example, they write details in notebooks about delays, equipment malfunctions and outstanding tasks to complete. They record key discussion points with dispatchers and customers about events such as changes to parking locations and damage to property. They record details about routes such as narrow roads, low overpasses and unusual restrictions in trip logs. (1)
n write brief descriptions and explanations in forms. For example, they describe safety concerns in risk assessment reports. They write details about equipment malfunctions and wear in tractor and trailer inspection reports. (2)
n write work activity reports, records of duty status, daily logs and/or cycle tracking records in accordance with Hours of Service regulations. (2)
n following customer complaints, write memos to the company manager explaining why it is not possible to complete pickups or deliveries. (2)
n write descriptions and explanations on forms. For example, when completing accident and incident reporting forms, they write narrative accounts of incidents such as collisions, physical accidents, damages to property and cargo and breaches of safety procedures. They comment on potential causes, steps taken afterwards and their interactions with individuals involved and witnesses. (3)
Writing Profile
Purpose for Writing
Length To organize/ To keep a record/ To inform/ to To present an to remember to document request information analysis or comparison Texts requiring less 3 3 3 than one paragraph of new text
Texts rarely requiring 3 3 3 more than one paragraph
Longer texts 3 3 3

10 | ESSENTIAL SKILLS PROFILE Commercial Vehicle Operator (Truck Driver) | TRAINING TOOL
The Numerical Calculation Rating Scale ranges from Level 1 (least complex) to Level 5 (most complex). The numeracy tasks of Commercial Vehicle Operators involve:
• Money Math at Complexity Levels 1 to 3.• Scheduling or Budgeting and Accounting Math at Complexity Levels 1 to 3.• Measurement and Calculation Math at Complexity Levels 1 and 2.• Data Analysis Math at Complexity Level 1.
D Numeracy
Commercial Vehicle Operators:
n collect money for COD deliveries, verifying the bill, receiving payment in cash, credit card or cheque and making change if necessary. (Money Math) (1)
n calculate expense claim amounts. They calculate reimbursement amounts for meals, highway tolls, accommodations and other related costs. (Money Math) (2)
n calculate pay. For example, they calculate their pay using specified rates per kilometre and other incentives. (Money Math) (3)
n schedule trip departure and arrival times after calculating trip durations. (Scheduling or Budgeting and Accounting Math) (1)
n prepare records of time and money expended during trips for presentation to the office along with time cards. (Scheduling or Budgeting and Accounting Math) (2)
n may calculate unit prices, total prices and net prices to identify lowest costs for goods and services. For example, they may calculate total travel costs for various routes considering items such as fuel, accommodations and permits to determine which route is the most cost effective. They calculate the total costs of trucks, tractors and equipment considering initial prices, interest and after service charges. (Scheduling or Budgeting and Accounting Math) (3)
n measure tire tread to establish that the tire treads are at a safe thickness. (Measurement and Calculation Math) (1)
n calculate fuel purchases for the reporting quarter for fuel tax reports. (Measurement and Calculation Math) (1)
n calculate route and trip distances. (Measurement and Calculation Math) (2)
n calculate gross weights of loads to ensure that they do not exceed load limits. (Measurement and Calculation Math) (2)
n measure air pressure build-up time expressed as the amount of time (less than 2 minutes) required for the pressure to reach an end value of 690 kPa (100 psi). (Measurement and Calculation Math) (2)
n calculate Hours of Service and determine remaining available hours. (Measurement and Calculation Math) (2)
n calculate actual and allowable axle weights. (Measurement and Calculation Math) (2)
n compare counts and readings to standards and specifications. For example, they compare temperatures and pressure readings to specifications in order to verify that systems are operating correctly. They compare fuel consumption to specifications (Data Analysis Math) (1)

TRAINING TOOL | ESSENTIAL SKILLS PROFILE Commercial Vehicle Operator (Truck Driver) | 11
Commercial Vehicle Operators:
n estimate the time needed to complete tasks. For example, they estimate the time needed to load and unload cargo. They depend on their experience with similar tasks and environmental conditions to estimate times. (1)
n estimate transit times. They consider factors such as driving conditions, times of day, routes, cargo, permit restrictions, personal well-being and transit times for similar routes. (2)
n estimate the size and weight of cartons and skids to determine if they will fit in the trailer and not exceed load limits. (2)
n estimate fuel consumption rates. (2)
n estimate how far the vehicle can travel on a particular quality of fuel. (2)
Numerical Estimation The Numerical Estimation Rating Scale ranges from Level 1 (least complex) to Level 4 (most complex). The numerical estimation tasks of Commercial Vehicle Operators are at Complexity Level 2.
Math Skills Profile
a. Mathematical Foundations Used
Commercial Vehicle Operators
Number Concepts
Whole Numbers read and write, count, round off, add or subtract, multiply or divide whole numbers. For example, recording how many litres of fuel are in each compartment and adding to get the total; calculating change for a delivery payment; recording and adding the number of hours driven; calculating distances; calculating gross weights.
Integers read and write, add or subtract, multiply or divide integers. For example, using negative numbers to denote a shortage of freight at the destination; verifying temperatures of reefers.
Rational Numbers – read and write, add or subtract fractions, multiply or divide by a fraction, multiply Fractions or divide fractions. For example, recording fractions of an hour in the log book; reading and writing fractions of inches on measuring instruments.
Rational Numbers – read and write, round off, add or subtract decimals, multiply or divide by a Decimals decimal, multiply or divide decimals. Use decimals mainly to refer to dollars and cents. For example, adding the cost of repairs in dollars and cents; adding fuel purchases for fuel tax reports as dollars and cents; writing the length of a trailer as a decimal (e.g. 14.65 metres); reading and writing measurements in millimetres and centimetres; calculating weight loads and trailer capacities.
Rational Numbers – read and write percents, calculate the percent one number is of another, Percent calculate a percent of a number. For example, calculating the actual weight of a load as a percentage of the total allowable load for the vehicle; calculating that the aggregate working load limit of tiedowns used for cargo securement equals at least 50% of the cargo weight; estimating the percentage of wear on tire treads.

12 | ESSENTIAL SKILLS PROFILE Commercial Vehicle Operator (Truck Driver) | TRAINING TOOL
Commercial Vehicle Operators
Number Concepts
Equivalent Rational convert between fractions and decimals or percentages, convert between Numbers decimals and percentages. For example, converting 3/4 hr to .75 hr to multiply by their hourly rate; converting depths and distances from fractions of feet and inches to decimal equivalents.
Patterns and Relations
Equations and Formulae solve problems by constructing and solving equations with one unknown, use formulae by inserting quantities for variables and solving, write, simplify and solve two variable algebraic problems, write simplify and solve quadratic equations. For example, using a formula to calculate cubic weight; using the ‘Bridge Gross Weight Formula’ where W = the maximum weight in pounds that can be carried on a group of two or more axles to the nearest 500 pounds; L = the distance in feet between the outer axles of any two or more consecutive axles; and N = the number of axles being considered.
w = 500[12N + 36] N-1
Use of Rate, Ratio use a rate showing comparison between two quantities with different units, and Proportion use a ratio showing comparison between two quantities with the same units, use a proportion showing comparison between two ratios or rates in order to solve problems. For example, calculating the amount of fuel additive to use for a certain amount of fuel in order to obtain a particular fuel to additive ratio, such as 4 to 1; verifying frequency of engine rotation as rpm (revolutions per minute); expressing air pressure build up time in psi (pounds per square inch); calculating average distances, speeds and fuel consumption; using proportional calculations to determine distances on road maps.
See Use of - using scale drawings. Documents for information on:
Shape and Spatial Sense
Measurement perform measurement conversions. For example, converting kilograms to pounds Conversions and litres to gallons when driving in the United States; converting metres to feet (e.g. 14.65 metres = 48 feet) when verifying compliance with size and weight restrictions.
Areas, Perimeters, calculate areas, calculate perimeters, calculate volumes. For example, calculating Volumes the volume of diesel when carrying tanker loads; or calculating the space taken up by a load in order to maintain a 95% full rate.
See Use of - recognizing common angles. Documents for - using tables, schedules or other table-like text. information on: - using graphical presentations.
TRAINING TOOL | ESSENTIAL SKILLS PROFILE Commercial Vehicle Operator (Truck Driver) | 13
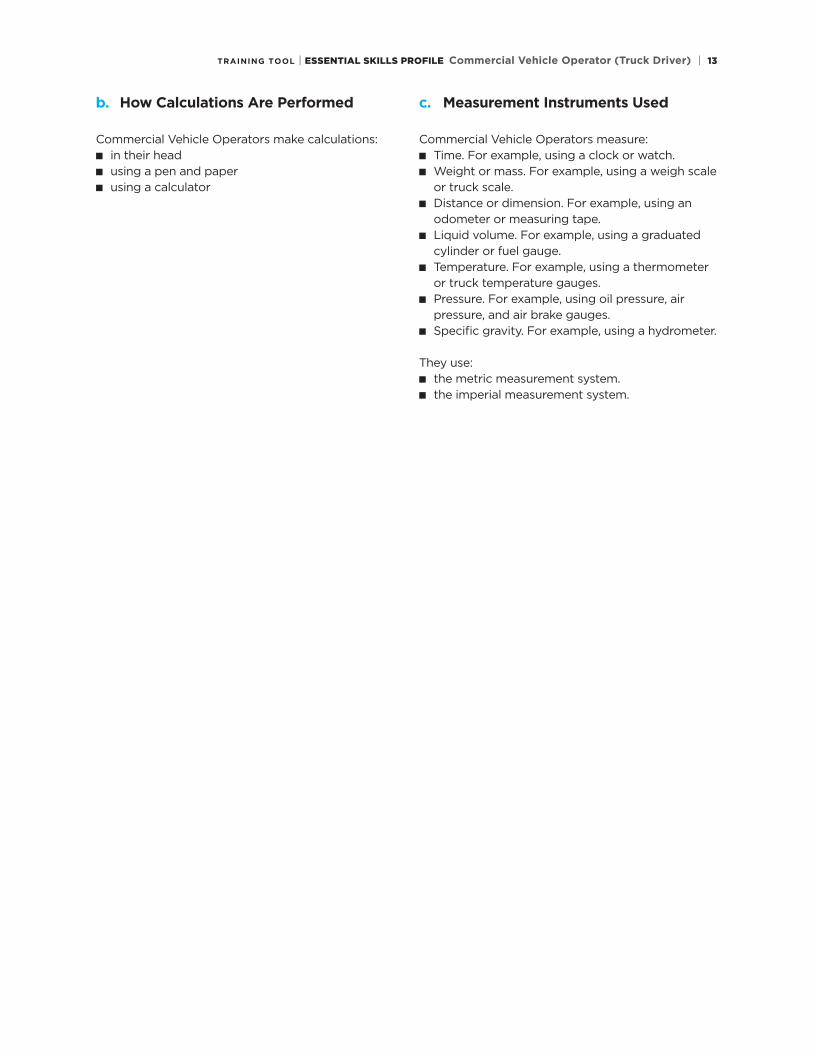
b. How Calculations Are Performed
Commercial Vehicle Operators make calculations: n in their head n using a pen and papern using a calculator
c. Measurement Instruments Used
Commercial Vehicle Operators measure: n Time. For example, using a clock or watch. n Weight or mass. For example, using a weigh scale or truck scale.n Distance or dimension. For example, using an odometer or measuring tape. n Liquid volume. For example, using a graduated cylinder or fuel gauge. n Temperature. For example, using a thermometer or truck temperature gauges.n Pressure. For example, using oil pressure, air pressure, and air brake gauges. n Specific gravity. For example, using a hydrometer.
They use: n the metric measurement system.n the imperial measurement system.

14 | ESSENTIAL SKILLS PROFILE Commercial Vehicle Operator (Truck Driver) | TRAINING TOOL
The typical oral communication tasks of Commercial Vehicle Operators are at Complexity Levels 1 to 2. Their most com-plex oral communication tasks are at Complexity Level 3.
E Oral Communication
Commercial Vehicle Operators:
n communicate with office staff when bringing in time sheets and expense claims. (1)
n may interact with terminal or depot managers to discuss upcoming business. (2)
n discuss work with co-workers and colleagues. For example, they receive updates from dispatchers about road conditions, delivery schedules and other work related matters. They coordinate tasks with dock workers as they load and unload cargo. They discuss driving schedules, loading and tie down tasks with co-drivers. They exchange ideas and suggestions for handling a range of situations and events. They discuss equipment failures and repair requirements with mechanics. They may discuss changes to office procedures and documents with office staff. (2)
n may participate in meetings about safety, routes and vehicle operations and problems. (2)
n give directions to co-workers and discuss job tasks with them. For example, they review the steps for unloading and loading bulk cargo in unusual locations not serviced by ordinary cargo handling equipment, such as from and to rail cars and ships. (2)
n may discuss products, prices, delivery dates and other matters with clients. For example, they check with clients to verify delivery dates and receive instructions for unloading cargo. They may explain charges on bills to clients. They may inform clients about damages to property and discuss options for repair and repayment. (2)
n may interact with terminal or depot managers and other supervisors. For example, they discuss loading and unloading procedures and upcoming business with terminal managers. They may discuss trip routes, receive special instructions and coordinate moves with supervisors. (2)
n communicate with supervisors and dispatchers to receive orders and discuss problems. For example, they discuss reasons for delays with dispatchers and negotiate new delivery schedules. They discuss problems such as damage to property during loading and unloading of cargo. (2)
n discuss a range of matters with officials from government departments. For example, they discuss load restrictions and other compliance issues with staff at weigh scales. They discuss permits and receive instructions about alternative routes from staff at permit offices. They discuss events such as accidents, spills and movement of over dimensional cargo with officials such as police officers. (3)

TRAINING TOOL | ESSENTIAL SKILLS PROFILE Commercial Vehicle Operator (Truck Driver) | 15
Modes of Communication Used
Commercial Vehicle Operators communicate: n in person.n using a telephone. n using a two-way radio or other such means. n using specialized communications signals
Environmental Factors Affecting Communication
The sound of the truck engine can impede communication when travelling with a partner. Communication on loading docks may be hindered by noise from heavy equipment such as forklifts or cranes.
Oral Communication Profile
Purpose for Oral Communication
Type To provide/ To seek, To co-ordinate To discuss To instruct, To negotiate, receive obtain work with (exchange instill resolve information, information that of others information, understanding, conflict explanation, opinions) knowledge direction
Interact with 3 3 3 co-workers
Interact with 3 3 3 3 supervisor/ manager
Interact with 3 3 3 3 3 customers/ clients/ public
Interact with 3 3 3 3 3 suppliers, servicers
Participate 3 3 3 3 in group discussion
Present 3 3 3 information to a small group

16 | ESSENTIAL SKILLS PROFILE Commercial Vehicle Operator (Truck Driver) | TRAINING TOOL
F Thinking Skills
Commercial Vehicle Operators:
n encounter construction, heavy traffic, bad weather or closed streets on routes causing delays. They find alternate routes around affected areas by speaking to other drivers, dispatchers and officials and by listening to the radio. In the event of extended delays, they may contact dispatchers to make alternate delivery arrangements. (1)
n may find that loads do not fit in the truck. They call dispatchers to explain the problem and to request a replacement vehicle or to arrange to share the load with a co-worker. (1)
n may find that no forklifts are available to receive the load at the destination or there is no space to unload. They attempt to call customers to discover what preparations they have made for the delivery. (2)
n encounter unexpected situations and conditions. For example, they encounter low overhead bridges and sharp turns that prevent them from continuing on routes. They determine where to turn around and to locate alternative routes on maps and through talking to dispatchers and other drivers (2)
n may find they are involved in incidents such as shifting of cargo and malfunctioning equipment. For example, they may encounter failure and malfunctioning of equipment such as refrigeration systems when transporting temperature sensitive products. They inform the dispatcher and gather data about temperature specifications for the products and cooling capacities of trailers. They work with their co-workers, colleagues and clients to arrange repairs of equipment and alternative storage if required. (2)
n suspect that there is a discrepancy between orders and the load. They double check all of the relevant documentation to verify that a discrepancy does in fact exist and coordinate with the shipper to solve the problem, keeping the dispatcher informed as necessary. (2)
n are the first to arrive at accident scenes with people in need of immediate emergency assistance. They may be required to physically remove injured people from pending dangers that may cause further harm and provide first aid until emergency officials arrive. (3)
1. Problem Solving: Involves problems that require solutions; most problems concern mechanical challenges, people or situations.
The Problem Solving Complexity Rating Scale ranges from Level 1 (least complex) to Level 4 (most complex). The typical problem solving tasks of Commercial Vehicle Operators are at Complexity Levels 1 and 2. Their most complex problem solving tasks are at Complexity Levels 2 and 3.

TRAINING TOOL | ESSENTIAL SKILLS PROFILE Commercial Vehicle Operator (Truck Driver) | 17
2. Decision Making: Refers to making a choice among options.
The Decision Making Complexity Rating Scale ranges from Level 1 (least complex) to Level 4 (most complex). The typical decision making tasks of Commercial Vehicle Operators are at Complexity Levels 1 and 2. Their most complex decision making tasks are at Complexity Levels 2 and 3.
Commercial Vehicle Operators:
n decide if the vehicle is safe to operate. (1)
n choose routes. They consider factors such as distances, restrictions for dimension and weights, travel costs such as those for tolls, permits and types of roadways, times of day travelling, construction and other road conditions. They may be required to seek approval from dispatchers and supervisors before revising routes. (2)
n may choose the placement of cargo order in which to load cargo. When loading cargo, they consider the quantity, type, size and shape of cargo. (2)
n choose steering and breaking techniques considering the steepness of hills, road conditions and type and amount of load, type of trailer and road and traffic conditions. (2)
n decide whether the load has been properly positioned so that items will not shift in transit. (2)
n decide how to divide a load which must be delivered in two different trucks. (2)
n choose what maintenance tasks have to be completed. They consider the amount of wear on equipment and parts, safety requirements, route distances, the type of freight and cargo, ease of access to parts once loaded and access to mechanics once on route. They may seek supervisors’ approval for maintenance activities. (2)
n decide whether to continue driving while en route. They consider driving conditions, restrictions on permits, their driving experiences and alertness. (3)

18 | ESSENTIAL SKILLS PROFILE Commercial Vehicle Operator (Truck Driver) | TRAINING TOOL
3. Critical Thinking: Refers to the process of evaluating ideas or information, using a rational, logical thought process, and referring to objective criteria, to reach a rational judgment about value, or to identify strengths and weaknesses.
The Critical Thinking Complexity Rating Scale ranges from Level 1 (least complex) to Level 4 (most complex). The typ-ical critical thinking tasks of Commercial Vehicle Operators are at Complexity Levels 1 to 2. Their most complex critical thinking tasks are at Complexity Level 3.
Commercial Vehicle Operators:
n assess the safety and appropriateness of load positions and securement. They consider the dimensions and weight distribution and tie down and securement locations on cargo. They review transport regulations, permit restrictions and unloading schedules. (2)
n judge the severity of worksite hazards and driving conditions. For example, they assess the risks of injury to individuals and damage to property and equipment while loading, securing and unloading cargo. They complete visual inspections to assess the potential risks presented by such things as low hanging wires, slippery surfaces, damaged and worn equipment and shifting of cargo during transit. When assessing driving conditions, they
consider risk factors such as visibility, traffic volume, ice and snow, their experience and alertness and type of cargo. They also assess comments and warnings from other drivers and dispatchers and announcements from radio stations and weather offices. (2)
n judge the suitability of routes. They consider costs, travel times and potential driving complications and delays. They examine maps, permits, road schedules, transportation regulations. They speak to dispatchers and other drivers and review websites for information about road construction and features such as low bridges, sharp and limited turns and other potential obstructions and complications. (3)

TRAINING TOOL | ESSENTIAL SKILLS PROFILE Commercial Vehicle Operator (Truck Driver) | 19
4 Job Task Planning and Organizing: Refers to the extent to which Commercial Vehicle Operators plan and organize their own tasks.
The Job Task Planning and Organizing Rating Scale ranges from Level 1 (least complex) to Level 4 (most complex). Commercial Vehicle Operators plan and organize their job tasks at Complexity Level 2.
Description:
Job task planning and organizing is very important in the day-to-day work of Commercial Vehicle Operators. While dispatchers often assign priorities for loads, deadlines and routes, drivers are responsible for ensuring they have required documents and that routes are appropriate for their tractor/trailers, cargo and associated restrictions. They are often required to revise routes when complications or obstructions occur. As part of their daily activities they plan tasks such as fuel and rest stops, delivery schedules and routes.
While the task of driving itself is repetitive, Commercial Vehicle Operators must stay alert and prepared to respond to new information and unforeseen circumstances (e.g., emergencies, adverse weather conditions and obstructions such as low bridges and wires). The work of Commercial Vehicle Operators requires some coordination with the work plan of others; for example, when cargo is being loaded and unloaded.
5 Significant Use of Memory
Commercial Vehicle Operators:
n remember routes to loading docks in many cities.
n recall verbal instructions; for example, do not arrive at the customer’s loading dock before 6:00 pm and the order to load cargo.
n remember phone numbers of often called contact persons at various destinations.
n remember placards for different dangerous goods cargo to speed up the placement of the placards when needed.
n remember routes through large cities, including details such as low underpasses and narrow turns.

20 | ESSENTIAL SKILLS PROFILE Commercial Vehicle Operator (Truck Driver) | TRAINING TOOL
6 Finding Information
Commercial Vehicle Operators perform tasks that involve finding information at Complexity Levels 1 to 3.
Commercial Vehicle Operators:
n find information about current road conditions and weather forecasts. They listen to announcements on radio stations and weather channels and receive updates from dispatchers and other drivers. (1)
n read bills of lading or contact customers to gain information about the contents of a load. (1)
n find information about routes, including restrictions and details such as bridge heights and widths, scheduled construction and potential hazards and obstructions. They consult with
dispatchers and other drivers and search maps, databases, road condition tables and construction schedules. (2)
n look up information on classifications of dangerous goods and their labels in dangerous goods manuals and charts. (2)
n find information about changes to ground transport rules and regulations by consulting co-workers and searching government websites, memoranda and notices. (3)
G Working with Others
The Working with Others Complexity Rating Scale ranges from Level 1 (least complex) to Level 4 (most complex). Commercial Vehicle Operators work with others at Complexity Level 3.
Description:
Commercial Vehicle Operators work independently to complete tasks such as driving and loading and unloading cargo. They may coordinate and integrate job tasks with colleagues and co-workers, which may include dispatchers and loading dock workers.
While on the road, Commercial Vehicle Operators remain connected to dispatchers, fellow drivers and their supervisors through telecommunications and computer technology.
Commercial Vehicle Operators:
n participate in formal discussions about work processes or product improvement.
n have opportunities to make suggestions on improving work processes.
n monitor the work performance of others.
n inform other workers or demonstrate to them how tasks are performed.
n orient new employees.
Participation in Supervisory or Leadership Activities

TRAINING TOOL | ESSENTIAL SKILLS PROFILE Commercial Vehicle Operator (Truck Driver) | 21
H Digital Technology
The Digital Technology Rating Scale ranges from Level 1 (least complex) to Level 5 (most complex). The Digital Technology tasks of Commercial Vehicle Operators are at Complexity Levels 1 and 2.
Commercial Vehicle Operators:
n may use bookkeeping, billing and accounting software. For example, may enter predefined codes into the computer to call up bills of lading and customer account information. (2)
n use communications software. For example, they send and receive email and attachments to customers, co-workers and colleagues. They may also receive information about regulations and links to government websites. (2)
n use the Internet. For example, they may access websites to review acts, regulations and procedures, to download forms and to organize services such as repairs and hotel reservations. (2)
n use customer-specific data entry devices when transporting cargo to ensure traceability. (2)
n use on-board tracking and video event recording devices during trips. (2)
n use other computer and software applications. For example, they use function keys and codes in loading and unloading systems to generate bills and printouts of load information. They use route optimization software such as PC Miler to review different road maps and identify distances and times in trip. Some drivers may use them to plan and customize travel itineraries. (2)

22 | ESSENTIAL SKILLS PROFILE Commercial Vehicle Operator (Truck Driver) | TRAINING TOOL
I Continuous Learning
The Continuous Learning Complexity Rating Scale ranges from Level 1 (least complex) to Level 4 (most complex). Commercial Vehicle Operators perform Continuous Learning tasks at Level 3.
Description:
Commercial Vehicle Operators are expected to stay abreast of industry trends and changes to government rules and regulations. Continuous learning typically relates to: driving skills; compliance/safety; company policies and procedures; and new technology. They learn through completion of their daily tasks and interactions with dispatchers, supervisors and other drivers and by reading trade publications, e-magazines and government legislation, memoranda and notices. Their organizations may provide training and training materials on changes to policies and procedures such as the implementation of specialized routing software.
New drivers enhance their driving skills by: talking with supervisors and other drivers; attending safety meetings; and, participating in classroom training. Driving as a team with a second driver and serving as a coach or mentor is often an available option. Experienced drivers also are involved in professional development to keep up with new equipment technology. Many carriers make driver training videos and resources available. Industry magazines are an important source of information and are widely read by drivers.
How the Learning Occurs
Learning may be acquired:n as part of regular work activity. n from co-workers. n through training offered in the workplace. n through off-site training: • during working hours at no cost to the worker. • partially subsidized.

TRAINING TOOL | ESSENTIAL SKILLS PROFILE Commercial Vehicle Operator (Truck Driver) | 23
J Other Information
In addition to collecting information for this Essential Skills Profile, our interviews with job incumbents also asked about the following topics
1. Physical Aspects
Commercial Vehicle Operators sit to drive, read and complete documents. They walk, bend and climb to inspect tractors and trailers and to load, secure, transport, unload and deliver cargo. They use hand-eye coordination and upper limb coordination to drive trucks and to operate equipment. Multiple limb coordination is required for climbing onboard tractors, trailers and equipment. They use heavy strength to move equipment and goods.
2. Attitudes
Commercial Vehicle Operators should be patient, alert, organized and able to handle the stress of heavy traffic and tight deadlines while working in isolation. They must be able to manage time, stress and fatigue. They should have a positive attitude and the ability to work alone for considerable periods of time. Self-awareness is important as a means to maintain physical and mental wellness and support healthy eating habits while on the road for extended periods of time. Balancing family and work priorities is seen as helpful to deal with loneliness while on the road.
3. Future Trends Affecting Essential Skills
In the future, Commercial Vehicle Operators will need enhanced essential skills to manage advancements in computer technology, changes to legislation and stricter environmental and safety standards. Carrier companies’ adoption of computers to manage routing, cargo and communications will require advanced digital technology skills and continuous learning. Changes to regulations and stricter transportation, safety and environmental standards will increase the requirement for reading, writing and document use skills.

TRAINING TOOL
DRIVING THE FUTURE
Entry-Level Training
Curriculum Framework

2 | Entry-Level Training Curriculum Framework | TRAINING TOOL
This document sets out a framework for the curriculum and the learning outcomes for training delivered to individuals
aspiring to enter the occupation of a commercial vehicle operator (truck driver). This framework is aligned with the
National Occupational Standard (NOS) for Commercial Vehicle Operator (truck driver). The NOS defines the skills,
knowledge and abilities required of today’s professional drivers. Simply put, the NOS describes ‘what a driver must be able to do’ and ‘what a driver must know’ to perform the job safely, effectively and efficiently. The overall purpose of this
curriculum framework is to provide consistent training within entry-level programs.
Entry-Level Training
Curriculum Framework

3 | Entry-Level Training Curriculum Framework | TRAINING TOOL
USING THE CURRICULUM FRAMEWORK
USE 1: Developing New Entry-Level Training
Programs
Successful entry-level training programs will prepare
students for the employment in Canada’s trucking
and transportation workforce. The curriculum
framework outlines the skills and knowledge that
students need to acquire in the entry-level training
phase to prepare them to successfully obtain a
commercial driver’s license (CDL).
USE 2: Assessing Existing Entry-Level Training
Programs
There are several public and private training
institutions across the country that provide entry-
level training for commercial vehicle operators.
To ensure that current training programs and
curriculum are adequately preparing students for
their commercial licensing assessments as well as
entry into the workforce, the curriculum framework
can be used to conduct a training gap analysis.
A training gap analysis is a way for institutions
to compare their current curriculum (including
course objectives and course outcomes) with a
national standard to identify areas that may not
be addressed in their current program offering.
Assessing existing training programs against the
curriculum framework helps to ensure that students
are receiving the most comprehensive training
possible.
The Curriculum Framework for Entry-Level Training has two main uses:
PURPOSE
This curriculum framework assumes that the
individual being taught the curriculum will begin
with only automobile driving experience. The
curriculum concludes by preparing the learner to
successfully challenge the government examinations
to obtain a commercial class of driver licence
(CDL), and also provides a base of competency that
enables the individual to begin employment within
the occupational field.
It is important to recognize that this curriculum
framework only addresses the first stage of
entry-level learning. The individual will continue
to acquire competency in the workplace. The
goal of this workplace-based training is to reach
the competency level defined in the National
Occupational Standard for Commercial Vehicle
Operator (truck driver).
This curriculum framework assumes that most
learning/training takes place in two separate and
distinct phases. The phases are not separated in
all situations. In workplace-based driver training
settings, the entry-level and workplace-based
phases of training/learning are likely to have a
greater degree of cross-over.
Potential Users:
• Curriculum Developers • Provincial/Territorial Trucking Associations
• Training Program Administrators • Provincial/Territorial Governments

4 | Entry-Level Training Curriculum Framework | TRAINING TOOL
FRAMEWORK COMPONENTS
COMPETENCE
CATEGORY:
Main duty area
LEARNING OUTCOME:
Defines what a learner
will be able to do at the
end of the training
LEARNING
INDICATORS:
The Knowledge that
the trainee will be able
to demonstrate (e.g.
explain, describe)
PERFORMANCE
ELEMENTS:
The Skills that the
trainee will be able to
demonstrate.
SUB-TASKS (FOR
SOME PERFORMANCE
ELEMENTS):
The steps that the
trainee will take to
demonstrate the
Skill identified in the
Performance Element.
Competence Category
Learning 8.1 At the end of this training program the graduate will be able to inspect and Outcome operate a commercial vehicle with air brakes.
8.1.1 Explains the basic operating principles of air brakes. (H)*
8.1.2 Explains the general function of supply, service, parking/emergency and trailer sub-systems and related components. (H)*
8.1.3 Explains the visual characteristics, external components and basic function of foundation brakes. (H)*
8.1.4 Explains how speed, weight, vehicle specifications and downhill grades affect vehicle braking. (H)*
8.1.5 Describes conditions such as brake fade, and brake lag. (H)*
8.1.6 Identifies common brake types and recognize many of the components. (H)*
8.1.7 Explains the importance of proper brake pushrod stroke. (H)*
8.1.8 Uses an effective method for measuring brake pushrod stroke. (H)*
8.1.9 Explains that only qualified individuals may repair brakes. (H)*
8.1.10 Identifies brake component defects. (H)*
Identifying brake defects includes performing the following sub-tasks.
1) The driver will identify:
a) damaged, missing or malfunctioning foundation brake components
b) cracked, loose, missing, or contaminated brake lining, improper drum contact, or lining that is less than the required thickness
c) audible air leaks, and visible evidence of cracks and non- manufactured holes in brake chambers
d) mismatched brake chamber size and/or slack adjuster length on steering axles.
e) cracked and/or broken brake drums or rotors
f) leaks, damage, deterioration and improper fittings on readily visible brake hoses and air lines
g) loose, cut or frayed compressor drive belt
h) insecure air compressor mounts, brackets or fasteners
8 AIR BRAKE SYSTEMS
Performance Elements
Sub-tasks
Learning Indicators

5 | Entry-Level Training Curriculum Framework | TRAINING TOOL
con’t
LEARNING OUTCOMES SUMMARY
1. Employment in the commercial vehicle industry
At the end of this training program the graduate will be able to:
1.1 describe the requirements for employers and workers in a workplace to comply with government
regulations and develop standards. (18 Learning Indicators)
1.2 interact effectively and speak with coworkers, supervisors, customers, suppliers, enforcement
officials and the general public. (2 Learning Indicators, 4 Performance Elements)
1.3 explain the importance of being “fit for work”, maintaining a healthy lifestyle, and balancing
personal and work life. (3 Learning Indicators, 2 Performance Elements)
1.4 explain the purpose, fundamental structure, and basic content of regulations that apply to
commercial vehicle operations. (18 Learning Indicators)
2. Vehicle components & systems
At the end of this training program the graduate will be able to:
2.1 operate commercial vehicle systems and controls. (11 Learning Indicators, 14 Performance Elements)
3. Basic driving techniques
At the end of this training program the graduate will be able to:
3.1 prepare and start to drive a commercial vehicle. (3 Learning Indicators, 12 Performance Elements)
3.2 comply with operational regulations that apply to commercial vehicles. (11 Learning Indicators,
7 Performance Elements)
3.3 drive a commercial vehicle in a safe manner and perform basic driving maneuvers.
(3 Performance Elements)
3.4 operate a commercial vehicle in a safe manner and perform the required maneuvers for driving on
urban, commercial, and industrial roads. (2 Performance Elements)
3.5 operate a commercial vehicle in a safe manner and perform the required maneuvers for driving on
expressways. (2 Learning Indicators, 20 sub-tasks)
4. Professional driving habits
At the end of this training program the graduate will be able to:
4.1 apply defensive driving techniques. (3 Learning Indicators, 10 Performance Elements)
4.2 apply fuel efficient driving techniques. (2 Learning Indicators, 10 Performance Elements)
5. Tractor-trailer off-road tasks and maneuvers
At the end of this training program the graduate will be able to:
5.1 safely perform backing and parking maneuvers with a tractor-trailer. (4 Performance Elements)
5.2 safely perform tractor-trailer coupling and uncoupling tasks. (2 Performance Elements)

6 | Entry-Level Training Curriculum Framework | TRAINING TOOL
6. Documents, paperwork & regulatory requirements
At the end of this training program the graduate will be able to:
6.1 administer written workplace documents, and communicate effectively through written means.
(4 Learning Indicators, 4 Performance Elements)
6.2 complete basic mathematical calculations required for commercial vehicle operation.
(2 Learning Indicators, 6 Performance Elements)
6.3 use computers, electronic and communication devices common in commercial vehicle operations.
(3 Performance Elements)
6.4 plan ahead, anticipate problems, and begin to deal with an emergency situation. (11 Learning
Indicators, 9 Performance Elements)
7. Vehicle inspection activities
At the end of this training program the graduate will be able to:
7.1 inspect and maintain commercial vehicles. (3 Learning Indicators, 6 Performance Elements)
7.2 conduct required daily inspections and monitor a commercial vehicle’s safe condition.
(3 Learning Indicators, 10 Performance Elements)
7.3 inspect each component or system listed in NSC 13, Schedule 1 and conduct proper inspections to
determine when a minor or major defect is present. (23 Performance Elements)
8. Air brake systems
At the end of this training program the graduate will be able to:
8.1 inspect and operate a commercial vehicle with air brakes. (9 Learning Indicators, 2 Performance
Elements)
9. Hours of Service compliance
At the end of this training program the graduate will be able to:
9.1 comply with the requirements of the Hours of Service regulations. (27 Learning Indicators,
9 Performance Elements)
10. Cargo securement & loss prevention
At the end of this training program the graduate will be able to:
10.1 meet basic cargo securement requirements. (20 Learning Indicators, 5 Performance Elements)
10.2prevent cargo loss claims, and follow required procedures to maintain secure facilities, prevent
cargo loss and avoid damage. (1 Learning Indicator, 3 Performance Elements)
11. Handling emergencies
At the end of this training program the graduate will be able to:
11.1 assess and adapt to changing conditions. (4 Learning Indicators, 12 Performance Elements)
11.2 handle minor emergency incidents in a professional manner. (5 Learning Indicators, 1 Performance
Element)

7 | Entry-Level Training Curriculum Framework | TRAINING TOOL
Competence Category
Learning 1.1 At the end of this training program the graduate will be able to describe the Outcome requirements for employers and workers to comply with government regulations and develop standards.
1.1.1 Explains that employers must comply with government regulations. (H)*
1.1.2 Identifies employer standards that apply to occupational health and safety, employment, transportation, and business operations as: Canada Labour Code, National Safety Code, Transportation of Dangerous Goods Act, provincial Occupational Health and Safety acts, etc. (M)
1.1.3 Explains that workers must comply with government regulations and standards. (M)
1.1.4 Identifies that standards may apply to worker obligations, rights and responsibilities; employment; health and safety; labour agreements; etc. (H)*
1.1.5 Explains that there are requirements for gaining and sustaining employment within the occupation. (M)
1.1.6 Identifies that employment requirements may include: security screening and background checks; regular appraisals and performance reviews; pre-employment, periodic, or post-incident drug and alcohol testing; etc. Workers may also need to acknowledge that they understand and accept workplace standards and policies. (M)
1.1.7 Identifies that employment requirements may also require medical clearance based on a specific type of driver’s license, and may also involve a physical assessment or fitness screening. (M)
1.1.8 Identifies some of the medical conditions that may prohibit a driver from holding specific types of commercial drivers’ licenses, such as: heart conditions, epilepsy, some types of diabetes, etc. (M)
1.1.9 Explains that expectations of worker performance are usually defined through workplace practices, procedures and policies that may include: corrective action processes, consequences for failing to adhere to requirements, and steps that can lead to dismissal. (H)*
1.1.10 Explains that specific workplace practices, procedures and policies vary in scope and application, and may be written or unwritten. (L)
1.1.11 Explains that workers are sometimes expected to rely heavily on their personal knowledge of regulatory or compliance requirements. (M)
1.1.12 Explains the need to identify workplace hazards according to workplace practices, procedures and policies. (L)
1 EMPLOYMENT IN THE COMMERCIAL VEHICLE INDUSTRY
con’t
Learning Indicators
(H, M and L) – Indicates that the graduate will have a high (H), moderate (M) or low (L) level of acquirement of the competency. (*) – Indicates the curriculum will include validation
(knowledge testing, task demonstration) of the Learning Indicator.

8 | Entry-Level Training Curriculum Framework | TRAINING TOOL
1 1.1.13 Identifies that hazards are communicated through methods such as Workplace Hazardous Materials Information System (WHMIS), and labels and Safety Data Sheets (SDS), used in the system known as the Globally Harmonized System of Classification and Labelling of Chemicals (GHS) for Workplace Chemicals. (L)
1.1.14 Explains that some cargo is defined through regulations as “dangerous goods”. (L)
1.1.15 Explains that dangerous goods can only be handled and transported by workers who have been specifically trained and certified. (L)
1.1.16 Identifies the symbols and methods used to identify “dangerous goods.” (H)*
1.1.17 Explains the need for developing a clear understanding of workplace practices, procedures and policies. (L)
1.1.18 Explains the need to take steps to recognize and resolve situations in which a worker’s understanding is unclear about instructions, expectations, procedures or policies. (M)
Learning 1.2 At the end of this training program the graduate will be able to effectively Outcome interact and speak with coworkers, supervisors, customers, suppliers, enforcement officials and the general public.
1.2.1 Explains that interactions involving spoken words include specific words as well as the accompanying tone of voice, context, gestures and body language. (L)
1.2.2 Describes gestures and body language that convey messages without exchanging spoken words. (L)
1.2.3 Greets a person or group before interacting on any issue. (L)
1.2.4 Adheres to regulations that require employers and workers to provide a workplace in which everyone feels secure and free of unnecessary conflict. (M)
1.2.5 Practices sensitivity to cultural diversity, and uses a gentle and careful approach when encountering any misunderstanding. (L)
1.2.6 Uses techniques for social, verbal and electronic interactions that positively impact the graduate’s success. (M)*
Learning 1.3 At the end of this training program the graduate will be able to explain the Outcome importance of being “fit for work”, maintaining a healthy lifestyle, and balancing personal and work life.
1.3.1 Explains that that some types of driving require significant amounts of time away from home, and that this schedule can cause work-related and personal stress, and can affect family relationships. (L)
Learning Indicators
Performance Elements
Learning Indicators
Learning Indicators
con’t
(H, M and L) – Indicates that the graduate will have a high (H), moderate (M) or low (L) level of acquirement of the competency. (*) – Indicates the curriculum will include validation
(knowledge testing, task demonstration) of the Learning Indicator.

9 | Entry-Level Training Curriculum Framework | TRAINING TOOL
1.3.2 Explains that lifestyle and dietary factors can influence fatigue, performance, physical fitness and agility. (L)
1.3.3 Describes occupational factors which can contribute to health-related challenges such as obstructive sleep apnea, back strain, injuries caused by slips, trips and falls, etc. (L)
1.3.4 Practices stretching and proper lifting methods to prevent workplace injuries. (L)
1.3.5 Practices personal hygiene habits that positively affect workplace relationships. (L)
Learning 1.4 At the end of this training program the graduate will be able to explain the Outcome purpose, fundamental structure, and basic content of regulations that apply to commercial vehicle operations.
1.4.1 Describes the National Safety Code is a model for Canadian jurisdictions to regulate the safe operation of commercial vehicles. (M)*
1.4.2 Explains that legislation and regulations may affect operations within each jurisdiction, and that applicable rules can vary, even during the same workday, depending on where a driver is working. (M)
1.4.3 Explains that commercial vehicles are generally defined by weight and that individual Canadian jurisdictions can set unique weight thresholds. (M)
1.4.4 Explains that different classes of drivers’ licenses apply to different types of vehicles and the required license classes vary between Canadian jurisdictions. (M)
1.4.5 Explains that a driver’s license may require specific endorsements for certain types of commercial vehicles and operations. (M)
1.4.6 Explains that personal driving history can affect the status of a worker’s commercial license and ability to drive commercial vehicles. (M)
1.4.7 Explains that government agencies develop and retain records of driver incidents and infractions. (M)*
1.4.8 Explains that government agencies develop and retain records of commercial motor carrier incidents and infractions. (M)*
1.4.9 Explains that medical condition and history affect the type of license a driver can hold. (M)
1.4.10 Explains that regulations apply to the movement of vehicles on all public roads and highways. (M)
1.4.11 Explains that regulations apply to the mechanical condition of commercial vehicles. (M)*
1
con’t
Performance Elements
Learning Indicators
Learning Indicators
(H, M and L) – Indicates that the graduate will have a high (H), moderate (M) or low (L) level of acquirement of the competency. (*) – Indicates the curriculum will include validation
(knowledge testing, task demonstration) of the Learning Indicator.

10 | Entry-Level Training Curriculum Framework | TRAINING TOOL
1.4.12 Explains that regulations apply to the allowable weights and dimensions of commercial vehicles. (M)*
1.4.13 Explains that regulations apply to the securing of cargo transported by commercial vehicles. (M)
1.4.14 Explains that regulations apply to the air brake systems used on commercial vehicles. (M)
1.4.15 Explains that regulations apply to the daily inspection of commercial vehicles. (M)
1.4.16 Explains that regulations apply to the transport of materials and products that are defined as “dangerous goods.” (M)*
1.4.17 Explains that regulations apply to the hours a person is permitted to drive a commercial vehicle, be on duty, and be off duty. (M)
1.4.18 Explains that commercial vehicles may be restricted from operating on certain routes, or at particular times, due to their weight, license, size or commodity being transported. (M)*
1Learning Indicators
(H, M and L) – Indicates that the graduate will have a high (H), moderate (M) or low (L) level of acquirement of the competency. (*) – Indicates the curriculum will include validation
(knowledge testing, task demonstration) of the Learning Indicator.

11 | Entry-Level Training Curriculum Framework | TRAINING TOOL
Competence Category
Learning 2.1 At the end of this training program the graduate will be able to operate Outcome commercial vehicle systems and controls.
2.1.1 Describes the general layout of a typical commercial vehicle engine compartment. (M)
2.1.2 Describes the general layout and function of major body, frame and external vehicle components and systems. (M)
2.1.3 Explains the differences between single, tandem, tridem and other multi-axle configurations. (H)*
2.1.4 Describes the basic types, features and function of tires and wheels. (H)*
2.1.5 Describes the physical features and operation of common types of suspension systems. (H)*
2.1.6 Describes the physical features and basic operation of drum and disc brake systems. (M)
2.1.7 Describes how steering control is lost when tires skid during heavy brake use or when braking with poor traction. (H)*
2.1.8 Describes the way that Anti-Lock Brake Systems (ABS) keep wheels from locking, but may not shorten vehicle stopping distance. (H)*
2.1.9 Describes how stability control systems operate and affect vehicle operation. (H)*
2.1.10 Describes the physical features, indicators, warnings, and the basic operation of hydraulic brake systems. (M)
2.1.11 Describes the basic operation of portable or on-board cargo heating equipment. (L)
2.1.12 Locates and operates all typical primary and secondary controls, gauges and instruments. (H)*
2.1.13 Reads the instrument panel indicators displaying important vehicle operating information, warnings and safety system status. (H)*
2.1.14 Operates one or more typical manual transmission and clutch, automated manual transmission and/or automatic transmission. (H)*
2.1.15 Operates a differential and inter-axle differential used in tandem drive axles. (M)
2.1.16 Locates fuel tanks and filler caps, and practices proper fueling methods. (M)
2 VEHICLE COMPONENTS & SYSTEMS
con’t
Learning Indicators
Performance Elements
(H, M and L) – Indicates that the graduate will have a high (H), moderate (M) or low (L) level of acquirement of the competency. (*) – Indicates the curriculum will include validation
(knowledge testing, task demonstration) of the Learning Indicator.

12 | Entry-Level Training Curriculum Framework | TRAINING TOOL
2 2.1.17 Identifies important commercial vehicle service items, and locates operating fluid check points. (M)
2.1.18 Identifies the correct operating fluids required for a vehicle and properly re-fills and maintains fluid levels. (M)
2.1.19 Operates a differential lock or inter-axle differential lock. (M)
2.1.20 Operates engine brake or retarders, and describes how and when to appropriately use these systems to control vehicle speed. (M)
2.1.21 Operates vehicle heating, defrosting and air-conditioning systems. (H)*
2.1.22 Operates vehicle lamps and accessories. (H)*
2.1.23 Operates windshield wiper and washer systems. (H)*
2.1.24 Carries, secures, stores and uses, or operates required emergency equipment. (M)
2.1.25 Operates different types of trailer coupling devices. (M)
Performance Elements
(H, M and L) – Indicates that the graduate will have a high (H), moderate (M) or low (L) level of acquirement of the competency. (*) – Indicates the curriculum will include validation
(knowledge testing, task demonstration) of the Learning Indicator.

13 | Entry-Level Training Curriculum Framework | TRAINING TOOL
con’t
Competence Category
Learning 3.1 At the end of this training program the graduate will be able to prepare Outcome and start to drive a commercial vehicle.
3.1.1 Explains the importance of being fully alert when driving. (H)
3.1.2 Describes ways to check and remove vehicle restraints and other loading dock devices. (L)
3.1.3 Explains the importance of proper start-up and/or warm-up procedures. (M)
3.1.4 Applies a method for confirming that they are fully alert and their judgment is not impaired in any way before they begin to drive. (H)
3.1.5 Confirms every time before leaving the driver’s seat that the vehicle is secured by the vehicle’s parking brake, wheel chocks or suitable blocks. (H)*
3.1.6 Enters and exits the cab, or the vehicle cargo area maintaining 3-point contact, and recognizes the risks of improperly climbing onto or jumping from equipment. (H)*
3.1.7 Confirms all required vehicle and cargo documents are valid and correct. (M)
3.1.8 Locates required vehicle documents such as permit books, vehicle registration, insurance, bills of lading, etc. (M)
3.1.9 Confirms that cargo handling equipment and devices are returned to their proper place when in a loading dock. (L)
3.1.10 Checks and/or adjusts air suspension settings and controls, axle spacing, and 5th wheel position – when operating a tractor-trailer. (L)
3.1.11 Adjusts the driver’s seat to the correct position before driving. (H)*
3.1.12 Inspects, wears and properly adjusts seatbelts before driving. (H)*
3.1.13 Scans all controls and instruments before driving. (M)*
3.1.14 Monitors the engine, instrument panel and indicator lamps. (H)*
3.1.15 Listens for normal vehicle sounds while starting the vehicle’s engine and avoids unnecessary idling. (M)*
3.2 At the end of this training program the graduate will be able to comply with operational regulations that apply to commercial vehicles.
3.2.1 Explains the need to know the height of their vehicle before driving on any road. (H)*
3 BASIC DRIVING TECHNIQUES
Learning Indicators
Performance Elements
Learning Indicators
(H, M and L) – Indicates that the graduate will have a high (H), moderate (M) or low (L) level of acquirement of the competency. (*) – Indicates the curriculum will include validation
(knowledge testing, task demonstration) of the Learning Indicator.

14 | Entry-Level Training Curriculum Framework | TRAINING TOOL
3.2.2 Explains the need to know the approximate empty and loaded weight of their vehicle before driving on any road. (M)*
3.2.3 Explains how to comply with specific requirements for using toll routes and bridges. (M)
3.2.4 Explains the location and proper use of truck emergency runaway lanes. (M)*
3.2.5 Explains the times, days and/or weeks when commercial vehicle operations are restricted in certain urban areas. (M)*
3.2.6 Explains standard highway height and weight limits and restrictions. (H)*
3.2.7 Explains the need to carry and know how to use the emergency equipment required for certain commercial vehicle operations. (M)
3.2.8 Explains how and when to properly set up emergency warning devices such as triangle reflectors. (M)*
3.2.9 Explains the importance of immediately recognizing and responding to an unexpected situation in which their vehicle weight or height is greater than what is permitted to operate on a particular road or highway. (M)
3.2.10 Explains the importance of respecting local bylaws restricting vehicle loading and unloading activities, parking and idling. (M)
3.2.11 Identifies routes that prohibit commercial vehicles. (H)*
3.2.12 Reads all road signs with particular messages that apply to commercial vehicles. (H)*
3.2.13 Takes extra care when crossing railway tracks and, before crossing, determines the space available for vehicles. (H)*
3.2.14 Shifts gears while crossing the railway tracks only when it is necessary.
3.2.15 Enters vehicle inspection facilities, or pulls off the roadway, when instructed by an officer or highway sign. (H)*
3.2.16 Watches for potential hazards of unmarked overhead obstructions such as: canopies, roof overhangs and other building protrusions, signs, utility lines, tree limbs, doorway entries, etc. (M)*
3.2.17 Watches for snow build-up, debris or road construction that can change vehicle height, weight or clearances. (M)*
3.2.18 Identifies and reads all road signs indicating the weight capacity of roadways or bridges – including seasonal weight restrictions. (H)*
3
con’t
Performance Elements
Learning Indicators
(H, M and L) – Indicates that the graduate will have a high (H), moderate (M) or low (L) level of acquirement of the competency. (*) – Indicates the curriculum will include validation
(knowledge testing, task demonstration) of the Learning Indicator.

15 | Entry-Level Training Curriculum Framework | TRAINING TOOL
Learning 3.3 At the end of this training program the graduate will be able to operate a Outcome commercial vehicle in a safe manner and perform basic driving maneuvers.
3.3.1 Drives a commercial vehicle in a safe manner along typical roads and highways (H)*
Driving-along includes performing the following sub-tasks.
The driver will:
1) Practice continual observation and monitoring of road conditions
2) Interpret traffic and road conditions
3) Monitor vehicle blind spots
4) Drive defensively
5) Monitor vehicle behavior and operating conditions
6) Recognize their responsibilities for sharing a workplace with the public
7) Manage speed and following distance to allow adequate time to observe, react and manoeuver vehicle if necessary
8) Maintain proper road and lane position
9) Observe road signs and pavement markings
10) Integrate with traffic
11) Operate vehicle controls smoothly
12) Maintain two-handed grip on the steering wheel as much as practicable
13) Operate a manual transmission if necessary, selecting gears correctly and shifting smoothly
3.3.2 Drives a commercial vehicle through curves in a safe manner. (H)*
Driving through curves includes performing the following sub-tasks.
The driver will: 1) Prepare for the curve as it becomes visible by completing the following steps: a) conduct a visual assessment b) conduct a sign check c) conduct a pavement marking check d) conduct a traffic check
2) Travel through the curve by completing the following steps: a) manage speed and following distance to allow adequate time to observe, react and manoeuver vehicle if necessary b) steer through the curve following a proper path, based on vehicle off-tracking and clearance requirements c) conduct a traffic check d) maintain two-handed grip on the steering wheel as much as practicable
3
con’t
Performance Elements
Sub-tasks
Performance Elements
Sub-tasks
(H, M and L) – Indicates that the graduate will have a high (H), moderate (M) or low (L) level of acquirement of the competency. (*) – Indicates the curriculum will include validation
(knowledge testing, task demonstration) of the Learning Indicator.

16 | Entry-Level Training Curriculum Framework | TRAINING TOOL
3.3.3 Changes lanes in a commercial vehicle in a safe manner. (H)*
Lane changes include performing the following sub-tasks.
The driver will: 1) Prepare for the lane change by completing the following steps: a) conduct a traffic check b) conduct a pavement marking check c) manage speed and following distance to allow adequate time to observe, react and manoeuver vehicle if necessary d) activate turn signal correctly and on time
2) Execute the lane change by completing the following steps: a) steer vehicle into the correct position in the new lane b) manage speed and following distance to allow adequate time to observe, react and manoeuver vehicle if necessary c) cancel turn signal within about 4 seconds after completion
Learning 3.4 At the end of this training program the graduate will be able to operate a Outcome commercial vehicle in a safe manner and perform the required maneuvers for driving on urban, commercial, and industrial roads.
3.4.1 Crosses intersections in a commercial vehicle in an urban setting in a safe manner (H)*
Crossing an intersection includes performing the following sub-tasks.
The driver will:
1) Prepare for crossing the intersection as it becomes visible by completing the following steps: a) conduct a visual assessment b) conduct a sign check c) conduct a pavement marking check d) conduct a traffic control signals check e) conduct a traffic check
2) Approach the boundary of the intersection while completing the following steps: a) read and respond to sign b) read and respond to traffic control signals c) conduct a traffic check d) plan a crossing path
3) Stop at an intersection when required by completing the following steps: a) read and respond to sign b) read and respond to traffic control signals c) stop the vehicle in the correct location d) drive vehicle forward when necessary
4) Proceed across the intersection after stopping, or when no stop is necessary, by completing the following steps: a) conduct a traffic signal light check b) conduct a traffic check c) steer the vehicle through the proper path d) manage speed and following distance to allow adequate time to observe, react and manoeuver vehicle if necessary
3
con’t
Performance Elements
Performance Elements
Sub-tasks
Sub-tasks
(H, M and L) – Indicates that the graduate will have a high (H), moderate (M) or low (L) level of acquirement of the competency. (*) – Indicates the curriculum will include validation
(knowledge testing, task demonstration) of the Learning Indicator.

17 | Entry-Level Training Curriculum Framework | TRAINING TOOL
3.4.2 Turns at intersections in a commercial vehicle in an urban setting in a safe manner. (H)*
Turning at intersections includes performing the following sub-tasks.
The driver will:
1) Select the correct lane for starting the turn
2) Activate turn signal correctly and on time
3) Conduct a continuous traffic check while turning
4) Manage speed and following distance throughout the turn to allow adequate time to observe, react and manoeuver vehicle if necessary
5) Interpret right-of-way obligations correctly
6) Steer through the intersection following a proper path, based on vehicle off-tracking and clearance requirements
7) Select the correct lane for travel after the turn
8) Cancel turn signal within about 4 seconds after completion
Learning 3.5 At the end of this training program the graduate will be able to operate a Outcome commercial vehicle in a safe manner and perform the required maneuvers for driving on expressways.
3.5.1 Enters an expressway in a commercial vehicle in a safe manner. (H)*
Entering an expressway includes performing the following sub-tasks.
The driver will:
1) Conduct a traffic check
2) Manage vehicle speed according to conditions, posted advisories and speed limit
3) Manage following distance to allow adequate time to observe, react and manoeuver vehicle if necessary
4) Activate turn signal correctly and on time
5) Interpret right-of-way obligations correctly
6) Conduct a pavement marking check and stay within markings
7) Negotiate the ramp at appropriate speed and change lanes or merge as necessary
8) Adjust vehicle speed within the acceleration ramp to facilitate merge into traffic
9) Merge onto expressway maintaining suitable distance from other vehicles and adjusting speed as needed
10) Cancel turn signal within about 4 seconds after completion
3
con’t
Performance Elements
Sub-tasks
Performance Elements
Sub-tasks
(H, M and L) – Indicates that the graduate will have a high (H), moderate (M) or low (L) level of acquirement of the competency. (*) – Indicates the curriculum will include validation
(knowledge testing, task demonstration) of the Learning Indicator.

18 | Entry-Level Training Curriculum Framework | TRAINING TOOL
3.5.2 Exits an expressway in a commercial vehicle in a safe manner. (H)*
Exiting an expressway includes performing the following sub-tasks.
The driver will:
1) Conduct a traffic check
2) Manage following distance to allow adequate time to observe, react and manoeuver vehicle if necessary
3) Reduce speed as appropriate (neither too soon nor too late)
4) Activate turn signal correctly and on time
5) Conduct a pavement marking check and stay within markings
6) Drive onto exit ramp as soon as space is available
7) Decelerate as necessary within deceleration ramp
8) Manage vehicle speed according to conditions, posted advisories and speed limit
9) Negotiate the ramp at appropriate speed and change lanes or merge as necessary
10) Cancel turn signal within about 4 seconds after leaving expressway
3 Performance Elements
Sub-tasks
(H, M and L) – Indicates that the graduate will have a high (H), moderate (M) or low (L) level of acquirement of the competency. (*) – Indicates the curriculum will include validation
(knowledge testing, task demonstration) of the Learning Indicator.

19 | Entry-Level Training Curriculum Framework | TRAINING TOOL
con’t
Competence Category
Learning 4.1 At the end of this training program the graduate will be able to apply Outcome defensive driving techniques.
4.1.1 Explains the importance of defensive driving habits. (M)
4.1.2 Explains their “duty of care” – to proactively protect other road users from harm. (H)
4.1.3 Explains their responsibility to share their workplace with the public, and how the additional size and weight of their vehicle may be perceived by other road users. (H)*
4.1.4 Observes and critiques personal driving techniques to identify ways to improve. (M)
4.1.5 Monitors the actions of other drivers, changing weather and changing road surfaces. (M)
4.1.6 Adjusts driving techniques to match the vehicle configuration, cargo weight, center of gravity, and driving experience. (M)
4.1.7 Recognizes and takes steps to avoid situations that might cause anger, hostility or danger. (M)
4.1.8 Is courteous, and yields to other motorists, cyclists, pedestrians and slow-moving vehicles. (M)
4.1.9 Scans mirrors, instruments and gauges regularly and systematically. (H)*
4.1.10 Explains the visual cues and other signs of potentially hazardous traffic situations. (H)
4.1.11 Maintains an appropriate following distance in all driving conditions. (H)*
4.1.12 Avoids sources of distraction while driving. (H)*
4.1.13 Maintains vehicle speed that is appropriate for road and traffic conditions, and adheres to regulations. (H)*
Learning 4.2 At the end of this training program the graduate will be able to apply fuel Outcome efficient driving habits.
4.2.1 Explains the importance of fuel efficient driving methods. (M)
4.2.2 Explains the use of auxiliary power units and “shore power.” (M)
4 PROFESSIONAL DRIVING HABITS
Learning Indicators
Performance Elements
Learning Indicators
(H, M and L) – Indicates that the graduate will have a high (H), moderate (M) or low (L) level of acquirement of the competency. (*) – Indicates the curriculum will include validation
(knowledge testing, task demonstration) of the Learning Indicator.

20 | Entry-Level Training Curriculum Framework | TRAINING TOOL
4.2.3 Describes the use of different fuel types, vehicle technology, fuel additives, etc. to help reduce fuel consumption. (L)
4.2.4 Accelerates at a smooth and gradual rate. (M)*
4.2.5 Anticipates when most changes in speed, gear selection and surrounding space will be necessary. (M)*
4.2.6 Operates the engine and transmission close to the fuel-efficient rpm range whenever possible. (M)
4.2.7 Practices progressive shifting and selects the engine rpm and gear that are best for the vehicle speed and load, when driving a vehicle with manual transmission. (M)
4.2.8 Controls shift points by adjusting the throttle, when driving a vehicle with an automated manual transmission. (M)
4.2.9 Looks ahead continually, anticipates the need to change speed, and gradually changes speed. (H)
4.2.10 Uses cruise control whenever possible and appropriate for driving conditions. (M)
4.2.11 Idles a vehicle’s engine as little as possible. (M)
4.2.12 Sets up vehicle to minimize the gap between tractor and trailer. (L)
4
Performance Elements
(H, M and L) – Indicates that the graduate will have a high (H), moderate (M) or low (L) level of acquirement of the competency. (*) – Indicates the curriculum will include validation
(knowledge testing, task demonstration) of the Learning Indicator.

21 | Entry-Level Training Curriculum Framework | TRAINING TOOL
con’t
Competence Category
Learning 5.1 At the end of this training program the graduate will be able to perform Outcome backing and parking maneuvers with a tractor-trailer.
5.1.1 Performs straight-line backing maneuvers with a tractor-trailer unit in a safe manner. (H)*
Maneuver Space – straight-line backing maneuvers will be in a space that is between 3.5 and 3.7 meters wide, and 30 meters long.
Completion of straight-line backing maneuvers includes performing the following sub-tasks.
The driver will:
1) Check mirror set up
2) Set up the tractor-trailer for the backing maneuver
3) Examine the maneuver space from outside the tractor and check vehicle position
4) Activate warning flashers and sound vehicle horn briefly
5) Drive slowly backwards into the space
6) Pull up the vehicle no more than once to align it during the maneuver
7) Exit the tractor to examine space and vehicle alignment no more than once during the maneuver
8) Complete the reverse movement while staying entirely within the maneuver space
9) Stop tractor-trailer movement upon reaching the desired position
10) Stop the tractor-trailer gently when backing up to a solid fixture
11) Complete the entire backing maneuver in a reasonable period of time
5.1.2 Performs offset backing maneuvers with a tractor-trailer in a safe manner. (H)*
Maneuver Space – offset backing maneuvers will be from a space that is between 3.5 and 3.7 meters wide, and at least as long as the tractor-trailer, into an adjacent space of the same dimensions. The pull-up space in front of the two spaces described must be at least one and one half time the length of the tractor-trailer. The maneuver can be performed from either side.
Completion of offset backing maneuvers includes performing the following sub-tasks.
The driver will:
1) Check mirror set up
2) Drive the tractor-trailer forward out of the starting position
3) Align the tractor-trailer with the target space while driving forward into the pull up area
5 TRACTOR-TRAILER OFF-ROAD TASKS AND MANEUVERS
Performance Elements
Sub-tasks
Performance Elements
Sub-tasks
(H, M and L) – Indicates that the graduate will have a high (H), moderate (M) or low (L) level of acquirement of the competency. (*) – Indicates the curriculum will include validation
(knowledge testing, task demonstration) of the Learning Indicator.

22 | Entry-Level Training Curriculum Framework | TRAINING TOOL
4) Examine the maneuver space from outside the vehicle and check vehicle position if necessary
5) Activate warning flashers and sound vehicle horn briefly
6) Drive slowly backwards steering to align the rear of the trailer into the target space
7) Pull up the tractor-trailer no more than once to align it during the maneuver
8) Exit the tractor to examine space and vehicle alignment no more than once during the maneuver
9) Complete the reverse movement while staying entirely within the maneuver space
10) Stop tractor-trailer movement upon reaching the desired position
11) Stop the tractor-trailer gently when backing up to a solid fixture
12) Complete the entire backing maneuver in a reasonable period of time
5.1.3 Performs alley-dock backing maneuvers with a tractor-trailer in a safe manner. (H)*
Maneuver Space – alley-dock backing maneuvers will be into a space that is between 3.5 and 3.7 meters wide, and at least as long as 2/3 the length of the tractor-trailer, starting with the vehicle positioned perpendicular to the space and with the front of the tractor directly in front of it. The pull-up space in front of the backing target space must be no deeper than the length of the vehicle. The maneuver can be performed from either side.
Completion of alley-dock backing maneuvers includes performing the following sub-tasks.
The driver will:
1) Check mirror set up
2) Drive the vehicle forward out of the starting position
3) Align the trailer with the target space while driving forward into the pull up area
4) Examine the maneuver space from outside the vehicle and check vehicle position if necessary
5) Activate warning flashers and sound vehicle horn briefly
6) Drive slowly backwards steering to align the trailer into the target space
7) Pull up the vehicle no more than twice to align it during the maneuver
8) Exit the vehicle to examine space and vehicle alignment no more than twice during the maneuver
9) Complete the reverse movement while staying entirely within the maneuver space
10) Stop vehicle movement upon reaching the desired position
11) Stop the vehicle gently when backing up to a solid fixture
12) Complete the entire backing maneuver in a reasonable period of time
5
Performance Elements
Sub-tasks
Sub-tasks
con’t
(H, M and L) – Indicates that the graduate will have a high (H), moderate (M) or low (L) level of acquirement of the competency. (*) – Indicates the curriculum will include validation
(knowledge testing, task demonstration) of the Learning Indicator.

23 | Entry-Level Training Curriculum Framework | TRAINING TOOL
5.1.4 Performs parallel parking maneuvers with a tractor-trailer in a safe manner. (H)*
Maneuver Space – parallel parking maneuvers will be into a space that is between 3.5 and 3.7 meters wide, and at least as long as 1.5 times the length of the tractor-trailer. The maneuver can be performed from either side.
Completion of parallel parking maneuvers includes performing the following sub-tasks.
The driver will:
1) Check mirror set up
2) Drive the tractor-trailer forward into the starting position
3) Examine the maneuver space from outside the vehicle and check vehicle position if necessary
4) Activate warning flashers and sound vehicle horn briefly
5) Drive slowly backwards steering to align the rear of the trailer into the target space
6) Pull up the tractor-trailer no more than once to align it during the maneuver
7) Exit the tractor to examine space and vehicle alignment no more than once during the maneuver
8) Stop tractor-trailer movement upon reaching the desired position
9) Complete the reverse movement while staying within 1 meter of the curb or curb markers
10) Complete the entire backing maneuver in a reasonable period of time
Learning 5.2 At the end of this training program the graduate will be able to safely perform Outcome tractor-trailer coupling and uncoupling tasks.
5.2.1 Couples a tractor-trailer unit in a safe manner. (H)*
Completion of coupling tasks includes performing the following sub-tasks.
The driver will:
1) Start the coupling task: a) inspect couplers and connectors before coupling b) approach the trailer with the tractor as straight in line as possible, overcome any challenges involving ground surface conditions
2) Continue coupling with a tractor with fixed suspension: a) align the tractor and trailer, backing up until the 5th wheel is just ahead of trailer, touching the trailer or slightly under, but not against the kingpin b) exit the tractor and check that the kingpin is no more than 10 cm (4 in.) from the center of the 5th wheel lower coupler, adjust height if necessary so that contact of the upper coupler will be on the bottom half of the 5th wheel lower coupler c) monitor the trailer’s position during coupling using the mirrors to confirm proper alignment d) reverse the tractor, gently but firmly engaging the 5th wheel e) listen for and feel the 5th wheel latch into its locked position
5Performance Elements
Sub-tasks
Performance Elements
Sub-tasks
con’t
(H, M and L) – Indicates that the graduate will have a high (H), moderate (M) or low (L) level of acquirement of the competency. (*) – Indicates the curriculum will include validation
(knowledge testing, task demonstration) of the Learning Indicator.

24 | Entry-Level Training Curriculum Framework | TRAINING TOOL
3) Continue coupling with a tractor having air suspension offering a suspension drop feature: a) back up to the trailer until the 5th wheel just touches the trailer, or is about to touch it b) exit the tractor and check vehicle heights c) return to the tractor and dump the tractor air suspension, then reverse the tractor until the 5th wheel lower coupler is fully under the front of the trailer, but still ahead of the king pin d) restore the tractor air suspension to its normal height e) monitor the trailer’s position during coupling using the mirrors to confirm proper alignment f) reverse the tractor, gently but firmly engaging the 5th wheel g) listen for and feel the 5th wheel latching into its locked position
4) Complete the coupling for all suspension types: a) attempt to move the tractor forward (perform a “tug test”) b) connect the air and electrical lines properly, and confirm normal operation c) raise the trailer landing gear fully and stow the handle into its retainer d) get back in the tractor and supply air to the trailer with the trailer supply valve, monitor the air pressure gauges, and confirm air pressure gauges show normal pressure levels e) pull forward a short distance and apply either the trailer service brakes only, or the full service brakes to test brake operation
5.2.2 Uncouples a tractor-trailer in a safe manner. (H)*
Completion of uncoupling tasks includes performing the following sub-tasks.
The driver will:
1) Start the uncoupling task: a) confirm the location is suitable and safe for uncoupling b) park the trailer in the selected location and apply the trailer parking brakes c) secure the tractor d) place any required wheel chocks and blocks, or engage locks into position e) place adequate support material under the landing gear if necessary f) Lower the trailer landing gear until it just touches the ground, but does not raise the trailer from the 5th wheel g) disconnect air and electrical connections and stow them h) release the 5th wheel coupler lock by means of the release handle i) operate trailer air suspension controls as required
2) For a tractor with fixed suspension a) drive slowly forward, until the 5th wheel lower coupler is fully out from under the trailer, but the tractor is still under the front of the trailer b) watch the trailer in the mirrors or out of the rear window, when confident the trailer is stable, drive slowly forward until the tractor is clear of the trailer
5
Performance Elements
Sub-tasks
Sub-tasks
con’t
(H, M and L) – Indicates that the graduate will have a high (H), moderate (M) or low (L) level of acquirement of the competency. (*) – Indicates the curriculum will include validation
(knowledge testing, task demonstration) of the Learning Indicator.

25 | Entry-Level Training Curriculum Framework | TRAINING TOOL
3) For a tractor with air suspension having suspension drop feature: a) drive forward slowly far enough to unlatch the 5th wheel coupler and stop b) operate the control to drop the tractor suspension c) watch the trailer in the mirrors or out of the rear window, when confident the trailer is stable, drive slowly forward until the tractor is clear of the trailer, and raise the tractor suspension to the normal position d) drive slowly forward while confirming that the trailer is stable until the tractor is clear of the trailer
4) Complete the uncoupling for all suspension types:
a) secure the trailer before driving away
5
Sub-tasks
(H, M and L) – Indicates that the graduate will have a high (H), moderate (M) or low (L) level of acquirement of the competency. (*) – Indicates the curriculum will include validation
(knowledge testing, task demonstration) of the Learning Indicator.

26 | Entry-Level Training Curriculum Framework | TRAINING TOOL
con’t
Competence Category
Learning 6.1 At the end of this training program the graduate will be able to Outcome administer written workplace documents, and communicate effectively through written means.
6.1.1 Identifies workplace forms that are needed to establish and sustain employment. (L)
6.1.2 Identifies and describes the meaning of messages and symbols on cargo packaging and cargo documents such as way-bills, packing lists, delivery documents, instructions, workplace hazard information, etc. (L)
6.1.3 Identifies and describes the basic purpose, importance and proper condition of vehicle related documents such as vehicle registration, insurance, program registry, fuel tax reporting, permits, etc. (H)*
6.1.4 Explains the need to access written workplace information such as practice, procedure and policy documents related to cargo securement, job task analysis, hazard assessment, etc. (L)
6.1.5 Seeks clarification and assistance when they do not fully understand any written workplace documents. (L)
6.1.6 Composes and delivers basic written information and messages relating to driving activities. (L)
6.1.7 Accesses information and reference tables such as those related to vehicle weights and dimensions. (L)
6.1.8 Records some basic information onto cargo related documents such as way-bills. (L)
Learning 6.2 At the end of this training program the graduate will be able to complete basic Outcome mathematical calculations required for commercial vehicle operation.
6.2.1 Describes information needed for fuel tax reports. (L)
6.2.2 Converts simple imperial and metric measurements using tables, mathematical formulas, or conversion programs. (M)
6.2.3 Calculates route and trip distances. (L)
6.2.4 Estimates fuel consumption rates, and how far a vehicle can travel on a particular quantity of fuel. (L)*
6.2.5 Determines allowable axle weights. (M)*
6 DOCUMENTS, PAPERWORK & REGULATORY REQUIREMENTS
Performance Elements
Performance Elements
Learning Indicators
Learning Indicators
(H, M and L) – Indicates that the graduate will have a high (H), moderate (M) or low (L) level of acquirement of the competency. (*) – Indicates the curriculum will include validation
(knowledge testing, task demonstration) of the Learning Indicator.

27 | Entry-Level Training Curriculum Framework | TRAINING TOOL
6.2.6 Determines basic vehicle dimension and axle spacing requirements, and completes calculations to identify compliance with vehicle requirements such as “bridge formulas”, etc. (L)*
6.2.7 Calculates trip durations to determine arrival times and plans departure times. (L)
6.2.8 Estimates and records cargo weight. (L)
Learning 6.3 At the end of this training program the graduate will be able to use computers, Outcome electronic and communication devices common in commercial vehicle operations.
6.3.1 Uses a calculator or computer to complete some simple tasks. (L)
6.3.2 Operates a hand-held electronic or communication device for basic tasks and describes when and where such use is permitted. (L)
6.3.3 Completes basic data-entry, form-filling and online search tasks. (L)
Learning 6.4 At the end of this training program the graduate will be able to plan ahead, Outcome anticipate problems, and begin to deal with an emergency situation.
6.4.1 Explains the risk of traveling to an unfamiliar location without first confirming facilities and preferred routes. (L)
6.4.2 Identifies some special requirements relating to a vehicle, load, routing or commodity. (M)*
6.4.3 Identifies sources of reliable information about weather and road conditions. (M)*
6.4.4 Describes the need to carry required emergency equipment on or inside the vehicle. (M)
6.4.5 Describes how and when to use emergency equipment carried on the equipment. (M)
6.4.6 Describes typical workplace risks and hazards. (M)
6.4.7 Describes the basic operation of emergency equipment such as a fire extinguisher, safety warnings (triangles, flares), spill kits, etc.(M)*
6.4.8 Explains the need to carry first aid supplies. (M)
6.4.9 Explains personal limitations in administering first aid. (M)
6.4.10 Explains the need to protect oneself against potential falling cargo when opening doors. (H)*
6.4.11 Explains the driver’s obligations in regulation to deal with a build-up of snow or ice on their vehicle(s). (M)*
6
Performance Elements
con’t
Performance Elements
Learning Indicators
(H, M and L) – Indicates that the graduate will have a high (H), moderate (M) or low (L) level of acquirement of the competency. (*) – Indicates the curriculum will include validation
(knowledge testing, task demonstration) of the Learning Indicator.
Performance Elements

6.4.12 Accesses sources of maps and electronic route information. (M)*
6.4.13 Accesses sources of information about commercial vehicle routes, road construction, road closures, height clearances, weight restrictions, permit requirements, etc. (M)*
6.4.14 Prepares a route plan that considers vehicle size and weight. (M)*
6.4.15 Demonstrates use of some basic hand tools. (L)
6.4.16 Properly wears or otherwise uses appropriate Personal Protective Equipment. (M)*
6.4.17 Locates emergency contact information. (M)*
6.4.18 Adjusts a vehicle’s 5th wheel setting, axle position, or suspension system. (M)
6.4.19 Uses a safe method for operating cargo access doors. (M)
6.4.20 Practices safe driving technique when proceeding through construction zones and detours. (H)*
6
Performance Elements
(H, M and L) – Indicates that the graduate will have a high (H), moderate (M) or low (L) level of acquirement of the competency. (*) – Indicates the curriculum will include validation
(knowledge testing, task demonstration) of the Learning Indicator.
28 | Entry-Level Training Curriculum Framework | TRAINING TOOL

29 | Entry-Level Training Curriculum Framework | TRAINING TOOL
con’t
Competence Category
Learning 7.1 At the end of this training program the graduate will be able to inspect and Outcome maintain commercial vehicles.
7.1.1 Explains the need for every workplace to establish a system, and keep a written record, for periodically inspecting and maintaining vehicles. (M)
7.1.2 Explains that every commercial vehicle must meet prescribed performance standards while operating on a highway. (H)
7.1.3 Explains the importance of enforcement and audit programs to ensure that inspection and maintenance is adequate. (M)
7.1.4 Inspects the condition of vehicles and operating components. (H)*
7.1.5 Uses Personal Protective Equipment during maintenance and inspection activities. (M)*
7.1.6 Confirms that every commercial vehicle being operated displays valid evidence that regulatory periodic inspections and workplace-specific inspections have been conducted. (M)*
7.1.7 Inspects the level of operating fluids including fuel, engine oil, engine coolant, power steering oil, windshield washer, diesel exhaust fluid (DEF), etc – and tops up when necessary. (H)*
7.1.8 Inspects basic vehicle components, such as drive belts, hoses, tires, etc. (H)*
7.1.9 Completes minor vehicle repairs such as: repair minor electrical connection problem, replace lamp, gladhand seal or wiper blade, reset circuit breaker, etc. (L)*
Learning 7.2 At the end of this training program the graduate will be able to conduct required Outcome daily inspections and monitor the vehicle’s safe condition.
7.2.1 Explains their responsibility for the safe condition of each commercial vehicle they operate. (H)*
7.2.2 Explains that Schedule 1 of National Safety Code Standard 13 (NSC 13) lists all minor and major defects that the driver is expected to identify. (H)*
7.2.3 Explains that NSC 13 Schedule 1 includes the most common defects/unsafe conditions that a driver may encounter. (H)*
7.2.4 Conducts daily inspections and identifies each of the 75 minor and major defects listed in NSC 13 Schedule 1. (H)*
7.2.5 Identifies when a minor or major defect listed in NSC 13 Schedule 1 is present on their vehicle. (H)*
7 VEHICLE INSPECTION ACTIVITIES
Performance Elements
Performance Elements
Learning Indicators
Learning Indicators
(H, M and L) – Indicates that the graduate will have a high (H), moderate (M) or low (L) level of acquirement of the competency. (*) – Indicates the curriculum will include validation
(knowledge testing, task demonstration) of the Learning Indicator.

30 | Entry-Level Training Curriculum Framework | TRAINING TOOL
7.2.6 Completes and signs written or electronic daily inspection reports that declare the vehicle’s condition. (H)*
7.2.7 Monitors vehicle condition on a continuous basis, according to NSC 13 Schedule 1, while driving or otherwise being responsible for the vehicle, and updates the inspection report as required. (H)*
7.2.8 Records on an inspection report every minor defect found during an inspection or while operating a vehicle, and reports the minor defect according to workplace practices, procedures and policies. (H)*
7.2.9 Records immediately on an inspection document and reports every major defect found during an inspection, or while operating a vehicle, and stops operating the vehicle. (H)*
7.2.10 Maintains a vehicle’s out-of-service status whenever a major defect is identified, until the condition is corrected. (H)*
7.2.11 Conducts regular enroute and post-trip vehicle inspections. (M)*
7.2.12 Adheres to the regulations whenever accepting an inspection report from another worker. (M)*
7.2.13 Carries a valid inspection report for each vehicle operated and a copy of NSC 13 Schedule 1, and produces these items when required by an enforcement officer. (H)*
Learning 7.3 At the end of this training program the graduate will be able to inspect each Outcome component or system listed in NSC 13 Schedule 1.
7.3.1 Inspects the air brake system. (H)*
Completing inspection includes performing the following sub-tasks.
1) The driver will inspect for the following minor defects: a) audible air leak b) slow air pressure build-up rate
2) The driver will inspect for the following major defects: a) pushrod stroke of any brake exceeds the adjustment limit b) air loss rate exceeds the prescribed limit c) inoperative towing vehicle (tractor) protection system d) low air warning system fails or system is activated e) inoperative service, parking or emergency brake
7.3.2 Inspects the cab. (H)*
Completing inspection includes performing the following sub-tasks.
1) The driver will inspect for the following minor defect: a) occupant compartment door fails to open
7
con’t
Performance Elements
Performance Elements
Sub-tasks
(H, M and L) – Indicates that the graduate will have a high (H), moderate (M) or low (L) level of acquirement of the competency. (*) – Indicates the curriculum will include validation
(knowledge testing, task demonstration) of the Learning Indicator.
Performance Elements
Sub-tasks

31 | Entry-Level Training Curriculum Framework | TRAINING TOOL
2) The driver will inspect for the following major defect: a) any cab or sleeper door fails to close securely
7.3.3 Inspects cargo securement. (H)*
Completing inspection includes performing the following sub-tasks.
1) The driver will inspect for the following minor defect: a) insecure or improper load covering (e.g. wrong type or flapping in the wind)
2) The driver will inspect for the following major defect: a) insecure cargo absence, failure, malfunction or deterioration of required cargo securement device or load covering
7.3.4 Inspects coupling devices. (H)*
Completing inspection includes performing the following sub-tasks.
1) The driver will inspect for the following minor defect: a) coupler or mounting has loose or missing fastener coupler is insecure or movement exceeds prescribed limit
2) The driver will inspect for the following major defects: a) coupling or locking mechanism is damaged or fails to lock b) defective, incorrect or missing safety chain/cable
7.3.5 Inspects dangerous goods. (H)*
Completing inspection includes performing the following sub-tasks.
1) The driver will inspect for the following major defect: a) dangerous goods requirements not met
7.3.6 Inspects driver controls. (H)*
Completing inspection includes performing the following sub-tasks.
1) The driver will inspect for the following minor defect: a) accelerator pedal, clutch, gauges, audible and visual indicators or instruments fail to function properly
7.3.7 Inspects driver seat. (H)*
Completing inspection includes performing the following sub-tasks.
1) The driver will inspect for the following minor defects: a) seat is damaged or fails to remain in set position b) seatbelt or tether belt is insecure, missing or malfunctions
7
con’t
Performance Elements
Sub-tasks
Sub-tasks
Sub-tasks
Sub-tasks
Sub-tasks
Sub-tasks
Performance Elements
Performance Elements
Performance Elements
Performance Elements
(H, M and L) – Indicates that the graduate will have a high (H), moderate (M) or low (L) level of acquirement of the competency. (*) – Indicates the curriculum will include validation
(knowledge testing, task demonstration) of the Learning Indicator.

32 | Entry-Level Training Curriculum Framework | TRAINING TOOL
7.3.8 Inspects electric brake system. (L)*
Completing inspection includes performing the following sub-tasks.
1) The driver will inspect for the following minor defect: a) loose or insecure wiring or electrical connection
2) The driver will inspect for the following major defects: a) inoperative breakaway device b) inoperative brake
7.3.9 Inspects emergency equipment and safety devices. (M)*
Completing inspection includes performing the following sub-tasks.
1) The driver will inspect for the following minor defect: a) emergency equipment is missing, damaged or defective
7.3.10 Inspects exhaust system. (H)*
Completing inspection includes performing the following sub-tasks.
1) The driver will inspect for the following minor defect: a) exhaust leak
2) The driver will inspect for the following major defect: a) leak that causes exhaust gas to enter the occupant compartment
7.3.11 Inspects frame and cargo body. (H)*
Completing inspection includes performing the following sub-tasks.
1) The driver will inspect for the following minor defect: a) damaged frame or cargo body
2) The driver will inspect for the following major defect: a) visibly shifted, cracked, collapsing or sagging frame member(s)
7.3.12 Inspects fuel system. (H)*
Completing inspection includes performing the following sub-tasks.
1) The driver will inspect for the following minor defect: a) missing fuel tank cap
2) The driver will inspect for the following major defects: a) insecure fuel tank b) dripping fuel leak
7.3.13 Inspects a vehicle’s general condition. (M)*
Completing inspection includes performing the following sub-tasks.
1) The driver will inspect for the following major defect: a) serious damage or deterioration that is noticeable and may affect the vehicle’s safe operation
7
con’t
Sub-tasks
Performance Elements
Sub-tasks
Sub-tasks
Sub-tasks
Sub-tasks
Performance Elements
Performance Elements
Performance Elements
Performance Elements
(H, M and L) – Indicates that the graduate will have a high (H), moderate (M) or low (L) level of acquirement of the competency. (*) – Indicates the curriculum will include validation
(knowledge testing, task demonstration) of the Learning Indicator.
Performance Elements
Sub-tasks

33 | Entry-Level Training Curriculum Framework | TRAINING TOOL
7.3.14 Inspects glass and mirrors. (H)*
Completing inspection includes performing the following sub-tasks.
1) The driver will inspect for the following minor defects: a) required mirror or window glass fails to provide the required view to the driver as a result of being cracked, broken, damaged, missing or maladjusted b) required mirror or glass has broken or damaged attachments onto vehicle body
7.3.15 Inspects heater/defroster. (H)*
Completing inspection includes performing the following sub-tasks.
1) The driver will inspect for the following minor defect: a) control or system failure
2) The driver will inspect for the following major defect: a) defroster fails to provide unobstructed view through the windshield
7.3.16 Inspects horn. (H)*
Completing inspection includes performing the following sub-tasks.
1) The driver will inspect for the following minor defect: a) vehicle has no operative horn
7.3.17 Inspects hydraulic brake system. (M)*
Completing inspection includes performing the following sub-tasks.
1) The driver will inspect for the following minor defect: a) brake fluid level is below indicated minimum level
2) The driver will inspect for the following major defects: a) parking brake is inoperative b) brake boost or power assist is not operative c) brake fluid leak d) brake pedal fade or insufficient pedal reserve e) activated (other than ABS) warning device f) brake fluid reservoir is less than ¼ full
7.3.18 Inspects lamps and reflectors. (H)*
Completing inspection includes performing the following sub-tasks.
1) The driver will inspect for the following minor defects: a) required lamp does not function as intended b) required reflector is missing or partially missing
2) The driver will inspect for the following major defects – that can only be present when use of lamps is required: a) failure of both low-beam headlamps b) failure of both rearmost tail lamps
7
con’t
Sub-tasks
Performance Elements
Performance Elements
Performance Elements
Performance Elements
Sub-tasks
Sub-tasks
Sub-tasks
(H, M and L) – Indicates that the graduate will have a high (H), moderate (M) or low (L) level of acquirement of the competency. (*) – Indicates the curriculum will include validation
(knowledge testing, task demonstration) of the Learning Indicator.
Performance Elements
Sub-tasks

34 | Entry-Level Training Curriculum Framework | TRAINING TOOL
3) The driver will inspect for the following major defects – that can be present at all times: a) failure of a rearmost turn-indicator lamp b) failure of both rearmost brake lamps
7.3.19 Inspects steering. (H)*
Completing inspection includes performing the following sub-tasks.
1) The driver will inspect for the following minor defect: a) steering wheel lash (free-play) is greater than normal
2) The driver will inspect for the following major defects: a) steering wheel is insecure, or does not respond normally b) steering wheel lash (free-play) exceeds prescribed limit
7.3.20 Inspects suspension system. (H)*
Completing inspection includes performing the following sub-tasks.
1) The driver will inspect for the following minor defects: a) air leak in air suspension system b) broken spring leaf c) suspension fastener is loose, missing or broken
2) The driver will inspect for the following major defects: a) damaged or deflated air bag [‘damaged’ means – patched, cut, bruised, cracked to braid, mounted insecurely] b) cracked or broken main spring leaf or more than one broken spring leaf c) part of spring leaf or suspension is missing, shifted out of place or in contact with another vehicle component d) loose U-bolt
7.3.21 Inspects tires. (H)*
Completing inspection includes performing the following sub-tasks.
1) The driver will inspect for the following minor defects: a) damaged tread or sidewall of tire b) tire leaking (if leak can be felt or heard, tire is to be treated as flat)
2) The driver will inspect for the following major defects: a) flat tire b) tire tread depth is less than wear limit c) tire is in contact with another tire or any vehicle component other than mud-flap d) tire is marked “Not for highway use” e) tire has exposed cords in the tread or outer side wall area
7
con’t
Sub-tasks
Performance Elements
Performance Elements
Sub-tasks
Sub-tasks
(H, M and L) – Indicates that the graduate will have a high (H), moderate (M) or low (L) level of acquirement of the competency. (*) – Indicates the curriculum will include validation
(knowledge testing, task demonstration) of the Learning Indicator.
Performance Elements
Sub-tasks

35 | Entry-Level Training Curriculum Framework | TRAINING TOOL
7.3.22 Inspects wheels, hubs and fasteners. (H)*
Completing inspection includes performing the following sub-tasks.
1) The driver will inspect for the following minor defects: a) hub oil below minimum level (When fitted with sight glass) b) leaking wheel seal
2) The driver will inspect for the following major defects: a) wheel has loose, missing or ineffective fastener b) damaged, cracked or broken wheel, rim or attaching part c) evidence of imminent wheel, hub or bearing failure
7.3.23 Inspects windshield wiper/washer. (H)*
Completing inspection includes performing the following sub-tasks.
1) The driver will inspect for the following minor defects: a) control or system malfunction b) wiper blade damaged, missing or fails to adequately clear driver’s field of vision
2) The driver will inspect for the following major defect – that can only be present when use of wipers or washer is required: a) wiper or washer fails to adequately clear driver’s field of vision in area swept by driver’s side wiper
7
Sub-tasks
Performance Elements
Sub-tasks
(H, M and L) – Indicates that the graduate will have a high (H), moderate (M) or low (L) level of acquirement of the competency. (*) – Indicates the curriculum will include validation
(knowledge testing, task demonstration) of the Learning Indicator.
Performance Elements

36 | Entry-Level Training Curriculum Framework | TRAINING TOOL
con’t
Competence Category
Learning 8.1 At the end of this training program the graduate will be able to inspect and Outcome operate a commercial vehicle with air brakes.
8.1.1 Explains the basic operating principles of air brakes. (H)*
8.1.2 Explains the general function of supply, service, parking/emergency and trailer sub-systems and related components. (H)*
8.1.3 Explains the visual characteristics, external components and basic function of foundation brakes. (H)*
8.1.4 Explains how speed, weight, vehicle specifications and downhill grades affect vehicle braking. (H)*
8.1.5 Describes conditions such as brake fade and brake lag. (H)*
8.1.6 Identifies common brake types and recognizes many of the components. (H)*
8.1.7 Explains the importance of proper brake pushrod stroke. (H)*
8.1.8 Uses an effective method for measuring brake pushrod stroke. (H)*
8.1.9 Explains that only qualified individuals may repair brakes. (H)*
8.1.10 Identifies brake component defects. (H)*
Identifying brake defects includes performing the following sub-tasks.
1) The driver will identify:
a) damaged, missing or malfunctioning foundation brake components b) cracked, loose, missing, or contaminated brake lining, improper drum contact, or lining that is less than the required thickness c) audible air leaks, and visible evidence of cracks and non- manufactured holes in brake chambers d) mismatched brake chamber size and/or slack adjuster length on steering axles e) cracked and/or broken brake drums or rotors f) leaks, damage, deterioration and improper fittings on readily visible brake hoses and air lines g) loose, cut or frayed compressor drive belt h) insecure air compressor mounts, brackets or fasteners
8 AIR BRAKE SYSTEMS
Performance Elements
Sub-tasks
Learning Indicators
(H, M and L) – Indicates that the graduate will have a high (H), moderate (M) or low (L) level of acquirement of the competency. (*) – Indicates the curriculum will include validation
(knowledge testing, task demonstration) of the Learning Indicator.

37 | Entry-Level Training Curriculum Framework | TRAINING TOOL
8.1.11 Tests air brake system operation. (H)*
Testing air brake operation includes performing the following sub-tasks.
1) The driver will:
a) check the system for audible air leaks b) test the low air pressure warning device c) measure air pressure build-up time d) identify air compressor governor cut-out and cut-in pressure settings e) test the air loss rate of an air brake system f) test the tractor (towing vehicle) protection valve g) test automatic-application of the trailer spring (parking/emergency) brakes h) test spring (parking/emergency) brakes i) test the function and condition of air tank drain valves j) identify insecurely mounted air tanks k) test spring brake operation
8Performance Elements
Sub-tasks
(H, M and L) – Indicates that the graduate will have a high (H), moderate (M) or low (L) level of acquirement of the competency. (*) – Indicates the curriculum will include validation
(knowledge testing, task demonstration) of the Learning Indicator.

38 | Entry-Level Training Curriculum Framework | TRAINING TOOL
con’t
Competence Category
Learning 9.1 At the end of this training program the graduate will be able to comply Outcome with the requirements of the Hours of Service regulations.
9.1.1 Explains that the Hours of Service regulations apply to operating any commercial vehicle. (H)*
9.1.2 Explains that they are on-duty when driving, in care and control of a vehicle, and performing other types of work. (H)*
9.1.3 Explains that in normal conditions they must take 10 hours off-duty each day, and have one 24-hour period off-duty within the previous 14 days. (H)*
9.1.4 Explains that driving a commercial vehicle is prohibited after being on-duty for 14 hours in a day. (H)*
9.1.5 Explains that driving a commercial vehicle is prohibited after accumulating 13 hours of driving in a day. (H)*
9.1.6 Explains that driving a commercial vehicle is prohibited when 16 hours have elapsed since their work shift began. (M)*
9.1.7 Identifies that a commercial vehicle may be operated for personal use, and for up to 75 km in a day when: the vehicle is empty and no trailer is being towed; no work of any sort is being done for a motor carrier; and the starting and ending odometer readings are recorded in the driver’s daily log. (M)*
9.1.8 Explains that a work shift begins when they return to on-duty after being off-duty for at least 8 consecutive hours. (H)*
9.1.9 Identifies they are still considered to be on the previous work shift when returning to on-duty after less than 8 hours off-duty, and they may be prohibited from driving. (M)*
9.1.10 Explains that a 7-day cycle is called “Cycle 1” and allows a driver to be on-duty for 70 hours in a 7-day period. (M)*
9.1.11 Identifies that a 14-day cycle is called “Cycle 2” and allows a driver to be on-duty for 120 hours in a 14-day period. (M)*
9.1.12 Explains that a new cycle can start only after taking the required minimum number of hours off-duty, and this period is called a “reset.” (H)*
9.1.13 Explains that resetting Cycle 1 requires at least 36 hours off duty. (H)*
9.1.14 Identifies that resetting Cycle 2 requires at least 72 hours off duty. (M)*
9 HOURS OF SERVICE COMPLIANCE
Learning Indicators

39 | Entry-Level Training Curriculum Framework | TRAINING TOOL
9.1.15 Identifies that up to 2 hours of the required minimum daily off-duty time can be deferred from one day to the next as long as the deferred time is properly added to the correct portion of off-duty time in the following day. (M)*
9.1.16 Identifies that when encountering specifically defined adverse driving conditions, driving up to 2 hours beyond the daily limit is permitted, when remaining within the 16-hour work shift rule. (M)*
9.1.17 Identifies that, when adverse conditions cause a driver to be on-duty longer than is normally permitted, the off-duty period on the following day must be increased by a similar amount. (M)*
9.1.18 Identifies that they must maintain and carry a daily log whenever they: operate beyond 160 km of their home terminal; return to a location other than their home terminal at the end of the day; or work for an employer who does not maintain a record of the driver’s duty status. (M)*
9.1.19 Identifies that the “day” shown on a daily log is a 24-hour period which generally begins at midnight, but can start at any time set by an employer. (M)*
9.1.20 Explains that the “home terminal” is determined by the employer and is normally associated with the location where a worker begins to drive a commercial vehicle. (H)*
9.1.21 Identifies reasons that driver’s daily logs may also need to be retained for tax purposes such as meal deductions, etc. (L)*
9.1.22 Identifies that a driver may be exempt from the requirements to complete and carry a daily log when: they drive within a radius of 160 km from their home terminal; return to their home terminal at the end of the day; and work for an employer who maintains a record of their duty status. (M)
9.1.23 Identifies that a record of each driver’s duty status must track the driver’s activities within each day, within the work shift, and within a duty cycle. (M)
9.1.24 Identifies that a driver using a record of duty status instead of a daily log must still comply with all of the driving restrictions. (M)
9.1.25 Identifies that proper use of the sleeper berth allows the off-duty period to be split. (M)
9.1.26 Identifies that off-duty periods can be split into shorter periods in certain conditions. (M)
9.1.27 Identifies that Canadian HOS requirements differ from those in the U.S.(M)
9
Learning Indicators
con’t

40 | Entry-Level Training Curriculum Framework | TRAINING TOOL
9.1.28 Calculates when they can begin to drive, and how many hours are available for driving each day. (H)*
9.1.29 Stops driving when any one of the on-duty limits is reached. (H)*
9.1.30 Stops driving a commercial vehicle after being on-duty for 14 hours in a day. (H)*
9.1.31 Stops driving a commercial vehicle after accumulating 13 hours of driving in a day. (H)*
9.1.32 Stops driving a commercial vehicle when 16 hours have elapsed since their work shift began. (M)*
9.1.33 Tracks their status within each day as defined on the daily log and tracks the duty status within their work shift, which can start at any time of day. (M)*
9.1.34 Maintains a complete, legible, and accurate driver’s daily log (in a written or electronic format) that fully complies with the regulations. (H)
9.1.35 Carries daily logs that apply to the preceding 14 days, whenever operating a commercial vehicle requiring the driver to carry a log. (H)
9.1.36 Retains daily logs as required by the regulations. (M)
9
Performance Elements

41 | Entry-Level Training Curriculum Framework | TRAINING TOOL
con’t
Competence Category
Learning 10.1 At the end of this training program the graduate will be able to comply Outcome with basic cargo securement requirements.
10.1.1 Explains that every commercial vehicle transporting cargo must have the cargo secured according to the regulations. (H)*
10.1.2 Explains that the requirement to secure cargo includes any material, equipment or other loose article carried on the vehicle, including dunnage, blocking, tarps, tools, equipment, spare materials, etc. (H)*
10.1.3 Explains that all cargo must be secured so that it cannot fall off the vehicle, or in any way be lost. (H)*
10.1.4 Explains that articles of cargo must be secured to prevent forward, rearward and sideways movement, and in some cases must also be secured to prevent upward movement. (H)*
10.1.5 Explains that all cargo must be secured so that it cannot shift in a way that can affect a vehicle’s stability or maneuverability in a negative way. (H)*
10.1.6 Explains that cargo must be loaded in such a way that it does not interfere with the driver’s ability to drive the vehicle safely, and does not block vehicle entry or exit. (H)*
10.1.7 Explains that articles of cargo are generally secured against the vehicle’s structure and by using devices such as tiedowns, blocking and bracing. (H)
10.1.8 Describes methods for rating the strength of devices used to secure cargo and recognizes that most cargo requires a minimum number of tiedowns with particular working load limit ratings. (H)
10.1.9 Explains that cargo tiedowns are specifically designed and rated for particular use, and must have a means to be tightened, and must be used according to the manufacturer instructions. (M)
10.1.10 Explains that tiedown ratings are determined by manufacturers, are expressed as a “working load limit” (WLL), and marked on the tiedowns. (H)
10.1.11 Describes how the combined strength of individual tiedowns used together to restrain cargo is called the “aggregate working load limit.” (H)
10.1.12 Explains how friction between cargo and vehicle surfaces, and friction between different articles of cargo that are in contact, helps to keep some types of cargo secure. (M)
10.1.13 Describes how the size, shape and weight of cargo generally dictates the required number, strength and placement of tiedowns. (L)
10.1.14 Explains how the aggregate working load limit of tiedowns used to secure cargo must equal at least 50% of the cargo weight. (L)
10 CARGO SECUREMENT & LOSS PREVENTION
Learning Indicators

42 | Entry-Level Training Curriculum Framework | TRAINING TOOL
10.1.15 Explains how cargo fully enclosed within a vehicle structure will not generally require tiedowns, but may require blocking, bracing or devices to increase friction between the vehicle and cargo. (M)
10.1.16 Explains how individual pieces of cargo are “unitized” into larger units of cargo. (M)
10.1.17 Explains that drivers are not required to inspect cargo if a vehicle has been sealed to prevent access and they have been instructed by their employer not to remove the seal. (M)*
10.1.18 Explains that some cargo can be secured according to general regulatory requirements. (M)
10.1.19 Explains how certain commodities require specific securing methods, devices and equipment to comply with specific regulatory requirements. (M)
10.1.20 Identifies that specific securement methods are required for: logs, dressed lumber and similar building materials, metal coils, paper rolls, concrete pipe, inter-modal containers, automobiles, light trucks and vans, heavy vehicles equipment and machinery, flattened or crushed cars, roll-on/roll-off and hook-lift containers, boulders, etc. (M)
10.1.21 Confirms that cargo securing methods or devices are the proper type, and are being properly used, strong enough, and in good condition. (M)
10.1.22 Inspects cargo and methods used to secure the cargo before driving, to confirm everything is properly secured to comply with regulations. (L)
10.1.23 Inspects cargo and related articles at specific intervals during the trip to ensure everything remains properly secured to comply with regulations. (L)
10.1.24 Confirms that proper methods and devices have been used to secure cargo; that they are in good condition, and are in the proper locations. (L)
10.1.25 Conducts inspection of the condition and integrity of tiedown devices, and adjusts tiedowns as necessary to keep cargo secure during transport. (L)
Learning 10.2 At the end of this training program the graduate will be able to prevent cargo Outcome loss claims, and follow required procedures to maintain secure facilities, prevent cargo loss and avoid damage.
10.2.1 Identifies that operation of cargo handling equipment must be performed in the proper manner, and only when a person is fully trained and authorized. (L)
10.2.2 Handles and loads cargo carefully and describes basic ways to confirm that all cargo is properly packaged, unitized, arranged and secured inside facilities and vehicles. (L)
10.2.3 Uses appropriate Personal Protective Equipment properly and recognizes that such use may be required, inside or outside of every workplace, shipper facility and customer facility. (L)*
10.2.4 Uses cargo seals, pin locks and similar vehicle security devices. (L)
10
Performance Elements
Learning Indicators
Learning Indicators
Performance Elements

43 | Entry-Level Training Curriculum Framework | TRAINING TOOL
con’t
Competence Category
Learning 11.1 At the end of this training program the graduate will be able to assess Outcome and adapt to changing conditions.
11.1.1 Describes common workplace hazards and risks and how such hazards and risks can change. (L)
11.1.2 Explains the role and importance of workplace practices, procedures and policies which are used to manage hazards and risks. (L)
11.1.3 Locates and understand workplace practices, procedures and policies which are used to manage hazards and risks. (L)
11.1.4 Explains the visual cues and other signs of potentially hazardous traffic situations. (M)*
11.1.5 Reviews and understands documented job task analyses and hazard assessments. (L)
11.1.6 Adapts to the presence of other motorists, pedestrians, cyclists and slow-moving vehicles which share the road with commercial vehicles. (M)
11.1.7 Watches for wildlife or livestock which can enter the space around a vehicle, particularly on routes known for collisions involving animals. (L)
11.1.8 Sets up mirrors to minimize a vehicle’s “blind spots.” (H)*
11.1.9 Monitors and adheres to highway speed advisories. (H)*
11.1.10 Maintains a high level of alertness while driving. (H)*
11.1.11 Scans conditions around the vehicle by looking ahead and using mirrors regularly and systematically. (H)*
11.1.12 Monitors vehicle conditions by scanning instruments and gauges regularly and systematically. (H)*
11.1.13 Monitors the movement and actions of other motorists while passing or being passed. (H)*
11.1.14 Diffuses any situation that could cause anger, hostility or danger. (L)*
11.1.15 Exits the vehicle whenever necessary to inspect clearances and identify potential obstructions. (H)*
11.1.16 Secures a vehicle properly before exiting the cab or vacating the driver seat. (H)*
11 HANDLING EMERGENCIES
Learning Indicators
Performance Elements

44 | Entry-Level Training Curriculum Framework | TRAINING TOOL
Learning 11.2 At the end of this training program the graduate will be able to handle minor Outcome emergency incidents in a professional manner.
11.2.1 Describes the typical kinds of incidents that must be reported to employers, police and other reporting agencies. (M)*
11.2.2 Explains the importance of following the specific requirements of workplace practices, procedures and policies regarding collisions, close calls, injuries or other similar incidents. (L)
11.2.3 Explains the importance of workplace practices, procedures and policies relating to obligations and limitations in administering first aid. (L)
11.2.4 Describes the importance of conducting themselves according to workplace practices, procedures and policies in any emergency situation when speaking to police, media, other motorists and the public. (L)
11.2.5 Describes the importance of following workplace practices, procedures and policies when engaging emergency support such as: towing and recovery service, vehicle repair, breakdown, tire repair, etc. (L)
11.2.6 Uses warning devices and other emergency equipment in compliance with regulations. (L)
11
Performance Elements
Learning Indicators

TRAINING TOOL
DRIVING THE FUTURE
Driver Learning
Record

2 | Driver Learning Record | TRAINING TOOL
The Driver Learning Record is a tool that can be used to monitor and document the on-the-job skills development of a new driver following the attainment of a Commercial Driver’s
License (CDL). Ideally, new drivers are assigned to a senior driver/mentor who is deemed to have the knowledge and skill required to demonstrate the proper performance of the skills and assess the driver’s performance of the competencies as
they are performed. The Driver Learning Record is an ongoing assessment tool that is used to determine the strengths and
abilities of the driver as well as the skill areas that require additional attention, training and development.
Driver Learning
Record
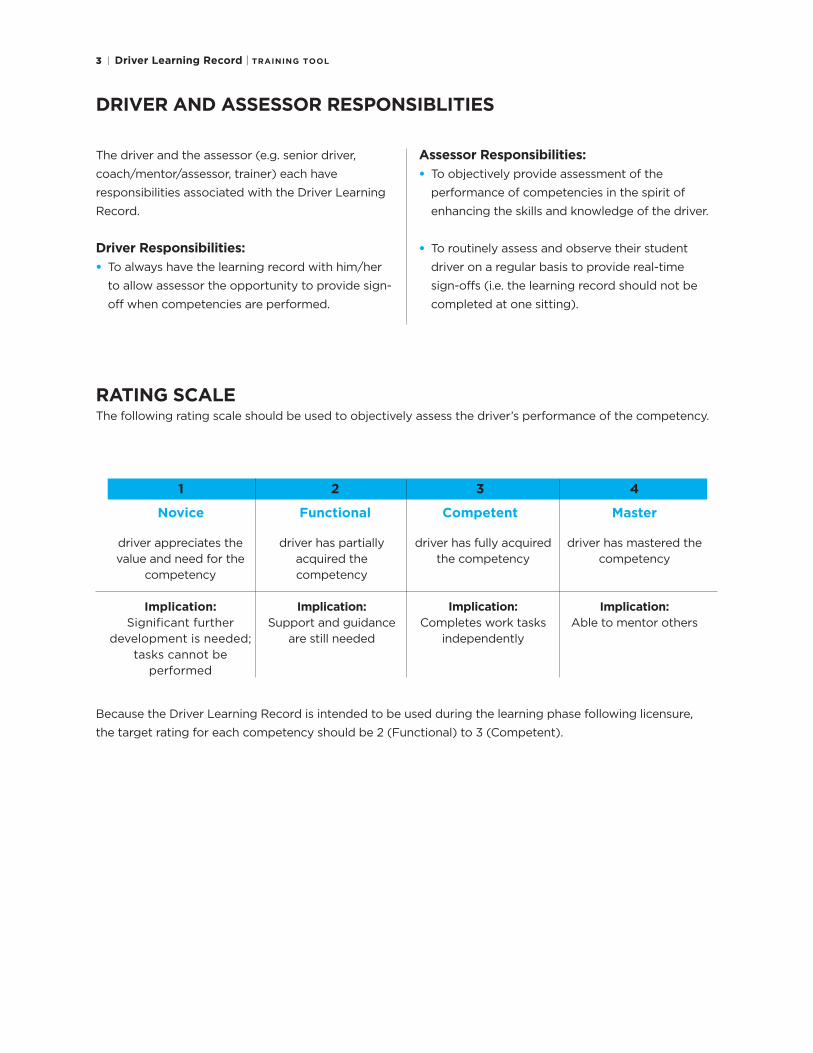
3 | Driver Learning Record | TRAINING TOOL
DRIVER AND ASSESSOR RESPONSIBLITIES
The driver and the assessor (e.g. senior driver,
coach/mentor/assessor, trainer) each have
responsibilities associated with the Driver Learning
Record.
Driver Responsibilities:
• To always have the learning record with him/her
to allow assessor the opportunity to provide sign-
off when competencies are performed.
Assessor Responsibilities:
• To objectively provide assessment of the
performance of competencies in the spirit of
enhancing the skills and knowledge of the driver.
• To routinely assess and observe their student
driver on a regular basis to provide real-time
sign-offs (i.e. the learning record should not be
completed at one sitting).
RATING SCALEThe following rating scale should be used to objectively assess the driver’s performance of the competency.
driver appreciates the value and need for the
competency
Implication:Significant further
development is needed; tasks cannot be
performed
1 2 3 4
Novice Functional Competent Master
driver has partially acquired the competency
Implication:Support and guidance
are still needed
driver has fully acquired the competency
Implication:Completes work tasks
independently
driver has mastered the competency
Implication:Able to mentor others
Because the Driver Learning Record is intended to be used during the learning phase following licensure,
the target rating for each competency should be 2 (Functional) to 3 (Competent).

4 | Driver Learning Record | TRAINING TOOL
Personal Development, Workplace Relationships and Team Skills Rating Assessor Initials
Awareness
Utilizes personal hygiene habits that positively affect workplace relationships.
Speaks clearly and professionally to fellow workers, supervisors, dispatchers and workplace operations staff.
Effectively approaches supervisors to help resolve workplace difficulties, and knows the process to be followed if the difficulties are not resolved.
Complies with workplace practices, procedures and policies that workers must follow when dealing with internal contacts such as coworkers, supervisors, customers and suppliers, and external contacts such as other motorists, officials, media and the public.
Complies with workplace practices, procedures and policies for interacting with people including police, enforcement personnel, the media, general public, other motorists, etc.
Assessor Notes:
Driver Notes:
Date of Final Sign-off on Module:
Signature of Assessor:
Signature of Driver:
1

5 | Driver Learning Record | TRAINING TOOL
2
Dependability and Administrative Task Completion Rating Assessor Initials
Workplace Compliance
Receives, understands and follows written and verbal instructions from supervisors, dispatchers and other workplace staff.
Reviews and understands documented job task analyses and hazard assessments.
Adopts and consistently follows standard workplace protocols when using phones, radios, computers, on-board systems, written forms of communication, etc.
Composes and delivers written information and messages relating to workplace activities.
Follows workplace practices, procedures and policies when releasing sensitive information about an operation, vehicle, trips, routes or cargo.
Document Processing
Legibly completes all workplace forms needed to establish and sustain employment.
Converts imperial and metric measurements using tables, mathematical formulas, or conversion programs.
Completes basic data-entry, form-filling and online search tasks.
Proficiently uses a calculator or computer.
Confirms all required vehicle and cargo documents are valid and correct. These documents include items such as permit books, vehicle registration, insurance, bills of lading, etc.
Legibly records information onto, tracks and manages cargo related documents such as way-bills.
Confirms that cargo matches related documents – and identifies any areas requiring clarification, changes, adjustment or planning.
Proficiently uses workplace-specific electronic tools such as communication, tracking and video event recording devices, customer-specific data-entry devices, etc.
Calculates and records information needed for fuel tax reports.
con’t

6 | Driver Learning Record | TRAINING TOOL
Regulatory Compliance
Maintains a complete, legible, and accurate driver’s daily log (in a written or electronic format) that fully complies with the regulations.
Carries daily logs that apply to the preceding 14 days, whenever operating a commercial vehicle requiring the driver to carry a log.
Retains and submits daily logs as required by the regulations and according to workplace practices, procedures and policies.
Assessor Notes:
Driver Notes:
Date of Final Sign-off on Module:
Signature of Assessor:
Signature of Driver:
Dependability and Administrative Task Completion, CON’T Rating Assessor Initials
2 con’t

7 | Driver Learning Record | TRAINING TOOL
Service to Shippers/Receivers Rating Assessor Initials
Maintains personal appearance and behavior that positively affect the employer’s corporate image.
Speaks clearly and professionally to staff at shipper and customer locations.
Listens to and conveys messages from shippers and customers.
Receives and conveys negative messages and/or complaints in a polite and professional manner.
Seeks appropriate help when accessing an unfamiliar location or facility.
Uses appropriate Personal Protective Equipment properly and as required, inside or outside of every workplace, shipper facility and customer facility.
Avoids revealing any sensitive information about their operation, vehicle, trips, routes or cargo.
Assessor Notes:
Driver Notes:
Date of Final Sign-off on Module:
Signature of Assessor:
Signature of Driver:
3

8 | Driver Learning Record | TRAINING TOOL
Planning and Problem Solving Rating Assessor Initials
Accesses reliable information about weather and road conditions, before and during a trip.
Identifies special requirements relating to the vehicle, load, routing or commodity.
Avoids traveling to an unfamiliar location without first confirming facilities and preferred routes.
Calculates when they can begin to drive, and how many hours are available for driving.
Calculates trip durations to determine arrival times and plan departure times.
Calculates route and trip distances.
Prepares a route plan, or identifies a predetermined route plan, that considers vehicle size and weight.
Accesses information and reference tables such as those related to vehicle weights and dimensions.
Accesses reliable and up-to-date maps and electronic route information.
Accesses reliable information about commercial vehicle routes, road construction, road closures, height clearances, weight restrictions, permit requirements, etc.
Plans ahead and knows where work breaks can be taken.
Identifies, locates and accesses service facilities, rest areas, and emergency refuge locations as necessary.
Estimates fuel consumption rates, and estimates how far a vehicle can travel on a particular quantity of fuel.
Identifies and locates suitable fuel sources, and purchase fuel according to workplace practice, procedures and policies.
Calculates actual and allowable axle weights.
Identifies and prepares for common problems and challenges, such as packing cold weather attire and equipment when necessary.
4
con’t

9 | Driver Learning Record | TRAINING TOOL
Adjusts trip plans or work plans when encountering unanticipated changes.
Carries necessary first aid supplies, and understands personal limitations in administering first aid.
Operates basic emergency equipment such as a fire extinguisher, safety warnings (triangles, flares), spill kits, etc.
Assessor Notes:
Driver Notes:
Date of Final Sign-off on Module:
Signature of Assessor:
Signature of Driver:
Planning and Problem Solving, CON’T Rating Assessor Initials
4 con’t

10 | Driver Learning Record | TRAINING TOOL
Use and Care of Equipment Rating Assessor Initials
Identifies the purpose, importance and proper condition of vehicle related documents such as vehicle registration, insurance, program registry, fuel tax reporting, permits, etc.
Confirms that every commercial vehicle being operated displays valid evidence that regulatory periodic inspections and workplace-specific inspections have been conducted.
Checks level of operating fluids including fuel, engine oil, engine coolant, power steering oil, windshield washer, diesel exhaust fluid (DEF), etc. – and tops up when necessary.
Regularly checks basic vehicle components, such as drive belts, hoses, tires, etc.
Proficiently uses some basic hand tools (if company policy permits)
Completes minor vehicle repair such as: repair minor electrical connection problem, replace lamp, gladhand seal or wiper blade, reset circuit breaker, etc. (if company policy permits)
Practices engine warm-up and cool-down procedures that are appropriate for conditions, following manufacturer recommendations and in accordance with workplace practices, procedures and policies.
Identifies defective conditions and damage on most vehicle components and systems, according to company practices, procedures and policies.
Reports vehicle damage, defects, completed repairs and any other condition that may require maintenance, correction or review.
5
con’t

11 | Driver Learning Record | TRAINING TOOL
Proficiently operates portable or on-board cargo heating equipment.
Proficiently operates different types of trailer coupling devices.
Understands the nature of the content, and locates vehicle owner and operator manuals as needed.
Assessor Notes:
Driver Notes:
Date of Final Sign-off on Module:
Signature of Assessor:
Signature of Driver:
Use and Care of Equipment, CON’T Rating Assessor Initials
5 con’t

12 | Driver Learning Record | TRAINING TOOL
Daily Inspection Requirements Rating Assessor Initials
Continuously monitors vehicle condition according to NSC 13 Schedule 1 while driving or otherwise being responsible for the vehicle, and updates the inspection report as required.
Records on an inspection report every minor defect found during an inspection or while operating a vehicle, and reports the minor defect according to workplace practices, procedures and policies.
Immediately records on an inspection document and reports every major defect found during an inspection, or while operating a vehicle, and immediately stops operating the vehicle.
Maintains a vehicle’s out-of-service status whenever a major defect is identified, until the condition is corrected.
Conducts regular en-route and post-trip vehicle inspections according to workplace practices, procedures and policies.
Assessor Notes:
Driver Notes:
Date of Final Sign-off on Module:
Signature of Assessor:
Signature of Driver:
6

13 | Driver Learning Record | TRAINING TOOL
Cargo Handling and Care Rating Assessor Initials
Calculates and records cargo weight when necessary.
Operates cargo handling equipment in the proper manner, and only when fully trained and authorized.
Handles and loads cargo carefully, and confirms that all cargo is properly packaged, unitized, arranged and secured inside facilities and vehicles.
Uses cargo seals, pin locks and similar vehicle security devices according to company practices, procedures and policies.
Ensures that, in cases where cargo needs to be unitized, individual articles of cargo remain adequately secured into larger articles of cargo.
Inspects cargo and methods used to secure the cargo before driving, to confirm everything is properly secured to comply with the regulations, and according to workplace practices, procedures and policies.
Ensures that cargo secured to the vehicle structure is properly distributed and arranged, and that any required blocking, bracing or friction mat is adequate, properly positioned and securely in place.
Confirms proper methods and devices have been used to secure cargo, are in good condition, and are in the proper locations.
Inspects cargo and related articles at specific intervals during the trip to ensure everything remains properly secured to comply with the regulations, and according to workplace practices, procedures and policies.
Inspects the condition and integrity of tiedown devices, and adjusts tiedowns as necessary to keep cargo secure during transport.
Carefully tracks cargo and related documents during each trip; identifies any discrepancies between cargo documents and the cargo being transported.
Calculates changing cargo weight when needed and verifies compliance with vehicle weight regulations.
7
con’t

14 | Driver Learning Record | TRAINING TOOL
Assessor Notes:
Driver Notes:
Date of Final Sign-off on Module:
Signature of Assessor:
Signature of Driver:
Cargo Handling and Care, CON’T
7 con’t

15 | Driver Learning Record | TRAINING TOOL
Off Road Tasks and Maneuvers Rating Assessor Initials
Determines before leaving the driver’s seat that the vehicle is secured by the vehicle’s parking brake, wheel chocks or suitable blocks.
Properly enters and exits the cab or vehicle cargo area, maintains 3-point contact, and avoids the risks of improperly climbing onto or jumping from equipment.
Proficiently adjusts overall vehicle length, 5th wheel position and axle positions as required, accounting for the vehicle’s overhang, trailer swing, and the rules governing vehicle weights and dimensions.
Checks and/or adjusts air suspension settings and controls, axle spacing, and 5th wheel position (tractor-trailer only)
Loading Dock
Opens cargo doors when needed before backing.
When in a loading dock, confirms that all cargo handling equipment and devices have been returned to their proper place.
Checks or removes vehicle restraints and other loading dock devices.
Observes signals and other warning devices used around loading docks.
Backing & Parking
Proficiently backs into and properly aligns with loading docks.
Proficiently backs 30 metres in a straight line in a path that provides 15 cm clearance on either side at the vehicle’s widest point, door or mirror.
Minimizes backing activity by driving forward, driving around the block, or finding a different approach whenever possible.
Plans ahead to ensure backing is always done in the safest manner.
Exits the vehicle and checks the intended path for clearances, obstructions and hazards as often as necessary, before and during backing. Rechecks the path whenever delays could allow conditions to change.
8
con’t

16 | Driver Learning Record | TRAINING TOOL
Assessor Notes:
Driver Notes:
Date of Final Sign-off on Module:
Signature of Assessor:
Signature of Driver:
Off Road Tasks and Maneuvers, CON’T
8 con’t

17 | Driver Learning Record | TRAINING TOOL
Review of On-Road Safe Driving Record (solo driving history) Rating Assessor Initials
Immediately recognizes and responds to an unexpected situation in which vehicle weight or height is greater than what is permitted to operate on a particular road or highway.
Complies with specific requirements for using toll routes and bridges.
Respects local bylaws restricting vehicle loading and unloading activities, parking and idling.
Additional for tractor-trailer
Plans how to approach a turn, and takes a different route whenever a safe turn may not be possible.
Proficiently turns tractor-trailers from a laneway onto a two-lane street.
Performs U-turns with a tractor-trailer according to company practices, procedures and policies. Proficiently completes a U-turn only where legally permitted, when necessary and after assessing all hazards.
Assessor Notes:
Driver Notes:
Date of Final Sign-off on Module:
Signature of Assessor:
Signature of Driver:
9

18 | Driver Learning Record | TRAINING TOOL
Fuel Consumption Rating Assessor Initials
Uses auxiliary power units and “shore power” according to workplace practices, procedures and policies.
Idles the engine as little as possible, and only when and where permitted.
Sets up and operates vehicle to minimize fuel consumption. Minimizes the gap between tractor and trailer where possible and allowed.
Uses fuel types, vehicle technology, fuel additives, etc., according to workplace practices, procedures and policies. Purchases fuel based on workplace practices, procedures and policies that reflect price, etc.
Assessor Notes:
Driver Notes:
Date of Final Sign-off on Module:
Signature of Assessor:
Signature of Driver:
10

TRAINING TOOL
DRIVING THE FUTURE
On-Road Skills Demonstration

2 | ON-ROAD SKILLS DEMONSTRATION | TRAINING TOOL
This document is a resource for consistent and objective evaluation of driver competencies. Demonstration and
evaluation of the skills contained in this resource establishes or confirms the level of proficiency of an individual. This
resource is suitable for use in a training environment to aid in the development of proficiency, and is also suitable for
confirmation of skills after training. This resource is also suitable for use in periodic driver evaluation and for remedial purposes. The evaluation criteria are drawn from the relevant
competencies of the National Occupational Standard.
On-Road Skills Demonstration

3 | ON-ROAD SKILLS DEMONSTRATION | TRAINING TOOL
Skill Demonstration Items
1. Driving along urban roadways
2. Driving through curves
3. Stopping at intersections
4. Driving through intersections
5. Turning at intersections
6. Circular intersections
7. Lane changes
8. Entering an expressway
9. Driving along an expressway
10. Exiting an expressway
11. Roadside stop
12. Railway crossing
Demonstration/Evaluation Steps Evaluate the driver as he/she is driving between
the specific maneuvers that will be part of the
driving evaluation. The demonstration may
include additional workplace-specific and/or
vehicle-specific procedures. These issues must be
addressed and fully conveyed to the driver prior to
beginning any demonstration and not be discussed
during the evaluation.
The demonstration of on-road maneuvers includes the following items:
Method
This skills demonstration can be completed in
stages spread out over time, or can be completed
as a single exercise involving demonstration of all
the items in sequence. For each demonstration
item the individual will complete the required steps
so that the evaluator can observe the work being
performed. Direction and coaching are appropriate
when this resource is being used in a training or
development capacity. The evaluator will observe
without providing any direction or coaching when
the evaluation is conducted for skills confirmation.
A driving skills demonstration for evaluation
purposes can be used at any stage of training after
an individual starts to drive.
The actual maneuvers that require proficiency will
depend on the stage of learning or the expectation
of development of the driver’s skills. During initial
driver training the demonstration maneuvers may
be limited and then expand as skill levels develop.

4 | ON-ROAD SKILLS DEMONSTRATION | TRAINING TOOL
Instruction to Driver Inform the driver that he/she will be observed and
evaluated while driving between specific maneuvers
that will be part of the driving evaluation. Make the
driver aware of the maneuvers that will be assessed
during the evaluation.
Scoring Procedure Because the on-road skills assessment can be used
as a training and development tool for drivers with
varying levels of skills, the scoring of the assessment
is situation-specific. Companies may opt to set
target ‘scores’ for each classification of driver (e.g.
new driver, novice driver, experienced driver) to
identify how many errors (major or minor offences)
the driver is allotted. To be an effective skills
development tool, the on-road skills demonstration
should be used to identify areas that require more
training and instruction. This demonstration should
be a starting point for further instruction and
professional development.
Legend:The Errors listed in each competency table have
been assigned a ‘Major’ or ‘Minor’ rating. ‘Major’
errors are denoted in RED ; ‘Minor’ errors are
denoted in YELLOW .

5 | ON-ROAD SKILLS DEMONSTRATION | TRAINING TOOL
DRIVING COMPETENCY
Driving Evaluation 1 – Driving along urban roadways
Driver action Errors Minor/Major
Doesn’t conduct adequate checks of conditions in front, beside or behind
Fails to notice conditions or hazards
Reacts too late to changing conditions
Over-reacts to changing conditions
Is not aware of blind spots
Fails to check blind spots regularly
Fails to adequately track vehicles in blind spots
Doesn’t conduct adequate checks of vehicle conditions
Takes eyes off road too long to check instrument panel
Refuses to give space or be courteous toward other motorists
Intimidates other motorists or fails to notice action that may be risky for others
Follows too closely
Drives with excessive speed
Fails to leave enough space when stopping behind another vehicle
Drives in the wrong lane or fails to stay right as much as possible
Fails to drive near the center of the lane
Drives in a prohibited lane
1. Observe and monitor
Scans the roadway and traffic conditions in front, beside and behind on a regular basis of about 5 to 10 seconds
2. React to conditions
Notices conditions that may require a change in speed or lane position and adjusts smoothly
3. Monitor blind spots
Checks blind spots regularly and tracks vehicles entering and leaving blind spots
4. Monitor vehicle
Scans the instrument panel at regular intervals of about 10 to 30 seconds
5. Drives courteously
Recognizes their responsibilities for sharing a workplace with the public
6. Manage speed and distance
Manages speed and following distance to allow adequate time to observe, react and manoeuver vehicle if necessary
7. Road and lane position
Selects the correct lane and stays near the center of the lane
Drives in the right-most unless there is an obstruction or other need to move over
1 Driving along urban roadways

6 | ON-ROAD SKILLS DEMONSTRATION | TRAINING TOOL
Driving Evaluation 1 – Driving along urban roadways, continued
Driver action Errors Minor/Major
Fails to notice road signs
Fails to notice pavement markings
Impedes other vehicles unnecessarily
Operates vehicle in a rough or erratic manner
Uses improper grip
Over-speeds engine
Lugs engine
Misses gears or selects wrong gear
Clashes gears
Total Minor
Total Major
8. Signs and pavement markings
Pays attention to road signs and pavement markings
9. Integrate with traffic
Avoids blocking other vehicles and operates at appropriate speed
11. Smooth operation
Operates vehicle controls smoothly
12. Steering grip
Maintains two-handed grip on the steering wheel as much as practicable
13. Clutch and manual transmission
Operates clutch, selects gears correctly and shifts smoothly

7 | ON-ROAD SKILLS DEMONSTRATION | TRAINING TOOL
Driving Evaluation 2 – Driving through curves
Driver action Errors Minor/Major
Fails to notice curve ahead of time
Fails to check for signs or pavement markings, or fails to read them correctly
Fails to check traffic
Adjusts speed too late or adjusts speed while in curve
Exceeds speed limit or speed advisory
Travels too close to other vehicles
Travels too fast for vehicle or road conditions
Fails to maintain proper grip on steering wheel
Fails to keep vehicle within lane markings
Doesn’t conduct adequate checks of conditions in front, beside or behind
Total Minor
Total Major
1. Prepare
Conducts a visual assessment of the curve as soon as it is visible, checks for signs and pavement markings
Checks traffic in front, beside and behind
2. Travel through curve
Adjusts speed before the curve starts, manages speed and distance to vehicle in front
3. Steering and lane position
Positions vehicle to stay in lane and keeps two hands on wheel
4. Traffic check
Monitors traffic during curve
DRIVING COMPETENCY
2 Driving through curves

8 | ON-ROAD SKILLS DEMONSTRATION | TRAINING TOOL
Driving Evaluation 3.1 – Crossing uncontrolled intersections
Driver action Errors Minor/Major
Fails to notice intersection
Fails to check for signs or pavement markings, or fails to read them correctly
Starts scanning for cross traffic
Fails to adequately check conditions in front, beside or behind
Fails to notice or react to traffic
Travels at excessive speed
Slows down unnecessarily
Crosses in the wrong lane or fails to stay near the center of the lane
Total Minor
Total Major
1. Prepare
Conducts a visual assessment of the intersection as soon as it is visible, checks for signs and pavement markings and checks sight lines
2. Traffic check
Scans the roadway, traffic pattern signs, pavement markings and controls to confirm intersection can be crossed safely
3. Crossing
Executes crossing at appropriate speed
4. Road and lane position
Stays in the correct lane and stays near the center of the lane
DRIVING COMPETENCY
3 Driving through intersections

9 | ON-ROAD SKILLS DEMONSTRATION | TRAINING TOOL
Driving Evaluation 3.2 – Approaching controlled intersections
Driver action Errors Minor/Major
Fails to notice intersection in time
Fails to check for signs or pavement markings, or fails to read them correctly
Starts to scan traffic pattern
Fails to adequately check conditions in front, beside or behind
Fails to notice or react to traffic
Fails to properly notice or react to traffic control signal
Proceeds against a signal
Total Minor
Total Major
1. Prepare
Conducts a visual assessment of the intersection as soon as it is visible, checks for signs and pavement markings
2. Traffic check
Scans the roadway, traffic pattern signs, and pavement markings to confirm intersection can be crossed safely
3. Traffic control signal
Watches and observes traffic signals carefully
Driving Evaluation 3.3 – Driving through controlled intersections
Driver action Errors Minor/Major
Follows too closely
Drives with excessive speed
Fails to leave enough space when stopping behind another vehicle
Travels at excessive speed
Slows down unnecessarily
Crosses in the wrong lane or fails to stay near the center of the lane
Total Minor
Total Major
4. Manage speed and distance
Manages speed and following distance to allow adequate time to observe, react and manoeuver vehicle if necessary
5. Crossing
Executes crossing at appropriate speed
6. Road and lane position
Stays in the correct lane and stays near the center of the lane

10 | ON-ROAD SKILLS DEMONSTRATION | TRAINING TOOL
Driving Evaluation 4 – Stopping at controlled intersections
Driver action Errors Minor/Major
Fails to properly notice or react to traffic control signal
Proceeds against a signal
Fails to leave enough space when stopping behind another vehicle
Leaves too much space in front
Blocks crosswalk or impedes a pedestrian or other road user
Travels at excessive speed
Slows down unnecessarily
Crosses in the wrong lane or fails to stay near the center of the lane
Over-speeds engine
Lugs engine
Misses gears or selects wrong gear
Clashes gears
Total Minor
Total Major
1. Traffic control signal
Watches and observes traffic signals carefully
2. Manage vehicle distance and position
Maintains distance to other vehicles (able to see the rear tires of the vehicle in front)
3. Crossing
Executes crossing at appropriate speed
4. Road and lane position
Stays in the correct lane and stays near the center of the lane
5. Clutch and manual transmission
Operates clutch, selects gears correctly and shifts smoothly
DRIVING COMPETENCY
4 Stopping at intersections

11 | ON-ROAD SKILLS DEMONSTRATION | TRAINING TOOL
Driving Evaluation 5 – Turning at intersections
Driver action Errors Minor/Major
Fails to select the best lane for the turn
Turns from a prohibited lane
Signal is not activated
Signal is activated too late
Signal does not remain activated during entire lane change
Fails to adequately check conditions in front, beside or behind
Fails to notice another vehicle that must be monitored or may be affected during the turn
Allows following distance to get too short before turn
Slows down unnecessarily before turn
Starts turn without adequate space in target lane
Impedes another vehicle during the turn
Causes other motorists to react in a risky manner
Steers too tight for turn
Steers too wide for turn
Fails to select the best lane for completing the turn
Turns into prohibited lane
Fails to cancel turn signal in time
1. Lane selection
Selects the correct lane for starting the turn
2. Signal use
Activates signal at least 2-3 seconds before turn and keeps signal on through the turn
3. Traffic check
Scans the roadway and traffic pattern to plan when to execute the turn
4. Vehicle spacing
Maintains safe following distance during turn and accurately judges distance needed in target lane
5. Vehicle position
Steers through the intersection following a proper path, based on vehicle off-tracking and clearance requirements
6. Lane selection
Selects the correct lane for completing the turn
7. Signal cancellation
Cancels turn signal within about 4 seconds after completing turn
DRIVING COMPETENCY
5 Turning at intersections
con’t

12 | ON-ROAD SKILLS DEMONSTRATION | TRAINING TOOL
Driving Evaluation 5 – Turning at intersections, continued
Driver action Errors Minor/Major
Over-speeds engine
Lugs engine
Misses gears or selects wrong gear
Clashes gears
Total Minor
Total Major
8. Clutch and manual transmission
Operates clutch, selects gears correctly and shifts smoothly

13 | ON-ROAD SKILLS DEMONSTRATION | TRAINING TOOL
Driving Evaluation 6 – Driving through a circular intersection
Driver action Errors Minor/Major
Fails to notice intersection in time
Fails to check for signs or pavement markings, or fails to read them correctly
Starts to scan traffic pattern
Fails to adequately check conditions in front, beside or behind
Fails to notice or react to traffic
Fails to properly notice or react to pavement markings or traffic control sign
Follows too closely
Drives too fast
Drives too slow
Crosses in the wrong lane or fails to stay near the center of the lane
Total Minor
Total Major
1. Prepare
Conducts a visual assessment of the intersection as soon as it is visible, checks for signs and pavement markings
2. Traffic check
Scans the roadway, traffic pattern signs, and pavement markings on approach
3. Traffic signs and pavement markings
Reads and follows signs and pavement markings
4. Manage speed and distance
Manages speed and following distance to allow adequate time to observe, react and manoeuver vehicle if necessary
5. Road and lane position
Stays in the correct lane and stays near the center of the lane
DRIVING COMPETENCY
6 Circular intersections

14 | ON-ROAD SKILLS DEMONSTRATION | TRAINING TOOL
con’t
Driving Evaluation 7 – Changing lanes
Driver action Errors Minor/Major
Fails to adequately check conditions in front, beside or behind
Fails to notice another vehicle that must be monitored or may be affected by the lane change
Signal is not activated
Signal is activated too late
Signal does not remain activated during entire lane change
Allows following distance to get too short before lane change
Slows down unnecessarily before lane change
Starts lane change without adequate space in target lane
Impedes another vehicle during the lane change
Causes other motorists to react in a risky manner
Fails to see lane marking prohibiting a lane change
Changes lane where prohibited
Changes lane in intersection , near crosswalk or railway crossing
Lane change is made too quickly
Takes too long to change lane
Steering is jerky
Gets too close to another vehicle during lane change
Fails to adjust speed after lane change
Moves to far to either side within the target lane
1. Traffic check
Scans the roadway and traffic pattern to plan when to execute the lane change
2. Signal use
Activates signal at least 2-3 seconds before lane change
3. Vehicle spacing
Maintains safe following distance in current lane and accurately judges distance needed in target lane
4. Lane change execution
Changes lane where it is safe and legal to do so
Makes a smooth and deliberate lane change
DRIVING COMPETENCY
7 Changing lanes

15 | ON-ROAD SKILLS DEMONSTRATION | TRAINING TOOL
Driving Evaluation 7 – Changing lanes, continued
Driver action Errors Minor/Major
Leaves signal on too long
Total Minor
Total Major
5. Cancel turn signal
Cancels turn signal within 4 seconds of completing lane change

16 | ON-ROAD SKILLS DEMONSTRATION | TRAINING TOOL
Driving Evaluation 8 – Entering an expressway
Driver action Errors Minor/Major
Fails to adequately check conditions in front, beside or behind
Fails to notice another vehicle that must be monitored or may be affected by the lane change
Follows too closely
Drives too fast
Drives too slow
Fails to properly notice or react to pavement markings or traffic control signs
Signal is not activated
Signal is activated too late
Signal does not remain activated during entire lane change
Crosses in the wrong lane or fails to stay near the center of the lane
Accelerates to soon or too much to blend with traffic
Accelerates late or too little to blend with traffic
Fails to cancel turn signal in time
1. Traffic check
Scans the roadway and traffic pattern to plan when to execute the lane change
2. Manage speed and distance
Manages speed and following distance to allow adequate time to observe, react and manoeuver vehicle if necessary
3. Traffic signs and pavement markings
Reads and follows signs and pavement markings
4. Signal use
Activates signal at least 2-3 seconds before lane change or merge
5. Road and lane position
Stays in the correct lane and stays near the center of the lane
6. Adjust speed
Controls vehicle speed within the acceleration ramp to facilitate merge into traffic
7. Signal cancellation
Cancels turn signal within about 4 seconds after completing turn
DRIVING COMPETENCY
8 Entering an expressway
con’t

17 | ON-ROAD SKILLS DEMONSTRATION | TRAINING TOOL
Driving Evaluation 8 – Entering an expressway, continued
Driver action Errors Minor/Major
Over-speeds engine
Lugs engine
Misses gears or selects wrong gear
Total Minor
Total Major
8. Clutch and manual transmission
Operates clutch, selects gears correctly and shifts smoothly

18 | ON-ROAD SKILLS DEMONSTRATION | TRAINING TOOL
Driving Evaluation 9 – Driving along an expressway
Driver action Errors Minor/Major
Doesn’t conduct adequate checks of conditions in front, beside or behind
Fails to notice conditions or hazards
Reacts too late to changing conditions
Over-reacts to changing conditions
Is not aware of blind spots
Fails to check blind spots regularly
Fails to adequately track vehicles in blind spots
Doesn’t conduct adequate checks of vehicle conditions
Takes eyes of road too long to check instrument panel
Refuses to give space or be courteous toward other motorists
Intimidates other motorists or fails to notice action that may be risky for others
Follows too closely
Drives with excessive speed
Fails to leave enough space when stopping behind another vehicle
Drives in the wrong lane or fails to stay right as much as possible
Fails to drive near the center of the lane
Drives in a prohibited lane
1. Observe and monitor
Scans the roadway and traffic conditions in front, beside and behind on a regular basis of about 5 to 10 seconds
2. React to conditions
Notices conditions that may require a change in speed or lane position and adjusts smoothly
3. Monitor blind spots
Checks blind spots regularly and tracks vehicles entering and leaving blind spots
4. Monitor vehicle
Scans the instrument panel at regular intervals of about 10 to 30 seconds
5. Drive courteously
Recognizes their responsibilities for sharing a workplace with the public
6. Manage speed and distance
Manages speed and following distance to allow adequate time to observe, react and manoeuver vehicle if necessary
7. Road and lane position
Selects the correct lane and stays near the center of the lane
Drives in the right-most unless there is an obstruction or other need to move over
con’t
DRIVING COMPETENCY
9 Driving along an expressway

19 | ON-ROAD SKILLS DEMONSTRATION | TRAINING TOOL
Driving Evaluation 9 – Driving along an expressway, continued
Driver action Errors Minor/Major
Fails to notice road signs
Fails to notice pavement markings
Impedes other vehicles unnecessarily
Operates vehicle in a rough or erratic manner
Uses improper grip
Over-speeds engine
Lugs engine
Misses gears or selects wrong gear
Clashes gears
Total Minor
Total Major
8. Signs and pavement markings
Pays attention to road signs and pavement markings
9. Integrate with traffic
Avoids blocking other vehicles and operates at appropriate speed
10. Smooth operation
Operates vehicle controls smoothly
11. Steering grip
Maintains two-handed grip on the steering wheel as much as practicable
12. Clutch and manual transmission
Operates clutch, selects gears correctly and shifts smoothly

20 | ON-ROAD SKILLS DEMONSTRATION | TRAINING TOOL
con’t
Driving Evaluation 10 – Exiting an expressway
Driver action Errors Minor/Major
Fails to adequately check conditions in front, beside or behind
Fails to notice another vehicle that must be monitored or may be affected by the lane change
Follows too closely
Drives too fast
Drives too slowly
Signal is not activated
Signal is activated too late
Signal does not remain activated during entire lane change
Crosses in the wrong lane or fails to stay near the center of the lane
Waits too long to move onto exit ramp, or moves over too slowly
Gets on to exit ramp too soon or too suddenly
Reduces speed while still on expressway when it is not necessary
Does not adequately reduce speed on exit ramp
Fails to cancel turn signal in time
1. Traffic check
Scans the roadway and traffic pattern to plan exit from expressway
2. Manage speed and distance
Manages speed and following distance to allow adequate time to observe, react and manoeuver vehicle if necessary
3. Signal use
Activates signal at least 2-3 seconds before lane change or exit
4. Road and lane position
Stays in the correct lane and stays near the center of the lane
5. Exit ramp
Drives onto exit ramp as soon as space is available
6. Adjust speed
Reduces vehicle speed within the deceleration ramp
7. Cancel turn signal
Cancels turn signal within about 4 seconds after completing turn
DRIVING COMPETENCY
10 Exiting an expressway

21 | ON-ROAD SKILLS DEMONSTRATION | TRAINING TOOL
Driving Evaluation 10 – Exiting an expressway, continued
Driver action Errors Minor/Major
Over-speeds engine
Lugs engine
Misses gears or selects wrong gear
Grinds or clashes gears
Total Minor
Total Major
8. Clutch and manual transmission
Operates clutch, selects gears correctly and shifts smoothly

Driving Evaluation 11 – Making a roadside stop
Driver action Errors Minor/Major
Fails to turn head far enough to observe traffic
Fails to use mirrors to check traffic to rear
Allows following distance to get too short
Impedes other vehicles during the stop
Activates wrong turn signals
Activates turn signal too early
Activates turn signal too late
Fails to stop far enough to the right
Stops farther than 0.6m from the curb
Fails to prevent the vehicle from rolling
Fails to avoid obstructing other vehicles
Fails to apply parking brakes
Fails to deactivate turn signals
Fails to activate hazard warning lights
Starts moving too soon
Starts moving forward too late
Starts aggressively/roughly
Activates wrong signal light
Activates signal light too early
Activates signal light too late
1. Traffic check
Observes traffic in front, to the left, right and to the rear through the vehicle mirrors
2. Manage speed and distance
Maintains appropriate speed and distance from other vehicles
3. Signal use
Activates signal at least 2-3 seconds before lane change or exit
4. Stop position
Stops on the right side of the road
5. Secure vehicle
Applies parking brakes
6. Signal use
Deactivates turn signals; activates hazard warning lights
7. Start
Starts moving vehicle forward smoothly as soon as space is clear
8. Signal use
Activates correct turn signal
con’t
DRIVING COMPETENCY
11 Making a roadside stop
22 | ON-ROAD SKILLS DEMONSTRATION | TRAINING TOOL

Driving Evaluation 11 – Making a roadside stop, continued
Driver action Errors Minor/Major
Fails to turn head far enough to observe traffic
Fails to use mirrors to check traffic in rear
Follows too close to other vehicles
Impedes other vehicles
Fails to deactivate turn signal lights
Fails to observe traffic
Over-speeds engine
Lugs engine
Misses gears or selects wrong gear
Grinds or clashes gears
Total Minor
Total Major
9. Traffic check
Observes traffic in front, to the left, right and to the rear through the vehicle mirrors
10. Manage speed and distance
Maintains appropriate speed and distance from other vehicles
11. Signal use
Deactivates turn signal lights
12. Traffic check
Observes traffic in front, to the left, right and to the rear
13. Clutch and manual transmission
Operates clutch, selects gears correctly and shifts smoothly
23 | ON-ROAD SKILLS DEMONSTRATION | TRAINING TOOL

24 | ON-ROAD SKILLS DEMONSTRATION | TRAINING TOOL
Driving Evaluation 12 – Crossing a railway
Driver action Errors Minor/Major
Fails to turn head far enough to observe traffic
Fails to use mirrors to check traffic to rear
Allows following distance to get too short
Impedes other vehicles during the stop
Activates hazard lights too early
Activates hazard lights too late
Fails to silence audio source
Fails to open one or more windows
Disobeys any sign or signal
Stops closer than 5m from track or gate
Stops too far away to be able to see and hear
Fails to turn head far enough to observe traffic
Fails to use mirrors to check traffic to rear
Allows following distance to get too short
Impedes other vehicles during crossing
1. Traffic check
Observes traffic in front, to the left, right and to the rear through the vehicle mirrors
2. Manage speed and distance
Maintains appropriate speed and distance from other vehicles
3. Hazard lights
Activates hazard lights when reducing speed
4. Attention
Silences audio systems, radio, etc. Opens driver side window or both side windows to look and listen
5. Signs and signals
Responds correctly to signs and signals
6. Stop position (if stop required)
Stops at least 5m from the railway track or gate but close enough to see and hear
7. Traffic check
Scan traffic in front, to the left, right and to the rear through the vehicle mirrors
8. Speed and distance
Maintain appropriate speed and distance from other vehicles
DRIVING COMPETENCY
12 Crossing a railway

25 | ON-ROAD SKILLS DEMONSTRATION | TRAINING TOOL
Driving Evaluation 12 – Crossing a railway
Driver action Errors Minor/Major
Cancels hazard lights too early
Cancels hazard lights too late
Total Minor
Total Major
9. Hazard lights
Cancels hazard lights upon reaching traffic speed

TRAINING TOOL
DRIVING THE FUTURE
On-Road Skills DemonstrationDRIVER PREPARATION GUIDE

2 | ON-ROAD SKILLS DEMONSTRATION | TRAINING TOOL
This document is a resource for drivers who are preparing for an on-road demonstration. This resource provides
direction and explanation regarding each of the driving competencies that will be evaluated.
Any driver, from entry-level to experienced, will benefit from the review of this resource to clarify expectations
and provide additional tips and procedures for effectively performing on-road skills.
METHODThis document should be reviewed by the driver prior to the
on-road skills demonstration. If questions arise while reviewing the document, drivers are encouraged to seek clarification
from their evaluator, coach, mentor or assessor.
On-Road Skills Demonstration

3 | ON-ROAD SKILLS DEMONSTRATION | TRAINING TOOL
Urban roadways include city streets, commercial and industrial roads. Driving along safely on any roadway
requires constant application of a number of different driving skills.
Driving Skills
1. Observe and monitor Maintain constant awareness of the conditions
surrounding your vehicle. This involves regular
scanning in front of the vehicle, to the immediate
right and left sides, and farther along each side
and the rear using the mirrors. Look back and
forth across the field of view directly in front,
turning your head slightly to each side to get
a wider view, then far enough to look in the
mirrors. Conduct this type of scan every 5 to 10
seconds or so. The scan interval will be longer in
light traffic and shorter in congested traffic.
Monitor the position of other vehicles around
your vehicle and make a mental note of which
vehicles are traveling faster or slower than you
are. The specific areas that need to be scanned
more intently will depend on particular road and
traffic conditions. Far more frequent scanning of
traffic is necessary on busy multi-lane highways
than on two lane roads. Driving in the right
hand lane can also reduce the need to monitor
conditions as frequently on the right-hand side
and rear of the vehicle, as would be required
while driving in the center lane.
Intersections, driveways, and vehicles entering or
leaving the roadway can cause rapid changes in
traffic speed and the position of other vehicles
around your vehicle. Pedestrians, cyclists
and motorcyclists, who are considered to be
‘volnerable road users,’ may be present, requiring
you to yield the right of way or take action that
may require changes in speed or road position.
Greater care and observation are necessary on
roads where vulnerable road users are more likely.
In addition to scanning the conditions
surrounding the vehicle, you must also mentally
forecast the road conditions. This involves
looking far enough ahead to anticipate what
might be necessary for you to adapt to any
driving situation. Look about 10 seconds ahead
of your current vehicle position in urban driving
environments and about 15 to 20 seconds ahead
on expressways. Make mental notes of the things
that could be important. This will include other
vehicle positions; their speed and changes in
their speed; slow moving vehicles; traffic control
devices; vehicles merging; entering or leaving
the roadway; the surface of the road; etc. Always
watch for pavement markings that define lanes,
lanes that merge or end, and lanes that are
added.
Driving Competency – Driving along urban roadways1

4 | ON-ROAD SKILLS DEMONSTRATION | TRAINING TOOL
2. Respond to traffic and road conditions Each driving environment has its own unique
conditions that must be taken into account.
In commercial and industrial areas these can
be entrances to businesses, institutions and
construction sites, as well as pedestrian and
railway crossings. Residential streets often
have more entrances to schools, pedestrians,
pedestrian crosswalks, driveways and sidewalks.
Rural roads have industrial and farm entrances,
agricultural and slow moving vehicles. Cyclists
can be encountered on almost any road.
Be constantly aware of conditions around your
vehicle and stay alert for the mistakes that other
motorists might make. You cannot depend on
other drivers to always do the right thing or to
do things safely. You must be ready to react
even when the other motorist is in the wrong.
Avoid becoming distracted or complacent while
driving.
3. Monitor blind spots Mirrors provide visibility to the sides and rear of
the vehicle. Mirror capabilities vary depending
on their location. Flat mirrors have a small field
of view while convex mirrors offer a much wider
view. When a commercial vehicle has adequate
mirrors and they are properly set up, there
will be minimal blind spots on the sides of the
vehicle. With adequate convex mirrors, virtually
all blind spots can be eliminated. Recognize the
areas where visibility is restricted around your
vehicle and monitor adjacent vehicles, overtaking
vehicles, as well as those that are being passed.
By keeping mental track of vehicles that enter
any blind spot, and watching for those same
vehicles to re-appear, you can reduce the
chances of having to deal with vehicles that you
may otherwise not be aware of.
4. Monitor your vehicle Monitor vehicle conditions by scanning
instruments regularly and pay attention to the
way the vehicle responds. Get used to the normal
sounds and feel of your vehicle.
5. Interact with other motorists As the driver of a large commercial vehicle, you
have a “duty of care” to proactively protect other
road users from harm. You must recognize your
responsibilities for sharing your workplace with
the public. Appreciate the additional size and
weight of your vehicle and how it may affect and
be perceived by other road users. Be courteous,
and be prepared and willing to yield to other
motorists, cyclists, pedestrians and slow-moving
vehicles.
con’t

5 | ON-ROAD SKILLS DEMONSTRATION | TRAINING TOOL
6. Manage speed and following distance Always be aware of the speed limit of each road
you travel and monitor speed advisories. Speed
of commercial vehicles should be maintained at
or below the speed limit and should be steady.
Speed must be reduced in congested traffic and
around obstacles, construction and vulnerable
road users.
Distance to the vehicle in front should not be less
than the amount of road covered in 6 seconds
of travel. Maintaining this distance can be
challenging in congested traffic situations where
other vehicles regularly move into that space
and reduce the following distance that you were
trying to maintain in front of the vehicle. Always
be cautious and courteous.
Driving a little slower than the main flow of
traffic can make it easier to manage space and
following distance. It means traffic will be flowing
away from you. Other vehicles will always be
passing through any blind spots you might have,
rather than staying hidden in them.
7. Select and maintain proper road and lane position
As the driver of a large commercial vehicle, you
usually travel in the curb lane when there are
two or more lanes. Driving in the right-hand lane,
or curb lane, minimizes the number of vehicles
that will be on your “blind” side. There are many
reasons for commercial vehicles to travel in lanes
other than the curb lane. When the curb lane is
blocked by traffic or there are other potential
hazards, driving farther away from the curb
may be a better option. When turning, entering
or exiting, it will often be necessary to be in a
lane further away from the curb or shoulder. In
congested areas it may also be helpful to both
the commercial vehicle, and other vehicles, for
the commercial vehicle to be in a lane farther
away from the curb. This will avoid blocking
smaller vehicles that are entering and will avoid
the commercial vehicle from having to slow
down quickly and/or frequently to deal with
merging and exiting traffic.
Always operate the vehicle within the lane
markings and normally near the centre of the
selected lane. Monitoring traffic, monitoring signs
and pavement markings, and planning ahead will
ensure you are in the correct lane. Driving over
lane markings or outside of the marked travel
portion of the roadway may occasionally be
required to get around obstacles. Only do this
when necessary and only after a careful check
around the vehicle. A prudent reduction in speed
should always precede any departure outside of
a marked travel lane.
There are situations where you might drive to
one side of the lane rather than in the center. This
would be necessary when overtaking another
vehicle, when passing an over-dimensional
vehicle, when approaching a curve or hill with
reduced forward visibility, getting around an
obstacle, or when encountering another vehicle
that is out of position in a lane.
When encountering any obstacle on the road,
on the shoulder or approaching the road, slow
down and take a good look around. Before
driving outside of a lane, carefully consider the
conditions before executing. Often it is safer to
slow down or stop within the lane than it is to
move over.
8. Observe road signs Train yourself to read every road sign. Not every
sign will apply, but it keeps you alert and will help
to inform you and help you anticipate what other
vehicles might be doing. Respond properly to
the signs that do apply to your vehicle. Make sure
you always know the speed limit. Make sure you
know the times of day that certain signs impose
restrictions on you. Understand the different
colors used for different sign purposes.
con’t

6 | ON-ROAD SKILLS DEMONSTRATION | TRAINING TOOL
9. Integrate with traffic Your large vehicle can make driving difficult for
other smaller vehicles. Your driving style can
make it even more difficult when you travel
slower than necessary, take longer completing
driving maneuvers, block traffic or frequently
change speed. It is easier for other motorists
when you keep your speed very slightly below
the speed of the main flow of traffic, when you
move over to let other vehicles have space or
otherwise be accommodating and courteous to
them.
10. Operate smoothly A smooth driving style is the sign of a true
driving expert. It saves wear on the vehicle,
conserves fuel and makes driving more
comfortable.
11. Steering wheel grip A two-handed grip on the steering wheel
provides maximum steering control. Use the
two-handed grip consistently when driving in
congested traffic, through intersections, when
passing other vehicles, in windy conditions,
when travelling though construction zones, on
narrow roadways, while passing obstacles and
when near vulnerable road users. Constantly
maintaining a two-handed grip can be tiring
and you may find it necessary to change grip
occasionally to remain comfortable. By looking
ahead - and through driving experience - you
can determine where you need to be ready to
utilise maximum steering control using the two-
handed grip. In other driving settings you may
be able to maintain adequate control without a
constant two-handed grip.
ADDITIONAL FOR MANUAL TRANSMISSION
12. Gear selection Select a gear that is appropriate for the vehicle
speed and load that allows the engine to
operate within its normal rpm range. Lugging or
over-speeding the engine are obvious signs of
poor gear selection and must be avoided.
13. Gear changes Make all gear changes smoothly. Use of the
clutch may be required, including double-
clutching, as long as each gear change is
smooth. Gear clashing or grinding are obvious
signs of poor gear change technique and must
be avoided.

7 | ON-ROAD SKILLS DEMONSTRATION | TRAINING TOOL
Driving Competency – Driving through curves
You will encounter an almost infinite variety of
curves while driving. The degree of change in
direction and the radius of the particular curve may
require reduced vehicle speed from the prevailing
speed limit. Road signs notifying of the presence of
a curve are common and frequently also include a
speed advisory to assist drivers in preparing for the
curve. Any such speed advisory is based on typical
passenger vehicle operating characteristics and may
not be accurate for a large commercial vehicle. The
size and weight of a commercial vehicle must be
taken into account when selecting the speed that is
appropriate for a curve. Another important factor
is the center of gravity of a vehicle. A vehicle with
a high load will require a greater speed reduction
than a similar vehicle with a lower load. Drivers of
commercial vehicles find it is prudent to reduce
speed to 10 km/h less than the speed posted on a
curve speed advisory sign.
While most road curves are constructed with a
consistent radius, geography may require a different
radius at different points of the curve. This means
that the portion of a curve that is visible to a
driver may not represent the continuing radius of
that curve, and this can be visually deceiving. It is
important for drivers to read and respond to posted
speed advisories, even when initially the speed
reduction may be unnecessary.
Depending on the length of a vehicle it is also often
necessary to deliberately steer the vehicle into a
position in the lane that is closer to the outer edge
of the curve. This ensures that the rear of the vehicle
will also remain in the driving lane. In contrast to the
need to steer toward the outside of a curve when
driving a long vehicle, it is otherwise generally good
practice to steer nearer toward the inside of a curve
in case an approaching vehicle is out of position
on the curve. These two considerations need to be
balanced to suit the specific road conditions.
When traction is reduced due to a wet road
surface or the presence of snow or ice, a significant
reduction in speed may be needed to avoid losing
traction and sliding the tires. It is often on a curve
that a driver first realizes that traction is reduced. A
vehicle can slide or spin easily on slippery surfaces,
and an articulated vehicle (tractor-trailer or straight
truck and trailer) can suffer from trailer “swing-out”,
which can quickly become a “jack-knife” condition.
Pay careful attention to road surface conditions
based on the prevailing season and anytime when
the weather deteriorates.
Driving safely through a curve requires application
of different driving skills at three different stages of
the maneuver. These stages are to prepare, execute
and then resume driving along.
2

8 | ON-ROAD SKILLS DEMONSTRATION | TRAINING TOOL
STAGE 1 Prepare for the curve
Preparing for a curve requires application of the following driving skills:
1. Look ahead Assess the type and severity of the curve as soon as it becomes visible, observe traffic and particularly check for any visible oncoming traffic.
2. Sign check Look for signs indicating the curve. The sign may include a speed advisory. When a speed is posted, reduce your speed far enough to suit the operating characteristics of your vehicle and its load.
3. Pavement marking Look at the pavement markings to know what to potentially expect check from adjacent and oncoming vehicles.
STAGE 2 Execute the curve
Executing a curve requires application of the following driving skills:
1. Speed Adjust speed on approach to the curve. Don’t apply brakes to reduce speed while in the curve. Brakes may be needed to maintain the desired speed. Manual gear selection in a curve should also not be necessary – unless it is to maintain speed due to the grade of the road surface.
2. Lane position Select and maintain the vehicle’s lane position on the curve to suit the and off-tracking radius of the curve. Select the path for the front of the vehicle to keep the rear of the vehicle within the driving lane. The distance to steer off center depends on the vehicle’s length and its articulation points. Experience and observation will help you achieve adequate clearance. Any encroachment of the vehicle outside of the lane boundaries should only occur when absolutely necessary.
3. Traffic check While negotiating the curve, monitor the surrounding traffic in front, beside and through the vehicle mirrors. This includes conducting a visual search for other vehicles and for potential vulnerable road users such as pedestrians, slow moving vehicles and cyclists.
4. Steering wheel Maintain a two-handed grip on the steering wheel as much as grip possible in the curve. One-handed gripping of the steering wheel must be limited to times are when it is necessary to operate other vehicle controls or to make a gear selection.
STAGE 3 Resume driving along
A curve maneuver is complete when you resume driving along.
This may involve accelerating, if speed was reduced on approach or
while travelling through the curve, and maintaining speed and
distance to other vehicles.

9 | ON-ROAD SKILLS DEMONSTRATION | TRAINING TOOL
Driving Competency – Stopping at intersections
1. Traffic sign or signal light response Respond to the traffic control sign or traffic
signals allowing adequate time for a smooth and
gradual stop.
2. Traffic check While travelling up to the intersection, monitor
the surrounding traffic in front, beside and
through the vehicle mirrors. Be prepared to
respond to unplanned conditions, this may
involve responding to potential obstructions
or delays that can prevent travelling through
the intersection in normal time and a possible
violation of the traffic light.
3. Stop position Stop the vehicle in accordance with the
pavement markings when there is no vehicle
in front, or stop with enough space between
your vehicle and the one in front. Leave enough
distance to be able to maneuver the vehicle
around the vehicle in front, should this become
necessary. Another measure of a suitable
distance to stop behind another vehicle is to
stop where you can still see the rear tires of the
vehicle in front. In an intersection with pedestrian
crossings, stop the vehicle in a position that
allows you to see any pedestrian that may be
crossing or preparing to cross.
4. Move forward Move forward when adequate space becomes
available in front. This is particularly necessary in
an intersection controlled by a stop sign.
Note: Stopping within an intersection (beyond the
pavement marking) may be necessary while waiting
for a gap in traffic. Stopping in an intersection
should only take place when you can complete
travel through the intersection while obeying the
traffic lights. When there is a likelihood that travel
through the intersection won’t be possible without
violating the traffic lights, stop and wait before
entering the intersection.
3Stopping before executing the intersection crossing requires application of the following driving skills:

10 | ON-ROAD SKILLS DEMONSTRATION | TRAINING TOOL
Driving Competency – Driving through intersections
means you can easily travel through an intersection
without even realizing it. These situations may
involve road signs telling the driver ahead of time
about upcoming cross roads.
At intersections where all traffic must stop, the
right-of-way is determined based on when each
vehicle arrived at the intersection. Vehicles that
stopped first have the right of way to leave first.
When vehicles arrive at the all-way stop at same
time, right-of-way is given to the vehicle that is on
the right-hand side of the other vehicle.
At uncontrolled intersections, all vehicles must
slow down to determine that it is safe to enter
the intersection and the right-of-way rules are
the same as a four-way stop where vehicles that
stopped sooner to have the right-of-way and leave
first. When vehicles arrive at the uncontrolled
intersection at the same time, right-of-way is given
to the vehicle that is on the right-hand side of the
other vehicle.
Activate the turn signal later when there are other
places where it may appear you could be turning
into to avoid confusion for other motorists.
The nature of the traffic control devices helps
to inform the driver about the preparation and
execution that are needed to safely travel through
each intersection.
Note: There will be exceptions to the standard
procedures outlined below. You must make
accommodations as are appropriate for such
situations.
4
An intersection is a meeting or crossing of roads
at the same grade – or the same road surface level.
Travelling through an intersection involves vehicles
travelling in different directions and potentially
crossing paths. Intersections have a significantly
higher crash risk than other road settings and
require fundamental precautions to be taken
by every driver using the intersection. Proper
application of fundamental driving skills is necessary
to avoid collisions in intersections. Application of
these skills is part of every basic driver evaluation.
Intersections normally include traffic control devices
such as signs, road markings and traffic control
signals.
Right of way at intersectionsControl devices such as yield signs, stop signs and
traffic lights show drivers which vehicle has the
right-of-way. Signs provide right-of-way that is
constant, while traffic lights change the right-of-
way in regular cycles. Traffic control devices may be
oriented to traffic in every direction of traffic flow, or
the devices may be oriented for selected traffic only.
Some intersections involve roads with very different
traffic volume levels where minor roads meet major
roads. Traffic is often only controlled on the minor
road. This is common on roads where traffic is
dense on a main road, and side streets intersect
with no pavement markings on the main roadway.
For example, an intersection can allow free flow
of traffic on a primary road, while requiring traffic
on a secondary road to stop before entering the
intersection.
Pavement markings are also typically used to help
drivers recognize intersections. Some intersections
on secondary roads that are very lightly travelled
may have no control devices and may not have any
pavement markings. The lack of pavement markings

11 | ON-ROAD SKILLS DEMONSTRATION | TRAINING TOOL
Crossing an Intersection Safely crossing an intersection includes application
of driving skills at particular stages of the maneuver.
These stages of the maneuver are:
• Prepare for the intersection
• Approach the intersection
• Stop at an intersection
• Go straight through or restarting after a stop
• Turn at an intersection (may be required)
• Resume driving along
STAGE 1 Prepare for the intersection
Preparing to safely cross an intersection requires application of the
following driving skills:
1. Visual assessment Successful crossing of any intersection begins by assessing the type of intersection involved as soon as it becomes visible, watching for signage, observing traffic control devices and monitoring traffic flow.
2. Sign check Look for specific signs that prohibit or direct traffic flow. The conditions may apply at specific times of certain days only, or at all times. You must accurately read the signs and be ready to obey them.
3. Pavement marking Look for pavement markings that direct traffic flow or change lane check configuration to properly plan your vehicle lane position for travel through the intersection.
4. Traffic check Monitor the surrounding traffic in front, beside and through the vehicle mirrors.

12 | ON-ROAD SKILLS DEMONSTRATION | TRAINING TOOL
STAGE 2 Approach the intersection
Crossing an intersection may require the driver to stop before
entering the intersection. The approach portion of executing the
intersection crossing is generally the same whether stopping or not.
Driving safely through an intersection requires application of the
following driving skills:
5. Sign response On approach, read and respond correctly to any road sign.
6. Traffic signal light On approach, read and respond correctly to traffic signal lights. response This includes making the correct decision to slow down, to stop or to proceed without stopping.
7. Traffic check On approach, monitor the surrounding traffic in front, beside and through the vehicle mirrors. Also, conduct a visual search of the intersection for other vehicles and for potential vulnerable road users such as pedestrians, slow moving vehicles and cyclists.
8. Plan path On approach, plan a suitable pathway for entering and exiting the intersection.
STAGE 3 Go straight through an intersection or restarting after a stop
Safely executing the intersection crossing requires application of the following driving skills:
9. Traffic check Before crossing into the intersection, check the surrounding traffic in front, beside and through the vehicle mirrors. This includes conducting a visual search for other vehicles and for potential vulnerable road users such as pedestrians, slow moving vehicles and cyclists.
10. Sign and traffic Correctly read the traffic controls. This involves anticipating and signal light responding to changes in the traffic lights. response
11. Prepare to react While travelling through the intersection, the driver must be prepared to react quickly to any unexpected change in traffic conditions. This may include a speed reduction and may involve keeping a foot over the brake pedal for all or part of the intersection crossing. Always be ready to respond to another vehicle making a mistake. It is not always clear who has the right of way and drivers often misjudge the time and space they need to cross.
12. Proceed Start vehicle movement within a reasonable time when permitted by the traffic light and/or the movement of the vehicle in front. Enter and travel through the intersection in a reasonable time. Waiting more than 4 seconds to start vehicle movement is too long.
13. Plan path Follow the correct pathway and select the correct lane upon entering and exiting the intersection.

13 | ON-ROAD SKILLS DEMONSTRATION | TRAINING TOOL
14. Gap and speed Maintain an appropriate speed and distance from other vehicles.
15. Steering wheel Maintain a two-handed grip on the steering wheel as much as grip possible during an intersection crossing. Situations where only one hand is on the wheel must be limited to times when it is necessary to operate other vehicle controls or to make a gear selection.
STAGE 4 Resume driving along
An intersection crossing maneuver is complete when the driver resumes driving along. This may involve a change in speed, if speed was reduced while approaching or travelling through the intersection.

14 | ON-ROAD SKILLS DEMONSTRATION | TRAINING TOOL
con’t
Driving Competency – Turning at an intersection5
Turning at an intersection requires application of all of the driving skills required for crossing the intersection
and additional requirements for completing the turn itself.
STAGE 1 Execute the turn
Safely executing a turn at an intersection requires application of the
following driving skills:
1. Lane selection Select the correct lane(s) for entering and exiting the intersection. Executing a turn may involve crossing over lane markings and travelling in more than one lane to adequately clear the intersection. Any movement outside of a single driving lane must only be done after carefully checking the surrounding conditions, assessing all risks and proceeding with caution.
2. Turn signal Activate turn signals on approach – giving at least 4 seconds of notice to other motorists. Only provide less notice when it might cause confusion due to passing other possible locations where you could be turning. Keep the signal on, and cancel the signal within 4 seconds after the turn.
3. Speed Complete the turn at a speed appropriate for the conditions. Excessive speed is dangerous, and going too slowly can impede traffic and create other hazards.
4. Right of way Recognize and correctly respond to right of way obligations in making the turn.
5. Path, off-tracking Follow the path that is appropriate for your vehicle size and length. and clearance Position the front correctly to place the rear of the vehicle on a path that provides adequate clearances to the edge of the roadway, obstructions and other vehicles. The dimensions of the intersection and the presence of other vehicles will dictate which maneuver is the best option for completing the turn. Steer outside (swing to the left or right) of the departure lane or beyond the target lane (stretching the turn) to deal with the off-tracking needs of the vehicle. Avoid traveling too far away from normal lane position in a way that provides enough space for another vehicle to attempt a risky overtaking maneuver. Generally it is safer to stretch a turn than it is to swing to the left or right because visibility is better in the front than it is to the sides – particularly on the right side.
6. Traffic check While making the turn, monitor the surrounding traffic in front, beside and through the vehicle mirrors. This includes conducting a visual search for other vehicles and for potential vulnerable road users such as pedestrians, slow moving vehicles and cyclists.

15 | ON-ROAD SKILLS DEMONSTRATION | TRAINING TOOL
7. Select the lane Complete the turn in the lane that corresponds to your lane position when you entered the intersection (or where you left the road you came from). It may not be possible to get into that lane immediately, depending on the path you needed to follow. The front of your vehicle may have to be out of lane position and it may even cross over lane markings to complete the turn. Lane position should be based on the back of your vehicle, which should follow the most direct path to your intended lane. If you can’t get into the correct lane right away, do so as soon as it is practicable.
STAGE 2 Resume driving along
An intersection crossing maneuver is complete when the driver is in the correct lane and resumes driving along. This will normally involve accelerating to normal speed.
Additional driving techniques for manual transmissions during intersection crossings
8. Gear selection Select a gear that is appropriate for the vehicle speed and load that allows the engine to operate within its normal rpm range.
9. Gear changes Minimize gear changes during an intersection crossing and avoid all unnecessary gear changes. Beginning from a stop will require upshifting to facilitate normal acceleration. Slowing down may require downshifting. A grade in an intersection may also necessitate a gear change to maintain a consistent speed. All gear changes that are necessary must be smooth.

16 | ON-ROAD SKILLS DEMONSTRATION | TRAINING TOOL
Driving Competency – Circular intersections (Roundabouts or traffic circles)
6
Circular intersections, known as traffic roundabouts
or traffic circles, allow traffic from one or more
roads to change direction, or cross over the line of
travel of another road, without having the vehicles
actually crossing paths. By requiring all vehicles to
travel at a reduced speed and in the same direction
within the circle, the chances of collision and the
severity of any collision are greatly reduced. Circular
intersections also reduce the time vehicles spend
stopped at controlled intersections.
Vehicles travel in a counter-clockwise direction
around a center island - with exit and entry points
at various locations on the outside of the circle.
Circular intersections may be large or small with
one, two or more lanes in the circle. The number
of lanes in the circle may be consistent all the
way around or differ in particular sections of the
circle. The size of the circle defines the speed
of travel. Smaller circles force vehicles to slow
down more. Signs will advise the recommended
speed for a passenger vehicle under normal road
conditions. Use the posted speed as an indicator
for determining the speed adjustment needed for a
commercial vehicle. It will be lower than the posted
speed and will depend on many factors.
Watch for pedestrian crossings at or near a circular
intersection. They are usually positioned outside of
the intersection for the safety of the pedestrian and
to provide better visibility for motorists.
Circular intersections require every driver to know
and follow the rules for right-of-way. In addition to
the right-of-way rules, commercial vehicle drivers
must overcome the challenge of their large size
and potentially deal with lane encroachment. Other
motorists and vulnerable road users will also need
to deal with your presence and any encroachment
outside of the lane can be very challenging for
them.
Circular intersections generally use medians to
help direct traffic flow and provide aprons to allow
some movement of traffic outside of the marked
lanes. This is particularly helpful for long commercial
vehicles that cannot stay within the marked lanes
while negotiating the circle.
Approaching a circular intersection Read the signs and pavement markings as you
approach the intersection. You need to know which
exit you will need to use to leave the circle and
follow your route. This will also help you to select
the appropriate entry lane when there are multiple
lanes. A circular intersection with only a single lane
throughout may not have any signs or pavement
markings to direct traffic flow.
Entering a circular intersection As a general rule, a vehicle inside the circle has the
right-of-way to vehicles entering. A “yield” sign is
usually posted at the entry ramps to the circle. Stop
if the space between vehicles already in the circle
is not large enough for your vehicle. Enter the circle
when there is a safe gap in traffic.
When a circle has more than one lane, select the
correct lane as soon as you are in the circle. When
you are not going to take the first exit, move over to
the left lane.
When the entry to the circular intersection consists
of multiple lanes, select the entry lane based on
the direction posted on signs and/or pavement
markings. Select the right-hand lane only when
you are taking the first available exit. When you are
going to drive past the first exit in the circle, select a
different entry lane.
Large commercial vehicles may need to cross over
lane markings on entry to the circle. Monitor the
surrounding traffic in front, beside and through the
vehicle mirrors, and proceed carefully through the
intersection.

17 | ON-ROAD SKILLS DEMONSTRATION | TRAINING TOOL
Driving in a circular intersection Vehicles inside the circle have the right-of-way to
vehicles entering the circle. You must also generally
yield the right-of-way to a vehicle to your left in
the circle, depending on lane markings. The lane
configuration can vary and the outer lanes usually
lead directly to an exit. Don’t stop inside the circle,
except to avoid a collision.
Watch the lane markings in the circle; staying inside
the circle will require changing lanes, unless you
are in the inner-most lane. When you miss an exit,
continue around the circle to approach the exit
again. Always check traffic carefully before crossing
over any lane marking. Stay father to the left until
you approach your exit. Keep your vehicle a safe
distance from others and keep your speed to a safe
level.
Large commercial vehicles may need to cross
over lane markings within the circle. Monitor the
surrounding traffic in front, beside and through the
vehicle mirrors, and proceed carefully.
Exiting from a circular intersection When in a circular intersection that has a single lane,
activate your turn signal right after passing the exit
just before the one you will actually take.
When a circular intersection consists of two lanes,
make sure you know what lane you need to exit
from. You may be able to exit from the left lane as
well as the right lane. Avoid crossing lane markings
on exit and if you change lanes in the circle, make
sure you follow the right-of-way rules and make any
lane change just like you would on the road.

18 | ON-ROAD SKILLS DEMONSTRATION | TRAINING TOOL
con’t
Examples of circular intersections

19 | ON-ROAD SKILLS DEMONSTRATION | TRAINING TOOL
Driving Competency – Lane changes7
Making lane changes requires application of different driving skills at three different stages of the maneuver.
The three stages are (1) prepare, (2) execute and then (3) resume driving along.
STAGE 1 Prepare
Preparing for a lane change requires application of the following
driving skills:
1. Traffic check Monitor the surrounding traffic in front, beside and through the vehicle mirrors. Identify where and when the lane change should be made. This decision will be based on present conditions and anticipated conditions that will either make the lane change easier, or more difficult. Consider likely changes in the adjacent traffic and vehicles further away that may change position. Observe signs, pavement markings and any anticipated changes in the marking in selecting the point of executing the lane change. Check mirrors for vehicles traveling alongside, passing or approaching from the rear, and any vehicle that may already be in – or may enter – a blind spot.
2. Signal Signal to indicate your intention to change lanes. The signal must be initiated a reasonable time before the lane change, depending on the conditions, but try to never provide less than 4 seconds of indication. Early use of turn signal can also help get other motorists to provide the necessary space.
3. Vehicle space Maintain safe following distance within the current lane while preparing to make the lane change.
STAGE 2 Execute
Executing a lane change requires application of the following driving skills:
4. Move over Make the lane change at a point of the roadway where road conditions and markings indicate the lane change can be made. Lane changes should never be made in intersections, near pedestrian crossings, railway crossings or where solid lane markings indicate it is not permitted. Make a deliberate, smooth and steady lane change. Sudden or jerky movements should be avoided. Taking too much time allows the traffic patterns to change during the lane change. Hesitating may also cause other motorists to change speed or position. Steer into the center of the target lane, adjusting speed as necessary to establish safe distances from other vehicles.

20 | ON-ROAD SKILLS DEMONSTRATION | TRAINING TOOL
5. Vehicle space The space in the target lane must be adequate for the vehicle’s length and include a reasonable distance between any other vehicles already in that lane. The required distance will vary depending on the density and speed of traffic. Other vehicles may need to alter their speed to accommodate the lane change, but any sudden or evasive reaction by another motorist may indicate a poorly executed lane change. It may be a sign of inadequate space, inadequate anticipation or inappropriate speed. It may also be an unnecessary reaction by another possibly inattentive motorist.
6. Cancel turn signal Cancel the turn signal as soon as the vehicle is fully in the new lane position. Keeping the turn signal on for more than 4 seconds after a lane change can be confusing to other motorists.
STAGE 3 Resume driving along
A lane change is complete when you resume driving along. This involves maintaining speed and distance to other vehicles.

21 | ON-ROAD SKILLS DEMONSTRATION | TRAINING TOOL
Driving Competency – Expressway driving (if applicable)
8
The major difference between driving in urban and expressway environments is vehicle speed. At higher
speeds, conditions can change quickly and drivers need to watch further ahead of their vehicle. In some
ways expressway driving is easier, because you don’t have intersections, cross traffic and most vehicles
travel at about the same speed. Getting on and off of an expressway requires careful speed control on the
acceleration and deceleration lanes and particularly on the ramps, which are often curved.
that is best under the conditions, it is usually the
curb lane, but it may also be the left lane. Treat
any merge on the ramp the same way as you
would a lane change. Keep your wheels inside
the marked lanes on the ramp.
2. Approach Watch the traffic while you accelerate. Start to
locate the space you need to merge onto the
expressway. Adjust your speed to align with
a gap that has enough space for your vehicle.
Going too slow or too fast makes merging more
difficult. You should not accelerate above the
speed of traffic and always stay below the speed
limit. Driving a little bit slower on the ramp than
expressway traffic usually helps you to align with
a merge space. Going too slow impedes traffic,
and makes the merge more difficult.
3. Signal Signal to indicate your intention to merge.
The signal must be initiated a reasonable time
before the merge, depending on the conditions,
but try to never provide less than 4 seconds of
indication before moving into the lane. Early
use of your turn signal can also help get other
motorists to provide the necessary space.
4. Vehicle space Maintain safe following distance on the ramp
while preparing to merge.
Entering an expressway Entering an expressway requires application of the
following driving skills:
1. Negotiate the ramp Read signs to identify the ramp that places
you in the correct direction on the expressway.
Ramps often have curves that require careful
speed management. Before driving on the ramp
you must know the weight of your load and
have a good idea about the height of the center
of gravity of your load. It is important that you
know as much as possible about the cargo you
transport and the way it is loaded. Roll-overs on
expressway ramps are common - and most of
the time they are the result of excessive speed.
Speed advisories that are posted for expressway
ramps provide a speed that is suitable for
passenger vehicles and the speed is based on
good road conditions. You can use the posted
advisory speed as a way to judge the severity
of the curve of a ramp, but you can’t assume
that the posted speed is suitable for your
vehicle. As a general guide, your speed should
be approximately 10 km/h less than the posted
speed, but you may have to slow down even
more when road surface conditions are poor, or
when you have a load that is heavy, or has a high
center of gravity.
Expressway ramps may consist of one lane, or
two lanes that merge into a single lane, before
merging onto the expressway itself. Sometimes
the ramp becomes a new lane on the expressway
and no merge is necessary. Select the ramp lane

22 | ON-ROAD SKILLS DEMONSTRATION | TRAINING TOOL
5. Merge Monitor the surrounding traffic in front, beside
and through the vehicle mirrors. When your
path is clear, start to move into the expressway
lane and steer toward the center of the lane.
Make a deliberate, smooth and steady lane
change. Sudden or jerky movements should be
avoided. Taking too much time allows the traffic
patterns to change during the merge. Hesitating
may cause other motorists to change speed or
position. Remember that the vehicles already
on the expressway have the right-of-way and
you may need to rely on them to be courteous
towards you when space is tight.
6. Vehicle space The space in the target lane must be adequate
for the vehicle’s length and include a reasonable
distance between any other vehicles already in
that lane. Continue to adjust speed as necessary
maintain safe distances from other vehicles. The
required distance will vary depending on the
density and speed of traffic. You may sometimes
need to deal with less space between your
vehicles and others as you merge and in those
cases it is best when your speed is just slightly
slower or slightly faster than the lane you merge
into. Adjust your speed as necessary as soon as
you get into the lane to establish safe distances
from other vehicles.
Other vehicles may need to alter their speed
to accommodate your lane change, but any
sudden or evasive reaction by another motorist
may indicate a poorly executed merge. It may
be a sign of inadequate space, inadequate
anticipation or inappropriate speed. It may also
be an unnecessary reaction by another possibly
inattentive motorist.
7. Cancel Turn Signal Cancel the turn signal as soon as the vehicle is
fully in the new lane position. Keeping the turn
signal on for more than 4 seconds after a lane
change can be confusing to other motorists.
Resume driving alongAn expressway entry is complete when you resume
driving along. This involves maintaining speed and
distance to other vehicles
Exiting an expresswayExiting an expressway requires application of the
following driving skills:
1. Approach
Monitor the surrounding traffic in front, beside
and through the vehicle mirrors. Start to slow
down if it is necessary, but if there is enough
room on the deceleration lane and the exit ramp,
slow down after you leave the driving lane.
2. Signal Signal to indicate your intention to exit. The
signal must be initiated a reasonable time before
the exit, depending on the conditions, but try to
never provide less than 4 seconds of indication.
3. Negotiate the ramp Move into the deceleration lane as soon as you
can. Don’t delay or other vehicles may try to get
in beside you. Read speed advisory signs to give
you an indication of the severity of any curve on
the ramp. Adjust your speed to suit the needs of
your vehicle and the nature of the ramp. Keep
your wheels inside the marked lanes on the ramp.

23 | ON-ROAD SKILLS DEMONSTRATION | TRAINING TOOL
Remember that speed advisories posted for
expressway ramps provide a speed that is
suitable for passenger vehicles and the speed
is based on good road conditions. You can use
the posted advisory speed as a way to judge
the severity of the curve of a ramp, but you can’t
assume that the posted speed is suitable for your
vehicle. As a general guide, your speed should
be approximately 10 km/h less than the posted
speed, but you may have to slow down even more
when road surface conditions are poor, or when
you have a load that is heavy, or has a high center
of gravity.
Resume driving alongAn expressway exit is complete when you resume
driving along. This involves maintaining speed and
distance to other vehicles.

24 | ON-ROAD SKILLS DEMONSTRATION | TRAINING TOOL
Driving Competency – Roadside stop9
When you are disabled on the road with a speed
limit higher than 60 km/hr during the time when
vehicle lights are required, you must place flares,
lamps or lanterns or portable reflectors 30m ahead
of and 30m behind your vehicle. This requirements
for these warning devices applies whether your
vehicle is on the roadway itself or on the shoulder
of the road. Lamps are required from one half hour
before sunset until one half hour after sunrise. The
warning devices must be visible from at least 150m
away. These are the minimum requirements and you
can always have additional warning devices.
The steps involved in making a proper roadside stop
include the following major stages of the stop: the
approach, stopping and starting after the stop.
There will be occasions when you must pull your
vehicle over out of the normal flow of traffic. When
you make such a stop, you much be sure to it
safely and legally. The best location for such a stop
is a long, straight road that allows you to move far
enough to the right, get parallel with the road and
have enough sight distance in front and behind to
get off and back on the road safely.
You must be aware that it is illegal for you to park,
stand or stop a vehicle on a roadway what it is
possible for you to do so off the roadway. When
you have no choice but to stop on the roadway,
you must try to do so where there will be a clear
view of the vehicle and the roadway for at least
125m in each direction. This requirement does not
apply when your vehicle is disabled and can’t be
moved.
STAGE 1 Approaching the roadside stop
On approaching a roadside stop, you must apply the following
driving skills:
1. Traffic check Monitor the surrounding traffic in front, beside and through the vehicle mirrors.
2. Speed and distance Maintain appropriate speed and distance from other vehicles
3. Turn signals Activate correct turn signals. Provide indication of intention to move off the roadway.

25 | ON-ROAD SKILLS DEMONSTRATION | TRAINING TOOL
STAGE 2 Stopping
When you stop, you must apply the following driving skills:
4. Stop position Stop as far to the right as you can. Do not restrict vision or cause a distraction to other vehicles. When there is a curb, don’t contact it with your tires, and don’t stop more than 0.6m from the curb. Stop so you don’t block any entrance or obstruct traffic. Make a full stop and don’t allow the vehicle to roll.
5. Secure the vehicle Place the transmission in neutral and apply the parking brakes.
6. Turn signals Deactivate the turn signal and activate hazard warning lights.
STAGE 3 Starting after the stop
When you move away from the stop, you must apply the following driving skills:
7. Start Place the vehicle in the correct gear and smoothly start moving forward as soon as space is clear.
8. Turn signals Cancel the hazard warning lights and activate the left turn signal light.
9. Traffic check Scan the surrounding traffic in front, beside and through the vehicle mirrors.
10. Speed and Accelerate smoothly to an appropriate speed and maintain an distance appropriate distance from other vehicles.
11. Turn signals Deactivate the turn signal.
12. Traffic check Monitor the surrounding traffic in front, beside and through the vehicle mirrors.

26 | ON-ROAD SKILLS DEMONSTRATION | TRAINING TOOL
Driving Competency – Railway crossing 10
crossing signal is activated or you are signaled to
do so by police or a railway official. You must not
be any closer than 5m from any gate or from the
railway track itself. Stopping too far away may
prevent you from being able to see whether or not
you can proceed.
Never cross railway tracks when a crossing gate
is lowered. When there is no gate, you may be
permitted to cross even while the signal is activated,
but you should only do so when directed by a police
officer or railway official.
Angled crossings take extra time to cross, so take
this into account. Once you’re certain it’s safe to
cross and you have enough space to your vehicle
completely clear on the other side, cross slowly. You
are generally advised to avoid changing gears and
in some cases, gear changes are prohibited. When
crossing over multiple or angled tracks, it may be
necessary to shift gears to be able to get across in
a reasonable time. When you drive an automated-
manual or automatic transmission, gear changes will
be hard to avoid.
Here are some of the hazards you need to consider
when you cross railway tracks:
• Tractor-trailers need time to clear the crossing.
• You will need more stopping room if required.
• A collision between a vehicle and a train is
devastating to the vehicle.
• Trains need a lot of room to slow or stop.
• When you have a trailer with low ground
clearance, check the grade carefully for any
high spots that you need to avoid.
• Unusual obstructions may block your vision or
ability to listen for trains, including snowbanks,
construction, signs, tree, brush and other
vehicles.
Wherever railway tracks cross a road in the same
grade, there is a risk of collision. Crossings are
marked with an “X” sign.
Tractor-trailers need a lot of time to complete a
railway crossing. The number of tracks and the
layout of each crossing dictate the need to get
across safely. You need to be sure that you have
enough room on the rother side of the crossing
before you start. You don’t want to get caught on
the railway tracks without an escape route.
On approach to any railway crossing, slow down
and check both ways. Look and listen, and roll down
your windows if you aren’t sure. Trains will whistle
on approach to any level crossing. Watch other
vehicles on approach to a railway crossing. Most
buses and some public vehicles must stop before
crossing, and when they are in front of you, you will
need to adjust your speed and following distance.
When you transport dangerous goods like
explosives, poisonous or flammable substances,
combustibles or corrosive liquids, or liquefied
petroleum gas, you may be required to stop at
every railway crossing. You may be required to stop
even you are empty. Make sure you understand and
follow all company policies.
Most railway crossings have signals that you need
to read and respond to on approach. When the only
signal is a stop sign, you must stop, check carefully,
and decide that it’s safe to cross. Stop at least 5m
from the railway track.
Railway crossings in areas with higher traffic
density usually have active crossing signals. The
active signal may be an electric and/or mechanical
signalling device, with or without a crossing gate,
or a flag-person. You must stop when a railway

27 | ON-ROAD SKILLS DEMONSTRATION | TRAINING TOOL
Approaching a Railway CrossingOn approach to a railway crossing, you must apply
the following driving skills:
1. Traffic check Monitor the surrounding traffic in front, beside
and through the vehicle mirrors.
2. Speed and distance Maintain appropriate speed and distance from
other vehicles.
3. Hazard lights Activate your hazard lights.
4. Attention Silence your audio systems, radio, etc. Open
at least your driver side window or both side
windows so you can look and listen for trains.
5. Signs and signals Obey all signs, signals and gates. Stop when
it is required for any dangerous goods being
transported.
6. Stop position Stop at least 5m from the gate or railway tracks.
7. Traffic check Scan the surrounding traffic in front, beside and
through the vehicle mirrors.
8. Speed and distance Once able, accelerate smoothly to an appropriate
speed and maintain an appropriate distance
from other vehicles.
9. Hazards lights Cancel hazard lights when you reach traffic
speed.

TRAINING TOOL
DRIVING THE FUTURE
Off-Road Skills Demonstration

2 | OFF-ROAD SKILLS DEMONSTRATION | TRAINING TOOL
This document is a resource for consistent and objective evaluation of driver competencies. Demonstration and
evaluation of the skills contained in this resource establishes or confirms the level of proficiency of an individual. This
resource is suitable for use in a training environment to aid in the development of proficiency, and is also suitable for
confirmation of skills after training. This resource is also suitable for use in periodic driver evaluation and for remedial purposes. The evaluation criteria are drawn from the relevant
competencies of the National Occupational Standard.
Off-Road Skills Demonstration

3 | OFF-ROAD SKILLS DEMONSTRATION | TRAINING TOOL
Skill Demonstration Items
Tractor-trailer 1. straight-line backing
2. offset backing
3. alley-dock backing
4. parallel parking
5. coupling a trailer
6. uncoupling a trailer
Demonstration Environment Selecting a suitable site for this demonstration is
important for consistency and validity of the results.
In many cases, an actual workplace setting may be
available and may reduce the time needed for any
set up. Dimensions are provided for each backing
and parking maneuver and must be confirmed
before beginning the demonstration.
The demonstration of off-road maneuvers includes the following items:
Method
This skills demonstration can be completed in
stages spread out over time, or can be completed
as a single exercise involving demonstration of all
the items in sequence. For each demonstration
item the individual will complete the required steps
so that the evaluator can observe the work being
performed. Direction and coaching are appropriate
when this resource is being used in a training or
development capacity. The evaluator will observe
without providing any direction or coaching when
the evaluation is conducted for skills confirmation.
This demonstration includes specific maneuvers
and tasks that can be performed in actual
workplace settings or on a pre-determined range
layout that simulates conditions that are like those
of an actual workplace. The purpose of the backing
and parking demonstration is to confirm the
driver’s ability to perceive and control the position
and movement of their vehicle in confined spaces
and while travelling in reverse. The main features
of proficient performance of these tasks are the
knowledge of how to steer correctly, confidence,
maintaining the necessary clearance with all
obstructions and minimizing the time to complete
each maneuver without rushing and without taking
any unnecessary risks.
The actual maneuvers that require proficiency will
depend on the stage of learning or the expectation
of development of the driver’s skills. During initial
driver training the demonstration maneuvers may
be limited and then expand as skill levels develop.
For the purposes of challenging the commercial
driver licence examination, the driver must be
proficient in offset backing (from either side) and
parallel parking maneuvers. Additional proficiency
can be demonstrated within occupational post-
licencing skill development, end of training skills
confirmation and for periodic, or remedial purposes.

4 | OFF-ROAD SKILLS DEMONSTRATION | TRAINING TOOL
Evaluation Elements The skill level of the driver on each backing and
parking maneuver will be judged on the following
elements: set up, pull-ups, encroachment, final
position and elapsed time. Each maneuver has
specific criteria for the number of allowable
elements and error scoring. Items that are not
scored include allowing the driver to exit the vehicle
to check position as often as needed, subject to the
elapsed time scoring.
Set up – includes the mirror check, getting out
and making any mirror adjustment, looking
behind the vehicle for clearances, obstructions
and hazards before starting to move in reverse,
silencing entertainment and communication
systems, activating warning flashers and
sounding the horn.
Pull-up – means any forward movement after
beginning travel in reverse. Stopping without
pulling forward is not considered a pull-up.
Encroachment – means contacting any
boundaries or positioning any part of the vehicle
outside the boundaries of the space provided
for the maneuver. Encroachment is considered
equivalent to vehicular contact with any other
vehicle, building or fixed obstruction.
Final position – means the point where the driver
indicates the maneuver to be complete. This will
vary from one maneuver to the other and will
vary based on the range being used for the skills
demonstration.
Elapsed time – means the time from start
to completion of the maneuver. Since the
demonstration is meant to confirm proficiency,
an excessive amount of time is indicative of a lack
of proficiency. Excessive elapsed time will initially
affect the driver’s score and will have a maximum
time to complete the maneuver.
Instruction to DriverInform the driver that he/she will be observed and
evaluated while performing the specific maneuvers
that will be part of the off-road skill demonstration.
Make the driver aware of the maneuvers that will be
assessed during the evaluation.
Scoring ProcedureBecause the off-road skills assessment can be
used as a training and development tool for drivers
with varying levels of skills, the scoring of the
assessment is situation-specific. Companies may
opt to set target ‘scores’ for each classification of
driver (e.g. new driver, novice driver, experienced
driver) to identify how many errors (major or
minor offences) the driver is allotted. To be an
effective skills development tool, the off-road skills
demonstration should be used as a tool to identify
areas that require more training and instruction. This
demonstration should be a starting point for further
instruction and professional development.
Legend:The Errors listed in each competency table have
been assigned a ‘Major’ or ‘Minor’ rating. ‘Major’
errors are denoted in RED ; ‘Minor’ errors are
denoted in YELLOW .

5 | OFF-ROAD SKILLS DEMONSTRATION | TRAINING TOOL
Tractor-Trailer Maneuvers
Off-Road Skills Demonstration

6 | OFF-ROAD SKILLS DEMONSTRATION | TRAINING TOOL
Maneuver requires the driver to back a vehicle a minimum dis-tance of 30 meters in an “alley” space that is between 3.5 and 3.7 meters wide. The maneuver can also be performed at a loading dock or a parking space with the same dimensions. The range or workplace where the maneuver is demonstrat-ed will determine whether the driver will have the option to drive forward through the space before reversing or aligning in front of it before reversing.
1 Straight-line backing a tractor-trailer
Demonstration/evaluation stepsEvaluate the driver as he or she demonstrates each
sub-task listed in the table. The demonstration
may include additional workplace-specific and/or
vehicle-specific procedures. These issues must be
addressed and fully conveyed to the driver prior to
beginning any demonstration and not discussed
during the evaluation.
Once the vehicle enters or re-enters the space, any
forward movement is considered a pull-up. Timing
begins at the point the vehicle reverses past the
outer alley markers.
Instruction to driver Inform the driver that he or she needs to complete
a straight-line backing maneuver. Make the driver
aware that they will be evaluated on all of the sub-
tasks that they learned in training or that should be
included each time when they complete this task or
maneuver.
Evaluation Procedure: Straight-line backing with a tractor-trailerThe evaluation criteria for the straight-line backing
maneuver are listed in the table below. This table
can be used for training, evaluating, coaching or as
part of an entry-level or occupational-level road test.

7 | OFF-ROAD SKILLS DEMONSTRATION | TRAINING TOOL
Task Evaluation 1 – Straight-line backing a tractor-trailer
Driver action Errors Minor/Major
SET UP
Check mirror set up Fails to check mirror set up
Position truck to start backing Fails to get vehicle into a good position to start backing
Exit the vehicle and check the path Fails to get out and check path before backing
Activate warning flashers Fails to activate flashers
Silence audio systems Fails to silence audio system
Open windows Fails to open windows
Sound the horn Fails to sound horn
Start moving backwards at a walking Drives backward too quickly or too slowly pace
PULL-UP
Pull up the truck no more than Pulls up more than {target value} {target value} to align it during to complete maneuver the maneuver
Exit the vehicle and check the path as Fails to get out of vehicle when it is necessary often as necessary
Respond to any stop signal from the Fails to notice or respond to a signal to stop evaluator
ENCROACHMENT
Stay entirely within the maneuver Any part of the vehicle encroaches on the space marked boundary or contacts any object
FINAL POSITION
Stop truck movement upon reaching Is too far from stop position or makes harsh the desired position (exiting the vehicle contact with a loading dock to check position and moving further backwards is acceptable)
ELAPSED TIME
Complete the entire backing maneuver Does not have the driving proficiency to in a reasonable period of time complete the maneuver in a reasonable period (the evaluator will need to determine of time whether excessive time is due to lack of proficiency {an error} or due to the driver taking extra care {not an error})
Total Minor
Total Major

8 | OFF-ROAD SKILLS DEMONSTRATION | TRAINING TOOL
Maneuver space: This maneuver requires the driver to pull for-ward out of one space and back into an adjacent space. The maneuver will be from a space that is between 3.5 and 3.7 meters wide, and at least as long as the tractor-trailer, into an adjacent space of the same dimensions. The pull-up space in front of the two spaces described must be at least one and one half time the length of the tractor-trailer. The maneuver can be performed from either side.
2 Offset backing maneuver with a tractor-trailer
Demonstration/evaluation stepsEvaluate the driver as he or she demonstrates each
sub-task listed in the table. The demonstration
may include additional workplace-specific and/or
vehicle-specific procedures. These issues must be
addressed and fully conveyed to the driver prior to
beginning any demonstration and not discussed
during the evaluation.
The maneuver can be done from either side
depending on the facility, the driver preference or
the range layout.
Instruction to driver Inform the driver that he or she needs to complete
an offset backing maneuver. Make the driver
aware that they will be evaluated on all of the sub-
tasks that they learned in training or that should
be included each time when they complete this
maneuver.
Once the vehicle enters or re-enters the space, any
forward movement is considered a pull-up. Timing
begins at the point the vehicle reverses past the
outer alley markers.
Evaluation Procedure: Offset backing with a tractor-trailerThe evaluation criteria for the offset backing
maneuver are listed in the table below. This table
can be used for training, evaluating, coaching or as
part of an entry-level or occupational-level road test.

9 | OFF-ROAD SKILLS DEMONSTRATION | TRAINING TOOL
Task Evaluation 2 – Offset backing a tractor-trailer
Driver action Errors Minor/Major
SET UP
Check mirror set up Fails to check mirror set up
Position truck to start backing Fails to get vehicle into a good position to start backing
Exit the vehicle and check the path Fails to get out and check path before backing
Activate warning flashers Fails to activate flashers
Silence audio systems Fails to silence audio system
Open windows Fails to open windows
Sound the horn Fails to sound horn
Start moving backwards at a walking pace Drives backward too quickly or too slowly
PULL-UP
Pull up the truck no more than {target Pulls up more than {target value} value} to align it during to complete maneuver the maneuver
Exit the vehicle and check the path as Fails to get out of vehicle when it is necessary often as necessary
Respond to any stop signal from the Fails to notice or respond to a signal to stop evaluator
ENCROACHMENT
Stay entirely within the maneuver space Any part of the vehicle encroaches on the marked boundary or contacts any object
FINAL POSITION
Stop truck movement upon reaching Is too far from stop position or makes harsh the desired position (exiting the vehicle contact with a loading dock to check position and moving further backwards is acceptable)
ELAPSED TIME
Complete the entire backing maneuver Does not have the driving proficiency to in a reasonable period (the evaluator complete the maneuver in a reasonable period will need to determine whether excessive time is due to lack of proficiency {an error} or due to the driver taking extra care {not an error})
Total Minor
Total Major

10 | OFF-ROAD SKILLS DEMONSTRATION | TRAINING TOOL
Maneuver space: Maneuver will be into a space that is between 3.5 and 3.7 meters wide, and at least as long as 2/3 the length of the tractor-trailer, starting with the vehicle positioned perpen-dicular to the space and with the front of the tractor directly in front of it. The pull-up space in front of the backing target space must be no deeper than the length of the vehicle. The maneuver can be performed from either side.
3 Alley-dock backing with a tractor-trailer
Demonstration/evaluation stepsEvaluate the driver as he or she demonstrates each
sub-task listed in the table. The demonstration
may include additional workplace-specific and/or
vehicle-specific procedures. These issues must be
addressed and fully conveyed to the driver prior to
beginning any demonstration and not discussed
during the evaluation.
Instruction to driver Inform the driver that he or she needs to complete
an alley-dock backing maneuver. Make the driver
aware that they will be evaluated on all the sub-
tasks that they learned in training or that should be
included each time when they complete this task or
maneuver.
Once the vehicle enters or re-enters the space, any
forward movement is considered a pull-up. Timing
begins at the point the vehicle reverses past the
outer alley markers.
Evaluation Procedure: Alley-dock backing with a tractor-trailerThe evaluation criteria for the alley-dock backing
maneuver are listed in the table below. This table
can be used for training, evaluating, coaching or as
part of an entry-level or occupational-level road test.

11 | OFF-ROAD SKILLS DEMONSTRATION | TRAINING TOOL
Task Evaluation 3 – Alley-dock backing with a tractor-trailer
Driver action Errors Minor/Major
SET UP
Check mirror set up Fails to check mirror set up
Position truck to start backing Fails to get vehicle into a good position to start backing
Exit the vehicle and check the path Fails to get out and check path before backing
Activate warning flashers Fails to activate flashers
Silence audio systems Fails to silence audio system
Open windows Fails to open windows
Sound the horn Fails to sound horn
Start moving backwards at a walking pace Drives backward too quickly or too slowly
PULL-UP
Pull up the truck no more than {target Pulls up more than {target value} to value} to align it during complete maneuver the maneuver
Exit the vehicle and check the path as Fails to get out of vehicle when it is necessary often as necessary
Respond to any stop signal from the Fails to notice or respond to a signal to stop evaluator
ENCROACHMENT
Stay entirely within the maneuver space Any part of the vehicle encroaches on the marked boundary or contacts any object
FINAL POSITION
Stop truck movement upon reaching Is too far from stop position or makes harsh the desired position (exiting the vehicle contact with a loading dock to check position and moving further backwards is acceptable)
ELAPSED TIME
Complete the entire backing maneuver Does not have the driving proficiency to in a reasonable period (the evaluator complete the maneuver in a reasonable period will need to determine whether of time excessive time is due to lack of proficiency {an error} or due to the driver taking extra care {not an error})
Total Minor
Total Major

12 | OFF-ROAD SKILLS DEMONSTRATION | TRAINING TOOL
Maneuver space: Maneuver will be into a space that is between 3.5 and 3.7 meters wide, and at least as long as 1.5 times the length of the tractor-trailer. The maneuver can be performed from either side.
4 Parallel parking a tractor-trailer
Demonstration/evaluation stepsEvaluate the driver as he or she demonstrates each
sub-task listed in the table. The demonstration
may include additional workplace-specific and/or
vehicle-specific procedures. These issues must be
addressed and fully conveyed to the driver prior to
beginning any demonstration and not discussed
during the evaluation.
The maneuver can be demonstrated from either
side depending on the facility, the driver preference
or the range layout.
Instruction to driver Inform the driver that he or she needs to parallel
park their vehicle. Make the driver aware that they
will be evaluated on all of the sub-tasks that they
learned in training or that should be included each
time when they complete this maneuver.
Once the vehicle enters or re-enters the space, any
forward movement is considered a pull-up. Timing
begins at the point the vehicle reverses past the
outer alley markers.
Evaluation Procedure: Parallel parking a tractor-trailerThe evaluation criteria for the parallel parking task
are listed in the table below. This table can be used
for training, evaluating, coaching or as part of an
entry-level or occupational-level road test.

13 | OFF-ROAD SKILLS DEMONSTRATION | TRAINING TOOL
Task Evaluation 4 – Parallel parking a tractor-trailer
Driver action Errors Minor/Major
SET UP
Check mirror set up Fails to check mirror set up
Position truck to start backing Fails to get vehicle into a good position to start backing
Exit the vehicle and check the path Fails to get out and check path before backing
Activate warning flashers Fails to activate flashers
Silence audio systems Fails to silence audio system
Open windows Fails to open windows
Sound the horn Fails to sound horn
Start moving backwards at a walking pace Drives backward too quickly or too slowly
PULL-UP
Pull up the truck no more than {target Pulls up more than {target value} to value} to align it during complete maneuver the maneuver
Exit the vehicle and check the path as Fails to get out of vehicle when it is necessary often as necessary
Respond to any stop signal from the Fails to notice or respond to a signal to stop evaluator
ENCROACHMENT
Stay entirely within the maneuver space Any part of the vehicle encroaches on the marked boundary or contacts any object
FINAL POSITION
Stop truck movement upon reaching Is more than 1 meter away from curb or curb the desired position (exiting the vehicle marker to check position and moving further backwards is acceptable) Driver over curb or curb marker
ELAPSED TIME
Complete the entire backing maneuver Does not have the driving proficiency to in a reasonable period (the evaluator complete the maneuver in a reasonable period will need to determine whether of time excessive time is due to lack of proficiency {an error} or due to the driver taking extra care {not an error})
Total Minor
Total Major

14 | OFF-ROAD SKILLS DEMONSTRATION | TRAINING TOOL
5 Coupling a Tractor-Trailer
Demonstration/evaluation stepsEvaluate the driver as he or she demonstrates
each task listed in the table. The demonstration
may include additional workplace-specific and/or
vehicle-specific procedures. These issues must be
addressed and fully conveyed to the driver prior to
beginning any demonstration and not discussed
during the evaluation.
Instruction to driver Inform the driver that he or she needs to couple the
tractor-trailer. Make the driver aware that they will
be evaluated on all the tasks that they learned in
training or that should be included each time when
they complete this maneuver.
Evaluation Procedure: Coupling a tractor-trailer The evaluation criteria for coupling at tractor-trailer
are listed in the table below. This table can be used
for training, evaluating, coaching or as part of an
entry-level or occupational-level road test.

15 | OFF-ROAD SKILLS DEMONSTRATION | TRAINING TOOL
con’t
Task Evaluation 5 – Coupling a tractor-trailer
Driver action Errors Minor/Major
INSPECT 5th WHEEL
Inspect the condition of the 5th wheel, connecting lines and connectors, while outside of the tractor
Check the position of the 5th wheel release handle and latch
ALIGN TRACTOR TO TRAILER
Release tractor parking brakes
Reverse the tractor slowly toward the trailer
Use the mirrors to get the tractor in a straight line with the trailer
Stop when the 5th wheel is just ahead of the trailer
Place transmission in neutral
Apply tractor parking brake
Shut off the engine
SECURE THE TRACTOR
Confirm transmission is in neutral
Confirm the tractor parking brakes are applied
CHECK ALIGNMENT
Exit tractor and check distance and alignment
Position the tractor the correct distance from the trailer
Re-position tractor if required
CHECK TRAILER HEIGHT
Set trailer height correctly. (The trailer upper coupler must be set to make contact with the bottom half of the 5th wheel plate.)
Adjust trailer height using the landing gear
Fails to inspect the condition of the 5th wheel
Fails to check the status of the 5th wheel latch
Fails to release tractor parking brakes
Fails to reverse slowly
Fails to use mirrors while reversing
Fails to stop when 5th wheel is just ahead of the trailer
Fails to place transmission in neutral
Fails to apply tractor parking brake
Fails to shut off engine
Fails to confirm transmission is in neutral
Fails to confirm tractor parking brakes are applied
Fails to position the tractor the correct distance from the trailer
Fails to Align the tractor with the trailer. (The trailer kingpin must be aligned to contact only the 5th wheel guide ramps)
Fails to reposition tractor
Fails to set trailer height correctly
Fails to adjust trailer height using landing gear

16 | OFF-ROAD SKILLS DEMONSTRATION | TRAINING TOOL
con’t
Task Evaluation 5 – Coupling a tractor-trailer, continued
Driver action Errors Minor/Major
INSPECT TRAILER
Inspect the condition of the trailer upper coupler and kingpin, and trailer connectors
CHOCK WHEELS
Confirm chocks are in place at the trailer wheels
ENGAGE 5TH WHEEL
Reverse slowly under the trailer.
Use the mirrors to confirm proper alignment and trailer stability
Gently but firmly engage the 5th wheel
Listen for and feel the 5th wheel latching into its locked position
TEST 5th WHEEL
Attempt to move the tractor forward to confirm the 5th wheel is locked
Place transmission in neutral
Apply tractor parking brake
Shut off the engine
CONFIRM 5th WHEEL LOCK
Exit the vehicle and visually confirm the 5th wheel is locked by checking the 5th wheel contact and the release handle position
Get under the trailer to visually check the closed position of the latch or locks
CONNECT AIR AND ELECTRICAL SYSTEMS
Inspect the condition of the trailer air and electrical connections
Connect the air and electrical lines properly
Fails to inspect the condition of the trailer upper coupler
Fails to inspect the kingpin
Fails to check wheel chocks
Fails to reverse slowly
Fails to monitor the trailer’s position using mirrors
Fails to engage 5th wheel
Fails to have kingpin align correctly with the 5th wheel
Fails to test that the 5th wheel is locked
Fails to place transmission in neutral
Fails to apply brakes
Fails to shut off engine
Fails to exit the vehicle to visually check the release handle position
Fails to get into a position under the trailer to visually check that the 5th wheel is in the closed position
Fails to inspect the condition of the trailer air and electrical connections
Fails to connect the air and electrical lines properly

17 | OFF-ROAD SKILLS DEMONSTRATION | TRAINING TOOL
Task Evaluation 5 – Coupling a tractor-trailer, continued
Driver action Errors Minor/Major
RAISE LANDING GEAR
Raise the trailer landing gear fully and stow the handle into its retainer
CHECK AIR BRAKE SYSTEM
Check and adjust air pressure if needed
Start the engine, if necessary to raise air pressure to normal operating range
Supply air to the trailer with the trailer supply valve
Monitor the air pressure gauges, and confirms air pressure gauges show normal pressure levels
Shut engine off
Listen for air leakage at supply gladhand
Apply service brakes
Listen for air leakage at the service gladhand
Remove wheel chocks
Test service brake reaction by driving slowly forward and applying brakes
Fails to raise the trailer landing gear fully
Fails to stow landing gear handle properly
Fails to get air pressure into normal operating range
Fails to raise air pressure to normal operating range when required
Fails to supply air to trailer system
Fails to check for or establish normal air pressure
Fails to shut off engine
Fails to listen for supply gladhand leakage with the engine shut off
Fails to apply service brakes
Fails to listen for service gladhand leakage with the engine shut offNote: The driver does not need to exit the tractor to check for leaks at the gladhand connections.
Fails to remove wheel chocks
Fails to test brakes properly
Total Minor
Total Major

18 | OFF-ROAD SKILLS DEMONSTRATION | TRAINING TOOL
6 Uncoupling a Tractor-Trailer
Demonstration/evaluation stepsEvaluate the driver as he or she demonstrates
each task listed in the table. The demonstration
may include additional workplace-specific and/or
vehicle-specific procedures. These issues must be
addressed and fully conveyed to the driver prior to
beginning any demonstration and not discussed
during the evaluation.
Instruction to driver Inform the driver that he or she needs to uncouple
the tractor-trailer. Make the driver aware that they
will be evaluated on all the tasks that they learned in
training or that should be included each time when
they complete this maneuver
Evaluation Procedure: Parallel parking a tractor-trailerThe evaluation criteria for uncoupling a tractor-
trailer are listed in the table below. This table can be
used for training, evaluating, coaching or as part of
an entry-level or occupational-level road test.

19 | OFF-ROAD SKILLS DEMONSTRATION | TRAINING TOOL
con’t
Task Evaluation 6 – Uncoupling a tractor-trailer
Driver action Errors Minor/Major
Select a location that is suitable for dropping the trailer
PARK THE TRAILER
Locate trailer with tractor as straight as possible
SECURE TRACTOR AND TRAILER PARKING BRAKES
Confirm that the tractor and trailer are secured by application of the parking brakes
Confirm transmission is in neutral
Shut engine off if not already off
Confirm that wheel chocks are properly in place or position chocks at the trailer wheels
CHECK GROUND CONDITION AND USE SUPPORT IF NEEDED
Confirm whether the trailer is loaded or empty and its approximate weight
When ground conditions are soft, place supports under the landing gear
Operate trailer air suspension controls as needed
LOWER LANDING GEAR
Lower the trailer landing gear until it makes contact with the ground (or is just above the ground), but does not raise the trailer from the 5th wheel
Place the landing gear in low range and stow the handle
Fails to know approximate trailer weight
Has tractor at an unnecessary angle to the trailer
Fails to confirm application of, or to apply, tractor brakes
Fails to confirm application of, or to apply, trailer brakes
Fails to confirm transmission is in neutral
Fails to ensure engine is shut off
Fails to properly place wheel chocks or check that wheel chocks are properly in place
Fails to determine the trailer loaded condition or weight
Fails to place supports under the landing gear when ground condition is soft
Does not know how to operate suspension controls
Has trailer landing gear more than 2cm from the ground
Lowers the landing gear so far that a gap appears between the 5th wheel and trailer upper coupler
Fails to place landing gear handle into storage location

20 | OFF-ROAD SKILLS DEMONSTRATION | TRAINING TOOL
Task Evaluation 6 – Uncoupling a tractor-trailer, continued
Driver action Errors Minor/Major
REMOVE AIR AND ELECTRICAL CONNECTIONS
Note: Can be done before or after unlocking 5th wheel)
Disconnect air and electric lines
Secure air and electric lines
Release 5th wheel latchNote: You can pull directly on the 5th wheel handle or use a tool to reach the release handle
DISENGAGE 5th WHEEL
Enter tractor, start the engine and drive slowly forward in lowest gear to release 5th wheel. Stop when the 5th wheel lower coupler is fully out from under the trailer, but the tractor frame is still under the front of the trailer.
Place transmission in neutral
Apply tractor parking brake
Shut off the engine (putting the engine off is not always necessary)
DISENGAGE 5th WHEEL WITH SUSPENSION DROP (Optional)
Drive slowly forward just far enough to release the 5th wheel from the kingpin
Drop the suspension
Stop when tractor frame is still under the trailer
Exit the tractor and confirm that the trailer and landing gear are stable and secure
Re‐enter the tractor and drive forward slowly until the tractor is clear of the trailer
Fails to disconnect one or more lines
Fails to secure one or more linesNote: The lines can be placed into storage receptacles or temporarily secured onto the tractor using straps or similar devices
Fails to unlock 5th wheel
Drives forward too little or too farNote: The 5th wheel must no longer contact the trailer and a portion of the tractor frame must still be under the trailer.
Fails to place transmission in neutral or apply parking brake
Fails to shut off engine
Drives forward too quickly
Fails to drop the suspension
Fails to stop when tractor frame is still under trailer
Fails to exit the tractor to confirm trailer security
Drives forward too quickly
Total Minor
Total Major

TRAINING TOOL
DRIVING THE FUTURE
Coupling & Uncoupling a
Tractor-Trailer

2 | Coupling and Uncoupling a Tractor-Trailer | TRAINING TOOL
When operating articulating vehicles such as a truck-trailer combination, frequent coupling
and uncoupling of the vehicles becomes a routine part of the job. A systematic routine
approach must be used for the coupling process that may vary based on the specific
vehicles involved and the location where coupling is performed.
Completion of ‘Coupling a Tractor-Trailer’ includes the safe and effective performance
of the following steps.
1Coupling a Tractor-Trailer

TRAINING TOOL | Coupling and Uncoupling a Tractor-Trailer | 3
Make sure the transmission is in neutral and the tractor parking brakes are applied. Get out of the tractor and inspect the 5th wheel and connectors.
1 Inspect tractor
1 Inspect the 5th wheel for damage and other defects. Check that the 5th wheel is open.To conduct a proper 5th wheel inspection, you need to know what are normal conditions and have some idea of the kinds of things that can go wrong. You will learn this from your trainer and your own experience. You also need to be prepared for unexpected problems.
Among the items you need to inspect on a 5th wheel are:• The condition of the 5th wheel, making sure there
is no damage, crack, missing fastener or bent parts.
• The condition and position of the lock and release mechanism.
• The 5th wheel must be tilted down at the rear.• For a sliding 5th wheel, confirm the slider is in the
proper locked position and is free of damage. If the sliding mechanism is air-operated check those components as well.
• Confirm there is enough lubricant on the plate.
2 Inspect the air and electrical lines. Confirm they are in good condition, are properly installed and are free of damage. Confirm the gladhands are in good condition, look for damaged or missing seals. Confirm the 7-way connector and the cord itself are in good shape and free of damage.

4 | Coupling and Uncoupling a Tractor-Trailer | TRAINING TOOL
Enter the tractor, release the parking brakes and reverse slowly, approach the trailer with the tractor as straight in line as possible. Reverse at a walking pace to approach the trailer. When the tractor has a rear window, use it to align the tractor and trailer. If there is no rear window, use the mirrors. The tires, frame and/or body can be used to visually align to the trailer. You should have the tractor roughly in a straight line with the trailer, and have the tractor wheels positioned to align within vertical lines extending downward from the sides of the trailer.
2 Align trailer
1 You may face challenges involving uneven or slippery ground surface conditions as you reverse toward a trailer and you need to know how to overcome these challenges. Using the inter-axle differential lock, and putting down sand or gravel, are a couple of ways to gain traction on slippery surfaces. Sometimes it may be necessary to put chains on the tires and in other cases, you can get by simply placing chains on the ground right in front of the trailer to get enough traction.
2 Stop when the 5th wheel is just ahead of the trailer, touching the trailer or is slightly under the trailer, but not against the kingpin. Stop before coupling the 5th wheel. How close you get to the trailer will depend on several factors. A good reference for the distance that you need to be under the trailer is to get the center of the rear axle of the tractor just under the front of the trailer. Your ability to see is the primary factor the will determine how close you get.
3 You must be able to judge the height and alignment of the 5th wheel to the trailer kingpin. Being more than 1 meter from the trailer is too far away and having the front edge of the 5th wheel fully underneath the trailer is too far back.

TRAINING TOOL | Coupling and Uncoupling a Tractor-Trailer | 5
Apply the tractor parking brakes and exit the tractor to inspect the trailer upper coupler and the kingpin. The upper coupler must be flat, free of rust and damage and the kingpin must also be free of damage. Inspect the air and electrical connec-tions for damage and other problems.
3 Inspect trailer
1 Confirm that the kingpin is aligned so that it will only contact the guide ramps of the 5th wheel lower coupler. Adjust height if necessary so that contact of the upper coupler will be on the bottom half of the 5th wheel lower coupler face.
2 Your height is correct when the trailer contacts the 5th wheel in the bottom half of its upper face. Tractor to trailer height is wrong when the trailer contacts the 5th wheel near the bottom of the tapered section of the 5th wheel, or when the 5th wheel plate fails to fully contact the trailer as it begins to slide under. Any gap between the 5th wheel and trailer requires pulling forward and adjusting height before proceeding with coupling.
5th Wheel
Guide Ramps
3 Alignment is correct when the kingpin contacts the tapered guide section of the 5th wheel. Alignment is incorrect when the kingpin touches any upper face of the 5th wheel.
Alignment Target

6 | Coupling and Uncoupling a Tractor-Trailer | TRAINING TOOL
Place wheel chocks to secure the trailer.
4 Chock wheels (SITUATION DEPENDENT)*
Newer trailers are equipped with trailer brakes, which may discount the need for wheel chocks during coupling and uncoupling. However, proper placement of wheel chocks is a necessary skill for drivers, particularly in situations that require
additional safety precautions, such as slippery road conditions or trailer inspections (e.g. when the trailer brakes must be released) or during provincial/territorial licensing road-tests.
Release the tractor parking brakes and reverse under the trailer. Monitor the trailer’s position during coupling using the mirrors to confirm proper alignment and trailer stability. Gently but firmly engage the 5th wheel.
5 Engage 5th wheel
A Listen for and feel the 5th wheel latching into its locked position.
B When using a tractor with an air suspension drop feature, drop the tractor air suspension only after confirming correct coupling height and before reversing under the trailer. Once the 5th wheel is fully under the trailer, but still ahead of the king pin, raise the suspension to normal ride height.

TRAINING TOOL | Coupling and Uncoupling a Tractor-Trailer | 7
Attempt to move the tractor forward (perform a “tug test”). This must be done in the lowest forward gear and with the engine idling. The 5th wheel coupling will hold if it is properly engaged and locked.
6 Test lock
Apply the tractor parking brakes and exit the tractor to visu-ally confirm that the 5th wheel is in full contact with the trailer upper coupler. There must not be any gap between the 5th wheel and the trailer. Confirm that the 5th wheel latch is in the locked position by checking the release handle position.
7 Confirm 5th wheel lock
If the 5th wheel is not fully engaged and locked, the 5th wheel will release and tractor will move forward. This will require reversing again to properly engage and lock the 5th wheel. Gently but firmly engage the 5th wheel. Listen for and feel the 5th wheel latching into its locked position.
Get into a position under the trailer to visually check that the 5th wheel locking mechanism is in the proper closed position. Watch your head as you get under the trailer and wear protective head gear if that is a workplace requirement. Look for closed jaws or the lock bar position, depending on the style of 5th wheel.

8 | Coupling and Uncoupling a Tractor-Trailer | TRAINING TOOL
Connect the air and electrical lines properly, and confirm nor-mal operation.
8 Connect
Raise the trailer landing gear fully and stow the handle into its retainer.
9 Raise landing gear

TRAINING TOOL | Coupling and Uncoupling a Tractor-Trailer | 9
Get back in the tractor and confirm air pressure gauges show normal pressure levels. Start the engine, (if necessary to raise air pressure to normal operating range), then supply air to the trailer by opening (pushing in) the trailer supply valve.
10 Supply air
1 Check the air gauges and make sure pressure is normal. It should be in the normal operating range and should not be dropping, which could indicate a leak. The pressure will drop initially if the trailer system is completely empty of air; however, once the trailer system is fully charged, the system should stabilize.
2 Shut off the engine, (if you needed to run it to raise air pressure), and listen for air leakage at the supply gladhand. Apply the service brakes, watch air pressure to make sure it stays normal, and listen for air leakage at the service gladhand. If there are no leaks, you are ready to go.

10 | Coupling and Uncoupling a Tractor-Trailer | TRAINING TOOL
If wheel chocks were used, remove them. Drive forward slowly a short distance and apply either the trailer service brakes only, or the full service brakes to test brake operation. If the tractor is equipped with a hand valve for the trailer brakes, both the trailer service brakes and full-service brakes should be tested for operation.
11 Test brakes
Coupling to a trailer without parking brakes
Older trailers with air brakes sometimes use parking brakes that require air pressure to stay in an applied position. After being parked for a period, the air pressure could have dropped far enough that the parking brakes will no longer hold the trailer stationary. Some special design trailers may also be made without normal parking brake features.
Not having the trailer secured by parking brakes creates a potential challenge when trying to couple to it. Any force of trying to couple the 5th wheel can cause the trailer to roll away. A different procedure is needed for coupling to a trailer when it has no parking brakes. One method is to chock the wheels. Another method is to connect the air brakes system and apply either the trailer parking brakes or the service brakes before trying to couple the 5th wheel.

TRAINING TOOL | Coupling and Uncoupling a Tractor-Trailer | 11
When operating articulating vehicles such as a truck-trailer combination, frequent coupling and uncoupling of the vehicles becomes a routine part of the job. A systematic routine approach must be used for the uncoupling process that may vary based on the specific vehicles involved and the location where uncoupling is performed.
Completion of ‘Uncoupling a Tractor-Trailer’ includes the safe and effective performance of the following steps.
2 Uncoupling a Tractor-Trailer

12 | Coupling and Uncoupling a Tractor-Trailer | TRAINING TOOL
Confirm you have a location that is suitable and safe for un-coupling
1 Select location and check ground condition
It is important that you know the approximate weight of the trailer you are towing. This will allow you to make the right decision about where you can drop the trailer. Select a location that is known to be suitable and firm enough to support the weight of the trailer.
Park the trailer in the selected location with the tractor and trailer in as straight a line as possible.
2 Park the trailer

TRAINING TOOL | Coupling and Uncoupling a Tractor-Trailer | 13
Apply the trailer parking brakes, secure and exit the tractor.
3 Secure tractor and trailer
Apply both the tractor and trailer parking brakes using the appropriate airbrake system controls (the trailer supply valve [red knob] and the spring brake control valve [yellow knob]).
Place any required wheel chocks and blocks, or engage locks into position.
4 Chock trailer wheels
Exit the cab and place wheel chocks into positions that will prevent rolling in both forward and rearward direction. This can be between the axles, or in front of and behind the same axle. (See illustration on acceptable placement of wheel chocks).
Newer trailers are equipped with trailer brakes, which may discount the need for wheel chocks during coupling and uncoupling. However, proper placement of wheel chocks is a necessary skill for drivers, particularly in situations that require additional safety precautions, such as slippery road conditions or trailer inspections (e.g. when the trailer brakes must be released) or during provincial/territorial licensing road-tests.

14 | Coupling and Uncoupling a Tractor-Trailer | TRAINING TOOL
Place adequate support material under the landing gear, if necessary.
5 Support landing gear
1 Wet ground and ground that is thawing are riskier surfaces for dropping a trailer. Freshly disturbed soil and grass are soft and may not even be able to support an empty trailer. Packed gravel driveways and parking lots are normally adequate to support loaded trailers. Paved and concrete surfaces are generally necessary for the heaviest loads.
2 Depending on the combination of trailer weight and surface conditions, blocks, beams or pads may be needed under the landing gear to prevent them from sinking into the ground surface. When trailers will be left in a location for longer periods of time, it can also be necessary to provide some sort of support under the landing gear.
Operate trailer air suspension controls when and as required.
6 Set suspension

TRAINING TOOL | Coupling and Uncoupling a Tractor-Trailer | 15
Lower the trailer landing gear until it is just above the ground, or just touches the ground, but does not raise the trailer from the fifth wheel.
7 Lower landing gear
1 Use the landing gear crank handle to lower the landing gear until it either is just above the ground, just touching the ground, or taking some of the trailer weight. The trailer landing gear is extended too far when there is a gap between the fifth wheel lower plate and the trailer. The trailer landing gear is not extended far enough when there is more than 2 cm (about 1 inch) between the landing gear and the ground.
2 The tractor suspension may react to loss of trailer weight by exhausting air from the air bags. The air may start to exhaust right away or after a short delay. This is an indication that the trailer landing gear is down too far. It may just be down a little too far, but some suspension systems are very sensitive to slight weight changes. You can crank the landing gear up just a little to keep the air suspension at its normal height. Place it in low gear and turn it a full turn higher and put the crank handle back in the stow position.
Stow the landing gear handle. It may be good practice to place the landing gear into low range before stowing it to prevent the handle from getting jammed. (The “low range” position of the landing gear usually involves pushing the handle shaft inwards. The “high range” position of the landing gear then involves pulling the handle shaft outwards, but some work the other way around.)
8 Stow handle

16 | Coupling and Uncoupling a Tractor-Trailer | TRAINING TOOL
Disconnect air and electrical connections and stow them.
9 Remove connections
Connect the gladhands to “dummy” couplers and place the 7-way electrical connector into the receiver. If you are going to couple onto another
trailer in the same yard, the lines can be secured onto the tractor deck or “catwalk” using a strap as you travel to the next trailer.
Note: Steps 9 and 10 can be completed in the reverse order, where the 5th wheel is released before the lines are disconnected.
Release the fifth wheel coupler lock.
10 Unlock 5th wheel
Note: In some cases, the trailer suspension will drop when the air is exhausted out of the supply line. This can cause the trailer to shift a little forward or backward. This movement can cause the 5th wheel to jam, making it impossible to pull the 5th wheel release handle. When this occurs, you can reverse the tractor a little, to relieve the tension. Sometimes
just releasing the tractor parking brakes will loosen the 5th wheel. Remember to apply the tractor parking brake again before you get out. Try the 5th wheel release again. You may also be able to avoid this problem by releasing the 5th wheel before disconnecting the air lines.

TRAINING TOOL | Coupling and Uncoupling a Tractor-Trailer | 17
Enter the tractor, drive slowly forward far enough to release the fifth wheel from the kingpin. Stop the tractor when the fifth wheel lower coupler is fully out from under the trailer, but the tractor frame is still under the front of the trailer.
11 Disengage 5th wheel
For a tractor with air suspension drop feature, drive forward slowly far enough to unlatch the fifth wheel coupler and stop. Operate the control to drop the tractor suspension. Watch the trailer in the mirrors or out of the rear window, confirm the trailer is stable.
12 Disengage 5th wheel with suspension drop (OPTIONAL)

18 | Coupling and Uncoupling a Tractor-Trailer | TRAINING TOOL
Place the transmission in neutral, apply the tractor parking brake and shut off the engine. Exit the tractor and confirm that the trailer and landing gear are stable and secure.
13 Confirm trailer is secure
Re-enter the vehicle and drive forward slowly until the tractor is clear of the trailer.
14 Clear trailer
NOTE: For a tractor with an air suspension drop feature, raise the tractor suspension to the normal position.

TRAINING TOOL
DRIVING THE FUTURE
Workplace Performance
Evaluation

2 | Workplace Performance Evaluation | TRAINING TOOL
The purpose of this performance evaluation is to allow supervisors to assess the competency (i.e. the skills and
knowledge) of commercial vehicle operators under their supervision. A performance evaluation can be completed for
every driver in a fleet, regardless of the driver’s experience level. For example, new drivers can be assessed during
on-boarding training when they are just learning many of the skills required for the job. Experienced drivers can also be
assessed to affirm their competency and to identify areas for development and improvement. Performance Evaluations
can be conducted before, during or after the completion of learning/training and as part of periodic human resource
management efforts.
Workplace Performance
Evaluation

3 | Workplace Performance Evaluation | TRAINING TOOL
USING THE PERFORMANCE EVALUATION
The performance evaluation can be conducted by an individual(s) who directly supervises the driver. This individual(s) will vary depending on the
experience and skill level of the driver being assessed. During the initial training and onboarding phase, a driver trainer or coach/mentor/assessor may
conduct the evaluation; a driver supervisor or manager may conduct a performance evaluation of an experienced driver as part of an annual review
process. Regardless of who conducts the evaluation, the process remains the same.
HOW TO USE THE PERFORMANCE EVALUATION There are 3 steps to using the Performance Evaluation tool. Please note that Step 1 is optional, depending upon the workplace.
Not relevant or required
in the workplace
0 1 2 3 4
Occasionally required, not
important
Required element
of the job function, low importance
Critical element
of the job function, high importance
Required element
of the job function, moderate
importance
STEP 2: Define workplace target for each performance evaluation
element
An overall target rating for each element of the performance evaluation
must also be established. To develop the workplace target, the ratings
for each competency/performance criterion should be added and then
averaged.
The workplace target for each performance evaluation element will
vary depending on the experience level of the driver. For example, the
workplace target(s) for new drivers will likely be lower than the target(s)
set for experienced drivers.
This difference in target ratings considers the level of skills development
and experience of drivers along the learning continuum. Each workplace
can develop expected workplace targets for various driver levels.
STEP 1: Define workplace ratings for each competency/performance
criterion.
Prior to conducting any evaluation of worker performance, the
supervisory staff must rate each element of competency/performance
that will be used to score the individual. These ratings must represent
the realities of the workplace where the individual is employed. The
individual’s score will be compared to the workplace rating. The criteria
used to rate each element of competency/performance are shown below.

4 | Workplace Performance Evaluation | TRAINING TOOL
STEP 3: Assess the driver’s performance
Each individual must be given a score for each competency/performance
criterion based on his/her performance of the particular task. The scoring
may be determined by one assessor or by consensus among several
assessors who have direct interaction with the driver. The criteria used to
score each element of competency/performance are shown below.
Individual appreciates
the value and need for the competency
Implication:Significant
further development is needed; tasks
cannot be performed
1 2 3 4
Novice Functional Competent Master
Individual has partially acquired the competency
Implication:Support and
guidance are still needed
Individual has fully acquired
the competency
Implication:Completes work tasks
independently
Individual has mastered the competency
Implication:Able to mentor
others
After assigning a score for each competency/performance criterion,
an overall score for each competency element can be determined by
totalling all ratings and determining the individual’s average score. The
average score can then be compared to the workplace average score
to determine if the individual is meeting, exceeding or falling short of
workplace expectations.
STEP 4: Determine Required Action(s)
By comparing the driver score with the workplace target for each
performance element, the assessor can determine if the driver is
meeting, exceeding or falling short of the expected performance of
the performance element. The result of this assessment will determine
the actions that are required. Actions may include providing a reward
for excellent performance, incentivizing enhanced performance or
identifying the need for remedial action such as enhanced training or
learning opportunities.
It is important to note that the Performance Evaluation is meant to
be a positive tool that is meant to identify areas for improvement and
development to enhance the safety and efficiency of drivers.

5 | Workplace Performance Evaluation | TRAINING TOOL
SAMPLE:
STEP 1: Assign workplace rating(s) for each
competency/ performance criterion using rating
scale (if using)
STEP 2: Determine workplace scoring target
for Element (i.e. 12 (total workplace rating)/4
(number of tasks) = 3)
STEP 3: Assess driver’s performance of each
competency/performance criterion (using
rating scale). Determine average driver score
(i.e. 10 (total score) / 4 (number of tasks) = 2.5)
STEP 4: Compare Workplace Scoring Target
and Average Driver Score. Consider Required
Action(s).
Workplace Competency/ Score Evaluator Comments Required Action(s) Rating performance criterion
1.1 Meets workplace expectations for internal social interaction
and communication while on the job.
1.2 Consistently complies with workplace policies relating to risk awareness and hazard
avoidance.
1.3 Meets workplace expectations for external engagement,
communication and interaction while on the job.
1.4 Follows procedures relating to workplace conduct and seeks help whenever uncertain about any workplace issue.
Workplace Scoring Target for Element 1 Average Driver Score
PERFORMANCE EVALUATION – ELEMENT 1 Personal Development, Workplace Relationships and Social Skills

6 | Workplace Performance Evaluation | TRAINING TOOL
Workplace Competency/ Score Evaluator Comments Required Action(s) Rating performance criterion
1.1 Meets workplace expectations for internal social interaction
and communication while on the job.
1.2 Consistently complies with workplace policies relating to risk awareness and hazard
avoidance.
1.3 Meets workplace expectations for external engagement,
communication and interaction while on the job.
1.4 Follows procedures relating to workplace conduct and seeks help whenever uncertain about any workplace issue.
Workplace Scoring Target for Element 1 Average Driver Score
PERFORMANCE EVALUATION – ELEMENT 1 Personal Development, Workplace Relationships and Social Skills

7 | Workplace Performance Evaluation | TRAINING TOOL
Workplace Competency/ Score Evaluator Comments Required Action(s) Rating performance criterion
2.1 Consistently meets expectations for following workplace instructions.
2.2 His/her conduct with respect to job task analyses and hazard assessments meets workplace
expectations.
2.3 Meets workplace expectations for effective use of communication and electronic
systems.
2.4 Consistently meets workplace expectations for producing written communication.
2.5 Consistently meets workplace expectations for security related to work activities.
2.6 Meets workplace expectations for numeracy tasks.
2.7 Meets workplace expectations for computer usage.
2.8 Consistently meets workplace expectations for managing vehicle and cargo
documentation.
PERFORMANCE EVALUATION – ELEMENT 2 Dependability and Administrative Task Completion
con’t

8 | Workplace Performance Evaluation | TRAINING TOOL
Workplace Competency/ Score Evaluator Comments Required Action(s) Rating performance criterion
2.9 Meets workplace expectations in providing information necessary for fuel tax records.
2.10 Consistently maintains driver’s daily logbooks that are compliant with the regulations.
Workplace Scoring Target for Element 2 Average Driver Score
PERFORMANCE EVALUATION – ELEMENT 2, continuedDependability and Administrative Task Completion

9 | Workplace Performance Evaluation | TRAINING TOOL
Workplace Competency/ Score Evaluator Comments Required Action(s) Rating performance criterion
3.1 Consistently meets workplace expectations for appearance and behaviour.
3.2 Consistently meets workplace expectations in shipper and customer staff engagements.
3.3 Consistently follows workplace requirements for correct use of PPE.
Workplace Scoring Target for Element 3 Average Driver Score
PERFORMANCE EVALUATION – ELEMENT 3 Service to Shippers/Receivers

10 | Workplace Performance Evaluation | TRAINING TOOL
Workplace Competency/ Score Evaluator Comments Required Action(s) Rating performance criterion
4.1 Meets workplace expectations for handling stress and fatigue.
4.2 Meets workplace requirement to consistently be ready and fit for work.
4.3 Meets workplace expectations for injury prevention.
4.4 Meets workplace expectations/ needs in planning for weather and road conditions
4.5 Meets workplace requirement for successful route and work
planning.
4.6 Meets workplace expectation/ requirement for planning related to vehicle height, weight and route restrictions.
4.7 Meets workplace requirement for planning/taking necessary work breaks at appropriate
locations.
4.8 Meets workplace requirement for planning fuel refills at appropriate times and
locations.
PERFORMANCE EVALUATION – ELEMENT 4 Preparedness, Planning and Problem Solving
con’t

11 | Workplace Performance Evaluation | TRAINING TOOL
Workplace Competency/ Score Evaluator Comments Required Action(s) Rating performance criterion
4.9 Meets workplace requirement for weight and dimension
compliance.
4.10 Meets workplace expectations/ needs in planning and preparing for expected and unexpected challenges.
Workplace Scoring Target for Element 4 Average Driver Score
PERFORMANCE EVALUATION – ELEMENT 4 , continuedPreparedness, Planning and Problem Solving

12 | Workplace Performance Evaluation | TRAINING TOOL
Workplace Competency/ Score Evaluator Comments Required Action(s) Rating performance criterion
5.1 Follows workplace requirements for use of PPE around vehicles.
5.2 Meets workplace expectations related to understanding of vehicle configurations.
5.3 Meets workplace expectations for consistently inspecting, monitoring and reporting vehicle conditions.
5.4 Meets workplace expectations related to making minor vehicle repairs.
5.5 Consistently meets workplace expectations for engine warm up and cool down procedures.
5.6 Meets workplace requirements/ needs for use of on-board heating equipment.
5.7 Meets workplace expectations for safe operation of coupling
devices.
Workplace Scoring Target for Element 5 Average Driver Score
PERFORMANCE EVALUATION – ELEMENT 5 Knowledge, Use and Care of Equipment

13 | Workplace Performance Evaluation | TRAINING TOOL
Workplace Competency/ Score Evaluator Comments Required Action(s) Rating performance criterion
6.1 Consistently monitors vehicle condition according to regulations, and to workplace expectations.
6.2 Consistently completes and processes inspection reports according to regulations, and to workplace expectations.
6.3 Consistently deals with vehicle defects according to regulations, and to workplace expectations.
Workplace Scoring Target for Element 6 Average Driver Score
PERFORMANCE EVALUATION – ELEMENT 6 Daily Inspection Requirements

14 | Workplace Performance Evaluation | TRAINING TOOL
Workplace Competency/ Score Evaluator Comments Required Action(s) Rating performance criterion
7.1 Meets workplace expectations for understanding of relevant cargo documents and symbols.
7.2 Meets workplace expectations for dealing with cargo handling and equipment needs.
7.3 Meets workplace requirements for cargo and loss prevention
procedures.
7.4 Consistently keeps cargo secure according to regulations, and to workplace expectations.
7.5 Consistently uses and maintains cargo securing devices according to regulations, and to workplace
expectations.
7.6 Meets workplace expectations for managing cargo status and managing cargo
documentation.
Workplace Scoring Target for Element 7 Average Driver Score
PERFORMANCE EVALUATION – ELEMENT 7 Cargo Securement

15 | Workplace Performance Evaluation | TRAINING TOOL
Workplace Competency/ Score Evaluator Comments Required Action(s) Rating performance criterion
8.1 Consistently secures vehicles properly.
8.2 Consistently enters and exits the vehicle properly.
8.3 Consistently meets workplace expectations/needs for proper vehicle set up for weight and dimension compliance.
8.4 Consistently follows all workplace, shipper and customer procedures in loading docks.
8.5 Consistently meets workplace expectations for safe and proficient backing.
Workplace Scoring Target for Element 8 Average Driver Score
PERFORMANCE EVALUATION – ELEMENT 8 Off-Road Tasks and Maneuvers

16 | Workplace Performance Evaluation | TRAINING TOOL
con’t
Workplace Competency/ Score Evaluator Comments Required Action(s) Rating performance criterion
9.1 Consistently meets workplace expectations for avoiding fatigue and exercising poor judgement.
9.2 Consistently meets workplace expectations for maintaining adequate following distance.
9.3 Consistently meets workplace expectations for avoiding unsafe operating conditions.
9.4 Consistently meets workplace expectations for vehicle speed.
9.5 Consistently meets workplace expectations for avoiding any aggressive or discourteous driving.
9.6 Consistently meets workplace expectations for avoiding any incident involving distracted driving.
9.7 Consistently meets workplace expectations for proper railway crossing.
9.8 Consistently meets workplace expectations for avoiding collision and impact with any obstruction.
PERFORMANCE EVALUATION – ELEMENT 9On-Road Driving

17 | Workplace Performance Evaluation | TRAINING TOOL
Workplace Competency/ Score Evaluator Comments Required Action(s) Rating performance criterion
9.9 Consistently meets regulatory requirements and workplace expectations for entering vehicle inspection facilities.
9.10 Consistently meets regulatory requirements and workplace expectations/needs for over-weight or over-height vehicle.
9.11 Consistently meets regulatory requirements and workplace expectations for toll routes and bridges.
9.12 Consistently meets regulatory requirements and workplace expectations for vehicle parking.
9.13 Consistently meets regulatory requirements and workplace expectations for turns.
9.14 Consistently meets regulatory requirements and workplace expectations for U-turns.
Workplace Scoring Target for Element 9 Average Driver Score
PERFORMANCE EVALUATION – ELEMENT 9, continuedOn-Road Driving

18 | Workplace Performance Evaluation | TRAINING TOOL
Workplace Competency/ Score Evaluator Comments Required Action(s) Rating performance criterion
10.1 Meets workplace expectations for using auxiliary power.
10.2 Consistently meets workplace expectations for vehicle idling.
10.3 Consistently meets workplace expectations for fuel
consumption.
10.4 Consistently meets workplace expectations for proper fueling of vehicle.
Workplace Scoring Target for Element 10 Average Driver Score
PERFORMANCE EVALUATION – ELEMENT 10 Fuel Consumption