Embed Size (px)
Citation preview
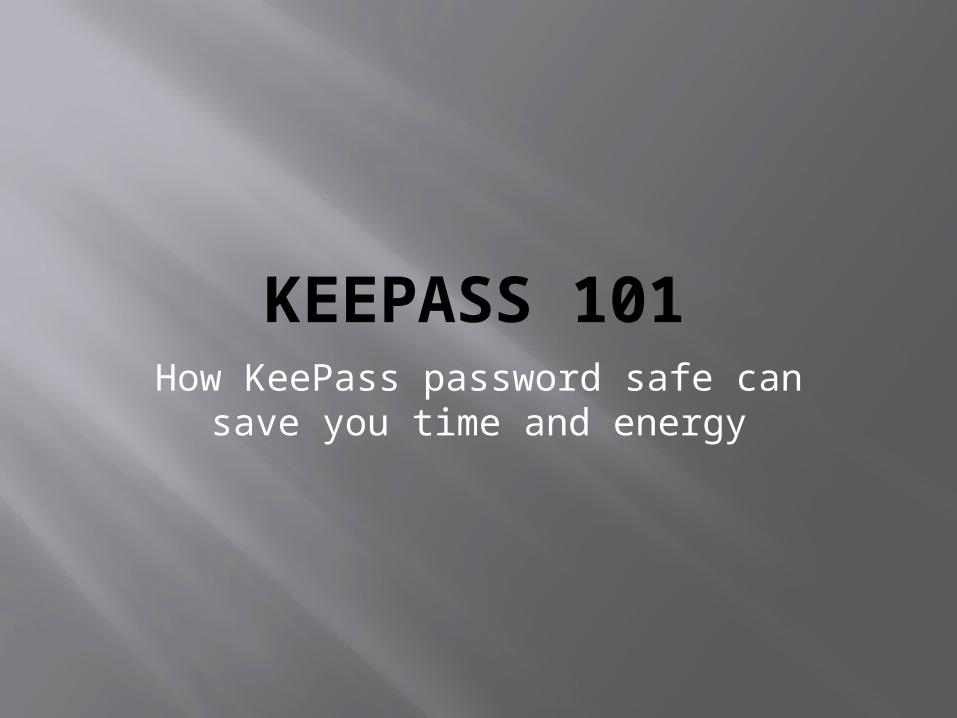
KEEPASS 101How KeePass password safe can
save you time and energy
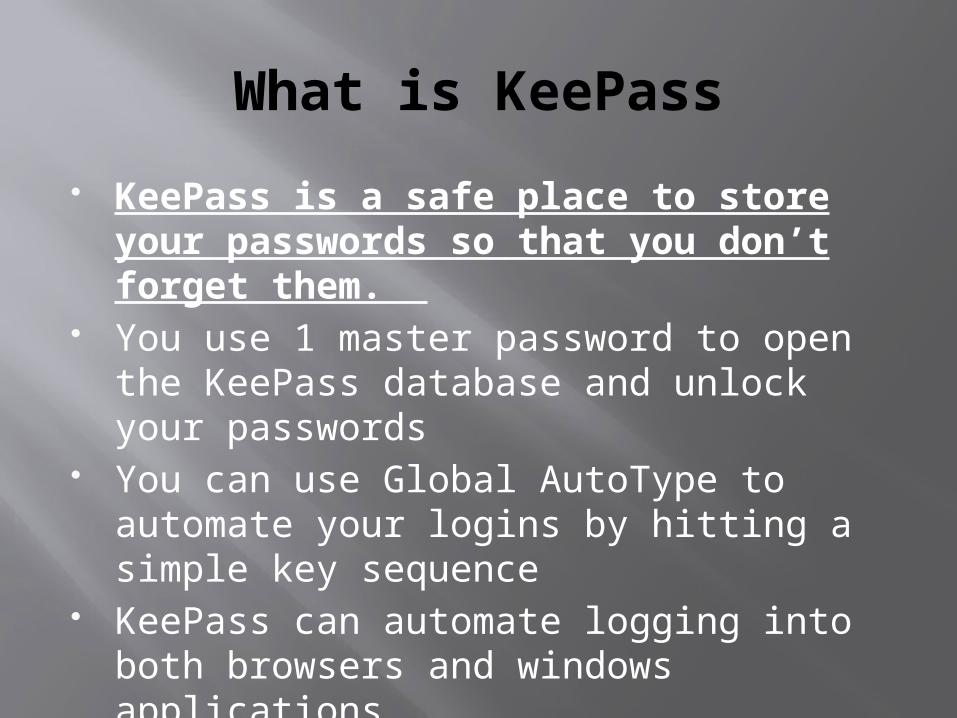
What is KeePass
KeePass is a safe place to store your passwords so that you don’t forget them.
You use 1 master password to open the KeePass database and unlock your passwords
You can use Global AutoType to automate your logins by hitting a simple key sequence
KeePass can automate logging into both browsers and windows applications

Installing KeePass
You can download KeePass for your laptop at http://KeePass.info/
Download the latest version 2 release (Professional Edition) and get the Installer exe for windows.
After you download run the executable to install. Accept all the defaults (i.e. click through the install screens).
Note: KeePass is also installed on the View. To run KeePass in View and on your laptop you will need separate databases with separate global autotype sequences.

Download KeePass
Download KeePass and install like you would any windows application, accept all defaults during the install.

Set up new KeePass database
After installing and starting KeePass you will want to set up your database, click File->New

Name and save your DB
After clicking New you will need to name and save your database, I recommend the U: drive.

Create your master password
Now you must set the password to access your KeePass database, this is the one password you must remember. You can click the button with 3 dots to display the password if you want to see what you are typing. You don’t need the Key file or windows user account.

Database options
Next you will get a screen for database options. You don’t really need to change anything here except possibly the description and default user name for new entries. The default username will fill in that value for the username when you create a new KeePass entry. If you want fill these in and click ok or leave blank and click ok.

Database screen
Now you will be at the main screen for KeePass. The entries in the left pane are for categorizing. I generally just keep everything in the main db and do not categorize but it is up to you how you want to organize. The entries on the right are samples and can be deleted.

Database screen
To delete the samples you can select them both and right click and click delete entry.

Before we set up our first entry we will check out the global autotype setup. Click Tools-> Options
Global AutoType Setup

Next click the Integration Tab. Note that Global Auto-type is set to Ctrl-Alt-A. This is a good key sequence, if you want to change to another letter just type that one letter in the box. If you are running KeePass on your laptop and in View you will need to have different key combinations. Click OK.
Global AutoType Setup
You can decide if you want Keypass to run at startup

To set up a new entry click the add entry button next to the save. Note you can hover your mouse over the buttons to get a display of what the button is.

Our first entry will be to log into Central Authentication (Web Auth). Give your entry a title and put in your userid and password. Click the 3 dot button if you want to see what you type. If you click the button to see what you type you do not need to do the repeat. Do not click OK yet.
Side Note: You can generate secure passwords with keepass by clicking here

From this point on we will concentrate on the Global AutoType setup. If you decide not to use this feature or it doesn’t work for you for some reason, you can still use KeePass to store your passwords safely. On to Autotype.

Next Go to your browser and navigate to a PIA, you should have not logged into CAS at this point. When you get the page like above, Note the title of the Window.

Go back to KeePass entry that you started before and click on the Auto-Type Tab. We will now associate the browser window with KeePass. Click the Add button

We will now associate the browser window to KeePass by clicking the dropdown box for Target window and selecting the one we just looked at and then click Ok.

Now we have selected the target window. Note that it says Mozilla Firefox on the end. For browsers you will need to repeat this setup for each browser you use or edit to use the wildcard mentioned above. We will be using the default keystroke sequence for this which is Username->Tab->Password->Enter so we can leave that. Then click OK.
You can also use a wildcard on the target window so you could edit the window to CAS – Central Authentication Service* and it would work on all browsers

If we need to add other browsers you will click Add again and repeat the process. Make sure the browser is up and running and at the correct page so you can select it from the dropdown. Once you are done click OK.
Only If you need more browsers

You now have your first entry done. We will now test the global auto-type function.

Now, go back to your browser and make sure your are in the NetID: box and press Alt-Ctrl-A (or whatever you set up as your autotype sequence). This should type your NetID and password and press enter automatically.

In my example I was logging into DEV via Shib so it logged me directly into PIA for DEV.

Next we will set up a non-shib login. Again, note the name of the window title

If you keep your password for Non-Shib the same as your NetID you can simply add the window to your Central Authentication KeePass Entry. Go into that entry and go to the auto-type tab and click add, select the correct window and click OK. You will now have 2 windows associated to the one KeePass entry.

Setup Non-shib as your entry and put in your password. Note: Because KeePass works on the window title this only works if all your environment non-shib passwords are the same. The window title is the same for all environments. If you use separate passwords this will not work for you.
If you do not keep them the same then you would set up a different entry for Non-shib.

Again, go into the Auto-type tab, click add and select the target window using the Window Title and click OK.

Now you have your entry set, click OK and then test on the page.

Note: If you have your ID already there from a previous login you will need to erase it because KeePass will retype it. If the field is clear and cursor is positioned in the UserID then hit the Ctrl-Alt-A key sequence and it should log you on.

KeepPass in View
View represents a few issues with KeePass.
Since view is an application on your laptop with its own Window Title you cannot use your laptop KeePass with Auto-type.
The solution is to set up a separate KeePass database with a different Global Auto-Type sequence in View.

To find KeePass in View you can click the Start Menu and in the search box type KeePass and you should see an entry with the KeePass Icon.

I would recommend right clicking on KeePass and click Send To -> Desktop and create a shortcut on your desktop.
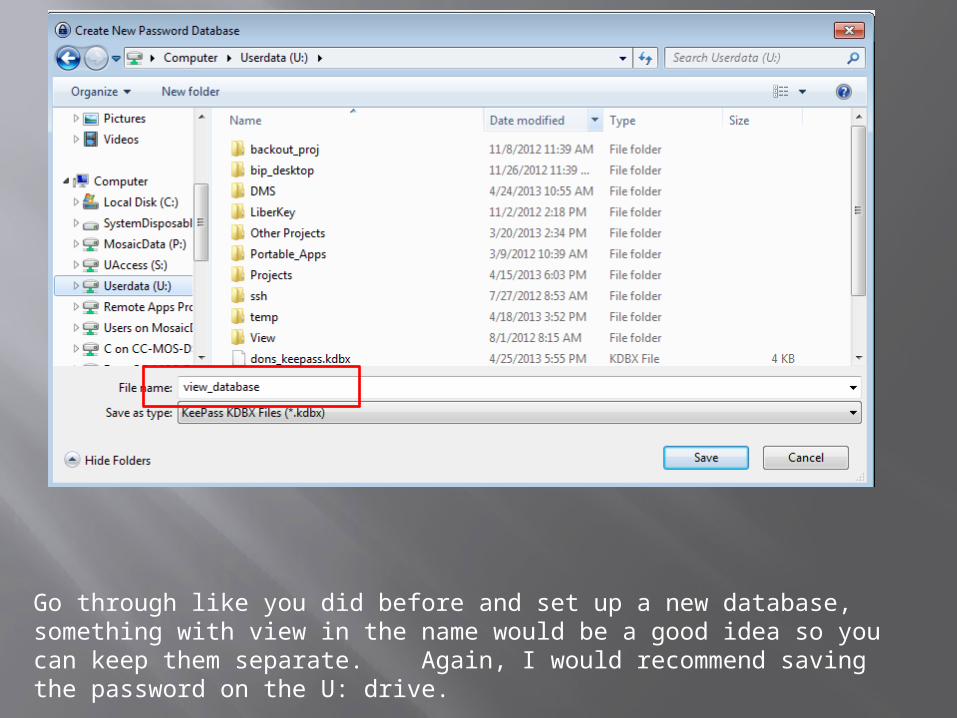
Go through like you did before and set up a new database, something with view in the name would be a good idea so you can keep them separate. Again, I would recommend saving the password on the U: drive.

I would recommend keeping the view database password the same as your laptop database password. The main difference we will be doing is to set the Global auto-type key sequence to something different than our laptop. I used Alt-Ctrl-A on my laptop so I am setting my view key sequence to Alt-Ctrl-Z.

Next, Start SQL Developer. There should be a SQL Developer link in your start menu. If not type SQL Developer in the search box to locate it. Again, I would recommend creating a desktop shortcut for it.

Our connections should look something like this where we have the Username filled in the Password is blank. This will prompt us when we log into the database. Refer to the SQL developer tutorial for more on this setup if needed.
SQL Developer Setup

To log in you can click the little guy that says SQL at the top or click the + next to one of the databases in the connections window

Once you click one of those you will get the Connection Information Window. Notice the window name and that Password is the only thing we need to fill in.

Create your entry like you normally would and then click the Auto-Type tab

Click the Target window dropdown and select Connection Information

Because we only need the password for the connection we will use a customized keystroke sequence. Click the Use custom keystroke sequence radio button and in the text box remove the Username and Tab entries. Now it will only type the password and press enter. Click OK when complete. Then Click Ok to close the Edit entry window.

Now click into the Password edit box and type Ctrl-Alt-Z or whatever you set as your View Global Auto-Type sequence. The password should be typed and enter pressed and should log you into the database. As in the other setup the window title for connection information is the same for all databases so you should set your database passwords to be the same.
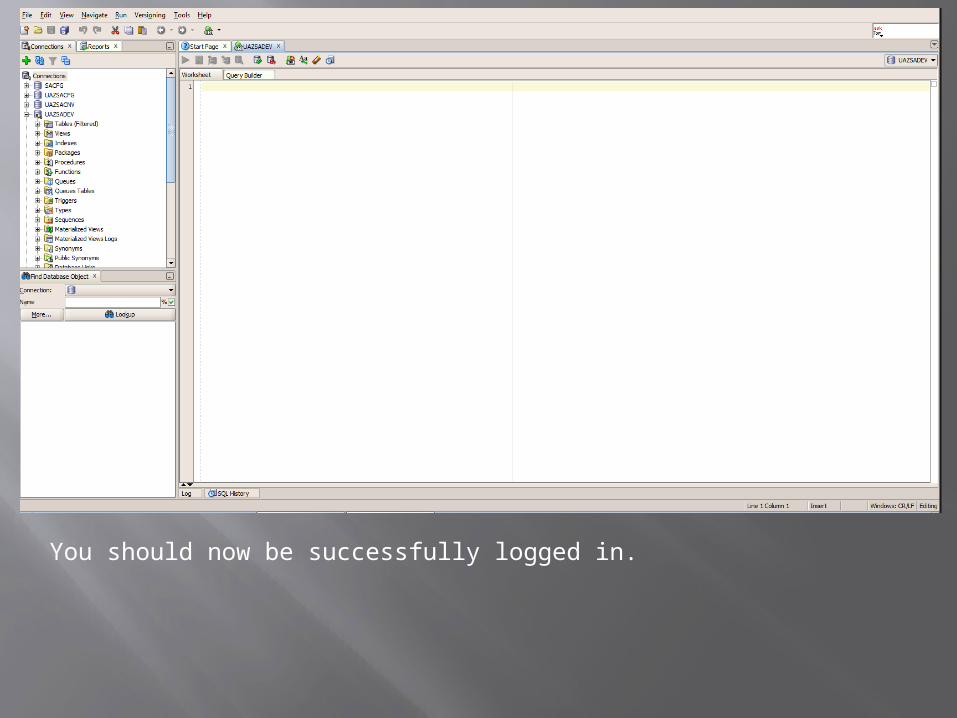
You should now be successfully logged in.

Logging into App Designer is similar to SQL Developer. Note that the Window Title (Signon) is the same for all environments so you will again want to have your passwords be the same. Also not that the initial cursor position is in the database name box.

I generally set up my Configuration Manager so that my Database Name defaults and my User ID defaults.

So with those settings in Configuration Manager I use the following setup. I select the Sigon target window and use a customized keystroke sequence of two tabs then the password then enter. This allows me to change the database name if I need to then press my global auto-keys and it will tab to the User ID field, then tab again to the password field type the password and press enter.
Note: You can click on the Fields and special keys to put them into the custom keystroke sequence box rather than type them.

Manual Auto-Type and other options
For those of you that do not keep the passwords the same for each environment all is not lost.
There is a way in KeePass to auto-type a specific entry.
You can also easily copy entry Usernames and Passwords to the clipboard and paste them in

You can use what is called an entry auto-type sequence. The way this works is you position you cursor where you want to autotype then go directly to Keepass and click on our entry and press Ctrl-V. This will go back to your last application and autotype the sequence where your cursor was. You can also right click the entry and click Perform Auto-Type.

For the entry Auto-Type to work correclty you must go directly from the application and location where you want to type the sequence to KeePass. For this method I recommend keeping the Keepass window up so you can easily go to it next. This can be a bit quirky but generally works well.

If the auto-type sequence is to difficult to set up or for some reason is not working for you can copy to your clipboard using Ctrl-B for the Username and Ctrl-C for the password. Keepass will keep the entry in your clipboard for only about 10 seconds before it clears it so you need to paste it rather quickly.

Final Words
KeePass is not just a handy tool for work. You can use to store all of your various personal passwords such as bank, credit card company, utilities. Almost anything.
The KeePass database is encrypted with AES encryption so your database is safe unless you know the master password. You can store it in Dropbox if you desire to have available on all your devices.
KeePass compatible apps are available on Iphone( MiniKeePass) and Android phones (KeePassDroid) also.

Final Words
For very strong passwords KeePass has a password generator. Use these for your bank accounts where you want extra protection.

Final, Final Word
I hope this Tutorial helps you in the ever expanding world of online passwords. Once you get to trust KeePass you will find it hard to live without.
Make sure you don’t forget your master password and you should backup your database file periodically to another location.

![WELCOME [] · Password manager applications (e.g. ) ... KeePass LastPass 18. Copy the public key to Tetralith. On some systems you can use ssh-copy-id. However, you can also just](https://img.dokumen.tips/doc/110x75/5ed3b22d7f3dc53cc40caec6/welcome-password-manager-applications-eg-keepass-lastpass-18-copy.jpg)