Embed Size (px)
Citation preview

A Client Care Module for Nurse Aides:
Helping with Activities of Daily Living
...Developing top-notch CNAs, one inservice at a time
A Client Care Module:Helping with Activities of Daily Living
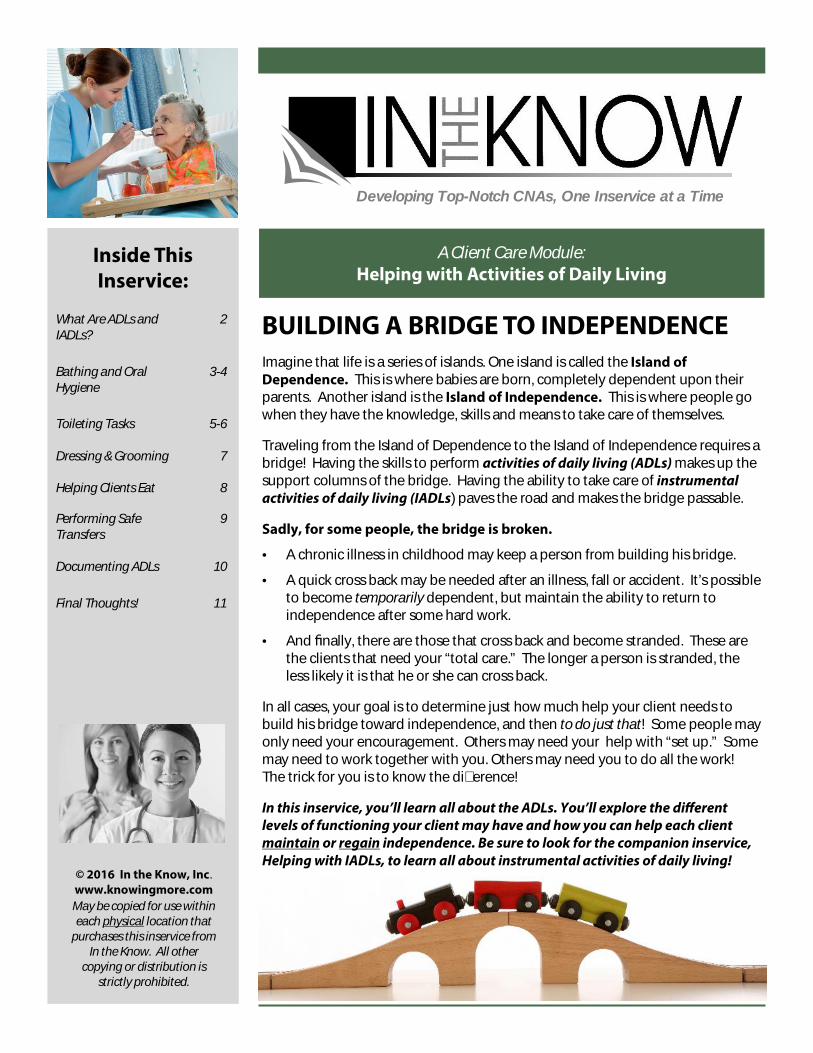
Imagine that life is a series of islands. One island is called the Island ofDependence. This is where babies are born, completely dependent upon theirparents. Another island is the Island of Independence. This is where people gowhen they have the knowledge, skills and means to take care of themselves.
Traveling from the Island of Dependence to the Island of Independence requires abridge! Having the skills to perform activities of daily living (ADLs) makes up thesupport columns of the bridge. Having the ability to take care of instrumentalactivities of daily living (IADLs) paves the road and makes the bridge passable.
Sadly, for some people, the bridge is broken.
A chronic illness in childhood may keep a person from building his bridge.
A quick cross back may be needed after an illness, fall or accident. It’s possibleto become temporarily dependent, but maintain the ability to return toindependence after some hard work.
And nally, there are those that cross back and become stranded. These arethe clients that need your “total care.” The longer a person is stranded, theless likely it is that he or she can cross back.
In all cases, your goal is to determine just how much help your client needs tobuild his bridge toward independence, and then to do just that! Some people mayonly need your encouragement. Others may need your help with “set up.” Somemay need to work together with you. Others may need you to do all the work!The trick for you is to know the difference!
In this inservice, you’ll learn all about the ADLs. You’ll explore the differentlevels of functioning your client may have and how you can help each clientmaintain or regain independence. Be sure to look for the companion inservice,Helping with IADLs, to learn all about instrumental activities of daily living!
BUILDING A BRIDGE TO INDEPENDENCE
Inside ThisInservice:
What Are ADLs andIADLs?
2
Bathing and OralHygiene
3-4
Toileting Tasks 5-6
Dressing & Grooming 7
Helping Clients Eat 8
Performing SafeTransfers
9
Documenting ADLs 10
Final Thoughts! 11
© 2016 In the Know, Inc.www.knowingmore.com
May be copied for use withineach physical location that
purchases this inservice fromIn the Know. All other
copying or distribution isstrictly prohibited.
Developing Top-Notch CNAs, One Inservice at a Time

WHAT EXACTLY ARE ADLs AND IADLs?
© 2016 In the Know, Inc. Page 2
THE ACTIVITIES WHAT’S EXPECTED?
Bathing & Personal HygieneBathing, showering, washing hair and oralcare.
Bowel/Bladder Controland Toilet Hygiene
Recognizing the need to relieve oneself,getting to the bathroom or commode,completing the act and wiping, as needed.
Dressing & GroomingPutting on and removing clothing, brushinghair, shaving and applying make-up.
EatingSetting up food, using utensils to bring foodto mouth, chewing and swallowing.
Functional mobilityTransfer and ambulation from one place toanother while performing activities
THE SUPPORT COLUMNS OF THE BRIDGE: ADLs, or Activities of DailyLiving, are all those basic self-care activities that people without an illness orinjury normally do for themselves.
THE ACTIVITIES WHAT’S EXPECTED?
HouseworkKeeping one’s environment clean, includingdoing laundry and dishes.
Meal preparationPlanning and preparing healthy meals andsnacks.
Taking Medications asPrescribed
Understanding what medications areprescribed, why they are needed, how andwhen to take them and possible side effects.
ShoppingNavigating around a store, nding desireditems and making purchases.
Using the telephoneLocating and dialing a number, then carryingout a conversation with the person called.
Transportation within theCommunity
Driving, asking a friend or family member todrive or using public transportation to getwhere needed.
THE ROAD THAT MAKES THE BRIDGE PASSABLE: IADLs, or InstrumentalActivities of Daily Living, are activities that go beyond basic needs. IADLsallow the person to be independent at home and in the community.
In this inservice, you willlearn a little bit about a lotof things!
If you want more, in-depthtraining on any of theADLs covered in thislesson, check our catalogfor full topics on:
Bathing Tips
Toileting Tips
Handling Incontinenceand UTIs
Dressing & GroomingTips
Performing Mouth Care
Feeding Your Clients
Mealtime Tips
Helping Clients withMobility
Performing SafeTransfers
Ask your supervisor ifthese topics are alreadypart of your In the Knowlibrary.
If you are a CNA whopurchases your owncontinuing education,many of these topics maybe available for online self-study for $8.50/each. Go towww.knowingmore.comto learn more!

FOCUS ON BATHING & ORAL HYGIENE
ROBOT AND FRANK
The award winning lm,Robot and Frank (get it onDVD) tells a tale of howthe adult children of anaging baby boomer hire arobot to keep their fatherfrom having to go into anursing home.
Sound like far-fetchedscience ction? It may notbe that far from becominga reality!
Just Google the term“robot caregiver” to learnabout all the research anddevelopment happeningin this budding eld!
How do you feel aboutthe idea of robots beinginvolved in human care?
If you could design arobot to care for humans,what would you want itto be able to do?
Do you think your clientswould be willing to becared for by a robot? Whyor why not?
Bathing is important because it prevents infection, controls body odor,promotes comfort and stimulates circulation. Depending on yours client’sabilities and care plan, you may give a:
Full or Partial Bed Bath: Although this is the most “dependent” type ofbathing, you can still encourage the client to assist as much as possible. Best Practices: Gather all your supplies ahead of time and have them within
reach of the bed. Close any doors or windows to avoid drafts. To ensure bothwarmth and privacy, cover the client with a light cotton blanket. Uncover,wash and dry only a small part of the body at a time.
Tub Bath: Tub baths place clients at a high risk for falls, burns and drowningand should be reserved for clients with good posture, balance and mentalalertness. Best Practices: Never give a tub bath unless it is ordered in the client’s care
plan. Don’t attempt to help a client in or out of a tub unless you feel secureabout your ability and/or you have the proper equipment (like a lift or slideboard). Tub baths can dry the skin, so shouldn’t last longer than 20 minutes.
Shower: A shower is appropriate for the most “independent” clients only. Itcan be done standing or by using a shower chair, if ordered. Best Practices: Be sure to place a rubber mat on the shower oor—but don’t
cover the drain opening. Stand close by, while still providing privacy, if you areunsure of your client’s ability to shower independently.
MOUTH CARE AND ORAL HYGIENEHaving a healthy mouth helps clients feel better, have a heartier appetiteand eat a more balanced diet. Depending on yours client’s abilities and careplan, you may need to:
Encourage or Remind: Your most independent client may just need areminder to brush his teeth or take care of his dentures independently. Best Practices: Remind clients to brush at least once a day using a soft
toothbrush. It’s even better to brush after every meal!
Set-up Supplies: A client with mobility problems may need you to set up andarrange her toothbrush, toothpaste, water and towel within easy reach. Best Practices: If help is needed, wet the toothbrush with water and put the
toothpaste on the toothbrush. Provide a basin for the person to spit.
Total Care: A client who is confused, completely immobile, in a coma or in theend stages of life will need you to perform the oral care tasks for him. Best Practices: An unconscious person may need oral care every 2 hours.
Gently swab the teeth, gums, inside of cheeks and tongue with a soft brush ora “toothette,” if available.
Denture Care: Dentures need to be removed from the mouth, rinsed, brushedwith a denture brush and denture paste and soaked over night.
© 2016 In the Know, Inc. Page 3

BATHING AND ORAL HYGIENE SKILL CHECK!
GIVING A BED BATHUse these steps for giving a partial or complete bedbath. A complete bed bath involves washing the entirebody. A partial bed bath includes only the face, hands,underarms and perineal area.
What you’ll need:
Procedure:
1. Put on clean gloves.
2. Fill a clean basin with warm water that is between105 and 115 degrees.
3. Provide privacy.
4. Remove client's top linen or bedspread and coverher body with a bath blanket. (A bath blanket canbe any soft, absorbent blanket or towel that coversthe entire body.)
5. Remove the client’s clothing, keeping her bodycovered by the bath blanket.
6. Working from head to toe, start at the face.Place a dry towel under the head and neck whileyou gently wash the face with a clean washclothand water only. (Soap can dry the face.)
7. Moving downward, wash the arms, chest,stomach, legs and back. Wash one section at atime and only expose the section being washed.(As you move down the body, move the drytowel to protect the bedding.)
8. Use a clean cloth, a fresh basin of water and anew pair of gloves to clean the perineal arealast.
9. Apply lotion if desired.
10. Assist client into a comfortable position, anddress or help the client dress herself.
11. Dispose of supplies and wash your hands.
Please Note: It’s always best to allow the client tocomplete as much of the process as possible. Thisincreases a sense of independence and control.
© 2016 In the Know, Inc. Page 4
Basin
Bath blanket
Washcloths
Towels
Mild soap
Lotion, if desired
Clean clothes
CARING FOR DENTURESDentures are expensive and replacing them may meanmany trips to the dentist. Without proper care, denturescan become damaged or lead to painful and difficult-to-treat infections of the mouth.
What you’ll need:
Procedure:
1. Wash hands and put on clean gloves.
2. If the client is able, have them remove thedentures and give them to you. If assistance isneeded, remove the dentures carefully. Start withthe upper denture by gently moving it up anddown to break the seal, then gently slide it out ofthe mouth. Repeat with the bottom denture.
3. Take the dentures to the sink. Line the basin witha washcloth and ll 2 to 3 inches with warmwater. This provides a “cushion” for the denturesin the event youdrop them whilecleaning.
4. Using a softtoothbrush andnon-abrasivetoothpaste, cleanthe dentures one ata time. (Never use regular toothpaste on dentures. Itis abrasive and will scratch the surface.)
5. After brushing the teeth and gum area of thedentures, place them into a clean denture cup
lled with cool water.
6. Assist the client with proper oral care usingsponge swabs and mouthwash.
7. Dispose of used supplies, drain sink, removegloves and wash hands.
Don’t Forget! Take this opportunity to look into themouth for any signs of irritation or infection. Reportany abnormal observations to your supervisor.
Washcloth
Non-abrasivetoothpaste
Soft toothbrush
Denture cup
Sponge swabs
Mouthwash
WHAT’S NORMAL?
You’ve been asked to trackyour client’s intake andoutput and to report to yoursupervisor if the output isabnormal. See if you cananswer these questionsabout normal outputs:
1. What is a normal urineoutput for a healthy adult?
_____________________
2. What would you expectif your client was on adiuretic (water pill)?
_____________________
3. How many bowelmovements a day arenormal?
_____________________
4. What does it mean if thebowel movement is black?
_____________________
© 2016 In the Know, Inc. Page 5
HELPING OUT WITH TOILETING TASKS!
There’s no way around this one! Every client has to eliminate! Dependingon your client’s abilities and care plan, toileting may involve:
Clearing a Safe Path: For clients who are independent and mobile, your onlyinvolvement in toileting may be to make sure the path to the bathroom isclear and clutter free!
Best Practices: Remove any area rugs that slide or move. Make sure there areno electrical cords crossing the path. Leave a nightlight on at night to light theway from the client’s bed to the bathroom.
Placing the Client on a Bedpan: Clients who are immobile and cannot getout of bed will need to use a bedpan.
Best Practices: Unless ordered to stay at, the best position for elimination issitting upright. It may be helpful to powder the rim of the bedpan to keep skinfrom sticking or tearing.
Using a Urinal (for men): Urinals are a handy option for your immobile maleclients.
Best Practices: If possible, encourage your clients to sit on the side of the bedto use the urinal. You may have to place the penis inside the urinal and holdthe urinal while your client urinates.
Using a Bedside Commode: For clients who can transfer out of bed with orwithout help, a bedside commode may be used.
Best Practices: Keep the commode near the bed and clean it after each use toeliminate unpleasant odors. Adjust the legs of the commode so that theclient’s feet plant rmly on the ground during elimination. Having feet rmlyplanted makes bowel movements easier.
For all clients . . .
Be prepared to answer call bells or requests for help immediately!
Never make a client wait to use the toilet. It’s embarrassing to have anaccident and may lead to an unsafe attempt to use the bathroom withoutassistance.
Always try to provide privacy during elimination. If your client requiresconstant supervision, stand just out of sight.
Avoid hovering, watching and chatting while your client tries to eliminate.This is uncomfortable and may actually prevent elimination.
Provide toilet tissue or wet wipes and encourage your client to clean theperineal and anal area independently, but always inspect and assist asneeded.
Answers1.An average adult urinates
about 1200-1400ml a day.2.It would increase urine output.3.Once a day. But it’s also normal
to go up to 3 times a day or aslittle as once every 3 days!
4.There may be bleeding in theupper GI tract.

TOILETING TIME SKILL CHECK!
HELPING WITH A BEDPANWhat you’ll need:
Procedure:1. Provide privacy.
2. Lower the head of bed.
3. Put on clean gloves before handling bedpan.
4. Place bedpan under client’s buttocks.
5. Remove and dispose of gloves.
6. Raise the head of the bed to place the client in aseated position.
7. Place toilet tissue, wet wipes (for client to cleanhands after using toilet tissue) and call bell withinreach. In home health, stand close enough to hearwhile still providing privacy.
8. Wait for client to call or signal. Put on cleangloves before returning.
9. If client has used the toilet tissue, proceed to step# 10. If not, help clean the perineal area.
10. Lower the head of the bed.
11. Remove the bedpan, being careful not to spill orsplash the contents.
12. Empty contents into a commode (never emptythe bedpan or bedside commode into a sink orshower drain).
13. Rinse bedpan and pour rinse into toilet.
14. Place bedpan in designated dirty supply area.
15. Remove and dispose of gloves and wash hands.
© 2016 In the Know, Inc. Page 6
Bedpan Toilet tissue Wet wipes
CHANGING INCONTINENCE BRIEFSWhat you’ll need:
Procedure:1. Fill basin with warm water.
2. Place lined trash can next to bed for easy disposalof soiled products.
3. Put on clean gloves.
4. Open soiled brief and fold clean end over thesoiled contents (while leaving the brief in place).
5. Initially wipe away as much stool or urine aspossible with disposable wipes and discard intolined trash can.
6. Carefully remove soiled (folded) brief and place inlined trash can.
7. Using a clean, wet wash cloth, clean genital areaby wiping from front to back. Use a clean area ofthe cloth (or a new cloth) for each wipe until allvisibleincontinencehas beenremovedandarea isclean.
8. Dry areaand applybarriercream tobuttocks andgroin folds.
9. Put clean incontinence brief on client.
10. Remove liner from trash can and dispose of it peryour workplace policy.
11. Place washcloths in dirty linen per yourworkplace policy.
12. Remove gloves and wash hands.
Basin and washcloths
Disposable wipes
Barrier cream
Clean briefs
Lined Trash Can
If client is able, have her lifther buttocks as you slidethe pan under her hips.
Or, turn onto side, alignbedpan with buttocks andhold in place while turningclient back.

© 2016 In the Know, Inc. Page 7
SPOTLIGHT ON DRESSING & GROOMING
HOW IMPORTANT ISHAIR CARE?
It can be particularlyupsetting for an adult childto see his or her motherwith a wild-bedhead-hairdo,especially if, in the past, shewas a stylish woman whoalways took special care ofher appearance.
What do you do to makesure your client’s hair isbeing properly cared for?
Here are a few tips:
Most people only needtheir hair washed once aweek. Dry shampoos are agood option for immobileclients and for clients whoare confused.
If your client spends a lotof time lying on her hair inbed, then use a silk pillowcase or try having hersleep in a hair net tominimize tangles.
Women with long hairmay need a shorterhairstyle. If a shorter cut isnot an option, then braidsor an up-do bun can tamea wild style!
Getting dressed and taking care of your appearance seems easy enough! Butfor people who have physical or mental impairments, dressing andgrooming tasks are often difficult to manage alone. That’s where you comein. You can help your clients feel good about their appearance by:
Helping Clients Choose Clothing: Clients should be allowed to choose theirown clothing, if able. Letting clients choose their own clothing gives them afeeling of being independent and in charge.
Laying Out the Clothing: Clients with dementia or Alzheimer’s Disease mayhave trouble making choices. In this case, you might limit choices to just twoitems or choose the clothing and lay it out for the person.
Assisting with Dressing: Clients with physical impairments, like paralysis aftera stroke or stiff joints from arthritis may need you to assist with dressing. Bestchoices are items with elastic waistbands and no buttons or zippers.
DRESSING CLIENTS SKILL CHECK!
No matter what level of support your clients need, the best thing you can do is toencourage participation. This helps them feel con dent and in control. It also may helpthem regain some of the skills they lost.
Procedure
1. Allow client to choose clothing, if possible. If your client can’t get to the closet,you might ask “Would you like to wear the red shirt or the blue shirt today?”
2. Place the clean clothes within easy reach.
3. Help client to sit on a chair or the side of the bed.
4. If your client has a weak side, teach her to use her stronger arm to slide theclothing off the weak side rst. Assist only as much as needed. Next, coachyour client to use her strong arm to dress the weak side of the body rst.
5. If your client is confused, give simple instructions, one at a time. For example,instead of just saying “Take off your pajamas,” break it down into smaller stepslike “Take off your shirt.” “Now take off your pants.” And so on.
6. Bending down to put on pants or shoes may cause dizziness. Help your clientput her feet into her pants, pull them up to the knees or higher. Assist her tostand, then help her pull them up as needed.
7. Place shoes close to feet and help slide them on.
8. Place dirty clothes in the appropriate receptacle and wash your hands.
Please Note: If your client becomes fatigued or dizzy while getting dressed, helpher sit or lie down before continuing the task.
WHAT WOULDYOU DO IF . . .
Mr. Watson has hadtrouble chewing since hisstroke a few months ago,but today is his birthdayand he begs you to allowhim to eat a steaksandwich from his favoritesub shop.
Mrs. Shue is undergoingchemo for cancer. It makesher feel nauseous all thetime. She hasn’t eatenmore than a few crackersin the past 48 hours.
Mr. Suarez is depressed. Hecomes from a large familywhere mealtimes arealways a celebration. Nowthat he’s sick and elderly,he has to eat alone and hehates it. He tells you he’djust rather not eat at all.
Nothing you serve is evergood enough for Mrs.Johnson. She always ndssomething to complainabout. It’s too hot, too dry,too bland and on and on.
Eating may be difficult for the clients you care for. They may have troublechewing or swallowing after a stroke. They could feel nauseated from certainmedications. Or they may have little or no appetite. Whatever the reason, it’syour job to help your clients get the nourishment they need to stay physicallyand emotionally healthy while remaining as independent as possible.
Just like all ADLs, there are various levels of support. Follow your clientscare plan for preparing, serving and feeding foods. Here are some generalguidelines to follow with ALL clients:
Sit for Safety! Position your clients so they are sitting up as straight aspossible. Feeding a client who is reclining increases the risk of choking.
Prepare and Present! Remove covers from food and open any containersthat may be difficult for the client. Check the temperature of the food. Addseasoning if the client requests it and it’s allowed. Cut solid foods into smaller,teaspoon-sized pieces.
Take It Step-By-Step. For clients who can feed themselves, but may becomeconfused, give simple step-by-step instructions. For example, you might say“Pick up your spoon.” “Now scoop the oatmeal.” It’s important to remainpatient and kind, even if it seems like your client is being difficult.
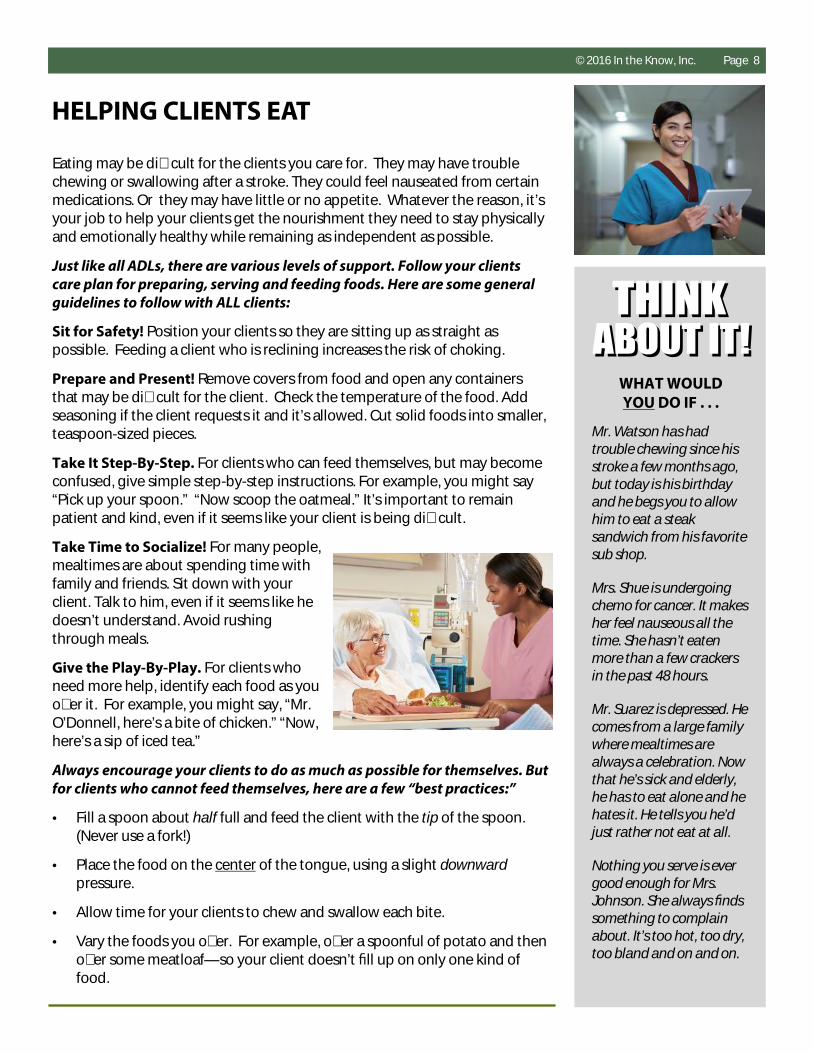
Take Time to Socialize! For many people,mealtimes are about spending time withfamily and friends. Sit down with yourclient. Talk to him, even if it seems like hedoesn’t understand. Avoid rushingthrough meals.
Give the Play-By-Play. For clients whoneed more help, identify each food as youoffer it. For example, you might say, “Mr.O’Donnell, here’s a bite of chicken.” “Now,here’s a sip of iced tea.”
Always encourage your clients to do as much as possible for themselves. Butfor clients who cannot feed themselves, here are a few “best practices:”
Fill a spoon about half full and feed the client with the tip of the spoon.(Never use a fork!)
Place the food on the center of the tongue, using a slight downwardpressure.
Allow time for your clients to chew and swallow each bite.
Vary the foods you offer. For example, offer a spoonful of potato and thenoffer some meatloaf—so your client doesn’t ll up on only one kind offood.
HELPING CLIENTS EAT
© 2016 In the Know, Inc. Page 8

PERFORMING SAFE TRANSFERS
© 2016 In the Know, Inc. Page 9
TIP 1: Think before you act! Before you start, be sureyou know if the client is physically able to participatein the transfer. If you’ve never transferred a particularclient before, go through the entire transfer in yourmind before you begin.
TIP 2: Get help if you need it. Be realistic about whatyou can do safely on your own. Use transferequipment or a mechanical lift if available. Ask forhelp if you need it!
In a client's home, a family member may be able tohelp you or they may need to rent or buy sometransfer equipment.
TIP 3: Set the stage. Clear the path where you planto stand, walk or pivot the client. Place yourwheelchair, walker or mechanical lift where it needsto be.
TIP 4: Balance it out. Stand so that your weight iscentered over your feet with feet shoulder-widthapart. Don't “lock” your knees.
TIP 5: Tighten it up! Pull in your abdominal musclesand tighten your buttocks to support your lower back.
TIP 6: Use your BIG muscles! Bend your knees tohelp you keep your balance during a transfer. If youneed to bend forward, bend from the hips, not fromthe waist.
TIP 7: Don’t do the Twist! Plan your transfer so thatyou don't have to twist your body. Twisting yourlower back puts you at risk for muscle strain—or evena more serious back injury.
TIP 8: Get close! Keeping the client close to youhelps you use your large muscle groups to do thework and prevents straining the smaller arm andback muscles.
TIP 9: Take a breath test! If you can't lift and breatheat the same time, the client is too heavy for you. Askfor help!
TIP 10: Encourage participation! The mostimportant tip of all . . . encourage your client to helpas much as possible during the transfer! This will givehim the opportunity to use his muscles and joints—and possibly regain some mobility in the future.
Helping clients with transfers and ambulation are important steps on the road to independence. Here areTEN important tips you can follow to keep your client and yourself safe while doing this ADL!
SAFE TRANSFERS SKILL CHECK!
1. Help the client to sit on the side of the bed.
2. Put on non-skid slippers or shoes.
3. Position the chair near the bed. If the client has aweak side, place the chair on the stronger side. Ifthe chair has wheels, be sure to lock them.
4. Now, support the client’s knees by putting yourknees right in front of them. And, keep the client’sfeet from sliding by putting your feet in front of hisfeet. DO NOT LOCK YOUR KNEES!
5. Ask the client to lean forward and push off the bedat the count of three. It’s okay for a client holdonto your shoulders or waist, but never your neck!
6. Once client is sanding, turn your body, along withthe client.
7. Make sure the chair seat touches the back of theclient’s legs before he begins to sit. Ask him toreach back for the armrests, if able.
8. Lower the client slowly to the chair seat withoutrounding your back.
TRANSFER A WEIGHT BEARING CLIENT FROM BED TO CHAIR

HOW AND WHAT TO DOCUMENT FOR ADLs
© 2016 In the Know, Inc. Page 10
When documenting ADLs, two pieces of informationare critical—what actually happened and howmuch you helped:
What actually happened? You must documentwhat the client actually did (not what he or she mightbe capable of doing) even if it varies from day to dayor hour to hour. Here are some ways to documenthow your client performed the ADL:
Independent: The client performed the ADL withno help or supervision from you.
Needed Supervision: You provided oversight,encouragement or cueing during the activity.
Limited assistance: The client was highlyinvolved in the activity but required physical helpto move limbs.
Extensive assistance: The client performed partof the activity, but needed weight-bearingsupport.
Total dependence: The client was unable toperform the activity.
How much did you help? You will need todocument exactly how much you helped. This is howMedicare and the insurance companies determinehow much to pay for the client’s care. Some optionsare:
No setup or physical help from staff: Theclient completed the activity with no helpfrom you.
Setup help only: You set up the materialsand the client performed the ADLindependently.
One person physical assist: You physicallyassisted the person to complete the ADL.
Two or more person physical assist: You andanother co-worker physically assistedthe client.
EATING HAS A SEPARATE LANGUAGE!You may be asked to record your client’s appetite orto indicate how much of the meal was eaten. Hereare a few ways you can estimate this:
Refused to eat or 0% was eaten.
Poor appetite, less than half eaten, or 25%.
Fair appetite, half was eaten, or 50%.
Good appetite, more than half eaten, or 75%.
Excellent appetite, entire amount, or 100%eaten.
DETAILS ON TOILETINGIn addition to documenting what actually happened(independent, supervision, etc) and how much youhelped, it’s also important to document if your clientwas continent or incontinent during your shift andthe number of episodes or movements that occurred.
THERE’S MORE ABOUT BATHINGWhen it comes to bathing, there are acouple more ways to describe whatactually happened. They are:
Physical help limited to transferonly: This is when the client is able
to bathe independently, but justneeds help getting into and out
of the tub or shower.
Physical help in part ofbathing activity: This level is
for clients who need assistancewith some part of bathing.
Activity did not occur: Usethis to indicate that the activitydid not happen at all duringthe shift.
These documentation terms are standard language for the MDS and OASIS reporting systems used in long termcare and home health. Your workplace will have its own system for tracking ADLs that may or may not use theseexact terms. It’s important to know your workplace policy for documenting ADLs and to follow those guidelines.
Now that you‘ve read thisinservice on helping with
ADLs, jot down a couple ofthings you learned that you
didn’t know before.
_______________________
_______________________
_______________________
_______________________
_______________________
_______________________
_______________________
_______________________
_______________________
_______________________
_______________________
_______________________
_______________________
FINAL THOUGHTS ON ADLs
© 2016 In the Know, Inc. Page 11
If your client’s care plan instructs you to provide assistance with ADLs, at anylevel of functioning, then follow these general guidelines:
Develop a routine with your client. Provide assistance with ADLs at thesame time of day the client would normally do that activity. For example, ifyour client normally likes to get washed and brush her teeth before breakfast,then help her with those tasks at that time.
Include the client in the activity. Ask and encourage clients to participate inpersonal care and give them time to perform the activity.
Never rush a client through ADLs. Remember, the goal is increase theperson’s ability to do this task independently. If you rush, or get impatientand do it yourself, you deprive the person of the opportunity to regain thisskill. This means you will ALWAYS have to do it!
Give a head start. Set up the items needed for the client to perform theactivity independently. For example, put toothpaste on the toothbrush andplace it near the client.
Keep it simple. Break complex tasks down into smaller steps. Provide cuesfor activities to be completed. For example, "Here is the wash cloth. Washyour face." Or, "Pick up the brush and brush your hair."
Use the “hand-over-hand” method. If your client does not respond to yourverbal cues, try the hand-over-hand method. You do this by placing yourhand on top of the client's hand and performing the activity together.
Be patient. Allow your clients to do as much ofthe activity as possible, even if it takes longerfor the task to be completed.
Be positive. Encourage clients who try to dothings for themselves. Show them that you arecon dent in their abilities.
Every effort counts. If a client cannot completea task after a reasonable amount of time andeffort, praise her effort and then complete thetask for her.
It’s okay to fall short. Never punish clients fornot being able to do a task, even if you thinkthey should be able to do it.
Be sure to read part 2 of this inservice. Itcovers the IADLs, such as housework, mealpreparation, taking medications asprescribed, shopping, using the telephone,and transportation within the community.