Embed Size (px)
Citation preview

USER MANUAL
HEAVY DUTY BATTERY BOX
v1.5.0 - April 2020

3
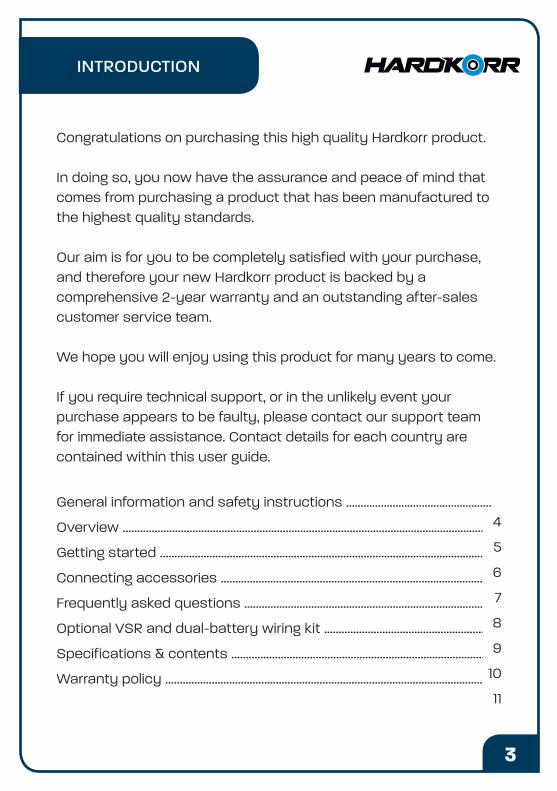
Congratulations on purchasing this high quality Hardkorr product.
In doing so, you now have the assurance and peace of mind that comes from purchasing a product that has been manufactured to the highest quality standards.
Our aim is for you to be completely satisfied with your purchase, and therefore your new Hardkorr product is backed by a comprehensive 2-year warranty and an outstanding after-sales customer service team.
We hope you will enjoy using this product for many years to come.
If you require technical support, or in the unlikely event your purchase appears to be faulty, please contact our support team for immediate assistance. Contact details for each country are contained within this user guide.
General information and safety instructions ..................................................
Overview ...............................................................................................................................
Getting started ..................................................................................................................
Connecting accessories .............................................................................................
Frequently asked questions .....................................................................................
Optional VSR and dual-battery wiring kit ..........................................................
Specifications & contents .........................................................................................
Warranty policy ..................................................................................................................
INTRODUCTION
4
5
6
7
8
9
10
11

GENERAL INFORMATION &SAFETY INSTRUCTIONS
4
This battery box must only be used for the prescribed purpose. Any uses other than those mentioned in this manual will be considered a case of misuse. The manufacturer will not be liable for any damage or injury resulting from such cases of misuse.
To use the battery box properly you must observe the safety instructions, assembly instructions and operating instructions found within this manual.
Never allow children to play with electrical equipment
WARNINGS
Do not allow children to operate this battery box.
For charging 12V deep cycle batteries only. Never attempt to recharge non-rechargeable batteries.
Do not attempt to disassemble the battery box. Any attempt to disassemble, make unauthorised repairs or modify the box will void the warranty.
The lid of the battery box must remain shut at all times whilst charging a battery or powering a device from an outlet.
Do not allow any metal objects to fall into the battery box or enter any of the ports.
Do not allow any of the ports to get wet. If it accidentially gets wet, please turn off the main power switch and dry the box ASAP.
OVERVIEW
5
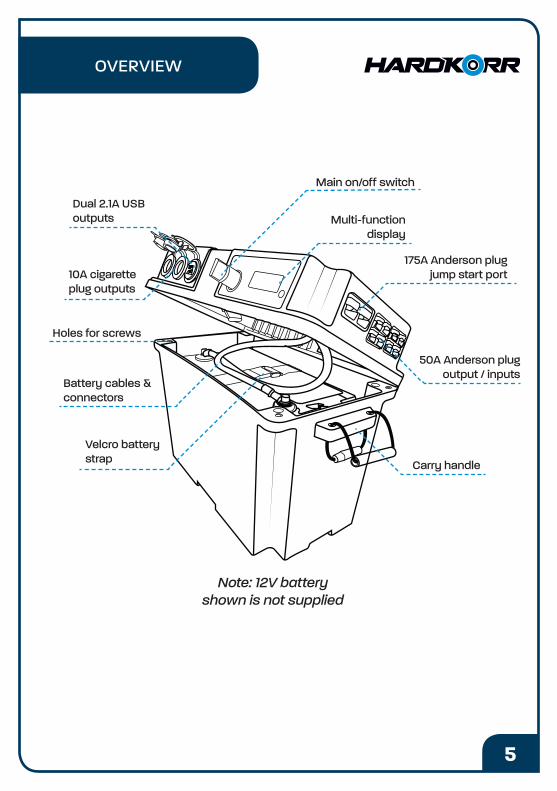
50A Anderson plug output / inputs
Multi-function display
Dual 2.1A USB outputs
10A cigaretteplug outputs
Main on/off switch
Holes for screws
Carry handle
Battery cables & connectors
Velcro battery strap
Note: 12V battery shown is not supplied
175A Anderson plug jump start port

GETTING STARTED
6
Step 1Place a 12v battery inside the battery box and secure with the Velcro strap. Ensure the Battery Main Switch is in the OFF position.
Step 2Connect the red lead to the positive terminal on the battery, then connect the black lead to the negative terminal. Ensure the nuts on each terminal are firmly fastened.
Step 3Close the lid, ensuring the battery box handles are outside the box and all leads remain inside. Insert and tighten the screws in each corner of the box.
Step 4Turn the Battery Main Switch (1) clockwise to the ON position and press the ON/OFF switch (2) to illuminate the multi-function display if required.
12
Step 5Connect the battery box to your chosen power source using one of the Anderson plug inputs.
Step 6Connect your devices and enjoy the convenience of having a portable power station with you!

CONNECTING ACCESSORIES
7
This battery box is able to power many different types of 12v accessories. It is designed to enable you to charge the battery at the same time as your devices are being powered.
Please observe the following precautions and limitations:
If the battery voltage drops below 11.0V on the Multi Function Display, please immediately disconnect all devices and charge the battery.
Ensure you observe the rated output limits of each port, which are:
- Anderson plug outputs: 50A- Cigarette outputs: 10A- USB outputs: 2.1A
Never insert anything other than a compatible electrical plug into any of the ports on the battery box.
Ensure that the battery box is shut and the screws are tight before powering any devices.
Never use the battery box to power medical equipment.
If you are powering a fridge and the battery is being charged via the VSR, ensure the fridge is not earthed to the vehicle chassis.

FREQUENTLY ASKED QUESTIONS
8
Q. What types of batteries can I charge with this battery box?
A. You can charge most types of 12v rechargeable deep cycle batteries from 60Ah to 130Ah capacity. This includes AGM, Wet, Calcium, Gel and lithium batteries.
Q. Can I charge the battery and power a device at the same time?
A. Yes.
Q. Does the Battery Main Switch need to be on at all times?
A. Yes, if the battery is being either charged or discharged the Battery Main Switch must be in the on position.
Q. How can I charge the battery box?
A. The battery box can be charged from any battery charger or solar panels via the Anderson plug outlets. You can also use the optional Voltage Sensitive Relay (VSR) which is sold separately.
Q. Do I need to use a regulator if charging via solar panels?
A. Yes, you will need to use a regulator if you are charging the battery with solar panels.
Q. Why have my devices suddenly stopped receiving power?
A. The circuit breaker may have been tripped due to a connected device drawing too much power. Disconnect all devices and wait for the circuit breaker to reset. If the problem persists, check the fuses and replace any that are blown.
Q. Can I use this battery box to jump start my car?
A. Yes, using the 175A Anderson plug outlet. You will need to purchase the optional jump start kit (SKU: HKPBATTJUMP).
OPTIONAL VSR & DUAL BATTERY WIRING KIT
9
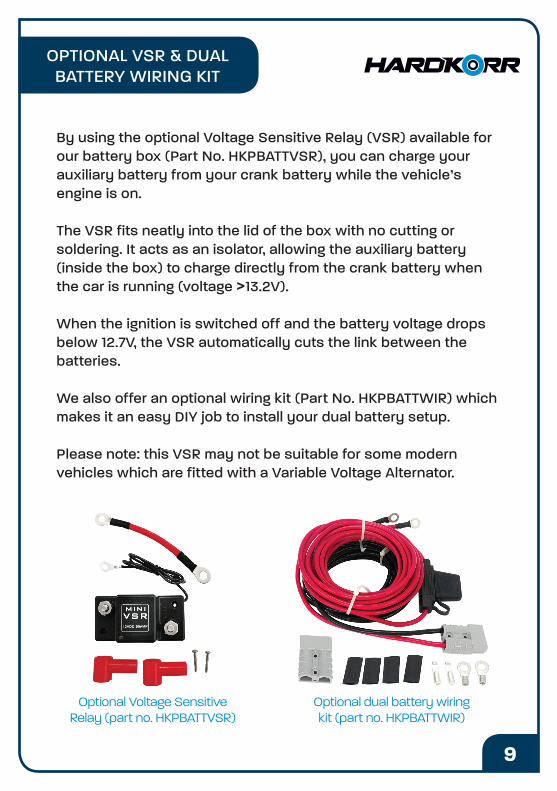
By using the optional Voltage Sensitive Relay (VSR) available for our battery box (Part No. HKPBATTVSR), you can charge your auxiliary battery from your crank battery while the vehicle’s engine is on.
The VSR fits neatly into the lid of the box with no cutting or soldering. It acts as an isolator, allowing the auxiliary battery (inside the box) to charge directly from the crank battery when the car is running (voltage >13.2V).
When the ignition is switched off and the battery voltage drops below 12.7V, the VSR automatically cuts the link between the batteries.
We also offer an optional wiring kit (Part No. HKPBATTWIR) which makes it an easy DIY job to install your dual battery setup.
Please note: this VSR may not be suitable for some modern vehicles which are fitted with a Variable Voltage Alternator.
Optional dual battery wiring kit (part no. HKPBATTWIR)
Optional Voltage Sensitive Relay (part no. HKPBATTVSR)

SPECIFICATIONS & CONTENTS
10
PACK CONTENTS - 1 x heavy duty battery box
- 1 x Velcro strap (to secure battery)
- 4 x screws to fasten lid to body
- 1 x mounting bracket
AVAILABLE ACCESSORIES - Voltage Sensitive Relay (Part No. HKPBATTVSR)
- Dual battery wiring kit (Part No. HKPBATTWIR)
- Vehicle jump start cable (Part No. HKPBATTJUMP) optional extra jumper cable HKPBATTJUMP

WARRANTY POLICY
11
Our goods come with guarantees that cannot be excluded under the Australian Consumer Law. You are entitled to a replacement or refund for a major failure and compensation for any other reasonably foreseeable loss or damage. You are also entitled to have the goods repaired or replaced if the goods fail to be of acceptable quality and the failure does not amount to a major failure.
Hard Korr warrants that this product will be free from defects in material and workmanship for two years. The warranty commences on the date of purchase by the original purchaser, and is not transferable. To access the benefits of this warranty, you must retain your proof of purchase and follow any other direction we reasonably give you (e.g. completing and returning your warranty card if applicable).
If you believe your Hard Korr product is defective, it must be returned to Hard Korr for inspection by our warranty claims department. Hard Korr will not be liable for any charges you incur relating to installation, repair or removal of Hard Korr products, nor for any costs incurred in returning the product to us.
To begin your warranty claim:
1. You must have a Return Authorization (RA) number. To get your RA number, please complete the form found on our website and wait for the warranty team to contact you.
2. Once you have an RA number, you must arrange for the product must be shipped back to Hard Korr (except in the case of fridge/freezers, which must be taken to an authorised service agent for examination). The address for shipment is 25 Old Pacific Hwy, Yatala Qld 4207.
3. Please include a copy of your original proof of purchase.4. Please be sure that your RA number is clearly marked on your documentation as well as on the outside of the
packaging used for shipping.
Completing the steps above will ensure faster processing of your claim, so that Hard Korr® can get your product back to you as soon as possible.
If Hard Korr determines, at our sole discretion, that your product is defective in material or workmanship, we will honor your warranty claim. We will determine whether the item is repaired or replaced.
Your warranty is voided if we (at our sole discretion) determine that there is evidence of one or more of the following:
- Negligence: Improper installation, improper or extreme use, etc. - Abuse: Road hazards, Damage beyond the limits of “normal wear and tear.” - Unauthorized Repair: Repair service performed by an unauthorized service centre. - Disassembly: Any attempt to open, tamper with or otherwise compromise the integrity of the product.
Discontinued Items:
Discontinued items that are still under warranty will be reviewed by Hard Korr®. If a discontinued item is covered under warranty it may be replaced by an equivalent item. If an equivalent item is not available Hard Korr® will determine terms of resolution on a case-by-case basis.
Exceptions to this Warranty:
Painted Finish: Hard Korr uses the highest quality materials available, but depending on location, environment and exposure, painted surfaces can fade. We will not approve any warranty claims that relate to faded paint.
Damage to Lenses: Please be aware that certain chemicals cause damage to polycarbonate plastics. Do not use cleaning products that contain any chemicals in the following list: Acetic Acid Aq., Acetone, Ammonium Carbonate Aq., Ammonium Chloride Aq., Benzene, Calcium Hypochlorite, Chloroform, Chromic Acid Aq., Ethyl Acetate, Ethylene, Glycol Aq., Formaldehyde Aq., Citric Acid, Heptane, Hydrofluoric Acid Aq., Lubricating Oils (Petroleum), Methyl Ethyl Ketone, Methyl Chloride, Mineral Oils, Oleic Acid, Ozone, Phosphoric Acid Aq., Toluene, Turpentine, Zinc Chloride Aq.
Hard Korr will not approve any warranty claims for lighting products where we reasonably believe that products have been exposed to any of these chemicals.
WARR ANTY
HARD KORR
2YEARS

WWW.HARDKORR.COM