Embed Size (px)
DESCRIPTION
hdg
Citation preview

Pag. 1 din 215
HOT DIP GALVANIZING
THE PROCESS & BEST PRACTICES
The International Zinc Association -IZA

Pag. 2 din 215
Contents The Process Hot Dip Galvanizing ............................................................................................... 8
The Language of Galvanizing ............................................................................................... 8
The Black Steel Yard ............................................................................................................... 8
Goods Receiving, Materials Handling and Inspection ........................................................... 14
Waste Disposal ........................................................................................................................ 23
Abrasive Blasting .................................................................................................................... 23
Jigging .......................................................................................................................................... 26
What is Jigging? ..................................................................................................................... 26
Why is Jigging Important? ................................................................................................. 26
What has happened so far? ................................................................................................ 26
What happens just prior to Jigging? ............................................................................... 27
Steps for Jigging ..................................................................................................................... 27
Step 1 – Sorting and Separating ...................................................................................... 27
What speed will the articles be immersion into the molten zinc? ....................... 28
Dipping Vertically ................................................................................................................... 28
Double Dipping and Centrifuging ..................................................................................... 29
Step 2 – Selecting Suitable and Safe Fixture............................................................... 29
How many wires should you use? .................................................................................... 30
Best Practices in Wire Tying .............................................................................................. 31
Chains and Hooks ................................................................................................................... 32
Special Racks ........................................................................................................................... 33
Mixing Articles ......................................................................................................................... 36
Step 4 – Inspect Load ........................................................................................................... 38
Waste Disposal ........................................................................................................................ 40
The Degreasing Process ............................................................................................................ 41
What is Degreasing? ............................................................................................................. 41
What is the purpose of Degreasing? ............................................................................... 41
What Degreasing can remove? ......................................................................................... 41
What has happened so far? ................................................................................................ 42
What happens just prior to Degreasing? ...................................................................... 42
The Degreasing Solutions ................................................................................................... 42
Two kinds of Degreasing ..................................................................................................... 42
Alkaline Degreasing .............................................................................................................. 42
What do these components do? ....................................................................................... 43
Acid Degreasing ...................................................................................................................... 43
Degreasing Solution Tanks ................................................................................................. 44
Temperature of Degreasing Solution .............................................................................. 44

Pag. 3 din 215
Alkaline Solution ..................................................................................................................... 44
Acid Solution ............................................................................................................................ 45
Heating of Degreasing Solution ........................................................................................ 45
Fumes ......................................................................................................................................... 45
Action Steps in Pre-Treatments ........................................................................................ 46
5. Inspect for Water Breaks ............................................................................................... 47
Good Degreasing Practice ................................................................................................... 47
Agitation in Degreasing ....................................................................................................... 48
Quality Control and Maintenance ..................................................................................... 48
Solution Control ...................................................................................................................... 48
Alkaline Solution ..................................................................................................................... 49
Acid Solution ............................................................................................................................ 49
Rinsing after Degreasing ..................................................................................................... 49
Good Rinsing Practice (After Alkaline Degreasing) .................................................. 50
Stagnant and Flowing Rinses ............................................................................................ 50
What happens if you see Water Breaks? ....................................................................... 50
Control of Rinsing .................................................................................................................. 50
Waste Disposal ........................................................................................................................ 51
Next Process ............................................................................................................................ 51
Acid Pickling Process .................................................................................................................. 52
What is the purpose of Acid Pickling? ............................................................................ 52
What Acid Pickling can remove? ...................................................................................... 52
What has happened so far? ................................................................................................ 52
What happens just prior to Acid Pickling? .................................................................... 53
The Pickling Solutions .......................................................................................................... 53
Hydrochloric Acid (HCl) ........................................................................................................ 53
Acid Pickling Solutions ......................................................................................................... 54
Over Pickling ............................................................................................................................ 57
Why use Inhibitors in the Acid Solution? ...................................................................... 57
Pickling Solution Tanks ........................................................................................................ 58
Quality Control and Maintenance ..................................................................................... 62
Rinsing after Pickling ............................................................................................................ 62
Agitation in Pickling Rinse .................................................................................................. 63
Two-tank/Cascade Rinse System .................................................................................... 63
What happens if you see Water Breaks? ....................................................................... 64
Control of Rinsing .................................................................................................................. 64
Safety in Acid Pickling .......................................................................................................... 64
Waste Disposal ........................................................................................................................ 66

Pag. 4 din 215
Next Process ............................................................................................................................ 66
Action Steps in Pre-Treatments ................................................................................................ 66
The Fluxing Process ................................................................................................................... 72
What is the purpose of Fluxing? ....................................................................................... 72
What has happened so far? ................................................................................................ 72
Difficult Articles ...................................................................................................................... 74
Fluxing Solution Tanks ......................................................................................................... 75
Fumes ......................................................................................................................................... 77
Good Fluxing Practice ........................................................................................................... 77
Quality Control and Maintenance ..................................................................................... 78
Next Process ............................................................................................................................ 82
Hot Dip Galvanizing .................................................................................................................... 83
What is Hot Dip Galvanizing? ............................................................................................ 83
What is the purpose Hot Dip Galvanizing? ................................................................... 83
What has happened so far? ................................................................................................ 83
Good Skimming Practice ............................................................................................................ 98
Steps to Good Skimming Practice .......................................................................................... 100
Good Galvanizing Practice ....................................................................................................... 101
Flat Flame Burners ................................................................................................................... 103
Melt Down ............................................................................................................................... 115
Temperature Control ........................................................................................................... 115
Focus on Kettle ...................................................................................................................... 115
Focus on Zinc ......................................................................................................................... 115
Pump Out................................................................................................................................. 116
Re-Melt ..................................................................................................................................... 117
Safety in Hot Dip Galvanizing .......................................................................................... 117
The Water Quenching, Passivating and Air-Cooling Process ............................................. 120
What has happened so far? .............................................................................................. 121
What happens just prior to Water Quenching, Passivating or Air Cooling? .. 122
The Water Quench ............................................................................................................... 123
The Passivating Solutions ................................................................................................. 123
If the article is to be Painted /Duplex Coating ......................................................... 126
Waste Disposal ...................................................................................................................... 127
The De-Jigging, Fettling and Cleaning Process .................................................................... 128
What is De-Jigging? ............................................................................................................ 128
What is the purpose of De-Jigging? .............................................................................. 128
What is Fettling? .................................................................................................................. 129
What is Cleaning? ................................................................................................................ 129

Pag. 5 din 215
What is the purpose of Fettling and Cleaning? ......................................................... 129
What has happened so far? .............................................................................................. 129
What happens just prior to De-Jigging, Fettling and Cleaning? ........................ 130
Packing and Dispatch ......................................................................................................... 135
Waste Disposal ...................................................................................................................... 137
Quality Coating, Surface Defects and Repairs ..................................................................... 138
Storage ....................................................................................................................................... 150
Storage Areas ........................................................................................................................ 150
Black Steel Yard .................................................................................................................... 150
Liquid Chemical Storage Areas ....................................................................................... 150
Liquid Degreasers ................................................................................................................ 151
Powdered Chemical Storage Area.................................................................................. 151
Powered Degreasers ........................................................................................................... 152
Zinc Ingot Storage Area ..................................................................................................... 152
Finished Goods Handling Area ........................................................................................ 152
Best Practices for Storage ................................................................................................ 153
Best Practices in Hot Dip Galvanizing .................................................................................... 154
Best Practices in Goods Receiving, Materials Handling and Inspection ......... 154
Inspection of Incoming Articles ..................................................................................... 155
Steps for Jigging ................................................................................................................... 155
Step 1 – Sorting and Separating .................................................................................... 155
Step 2 – Selecting Suitable and Safe Fixture............................................................. 155
Step 3 – Attaching Articles to Flight Bar ..................................................................... 155
Step 4 – Inspect Load ......................................................................................................... 155
Wire Tying ............................................................................................................................... 155
Lifting Positions .................................................................................................................... 156
Degreasing Steps ................................................................................................................. 156
Rinsing Steps (After Alkaline Degreasing) ................................................................. 156
Acid Pickling Steps ............................................................................................................... 157
Rinsing after Pickling .......................................................................................................... 157
Rinsing Steps (After Pickling) ......................................................................................... 157
Fluxing Steps ......................................................................................................................... 158
Drying after Fluxing ............................................................................................................ 158
Skimming Steps .................................................................................................................... 160
Best Practices in Storage .................................................................................................. 163
Full Glossary .............................................................................................................................. 165
Health and Safety ..................................................................................................................... 169
Why is Health and Safety important in HDG? ........................................................... 169

Pag. 6 din 215
General Safety ....................................................................................................................... 169
Personal Protective Equipment (PPE) .......................................................................... 169
Process Specific Safety ............................................................................................................ 175
Safety in Goods Receiving and Materials Handling ............................................................. 175
Waste Disposal .......................................................................................................................... 176
Waste Disposal .......................................................................................................................... 179
Waste Disposal .......................................................................................................................... 181
Waste Disposal .......................................................................................................................... 182
Safety in Water Quenching and Passivation ......................................................................... 188
The emissions from passivation containing traces of dichromate may constitute a potential
human health risk. .................................................................................................................... 188
The only discharge to air from the quenching process is the release of water vapour from the
bath. ........................................................................................................................................... 188
Waste Disposal .......................................................................................................................... 189
Waste Disposal .......................................................................................................................... 190

Pag. 7 din 215
Section 1: The Process
Section 2: Goods Receiving & Materials Handling
Section 3: Jigging
Section 4: Degreasing
Section 5: Acid Pickling
Section 6: Fluxing
Pre-treatments
Section 7: Galvanizing
Section 8: Water Quenching & Passivation
Section 9: De-jigging, Fettling & Cleaning
Section 10: Quality Coating, Defects & Repairs
Section 11: Storage
Section 12: BAT
Health and Safety

Pag. 8 din 215
The Process Hot Dip Galvanizing
It involves dipping the article, cleaned of rust, mill scale and other contaminants, into a bath of molten zinc, producing a coating of iron/zinc alloys with pure zinc on the surface.
Since molten zinc cannot react with iron and steel covered in mill scale or oil, the article to be galvanized must first be prepared for hot dipping by cleaning processes that may include:
Abrasive blasting
Degreasing
Pickling (Acid cleaning)
The article next receives a coating of flux, which activates its surface to allow the zinc to ‘wet’ it and react with it on immersion.
When it is withdrawn surplus zinc drains back into the zinc bath (kettle). The zinc-coated article may be quenched by immersion in water or simply cooled in air.
The Language of Galvanizing
You will have already realised that there are many new words and terms to learn in Hot Dip Galvanizing.
When exploring new territory it helps to know the language. Aim to have a wider and deeper knowledge of the names, numbers and symbols used by galvanizers.
By learning how galvanizers communicate you will take an important first step towards learning how hot dip galvanizing is done.
Review the words you have already learned by clicking on the Mini Glossary button. Take a few moments to make sure you know the meaning of these words.
Now let’s look at some of the words you will need to know in the full process of Hot Dip Galvanizing.
The Black Steel Yard

Pag. 9 din 215
Articles come into the plant are stacked and stored in a yard called the black steel yard or deck.
Black steel is the common term for ungalvanized steel.
The two processes involved here are:
Goods Receiving – articles coming into the plant to be galvanized
Materials Handling – moving the articles to a place where they can be inspected
Remember what was said about the designers, manufacturers and fabricators in the introduction.The articles need to be put together in such a way as to minimise or prevent distortion, venting and drainage holes present in the hollow sections and welds done correctly.
As a check before the articles are processed, an inspector will check that the articles conform to the correct specifications.
Inspection – looking at the design, the surfaces, and the venting and draining holes, which are small holes in the article to allow the molten zinc to coat on all surfaces and to allow for drainage when taken out of the tanks.
If an article is badly rusted, covered in mill scale, has rough welds or has oil based paints or markings then this article will need to be cleaned by abrasive blasting.
Abrasive blasting – some articles that have paint marks, weld slag and other substances not easily removed by acid, will require abrasive cleaning. This is also referred to as shot or grit blasting, depending on the material used in the abrasive cleaning.

Pag. 10 din 215
Articles ready to be moved to the pre-treatment tanks are hung, or jigged onto a boom or flight bar. This operation is called jigging.
Jigging – hanging the articles from a boom bar or flight bar, which is a metal bar suspended from a crane that carries the articles to the tanks so the process can begin
The jigged articles now are ready to go through a series of pre-treatments that clean and prepare the articles for galvanizing. The articles are placed, in a continuous process, in and out of a series of tanks. These tanks can also be called baths. The last pre-treatment before galvanizing is where the articles are dried in a drying bay.
Degreasing – dipping the jigged articles into degreasing chemicals, either alkali or acid based, to clean off any grease, oil, rust, mill scale, etc
Rinsing (after alkaline degreasing) – rinsing off the degreasing solution in a tank of water

Pag. 11 din 215
Pickling - dipping the jigged articles into an acid tank to further clean the surface of the metal
Rinsing (after pickling) – rinsing off the acid solution in a tank of water
Fluxing – the pickled and rinsed steel is dipped in a flux solution of ammonium chloride and zinc chloride. This deposits a thin layer of flux salts on the steel surfaces
Drying – in dry galvanizing the article is dried before being dipped into the molten zinc
The articles are now dipped into the molten zinc which is the actual hot dip galvanizing process. This bath or tank is often referred to as the kettle. All the other tanks or baths in the plant cannot be called the kettle, only the zinc bath.
The post-treatments are dependant on what the article is going to be used for and whether it is going to be painted.
A paint coating over a galvanized surface is called a duplex coating.

Pag. 12 din 215
Water Quenching – after withdrawal from the zinc bath, articles are quenched in plain water.
Passivation – sometimes the articles are dipped into a passivation tank (chemicals and water) to reduce the possibility ofwet storage stain, often referred to as ‘white rust’, during transport and storage.
Articles that are to be just cooled in the air are taken down from the jig. After cooling the articles are cleaned up and zinc spikes removed. Fettling is a very old name that has stayed with the industry for over a hundred and fifty years.
De-jigging – taking the galvanized articles off the flight bar
Fettling and Cleaning – removing, if necessary, zinc spikes, filing down sharp points and rough edges
A final inspection takes place to check if the article has been properly galvanized.
Final Inspection – checking that the article is properly galvanized cleaned up and that no repairs are necessary.
Any repairs would be done at this point, and these finished articles are now ready to be packed and dispatched.

Pag. 13 din 215
Packing and Dispatch – finished articles are packed and ready for collection or delivery to the customer.
Here are all the steps in order:
Goods Receiving – articles coming into the plant to be galvanized
Materials Handling – moving the articles to a place where they can be inspected
Inspection– looking at the design, the surfaces, and the venting and draining holes, which are small holes in the article to allow the molten zinc to coat on all surfaces and to allow for drainage when taken out of the tanks.
Abrasive blasting – some articles that have paint marks, weld slag and other substances not easily removed by acid, will require abrasive cleaning. This is also referred to as shot or grit blasting, depending on the material used in the abrasive cleaning.
Jigging – hanging the articles from a boom bar or flight bar, which is a metal bar suspended from a crane that carries the articles to the tanks so the process can begin
Degreasing – dipping the jigged articles into degreasing chemicals, either alkali or acid based, to clean off any grease, oil, rust, mill scale, etc
Rinsing (after alkaline degreasing) – rinsing off the degreasing solution in a tank of water
Pickling - dipping the jigged articles into an acid tank to further clean the surface of the metal
Rinsing (after pickling) – rinsing off the acid solution in a tank of water
Fluxing – the pickled and rinsed steel is dipped in a flux solution of ammonium chloride and zinc chloride. This deposits a thin layer of flux salts on the steel surfaces
Drying – in dry galvanizing the article is dried before being dipped into the molten zinc
Water Quenching – after withdrawal from the zinc bath, articles are quenched in plain water.
Passivation – sometimes the articles are dipped into a passivation tank (chemicals and water) to reduce the possibility of wet storage stain, often referred to as ‘white rust’, during transport and storage.
De-jigging – taking the galvanized articles off the flight bar
Fettling and Cleaning – removing, if necessary, zinc spikes, filing down sharp points and rough edges
Final Inspection – checking that the article is properly galvanized, cleaned up and that no repairs are necessary.
Packing and Dispatch – finished articles are packed and ready for collection or delivery to thecustomer.

Pag. 14 din 215
Goods Receiving, Materials Handling and Inspection
Goods Receiving
The articles or fabrications, that require hot dip galvanizing, are delivered to the plant. Either the plant or the customer employs the truck drivers.
The customer will pay for the amount of zinc coating that it takes to galvanize the articles.
The truck or trailer load is weighed on a weighbridge when it comes in as ‘black steel’, or un-galvanized steel.
The receiving clerk or weighbridge operator enters the weight of the black steel onto the computer. The computer program knows the weight of the trucks and trailers, which gets taken away from the total weight, leaving just the weight of the material to be galvanized.
A security camera monitors the weighbridge.
A job card is made for this order and a job number given. This document is made out by the weigh bridge staff or by another authorized representative, and should have an identifying label, which will be attached to the actual material to be galvanized. (refer to Contract Review)
Materials Handling
Some plants have their own materials handlers; others make use of the plant operators.

Pag. 15 din 215
Defects may be due to steel quality, design, and fabrication or may be caused by poor material
handling at the HDG facility. These are difficult and costly to rectify and may make further galvanizing uneconomical.
Handle the articles carefully to avoid damage.
While moving the articles from the customers’ truck, generally forklifts or overhead cranes are used.
Nylon slings, chains and locking hooks allow for slinging of the product to the handling equipment (Cranes), which then moves the product to the stacking area.

Pag. 16 din 215
As the articles are removed from the truck or trailer, they are stacked and labelled, usually with a metal tag with the same number as the job card. These metal tags are pre-stamped. Other methods of labelling could be used.
Stack the articles for easy identification and labelling with information on customer, type of steel, order number and any special requirements.
Some articles can be stacked and secured in stacking racks pending inspection.
Various designs of stacking racks are used to secure incoming product.
Stacking racks make it easier for all the many
shapes and sizes of product to be stacked
and secured safely.
Wooden or steel blocks are sometimes used
to align and place the load on ground.

Pag. 17 din 215
Also wooden blocks are used to stack articles and avoid direct contact between them.
Only qualified forklift drivers are allowed to operate the forklift trucks. Forklift drivers will handle any items that are on palettes. Make sure you stand back and give the forklift driver space to operate effectively. There is always a Safe Lifting Load (SLL) indicated on the forklift.
This SLL must not be exceeded.
Cranes are also used to lift bigger articles from the trucks. Only qualified crane drivers are allowed to operate the cranes. There is always a Safe Woking Load (SWL) indicated on the crane. This SWL must not be exceeded.

Pag. 18 din 215
Remove all tools, equipment and boxes that may be in the path of the crane when it is lifting or moving.
An essential requirement of goods receiving, material handling and inspection is to offload and stack such material in a safe and secure manner. This includes positioning such materials so that they are identifiable in terms of customer, type of steel, job number and any other important details.
Inspection of Incoming Articles
The inspectors are looking for three main points: 1. How clean are the articles? 2. Do the design and surface conditions conform to fabrication standards? 3. Do the articles have adequate draining and venting holes?
(refer to Pre-galvanizing report) 1. Clean Surfaces Hot dip galvanizing only bonds molten zinc to a clean steel surface. If the surface is not clean, zinc will not adhere to the steel or iron surface.
“If it not clean it will not galvanize”
Paint remover or stripper is used for small problem areas. Paint Stripping
Apply liberally with paintbrush and rub with steel wool.
Apply after jig is complete
Wear correct PPE
Be familiar with material safety data sheets.
If your skin comes in contact with paint stripper.
o Wash off immediately in water,
o Do not wipe off on your clothing,
o If a reaction occurs see your safety officer immediately

Pag. 19 din 215
Some types of surface conditions cannot be cleaned using the standard cleaning practices.
These are some of the problems that cannot be cleaned by standard cleaning practices:
Oil based paints
Non water-soluble colour-coding marks and identification marks
Anti-spatter sprays using oil and silicon based products
Lacquer on pipe work and fittings
Sticky labels
Black varnish coating
These articles will be identified for abrasive blasting (grit or shot blasting)
Before articles can be sent for abrasive blasting a non-conformance report must be raised. The customer will need to be informed because abrasive blasting is an extra charge as it is not standard practice. (refer to abrasive blasting)
2. Fabrication Standards
Steel cannot be galvanized properly and safely, if the articles do not conform to certain fabrication and surface standards. The article has to be properly designed and the correct fabrication practices followed.
The inspector looks for fabrication defects or problems, like:
Burrs
Sharp edges not rounded
Flame cutting that could cause the hardened steel to crack
Slag on welds
Weld spatter
Welding damage or distortion
Overlaps that will not give proper access to the zinc
Poor surface conditions
Damage to the article
Distortion or the potential for distortion
Temporary or permanent bracing, gussets and stiffeners should be cropped and allow for the free flow of zinc
Steel grade (Mill certificate) – some steels are highly reactive and could cause problems when galvanized

Pag. 20 din 215
Grinding, chipping or abrasive blasting can sort some of these problems out.
Articles that have been soldered or have aluminium inserts, or contain any form of aluminium, cannot be accepted, as these will be destroyed.
3. Draining and Venting Holes
Good fabrication design should include ventilation and drainage, to prevent explosions. Any manufacturers and fabricators are aware of the necessity for draining and venting holes. The International Standards are ISO (International Organization for Standardisation) 14713 and ASTM A385.
Also all vents and drain holes need to be sufficient in size and quantity to allow for adequate chemical and zinc drainage.
If all vents and drain holes are located properly there will be one or more for draining and one or more for venting
If these vents are absent, the wrong size or there are not enough of them, the fabricator will be contacted to get permission to drill vent holes. Sometimes they will send out one of their employees to drill the holes.

Pag. 21 din 215
The holes should be diagonally opposite each other with vent holes at the high point and drainage holes at the low point of the article in the position it is suspended.
Drainage and venting holes must be provided on hollow articles which are totally enclosed and which are to be galvanized on the internal surface.
Drain holes should be in the centre faces of the hollow sections
A breather pipe (snorkel) is attached to the article and is kept above the liquid levels during degreasing, rinsing and galvanizing.

Pag. 22 din 215
Use special handling equipment in order to overcome the buoyancy. This is very important for safety of the personnel.
What happens if there is a problem?
The main problems are:
Articles are too dirty to be cleaned by standard cleaning and if it is not clean it will not galvanize
The design and surface conditions have defects that will prevent successful galvanizing
There are inadequate draining and venting holes which will prevent safe and successful galvanizing
If the problem will prevent proper galvanizing, then the batch will be put to one side, red tagged, and quality control and the customer informed.
The inspector will issue a non-conformance report. (refer to non-conformance report)
Help the inspector by checking the articles as you off-load and stack them ready for pre-treatment. Alert your supervisor or the inspector if the articles are NOT as per the requirements for successful and safe galvanizing.
Safety in Goods Receiving and Materials Handling
Personal Protective Equipment (PPE)
Out in the stacking and storage area the minimum PPE would be:
Hard hats
Steel-toed safety boots
Long-sleeved overalls
Leather gloves
Waterproof clothing depending on the weather.
Safety Awareness and Procedures
Safety awareness is of great importance when handling material.
Make use of the various items and equipment supplied for the safe slinging, moving and stacking of the incoming material to be galvanized.

Pag. 23 din 215
Keep stacking and storage area clean and clutter-free using good housekeeping.
Remove tripping hazards from working areas and walkways. Maintain clear all walkways at all times.
If your skin comes in contact with paint stripper:
Wash off immediately in water,
Do not wipe off on your clothing,
If a reaction occurs see your safety officer immediately
(refer to Hand Lifting safety)
Waste Disposal
Remove all waste materials to disposal points.
Next Process
Articles that have passed the first inspection are ready to be jigged. Articles that have been abrasive blasted and re-inspected are also ready for jigging.
Abrasive Blasting
What is Abrasive Blasting?
Abrasive blasting is the operation of cleaning or preparing a surface by forcibly propelling a stream of abrasive material against it.
Another explanation is the use of a material against another material to make it smoother, remove surface contaminants or to roughen a surface.
The reason abrasive blasting is sometimes used in the galvanizing plant is to remove surface contaminants and not to roughen the surface.
In the galvanizing process, all interior and exterior surfaces are coated with corrosion-inhibiting zinc, which bonds with the base steel, metal on metal. This metallurgical bond will only take place provided the steel surface is perfectly cleaned.
The primary method of cleaning in a hot dip galvanizing plant is to immerse the steel in chemicals (degreaser, acid pickle and flux) in a pre-treatment plant.

Pag. 24 din 215
When chemical cleaning is thought not to be effective due to the presence of mill lacquer, oil based paints, markings, weld slag, or sand (used in the manufacture of castings), abrasive blasting may be required.
Other terms for abrasive blasting are grit blasting, sand blasting, and shot blasting.
Blasting Method
The method most commonly used is propelling abrasive material using compressed air.
Abrasive blasting is effective for cleaning exterior surfaces, but it cannot effectively remove contaminants in small crevices, threads or on hidden surfaces such as the inside of a pipe. These areas will be reached by the chemical cleaning.
Safety in Abrasive Blasting
Personal Protective Equipment (PPE)
Essential equipment for the blaster is:
A blast hood or helmet with clean air supply. The hood or helmet allows the operator to move his head within the device, and has a view window with lens protection and an air feed hose. The air feed hose is attached to a pressurized air supply. It includes a pressure regulator, air filtration and a carbon monoxide alarm.
Special safety gloves - PVC re-enforced and/or leather gloves, elbow length
A protective leather apron or a leather coat and leggings (sometimes called chaps)
Overalls or a canvas blast suit
Ear protection or ear muffs or ear plugs
The equipment has to be comfortable and guarantee the operator a sufficient quantity of dry, smell-free and contaminant-free air.
PPE in this environment is rapidly worn out and has to be regularly changed.
Using abrasive blasting as a cleaning method has some risks for operators' health and safety. Certain precautions must be taken.
Wear specialized PPE for abrasive blasting to prevent:
Burns
Skin or eye lesions
Exposure to hazardous dusts
Heat exhaustion

Pag. 25 din 215
Exposure to excessive noise

Pag. 26 din 215
Jigging
What is Jigging?
Jigging is the hanging of articles from a boom bar or flight bar, which is a metal bar suspended from a crane that carries the articles to the tanks so the process can begin.
Why is Jigging Important?
The articles need to be jigged in such a way that they get a high quality coating, with the maximum weight per dip, for maximum number of dips per shift while ensuring safety of all personnel and equipment.
In short, this is what good jigging will make happen:
High quality coating
Maximum weight per dip
Maximum number of dips per shift
Ensures safety of people and equipment
International Target Minimum Standard – 5 dips per hour – and 1 tonne (1000kg) per dip = 5 tonnes per hour
There should always be at least another loaded jig in the waiting bay ready to be pre-treated in the degreasing bath.
Also there must always be at least another loaded jig in front of the kettle area.
What has happened so far?
1. So far the batches of articles have come in from the customer and they have been weighed and labelled.
2. The articles have been taken off the truck and sorted and separated.
3. Inspection has taken place to see if these articles can be safely galvanized, looking at:

Pag. 27 din 215
1. Design
2. Vent and drain holes
3. Needs abrasive blasting
4. Needs Double Dipping (Large/Long articles)
4. More vent and drain holes may have been added. Snorkels or breather pipes are used if necessary.
5. Paint stripper may have been used to remove oil paints or varnish.
6. Welding slag, flux and spatter will have been removed by grinding
7. Heavy grease will have to be removed manually as it will not be removed during the normal degreasing process.
8. Articles have been checked for soldering (metal that has been soldered together), as the solder will be destroyed in the galvanizing process.
9. Products containing temporary or permanent bracing are checked (internal stiffeners, baffles, diaphragms, gussets etc)
What happens just prior to Jigging?
Goods to be galvanized have been off-loaded from the trucks onto the black steel yard. They have been stacked and labelled. These articles have been inspected and non-conformance reports have been raised for articles needing more vent and drainage holes or require abrasive blasting.
Articles that have passed this first inspection are ready to be jigged.
Steps for Jigging
Step 1 – Sorting and Separating
Step 2 – Selecting Suitable and Safe Fixture
Step 3 – Attaching Articles to Flight Bar
Step 4 – Inspect Load
Step 1 – Sorting and Separating

Pag. 28 din 215
Why is it important to sort the articles?
A batch of articles from a customer could contain a variety of size, shape and weight. Some articles could be solid and others hollow.
Sort by separating this way:
Separate thinner and lighter articles from thicker and heavier ones.
Separate solid articles from hollow ones.
Separate heavily rusted from lightly rusted
Check for articles that might easily distort (warp) in the molten zinc e.g. large thin plates of steel, long welded channels, chequered plate (floor grating)
What speed will the articles be immersion into the molten zinc?
Light and hollow articles need a slow immersion
Heavy and solid articles and plate work need a fast immersion
Dipping Vertically
Normally articles are dipped horizontally at an angle into the kettle, but for a big batch of same-sized articles, they can be dipped vertically (the size of the articles will depend on the depth of the kettle). Vertical dipping is a quick immersion process.

Pag. 29 din 215
Double Dipping and Centrifuging
The after-fabrication articles may range in sizes from small pieces of hardware like nuts and bolts to large welded steel assemblies like poles, structural steel members or castings weighing several tons. Large articles that will not fit into the tanks in one dip will be dipped twice. Half of the article is dipped at an angle, lifted out and the second half is then lowered in at an angle.
Putting small articles in a centrifuge basket is the method sometimes used to galvanize small articles.
Step 2 – Selecting Suitable and Safe Fixture
Jigging depends on the type, shape, size and weight of steel components to be galvanized.
Select the most suitable and safe fixture for attaching the articles including:
Wires
Hooks
Chains
Special Racks
Nylon Slings*
*Only use nylon slings during the pre-treatment only. DO NOT use them in the zinc kettle area.

Pag. 30 din 215
Any combination of chains, hooks, wire, or specially designed jigs can be used.
Wires Annealed wires are mostly used for jigging, with a minimum diameter of 3.00mm.
More steel wires are used compared with hooks and chains, which carry over too much zinc.
How many wires should you use?
It is important to use sufficient wire strands when jigging articles. Using too few wire strands creates a safety hazard, and using too many strands is a waste of money.
Light articles need single or double strands of jigging wire, whereas heavy articles requires as many as six or eight strands of jigging wire to safely secure them to the flight bars.

Pag. 31 din 215
Another way of looking at it is this:
Lift with one hand – one wire
Lift with two hands – two wires
Unable to lift – check on loading chart/table
Knowing the correct wire sizes, diameters, lengths, number of strands, will come with experience.
Best Practices in Wire Tying
Use leather gloves to protect your hands from being cut whilst jigging
Looping and twisting is the most common way to jig an article with wires
Use pre-tie wires or locking ties, if they are available, to prevent the wires slipping through and unravelling Use cutters with long handles, if possible, so that you use less pressure when cutting wire.
Use spring-loaded pliers to reduce hand-exertion
Check the ductility (pliability) or the ability to bend, or be looped and shaped (pliability) of the wire before use by bending it back and forth in your hands before looping and twisting
Loop the correct number of wires for the weight of the article through the holes or lifting lugs on the flight bar, attaching the article to the bar
Do not tie too tight or too loose – articles must be able to move but with no lateral (sideways) movement
Hang the articles securely, not right up against the flight bar, but not too loose that they flap around. There should always be a gap between the connecting wire loop and the article.

Pag. 32 din 215
If the wire is attached too tightly, the coating will be damaged, by way of touch marks, when the attaching wire is removed after galvanizing.
After you have looped and twisted the wire, bend the end piece or pieces back so it cannot unravel
Chains and Hooks
Chains and hooks are mainly used for large articles.
Check hooks for wear and erosion before using them for hanging
Ensure that the zinc has been stripped off the chains and hooks before reusing them to avoid contaminating the main pickling acid. This is done in a separate acid tank designed for this purpose.

Pag. 33 din 215
Lifting Points
Place hooks in the ends of the articles in such a way that each article can be lifted without unhooking and produce minimum touch marks If this is not possible provide special temporary lifting supports, points or holes to use chain, wire and other holding devices to prevent markings on the galvanized item
For symmetrical parts e.g. pipes, closed hollow sections – provide lifting points or lugs at the quarter points
The best lifting positions are:
A distance of one quarter or 25% of the length from each end
At 30% in from bottom end (first in the kettle) and at the top - referred to as
the 70/30 lifting position
Do not jig an article from both ends, to minimise distortion.
When the temporary lifting points are removed after galvanizing, touch up the exposed area.
Special Racks
Special designed racks are used for pipes and large orders of similar shaped articles

Pag. 34 din 215
Step 3 – Attaching Articles to Flight Bar
Attach correctly making sure the vent and drainage holes are diagonally opposite one another
Hang at a 45° angle from the flight bar for effective drainage of pre-treatment chemicals and molten zinc.

Pag. 35 din 215
Narrow articles should be suspended at the steepest possible angle to the vertical.
Load the maximum weight for the flight bar (SWL) – Safe Working Load – this is usually 1000 – 1200kg per dip
The maximum number of items per dip will also be influenced by the size (width, depth, length) of the processing tanks. The load must fit into the tanks, allowing for product expansion without damaging the walls and floor of the tank. A minimum clearance of 100mm should be allowed on the sides and ends of the tank.
Make sure there is a small space between each article so that they do not stick together in the molten zinc, or scrape against each other
But do not have any wasted space on the flight bar.

Pag. 36 din 215
You will be shown how to operate bridge cranes, monorail hoists, and simple hand tools in the performance of their duties.
Mixing Articles
Try not to mix articles.
Do not mix light and heavy articles Do not mix heavy solid and hollow articles
Long and short articles can be jigged together providing the long work is first end (of the flight bar) into the kettle and the short work last end (of the flight bar) into the kettle
Heavy work needs to ‘cook’ in the kettle longer so needs to be first end in. Hollow and light solids can be jigged together providing the hollow work is first end into the kettle and the light solid work last into the kettle.
All solid plate work must have a fast dip in time so that the plate is the same temperature all over as quick as possible. This quick time prevents distortion of the metal.
Chequered plate should be placed on the outside of the jig for easy access, as this material can warp easily. Ideally chequered plate should be jigged separately and not mixed with other articles.
All work that takes up more than half the length of the jig must be at the first end in.
Draining and Venting Holes
The holes should be diagonally opposite each other with vent holes at the high point and drainage holes at the low point of the article in the position it is suspended.

Pag. 37 din 215
The holes should be 25% of the diameter or cross-section e.g. 100mm pipe – holes 25mm, 200mm x 200mm SHS (Square Hollow Section) – holes 50mm
Closed Hollow Sections (CHS) come in three types:
Round Hollow Sections (RHS) – known as ‘Rounds’
Square Hollow Sections (SHS) – known as ‘Squares’
Rectangular Hollow Sections (RHS) – known as ‘Recs’
Holes should be away from welded areas if possible.
Drainage and venting holes must be provided on hollow articles which are totally enclosed and which are to be galvanized on the internal surface.
Any moisture trapped in the hollow, sealed articles will turn to steam when dipped in molten zinc at 450°C. The pressure will build up and could lead to a violent explosion and serious injury to the workers around the zinc kettle.
In large vessels, the venting and drainage holes are sometimes manholes in the baffle.
Jigging should allow for complete venting and draining.
If there are no venting and draining holes – NO PROCESSING!
The customer, not by the galvanizer, must make venting and draining holes. Most fabricators know that this is an essential part of the design.
If hollow, sealed articles have been designed to be galvanized only on the external surfaces, then it can be galvanized using snorkels. A breather pipe (snorkel) is attached to the article and is kept above the liquid levels during degreasing, rinsing and galvanizing.

Pag. 38 din 215
Use special handling equipment in order to overcome the buoyancy. This is very important for safety of the personnel.
Step 4 – Inspect Load
Inspect the article to check whether the vent and drainage holes are diagonally opposite one another.
Check that the articles are hanging at a 45° angle, or steeper, from the flight bar for effective drainage of pre-treatment chemicals and molten zinc.
Check that the load does not exceed the SWL (Safe Working Load) - this is usually 1000 – 1200kg per dip
Inspect the racks, chains, and wires to ensure there are no weak links or weak areas. Check that a breather pipe (snorkel) is attached to the hollow sealed articles and special buoyancy equipment is in place.

Pag. 39 din 215
Check that narrow articles are suspended at the steepest possible angle to the vertical.
Check that the load must fit into the tanks, allowing for product expansion without damaging the walls and floor of the tank. Remember the minimum clearance is 100mm on the sides and ends of the tank.
Check there is a small space between each article so that they do not stick together in the molten zinc, or scrape against each other, but there is no wasted space on the flight bar.
Check that articles are mixed correctly. Remember - Do not mix light and heavy articles - Do not mix heavy solid and hollow articles
Check that if long and short articles are jigged together, the long work is first end (of the flight bar) into the kettle and the short work is last end (of the flight bar) into the kettle
Also if hollow and light solid articles are jigged together that the hollow work is first end into the kettle and the solid work is last end into the kettle
Because heavy work needs to ‘cook’ in the kettle longer, make sure it is first end in.
Check all solid plate work that it jigged to allow for a fast dip so the plate is the same temperature all over as quick as possible in order to prevent distortion of the metal.
Check that chequered plate is placed on the outside of the jig for easy access, as this material can warp easily
Safety in Jigging
Personal Protective Equipment (PPE)
In the jigging area the minimum PPE would be:
Hard hats
Steel-toed safety boots
Long-sleeved overalls
Leather gloves
Waterproof clothing depending on the weather.

Pag. 40 din 215
Use leather gloves to protect your hands from being cut whilst jigging.
Safety goggles should be worn when cutting wire.
Safety Awareness and Procedures
Adhere to the SWL (Safe Working Load) that is displayed on all the jigs and lifting equipment.
All jigs, slings and handling equipment must be registered in the lifting equipment logbook. This equipment should be inspected daily for safety. No unregistered jigs and handling equipment should be used in the plant.
All jigs and lifting equipment must be stored in a designated area on racks provided, when not in used.
Safe Wire Tying
Wire locking
Wire twisting Wire looping
Wire capacity
Wire Cutting
Keep wrist straight.
Do not rotate wrist.
Do not cut more than one wire at a time.
Keep cutters well adjusted in palm of hand against thumb pad.
Do not squeeze cutters from top of handles
(refer to Hand Lifting, Hand Drilling, and Paint Stripping safety)
Waste Disposal
Small cuttings of jigging wires that cannot be used must be disposed of.
Chains, hooks and special racks that have not had the excess zinc removed must be stripped in an acid stripping bath.
Next process
Once the jigs have been fully loaded they are ready for the first of the pre-treatments, degreasing.
wires are mostly used for jigging, with a minimum diameter of 3.00mm.

Pag. 41 din 215
The Degreasing Process
What is Degreasing?
Degreasing is a chemical cleaning process that removes dirt, oil and light grease from the articles before it is
galvanized.
Degreasing involves dipping jigged articles into an alkaline or an acid degreasing solution.
What is the purpose of Degreasing?
The purpose of degreasing is to remove light soluble oil, grease and water-soluble paints and other surface
contaminants.
The effectiveness of the following stages in the pre-treatment (product cleaning) as well as the hot dip
galvanizing process depends largely upon how well the product is cleaned during the degreasing operation.
If the surface is not clean, zinc will not adhere to the steel surface.
Remember „If it is not clean, it cannot be galvanized‟.
What Degreasing can remove?
The most common contaminants that can be removed are:
Dirt
Light rust
Light grease
Oil
Deep drawing and rolling lubricants*
Water-soluble paint markings
The contaminants difficult to remove are:
• Old zinc coatings
• Organic lacquer
• Varnish
• Water-insoluble paints *
• Cutting Oil *
• Black varnish coating
• Adhesives
• Sticky labels
• Sand on castings*
• Heat-treated steel surface coating*
• Welding slag, flux and spatter on the surface
*Some types of oil and paint cannot be removed by normal alkaline cleaning process. Bituminous paint* is
insoluble in caustic soda and would need to be degreased in an acid solution.
*Cutting oil is a mineral based (not water based) lubricant used by the manufacturer when they have had to
drill or saw metal. Some of the cutting oil used by the fabricator will require special degreasing.

Pag. 42 din 215
*Bituminous paint is paint made from asphalt or petroleum bitumen and a solvent or a bitumen emulsion. It
is inexpensive and normally used for waterproofing or to protect metals
What has happened so far?
1. So far the batches of articles have come in from the customer and they have been weighed and
labelled.
2. The articles have been taken off the truck and sorted and separated.
3. Inspection has taken place to see if these articles can be safely galvanized, looking at:
1. Design
2. Vent and drain holes
3. Needs abrasive blasting
4. Needs Double Dipping (Large/Long articles)
4. More vent and drain holes may have been added. Snorkels or breather pipes are used if necessary.
5. Paint stripper may have been used to remove oil paints or varnish.
6. Welding slag, flux and spatter will have been removed by grinding
7. Heavy grease will have to be removed manually as it will not be removed during the normal
degreasing process.
8. Articles have been checked for soldering (metal that has been soldered together), as the solder will
be destroyed in the galvanizing process.
9. Products containing temporary or permanent bracing are checked (internal stiffeners, baffles,
diaphragms, gussets etc)
10. Articles have been jigged correctly, ready for pre-treatment.
What happens just prior to Degreasing?
Inspect again for errors and make sure that the articles have enough venting and drain holes. Especially
check for hollow, sealed articles.
Check that the articles are jigged correctly according to weigh, shape, and size. Also make sure that the
articles that are mixed on the flight bar can be mixed e.g. Hollow and light solid articles can be jigged
together.
Sometimes articles are sprayed with low foaming alkaline cleaners to enhance cleaning of certain soils,
almost like a pre-wash if you were washing clothes.
The Degreasing Solutions
Two kinds of Degreasing
There are two kinds of degreasing, one using an alkaline solution and another using an acid solution.
Alkaline Degreasing
Alkaline degreasers consist of a 5% to 6% caustic soda (NaOH) based solution.

Pag. 43 din 215
The pH level of this alkaline degreasing solution needs to be 11 to 14.
Caustic soda can be found in everyday cleaning agents such as household soaps and surface cleaners but in
a much-diluted form. It is often found in oven and drain cleaners.
Added to this caustic soda solution is:
Emulsifiers
Wetting Agents
Inhibitors
Detergent/Foaming agents
Water softener/Phosphates
Buffers
Alkalinity builders
You were introduced to surfactants in your pre-work. Remember surfactant is a general term for an active
surface-cleaning agent that alters the surface tension of the surface it is cleaning. Therefore, from the above
list these are surfactants:
Wetting Agents
Detergent/Foaming agents
What do these components do?
Emulsifiers are chemicals that will combine with oil, change the oil into sludge or a liquid that floats on the
surface.
Wetting Agents are chemicals that allow degreasing solutions to break through oils and dirt so that they
can ‘wet’ the steel surfaces.
Inhibitors are chemicals that slow the rate of acid attack once the steel has been cleaned. Inhibitors
prevent over pickling (next process).
Detergent/Foaming Agents are a surface-active agent, which provides a cover to reduce loss due to
evaporation.
Water Softener/ Phosphates make sure nothing deposits on the surface of the metal. Phosphates help to
soften water and increase alkalinity. They also help disperse the soil once it is removed from the article and
prevent its re-deposition on the articles.
Buffers keep the pH constant.
Alkalinity Builders keep the solution alkaline.
Acid Degreasing

Pag. 44 din 215
The acid degreaser consists of an HCl solution of 7% to 10%, with a wetting agent, an inhibitor,
emulsifiers, and a detergent or foaming agent. Do not use too many foaming agents as they make it difficult
to see what is happening on the surface of the solution.
It is ineffective on silicon lubricants, paints and most lacquers.
Degreasing Solution Tanks
Acid tanks must be acid resistant. Alkali tanks, because of the closeness of acid tanks, are usually made of
the same acid resistant material.
Degreasing tanks can be made of concrete, steel framed and polypropylene (plastic) or fibreglass or rubber
lined, or have wooden protection of the internal sidewalls. Sometimes acid resistant bricks are used.
All heated tanks must be covered when not in use.
Temperature of Degreasing Solution
Alkaline Solution
Maintain the temperature of the alkaline solution between 55° and 85 °C, preferably in the range of 65° to
75° Cto ensure adequate cleaning and to minimize the processing time.

Pag. 45 din 215
Acid Solution
A temperature of 25° C. (Room temperature – sometimes referred to as ambient temperature) is perfect but
difficult to maintain with varying weather conditions.
Keep the temperature of the acid solution between 15° and 30 °C for good pickling. Loss of bath
temperature below 15°C should be reported to the supervisor. When the temperature gets above 30
°C there could be excessive fuming.
Heating of Degreasing Solution
Heat the degreasing tank to increase soil removal and aid in floating oil and grease to the surface.
Heating can be accomplished by:
• Electric immersion heaters
• Gas or oil heated immersion tube heaters
• Exhaust gases from the zinc furnace using heat exchangers
• Steam or hot water heating through heat exchangers
Use a cover over the tank to:
Minimize loss of cleaning solutions to the atmosphere
Insulate the baths to save heating costs
Provide better temperature control
Reduce evaporation and therefore increase energy efficiency
Fumes
There is minimal fuming from both the alkaline and acid degreasing tanks, but safety precautions must be
taken and PPE must be worn.

Pag. 46 din 215
Action Steps in Pre-Treatments
Certain action steps are common throughout all the pre-treatment – degreasing, rinsing after degreasing,
acid pickling, rinsing after acid pickling, fluxing and drying.
1. Immersion
The loaded jig is immersed in the solution as fast as possible. The solution must completely cover all the
articles.
2. Unhooking the Flight Bar
If the crane is needed for another operation and there is enough time (15 –30 minutes), the flight bar will be
unhooked.
3. Agitation
The Solution
The solution needs to be circulated around the articles. Preferably re-circulate the solution through a pump
and filter.
Air or Steam Jets
Air or steam jets just below the surface of the solution achieve a gentle agitation with fine bubbles,
so that the solution is disturbed and makes contact with all surfaces of the product.
Ultrasonic Cleaning
These cleaners create a fine vibration of the water thus loosening the dirt; they are commonly used
in the jewellery industry.
Compressed Air
Compressed air can be used to agitate the liquid, but is often too violent; this method can only be
used in the flux tank.
The Articles
Agitation of the articles can also be achieved by moving the product up and down in the solution by means of
the handling equipment, so that the solution is disturbed and makes contact with all surfaces of the product.
The movement of the product causes air bubbles to escape, allowing the solution to act directly upon the
surfaces to be cleaned. This can only be done if there is time to move the products whilst immersed in the
solution. If the flight bar is unhooked this method cannot be used.
Here’s a common example of how agitating helps the cleaning process:
In an automatic washing machine your clothes are immersed in a soapy water solution, consisting of a
certain amount of detergent to the amount of water, at a suitable temperature. The clothes soak for a while
and then the washing machine agitates the clothes in the soapy water for better cleaning action.
4. Minimising „Drag-Out‟
Drainage during withdrawal of articles must be done carefully to minimise ‘Drag Out’. Spillage and carryover
of chemicals needs to be prevented or at least minimised.
Raise the articles and suspend them above the bath solution at an angle of 45° angle or more.

Pag. 47 din 215
Remember the importance of jigging articles at a 45° angle or steeper.
This allows excess liquid to drain back into the bath.
The jigged articles or the racks can be gently tapped, using a paddle, to assist drainage from the articles,
especially out of grooves and cavities
If possible use drag out boards to collect and return the drag out back into the tank.
This step also avoids wasting expensive chemicals and also prevents contaminating the rinse water and
solutions in the next operation.
5. Inspect for Water Breaks
The effectiveness of the pre-treatments and hot dipping largely depends upon how well the oil and other
contaminants are removed from the articles.
If the surface is not properly cleaned and oil remains, the water will ‘break away’ and reveal an un-wetted
surface. This is called ‘water break’.
A ‘water break free’ surface is one where the entire surface is wet after withdrawing the product from the
solution or rinse.
Example of a „water break free‟ surface:
When rain falls on a clean (no oil) window, it flows freely and smoothly down the glass surface. When rain
falls on an oily window, it tends to ‘stick’ in certain areas forming patches of wet and dry spots.
Good Degreasing Practice
1. Immerse the articles in the solution as fast as possible.
2. Unhook the flight bar if there is enough time.
3. Time in solution will differ depending on whether the solution is heated or not. Not heated – 15 –
20 minutes – Heated 5 – 10 minutes. If degreasing time exceeds 15 minutes in a heated solution, call
your supervisor or team leader.
4. Agitate the articles in the solution if the flight bar has not been unhooked. Air or steam jets and
ultrasonic cleaning can be used to agitate the solution. Do not use compressed air agitation.
5. Minimise Drag Out – withdraw the articles carefully and suspend at a 45° angle or more above the
bath. Allow about 45 seconds to a minute for the excess solution to drain.
6. Inspect for Water Breaks - after drainage, visually inspect the product to ensure that there are no
water breaks on all surfaces. Check blind areas. You want to see a ‘water break free’ surface.
7. Check all articles are still on the flight bar – if not get them out of the tank as soon as possible,
using the correct ‘fishing tools’.
8. Move to Rinsing (only after alkaline degreasing) – once drainage is complete, carefully move
articles to the water-rinsing bath as quickly as possible.

Pag. 48 din 215
Agitation in Degreasing
Do not use compressed air agitation, as it will deplete the caustic from the bath rapidly by the formation of
sodium carbonate, which is a much less active cleaning material.
Quality Control and Maintenance
Routine maintenance, chemical controls and tests are the responsibility of the QA department, but if you
notice any quality issues, tell your supervisor.
Skimming or Filtering
Remove the oily scum prior to the processing of product through the degreasing tank.
Removing oil, dirt and scum collected on the surface of the degreasing solution is done by use of a filter or
by skimming.
Continuously skimming the surface of the bath is still used as a cleaning method. A clean degreasing bath
surface is important
Some tanks have a weir at one end of the bath to collect the oil and grease as waste product in an external
grease trap. Returning the degreasing liquid separated within the external grease trap to the bath.
Alternatively a low pressure degrease filter is used to remove oil.
Solution Control
Regular checks should be done (ideally, once per working day, but a minimum of 3 checks per week is
recommended) to control the concentration
of the chemicals.

Pag. 49 din 215
Alkaline Solution
The solution needs to be checked for free alkali (alkali floating free in the solution) and total alkali (the sum
of free alkali and the alkali combined with the soil).
The ratio of the free alkali to total alkali should not be below 0.5. In other words, 50% of the alkali must be
free alkali.
Make fresh additions of the degreaser to maintain the minimum ratio.
When the amount of by-products (the cleaning material and the dirt and grease form compounds) builds up
to a level where the ratio cannot be maintained above 0.5, then it is time to de-sludge and regenerate
solution.
Never dispose of alkaline degreasers to waste.
There will be a schedule, which you need to follow on when to replace degreasing agents to ensure that
there is no re-greasing of the surfaces.
Acid Solution
Recover and recycle degreasing solution after removing impurities.
Replace the chemicals when they lose concentration through usage.
This reduces the consumption of the expensive degreasing solutions.
Wherever possible Hydrochloric Acid degreasers should be regenerated (recycled). If this is not possible,
such acid must be neutralised with lime alkali and removed from the plant in terms of an approved authority.
There will be a schedule, which you need to follow on when to replace degreasing agents to ensure that
there is no re-greasing of the surfaces.
Sludge Control
The sludge level will be checked on a weekly basis using a probe.
If the sludge level is not excessive it is usually pushed to one side by way of a paddle. The action is one of
‘squeezing’ the oil out of the sludge and letting the oil and scum float to the top where it can be removed.
The maximum level of sludge allowed is when the sludge interferes with the degreasing process.
When this happens the bath must be de-sludged.
De-sludging
Remove the sludge after bypassing the heat exchanger from the tank that is being de-sludged.
Transfer the contents to an empty tank, and manually remove the sludge.
Clean the walls of the tank using a high-pressure hose to remove all sludge adhering to the sidewalls.
Transfer back the degreasing solution into the cleaned degreasing tank and allow the solution to stand idle
for some hours. This allows an oily scum to rise to the surface.
Remove the bottom sludge once or twice per year or when required.
The time and date of the de-sludging must be logged and recorded.
Rinsing after Degreasing
For acid degreasing, it is NOT necessary to rinse the articles in water afterwards, because the acid residue
on the articles will not contaminate the pickling acid in the next step of the process.
Acid + Acid = No problem.

Pag. 50 din 215
For alkaline degreasing it IS necessary to rinse the product in water afterwards, to prevent carrying over
(drag out) of alkaline chemicals into the acid pickling solution.
Acid + Alkali = Problem - the acid will lose its strength.
Good Rinsing Practice (After Alkaline Degreasing)
1. Immerse the articles in the solution as fast as possible.
2. Do not unhook the flight bar in the rinsing process.
3. Time in rinse – 5 minutes.
4. Agitate the articles by moving the product up and down in the solution twice. This must be done
carefully so as not to damage the product or the tank.
5. Minimise Drag Out
6. Inspect for Water Breaks
7. Check all articles are still on the flight bar
8. Transfer - after rinsing, immediately transfer the article to the pickling tank to prevent rust on the
article.
Stagnant and Flowing Rinses
Stagnant rinse consists of filling the rinse tank with clean water once every two weeks, and dipping the
articles. Stagnant rinse does not give high-quality rinse. If using a stagnant rinse, increase the contact time
between the article and the rinse water.
Flowing rinse consists of continuous flow of water, which can be stopped and restarted when needed.
What happens if you see Water Breaks?
If a water break is found then return the article to the degreasing bath for further cleaning. Check the
temperature and concentration of the degreaser and adjust it to the correct levels.
Monitor the rinse for any oil build up of oil and grease as these will redeposit on the article and cause
galvanizing problems. Oil appears on the surface of the tanks as an iridescent film.
You do not want to see oil! This will indicate if the degreasing is working properly or not. Alert your
supervisor immediately!
Control of Rinsing
It is good practice to monitor the degreasing rinse by sampling daily. Check pH and iron content in water
rinse baths. These figures will indicate when it is time to renew the water in these baths. These figures are
recorded on the Daily Chemical Log Sheet. (refer to daily log)
Skim the oil layer on rinse water surface daily or more to prevent oil carryover on the article surface.
The water must be as clean as possible so as not to leave any residue or contaminants on the surface of the
metal.
Do not use the same tank for rinsing after degreasing that is used for rinsing after pickling (next process).

Pag. 51 din 215
In some plants there will be a double rinse tank or a cascade rinse, but this is rare for degreasing rinse. You
will hear more about this during the acid pickling rinse stage.
Sludge removal and de-sludging of the rinse tanks is the same as for the degreasing solution, but less sludge
is produced in the rinse tanks.
Safety in Degreasing
Personal Protective Equipment (PPE)
In the degreasing area, and all the pre-treatment areas, the minimum PPE would be:
Hard hats
Face shields/visors
Rubber boots
Long-sleeved acid-resistant overalls
Acid-resistant apron
PVC re-enforced gloves, elbow length
Additional PPE can be worn:
Neck/hat flaps
Earplugs – if noise exceeds acceptable levels
Safety Awareness and Procedures
The chemicals used in the pre-treatment tanks are hazardous and all safety precautions given in the material
data safety sheets (MSDS) should be followed.
Be aware of the location of the safety showers and eye rinse baths.
Vapour emitted from the caustic bath can contain traces of caustic material and may in extreme cases
represent a potential occupational health issue for personnel. Keep your distance from the bath and do not
stand or bend over the degreasing bath.
Additionally, caustic soda is highly corrosive and hazardous when in contact with exposed skin.
Remember – always add Acid to Water, never the reverse
Water rinsing operations that follow alkaline cleaning is one of the major sources of hazardous wastewater.
Accurately monitor by visual inspection, testing and record all the chemicals.
Waste Disposal
No chemicals should be disposed of down drains.
Never dispose of alkaline degreasers to waste.
Wherever possible Hydrochloric Acid degreasers should be regenerated (recycled). If this is not possible,
such acid must be neutralised with lime alkali and removed from the plant in terms of an approved authority.
Next Process
The articles are moved to the next pre-treatment solution where they are chemically cleaned in an acid
pickling bath.

Pag. 52 din 215
Acid Pickling Process
What is Acid Pickling?
Acid pickling is a chemical cleaning process, following on from degreasing, that removes rust, hot rolling mill scale, annealing scales and any other contaminants from the articles before it is galvanized.
Pickling involves dipping jigged articles into either a hydrochloric (HCl) or sulphuric acid (H2SO4) pickling solution.
What is the purpose of Acid Pickling?
The purpose of pickling is to remove any further surface contaminants that previous cleaning has not removed. Pickling goes deeper than Degreasing.
Remember „If it is not clean, it cannot be galvanized‟.
What Acid Pickling can remove?
The most common contaminants that can be removed are:
Heavy rust
Hot rolling mill scale*
Annealing scale*
The contaminants difficult to remove are:
• Oil and bitumen paints
*Hot rolling is the process of heating and converting semi-finished products of the steel mill into more suitable forms for commercial use.
*Annealing – process of softening the steel.
What has happened so far?
1. So far the batches of articles have come in from the customer and they have been weighed and labelled.
2. The articles have been taken off the truck and sorted and separated.
3. Inspection has taken place to see if these articles can be safely galvanized, looking at:
1. Design
2. Vent and drain holes

Pag. 53 din 215
3. Needs abrasive blasting
4. Needs Double Dipping (Large/Long articles)
4. More vent and drain holes may have been added. Snorkels or breather pipes are used if necessary.
5. Paint stripper may have been used to remove oil paints or varnish.
6. Welding slag, flux and spatter will have been removed by grinding
7. Heavy grease will have to be removed manually as it will not be removed during the normal degreasing process.
8. Articles have been checked for soldering (metal that has been soldered together), as the solder will be destroyed in the galvanizing process.
9. Products containing temporary or permanent bracing are checked (internal stiffeners, baffles, diaphragms, gussets etc)
10. Articles have been jigged correctly, ready for pre-treatment.
11. Articles have been degreased, either in an alkaline or acid solution.
12. If the articles were degreased in an alkaline solution they will have been rinsed in water.
What happens just prior to Acid Pickling?
If the articles were degreased in an alkali solution, they would have been rinsed in water before being put into the pickling tank.
If the articles were degreased in an acid solution, they would be put straight into the pickling tank.
The Pickling Solutions
Common acids used in Pickling
The most common acids are sulphuric (H2SO4) and hydrochloric (HCl).
Advantages and Disadvantages of the two acids:
Item Hydrochloric Acid (HCl) Sulphuric Acid (H2SO4)
Corrosion of structures
Severe Moderate
Health and safety Moderate Can be dangerous
Equipment for Specially lined tank due to severe Only mild steel storage tanks needed

Pag. 54 din 215
storage corrosive nature for concentrated acid
Pickling tanks Less expensive Need to heat – more expensive
Heating Not needed Required with close temperature control. High maintenance
Disposal of spent acid
To a regenerating plant Costly equipment for regeneration or disposal.
Transport cost Costly over long distance Less costly
Pickling rate Slower but less attack on metal Faster, attacks the steel, danger of over pickling
Zinc consumption Provides smooth coating, lower Zn consumption
Rougher surface leads to higher Zn consumption
Zinc stripping Can be used to make flux, hence no wastage or disposal
Not efficient for stripping. Disposal problem
Cost More expensive Less expensive
Acid Pickling Solutions
The quality controllers monitor the pickling solutions. They usually display on a white board near the tanks the ideal parameters for the solution and latest check.
Sulphuric Acid Solution
Usually this solution starts with a concentration of 10%.
Maintain sulphuric acid concentration between 6% and 10%.
The iron content in the solution must be below 7% (< 7%).
Too much iron sulphate in the solution deposits on the surface and the article and slows down the pickling action.
If the iron content gets too excessive discard or regenerate the solution.

Pag. 55 din 215
Temperature of Sulphuric Acid Pickling Solution
Temperature control is important with sulphuric acid pickling.
Maintain temperatures of sulphuric acid pickling tanks by heating between 60° and 80 °C.
Do not raise the temperature above 80° C as this will increase water vapour and raise humidity and will corrode plant structures.
Provide proper ventilation in the pickling room, when acid temperature is above 80°C. Alternatively; protect the pickle tanks by ventilated covers or hoods.
Hydrochloric Acid
Usually this solution starts with a concentration of 16%.
Maintain the hydrochloric acid concentration between 6% and 16%.
As pickling proceeds the iron concentration of the pickle solution will increase as the acid strength decreases.
The iron chloride remains dissolved and does not deposit on the surface of the article. It becomes a function of the acid concentration i.e. acting with the acid to pickle the articles.
To achieve the best pickling rate, the ratio of iron concentration to acid concentration needs to be closely monitored. Keeping the ratios balanced prevents discarding of old acid and use of too much new acid.

Pag. 56 din 215
However, when HCl concentration falls too low and the iron content too high, pickling is not possible. This solution can be used for stripping zinc from jigging chains and hooks.
Temperature of Hydrochloric Acid Pickling Solution
It is usually not necessary to heat the Hydrochloric Acid solution as it operates well at room temperature (ambient temperature), which is 25 °C.
HCl will still pickle effectively at temperatures between 15° and 30 °C. Below 15°C pickling will be very slow andabove 30 °C the solution will start fuming.

Pag. 57 din 215
Other interesting comparisons
Almost identical pickling rates can be obtained from:
Sulphuric acid with moderate concentration and higher temperature
and
Hydrochloric acid with high concentration and moderate temperature
Faster Pickling
Raising the temperature causes faster pickling, not a higher concentration of HCl. But the higher temperature can lead to loss of acid by drag out on the article. Also the temperature of HCl should not be raised beyond 30° C due to excessive fuming.
Raising the temperature of sulphuric acid also causes a faster pickle. You must not heat sulphuric acid more than 80° C.
Faster pickling creates a rougher surface, slightly more so with sulphuric acid.
Over Pickling
Over pickling occurs when the pickling solution attacks and dissolves base metal after scale removal. The major causes for over pickling are due to:
Different thicknesses of scale layers and some scale being more deeply embedded into the metal than others, all of which require more time for removal.
High temperature
High acid concentration
Other quality problems due to over pickling also include possible hydrogen embrittlement (when the steel loses too much strength and becomes brittle) and excessive surface roughness due to pickling blisters.
Why use Inhibitors in the Acid Solution?
Inhibitors provide better quality of galvanized product and reduce cost of pickling.
Inhibitors are absorbed on the surface of steel and form a layer that considerably reduces the attack of the acid on the metal. This reduces over pickling and lowers acid consumption.

Pag. 58 din 215
To be suitable as an inhibitor, a substance must be soluble in the acid and have some resistance to heat and other chemicals present in the solution.
The presence of inhibitors has no effect on the pickling rate.
Inhibitor also smoothes the surface ensuring a better finish to the article and lowers pick-up of zinc.
The iron build up in the acid solution is reduced while the life of the pickling solution is increased.
The quantity of acid pickle waste is also reduced.
Some inhibitors reduce acid fog and steam around the pickle tank improving the working conditions.
Fuming is reduced and there is less wear of the pickling facilities
The inhibitor concentrations are monitored and more added regularly to the pickling acid.
Use an anti-fume agent to minimize acid droplets in the air around the tanks and to provide better environment for personnel and equipment. The anti-fume agent may be a foam layer, plastic balls, etc., or a chemical additive that minimizes droplet formation, which is sprayed on top of the pickling bath.
Pickling Solution Tanks
Acid tanks must be acid resistant. Pickling tanks can be made of concrete, steel framed and polypropylene (plastic) or fibreglass or rubber lined, or have wooden protection of the internal sidewalls. Sometimes acid resistant bricks are used.
All heated tanks must be covered when not in use.

Pag. 59 din 215
Heating of Pickling Solution (H2SO4)
Heating of the pickling solution is only necessary if sulphuric acid is used.
Open steam jets through acid-and heat-resistant materials may be used. However, use of open steam heating causes dilution of the pickle solution. This can result in loss of acid through overflow and increases waste control costs. They also consume more energy for heating. The better practice is to heat the pickling tank using heating coils connected to a waste heat recuperator recovers any waste heat that is around.
A waste heat recuperator recovers heat from the exhaust gases from the galvanizing furnace. The waste gases are passed over a heat exchanger coil that transfers the heat to a liquid in the coil. The heated liquid is run through another coil in the pickling tank transferring the heat to the solution.
Fumes in Pickling
During acid pickling, fumes can arise from the pickling bath, depending on its concentration and temperature.
Acid fumes also arise from the pickled articles.
Fuming is increased by:
Air speed across the surface of the tank
Stronger acids
High acid temperature
Practices for reducing loss of acids due to fuming
Do not directly inject steam into acid pickling baths to avoid unacceptable levels of fuming.

Pag. 60 din 215
Where mist or fume is emitted, these are captured and vented into a suitable capture facility such as a scrubber. A scrubber is a capture facility where the gas is passed through water falling like mist, which strips the acid out of the gas.
Using a pickling inhibitor e.g. foam spray, and a fume suppressant in the pickling solution will reduce or eliminate emissions from the acid.
Do not operate an acid tank without either a hood; exhaust fans near the tank, or a fume suppressant. Some plants have a completely enclosed cleaning room.
Good Acid Pickling Practice
1. Immerse the articles in the solution as fast as possible.
2. Unhook the flight bar if there is enough time.
3. Time in solution - 15 – 30 minutes

Pag. 61 din 215
4. Agitate the articles in the solution if the flight bar has not been unhooked. Air or steam jets and ultrasonic cleaning can be used to agitate the solution. Do not use compressedair agitation.
5. Minimise Drag Out – withdraw the articles carefully and suspend at a 45° angle or more above the bath. Allow about 45 seconds to a minute for the excess solution to drain.
6. Inspect for Water Breaks - after drainage, visually inspect the product to ensure that there are no water breaks on all surfaces. Check blind areas. You want to see a ‘water break free’ surface.
7. Check all articles are still on the flight bar – if not get them out of the tank as soon as possible, using the correct ‘fishing tools’.
8. Move to Rinsing – once drainage is complete, carefully move articles to the water-rinsing bath as quickly as possible. Do not expose the articles to the air for to long, to prevent ‘flash rusting’, which degrades the surface.
Agitation in Pickling
Agitation reduces pickling time.
Agitation also breaks up the scale mechanically, and removes the build up of iron salts on the article surface.
Agitation brings fresh acid to the surface of the article and the weak acid, contaminated with dissolved iron, is spread throughout the bath away from the metal.
Increase the agitation in the pickling solution by air or steam injection or mechanically, especially when the acid concentration is low.
Flash Rusting
Clean steel is attacked by oxygen in the air, causing it to rust within a few minutes. This is usually only a potential problem in acid pickling.

Pag. 62 din 215
Quality Control and Maintenance
Although routine maintenance, chemical controls and tests are the responsibility of the QA department, it is everyone’s responsibility.
Pickle solution limits should be monitored and recorded on a daily basis and each time a ‘new’ pickling bath is made up to ensure the best pickling rate.
When the iron concentration in the pickle solution no longer dissolves in the acid, pickling will not take place.
When HCl concentration falls too low and the iron content too high, pickling is not possible. This solution can be used for stripping zinc from jigging chains and hooks.
To achieve the best pickling rate, the ratio of iron concentration to acid concentration needs to be closely monitored. Keeping the ratios balanced prevents discarding of old acid and use of too much new acid.
Sludge Control and De-sludging
Removing acid sludge is a problem because of the corrosive nature of acids.
Only when the sludge is a big problem is it removed, usually once or twice a year.
The sludge can be disposed via the site wastewater treatment plant or off-site disposal by an authorized procedure.
Rinsing after Pickling
Good Rinsing Practice (After Pickling)
1. Immerse the articles in the solution as fast as possible.
2. Do not unhook the flight bar in the rinsing process.
3. Time in rinse – 5 minutes in each tank (two-tank rinse)
4. Agitation of the rinse water is created by the backwards cascade series of streams of water of the two rinse tanks. The water flow is in the opposite direction of movement of the articles.
5. Minimise Drag Out
6. Inspect for Water Breaks
7. Check all articles are still on the flight bar

Pag. 63 din 215
8. Transfer - after rinsing, immediately transfer the article as quickly as possible into the flux solution. Speed is necessary to prevent the clean steel being attacked by oxygen in the air, causing ‘flash rusting’ within a few minutes.
Agitation in Pickling Rinse
Before immersing the articles in the rinse tank, use water nozzles to produce a fine water spray on parts going into a rinse to remove about 80-90% of the solution from outside surfaces of the work. This is also a good way to provide the fresh water to a rinse tank.
After the maximum amount of pickle solution has drained back, hydrogen bubbles (surface still active) and scale residue (not quite dissolved yet, similar to scale in your electric kettle) are carried along with the article into the rinse water.
Provide vigorous agitation by raising and lowering the lift carefully in the rinse solution to remove the thin film of acid and iron sulphate adhering to the surface of the article and to ensure a chemically clean surface.
Two-tank/Cascade Rinse System
The two-tank rinse system (two rinsing tanks) is often used after pickling.
The two-tank rinse system significantly increases the efficiency of rinsing and ensures that all excess acid, acid pickle salts and iron compounds are removed from the surface of the article.
The first tank rinses the articles that come directly from the pickle tank.
After exiting the first tank, immerse the article in the second overflowing type rinse tank (cascading rinse). The second bath should preferably cascade backwards into the first rinse tank.

Pag. 64 din 215
These continuous flow rinse tanks work by the water entering at the bottom, flowing diagonally upward across the tank and flowing out the opposite side. The water flow is in the opposite direction of movement of the article.
What happens if you see Water Breaks?
If a water break is found then return the article to the degreasing or pickling bath for further cleaning. Check the temperature and concentration of the degreaser/pickle and adjust it to the correct levels.
Monitor the rinse for any oil build up of oil and grease as these will redeposit on the article and cause galvanizing problems. Oil appears on the surface of the tanks as an iridescent film.
You do not want to see oil! This will indicate if the degreasing and pickling is working properly or not.
At this stage there should be no oil contamination! If you see oil contamination, alert your supervisor immediately!
Flash Rusting
Clean steel is attacked by oxygen in the air, causing it to rust within a few minutes.
Control of Rinsing
Add wetting agents to the rinsing water, especially after pickling with sulphuric acid.
Test the water daily. Determine the pH by the use of the pH meter. If it is too acidic it should be discharged and replaced using the cascade method to control acid build-up. Record such on suitable graphs and in the logbook.
Use the water in this (first) tank as make up water for the pickle tank when the free acid content in this tank reaches 1 - 2% and the iron content reaches 0.5 - 1%. Also this rinse water can be used as a top up in the pickling solution.
Safety in Acid Pickling
Personal Protective Equipment (PPE)
In the acid pickling area, and all the pre-treatment areas, the minimum PPE would be:
Hard hats
Face shields/visors

Pag. 65 din 215
Rubber boots
Long-sleeved acid-resistant overalls
Acid-resistant apron
PVC re-enforced gloves, elbow length
Additional PPE can be worn:
Neck/hat flaps
Earplugs – if noise exceeds acceptable levels
Safety Awareness and Procedures
The chemicals used in the pre-treatment tanks are hazardous and all safety precautions given in the material data safety sheets (MSDS) should be followed. (Example)
The primary health and safety issue is the impact of acidic rinse water contact with eyes and exposed skin surfaces
Be aware of the location of the safety showers and eye rinse baths.
Air emissions from the rinse water tanks consist mainly of water vapour and have little potential to impact air quality either internally or in the external environment.
It is essential to use good work-handling procedures to minimize the risk of splashing.
Remember – always add Acid to Water, never the reverse
Over time static (drag-out) rinses following acid pickling baths gradually increase in acid and metal contaminant levels to the point where such levels constitute a potential exposure hazard to operators.
Running rinses pose a lower exposure risk than static rinses due to the inherently lower acid contaminant levels. However, pH values of less than 4 (<4) have been observed in running rinses.

Pag. 66 din 215
Waste Disposal
The spent rinse can sometimes be blended with spent acid and the two wastes disposed off simultaneously.
Next Process
The last pre-treatment process is fluxing and drying, providing final cleaning and temporary corrosion protection up until the moment the articles enter the zinc kettle.
Action Steps in Pre-Treatments
Certain action steps are common throughout all the pre-treatment – degreasing, rinsing after degreasing, acid pickling, rinsing after acid pickling, fluxing and drying.
1. Immersion
The loaded jig is immersed in the solution as fast as possible. The solution must completely cover all the articles.
2. Unhooking the Flight Bar
If the crane is needed for another operation and there is enough time (15 –30 minutes), the flight bar will be unhooked.
3. Agitation
The Solution
The solution needs to be circulated around the articles. Preferably re-circulate the solution through a pump and filter.
Air or Steam Jets - Air or steam jets just below the surface of the solution achieve a gentle agitation with fine bubbles, so that the solution is disturbed and makes contact with all surfaces of the product.
Ultrasonic Cleaning - These cleaners create a fine vibration of the water thus loosening the dirt; they are commonly used in the jewellery industry.
Compressed Air - Compressed air can be used to agitate the liquid, but is often too violent; this method can only be used in the flux tank.
The Articles
Agitation of the articles can also be achieved by moving the product up and down in the solution by means of the handling equipment, so that the solution is disturbed and makes

Pag. 67 din 215
contact with all surfaces of the product. The movement of the product causes air bubbles to escape, allowing the solution to act directly upon the surfaces to be cleaned. This can only be done if there is time to move the products whilst immersed in the solution. If the flight bar is unhooked this method cannot be used.
Here’s a common example of how agitating helps the cleaning process:
In an automatic washing machine your clothes are immersed in a soapy water solution, consisting of a certain amount of detergent to the amount of water, at a suitable temperature. The clothes soak for a while and then the washing machine agitates the clothes in the soapy water for better cleaning action.
4. Minimising „Drag-Out‟
Drainage during withdrawal of articles must be done carefully to minimise ‘Drag Out’. Spillage and carryover of chemicals needs to be prevented or at least minimised.
Raise the articles and suspend them above the bath solution at an angle of 45° angle or more.
Remember the importance of jigging articles at a 45° angle or steeper.
This allows excess liquid to drain back into the bath.
The jigged articles or the racks can be gently tapped, using a paddle, to assist drainage from the articles, especially out of grooves and cavities
If possible use drag out boards to collect and return the drag out back into the tank.
This step also avoids wasting expensive chemicals and also prevents contaminating the rinse water and solutions in the next operation.
5. Inspect for Water Breaks
The effectiveness of the pre-treatments and hot dipping largely depends upon how well the oil and other contaminants are removed from the articles.
If the surface is not properly cleaned and oil remains, the water will ‘break away’ and reveal an un-wetted surface. This is called ‘water break’.
A ‘water break free’ surface is one where the entire surface is wet after withdrawing the product from the solution or rinse.
Example of a „water break free‟ surface:
When rain falls on a clean (no oil) window, it flows freely and smoothly down the glass surface. When rain falls on an oily window, it tends to ‘stick’ in certain areas forming patches of wet and dry spots.

Pag. 68 din 215
Good Degreasing Practice
1. Immerse the articles in the solution as fast as possible.
2. Unhook the flight bar if there is enough time.
3. Time in solution will differ depending on whether the solution is heated or not. Not heated – 15 – 20 minutes – Heated 5 – 10 minutes. If degreasing time exceeds 15 minutes in a heated solution, call your supervisor or team leader.
4. Agitate the articles in the solution if the flight bar has not been unhooked. Air or steam jets and ultrasonic cleaning can be used to agitate the solution. Do not use compressed air agitation.
5. Minimise Drag Out – withdraw the articles carefully and suspend at a 45° angle or more above the bath. Allow about 45 seconds to a minute for the excess solution to drain.
6. Inspect for Water Breaks - after drainage, visually inspect the product to ensure that there are no water breaks on all surfaces. Check blind areas. You want to see a ‘water break free’ surface.
7. Check all articles are still on the flight bar – if not get them out of the tank as soon as possible, using the correct ‘fishing tools’.
8. Move to Rinsing (only after alkaline degreasing) – once drainage is complete, carefully move articles to the water-rinsing bath as quickly as possible.
Agitation in Degreasing
Do not use compressed air agitation, as it will deplete the caustic from the bath rapidly by the formation of sodium carbonate, which is a much less active cleaning material.
Good Rinsing Practice (After Alkaline Degreasing)
1. Immerse the articles in the solution as fast as possible.
2. Do not unhook the flight bar in the rinsing process.
3. Time in rinse – 5 minutes.
4. Agitate the articles by moving the product up and down in the solution twice. This must be done carefully so as not to damage the product or the tank.
5. Minimise Drag Out
6. Inspect for Water Breaks
7. Check all articles are still on the flight bar
8. Transfer - after rinsing, immediately transfer the article to the pickling tank to prevent rust on the article.

Pag. 69 din 215
Stagnant and Flowing Rinses
Stagnant rinse consists of filling the rinse tank with clean water once every two weeks, and dipping the articles. Stagnant rinse does not give high-quality rinse. If using a stagnant rinse, increase the contact time between the article and the rinse water.
Flowing rinse consists of continuous flow of water, which can be stopped and restarted when needed.
What happens if you see Water Breaks?
If a water break is found then return the article to the degreasing bath for further cleaning. Check the temperature and concentration of the degreaser and adjust it to the correct levels.
Monitor the rinse for any oil build up of oil and grease as these will redeposit on the article and cause galvanizing problems. Oil appears on the surface of the tanks as an iridescent film.
You do not want to see oil! This will indicate if the degreasing is working properly or not. Alert your supervisor immediately!
Good Acid Pickling Practice
1. Immerse the articles in the solution as fast as possible.
2. Unhook the flight bar if there is enough time.
3. Time in solution - 15 – 30 minutes
4. Agitate the articles in the solution if the flight bar has not been unhooked. Air or steam jets and ultrasonic cleaning can be used to agitate the solution. Do not use compressed air agitation.
5. Minimise Drag Out – withdraw the articles carefully and suspend at a 45° angle or more above the bath. Allow about 45 seconds to a minute for the excess solution to drain.
6. Inspect for Water Breaks - after drainage, visually inspect the product to ensure that there are no water breaks on all surfaces. Check blind areas. You want to see a ‘water break free’ surface.
7. Check all articles are still on the flight bar – if not get them out of the tank as soon as possible, using the correct ‘fishing tools’.
8. Move to Rinsing – once drainage is complete, carefully move articles to the water-rinsing bath as quickly as possible. Do not expose the articles to the air for to long, to prevent ‘flash rusting’, which degrades the surface.
Agitation in Pickling
Agitation reduces pickling time.

Pag. 70 din 215
Agitation also breaks up the scale mechanically, and removes the build up of iron salts on the article surface.
Agitation brings fresh acid to the surface of the article and the weak acid, contaminated with dissolved iron, is spread throughout the bath away from the metal.
Increase the agitation in the pickling solution by air or steam injection or mechanically, especially when the acid concentration is low.
Good Rinsing Practice (After Pickling)
1. Immerse the articles in the solution as fast as possible.
2. Do not unhook the flight bar in the rinsing process.
3. Time in rinse – 5 minutes in each tank (two-tank rinse)
4. Agitation of the rinse water is created by the backwards cascade of the two rinse tanks. The water flow is in the opposite direction of movement of the articles.
5. Minimise Drag Out
6. Inspect for Water Breaks
7. Check all articles are still on the flight bar
8. Transfer - after rinsing, immediately transfer the article as quickly as possible into the flux solution. Speed is necessary to prevent the clean steel being attacked by oxygen in the air, causing ‘flash rusting’ within a few minutes.
Agitation in Pickling Rinse
Before immersing the articles in the rinse tank, use water nozzles to produce a fine water spray on parts going into a rinse to remove about 80-90% of the solution from outside surfaces of the work. This is also a good way to provide the fresh water to a rinse tank.
After the maximum amount of pickle solution has drained back, hydrogen bubbles (surface still active) and scale residue (not quite dissolved yet, similar to scale in your electric kettle) are carried along with the article into the rinse water.
Provide vigorous agitation by raising and lowering the lift carefully in the rinse solution to remove the thin film of acid and iron sulphate adhering to the surface of the article and to ensure a chemically clean surface.
Two-tank/Cascade Rinse System
The two-tank rinse system (two rinsing tanks) is often used after pickling.
The two-tank rinse system significantly increases the efficiency of rinsing and ensures that all excess acid, acid pickle salts and iron compounds are removed from the surface of the article.

Pag. 71 din 215
The first tank rinses the articles that come directly from the pickle tank.
After exiting the first tank, immerse the article in the second overflowing type rinse tank (cascading rinse). The second bath should preferably cascade backwards into the first rinse tank.
These continuous flow rinse tanks work by the water entering at the bottom, flowing diagonally upward across the tank and flowing out the opposite side. The water flow is in the opposite direction of movement of the article.
What happens if you see Water Breaks?
If a water break is found then return the article to the degreasing or pickling bath for further cleaning. Check the temperature and concentration of the degreaser/pickle and adjust it to the correct levels.
Monitor the rinse for any oil build up of oil and grease as these will redeposit on the article and cause galvanizing problems. Oil appears on the surface of the tanks as an iridescent film.
You do not want to see oil! This will indicate if the degreasing and pickling is working properly or not.
At this stage there should be no oil contamination! If you see oil contamination, alert your supervisor immediately
Good Fluxing Practice
1. Immerse the articles in the solution as fast as possible.
2. Do not unhook the flight bar in this process.
3. Time in solution - 2 – 8 minutes
4. Agitate the solution vigorously. Use compressed air agitation as this will speed up the fluxing process.
5. Minimise Drag Out – withdraw the articles carefully and suspend at a 45° angle or more above the bath. Allow about 45 seconds to a minute for the excess solution to drain.
6. Inspect for Water Breaks – there should be no water breaks at this stage. The surface of the article will retain its uniform grey colour, but as the flux starts to drain, a dry, ‘crystalline’ deposit becomes evident on the surface of the product.
7. Check all articles are still on the flight bar – if not get them out of the tank as soon as possible, using the correct ‘fishing tools’.
8. Move to Drying Bay – once drainage is complete, carefully move articles to the drying bay. With a good quality flux, there should be no ‘flash rusting’.

Pag. 72 din 215
Agitation in Fluxing
In fluxing the agitation needs to be more aggressive than in the previous processes. This increased agitation can be by achieved by compressed air.
Brushing Flux
After withdrawing the articles from the tank it is sometimes necessary, if there are bare areas, to brush the flux solution on these areas. Bare areas can occur when the articles has angles and crevices that are difficult to cover with the flux solution.
The Fluxing Process
What is Fluxing?
Fluxing is the final cleaning and preparation process before the product is galvanized.
What is the purpose of Fluxing?
The purpose of fluxing is to provide further and final cleaning of the steel up until the moment that it enters the molten zinc.
Remember „If it is not clean, it cannot be galvanized‟.
Fluxing also provide a temporary corrosion protection barrier in order to prevent any further formation of rust on the articles e. g. ‘ Flash rusting’
Thus allowing some delay between fluxing and galvanizing, this will happen in a busy plant. This is a good feature because in a smoothly run plant, the molten zinc tank should not be waiting for the articles. Articles should be lined up ahead of the hot dipping operation.
What has happened so far?
1. So far the batches of articles have come in from the customer and they have been weighed and labelled.
2. The articles have been taken off the truck and sorted and separated.
3. Inspection has taken place to see if these articles can be safely galvanized, looking at:
1. Design
2. Vent and drain holes
3. Needs abrasive blasting
4. Needs Double Dipping (Large/Long articles)

Pag. 73 din 215
4. More vent and drain holes may have been added. Snorkels or breather pipes are used if necessary.
5. Paint stripper may have been used to remove oil paints or varnish.
6. Welding slag, flux and spatter will have been removed by grinding
7. Heavy grease will have to be removed manually as it will not be removed during the normal degreasing process.
8. Articles have been checked for soldering (metal that has been soldered together), as the solder will be destroyed in the galvanizing process.
9. Products containing temporary or permanent bracing are checked (internal stiffeners, baffles, diaphragms, gussets etc)
10. Articles have been jigged correctly, ready for pre-treatment.
11. Articles have been degreased, either in an alkaline or acid solution.
12. If the articles were degreased in an alkaline solution they will have been rinsed in water.
13. The articles have already been further cleaned by means of acid pickling and rinsed in water.
What happens just prior to Fluxing?
The final cleaning pre-treatment process, acid pickling and rinsing, has taken place.
The Flux Solution
The flux solution consists of a mixture of two chemical compounds, each being compounds of two elements, namely:
Zinc Chloride (ZnCl2), and
Ammonium Chloride (NH4Cl)
These two compounds are mixed in water to form a product called Zinc Ammonium Chloride.
The flux can be produced using so-called Double Salts containing a compound of two elements or alternatively Triple Salts.
Double Salts – 56% Zinc Chloride (ZnCl2), and 44% Ammonium Chloride (NH4Cl)
Triple Salts – 46% Zinc Chloride (ZnCl2), and 54% Ammonium Chloride (NH4Cl)
Put simply:
Double Salts – More Zinc Chloride than Ammonium Chloride

Pag. 74 din 215
Triple Salts – More Ammonium Chloride than Zinc Chloride
A suitable wetting agent is also added to the flux, which aids and improves the contact ‘wetting’ between the flux and the steel surface. Also adding a wetting agent minimizes the amount of flux carried on the article and thereby reducing the fumes in kettle.
Ammonium Chloride (NH4Cl)
Has a quick fluxing action but can be unstable and give off dense fumes upon immersion in the molten zinc. High humidity increases the fume density.
Zinc Chloride (ZnCl2)
Stabilises the flux and protects the article surface from further oxidation because it reacts more slowly. In the drying process (after fluxing) it forms a salt, which provides a temporary crystallinelike crystal, shiny and clear barrier protecting the steel surface from further oxidation.
Difficult Articles
If the articles are difficult to galvanize, or the degreasing or pickling is poor for some reason, by adding more ammonium chloride (NH4Cl) to the flux solution will increase the flux activity. There will be more fumes with these stronger solutions but they can give better coatings on difficult work. The more active flux also generates more ash in the kettle.
Initial Flux Solution
When making up a new tank of flux solution, the salts of zinc chloride (ZnCl2) and ammonium chloride (NH4Cl) are dissolved in a small amount of water in the correct proportion. The salts are scattered evenly and the solution is agitated by compressed air to prevent the salts settling in one area. The balance of the water is then added and it is agitated again to mix to a uniform solution.
This initial solution is topped up with more salts when required.
The flux solution must be accurately monitored by visual inspection, testing and the recording of all the chemicals.
The Importance of Colour
Flux colour is a good visual indicator of the solution’s quality and purity.
Over time you will become a good judge on flux performance and the ultimate quality of the final product.

Pag. 75 din 215
The colour of the clean, well-controlled and monitored flux solution is a „light grey watery‟ colour. This indicates that the solution is within specifications (not too much iron transfer).
If the flux colour becomes more ‘reddish brown and muddy‟, it indicates the presence of iron.
If the flux colour becomes ‘greenish brown‟, it indicates the presence of excess amounts of dissolved iron.
In both instances, you must report the change in colour to the line supervisor who will ensure that corrective action is taken.
Fluxing Solution Tanks
Fluxing tanks can be made of concrete, steel framed and polypropylene (plastic) or fibreglass or rubber lined, or have wooden protection of the internal sidewalls. Sometimes acid resistant bricks are used.
All heated tanks must be covered when not in use.

Pag. 76 din 215
Heating of Flux Solution
The flux solution is heated to between 35°C and 45°C if an adequate drying facility exists.
Where the drying facilities are minimal or less effective, a flux temperature of 60°C to 80°C is normally used.
Although the temperature of the flux is not important to the fluxing action, the temperature of the articles should remain below 80° C to prevent oxidizing (breaking down) the flux.

Pag. 77 din 215
There are a number of ways in which to heat the flux baths. Each method has cost implications with the exception of re-cycled exhaust gasses from the galvanizing bath furnace. The following are examples of ways in which the flux baths can be heated:
Electricity
Gas or furnace oil heaters
Steam from a boiler
Exhaust gases from the zinc furnace (recycling)
Keeping the temperature at the correct level is very important. Flux baths should be insulated where practicable, including the base. Also insulated covers can be put over the bath when not in use.
The build up of free acid in the flux bath increases corrosion of the heating coils, if this form of heating is used. If bubbles appear near the heating coils in the bath, alert the supervisor.
Fumes
There is minimal fuming from the flux tanks, but safety precautions must be taken and PPE must be worn.
Good Fluxing Practice
1. Immerse the articles in the solution as fast as possible.
2. Do not unhook the flight bar in this process.
3. Time in solution - 2 – 8 minutes
4. Agitate the solution vigorously. Use compressed air agitation as this will speed up the fluxing process.
5. Minimise Drag Out – withdraw the articles carefully and suspend at a 45° angle or more above the bath. Allow about 45 seconds to a minute for the excess solution to drain.
6. Inspect for Water Breaks – there should be no water breaks at this stage. The surface of the article will retain its uniform grey colour, but as the flux starts to drain, a dry, „crystalline‟ deposit becomes evident on the surface of the product.
7. Check all articles are still on the flight bar – if not get them out of the tank as soon as possible, using the correct ‘fishing tools’.
8. Move to Drying Bay – once drainage is complete, carefully move articles to the drying bay. With a good quality flux, there should be no ‘flash rusting’.

Pag. 78 din 215
Agitation in Fluxing
In fluxing the agitation needs to be more aggressive than in the previous processes. This increased agitation can be by achieved by compressed air.
Brushing Flux
After withdrawing the articles from the tank it is sometimes necessary, if there are bare areas, to brush the flux solution on these areas. Bare areas can occur when the articles has angles and crevices that are difficult to cover with the flux solution.
Quality Control and Maintenance
Although routine maintenance, chemical controls and tests are the responsibility of the QA department, it is everyone’s responsibility.
Four main quality checks of the fluxing process:
1. Ratio of zinc chloride to ammonium chloride
2. pH control
3. Iron level
4. Temperature
Never discard the flux solution! Better practice is to chemically treat the contaminated solution rather than prepare a new solution especially when large flux tanks are involved.
Most plants have their own purification system ensuring continuous purification.

Pag. 79 din 215
Due to the continuous purification process there is no need to remove the sludge or de-sludge the flux tank.
If continuous re-generation is not possible, such solution should be removed from the plant by an approved authority.
Drying after Fluxing
The purpose of drying after fluxing is the evaporation of water and not preheating the articles.
DO NOT OVERHEAT THE ARTICLE OVER 80°C. DO NOT DRY FOR TOO LONG.
Control of Drying
Control of the temperature of the articles is very important; if it is too hot it will break down the flux. Remember that this is not a pre-heating of the article it is a drying of the flux coating.

Pag. 80 din 215
Drying is usually a continuous operation prior to hot dipping.
The drying bay is usually heated by means of hot air being blown across the bay area. The air can be heated in a number of ways, but the most economical is the use of the waste exhaust gases discharged from the zinc furnace.
A pit dryer with a cover and heated by waste gases from kettle furnace also provides adequate drying. Make sure the waste gases do not contain any moisture
Another practice, if there is not adequate drying, is to flux at higher temperature without raising the temperature of the article above 80°C. If the temperature or the article goes above 80°C the flux will burn and lead to uncoated areas or bare spots.
Using dryers at 100°C will provide better quality finish. Do not dry above 120°C or allow the article temperature of the article to exceed 80°C to prevent break down of flux.
Allow sufficient time, about 10 – 15 minutes, to dry in air prior to transferring the articles to the zinc kettle to avoid hazardous spattering from the immediate evaporation of the water.
Do not store the dried article near flux or cleaning tanks where the humidity can be high, because it will become damp again and the water vapour will get into the flux.
Do not allow the fluxed and dried article to stand longer than necessary prior to immersion in zinc bath, to avoid moisture build-up when the humidity is high.
Articles given a heavier coating using higher strength flux solutions must be dried more slowly to give additional protection from rusting.
The drying bay also serves as a temporary storage area for articles prepared for zinc dipping. This ensures a continuous flow of product through the zinc bath.
The drying bay must be large enough to accommodate the jigged articles. It is useful to have the drying bay large enough to house three or four flight bars of jigged articles at any one time.

Pag. 81 din 215
This will improve the production rates by always having product available and waiting to be dipped in the molten zinc.
Safety in Fluxing
Personal Protective Equipment (PPE)
In the fluxing area, and all the pre-treatment areas, the minimum PPE would be:
Hard hats
Face shields/visors
Rubber boots
Long-sleeved acid-resistant overalls
Acid-resistant apron
PVC re-enforced gloves, elbow length
Additional PPE can be worn:
Neck/hat flaps
Earplugs – if noise exceeds acceptable levels
Safety Awareness and Procedures
The chemicals used in the pre-treatment tanks are hazardous and all safety precautions given in the material data safety sheets (MSDS) should be followed.
The primary health and safety issue is the impact of hot corrosive flux solution in contact with eyes and exposed skin surfaces as it is a skin irritant.
Be aware of the location of the safety showers and eye rinse baths.
It is essential to use good work-handling procedures to minimize the risk of splashing.
Vapour emitted from the flux bath is mainly steam and may contain traces of zinc ammonium chloride (ZAC) that is potentially an occupational health issue for personnel. Do not lean over the flux bath. Adequate ventilation is vital to prevent the inhalation of fumes.
Air emissions from natural evaporative drying comprise mainly water vapour and traces of ammonia from flux solutions. These emissions do not pose health or safety risk to personnel.
However, when cleaning the internal surfaces of the drying oven, appropriate respiratory PPE should be used.

Pag. 82 din 215
Waste Disposal
Never discard the flux solution! Better practice is to chemically treat the contaminated solution rather than prepare a new solution especially when large flux tanks are involved.
Most plants have their own purification system ensuring continuous purification.
If the plant does not have a purification system the flux solution should be disposed of. Any off-site disposal of flux solution requires the services of an authorized agency because of the high ammonia content of the waste.
Remove iron that accumulates in the flux solution by treatment with hydrogen peroxide (H2O2). Sludge generated during this process contains high levels of ammonia and must be disposed by an authorized agency.
Natural drying frequently results in drainage of excess flux solution to the floor and requires clean-up and liquid waste disposal.
Liquid wastes are mainly from drag out of flux solution falling on the drying area floor. This may occur in the form of drips during transport or during the static dwell time in the drying area. The fluid may run into an effluent collection pit or may dry on the workplace floor.
Clean the floor periodically by water hose. Make sure that the contaminated water is treated (own water treatment system) or disposed off-site by authorised agency.
No chemicals should be disposed of down drains.
Next Process
From the drying bay the articles go straight into the molten zinc in the kettle.

Pag. 83 din 215
Hot Dip Galvanizing
What is Hot Dip Galvanizing?
Hot dip galvanizing is a process by which iron and steel can be treated to prevent corrosion.
It involves dipping the article, cleaned of rust, mill scale and other contaminants, into a bath of molten zinc, producing a coating of iron/zinc alloys with pure zinc on the surface.
What is the purpose Hot Dip Galvanizing?
Hot dip galvanizing is a highly cost effective way to protect our steel structures from corrosion. For example, galvanizing makes bridges, stadiums, buildings, etc., last longer.
It covers the surface with an impenetrable barrier to prevent moisture or air reaching the metal.
It also prevents rust creep underneath the coating. This means that the zinc is consumed first before the iron or steel. Corrosion does not occur between the zinc coating and the steel. A hot dipped coating of zinc is able to provide more permanent protection than a paint coating. This protective coating can last for decades.
What has happened so far?
1. So far the batches of articles have come in from the customer and they have been weighed and labeled.
2. The articles have been taken off the truck and sorted and separated.
3. Inspection has taken place to see if these articles can be safely galvanized, looking at:
1. Design
2. Vent and drain holes
3. Needs abrasive blasting
4. Needs Double Dipping (Large/Long articles)
4. More vent and drain holes may have been added. Snorkels or breather pipes are used if necessary.
5. Paint stripper may have been used to remove oil paints or varnish.
6. Welding slag, flux and spatter will have been removed by grinding
7. Heavy grease will have to be removed manually as it will not be removed during the normal degreasing process.
8. Articles have been checked for soldering (metal that has been soldered together), as the solder will be destroyed in the galvanizing process.
9. Products containing temporary or permanent bracing are checked (internal stiffeners, baffles, diaphragms, gussets etc)

Pag. 84 din 215
10. Articles have been jigged correctly, ready for pre-treatment.
11. Articles have been degreased, either in an alkaline or acid solution.
12. If the articles were degreased in an alkaline solution they will have been rinsed in water.
13. The articles have already been further cleaned by means of acid pickling and rinsed in water.
14. The articles have been fluxed, which is the final cleaning and preparation process before the product is galvanized. Fluxing also provide a temporary corrosion protection barrier in order to prevent any further formation of rust on the articles.
15. The articles have been hot air dried to evaporate the moisture and dry the flux coating.
Why all the Pre-treatment?
Remember „If it is not clean, it cannot be galvanized‟.
Since molten zinc cannot react with iron and steel covered in mill scale or oil, the article to be galvanized must first be prepared for hot dipping by cleaning processes that include:
Abrasive blasting (when needed)
Degreasing (Alkali or Acid cleaning)
Pickling (Acid cleaning)
Fluxing (final cleaning and temporary protective coating)
This coating of flux activates the surface to allow the zinc to ‘wet’ it and react with it on immersion.
So the aim of the pre-treatments is to supply the galvanizing bath with clean work, which will react freely with the molten zinc.
What happens just prior to Hot Dip Galvanizing?
Drying is usually a continuous operation prior to hot dipping.
The Zinc Coating
A number of factors are important to understand, which will affect the quality of the final product. Assuming that the work has been properly prepared, the characteristics of the coating formed on a particular type of iron or steel depends on:
1. Quality of the zinc.
2. Temperature of the molten zinc.
3. Rate and time of immersion.
4. Rate and angle of withdrawal.
5. The steel composition.

Pag. 85 din 215
Quality of the Zinc
Zinc used for hot dip galvanizing is available in approximately 1-ton packs of 25 kg ingots, or 1 or 2 ton ‘jumbo’ ingots. There are various grades of zinc but usually a zinc grade with about 1% lead is used. Slab zinc containing more than 1% can be safely used, since the excess lead separates and sinks to the bottom of the bath when the zinc is molten.
Temperature of the Molten Zinc
Almost all work can be satisfactorily galvanized within the temperature range of 440°C to 465°C. The most common working temperature is 450°C.
Rate of Immersion
The articles should besubmerged as quickly as possible, but with due regard to the operator’s safety.
Ensure that no flux solution is trapped in the hard-to-drain area. This causes an eruption and splattering of molten zinc for some distance from the kettle.
When articles are immersed in molten zinc, their temperature rises to that of the molten zinc. The rate at which the article reaches this temperature across its entire surface will depend on:
• Thickness of the sections • Rate of immersion • Total mass of the article
The speed of immersion also influences the evenness of the coating, particularly with long articles where the difference in immersion time between the first and last articles to enter the bath maybe considerable.
Lower the article as rapidly and safely as possible by using the fast speed motor on the handling equipment. Use hoists capable of providing two speeds for fast immersion and slow withdrawal. Ensure that immersion is fast and withdrawal is slow at between 0.5 to 1 m / min.
Distortion is also minimised by rapid immersion.

Pag. 86 din 215
Time of Immersion
In general, a coating heavy enough to suit most purposes will be obtained if the work is left in the bath until ‘boiling off’* stops and the articles withdrawn immediately. The reaction between the cleaned steel and the molten zinc proceeds quickly in the first one to two minutes after the work has been immersed, producing an alloy layer that continues to grow at a decreasing rate the longer the articles are left in the bath. The time of immersion to ‘boiling off’ varies between 1 to 5 minutes.
The time of immersion in the zinc bath varies with the:
· Chemistry and thickness of the steel
· Temperature of molten zinc
· Rate and angle of withdrawal
· Aluminium and lead content of molten zinc
· Thickness of coating desired
Equalize the immersion time by immersing one end at a proper angle and withdrawing the other end at similar angle.
*„Boiling Off‟
Once material is immersed, turbulence will be seen in the molten zinc, which is caused by the steel that is been heated to the same temperature as the molten zinc.
Sometimes this is referred to as ‘boiling’ or ‘boiling off’, which is a good description of what is seen.
As the relatively cold steel (±60°C) enters the molten zinc a reduction in zinc temperature occurs in the zinc immediately surrounding the cold steel. The steel will become coated with a film of solidified zinc, i.e. the molten zinc is cooled below its melting point of 419.5°C and freezes.
Once the turbulence (boiling) in the zinc stops, the solidified zinc will have melted away and the ‘chemical’ or the ‘metallurgical’ reaction between the zinc and steel will have taken place, i.e. it has galvanized.
This reaction between the molten zinc and the steel forms a zinc iron alloy, which is the reason why a hot dip galvanized coating has such a strong bond and adhesion to the steel.

Pag. 87 din 215
In the case of heavy articles, lifting and lowering of the jig in the molten zinc will accelerate the melting of solidified zinc and thus reduce the required immersion time.
The light or thin articles heat up to the galvanizing temperature a lot faster than the large heavy structural sections, which, due to the large mass of steel, will require a longer immersion time in order to galvanize.
Narrow products such as angles, should be suspended at the steepest possible angle to the vertical. Apart from improving quality and better drainage of expensive zinc and chemicals, the correct angle of suspension also reduces the possibility of distortion (bending or twisting) when the product is dipped in the molten zinc at 450° C.
Double End or Side Dipping
Large articles exceeding bath dimension require double dipping (end or side) and only a part of the article is heated. The time for immersion is one to five minutes, depending upon the thickness, configuration, and type of alloy for the articles to be coated.
In double dipping the zinc layer overlaps the layer made by the first dip making ‘touch-ups’ of the zinc layer unnecessary.
The Coating Layers
The galvanized coating consists of a series of iron-zinc alloy layers over coated with a layer of zinc. The alloy layers enhance the abrasion resistance and allow a thicker coating to be applied. The interior layers of the galvanized coating comprised of iron/zinc, which are formed when molten zinc reacts with iron in the steel.
When an article is dipped in the zinc bath, within the first half minute of reaction time, three layers of zinc-iron (Fe-Zn) alloy are formed on the surface of the article.
The fourth layer (unalloyed) is a pure zinc coating. The thickness, especially of this layer needs to be controlled.
Eta Layer
100% Zinc
Soft outer layer – good ductility
Light grey colour
Zeta Layer
94% Zinc and 6% Iron
Harder than steel – abrasive resistant
Dark grey colour
Delta Layer
90% Zinc and 10% Iron

Pag. 88 din 215
Extremely hard
Possible site for brittle fractures
Gamma Layer
75% Zinc and 25% Iron
Very thin layer
Well matched with steel structure
Control of the Pure Zinc Layer (Eta layer)
Control the pure zinc layer coating by:
Proper dipping time
Bath temperature and concentration
Withdrawal speed
When the article is removed from the molten zinc bath, the bright pure zinc layer (Eta layer) with 100% Zn is retained on the surface.
The thickness and the characteristics of this layer depend upon the withdrawal rate between 0.5 and 1.0 metre/minute from the zinc bath and the draining rate of liquid zinc. A faster withdrawal rate allows the article to carry out more molten zinc on the surface and produces a thicker coating.
The growth of the three alloy layers will continue as long as the article is at high temperature when some or the entire Eta layer is converted to higher Fe-Zn alloy. Quenching the article in water will minimize this reaction.

Pag. 89 din 215
Rate and Angle of Withdrawal
The rate of withdrawal determines the thickness of the unalloyed zinc layer left on the work.
In general the withdrawal needs to be slow and controlled. Provided the articles are not withdrawn faster than the rate at which the zinc drains freely from the surface, the unalloyed zinc layer of coating is evenly distributed.
Withdraw the articles through a clean zinc surface (skimmed) to prevent entraining ash (ash in the zinc) and other surface contaminants in the zinc coating.
Remove the articles from the molten zinc at the slowest possible speed, using the hoist creep speed, usually 0.5 - 1.0 metre/minute.
The Initial Melt Down
The quantity of zinc ingots required to pack a bath prior to melt down will depend on its size.
The bath is packed with a number of 25kg zinc ingots in such a way so as to achieve the maximum surface area contact between the zinc ingots and the bath wall.
Once the zinc bath is fully loaded, insulated (thermal) covers are placed over the top of the packed bath and melt down may proceed.
The thermal covers are very important in that substantial heat losses can be prevented with energy savings and more efficient melt down made possible.
Never charge the bath with lead when melting down for the first time. Lead has a very low melting point and if added to the zinc it will be difficult to maintain an even temperature on the walls and bottom of kettle. Lead is only added once the zinc is fully molten and up to operating temperature.
The diagram shows how the zinc blocks lying nearest the kettle wall melt first and cause the formation of a protective Fe-Zn layer.
To avoid a too high pressure on the kettle walls, a gap of about 100mm must be kept free in the middle.
The expansion of zinc is about three times that of iron. To stabilize the zinc blocks some soft wooden beams can be put in
the gap.

Pag. 90 din 215
The expanding zinc blocks compress them and either they rise to the surface or are broken. They then char in the liquid zinc and float to the surface.
After testing the heating system, and packing the bath with zinc, melt down may proceed.
Primary temperature control, during meltdown, is monitored in the furnace space. Checking the external furnace gives you the measure of the external kettle temperature.
After the zinc is molten, temperature control will be switched to monitoring the actual zinc temperature.
The initial meltdown process can take anything from 8 to 12 days to complete, depending on the type and size of the kettle. This is due to the ‘drying out’ and heating up of the surrounding environment. Subsequent meltdowns can be achieved within 6 to 10 days.
A recommended process is to increase the bath temperature by 4°C every 2 hours, until 300°C is reached. At this temperature, the zinc bath and its contents is allowed to ’heat soak’ for 24 hours. Up to this point the external kettle was being heated and monitored.
After this ‘heat soak’, the temperature is increased to about 420°C, again at 4°C every 2 hours. At 420°C the zinc starts to melt. At this point the temperature must remain constant until all the zinc is melted.
From now on the focus is on the temperature of the zinc. It is now very important to ensure that additional zinc ingots are added to the bath to ensure that the bath is kept ‘full’ and in contact with the bath sidewalls at all times.
While the actual melt down is taking place, no further temperature increase will be evident, due to the zinc changing state from solid to liquid. This will take approximately 48 hours to complete, depending on the bath size.

Pag. 91 din 215
Once the zinc is molten, the temperature will again be increased by 10°C every 2 hours. Final zinc temperature is achieved at between 445°C and 450°C, depending on the plants operational procedures.
Once melt down is complete, the molten zinc is skimmed (see steps for skimming) and the zinc melt cleared of impurities such as char, floating dross etc. One easy way to do this is using the potato trick:
The potato trick involves the process of placing five or six potatoes within a perforated basket fixed to the end of a solid steel bar. This arrangement is then submerged below the molten zinc surface and dragged around the bath. The potatoes, being moist and at room temperature react violently with the molten zinc causing them to be become extremely agitated. The charred potatoes attract the particles of dross and make them easy to remove (activated carbon). By using the potato trick the galvanizer is able to ‘clean’ the molten zinc and return to production in as short a time as possible.
The surrounding bath area should also be cleaned (housekeeping standards) before the galvanizing of steel is allowed to commence.
Behaviour of Molten Zinc
The liquid zinc is always moving. It streams up along the heated surfaces, into the middle of the kettle and down again. The zeta crystals (hard zinc) are carried along by the zinc and settle mostly at the bottom of the kettle.
Part of the up streaming zinc is deflected near the zinc surface because here no heat is put into the zinc.
Zeta crystals are carried along with the zinc and settle on the kettle wall where they build a layer of porous hard zinc about 100mm below the zinc surface. If this layer becomes too thick it must be scraped off carefully.
When solid zinc blocks are added to the melt they sink to the bottom. Dry blocks sink faster than moist ones. Moist blocks move around the molten zinc more and the blocks can touch the kettle wall where they can destroy the protective hard zinc layer.
Common practice is to have ten 25kg zinc ingots on the side flange of the kettle (five each side). These are carefully pushed into the molten zinc when the kettle requires a top-up. A drossing spoon or grab could be used to place the ingots into the kettle.
The larger ingots (1 and 2 tonne) need to be added by means of a crane and must be immersed very slowly.

Pag. 92 din 215
Adding Lead
Lead is added to the molten zinc for two reasons:
1. To help the drossing* process.
2. To improve the fluidity (viscosity) of the molten zinc and thereby improve the runoff as the product is withdrawn from the molten zinc during galvanizing.
Lead can come in the form of zinc ingots, e.g. HG (Higher Grade) has 0.03% and SHG (Special Higher Grade) has 0.003% lead (most galvanizing plants use SHG). However, the quantity of lead supplied in this form is insufficient for requirements and thus additional lead must be added to the molten zinc.
25 kg lead ingots are added along the length of the bath. Remember not at the initial melt down. These ingots will sink to the bottom of the bath and melt, forming a ‘lead layer’ of approximately 50mm to 70mm in thickness covering the whole base or bottom of the bath.
Lead can be mixed into the molten zinc by stirring it into suspension. Molten zinc at 450°C will support up to 1.2% lead in suspension. At 1.2% lead the molten zinc is saturated, i.e. the molten zinc will not support any more lead in suspension and the excess will precipitate out and settle to the bottom. Should the zinc bath be allowed to stand for an extended period the lead in suspension will tend to settle out and the lead composition will reduce to approximately 0.5% i.e. what was in suspension is now at the bottom of the bath.
Adding Aluminium
Ideally zinc should have 0.005% to 0.007% aluminium for reasons of the molten zinc’s fluidity and to some extent the reaction rate of zinc on the steel.
Both the lead and aluminium aid the run-off of molten zinc from the articles being processed. Aluminium retards the zinc ash production, improves the evenness of the surface finish and gives a bright appearance to the coating by reducing spangle* size. Too little aluminium in the zinc gives the surface of the article a yellowish hue. Hence the correct addition of aluminium will have a marked influence on zinc consumption and finish quality.
Small quantities of aluminium are added to the molten zinc, 3 or 4 times during the course of a shift. Accurate quantities to be added are determined by trial and experience. Never add all at one time, but at intervals during the operating shift.
The aluminium content must, however, not exceed 0.007% with 0.005% regarded as adequate. Aluminium in excess quantities will adversely influence coating quality with uncoated areas appearing on steel surfaces.
A weak or out of balance flux solution (zinc chloride/ammonium chloride), and high quantities of aluminium could result in uncoated steel surfaces.
Aluminium is added as an alloy (Ingots of 80% zinc and 20% aluminium) and placed in a perforated cage welded to a rod for immersing in the bath. The immersed cage must be moved

Pag. 93 din 215
around below the zinc surface for the full length and width of the bath to ensure even disbursement.
If ingots are dropped onto the bath surface, they will float and the 20% aluminium will be oxidised and therefore wasted. The aluminium will also tend to form undesirable concentrated pockets on or near the molten zinc surface.
At start up, the quantity of aluminium/zinc ingots added will depend on the size of the bath. The Line Supervisor will determine the quantity of aluminium/zinc ingots to be added. A periodic aluminium check should be carried out during the course of the shift.
The drossing operation removes aluminium from the bath and therefore after drossing, the aluminium concentration should be checked and adjusted as necessary. A routine physical analysis of the zinc is carried out, once per month, to ensure that daily practices are well maintained and effective.
A quick guide to the aluminium content is to scatter a few crystals of ammonium chloride salts onto the molten zinc surface, after it has been skimmed.
At low aluminium levels, the aluminium oxide film is rapidly dissolved and the ammonium chloride crystals move about freely on the zinc surface. Between 0.005% and 0.007% the crystals lie inert for several seconds before moving around slowly. At undesirably high levels, the crystals lie inert on the zinc surface and are gradually volatilised.
If in doubt regarding the level of aluminium present, a zinc sample should be taken from the bath and sent out for accurate analysis. Such a sample must be taken from well below the zinc surface to avoid a misleading result, which will arise if the thin aluminium film occurring on the zinc surface is included in the sample.
When zinc samples are sent for analysis, the laboratory tests for zinc (Zn), aluminium (Al) and lead (Pb).
The rate of withdrawal and the angle determines the thickness of the pure zinc layer on the article.
Ensure a continuous and uninterrupted withdrawal creep speed to match the drainage rate of molten zinc on the article surfaces.
The withdrawal rate should also be slow enough to prevent excessive thickness and irregularity of the coating, but fast enough to yield an outer layer of bright zinc.
Equalize the immersion time by immersing one end at a proper angle and withdrawing the other end at similar angle.
Once the article suspended from the jig is above the molten zinc level, remove any remaining zinc droplets, which have not drained away to avoid drainage spikes.

Pag. 94 din 215
Remember at the jigging stage the importance of jigging the articles at a 45° angle or steeper from the flight bar for effective drainage of pre-treatment chemicals and molten zinc.
Shake off the excess zinc with a vibrator on the hoist, by striking the article or carriers, or by centrifuging where practical.
With long articles, for which the withdrawal occupies a large part of the handling time, higher speeds may be necessary to maintain a reasonable rate of production.
Also remember the international target minimum standard of 5 dips per hour.
The Steel Composition
Steel reacts with the zinc in the galvanizing process. Certain compositions of steel react excessively with zinc to give thick and unsightly coatings. These coatings may be brittle and flake off.
The galvanizer should always ensure that the customer’s steel is suitable for galvanizing. The main elements to check for are silicon and phosphorus.
What is Spangle?
*Spangle is the appearance of tiny fern shaped crystals on the outer surface of the galvanized coating.
The spangle or grain varies in size, brightness and surface relief, depending upon a number of factors, most of which are related to the composition of the coating and cooling practices.
As the outer molten zinc surface begins to solidify, random crystal nucleation sites appear on the surface. At these sites, actual grains of zinc form in a typical dendritic (fern-like) way.
These fern-like patterns grow outwards from the centre and when they come into contact with other sites they stop. This produces the visually observable spangles.
Of interest is that each spangle is thickest at its centre and thinnest at its edge. This also assists with them being clearly observable.
The size and type of spangle are greatly affected by the concentrations of the alloying elements and the rate in which the article is cooled.
Some of the common elements added to the zinc that play a part in the production of spangle are lead (Pb) and aluminium (Al). Other elements such as antimony (Sb), bismuth (Bi) and tin (Sn) are sometimes used.
The largest crystals, or spangle, are formed on smooth surfaces with a thin layer of zinc.

Pag. 95 din 215
The immersion time plays a part in producing spangle. The longer the dipping time the thicker the alloy layers. The result is less free zinc available to form crystals once removed from the kettle.
Quenching articles after galvanizing will cool the zinc coating to a level below that at which crystals will form, and the appearance of spangle will be significantly decreased or eliminated.
The desire to have a clear spangle has been shown to be cultural and well-defined spangles are indicators of a good coating in areas such as the Far East. In other regions spangle is not considered important.
Although spangle can be pleasing to the eye, it is not a certainty. More important is that whether the coating is lightly spangled, highly spangled or matte grey, the protection from corrosion provided by the galvanized coating is identical.
What is Dross?
* „Dross‟ is a pasty solid iron-zinc alloy containing about 25 parts of zinc to one part of iron. Dross appears dull grey and grainy and should not be bright and shiny. Dross is a waste product formed by iron carry over from the pickling process where water-rinsing has been poor, as well as from the actual galvanizing process, which we have seen is a reaction between the molten zinc and the steel. Some zinc iron alloys are freed during the galvanizing process and forms dross.
Dross or ‘heavy zinc’ that forms as a result of the galvanizing process will float above the lead layer, but below the molten zinc. These layers are formed as a result of the different densities of the three materials. Lead is the densest and therefore goes to the bottom of the bath. Dross is less dense than lead, but more dense than zinc and hence floats above the lead, but below the molten zinc. Using lead in the bottom of the bath will facilitate the removal of the dross, due to the fact that the dross separates from the lead.
What causes excessive Dross?
The extent of dross formation will vary, depending on the reactivity and quantity of steels being galvanized.
However, there is no direct relationship between coating thickness and dross formation. Ductile cast iron, for example, produces massive quantities of dross with moderately thick coatings achieved, whereas mild steel containing reactive levels of silicon can produce very thick coatings whilst not necessarily resulting in a similarly high formation of dross.
Poor Drossing Practice
Excessive dross formation can be caused by:
Higher Zinc temperature - Normally set to provide a zinc temperature of 4450C to 450°Cduring galvanizing. Higher zinc temperatures will result in higher levels of dross formation.

Pag. 96 din 215
Extended Immersion periods - To a lesser or greater degree and, depending on steel composition, extended immersion times will produce more dross in relation to the quantity of steel processed. The immersion period should be as short as possible in order to reduce overall zinc consumption as well as to maintain efficient production levels.
The dross level on the bath floor must never be allowed to build up excessively. Too much dross creates a rough coating and also reduces the depth of the kettle.
Dross is a poor conductor of heat and if the build up is such that the internal bath plate in line with the heating elements is submerged in dross, heat will not be able to escape into the molten zinc and local hot spots, which damage bath plate, will develop.
At the same time, dross retained in the bath for lengthy periods becomes denser and will eventuallyadhere to bath walls thus making its removal extremely difficult.
Poor drossing practice is a common cause of bath failure and such failures, when they arise, are more catastrophic than in the case of damage resulting from zinc over-temperature. This is because the plate is destroyed near the bath floor as opposed to just below the zinc surface and hence, zinc run out can destroy the entire galvanizing bath installation.
Good Drossing Practice
The build up of dross is dependent on:
· The volume of work
· The reactivity of material being processed
Good drossing techniques remove as much free zinc as possible from the dross. Dross with iron content over 3% is good dross.
Dross levels must be monitored and a regular routine set up.
While it is important to remove dross, one must also guard against excessive drossing as such practice leads to zinc wastage.
The dross level is determined by means of a steel probe, which is used to check the level every week.
If the layer exceeds 150 mm, in any given week, the bath must be drossed. Although the weekly dross production varies, the average during a 4 – 6 week period must be approximately the same.
When dross production increases with no cause to be found, it can be a sign that the temperature at the inside of the kettle wall is too high and the kettle is being attacked more than normal by the molten zinc.
Drossing normally takes place at the end of a production week and this facilitates the addition of new zinc and enables dross particles, which have been stirred up during drossing, to settle prior to galvanizing recommencing after the weekend.

Pag. 97 din 215
For the best drossing results the zinc temperature must be set at 4400C. A perforated spoon or grab is provided and prior to the operation commencing, it must be inspected to ensure that the perforations are not blocked.
These can be cleared either by stripping in the acid stripping bath or by means of an electric drill. Blocked holes will prevent entrained zinc from draining out of the spoon on withdrawal.
If a drossing spoon is used care must be taken not to scrape the sides of the kettle and remove the thin protective zinc and iron alloy layer.
Drossing commences at one end of the bath and is systematically continued until the other end is reached. A second run then takes place in the reverse direction. Special care must be taken to ensure that the corners have been adequately cleaned.
As each shovel load is withdrawn, it must be suspended over the bath with the contents worked, by means of a wooden pole, to allow free zinc to drain back into the bath.
When drossing is complete, the supervisor will determine, with the aid of a probe, that the bath is clean. If drossing has been thorough, the probe will fall freely through what little dross remains.
All dross removed must be weighed and the mass recorded prior to removal from the plant. New zinc is then added with the mass recorded and the zinc level increased to the standard position.
Steps for Good Drossing Practice
Step 1 - Check Dross Level
The dross level is determined by means of a steel probe, which is used to check the level every week. If the layer exceeds 150 mm, in any given week, the bath must be drossed.
Step 2 - Set Kettle Temperature to 4400C
For the best drossing results the zinc temperature must be set at 4400C.
Step 3 - Check the Perforated Spoon or Grab
Prior to the operation commencing, the perforated spoon or grab must be inspected to ensure that the perforations are not blocked.
Step 4 - Clear the Perforated Spoon or Grab

Pag. 98 din 215
These can be cleared either by stripping in the acid stripping bath or by means of an electric drill. Blocked holes will prevent entrained zinc from draining out of the spoon on withdrawal.
Step 5 - Commence Drossing
Drossing commences at one end of the bath and systematically continue until the other end is reached. If a drossing spoon is used care must be taken not to scrape the sides of the kettle and remove the thin protective zinc and iron alloy layer.
Step 6 - Second Run
A second run then takes place in the reverse direction.
Step 7 - Check Corners
Special care must be taken to ensure that the corners have been adequately cleaned.
Step 8 - Drain Shovel Loads
As each shovel load is withdrawn, it must be suspended over the bath with the contents worked, by means of a wooden pole, to allow free zinc to drain back into the bath.
Step 9 - Complete Drossing/Supervisor Check
When drossing is complete, the supervisor will determine, with the aid of a probe, that the bath is clean. If drossing has been thorough, the probe will fall freely through what little dross remains.
Step 10 - Weigh and Record
All dross removed must be weighed and the mass recorded prior to removal from the plant.
Skimming
Prior to lowering of articles into the kettle, the zinc surface must be skimmed to remove ash. Lowering must then take place as rapidly as possible by means of the fast speed motor on the handling equipment.
Zinc Ash
At the galvanizing temperature, of 450°C, the molten zinc surface reacts with oxygen in the atmosphere. This forms zinc oxide (ZnO) and other contaminants, which are referred to as ash.
Skimmed ash is accumulated at the end of the bath from where it is removed. Before such skimmed ash is disposed of it should be reworked in order to extract as much of the metallic zinc as possible. Some operations install zinc ash recovery units, justified by the amount of metallic zinc recovered from ash when reworked.
Green Zinc
If galvanizing plants send out their ash to a local recovery unit it comes back to the plant in ingot form, in what is called, ‘green zinc’. This poor quality ingot has very high iron content. A large amount of dross is created by green zinc.
Good Skimming Practice
The formation of ash and its removal can be extremely wasteful and the following procedures will avoid unnecessary zinc losses in this form

Pag. 99 din 215
Never remove ash if not dipping.
Skimming is necessary both before immersion and before withdrawal during the galvanizing operation to avoid ash collecting on the surface of the material being galvanized.
The skimming operation must be carried out with a smooth flowing action. Excessive agitation and the creation of ripples or waves will increase the formation of more ash while not providing an ash free zinc surface.
The skimming operation should take place in one direction only. This should be towards the end of the bath where a container is situated to collect the ash. This container will have a weir or a circular steel ring sieve mounted in the zinc and supported from the bath top flange.
As skimmed ash builds up, it must be scooped off the zinc surface with the aid of a perforated ladle. Before depositing the contents of the ladle into the container it must be tapped against the bath side to remove as much entrained molten zinc as possible.
The ash in the container should be shaken from time to time; ideally each time more ash is put in, to help the drainage of the remaining entrained zinc metal back into the bath.
Failure to do so will result in ash and residues adhering to the product surface as the articles are withdrawn from the molten zinc and lead to unacceptable product quality.
When the ash container is full, the ladle should be used to remove the ash taking care to avoid contact with the zinc surface. In this way, the quantity of metallic zinc removed in the waste ash will be low.
The galvanizing process will result in the accumulation, on the zinc surface, of zinc oxide and other residues. Prior to withdrawal, therefore, the zinc surface must be skimmed in order to ensure that surface contaminants are not entrained in the zinc on galvanized material.
Withdrawal of material from the molten zinc must take place at the slowest possible speed, utilising the hoist creep speed, usually 0.5 - 1.0 m/minute. Withdrawal should be continuous and uninterrupted as the creep withdrawal speed is calculated to equal the drainage rate of excess zinc present on steel surfaces.
Once the product has been properly withdrawn the product is moved to the water quench and passivating area. Articles that are not to be quenched or passivated, are de-jigged and air-cooled.

Pag. 100 din 215
Steps to Good Skimming Practice
Step 1 – Check kettle operation
Skimming must take place before immersion and before withdrawal during the galvanizing operation to avoid ash collecting on the surface of the material being galvanized. Never remove ash if not dipping!
Step 2 - Smooth Flowing Action
Skimming must be carried out with a smooth flowing action. No excessive agitation or creating ripples or waves, as this will form more ash and not an ash free zinc surface.
Step 3 - One Direction Only
Skimming must be in one direction only. This should be towards the end of the bath where a container is situated to collect the ash e.g. a weir or a circular steel ring sieve.
Step 4 - Scooped Off Skimmed Ash
As skimmed ash builds up, it must be scooped off the zinc surface with the aid of a perforated ladle.
Step 5 – Tap and Deposit
Before depositing the contents of the ladle into the container it must be tapped against the bath side to remove as much entrained molten zinc as possible.
Step 6 – Shake Container
Shaking the ash in the container each time more ash is put in, to help drainage of the remaining entrained zinc metal back into the bath. If not done, ash and residues will adhere to the product surface and lead to unacceptable product quality.
Step 7 – Remove Full Containers
Using the ladle, remove the full containers taking care to avoid contact with the zinc surface. In this way, the quantity of metallic zinc removed in the waste ash will be low.
Step 8 – Ash Disposal
Local recovery units buy the entrained ash then sell it back to the plant in ingot form. This is called green zinc.
Splashing
Excessive splashing, apart from being dangerous, is one of the major causes of zinc surface oxidation. Zinc readily reacts with the oxygen in the atmosphere forming ash (ZnO).
Splashing of molten zinc allows this process to speed up due to the agitation of the zinc surface. Splashing can be prevented in three main ways:
· Adequate drying of material prior to dipping into molten zinc. A good supply of material in the drying area, waiting to be galvanized, will ensure sufficient drying time prior to galvanizing.
· Maintenance of clean and uncontaminated flux
· Zinc bath enclosures, such as an overhead fume extraction hood. An overhead fume extraction hood will contain zinc splashing, which can be collected and returned to the bath.

Pag. 101 din 215
Good Galvanizing Practice
1. Skim the ash from the surface of the molten zinc
2. Dip the articles in the molten zinc as fast as possible, without splashing
3. Leave until „boiling off‟
4. Skim again before articles are withdrawn
5. Withdraw slowly
6. Suspend above the bath for good drainage
7. Remove ‘drainage spikes’ (zinc spikes)
8. Move to a water quenching or passivation tank or cool in the air
Inspection after Hot Dipping
Visually inspect the coating to determine that no uncoated areas exist and that all drops of molten zinc have been removed.
If uncoated areas exist, stop hot dipping articles until the cause of the problem has been established.
Rejects are extremely costly and result in a waste of time, chemicals, energy, and zinc.
Zinc Temperature Control
Zinc temperature control is of prime importance. Temperature control is achieved by the main control instrument, which is housed in a control room or a well-positioned control panel clearly visible to the operator.
The primary zinc temperature controller is set at the required operating temperature (usually 445°C to 450°C) and will automatically control the zinc temperature.
The maximum limit is normally 465°C, with the lower limit of 435°C. These settings are extremely important and must not be varied. Maximum and minimum temperatures are also set on a secondary backup safety controller. So if the primary temperature controller fails the secondary controller will take over. The system is normally supported by an alarm (siren) that signifies that either the maximum or minimum temperatures have been exceeded. In some plants these controls are connected to an automatic shutdown.
The temperature of the molten zinc in the galvanizing bath not only influences the quality of the galvanized coating, but also has a direct bearing on the service life of the equipment.
Zinc temperatures in excess of 470°C reduce the life of the steel bath substantially, while a sustained bath temperature in excess of 485°C will result in the destruction of the galvanizing bath within a few days.
Should the zinc temperature fall below its melting point, 419.5°C, bath damage can occur during the re-melting process. It is thus essential that the zinc temperature be maintained within the set limits.

Pag. 102 din 215
Hot Dipping Temperature Control
Maintain the molten zinc temperature in the range of 445-450°C. The bath should never be heated above 465°C to prevent linear growth of the coating. This will produce thicker coating and also reduce kettle life. Below 435 °C, the reaction between zinc and iron becomes sluggish and inefficient.
Ensure temperature measurement at locations shown in the image.
Furnace Design
The good furnace design will provide an even heat distribution through the kettle wall, i.e. ‘no hot spots’.
Currently, using gas, flat flames burners, end-fired high-velocity burners and; electric resistance heating are among the most common kettle heating systems.
Kettle life depends entirely on the amount of heat transferred through the kettle wall and the design of the furnace with its ability to transfer the heat evenly and efficiently with minimum damage to the kettle.
The furnace that is most efficient and produces the best kettle life is the one that produces the most even radiation of heat onto the outer surface of the kettle wall.
In this way, the inner kettle wall is kept at the lowest most uniform temperature, and erosion of the wall is minimized.
Historically, the industry has undersized and over fired the galvanizing furnace, and as a result, short kettle life has been the result

Pag. 103 din 215
Gas Furnaces
1. Traditional End Fired Furnaces
End fired furnaces have been in use for many years. They are excellent for specific plant applications with moderate production rates, are easy to run and maintain and inexpensive to build.
However, end fired furnaces must be carefully designed and the kettle wall must be protected with insulation for the first metre from the burner or rapid erosion of the kettle inner wall will occur.
The major portion of heat transfer through the kettle wall occurs in the next metre or so (where the flame is radiant). This is easily shown during meltdown of long kettles where the zinc in the radiant region of the kettle is the first to melt.
It is particularly important not to over fire this type of furnace.
2. Modern End and Side Fired Furnaces
High velocity burners
High velocity burners can be fired continuously with high fire at maximum heat input during dipping of the articles, and at low fire when the kettle is idling between dips and over the weekend. The turn down is continuous between the high flame and the low flame. The fuel efficiency is high at the high fire and decreases to minimum fuel efficiency at low fire. The hot gases spin around the kettle resulting a very even heat transfer rate, eliminating hot spots and further resulting in high thermal efficiency.
Flat Flame Burners
The flat flame furnace uses a number of burners spaced evenly along the sides of the furnace. A well-designed side fired ‘flat flame’ furnace is good for high production rates.
Each burner is positioned optimally from its neighbour and separated from the kettle by a gallery/corridor of approximately 300mm to avoid kettle overheating, and if the kettle is properly sized for the desired production rate, kettle life will be much improved.
The setting of correct air/fuel ratio is important.
A swirling motion is imparted to the flame, forcing it back against the gallery wall and away from the kettle, so designed to prevent hot spots.
Effective Design
Both furnace designs have their place in the industry. All modern burner designs will burn fuel efficiently, but burner efficiency has

Pag. 104 din 215
little to do with the efficient transfer of heat through the kettle wall. It is the furnace design that impacts on the efficiency and evenness of heat transfer.
Burner systems should be set to optimize combustion (complete burning) of the gases (computerized settings). There is an optimum (most effective) air/fuel ratio for each setting. The flame colour provides a good indication of how correct this setting is. A rich fuel with no premixed oxygen produces a yellow sooty flame; a lean fully oxygen premixed flame produces no soot and the flame is a blue colour. (The purple colour is just a result of the photographic process).
Electric Furnaces
1. Electrical Resistance Heating
Electric furnaces are the most reliable and maintenance free of all types and the cost is about the same as a flat flame furnace. However, the cost of electricity may make this furnace economically unattractive.
In electrical resistance heating, 60% of the heat is transferred by radiation and 40% by convection from the high temperature heating elements.
By grouping heaters into banks of heated wires, heat can be provided in specific zones.
The resistance heating coils, mounted on the exterior sidewalls of the kettle, heats zinc directly.
With good insulation of the furnace walls and the kettle bottom, the thermal efficiency is high and the heat losses are low.
Direct heat generation at the exterior wall enables accurate temperature control.
Kettle Size
The size and shape of the kettle depends on the article size, steel alloy, and type of zinc alloy to be used, and quantity of parts to be galvanized.
The weight of zinc in the bath should be at least 20 times the weight of articles dipped in one hour including the weight of the articles, jigs, racks, etc. i.e. this is calculated only on the weight of what is immersed into the zinc.

Pag. 105 din 215
In practice for maintaining high production rates, this ratio may be doubled to 40.
The amount of zinc in the kettle should be sufficiently large to ensure temperature uniformity when the articles are introduced.
The size of the kettle must be suitable for the articles to be galvanized and provide at least the international target minimum standard of 5 dips per hour.
The kettle length is largely determined by product to be hot dip galvanized.
Kettle depth is mainly determined by the heating method and overall thermal requirements. The kettle should be deep enough so that the articles will be at least 0.30 m above the bottom of the kettle to provide space for the dross to settle.
The width is determined by the type of handling equipment for transporting the articles through the zinc bath.
Minimum top surface area should be used to reduce heat loss and produce less surface oxidation.
Very small kettles will place greater demand on the heating system as the rate of heat removed by the articles becomes too high.
Kettle Hoods and Enclosures
Air quality is the primary concern in the operation of a hot dip galvanizing plant. The principle component is the particulate emission (smoke), which escapes from the surface of the molten zinc bath as the article to be galvanized is dipped.
The emission is caused by the volatility of the flux and is primarily ammonium chloride although zinc oxide is also present.
Tests made of the air around the kettle have shown that these fumes do not present a health hazard to personnel, but even though the rate of emission is low, the typical light blue haze is source of complaints.
Pollution control agencies in general have ruled that these fumes must be collected using the best available technology.

Pag. 106 din 215
The combination of a tightly enclosed fume hood or enclosure and a baghouse will capture most of the particulate emission.
This filter is equipped with a powerful suction fan and cloth bags through which the air is filtered, and it may be thought of as a very large vacuum cleaner. The fume hood also makes a significant contribution to personnel safety by containing the splatter of hot zinc that sometimes results when work is dipped.

Pag. 107 din 215
Extraction hoods must be big enough to pull the unwanted air up from the kettle and the filter it and re-circulate for good ventilation.
The distance from the kettle must be at least sufficient to permit the articles to be galvanized to be conveyed over and away from the kettle, and to be lowered into and withdrawn from the kettle without obstruction by the hood.
Where a fume extraction hood is installed over the zinc bath, ensure that the end and side safety doors are closed during the immersion of the product.
Slot hoods, mounted on the bath sides, may be used for operations where the area of fume generation is small. Air is sucked through slots just above the zinc surface.
The extraction speed needed to overcome the hot draft for the entire surface of a large kettle is high. Large volumes of air movement across the kettle cool the surface of the zinc bath, resulting in increased heat losses.
The capture rate of the slot hood is less efficient than that of the high-canopy or hood.
Make sure that there are no open doors or windows nearby causing strong cross drafts.
What to do during long idling periods?
The heat loss from a clear (skimmed) zinc surface is massive. Therefore steps must be taken to decrease those losses.

Pag. 108 din 215
When production stops, during weekends and public holidays an insulating cover should cover the entire surface of the zinc.
If the zinc surface is adequately covered the necessary heat to maintain the zinc temperature at the same level is far less than the heat required to heat up the zinc again to operating temperature.
Be aware that the lowering of the zinc temperature is always combined with a higher dross production.
At 420°C the zinc will become solid and will need to be heated up very slowly to avoid temperature differences in the kettle wall of more than 50°C.
No skimming or fume extraction should take place on an idle kettle.
Zinc Kettle Maintenance
The equipment in and around the galvanizing bath should be inspected on a regular basis and necessary repairs carried out before they develop into major problems.
The temperatures that need to be maintained are:
1. Molten zinc at 445 - 450ºC
2. External kettle wall at no more than 530ºC
3. Internal kettle wall at 490ºC
4. External furnace wall at 60 - 80ºC

Pag. 109 din 215
The temperature of the molten zinc and the external kettle wall can be measured and regulated.
For obvious reasons the internal kettle wall cannot be tested. Carefully monitoring the dross levels and averaging them out over a 4 to 6 week period will alert you to a problem with the internal wall temperature.
The external wall temperature of the furnace should not exceed 60 - 80ºC and this can be checked by quickly placing your hand on and off the wall.
There should be sufficient furnace insulation to prevent too much heat loss. An even temperature across the kettle wall must be maintained. Do not turn off some of the burners or element panels. The temperature gradient across the kettle wall must be uniform.
Maintenance Procedures
The following maintenance should occur:
Thermocouples and other temperature recorders check the molten zinc. These temperature probes are housed in a metal sheath that will not be attacked by the zinc (usually made of stainless steel). Also the thermocouples and temperature recorders should be checked monthly for accuracy and if necessary for calibration (checking that what the instrument shows is actually correct and giving accurate information).
The bath walls should be inspected at each drossing for progress of erosion at the metal ‘wet’ line or ‘swill’ line. The bath walls below the zinc surface can be checked with a steel probe moved up and down the walls for evidence of erosion or pitting. Do not remove (scrape off) the thin protective zinc iron layer, which has formed on the bath wall. Removing this layer results in serious damage to the bath and reduces its service life. However, thick deposits should be removed.

Pag. 110 din 215
Kettle Failures
With the present technique of kettle and furnace construction failures resulting in the loss of molten zinc from the bath are very rare. The failures happening today are through the incorrect use of the kettle. In the unlikely event of a kettle failure, fast and safe action is necessary.
Depending on the size and position of the leak, the zinc can stream out of the kettle in a slow trickle or a strong jet, emptying the bath in a very short time. It is important to notice the failure at an early stage.
The zinc furnace must be equipped with an alarm system that is sounded as soon as a leak is detected.
The simplest way is to mount a metal wire loop around the kettle at the bottom of the furnace. The leaking zinc will always come in to contact with the wire and create a short circuit, which can switch off the heating system. At the same time this short circuit can activate an alarm.
There should be run-out ports at the base of the kettle with adequately sized receptacles for the zinc run out should also be available. The containers should be prepared in advance and kept in readiness for an emergency.
Pumping zinc
The pumping out of molten zinc, at 460ºC, is an extremely hazardous operation and all safety precautions must be exercised, including planning, preparations, and safety equipment and to be undertaken by experienced personnel.

Pag. 111 din 215
This is a very expensive operation as the pump out, kettle repairs and remelt could take up to 14 days to complete.
What is needed for the Pump Out?
While pumping out molten zinc into insulated receptacles, ensure that they have sufficient capacity to hold all the molten zinc. These moulds should be smooth sided and tapered from top to bottom.
These receptacles should be safely located at a minimum distance between from the kettle, with no moisture inside these receiving vessels.
If the volume of the insulated receptacles is insufficient to hold all the molten zinc, then pump the remaining zinc into moulds and solidify those using fans for forced cooling.
Do not use 200 litre steel drums; they are a poor alternative to proper ingot moulds.
The equipment for pumping molten zinc consists of:
· A pump
· Moveable steel outlet pipe from the zinc pump
· Suitable overhead crane to support zinc pump and outlet pipe
· Preferably squared and tapered ingot moulds (not oil drums)
· Attachments to the moving end of the outlet pipe
Ensure there is sufficient height of the crane hook to enable the zinc pump to be lowered into the zinc vertically.
Make sure the steel delivery pipe is kept as short as possible, preferably less than 10 metres.
The steel delivery pipe must be pre-heated prior to the commencement of the pump out operation.
Preheated pipelines should be supported at every 3 metres to prevent sagging.
Oxygen acetylene heating torches are used for this heating process. Also there must be adequate electrical power.
Prior to the Pump Out
The zinc bath should be thoroughly drossed prior to the commencement of the pump out.
Carefully remove the dross after the zinc has cooled down to at least 440 °C prior to pumping.

Pag. 112 din 215
Raise the temperature after drossing to 465-470 °C prior to pumping.
The Pump Out
1. Before operating the zinc pump attach the discharge pipe to the riser pipe of the pump.
2. Pick up the pump with the crane and immerse only the impeller housing in the molten zinc.
3. Allow the pump to heat until the pump shaft can be turned freely by hand.
4. While the pump is heating, use a torch to pre-heat the riser and discharge pipes.
5. Place guy wires 8 to 10 metres long on the extended discharge pipe of the zinc pump, so that the pipe can be moved safety from mould to mould.
6. Turn on pump.
7. Lower the pump housing with the crane as the metal level drops in the bath.
8. The pump can be switched off for short periods during the operation. This allows for repositioning of the ingot moulds and or the pump.
9. Do not switch off for extended periods as the zinc in the delivery pipe will solidify and will need to be re-melted before pumping can be recommenced.
10. Keep heat on the bath until the pumping is finished.
After the Pump Out has finished
When pumping is finished, the cleaning of the zinc pump can be undertaken.
Lift the pump out of the remaining zinc.
Allow the pump to run freely for a few minutes, at low speed, to remove the remaining zinc in the pump.
When the pump has cooled, any remaining solidified zinc can be removed by immersing the pump body and impeller portion into the stripping bath (cold hydrochloric acid). Once the remaining solid zinc has been removed, it is essential that the pump body and impeller is neutralised in the alkaline degreasing bath thus removing remaining acid.
Make sure the pump is in an operating condition for its next use.
While this is taking place, metal separation sheets must be inserted vertically into the remaining zinc in order to split into several blocks when it solidifies.
Just before it solidifies a draw hook needs to be set in each block (usually in the shape of an omega) to be able to lift the blocks in and out of the kettle.

Pag. 113 din 215
The Re-melt
The solidified ingots need to be placed back into the kettle following the procedures for the initial melt down.
Repairing the Kettle
Inspector
1. Visually inspect the inside kettle wall to determine if the wall thickness should be measured ultrasonically. Remember the ultrasonic device sometimes used in degreasing as a method of agitation. This time ultrasonic waves are used to measure the thickness of the zinc layer on the kettle wall. Ultrasonic waves are sound waves at a pitch above the upper limit of normal hearing. Sound waves are reflected back from the pure steel surface. By determining the time taken from the reflected wave to reach the surface of the steel an estimate of the thickness of the hard zinc layer can be made.
Plant Operator
2. Remove the hard zinc layer (2.3 mm) by chipping and discard.
3. Remove any dross from the base.
Artisan Welder
4. Draw grid lines at about 0.15 m interval on the walls and base.
5. Using spot and angle grinders, grind back to the steel surface at the grid intersections. When sparks are seen, the steel surface is reached. 6. Spot grind to bare steel where ultrasonic tests have to be carried out to test the integrity of the wall.
7. Pay special attention to the swill line, at the original surface level of the zinc bath.
8. Based on the size of the kettle and the decrease in the wall thickness, make a decision to install a new kettle or repair the local attack by weld overlay.
9. On badly attacked areas and grooves, remove the hard zinc layer or any zinc that remains attached to the surface grinding down the steel surface.

Pag. 114 din 215
10. A qualified artisan welder will build up the whole area with a full penetration multiple weld layers. THIS IS A SPECALIST JOB AND MUST BE CARRIED OUT CORRECTLY IF THE REPAIRS ARE TO BE SUCCESSFUL.
Any maintenance on the zinc bath must only be carried out after proper authorization by the issue of a hot work permit.
Quality Control and Reduction of Waste
Zinc is the major cost of galvanizing. Strict control of zinc consumption and the prevention of waste are therefore essential. Approximately 15% of the zinc used in the galvanizing process is lost in the form of residues (ash and dross), spillage and splashing. By enforcing correct disciplines and procedures, zinc wastage can be contained well within this limit.
In order to determine the actual amount of zinc consumed, in relation to the mass of steel galvanized per week, the following detailed statistics must be recorded and documented daily or, at least, once per week:
· Zinc bath levels of molten zinc at the commencement and end of each period, shift or operating week.
· New zinc should be added daily to ensure that the zinc level remains within ±50mm of its top level (Full mark). All zinc additions must be recorded as part of the management control system.
· Dross produced and removed from the bottom of the bath.
· Ash produced and removed from the molten zinc surface.
The Initial Melt Down, Pump out and Re-melt
In your working life as a plant operator you may be privileged to experience the initial melt down of zinc in a new kettle.
If you are experiencing this melt down as a re-melt, it will be after a kettle failure and extensive repairs, which should rarely happen in a properly run galvanizing plant. Having to pump out the zinc from a damaged kettle is a major disaster and very costly as this whole operation could take up to two weeks.
Important Points to Remember
Packing Ingots
· Pack with a number of 25Kg zinc ingots in such a way as to achieve the maximum surface area contact between the zinc ingots and the bath wall.
· The zinc blocks lying nearest the kettle wall melt first and cause the formation of a protective Fe-Zn layer.
· To avoid a too high pressure on the kettle walls, a gap of about 100mm must be kept free in the middle.
· The expansion of zinc is about three times that of iron. To stabilize the zinc blocks some soft wooden beams can be put in the gap.
· Never charge the bath with lead when melting down for the first time.

Pag. 115 din 215
· After testing the heating system, and packing the bath with zinc, place insulated (thermal) covers over the top of the packed bath and melt down may proceed.
Melt Down
The meltdown process can take anything from 8 to 12 days to complete, depending on the type and size of the kettle. This is due to the ‘drying out’ and heating up of the surrounding environment. Subsequent meltdowns can be achieved within 6 to 10 days.
Temperature Control
Focus on Kettle
Increase the bath temperature by 4°C every 2 hours, until 300°C is reached.
At this temperature, the zinc bath and its contents is allowed to ‟heat soak‟ for 24 hours.
After this ‘heat soak’, the temperature is increased to about 420°C, again at 4°C every 2 hours.
At 420°C the zinc starts to melt. At this point the temperature must remain constant until all the zinc is melted.
Focus on Zinc
It is now very important to ensure that additional zinc ingots are added to the bath to ensure that the bath is kept ‘full’ and in contact with the bath sidewalls at all times.
While the actual melt down is taking place, no further temperature increase will be evident, due to the zinc changing state from solid to liquid. This will take approximately 48 hours to complete, depending on the bath size.
Once the zinc is molten, the temperature will again be increased by 10°C every 2 hours.
Final zinc temperature is achieved at between 445°C and 450°C, depending on the plants operational procedures.
Once melt down is complete, the molten zinc is skimmed (see steps for skimming) and the zinc melt cleared of impurities such as char, floating dross etc. Remember the potato trick for clearing these impurities!

Pag. 116 din 215
The surrounding bath area should also be cleaned (housekeeping standards) before the galvanizing of steel is allowed to commence.
Pump Out
The pumping out of molten zinc, at 460ºC, is an extremely hazardous operation and all safety precautions must be exercised, including planning, preparations, and safety equipment and to be undertaken by experienced personnel.
This is a very expensive operation as the pump out, kettle repairs and re-melt could take up to 14 days to complete.
What is needed for the Pump Out?
· Insulated receptacles
§ Sufficient capacity to hold all the molten zinc
§ Moulds should be smooth sided and tapered from top to bottom
§ Safely located at a minimum distance from the kettle
§ No moisture inside these receiving vessels
Do not use 200 litre steel drums; they are a poor alternative to proper ingot moulds.
· Fans for forced cooling of the zinc in the moulds
· A pump and attachments
§ Moveable steel outlet pipe from the zinc pump
§ Attachments to the moving end of the outlet pipe
· Suitable overhead crane to support zinc pump and outlet pipe
· Sufficient height for the hook on the crane to lower the pump into the zinc vertically
· Steel delivery pipe to be kept as short as possible, preferably less than 10 metres (<10 m)
· Oxygen acetylene heating torches are used for pre-heating the steel delivery pipe and the other pipelines
· Preheated pipelines supported at every 3 metres to prevent sagging
· Adequate electrical power
Prior to the Pump Out
· Cool down zinc to at least 440 °C
· Carefully remove the dross.
· Raise the temperature 465-470 °
Steps to Pump Out
1. Before operating the zinc pump attach the discharge pipe to the riser pipe of the pump.
2. Pick up the pump with the crane and immerse only the impeller housing in the molten zinc.
3. Allow the pump to heat until the pump shaft can be turned freely by hand.
4. While the pump is heating, use a torch to pre-heat the riser and discharge pipes.
5. Place guy wires 8 to 10 metres long on the extended discharge pipe of the zinc pump, so that the pipe can be moved safety from mould to mould.
6. Turn on pump.

Pag. 117 din 215
7. Lower the pump housing with the crane as the metal level drops in the bath.
8. The pump can be switched off for short periods during the operation. This allows for repositioning of the ingot moulds and or the pump.
9. Do not switch off for extended periods as the zinc in the delivery pipe will solidify and will need to be re-melted before pumping can be recommenced.
10. Keep heat on the bath until the pumping is finished.
After the Pump Out has finished
· When pumping is finished, the cleaning of the zinc pump can be undertaken.
· Lift the pump out of the remaining zinc.
· Allow the pump to run freely for a few minutes, at low speed, to remove the remaining zinc in the pump.
· When the pump has cooled, any remaining solidified zinc can be removed by immersing the pump body and impeller portion into the stripping bath (cold hydrochloric acid).
· Once the remaining solid zinc has been removed, it is essential that the pump body and impeller is neutralise in the alkaline degreasing bath thus removing remaining acid.
· Make sure the pump is in operating condition for its next use.
· While this is taking place, metal separation sheets must be inserted vertically into the remaining zinc in order to split into several blocks when it solidifies.
· Just before it solidifies a draw hook needs to be set in each block (usually in the shape of an omega) to be able to lift the blocks in and out of the kettle.
Re-Melt
The solidified ingots need to be placed back into the kettle following the procedures for the initial melt down.
Safety in Hot Dip Galvanizing
Personal Protective Equipment (PPE)
In the kettle area the minimum PPE would be:
Hard hats Face shields/visors
Steel-toed safety boots
Long-sleeved acid-resistant overalls
Heat reflective apron
Heat reflective gloves
Additional PPE can be worn:
Neck/hat flaps
Heat reflective half jackets
Heat reflective leggings (chaps)
Earplugs – if noise exceeds acceptable levels

Pag. 118 din 215
At least leather aprons should be worn, and half jackets and leggings (chaps) are recommended.
Safety Awareness and Procedures
The zinc used in the kettle can be hazardous and all safety precautions given in the material data safety sheets (MSDS) should be followed.
If the operator experiences the buoyancy of the article then he should immediately call the supervisor. Galvanizing should be stopped and the article investigated for sealed sections. Do not attempt dipping in molten zinc without vent and drain holes.
Wet or cold material lowered into molten zinc will cause explosions or spattering.
Burns from molten zinc splatter do occur, but the fume hood enclosure is the primary means of preventing these burns. The galvanizers should also wear eye/face protection and burn resistant long sleeve clothing.
Preheat all tools before using in the molten zinc.
Stay well away from the bath while the crane lowers the articles into the zinc. Use the safety shields installed at the zinc bath to protect operating crew during the dipping process.
Pipe or tubular products may shoot zinc at terrific force. Do not stand in line of these products being galvanized.
Where a fume extraction hood is installed over the zinc bath, ensure that the end and side safety doors are closed during the immersion of the product.

Pag. 119 din 215
Zinc dripping from articles removed from the bath can cause burns directly or from splattering on the floor. Keep back from the fully loaded flight bar to avoid this type of injury. Zinc burns are painful and very slow to heal. Every sensible precaution should be employed to avoid this type of injury. Standing on the bath flange is strictly prohibited. Any maintenance work to be carried out on the zinc bath is to be authorized by the issue of a hot work permit. (refer to Oxy/acetylene safety)
Next process
When it is withdrawn surplus zinc drains back into the zinc bath (kettle). The zinc-coated article may be quenched by immersion in water or simply cooled in air.
Once all material suspended from the jig is above the molten zinc level in the bath, any remaining zinc droplets, which have not drained away, must be removed by the galvanizer prior to transfer to the quench bath.

Pag. 120 din 215
The Water Quenching, Passivating and Air-Cooling Process
What is Water Quenching?
The zinc-coated articles, having been drained of surplus zinc and the soft zinc spikes removed, may be quenched by immersion in water or simply cooled in air.
What is the purpose of Water Quenching?
The purpose of water quenching is to minimise any further growth of the alloy layers.
Articles that are prone to distortion should not be water quenched but rather cooled in the air.
What is Passivation?
Passivating involves dipping the galvanized articles into a passivating solution.
What is the purpose of Passivation?
The main purpose for passivating is to prevent 'white rust' or what is generally referred to as ‘wet storage stain’.
Passivating is used to provide temporary protection of the ‘new’ pure zinc surface from attack by oxygen and water.
Zinc is a very reactive material and the ‘new’ pure zinc surfaces emerging from the molten zinc will react with the atmosphere forming unstable what we call, ‘white rust’.
Although white rust is easily removed, it tends to be unsightly and therefore undesirable.
What is White Rust or Wet Storage Stain?
White rust or wet storage stain (Zinc hydroxide) occurs when freshly galvanized articles are exposed to wetness (rain, condensation) and are not allowed to dry.
Wet storage stain or white rust will also form if the closely stacked articles are rained on, or are under conditions promoting formation of dew or condensation.
Wet storage stain gives a mottled surface and the loose white powder can impair later operations such as painting.
Severe white rust may impair long-term corrosion protection.
Passivation of the articles will prevent white rust forming and give it temporary protection from attack by oxygen and water.
However, the customer may not have requested passivation for various reasons:
Cannot paint the article (duplex coating) after a sodium di-chromate passivation
Articles are prone to distortion
Environmentally unfriendly nature of hexavalent chrome in the sodium di-chromate

Pag. 121 din 215
Other methods for prevention of white rust, is using appropriate propriety products.
Some treatments prematurely age the surface (Zinc Carbonate which protects the zinc layer) into its long-term state. Others provide a more water repellent surface having self-healing properties.
Some of these treatments convert the surface to be more ‘paintable’ besides providing the necessary barrier to moisture.
What is Air-Cooling?
It is the cooling of the articles in such a way that they do not distort.
What is the purpose of Air-Cooling?
The articles need to be cooled down before they can be handled and articles prone to distortion cannot be put into a water or passivation quench.
Cooling Double or Side Dipped Articles
Large articles exceeding bath dimension require double dipping (end or side) and only a part of the article is heated. The time for immersion is one to five minutes, depending upon the thickness, configuration, and type of alloy for the articles to be coated.
When required, due to the article size, double ‘end dipping’ or ‘side dipping’, the article must not be quenched, but air cool on a flat surface. If necessary place heavy plates on the article in order to keep it straight while cooling. A thermal blanket, placed over the cooling article, will also slow down and equalize the cooling rate across the section. This procedure is used where the fabricated article contains substantially difference thicknesses of steel components.
Galvanizing such components, it is essential to equalize the rate of heating, during immersion into molten zinc, and allow for slow cooling on a flat surface.
The surface and the core temperature need to be carefully controlled as they cool at different rates.
What has happened so far?
1. So far the batches of articles have come in from the customer and they have been weighed and labelled.
2. The articles have been taken off the truck and sorted and separated.
3. Inspection has taken place to see if these articles can be safely galvanized, looking at:
1. Design
2. Vent and drain holes
3. Needs abrasive blasting

Pag. 122 din 215
4. Needs Double Dipping (Large/Long articles)
4. More vent and drain holes may have been added. Snorkels or breather pipes are used if necessary.
5. Paint stripper may have been used to remove oil paints or varnish.
6. Welding slag, flux and spatter will have been removed by grinding
7. Heavy grease will have to be removed manually as it will not be removed during the normal degreasing process.
8. Articles have been checked for soldering (metal that has been soldered together), as the solder will be destroyed in the galvanizing process.
9. Products containing temporary or permanent bracing are checked (internal stiffeners, baffles, diaphragms, gussets etc)
10. Articles have been jigged correctly, ready for pre-treatment.
11. Articles have been degreased, either in an alkaline or acid solution.
12. If the articles were degreased in an alkaline solution they will have been rinsed in water.
13. The articles have already been further cleaned by means of acid pickling and rinsed in water.
14. The articles have been fluxed, which is the final cleaning and preparation process before the product is galvanized. Fluxing also provide a temporary corrosion protection barrier in order to prevent any further formation of rust on the articles.
15. The articles have been hot air dried to evaporate the moisture and dry the flux coating.
16. The articles have been hot dip galvanized.
What happens just prior to Water Quenching, Passivating or Air
Cooling?
The articles have been very slowly withdrawn from the molten zinc and suspended above the kettle to allow the excess zinc to drain back into the bath. Any soft zinc spikes have been removed.
The galvanizer is responsible for visually inspecting the coating to determine that no uncoated areas exist and that all drops and spikes have been removed.
If serious uncoated areas exist, he must alert the supervisor and cease galvanizing further loads until the cause of the problem has been established.
Rejects are extremely costly and result in wastage of time, chemicals and zinc.
Also check whether the product is to be passivated, quenched or air-cooled. Refer to the written works instruction for guidance.

Pag. 123 din 215
Articles to be water quenched or passivated must remain on the flight bar so they can be dipped into the tanks.
These two baths represent the post treatment operation and final stages of the hot dip galvanizing process.
Articles that need to be cooled in the air must be removed from the flight bar (de-jigged). Some articles will require thermal blankets to prevent the surface cooling quicker than the core, possibly causing distortion.
Also articles should be handled and positioned appropriately during cooling to prevent the freezing together of articles.
The Water Quench
This is simply a plain water rinse tank. Articles are cooled in the water and are easier to handle.
The Passivating Solutions
The 2 most common chemicals used in passivating are:
· Chromate (up to 1% sodium di-chromate is the most common)
· Zinc phosphate
Higher levels of chromate (> 1%) can make the surface turn yellow to brown in colour but will provide greater protection to the galvanized surface.
With chromate passivation, the concentration of zinc in wastewater is between a few grams to several tens of grams per litre. Therefore, avoid spillage and splashing by carefully lowering the articles into the tank.
Also sodium di-chromate contains hexavalent chrome, which is environmentally ‘unfriendly’.

Pag. 124 din 215
Therefore, only use sodium di-chromate passivation to prevent white rust, when required by the customer and when environmental regulations permit.
For this reason, a zinc phosphate solution is sometimes used.
However this kind of passivation leaves a ‘greyish’ colour to the zinc surface and is not always acceptable by the customer.
Many plants use other products that contain trivalent chromium and organic polymer in view of the health concerns of hexavalent chromium. This colourless coating provides up to six months protection against wet storage stain, depending on the humidity of the atmosphere.
Alternative passivation solutions are being investigated in order to find a passivation solution that is environmentally friendly.
It is becoming more common for customers to accept minor amounts of white rust on newly hot dip galvanized steel.
White rust is soluble in water, easily removed and will not reoccur once the zinc has developed the zinc carbonate layer (matt dull grey surface finish).
Post Treatment Tanks
The passivation baths can be constructed from steel, as the liquids being handled are non-corrosive.
Care should be taken when dipping and removing products not to bump the sides of the bath as this could damage both the bath and the product.
The size of the baths will vary according to the type of galvanizing plant and the products being galvanized. Sizes vary form 1m to 15m in length.
Temperature of Passivating Solution and Water Quench
The passivating solution and the water quench will become heated due to the heat carry over from the zinc bath.

Pag. 125 din 215
The temperature of the passivating solution and water quench should be maintained at approximately 70°C to 80°C by either cooling through the cooling tower or by heating via the heating system.
It is important to monitor the temperatures on the control instruments to ensure that correct temperatures are maintained. A simple check is that the water/solution must not bubble.
Use external heating on cold days. Solution temperature above 70°C dries the articles faster and facilitates handling and storage.
Immersion Time
The product will normally be immersed in the passivating or water quench by simply dipping in and out, and this is normally enough.
The jigged galvanized articles can also be left submerged until it is time for de-jigging and stacking.
The articles must be sufficiently cooled before de-jigging and stacking.
Inspection after Passivation
The operator is responsible for visually inspecting the product to determine that passivation has taken place.

Pag. 126 din 215
This will be indicated by the finished surface, which will have a yellowish greenish colour when sodium di-chromate is used for passivation.
The alternative of zinc phosphate will be purple–brownish in colour.
Remember, that sodium di-chromate is soluble in water and will be removed within three to four months of field service.
When passivation is removed it is replaced by zinc carbonate (ZnCO3). Zinc carbonate (ZnCO3) is a stable corrosion protective layer, which will be a uniform dull grey colour. This is the outer zinc layer reacting with the atmosphere.
After inspection the articles are moved to the dejigging, fettling and cleaning area.
If the article is to be Painted /Duplex Coating
The article must not be passivated in a chromate solution if it is going to be painted, as the passivated zinc surface will prevent the paint coating ‘sticking’ to the zinc surface.
Zinc phosphate passivation is allowed if the product is to be painted afterwards.
Zinc phosphating is a form of primer and therefore prepares the zinc surface for painting.
Water quenching or air-cooling is used if the article is to be painted (Duplex coating) after hot dip galvanizing.
Quality Control and Maintenance
Recover and Recycle
A cooling tower and circulation system is used to recycle the quenching and passivation tanks.
The water/solution will eventually heat up as the hot metal articles are placed in the tanks, making the cooling nature ineffective.
The chemicals in the passivation solution will be checked regularly and topped up when necessary.
Safety in Water Quenching and Passivation
Personal Protective Equipment (PPE)
In the post-treatment area, as in all the pre-treatment areas, the minimum PPE would be:

Pag. 127 din 215
Hard hats
Face shields/visors
Rubber boots
Long-sleeved acid-resistant overalls
Acid-resistant apron
PVC re-enforced gloves, elbow length
Additional PPE can be worn:
Neck/hat flaps
Earplugs – if noise exceeds acceptable levels
Safety Awareness and Procedures
The chemicals used in the pre-treatment tanks are hazardous and all safety precautions given in the material data safety sheets (MSDS) should be followed.
Chromates are poisonous and irritant to skin and eyes.
Be aware of the location of the safety showers and eye rinse baths. The emissions from passivation containing traces of dichromate may consititute a potential human health risk.
The only discharge to air from the quenching process is the release of water vapour from the bath.
Ensure good work practices to minimize the risk of exposure to hot water and steam. Do not stand near the quench tank as hot water and steam can be ejected from the hot articles.
Ensure that quench and passivation operations are conducted in a well-ventilated location.
Sodium dichromate is an irritant, a corrosive, and a strong oxidizing agent. Such materials may cause skin dermatitis, ulcers and respiratory tract irritation.
Good work and housekeeping practices will minimize the risk of exposure to sodium dichromate.
Waste Disposal
Small quantities of sludge accumulate in the quench tank over time and contain chromium and other heavy metals.

Pag. 128 din 215
These will eventually require removal and disposal. The sludge must be disposed by an authorized agency to a treatment facility having the capability to treat chromium wastes. Waste solution from passivation treatment must also be disposed by an authorized agency.
Dichromate quench solutions require periodic replenishment to maintain the chemical balance and are never disposed of.
Next process
If the articles need to be water quenched or passivated, they would now be de-jigged and inspected for defects.
Air-cooled articles, previously de-jigged, will also be inspected for defects.
A non-conformance report will be issued for articles requiring repairs. Cleared articles will be stacked ready for packaging and dispatch. (refer to non-conformance report).
The De-Jigging, Fettling and Cleaning Process
What is De-Jigging?
Once the product has been hot dip galvanized, quenched or passivated it is moved by the handling equipment to the de-jigging area for off loading from the flight bar.
De-jigging is the removal of the hot dip galvanized product from the flight bars as well as the removal of the attachments such as wire, hooks and chains.
What is the purpose of De-Jigging?
The jigging equipment holding the articles onto the flight bar are removed or cut so that the articles can be stacked ready for a full inspection.
De-jigging also provides an opportunity to inspect the articles as they are removed from the flight bar.

Pag. 129 din 215
What is Fettling?
Fettling is the term we use to describe the process of removing excess droplets of solidified zinc from the galvanized product after it has been de-jigged.
What is Cleaning?
Cleaning is the removal of entrained ash deposits resulting from inadequate skimming while withdrawing from the molten zinc.
What is the purpose of Fettling and Cleaning?
The purpose of fettling and cleaning is to make the final galvanized product look good to the customer. It should not need to take place if all the processes have been effectively carried out.
What has happened so far?
1. So far the batches of articles have come in from the customer and they have been weighed and labeled.
2. The articles have been taken off the truck and sorted and separated.
3. Inspection has taken place to see if these articles can be safely galvanized, looking at:
1. Design
2. Vent and drain holes
3. Needs abrasive blasting
4. Needs Double Dipping (Large/Long articles)
4. More vent and drain holes may have been added. Snorkels or breather pipes are used if necessary.
5. Paint stripper may have been used to remove oil paints or varnish.
6. Welding slag, flux and spatter will have been removed by grinding
7. Heavy grease will have to be removed manually as it will not be removed during the normal degreasing process.
8. Articles have been checked for soldering (metal that has been soldered together), as the solder will be destroyed in the galvanizing process.
9. Products containing temporary or permanent bracing are checked (internal stiffeners, baffles, diaphragms, gussets etc)
10. Articles have been jigged correctly, ready for pre-treatment.
11. Articles have been degreased, either in an alkaline or acid solution.
12. If the articles were degreased in an alkaline solution they will have been rinsed in water.
13. The articles have already been further cleaned by means of acid pickling and rinsed in water.

Pag. 130 din 215
14. The articles have been fluxed, which is the final cleaning and preparation process before the product is galvanized. Fluxing also provide a temporary corrosion protection barrier in order to prevent any further formation of rust on the articles.
15. The articles have been hot air dried to evaporate the moisture and dry the flux coating.
16. The articles have been hot dip galvanized.
17. The articles have been water quenched, passivated or air-cooled.
What happens just prior to De-Jigging, Fettling and Cleaning?
The articles have been dipped into a water quench or a passivating solution or air-cooled.
Quality Control
Do not assume that quality control through the process has been carried out as per the requirements. Inspection at this point in the process should be conducted as if it was the only inspection to be undertaken.
In de-jigging you handle each item of product. This allows you the opportunity to inspect each item for possible defects.
The quality of each phase of the process, having been carried out correctly, the amount of fettling and cleaning should be minimal.
If fettling is to be carried out, it is essential to ensure a close control of the process.
There is no point in spending time and money to achieve a quality zinc coating (hot dip galvanized) if we now have an un-controlled removal of the same zinc coating.
Remember do not over fettle, which is the removal of all the zinc coating, i.e. destroying the corrosion protection that hot dip galvanizing (zinc) is designed to give to the steel product.

Pag. 131 din 215
Best Practices
De-Jigging
Remember the wire cutting procedures from jigging. In de-jigging you are cutting the articles from the flight bar once they have been laid down in a safe place. Do not de-jig whilst the articles are still suspended on the flight bar.
Carefully remove the articles from the flight bars and the attachments such as wire, hooks and chains.
Care should be exercised when de-jigging not to damage articles that have been now fully processed and that have a considerable amount of added value.
Make sure the correct PPE is worn to minimise such injuries as burns from the hot newly galvanized articles and articles falling on toes.
Fettling
Do not fettle on the jig!
The common method is a grinder or file to remove excess zinc.
The disadvantage of this method is that all the zinc coating could be removed and exposes the underlying steel to corrosion.
The preferred method is using a gas heater to re-melt the excess zinc and scrape it off with a hand scrapper.
The disadvantage is that a certain amount of discolouration takes place, which will disappear in time with the whole structure becoming uniform grey colour.
Fettling should be done in an orderly manner otherwise it is difficult to know which articles still need fettling.

Pag. 132 din 215
Cleaning
When cleaning is required it should be carried out using a stainless steel or a stiff nylon brush to remove all entrained ash deposits from inadequate skimming during the withdrawal of the article.
‘Carbon steel wire’ brushes are must not be used because they could leave traces of carbon steel that could impregnate the soft zinc coating and lead to rust staining.
The process should be to remove the ash without damaging or removing the actual galvanized surface.
Ash deposits represent potential corrosion sites and indicate poor quality control at the zinc bath.
Such occurrences should be addressed at the zinc bath and prevented.
Cleaning should be limited to crevices and inaccessible surfaces.
How do we stack the product after De-Jigging, Fettling and Cleaning?
Newly hot dip galvanized product, even though it has been passivated must be handled and stacked correctly.
Stacking of the finished product is very important for safety requirements as well as to show product quality and company professionalism.
Remember, a well-presented product will develop a very positive customer image of the plant.
Do not stack the articles in contact with one another to avoid slow cooling that can lead to flaking of the coating or heat peeling.
The following diagrams are designed to illustrate how such stacking should be undertaken in order to prevent ‘wet storage stains’.

Pag. 133 din 215
Do not store the articles in the presence of moisture or in wet condition and closely nested without access to freely circulating air to avoid white storage stains.
White storage stains can be prevented by adequate passivating, but more so by following the correct stacking procedure.
Do not store closely stacked articles in rain or under conditions that promote the formation of dew or condensation on the articles to avoid white storage stains. Cover or store them indoors.
When it is raining store articles indoors or in an inclined position when stored outdoors in sunshine.
Use wide-spaced racks and wood spacers between the articles.
Store articles in reasonable sized piles so there is no danger of them falling over.
Always incline articles at an angle to allow moisture to drain off the surface.
Long-term storage of hot dip galvanized product will need to be well ventilated to allow moisture to escape and air to circulate.

Pag. 134 din 215
Causes and Treatments for Wet Storage Stains
White rust or wet storage stain occurs when freshly galvanized articles are exposed to wetness (rain, condensation) and are not allowed to dry.
Wet storage stain or white rust will also form if the closely stacked articles are rained on, or are under conditions promoting formation of dew or condensation.
Wet storage stain gives a mottled surface and the loose white powder can impair later operations such as painting.
Severe white rust may impair long-term corrosion protection.
Passivation of the articles will prevent white rust forming and give it temporary protection from attack by oxygen and water.
However, the customer may not have requested passivation for various reasons:
Cannot paint the article (duplex coating) after a sodium di-chromate passivation
Articles are prone to distortion
Environmentally unfriendly nature of hexavalent chrome in the sodium di-chromate
Other methods for prevention of white rust, is using appropriate propriety products.
Some treatments prematurely age the surface (Zn Carbonate which protects the zinc layer) into its long-term state. Others provide a more water repellent surface having self-healing properties.
Some of these treatments convert the surface to be more ‘paintable’ besides providing the necessary barrier to moisture.
Removal of Wet Storage Stain
Wet storage stain is often superficial despite the thickness of the white rust.

Pag. 135 din 215
Carefully and lightly rub fingertips across the surface and observe the surface.
If the staining is light and smooth without growth of the zinc oxide layer, then the staining will gradually disappear and blend in with the surrounding zinc surface as a result of normal weathering in service.
When the affected area will not be fully exposed in service or when it will be subjected to a humid environment, then remove the wet storage staining, even if it is light.
In extreme cases the protective value of the coating may be impaired.
Sometimes the typical white or grey stains may blacken. This indicates that a significant amount of coating has been lost to corrosion and the service life is decreased.
Remove light deposits by cleaning with a stiff bristle brush. Do not use a wire brush.
Remove heavier deposits by brushing with appropriate propriety products.
Apply these solutions with a stiff bristle brush and after for about 30 seconds thoroughly rinse and dry.
Perform a coating thickness check on the affected areas to ensure that sufficient zinc coating remains after the removal of the wet storage stain.
In extreme cases where heavy white deposits or red rust have formed as a result of prolonged storage under poor conditions, the corrosion products must be removed and the damaged area repaired.
Re-galvanize the article where the affected area is extensive, or when the wet storage stain would impair the use of the article for its intended service.
Packing and Dispatch
After the hot dip galvanized articles have been cleaned (fettled), passed inspection they are packed ready for dispatch.
Articles that did not pass inspection will be first repaired or re-galvanized, and inspected again before being packed for dispatch.
Remember the appearance of the newly galvanized articles at dispatch and ultimately when it arrives at the customer is of major importance in that well presented product promotes the impression of top quality.
Packing
There are many different shapes and sizes of product that all have different packing requirements.

Pag. 136 din 215
By the time the product arrives at dispatch, much effort and expense has been expended in the production of a quality product.
Should the product be incorrectly packed or damaged, this effort would be wasted.
There are certain fundamental rules that must be followed when packing goods for dispatch.
1. Use the dispatch documents to identify the correct job number, check that the correct quantities are packed with the correct labelling attached as per the customer’s instructions.
2. Make sure that appropriate packaging is used for the different shapes and sizes of articles.
3. Do not pack product where moisture could collect and thereby promote ‘wet storage stain’, white rust.
4. Bundle the product and secure the components so that loading and off loading from the transport will not result in damage to the product.
5. Bundles should not exceed the loading capacities of the lifting equipment or that of the transport.
6. Following the loading of the product onto the transport, the bundles should be secured and comply with the legal requirements of the road, rail, air or sea transport.
Safety in De-jigging, Fettling and Cleaning
Personal Protective Equipment (PPE)
In the de-jigging area the minimum PPE would be:
Hard hats
Steel-toed safety boots
Long-sleeved overalls
Leather gloves
Waterproof clothing depending on the weather.
Safety Awareness and Procedures
Burns from touching galvanized work before it has cooled, and mashed fingers and toes are the most common injuries. Wearing the correct PPE will minimise such injuries.

Pag. 137 din 215
Remember the wire cutting procedures from jigging. In de-jigging you are cutting the articles from the flight bar once they have been laid down in a safe place. Do not de-jig whilst the articles are still suspended on the flight bar.
Wire Cutting
· Keep wrist straight.
· Do not rotate wrist.
· Do not cut more than one wire at a time.
· Keep cutters well adjusted in palm of hand against thumb pad.
· Do not squeeze cutters from top of handles
Mechanical finishing can also include hand operations with wire brushes, abrasive paper, files, etc. Usually only very small areas are economically cleaned by hand operations.
When removing hard zinc spikes and cleaning with wire brushes, safety goggles should be worn.
Waste Disposal
Jigging wires are not re-used and can be disposed of.
Chains, hooks and special racks are re-used after the excess zinc is removed in an acid stripping bath

Pag. 138 din 215
Quality Coating, Surface Defects and Repairs
What is a Quality Coating?
The purpose of hot dip galvanizing is to protect steel from corrosion by a quality coating of zinc.
‘Service life to first maintenance’ is the duration of this protection until the appearance of 5% surface rust.
This ‘Service life to first maintenance’ can be decades!
Thicker zinc coating provides longer service life.
Zinc coating thickness together with environmental exposure is the most important factor determining the life-time of a hot dip galvanized coating.
Generally, the coating specifications require that the galvanized coating:
Be continuous – no breaks or holes in the coating
Reasonably smooth and evenly distributed as possible – minor roughness that does not interfere with the intended use e.g. handrails, moving parts
Free from uncoated areas and defects
Visual Inspection
Visual inspection needs to be done with the understanding of the:
Types of surface defects
Cause of such defects
Effect on the corrosive protection
A visual inspection (unmagnified or naked eye) should observe all surface conditions e.g. both inside and outside of a pipe. The inspector will pay particular attention to contact points i.e. welds, junctions, bent areas.
What are Surface Defects?
Defects on galvanized steel structures can be due to
Material defects
Galvanizing process errors
Packing and storage errors
Not all defects mean that the article is rejected and has to be re-galvanized.

Pag. 139 din 215
Some defects change the appearance of the surface but do not affect the corrosion protection. Small amounts of oxides from the bath surface cannot always be avoided.
The following appearance conditions are usually acceptable:
Appearance Conditions
Appearance Cause Remedies Effects
1.
Dark yellow
to brown
color
Too much sodium dichromate - although
the recommended quantity of sodium
dichromate, in the
passivation solution, is 0, 15 to 0.3% occasionally
when topping up more is added.
Maintain quantity
of sodium dichromate at 0,15
to 0.3%
The darker the colour will
provide enhanced
initial corrosion protection.
2. Dull grey or
mottled
Composition of steel -
the presence of extensive iron/zinc alloy phase
growth due to composition of steel
Small additions of
aluminium may
brighten the coating.
Dull grey coating
provides
similar or better
protection.
3.
Spangle in a
range of sizes
Composition of steel –
different compositions make reactive and non-
reactive steels Cooling rate – faster
cooling usually results in
a brighter coating with smaller spangle size.
Bath composition – the lead, aluminium and
other alloy additions will
result in a spangled surface.
Small additions of
aluminium may brighten the
coating and reduce
the spangle size. The spangle
pattern is not predictable or
guaranteed.
No effect on
corrosion resistance.
4. Oxide lines
Poor drainage – this
could be due to the shape and drainage condition of
the article or the hoist
has stopped and started on withdrawal from the
kettle.
Check vent and drainage holes,
especially on complicated
shaped articles.
Practice slow consistent
withdrawal procedures.
No effect on corrosion
resistance.
The overall appearance
becomes uniform over
time.

Pag. 140 din 215
The following surface conditions are the most common and usually repairable:
Common Defects
Defects Causes Remedies
1. Bare spots and uncoated
areas
Over drying – temporary protection from flux is lost
Excess aluminium –
sometimes referred to as ‘black spots’. All content must
be maintained at < 0.007%
If the uncoated spot is
small it can be repaired. If it exceeds 0.5% of
the total surface area
the product is rejected. Gross uncoated areas
usually mean re-galvanizing.
2. Ash deposits and
entrapment
Inadequate skimming – either when article was
immersed or withdrawn or both.
Ash deposits are on top of the coating and ash entrapment is
under the coating.
The coating is usually intact underneath the
ash deposits. Remove
ash with a stainless steel wire brush and
coating area needs to be checked for
conformance. Ash inclusions cannot
be removed and are
usually accepted depending on intended
use.
3.
Dross deposits
and entrapment
(pimples and
blisters)
Inadequate drossing or
skimming or both - gross deposits from the bottom of
the kettle can get trapped in corners and other areas.
Agitation of the dross
layer or dragging the articles through the dross
layer - dross entrapment appears as small, hard lumps
in an otherwise normal
galvanized surface.
Remove dross with a
stainless steel wire brush, if possible.
Check coating
underneath. Dross consists of the same
zinc/iron alloy as the coating and will provide
the same corrosion
protection.
Repair if necessary or depending on intended
use, re-galvanize.
4.
Flux deposits,
stains and entrapment
Excessive ammonium chloride dusting – dusting is
not good practice.
Inadequate or poor quality fluxing – flux
solution needs to be tested and corrected.
If possible, remove flux with a stainless steel
wire brush and coating
area needs to be checked for
conformance. This can be a serious defect and

Pag. 141 din 215
sometimes cannot be treated in the same
way as ash or dross deposits. If there is no
coating after removal of
the flux deposits it means that that area is
not galvanized. Re-galvanize.
5. Insufficient
coating
Minimum coating is 45um or 2
mil. Too much
aluminium andsteel
composition are the main causes.
Re-galvanizing is the
only remedy – strip the article and start again.
6.
Excessive
coating –
smooth and even and
rough and uneven
Excessive coating is anything over 300um
Main reasons for excessive
coating:
Over pickling
High galvanizing
temperature
Extended immersion
Steel composition
Excessively rough steel surface
Rough heavy coating is usually caused by steel
surface conditions or the
chemical composition of the steel. If extreme, called the
‘tree bark’ effect.
A thicker coating
produced will provide greater corrosion
protection. Except when coating tends to flake
off or delaminate (See
8.)
7. Distortion
Many different reasons for
distortion:
Poor design
Thickness and
shape
Inadequate
Repair if possible. Avoid
using re-heating
methods that may damage the coating.

Pag. 142 din 215
venting/drainage
Too rapid withdrawal from kettle
Too slow immersion into kettle
Quenched instead
of air-cooled
Air-cooled too
rapidly
8. Flaking and
delaminating
This can be caused by the steel type not reacting well
with the molten zinc
Repair if possible
9. Weld spatter Main reason is improper welding procedures.
Loosely adherent weld spatter should be
removed prior to galvanizing. Although
not acceptable in terms of specification, tightly
adherent weld spatter
after galvanizing will not affect the corrosion
protection.

Pag. 143 din 215
The following surface conditions are the less common and usually repairable:
Less Common Defects
Defects Causes Remedies
1. Uncoated areas
Steel surface
contaminants and entrapped air – such as oil
based paints, grease, oil or
labels or incorrectly positioned vent holes
In vicinity of a weld – caused by weld slag deposits,
weld porosity or weld undercut
All paint, grease, oil and
sticky labels should have been removed before
galvanizing. Also any temporary marking made
by the galvanizers should
be with suitable marking pens.
Vent holes need to be correctly positioned.
Weld deposits should have been removed
before galvanizing.
Repair, if necessary.
2. Mechanical damage
Chains, wire ropes,
dragging or dropping on
the articles – this occurs more with extremely thick
coatings that tend to be brittle.
Warning labels,
highlighting a thick coating and possible
damage if manhandled. The use of nylon slings is
recommended.
Repair, if necessary.
3. Touch marks
Too tightly packed jig – The zinc in the kettle should
have free access to all component surfaces. Jigging
wire should be loosely
attached to eliminate wire marks.
Minimize contact between
components and jig connections. Repair if
necessary or re-galvanize.
Repair, if necessary.
4. Stains caused be weeping
Porous welding - Salts from
acid or flux that have penetrated porous welding or
between contact surfaces can
weep after galvanizing or water quenching.
Inadequate or poor quality Fluxing – flux
solution needs to be tested
and corrected
A bristle brush can easily remove the stains.
After cleaning the crevice
should be sealed with a sealant, especially if
component is for use in a highly corrosive
environment.

Pag. 144 din 215
5.
Lumps of zinc stuck inside
heavy walled
steel pipes
Withdrawal speed too fast – removing the pipes
before the zinc has melted
from the inside of the pipe.
Longer immersion time to ensure all zinc has been
removed from inside the pipe.
Repair, if necessary.
6. Uneven drainage
Withdrawal speed too fast
or low galvanizing temperature – this condition
can occur over the entire surface or in isolated areas.
Uneven drainage also includes drips at the end of parts and
runs near holes.
Check the vent and
drainage holes. Withdraw slowly and allow for
proper drainage. Although not particularly
attractive this condition will not affect the
corrosion protection.
7. Zinc Splatter
Moisture on the surface of
the article – this causes the zinc to splatter when it is in
contact with the moisture. This happens mainly when it
is a large article that requires
deep dipping or double dipping.
The loosely adherent zinc
splatter is easily removed.
An experienced galvanizer can ensure the coating
overlap on double dipped surface is not visible.
Repair, if necessary.

Pag. 145 din 215
The following surface conditions are rare and usually repairable:
Rare Defects
Defects Causes Remedies
1. Blowouts
Pre-treatment chemicals penetrating sealed overlap areas –
chemicals seep through the required vent holes, or unsealed welds and
escaping during galvanizing. The effect
tends to damage the flux coating, causing localized uncoated areas.
Pre-heat item prior to immersion in zinc
bath to dry out overlap area as much
as possible.
Repair uncoated areas, if possible.
2. Clogged holes
Molten zinc does not easily drain
from holes less than 8mm – zinc film clogs the holes completely or
partially.
Make holes as large
as possible. Remove the molten
zinc over the kettle and make use of the
vibrator hoist to
reduce the clogging.
3. Clogged
threads
Insufficient centrifuging or poor
drainage of threaded components
on withdrawal – zinc film clogs the threads of threaded components or
attachments.
Use correct centrifuging
equipment or clean
threads by heating then wire brush or
oversize tapping of nuts.
4.
Uncoated
surfaces caused by
scale and sand
Process used to form the product –
Scale and sand on the steel surface, is generally caused by the process used
to form or roll the product.
Poor pre-treatment - Scale or sand from the moulding or rolling should be
removed in the acid pickling or abrasive blasting process.
Repair uncoated
areas, if possible.

Pag. 146 din 215
How do we repair small defects?
A ‘small’ defect is defined in terms of the specification as well as the quality control manual.
Their acceptability depends on the size and shape of the object, its management in the zinc bath and its intended use.
Three different methods are used to repair small defects.
Zinc rich paint
Zinc flame spray (metallizing)
Zinc based solder
Hot zinc metal spray is the recommended method. Soldering is the least recommended method.
The coating thickness has to be built up to an additional 30m over that required by the
specification on a normal surface.
This applies to whichever method is used to repair the defect.
What is a hot zinc metal spray?
Hot zinc metal spray is also called ‘metallizing’.
The equipment required for hot zinc metal spray consists of an oxygen acetylene supply connected to a spray gun-torch through which zinc powder or wire is fed.
As the zinc powder or wire is fed through the torch it melts and this atomized zinc is sprayed, at high speed, onto the defective surface.
The temperature of the zinc upon impact with the base metal is not high enough to result in a true metallurgical bond with alloy coating.
The zinc used is 99.5% pure or better. The performance of the coating is the same whether wire or powder is used. Zinc-aluminum alloys can also be used. The spray equipment may limit the concentration of aluminum, because aluminium has a higher melting point.
Spray the clean, dry surface as soon as possible after preparation but no later than four (4) hours and before surface oxides are visible.
Mask the surrounding coating in order to limit damage to good coating.
Spray in horizontal overlapping lines to get a more even thickness instead of the crosshatch technique.
If high humidity conditions exist during spraying, adhesion may be reduced.
The hot metal zinc spray is continued until such time as the coating thickness has been build up to the additional 30m.

Pag. 147 din 215
Wire brush, preferably using stainless steel (not carbon steel) or nylon the repaired area to remove loosely adhering over-sprayed zinc.
Wire brushing provides the added benefit of sealing the pores that may be present in the sprayed coating.
Measure the thickness of the sprayed coating with either a magnetic, electromagnetic or eddy current gauge.
What is zinc rich paint?
Zinc rich epoxy is a two-part epoxy into which zinc powder is mixed.
The zinc coating in the vicinity of the defect to be repaired should be sanded down (often using a*pencil blaster) to ‘feather’ the zinc and ensure a smooth transition between the epoxy zinc paint and the galvanized surface.
The zinc content of the epoxy zinc paint is high with the norm being a zinc content of 80% minimum in the cured dry film.
As zinc epoxy repair paints comprise of two parts, which harden quickly once mixed, it is recommended to only mix portions that can be applied within 15 minutes.
The application of zinc epoxy paints should be by brush and the final film thickness should be 30m greater than the surrounding galvanizing coating.
Proprietary products include a ‘squish pack’ containing a two-part epoxy into which a metallic zinc dust is mixed to form a ‘creamy solution’.
This solution is then applied to the defect. It must be applied to the defect surface within 30 minutes, by which time the epoxy will cure and harden.
*Pencil Blasting
Abrasive blasting is not just for large objects. There are many applications that require that the blast energy be directed to a very small, very precise area. This is accomplished with micro or ‘pencil’ blasting equipment. The hand piece is held like a pencil and the end of the nozzle resembles the tip. The pencil blaster provides a consistent flow of tiny abrasive particles that is focused, making it an ideal process for a variety of precision applications

Pag. 148 din 215
What is zinc based soldering?
In soldering, zinc-based alloys are applied in stick or powder form.
Common solders used for repair include zinc-tin-lead, zinc-cadmium and zinc-tin-copper alloys.
Because of the relatively thin film of zinc applied they do not perform as well as metallizing or painting with zinc.
Soldering provides some barrier protection
Abrasion resistance of solders is minimal compared to HDG surfaces and even metallized surfaces.
Solders in general have a smooth surface and they should not be used on areas that rub together.
Preheat the area to be repaired to approximately 315 °C and at the same time wire brush.
Exercise caution while heating the bare spot to avoid oxidizing the exposed steel or damaging the surrounding galvanized coating.
Resultant coatings are inherently thin because solders are molten when applied.
Remove the flux residue by rinsing with water or wiping with a damp cloth when the repair has been completed.
Due to heating of the surface to 315 °C, there may be some alloy layer development between the base metal and the zinc. Thus, bond strength for solders is very good.
Solder materials have little or no effect on the mechanical properties of the underlying steel.
Solders are typically not economically suited for touch-up of large areas because of the time involved in the process. Also heating large areas to the same temperature is very difficult.
Ensure that the renovated area has a zinc coating thickness at least as much as that specified for the thickness grade for the appropriate material category, but not more than 100 µm. Take thickness measurements with either a magnetic, electromagnetic or eddy-current gauge.
The skill in soldering is to provide consistent coating thickness across the repair area.
The application of solder is a skilled process. The solder should be brushed with a wire brush whilst still molten to spread it out and provide a smooth surface.
What the operator must check before carry out the repair?
Before the defect can be repaired it must be cleaned, and free of contaminants, weld slag, oxides etc.
Cleaning is best achieved by blasting using preferably a pencil-blasting nozzle so it can be controlled and not affect the good coating.

Pag. 149 din 215
Stainless steel wire brushing can also be used on the surface to be repaired, before applying a corrosion protection coating.
Just like the galvanizing process, the preparation is very important. Remember: If it is not clean it will not galvanize. This applies to the quality of the repairs too.
Prepare the surface well before applying the repair material. Dry all surfaces properly if moisture is present. The repair will be ineffective if the surface is not clean and dry.
Mask the surrounding coating in order to limit damage to good coating.
What is a reject?
The inspector will decide on whether to reject any galvanized articles based on the relevant international standard.
A reject is a hot dip galvanized article that does not meet the requirements of SABS ISO 1461:1999 or SABS EN 10240:1997: ASTM A123
Coating Thickness – material category and steel thickness
Finish – continuous, smooth and uniform
Appearance – free of uncoated areas, blisters, flux deposits and gross dross inclusions – no
heavy zinc
deposits that interfere with intended use
Adherence – should be tightly adherent through all expected uses of the article
If the hot dip galvanized product fails to meet the requirements of such standards, it will be rejected and need to be repaired, in order to fix the defect, or be totally rejected.
Re-galvanizing has to be done if the defect seriously impacts on the corrosion protection. The article would have to be put in a separate stripping bath of hydrochloric acid (HCl), before re-galvanizing could take place. This is the same stripping tank used for stripping jigging chains and hooks etc.
Once the article has been stripped of all the zinc, it is returned to the main process operation.
Should this take place immediately after stripping, within 3 to 4 minutes, it may be possible to skip the degreaser and proceed direct to the acid pickling bath.
If there is a long delay before re-galvanizing, it is advisable that it should be returned to the start of the operation.
In re-processing the ‘stripped’ product the same rules and requirements apply as when the article was processed the first time.
Rejects are extremely costly and result in the wastage of time, manpower, chemicals and zinc.
Safety in Repairs
Personal Protective Equipment (PPE)

Pag. 150 din 215
In the repairs area the minimum PPE would be:
Hard hats
Steel-toed safety boots
Long-sleeved overalls
Leather gloves
Waterproof clothing depending on the weather.
Safety Awareness and Procedures
(See Oxy/acetylene safety)
Storage
Storage Areas
Black Steel Yard
Articles stacked and labelled ready for jigging.
Jigging Store
Jigging Wires, chains, hooks and special racks are usually stored near the black steel yard for easy access for the jiggers.
Liquid Chemical Storage Areas

Pag. 151 din 215
Acids
Acid storage tanks are in a place where there is easy access directly into the acid baths and the acid tankers. These acid tanks usually contain fresh acid and sometimes, regenerated acid. The spent acid is pumped straight from the acid bath into the tanker.
Acid storage tanks are bunded as protection again major spills or leaks.
What is a Bunded Tank?
A bunded tank is quite simply a tank within a tank. The outer tank has the ability to hold 110% of the volume of the inner tank, so if the worst does happen and the tank is pierced or overfilled then the leaked product will all be contained in the outer tank. Bunded areas for hazardous chemicals are best at 125% of the volume of acid in the storage tank.
Liquid Degreasers
· Emulsifiers
· Wetting Agents
· Inhibitors
· Detergent/Foaming agents
· Water softener/Phosphates
· Buffers
· Alkalinity builders
Degreasers are stored in lined steel drums or plastic containers. These containers should be in a storeroom or enclosed area. Degreasers should be stored away from the flux salts.
Powdered Chemical Storage Area
Flux Salts
Flux salts should be stored in cardboard drums with a plastic bag inside. Flux salts can be stored in the same storeroom as the degreasers, but should not be stored next to one another.

Pag. 152 din 215
Powered Degreasers
Detergents, foaming agents and alkalinity builders can also be in powdered form. As with the liquid degreasers these powdered degreasers must be not stored next to flux salts.
Zinc Ingot Storage Area
Some plants store the zinc ingots in a demarcated area and others have then locked up in a metal cage or fenced off area.
It is very important that zinc ingots are stored and controlled from a secure storage facility.
Zinc ingots come in 25 kg, 1 tonne and 2 tonne ingots.
Finished Goods Handling Area
Finished articles are stacked and stored in this area of the plant, which is usually out in the open. If articles are going to be nested together they must be covered to prevent them getting wet and producing wet storage stains.

Pag. 153 din 215
Best Practices for Storage
Health and Safety
Maintain a high standard of housekeeping.
Avoid dry sweeping to prevent airborne dust outside any building.
Keep the storage area clean and uncluttered.
Chemicals and equipment should be in the correct storage areas.
Chemicals should be properly labelled and all storage areas must have the appropriate health and safety signs.
Pumping Acid
Proper storage and handling of materials is essential to minimize the environmental impact caused by the spillage of liquids followed by run-off into water or to land.
Make sure that at least two people are present at all times when involved with the pumping of acid and other chemicals.
Secure the discharge hose to a rigid filling pipe that terminates below the surface of the liquid when taking delivery directly into an acid bath or when re-making acid baths.
Ensure good control of the delivery rate and pressure release to avoid air surge towards the end of delivery.
Ensure that deliveries are carried out with the minimum noise, spillage, leaks and dust emissions.
Avoid accidents during material transfer by adherence to the laid down safety rules and standard operational procedures.
Dealing with Spillages and Leaks
Clear all solids spillage immediately by vacuum cleaning or wet methods.
Add an absorbent to clean liquid spillage.
Ventilate area of leak or spill.

Pag. 154 din 215
Isolate hazard area.
Contain and recover liquid where possible.
Neutralise with alkaline material (soda ash, lime) then absorb with inert material e.g. dry sand, earth
Do not use combustible material such as sawdust.
Do not flush down the sewer drain.
Major spills must be reported to the authorities.
Best Practices in Hot Dip Galvanizing
Best Practices in Goods Receiving, Materials Handling and Inspection
Goods Receiving
Handle the articles carefully to avoid damage.
While moving the articles from the customers’ truck, generally forklifts or overhead cranes are used.
Nylon slings, chains and locking hooks allow for slinging of the product to the handling equipment (Cranes), which then moves the product to the stacking area.
As the articles are removed from the truck or trailer, they are stacked and labelled, usually with a metal tag with the same number as the job card. These metal tags are pre-stamped. Other methods of labelling could be used.
Stack the articles for easy identification and labelling with information on customer, type of steel, order number and any special requirements.
Some articles can be stacked and secured in stacking racks pending inspection.
Various designs of stacking racks are used to secure incoming product.
Stacking racks make it easier for all the many shapes and sizes of product to be stacked and secured safely.
Wooden or steel blocks are sometimes used to align and place the load on ground.
Also wooden blocks are used to stack articles and avoid direct contact between them.
Materials Handling
Only qualified forklift drivers are allowed to operate the forklift trucks. Forklift drivers will handle any items that are on palettes.
Make sure you stand back and give the forklift driver space to operate effectively. There is always a Safe Lifting Load (SLL) indicated on the forklift. This SLL must not be exceeded.
Cranes are also used to lift bigger articles from the trucks. Only qualified crane drivers are allowed to operate the cranes.

Pag. 155 din 215
There is always a Safe Woking Load (SWL) indicated on the crane. This SWL must not be exceeded.
Remove all tools, equipment and boxes that may be in the path of the crane when it is lifting or moving.
Position such materials so that they are identifiable in terms of customer, type of steel, job number and any other important details.
Inspection of Incoming Articles
The inspectors are looking for three main points:
1. How clean are the articles?
2. Do the design and surface conditions conform to fabrication standards?
3. Do the articles have adequate draining and venting holes?
Best Practices in Jigging
Steps for Jigging
Step 1 – Sorting and Separating
Step 2 – Selecting Suitable and Safe Fixture
Step 3 – Attaching Articles to Flight Bar
Step 4 – Inspect Load
Wire Tying
Use leather gloves to protect your hands from being cut whilst jigging
Looping and twisting is the most common way to jig an article with wires
Use pre-tie wires or locking ties, if they are available, to prevent the wires slipping through and unravelling
Use cutters with long handles, if possible, so that you use less pressure when cutting wire.
Use spring-loaded pliers to reduce hand-exertion
Check the ductility (pliability) of the wire before use by bending it back and forth in your hands before looping and twisting
Loop the correct number of wires for the weight of the article through the holes or lifting lugs on the flight bar, attaching the article to the bar
Do not tie too tight or too loose – articles must be able to move but no lateral (sideways) movement
Hang the articles securely, not right up against the flight bar, but not too loose that they flap around.There should always be a gap between the connecting wire loop and the article.

Pag. 156 din 215
If the wire is attached too tightly, the coating will be damaged, by way of touch marks, when the attaching wire is removed after galvanizing.
After you have looped and twisted the wire, bend the end piece or pieces back so it cannot unravel
Lifting Positions
The best lifting positions are:
· A distance of one quarter or 25% of the length from each end
· At 30% in from bottom end (first in the kettle) and at the top - referred to as the 70/30 lifting position
Best Practices in Degreasing
Degreasing Steps
1. Immerse the articles in the solution as fast as possible.
2. Unhook the flight bar if there is enough time.
3. Time in solution will differ depending on whether the solution is heated or not. Not heated – 15 – 20 minutes – Heated 5 – 10 minutes. If degreasing time exceeds 15 minutes in a heated solution, call your supervisor or team leader.
4. Agitate the articles in the solution if the flight bar has not been unhooked. Air or steam jets and ultrasonic cleaning can be used to agitate the solution. Do not use compressed air agitation.
5. Minimise Drag Out – withdraw the articles carefully and suspend at a 45° angle or more above the bath. Allow about 45 seconds to a minute for the excess solution to drain.
6. Inspect for Water Breaks - after drainage, visually inspect the product to ensure that there are no water breaks on all surfaces. Check blind areas. You want to see a ‘water break free’ surface.
7. Check all articles are still on the flight bar – if not get them out of the tank as soon as possible, using the correct ‘fishing tools’.
8. Move to Rinsing (only after alkaline degreasing) – once drainage is complete, carefully move articles to the water-rinsing bath as quickly as possible.
Rinsing Steps (After Alkaline Degreasing)
1. Immerse the articles in the solution as fast as possible.
2. Do not unhook the flight bar in the rinsing process.
3. Time in rinse – 5 minutes.

Pag. 157 din 215
4. Agitate the articles by moving the product up and down in the solution twice. This must be done carefully so as not to damage the product or the tank.
5. Minimise Drag Out
6. Inspect for Water Breaks
7. Check all articles are still on the flight bar
8. Transfer - after rinsing, immediately transfer the article to the pickling tank to prevent rust on the article.
Best Practices in Acid Pickling
Acid Pickling Steps
1. Immerse the articles in the solution as fast as possible.
2. Unhook the flight bar if there is enough time.
3. Time in solution - 15 – 30 minutes
4. Agitate the articles in the solution if the flight bar has not been unhooked. Air or steam jets and ultrasonic cleaning can be used to agitate the solution. Do not use compressed air agitation.
5. Minimise Drag Out – withdraw the articles carefully and suspend at a 45° angle or more above the bath. Allow about 45 seconds to a minute for the excess solution to drain.
6. Inspect for Water Breaks - after drainage, visually inspect the product to ensure that there are no water breaks on all surfaces. Check blind areas. You want to see a ‘water break free’ surface.
7. Check all articles are still on the flight bar – if not get them out of the tank as soon as possible, using the correct ‘fishing tools’.
8. Move to Rinsing – once drainage is complete, carefully move articles to the water-rinsing bath as quickly as possible. Do not expose the articles to the air for to long, to prevent ‘flash rusting’, which degrades the surface.
Rinsing after Pickling
Rinsing Steps (After Pickling)
1. Immerse the articles in the solution as fast as possible.
2. Do not unhook the flight bar in the rinsing process.
3. Time in rinse – 5 minutes in each tank (two-tank rinse)
4. Agitation of the rinse water is created by the backwards cascade of the two rinse tanks. The water flow is in the opposite direction of movement of the articles.

Pag. 158 din 215
5. Minimise Drag Out
6. Inspect for Water Breaks
7. Check all articles are still on the flight bar
8. Transfer - after rinsing, immediately transfer the article as quickly as possible into the flux solution. Speed is necessary to prevent the clean steel being attacked by oxygen in the air, causing ‘flash rusting’ within a few minutes.
Best Practices in Fluxing
Fluxing Steps
1. Immerse the articles in the solution as fast as possible.
2. Do not unhook the flight bar in this process.
3. Time in solution - 2 – 8 minutes
4. Agitate the solution vigorously. Use compressed air agitation as this will speed up the fluxing process.
5. Minimise Drag Out – withdraw the articles carefully and suspend at a 45° angle or more above the bath. Allow about 45 seconds to a minute for the excess solution to drain.
6. Inspect for Water Breaks – there should be no water breaks at this stage. The surface of the article will retain its uniform grey colour, but as the flux starts to drain, a dry, „crystalline‟ deposit becomes evident on the surface of the product.
7. Check all articles are still on the flight bar – if not get them out of the tank as soon as possible, using the correct ‘fishing tools’.
8. Move to Drying Bay – once drainage is complete, carefully move articles to the drying bay. With a good quality flux, there should be no ‘flash rusting’.
Brushing Flux
After withdrawing the articles from the tank it is sometimes necessary, if there are bare areas, to brush the flux solution on these areas. Bare areas can occur when the articles has angles and crevices that are difficult to cover with the flux solution.
Drying after Fluxing
Control of the temperature of the articles is very important; if it is too hot it will break down the flux. Remember that this is not a pre-heating of the article it is a drying of the flux coating.
Using dryers at 100°C will provide better quality finish. Do not dry above 120°C or allow the article temperature of the article to exceed 80°C to prevent break down of flux.
Do not allow the fluxed and dried article to stand longer than necessary prior to immersion in zinc bath, to avoid moisture build-up when the humidity is high.

Pag. 159 din 215
Articles given a heavier coating using higher strength flux solutions must be dried more slowly to give additional protection from rusting.
Best Practices in Galvanizing
Rate of Immersion
The articles should be submerged as quickly as possible, but with due regard to the operator’s safety.
Rate of Withdrawal
In general the withdrawal needs to be slow and controlled. Provided the articles are not withdrawn faster than the rate at which the zinc drains freely from the surface, the unalloyed zinc layer of coating is evenly distributed.
Drossing Steps
Step 1 - Check Dross Level
The dross level is determined by means of a steel probe, which is used to check the level every week. If the layer exceeds 150 mm, in any given week, the bath must be drossed.
Step 2 - Set Kettle Temperature to 4400C
For the best drossing results the zinc temperature must be set at 4400C.
Step 3 - Check the Perforated Spoon or Grab
Prior to the operation commencing, the perforated spoon or grab must be inspected to ensure that the perforations are not blocked.
Step 4 - Clear the Perforated Spoon or Grab
These can be cleared either by stripping in the acid stripping bath or by means of an electric drill. Blocked holes will prevent entrained zinc from draining out of the spoon on withdrawal.
Step 5 - Commence Drossing
Drossing commences at one end of the bath and systematically continue until the other end is reached. If a drossing spoon is used care must be taken not to scrape the sides of the kettle and remove the thin protective zinc and iron alloy layer.
Step 6 - Second Run
A second run then takes place in the reverse direction.
Step 7 - Check Corners
Special care must be taken to ensure that the corners have been adequately cleaned.
Step 8 - Drain Shovel Loads
As each shovel load is withdrawn, it must be suspended over the bath with the contents worked, by means of a wooden pole, to allow free zinc to drain back into the bath.
Step 9 - Complete Drossing/Supervisor Check

Pag. 160 din 215
When drossing is complete, the supervisor will determine, with the aid of a probe, that the bath is clean. If drossing has been thorough, the probe will fall freely through what little dross remains.
Step 10 - Weigh and Record
All dross removed must be weighed and the mass recorded prior to removal from the plant.
Skimming Steps
Step 1 – Check kettle operation
Skimming must take place before immersion and before withdrawal during the galvanizing operation to avoid ash collecting on the surface of the material being galvanized. Never remove ash if not dipping!
Step 2 - Smooth Flowing Action
Skimming must be carried out with a smooth flowing action. No excessive agitation or creating ripples or waves, as this will form more ash and not an ash free zinc surface.
Step 3 - One Direction Only
Skimming must be in one direction only. This should be towards the end of the bath where a container is situated to collect the ash e.g. a weir or a circular steel ring sieve.
Step 4 - Scooped Off Skimmed Ash
As skimmed ash builds up, it must be scooped off the zinc surface with the aid of a perforated ladle.
Step 5 – Tap and Deposit
Before depositing the contents of the ladle into the container it must be tapped against the bath side to remove as much entrained molten zinc as possible.
Step 6 – Shake Container
Shaking the ash in the container each time more ash is put in, to help drainage of the remaining entrained zinc metal back into the bath. If not done, ash and residues will adhere to the product surface and lead to unacceptable product quality.
Step 7 – Remove Full Containers
Using the ladle, remove the full containers taking care to avoid contact with the zinc surface. In this way, the quantity of metallic zinc removed in the waste ash will be low.
Step 8 – Ash Disposal
Local recovery units buy the entrained ash then sell it back to the plant in ingot form. This is called green zinc.
Galvanizing Steps
1. Skim the ash from the surface of the molten zinc
2. Dip the articles in the molten zinc as fast as possible, without splashing
3. Leave until „boiling off‟
4. Skim again before articles are withdrawn
5. Withdraw slowly
6. Suspend above the bath for good drainage

Pag. 161 din 215
7. Remove ‘drainage spikes’ (zinc spikes)
8. Move to a water quenching or passivation tank or cool in the air
Zinc Kettle Maintenance
The temperatures that need to be maintained are:
1. Molten zinc at 445 - 450ºC
2. External kettle wall at no more than 530ºC
3. Internal kettle wall at 490ºC
4. External furnace wall at 60 - 80ºC
Best Practices in Water Quenching, Passivating and Air-Cooling Process
Water Quenching and Passivation
The temperature of the passivating solution and water quench should be maintained at approximately 70°C to 80°C by either cooling through the cooling tower or by heating via the heating system.
It is important to monitor the temperatures on the control instruments to ensure that correct temperatures are maintained. A simple check is that the water/solution must not bubble.
Only use sodium di-chromate passivation to prevent white rust, when required by the customer and when environmental regulations permit.
Preferably use a zinc phosphate solution to passivate the articles.
Air Cooling
The surface and the core temperature need to be carefully controlled as they cool at different rates. Some articles will require thermal blankets to prevent the surface cooling quicker than the core, possibly causing distortion.
Also articles should be handled and positioned appropriately during cooling to prevent the freezing together of articles.
Best Practices in De-Jigging, Fettling and Cleaning
De-Jigging
Remember the wire cutting procedures from jigging. In de-jigging you are cutting the articles from the flight bar once they have been laid down in a safe place. Do not de-jig whilst the articles are still suspended on the flight bar.
Carefully remove the articles from the flight bars and the attachments such as wire, hooks and chains.

Pag. 162 din 215
Care should be exercised when de-jigging not to damage articles that have been now fully processed and that have a considerable amount of added value.
Make sure the correct PPE is worn to minimise such injuries as burns from the hot newly galvanized articles and articles falling on toes.
Fettling
Do not fettle on the jig!
The common method is a grinder or file to remove excess zinc.
The disadvantage of this method is that all the zinc coating could be removed and exposes the underlying steel to corrosion.
The preferred method is using a gas heater to re-melt the excess zinc and scrape it off with a hand scrapper.
The disadvantage is that a certain amount of discolouration takes place, which will disappear in time with the whole structure becoming uniform grey colour.
Cleaning
When cleaning is required it should be carried out using a stainless steel or a stiff nylon brush to remove all entrained ash deposits from inadequate skimming during the withdrawal of the article.
‘Carbon steel wire’ brushes are must not be used because they could leave traces of carbon steel that could impregnate the soft zinc coating and lead to rust staining.
The process should be to remove the ash without damaging or removing the actual galvanized surface.
Ash deposits represent potential corrosion sites and indicate poor quality control at the zinc bath.
Such occurrences should be addressed at the zinc bath and prevented.
Cleaning should be limited to crevices and inaccessible surfaces.
Best Practices in Final Inspection
Visual inspection needs to be done with the understanding of the:
Types of surface defects
Cause of such defects
Effect on the corrosive protection
A visual inspection (unmagnified or naked eye) should observe all surface conditions e.g. both inside and outside of a pipe. Paying particular attention to contact points i.e. welds, junctions, bent areas.
The inspector will decide on whether to reject any galvanized articles based on the relevant international standard.

Pag. 163 din 215
A reject is a hot dip galvanized article that does not meet the requirements of SABS ISO 1461:1999 or SABS EN 10240:1997: ASTM A123
Best Practices in Packing
1. Use the dispatch documents to identify the correct job number, check that the correct quantities are packed with the correct labelling attached as per the customer’s instructions.
2. Make sure that appropriate packaging is used for the different shapes and sizes of articles.
3. Do not pack product where moisture could collect and thereby promote ‘wet storage stain’, white rust.
4. Bundle the product and secure the components so that loading and off loading from the transport will not result in damage to the product.
5. Bundles should not exceed the loading capacities of the lifting equipment or that of the transport.
6. Following the loading of the product onto the transport, the bundles should be secured and comply with the legal requirements of the road, rail, air or sea transport.
Best Practices in Storage
Health and Safety
Maintain a high standard of housekeeping.
Avoid dry sweeping to prevent airborne dust outside any building.
Keep the storage area clean and uncluttered.
Chemicals and equipment should be in the correct storage areas.
Chemicals should be properly labelled and all storage areas must have the appropriate health and safety signs.
Pumping Acid
Proper storage and handling of materials is essential to minimize the environmental impact caused by the spillage of liquids followed by run-off into water or to land.
Make sure that at least two people are present at all times when involved with the pumping of acid and other chemicals.
Secure the discharge hose to a rigid filling pipe that terminates below the surface of the liquid when taking delivery directly into an acid bath or when re-making acid baths.
Ensure good control of the delivery rate and pressure release to avoid air surge towards the end of delivery.
Ensure that deliveries are carried out with the minimum noise, spillage, leaks and dust emissions.
Avoid accidents during material transfer by adherence to the laid down safety rules and standard operational procedures.

Pag. 164 din 215
Dealing with Spillages and Leaks
Clear all solids spillage immediately by vacuum cleaning or wet methods.
Add an absorbent to clean liquid spillage.
Ventilate area of leak or spill.
Isolate hazard area.
Contain and recover liquid where possible.
Neutralise with alkaline material (soda ash, lime) then absorb with an inert material e.g. dry sand, earth
Do not use combustible material such as sawdust.
Do not flush down the sewer drain.
Major spills must be reported to the authorities.

Pag. 165 din 215
Full Glossary
Abrasive – gritty, rough
Abrasive blasting (grit or shot blasting) – is the process using a forceful stream of particles, available in varying hardness, to remove residue and contaminants from steel surfaces to prepare for galvanizing.
Accelerate – speeds up
Acids – solutions with pH levels from 6 to zero (low pH)
Agitate – shake or vibrate
Alkalis - solutions with pH levels from 8 to 14 (high pH)
Alloy layers - The galvanized coating consists of a series of iron-zinc alloy layers over coated with a layer of zinc. The alloy layers enhance the abrasion resistance and allow a thicker coating to be applied. The interior layers of the galvanized coating comprise of iron/zinc formed when molten zinc reacts with iron in the steel Aluminum - element found in the galvanizing bath. Added to molten zinc through a product commonly called ‘brightener bar’ that gives the hot-dip galvanized coating a shiny appearance
Ambient temperature – is a temperature of 25° C – often referred to as room temperature. This is difficult to maintain with varying weather conditions.
Annealed – softened steel to improve its effectiveness without losing its strength e.g. annealed wires can be bent and looped back and forth and will not break
Black steel – ungalvanized steel.
Black steel yard – where the ungalvanized steel is stored waiting to be galvanized
Bracing - metal that is attached to a fabrication prior to galvanizing in order to provide support so that the steel does not change shape during heating and cooling; can be temporary or permanent.
Buoyancy – ability to stay afloat and not sink in the water
Burrs – rough edges or small sharp pieces of metal from a drilled hole or machined section
By-product – something produced in the process of manufacturing another article or product
Cascade – series of streams of water
Caustic soda (Sodium Hydroxide - NaOH) - highly corrosive alkali
Centigrade (Celsius) (°C) – a measure of temperature
Chequered plate – thin metal plate with a chequered pattern, often used for steps
Cleaning – cleaning the de-jigged articles of ash and other contaminants
Compounds - two or more elements together
Consumed – eaten away, destroyed
Corrodes – to destroy slowly by chemical action
Cost Effective – saves money
Cropped – a ‘V’ shaped hole for drainage
Crystalline – like crystal, shiny and clear
Decades – one decade is a period of ten years
Degreasing – dipping the jigged articles into degreasing chemicals, either alkali or acid based, to clean off any grease, oil, rust, mill scale, etc

Pag. 166 din 215
De-jigging – taking the galvanized articles off the flight bar
Delta layer - the second layer of zinc-iron alloy growth from the base steel formed during the galvanizing process; the Delta layer's chemical composition is approximately 90% zinc and 10% iron.
Deteriorate - becomes worse
Dispatch – finished articles ready for collection or delivery to the customer.
Distortion – twisting, warping and bowing of articles caused by poor jigging or poor design. The heat of the molten zinc can cause certain articles to change shape.
Double Salts – salts containing a compound of two elements
Double-dipping - The act of dipping steel, too large to completely fit into the galvanizing kettle, more than once in cleaning solutions and molten zinc metal in order to produce a coating that covers the entire surface of the steel.
Drainage - the process of becoming emptied or freed of cleaning solutions and/or zinc
Drainage holes – allows for the empting or freeing of cleaning solutions and/or zinc.
Drying – in dry galvanizing the article is dried before being dipped into the molten zinc
Ductility – pliability or the ability to bend, or be looped and shaped
Elements – Solids, liquids or gases. Examples of metal elements are Zn – zinc, Pb – lead and Al - aluminium
Emulsifiers - is a substance which, stabilizes an emulsion
Emulsions - a mixture of two unblendable liquids.
Entrained – mixed with e.g. entrained zinc in the ash
Eta layer - the fourth, outer layer of the galvanized coating solely comprised of zinc
Fabrications – constructed/manufactured steel articles.
Fabricators – makers of steel articles
Fahrenheit (°F) – a measure of temperature
Ferrous – contains iron
Ferrous Oxide - red-brown rust
Fettling – removing, if necessary, zinc spikes, filing down sharp points and rough edges
Final Inspection – checking that the article is properly galvanized and cleaned up so that no repairs are necessary.
Fluxing – the pickled and rinsed steel is dipped in a flux solution of ammonium chloride and zinc chloride. This deposits a thin layer of flux salts on the steel surfaces
Gamma layer - the first layer of zinc-iron alloy growth from the base steel formed during the galvanizing process; the chemical composition of this layer is approximately 75% zinc and 25% iron
Goods Receiving – articles coming into the plant to be galvanized
Gussets – triangular piece of metal to support two right angle pieces welded together
Guy wires – guiding wires similar to those used in putting up a tent
Hydrochloric acid (HCl) – (H - Hydrogen and Cl – Chloride) - highly corrosive acid
Hydrogen embrittlement - a condition of low ductility in metals resulting from the absorption of hydrogen. Some steels may be prone to embrittlement from hydrogen entering the steel during acid pickling
Immerse – place under the surface of a solution or water

Pag. 167 din 215
Impenetrable – cannot get through
Insoluble – will not dissolve in water
Inspection – looking at the design, the surfaces, and the venting and draining holes, which are small holes in the article to allow the molten zinc to coat on all surfaces and to allow for drainage when taken out of the tanks.
Iron Oxide – red-brown rust
ISO (International Organization for Standardisation) - A network of national standards institutes from 140 countries working in partnership with international organizations, governments, industry, businesses and consumer representatives. The ISO 9000 is from 13,000 international standards for business, government and society.
Jigging – hanging the articles from a boom bar or flight bar, which is a metal bar suspended from a crane that carries the articles to the tanks so the process can begin
Kettle - The zinc bath or tank is often referred to as the kettle. All the other tanks or baths in the plant cannot be called the kettle, only the zinc bath.
Materials Handling – moving the articles to a place where they can be inspected
Metric ton or tonne – 1000 kg
Micrometer - measures microns (One-millionth of a metre)
Mill scale – oxides that develop during the processing of steel
Molten – melted, made liquid
Mottled – patterned with irregular patches of colour
Neutralize - cancel one another out
Non-conformance – does not comply with set rules
Non-ferrous – does not contain iron
Packing – finished articles are packed and ready for collection or delivery to the customer.
Passivation – where the articles are dipped into a passivation tank (chemicals and water) to reduce the possibility of wet storage stain, often referred to as ‘white rust’, during transport and storage.
Personal Protective Equipment (PPE) – personal safety equipment
pH level - a measure of acidity and alkalinity
Pickling - dipping the jigged articles into an acid tank to further clean the surface of the metal
Post-treatments – the processes that happen after galvanizing
Pre-treatments – the processes that happen before galvanizing
Ratio – the numerical relation one quantity bears to another
Recyclable – re-usable after contaminants are removed
Regenerated – revived, made new again
Rinsing (after alkaline degreasing or pickling) – rinsing off the degreasing solution or acid pickling solution in a tank of water
Rust creep – rust forming slowly along the surface of the exposed metal under the broken or chipped paint coating
Snorkel or breather pipe – a pipe to allow hollow sealed sections to vent
Soldered – molten soft metal e.g. aluminium or silver that is used to join two pieces of metal together
Soluble – can dissolve in water

Pag. 168 din 215
Stiffeners – usually part of the structure designed to restrain movement
Submerge – sink under the surface of a solution or water
Sulphuric acid (H2SO4) - highly corrosive acid
Surface tension – the tension of the surface of a liquid
Surfactants - an abbreviation of the words SURFace ACTive AgeNT. Surfactants are also referred to as wetting agents and foamers. Everyday examples of surfactants are soaps, household cleaners and your detergents for washing your clothes.
Triple Salts - salts containing a compound of three elements
Ventilation – free circulation of fresh air
Venting holes - holes in articles to be galvanized that allow entrapped, heated liquids and gases to escape as pressure increases. All hollow sections must be correctly vented to allow air and steam to escape during immersion in the molten zinc.
Waste heat recuperator – recovers any waste heat that is around
Water breaks - if the surface is not properly cleaned and oil remains, the water will ‘break away’ and reveal an un-wetted surface
Water Quenching – after withdrawal from the zinc bath, articles are quenched in plain water.
Weld slag – a combination of weld material and weld flux; weld slag will prevent a smooth galvanized coating
Weld spatter – ejected molten metal away from the weld pool
White rust or wet storage stain (zinc hydroxide) – is a white, sticky substance, which occurs when freshly galvanized articles are exposed to wetness (rain, condensation) and are not allowed to dry. Wet storage stain or white rust will also form if the closely stacked articles are rained on, or are under conditions promoting formation of dew or condensation.
Zeta layer - the third layer of zinc-iron alloy growth from the base steel formed during the galvanizing process; the chemical composition of this layer is approximately 94% zinc and 6% iron

Pag. 169 din 215
Health and Safety
Why is Health and Safety important in HDG?
Galvanizing plants, much like most plants and factories, are dangerous places. It is important to understand general health and safety as well as the specific health and safety issues at the different stages in the process. By following the health and safety rules you prevent injuries and minimize hazards.
Who is responsible for Health and Safety?
Quality Control staff and the Safety Representatives are responsible for safety inspections and will identify safety hazards.
However, all plant operators are equally responsible for:
· Wearing correct PPE
· Checking that products comply with safety requirements
· Adhering to all health and safety rules
Health and safety is everyone‟s responsibility!
General Safety
Personal Protective Equipment (PPE)
Wearing the correct personal protective equipment (PPE) is essential in a galvanizing plant. Tie back long hair and loose clothing. Always wear a long-sleeved shirt under your overalls.
The PPE you will need to wear in various places in the plant are:
Hard hats
Neck/hat flaps
Safety gloves (various)

Pag. 170 din 215
Steel-toed safety boots
Rubber boots
Safety goggles
Face shields/visors
Earplugs
Long-sleeved overalls (sometimes acid resistant)
Aprons (various)
Leggings or chaps
Half-jackets
Blast hood or helmet
Respirator
The PPE you will have to wear at all times in the plant is:
Hard hats
Safety Footwear
Long-sleeved overalls (sometimes acid resistant)
Safety Signs and Designated Areas
Be guided by the safety signs and keep within the designated areas, usually marked by painted yellow lines, when walking inside the plant.

Pag. 171 din 215
Important Locations
It is vital that you know the location of the following:
First-aid kits
Medical stations
Emergency Showers
Emergency stop buttons
Eye rinse baths
Fire equipment
Fire alarms
Fire blankets
Fire exits

Pag. 172 din 215
Important Health and Safety Information
Safety representatives for each area
Incident reports
Materials Safety Data Sheets (MSDS)
Fire procedures
Evacuation procedures
Spillage procedures
Simple General Safety Rules
Good Housekeeping - Keeping the work-area clean in a galvanizing plant is a challenge but can be done; especially in areas like the black steel yard and the storage area.
It is essential that the work areas are tidy and uncluttered.
Eating, drinking, smoking and chewing gum - Eating, drinking, smoking, chewing gum where chemicals are present is not allowed. There will be

Pag. 173 din 215
designated areas were you can do these activities. It is good practice to wash your hands before conducting any of these activities.
Food and beverages must not be stored in refrigerators, freezers or cold room used for chemical storage. Laboratory glassware or utensils are not to be used for the storage or consumption of food or beverages.
Recreation Area
The plant or the yard is not a recreational area. Do not be tempted to engage in recreational activities, even on a break, anywhere in the plant and outside storage area e.g. playing football, kicking a tin can around as a soccer ball, teasing a colleague, play fighting.
Safety Awareness and Procedures in the Pre-treatment and Kettle area
The chemicals used in the pre-treatment tanks are hazardous and all safety precautions given in the material data safety sheets (MSDS) should be followed. There is also a material data safety sheet for the correct safety measures for the kettle area

Pag. 174 din 215
Correct PPE for the different areas must be worn at all times. Wearing the proper PPE can
prevent chemical burns. Remember the less exposed skin the better.
When working with acid always add small amounts of acid to large amounts of water. A large amount of heat is released when strong acids are mixed with water, therefore adding more acid releases more heat. If you add water to acid, you form an extremely concentrated solution of acid initially. A great deal of heat is released that the solution may boil very violently, splashing concentrated acid out of the tank! If you add acid to water, the solution that forms is very dilute and the small amount of heat released is not enough to vaporize and splatter it. So always add Acid to Water, never the reverse.
Report any chemical spills to your supervisor.
Exposures
Avoid unnecessary exposure to chemicals by any route
Develop and encourage safe work habits
Do not smell or taste chemicals
For exposures, the following actions are recommended:
Inhalation: Remove the affected person to fresh air. If breathing becomes difficult give oxygen and seek medical attention.

Pag. 175 din 215
Eye Contact: Promptly flush eyes with room temperature water provided by the eye rinse baths. Rinse for a minimum of 15 minutes, occasionally lifting the upper and lower lids and seek medical attention. Do not rub your eyes or keep eyes closed.
Skin Contact: Quickly use the deluge shower. These showers either work on a pressure plate system or you pull on what looks like an old-fashioned toilet chain. Do not waste time removing your clothes. Saturate the clothes and your body. Stay under the shower water for a minimum of 15 minutes. If symptoms persist after washing, notify the supervisor, inspector or the safety officer and seek medical attention. The use of chemical neutralizers or absorbers directly on the skin is NOT recommended.
Ingestion: Your local or regional Poison & Drug Information Centre will give you immediate first aid procedures to follow. Their number needs to be easily available. Do not induce vomiting. Drink large volumes of water. Never give anything by mouth to an unconscious person. Seek medical attention immediately.
Fill Out an Incident Report: All chemical exposures are to be documented. The incident report is to be filled out by the employee and the supervisor.
Clothing catching fire: If your clothing catches fire, smother it with the fire blanket or a coat.
Stop, Drop and Roll – NEVER RUN!
Report any accidents or injuries, no matter how small, to your supervisor or safety representative.
Process Specific Safety
Safety in Goods Receiving and Materials Handling
Personal Protective Equipment (PPE)
Out in the stacking and storage area the minimum PPE would be:
Hard hats

Pag. 176 din 215
Steel-toed safety boots
Long-sleeved overalls
Leather gloves
Waterproof clothing depending on the weather.
Safety Awareness and Procedures
Safety awareness is of great importance when handling material.
Make use of the various items and equipment supplied for the safe slinging, moving and stacking of the incoming material to be galvanized.
Keep stacking and storage area clean and clutter-free using good housekeeping.
Remove tripping hazards from working areas and walkways. Maintain clear all walkways at all times.
If your skin comes in contact with paint stripper:
§ Wash off immediately in water,
§ Do not wipe off on your clothing,
§ If a reaction occurs see your safety officer immediately
Waste Disposal
Remove all waste materials to disposal points.

Pag. 177 din 215
(See Hand Lifting safety)
Safety in Abrasive Blasting
Personal Protective Equipment (PPE)
Essential equipment for the blaster is:
A blast hood or helmet with clean air supply. The hood or helmet allows the operator to move his head within the device, and has a view window with lens protection and an air feed hose. The air feed hose is attached to a pressurized air supply. It includes a pressure regulator, air filtration and a carbon monoxide alarm.
Special safety gloves - PVC re-enforced and/or leather gloves, elbow length
A protective leather apron or a leather coat and leggings (sometimes called chaps)
Overalls or a canvas blast suit
Ear protection or ear muffs or ear plugs

Pag. 178 din 215
The equipment has to be comfortable and guarantee the operator a sufficient quantity of dry, smell-free and contaminant-free air.
PPE in this environment is rapidly worn out and has to be regularly changed.
Using abrasive blasting as a cleaning method has some risks for operators' health and safety. Certain precautions must be taken.
Wear specialized PPE for abrasive blasting to prevent:
· Burns
· Skin or eye lesions
· Exposure to hazardous dusts
· Heat exhaustion
· Exposure to excessive noise
Safety in Jigging
Personal Protective Equipment (PPE)
In the jigging area the minimum PPE would be:
Hard hats
Steel-toed safety boots

Pag. 179 din 215
Long-sleeved overalls
Leather gloves
Waterproof clothing depending on the weather.
Use leather gloves to protect your hands from being cut whilst jigging.
Safety goggles should be worn when cutting wire.
Safety Awareness and Procedures
Adhere to the SWL (Safe Working Load) that is displayed on all the jigs and lifting equipment.
All jigs, slings and handling equipment must be registered in the lifting equipment logbook. This equipment should be inspected daily for safety. No unregistered jigs and handling equipment should be used in the plant.
All jigs and lifting equipment must be stored in a designated area on racks provided, when not in used.
Safe Wire Tying
· Wire locking
· Wire twisting
· Wire looping
· Wire capacity
Wire Cutting
· Keep wrist straight.
· Do not rotate wrist.
· Do not cut more than one wire at a time.
· Keep cutters well adjusted in palm of hand against thumb pad.
· Do not squeeze cutters from top of handles
(See Hand Lifting, Hand Drilling, and Paint Stripping safety)
Waste Disposal
Small cuttings of jigging wires that cannot be used must be disposed of.
Chains, hooks and special racks that have not had the excess zinc removed must be stripped in an acid stripping bath.

Pag. 180 din 215
Safety in Degreasing
Personal Protective Equipment (PPE)
In the degreasing area, and all the pre-treatment areas, the minimum PPE would be:
Hard hats
Face shields/visors
Rubber boots
Long-sleeved acid-resistant overalls
Acid-resistant apron
PVC re-enforced gloves, elbow length
Additional PPE can be worn:
Neck/hat flaps
Earplugs – if noise exceeds acceptable levels
Safety Awareness and Procedures
The chemicals used in the pre-treatment tanks are hazardous and all safety precautions given in the material data safety sheets (MSDS) should be followed.

Pag. 181 din 215
Be aware of the location of the safety showers and eye rinse baths.
Vapour emitted from the caustic bath can contain traces of caustic material and may in extreme cases represent a potential occupational health issue for personnel. Keep your distance from the bath and do not stand or bend over the degreasing bath.
Additionally, caustic soda is highly corrosive and hazardous when in contact with exposed skin.
Remember – always add Acid to Water, never the reverse
Water rinsing operations that follow alkaline cleaning is one of the major sources of hazardous wastewater.
Accurately monitor by visual inspection, testing and record all the chemicals.
Waste Disposal
No chemicals should be disposed of down drains.
Never dispose of alkaline degreasers to waste.
Wherever possible Hydrochloric Acid degreasers should be regenerated (recycled). If this is not possible, such acid must be neutralised with lime alkali and removed from the plant in terms of an approved authority.
Safety in Acid Pickling
Personal Protective Equipment (PPE)
In the acid pickling area, and all the pre-treatment areas, the minimum PPE would be:
Hard hats
Face shields/visors
Rubber boots
Long-sleeved acid-resistant overalls
Acid-resistant apron
PVC re-enforced gloves, elbow length
Additional PPE can be worn:
Neck/hat flaps
Earplugs – if noise exceeds acceptable levels

Pag. 182 din 215
Safety Awareness and Procedures
The chemicals used in the pre-treatment tanks are hazardous and all safety precautions given in the material data safety sheets (MSDS) should be followed.
The primary health and safety issue is the impact of acidic rinse water contact with eyes and exposed skin surfaces.
Be aware of the location of the safety showers and eye rinse baths.
Air emissions from the rinse water tanks consist mainly of water vapour and have little potential to impact air quality either internally or in the external environment.
It is essential to use good work-handling procedures to minimize the risk of splashing.
Remember – always add Acid to Water, never the reverse.
Over time static (drag-out) rinses following acid pickling baths gradually increase in acid and metal contaminant levels to the point where such levels constitute a potential exposure hazard to operators.
Running rinses pose a lower exposure risk than static rinses due to the inherently lower acid contaminant levels. However, pH values of less than 4 (<4) have been observed in running rinses.
Waste Disposal
The spent rinse can sometimes be blended with spent acid and the two wastes disposed off simultaneously.

Pag. 183 din 215
Safety in Fluxing
Personal Protective Equipment (PPE)
In the fluxing area, and all the pre-treatment areas, the minimum PPE would be:
Hard hats
Face shields/visors
Rubber boots
Long-sleeved acid-resistant overalls
Acid-resistant apron
PVC re-enforced gloves, elbow length
Additional PPE can be worn:
Neck/hat flaps
Earplugs – if noise exceeds acceptable levels
Safety Awareness and Procedures
The chemicals used in the pre-treatment tanks are hazardous and all safety precautions given in the material data safety sheets (MSDS) should be followed.
The primary health and safety issue is the impact of hot corrosive flux solution in contact with eyes and exposed skin surfaces as it is a skin irritant.
Be aware of the location of the safety showers and eye rinse baths.
It is essential to use good work-handling procedures to minimize the risk of splashing.
Vapour emitted from the flux bath is mainly steam and may contain traces of zinc ammonium chloride (ZAC) that is potentially an occupational health issue for personnel. Do not lean over the flux bath. Adequate ventilation is vital to prevent the inhalation of fumes.

Pag. 184 din 215
Air emissions from natural evaporative drying comprise mainly water vapour and traces of ammonia from flux solutions. These emissions do not pose health or safety risk to personnel.
However, when cleaning the internal surfaces of the drying oven, appropriate respiratory PPE should be used.
Waste Disposal
Never discard the flux solution! Better practice is to chemically treat the contaminated solution rather than prepare a new solution especially when large flux tanks are involved.
Most plants have their own purification system ensuring continuous purification.
If the plant does not have a purification system the flux solution should be disposed of. Any off-site disposal of flux solution requires the services of an authorized agency because of the high ammonia content of the waste.
Remove iron that accumulates in the flux solution by treatment with hydrogen peroxide (H2O2). Sludge generated during this process contains high levels of ammonia and must be disposed by an authorized agency.
Natural drying frequently results in drainage of excess flux solution to the floor and requires clean-up and liquid waste disposal.
Liquid wastes are mainly from drag out of flux solution falling on the drying area floor. This may occur in the form of drips during transport or during the static dwell time in the drying area. The fluid may run into an effluent collection pit or may dry on the workplace floor.
Clean the floor periodically by water hose. Make sure that the contaminated water is treated (own water treatment system) or disposed off-site by authorised agency.
No chemicals should be disposed of down drains.
Safety in Hot Dip Galvanizing
Personal Protective Equipment (PPE)
In the kettle area the minimum PPE would be:
Hard hats
Face shields/visors
Steel-toed safety boots

Pag. 185 din 215
Long-sleeved acid-resistant overalls
Heat reflective apron
Heat reflective gloves
Additional PPE can be worn:
Neck/hat flaps
Heat reflective half jackets
Heat reflective leggings (chaps)
Earplugs – if noise exceeds acceptable levels
At least heat reflective aprons should be worn, and half jackets and leggings (chaps) are recommended.
Safety Awareness and Procedures
The zinc used in the kettle can be hazardous and all safety precautions given in the material data safety sheets (MSDS) should be followed.
If the operator experiences the buoyancy of the article then he should immediately call the supervisor. Galvanizing should be stopped and the article investigated for sealed sections. Do not attempt dipping in molten zinc without vent and drain holes.
Wet or cold material lowered into molten zinc will cause explosions or splattering.
Burns from molten zinc splatter do occur, but the fume hood enclosure is the primary means of
preventing these burns. The galvanizers should also wear eye/face protection and burn
resistant long sleeve clothing.

Pag. 186 din 215
Preheat all tools before using in the molten zinc.
Stay well away from the bath while the crane lowers the articles into the
zinc.
Use the safety shields installed at the zinc bath to protect operating crew during the dipping process.
Pipe or tubular products may shoot zinc at terrific force. Do not stand in line of these products being galvanized.

Pag. 187 din 215
Where a fume extraction hood is installed over the zinc bath, ensure that the end and side
safety doors are closed during the immersion of the product.
Zinc dripping from articles removed from the bath can cause burns directly or from splattering on the floor. Keep back from the fully loaded flight bar to avoid this type of injury. Zinc burns are painful and very slow to heal. Every sensible precaution should be employed to avoid this type of injury.
Standing on the bath flange is strictly prohibited.

Pag. 188 din 215
Any maintenance work to be carried out on the zinc bath is to be authorized by the issue of a hot work permit. (See Oxy/acetylene safety)
Safety in Water Quenching and Passivation
Personal Protective Equipment (PPE)
In the post-treatment area, as in all the pre-treatment areas, the minimum PPE would be:
Hard hats
Face shields/visors
Rubber boots
Long-sleeved acid-resistant overalls
Acid-resistant apron
PVC re-enforced gloves, elbow length
Additional PPE can be worn:
Neck/hat flaps
Earplugs – if noise exceeds acceptable levels
Safety Awareness and Procedures
The chemicals used in the pre-treatment tanks are hazardous and all safety precautions given in the material data safety sheets (MSDS) should be followed.
Chromates are poisonous and irritant to skin and eyes.
Be aware of the location of the safety showers and eye rinse baths.
The emissions from passivation containing traces of dichromate may constitute a potential human health risk.
The only discharge to air from the quenching process is the release of water vapour from the bath.
Ensure good work practices to minimize the risk of exposure to hot water and steam. Do not stand near the quench tank as hot water and steam can be ejected from the hot articles.
Ensure that quench and passivation operations are conducted in a well-ventilated location.
Sodium dichromate is an irritant, a corrosive, and a strong oxidizing agent. Such materials may cause skin dermatitis, ulcers and respiratory tract irritation.

Pag. 189 din 215
Good work and housekeeping practices will minimize the risk of exposure to sodium dichromate.
Waste Disposal
Small quantities of sludge accumulate in the quench tank over time and contain chromium and other heavy metals.
These will eventually require removal and disposal.
The sludge must be disposed by an authorized agency to a treatment facility having the capability to treat chromium wastes.
Waste solution from passivation treatment must also be disposed by an authorized agency.
Dichromate quench solutions require periodic replenishment to maintain the chemical balance and are never disposed of.
Safety in De-jigging, Fettling and Cleaning
Personal Protective Equipment (PPE)
In the de-jigging area the minimum PPE would be:
Hard hats
Steel-toed safety boots
Long-sleeved overalls
Leather gloves
Waterproof clothing depending on the weather.
Safety Awareness and Procedures
Burns from touching galvanized work before it has cooled, and mashed fingers and toes are the most common injuries.
Wearing the correct PPE will minimise such injuries.
Remember the wire cutting procedures from jigging. In de-jigging you are cutting the articles from the flight bar once they have been laid down in a safe place. Do not de-jig whilst the articles are still suspended on the flight bar.

Pag. 190 din 215
Wire Cutting
· Keep wrist straight.
· Do not rotate wrist.
· Do not cut more than one wire at a time.
· Keep cutters well adjusted in palm of hand against thumb pad.
· Do not squeeze cutters from top of handles
Mechanical finishing can also include hand operations with wire brushes, abrasive paper, files, etc. Usually only very small areas are economically cleaned by hand operations.
When removing hard zinc spikes and cleaning with wire brushes, safety goggles should be worn.
Waste Disposal
Jigging wires are not re-used and can be disposed of.
Chains, hooks and special racks are re-used after the excess zinc is removed in an acid stripping bath.

Pag. 191 din 215
Safety in Repairs
Personal Protective Equipment (PPE)
In the repairs area the minimum PPE would be:
Hard hats
Steel-toed safety boots
Long-sleeved overalls
Leather gloves
Waterproof clothing depending on the weather.
Safety Awareness and Procedures
(See Oxy/acetylene safety)
Safety in Storage
Personal Protective Equipment (PPE)
Wear PPE appropriate to the storage area in which you are working.
Safety Awareness and Procedures
Degreasers and flux salts should be stored away from each other.
Chemicals and equipment should be in the correct storage areas.

Pag. 192 din 215
Chemicals should be properly labelled and all storage areas must have the appropriate health and safety signs.
Pumping Acid
Proper storage and handling of materials is essential to minimize the environmental impact caused by the spillage of liquids followed by run-off into water or to land.
Make sure that at least two people are present at all times when involved with the pumping of acid and other chemicals.
Secure the discharge hose to a rigid filling pipe that terminates below the surface of the liquid when taking delivery directly into an acid bath or when re-making acid baths.
Ensure good control of the delivery rate and pressure release to avoid air surge towards the end of delivery.
Ensure that deliveries are carried out with the minimum noise, spillage, leaks and dust emissions.
Avoid accidents during material transfer by adherence to the laid down safety rules and standard operational procedures.
Dealing with Spillages and Leaks
Clear all solids spillage immediately by vacuum cleaning or wet methods.
Add an absorbent to clean liquid spillage.
Ventilate area of leak or spill.
Isolate hazard area.
Contain and recover liquid where possible.
Neutralise with alkaline material (soda ash, lime) then absorb with an inert material e.g. dry sand, earth
Do not use combustible material such as sawdust.
Do not flush down the sewer drain.
Major spills must be reported to the authorities.

Pag. 193 din 215

Pag. 194 din 215

Pag. 195 din 215

Pag. 196 din 215
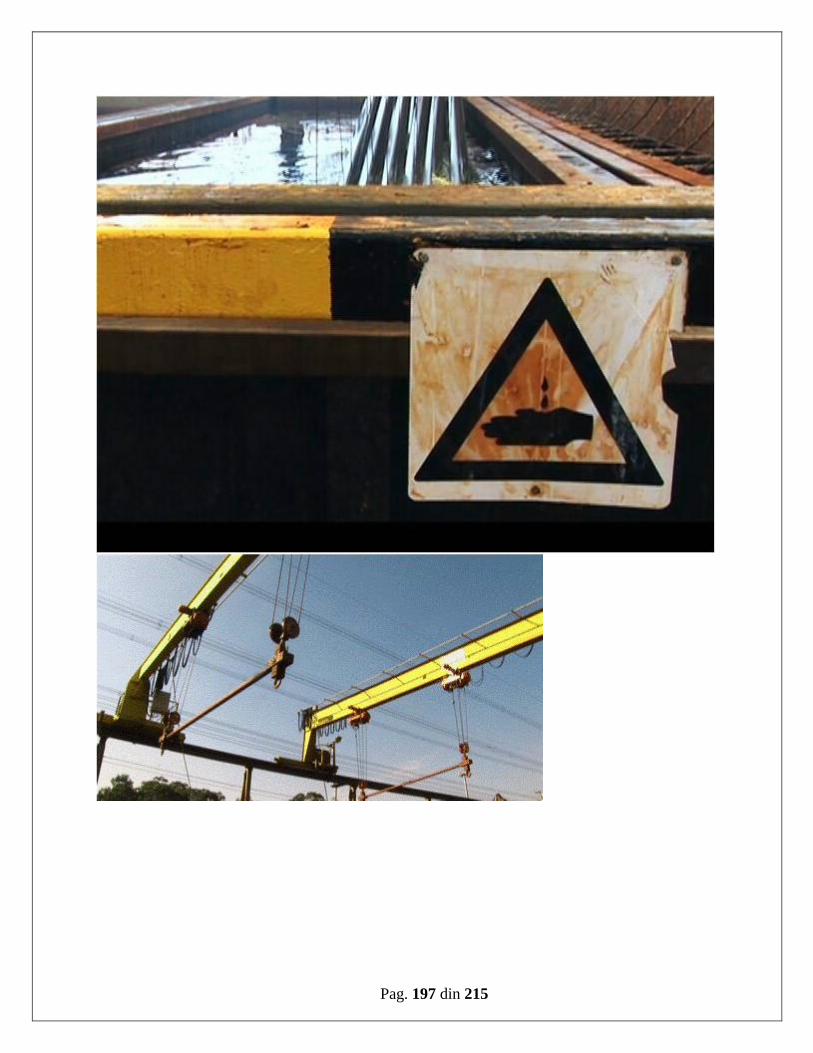
Pag. 197 din 215

Pag. 198 din 215

Pag. 199 din 215

Pag. 200 din 215

Pag. 201 din 215

Pag. 202 din 215

Pag. 203 din 215

Pag. 204 din 215

Pag. 205 din 215

Pag. 206 din 215

Pag. 207 din 215

Pag. 208 din 215

Pag. 209 din 215

Pag. 210 din 215

Pag. 211 din 215

Pag. 212 din 215

Pag. 213 din 215

Pag. 214 din 215

Pag. 215 din 215


