Embed Size (px)
Citation preview

Introduction Even though the vast majority of contact lenses fit today are soft contact lenses, the hard contact lens is simply another tool available to the contact lens practitioner. Some practitioners never fit a hard lens, others fit a hard lens as their first choice. The soft vs. hard philosophy of the practitioner, I think, depends very much on where he or she went to school, who his instructor may have been, and/or what contact lens publications she reads. As ophthalmic technicians, we simply need to be familiar with the basic characteristics of both. Hard lenses offer some different modes of correction for astigmatism which have some advantages over soft toric correction. Hard lenses are generally less expensive for the patient (less frequent replacement), and hard lens wearers are less susceptible to corneal diseases than soft lens wearers. Hard lenses are not comfortable initially, requiring a build up of wearing time, and may never be comfortable if not fit properly.
Once upon a time, there was but one predominant hard contact lens material. That was PMMA (polymethylmethacrolate), otherwise known as plexyglass. Yes, I do remember those days, and no, Teddy Roosevelt was not president. Although very durable and optically efficient, PMMA plastic had an oxygen transmission capacity near zero. We know from corneal anatomy and physiology that the cornea usually gets most of its oxygen through the epithelium, from contact with the air. So, how did the cornea get its oxygen when covered with PMMA? Oxygen came from the tear layer, which was continually being "pumped" under the contact lens as the lens moved with each blink. The PMMA lens fit had to be adjusted not only for good vision, but also for good movement and good tear circulation. The practitioner could vary the base curve, the peripheral curves, the edge design, and the diameter to arrive at an acceptable fit. It was not unusual to see small diameters (7 to 8mm) in hard lenses. As you might expect, a small diameter was not conducive to optimum vision. Some practitioners busied themselves thinking up new ways to improve oxygen transmission so that larger diameters could be used. One method was to drill small holes near the edge of the lens (fenestration).
Then along came silicone acrylate, and later fluorinated silicone acrylate. These materials allowed some oxygen to pass through the lens material to the cornea, enough oxygen so that tear exchange became less important and larger diameter hard lenses became practical. The rigid gas permeable lens (RGP) was born (also known as a hard gas permeable, HGP). These lens materials were not without their problems, such as not wetting well. Some of these problems persist to this day, such as susceptibility to scratching and cracking. Oxygen transmissibility is expressed in terms of the Dk value, or the diffusion coefficient value. The higher the Dk value is, the higher the oxygen transmission through the material. It is usually given as Dk/L, with L being the center thickness of the lens. This means that, no matter what material is being measured, oxygen transmission will decrease as lens thickness increases. No matter what material is used, thinner is better as far as oxygen transmission is concerned. The down side of ultra thin lenses is undesirable flexing on an astigmatic cornea and decreased durability.
Hard Contact Lenses:
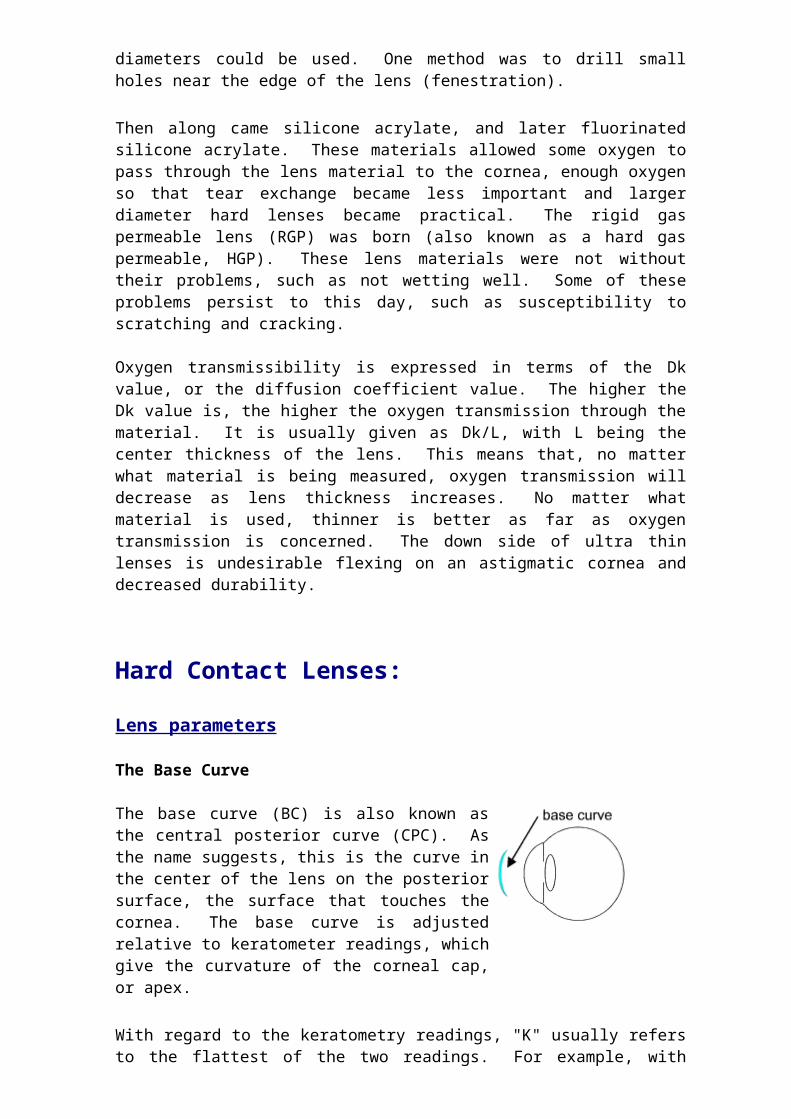
Lens parameters The Base Curve The base curve (BC) is also known as the central posterior curve (CPC). As the name suggests, this is the curve in the center of the lens on the posterior surface, the surface that touches the cornea. The base curve is adjusted relative to keratometer readings, which give the curvature of the corneal cap, or apex.
With regard to the keratometry readings, "K" usually refers to the flattest of the two readings. For example, with readings of 45.00 x 180 and 42.00 x 90, 42.00 would be the flatter reading and would be the value of K. A contact lens can be fit "on K", which would be a base curve of 42.00 in our example. The lens can be fit steeper than K. An example would be a base curve of 42.50. The lens can be fit flatter than K. An example would be a base curve of 41.50. The initial base curve is typically selected relative to the amount of corneal cylinder present. The protocol is usually supplied by the manufacturer of the lens, or it can come from another source. More on this when fitting methods are discussed. As discussed in the soft contact lens modules, the shape of the cornea is complex (aspherical to be more precise). Conventional keratometry only characterizes a small portion, the corneal cap. A hard contact lens has to be fit more precisely to the shape of the cornea because it does not "drape" over the surface like the soft lens does. It would be helpful to have an instrument that would more precisely measure the shape and guide you in designing the lens. Although hard lenses have been successfully fit for many years using the keratometer, the corneal topographer is a relatively new tool which will advance the art and science of hard contact lens fitting.
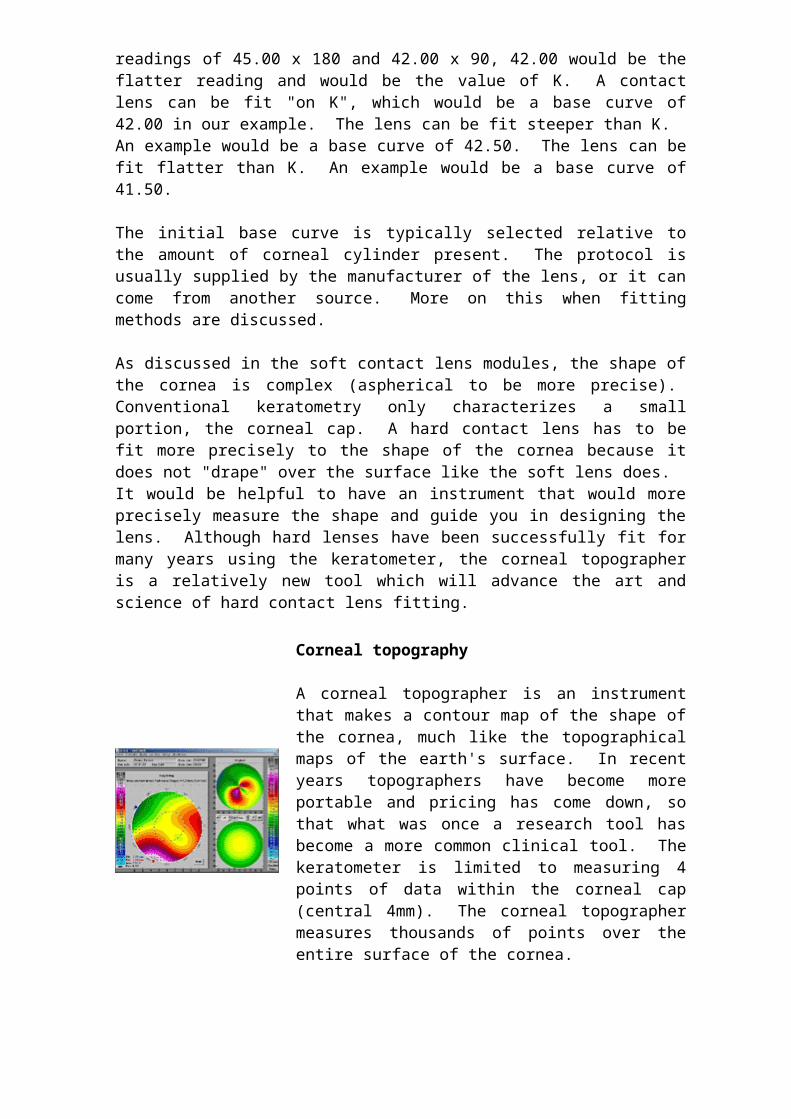
Corneal topography A corneal topographer is an instrument that makes a contour map of the shape of the cornea, much like the topographical maps of the earth's surface. In recent years topographers have become more portable and pricing has come down, so that what was once a research tool has become a more common clinical tool. The keratometer is limited to measuring 4 points of data within the corneal cap (central 4mm). The corneal topographer measures thousands of points over the entire surface of the cornea.
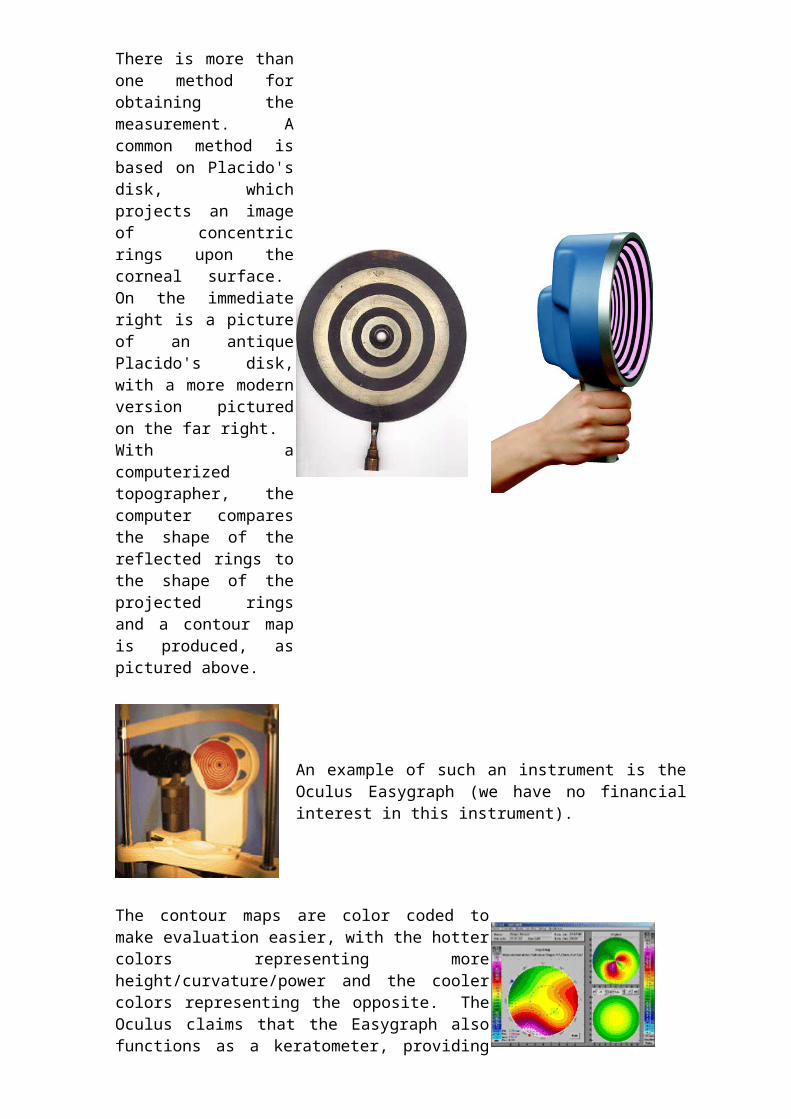
There is more than one method for obtaining the measurement. A common method is based on Placido's disk, which projects an image of concentric rings upon the corneal surface. On the immediate right is a picture of an antique Placido's disk, with a more modern version pictured on the far right. With a computerized topographer, the computer compares the shape of the reflected rings to the shape of the projected rings and a contour map is produced, as pictured above.
An example of such an instrument is the Oculus Easygraph (we have no financial interest in this instrument).
The contour maps are color coded to make evaluation easier, with the hotter colors representing more height/curvature/power and the cooler colors representing the opposite. The Oculus claims that the Easygraph also functions as a keratometer, providing "real" K readings instead of "simulated" K readings.
The corneal topographer has most commonly been used to screen patients for keratoconus and irregular astigmatism prior to refractive surgery, and to provide additional data to determine how much corneal tissue should be removed in refractive surgery. It is also used to diagnose and manage diseases and conditions that affect the corneal curvature, such as keratoconus, irregular astigmatism, corneal scars, and corneal transplants.
The corneal topographer may come with software that aids in the fitting of RGP
lenses. Based upon the topographic map, the software will recommend RGP
lens parameters for an "optimum" fit, and some software will provide a simulated fluorescein pattern. The parameters can be altered by the practitioner and the software will present a predicted fluorescein pattern based upon the changes.
Calculating the initial lens power
The initial power of the RGP lens is selected as follows:
1. Convert the manifest refraction or the glasses correction to minus cylinder form. Example: -7.50+1.50x180 transposes to -6.00-1.50x90.
2. Drop the cylinder power and use only the sphere component of the prescription. Example: -6.00-1.50x90 becomes -6.00.
3. Adjust for vertex power. You will need a table or a vertex calculator for this. You are changing the vertex distance from around 12-14 mm to zero (corneal contact). Using the free optics calculator from eyetec.net, a -6.00 lens power at 12 mm changes to a -5.62 lens power. If the lens was +6.00, then the power would adjust to +6.50. This is an important concept to keep in mind. As the vertex distance is reduced, minus lens powers go down, and plus lens powers go up.
The initial power for the trial lens in our example will be -5.62 D. Of course, if working from a trial set, you would choose the lens power closest to -5.62 D. But what happened to that -1.50 D cylinder power, you might be asking yourself, how does that get corrected? This is where the "tear lens" comes into effect.
The Tear Lens
Suppose that we fit our lens on K. This of course means that the base curve corresponds to the flattest meridian of the corneal cap. Let's continue with our example of a -5.62-1.50x90 correction. Suppose our K readings are 46.00 x 180 and 44.50 x 90. Since we are fitting on K, our base curve would be 44.50. In the 90 degree meridian, our lens would have the same (approximate) profile as the cornea. In the 180 degree meridian, however, the corneal curvature is steeper than the contact lens curvature (46.00 vs. 44.50).
This creates a gap toward the periphery of the lens. This gap is filled by the tear layer (red layer on the 180 degree image). Optically, this tear layer acts like cylindrical lens power to correct for the astigmatic curvature. Thus, the "tear lens".

The tear lens of the RGP contact lens is more efficient than the cylinder correction in the soft toric lens, because the tear lens fills the gap perfectly, and rotation of the lens has no effect on the performance of the correction.
The base curve / lens power relationship
As discussed earlier, sometimes a base curve is selected that is steeper or flatter than K. How does this affect the tear lens and lens power? Fitting the base curve steep or flatter than K modifies the tear lens. If the base curve is flatter than K, then the power must be adjusted by the same amount in the plus direction (flatter-add-plus, or FAP). If the base curve used is steeper than K, then the power must be adjusted by the same amount in the minus direction (steeper-add-minus, or SAM). Using our example, suppose that we choose to use a 45.00 base curve. This is .5 D steeper than our flat K of 44.50. We would add .5 D more minus to the -5.62 power to arrive at an adjusted power of approximately -6.00 D. The final lens power should be confirmed by an over-refraction once the trial lens has stabilized on the patient's eye.
Lens diameter and the optical zone
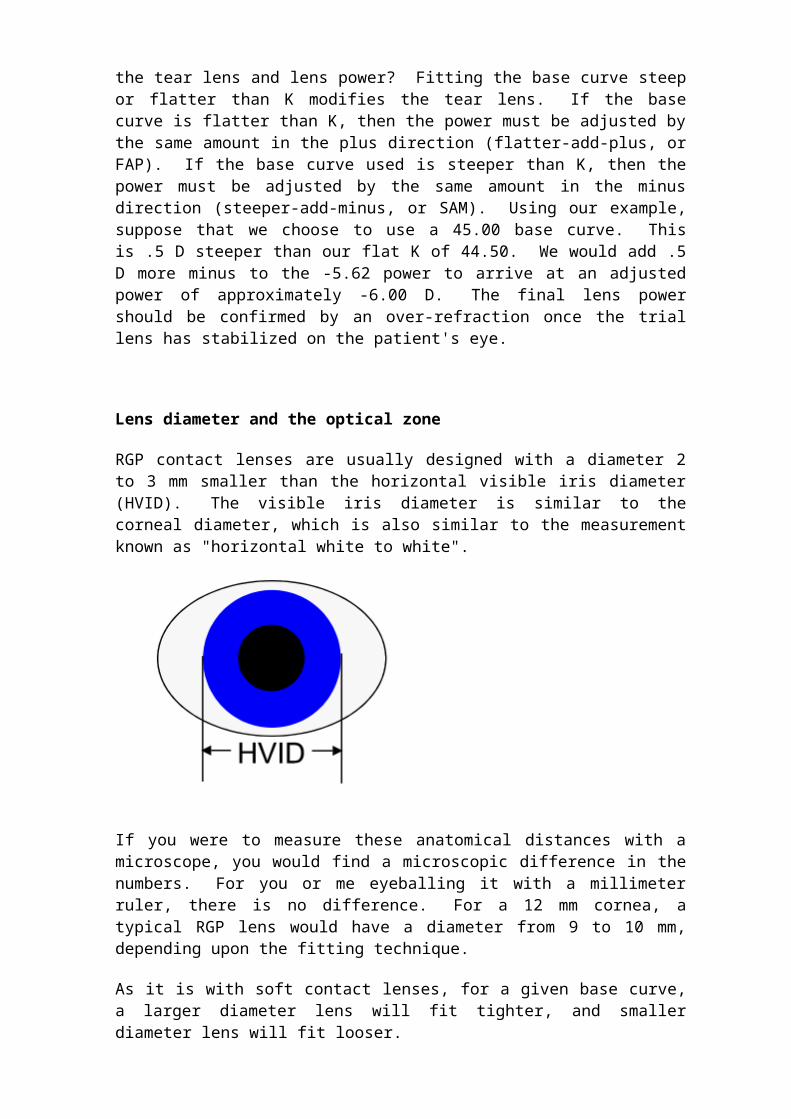
RGP contact lenses are usually designed with a diameter 2 to 3 mm smaller than the horizontal visible iris diameter (HVID). The visible iris diameter is similar to the corneal diameter, which is also similar to the measurement known as "horizontal white to white".
If you were to measure these anatomical distances with a microscope, you would find a microscopic difference in the numbers. For you or me eyeballing it with a millimeter ruler, there is no difference. For a 12 mm cornea, a typical RGP lens would have a diameter from 9 to 10 mm, depending upon the fitting technique.
As it is with soft contact lenses, for a given base curve, a larger diameter lens will fit tighter, and smaller diameter lens will fit looser.
When determining the diameter, other factors to consider are the palpebral aperture (the lid opening), the corneal curvature, and the patient's activity level. As will be discussed, the size of the lid opening will influence what type of fit is used, which in turn will affect the diameter. A steeper than average cornea generally requires a smaller diameter lens for a good fit. Patient's involved in

sports activities have more stable vision with a larger lens diameter and optical zone diameter.
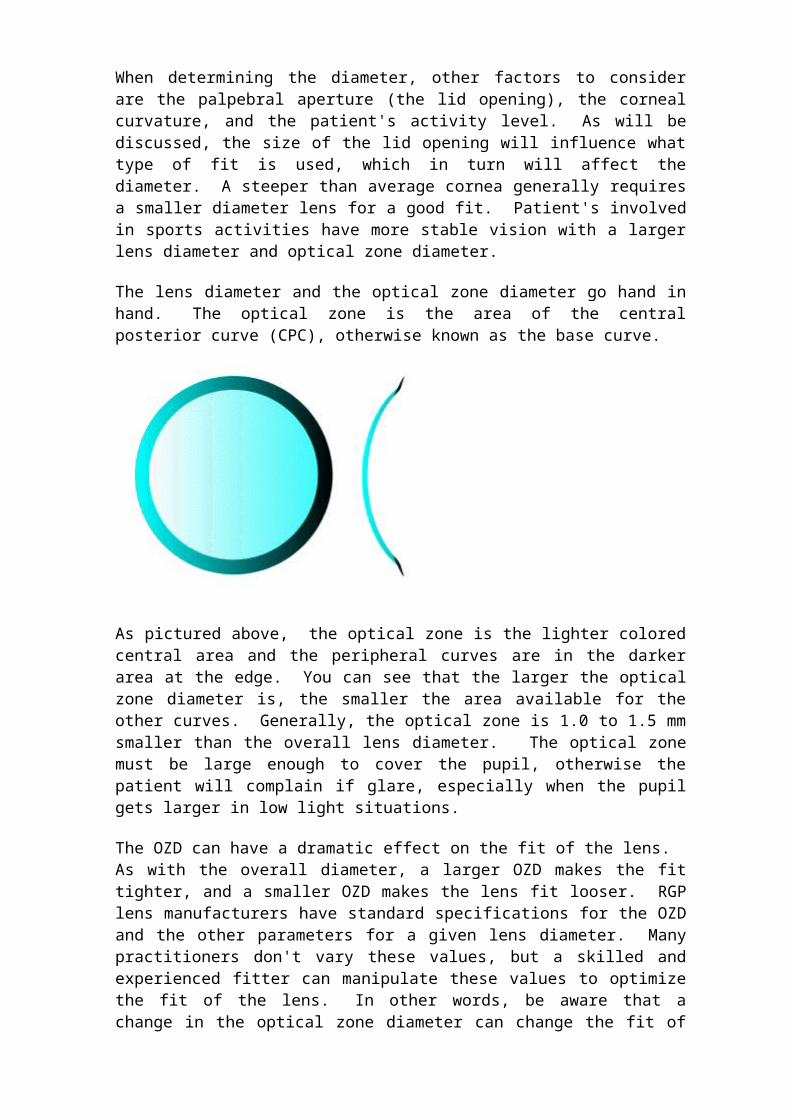
The lens diameter and the optical zone diameter go hand in hand. The optical zone is the area of the central posterior curve (CPC), otherwise known as the base curve.
As pictured above, the optical zone is the lighter colored central area and the peripheral curves are in the darker area at the edge. You can see that the larger the optical zone diameter is, the smaller the area available for the other curves. Generally, the optical zone is 1.0 to 1.5 mm smaller than the overall lens diameter. The optical zone must be large enough to cover the pupil, otherwise the patient will complain if glare, especially when the pupil gets larger in low light situations.
The OZD can have a dramatic effect on the fit of the lens. As with the overall diameter, a larger OZD makes the fit tighter, and a smaller OZD makes the lens fit looser. RGP lens manufacturers have standard specifications for the OZD and the other parameters for a given lens diameter. Many practitioners don't vary these values, but a skilled and experienced fitter can manipulate these values to optimize the fit of the lens. In other words, be aware that a change in the optical zone diameter can change the fit of the lens, even if the overall diameter is not changed.
Other lens parameters
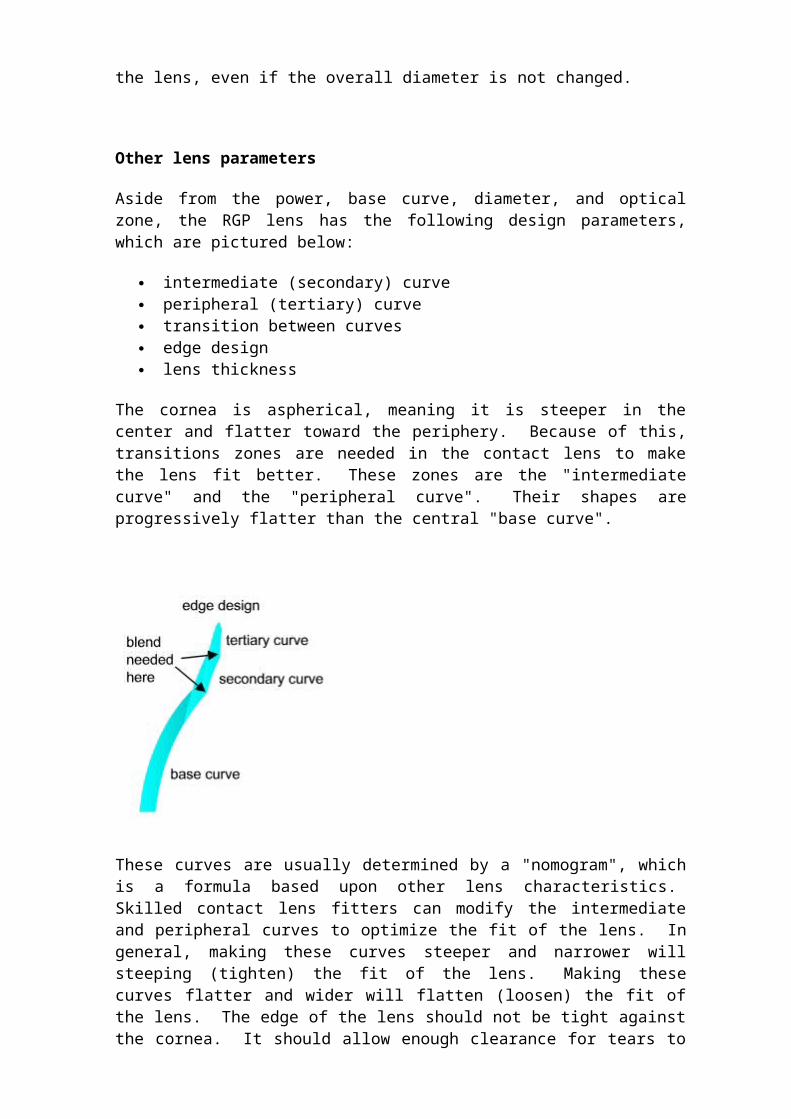
Aside from the power, base curve, diameter, and optical zone, the RGP lens has the following design parameters, which are pictured below:
intermediate (secondary) curve peripheral (tertiary) curve transition between curves edge design lens thickness
The cornea is aspherical, meaning it is steeper in the center and flatter toward the periphery. Because of this, transitions zones are needed in the contact lens to make the lens fit better. These zones are the "intermediate curve" and the
"peripheral curve". Their shapes are progressively flatter than the central "base curve".
These curves are usually determined by a "nomogram", which is a formula based upon other lens characteristics. Skilled contact lens fitters can modify the intermediate and peripheral curves to optimize the fit of the lens. In general, making these curves steeper and narrower will steeping (tighten) the fit of the lens. Making these curves flatter and wider will flatten (loosen) the fit of the lens. The edge of the lens should not be tight against the cornea. It should allow enough clearance for tears to circulate under the lens, but not too much clearance, which may adversely affect the fit of the lens. Edge clearance can be evaluated with fluorescein, as will be discussed.
RGP lens fitting techniques generally work best with very thin lenses. Minimal lens thickness should be ordered and should be modified only if excessive lens flexure occurs on the cornea. Lens thickness is expressed as center thickness, which is a function of lens power and lens diameter. A minus lens will be relatively thinner in the center and a plus lens will be relatively thicker in the center.
Lens fitting designs
Gas permeable contact lens fitting designs vary with the fitter and are influenced by who the fitter learned from, the fitter's own experience, manufacturer recommendations, what they had for lunch, and other factors. When the fog clears, there are generally two main fitting methodologies: "apical clearance" and "corneal alignment".
Apical clearance design
This method has also been termed "interpalpebral lens design" or "central palpebral design". As the terminology implies, the objective is to get the lens to center on the corneal between the eyelids. This method can be useful for the
patient with tight lids and/or a small lid opening and it can also be useful for the patient with a large lid opening that will not support an alignment or lid attachment type of fit. The fit is accomplished with a lens fit steeper than the flat K and with a relatively smaller diameter. The base curve selection is dependent upon the amount of corneal cylinder and the lens diameter. The lens diameter is dependent upon the corneal diameter and the lid opening. Base curve and diameter selection tables vary according to the source, but typical numbers are represented below.
Corneal cylinder BC selection 00 to .5 D .25 D steeper than K .75 to 1.25 D .37 D steeper than K 1.5 to 2.0 D .50 D steeper than K 2.25 to 2.75 D .75 D steeper than K 3.0 to 3.5 D 1.00 D steeper than K Corneal diameter Lens Diameter 12 mm plus 9.1 mm 11 to 12 mm 8.6 less than 11 mm 8.2
Remember that a larger diameter lens will require a flatter base curve to fit the same as a smaller diameter lens, and vice versa. A smaller diameter may be required for the lens to "float" between the lids if the lid opening is small.
With this fitting method, plus power lenses might require a slightly steeper fit than minus lenses to improve centering. Remember that plus power lenses are thicker in the center of the lens and minus power lenses are thicker at the edge of the lens. If the lens is thicker in the center, it tends to ride lower due to gravity and the lid pushing downward on the lens.
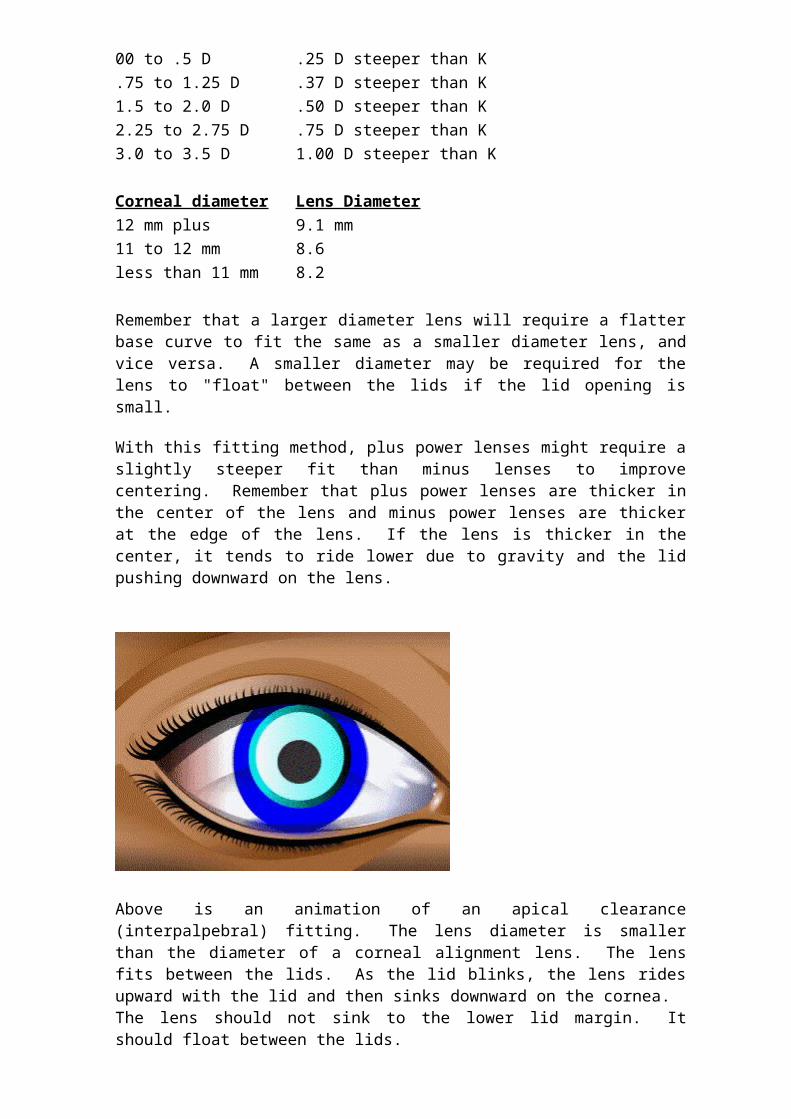
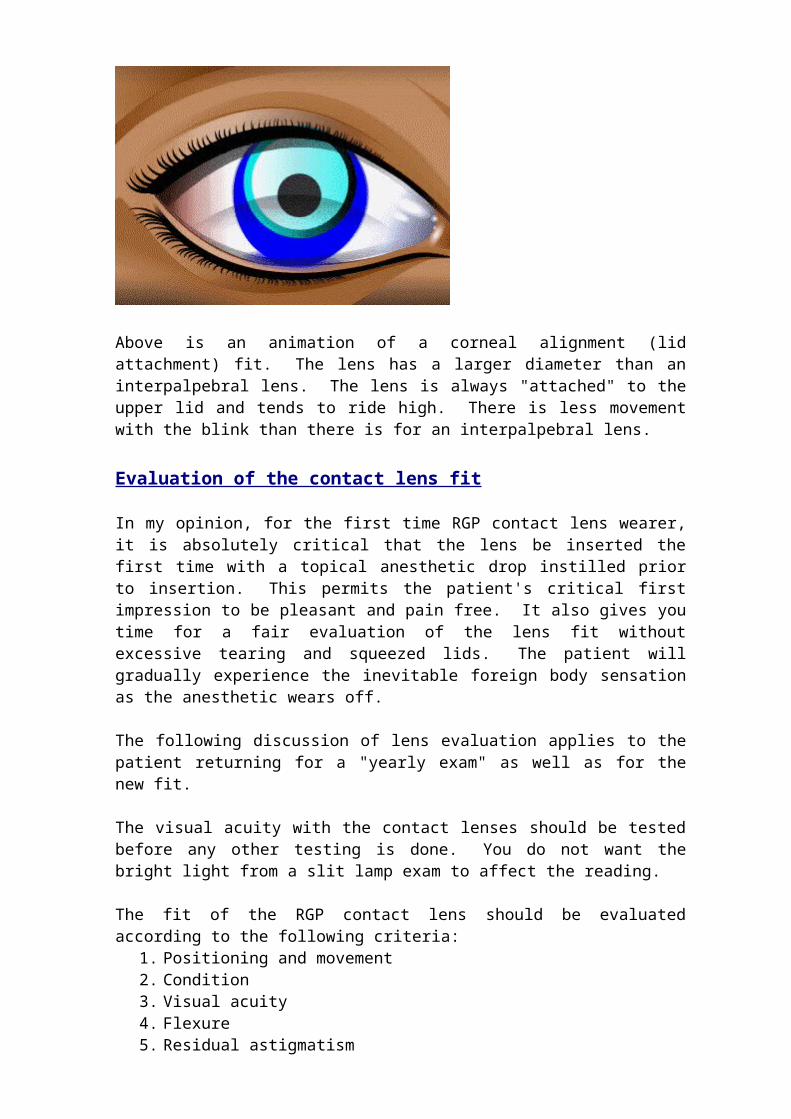
Above is an animation of an apical clearance (interpalpebral) fitting. The lens diameter is smaller than the diameter of a corneal alignment lens. The lens fits between the lids. As the lid blinks, the lens rides upward with the lid and then sinks downward on the cornea. The lens should not sink to the lower lid margin. It should float between the lids.
Corneal alignment design
This method is also termed, "upper lid attachment", "lid attachment", "Korb design", "modified Korb design", and "lid interactive". There seems to be endless variations of the basic design. The idea is for a relatively large diameter lens, fit flatter than K, to ride high on the cornea and be supported by an overlying upper lid. The apical clearance fit moves freely on the cornea. The lens fit with corneal alignment moves only when the lid blinks. The vision is supposed to be more stable with less lens awareness and a more natural blink compared to the apical fit. This fit does not work with a high upper lid that covers little or none of the cornea.
As with the apical fit, the initial base curve selection depends upon the amount of corneal cylinder. Comparing the apical fit table with this corneal alignment fit table, you will notice that these base curves are generally flatter than K as opposed to the steeper than K base curves of the apical table.
Corneal cylinder BC selection (for 9.5 diameter lens) 00 to .5 D .75 D flatter than K .75 to 1.25 D .50 D flatter than K 1.5 to 2.0 D .25 D flatter than K 2.25 to 2.75 D .on K 3.0 to 3.5 D .5 D steeper than K
The diameter of the corneal alignment lens is not so dependent upon the corneal diameter, it just needs to be relatively large. A good place to start is at 9.5 mm. This can be adjusted according to how the lens behaves when on the cornea. Remember, for a given base curve, a larger diameter will fit tighter and a small diameter will fit looser.
Above is an animation of a corneal alignment (lid attachment) fit. The lens has a larger diameter than an interpalpebral lens. The lens is always "attached" to the upper lid and tends to ride high. There is less movement with the blink than there is for an interpalpebral lens.
Evaluation of the contact lens fit
In my opinion, for the first time RGP contact lens wearer, it is absolutely critical
that the lens be inserted the first time with a topical anesthetic drop instilled prior to insertion. This permits the patient's critical first impression to be pleasant and pain free. It also gives you time for a fair evaluation of the lens fit without excessive tearing and squeezed lids. The patient will gradually experience the inevitable foreign body sensation as the anesthetic wears off. The following discussion of lens evaluation applies to the patient returning for a "yearly exam" as well as for the new fit. The visual acuity with the contact lenses should be tested before any other testing is done. You do not want the bright light from a slit lamp exam to affect the reading. The fit of the RGP contact lens should be evaluated according to the following criteria:
1. Positioning and movement 2. Condition 3. Visual acuity 4. Flexure 5. Residual astigmatism 6. Comfort 7. Fluorescein pattern 8. Corneal and eyelid integrity
1. Positioning and movement: This depends to upon the fitting method, that is, apical clearance design vs. corneal alignment design. A lens fit for apical clearance should center on the cornea, between the lids. It should move upward slightly with the blink and settle to a centered or slightly below center position. A lens fit for corneal alignment will ride high, under the upper lid. It will tend to move with the lid. In either case, the lens should not drift off to one side or the other, and it should not ride low. Modification to an initial fit of an apical clearance design generally begins with an adjustment of the base curve of the lens. For a given diameter, a steeper base curve (e.g. changing from 44.00 to 44.50) will fit tighter and a flatter base curve (e.g. changing from 45.00 to 44.50) will fit looser. Modification to an initial fit of a corneal alignment design generally begins with an adjustment to the diameter of the lens. For a given base curve, a larger diameter with fit tighter and a smaller diameter will fit looser. A larger diameter will also tend to have more coverage by the upper lid, increasing the "lid attachment". The amount and type of corneal astigmatism will affect the fit of the lens. So called "with-the-rule" astigmatism is created when the vertical corneal curvature is greater than the horizontal corneal curvature (e.g. 44.00 x 90, 42.00 x 180). "Against-the-rule" astigmatism is the opposite. A lens on a WTR cornea will tend to decenter vertically. A lens on an ATR cornea will tend to decenter horizontally. Horizontal decentration is more of a problem than vertical decentration. A steeper than recommended base curve for the ATR cornea will sometimes solve the horizontal decentration problem. I think it is best to try the recommended base curve first, before going to a steeper BC. These are general guidelines, however. Experienced practitioners have their
favored methods for modifying the fit. The diameter of the optical zone, the peripheral curves, and the edge profile can also be modified to affect the fit. For the patient new to your practice, who is already wearing RGP lenses, it is best not modify the design unless necessary. The old saying, "if it ain't broke, don't fix it", certainly applies to contact lens management. 2. Condition: This has to do with the optical quality of the lens. Is it clear, and does it wet well with the tears? The tear layer should coat the lens evenly so that a continuous, clear optical surface is created, without any dry spots or oily spots. Many times a good cleaning can remove surface deposits and improve a lens that wets poorly. A new lens may need a few cleaning and rinsing cycles before it wets properly. The manufacturer of the lens material usually has specific recommendations as to cleaning and wetting solutions. A few superficial scratches generally do not cause problems with comfort or acuity. Lens polishing can remove superficial scratches and improve wetting. 3. Visual acuity: The proof of the pudding for most contact lens wearers is their visual acuity. If the vision is good, most of the time they are happy. If their vision is not good, usually they are not happy. The lens positioning and the condition of the lens should always be evaluated before evaluating the vision. (As stated earlier, the visual acuity with the lenses should be checked first thing, before any other testing or examination is performed). If the lens centers poorly or is covered with deposits, you are wasting your time with a vision analysis, because those other problems must be dealt with first. The following discussion assumes that you have a well positioned, clear lens that has a good tear coating. After examining the lens positioning and movement with the slit lamp, allow a few moments for the patient to recover from the bright light, and then perform a spherical over-refraction with a phoropter, or with loose lenses. If the vision is good and crisp with the over-refraction, and it seems stable with blinking, then you can generally assume that flexure is not a problem and that residual astigmatism is not a problem. The power of the lens can be adjusted according to the results of the over-refraction. If the over-refraction is +0.50, then you will want to adjust the lens power by .50 D in the plus direction, meaning a +1.00 power becomes a +1.50 power, or a -2.00 power becomes a -1.50 power. In almost all cases, a plus power adjustment should be made to the contact lens power if indicated by over-refraction, but beware of the minus power adjustment. Just because you get an over-refraction of -0.75 D, do not assume that the power adjustment is in the best interest of the patient. Many older (35+) patients may do better with the improved intermediate/near vision of the current situation, rather than give that up for a slight improvement in distance vision. With minus adjustments, make sure your patient understands what is changing. If the visual acuity with spherical over-refraction is not good, stable, and sharp, then you must test for flexure and residual astigmatism. Subject matter continued on Module 36 (Modules 35 and 36 each have their own Post-Tests

4. Flexure: With the patient still behind the phoropter for the spherical over-refraction, it is a good time to test for lens flexure. Flexure occurs when the contact lens "bends" over the astigmatic ridge of the cornea when the patient blinks. Flexure can be observed by performing retinoscopy with the contact lens in place. Flexure is indicated by changes in the reflex after a blink. Flexure can also be tested for using the keratometer. With the lens in place on the eye, observe the pattern of the mires reflected on the lens through the keratometer, particularly after the patient blinks. Flexure will be indicated by changes in the shape of the mires. Flexure can be decreased by slightly flattening the base curve (.5 D) and/or by increasing the center thickness of the lens by .2 to .4 mm. As you might suspect, flexure is also a function of the amount of corneal astigmatism. The patient with 3+ diopters of corneal astigmatism may be better off with a bi-toric lens design. The bi-toric lens has two different base curves 90 degrees apart, so that the lens fits the shape of the corneal surface. The bi-toric design is complex and is beyond the scope of this module. 5. Residual astigmatism: Another possible cause of imperfect vision with a hard contact lens is residual astigmatism. This is astigmatism that is other than corneal astigmatism, and it is not corrected by the tear lens of the spherical hard contact lens. The usual suspect is lenticular astigmatism. In other words, the shape/optics of the crystalline lens inside the eye is not spherical. This can be measured by performing retinoscopy and a complete refraction (not just spherical) over the contact lens. Residual astigmatism of one diopter or less is usually tolerated by employing the spherical equivalent power. Residual astigmatism not well tolerated may require a re-fit with a toric lens. A problem with residual astigmatism can, to a degree, be predicted. If the refractive cylinder correction is significantly different from the corneal astigmatism as measured by the keratometer, residual astigmatism must be suspected. For example: MR OD -4.00-300X180 K OD 46.00 x 90, 44.00 x 180 The amount of refractive cylinder correction is -3.00, but the corneal astigmatism as measured by the keratometer is 2.00 D (46 minus 44). The difference (1 D) may be residual astigmatism. Knowing this may save you the trouble of a trial fit with a spherical RGP lens, but the only way to know for sure if this would be a problem would be to refract over the spherical RGP lens and get feedback from the patient. 6. Comfort: The first time RGP contact lens wearer will not be comfortable until wearing time has been gradually built up. If the established wearer complains of discomfort, you must find the underlying cause of the discomfort. It can be as simple as dryness, which may be alleviated by the use of re-wetting drops. The fit of the lens may need to be evaluated, as well as the integrity of the cornea and the lids. 7. Fluorescein pattern: It is possible to judge the dynamics of the hard contact lens fit by instilling a drop of fluorescein into the eye wearing the contact lens. The fluorescein temporarily stains the tears. The depth of the tear layer under the lens can be judged by the appearance of the fluorescein under the lens. A deeper layer of tears will appear brightly fluorescent when observed with the
cobalt blue light of the slit lamp microscope. A shallow layer of tears will appear a lighter shade of green. The illustration below depicts a contact lens that is fit well to a spherical cornea. There is a large, central pattern that is light green, indicating a close fit of the base curve of the lens to the central cornea. The bright green at the edge of the lens indicates a deeper layer of fluorescein under the peripheral curves of the contact lens.
A contact lens that fits flat will show a smaller area of light green in the center and a larger area of a deeper tear layer at the periphery of the lens. An "alignment fit" lens may normally have some flat fit characteristics.
A steep fit is illustrated below. The central area of the lens vaults the the central cornea, creating a pool of bright fluorescein in the center. An "apical clearance fit" lens may normally have some steep fit characteristics.
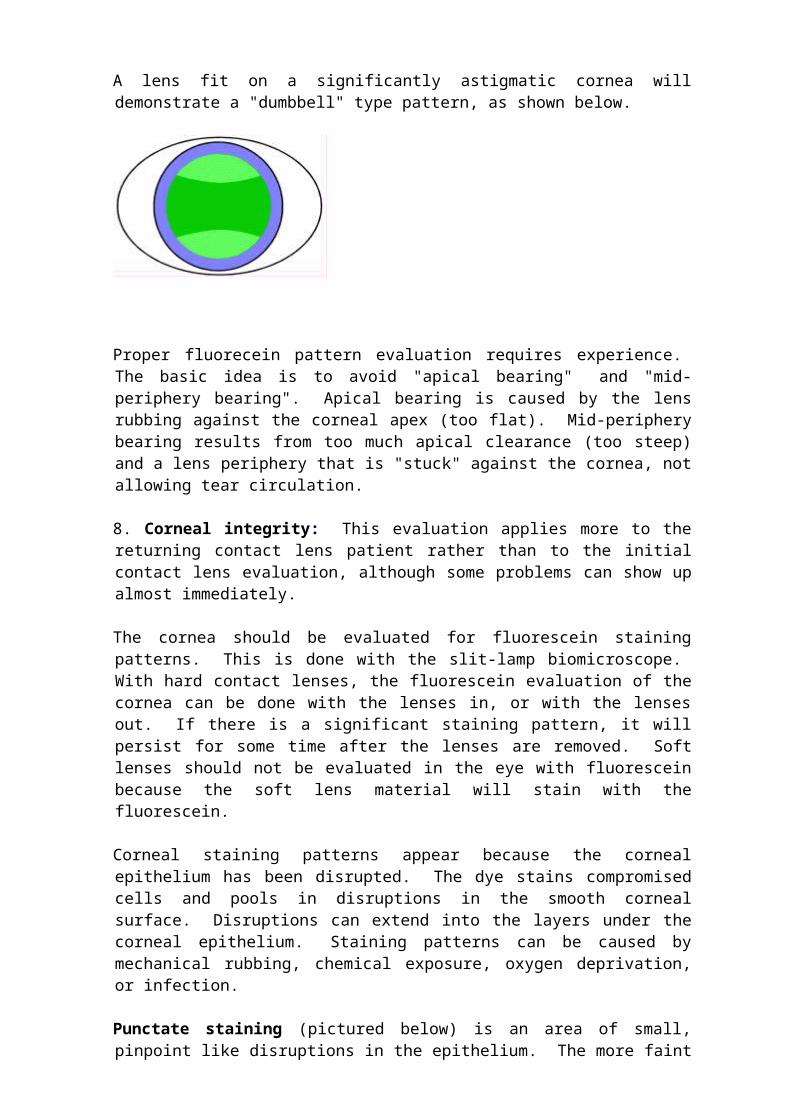
A lens fit on a significantly astigmatic cornea will demonstrate a "dumbbell" type pattern, as shown below.

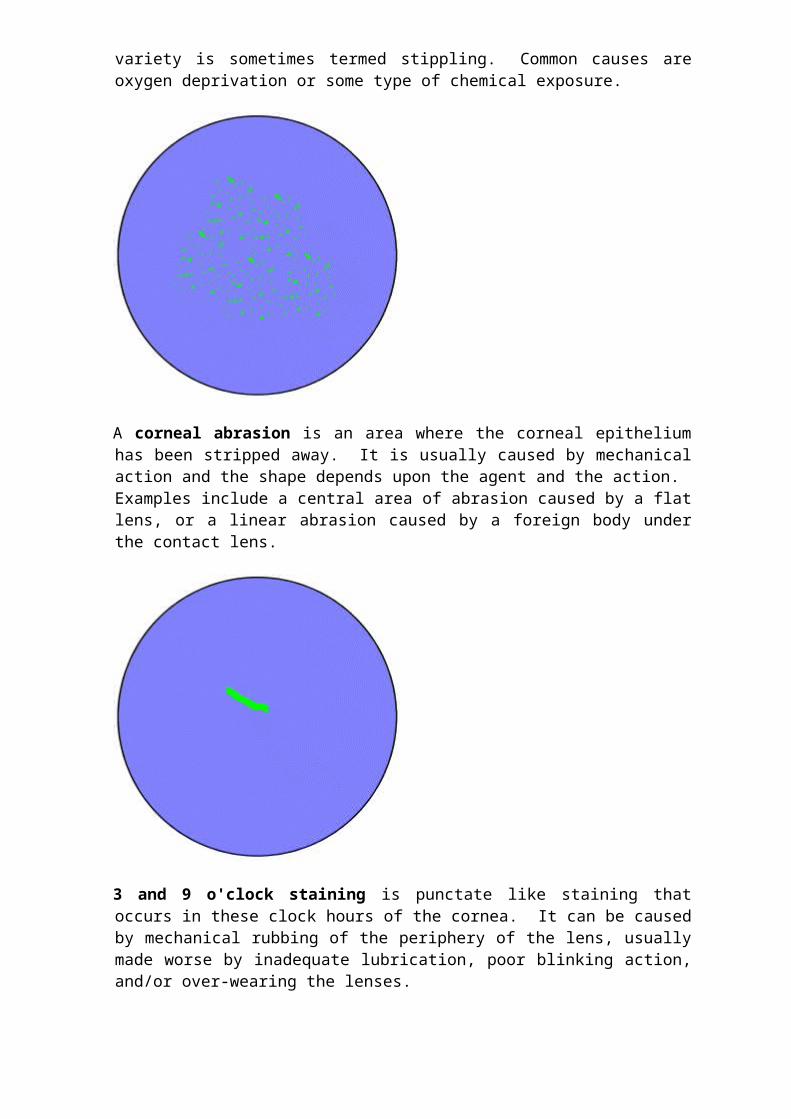
Proper fluorecein pattern evaluation requires experience. The basic idea is to avoid "apical bearing" and "mid-periphery bearing". Apical bearing is caused by the lens rubbing against the corneal apex (too flat). Mid-periphery bearing results from too much apical clearance (too steep) and a lens periphery that is "stuck" against the cornea, not allowing tear circulation. 8. Corneal integrity: This evaluation applies more to the returning contact lens patient rather than to the initial contact lens evaluation, although some problems can show up almost immediately. The cornea should be evaluated for fluorescein staining patterns. This is done with the slit-lamp biomicroscope. With hard contact lenses, the fluorescein evaluation of the cornea can be done with the lenses in, or with the lenses out. If there is a significant staining pattern, it will persist for some time after the lenses are removed. Soft lenses should not be evaluated in the eye with fluorescein because the soft lens material will stain with the fluorescein. Corneal staining patterns appear because the corneal epithelium has been disrupted. The dye stains compromised cells and pools in disruptions in the smooth corneal surface. Disruptions can extend into the layers under the corneal epithelium. Staining patterns can be caused by mechanical rubbing, chemical exposure, oxygen deprivation, or infection. Punctate staining (pictured below) is an area of small, pinpoint like disruptions in the epithelium. The more faint variety is sometimes termed stippling. Common causes are oxygen deprivation or some type of chemical exposure.
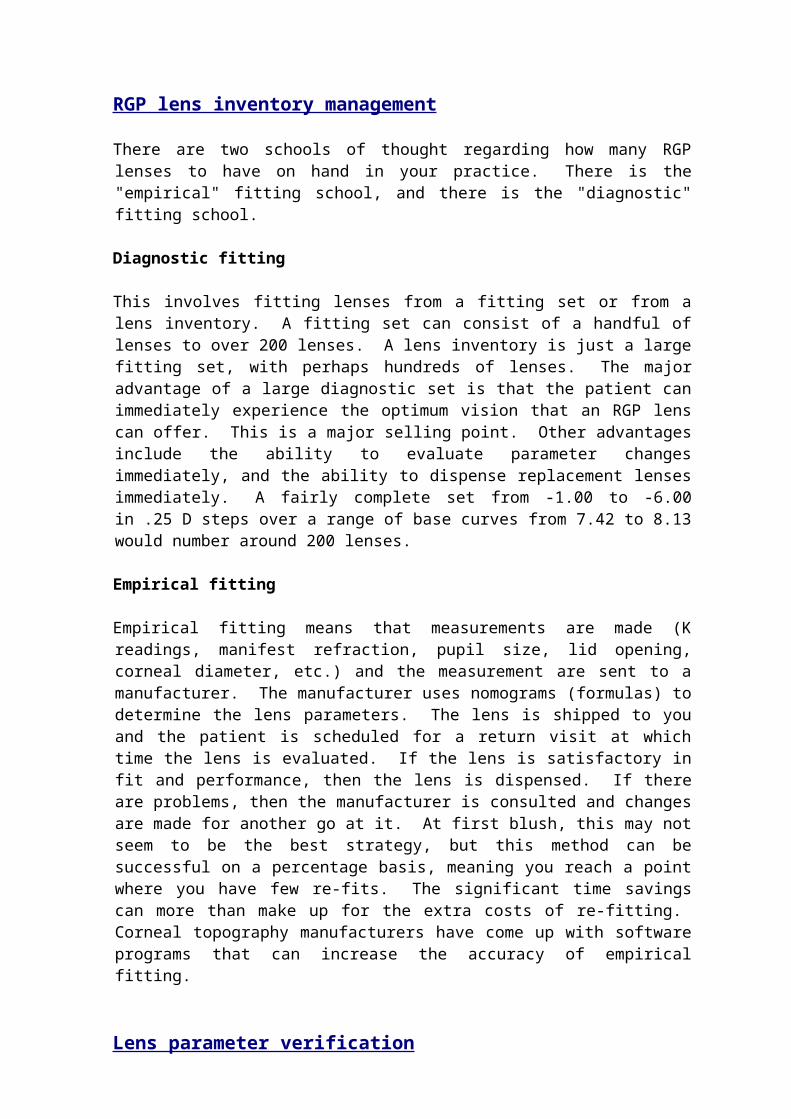
A corneal abrasion is an area where the corneal epithelium has been stripped away. It is usually caused by mechanical action and the shape depends upon the agent and the action. Examples include a central area of abrasion caused by a flat lens, or a linear abrasion caused by a foreign body under the contact lens.
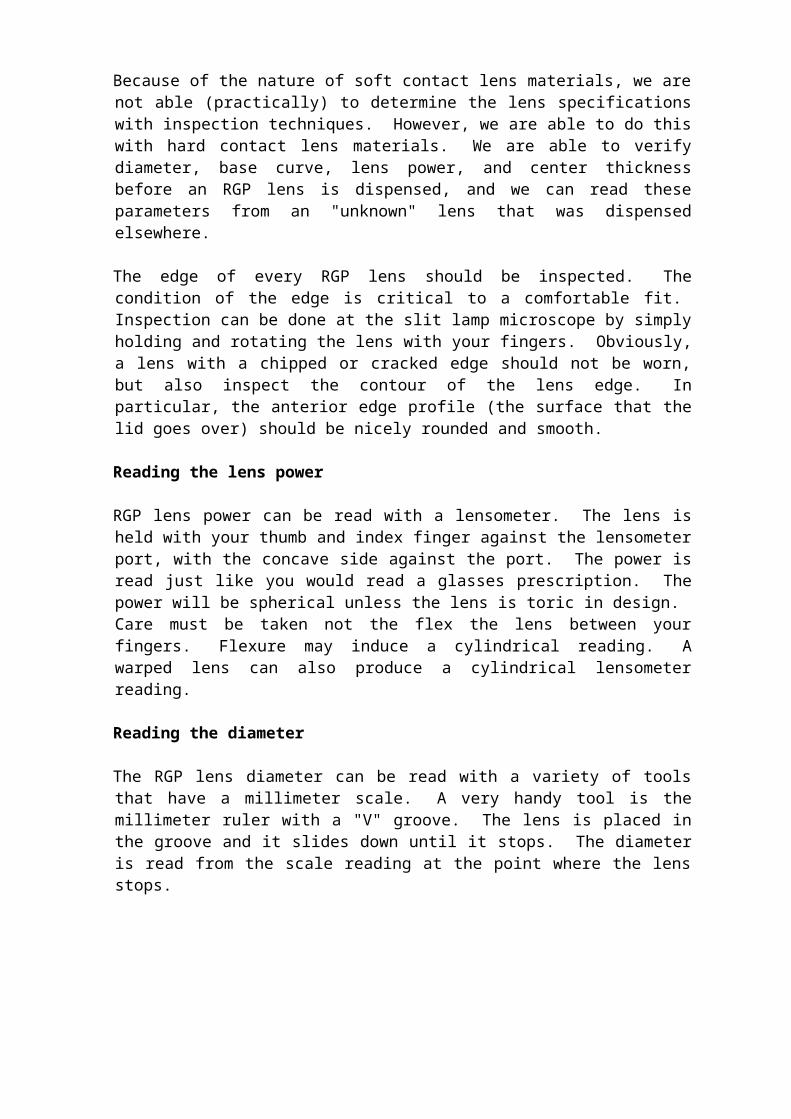
3 and 9 o'clock staining is punctate like staining that occurs in these clock hours of the cornea. It can be caused by mechanical rubbing of the periphery of the lens, usually made worse by inadequate lubrication, poor blinking action, and/or over-wearing the lenses.
Arcuate staining occurs in the shape of an arc in the periphery of the cornea. It is caused by rough blends between the peripheral curves.

Dimple veiling has a stippled appearance and is caused by air bubbles trapped under a lens that is either too steep (central staining) or too flat (limbal staining).
Significant corneal edema will show up as central clouding of the cornea, which can be seen without the aid of fluorescein. Corneal edema secondary to contact lens wear can be due to poor corneal metabolism. The contact lenses must be refit for better oxygen transmission or the contact lenses must be discontinued. If corneal oxygen metabolism is chronically depressed, as can be the case with extended wear soft lenses, new blood vessels may encroach across the limbus and grow into the cornea (neovascularization).
Also of concern is the loss of corneal endothelial cells that can result from poor metabolism secondary to contact lens wear. The problem is that the endothelial cells do not regenerate. The neighboring cells enlarge to fill in the void (polymegathism).
The endothelial cells are pumps that keep the cornea dry (free from edema) and clear. Significant endothelial cell loss can compromise the ability of the endothelium to keep the cornea dry and clear. Serial K readings (e.g. K readings at least once a year over a period of years) can be used to assess changes in corneal curvature over time. The shape of the cornea can tend to mold to the shape of the contact lens over time. This can be a bad thing or a good thing, depending upon your point of view. Corneal molding an make it difficult for the patient to see well with glasses, and make it difficult to re-fit contact lenses. So called "spectacle blur" is blurry vision with glasses following the removal of contact lenses. It is caused by the cornea molding to the contact lens and it is common with hard contact lenses. After removing the contact lenses, the cornea tends to revert to the original shape. The changing shape of the cornea causes the blurriness with glasses. It should not last more than 15 to 20 minutes, otherwise the fit may need to be re-evaluated. A type of spectacle blur can result from corneal edema secondary to contact lens wear. After the lenses are removed, the edema resolves and the vision improves. Some practitioners use corneal molding on purpose to reduce the patient's near-

sighted correction by using contact lenses to flatten the shape of the cornea. So called "orthokeratology" has been around for a long time. In 2002, the FDA approved corneal refractive therapy (CRT). The patient wears a contact lens overnight that gradually changes the shape of the cornea, reducing and sometimes eliminating myopia up to six diopters. If the patient stops wearing the lenses, the cornea gradually returns to the original shape and the myopia comes back. RGP lens inventory management There are two schools of thought regarding how many RGP lenses to have on hand in your practice. There is the "empirical" fitting school, and there is the "diagnostic" fitting school. Diagnostic fitting This involves fitting lenses from a fitting set or from a lens inventory. A fitting set can consist of a handful of lenses to over 200 lenses. A lens inventory is just a large fitting set, with perhaps hundreds of lenses. The major advantage of a large diagnostic set is that the patient can immediately experience the optimum vision that an RGP lens can offer. This is a major selling point. Other advantages include the ability to evaluate parameter changes immediately, and the ability to dispense replacement lenses immediately. A fairly complete set from -1.00 to -6.00 in .25 D steps over a range of base curves from 7.42 to 8.13 would number around 200 lenses. Empirical fitting Empirical fitting means that measurements are made (K readings, manifest refraction, pupil size, lid opening, corneal diameter, etc.) and the measurement are sent to a manufacturer. The manufacturer uses nomograms (formulas) to determine the lens parameters. The lens is shipped to you and the patient is scheduled for a return visit at which time the lens is evaluated. If the lens is satisfactory in fit and performance, then the lens is dispensed. If there are problems, then the manufacturer is consulted and changes are made for another go at it. At first blush, this may not seem to be the best strategy, but this method can be successful on a percentage basis, meaning you reach a point where you have few re-fits. The significant time savings can more than make up for the extra costs of re-fitting. Corneal topography manufacturers have come up with software programs that can increase the accuracy of empirical fitting. Lens parameter verification Because of the nature of soft contact lens materials, we are not able (practically) to determine the lens specifications with inspection techniques. However, we are able to do this with hard contact lens materials. We are able to verify diameter, base curve, lens power, and center thickness before an RGP lens is dispensed, and we can read these parameters from an "unknown" lens that was dispensed elsewhere. The edge of every RGP lens should be inspected. The condition of the edge is critical to a comfortable fit. Inspection can be done at the slit lamp microscope by simply holding and rotating the lens with your fingers. Obviously, a lens with a
chipped or cracked edge should not be worn, but also inspect the contour of the lens edge. In particular, the anterior edge profile (the surface that the lid goes over) should be nicely rounded and smooth. Reading the lens power RGP lens power can be read with a lensometer. The lens is held with your thumb and index finger against the lensometer port, with the concave side against the port. The power is read just like you would read a glasses prescription. The power will be spherical unless the lens is toric in design. Care must be taken not the flex the lens between your fingers. Flexure may induce a cylindrical reading. A warped lens can also produce a cylindrical lensometer reading. Reading the diameter The RGP lens diameter can be read with a variety of tools that have a millimeter scale. A very handy tool is the millimeter ruler with a "V" groove. The lens is placed in the groove and it slides down until it stops. The diameter is read from the scale reading at the point where the lens stops.
Reading the base curve The RGP lens base curve is read with a radiuscope. This instrument looks similar to a microscope. The lens is placed on a table under a lens. The user looks through an eyepiece to focus mires and to take a reading from a scale.
1. The lens holder is removed from the table. A drop of water is placed into the depression in the lens holder. The contact lens floats convex side down on the water drop. Care must be taken to have a minimal amount of water under the lens. Excess water can be removed by placing a tissue into one of the groves coming from the depression.
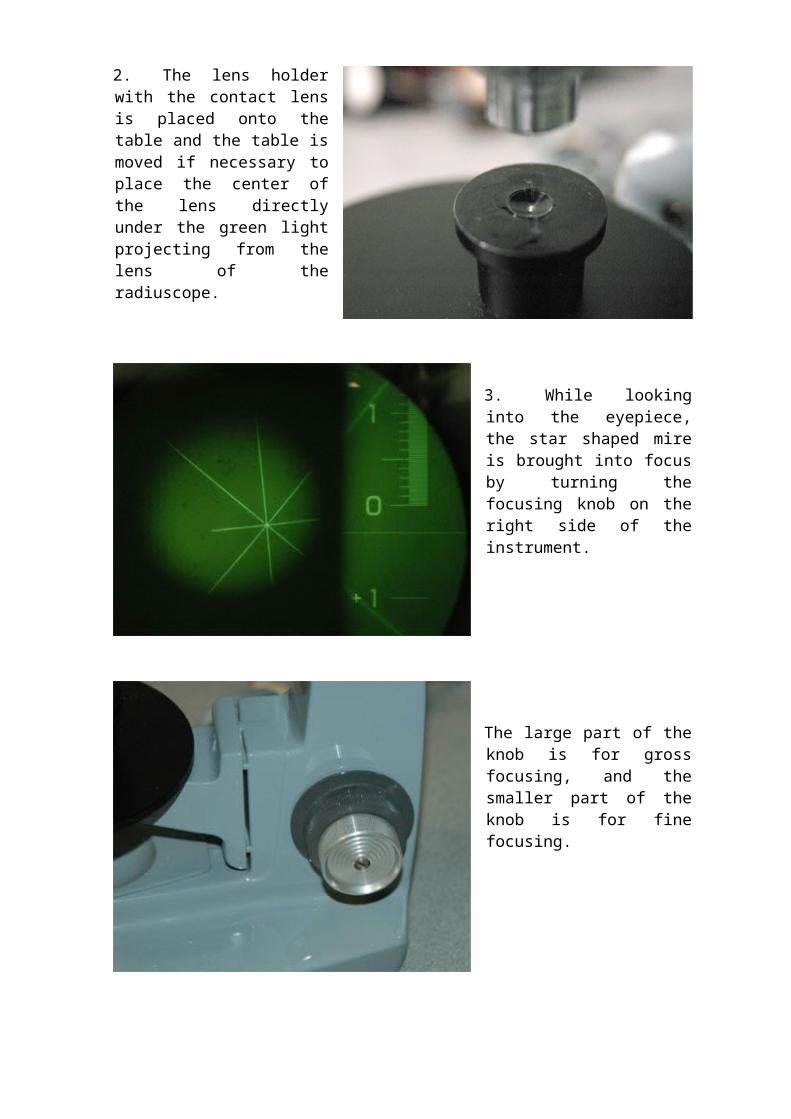
2. The lens holder with the contact lens is placed onto the table and the table is moved if necessary to place the center of the lens directly under the green light projecting from the lens of the radiuscope.
3. While looking into the eyepiece, the star shaped mire is brought into focus by turning the focusing knob on the right side of the instrument.

The large part of the knob is for gross focusing, and the smaller part of the knob is for fine focusing.
4. The small knob to the left of the eyepiece is used to move the line on the scale to the "zero" position.

The small knob under the eyepiece is used to focus the scale if necessary.
5. Once the star is in focus and the scale line is placed in the zero position, the base curve is measured by turning the focusing knob in the clockwise direction (away from you). The star mire will disappear at first, and then it will come back into focus as you continue to turn the focusing knob. The scale reading will be moving away from zero. Use the fine focus knob once the star mire comes back into focus.

When the star mire comes into focus the second time, it may not be centered, with only part of the star visible.
The star can be centered again by moving the table that holds the contact lens mount.
6. The base curve is then read at the position of the line on the scale. The reading will be a "radius of curvature" value in millimeters. It can be converted to diopters using a conversion table. This scale reading is about 8.41.
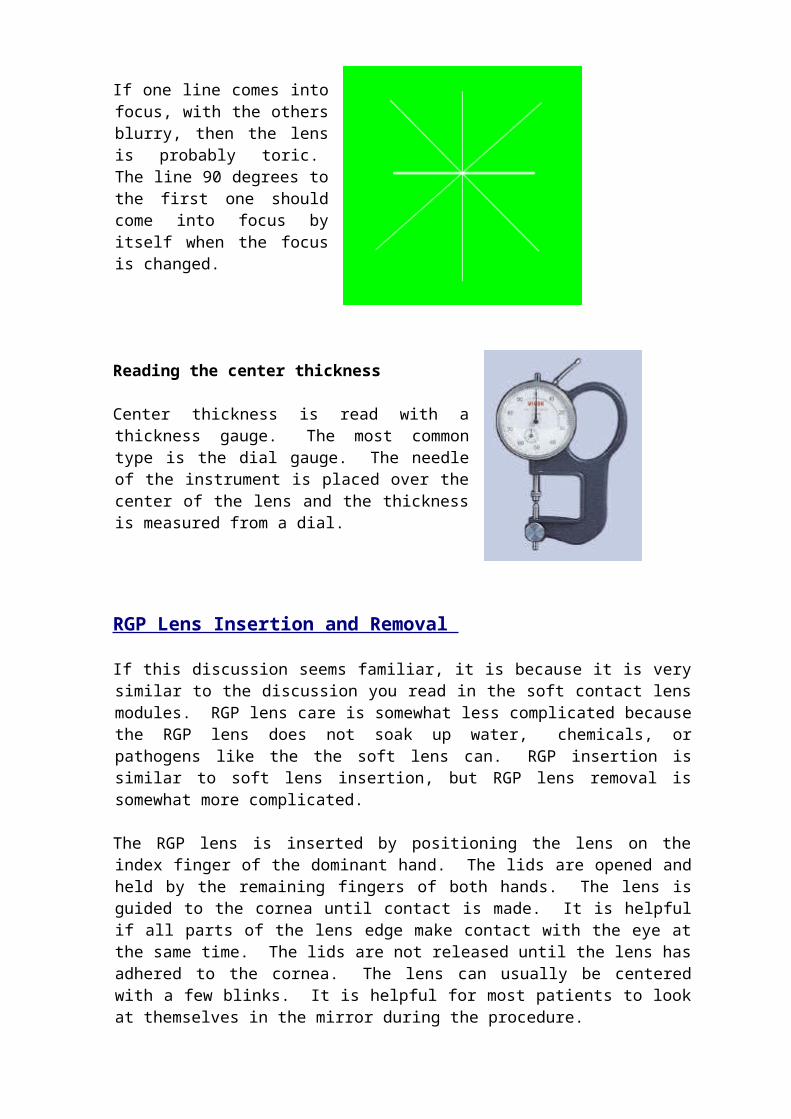
If the lines on the star focus at slightly different settings, then this indicates that the lens is warped.
If one line comes into focus, with the others blurry, then the lens is probably toric. The line 90 degrees to the first one should come into focus by itself when the focus is changed.
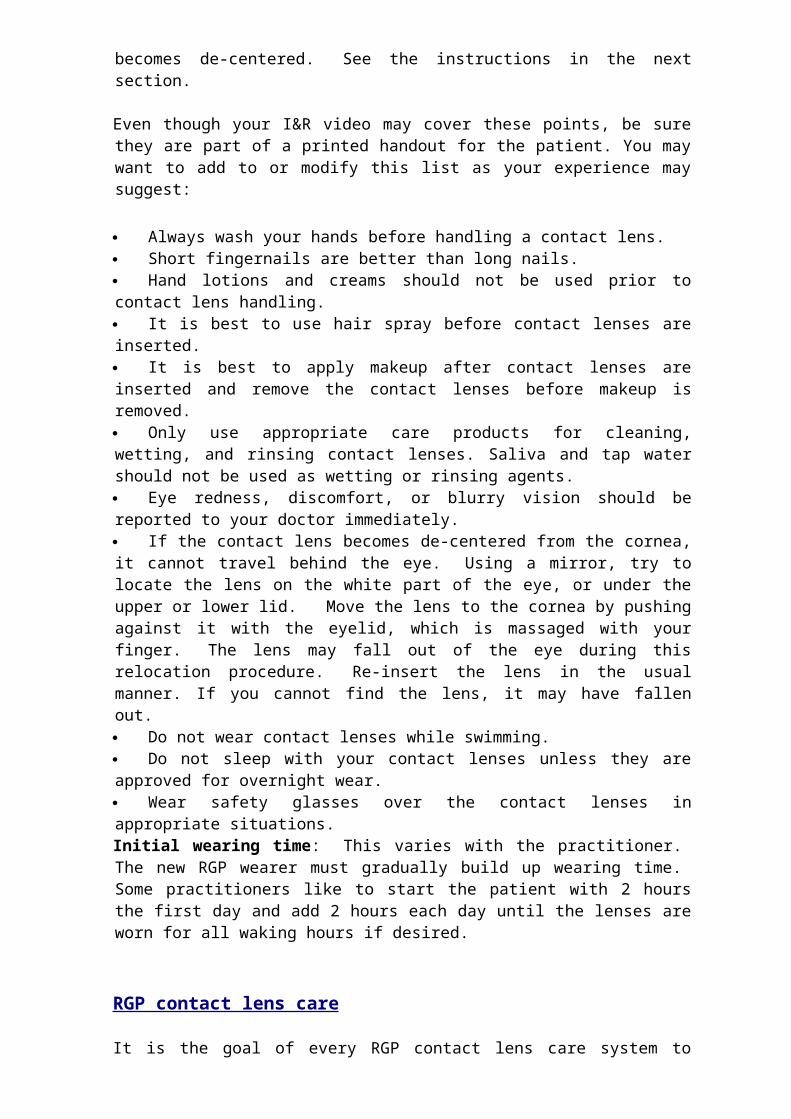
Reading the center thickness Center thickness is read with a thickness gauge. The most common type is the dial gauge. The needle of the instrument is placed over the center of the lens and the thickness is measured from a dial.
RGP Lens Insertion and Removal If this discussion seems familiar, it is because it is very similar to the discussion you read in the soft contact lens modules. RGP lens care is somewhat less complicated because the RGP lens does not soak up water, chemicals, or pathogens like the the soft lens can. RGP insertion is similar to soft lens insertion, but RGP lens removal is somewhat more complicated. The RGP lens is inserted by positioning the lens on the index finger of the dominant hand. The lids are opened and held by the remaining fingers of both
hands. The lens is guided to the cornea until contact is made. It is helpful if all parts of the lens edge make contact with the eye at the same time. The lids are not released until the lens has adhered to the cornea. The lens can usually be centered with a few blinks. It is helpful for most patients to look at themselves in the mirror during the procedure.
Yes, this is a soft lens, but the insertion technique is very similar.
The RGP lens is removed by placing the finger on the skin at the outer canthus and pulling outward. This tightens the lids against the the upper and lower edges of the lens. The patient then blinks, and if all goes well, the lens pops out of the eye.
It is best to bend over a towel on a flat surface to catch the lens. After some practice, the patient can pop the lens into the other hand. If the lens does not pop the first time, make sure the lens is centered in the palpebral fissure by looking straight ahead and be sure to apply equal pulling force to the upper and lower lids. An alternative to this method is to use a lens removal tool. This has a small suction cup on the end of a holder. The suction cup is guided to the lens until suction is achieved and the lens is then removed. Use of a wetting drop in the eye prior to using the tool usually helps.

The patient should be taught what to do if the contact lens becomes de-centered. See the instructions in the next section. Even though your I&R video may cover these points, be sure they are part of a printed handout for the patient. You may want to add to or modify this list as your experience may suggest: Always wash your hands before handling a contact lens. Short fingernails are better than long nails. Hand lotions and creams should not be used prior to contact lens handling. It is best to use hair spray before contact lenses are inserted. It is best to apply makeup after contact lenses are inserted and remove the contact lenses before makeup is removed. Only use appropriate care products for cleaning, wetting, and rinsing contact lenses. Saliva and tap water should not be used as wetting or rinsing agents. Eye redness, discomfort, or blurry vision should be reported to your doctor immediately. If the contact lens becomes de-centered from the cornea, it cannot travel behind the eye. Using a mirror, try to locate the lens on the white part of the eye, or under the upper or lower lid. Move the lens to the cornea by pushing against it with the eyelid, which is massaged with your finger. The lens may fall out of the eye during this relocation procedure. Re-insert the lens in the usual manner. If you cannot find the lens, it may have fallen out. Do not wear contact lenses while swimming. Do not sleep with your contact lenses unless they are approved for overnight wear. Wear safety glasses over the contact lenses in appropriate situations. Initial wearing time: This varies with the practitioner. The new RGP wearer must gradually build up wearing time. Some practitioners like to start the patient with 2 hours the first day and add 2 hours each day until the lenses are worn for all waking hours if desired. RGP contact lens care It is the goal of every RGP contact lens care system to remove foreign matter and microorganisms from the surface of the lens, to neutralize or kill any remaining microorganisms on the lens, and to properly "wet" the RGP lens prior to insertion. Care systems use various combinations of daily cleaners, disinfectants, and wetting agents. Daily cleaners work well only if combined with mechanically cleaning the lens. This is accomplished by putting a drop of cleaner on the lens and rubbing the lens gently with a finger in the cupped palm of the other hand, with the convex side of the lens against the palm. Unlike with the soft lens, with the RGP lens, the cleaner can be rinsed with warm tap water. This is best done after the contact lens is removed for the day. Disinfection can be accomplished by storing the contact lenses overnight in a disinfecting (storage) solution. Enzymatic cleaners are used to remove tear protein deposits from the surface of the contact lens. These are deposits that may not be removed with a daily cleaner. These cleaners are for the patients who are more susceptible to these deposits than other patients. Excessive protein deposits can block oxygen
transmission through the lens and they may trigger a hypersensitivity reaction under the eyelids. This is less of a problem with RGP lenses than it is with soft lenses. All-purpose RGP lens care systems are currently popular for contact lens care. One or two solutions are used for cleaning, disinfection (storage in the case), and wetting prior to insertion. The idea is to encourage better compliance with a more simple system. Unfortunately, many patients think all they have to do is remove the lenses and place them in the storage solution overnight. Be sure to encourage the patient to clean (rub and rinse) the lenses as described above. Some patients may become hypersensitive to the preservatives in care systems. Symptoms may include soreness, stinging, foreign body sensation, redness of the conjunctiva, redness of lids. swelling of the conjunctiva and/or lids, and punctate staining of the cornea. A major offender has been the preservative thimerosal. It is best to avoid care systems with this preservative. Switching the patient to a care system with a different preservative may solve the problem. General instructions to the patient should include: Only use products that are compatible with your lenses. Check with your doctor's office. Do not mix care product brands unless recommended by the doctor's office. Wash hands before handling lenses. Do not skip steps in your lens care routine, as instructed by the doctor's office. Keep the lens care environment clean (case, counter, storage bag, etc.). Keep care product bottle tops from touching any surface. Work over a clean surface. Use paper towels if in a public restroom. If you drop your lens prior to insertion, rinse the lens well before insertion. Notify your doctor's office if you experience eye or lid redness and/or irritation

Anterior segment examination: A new contact lens patient typically has a complete eye exam before contact lenses are fit. The ophthalmologist or optometrist will pay particular attention to the following details of the examination:
Health of the lids, conjunctiva, and cornea - patients with corneal diseases or chronic blepharitis are not good contact lens candidates. A pterygium or pinguecula may be irritated by contact lens wear.
Tear production - Poor tear production alone may cause a patient to discontinue contact lens wear. A Schirmer tear test and tear break-up time (BUT) may be performed.
Lids - the lids must be elastic and fit closely to the globe. This picture would obviously be an exaggeration of a loose lid.
The lid aperture must be wide enough for the patient to be able to insert the contact lens.
Giant papillary conjunctivitis may be in the history of a former contact lens wearer wanting to wear lenses again. This is characterized by large bumps, or "papillae", which cover the upper tarsal conjunctiva. It is usually caused by wearing contact lenses that are covered with deposits. The lid must be "everted" to view the extent of the condition. The patient must usually discontinue wear for the condition to subside. Some patients can resume contact lens wear with a frequent replacement schedule.
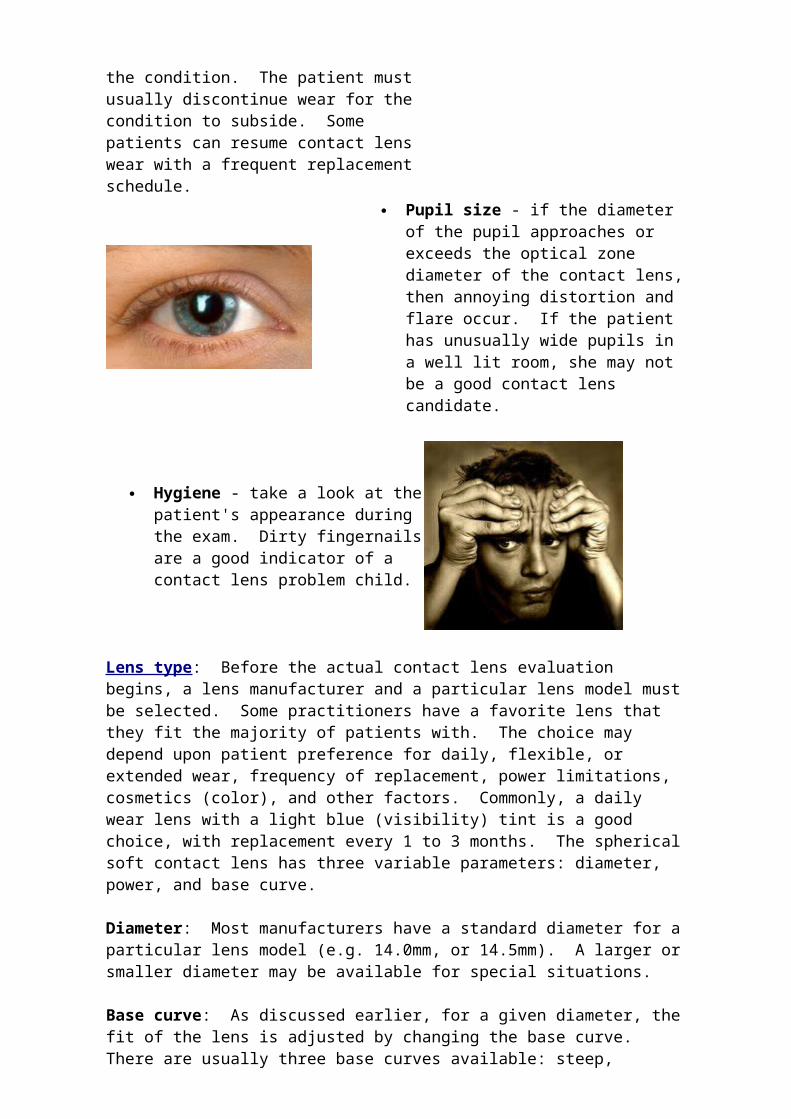
Pupil size - if the diameter of the pupil approaches or exceeds the optical zone diameter of the contact lens, then annoying distortion and flare occur. If the patient has unusually wide pupils in a well lit room, she may not be a good contact lens candidate.
Soft Contact Lenses:
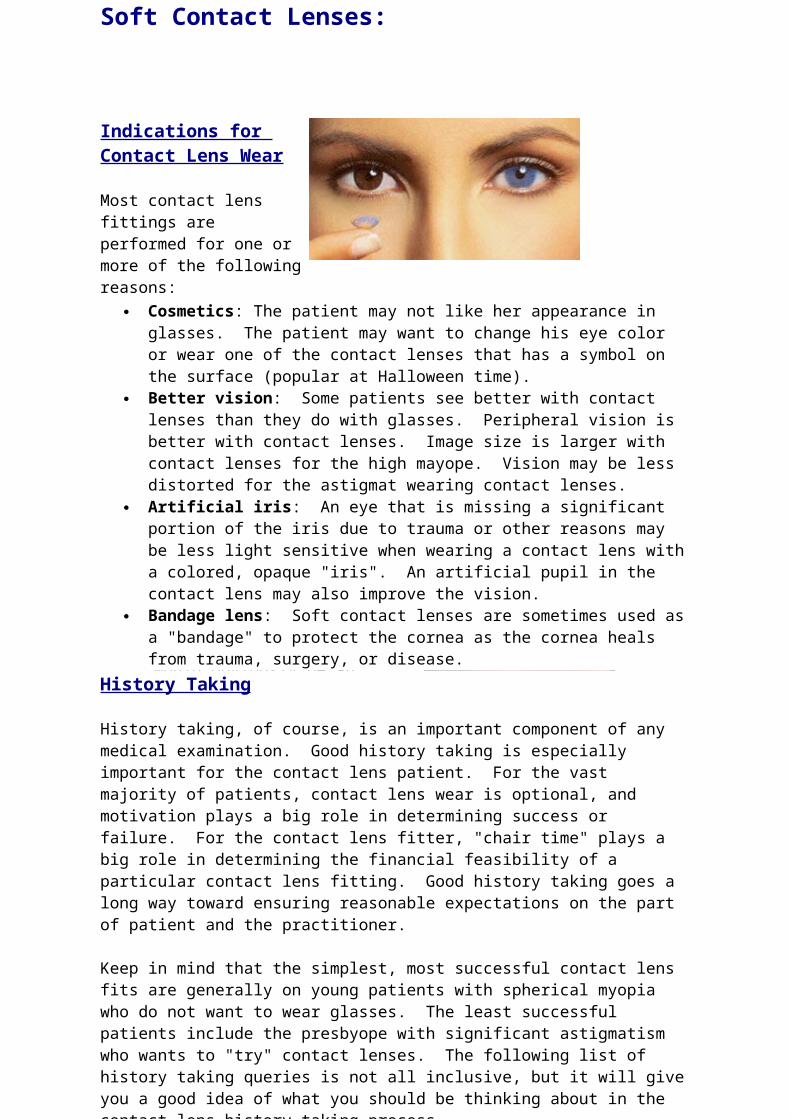
Indications for Contact Lens Wear Most contact lens fittings are performed for one or more of the following reasons:
Cosmetics: The patient may not like her appearance in glasses. The patient may want to change his eye color or wear one of the contact lenses that has a symbol on the surface (popular at Halloween time).
Better vision: Some patients see better with contact lenses than they do with glasses. Peripheral vision is better with contact lenses. Image size is larger with contact lenses for the high mayope. Vision may be less distorted for the astigmat wearing contact lenses.
Artificial iris: An eye that is missing a significant portion of the iris due to trauma or other reasons may be less light sensitive when wearing a contact lens with a colored, opaque "iris". An artificial pupil in the contact lens may also improve the vision.
Bandage lens: Soft contact lenses are sometimes used as a "bandage" to protect the cornea as the cornea heals from trauma, surgery, or disease.
History Taking History taking, of course, is an important component of any medical examination. Good history taking is especially important for the contact lens patient. For the vast majority of patients, contact lens wear is optional, and motivation plays a big role in determining success or failure. For the contact lens fitter, "chair time" plays a big role in determining the financial feasibility of a particular contact lens fitting. Good history taking goes a long way toward ensuring reasonable expectations on the part of patient and the practitioner. Keep in mind that the simplest, most successful contact lens fits are generally on young patients with spherical myopia who do not want to wear glasses. The least successful patients include the presbyope with significant astigmatism who wants to "try" contact lenses. The following list of history taking queries is not all inclusive, but it will give you a good idea of what you should be thinking about in the contact lens history taking process.
Why?: Ask the patient why she wants to wear contact lenses. You want a sense of the patient's level of motivation. The teenaged girl who does not want to be seen wearing glasses will be highly motivated. The teenaged boy who wants to wear contact lenses for sports will be highly motivated. During the history taking process, the patient with low motivation can be steered to arrive at his own conclusion that he is not a good candidate for contact lens wear.
Age: The two most important factors here are Presbyopia and dry eyes. If the patient is a presbyope, near correction limitations with contact lens wear may discourage contact lens wear. Near correction options must be discussed with the patient early in the process. The options include wearing readers with contact lenses, monovision, and bifocal contact lenses. None of these options offers a "perfect" solution, and the advantages and disadvantages of each should be discussed.
Dry eye symptoms increase with age. Dryness increases irritation when wearing contact lenses and may limit wearing time. The patient should be asked about dry eye symptoms and the use of lubricating drops. The patient should be informed about the effects of dry eyes on contact lens wear.
Occupation: Consider the patient's job (including school) as well as how she

Hygiene - take a look at the patient's appearance during the exam. Dirty fingernails are a good indicator of a contact lens problem child.
Lens type: Before the actual contact lens evaluation begins, a lens manufacturer and a particular lens model must be selected. Some practitioners have a favorite lens that they fit the majority of patients with. The choice may depend upon patient preference for daily, flexible, or extended wear, frequency of replacement, power limitations, cosmetics (color), and other factors. Commonly, a daily wear lens with a light blue (visibility) tint is a good choice, with replacement every 1 to 3 months. The spherical soft contact lens has three variable parameters: diameter, power, and base curve. Diameter: Most manufacturers have a standard diameter for a particular lens model (e.g. 14.0mm, or 14.5mm). A larger or smaller diameter may be available for special situations. Base curve: As discussed earlier, for a given diameter, the fit of the lens is adjusted by changing the base curve. There are usually three base curves available: steep, medium, and flat. Most manufacturers identify the base curve by radius of curvature. Examples would be 8.9 (flat), 8.6 (medium), and 8.3 (steep). Some use the Vault system: Vault I (flat), Vault II (medium), and Vault III (steep).
The starting point for choosing a base curve is keratometry. The manufacturer gives guidelines regarding which base curve should be used for a given K reading. An average K reading of 43.50 might call for a base curve of 8.6 in our 14.0 diameter trial contact lens.
Power: Since we are fitting a spherical soft contact lens, the eye should not have more than .75 D of astigmatism. If it does have more astigmatism than that, a toric soft lens or a hard gas permeable (HGP) lens is indicated for optimum vision. Thicker spherical soft contact lenses are thought to be able to "mask" a low amount of astigmatism. A thin lens however will drape over the curves of the cornea and the residual astigmatism will limit the visual acuity obtained with the spherical lens. If only one eye has significant astigmatism, it is sometimes acceptable to the patient to wear spherical lenses in both eyes, especially if the better seeing eye is the dominant eye. If the eye being fit has astigmatism, the refraction is converted to minus cylinder, and the spherical equivalent power is used. For example:

OD MR = -6.00+1.00x180Minus cyl. = -5.00-1.00x90Spherical equivalent = -5.50 The spherical equivalent power must then be adjusted for vertex distance. This is because the refractive power is measured at approximately 12 to 13 mm away from the cornea. The contact lens, of course, will be on the corneal surface. For powers 4 diopters or less, this calculation makes little difference. The greater the lens power is, the more difference this calculation makes in the contact lens power. Most contact lens publications have a table for figuring this adjustment. You will need to remember that, for minus lenses, power is taken away from the refractive lens power to arrive at the contact lens power. For plus lenses, power is added to the refractive power to arrive at the contact lens power.
Pictured to the right is a Hyperopes corrected with a glasses lens. VD is the vertex distance, which is measured from the back of the glasses lens to the cornea. FD is the focal length of the compound lens system (the glasses lens plus the cornea and the natural lens.
Pictured here is the same hyperopic eye corrected with a contact lens. The VD is zero and the focal length is shorter. Because the focal length is shorter, the plus powered contact lens will need to be proportional stronger than the glasses lens to focus light on the retina. Thus the vertex power adjustment increases the power of the plus powered contact lens compared to the power of the glasses lens.
Picture to the left is a myopic eye corrected with a glasses lens. The vertex distance (VD) and the focal distance (FD) are marked. Remember that a minus lens diverges light so that the focus is lengthened for the nearsighted eye.
Pictured here is the same myopic eye corrected with a contact lens. The VD is zero and the focal distance is shorter. Since the focal distance is shorter, the minus lens will need to be less powerful to achieve the same focus. Thus the vertex power adjustment decreases the power of a minus powered contact lens compared to the power of the glasses lens.
The clinical optics calculator that we give away free on this website has a vertex distance calculator. We would enter -5.00-1.00x90 into the calculator, along with a "present vertex distance" of 13 and a "new vertex distance" of zero. The calculator gives us a spherical equivalent, vertex adjusted contact lens power of -5.10, which we would round off to -5.00. This would be the power that we would choose for our trial lens. If a -5.00 D lens is not available in the fitting inventory, choose the closest power available. Fit evaluation: If the patient has no contact lens experience, you will need to insert the lenses for the evaluation. After insertion, wait at least 10 minutes before you evaluate the lens. This allows time for patient acclimation and time for the water content of the lens to stabilize. The lens will loose water after insertion, and it will fit tighter as a result. During this time, if the patient complains of a foreign body sensation, remove, rinse, and reinsert the lens. Start the 10 minute wait again after reinsertion. Evaluate the fit of the trial lens with the slit-lamp microscope, keeping the following points in mind:
1. Coverage - the lens should cover the entire surface of the cornea in all meridians and should go slightly beyond the limbus. A very loose lens may ride low, exposing an upper portion of the cornea. A solution may be a tighter lens. A lens that is loose may be too small. A larger diameter may solve the problem. Remember that a larger diameter lens will fit tighter if the base curve is kept the same.
2. Centering - the lens should center well on the cornea. A very loose lens may ride low. A high plus lens, particularly an aphakic lens, may ride low. A larger diameter lens may solve the problem.
3. Drape - the lens should fit closely to the cornea without any pockets between the lens and the cornea. This is rarely a problem unless the contact lens parameters are not close to what they should be.
4. Movement - the lens should show some movement. A thin lens will usually show less movement than a standard thickness lens. The standard for movement will depend upon the practitioner. Some doctors like to see .5 to 1 mm of movement with a complete blink. To evaluate this, watch an edge of the lens with the slit-lamp as the patient blinks. Other doctors think that a lens that does not move with a blink is not necessarily too tight.
However, every lens should show movement if it is mechanically pushed. To evaluate this at the slit-lamp, have the patient look slightly upward. With your finder, push on the patient's lower lid so that the lid pushes against the lower edge of the lens. The lens should move, if not, the lens is too tight. The fit can be loosened by going to a flatter base curve and/or a smaller diameter. A lens that is really tight will actually indent the conjunctiva at the edge of the

lens. This degree of tightness usually only shows up on extended wear patients at the end of the wear period. A lens can also demonstrate too much movement. Excessive movement may give the patient a foreign body sensation, and the vision will be disturbed as the lens moves on the cornea. The fit can be tightened by going to a steep base curve and/or a larger diameter. The fit could also be tightened by using a thinner lens. Before deciding that a lens is too loose, be sure to allow enough time for stabilization, perhaps longer than the minimum 10 minute period.
Evaluate the power of the trial lens - your power calculation should have you close to the optimum power, if not dead on. Evaluate the power by performing an over-refraction with the phoroptor or loose lenses.
Most of the time, a spherical over-refraction will be sufficient. The exception might be the patient with significant astigmatism (>.5D) who is being fit with a spherical soft lens. Any spherical error found during the over-refraction is simply added or subtracted from the trial lens power when finalizing the contact lens prescription. Ordering the contact lenses - if the lenses are being fit from an inventory, and the patient's optimum prescription is on hand, then the patient can leave the office wearing the lenses. Even if the optimum Rx is not on hand, if there are lenses in inventory close to the optimum prescription, then the patient can leave with those lenses and the correct Rx can be ordered. This always makes the patient happy, and we do like to make the patient happy. Insertion and Removal (I&R) - This routine is usually only for the new contact lens wearer, although some experienced patients can use the review. This duty can be drudgery, because it is always the same thing, over, and over, and over again. To minimize the drudgery, have the patient watch a videotape of I&R procedures. This procedure mainly has to do with the patient getting over the fear of sticking her finger in her eye. Once that is overcome, it is usually smooth sailing.
Soft contact lenses can be flipped inside-out. They are usually most comfortable, and vision is usually the best, when the lens is inserted correct-side out. Although with thin lenses, it doesn't seem to make much difference. The "taco test" is used to determine which way is the correct way.
The lens is slightly pinched between the thumb and forefinder, to make it look like a taco. It helps if the lens is slightly dry. The edge of the lens is observed. If the edges slope inward, then the lens is in the correct position.
If the lens edges reverse and curve outward, then the lens is inside-out. This phenomenon can usually be observed without pinching the lens.
Some manufacturers print initials near the edge of their lenses. A keen observer (or someone using a slit-lamp) can then tell if the lens is inside-out.
The soft lens is inserted by positioning the lens on the index finger of the dominant hand. The lids are opened and held by the remaining fingers of both hands. The lens is guided to the cornea until contact is made.
It is helpful if all parts of the lens edge make contact with the eye at the same
time. The lids are not released until the lens has adhered to the cornea. The lens can usually be centered with a few blinks, if not, the lens can be pushed toward center with a finger. It is helpful for most patients to look at themselves in the mirror during the procedure. Alternatively, the contact lens can be placed on the conjunctiva below the cornea as the eye looks upward. The lens is then moved onto the cornea with a finger.
The soft lens is removed by pinching the lens between the thumb and index finger of one hand. As with insertion, the lids are held open with the remaining fingers. It is helpful to look slightly upward, and pinch the lower edge of the lens. Some find it helpful to first slide the lens downward from the cornea before pinching the lens.
Most contact lens patients eventually become very adept at insertion and removal. Many are able to use a one handed technique that simply pulls the lower lid down for insertion and removal. It is best to teach the two handed technique and let them improvise on their own.
The patient should be taught what to do if the contact lens becomes de-centered. Knowing ocular anatomy, we know that the lens will not become "lost behind the eye", but the patient may not know this. Finding a de-centered lens is just a matter of searching the conjunctival area after the lids have been pulled away from the globe. The lens is then pinched, removed, and then re-inserted. Even though your I&R video may cover these next points, be sure they are part of
a printed handout for the patient. You may want to add to or modify this list as your experience may suggest:
Always wash your hands before handling a contact lens. Short fingernails are better than long nails. Care must be taken so that
long nails do not tear the lens. Hand lotions and creams should not be used prior to contact lens handling. It is best to use hair spray before contact lenses are inserted. It is best to apply makeup after contact lenses are inserted and remove the
contact lenses before makeup is removed. Only use appropriate care products for cleaning, wetting, and rinsing
contact lenses. Saliva and tap water should not be used as wetting or rinsing agents.
Eye redness, discomfort, or blurry vision should be reported to your doctor immediately.
If the contact lens becomes de-centered from the cornea, it cannot travel behind the eye. Using a mirror, try to locate the lens on the white part of the eye, or under the upper or lower lid. Move the lens with your finger if necessary. Remove the lens by pinching it with your fingers. Re-insert the lens in the usual manner. If you cannot find the lens, it may have fallen out.
It is not a good idea to wear contact lenses while swimming. The lenses can easily become dislodged and/or soft lenses may soak up some chlorine and irritate your eyes.
Do not use eye drops with contact lenses, except for lubricating drops approved for your lenses.
Do not sleep with your contact lenses unless they are approved for overnight wear.
Wear safety glasses over the contact lenses in appropriate situations. Initial wearing time: This varies with the practitioner. Many patients tolerate soft contact lenses right away. Some practitioners like to start the patient with 4 hours the first day and add 2 hours each day until the lenses are worn for all waking hours if desired.
Soft contact lens care It is the goal of every contact lens care system to remove foreign matter and microorganisms from the surface of the lens, and to neutralize or kill any remaining microorganisms on the lens. This is usually called "cleaning" and "disinfection". Care systems use various combinations of daily cleaners, rinsing agents, and disinfectants.
Daily cleaners work well only if combined with mechanically cleaning the lens. This is accomplished by putting a drop of cleaner on the lens and rubbing the lens gently with a finger in the cupped palm of the other hand. The lens can be flipped inside out so that the other surface can be cleaned. A rinsing agent is used to wash the daily cleaner and other matter from the surface of the lens. A rinsing agent should be used whether or not a daily cleaner
is used. Rinsing the lens will obviously be much more effective if a daily cleaner is used. Disinfection can be accomplished by storing the contact lenses overnight in a disinfecting solution. Enzymatic cleaners are used to remove tear protein deposits from the surface of the contact lens. These are deposits that may not be removed with a daily cleaner. These cleaners are for the patients who are more susceptible to these deposits than other patients. Excessive protein deposits can block oxygen transmission through the lens and they may trigger a hypersensitivity reaction under the eyelids. More frequent replacement of the lenses also reduces this problem. All-purpose soft contact lens care systems are currently popular for contact lens care. One solution is used for cleaning, rinsing, and for disinfection (storage in the case). The idea is to encourage better compliance with a more simple system. Unfortunately, many patients think all they have to do is remove the lenses and place them in the solution overnight. Be sure to encourage the patient to rub and rinse the lenses as described above. The all-purpose solutions are expensive. The cost for the patient can be reduced if the all-purpose solution is only used as the cleaning agent and the disinfecting agent (storage). A much less expensive contact lens saline solution can be purchased to rinse the lens during cleaning and to rinse the lens before insertion. Some patients may become hypersensitive to the preservatives in chemical care systems. Symptoms may include soreness, stinging, foreign body sensation, redness of the conjunctiva, redness of lids. swelling of the conjunctiva and/or lids, and punctate staining of the cornea. A major offender has been the preservative thimerosal. It is best to avoid care systems with this preservative. Switching the patient to a chemical care system with a different preservative may solve the problem. Alternatives to chemical care systems are daily disposables or a hydrogen peroxide care system as discussed below. A hydrogen peroxide based care system requires more steps for the patient, but it may be the only choice for the patient who is hypersensitive to the preservatives in other care systems. The peroxide is an efficient antimicrobial and it has some protein cleaning activity as well. The system requires an exposure step of about 10 minutes and a neutralization step that lasts from 20 minutes to a few hours, depending on the system. General instructions to the patient should include:
Only use products that are compatible with your lenses. Check with your doctor's office.
Do not mix care product brands unless recommended by the doctor's office.
Wash hands before handling lenses. Do not skip steps in your lens care routine, as instructed by the doctor's
office. Keep the lens care environment clean (case, counter, storage bag, etc.). Keep care product bottle tops from touching any surface. Work over a clean surface. Use paper towels if in a public restroom. If you drop your lens prior to insertion, rinse the lens well before insertion. Notify your doctor's office if you experience eye or lid redness and/or
irritation.
Soft Lenses for the astigmatic patient Does the patient really need astigmatic correction? Not all low astigmats (<1.25 D) require astigmatic correction. Not all of them want astigmatic correction, particularly if the dominant eye does not have significant astigmatism. If in doubt, trial fit with spherical soft lenses and over-refract. Show the patient the difference between astigmatic correction and correction with the spherical equivalent. Toric lenses are more expensive to replace, although the cost differential has come down significantly in recent years. Toric lenses generally are not as comfortable as spherical lenses. The difference in vision may not outweigh these other factors. The trial contact lens that you use may make a difference in this determination. Thicker, lower water content soft lenses tend to "mask" low amounts of astigmatism better than thin lenses.
Toric soft lenses vs. hard gas permeable lenses To be able to offer the astigmatic patient the best lens for his/her eyes, we need an understanding of the options in terms of lens design and the advantages and disadvantages of each type. The patient with significant astigmatism (generally > .5D) can be fit with toric soft contact lenses or hard gas permeable (HGP) contact lenses. Although HGP lenses can efficiently fit almost any degree of astigmatism, many astigmats less than 2.50 D are fit with toric soft lenses because of the initial comfort factor. Toric soft contact lenses correct astigmatism by providing a cylinder correction in the lens itself. The correction is similar to a glasses correction. For this to work, the lens must not rotate significantly on the cornea. Rotational stability is accomplished with a variety of lens designs, including weighting the bottom of the lens (prism ballast, top image) and/or flattening the bottom edge of the lens so that it rests against the lower lid (truncation, bottom image).

The conventional HGP lens corrects astigmatism with a "tear lens". This rigid, spherical lens is fit to one curve of the cornea (picture on the left). Because of astigmatism, the lens does not fit the other curve perfectly, but the space between the lens and cornea is filled in with tear fluid (picture on the right), which acts as a refracting surface to correct the astigmatic error. The tear lens is represented by the black area in the picture on the right. For the conventional HGP design, lens rotation does not affect the astigmatic correction. The conventional HGP lens works well only for low to moderate amounts of astigmatism. HGP lenses can also be designed to fit the cornea exactly for higher amounts of astigmatism (bitoric design). A bitoric HGP design is more complicated and more costly. The toric soft contact lens must maintain little or no lens rotation on the eye for maximum acuity. The regular HGP lens does not have this problem. For this reason, it is best to determine the patient's cylinder power and axis "sensitivity" before a lens type is recommended. If the patient notices a decrease in vision with a small axis rotation, she may be better off with an HGP lens fitting.
Cylinder Sensitivity testing At the completion of the manifest refraction, have the patient view a line on the chart one line above the line of best corrected visual acuity (BCVA). Ask the patient to let you know when she notices the letters blurring. Slowly rotate the cylinder axis away from the refracted axis. Stop when the patient notices blurring. The axis sensitivity is the degree of rotation from the refracted axis. For example:

suppose the refracted axis is 90 and the patient reports blurring at axis 100, then the axis sensitivity would be 10 degrees. Usually, the greater the cylinder power is, the more sensitive the patient is to axis rotation. If the patient has an axis sensitivity of 5 degrees, and the best fitting soft toric lens frequently rotates 10 degrees off axis, then the patient may be better off wearing HGP lenses.
How much astigmatic correction does the patient need? A similar procedure can be followed for cylinder power. The cylinder power is reduced by .50 D while simultaneously changing the sphere .25 D to keep the spherical equivalent. For example: change a +1.50 D cylinder power to +1.00 D, and at the same time change the sphere power .25 D in the plus direction. Again, the patient reports when blurring occurs. The distance traveled on the cylinder power wheel is the measure of cylinder power sensitivity. For example: suppose the refracted cylinder power is 1.5 D. The patient reports blurring at 1.00 D. The cylinder power sensitivity is thus .5 D. Most patients do well with an automatic .5 D reduction in cylinder power in the SCL prescription. Depending upon the cylinder power sensitivity, a greater reduction may be possible.
Using a trial toric soft lens A diagnostic or "trial" set of soft toric contact lenses (torics) should be used. Some practitioners have one or two favorite lens designs, and they fit these from inventory. Evaluating a lens with the exact parameters needed decreases the "chair time" needed to fit torics. However, many manufacturers have liberal return policies that allow you to fit from a limited trial set and return an ordered lens that may not be optimum when worn by the patient. Toric lens parameters vary from brand to brand. Variables include the following:
base curve diameter range of sphere powers range of cylinder powers range of axis alignments flexible wear, planned replacement, or daily wear
As you can imagine, fitting torics form inventory requires a lot of lenses. To help you sort things out, there are publications that organize all this information for you (e.g. Tyler's Quarterly). Obviously, you will be spared some frustration by beginning your fitting with a brand that includes the parameters that you need for a particular patient.
Choosing a trial lens To begin your toric lens fitting, you will need the manifest refraction and the keratometry readings. Toric lenses usually have a large diameter to aid stability, so measuring the patients cornea is usually not necessary. Just as with spherical soft lenses, the glasses lens power (or manifest refraction)

will need to be adjusted for vertex power. Toric vertex adjustment is a little tricky because you may have to adjust both the sphere power and the cylinder power. Let's look at an example: MR = -8.00+2.00X180 First of all, we convert to contact lens language (minus cyl.). MR = -6.00-2.00X90 From the optics modules, you may (hopefully) remember that we are really dealing with two different lenses. On an axis cross, the powers convert to: -6.00 D at 180 degrees-8.00 D at 90 degrees If we look up each of these powers on a vertex conversion chart, -6.00 D at a vertex distance of 12mm converts to -5.62 D at zero vertex distance, and -8.00 D converts to -7.25 D. Therefore, our CL Rx will be -5.62-1.63X90. You can also use the optics calculator to arrive a the same answer. Our ideal toric trial lens power would be -5.50-1.50X90. Remember that you want to start with a cylinder power that is less than the refracted power. Many manufacturers offer -1.25 and -1.75 cylinder powers and do not offer a -1.50 cylinder power. If this is the case, you would want to start with the -1.25 cylinder power. Just as with a spherical contact lens fitting, you will follow the manufacturers recommendation for the starting base curve. Most lenses come in "medium", "steep", and "flat" base curves. Example: Av. K reading Base Curve < 43.00 9.1 (flat)43.00 - 45.00 8.7 (medium)> 45.00 8.4 (steep)
Evaluating the fit The same basic evaluation criteria used with spherical soft lenses also applies to toric lenses. For best vision, the axis of the contact lens cylinder correction should line up with the axis as determined by the manifest refraction. All is well if the contact lens rotates to the correct position after insertion, and it should stay in the correct orientation throughout the day. This, of course, is not always the case. All toric soft lenses have some type of markings that assist in the evaluation of lens rotation. It might be a single mark at the 6 o'clock position, marks at 3 and 9 o'clock, three marks at 5, 6 and 7 o'clock, or some other marking scheme. The marks are viewed with a slit lamp to determine the degree of rotation of the lens. The rotation of the lens should not be evaluated until the lens has had time to stabilize on the eye. Ten to 15 minutes after insertion is usually sufficient time for

stabilization. If a toric lens consistently rotates to the same position on the eye, then the prescription can be adjusted to accommodate the rotation. For this adjustment, the "LARS" system is used. LARS stands for "left-add, right-subtract". If the lens is rotating to the right, then the degree of rotation is subtracted from the refractive axis. If the lens is rotating to the left, then the degree of rotation is added to the refractive axis. Let's look at an example: This patient is wearing a toric soft lens (light blue color over a blue iris) with a 6 o'clock rotational marker and two marks 15 degrees to either side. Ideally, after the lens has stabilized, the center marker should be at the 6 o'clock position as you look at the lens with a slit lamp.
Let's suppose that our lens stabilizes to a position with the lens rotated somewhat counterclockwise, like this:
The arrow marks the 6 o'clock position, so our lens has not rotated enough for the left 15 degree marker to align with the 6 o'clock position. So, we will have to estimate the degree of rotation. It looks like it has rotated about 2/3 of the way toward the marker. We estimate that it has rotated 10 degrees. Let us say that the patient's glasses prescription is -2.00-1.25x170, and this is the power of the lens that we have inserted. Our lens has rotated to our right. The LARS rule is: left add, right subtract. Therefore, we will subtract 10 degrees from 170 to get a contact lens axis of 160. This means that we will order the patient a new lens with the axis at 160. Theoretically, the new lens should behave the same way, rotating 10 degrees to the right after stabilization. If so, the cylinder axis will be in the correct position for good vision, at axis 170. As with a spherical soft lens, the toric lens should center well and exhibit some movement, at least when pushed with the lower lid. A loose fitting toric lens will generally not be a successful fit, as the excessive movement contributes to lens rotation and blurry vision. Once an acceptable fit has been achieved, with minimal rotation after being allowed
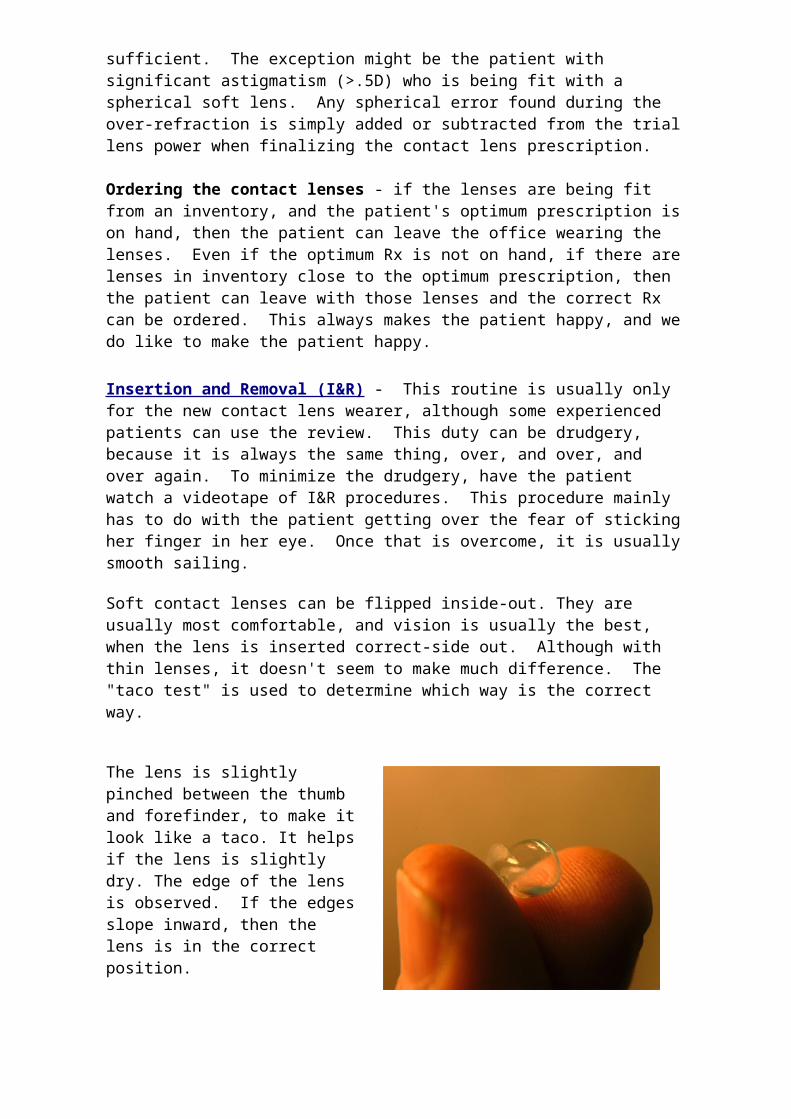
enough time to stabilize, an over-refraction should be performed. Perform the refraction as you would with an eye not wearing a contact lens. In other words, perform the normal refractometry routine, checking sphere, cylinder axis, and cylinder power. Record the results. To arrive at the final contact lens prescription, place the trial contact lens power specifications (adjusted for rotation) into a trial frame. Then place the over-refraction results into the same trial frame along with the other lenses. Now place the over-loaded trial frame onto a lensometer and read the final contact lens power Rx. This is the contact lens power that you will order, along with the other specifications of the particular trial lens that was used. If the results of the over-refraction were minimal, you can dispense with this final exercise and simply order the specifications of the trial lens as adjusted, if necessary, for lens rotation. The insertion, care, and handling of toric soft lenses are very similar to that of standard soft lenses. The patient need not pay particular attention to the orientation of the insertion, as the lenses should rotate to the proper position in a short period of time. The patient should, however, pay particular attention to inserting the lenses so that they are not inside-out. This is usually not a problem as most toric lenses give an obvious "taco test". The patient should be seen back in a week or two for a review of the fit. Many soft toric contact lens vision and comfort complaints originate from toric lens dehydration. This may become apparent in the return visit, but may not show up until much latter. If the symptoms are relieved by regular use of re-wetting drops, then the patient will need to make this a part of his routine. If the patient complains of intermittent blurring, then the lens may be too loose, allowing for excessive rotation upon blinking. A steeper base curve may be necessary. If the patient complains of constant blurring, the lens may be constantly misaligned, or the prescription may be wrong. If the fit seems adequate (not too steep or flat), a predictable axis misalignment can be again adjusted with the LARS principle. The prescription can be rechecked with over-refraction if necessary. When evaluating vision complaints, always keep in mind that the patient may have switched the lenses. If all else fails, the fit can be started from scratch before soft lenses are abandoned for RGP lenses. Some would argue, why put up with this non-sense? Simply fit RGP lenses in the first place! To be fair, many patients are successfully fit with soft toric lenses the first time. Presbyopia is the term for difficulty focusing at near due to the aging lens of the eye. Symptoms usually first occur between the ages of 40 and 50, with most patients needing some degree of near compensation by age 45. Near compensation means more plus power, which brings the near point closer
Soft lenses plus readers There is no ideal contact lens correction for Presbyopia. The presbyopic contact lens wearer must compromise; therefore, motivation is a key factor in successfully fitting the presbyope with contact lenses. Before modifying the contact lenses for near vision, be sure that your patient understands that readers can be worn over distance powered contact lenses. This is not always obvious to them, and it is the most simple solution. Of course, not everyone wants "simple", some do not want
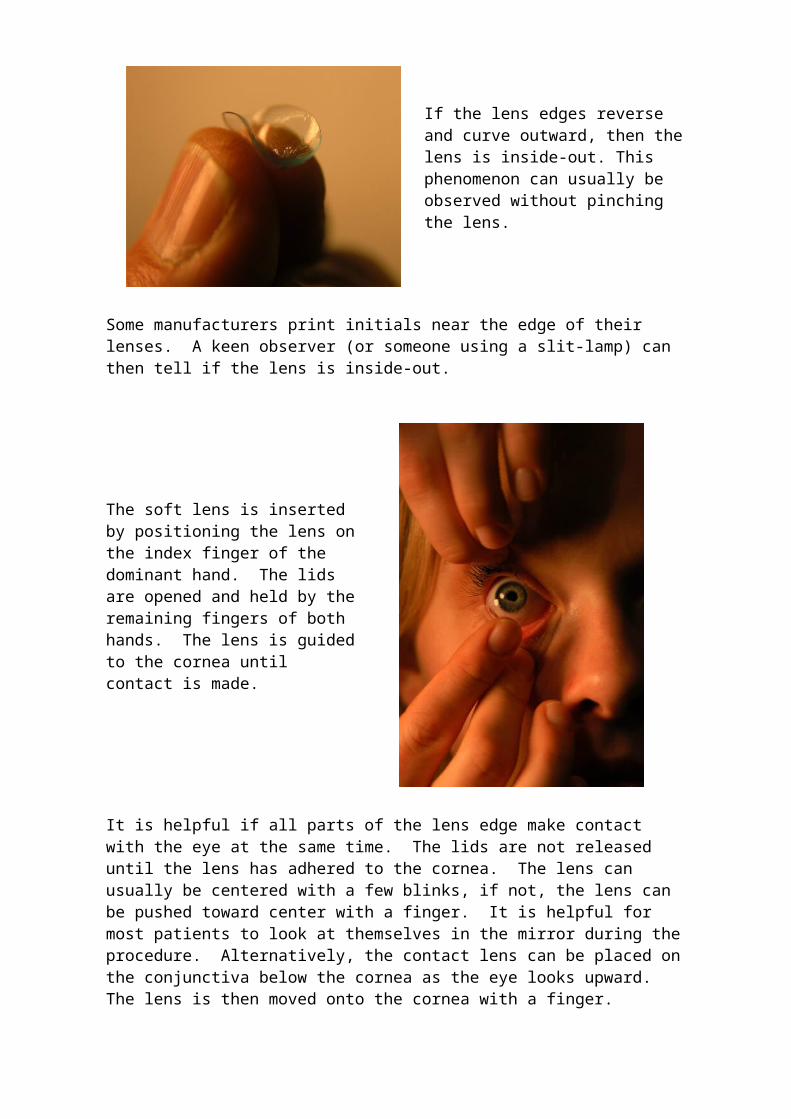
glasses, even for near vision. Over-plusing the contact lens power Helping the new presbyope who already wears contact lenses may be as simple as over-plusing the correction in both eyes. Over-plusing means changing a +1.50 correction to +2.00 or changing a -3.00 correction to -2.50. Hyperopes usually tolerate this better than myopes. The idea is to over-refract binocularly in the plus direction until the distance vision is unacceptable, and then back off a little until it is acceptable. If overplusing is not acceptable, then monovision may be tried. Monovision Monovision is a technique that corrects only one eye for near vision, while leaving the other eye for distance vision. Not everyone can tolerate having one eye blurry all the time. The success rate is enhanced by keeping the dominant eye the distance eye, and by minimizing the power difference between the two eyes. There have been many methods described for determining the dominant eye, and some of them don't work very well. Try first asking the patient which eye is dominant, Many patients already know what you are talking about and can give you the information. My personal experience has been that the vast majority of right handed people are also right eye dominant. My experience has also been that many left handed people are also right eye dominant. There are some people who seems not to have a dominant eye. If the patient is not aware of eye dominance, there are two methods that may work to determine dominance: The camera method: Keep an old camera handy and have the patient take a picture. Whichever eye is used to look through the viewfinder is the dominant eye. Look through the hole method: The patient extends both arms and holds the hands together so that a hole is formed through which the patient views a distant object. You cover one eye at a time and ask if the object can be seen. Whichever eye it is that can see the object is the dominant eye. Keep in mind that most people are right eye dominant, including almost everyone who is right handed. But, this is not always the case. That's why we check. When adjusting the contact lens power for monovision, the distance eye is given as much plus power (or as little minus power) as the patient will tolerate before complaining about blurry distance vision. This narrows the power difference between the two eyes and improves the intermediate and near vision. The near eye is given the minimum additional plus power to do the job. Keep in mind that, because of the vertex distance change, less plus power will be needed than what is given in the glasses bifocal correction. In other words, a +0.75 add with contact lenses is equivalent to a +1.00 add power in a glasses bifocal. When in doubt, give less power and have the patient try it for a few days.
Examples:
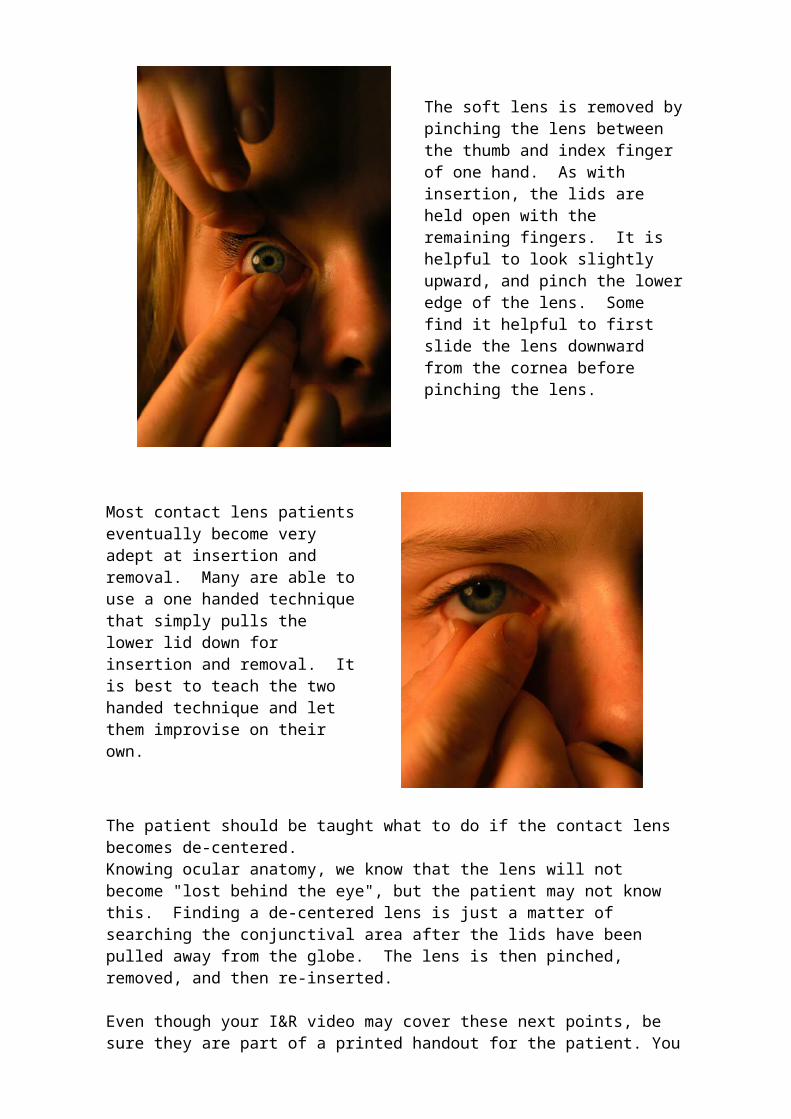
A 45 year old right eye dominant presbyope with a distance contact lens correction of -3.00 OD and -3.00 OS might end up with a monovision contact lens correction of: OD -2.75OS -2.25 Our patient tolerates a .25 reduction in the minus correction for the right eye, which focuses at distance. He can read well enough with a +0.75 D "add" for his left eye, which is the reading eye. A 60 year old right eye dominant presbyope with a distance contact lens correction of +1.50 OD and +1.50 OS might end up with a monovision contact lens correction of: OD +2.00OS +3.25 This hyperopes can tolerate a .5 D increase in the correction for the right eye, which is the distance eye. He can read well enough with a +1.75 D "add" for his left eye, which is the reading eye. From the above you might surmise that the 45 year old will have the greater chance of success because there is less power difference between the two eyes. If your patient does not tolerate monovision, bifocal contact lenses may be considered.
Bifocal soft lenses Bifocal contact lenses offer the possibility of success (compromised) for some of your contact lens patients who do not want to wear glasses for anything. The downside for the fitter is increased "chair time". The downside for the patient is increased expense. The are several design types of bifocal contact lenses. The simultaneous view bifocal design uses concentric circles of different powers that project focused light from two different distances simultaneously on the retina. The aspheric bifocal design is a type of progressive power design. The translating or alternating bifocal design is similar to the bifocal in a pair of glasses. The optics of these designs are complex and are beyond the scope of this module. They are mentioned in order to familiarize you with the vocabulary. The fitting techniques and characteristics of bifocal contact lenses are very specific to the brand. Proper alignment on the cornea is usually critical, and pupil size plays a role. Many practitioners prefer to begin with a "modified monovision", meaning one eye is fit with a conventional contact lens and the other eye is fit with a bifocal contact lens