Embed Size (px)
Citation preview

3001361 05.05 Installation & Operating Manual
USA
CAN
GSV 009-016 Grease Fan
EXHAUSTO Inc.1200 Northmeadow Pkwy.Suite 180Roswell, GA 30076
P: 770.587.3238F: 770.587.4731T: [email protected]
Job Name:
Installer:
Installation Date:
Product Information
Mechanical Installation
Electrical Installation
Start Up and Configuration
Maintenance and Troubleshooting
........................ Chapter 1 + 2
......................... Chapter 3
............................. Chapter 4
.................. Chapter 5
...... Chapter 6
CM
INTERTEK
LISTEDC US

2
3001361 05.05
1. ProductInformation 1.1 Function ...............................................................................................4 1.2 Components .........................................................................................5 1.3 Shipping ...............................................................................................5 1.4 Warranty ...............................................................................................52. Specifications 2.1 Dimensions & Capacities ......................................................................6
3. MechanicalInstallation 3.1 Positioning ............................................................................................7 3.2 Installation on Steel Duct .....................................................................7 3.3 Installation on Roof Curb ......................................................................8 3.4 Installation on Side Wall .......................................................................8 3.5 High Temperature Applications ............................................................8
4. ElectricalInstallation 4.1 Electrical Requirements .......................................................................9 4.2 Wiring Diagram ...................................................................................9
5. Start-up&Configuration 5.1 System Testing ...................................................................................10 5.2 Testing Pizza Oven Operation ............................................................10 5.3 Adjusting Fan Speed ..........................................................................10 5.4 Operation of Pizza Ovens .................................................................. 11 6. Maintenance&Troubleshooting 6.1 Care and Cleaning .............................................................................12 6.2 Chimney Cleaning Intervals ...............................................................12 6.3 Creosote Formation and Need for Removal ......................................12 6.4 Inspection Schedule ...........................................................................12 6.5 Chimney Fires and What To Do About Them .....................................13 6.6 Spare Parts Ordering .........................................................................14 6.7 Troubleshooting ..................................................................................15

3
3001361 05.05
SymbolLegend:
The following terms are used throughout this manual to bring attention to the presence of potential hazards or to important information concerning the product.
Danger: Indicates an imminently hazardous situation which, if not avoided, will result in death, serious injury or substantial property damage.
1. Use this unit in the manner intended by the manufacturer. If you have questions, contact the manufacturer at the address or telephone number listed on the front of the manual.2. Before servicing or cleaning the unit, switch off at service panel and lock service panel to prevent power from being switched on accidentally.3. Installationworkandelectricalwiringmustbedonebyaqualifiedperson(s) in accordance with applicable codes and standards.4. Sufficientairisneededforpropercombustionandexhaustingofgasesthroughtheflue(chimney)ofthefuelburningequipmenttoprevent backdrafting. Follow the cooking equipment manufacturer’s
Caution: Indicates an imminently hazardous situation which, if not avoided, may result in personal injury or property damage.
guidelines and safety standards such as those published by the National Fire Protection Association (NFPA), and the American Society for Heating, Refrigeration and Air Conditioning Engineers (ASHRAE) and the local code authorities.5. This unit must be grounded.
TOREDUCETHERISKOFFIRE,ELECTRICALSHOCKORINJURYTOPERSONS,OBSERVETHEFOLLOWING:
1. Immediately close all dampers and/or air entrance openings to the cooking appliance. This includes doors.2. Alert your patrons to the possible danger.3. Inspectyourcookingapplianceandchimneysurroundingsforpossiblefire.Ifindoubt,alertyourfiredepartment.4. Do not continue to use your appliance until it and your chimney have been throroughly inspected. Overheating can cause metal parts toexpand,buckleandcrack.Ifyouarenotcertain,haveacertifiedchimneysweepdisassembleallpartssotheycanbe inspectedandcleaned.5. Donotusesaltorwateronthefireinthecookingappliance.Saltiscorrosiveandwaterwillcauseadangeroussteamexplosion.Youmightbeabletocontrolthefirebyusingashes,sandorbakingsoda,sincebakingsodaisaningredientusedfordrychemical fireextinguishers. 6. Afterachimneyfire,whenitissafetodoso,checkinternallocationssuchasanatticandundertheroofandkeepwatchingfortwoorthreehours.Theremaybedelayedsmolderingandsubsequentignition,evenifthefireinsidethechimneyhasbeencontrolled.
TOREDUCETHERISKOFACHIMNEYFIRE:1. Keep chimney and grease fan clean.2. Always turn ON fan when using the cooking appliance.3. Do not leave cooking appliance unattended when in use.
CAUTION1.Pleasereadspecificationlabelonproductforfurtherinformationandrequirements.
TOREDUCETHERISKOFINJURYTOPERSONSINTHEEVENTOFACHIMNEYFIRE,OBSERVETHEFOLLOWING:
3/16

4
3001361 05.05
1.ProductInformation
1.1FunctionUse EXHAUSTO Model GSV Grease Fan is designed to provide a large exhaust volume at a high discharge velocity. It is intended for use as a part of a restaurant exhaust system for solid fuel cooking appliances and grease applications according to NFPA96. The use of the EXHAUSTO Grease Fan is not restricted to any type of chimney or grease duct. However, always follow the solid fuel appliance manufacturer’s instructions regarding the venting. The GSV is suitable for use with natural gas, LP-gas or solid fuel. The fan is designed to create a mechanical draft in chimney and grease duct systems. It can also be used to increasethecapacityorefficiencyofsuchasystem.
Construction The housing is made in heavy cast aluminum and can be opened for easy cleaning. The axial vane is made of stainless steel and is completely in balance. The motor is a direct-drive, variable speed, class H insulated, high temperature motor. It has permanently lubricated and sealed ball bearings and is maintenance free.
CodeCompliance Installation must conform to the requirements of the authority having jurisdiction. Where required by the authority having jurisdiction, the installation must also conform to the NFPA54, NFPA96 or NFPA211. All electrical wiring must be in accordance with the requirements of authority having jurisdiction or, in absence of such requirements, with the National Electrical Code, NFPA70.
Listings EXHAUSTO Model GSV is tested and listed to UL Standard 705 for Power Ventilators and UL Standard 762 for Power Ventilators for Restaurant Exhaust Ventilators. The model is also tested and listed to ULC-S645-93, Standard for Power Roof Ventilators for Commercial and Institutional Kitchen Exhaust Systems.
1.2Components
The GSV Grease Fan consists of the following components:
a. Top section f. Locking hinge b. Bottom section g. Bird screen c. Motor h. Carrying handle d. Axial vane i. Wiring conduit e. Inlet for impeller
Max.575°F(300°C)
Fig. 1

5
3001361 05.05
5/16
1.3ShippingTransport The fan is shipped in a corrugated cardboard box. If a transport securing device is attached to the bottom of the fan to hold the motor and impeller in place, do not remove it when unpacking the fan.
Donotremovethetransportsecuringdeviceuntilthefanisbeinginstalledontheductortheroofcurb.Themotorshaftcouldbedamaged.
Standard Fanwithflexibleconduitterminating2”x4”or4”x4”weathertightjunctionbox. PackingList If other components are shipped, these will appear on the shipment packing list.
NOTE: Allsinglephasefansareshippedwithacapacitorandjunctionboxconnectedviaconduit.Thecapacitoris locatedINSIDEthejunctionbox.Pleasedonotdiscard.
1.4Warranty
EXHAUSTO products are warranted for a period of two (2) years following the date of invoice. Replacement or repair will be at EXHAUSTO’s discretion, provided factory inspection shows a defect in material or workmanship.
CompletewarrantyconditionsareavailablefromEXHAUSTO.
Adequatefreshairmustbeprovidedforcombustion;otherwise,improperoperationandinadequateventingofdeadlyfluegasesmayresult.
Ifyouareinstallingthefanonanexistingchimneysystemorgreaseduct,youmustcleanthechimneyorductpriortoinstallation.
Alwaysuseacertifiedchimneysweep,certifiedbytheChimneySafetyInstituteofAmerica(CSIA)tocleanthechimney,ductandgreasefan.
!

6
3001361 05.05
2.Specifications2.1Dimensions&Capacities Model GSV009 GSV012 GSV014 GSV016Discharge VerticalFan Type Axial VaneMax. Discharge Velocity FPM 2,351 2,592 2,593 2,169Actual Discharge Velocity FPM 5.9 x CFM 2.9 x CFM 1.9 x CFM 1.2 x CFMVoltage VAC 1 x 120RPM 1600Amps A 0.5 1.4 2.9 5.8Power kW 0.025 0.10 0.16 0.35Weight lbs 28 46 60 86
kgs 12 18 26 35Dimensions A in 9.85 11.03 13.20 14.97
mm 250 280 335 380B x B in 12.21 15.37 19.11 22.85
mm 310 390 485 580C x C in 9.46 12.22 15.17 18.32
mm 240 310 385 465D Ø in 8.63 10.72 13.04 14.26
mm 219 272 331 362E in 2.76 3.15 3.94 4.53
mm 70 80 100 115

7
3001361 05.05
3.MechanicalInstallation3.1Positioning Considered a mechanical draft system, there are much different code requirements than for a gravity venting system or grease ducts used with gas or solid fuel applications. As a general rule, the mechancal draft system must be installed min. 3 feet away from any forced air inlet located within 10 feet, and min. 4 feet away from any door or window. For complete information, consult EXHAUSTO or your local building codes.
3.2InstallationonSteelDuct
• Insert the steel chimney adapter into the chimney where the long collar engagement ensures safe anchoring (see Fig. 2). If necessary, the adapter can be secured by means of long self-tapping stainlesssteelscrewsintothesideofcollarthroughthechimneywall.Donotobstructtheflow.
• Turn the fan upside-down and lay a bead of hi-temp silicon on the base close to the outer edge (not shown).
• Remove the transport securing device (if present) holding the motor shaft and impeller in place.
• Place the fan on the adapter with the fan inlet centered over the chimney outlet.
• Open the fan and secure the fan onto the adapter, through the pre-drilled holes in the bottom, with lag bolts or self-tapping sheet metal screws, one at each corner.
• Seal around the fan base to make sure it is watertight and no water can slip in between the fan and the adapter. Do not block the 4 drain holes.
Fig. 2
SteelChimneyAdapter

8
3001361 05.05
3.3InstallationonRoofCurb If the fan is installed on a roof curb, the curb will do the same as the adapter. Follow the instructions under 3.2.
3.4InstallationonSideWall
• Makesuretheventterminatesflushwiththewall.Insertthesteelchimneyadapterandsecureit safelytothewall.Sealaroundtheedgesoftheadapterflange.
• Mark the locations of the wall anchors and predrill holes for them.
• Turn the fan upside-down and lay a bead of hi-temp silicone on the base close to the outer edge (not shown).
• Open the fan and secure the fan onto the adapter with wall anchors, through the pre drilled holes in the bottom. Make sure the conduit is located on one of the sides. Never on the upside or downside.
• Seal around the fan base to make sure it is watertight and no water can slip in between the fan and the adapter. Do not block the 4 drain holes.
3.5HighTemperatureApplications
• If the fan is used for applications that exceed its temperature rating, dilution bolts must be used.
• Install the dilution bolts in the outer holes of the fan base.
• Adjust the height of the dilution gap by adjusting the dilution bolts, so the temperature of the exhaust going through the fan does not exceed the fan’s temperature rating.
• Be aware the dilution bolts will have a negative impact on the fan’s actual capacity and a stronger fan model may be required. For more information, please refer to the installation manual a accompanying the dilution bolts.
Fig. 3

9
3001361 05.05
!
4.ElectricalInstallation4.1ElectricalRequirements Power requirements depend on the fan size. They can be found on page 4.
Danger:Turnoffelectricalpowerbeforeservicing.Contactwithliveelectriccomponentscancauseshockordeath.
Notice:Ifanyoftheoriginalwiresuppliedwiththesystemmustbereplaced,usesimilarwireofthesametemperaturerating.Otherwise,insulationmaymeltordegrade,exposingbarewire.
4.2WiringDiagram The connection diagram below shows how the fan is connected to the fan speed control and the power source (see Fig. 4). Use a 2-conductor wire of min. 14 AWG with ground.
Fig. 4
Junction Bo
xCapacitorGreen
Black
Red
White
FAN MOT OR
Refer to Fan Speed Controlwiring diagram
PE M 2M 1
L1 N Power Supply1x120V AC
M 1 PEM 2
W ire Nut
Factory W ired
Not Connected
Field W iring
Connected
Fan Speed Control
Repair Switch
supplied by contractor
To fan
To power
Blac k
Blac k
White
White
Red Green

10
3001361 05.05
5.Start-up&Configuration5.1SystemTesting
• Check the line voltage with the motor nameplate rating.
• Determine if the axial vane is running free and has not been subject to misalignment in shipping or installation.
• Turn the grease fan ON and make sure that it is operating. Adjust the fan speed control to make sure it is operating properly.
Priortousingacookingappliance,makesurethatsufficientairneededforpropercombustionandexhaustingofgasesfromoil/gas-firedappliances,likewaterheaters,furnacesandboilers,isprovided.
• With the fan ON, check that other heating appliances (furnace, water heater, etc.) are operating safely without spillage(spillageistheescapeoffluegasesfromthereliefopeningofthedrafthoodofanatmospheric appliance). On start-up, a little spillage is normal, but it must stop after a couple of minutes.
• Spillagecanbedetectedbyintroducingsmokeintotheflueproductsaheadofthedrafthoodor byobservingiftheflameofamatchgoesoutwhenitisheldattheedgeofthedrafthoodreliefopening
(See Fig. 5).
5.2TestingPizzaOvenOperation Most pizza ovens consist of a dome with a front opening that can be closed with a cast iron door. Above the opening,ahoodconnectedtotheflueassuressmokeandodorsarecollectedandremovedsafely(seeFig.6). Placeafewlogsinthebackofthedomeandsetthefanathigh/fullspeed.Lightthefire.Turnonallexhaustfans (rangehoods,etc.)andmakesurethatthereisnospillagefromthehoodintotheroom.Whenthefirehascaught on,reducethespeedofthegreasefantoapointwhereitstillremovesthefluegasessafely.Markthissettingon the fan speed control cover, as this will be the operating position/speed of the grease fan.
5.3AdjustingFanSpeed Start all heating appliances connected to the chimney fan installed. Set the fan speed control to the speed where no spillage is experienced anywhere in the system.
Fig. 5
Fig. 6
DrafthoodRelief Opening
Flue connection
Check for �spillage here

11
3001361 05.05
5.4OperationofPizzaOvens Priortostartingafire,setthefanathigh/fullspeedandstartthefirefollowingtheovenmanufacturer’sinstructions or,intheabsenceofsuchinstructions,follownormalinstructionsonburningafireinafireplaceorstove. Afterthefirecatcheson,after3-5minutes,reducethespeedofthegreasefantoalevelwhereitsafelyremoves thefluegasesandaperfectflamecanbemaintained. Whenaddingwoodtothefire,itmaybenecessarytoincreasethefanspeedforashortperiodoftime.
Donotover-firethepizzaoven.Smalldepositsofcreosotecouldbeignitedandstartasmallchimneyfirewhichcouldcausethechimneyfluetoreachahazardoustemperature.!

12
3001361 05.05
6.Maintenance&Troubleshooting 6.1CareandCleaning The EXHAUSTO Grease Fan is designed for prolonged use. The fan should be inspected at least once a year when the chimney is inspected. Deposits should be removed from the fan blades or the impeller and the bottom of the motor housing.
The top of the fan is hinged and can be opened in order to ease the cleaning.
Donotopenthemotorhousingunlesspowertothegreasefanhasbeendisconnected.
6.2ChimneyCleaningIntervals The need for chimney and chimney fan maintenance depends on how the cooking appliance is operated. Pizza ovens and BBQ’s need a great deal of chimney and chimney fan maintenance. These appliances produce densesmokeconsistingofcreosoteandgreaseifitisloadedforlongdurationsorovernightfires.
6.3CreosoteFormationandNeedforRemoval
When wood is burned slowly, it produces tar and other organic vapors, which combine with expelled moisture to formcreosote.Thecreosotevaporscondenseintherelativelycoolchimneyflueofaslow-burningfire.Asaresult, creosoteresidueaccumulatesonthefluelining.Whenignited,thiscreosotemakesanextremelyhotfire. Creosote causes many problems. Some are visible, while others are not. It can make trouble if: 1.)Itrunsdownoutsidethepipetodamagethefinishonthemetal. 2.)Itdripsoutofjoints,damagingfloorsorfurnishings. 3.) It plugs up the chimney causing poor combustion, smoking, soiling walls and indoor pollution. 4.)Itcatchesfireinthechimneytocausepossiblechimneydamageanddamagetothebuilding.
6.4InspectionSchedule
Thechimneyandthechimneyfanshouldbeinspectedatleastevery2weeksforthefirstcoupleofmonths to determine at what rate the creosote builds up. If creosote has accumulated, it should be removed to reduce the riskofachimneyfire.
Evaluationofchimneysystemsinstalledincommercialrestaurantsservingawood-firedcookingapplianceindicatesabuild-upof1/8-1/4”ofcreosoteforevery4cordsofwoodburned.Thiscanbeusedasaguideline,buteachapplicationisdifferent.
Asaguideline,achimneyandgreasefanservingacommercialwood-firedcookingapplianceshouldbecleanedat least once a month, unless the use has proven this to be more than adequate. Mostchimneymanufacturersrequire,ifyouseedepositsmorethan1/16”thick,cleanallchimneyparts mechanically. This means using brushes, scraping or equivalent.
Don’tstartachimneyfireasameanstocleanthechimney!
Fig. 7
!

13
3001361 05.05
Withonlyslightdeposits,tryahotfiretoseeiftheblackdepositsfalldownthechimney.Youcanhearthesound of falling deposits when the temperature conditions are right. Afterwards, reinspect the chimney and the inside of the oven for deposits. Do not use chemical cleaners, they may corrode the inside of the chimney. They may or may not prevent or removethecreosote.Whentheyareusedtogetherwithahotfire,itisprobablythefirethatisdoingthework. Depending on the rate of build-up, as you learn what is going on in the chimney, you can adjust your cleaning schedule.
Ifyouhavedoubtsaboutyourabilitytocleanthechimney,orifthedepositsareveryheavyand hardtoremove,donottrytoburnthemoff.Callaprofessional,certifiedchimneysweep.The NationalChimneySweepGuildcanreferyoutothenearestcertifiedchimneysweep.The Guild’sphonenumberis(301)963-5600.
It does not matter how careful you are loading fuel, selecting wood or controlling draft, you should always observe the above precautions with any solid-fuel burning cooking appliance.
6.5ChimneyFiresandWhattoDoAboutThem Nochimneyorchimneyfanisintendedordesignedforuseasacombustionorfirechamber.Itisveryeasyto overfireawoodburningovenwithkindling,scrap,lumber,brushoranyfastburningfuel.Thiscanproduceflames and high temperatures all the way up the chimney and may cause chimney fan damage. Thecreosotemaybeburninginsidethechimney.Ifyoucanseeflamescomingoutofthetop,youareeitherover firingorthereisachimneyfire. Ifthefireinyourcookingappliance/chimneyhasgottenoutofcontrol,orifyoususpectachimneyfireforany reason, follow these steps: 1.) Immediately close all dampers and/or air entrance openings to the cooking appliance. This includes doors. 2.) Alert your patrons to the possible dangers. 3.)Inspectyourcookingapplianceandchimneysurroundingsforpossiblefire.Ifindoubt,alertyour firedepartment. 4.) Do not continue to use your cooking appliance until it and your grease fan have been thoroughly inspected. Overheating can cause metal parts to expand, buckle and crack. If you are not certain, haveacertifiedchimneyprofessionaldisassembleallpartssotheycanbeinspectedandreplaced,if necessary.
5.) Donotusesaltorwateronthefireinthecookingappliance.Saltiscorrosiveandwaterwillcausea dangeroussteamexplosion.Youmightbeabletocontrolthefirebyusingashes,sandor bakingsoda,sincebakingsodaisaningredientusedfordrychemicalfireextinguishers. 6.) Afterachimneyfire,whenitissafetodoso,checkinternallocationssuchasanatticandunderthe roof and keep watching for two or three hours. There may be delayed smoldering and subsequent ignition,evenifthefireinsidethechimneyhasbeencontrolled.
!

14
3001361 05.05
6.6SparePartsOrdering When ordering spare parts please have the model number and part position number available.
17 Screw - SS (4)21 Motor housing insulation22 Screw - SS (2)23 Washer - SS 24 Screw - SS29 Screw - SS31 Rivet41 Fiber Mat60 3/8”Conduit61 3/8”Connector62 Junction box with blank cover63 Wire nuts64 Capacitor (1x120V fans only)65 Wiring diagram (mounted on inside cover)
01 Motor02 Motor mounting plate03 Screw - SS (2)04 Washer - SS (2)05 Housing (top)06 Housing (base)07 Insert 08 Bird screen 09 Top plate10 Axial vane12 Locking hinge (2)13 Cooling vane14 Screw - SS16 Washer - SS
15
3001361 05.05
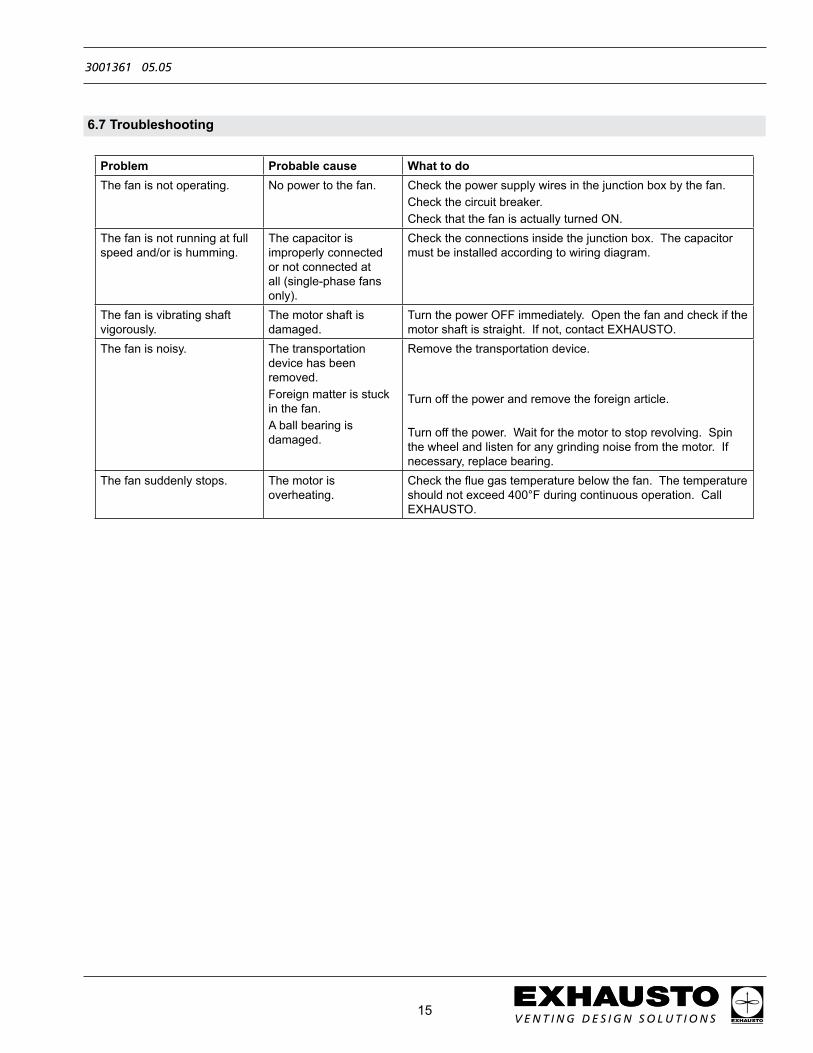
Problem Probablecause WhattodoThe fan is not operating. No power to the fan. Check the power supply wires in the junction box by the fan.
Check the circuit breaker.Check that the fan is actually turned ON.
The fan is not running at full speed and/or is humming.
The capacitor is improperly connected or not connected at all (single-phase fans only).
Check the connections inside the junction box. The capacitor must be installed according to wiring diagram.
The fan is vibrating shaft vigorously.
The motor shaft is damaged.
Turn the power OFF immediately. Open the fan and check if the motor shaft is straight. If not, contact EXHAUSTO.
The fan is noisy. The transportation device has been removed. Foreign matter is stuck in the fan.A ball bearing is damaged.
Remove the transportation device.
Turn off the power and remove the foreign article.
Turn off the power. Wait for the motor to stop revolving. Spin the wheel and listen for any grinding noise from the motor. If necessary, replace bearing.
The fan suddenly stops. The motor is overheating.
Checkthefluegastemperaturebelowthefan.Thetemperatureshould not exceed 400°F during continuous operation. Call EXHAUSTO.
6.7Troubleshooting
EXHAUSTO Inc.1200 Northmeadow Pkwy.Suite 180Roswell, GA 30076
P: 770.587.3238F: 770.587.4731T: [email protected]
3001361 05.05
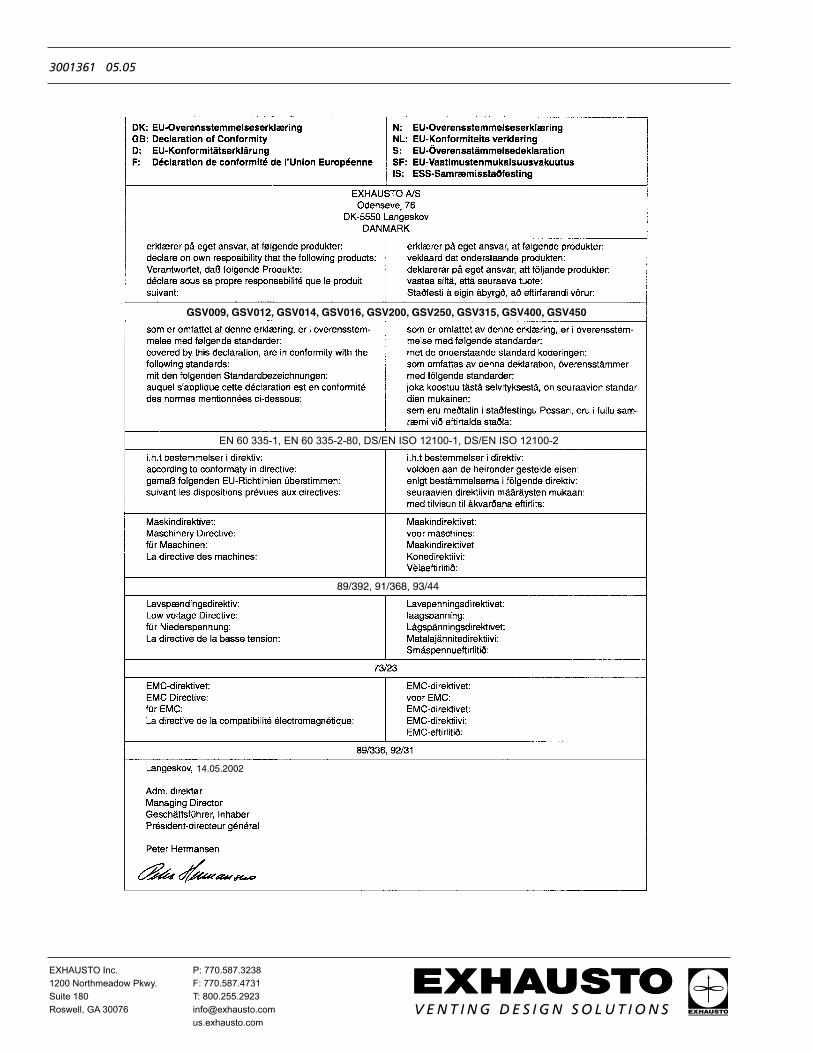
EN 60 335-1, EN 60 335-2-80, DS/EN ISO 12100-1, DS/EN ISO 12100-2