Embed Size (px)
Citation preview

Growing Up In Las Vegas
Activity Book
By: Jo Anne Kock & Vicki Agao Illustrated by: Lisa Pattieshaw
Celebrating Las Vegas, Nevada Centennial 1905 - 2005
COOPERATIVE EXTENSION
Bringing the University to You
UNIVERSITY OF NEVADA •Reno
CM-05-04

Special thanks to: Mark P. Hall-Patton Aviation Museum Administrator Howard W. Cannon Aviation Museum Department of Parks & Community Services Suzanne Turgeon Museum Registrar Howard W. Cannon Aviation Museum Department of Parks & Community Services Graphics by: Vicki Agao Lilian Blanchard Barbara Toston M. L. Robinson Mirtha Castellano

GROWING UP IN LAS VEGAS
Celebrating Las Vegas Centennial
1905-2005
ACTIVITY BOOK
TABLE OF CONTENTS Section 1 Introduction Section 2 Preparing for the Activities (for workshop presenters) Section 3 Activity Plan (for workshop presenters) Section 4 Activity Descriptions and Materials Section 5 Resource, Evaluation and Certificate

Introduction
Section 1

GROWING UP IN LAS VEGAS
ACTIVITY BOOK
Introduction
What an exciting time for children to learn some Las Vegas history. Children can begin to understand what it was like to live in Las Vegas in 1905 by having someone read Growing Up in Las Vegas to them or by reading the book themselves. All of the 2005 Las Vegas’ centennial celebrations will become more meaningful. The activi-ties in this manuscript will help them learn some new vocabulary, new ways to extend the infor-mation in the book, as well as provide many hours of educational entertainment. Growing Up in Las Vegas, and the activity book may be used as an in-service training curricu-lum for child care providers. The activity manual provides information and instructions for conducting a three hour, three credit workshop for child care providers wanting to offer an edu-cational history curriculum. The workshop focus is on working with preschoolers. This pro-gram has been designed primarily with child care providers in mind, though others may benefit from the material (e.g. parents, foster parents, teachers, and human service professionals). The overall goals of this history curriculum are to increase participant’s:
• knowledge of Las Vegas History • knowledge of how to share history with children through literacy • ability to identify appropriate literary history skills in young children • use of developmentally appropriate literary history activities in their child care programs.
This program is designed for three hours, though shorter formats are possible. Three hours is preferable in order to allow opportunity for discussion and reaction to the material. A list of materials needed for the workshop is provided in this manual along with a pre-workshop check-list. Most of the activities have instructions for working with both young (2 to 4 year old) and pre-school (4 to 6 year old) children. Evaluation Systematic feedback can improve the quality of programs. At the end of this manual is an evaluation tool that can be used to assess the knowledge gained from this program. It is sug-gested that you make copies of the evaluation, administer it after the program, then use the in-formation as you wish.
1-1

Preparing for the Activities
Section 2

Preparing for the Activities (to be used by workshop presenters when presenting a workshop)
A lot of effort goes into making a program successful. This guide may be used to help you with planning and organizing your Growing Up in Las Vegas workshops. Scheduling the Program Consider when to offer the workshop. Finding the best time may be challenging. Will you schedule workshops in the morning, afternoon, or evening? Which of these times is best and most convenient for providers to attend? How may the time you select affect how ready the audience will be to learn? What can you do to increase their readiness to learn? When schedul-ing, remember that each workshop lasts about three hours. What time of day will you offer your workshop? Publicizing the Program Publicity takes time. Before you begin, determine the very best way to communicate with the audience you want to reach. Brainstorm with your staff and with some providers from your target audience to get ideas on how to get the word out. Use your imagination. Start advertis-ing as soon as you can and get your message repeated as often as you can. Remember that great programs don’t just market themselves. Great programs result from set-ting up a sense of anticipation and excitement among participants before they begin. When cre-ating your advertising message, include words that generate audience interest, excitement and anticipation. Publicize the program by using flyers, posters and other promotional techniques. Site-based newsletters, or direct mailers to the target audience also can be an effective way to recruit par-ticipants. What types of publicity methods will you use?
2-1

Some ideas for flyers and posters: • Use large bold type at the top of the page, bright paper and eye-catching graphics to call
attention to the name of the program. • Give the time, date and location of the program including the street address and name of the
building, if appropriate. Consider including a map. • List a brief workshop agenda or topics that will be covered. People want to know what they
are getting into. • Give the name of the sponsoring organization. Also give the name and phone number of a
person to contact for more information. Registration You may want to encourage providers to sign up in advance for the program. By having providers register in advance, you will know better how to set up the rooms, the amount of refreshments to provide and the quantity of workshop materials to have on hand. Based on our experiences, the suggested maximum number of participants is about 35. Registering too many providers may negatively impact the quality of the Growing Up in Las Vegas experience. Have a clear plan on limiting participation to your desired number. Will you do this by stipulating that registration will occur on a “first-come, first-served” basis? Will you have another workshop series planned to accommodate the extra providers? Will you keep a waiting list? Whatever your approach, make sure you have a plan in mind. What is the ideal number of providers for your workshop location? Participant Registration Confirmation Just prior to beginning the workshop series, you may want to use a postcard, flyer or telephone call to confirm with the providers that they are registered to take part in the program. Confirm meeting times and dates. Ask providers to notify you if they become unable to participate. What method will you use to confirm attendance?
Workshop Site Logistics Whatever site you select for the program, make sure it can accommodate the anticipated number of providers. Also make sure that it is acceptable to persons with disabilities. Hold your meeting in a place that is easily accessible by public and private transportation.
2-2

Where will the workshop be held? ____________________________________________________ Room Arrangement Growing Up in Las Vegas workshop calls for providers to work in small groups and to interact with the workshop materials. Additional space is needed to accommodate this technique. As you think about the arrangements for the room, consider how many providers will be attending. Will the arrangement be conducive to accomplishing the workshop goals? Are there enough tables and chairs for everyone? Does each provider seat have a clear line of sight to the instructor and to any visuals that will be used? How will you arrange the room?
How many tables will you need? How many chairs will you need? Refreshments Program participants enjoy refreshments. Food and beverages can be a real selling point in getting them to come to your program. Refreshments will vary with the time of day, the time of year and the audience. The Growing Up in Las Vegas workshop suggests a pear snack to be served during the workshop. Supplies you will need for this snack are listed in the “Materials Presenter Will Need for the Workshop” Activity 12 portion of this section.
2-3

Activity Plan
Section 3

Pre-workshop Checklist (to be used by workshop presenter when presenting a workshop)
Use the checklist below to help make sure that all necessary details for conducting your Growing Up in Las Vegas workshop(s) are complete One month before the workshop Schedule the Growing Up in Las Vegas workshop. Confirm the availability and reservation of the workshop site. Begin Growing Up in Las Vegas publicity Have the sign-up registration sheet ready. Begin preparing the “Workshop Props and Demonstration Materials”. Begin preparing the activities for small groups to use during the workshop. (See details on “Activities for Small Groups to Use During the Workshop” page later in this section.) One week before the workshop Confirm with providers their participation in the Growing Up Las Vegas workshop. Purchase workshop refreshments. Begin preparing the materials listed in the “Materials Presenter Will Need for the Workshop” page. Review and practice your presentation. Make sure all workshop materials and supplies are ready. Specific materials for featured demonstration and activities conducted in the workshop Name tags Evaluation forms Print certificates if you will be handing them out at the end of the workshop
3-1

At the workshop Set out sign- in sheets and pens. Set out name tags and markers at a table near the door. Set out the props on the presenter’s table. Place the activities box in a convenient place with the activities in the order they will be presented. Set up the “Vegas Snack”, if desired. Review the script one more time. Greet your participants. Have a great workshop!
3-2

Materials Presenter Will Need for the Workshop (to be used by workshop presenters when presenting a workshop)
Binder with script, pre-workshop checklist, and materials list Copies of workshop handouts for participants: • Certificate original to be completed after class (optional) • Evaluations Sign- in sheets and pens Name tags Markers for name tags Pencils for pre– and post-tests Vegas Snack: • Fresh pears • Cinnamon • Nutmeg • Juice • Salt shaker • Paring knife • Napkins • Paper plates • Paper cups Activity # 1: Meet Ellie and Learn Some 1905 Las Vegas History Materials needed: Activity for Younger Children: Copies of Ellie and her clothes and hats, scissors, crayons, card table or similar table, sheet or blanket, small brush or broom to sweep pretend dust. Activity for Older Children: Copies of Ellie and her clothes, crayons, scissors, heavy paper, card stock, Growing Up in Las Vegas book, large sheet or blanket, card table or similar table, fabric material for a dusting cloth, small brush or broom, available small domestic toys.
3-3

Activity #2: Valentines Day 1905 Materials needed: Cut out valentine hearts of different sizes or have a sheet of paper with different sizes of valentine hearts for the child to cut out, doilies, ribbon, lace, markers, glue, paper plates, yarn. Activity #3: Pear Tree Planting Materials needed: Seeds, dirt, paper cup. Activity #4: Creative Clothes Pins Materials needed: Peg clothes pins, crayons, scissors, fabric, yarn, lace, pipe cleaners, marking pens, glue, glitter, colored paper, small diameter rope for displaying finished product. Activity #5: Las Vegas Train Ride Materials needed: Chairs, Props: such as pictures of (or the real items) a bell, whistle, (paper towel tube) and items that might be carried on trains, empty boxes (cargo), blocks (coal), stuffed animals (for real animals), clothes, masking tape, large cardboard boxes, crayons, markers. Activity #6: Swimming Materials needed: Mats or pads for the floor exercises. Activity #7: Lizards and Baskets Materials needed: Plastic weaving board with large holes cut into 4 inch squares, earth colored shoe strings, copies of the lizard to color and do dot-to-dot, crayons, scissors, large container, plastic lizard (optional). Activity #8: Fourth of July 1905 Materials needed: Papers printed with l905 flag, craft sticks, glue sticks, scissors, crayons. Activity #9: Ellie’s Birthday Party Materials needed: Large laminated birthday cake, and individual birthday candles, velcro, blind- fold (scarf, piece of material). Activity #10: Sewing Clothes in 1905 Materials needed: Card stock paper, hole punch, shoe strings. Optional: plastic weaving board.
3-4
Activity #11: School Days Materials needed: Small white boards with the proper erasable markers, or slate (blackboards) with chalk, erasers. Activity #12: Pear Snack Materials needed: One half cup sugar, 1/4 teaspoon cinnamon, ¼ teaspoon nutmeg, shaker, ripe pears (or canned pears), sharp paring knife, paper plate, napkins, apple juice, paper cups. Flour, salt, cream of tartar, vegetable oil, food coloring, water, measuring cups and spoons, pan or electric skillet, waxed paper, child size rolling pin, plastic bag or airtight container, pot holders. Gelatin (optional), small pie tin (optional). Activity#13: I’m Not Afraid of the Dark Materials needed: Scissors, copy of lantern, candle, and crayons Activity#14: Christmas In 1905 Materials needed: White paper with snowflake printed on it, glue sticks, yarn, single-hole punch; Optional: glitter, beads, scissors, other decorations.
3-5

Assemble kits that will be used by participants in the small groups by:
1. Reading the list of activities listed previously 2. Locating directions for each activity in the “Activity Packet” section of this manual (Section 4) 3. Assembling the materials needed for each activity and placing a copy of activities and materials in a large manila envelope or large plastic bag 4. Labeling the outside of the envelope with the name of each activity
3-6

Activity Descriptions
and Materials
Section 4

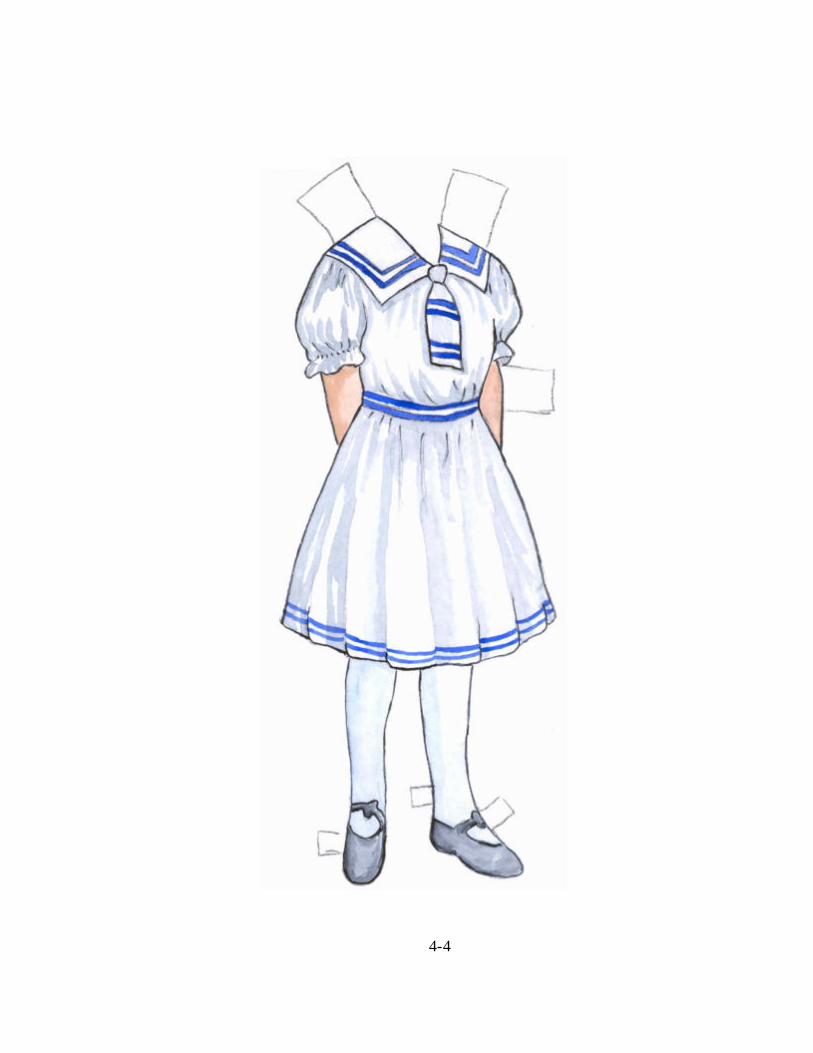
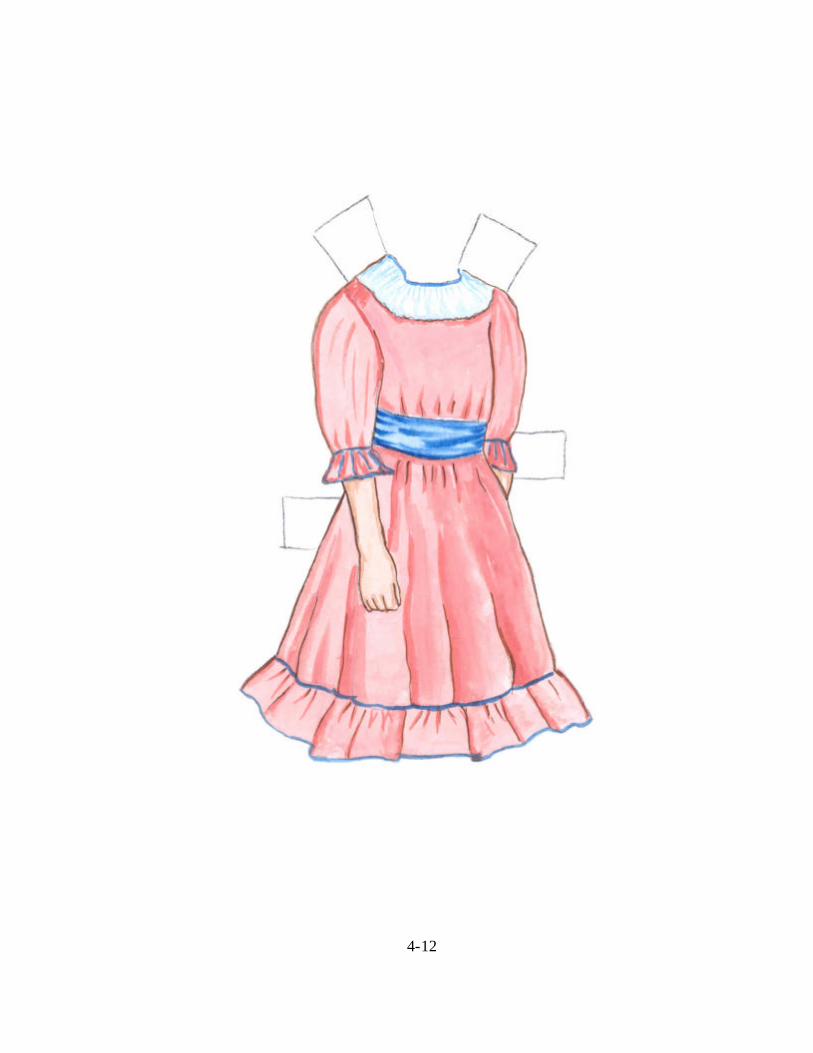
Activity Descriptions and Materials Activity # 1: Meet Ellie and Learn Some 1905 Las Vegas History The site of Las Vegas (“The Meadows” in Spanish) was originally a watering place for travelers on their way to southern California. It was first settled by Mormons in 1855. The Mormons abandoned their settlement two years later and the U.S. Army established Fort Baker here in 1864. In 1867, Las Vegas was detached from the Arizona Territory and joined with Nevada. Las Vegas was established by the arrival of the railroad in 1905. With the arrival of the railroad and the auction of land parcels owned by the railroad, Las Vegas was off and running as a typical frontier town. It was incorporated in 1911 when the first charter was adopted on March 16. Growing Up in Las Vegas is a fictional story about Ellie and her family living in Las Vegas in 1905. The story is based on historical facts and photos. The activity book contains Las Vegas history and activities that supplement the book, Growing Up in Las Vegas. The activity book is a base for interactive dialogue and hands-on activities between a caregiver and a child. Ellie and her brother Billy were born in Salt Lake City. They traveled and settled in what was to be Las Vegas when Ellie was one year old and Billy was three. They lived in a dusty tenthouse until their new home was built. Ellie wore dresses and bonnets made by her mother. Her dresses were usually pinafores. Activities for 2 to 4 year olds.
1. Copy the pages with Ellie and her clothes on a black and white printer. Have the children color Ellie and the clothes. If you want to take time to cut out the drawing of Ellie and her clothes you could have the children put the dresses and hats on Ellie. The younger children may not have developed the fine motor skills to do that. Don’t push the children if they are not ready to play “paper dolls.” Just let them enjoy coloring!
2. Place a large sheet or blanket over a card table to make a tenthouse. Have the
children crawl in and out of the tenthouse. Have them “sweep” dust out of the house. Crawling and sweeping will help develop large motor skills.
Materials needed: Copies of Ellie and her clothes and hats, scissors, crayons, card table or similar table, sheet or blanket, small brush or broom to sweep pretend dust.
4-1

Activities for 4 to 6 year olds.
1. Copy pages with Ellie and her clothes on either a black and white printer or a color copier. Have children cut out the paper doll and her clothes. Help them cut out a copy of Ellie on heavier paper or card stock. If copies are black and white, have children color them. Have children dress Ellie. Have them try to match the hat to the outfit. Hint: the clothes and matching hats are found in the Growing Up in Las Vegas book. Discuss what hat or bonnet Ellie is wearing at different times and events. Discuss what is a bathing costume.
2. Place a large sheet or blanket over a card table to make a tent house. Have the children
divide up the inside of the tent house into a kitchen, bedroom or living room. Have them place some of their “domestic” toys in the various rooms. Have them “dust” or “sweep” the inside of the tent house with a dusting cloth or a small brush or broom.
Materials needed: Copies of Ellie and her clothes, crayons, scissors, heavy paper, card stock, Growing Up in Las Vegas book, large sheet or blanket, card table or similar table, fabric material for a dusting cloth, small brush or broom, available small domestic toys. Vocabulary: New words to introduce bonnet celebrate centennial costume lumber mercantile pinafore lumber
4-2

4-3
4-4

4-5

4-6

4-7

4-8

4-9

4-10

4-11
4-12

Activity #2: Valentines Day 1905 Discuss with the children how valentines were made and not bought in l905. Explain to the children that you couldn’t buy valentines already made in a store; you had to make your own. Show a sample of a what a l905 valentine may have looked like, (a cut-out heart with lace or fabric glued on it/around it) Instructions:
1. Have children make their own valentines. You can have hearts of all sizes already cut out, or you can let the children cut out their own hearts. Let them decorate their paper hearts with lace, ribbon, doilies, and colored markers. 2. Optional: You can have children make a valentine card holder. You will need two paper plates. Cut one in half and take the half piece and glue or staple it to the other paper plate, creating a pouch/pocket. Have children decorate paper plate holder with valentine hearts, lace, fabric, doilies and markers. Punch a hole at the top and run a piece of yarn through the hole for hanging. Materials needed: Cut out valentine hearts of different sizes or a sheet of paper with different sizes of valentine hearts for the child to cut out, doilies, ribbon, lace, markers, glue, paper plates,, yarn. Vocabulary: New words to introduce. doilies valentine lace ribbon
4-13

Activity #3: Pear Tree Planting Ask the children if they have ever seen a pear tree. Show them a sample in the book. Explain to the children the process of pear growing. How the pears grow on the tree, picked when they are ripe, and brought to the market for us to purchase. Fruit trees such as apples, apricots and figs were grown in the Las Vegas Valley. Ellie’s family decided to try growing a pear tree and had great success. Instructions: Have children fill their cup with dirt half way. Have children place 3 bean seeds in their cup. Then have them add more dirt in cup and fill to top. Have the children place their cup in a sunny area of the classroom. Then let them water the plant. Have the children water plants every other day until sprouts appear, then have them take home. Materials needed: Seeds (beans), dirt, paper cups. Vocabulary: New words to introduce wooden bucket pear tree
4-14

Activity #4: Creative Clothes Pins Discuss with the children how laundry was done in 1905. Water was heated in a copper boiler on the stove or an outside fire. Soiled clothes were boiled, cooled a bit, then scrubbed with soap on a washboard. After the clothes were rinsed, they were hung on a clothes line with wooden clothes pins. Discuss watering the pear tree with water in a wooden bucket. Instructions:
1. Using peg clothes pins, not the type with a spring, show the children several different things they can do with the pins. They can make people, animals, trees, bugs, etc. Let them see how creative they can be. The younger children will probably just want to color them with crayons, but you can show them how to draw a simple face. The older children can use fabric to make clothes, pipe cleaners to make antennas, etc.. Have an area where the finished pins can be displayed and admired.
2. The older children can make white pear blossoms. Have them cut white tissue paper into four-inch squares. Place four squared on top of each other, accordion fold. Fold the accordion pleats in half; pinch the bottom closed end. Fluff the layered tissue to form a blossom. Use the pipe cleaner to fasten the blossom to a dead tree branch.
Materials needed: Peg clothes pins, crayons, scissors, fabric, yarn, lace, pipe cleaners, marking pens, glue, glitter, colored paper, small diameter rope for displaying finished product. Vocabulary: New words to introduce blossom bucket (wooden) clothes line clothes pin copper boiler washboard
4-15

Activity #5: Las Vegas Train Ride Talk about the different kinds of train cars that can be on a train, including what train car would be in the front (the engine), what train car would be at the back (caboose), and what kinds of cars might be in the middle (coal cars, box cars, passenger cars, etc.). You can show pictures from the book or other pictures of trains if you have them. Instructions: Set up chairs in rows of two, with chairs front-to-back, so that the children can sit as if they are on a train. Designate which is the front and which is the back, then let children take turns sitting in the location of different cars. After you’ve talked about the kinds of train cars in the middle, you might let the children decide what kinds of cars they want on their train. The children could pretend to be the actual cars, holding each of the different types of cargo. Let the children choose props to designate the kind of car they are riding in. Blocks could be used to represent coal cars. Empty boxes can represent cargo cars. Have the children that are the engine car (in front) have a whistle to blow (can use a paper towel tube to blow through). Use your imagination to create ideas for your train. Optional: Put masking tape on floor around the room in the form of train tracks. Have children decorate cardboard boxes (as train cars) and have them sit in them on train tracks, and pretend they are on a train. Materials needed: Chairs, Props such as: pictures of (or the real items) a bell, whistle, (paper towel tube) and items that might be carried on trains, empty boxes (cargo), blocks (coal), stuffed animals (for real animals), clothes, masking tape, large cardboard boxes, crayons, markers. Vocabulary: New words to introduce railroad Las Vegas San Pedro Los Angeles Salt Lake engine caboose
4-16

Activity #6: Swimming Las Vegas’ first public swimming pool was at Las Vegas Ranch under huge cottonwood trees that shaded the ranch headquarters. To escape the summer heat, many early Las Vegas families spent the day here swimming or sitting in the shade eating a picnic lunch. Extensive orchards at Las Vegas Ranch include trees bearing apples, pears, peaches, figs, apricots and almonds (Las Vegas, As It Began, As It Grew). Ellie and her family visited the ranch and the dammed up swimming hole several times during the summer. Ellie would swim in the swimming costume made by her mother. Instructions:
1. For the younger children, have them lie down on their tummies in a straight line. Say, “Let’s go swimming.” Lead the children in using their arms to do the Australian crawl---lifting one arm at a time, bending elbow and reaching out in front of them as far as possible. Once they have mastered the arm stroke, have them close their fingers, cupping their hands to replicate the actual swimming stroke.
2. Have the younger children lie down on their back and tell them to “Kick, Kick, Kick.”
They will need to lift their legs and point their toes. You may want to stand in front of them so they can see you and then use your arms like they are using their legs, count to five, then rest, then count six strokes, rest, etc., until they can do a total of 10 strokes.
3. The older children will enjoy doing the activities described above. Add the side
stroke to their swimming. Have the children stand. Tell them to reach up with their right arm as far as they can reach, left arm straight down at their side. Tell them to pretend they are picking a small pear with their right hand. Then bring the right hand down to their waist, and left hand up to their waist. Have them pretend transferring the pear from their right hand to their left hand. They will then “put the pear in a bucket” but bring their left hand and arm back down to their left side and bring the right arm back up on their right side as far as they can reach. Repeat. Once they master the movements, you can say with them, “Pick a pear; put it in a bucket”.
4. Both younger and older children will enjoy doing the back stroke. Have the children stand with both arms down at their sides. Turn the palms outward. Lift one arm at a time over their head; bring it back down to their side.
Materials needed: Mats or pads for the floor exercises. Vocabulary: New words to introduce ranch swimming swimming hole wagon
4-17

4-18

4-19

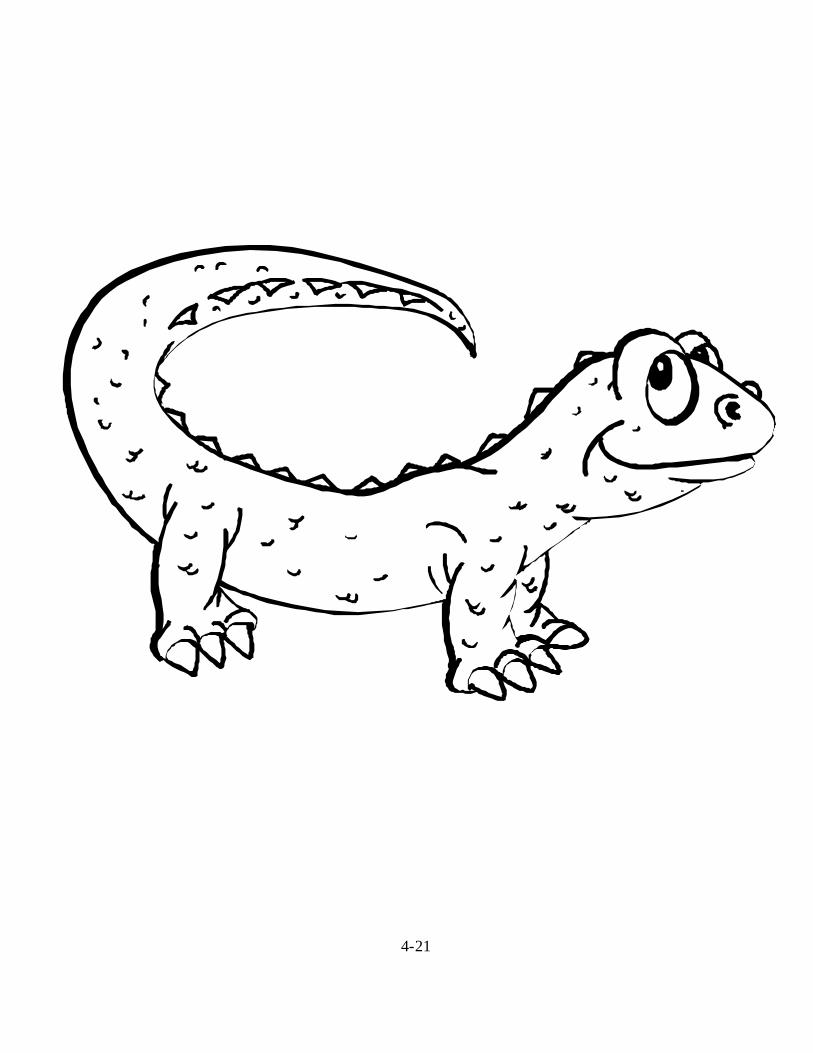
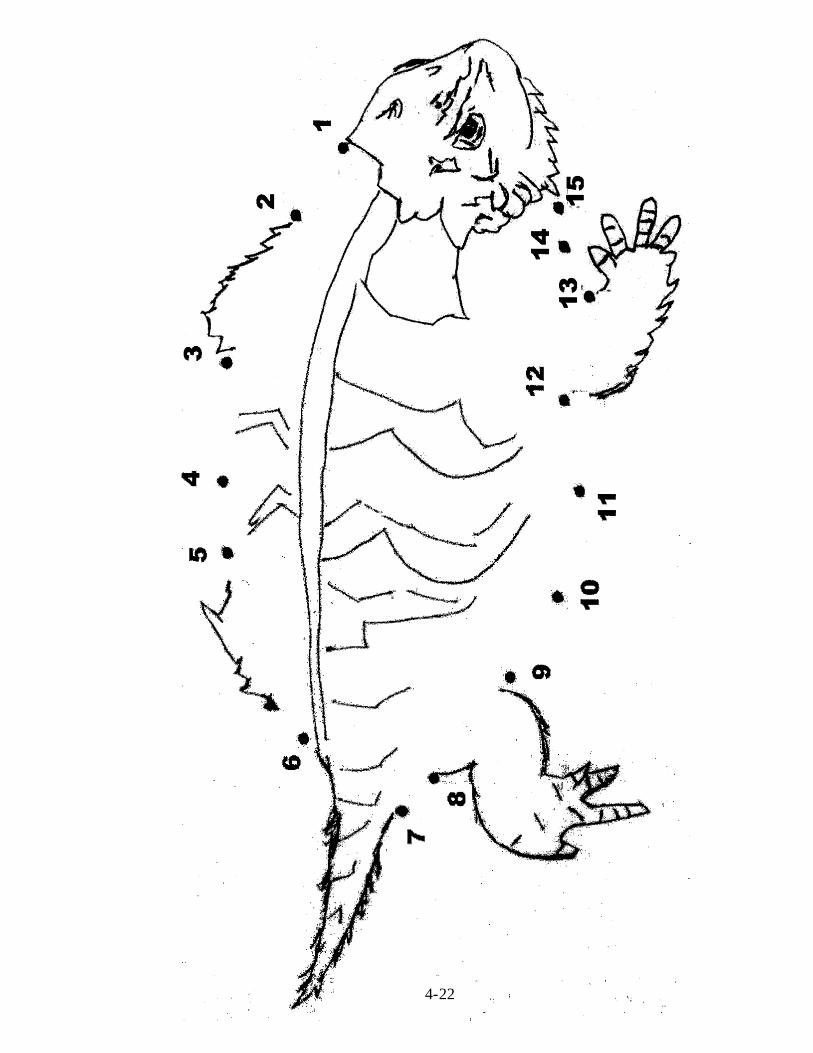
Activity #7: Lizards and Baskets The Paiute (spelled Piute or Pahute in some reference books) Indians often camped near the Las Vegas Ranch to be near a water source. The book shows the mother grinding corn. This was an everyday job for the females of the tribe. The women also spent quite a bit of time weaving baskets using the reeds that grew in the swampy places near the Ranch. The children did not have toys as a rule but would play with whatever was available. Thus, the Paiute boy is playing with a pet lizard in a large tub of water. There are two kinds of lizards found in Southern Nevada. The most common is the horned toad, which is actually a lizard. They are black and tan and can be easily identified by the horns on the backs of their heads. Their bodies are covered with small spines. The other common lizard is the western fence lizard. The western fence lizard can be easily identified by the bright blue patches on its stomach. If grabbed, the lizard’s tail comes off and this gives the lizard time to escape. It will soon grow a new tail. Instructions:
1. For the younger children, show them how to make designs in a large-hole 4 inch by 4 inch plastic weaving board using long earth colored shoe strings. The younger children may have trouble making a design but they will be developing their small motor skills just threading the shoe string through the holes in the weaving board. The older children can do an actual weaving design. Take the ends of the shoe string(s) when finished weaving and tie them together, bending two ends of the weaving board up with the shoe strings forming a handle
2. Have the younger children color the lizard. The older children can do the dot-to-dot
activity. Cut out the lizards and post around the room. 3. Have children pretend to “wash” the lizard in a large container found in the room Materials needed: Plastic weaving board with large holes cut into 4 inch squares, earth colored shoe strings, copies of the lizard to color and do dot-to-dot, crayons, scissors, large container, plastic lizard (optional). Vocabulary: New words to introduce basket Indian Paiute weaving
4-20
4-21
4-22

Activity #8: Fourth of July 1905 Discuss the picture in the book. Explain what a punk is. If available, have a punk to show children. Show pictures of the l905 flag and the flag of today and have children point out the differences. Instructions: Distribute paper with l905 flag printed on it. Have children color and cut out flag. Have them glue their flag onto a craft stick so they are able to wave their flag like Ellie is in the book. Materials needed: Papers printed with l905 flag, craft sticks, glue sticks, scissors and crayons. Vocabulary: New words to introduce punk flag celebration
4-23

Current U.S. Flag
1905 U.S. Flag
4-24

4-25

Activity #9: Ellie’s Birthday Party Discuss with the children that birthdays were celebrated in l905 the same way they are today. The difference is that Ellie’s cousins came to her birthday by wagon; there were no cars then. Instructions: Make a large paper birthday cake without candles to hang on wall (laminate if possible). Make individual birthday candles cut out, laminated, and velcro attached to back. Play “put the candles on the cake” (in lieu of “pin the tail on the donkey”). Have the children form a line, blind-fold one child at a time as they take their turn pinning the birthday candle on the cake. Materials needed: large laminated birthday cake, and individual birthday candles, velcro, blind- fold (scarf, piece of material). Vocabulary: New words to introduce cousins birthday party wagon
4-26

4-27

4-28

4-29

Activity #10: Sewing Clothes in 1905 Discuss with the children the picture in the book. Point out items of sewing machine, clock, candle, etc.. Explain how today we buy our clothes from the store, but in l905, they had to buy material/fabric, cut out the outfit (dress/shirt), and then sew it with thread on the sewing machine. Explain how a sewing machine makes an in and out stitch. Instructions: Print patterns on card stock, a shirt for the boys and a dress for the girls. Cut out shirt or dress and punch holes with single hole punch around pattern. Have children take a shoe string and weave the string in and out of the holes until they complete the pattern. You can also use plastic weaving material board that can be bought at a craft store and draw image of shirt/dress on top, cut out, and have children do the same process. Materials needed: Card stock paper, hole punch, shoe strings. Optional: plastic weaving, material board. Vocabulary: New words to introduce sewing machine dresses fabric treadle sewing machine
4-30

4-31

4-32 4-32

Activity #11: School Days, School Days What an exciting time! The first day of school! Ellie’s first school had two rooms and was located on the corner of Second and Lewis Streets. The rooms were finished in cloth and paper with a patch board ceiling. The building was previously the Salt Lake Hotel. It was remodeled for only $700, which included the addition of a pot-bellied stove (probably not as big as illustrated in the book). Although the two rooms had a blackboard, the children still used individual slates. Their books were called primers.
Instructions:
• Explain to the children the use of a slate. You may use a small individual white board with the proper markers or a small slate (blackboard) board with chalk. Have the youngest children draw people, animals, etc. on the board. The older children can write numbers, simple words, their name, etc..
Materials needed: Small white boards with the proper erasable markers, or slate (blackboards) with chalk, erasers. Vocabulary: New words to introduce chalkboard pot-bellied stove primer September slate
4-33

Activity #12: Pear Snack and Pear Activities Quite a few fruit trees such as apple, peaches, apricots and figs grew around the Las Vegas Ranch. Ellie’s family had planted a pear tree when they moved to Vegas. Canning was an important way to preserve fruit for the winter. Ellie’s mother spent many days in the fall canning fruit and making apple and pear butter. Instructions for the Pear Snack: Mix ½ cup of sugar, ¼ teaspoon cinnamon, ¼ teaspoon of nutmeg. Place in a clean shaker such as a salt shaker. Slice ripe pears, arrange on a plate, have the older children sprinkle, lightly, with sugar spice mix. If fresh pears are unavailable, use drained canned pears. Serve with apple juice. Have children pretend picking the apples for the juice. Materials needed for the snack: One half cup sugar, 1/4 teaspoon cinnamon, ¼ teaspoon nutmeg, shaker, ripe pears (or canned pears), sharp paring knife, paper plate, napkins, apple juice, paper cups. Instructions for Activities:
• Have the older children help prepare the clay dough (recipe listed below). When it has properly chilled, have the younger children roll it out on waxed paper like pie dough. Lift rolled out dough with waxed paper under it and place in a small pie pan. Crimp the edges.
Clay Dough
Ingredients: 1 cup white flour ¼ cup salt 2 tablespoons cream of tartar 1 tablespoon vegetable oil 2 teaspoons food color (optional) 1 cup water Mix flour, salt and cream of tartar in a medium pot or an electric fry pan. Add water, food coloring and oil. Stir over medium heat for 3-5 minutes. The mixture will look like a mess; this is normal. When the mixture forms a ball in the center of the pot, take it out and put in on a floured or oiled surface. Knead it. Be careful; it will be hot. After kneading for several minutes, place in a plastic bag or airtight container and store in the fridge. Variation: Add a small box of flavored gelatin mix to the dry ingredients. This gives added color and aroma.
4-34

Have the younger children take a piece of the clay dough about the size of a small apple, place it on a sheet of waxed paper. Roll out the dough with a child sized rolling pin. Pick up the dough with the waxed paper, flip it over into a small pie tin, remove the waxed paper and shape the dough to the pan. Crimp the edges. Materials needed: Flour, salt, cream of tartar, vegetable oil, food coloring, water, measuring cups and spoons, pan or electric skillet, waxed paper, child size rolling pin, plastic bag or airtight container, pot holders. Gelatin (optional), small pie tin (optional).
• The older children can play the “Can You Name This Game?” Using the book, point to a utensil or object in the kitchen picture and see if the children can name them. There is a labeled diagram of the kitchen on the following page.
Vocabulary: New words to introduce bread board canning colander core corn bread mold plan crimp flour sifter grater kitchen ladle measuring cup peel potato masher rolling pin slicer strainer tea kettle tea pot utensil whisk
4-35

tea pot
colander
ladle
potato masher
corn bread mold pan
whisk
grater
strainer
slicer
measuring cup
measuring cup
rolling pin
flour sifter
tea kettle
bread board 4-36

Activity #13: I’m Not Afraid of the Dark Ellie and her family celebrates Thanksgiving with a harvest dinner. A typical meal would consist of smoked ham, boiled potatoes, squash, apple sauce, freshly baked bread, home-made jam and mince and apple pies. Ellie and her family did not have electricity in 1905. They used kerosene lamps inside of the house for lighting and lanterns when they went outside. Since there was no toilet inside the house, they had to walk down a path to the outhouse to go to the “bathroom”. “Toilet tissue” consisted of newspapers and old catalogues. Instructions: Make copies of the lantern on the next page. Have the older children cut out the lantern. You may need to help them to cut out the handle and the “glass” inside of the wires in the center. Cut a slit in the bottom center for the candle to slide into. Color the candle with a bright yellow flame. Cut out the candle. Slide the candle into the slit in the lantern from the back. Have the children “light” and “unlight” the candle by sliding the candle up and down in the lantern. Materials needed: Scissors, copy of lantern, candle, and crayons Vocabulary: New words to introduce lantern outhouse Thanksgiving catalog
4-37

4-38

4-39
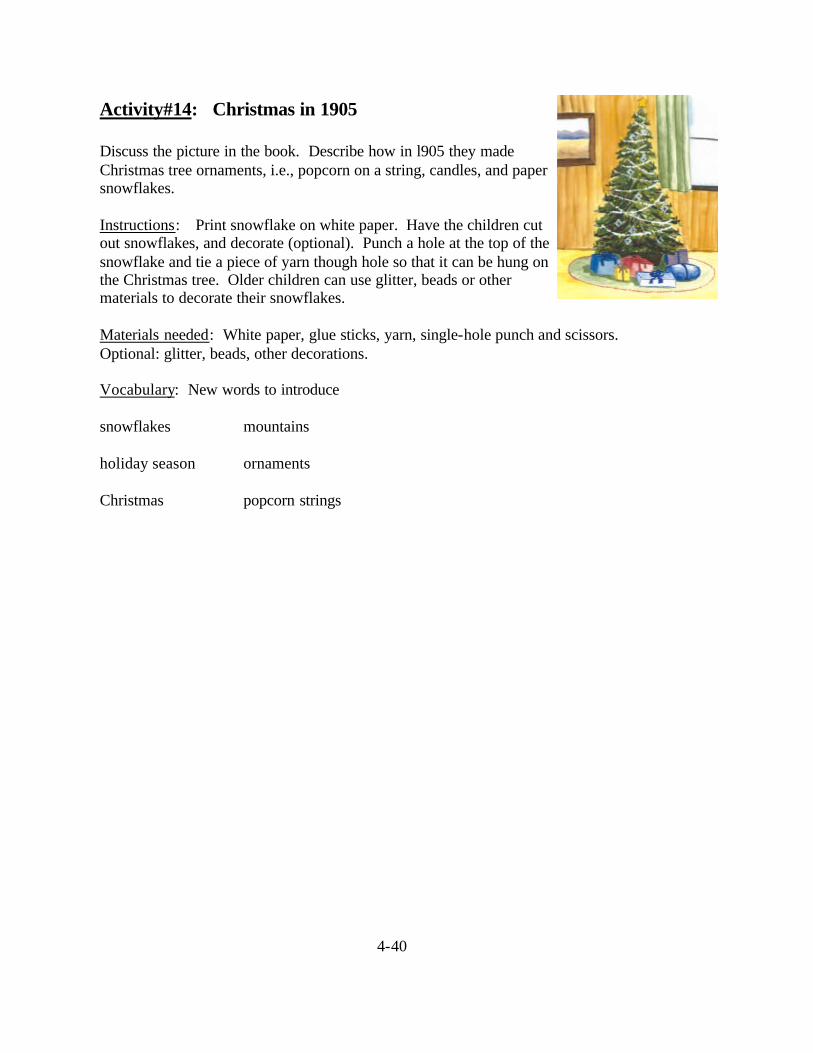
Activity#14: Christmas in 1905
Discuss the picture in the book. Describe how in l905 they made Christmas tree ornaments, i.e., popcorn on a string, candles, and paper snowflakes. Instructions: Print snowflake on white paper. Have the children cut out snowflakes, and decorate (optional). Punch a hole at the top of the snowflake and tie a piece of yarn though hole so that it can be hung on the Christmas tree. Older children can use glitter, beads or other materials to decorate their snowflakes. Materials needed: White paper, glue sticks, yarn, single-hole punch and scissors. Optional: glitter, beads, other decorations. Vocabulary: New words to introduce snowflakes mountains holiday season ornaments Christmas popcorn strings
4-40

4-41

4-42

Resources and Evaluation
Section 5

Resources
Barlow, R.S. 1992. The vanishing American outhouse. Windmill Publishing Co., El Cajon, CA. Ferris, R. 1983. Death Valley wildflowers. National History Association, Grass Valley, CA. Howard W. Cannon Aviation Museum, Department of Parks and Community Services, Henderson, NV. Las Vegas Chamber of Commerce. www.lvchamber.com/las_vegas/history.htm Paher, S.W. 1971. Las Vegas: As it began----as it grew. Nevada Publications, Las Vegas, NV. Patera, A.H. 2001. Rhyolite, the boom years. Western Places, Lake Grove, OR. Walker, P.R. 2003. The southwest: Gold, God, and grandeur. National Geographic, Washington, D.C.
The University of Nevada, Reno is an equal opportunity/affirmative action employer and does not discriminate on the basis of race, color, religion, sex, age, creed, national origin, veteran status, physical or mental disability and sexual orientation in any program or activity it operates. The University of Nevada employs only United States citizens and aliens lawfully authorized to work in the United States.
5-1

Growing Up In Las Vegas Evaluation
Date _________________ Facility (Place) ______________________________________ Please answer the questions below to help us review the workshop’s content and identify what you have learned. 1. Circle a number on the following scale to signify your level of understanding BEFORE this workshop about your knowledge of Las Vegas, Nevada history.
2. Circle a number on the following scale to signify your level of understanding AFTER this workshop about your knowledge of Las Vegas, Nevada history.
3. Circle the number on the following scale to signify how confident you feel about your
ability to effectively use the materials presented in this workshop.
4. How do you think your children will like the book and activities?
5. How would you rate this workshop?
not confident at all very confident
not at all liked it very much
very poor excellent
low level high level of knowledge of knowledge 1 2 3 4 5
low level high level of knowledge of knowledge
1 2 3 4 5
1 2 3 4 5
1 2 3 4 5
1 2 3 4 5
5-2
On the back, write suggestions that could improve this workshop.

5-3