Embed Size (px)
Citation preview

GRE AMERICA, INC
Wireless LAN USB Client Instllation

Table of ContentsFCC Warning Information
Chapter 1 IntroductionPackage Contents 1System Requirement 1Features 1
Chapter 2 Installing Application and Driver 2What you need 2Installing Application/Driver under Windows 98/Me/2000 2Ad-Hoc Mode 5Infrastructure Mode 6
Chapter 3 Uninstalling Application 6Uninstalling Application under Windows 98/Me 6Uninstalling Application under Windows 2000 7
Chapter 4 Configuration 7How to Install the Configuration & Monitor Utility 7Using the Configuration & Monitor Utility 8
Chapter 5 Firmware Upgrade 12Firmware Upgrade Utility 12
Chapter 6 Quick Overview 13Chapter 7 Q & A 15Warranty InformationContact Information

WARNING!!
RADIATION.
RF energy at microwave frequencies is present with this equipment.Personnel should not be exposed to high RF energies, and should notbe in front of the antenna when the equipment is switched on.
All accessible RF connections must be terminated when the radio ispowered on.
The radio should not be powered on with any of its covers removed.
INFORMATION TO USERS.
"Any changes or modifications not expressly approved by the partyresponsible for compliance could void the user's authority to operatethe equipment."
ANTENNA WARNING
EACH INDIVIDUAL ANTENNA USED FOR THIS TRASNMITTERMUST BE INSTALLED TO PROVIDE A MINIMUM SEPARATIONDISTANCE OF 20 CM OR MORE FROM ALL PERSONS AND MUSTNOT BE CO-LOCATED WITH ANY OTHER ANTENNA FORMEETING RF EXPOSURE REQUIREMENTS.

GRE Wireless LAN GINA USB 802.11b Client User Guide Page 1
Introduction
Chapter 1 IntroductionThe GINA USB Wireless LAN adapter based on 802.11b Wireless Media Access Controller is anetwork card with a rate of 1, 2, 5.5, and 11 Mbps operating in the ISM band using DirectSequence Spread Spectrum (DSSS) transmission implementing the IEEE 802.11b standard. Forthis card GRE currently provides Device Drivers for MS Windows® 98/2000, and Windows® Me.GRE also provides tools for the configuration and firmware upgrade of the cards. These tools, aswell as the installation procedure for the MS Windows 98/2000, and Windows Me operatingsystems are described in this document.To install the adapter and operate under an operating system two pieces of software are needed.The first one is the driver, which provides the necessary mechanisms to the operating system inorder to use the adapter as any other networking adapter. The driver communicates with thefirmware using exchange of commands (Set MIB, Get MIB, Scan, Sync, etc.). The other piece ofsoftware needed is the code written on the MAC chip, which is responsible for the interface withthe driver, and for the implementation of the IEEE 802.11b functions.
Package Contents
Please make sure that your received the following with your Wireless LAN Kit:Two (2) GINA USB WLAN unitsTwo USB CablesTwo antennasUser GuideWireless LAN Utility Manager CD
System Requirements
Operating System: MS Windows 98/2000, Windows Me with Service Pack 4 or laterDesktop PC or notebook PC with CD-ROM drive
Driver Features
The drivers for the GINA USB WLAN support:RoamingPreferred APDynamic configurationSite SurveyPreamble Type detectionFirmware UpgradeAuthentication Algorithm (Open System, Shared Key)

GRE Wireless LAN GINA USB 802.11b Client User Guide Page 2
Installation and ConfigurationProcedures Under Windows 98/Me/2000
Chapter 2 Installing Application and Driver
Use the procedures described in this chapter to install and configure the GINA 802.11 USB Clientunit (s) under MS Windows 98/Me/2000.
What You Need to Know About Windows 98/Me/2000
Although similar in appearance, Windows 98/Me/2000 have different philosophies when installinga new hardware.Throughout this section it is assumed that you have a basic working knowledge of Windows98/Me/2000 and of how to install new network cards on them. However, in this paragraph, somespecific features of Windows 98/Me/2000 are briefly explained.Windows 98/Me/2000 operating system supports the “Plug & Play” feature. That means that onceyou plug the GINA 802.11 USB Client unit (s) for the very first time, the operating system willdetect the card and automatically install the driver assuming that you have already installed theapplication utility.Another feature is the “Hot Swapping”. With this feature, you can unplug and plug again the cardwhenever you want.
What You Will Need
During the installation, you may be prompted to load operating system files from the Windowsinstallation disk. Please have this disk handy.You will need the Firmware and Software Tools CD provided with your "Wireless LAN Utility Kit".
In order to be able to install the GINA 802.11 USB Client unit (s) on to your PC running underWindows 2000, you will need to log on as “Administrator”.
Installing the Application and Drivers Under Windows 98/Me/2000
Please do not plug your USB unit (s) until the Application setup has been completed. Thesetup procedure described below installs the drivers, the Configuration & MonitorUtility and the Firmware Upgrade Utility.
Insert the Firmware and Software Tools CD into your CD-ROM drive and locate theexecutable file “setup.exe”.

GRE Wireless LAN GINA USB 802.11b Client User Guide Page 3
Figure 2-1
Follow the installation instructions from the InstallShield Wizard by pressing the “Next” button.
Figure 2-2
Figure 2-3
During the setup process, the window of Figure 2-3 will appear prompting you to select theadapter type you are going to install. If you plan to install an GINA 802.11 USB Client unit(s) only, then you must choose the “Application & USB Drivers” option. Selection ofadapter type

GRE Wireless LAN GINA USB 802.11b Client User Guide Page 4
Application & USB Drivers:By selecting this installation option, you will install the Applications (Configuration & Monitor Utility
and Firmware Upgrade Utility) and the latest USB drivers. If the USB drivers have beenpreviously installed and they have not been uninstalled prior to the new installation the newdrivers will overwrite the old ones without prompting you.
Application Only:By selecting this installation option, you will only install the Applications (Configuration & Monitor
Utility and Firmware Upgrade Utility).After you have assigned the Destination Location option where the application will be installed
(by Default this option is set to C:\Program Files\GRE\802.11 Wireless LAN), you can thenchoose the mode of operation:
Figure 3-1
3a. Ad-Hoc (Figure 3-2)
Figure 3-23b. Infrastucture (Figure 4-1).

GRE Wireless LAN GINA USB 802.11b Client User Guide Page 5
Figure 4-1
Ad-Hoc ModeIn Ad-Hoc Mode the wireless stations can directly communicate with each other.
Operating Mode Dialog
When selecting the Ad-Hoc mode you have to specify the ESSID and the Channel parameters(Figure 3-2).
ESSID: Select the ESSID of the Ad-Hoc network. All stations participating in the Ad-Hoc networkshould have the same ESSID.
Channel: Select the channel to be used. There are 14 channels available.
ESSID and Channel Dialog
As soon as you have set your selections, press the “Next” button and a window appears with areview of your installation settings. Please make sure that these values are the desired ones. Incase you have made a mistake you can always select the “Back” button to make a correction.Press the “Next” button to continue with the installation, and finally select the “Finish” button forthe installation to be completed.
Figure 4-2

GRE Wireless LAN GINA USB 802.11b Client User Guide Page 6
Figure 5-1
Infrastructure ModeIn Infrastructure Mode the use of an Access Point is necessary in order for the wireless clients tocommunicate with each other.
Operating Mode Dialog
When selecting the Infrastructure mode you need to specify the ESSID (Figure 4-1).
ESSID: Select the ESSID of the access point to which the wireless station will be associated within infrastructure mode.
ESSID Dialog
A soon as you have set your selections, press the “Next” button and a window appears with areview of your installation settings. Please make sure that these values are the desired ones. Incase you have made a mistake, you can always select the “Back” button to make a correction.Press the “Next” button to continue with the installation, and finally press the “Finish” button forthe installation to be completed.
You can now safely plug your USB device. The “Add New Hardware Wizard” automatically loadsthe Drivers for your USB device. As soon as the procedure has been completed.
In the Windows 2000 installation procedure an extra window appears prompting you to selectwhether you would like to install the “Digital Signature Not Found” or not. You cansafely select “YES”.
Chapter 3 Uninstalling ApplicationUninstall Procedure Under Windows 98/Me
In order to uninstall the Configuration & Monitor Utility from Windows 98/Me, you must select the“Unistall Configuration & Monitor Utility” option (Start -> Programs -> GRE 802.11b USB Client ->Unistall Configuration & Monitor Utility). It is recommended to stop the USB device and “Exit” theapplication prior to starting the unistallation procedure. If during the unistall procedure you receivean error message, please insert the CD, which contains the setup program and try to uninstall theUtility again.

GRE Wireless LAN GINA USB 802.11b Client User Guide Page 7
The above procedure uninstalls the Configuration & Monitor Utility, but not the card itself. In orderto uninstall the GINA 802.11 USB Client unit (s) from Windows 98/Me, you must double click onthe “Network” option in the “Control Panel” (Start -> Settings -> Control Panel). Select the “GRE802.11b USB Client ” unit (s) from the list and press the “Remove” button. The system will promptyou to re-boot. Press "Yes" to re-boot.
Uninstall Procedure Under Windows 2000
The procedure in order to remove the Monitor & Configuration Utility is the same with the onedescribed for Windows 98/Me.In order to uninstall the GINA 802.11 USB Client unit (s) from Windows 2000 you must select it inthe Device Manager of Windows 2000 and press “Uninstall”. The “Uninstall” procedure can beperformed only if the GINA 802.11 USB Client unit (s) is plugged in.
Configuration & Monitor Utility
Chapter 4 Configuration
The Configuration & Monitor Utility is a powerful application that helps you to configure the GINA802.11 USB Client unit (s) and monitor the statistics of the communication. Unlike the standardmethod of configuring the card via the operating system utilities (e.g. Control Panel), thisapplication permits the dynamic modification of the configuration parameters while the card isoperating. It also offers some more configuration options.GRE offers the Configuration & Monitor Utility for Windows 98/Me/2000.
Please keep in mind that the Configuration & Monitor Utility can be used to change the aboveconfiguration parameters when the cards are active. When the cards are not in use,please use the Control Panel method described in previous sections.
How to Install the Configuration & Monitor Utility
In order to setup the Configuration & Monitor Utility run the program “setup.exe,” which you willfind in your installation CD and follow the instructions as they appear on the screen (see section3). As soon as a link is established, the application will start running and will appear as an icon onthe system tray. You can locate the application under Start -> Programs -> GINA 802.11 USBClient -> Configuration & Monitor Utility.

GRE Wireless LAN GINA USB 802.11b Client User Guide Page 8
Using the Configuration & Monitor Utility
The Configuration & Monitor Utility appears as an icon on the system tray of Windows every timethe card is running (see Figure 7-1). You can open it by double-clicking on this icon. While thestation is in infrastructure mode and not associated to an access point, the color of the icon is red.As soon as the station associates itself to an Access Point (see page 4-4 “Site Survey”), the iconcolor automatically turns to blue. In Ad-Hoc mode the color is always blue, except when the cardis resetting and Initializing where it turns to red during the reset and initialization procedure.
The icon of the Configuration and Monitor Utility
(Figure 7-1)
When the application is opened the following options (tabs) are available:MonitorStatisticsSite SurveyEncryptionAdvancedVersion
MonitorA typical screen of the application in Infrastructure mode is shown in Figure 7-2. Theconfiguration parameters are shown at the top of the screen (Operation Mode, Channel, SSID,TxRate, Power Management Mode and MAC Address of the USB unit). In the middle of thescreen there is information about the status of the communication (the BSSID of the Access Pointto which the card is associated, Signal Strength, and Link Quality). In order to change theconfiguration parameters press the “Change” button, make your changes and then press “Submit”in order to save your changes.
A typical screen of the Monitor Utility in Infrastructure mode.

GRE Wireless LAN GINA USB 802.11b Client User Guide Page 9
(Figure 7-2)StatisticsThis option enables you to view the available statistic information (Data packets, ManagementPackets and Rejected packets). In order to renew or update this list of statistics, press the “Clear”button. In order to exit press the “Exit” button at the bottom of the screen.
Stastic information available
(Figure 8-1)
Site SurveyBy choosing the Site Survey option in any of the two modes, you can scan all the channels inorder to find all the access points within the range of your card. In Figure 8-2, the card can seefour access points. The list includes information about the BSSID and SSID of the accesspoint(s), the signal strength, the channel where the access point(s) operates, and whether or notWEP encryption is used. In order to update this list, press the “Rescan” button. If you want toassociate with any of the access point(s) listed, double click on your choice (on the BSSID field),and the system will take you back to the Monitor screen showing you the parameters of theconnection newly established.

GRE Wireless LAN GINA USB 802.11b Client User Guide Page 10
Site Survey Option
(Figure 8-2)
EncryptionBy choosing this option in any of the two modes, you can set four different WEP keys and specifywhich one of them to use. First, either enable or disable encryption from the appropriate
“Encryption” field (see Figure 9-1 below). If you decide to use encryption, you can choose any ofthe available WEP keys (1 to 4). You also have the option to select the WEP mode(Mandatory/Optional). If you select “Mandatory”, then not only WEP will be used, but also anyother station needs to use WEP encryption in order to establish a communication with yourstation. This requirement is in line with the IEEE 802.11b standard. If, on the other hand, youchoose “Optional”, then your station can communicate with every other station regardless if theyuse WEP or not. Please keep in mind that the WEP keys must be in HEX format. Finally, youhave the option to select whether Open System or Shared Key authentication will be used. Inorder to take effect the changes you wish to make, press the “Submit” button at the bottom of thescreen.Encryption
(Figure 9-1)

GRE Wireless LAN GINA USB 802.11b Client User Guide Page 11
AdvancedBy Choosing the Advanced option in any of the two modes, you can change advancedconfiguration settings, such as the Preamble Type, Fragmentation Threshold, and RTS/CTSThreshold (Figure 9-2). Before selecting Short Preamble, make sure that the other stations andAPs are also supporting this feature.
The USB device has an auto-detection feature therefore it automatically selects the PreambleType depending on the Access Point Preamble type. In order to enable theFragmentation and the RTS/CTS Threshold parameters move the slide bar with yourmouse and then use the right and left arrow keys of your keyboard in order to select anexact number.
Advanced Settings
(Figure 9-2)
VersionBy choosing this option, you can view basic information about the Utility like the Driver, Firmwareand Application Version. Use the “Exit” button in order to exit the application.

GRE Wireless LAN GINA USB 802.11b Client User Guide Page 12
Version information
(Figure 9-3)
How to Uninstall the Configuration & Monitor Utility
In order to uninstall the Configuration & Monitor Utility, you must select the “Unistall Configuration& Monitor Utility” option (Start -> Programs -> GINA 802.11 USB Client -> Unistall Configuration& Monitor Utility). It is recommended to “Exit” the Configuration & Monitor Utility prior to startingthe unistallation procedure. Finally a window will appear prompting you to reboot and you mustselect YES.
Firmware Upgrade Utility
Chapter 5 Firmware Upgrade
For the GINA 802.11 USB Client unit (s), GRE offers a firmware utility, which is a Windows,application (Firmware Upgrade utility) that allows you to upgrade the firmware of your card whileyour card is running.

GRE Wireless LAN GINA USB 802.11b Client User Guide Page 13
Figure 12-1
Firmware Upgrade Utility
Please DO NOT use this utility unless you have got new binary files from GRE. If you use thisutility and you do not supply the correct binary file, you may damage your card.
The Firmware Upgrade utility allows you to upgrade the firmware of your card while your card isrunning. It will download the new firmware and it will reset your card in order to start operatingwith the new firmware.GRE offers the Firmware Upgrade Utility for Windows 98, Windows Me, Windows 2000.The Firmware Upgrade Utility is automatically installed when you run the program “setup.exe” ofyou installation CD (see Section 4- “How to install the Configuration & Monitor Utility”). Locate theprogram from the Start Menu -> Programs -> GINA 802.11 USB Client unit -> Firmware UpgradeUtility. When you open the program, you will see the main screen of Figure 5-1.
Upgrading the firmware
When the firmware has been upgraded, you will see a notification from the Firmware UpgradeUtility (Figure 5-3). Press “OK” to complete the upgrade.
Completion of the firmware upgrade procedure
Installation Overview
Chapter 6 Quick Overview
This is a quick step by step guide on how to install your GINA 802.11 USB Client unit (s) adapter.Please follow the steps described below and refer to the appropriate sections for further details:
GRE Wireless LAN GINA USB 802.11b Client User Guide Page 14
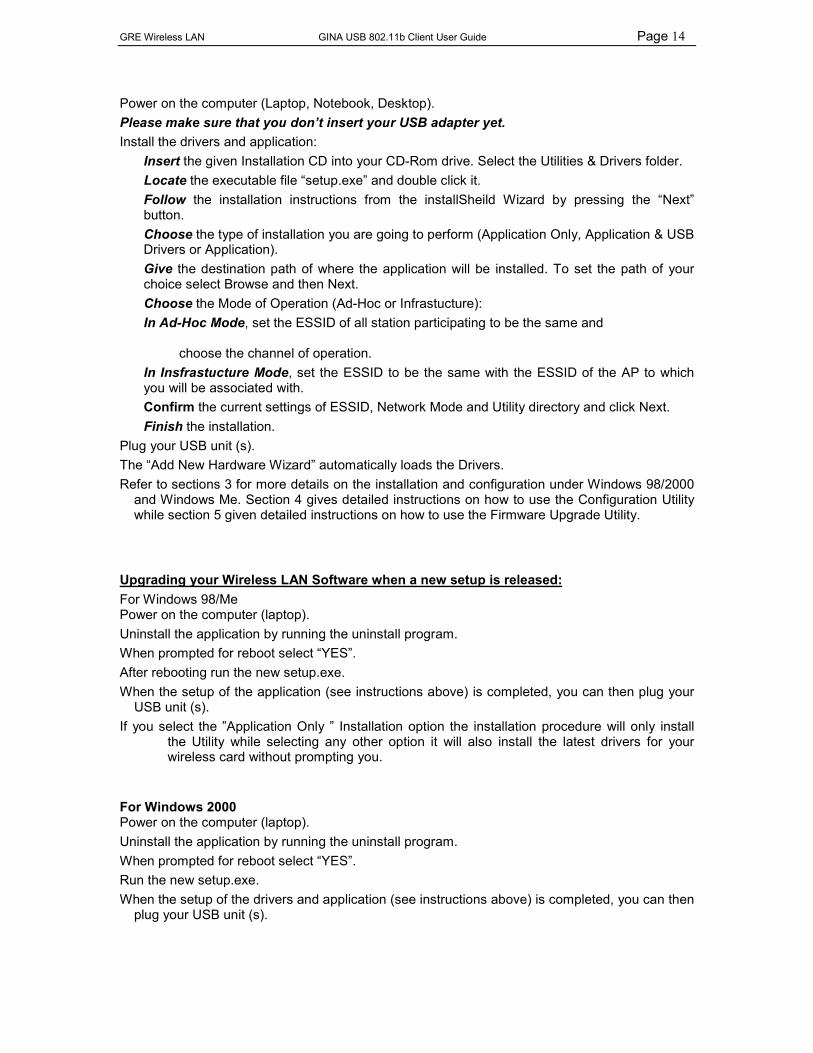
Power on the computer (Laptop, Notebook, Desktop).Please make sure that you don’t insert your USB adapter yet.Install the drivers and application:
Insert the given Installation CD into your CD-Rom drive. Select the Utilities & Drivers folder.Locate the executable file “setup.exe” and double click it.Follow the installation instructions from the installSheild Wizard by pressing the “Next”button.Choose the type of installation you are going to perform (Application Only, Application & USBDrivers or Application).Give the destination path of where the application will be installed. To set the path of yourchoice select Browse and then Next.Choose the Mode of Operation (Ad-Hoc or Infrastucture):In Ad-Hoc Mode, set the ESSID of all station participating to be the same and
choose the channel of operation.In Insfrastucture Mode, set the ESSID to be the same with the ESSID of the AP to whichyou will be associated with.Confirm the current settings of ESSID, Network Mode and Utility directory and click Next.Finish the installation.
Plug your USB unit (s).The “Add New Hardware Wizard” automatically loads the Drivers.Refer to sections 3 for more details on the installation and configuration under Windows 98/2000
and Windows Me. Section 4 gives detailed instructions on how to use the Configuration Utilitywhile section 5 given detailed instructions on how to use the Firmware Upgrade Utility.
Upgrading your Wireless LAN Software when a new setup is released:For Windows 98/MePower on the computer (laptop).Uninstall the application by running the uninstall program.When prompted for reboot select “YES”.After rebooting run the new setup.exe.When the setup of the application (see instructions above) is completed, you can then plug your
USB unit (s).If you select the ”Application Only ” Installation option the installation procedure will only install
the Utility while selecting any other option it will also install the latest drivers for yourwireless card without prompting you.
For Windows 2000Power on the computer (laptop).Uninstall the application by running the uninstall program.When prompted for reboot select “YES”.Run the new setup.exe.When the setup of the drivers and application (see instructions above) is completed, you can then
plug your USB unit (s).

GRE Wireless LAN GINA USB 802.11b Client User Guide Page 15
Chapter 7 Q& A
What is Ad-hoc?An Ad-hoc wireless LAN is a group of computers, each with a WLAN adapter, connected as anindependent wireless LAN. Ad hoc wireless LAN is applicable at a departmental scale for abranch or SOHO operation.
What is Infrastructure?An integrated wireless and wired LAN is called an Infrastructure configuration. Infrastructure isapplicable to enterprise scale for wireless access to central database, or wireless application formobile workers.
What is Roaming?Roaming is the ability of a portable computer user to communicate continuously while movingfreely throughout an area greater than that covered by a single Wireless Network WirelessBridge. Before using the roaming function,
What is BSS ID?A specific Ad hoc LAN is called a Basic Service Set (BSS). Computers in a BSS must beconfigured with the same BSS ID.
What is ESS ID?An Infrastructure configuration could also support roaming capability for mobile workers. Morethan one BSS can be configured as an Extended Service Set (ESS). Users within an ESS couldRoam freely between BSSs while served as a continuous connection to the network wirelessstations and Wireless Network Wireless Bridges within an ESS must be configured with the sameESS ID and the same radio channel.
What is WEP?WEP is Wired Equivalent Privacy, a data privacy mechanism based on a 64 / 128 bit shared keyalgorithm, as described in the IEEE 802.11 standard.
1 2 3 4 5 6 7 8 910 11 12 13 14 15 16 17 18 1920 21 22 23 24 25 26 27 28 2930 31 32 33

GRE Wireless LAN GINA Access Point/Bridge User Guide
Warranty
Introduction
This section contains user information about GRE’s limited warranty.
Limited Warranty
General
GRE America, Inc. warrants all parts of each new product tobe of sound design, good material and workmanship, and willrepair or exchange any parts proven to be defective undernormal use at no charge for a period of 12 months from thedate of sale to the end user.
Defects will be corrected by GRE America. There will be nocharge for labor for a period of 12 months from the date oforiginal sale, except as provided below. Overtime premiumsand/or expedited handling and shipping costs must be paid bythe owner.
Warranty Limitations
This warranty does not apply to equipment or parts that havebeen subject to accident, abuse, incorrect service, alterations,service by non-authorized service personnel, misuse, or onunits upon which the warranty seal has been removed, altered,or mutilated.
A copy of the warranty certificate or purchase receipt must besupplied to GRE America when requesting service.
Equipment must be sent to GRE America at the owner’sexpense and will be returned via surface carrier at no cost tothe owner.
This warranty is strictly limited to the terms indicated herein,and no other warranties or remedies thereunder, express orimplied, shall be binding on GRE America.

GRE Wireless LAN GINA Access Point/Bridge User Guide
Contact Information
GRE America, Inc.425 Harbor Blvd.Belmont, CA 94002USA.
Phone: (650) 591-1400 Toll Free 1-800-233-5973Fax: (650) 591-2001
Email:Sales Dept : [email protected] : [email protected]
Copyrights :© 2002 GRE America, Inc. All rights reserved. This material is theproperty of GRE America, Inc. Copying or reproducing this materialis strictly prohibited. All violators shall be prosecuted to the fullestextent of the law.