Embed Size (px)
Citation preview

Getting started with Morfik: Database programming
Michaël Van Canneyt
August 5, 2007
Abstract
In this second article about getting started with Morfik development, the possibil-ities for database access are examined. Morfik by default uses Firebird as a back-enddatabase engine, but it can access other databases as well, using ODBC.
1 Introduction
Almost all - if not all - web applications will need access to a database of some kind.Recognizing this, the Morfik designers centered the Morfik IDE around this concept: AMorfik application consists of a database with a web front-end. The approach is much thatused by Microsoft Access: The design of the database is prominently present in the IDE.The main difference is the use of Firebird as a database back-end, instead of the Microsoftjet engine used in MS-Access.
Firebird is an excellent open source database, which scales well from embedded database toenterprise-level installations. It has an excellent track record of reliability and robustness,with an extreme small installation footprint, and offers virtually 24/7 operation without ex-tensive maintenance: it has been around since the early eighties, under various incarnations.The many third-party tools make it also easy to maintain and design Firebird databases.
These third party tools are strictly speaking not necessary, as the Morfik IDE offers almostfull access to the Firebird database.
To demonstrate this, a small database application will be written in Morfik. The applicationis a Music CD catalogue. It will be centered around 3 tables:
ARTISTS a table with artist names. This will be used as a lookup table for the albums andartists. It contains essentially the name of the artist, and a unique ID.
ALBUMS a table with one record per album. It refers to the ARTISTS table for the albumAuthor.
TRACKS a table with the tracks of an album: it refers to the ALBUMS table and to theARTISTS table, in case the album has tracks by various artists.
this will be used to code a small application which can be used to manage an album collec-tion.
This application will need several forms:
• A list of artists.
• A list of all albums.
• A form to edit an album.
1

• A list of tracks per album.
Obviously, also some kind of menu is needed, and possibly also a search form.
2 Architecture
When designing a database application, it is important to keep in mind how Morfik accessesand shows the data in its reports and - more importantly - its forms. Morfik provides twosources of data:
Tables Correspond directly to database tables. A form can link directly to a table: the dataof this table will be shown in the form. A filter condition can be specified on thetable. The data is then updatable.
Queries It is possible to define (complex) queries in Morfik, and store them with a name. Theresult of these queries can also be shown in forms or reports.
To display data in a form, the easiest method is to make the form data bound. This meanssimply that the ’Datasource’ property of the form is set to the name of a table or a query,and the same for the controls in the form: each has a ’Datafield’ property, which can beset to the name of a field in the datasource of the form: the control will then display thecontents of the field instead of some static content.
What happens then depends on the view mode of the form, and this will be explained below.
3 Creating and editing tables
The first step in creating a database-driven application is designing the database, whichmeans creating the tables that make up the database. As usual, the Morfik IDE offers awizard to do this, or the table can be created directly in design view.
As stated in the introduction, the CD collection application will consist of 3 tables. Thefirst table is the artist table, with the following fields:
A_ID an autonumber field, which will be used to uniquely identify artists.
A_NAME a string field to hold the name of the artist.
A_DESCRIPTION a string field to hold a descriptive text about the artist.
A_GROUP a boolean field which indicates whether this entry denotes a band or a singleartist.
Care should be taken when creating tables: all field and table names are created case sen-sitive by the Morfik IDE: all identifiers are quoted unless typed all uppercase (contrary tothe Firebird default, which is case insensitive).
When this table is designed in the Morfik table editor, it will look something like in figure1 on page 3. Readers familiar with MS-Access or OpenOffice Base will recognize the lookand feel of the table editor. Not all field types available in MS-Access are available inMorfik, but most common field types are present. Note that the table name is Artists,to demonstrate that the name is indeed case sensitive. The A_ID field is made the primarykey field, which can be done with a simple click on a button in the toolbar.
To make sure that each artist is entered only once in the Artists table, a unique index iscreated on the A_NAME field. This can be done in the table index editor, as shown in figure
2

Figure 1: Designing the Artists table
Figure 2: Designing the indexes on the Artists table
3

2 on page 3. In the table index editor, fields are shown which are not visible in the tableeditor: they are fields that are added to every table which Morfik creates:
MFK$GUID a unique GUID for each record is created.
MFK$CTS the create timestamp of the record (hence CTS) is the time the record wascreated.
MFK$LMTS the last modification timestamp of the record (hence LMTS) is the time therecord was last updated.
These fields are maintained using some triggers in the Firebird database, which are alsoautomatically maintained by the Morfik IDE.
The ALBUMS table has slightly more fields than the Artists table:
B_ID An autonumber, which forms the unique ID for each album. This is the primary key.
B_TITLE The title of the album. A text field.
B_DESCRIPTION A descriptive text about the album.
B_YEAR An integer field containing the year the album was released.
B_ARTIST_FK An integer field containing the ID of the artist which released the album.
B_FRONTCOVER A picture field containing a picture of the front of the CD box.
B_BACKCOVER A picture field containing a picture of the back of the CD box.
B_DISCID An string field containing the unique disc id which can be used in a CDDBlookup.
The picture field can have 2 types: Linked or Embedded. An embedded picture is storeddirectly in the database in a blob field. If the field type is Linked, then the image data isstored not in the database, but in the directory where the morfik binary resides. The field inthe database will simply contain a link to the external document.
Similarly, the TRACKS table can be defined with the following fields:
T_ID The unique ID of the track.
T_NUMBER the track number.
T_TITLE The title of the song.
T_ALBUM_FK The ID of the album of which this track is part.
T_ARTIST_FK The ID of the artist performing the song. By default this will be filledwith the artist field of the Album table.
T_DURATIONMIN Duration of the track in minutes.
T_DURATIONSEC Duration of the track in seconds.
To make sure that the data in the tables remains consistent, some integrity constraints willbe defined between the three tables:
B_ARTIST_FK should always refer to an existing artist record.
T_ARTIST_FK should always refer to an existing artist record.
4

Figure 3: Designing the relations between tables
T_ALBUM_FK should always refer to an existing album record. Additionally, when thealbum is deleted from the database, all tracks should be deleted as well.
Defining these integrity constraints can be done in the ’Relationships’ tab of the projectexplorer: there the relations (foreign keys) between the various tables can be defined. Todefine a relation between 2 tables, both tables must be added to the relations display: thisis done with the context menu.
To define a relation between 2 tables (say T_ALBUM_FK pointing to B_ID), the foreignkey field T_ALBUM_FK can be dragged from table TRACKS and dropped on the B_ID fieldin table ALBUMS. Then the relation dialog appears as in figure figure 3 on page 5. Notethe options for referential integrity: only if the ’Enforce referential integrity’ is checked, aforeign key will be created.
After the tables have been created, the ’Data’ tab in the table designer can be used to entersample data in the table: it’s a simple data editing grid.
4 Creating a data-bound form
With the table definitions and their relations in place, it is already possible to design quitepowerful forms. As an example, we’ll take the form where the list of artists is managed:ArtistsForm. In this form, the complete list of artists should be managed. To createthis form there are several options: all can be done manually, or the Wizard offered by theMorfik IDE can be used. The wizard takes the programmer through the various stages ofthe form creation. Since most aspects of creating a data-bound form are covered in thewizard, it’s instructive to have a look at the various stages in the wizard. So, for this simple
5

form, the Wizard will be used.
1. A name for the form is asked. This will be ArtistsForm.
2. The wizard asks whether the form should have header and footer bands. A footerband is needed, because the form will need a navigator bar, and this is displayed inthe footer band. A header band can be added, but is not obligatory.
3. In the next step, the wizard asks if the form should display static content, or whetherit should be bound to a datasource. Obviously, it is the latter option that is needed,and the datasource should be the Artists table.
4. The wizard then asks what the ’view mode’ of the form should be. There are 2possibilities here:
Continuous This means that the form as designed will be repeated for a number ofrecords in the datasource. This is currently read-only. Since the artists formneeds to be editable, this cannot be used yet. (in the near future, this mode willalso be made editable). In a way, in this mode the form resembles a band in abanded report designer.
Single Form This means that the form will display a single record, and this recordcan be edited. The navigator bar can be used to navigate through the records inthe datasource.
The viewmode of the form is one of the most important concepts when programmingdatabases in Morfik: it will return on various places. Indeed, for each data boundform the decision whether it is continuous or single must be made.
5. After this, the wizard asks whether the form needs a navigation bar. For a singleform, this is easier. There is a customize button which can be used to completelycustomize the look and feel of the navigation bar: the order and image of the buttons,which buttons should be shown and so on. For the artists form, all buttons are needed:both the navigation buttons and the record manipulation records.
6. As a last step, the wizard asks whether it should add controls to the form. This is thecase, and the ’Customize...’ button can (and should) be used for this. The resultingdialog looks like figure figure 4 on page 7.
After some tweaking and moving of controls, the form can look like figure 5 on page 7.figure 4 on page 7.
To use this form, the main index form is divided in a heading and 2 subform containers:A sidebar (called leftarea) which will contain a menu form, and the MainArea subformcontainer, which will hold the artists form. On the menu form (called SidebarForm), alabel is added which, when clicked, shows the artists form in the main area:
Procedure SideBar.ArtistsClick(Event: TDOMEvent);Begin
OpenForm(’ArtistsForm’, ’Index:MainArea’,’’);End;
Now the project can be run. When the artists label is clicked, the artists form will be shown,and the first record in the table will be displayed. The navigation bar can be used to navigatethrough the records, and to add, edit or delete records.
The same excercise can be made for the ’All Albums’ form. To show the work that thewizard does, this time the form will be made manually. So, a new form is started in designview. The name of the form is AllAlbumsForm.
6

Figure 4: The IDE will create controls for all fields
Figure 5: The finished ArtistsForm in the IDE
7

Figure 6: The navigation bar configuration
In difference with the artists form, the album form will show a list of all albums, witha maximum of 20 per page: This decision makes the form read-only. To do this, theViewMode property of the form is set to vmContinuous, the DataSource propertyis set to the ALBUMS table, and the PageCount is set to 20.
Per record, the following information will be shown:
• The ID. The ID will be clickable, and doing so will take the user to a form where hecan edit the album.
• The title of the album.
• The year of the album.
• The description of the album.
Since the form is read-only, all controls will be labels. The ID label will have a slightlydifferent look, and the cursor will change shape, so the user knows it’s clickable.
For a nicer appearance, the form will contain a header band, so the header band must bemade somewhat larger, so a title text and some column header labels can be put in it.
The navigationbar is not a control by itself as it is in many other RAD environments. In-stead, it is a property of the footer band. To configure it, the NavigationBar propertyof the footerband must be edited: A property editor dialog will pop up, looking like figure6 on page 8.
With this, the form is ready to be used. A menu entry can be added to the sidebar: ’AllAlbums’. When clicked, similar code is executed as for the artists form:
8

Procedure SideBar.AllClick(Event: TDOMEvent);Begin
OpenForm(’AllAlbumsForm’, ’Index:MainArea’,’’);End;
5 Form parameters
The application has now 2 forms, both based on a table. The artists table can be edited,the Albums table can be displayed, and no code other than menu navigation code has beenwritten yet.
To be able to edit an album (or to add a new album), the AllAlbumsForm form is notsuitable: it is read only. Therefor, a new form must be made which enables the user to addor edit an album. The AlbumEditForm will allow the user to edit or create an album.This will again be a databound form, and it will again be bound to the ALBUMS table. Butin difference with the AllAlbumsForm, the form will have it’s Viewmode property setto vmSingle, so it will show only 1 record at a time.
The design of the form is slightly more complicated than the design of the previous forms:the controls for the title, year, discid and description fields are simple text edit fields, thesepresent no problem. The B_ARTIST_FK field is a reference to the Artists table. To setit, a combobox control is used. The items in the combobox controls must come from theArtists table, so an artist can be selected. To do this, the following properties must beset:
LookupDataSource can be set to the Artists table.
LookupDataField is the A_ID field. This is the field whose value will be stored in thefield edited by the combobox.
LookupTextField is the A_NAME field. This is the field whose value will be shown in thecombobox.
The maximum number of items that will be displayed in the combobox can be set using theLookupMaxRecords property.
To show the front and back pictures, and the tracks in the album, a tabcontrol (TCAlbum)is placed on the form. It will contain 3 tabs:
1. The first tab will show the tracks of the record. The tracks will be shown in a sep-arate form that will be displayed in a subform container placed on this tab (calledSFTracks).
2. The second tab will show the front cover picture. To show the picture, an image con-trol is dropped, and it’s DataField is set to the B_FRONTCOVER field. To allowthe user to set the picture, a file uploader control is placed below the picture, andit’s DataField property is also set to B_FRONTCOVER: The morfik frameworkknows how to handle the conversion from file to database field.
3. The third tab will show the back cover picture. The same controls are used as for thefront cover field.
The tabs should be big enough to display a CD cover image on 1:1 scale. The form gets stilla footer band, and the footer band contains a navigationbar which only shows the recordmanipulation buttons for edit, post (submit), delete and refresh. The header band will showa title label.
9

Figure 7: The parameter dialog
With this, the form is almost ready to go: the only thing that still needs to be done is tomake sure the form will show the correct record when it is called. To do this, 2 propertiesof a form are used:
• The form can have a number of parameters associated with it. The parameters ofa form must be defined at design time. This can be done using the parameter def-inition dialog; The dialog can be accessed from the context menu in the form de-signer. When opened, it will look something like figure 7 on page 10. For theAlbumEditForm form, a parameter AlbumID of type integer will be defined. Bydefault it’ll have a value 0. All parameters will be available in the code of the formas if the parameter was a string property of the form.
• In the parameters dialog a SQLFilter parameter is also visible: this is actually aproperty of the form. This gives us a hint of how to make sure the correct recordwill be shown when the AlbumEditForm form is shown: the SQLFilter propertyis used as a filter on the datasource to which the form is bound.
These 2 points give us the mechanism to show the correct record when the edit form isshown. In the OnReady event in the browser, the following code is executed:
Procedure AlbumEditForm.WebFormReady(Var Ready: Boolean);Begin
If (AlbumID<>’-1’) thenbeginChangeFilter(’B_ID=’+AlbumID);ShowTracks(StrToInt(AlbumID));LTitle.Caption:=’Editing album ’+AlbumID;end
elsebeginNewRecord(Nil);TCAlbum.Enabled:=False;LTitle.Caption:=’Adding new album’;end;
End;
The code is quite simple: if the AlbumID parameter is different from -1, the SQLFilterproperty is changed to B_ID=ALBUMID: this will make sure the form only shows therecord for the album with ID AlbumID. After this, the tracks for the form are shown (latermore about this), and the title caption is set.
10

If the AlbumID parameter is -1, this signals to the form that it should create a new record.This is done with the NewRecord procedure. The procedure accepts a parameter of typeTDomEvent. Since no such event is present, Nil is passed. After this, the tabcontrol withthe tracks and pictures is disabled and the title caption is set to something informative.
There are 2 good reasons for disabling the tabcontrol:
1. As long as the album is not in the database, the tracks cannot be entered, since theymust refer to an album record with their T_ALBUM_FK field.
2. The fileuploader controls do not work if no record is present: they need an existingrecord in the database in order to work.
The tabcontrol is enabled again after the record was posted to the database. There are var-ious events which are executed during the database update routines: OnBeforeSubmit,OnAfterSubmit (executed before and after the form submits the data to the server) andOnBeforeDataChange, OnAfterDataChange (executed before the submitted datais actually changed in the browser), and finally OnBeforeRefresh, OnAfterRefresh:when the form data is refreshed with the values from the database. The new values fromthe database are only known after the refresh, so this is when the tabcontrol can be enabledagain:
Procedure AlbumEditForm.WebFormAfterRefresh(Failed: Boolean);Begin
If Not TCAlbum.Enabled thenbeginTCAlbum.Enabled:=True;ShowTracks(StrToInt(LID.Caption));LTitle.Caption:=’Editing album ’+LID.Caption;end;
End;
Note that the AlbumID parameter is not usable in this routine (it’ll be set to -1), andtherefore an invisible textlabel (LID) is dropped on the form, bound to the B_ID field.Morfik offers currently no way to access the data of the datasource directly in the browsercode, so the use of an invisible label bound to a field is the only way of accessing datawithout actually showing the data to the user: in the above case, the new value of the B_IDfield will be shown in the LID as soon as the data is refreshed from the server. The valueis also used to update the title caption.
With the exception of the editing of album tracks, the form can now be used, and shouldlook something like figure figure 8 on page 12.
To call it, 2 labels are added to the rest of the application: The first label is a ’New album’label in the sidebar menu , which will have the following code in it’s ’OnClick’ eventhandler:
Procedure SideBar.LNewAlbumClick(Event: TDOMEvent);Begin
OpenForm(’AlbumEditForm’, ’Index:MainArea’,’"AlbumID=-1"’);End;
As can be seen, the sentinel value of -1 is passed to ensure the form is put in insert mode.
To edit an album, a label displaying the ID of an album was placed on the AllAlbumsForm.In the ’OnClick’ event of this label, the following code is placed:
11

Figure 8: The album editing form in action
12

Procedure AllAlbumsForm.Cell_B_IDClick(Event: TDOMEvent);
VarP : String;
BeginCell_B_ID.BandIndex:=GetEventSource(Event).BandIndex;P:=’"AlbumID=’+Cell_B_ID.Caption+’"’;XApp.OpenForm(’AlbumEditForm’,’Index:MainArea’,P);
End;
The first line makes sure that the correct Cell_B_ID label ID is used: since the formis displayed multiple times (once per record), the Cell_B_ID identifier needs to pointto the correct instance. This is done by setting its BandIndex property, which can beretrieved from the Event that caused the OnClick event to fire. The BandIndex tellsthe definition of the label which instance of the form should be used.
6 Using queries
Till now, only tables were used, with a filter on the table to limit the number of records.Obviously, it is also possible to use queries. Now that the album information can be edited,the last thing that still needs to be editable are the tracks in an album. This offers the chanceto show that queries can be used just as well as tables.
From the explanation above, it should be clear how this will be handled: A form mustbe created which allows to show and edit the tracks, and this form will be shown in thesubform container SFTracks in the AlbumEditForm. The design of the TracksFormis similar to the design of the AllAlbumsForm:
• It’s DataSource is the AlbumTracks query.
• It’s ViewMode will be vmContinuous.
• It’ll be read-only, editing will be done through a secundary form EditTrackForm,which will be shown modally as soon as the track is double-clicked.
• A separate label will be shown to create a new track.
• It gets passed a parameter AlbumID, which will be used in the query/
Once this form is ready, it is called in the AlbumEditForm with the following method:
Procedure AlbumEditForm.ShowTracks(AnAlbumID : Integer);
beginOpenForm(’TracksForm’,’self:SFTracks’,
’"AlbumID=’+IntToStr(AnAlbumID)+’"’);end;
To design the AlbumTracks query, the query designer must be used. The query designercan be used in 2 modes:
1. Visually. A visual query editor, as shown in figure 9 on page 14
13

Figure 9: The visual query editor
2. The SQL can be typed in directly. Optionally, the Morfik IDE will check the queryfor it’s syntax, but sometimes it is necessary to disable this behaviour: the MorfikIDE does not understand all possible forms of valid Firebird SQL syntax.
Obviously, the result of the query (if it is a SELECT query) can be viewed in a data grid.
Whatever method is used to create the query, the following is the query that is needed forthe TracksForm:
SELECTT_ID,T_NUMBER,T_TITLE,T_DURATIONMIN,T_DURATIONSEC,A_NAME
FROMTRACKS LEFT JOIN "Artists" ON (T_ARTIST_FK=A_ID)
WHERE(T_ALBUM_FK=:AlbumID)
ORDER BYT_NUMBER
Note the AlbumID parameter: this parameter must be defined as a query parameter in theparameter dialog, just as this is done for a form. If a form uses a query with parameters asa datasource, it will automatically define any of the query parameters as a form parameter,and in runtime, will apply the form parameters to the query.
The TracksForm form is now ready to be used: it can show the tracks of an album.
To edit a track, or to add a new track to an album, a small track editing dialog is created.Since queries are not updatable, this form must again be based on a table as a datasource.It will work similar to the AlbumEditForm:
14
• Its datasource is the Artists table.
• its viewmode is vmSingle
• It has a navigation bar with a submit and refresh button. No navigation buttons.
• On startup, it should check whether it should insert a new record, or edit an existingrecord.
But there is some additional functionality needed:
• The form must be shown modally, as a popup window.
• When a new record is inserted, the Artist ID (in the T_ARTIST_FK field) shouldbe pre-filled with the value that was specified for the album (B_ARTIST_FK). Thisvalue must be passed on by the TracksForm form in a form parameter (we’ll nameit ArtistID).
• Similarly, when a new record is inserted, it should fill in the track number with thenext track number. Again, the TracksForm should specify this value in a formparameter called TrackNo.
• Obviously, when submitting a new record, it should refer to the correct album. Forthis, the album ID must be passed on to the form in a AlbumID parameter. The al-bum ID field (T_ALBUM_FK) must therefor be made accessible through an invisibletextedit control.
• After submitting it’s data, it should refresh the list of tracks to reflect the changes inthe list of tracks.
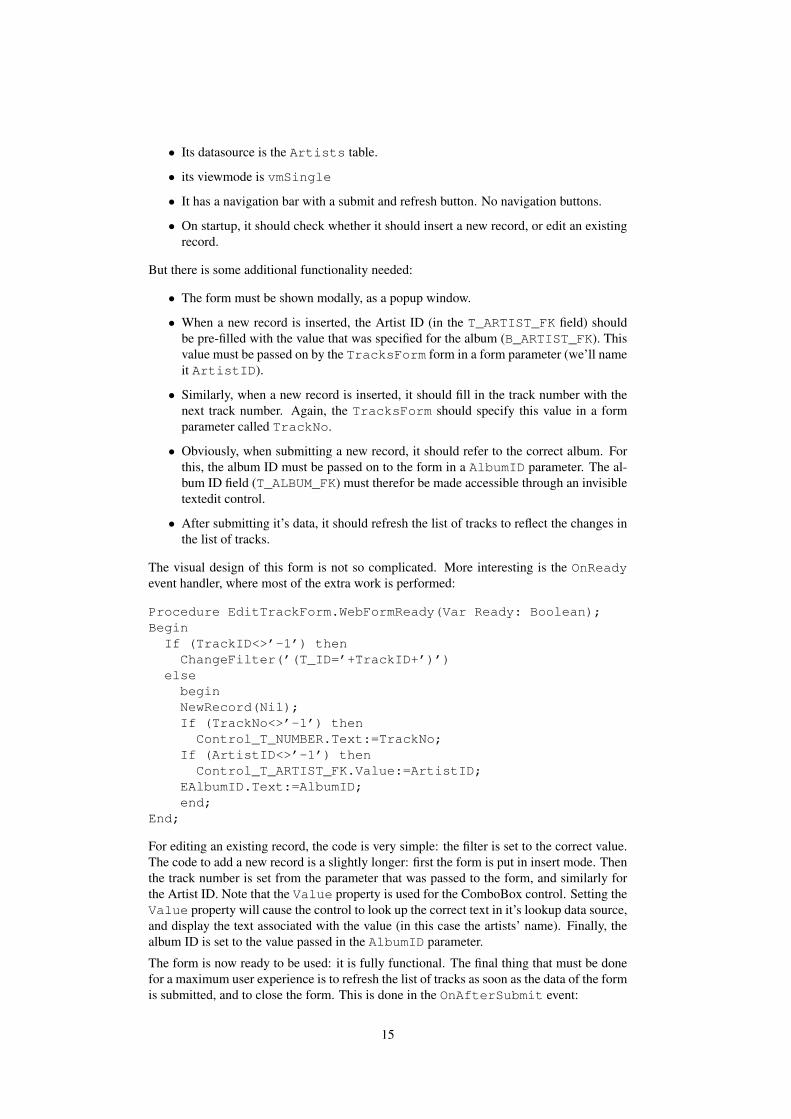
The visual design of this form is not so complicated. More interesting is the OnReadyevent handler, where most of the extra work is performed:
Procedure EditTrackForm.WebFormReady(Var Ready: Boolean);Begin
If (TrackID<>’-1’) thenChangeFilter(’(T_ID=’+TrackID+’)’)
elsebeginNewRecord(Nil);If (TrackNo<>’-1’) then
Control_T_NUMBER.Text:=TrackNo;If (ArtistID<>’-1’) then
Control_T_ARTIST_FK.Value:=ArtistID;EAlbumID.Text:=AlbumID;end;
End;
For editing an existing record, the code is very simple: the filter is set to the correct value.The code to add a new record is a slightly longer: first the form is put in insert mode. Thenthe track number is set from the parameter that was passed to the form, and similarly forthe Artist ID. Note that the Value property is used for the ComboBox control. Setting theValue property will cause the control to look up the correct text in it’s lookup data source,and display the text associated with the value (in this case the artists’ name). Finally, thealbum ID is set to the value passed in the AlbumID parameter.
The form is now ready to be used: it is fully functional. The final thing that must be donefor a maximum user experience is to refresh the list of tracks as soon as the data of the formis submitted, and to close the form. This is done in the OnAfterSubmit event:
15

Procedure EditTrackForm.WebFormAfterSubmit(Failed: Boolean);
VarP : String;
BeginP:=’"openmode=refresh"’;P:=P+’, "AlbumID=’+AlbumID+’"’;OpenForm(’TracksForm’,’AlbumEditForm:SFTracks’,P);Close;
End;
The refreshing is done by redisplaying the tracks form, with the openmode parameter setto refresh, and additionally passing the AlbumID parameter: this is necessary, becausethe form is actually refetched from the server, thereby discarding it’s previous state andparameter values.
Now that the form is ready for use, the code must be written to call the form. This is donein the TracksForm EditTrack method:
procedure TracksForm.EditTrack(TrackID : Integer);
VarP : String;T : String;
beginIf (TrackID=-1) then
T:=’New track’else
T:=’Edit track ’+IntToStr(TrackID);P:=’"title=’+T+’", "modal=true", "closeable=true"’;P:=P+’, "TrackID=’+IntToStr(TrackID)+’"’;P:=P+’, "AlbumID=’+AlbumID+’"’;If (TrackID=-1) then
beginP:=P+’, "TrackNo=’+IntToStr(RecordCount+1)+’"’;T:=ComboBox(OwnerForm.GetControlByName(’CBArtist’)).Value;P:=P+’, "ArtistID=’+T+’"’;end;
XApp.OpenForm(’EditTrackForm’,’POPUP’,P);end;
As can be seen, quite some work is done to prepare the form parameters: First of all, sincethe form will be shown modally (as a popup dialog) an appropriate title is constructed, andthe form is made modal and closeable by providing the appropriate parameters as discussedin the previous article.
After that, the TrackID, AlbumID and optionally the TrackNo and ArtistID param-eters are constructed. Note that the value of the ArtistID is retrieved directly from theAlbumEditForm, which is accessible through the OwnerForm property: the GetControlByNamefunction can be used to retrieve the Combobox instance bound to the B_ARTIST_FK field.Finally, the EditTrackForm is shown as a popup window. It can be seen in figure 10 onpage 17.
16

Figure 10: The track editing form
7 Reports
Morfik has a built-in reporting engine: the reports are created on the server and are sent tothe client as a PDF file, so they can be stored on disk or printed, as the user sees fit.
The Morfik report designer is a banded report designer. It is similar in set-up as the MS-Access reporting engine, or as reporting tools such as Fastreports or Rave reports thatcome with Delphi. As such, designing a Morfik report is similar to designing a continuousform: the report band is shown for each record in the datasource the report was bound to.(obviously, a report without datasource can also be made). For this reason, the design ofreports will not be extensively covered: it is completely similar to designing forms.
To demonstrate this, a small simple report will be made that makes a track list, suitable fora CD-Cover. The report (named CD Cover) will be made based on the AmbumTracksquery, which is used for the displaying of tracks in the album editing form. The form hasa single band which displays the track number, title, artist and duration: each in a textlabelof their own. This is an extremely simple report, with no code attached to it.
To show it, a small label is placed on the footer band of the TracksForm form. In it’sonclick event, the following code will be executed:
Procedure TracksForm.LCDCoverClick(Event: TDOMEvent);Begin
OpenReport(’CD Cover’,’"AlbumID=’+AlbumID+’"’);End;
As can be seen, the code is very similar to a OpenForm call. In difference with OpenForm,no target can be specified: a report is always opened in a new browser window, and cannotbe embedded in a form. The only parameter that needs to be passed is the ID of the albumfor which a tracklist must be printed. The result can be seen in figure 11 on page 18
17

Figure 11: The CD-Cover report
18

A more extensive report with grouping, a page footer and header can be found in the ’AllAl-bums’ report: it makes a report with all albums and their tracks, using AlbumContents.It also shows how to change the text of the controls in an event by displaying the pagenumber in a label on the page footer. The Report all albums label in the sidebar canbe used to show the report.
8 Conclusion
In this article, it has been shown that accessing a database in Morfik can be done with greatease: the only code needed to do this is form navigation code: almost no other code needsto be written. The code is mainly concerned with passing parameters. Actual databaseaccess code need not be written: all this is handled transparantly by the Morfik framework.What is true for user interaction forms is also true for reporting: the reports need no code,but can be customized through code. It is also possible to access the database more directlyinstead of through the pre-defined queries, but this will be shown in a next contribution,where web-methods will be discussed.
19


