Embed Size (px)
Citation preview

GGeeoo--EEnnggiinneeeerr iinngg AAssssiissttaanntt LL aabb TTeecchhnniicciiaann
Short term Curriculum (Competency Based)
Council for technical education and vocational training
Curriculum Development Division
Sanothimi, Bhaktapur
2014

2
Table of Contents
Introduction .......................................................................................................................... 3 Aim ........................................................................................................................................ 3 Objectives ............................................................................................................................. 3 Course description ............................................................................................................... 3 Course Structure .................................................................................................................. 3 Duration ................................................................................................................................ 4 Target Group ........................................................................................................................ 4 Target location ..................................................................................................................... 4 Group Size ............................................................................................................................ 4 Medium of Instruction ......................................................................................................... 4 Pattern of Attendance .......................................................................................................... 4 Focus of Curriculum ............................................................................................................ 4 Entry Criteria ....................................................................................................................... 4 Instructional Media and Materials .................................................................................... 4 Teaching Learning Methodologies ..................................................................................... 5 Students Evaluation Details ................................................................................................ 5 Trainers' Qualification (Minimum) ................................................................................... 5 Trainer-Trainees Ratio ........................................................................................................ 5 Suggestions for Instruction ................................................................................................. 5 Certificate Requirements .................................................................................................... 6 Skill Testing Provision ......................................................................................................... 6 Physical Facilities ................................................................................................................. 6 List of Module and Sub-Module ......................................................................................... 7 Detail Curriculum ................................................................................................................ 8 Module 1: Introduction ....................................................................................................... 8 Module 2: Geo Engineering Lab Management ................................................................. 9 Module 3: Geo Engineering Lab Tests ............................................................................ 14 Sub-module 3.1: Soil Tests ................................................................................................ 15 Sub-module 3.2: Aggregate Tests ..................................................................................... 28 Sub-module 3.3: Cement Tests ......................................................................................... 41 Sub-module 3.4: Concrete Tests ....................................................................................... 51 Sub-module 3.5: Bitumen Tests ........................................................................................ 60 Sub-module 3.6: Asphalt Tests ......................................................................................... 72 Sub-module 3.7: GI Wire Tests ........................................................................................ 81 Sub-module 3.8: Brick Tests ............................................................................................. 87 Module 4: Communication & Professionalism Development ........................................ 95 Module 5: Field Practice ................................................................................................... 97 References: ......................................................................................................................... 98 List of Tools and Equipment............................................................................................. 99

3
Introduction The competency based and market oriented curriculum for Geo-Engineering Assistant Lab Technician is designed to produce employable workforce equipped with knowledge, skills and attitudes related to geo-engineering laboratory. Once the trainees acquired the competencies they will have ample opportunity for employment through which they will contribute in the national streamline of poverty reduction in the country. The skills and knowledge included in this curriculum improve their knowledge and skills and make them competent Geo-Engineering Assistant Lab Technician needed for the occupation. Aim The main aim of this program is to produce employable Geo-Engineering Assistant Lab Technician who could provide soil, aggregate, cement, concrete, bitumen, brick, G.I. wire testing services for public and private sectors in the country and abroad. Objectives After completion of this training, the trainees will be able to:
1. Conduct lab test on soil & aggregate, 2. Conduct lab test on cement & concrete, 3. Conduct lab test on bitumen & bituminous materials, 4. Prepare lab report and interpret results.
Course description This course is designed to help the trainees to provide basic knowledge and skills on geotechnical lab works. This course especially provides skills focusing on the conducting different geo-engineering lab tests. This course also provides skills about reporting the lab test results. Trainees will practice & learn skills using typical tools, equipment, machines and materials necessary for the program.It is made mandatory that trainees should be placed in construction industries to gain hands on practice for at least two weeks.
Course Structure S.N. Modules Nature Time (hours)
Theory Practical Total 1 Introduction T 6 0 6 2 Geo Engineering Lab Management T+P 2 5 7 3 Geo Engineering Lab Tests T+P 70 246 316 3.1. Soil Tests T+P 10 40 50 3.2. Aggregate Tests T+P 10 40 50 3.3. Cement Tests T+P 10 30 40 3.4. Concrete Tests T+P 10 30 40 3.5. Bitumen Tests T+P 10 50 60 3.6. Asphalt Tests T+P 10 30 40 3.7. GI Wire Tests T+P 6 12 18 3.8. Brick Tests T+P 4 14 18 4 Communication& Professionalism
Development T+P 2 4 6
5 Field Practice P 0 55 55 Total 80 310 390

4
Duration The total duration of this training program will be of 390 hours including two weeks field works in construction industries. Target Group The target group for this training program will be all interested individuals with educational prerequisite of minimum T/SLC pass. Target location The target location for this training program will be all over Nepal. Group Size The group size of this training program will be 20 but need to provide all necessary resources to practice the tasks/competencies as specified in this curriculum. Medium of Instruction The medium of instruction for this program will be Nepali or English or both Pattern of Attendance Trainee should have 90% attendance during the training period to get the certificate. Focus of Curriculum This is a competency-based curriculum. This curriculum emphasizes on competency performance. 80% time is allotted for performance and remaining 20% time is for related technical knowledge. So, the main focus will be on performance of the specified competencies in the curriculum. Entry Criteria Individuals who meet the following criteria will be allowed to enter this curricular program:
• Minimum of T/SLC pass or equivalent • Physically and mentally fit • Should pass entrance examination
Instructional Media and Materials The following instructional media and materials are suggested for the effective instruction and demonstration.
� Printed Media Materials(Assignment sheets, Case studies, Handouts, Information sheets, Individual training packets, Procedure sheets, Performance Check lists, Textbooks etc.).
� Non-projected Media Materials(Display, Models, Flip chart, Poster, Writing board etc.).
� Projected Media Materials(Opaque projections, Overhead transparencies, Slides etc.).
� Audio-Visual Materials(Audiotapes, Films, Slide-tape programs, Videodiscs, Videotapes etc.).
� Computer-Based Instructional Materials(Computer-based training, Interactive video etc.).

5
Teaching Learning Methodologies The methods of teachings for this program will be a combination of several approaches,such as illustrated lecture, group discussion, demonstration, simulation, guided practice, practical experiences, fieldwork and other independent learning.
• Theory: lecture, discussion, assignment, group work. • Practical: demonstration, observation, guided practice and self-practice.
Students Evaluation Details
• Continuous evaluation of the trainees' performance is to be done by the related instructor/ trainer to ensure the proficiency over each competency under each area of the whole course.
• Related technical knowledge learnt by trainees will be evaluated through written or oral tests as per the nature in the institutional phase of training.
• Trainees must secure minimum marks of 60% in practical and 40% in theoretical evaluations.
• The entrance test will be administered by the concerned training institute.
Trainers' Qualification (Minimum) • Bachelors in civil engineering or equivalent in related field • Good communicative and instructional skills • Experience in related field
Trainer-Trainees Ratio
• In theory classes 1:20 • In practical classes (in workshop and laboratory) 1:10
Suggestions for Instruction
1. Select objectives • Write objectives of cognitive domain. • Write objectives of psychomotor domain. • Write objectives of affective domain
2. Select Subject matter • Study subject matter in detail. • Select content related to cognitive domain. • Select content related to psychomotor domain. • Select content related to affective domain.
3. Select Instructional Methods • Teacher centered methods: like lecture, demonstration, question answers inquiry,
induction and deduction methods. • Student initiated methods like experimental, field trip/excursion, discovery,
exploration, problem solving, and survey methods. • Interaction methods like discussion, group/team teaching, microteaching and
exhibition. • Dramatic methods like role play and dramatization
4. Select Instructional method(s) on the basis of objectives of lesson plans and KAS domains.
5. Select appropriate educational materials and apply at right time and place. 6. Evaluate the trainees applying various tools to correspond the KAS domains. 7. Make plans for classroom / field work / workshop organization and management. 8. Coordinate among objectives, subject matter and instructional methods. 9. Prepare lesson plan for theory and practical classes.

6
10. Deliver /conduct instruction / program. 11. Evaluate instruction/ program.
Special suggestion for the performance evaluation of the trainees
1. Perform task analysis. 2. Develop a detail task performance checklist. 3. Perform continuous evaluation of the trainees by applying the performance checklist.
Suggestion for skill training
1. Demonstrate task performance in normal speed. 2. Demonstrate slowly with verbal description of each and every step in the sequence of
activity of the task performance using question and answer techniques. 3. Repeat 2 for the clarification on trainees demand if necessary. 4. Perform fast demonstration of the task.
Provide trainees the opportunities to practice the task performance demonstration
1. Provide opportunity to trainees to have guided practice. 2. Create environment for practicing the demonstrated task performance. 3. Guide the trainees in each and every step of task performance. 4. Provide trainees to repeat and re-repeat as per the need to be proficient on the given
task performance. 5. Switch to another task demonstration if and only trainees developed proficiency in the
task performance.
Other suggestions 1. Apply principles of skill training. 2. Allocate 20% time for theory classes and 80% time for task performance while
delivering instructions. 3. Apply principles of learning relevant to the learners’ age group. 4. Apply principles of intrinsic motivation. 5. Facilitate maximum trainees' involvement in learning and task performance activities. 6. Instruct the trainees on the basis of their existing level of knowledge, skills and
attitude.
Certificate Requirements The related training institute will provide the certificate of "Geo-Engineering Lab Technician" to those trainees who successfully complete all the requirements as prescribed by the curriculum.
Skill Testing Provision The graduates who have the completion certificate of "Geo-Engineering Lab Technician" may sit in the skill testing examination as provisioned and administered by the National Skill Testing Board, CTEVT.
Physical Facilities The theory class rooms at least should have area of 10 square feet per trainee and in the workshop it should be at least of 30 square feet per trainees. All the rooms and laboratory should be well illuminated and ventilated.

7
List of Module and Sub-Module
Module 1: Introduction
Module 2: Geo Engineering LabManagement
Module 3: Geo Engineering LabTests
Sub-Module 3.1: Soil Tests
Sub-Module 3.2: Aggregate Tests
Sub-Module 3.3: Cement Tests
Sub-Module 3.4: Concrete Tests
Sub-Module 3.5: Bitumen Tests
Sub-Module 3.6: Asphalt Tests
Sub-Module 3.7: GI Wire Tests
Sub-Module 3.8: Brick Tests
Module 4: Communication and ProfessionalismDevelopment
Module 5: Field Practice

8
Detail Curriculum
Module 1: Introduction
Time: 6hrs Theory + 0hrs Practical = 6hrs Description: This module as a foundation module intends to provide basic knowledge
related to the occupation. This module deals with course information, course objectives, importance, concept & importance of geo-engineering lab test, instruments and their application, mathematical calculations etc.
Objectives: After its completion the trainees will able to:
• explain the objectives and importance of course • explain the concept and importance of geo-engineering lab test, • identify the instruments and their application • perform the simple mathematical calculation related with geo-engineering lab
test Related Knowledge
• Introduction and objectives • Concept of geo-engineering lab test. • Importance of geo-engineering lab test. • Types of tests • Duties and responsibilities of Geo-Engineering Lab Technician • Instruments required for lab test and their application • Simple mathematical calculations related to lab tests • Reporting test results

9
Module 2: Geo Engineering Lab Management Time: 2 hrs Theory + 5hrs Practical = 7 hrs
Description: This module provides basic knowledge and skills related to the management of geo-engineering lab.
Objectives: After its completion the trainees will be able to set up and manage geo-engineering lab. Tasks:
1. Plan for lab activities 2. Set up lab apparatus/equipment 3. Inspect lab apparatus/equipment 4. Use personal protective equipment (PPE)

10
Task Analysis TASK 1: Plan for lab activities
Time : 1 ½ hrs Theory : ½ hrs Practical: 1 hrs
Performance steps Terminal Performance Objectives
Related Technical Knowledge
1. Collect required information 2. Obtain instruction 3. Observe the lab 4. Determine the test 5. Make layout of lab setting 6. Check available
apparatus/equipment 7. Prepare reporting format
Condition (Given): Classroom, lab, sample plan Task (What): Plan for lab activities. Standards (How well): The lab plan be inclusive of all lab activities
Lab Activities Planning: • Concept of planning • Components of
planning • Types of planning • Types of lab activities • Process of planning • Reporting of result
Tools/equipment: Labapparatus/equipment Safety:

11
Task Analysis TASK 2: Set up lab apparatus/equipment
Time : 1 ½ hrs Theory : ½ hrs Practical: 1hrs
Performance steps Terminal Performance Objectives
Related Technical Knowledge
1. Collect required tools, equipment and material.
2. Obtain instruction. 3. Place lab apparatus/equipment in
proper place as per layout diagram. 4. Check the set up. 5. Readjust the set up if necessary. 6. Operate each apparatus/equipment
after the set up.
Condition (Given): Lab room, lab apparatus/equipment. Task (What): Set up lab apparatus/equipment. Standards (How well): All lab apparatus/equipment were set up as per given layout diagram.
Lab apparatus/equipment set up: • Process of lab
apparatus/equipmentset up
• Safety
Tools/equipment: Lab apparatus/equipment Safety: • WearPersonal protective equipment properly, otherwise it may cause accident. • Labapparatus/equipment should handle carefully. • Improper handling of lab apparatus/equipment may have accident and may have serious
injuries as well as damage of expensive apparatus/equipment.
12
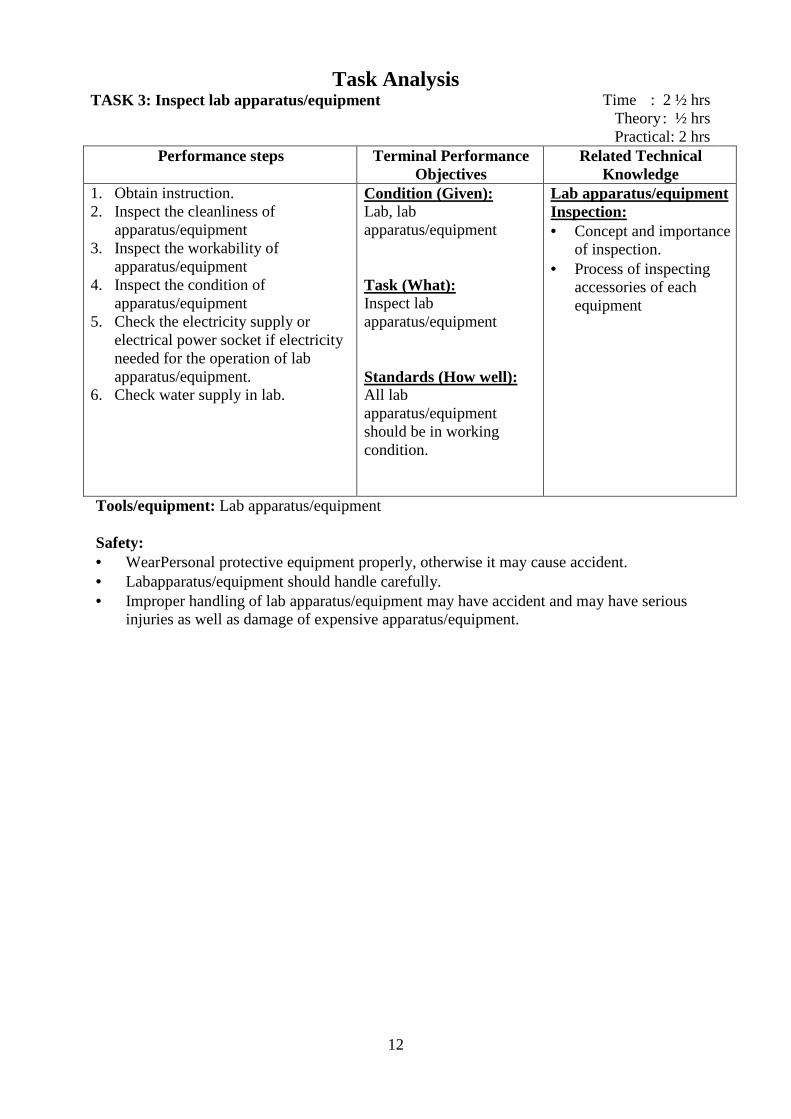
Task Analysis TASK 3: Inspect lab apparatus/equipment
Time : 2 ½ hrs Theory : ½ hrs Practical: 2 hrs
Performance steps Terminal Performance Objectives
Related Technical Knowledge
1. Obtain instruction. 2. Inspect the cleanliness of
apparatus/equipment 3. Inspect the workability of
apparatus/equipment 4. Inspect the condition of
apparatus/equipment 5. Check the electricity supply or
electrical power socket if electricity needed for the operation of lab apparatus/equipment.
6. Check water supply in lab.
Condition (Given): Lab, lab apparatus/equipment Task (What): Inspect lab apparatus/equipment Standards (How well): All lab apparatus/equipment should be in working condition.
Lab apparatus/equipment Inspection: • Concept and importance
of inspection. • Process of inspecting
accessories of each equipment
Tools/equipment: Lab apparatus/equipment Safety: • WearPersonal protective equipment properly, otherwise it may cause accident. • Labapparatus/equipment should handle carefully. • Improper handling of lab apparatus/equipment may have accident and may have serious
injuries as well as damage of expensive apparatus/equipment.

13
Task Analysis
TASK NO. 4: Use personal protective equipment (PPE)
Time : 1 ½ hrs Theory : ½ hrs Practical: 1hrs
Performance steps Terminal Performance Objectives
Related Technical Knowledge
1. Obtain personal protective equipment.
2. Obtain instruction. 3. Wear close shoes. 4. Wear clean apron. 5. Wear safety helmet. 6. Wear mask, gloves and other PPE as
per the need. 7. Store PPE.
Condition (Given): Geolab, Personal protective equipment. Task (What): Use personal protective equipment (PPE). Standards (How well): Personal protective equipmentusedproperly.
Use of PPE • Importance of
personal protective equipment
• Process of wearing personal protective equipment
Tools/equipment: Personal protective equipment Safety:
• WearPersonal protective equipment properly, otherwise it may cause accident.

14
Module 3: Geo Engineering Lab Tests Time: 70hrs Theory + 246hrs Practical =316hrs
Description: This module provides basic knowledge and skills related to geo-engineering lab tests.
Objectives: After its completion the trainees will be able to carry out various geo-engineering tests in the related lab and field conditions. Sub modules:
3.1: Soil Tests
3.2: Aggregate Tests
3.3: Cement Tests
3.4: Concrete Tests
3.5: Bitumen Tests
3.6: Asphalt Tests
3.7: GI Wire Tests
3.8: Brick Tests

15
Sub-module 3.1: Soil Tests Time: 10hrs Theory + 40hrs Practical = 50hrs
Description: This module provides basic knowledge and skills related to the soil tests. Objectives: After its completion the trainees will be able to carry out different types of soil tests in geo-engineering lab. Tasks:
1. Familiarize with soil testing equipment 2. Collect/prepare soil sample 3. Carryout moisture content test 4. Carryout gradation analysis test 5. Carryout Atterberg's limit test 6. Carryout proctor test 7. Carryout California Bearing Ratio (CBR) test 8. Carry out field density test.

16
Task Analysis
TASK 1: Familiarize with soil testing equipment
Time:6hrs Theory: 2hrs
Practical: 4hrs Performance steps Terminal Performance
Objectives Related Technical
Knowledge 1. Obtain instruction. 2. Prepare list of soil testing
equipment. 3. Collect required tools, equipment
and material. 4. Identify soil testing equipment. 5. Clean, dry all tools and equipment. 6. Fill/check fuel/oil if necessary. 7. Tight nut, grease etc. if necessary. 8. Handlethe equipment. 9. Clean all tools and equipment and
store in proper place.
Condition (Given): Well-equipped soil testing lab. Task (What): Familiarize with soil testing equipment. Standards (How well): All soil testing tools/equipment identified and handled safely.
Familiarize with soil testing equipment: • Characteristics of
soil • Desirable properties
of soil • Index properties of
soil • Purpose for soil
testing • Name and function
of soil testing equipment
Tools/equipment: Oven, Weighing machine, Container, Tongs,Brushes, Trays, Spatula, Wash bottle, Mechanical shaker, Metallic pressure vessel, Scoop, Steel balls, Sieves, Mortar with rubber pestle, Casagrande’s liquid limit device, Grooving tools of both standard and ASTM types, Evaporating dish, etc.
Safety:
• WearPersonal protective equipment properly, otherwise it may cause accident. • Labapparatus/equipment should handle carefully. • Toxic gas/fume generated during chemical tests may cause injuries. • Improper handling of lab apparatus/equipment may have accident and may have
serious injuries as well as damage of expensive apparatus/equipment.

17
Task Analysis
TASK 2: Collect/prepare soil sample
Time: 5hrs Theory: 1hrs
Practical: 4hrs Performance steps Terminal Performance
Objectives Related Technical
Knowledge 1. Collect required tools, equipment. 2. Collect/obtain soil sample. 3. Pulverize the clods using
wooden/rubber mallet. 4. Remove the organic content (roots,
pieces of barks, etc.) present in the sample.
5. Dry sample in air or sun. 6. In case of wet weather, dry in oven
at temperature not more than 60oC. 7. Remove the remaining foreign
materials if any. 8. Pack the sample. 9. Label the sample. 10. Take/send the sample to lab. 11. Keep records.
Condition (Given): Sample collection equipment and field. Task (What): Collect soil sample and prepare sample for different tests. Standards (How well): Soil sample collected and/or prepared as per Indian Standard 2720-1 (1983).
Soil Sample Collection • Type of soil tests • Number of soil tests • Process of soil sample
collection. • Labeling procedures. • Steps for soil
preparation for different tests.
• Related Indian Standard (IS)& Nepal Standard (NS)
Tools/equipment: Wooden/Rubber mallet, Trays, IS Sieves, Sampler Safety:
• WearPersonal protective equipment properly, otherwise it may cause accident. • Labapparatus/equipment should handle carefully. • Improper handling of lab apparatus/equipment may have accident and may have
serious injuries as well as damage of expensive apparatus/equipment.

18
Task Analysis
TASK 3: Carryout moisture content test
Time: 4½ hrs Theory: 1hrs
Practical:3½ hrs Performance steps Terminal Performance
Objectives Related Technical
Knowledge 1. Collect required tools, equipment
and material. 2. Obtain instruction. Oven Drying Method 3. Clean the container, dry it and
weigh it (Weight 'W1'). 4. Take the required quantity of the
wet soil specimen in the container and weigh it (Weight 'W2').
5. Place the container, with its lid removed, in the oven till its weight becomes constant (Normally for 24hrs.).
6. Remove the container from the oven by using tongs when the soil has dried.
7. Find the weight 'W3' of the container and the dry soil sample.
8. Clean all tools, equipment and store them in appropriate place.
Calcium Carbide Method 1. Check that the cup and the body are
clean. 2. Hold the body horizontally and
gently deposit the leveled, scoop-full of the absorbent (Calcium Carbide) inside the chamber.
3. Transfer the weighed soil from the pan to the cup.
4. Hold cup and chamber horizontally, bringing them together without disturbing the sample and the absorbent.
5. Clamp the cup tightly into place 6. Shake the unit up and down
vigorously in this position for about 15 seconds.
7. Hold the unit horizontally, rotating it for 10 seconds, so that the balls roll around the inner circumference of the body.
8. Wait for 20 seconds.
Condition (Given): Well-equipped soil testing lab with soil sample. Task (What): Carryout moisture content testof given soil sample. Standards (How well): Moisture content tests carried out as per Indian Standard 2720-2 (1973).
Moisture content test: • Concept of moisture
content test • Types of tests • Testing procedure • Methods of result
calculations

19
9. Repeat the above cycle until the pressure gauge reading is constant and note the reading.
10. Release the pressure slowly by opening the clamp screw and taking the cup out.
11. Empty the contents and clean the instrument with a brush.
12. Prepare report
Tools/equipment/chemicals: Thermostatically controlled oven, Weighing machine, Air-tight container, Tongs, Gloves, Metallic pressure vessel, Scoop, Speedy Moisture Meter setup, calcium carbide. Safety:
• WearPersonal protective equipment properly, otherwise it may cause accident. • Labapparatus/equipment should handle carefully. • Use tongs and gloves while placing in and taking out sample from oven. • Improper handling of lab apparatus/equipment may have accident and may have
serious injuries as well as damage of expensive apparatus/equipment. • Do not naked hand while handling the chemical.

20
Task Analysis
TASK 4: Carryout gradation analysis test
Time: 8hrs Theory: 1½ hrs
Practical: 6½ hrs Performance steps Terminal Performance
Objectives Related Technical
Knowledge 1. Collect required tools, equipment
and material. 2. Obtain instruction. 3. Take the weighted representative
prepared sample. 4. Wash the sample on 75 micron sieve
until clear water is seen. 5. Dry the sample retained on the sieve
on air/sun and take weight. 6. Arrange sieves according to the size
(larger hole sieve at top and smaller at the bottom) as per the standard.
7. Shake either by hand or by using sieve shaker for about two minutes.
8. Take weight of retained mass on each sieve.
9. Carry out hydrometer analysis if percentage passing 75 micron sieve is more than 10.
10. Prepare report.
Condition (Given): Well-equipped soil testing lab with soil sample. Task (What): Carryout gradation analysis test. Standards (How well): Gradation analysis test carried out as per Indian Standard 2720-4 (1987).
Gradation analysis test • Soil classification • Particle size
classification • Texture
classification • Unified soil
classification • IS soil classification • Process of gradation
analysis test • Gradation analysis
chart
Tools/equipment: Weighing machine, Trays, IS sieve sets, 1000ml calibrated cylinder, Hydrometer, Coagulant (sodium hexametaphosphate), Mechanical Stirrer, Thermometer, and Stopwatch. Safety:
• WearPersonal protective equipment properly, otherwise it may cause accident. • Labapparatus/equipment should handle carefully. • Improper handling of lab apparatus/equipment may have accident and may have
serious injuries as well as damage of expensive apparatus/equipment

21
Task Analysis TASK 5: Carryout Atterberg's limit tests
Time: 8 ½ hrs Theory: 1 ½ hrs Practical: 7 hrs
Performance steps Terminal Performance Objectives
Related Technical Knowledge
1. Collect required tools, equipment and material.
2. Obtain instruction. Liquid limit 1. Place a portion of the paste in the
cup of the liquid limit device. 2. Level the mix so as to have a
maximum depth of 1cm. 3. Draw the grooving tool through the
sample along the symmetrical axis of the cup, holding the tool perpendicular to the cup.
4. Rotate the handle at the rate of about 2 revolutions per second.
5. Count the no. of blows till the two parts of the soil sample comes into contact for about 10mm length.
6. Take about 10g of soil near the closed groove and determine its water content.
7. Transferthe soil of the cup to the dish containing the soil paste and mix thoroughly after adding a little more water.
8. Repeat the test. 9. Alter the water content of the soil
and repeat the foregoing operations, obtain at least 5 readings in the range of 15 to 35 blows.
10. Calculate the liquid limit. 11. Prepare report.
Condition (Given): Well-equipped soil testing lab with soil sample. Task (What): Carryout liquid limit of the given soil sample. Standards (How well): Liquid limit test carried out as per Indian Standard 2720-5 (1985).
Atterberg's limit test: • Concept • Types: Liquid,
Plastic & Shrinkage Liquid limit • Definition • Importance of the
test • Required equipment • Sample preparation • Testing procedure
Tools/equipment: Casagrande apparatus, Grooving tool, Spatula, Evaporating disc, 425 micron sieve, Wash bottle, Moisture can, Weighing machine, Thermostatically controlled oven. Safety:
• WearPersonal protective equipment properly, otherwise it may cause accident. • Labapparatus/equipment should handle carefully. • Improper handling of lab apparatus/equipment may have accident and may have
serious injuries as well as damage of expensive apparatus/equipment.

22
Plastic limit 1. Take about 8g of the soil. 2. Roll it with fingers on a glass plate. 3. Make the rolling between 80 to 90
strokes per minute. 4. Form a roll ofabout 3mm dia. 5. Repeat the process of alternate
rolling and kneading until the thread crumbles.
6. Collect and keep the pieces of crumbled soil thread in the container used to determine the moisture content.
7. Repeat the process at least twice more with fresh samples of plastic soil each time.
8. Determine the plastic limit of the soil.
9. Prepare report.
Condition (Given): Well-equipped soil testing lab with soil sample. Task (What): Carryout plastic limit of the given soil sample. Standards (How well): Plastic limit test carried out as per Indian Standard 2720-5 (1985).
Plastic limit test: • Definition • Importance of the
test • Required equipment • Sample preparation • Testing procedure
Tools/equipment: Ground glass plate, Spatula, Evaporating disc, 425 micron sieve, Wash bottle, Moisture can, Weighing machine, Thermostatically controlled oven, Rod (3mm dia. and 10 cm long) Safety:
• WearPersonal protective equipment properly, otherwise it may cause accident. • Labapparatus/equipment should handle carefully. • Improper handling of lab apparatus/equipment may have accident and may have
serious injuries as well as damage of expensive apparatus/equipment.

23
Shrinkage limit Sample preparation: 1. Determine the weight of the clean empty shrinkage
dish and record it. 2. Determine the capacity of the shrinkage dish by
filling the shrinkage dish with mercury 3. Record this volume as the volume of the wet soil
pat. Filling the Shrinkage disc: 1. Coat the inside of the shrinkage dish with grease
or Vaseline 2. Fill the shrinkage disc with the soil paste in three
layers. 3. Remove entrapped air and smoothen the top
surface. 4. Weigh immediately the shrinkage dish 5. Record the weight. 6. Allow the soil pat to dry in air until the colour of
the pat turns from dark to light. 7. Oven-dry the pat in the shrinkage dish to constant
weight at 105 to 110oC, 8. Cool in a desiccator and weigh immediately after
removal from the desiccator. 9. Record the weight as the weight of shrinkage dish
and dry soil. Volume of dry soil pat: 1. Fill the glass cup to overflowing with mercury 2. Remove the excess mercury by pressing the glass
plate with the three prongs firmly over the top of the cup.
3. Place the cup in the evaporating dish taking care not to spill any mercury from the glass cup
4. Place the oven-dried soil pat on the surface of the mercury in the cup.
5. Force the pat under the mercury by means of the glass plate with the same prongs and press the plate firmly over the top of the cup
6. Collect the displaced mercury in the evaporating dish without spilling.
7. Ensure that no air is trapped under the soil pat. 8. Weigh the mercury displaced by the dry soil pat 9. Determine its volume 10. Prepare report.
Condition (Given): Well-equipped soil testing lab with soil sample. Task (What): Carryout shrinkage limit test of the given soil sample. Standards (How well): Shrinkage limit test carried out as per Indian Standard 2720-6 (1972).
Shrinkage limit test: • Definition • Importance
of the test • Required
equipment • Sample
preparation • Testing
procedure
Tools/equipment: Shrinkage disc, Spatula, Evaporating disc, 425 micron sieve, Wash bottle, Moisture can, Weighing machine, Thermostatically controlled oven, Glass plate with 3 prongs. Safety:
• WearPersonal protective equipment properly, otherwise it may cause accident. • Labapparatus/equipment should handle carefully. • Improper handling of lab apparatus/equipment may have accident and may have
serious injuries as well as damage of expensive apparatus/equipment.

24
Task Analysis
TASK 6: Carryout proctor test
Time: 5hrs Theory: 1hrs
Practical: 4hrs Performance steps Terminal Performance
Objectives Related Technical
Knowledge 1. Collect required tools, equipment
and material. 2. Obtain instruction. Sample preparation: 1. Take about 6kg or 15 kg of sampleof
representative portion of air-dried soil sample passing through a 19mm IS Sieve.
2. Break down the rejected coarse fraction so that they are retained on 4.75mm IS Sieve.
Procedure: 1. Take 5kg sample of air-dried soil
passed through the 19mm IS Sieve. 2. Mix thoroughly with a suitable
amount of water depending on the soil type
3. Store the sample in a sealed container for a minimum period of 16hrs.
4. Attach the mould with base plate and take weight to the nearest 1g and place on solid base.
5. Compactthe moist soil into the mould, with the extension attached, in five layers of approximately equal mass,
6. Give 25 blows for each layer from the 4.9kg rammer dropped from a height of 450mm above the soil.
7. Removethe extension and level the compacted soil to the top of the mouldby means of the straight edge.
8. Weigh the mould and soil to the nearest gram.
9. Remove the compacted soil specimen from the mould and place into the mixing tray.
10. Determinethe water content of thesample.
11. Break up the remaining soil specimen.
12. Mix with the remaining original sample.
Condition (Given): Well-equipped soil testing lab with soil sample. Task (What): Carryout proctor test. Standards (How well): Proctor test carried out as per Indian Standards 2720-7 and 2720-8.
Proctor test • Definition • Importance of
test • Required
equipment • Testing
procedure

25
13. Add suitable increments of water
successively and mix into the sample.
14. Repeat the above operations for each increment of water added.
15. Determine the optimum moisture content, at which the maximum dry density occurs.
16. Prepare report.
Tools/equipment: Cylindrical metal mould, Weighing machine, Thermodynamically controlled oven, Straight edge, IS sieve. Safety:
• WearPersonal protective equipment properly, otherwise it may cause accident. • Labapparatus/equipment should handle carefully. • Improper handling of lab apparatus/equipment may have accident and may have
serious injuries as well as damage of expensive apparatus/equipment.

26
Task Analysis
TASK 7: Carryout California Bearing Ratio (CBR) test
Time: 6hrs Theory: 1hrs
Practical: 5hrs Performance steps Terminal Performance
Objectives Related Technical
Knowledge 1. Collect required tools, equipment and material. 2. Obtain instruction. 3. Place a filter paper on porous stone. 4. Insert it into the mould in place of the spacer. 5. Invert the mould and clamp it to the base plate. 6. Position the mould platen fixed to the lead screw of
the jack. 7. Place the surcharge weights, sufficient to produce an
intensity of loading equal to the weight of base and pavement.
8. Move the mould so that the piston is seated centrally on the specimen.
9. Apply a small load less than 4kg before starting to take penetration/load observations.
10. Fix dial gauge to the bracket. 11. Position the bracket in the reamed hole of the
penetration piston. 12. Adjust the length of its arm such that the dial gauge
rest on the rim of the bracket by the locking screw on the penetration piston.
13. Bring the piston in contact with specimen by applying the smallest possible so that full contact is established between the surface of specimen and piston.
14. Set displacement and load readings to zero. 15. Apply the load on penetration piston so that the
penetration is approximately equal to 1.25mm/min. 16. Record the load readings at 0, 0.5, 1.0, 1.5, 2.0, 2.5,
3.0, 3.5, 5.0, 7.5, 10.0 and 12.5mm 17. Record maximum load and penetration if it is occurs
for penetration less than 12.5mm. 18. Dismantle the assembly. 19. Take 20 to 50gm of soil from the top 3cm of the
specimen. 20. Prepare report.
Condition (Given): Well-equipped soil testing lab with soil sample. Task (What): Carryout California Bearing Ratio (CBR. Standards (How well): CBR test carried out as per Indian Standard 2720-31 (1990).
California Bearing Ratio (CBR) test• Definition • Importance of
test • Required
equipment • Testing
procedure
Tools/equipment: Mold with base plate, Collar, Spacer disc, Metal Rammer/Automatic Compactor, CBR Apparatus Safety:
• WearPersonal protective equipment properly, otherwise it may cause accident. • Labapparatus/equipment should handle carefully. • Improper handling of lab apparatus/equipment may have accident and may have
serious injuries as well as damage of expensive apparatus/equipment.

27
Task Analysis
TASK8: Carry out field density test (sand cone method)
Time: 7hrs Theory: 1hrs
Practical: 6hrs Performance steps Terminal Performance
Objectives Related Technical
Knowledge 1. Collect required tools, equipment
and material. 2. Obtain instruction. Calibration of Apparatus 3. Determine the unit weight of
standard sand used for density using cylindrical calibrating container.
Procedure 4. Lay the metal tray with a central
hole on the prepared surface of the soil.
5. Excavate about 150mm depth holeto the size of hole in tray.
6. Take weight of the excavated material.
7. Determine the water content of the excavated soil.
8. Fill the pouring cylinderto the constant weight with standard sand.
9. Place the cylinder above the hole concentrically.
10. Open the shutter and allow sand to run out into the hole.
11. Close the shutter whenno further movement of sand takes place.
12. Remove the cylinder and take weight.
13. Prepare report.
Condition (Given): Well-equipped soil testing lab with soil sample. Task (What): Carry out field density test of purposed pavement layer. Standards (How well): Field density test carried out as per Indian Standard 2720-28 (1974).
Field density test: • Definition • Importance of test • Required
instruments and materials
• Testing procedure
Tools/equipment: Sand cone, Calibrating container, Tray, Chisel, Hammer, Weighing machine, Standard sand, Measuring scale, Straight edge, Polythene bags. Safety:
• WearPersonal protective equipment properly, otherwise it may cause accident. • Labapparatus/equipment should handle carefully. • Improper handling of lab apparatus/equipment may have accident and may have
serious injuries as well as damage of expensive apparatus/equipment.

28
Sub-module 3.2: Aggregate Tests Time: 10hrs Theory + 40hrs Practical = 50 hrs
Description: This module provides basic knowledge and skills related to the aggregate test.
Objectives: After its completion the trainees will be able to carry out different types of aggregate tests in geo-engineering lab and field. Tasks:
1. Familiarize with aggregate testing equipment 2. Collect/prepare aggregate sample 3. Carryout sieve analysis 4. Carryout Los Angeles abrasion value test 5. Carryout aggregate impact value test 6. Carryout aggregate crushing value test 7. Carryout ten percentage fine value test 8. Carryout flakiness & elongation Indices test 9. Carryout soundness test 10. Carryout specific gravity and water absorption test 11. Carryout bulk density test

29
Task Analysis
TASK 1: Familiarize with aggregate testing equipment
Time: 3hrs Theory: 1hrs
Practical: 2hrs Performance steps Terminal Performance
Objectives Related Technical
Knowledge 1. Obtain instruction. 2. Prepare list soil testing equipment. 3. Collect required tools and
equipment. 4. Identify aggregate testing
equipment. 5. Clean, dry all tools and equipment. 6. Fill fuel if necessary. 7. Tight nut, grease etc. if necessary 8. Handle the equipment. 9. Clean all tools and equipment and
store in proper place.
Condition (Given): Well-equipped aggregate testing lab. Task (What): Familiarize with Aggregate testing equipment. Standards (How well): Each trainees should identified all aggregate testing tools/equipment and able to handle them.
Aggregate testing equipment: • Introduction • Properties of
aggregate • Tests on aggregate
(coarse & fine) and their evaluation
− Gradation and fineness modulus of aggregate
− Aggregate impact value
− Aggregate crushing value
− Los Angeles abrasion
− Flakiness and elongation indices
− Specific gravity and water absorption (fine & coarse aggregate)
• Reasons for aggregate testing
• Name and function of aggregate testing equipment
Tools/equipment/chemicals: Weighing machine, Metal Gauge, Sieves, Sample, Cylindrical measure and plunger, Compression testing machine, Los Angles abrasion testing machine, Oven, density basket, Water bath, Bulk density measure, Tamping rod, Containers, Sodium Sulphate, Brass Rod. Safety:
• WearPersonal protective equipment properly, otherwise it may cause accident. • Labapparatus/equipment should handle carefully. • Improper handling of lab apparatus/equipment may have accident and may have
serious injuries as well as damage of expensive apparatus/equipment.

30
Task Analysis
TASK 2: Collect/prepare aggregate sample
Time: 4hrs Theory: 1hrs
Practical: 3hrs Performance steps Terminal Performance
Objectives Related Technical
Knowledge 1. Collect required tools, equipment
and material. 2. Obtain instruction. 3. Take sufficient volume of sample
required for the purposed test. 4. Wash the sample if it contains clay
materials. 5. Dry the sample in oven of
temperature 100 to 110oC to a substantially constantweight.
6. Label the sample. 7. Take/send the sample to lab. 8. Keep records.
Condition (Given): Well-equipped aggregate testing lab with sample materials. Task (What): Collect aggregate sample for different tests. Standards (How well): Sample should be free from foreign materials like clay, organic matters, etc.
Aggregate sample collection: • Type of test • Number of tests
Tools/equipment: Scoop,Weighing machine, Tray, Oven. Safety:
• WearPersonal protective equipment properly, otherwise it may cause accident. • Labapparatus/equipment should handle carefully. • Improper handling of lab apparatus/equipment may have accident and may have
serious injuries as well as damage of expensive apparatus/equipment.

31
Task Analysis
TASK 3: Carryout sieve analysis
Time: 4hrs Theory: 1 hrs
Practical: 3hrs Performance steps Terminal Performance
Objectives Related Technical
Knowledge 1. Collect required tools, equipment
and material. 2. Obtain instruction. 3. Take the weighted representative
prepared sample. 4. Arrange sieves according to the size
(larger hole sieve at top and smaller at the bottom) as per the standard.
5. Shake either by hand or by using sieve shaker for about two minutes.
6. Take weight of retained mass on each sieve.
7. Perform the calculation. 8. Prepare report.
Condition (Given): Well-equipped aggregate testing lab with testing materials. Task (What): Carryout sieve analysis of aggregate (fine or coarse). Standards (How well): Provided sample should be lied within given gradation envelop and should have Coefficient of Curvature and Coefficient of Uniformity within the specified range.
Analysis of sieve: • Importance of test • Arrangement of
sieve sets • Testing procedure
Tools/equipment: IS standard sieve set, Shaker, Weighing machine, Trays Safety:
• WearPersonal protective equipment properly, otherwise it may cause accident. • Labapparatus/equipment should handle carefully. • Improper handling of lab apparatus/equipment may have accident and may have
serious injuries as well as damage of expensive apparatus/equipment.

32
Task Analysis
TASK 4: Carryout Los Angeles abrasion value test
Time: 6hrs Theory: 1hrs
Practical: 5hrs Performance steps Terminal Performance
Objectives Related Technical
Knowledge 1. Collect required tools, equipment
and material. 2. Obtain instruction. Sample preparation 3. Clean aggregate which hasbeen
dried in an oven at 105 to 110oC and conforming to one of the grading is taken for the test.
Preparation 4. Place the test sample and the
abrasive charge in the Los Angles abrasion testing machine.
5. Rotate the machine at a speed of 30- 33 revolutions/minute for 500 revolutions for fine grading and 1000 revolutions for coarse grading.
6. Discharge the material from the machine.
7. Sieve through 1.70mm IS Sieve. 8. Weigh the sample retained on the
sieve. 9. Prepare report.
Condition (Given): Well-equipped aggregate testing lab with testing materials. Task (What): Carryout Los Angeles abrasion value test of provided aggregate. Standards (How well): Los Angeles Abrasion value test carried out as per Indian Standard 2386-4 (1983).
Test of Los Angeles abrasion value:
• Importance of test
• Testing procedure
Tools/equipment: Los Angeles Abrasion Machine, Abrasive Machine, Weighing machine, 1.7mm IS sieve, Oven. Safety:
• WearPersonal protective equipment properly, otherwise it may cause accident. • Labapparatus/equipment should handle carefully. • Improper handling of lab apparatus/equipment may have accident and may have
serious injuries as well as damage of expensive apparatus/equipment.

33
Task Analysis
TASK 5: Carryout aggregate impact value test
Time: 5hrs Theory: 1hrs
Practical: 4hrs Performance steps Terminal Performance
Objectives Related Technical
Knowledge 1. Collect required tools, equipment and
material. 2. Obtain instruction. 3. Fix cup of the impact testing machine
firmly in position on the base of the machine.
4. Place the whole of the test sample in it. 5. Compactthe sample by 25 strokes of the
tamping rod. 6. Raise hammer to 380mm above the
upper surface of the aggregates in the cup and allowed to fall freely onto the aggregates.
7. Subject 15 such blows, each being delivered at an interval of not less than one second.
8. Remove sample and sieved through a 2.36mm IS Sieve.
9. Weigh the sample retained on the sieve. 10. Prepare report.
Condition (Given): Well-equipped aggregate testing lab with testing materials. Task (What): Carryout aggregate impact value testof provided aggregate. Standards (How well): Aggregate impact value test carried out as per Indian Standard 2386-4 (1983).
Test of aggregate impact value:
• Importance of test
• Testing procedure
Tools/equipment: Impact Testing Machine,IS Sieves, Cylindrical Metal Measure, Tamping rod, Oven, Weighing machine, Tray. Safety:
• WearPersonal protective equipment properly, otherwise it may cause accident. • Labapparatus/equipment should handle carefully. • Improper handling of lab apparatus/equipment may have accident and may have
serious injuries as well as damage of expensive apparatus/equipment.

34
Task Analysis
TASK 6: Carryout aggregate crushing value test
Time: 4 ½ hrs Theory: ½hrs
Practical: 4hrs Performance steps Terminal Performance
Objectives Related Technical
Knowledge 1. Collect required tools, equipment
and material. 2. Obtain instruction. 3. Take aggregate sample
passingthrough 12.5mm and retained on10mm IS Sieve.
4. Oven-dry the sample at a temperature of 100 to110oC for 3 to 4hrs.
5. Fill the cylinder of the apparatus in 3 layers, each layertamped with 25 strokes of a tamping rod.
6. Measure the weight of aggregates. 7. Insert theplunger. 8. Place the whole assembly in
compression testing machine. 9. Apply load to the sample at a
uniform rate so as to achieve 40t load in 10 minutes.
10. Release the load. 11. Sievethe sample through a 2.36mm
IS Sieve. 12. Weigh the sample retained on the
sieve. 13. Prepare report.
Condition (Given): Well-equipped aggregate testing lab with testing materials. Task (What): Carryout aggregate crushing value test of provided aggregate. Standards (How well): Aggregate crushing value test carried out as per Indian Standard 2386-4 (1983).
Test of aggregate crushing value:
• Importance of test
• Testing procedure
Tools/equipment: Cylindrical measure and plunger, Compression Testing Machine, IS Sieves, Weighing machine, Tray. Safety:
• WearPersonal protective equipment properly, otherwise it may cause accident. • Labapparatus/equipment should handle carefully. • Improper handling of lab apparatus/equipment may have accident and may have
serious injuries as well as damage of expensive apparatus/equipment.

35
Task Analysis
TASK 7: Carryout ten percentage finevalue test
Time: 4 ½ hrs Theory: ½hrs
Practical: 4hrs Performance steps Terminal Performance
Objectives Related Technical
Knowledge 1. Collect required tools, equipment and
material. 2. Obtain instruction. Sample preparation 3. Take certain amount of surface dry
aggregate passing 12.5mm sieve and retained on 10mm sieve.
4. Fill the cylindrical measure with the sample in three layers each layer tamped with 25 strokes of a tamping rod.
Procedure 5. Fill the cylinder of testing apparatus with
the measured sample in three layers stoked 25 times each layer.
6. Level the surface. 7. Insert the plunger so that it rests on
horizontal surface. 8. Apply load through compression machine
at a uniform rate so that to cause total penetration of the plunger in 10 minutes of about:
• 15mm for rounded or partially rounded (uncrushed gravel)
• 20mm for normal crushed gravel • 24mm for honeycombed aggregate
9. Release load after reaching the maximum penetration.
10. Sieve the samplethrough 2.36mm sieve. 11. Weighthe sample retained on the sieve. 12. Prepare report.
Condition (Given): Well-equipped aggregate testing lab with testing materials. Task (What): Determine the load resulting 10% fines for the given aggregate sample. Standards (How well): Ten percentage fine value (TFV) carried out as per Indian Standard 2386-4 (1983).
Test of 10% fineness: • Importance of
test • Testing
procedure
Tools/equipment: Cylindrical Measure, Compression Testing Machine, Weighing machine, Tamping rod, Trays, IS sieve. Safety:
• WearPersonal protective equipment properly, otherwise it may cause accident. • Labapparatus/equipment should handle carefully. • Improper handling of lab apparatus/equipment may have accident and may have
serious injuries as well as damage of expensive apparatus/equipment.

36
Task Analysis
TASK 8: Carryout flakiness&elongation indices test
Time: 5½ hrs Theory: 1hrs
Practical: 4 ½ hrs Performance steps Terminal
Performance Objectives
Related Technical
Knowledge 1. Collect required tools, equipment and material. 2. Obtain instruction. Flakiness index 3. Sieve the sample with the sieves specified as per
standard. 4. Gauge each fraction in turn for thickness on a
metal the gauge. 5. Use the width of slot as specified by the standard. 6. Weigh the total amount of aggregate passing the
gauge. 7. Calculate the flakiness index. 8. Prepare report. Elongation index 1. Collect required tools, equipment and material. 2. Obtain instruction 3. Sieve the sample with the sieves specified as per
standard. 4. Gauge each fraction in turn for thickness on a
metal the gauge. 5. Use the width of slot as specified by the standard. 6. Weigh the total amount of aggregate passing the
gauge. 7. Calculate the elongation index. 8. Prepare report.
Condition (Given): Well-equipped aggregate testing lab with testing materials. Task (What): Carryout FI & EI test of the given sample. Standards (How well): Flakiness and elongation indices test carried out as per Indian Standard 2386-1 (1963).
Test of FI & EI: • Definition of
FI & EI • Importance of
test • Testing
procedure
Tools/equipment: Thickness Gauge, Length Gauge, Weighing machine. IS Sieve. Safety:
• WearPersonal protective equipment properly, otherwise it may cause accident. • Labapparatus/equipment should handle carefully. • Improper handling of lab apparatus/equipment may have accident and may have
serious injuries as well as damage of expensive apparatus/equipment.

37
Task Analysis
TASK 9: Carryout soundness test
Time: 7hrs Theory: 1hrs
Practical: 6hrs Performance steps Terminal Performance
Objectives Related Technical
Knowledge 1. Collect required tools, equipment
and material. 2. Obtain instruction. Preparation of sodium sulphate solution 3. Dissolve 225 g of the anhydrous salt
or 750 g of the decahydrate salt for each liter of water.
Sample preparation for aggregate 4. Fine Aggregate –Thoroughly wash
the sample of fine on a 300-micron IS Sieve, dried to constant weight at 105 to 1 10°Cand separated into different sizes by sieving as per specified standard.
5. Coarse Aggregate- Thoroughly wash the sample of coarse aggregate, dry to constant weight at 105°C to 110°C andseparate into different sizes as per specified standard.
Procedure 6. Immerse the samples in the prepared
solution of sodium sulphate for not less than 16 hours or more than 18 hours.
7. Remove the aggregate sample from the solution.
8. Permit to drain for 15 minutes. 9. Place in oven of temperature 105 to
110°C for constant weight for not less than 4 hours or more than 18 hours.
10. Allow the samples to cool to room temperature.
11. Again immerse the sample in the prepared solution as described above.
12. Repeat the process of alternate immersion and drying for specified number of cycles.
13. Allow the sample to cool after completing the final cycle.
14. Wash it to free from the sodium sulphate.
Condition (Given): Well-equipped aggregate testing lab with testing materials. Task (What): Carryout soundness test of given aggregate sample. Standards (How well): Soundness test carried out as per Indian Standard 2386-5 (1963).
Test of soundness: • Importance of test • Testing procedure

38
15. Dry in oven for constant weight at temperature 105 to 110°C.
16. Sieve the fine aggregate over the same sieve on which it was retained before the test.
17. Sieve coarse aggregate as specified in the standard.
18. Weigh the sample retained on each sieve.
19. Prepare report.
Tools/equipment/chemicals:Sieves, Containers, Weighing machines, Drying Oven, Sodium Sulphate. Safety:
• WearPersonal protective equipment properly, otherwise it may cause accident. • Labapparatus/equipment should handle carefully. • Improper handling of lab apparatus/equipment may have accident and may have
serious injuries as well as damage of expensive apparatus/equipment.

39
Task Analysis
TASK 10: Carryout specific gravity and water absorption test
Time: 3 ½ hrs Theory: 1hrs
Practical: 2½ hrs Performance steps Terminal Performance
Objectives Related Technical
Knowledge 1. Collect required tools, equipment
and material. 2. Obtain instruction. 3. Take 2kg of aggregate sample. 4. Washit thoroughly to remove fine
particles and dust. 5. Drain off the excess water and place
it in density basket. 6. Immerse the basket in water at a
temperature between 22oC and 32oC. 7. Maintain 5cm cover above the top of
basket. 8. Jolt the basket and sample and
weight it in water. 9. Remove the basket with aggregate
from water. 10. Allow it to drain for few minutes. 11. Empty the basket and transfer the
aggregate to a dry cloth. 12. Weigh the empty basket in water. 13. Spread the aggregate on another dry
cloth for sun drying until it appears to be completely surface dry.
14. Weigh the surface dry aggregate. 15. Dry the sample in oven at a
temperature of 100 to 110oC for 24 hours and cool the sample at room temperature.
16. Weigh the aggregate. 17. Prepare report.
Condition (Given): Well-equipped aggregate testing lab with testing materials. Task (What): Carryout specific gravity and water absorption test of given aggregate. Standards (How well): Specific gravity and water absorption tests carried out as per Indian Standard 2386-3 (1963).
Test of specific gravity and water absorption: • Importance of test • Testing procedure
Tools/equipment: Density Basket, Water Bath, Weighing machine. Safety:
• WearPersonal protective equipment properly, otherwise it may cause accident. • Labapparatus/equipment should handle carefully. • Improper handling of lab apparatus/equipment may have accident and may have
serious injuries as well as damage of expensive apparatus/equipment.

40
Task Analysis
TASK 11: Carryout bulk density test
Time: 3hrs Theory: 1hrs
Practical: 2hrs Performance steps Terminal Performance
Objectives Related Technical
Knowledge 1. Collect required tools, equipment
and material. 2. Obtain instruction. 3. Calibrate the measure by
determining the weight of water at 27oC that is required to fill it, such that no meniscus is present above the rim of the container.
4. Obtain its capacity in liters. 5. Fill the measure with aggregate in
three equal layers, each layer being temped 25 times for rodded or compacted weights.
6. Strike off the surplus aggregate after compacting the final layer using the temping rod as a straight edge.
7. Fill the measure to overflowing by means of a shovel or scoop, the aggregate being discharged from a height not more than 5cm above the top of measure for loose weight.
8. Take care to prevent as far as possible, the segregation of the particle size of which the sample is composed.
9. Level the surface of aggregate with temping rod as a straight edge.
10. Determine the net weight of aggregate in either case and calculate the bulk density in kilogram per liter.
11. Prepare report.
Condition (Given): Well-equipped aggregate testing lab with testing materials. Task (What): Carryout bulk density test of given aggregate. Standards (How well): Bulk density test carried out as per Indian Standard 2386-3 (1963).
Test of bulk density: • Importance of
test • Testing
procedure
Tools/equipment: Bulk density measure (3ltr, 15ltr, 30ltr), Tamping rod, Weighing machine. Safety:
• WearPersonal protective equipment properly, otherwise it may cause accident. • Labapparatus/equipment should handle carefully. • Improper handling of lab apparatus/equipment may have accident and may have
serious injuries as well as damage of expensive apparatus/equipment.

41
Sub-module 3.3: Cement Tests Time: 10hrs Theory + 30hrs Practical = 40hrs
Description: This module provides basic knowledge and skills related to the cement tests.
Objectives: After its completion the trainees will be able to carry out different types of cement tests in geo-engineering lab and field. Tasks:
1. Familiarize with cement testing equipment 2. Collect cement sample 3. Carryout normal consistency test 4. Carryout setting time (initial/final) test 5. Carryout compressive strength test 6. Carryout fineness test 7. Carryout specific gravity test 8. Carryout soundness test 9. Carryout tensile test

42
Task Analysis
TASK 1: Familiarize with cement testing equipment
Time: 6hrs Theory: 2hrs
Practical: 4hrs Performance steps Terminal Performance
Objectives Related Technical
Knowledge 1. Obtain instruction 2. Prepare list cement testing
equipment 3. Collect required tools and equipment 4. Identify cement testing equipment 5. Clean and dry all tools/equipment 6. Fill fuel if necessary 7. Tight nut, grease etc. if necessary 8. Handle the equipment. 9. Clean all tools and equipment and
store in proper place.
Condition (Given): Well-equipped cement testing lab with tools and equipment. Task (What): Familiarize with cement testing equipment. Standards (How well): Each trainees should identified all cement testing tools/equipment and able to handle them properly.
Cement testing equipment: • Types of cement • Physical and
chemical requirements of different grades of cements
• Compressive strength of cements
• Tests on cement and their evaluation
− Fineness of cement − Consistency of
cement paste − Setting time − Soundness − Specific gravity − Strength
(compressive, tensile and flexure)
Tools/equipment: IS Sieve, Blaine apparatus, Electronic Weighing machine, Vicat’s apparatus, Gauging trowel, Le-Chatelier flask, specific gravity bottle,Le-Chateliermould, Briquette, Tensile Testing Machine, etc. Safety:
• WearPersonal protective equipment properly, otherwise it may cause accident. • Labapparatus/equipment should handle carefully. • Improper handling of lab apparatus/equipment may have accident and may have
serious injuries as well as damage of expensive apparatus/equipment.

43
Task Analysis
TASK 2: Collect cement sample
Time: 2hrs Theory: 1hrs
Practical: 1hrs Performance steps Terminal Performance
Objectives Related Technical
Knowledge 1. Collect required tools, equipment
and material. 2. Obtain instruction. 3. Take fresh cement for sample. 4. Avoid sample of containing any
lump, i.e. no warehouse set. 5. Pack the sample. 6. Label the sample. 7. Take/send the sample to lab. 8. Keep records.
Condition (Given): Well-equipped cement testing lab and cement. Task (What): Collect cement sample. Standards (How well): Collected sample should represent the whole mass.
Cement sample collection:
• Type of test • Number of tests
Tools/equipment: Scoop, Trays, Weighing machine. Gloves. Safety:
• WearPersonal protective equipment properly, otherwise it may cause accident. • Labapparatus/equipment should handle carefully. • Improper handling of lab apparatus/equipment may have accident and may have
serious injuries as well as damage of expensive apparatus/equipment.
44
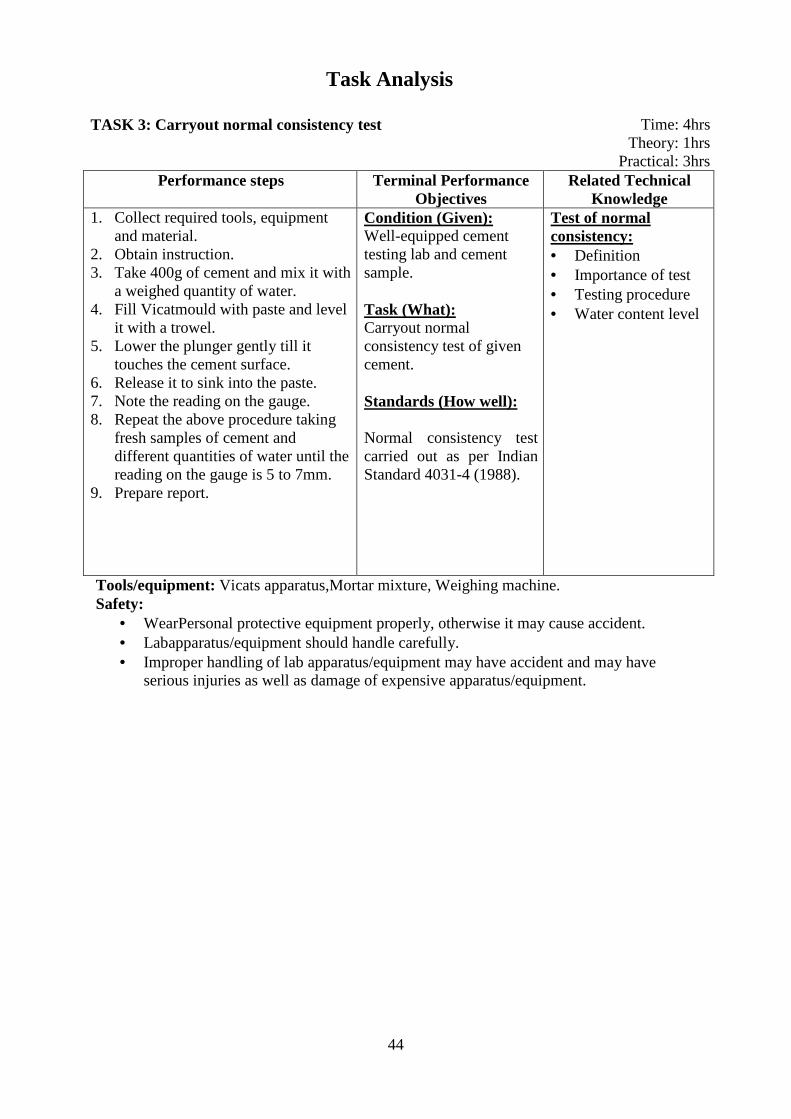
Task Analysis
TASK 3: Carryout normal consistency test
Time: 4hrs Theory: 1hrs
Practical: 3hrs Performance steps Terminal Performance
Objectives Related Technical
Knowledge 1. Collect required tools, equipment
and material. 2. Obtain instruction. 3. Take 400g of cement and mix it with
a weighed quantity of water. 4. Fill Vicatmould with paste and level
it with a trowel. 5. Lower the plunger gently till it
touches the cement surface. 6. Release it to sink into the paste. 7. Note the reading on the gauge. 8. Repeat the above procedure taking
fresh samples of cement and different quantities of water until the reading on the gauge is 5 to 7mm.
9. Prepare report.
Condition (Given): Well-equipped cement testing lab and cement sample. Task (What): Carryout normal consistency test of given cement. Standards (How well): Normal consistency test carried out as per Indian Standard 4031-4 (1988).
Test of normal consistency: • Definition • Importance of test • Testing procedure • Water content level
Tools/equipment: Vicats apparatus,Mortar mixture, Weighing machine. Safety:
• WearPersonal protective equipment properly, otherwise it may cause accident. • Labapparatus/equipment should handle carefully. • Improper handling of lab apparatus/equipment may have accident and may have
serious injuries as well as damage of expensive apparatus/equipment.

45
Task Analysis
TASK 4: Carryout setting time (initial/final) test
Time: 5hrs Theory: 1hrs
Practical: 4hrs Performance steps Terminal Performance
Objectives Related Technical
Knowledge 1. Collect required tools, equipment
and material. 2. Obtain instruction. 3. Prepare a cement paste by gauging
the cement with 0.85 times the water required to give a paste of normalconsistency.
4. Fill the Vicatmould completely with the cement paste, smooth off the surface of the paste making it level with the top of the mould.
Initial setting time 5. Place the prepared test sample under
the rod bearing the needle. 6. Lower the needle gently in order to
make contact with the surface of the cement paste.
7. Release quickly, allowing it to penetrate the test block.
8. Repeat the procedure till the needle fails to pierce the test block to a point 5.0 ± 0.5mm measured from the bottom of the mould.
9. Note the time. Final setting time 10. Replace the above needle by the one
with an annular attachment. 11. Note the time when the needle
makes impression on the surface of the test block.
12. Prepare report.
Condition (Given): Well-equipped cement testing lab and cement sample. Task (What): Carryout setting time (initial/final) test of given cement. Standards (How well): Setting time (initial/final) test carried out as per Indian Standard 4031-5 (1988).
Setting of time (initial/final): • Definition • Importance of test • Testing procedure
Tools/equipment: Vicats apparatus, Mortar mixture, Weighing machine. Safety:
• WearPersonal protective equipment properly, otherwise it may cause accident. • Labapparatus/equipment should handle carefully. • Improper handling of lab apparatus/equipment may have accident and may have
serious injuries as well as damage of expensive apparatus/equipment.

46
Task Analysis
TASK 5: Carryout compressive strength test
Time: 5hrs Theory: 1hrs
Practical: 4hrs Performance steps Terminal Performance
Objectives Related Technical
Knowledge 1. Collect required tools, equipment
and material. 2. Obtain instruction. 3. Take 200 gm of cement, 600 gm of
Indian Standard sand (in proportion 1:3) and (P/4+3)% of water. P is the percentage of water required for normal consistency.
4. Mix the components using mortar mixing equipment.
5. Fill the cube mould by compacting it for 2 minutes on a vibrating machine.
6. Smoothen the top surface with flat side of a trowel.
7. Place the cube in an atmosphere of 27+2oC and relative humidity over 90%.
8. Remove the specimen from mould after 24 hours and keep in water till testing.
9. Prepare other sample in the same way as before.
10. Test the cubes at 3 days and 7 days age in the compression testing machine.
11. Prepare report.
Condition (Given): Well-equipped cement testing lab and cement sample. Task (What): Carryout compressive strength test of given cement. Standards (How well): Compressive strength test carried out as per Indian Standard 4031-7(1988).
Test of compressive strength: • Importance of test • Testing procedure
Tools/equipment: Compression Testing Machine, Mould, Mortar Mixer, Vibrating machine, Trowel, Curing Tank, Weighing machine, Measuring cylinder, Standard Sand. Safety:
• WearPersonal protective equipment properly, otherwise it may cause accident. • Labapparatus/equipment should handle carefully. • Improper handling of lab apparatus/equipment may have accident and may have
serious injuries as well as damage of expensive apparatus/equipment.

47
Task Analysis
TASK 6: Carryout fineness test
Time: 2½ hrs Theory: 1hrs
Practical: 1 ½ hrs Performance steps Terminal Performance
Objectives Related Technical
Knowledge 1. Collect required tools, equipment
and material. 2. Obtain instruction. 3. Weigh2.8gm of sample;place the
perforated disc on the ledge with a filter disc over it.
4. Place the cement in the cell and tap the bed of cement.
5. Place a filter paper disc on the top of the cement bed.
6. Insert the plunger and compress it until the plunger collar is in contact with the top of the cell and then remove the plunger slowly.
7. Attach the cell to manometer tube making sure that an air tight connection has been made.
8. Press the start key on the pane. The pump should now lift the fluid column above the upper mark of the manometer tube.
9. Note the indicator displays: the Blaine value, Elapsed time, Blaine Readings, S. No., Temperature, and Date & Time.
10. Prepare report.
Condition (Given): Well-equipped cement testing lab and cement sample. Task (What): Carryout fineness test of given cement. Standards (How well): Fineness test carried out as per Indian Standard 4031-2(1999).
Test of fineness: • Importance of test • Testing procedure
Tools/equipment:Blain Apparatus, Weighing machine, Filter paper. Safety:
• WearPersonal protective equipment properly, otherwise it may cause accident. • Labapparatus/equipment should handle carefully. • Improper handling of lab apparatus/equipment may have accident and may have
serious injuries as well as damage of expensive apparatus/equipment.

48
Task Analysis
TASK 7: Carryout specific gravity test
Time: 5hrs Theory: 1hrs
Practical: 4hrs Performance steps Terminal Performance
Objectives Related Technical
Knowledge 1. Collect required tools, equipment
and material. 2. Obtain instruction. 3. Weigha clean and dry specific
gravity bottle with its stopper. 4. Place cement sample upto half of
bottle (about 50gm) and weight it with stopper.
5. Add kerosene (polar liquid) to cement in bottle till it is half full.
6. Mix thoroughly with glass to remove entrapped air.
7. Continue stirring and add more kerosene till it is flushed with graduated mark.
8. Wipe outside with cloth and take weight.
9. Empty the bottle, clean it and refill with kerosene till the level flush with graduated mark.
10. Wipe outside with cloth and take weight.
11. Prepare report.
Condition (Given): Well-equipped cement testing lab and cementsample. Task (What): Carryout specific gravity test of given cement. Standards (How well): Specific gravity test carried out as per Indian Standard 4031-11 (1988).
Test of specific gravity • Importance of test • Testing procedure
Tools/equipment/chemicals:Specific gravity bottle with stopper, Weighing machine, Kerosene. Safety:
� WearPersonal protective equipment properly, otherwise it may cause accident. � Labapparatus/equipment should handle carefully. � Improper handling of lab apparatus/equipment may have accident and may have
serious injuries as well as damage of expensive apparatus/equipment.

49
Task Analysis
TASK 8: Carryout soundness test
Time: 6hrs Theory: 1hrs
Practical: 5hrs Performance steps Terminal Performance
Objectives Related Technical
Knowledge 1. Collect required tools, equipment
and material. 2. Obtain instruction. 3. Prepare cement paste by gauging
cement with 0.78 times the water required to give a paste of standard consistency.
4. Fill the mould on a glass sheet with the prepared sample.
5. Cover the mould with another piece of glass sheet.
6. Place a small weight on this covering glass sheet.
7. Submerge the whole assembly in water at a temperature of 27 ± 2oC and keep it there for 24hrs.
8. Measure the distance separating the indicator points to the nearest 0.5mm (say dl).
9. Submerge the mould again in water at the temperature prescribed above.
10. Bring the water to boiling point in 25 to 30 minutes and keep it boiling for 3hrs.
11. Remove the mould from the water, allow it to cool.
12. Measure the distance between the indicator points.
13. Prepare report.
Condition (Given): Well-equipped cement testing lab and cement sample. Task (What): Carryout soundness test of given cement. Standards (How well): Soundness test carried out as per Indian Standard 4031-3 (1988).
Test of tensile • Importance of test • Testing procedure
Tools/equipment: Le-chatelier’smould, Glass plates, Weighing machine, Beaker, Water Boiler. Safety:
• WearPersonal protective equipment properly, otherwise it may cause accident. • Labapparatus/equipment should handle carefully. • Improper handling of lab apparatus/equipment may have accident and may have
serious injuries as well as damage of expensive apparatus/equipment.

50
Task Analysis
TASK 9: Carryout tensile test
Time: 4½ hrs Theory: 1hrs
Practical: 3 ½ hrs Performance steps Terminal Performance
Objectives Related Technical
Knowledge 1. Collect required tools, equipment and
material. 2. Obtain instruction. Sample preparation 3. Prepare cement/sand paste of ratio 1:3
with water cement ratio 0.5. 4. Thoroughly mix the paste and fill the
paste in standard tensile strength testing briquettes.
5. Prepare atleast six samples and let them dry in air for 24 hours.
6. Remove the sample from the mould and place in water.
Procedure 7. Level the machine and place the prepared
sample in the sample holding jaw. 8. Apply small tensile load on the sample
with loading wheel and switch ON the machine.
9. Let the weight move along the lever until the briquette snaps.
10. Note the reading of the vernier. 11. Lift the upper lever just off the micro-
switch and drop it again to start and stop the drive.
12. Make a note of the reading of the vernier again.
13. Calculate the creep. 14. Calculate the exact breaking load of the
test briquette. 15. Prepare report.
Condition (Given): Well-equipped cement testing lab and cement sample. Task (What): Carryout tensile test of given cement. Standards (How well): • Tensile test is carried
out as per specified standard.
• Tensile strength should be 10% of compression strength of cement.
Test of tensile • Importance of test • Testing procedure
Tools/equipment: Tensile Testing Machine, Briquettes, Mortar mixer, Standard Sand, Weighing machine. Safety:
• WearPersonal protective equipment properly, otherwise it may cause accident. • Labapparatus/equipment should handle carefully. • Improper handling of lab apparatus/equipment may have accident and may have
serious injuries as well as damage of expensive apparatus/equipment.

51
Sub-module 3.4: Concrete Tests Time:10hrs Theory + 30hrs Practical = 40hrs
Description: This module provides basic knowledge and skills related to the concrete tests.
Objectives: After its completion the trainees will be able to carry out different types of concrete tests in geo-engineering lab and field. Tasks:
1. Familiarize with Concrete testing equipment 2. Collect/Prepare concrete sample 3. Carryout slump test 4. Cast/make concrete cube 5. Carryout air content test 6. Carryout concrete flow test 7. Carryout compressive test 8. Carryout mix design

52
Task Analysis
TASK 1: Familiarize with Concrete testing equipment
Time: 6hrs Theory: 3hrs
Practical: 3hrs Performance steps Terminal Performance
Objectives Related Technical
Knowledge 1. Obtain instruction 2. Prepare list of concrete testing
equipment 3. Collect required tools and equipment 4. Identify concrete testing equipment 5. Clean, dry all tools and equipment 6. Fill fuel if necessary 7. Tight nut, grease etc. if necessary 8. Handle the equipment. 9. Clean all tools and equipment and
store in proper place.
Condition (Given): Well-equipped concrete testing lab. Task (What): Familiarize with concrete testing equipment. Standards (How well): Each trainee identified all concrete testing tools/equipment and became able to handle them.
Concrete testing equipment: • Ingredients of
concrete • Production of
concrete • Tests on concrete
and their evaluation • Tests of fresh
concrete − Slump value − Flow value − Air content
• Tests of hardened concrete − Compressive
strength • Mix design • Name and function
of concrete testing equipment
Tools/equipment: Slump cone, Flow table, Air entrainment meter, Compressive strength testing machine, Trowel, Tray, Rubber Mallet, Temping Rod, Gloves, Measuring cylinder, etc. Safety:
• WearPersonal protective equipment properly, otherwise it may cause accident. • Labapparatus/equipment should handle carefully. • Improper handling of lab apparatus/equipment may have accident and may have
serious injuries as well as damage of expensive apparatus/equipment.

53
Task Analysis
TASK 2: Collect/Prepare concrete sample
Time: 4hrs Theory: 1hrs
Practical: 3hrs Performance steps Terminal Performance
Objectives Related Technical
Knowledge 1. Collect required tools, equipment
and material. 2. Obtain instruction. 3. Take different ingredients required
for making concrete sample. 4. Remove any foreign materials
present in the ingredients. 5. Wash the aggregate if it contains
any clay material. 6. Weigh the sample as per the grade
of concrete. 7. Mix the ingredient either with
concrete mixer or with hand for purposed test.
8. Pack sample. 9. Label sample. 10. Take/send the sample to lab. 11. Keep records.
Condition (Given): Well-equipped concrete testing lab. Task (What): Collect/Prepare concrete sample. Standards (How well): Concrete sample collected and prepared so that the sample represents the whole mass.
Concrete sample Collection/Preparation: • Type of test • Number of test
Tools/equipment: Scoop, Trays, Weighing machine. Safety:
• WearPersonal protective equipment properly, otherwise it may cause accident. • Labapparatus/equipment should handle carefully. • Improper handling of lab apparatus/equipment may have accident and may have
serious injuries as well as damage of expensive apparatus/equipment.

54
Task Analysis
TASK 3: Carryout slump test
Time: 3 hrs Theory: ½ hrs
Practical: 2 ½ hrs Performance steps Terminal Performance
Objectives Related Technical
Knowledge 1. Collect required tools, equipment
and material. 2. Obtain instruction. 3. Clean the internal surface of the
mould thoroughly. 4. Apply a light coat of oil and placed
on a smooth, horizontal, rigid and nonabsorbent surface.
5. Fill the mould in four layers with freshly mixed concrete, each approximately to one-fourth of the height of the mould each layer is tamped 25 times by the rounded end of the tamping rod.
6. Struck off the concrete with a trowel.
7. Remove the mouldfrom the concrete immediately by raising it slowly in the vertical direction.
8. Measure the difference in level between the height of the mould and that of the highest point of the subsided concrete.
9. Prepare report.
Condition (Given): Well-equipped concrete testing lab with sample concrete. Task (What): Carryout slump test of given grade of concrete for the purposed work. Standards (How well): Slump test carried out as per Indian Standard 1199 – 1959.
Test of slump: • Importance of test • Testing procedure
Tools/equipment: Slump cone, tamping rod. Safety:
• WearPersonal protective equipment properly, otherwise it may cause accident. • Labapparatus/equipment should handle carefully. • Improper handling of lab apparatus/equipment may have accident and may have
serious injuries as well as damage of expensive apparatus/equipment.

55
Task Analysis
TASK 4: Cast/make concrete cube
Time: 6hrs Theory: 1hrs
Practical: 5hrs Performance steps Terminal Performance
Objectives Related Technical
Knowledge 1. Collect required tools, equipment
and material. 2. Obtain instruction. 3. Take different ingredients (cement
sand, aggregate and water) for making concrete cube as per the required grading for making three cubes.
4. Mix sand and cement first to uniform colour and then add coarse aggregate until the aggregate is uniformly distributed.
5. Add water as per given water cement ratio.
6. Mix the ingredients until resulting concrete is uniform in colour (at least 2 minutes).
7. Pour the concrete in the mould which have been oiled with a medium viscosity oil in three layers ramming not more than 35 times each layer or place on vibrator for compaction instead of ramming.
8. Trowel off surplus concrete from the top of the mould and cover the mould with wet mats and mark them after about 3-4 hours.
9. Remove the specimen from mould after 24 hours and are kept in water for curing.
10. Test the sample after specified number of days.
11. Prepare report.
Condition (Given): Well-equipped concrete testing lab with manufacturing materials. Task (What): Cast/make concrete cube for checking the compressive strength of given grade of concrete with fixed water cement ratio. Standards (How well): Concrete cube made/casted so that: • There should not be
any honey comb surfaces seen after removing the sample from the mould.
• Surfaces should be smooth.
Casting/making of concrete cube: • Importance of test • Grade of concrete • Water cement ratio • Testing procedure
Tools/equipment: Concrete mixer, IS standard mould, Vibrating machine, Trays, Trowel, Weighing machine, Measuring cylinder. Safety:
• WearPersonal protective equipment properly, otherwise it may cause accident. • Labapparatus/equipment should handle carefully. • Improper handling of lab apparatus/equipment may have accident and may have
serious injuries as well as damage of expensive apparatus/equipment.

56
Task Analysis
TASK 5: Carryout air content test
Time: 5hrs Theory: 1hrs
Practical: 4 hrs Performance steps Terminal Performance
Objectives Related Technical
Knowledge 1. Collect required tools, equipment
and material. 2. Place a representative sample of the
concrete in the measuring bowl in three equal layers tamping each layer 25 times evenly over the cross-section.
3. Follow the rodding of each layer by tapping the sides of the bowl smartly 10 to 15 times with the mallet.
4. Clean the- flanges of the bowl and of the conical cover thoroughly so that when the cover is clamped in place, a pressure-tight seal will be obtained.
5. Assemble the apparatus. 6. Fill the water column slightly above
the zero mark, while lightly tapping the sides of the bowl.
7. Bring the water level to the zero mark of the graduated tube before closing the vent at the top of the water column.
8. Apply pressure to the concrete by means of the small hand pump.
9. Read the water level when the pressure gauge indicates the exact test pressure P.
10. Release the air pressure gradually through the vent at the top of the water column and tap the sides of the bowl lightly for about one minute.
11. Record the water level to the nearest division or half division.
12. Calculate the air content. 13. Prepare report.
Condition (Given): Well-equipped concrete testing lab with sample concrete. Task (What): Carryout air content test of provided concrete. Standards (How well): Air content test carried out as per Indian Standard 1199 – 1959.
Test of air content: • Importance of test • Testing procedure
Tools/equipment: Air Entrain meter, Rubber mallet, Tamping rod, Trays. Safety:
• WearPersonal protective equipment properly, otherwise it may cause accident. • Labapparatus/equipment should handle carefully. • Improper handling of lab apparatus/equipment may have accident and may have
serious injuries as well as damage of expensive apparatus/equipment.

57
Task Analysis
TASK 6: Carryout concrete flow test
Time: 4hrs Theory: ½ hrs
Practical: 3½hrs Performance steps Terminal Performance
Objectives Related Technical
Knowledge 1. Collect required tools, equipment
and material. 2. Obtain instruction. 3. Apply light oil to the plunger, the
universal joint and adjustable shaft. 4. Clean the table top with water and
remove the excess water with rubber squeezer.
5. Clean the mould with water and remove excess water.
6. Place on the table centrally. 7. Fill the mould with sample material
in two layers each layer temping 25 times.
8. Struck the top surface of the concrete with trowel so that the mould is exactly filled.
9. Start the motor which causes 12.5mm raise of table and then dropped 15 times in about 15 seconds.
10. Note the diameter of spread concrete at six symmetrically distributed calipers to nearest 5mm.
11. Prepare report.
Condition (Given): Well-equipped concrete testing lab with sample concrete. Task (What): Carryout concrete flow test of given concrete sample. Standards (How well): Flow test carried out as per Indian Standard 1199 – 1959.
Test of concrete flow: • Importance of test • Testing procedure
Tools/equipment: Flow table, Mould, Trowel, Temping rod, Trays. Safety:
• WearPersonal protective equipment properly, otherwise it may cause accident. • Labapparatus/equipment should handle carefully. • Improper handling of lab apparatus/equipment may have accident and may have
serious injuries as well as damage of expensive apparatus/equipment.

58
Task Analysis
TASK 7: Carryout compressive test
Time: 4hrs Theory: 1hrs
Practical: 3hrs Performance steps Terminal Performance
Objectives Related Technical
Knowledge 1. Collect required tools, equipment
and material. 2. Obtain instruction. 3. Prepare the specimens according to
IS: 516 – 1959. 4. Store in water. 5. Test immediately after removal from
the water. 6. Immerse the specimen in water for
24 hours when received dry condition.
7. Measure the dimensions of the specimens to the nearest 0.2mm.
8. Record the weight. 9. Placethe sample on compression
strength testing machine. 10. Note that no packing should be
placed in-between loading plate and the sample.
11. Apply the load at a rate of approximately 140kg/sq.cm/minute until the specimen breaks down.
12. Record the maximum load applied to the specimen.
13. Prepare report.
Condition (Given): Well-equipped concrete testing lab with concrete cubes. Task (What): Carryout compressive test of provided concrete cubes. Standards (How well): 7 days compressive strength of concrete cube should be about 65% of its final strength.
Test of compressive: • Importance of test • Testing procedure
Tools/equipment: Compression Testing Machine, Weighing machine, Measuring scale, prepared sample. Safety:
• WearPersonal protective equipment properly, otherwise it may cause accident. • Labapparatus/equipment should handle carefully. • Improper handling of lab apparatus/equipment may have accident and may have
serious injuries as well as damage of expensive apparatus/equipment.

59
Task Analysis
TASK 8: Carryout mix design Time: 8hrs
Theory: 2hrs Practical: 6hrs
Performance steps Terminal Performance Objectives
Related Technical Knowledge
1. Collect required tools, equipment and material.
2. Obtain instruction. 3. Define the characteristic strength,
compaction factor, exposure condition of concrete.
4. Define the maximum size of aggregate, type of aggregate and grading of sand.
5. Determine the specific gravity value for coarse aggregate, sand and cement.
6. Determine water content of coarse aggregate and sand.
7. Calculate design strength using provided relation.
8. Obtain water cement ratio using provided curve.
9. Determine entrapped air, approximate value of water content and percentage of sand from maximum size of aggregate.
10. Adjust the water content and percentage of sand.
11. Determine the exact water content and percentage of sand.
12. Calculate the absolute volume of concrete.
13. Calculate the quantity of sand and coarse aggregate using the provided relations.
14. Determine the mix proportion.
Condition (Given): Well-equipped concrete testing lab with ingredients of concrete. Task (What): Carryout mix design. Standards (How well): Prepared sample should possess the target strength.
Mix design: • Importance of test • Testing procedure • Characteristics of
ingredients • Laboratory test data
Tools/equipment: Ingredients, Trays, Trowel, Vibrating machine, Measuring cylinder, Curing tank, Compression Testing Machine, Measuring scale, Weighing machine. Safety:
• WearPersonal protective equipment properly, otherwise it may cause accident. • Labapparatus/equipment should handle carefully. • Improper handling of lab apparatus/equipment may have accident and may have
serious injuries as well as damage of expensive apparatus/equipment.

60
Sub-module 3.5: Bitumen Tests Time: 10hrs Theory + 50hrs Practical = 60hrs
Description:This module provides basic knowledge and skills related to the bitumen tests. Objectives: After its completion the trainees will be able to carry out different types of bitumen tests in geo-engineering lab and field. Tasks:
1. Familiarize with Bitumen testing equipment 2. Collect sample 3. Carryout penetration test 4. Determine flash and fire point 5. Determine softening point 6. Carryout ductility test 7. Carryout water content test 8. Carryout specific gravity test 9. Carryout solubility test 10. Carryout loss on heating test 11. Carryout penetration of residue test

61
Task Analysis
TASK 1: Familiarize with bitumen testing equipment
Time: 5hrs Theory: 2hrs
Practical: 3hrs Performance steps Terminal Performance
Objectives Related Technical
Knowledge 1. Obtain instruction. 2. Prepare list of bitumen testing
equipment. 3. Collect required tools, equipment
and material. 4. Identify bitumen testing equipment. 5. Clean, dry all tools and equipment 6. Fill fuel if necessary. 7. Tight nut, grease etc. if necessary. 8. Handle the equipment. 9. Clean all tools and equipment and
store in proper place.
Condition (Given): Well-equipped bitumen testing lab. Task (What): Familiarize with bitumen testing equipment Standards (How well): Each trainee identified all bitumen testing tools/equipment and became handle them.
Bitumen testing equipment: • Introduction • Types of bituminous
materials • Tests on bitumen
and their evaluation
Tools/equipment/chemicals: Penetrometer, Ductility testing machine, Flash and fire point apparatus, Ring & ball apparatus, Water content testing apparatus, Specific gravity bottle, Oven, Trichloroethylene, Beakers, Thermometer, Water bath, Glycerin. Safety:
• WearPersonal protective equipment properly, otherwise it may cause accident. • Labapparatus/equipment should handle carefully. • Improper handling of lab apparatus/equipment may have accident and may have
serious injuries as well as damage of expensive apparatus/equipment.

62
Task Analysis
TASK 2: Collect sample
Time: 5hrs Theory: 1hrs
Practical: 4hrs Performance steps Terminal Performance
Objectives Related Technical
Knowledge 1. Collect required tools, equipment
and material. 2. Obtain instruction. 3. Use glycerin on hand for preventing
bitumen sticking in case of hot weather.
4. Take sample from a depth of 5 to 10 cm from the top surface to avoid dust and other impurities present on the bitumen.
5. Take steel sample container and fill about 1/3 of its volume.
6. Label sample. 7. Take/send the sample to lab. 8. Keep records.
Condition (Given): Well-equipped bitumentesting lab. Task (What): Collect bitumen sample for different tests. Standards (How well): Sampling of bitumen carried out as per Indian Standard 1201-1978.
Sample Collection: • Type of test • Number of tests
Tools/equipment/chemicals: Chisel, Hammer, Steel container with sufficient volume, Glycerin. Safety:
• WearPersonal protective equipment properly, otherwise it may cause accident. • Labapparatus/equipment should handle carefully. • Improper handling of lab apparatus/equipment may have accident and may have
serious injuries as well as damage of expensive apparatus/equipment.

63
Task Analysis
TASK 3: Carryout penetration test
Time: 6hrs Theory: 1hrs
Practical: 5hrs Performance steps Terminal Performance
Objectives Related Technical
Knowledge 1. Collect required tools, equipment
and material. 2. Obtain instruction. 3. Soften the bitumen above the
softening point (between 75 and 100oC).
4. Stir it thoroughly to remove air bubbles and water.
5. Pour it into a container to a depth of at least 15mm in excess of the expected penetration.
6. Cool it at an atmospheric temperature of 15 to 30oC for 1.5 hrs.
7. Place it in a transfer dish in the water bath at 25±0.1oC for 1.5 hrs.
8. Keep the container on the stand of the penetration apparatus.
9. Adjust the dial reading to zero and place the needle in such a way that it just touches the surface of bitumen.
10. Release the needle for exactly 5 seconds.
11. Record the dial reading. 12. Repeat the above procedure thrice. 13. Prepare report.
Condition (Given): Well-equipped bitumentesting lab with sample. Task (What): Carryout penetration test of provided bitumen sample. Standards (How well): Penetration test carried out as per Indian Standard 1203-1978.
Test of penetration: • Importance of test • Testing procedure
Tools/equipment: Bitumen penetrometer, Penetration cans, Beaker, Heating mechanism, Water bath. Safety:
• WearPersonal protective equipment properly, otherwise it may cause accident. • Labapparatus/equipment should handle carefully. • Improper handling of lab apparatus/equipment may have accident and may have
serious injuries as well as damage of expensive apparatus/equipment.

64
Task Analysis
TASK 4: Determine flash and fire point
Time: 6hrs Theory: 1hrs
Practical: 5hrs Performance steps Terminal Performance
Objectives Related Technical
Knowledge 1. Collect required tools, equipment
and material. 2. Obtain instruction. Flash point 3. Soften the bitumen between 75 and
100oC. Stir it thoroughly to remove air bubbles and water.
4. Fill the cup with the material to be tested upto the filling mark. Place it on the heater.
5. Insert the thermometer of high or low range as per requirement.
6. Light the test flame at different interval of time.
7. Note the temperature when flash is seen.
Fire point 8. Continue heating the sample after
flash point at a rate that the increase in temperature recorded by the thermometer is neither less than 5oC nor more than 6oC per minute.
9. Light the test flame at different interval of time.
10. Note the temperature when the bitumen catches fire.
11. Prepare report.
Condition (Given): Well-equipped bitumentesting lab with sample. Task (What): Determine flash and fire point of provided bitumen sample. Standards (How well): Flash and fire point test carried out as per Indian Standard 1209-1978.
Flash and fire point determination: • Importance of test • Testing procedure
Tools/equipment: Flash & Fire point apparatus, Thermometer, Firing system, Beaker. Safety:
• WearPersonal protective equipment properly, otherwise it may cause accident. • Labapparatus/equipment should handle carefully. • Improper handling of lab apparatus/equipment may have accident and may have
serious injuries as well as damage of expensive apparatus/equipment.

65
Task Analysis
TASK 5: Determine softening point
Time: 5hrs Theory: 1hrs
Practical: 4hrs Performance steps Terminal Performance
Objectives Related Technical
Knowledge 1. Collect required tools, equipment
and material. 2. Obtain instruction. Sample preparation 3. Heat the material between 75 and
100oC. 4. Stir it to remove air bubbles and
water, and filter it through IS Sieve 30, if necessary.
5. Heat the rings and apply glycerin. 6. Fill the material in it and cool it for
30 minutes. 7. Remove excess material with the
help of a warmed, sharp knife. Procedure 8. Assemble the apparatus with the
rings, thermometer and ball guides in position.
9. Fill the beaker with boiled distilled water at a temperature 5.0 ± 0.5oC per minute.
10. Stir the liquid with the help of a stirrer.
11. Apply heat to the beaker at a temperature of 5.0 ± 0.5oC per minute.
12. Apply heat until the material softens and allow the ball to pass through the ring.
13. Record the temperature at which the ball touches the bottom.
14. Prepare report.
Condition (Given): Well-equipped bitumentesting lab with sample. Task (What): Determine softening point of given bitumen sample. Standards (How well): Softening point test carried out as per Indian Standard 1205-1978.
Softening point determination:
• Importance of the test
• Testing procedure
Tools/equipment: Ring & ball apparatus, Glycerin, Knife, Thermometer, Beaker. Safety:
• WearPersonal protective equipment properly, otherwise it may cause accident. • Labapparatus/equipment should handle carefully. • Improper handling of lab apparatus/equipment may have accident and may have
serious injuries as well as damage of expensive apparatus/equipment.

66
Task Analysis
TASK 6: Carryout ductility test
Time: 6hrs Theory: 1hrs
Practical: 5hrs Performance steps Terminal Performance
Objectives Related Technical
Knowledge 1. Collect required tools, equipment and
material. 2. Obtain instruction. 3. Completely melt the bituminous
material to be tested by heating it to a temperature of 75 to 100oC above the approximate softening point until it becomes thoroughly fluid.
4. Assemble the mould on a brass plate. 5. Apply a thin coat of glycerin in order
to prevent the material under test from sticking.
6. Pour the sample in it. 7. Leave it to cool at room temperature
for 30 to 40 minutes. 8. Place it in a water bath maintained at
the specified temperature for 30 minutes.
9. Cut off theexcess bitumen by means of a hot, straight-edged putty knife or spatula, so that the mould is just level full.
10. Place the brass plate and mould with briquette specimen in the water bath and keep it at the specified temperature for about 85 to 95 minutes.
11. Remove the briquette from the plate 12. Detach the side pieces and the
briquette immediately. 13. Attach the rings at each end of the two
clips to the pins or hooks in the testing machine.
14. Pull the two clips apart horizontally at a uniform speed, as specified, until the briquette ruptures.
15. Measure the distance in cm through which the clips have been pulled to produce rupture.
16. Prepare report.
Condition (Given): Well-equipped bitumentesting lab with sample. Task (What): Carryout ductility test of given bitumen sample. Standards (How well): Ductility test carried out as per Indian Standard 1208-1978. .
Test of ductility: • Importance of
test • Testing
procedure
Tools/equipment: Ductility testing apparatus, Glycerin, Knife, Water bath, Beaker. Safety:
• WearPersonal protective equipment properly, otherwise it may cause accident. • Labapparatus/equipment should handle carefully. • Improper handling of lab apparatus/equipment may have accident and may have
serious injuries as well as damage of expensive apparatus/equipment.

67
Task Analysis
TASK 7: Carryout water content test
Time: 4hrs Theory: ½hrs
Practical: 3½hrs Performance steps Terminal Performance
Objectives Related Technical
Knowledge 1. Collect required tools, equipment
and material. 2. Obtain instruction. 3. Heat the sample at pouring
temperature and stir. 4. Take 100 gm bitumen sample, 40%
by weight of xylene and mix them. 5. Place the prepared sample on testing
apparatus and start heating. 6. Bring the temperature at boiling
point. 7. Continue boiling for minimum 15
minutes so that the water carrier chemical (xylene) removes the water present on the sample.
8. Read the amount of water present on the sample directly on the glass column.
9. Prepare report.
Condition (Given): Well-equipped bitumen testing lab with sample. Task (What): Carryout water content test of given bitumen sample. Standards (How well): Water content test carried out as per Indian Standard 1211-1978.
Test of water content: • Importance of test • Testing procedure
Tools/equipment: Glass distillation flask with a liebig condenser, Xylene, Beaker, Weighing machine, Stirrer. Safety:
• WearPersonal protective equipment properly, otherwise it may cause accident. • Labapparatus/equipment should handle carefully. • Improper handling of lab apparatus/equipment may have accident and may have
serious injuries as well as damage of expensive apparatus/equipment.

68
Task Analysis
TASK 8: Carryout specific gravity test
Time: 4½hrs Theory: ½hrs
Practical: 4hrs Performance steps Terminal Performance
Objectives Related Technical
Knowledge 1. Collect required tools, equipment
and material. 2. Obtain instruction. 3. Clean, dry and weigh the specific
gravity bottle along with the stopper. 4. Fill the specific gravity bottle with
freshly boiled distilled water and insert the stopper firmly.
5. Keep it in the water bath having a temperature of 27±1oC for not less than half an hour and weigh it.
6. Weighthe specific gravity bottle about half-filled with the material.
7. Weighthe specific gravity bottle about half-filled with the material and the other half with distilled water.
8. Prepare report.
Condition (Given): Well-equipped bitumentesting lab with sample. Task (What): Carryout specific gravity test of given bitumen sample. Standards (How well): Specific gravity test carried out as per Indian Standard 1202-1978.
Test of specific gravity: • Importance of
test • Testing
procedure
Tools/equipment: Specific gravity bottle, Beaker, Wash bottle, Oven. Safety:
• WearPersonal protective equipment properly, otherwise it may cause accident. • Labapparatus/equipment should handle carefully. • Improper handling of lab apparatus/equipment may have accident and may have
serious injuries as well as damage of expensive apparatus/equipment.

69
Task Analysis
TASK 9: Carryout solubility test
Time: 4hrs Theory: ½hrs
Practical: 3½hrs Performance steps Terminal Performance
Objectives Related Technical
Knowledge 1. Collect required tools, equipment
and material. 2. Obtain instruction. 3. Take 2 gm of sample. 4. Dissolvethe sample in about 100 ml
of solvent for 30 minutes. 5. Filter the solution through a filter
paper into a crucible. 6. Dry the insoluble material retained. 7. Weighthe dried sample to calculate
the percentage of the weight of the original bitumen sample.
8. Prepare report.
Condition (Given): Well-equipped bitumentesting lab with sample. Task (What): Carryout solubility test of given bitumen sample. Standards (How well): Solubility test carried out as per Indian Standard 1216-1978.
Test of solubility: • Importance of
test • Testing
procedure
Tools/equipment/chemical:Crucible, Electric Oven, Filter Paper with funnel, Trichloroethylene. Safety:
• WearPersonal protective equipment properly, otherwise it may cause accident. • Labapparatus/equipment should handle carefully. • Improper handling of lab apparatus/equipment may have accident and may have
serious injuries as well as damage of expensive apparatus/equipment.

70
Task Analysis
TASK 10: Carryout loss on heating test
Time: 6½hrs Theory: ½hrs
Practical: 6 hrs Performance steps Terminal Performance
Objectives Related Technical
Knowledge 1. Collect required tools, equipment
and material. 2. Obtain instruction. 3. Take some amount of bitumen
sample in porcelain basin. 4. Take weight. 5. Heat the sample in electric oven
upto 163oC for about 5 hours. 6. Allow the sample to cool at room
temperature after heating. 7. Take weight. 8. Calculate the loss in weight in
percentage by weight of original sample.
9. Prepare report.
Condition (Given): Well-equipped bitumentesting lab with sample. Task (What): Carryout loss on heating test of given bitumen sample. Standards (How well): Loss on heating test carried out as per Indian Standard 1212-1978.
Test of loss on heating: • Importance of test • Testing procedure
Tools/equipment: Electric Oven having heating range upto 163oC, Porcelain basin, Weighing machine. Safety:
• WearPersonal protective equipment properly, otherwise it may cause accident. • Labapparatus/equipment should handle carefully. • Improper handling of lab apparatus/equipment may have accident and may have
serious injuries as well as damage of expensive apparatus/equipment.

71
Task Analysis
TASK 11: Carryout penetration of residue test
Time: 6hrs Theory: 1hrs
Practical: 5hrs Performance steps Terminal Performance
Objectives Related Technical
Knowledge 1. Collect required tools, equipment
and material. 2. Obtain instruction. 3. Obtain the sample from loss on
heating test. 4. Cool it at an atmospheric
temperature of 15 to 30oC for 1.5 hrs.
5. Place it in a transfer dish in the water bath at 25±0.1oC for 1.5 hrs.
6. Keep the container on the stand of the penetration apparatus.
7. Adjust the dial reading to zero and place the needle in such a way that it just touches the surface of bitumen.
8. Release the needle for exactly 5 seconds.
9. Record the dial reading. 10. Repeat the above procedure thrice. 11. Prepare report.
Condition (Given): Well-equipped bitumentesting lab with sample. Task (What): Carryout penetration of residue test of given bitumen sample. Standards (How well): Penetration of residue test carried out as per Indian Standard 1204-1978.
Test of penetration of residue:
• Importance of test
• Testing procedure
Tools/equipment: Oven, Penetrometer, Penetration cans, Beaker, Water bath. Safety:
• WearPersonal protective equipment properly, otherwise it may cause accident. • Labapparatus/equipment should handle carefully. • Improper handling of lab apparatus/equipment may have accident and may have
serious injuries as well as damage of expensive apparatus/equipment.

72
Sub-module 3.6: Asphalt Tests
Time: 10hrs Theory + 30hrs Practical = 40hrs Description: This module provides basic knowledge and skills related to the asphalt tests. Objectives: After its completion the trainees will be able to carry out different types of asphalt tests in geo-engineering lab and field. Tasks:
1. Familiarize with Asphalt testing equipment 2. Collect sample 3. Determine bitumen content 4. Prepare Marshall mix design 5. Carryout Marshall stability test 6. Perform core cutting 7. Measure thickness 8. Measure density

73
Task Analysis
TASK 1: Familiarize with asphalt testing equipment
Time: 5hrs Theory: 2hrs
Practical: 3hrs Performance steps Terminal Performance
Objectives Related Technical
Knowledge 1. Obtain instruction 2. Prepare list asphalt testing
equipment 3. Collect required tools, equipment
and material. 4. Identify asphalt testing equipment 5. Clean, dry all tools and equipment 6. Fill fuel if necessary 7. Tight nut, grease etc. if necessary 8. Handle the equipment. 9. Clean all tools and equipment and
store in proper place.
Condition (Given): Well-equipped Asphalttesting lab. Task (What): Familiarize with Asphalttesting equipment. Standards (How well): Each trainee identified all asphalt testing tools/equipment and became able to handle them.
Asphalt testing equipment: • Introduction • Importance • name and function
of Asphalt testing equipment
• Safety precautions
Tools/equipment: Asphalt mixer,Marshall Apparatus, Asphalt compactor, Water bath, Trays, Vernier caliper, Weighing machine. Safety:
• WearPersonal protective equipment properly, otherwise it may cause accident. • Labapparatus/equipment should handle carefully. • Improper handling of lab apparatus/equipment may have accident and may have
serious injuries as well as damage of expensive apparatus/equipment.

74
Task Analysis
TASK 2: Collect sample
Time: 4hrs Theory: 1hrs
Practical: 3hrs Performance steps Terminal Performance
Objectives Related Technical
Knowledge 1. Collect required tools, equipment
and material. 2. Obtain instruction. 3. Define location. 4. Clear traffic. 5. Follow safety measures/precautions. 6. Dig sample pit of size 1ft x 1ft. 7. Take sample. 8. Label sample. 9. Pack sample. 10. Take/send the sample to lab. 11. Keep records.
Condition (Given): Well-equipped Asphalttesting lab. Task (What): Collect samplefor asphalt concrete tests. Standards (How well): Collected sample should be free from foreign materials and be representing the whole mass.
Sample collection: • Pavement thickness
Tools/equipment: Chisel, Hammer, Gal bar, Cutter (if available). Safety:
• WearPersonal protective equipment properly, otherwise it may cause accident. • Labapparatus/equipment should handle carefully. • Improper handling of lab apparatus/equipment may have accident and may have
serious injuries as well as damage of expensive apparatus/equipment.

75
Task Analysis
TASK 3: Determine bitumen content
Time: 6hrs Theory: 1hrs
Practical: 5hrs Performance steps Terminal Performance
Objectives Related Technical
Knowledge 1. Collect required tools, equipment
and material. 2. Obtain instruction. 3. Place the sample in a large pan and
warm upto 100oC to separate the particles if the mixture is not soft enough to separate with a trowel.
4. Place the sample in the centrifuge extractor.
5. Cover the sample with benzene; put the filter paper on it with the cover plate tightly fitted on the bowl.
6. Start the centrifuge extractor, revolving slowly and gradually increase the speed until the solvent ceases to flow from the outlet.
7. Allow the centrifuge extractor to stop.
8. Add 200ml benzene and repeat the procedure.
9. Repeat the procedure at least thrice, so that the extract is clear and not darker than the light straw colour.
10. Record the volume of total extract in the graduated vessel.
11. Remove the filter paper from the bowl.
12. Dry the filter paper in the oven at 110±5oC.
13. Take weight of the extracted sample after 24 hrs.
14. Prepare report.
Condition (Given): Well-equipped asphalttesting lab and sample asphalt. Task (What): Determine bitumen content of given core cutting sample of bituminous carpet. Standards (How well): Bitumen content test carried out as per ASTM 2172.
Determination of bitumen content: • Importance of test • Testing procedure
Tools/equipment/chemicals: Centrifuge extractor, Miscellaneous - bowl, filter paper, Weighing machine and commercial benzene. Safety:
• WearPersonal protective equipment properly, otherwise it may cause accident. • Labapparatus/equipment should handle carefully. • Improper handling of lab apparatus/equipment may have accident and may have
serious injuries as well as damage of expensive apparatus/equipment.

76
Task Analysis
TASK 4: Prepare Marshall mix design
Time: 12hrs Theory: 2hrs
Practical: 10hrs Performance steps Terminal Performance
Objectives Related Technical
Knowledge 1. Collect required tools, equipment
and material. 2. Obtain instruction. 3. Prepare the different sets (at least 5)
of materials (coarse aggregate, sand & filler) varying their combination proportion so that the combination lies within the provided gradation envelop having sample weight of 1200 gm.
4. Take different percentage of bitumen sample (4%, 4.5%, 5%, 5.5%, 6%) by weight of sample taken.
5. Heatthe weighed aggregates and the bitumen separately upto 170oC and 163oC respectively.
6. Mixthem thoroughly, transfer the mixed material to the compaction mould arranged on the compaction pedestal.
7. Give50 blows on the top side of the specimen mix with a standard hammer (45cm, 4.86kg).
8. Reverse the specimen and give 50 blows again.
9. Take the mould with the specimen and cool it for a few minutes.
10. Remove the specimen from the mould by gentle pushing.
11. Mark the specimen and cure it at room temperature, overnight.
Condition (Given): Well-equipped asphalttesting lab and sample asphalt. Task (What): Prepare Marshall mix design. Standards (How well): Marshal mix design carried out as per ASTM D1559.
Marshall mix design Preparation:
• Importance of test
• Testing procedure
• Specific gravity test results of used ingredients.
Tools/equipment: Marshall Mixer, Marshall automatic compactor, Trays, Trowel, Gloves, Bitumen heating assembly. Safety:
• WearPersonal protective equipment properly, otherwise it may cause accident. • Labapparatus/equipment should handle carefully. • Improper handling of lab apparatus/equipment may have accident and may have
serious injuries as well as damage of expensive apparatus/equipment.

77
Task Analysis
TASK 5: Carryout Marshall stability test
Time: 5hrs Theory: 1hrs
Practical: 4hrs Performance steps Terminal Performance
Objectives Related Technical
Knowledge 1. Collect required tools, equipment and
material. 2. Obtain instruction. 3. Take the earlier prepared samples. 4. Determine the weight and thickness. 5. Keep the mould in the water bath
having a temperature of 60oC for half an hour before testing of the mould
6. Take the specimens from water bath and place that on bottom jaw.
7. Replace the top jaw and mount the whole assembly on the base of the loading unit.
8. Start on the machine and make note on both load reading and flow reading dial gauge readings.
9. Determine the maximum load from the calibration chart.
10. Note that the time elapsed for the test from the removal of test specimen from the water bath to the maximum load determination shall not exceed one minute.
11. Prepare report.
Condition (Given): Well-equipped asphalttesting lab and sample asphalt. Task (What): Carryout Marshall stability test. Standards (How well): Marshal stability test carried out as per ASTM D1559.
Test of Marshall stability: • Importance of test • Testing procedure
Tools/equipment: Marshall Stability apparatus, Weighing machine,Water bath. Safety:
• WearPersonal protective equipment properly, otherwise it may cause accident. • Labapparatus/equipment should handle carefully. • Improper handling of lab apparatus/equipment may have accident and may have
serious injuries as well as damage of expensive apparatus/equipment.

78
Task Analysis
TASK 6: Perform core cutting
Time: 4hrs Theory: 1hrs
Practical: 3hrs Performance steps Terminal Performance
Objectives Related Technical
Knowledge 1. Collect required tools, equipment
and material. 2. Obtain instruction. 3. Define location 4. Clear traffic 5. Cut core using specified core bit 6. Pack the core in air tight bag and
place tag. 7. Handle the sample while
transportation.
Condition (Given): Well-equipped asphalttesting lab and sample asphalt. Task (What): Perform core cutting of pavement. Standards (How well): Shape of the sample should be well defined.
Core cutting: • Instruction • Tentative thickness
Tools/equipment: Core cutter with bit, Measuring tape, Chisel, Hammer, Plastic bag, Tags. Safety:
• WearPersonal protective equipment properly, otherwise it may cause accident. • Labapparatus/equipment should handle carefully. • Improper handling of lab apparatus/equipment may have accident and may have
serious injuries as well as damage of expensive apparatus/equipment.

79
Task Analysis
TASK 7: Measure thickness
Time: 2hrs Theory: 1hrs
Practical: 1hrs Performance steps Terminal Performance
Objectives Related Technical
Knowledge 1. Collect required tools, equipment
and material. 2. Obtain instruction. 3. Separate the base material attached
with asphalt core sample. 4. Measure the thickness of asphalt
layer with varnier. 5. Cross check can be done by
measuring the thickness of hole with measuring tape.
6. Prepare report.
Condition (Given): Well-equipped asphalttesting lab and sample asphalt. Task (What): Measure thickness of pavement layer. Standards (How well): Measurement should be conducted in the presence of eye witnesses.
Measurement of thickness: • Importance of
thickness measurement
• Separation process of overlaying layers.
Tools/equipment: Varnier caliper, measuring tape. Safety:
• WearPersonal protective equipment properly, otherwise it may cause accident. • Labapparatus/equipment should handle carefully. • Improper handling of lab apparatus/equipment may have accident and may have
serious injuries as well as damage of expensive apparatus/equipment.

80
Task Analysis
TASK 8: Measure density
Time: 2hrs Theory: 1hrs
Practical: 1hrs Performance steps Terminal Performance
Objectives Related Technical
Knowledge 1. Collect required tools, equipment
and material. 2. Obtain instruction. 3. Collect the core cutting material. 4. Handle the sample with care. 5. Weigh the sample in air. 6. Again weight it in water. 7. Submerge the sample in water for
about 15 minutes. 8. Wipe the surface with dry cloth. 9. Take weight in saturated surface dry
(SSD) condition. 10. Calculate density. 11. Prepare report.
Condition (Given): Well-equipped asphalttesting lab and sample asphalt Task (What): Measure density of pavement layer. Standards (How well): Density measured/ calculated by using apparatus/formula as per prescribed standard.
Measurement of density: • Importance of test • Testing procedure
Tools/equipment: Weighing machine with 0.1gm accuracy. Safety:
• WearPersonal protective equipment properly, otherwise it may cause accident. • Labapparatus/equipment should handle carefully. • Improper handling of lab apparatus/equipment may have accident and may have
serious injuries as well as damage of expensive apparatus/equipment.

81
Sub-module 3.7: GI Wire Tests
Time:6hrs Theory + 12hrs Practical = 18hrs Description: This module provides basic knowledge and skills related to the testing of GI Wire. Objectives: After its completion the trainees will be able to carry out different types of GI Wiretests in geo-engineering lab and field conditions. Tasks:
1. Familiarize with GI wire testing equipment 2. Collect sample 3. Determine diameter 4. Carryout zinc coating test 5. Carryout zinc coating uniformity test

82
Task Analysis
TASK 1: Familiarize with GI wire testing equipment
Time: 4hrs Theory: 2hrs
Practical: 2hrs Performance steps Terminal Performance
Objectives Related Technical
Knowledge 1. Obtain instruction 2. Prepare list GI wire testing
equipment 3. Collect required tools, equipment
and material. 4. Identify GI wire testing equipment 5. Clean, dry all tools and equipment 6. Fill fuel if necessary 7. Tight nut, grease etc. if necessary 8. Handle the equipments. 9. Clean all tools and equipment and
store in proper place.
Condition (Given): Well-equipped GI wire testing lab. Task (What): Familiarize with GI wire testing equipment. Standards (How well): Each trainee identified all GI wire testing tools/equipment and handled them.
GI wire testing equipment: • Introduction • Importance • Application of
material • Name and function
of GI wire testing equipment
Tools/equipment/chemicals: Wire cutter, wrapping plastic, Binding Tape, Micrometer Screw Gauge, Antimony trioxide (Sb2O3) or antimony trichloide (SbCl3), concentrated hydrochloric acid (sp. gr. 1.16), Beakers, Tongue, Weighing machines, etc. Safety:
• WearPersonal protective equipment properly, otherwise it may cause accident. • Labapparatus/equipment should handle carefully. • Improper handling of lab apparatus/equipment may have accident and may have
serious injuries as well as damage of expensive apparatus/equipment.

83
Task Analysis
TASK 2: Collect sample
Time: 3hrs Theory: 1hrs
Practical: 2hrs Performance steps Terminal Performance
Objectives Related Technical
Knowledge 1. Collect required tools, equipment
and material. 2. Obtain instruction. 3. Take about 1.5 m length wire
sample from about mid way of the coil.
4. Use wire cutter for sampling. 5. Wrap each sample with plastic/cloth
so that to protect rubbing against other hard surface.
6. Take sample. 7. Label sample. 8. Pack sample. 9. Take/send the sample to lab. 10. Keep records.
Condition (Given): Well-equipped GI wire testing lab. Task (What): Collect sample. Standards (How well): Collected sample should be cleaned and free from foreign material adhesion.
Sample collection: • Sampling process.
Tools/equipment: Wire cutter, wrapping plastic, Binding Tape. Safety:
• WearPersonal protective equipment properly, otherwise it may cause accident. • Labapparatus/equipment should handle carefully. • Improper handling of lab apparatus/equipment may have accident and may have
serious injuries as well as damage of expensive apparatus/equipment.

84
Task Analysis
TASK 3: Determine diameter
Time: 2hrs Theory: 1 hrs
Practical: 1hrs Performance steps Terminal Performance
Objectives Related Technical
Knowledge 1. Collect required tools, equipment
and material. 2. Obtain instruction. 3. Take straight piece of GI wire. 4. Measure the diameter of sample at
three places using micrometer screw gauge.
5. Prepare report.
Condition (Given): Well-equipped GI wire testing lab, micrometer screw gauge Task (What): Determine diameter of given GI wire sample. Standards (How well): The minimum diameter of 6, 7, 8, 9, 10, 11 and 12 SWG GI wire should be 4.88, 4.47, 4.06, 3.66, 3.25, 2.95 and 2.64 mm respectively.
Determination of diameter: • Importance of test • Testing procedure
Tools/equipment: Micrometer Screw Gauge. Safety:
• WearPersonal protective equipment properly, otherwise it may cause accident. • Labapparatus/equipment should handle carefully. • Improper handling of lab apparatus/equipment may have accident and may have
serious injuries as well as damage of expensive apparatus/equipment.

85
Task Analysis TASK 4: Carryout zinc coating test
Time: 4hrs Theory: 1hrs
Practical: 3hrs Performance steps Terminal
Performance Objectives
Related Technical Knowledge
1. Collect required tools, equipment and material. 2. Obtain instruction. Sample 3. Cut the sample length of wire from both ends of coil
under test. 4. Do not take the damaged portion of wire for testing. 5. Take the test piece of galvanized wire of any length
over 300mm but preferably 600mm. Cleaning of test piece 6. Wash the test piece with solvent naphtha,
trichloroethylene or any other suitable organic solvent, then with alcohol and dry thoroughly.
Stripping solution 7. Dissolve 20gm of antimony trioxide (Sb2O3) or
20gm of antimony trichloide (SbCl3) in 1000ml of concentrated hydrochloric acid (sp. gr. 1.16).
8. Prepare the stripping solution by adding 5ml of prepared under A to 100ml of concentrated hydrochloric acid (sp. gr. 1.16) immediately before test
9. Mix well. Procedure 10. Weighthe test piece. 11. Bend or coil the test piece when it is too long for the
container to permit complete immersion in the test solution.
12. Take out the sample when the evolution of hydrogen ceases of few bubbles are being evolved.
13. Wash in running water. 14. Wipe off well with clean soft cotton cloth 15. Dry fully/completely. 16. Take weight. 17. Measure the diameter to nearest 0.01mm at two
places at right angle to each other of the same location to obtain average value.
18. Calculate mass of coating in g/m2. 19. Prepare report.
Condition (Given): Well-equipped GI wire testing lab with sample. Task (What): Carryout zinc coating test of given zinc coated wire section. Standards (How well): Zinc coating test carried out as per Indian Standard 6745-1972.
Test of zinc coating: • Importance of
test • Testing
procedure
Tools/equipment/chemicals: Antimony trioxide (Sb2O3) or antimony trichloide (SbCl3), Concentrated hydrochloric acid (sp. gr. 1.16), Beakers, Tongue, Weighing machines, Micrometer. Safety:
• WearPersonal protective equipment properly, otherwise it may cause accident. • Labapparatus/equipment should handle carefully. • Improper handling of lab apparatus/equipment may have accident and may have
serious injuries as well as damage of expensive apparatus/equipment.

86
Task Analysis
TASK 5: Carryout zinc coating uniformity test
Time: 5hrs Theory: 1hrs
Practical: 4hrs Performance steps Terminal Performance
Objectives Related Technical
Knowledge 1. Collect required tools, equipment and material. 2. Obtain instruction. Reagents Preparation of Copper SulphateSolution: 3. Dissolve approximately 36g of crystalline copper
sulphate (CuSO4.5H2O) in each 100 ml of distilled water.
4. Shake the above solution with an excess of cupric hydroxide (approximately 1 g of cupric hydroxide per liter of the solution).
5. Allow to stand for at least 24 hours before filtering or decanting the solution from the sediment.
Procedure 6. Take undamaged test piece not less than 150 mm
in length. 7. Clean the test piece with a volatile organic
solvent (trichloroethylene) and dry with a clean soft cloth.
8. Fill the container with neutralized solution at a temperature of 18ºC and maintain this temperature within the range of 18 ± 2ºC for the duration of the test.
9. Place a maximum of three test pieces in the solution so that the pieces do not touch each other and are not disturbed.
10. Do not agitate the solution. 11. Subject the test pieces to successive dips of
exactly one minute according to the standard. 12. Rinse the sample after each dip immediately in
clean cloth 13. Dip for half a minute where specified in the
standard after the completion of all one minute dip.
14. Prepare report.
Condition (Given): Well-equipped GI wire testing lab with sample. Task (What): Carryout zinc coating uniformity test of given zinc coated wire. Standards (How well): Uniformity of zinc coating test carried out as per Indian Standard 2633-1972.
Test of zinc coating uniformity: • Importance of
test • Testing
procedure
Tools/equipment/chemicals: A glass container of internal diameter not less than 50 mm for wires of 2.8 mm diameter and smaller or 75 mm diameter for larger wires, Copper sulphate. Safety:
• WearPersonal protective equipment properly, otherwise it may cause accident. • Labapparatus/equipment should handle carefully. • Improper handling of lab apparatus/equipment may have accident and may have
serious injuries as well as damage of expensive apparatus/equipment.

87
Sub-module 3.8: Brick Tests
Time: 4 hrs Theory + 14hrs Practical = 18hrs Description: This module provides basic knowledge and skills related to the tests of
brick. Objectives: After its completion the trainees will be able to carry out different types of bricktests in geo-engineering lab and field conditions. Tasks:
1. Familiarize with Brick testing equipment 2. Collect sample 3. Determine size 4. Carryout water absorption test 5. Carryout compressive strength test 6. Carryout efflorescence test 7. Carryout soundness test

88
Task Analysis
TASK 1: Familiarize with brick testing equipment
Time: 2hrs Theory: 1hrs
Practical: 1hrs Performance steps Terminal Performance
Objectives Related Technical
Knowledge 1. Obtain instruction 2. Prepare list brick testing equipment 3. Collect required tools, equipment
and material. 4. Identify brick testing equipment 5. Clean, dry all tools and equipment 6. Fill fuel if necessary 7. Tight nut, grease etc. if necessary 8. Handle the equipments. 9. Clean all tools and equipment and
store in proper place.
Condition (Given): Well-equipped brick testing lab. Task (What): Familiarize with brick testing equipment. Standards (How well): Each trainee identified all brick testing tools/equipment and handled them.
Brick testing equipment: • Manufacture of
bricks • Types of bricks • Tests on bricks
Tools/equipment: Measuring scale, Water tank. Safety:
• WearPersonal protective equipment properly, otherwise it may cause accident. • Labapparatus/equipment should handle carefully. • Improper handling of lab apparatus/equipment may have accident and may have
serious injuries as well as damage of expensive apparatus/equipment.

89
Task Analysis
TASK 2: Collect sample
Time: 1 ½ hrs Theory: ½ hrs Practical: 1hrs
Performance steps Terminal Performance Objectives
Related Technical Knowledge
1. Collect required tools, equipment and material.
2. Obtain instruction. 3. Take random sample of brick for
test. 4. Label the sample 5. Pack sample. 6. Take/send the sample to lab. 7. Keep records.
Condition (Given): Well-equipped bricktesting lab and brick. Task (What): Collect sample for brick test. Standards (How well): Brick sample collected as per Indian Standard 5454-1978.
Sample collection: • Type of test • Number of tests
Tools/equipment: Safety:
• WearPersonal protective equipment properly, otherwise it may cause accident. • Labapparatus/equipment should handle carefully. • Improper handling of lab apparatus/equipment may have accident and may have
serious injuries as well as damage of expensive apparatus/equipment.

90
Task Analysis
TASK 3: Determine size
Time: 1 ½ hrs Theory: ½ hrs Practical: 1hrs
Performance steps Terminal Performance Objectives
Related Technical Knowledge
1. Collect required tools, equipment and material.
2. Obtain instruction. 3. Take the brick samples. 4. Measure the dimensions (length,
breadth and thickness) using measuring tape.
5. Prepare report.
Condition (Given): Well-equipped bricktesting lab. Task (What): Determine size of provided brick sample. Standards (How well): The size of brick should be as per the standard.
Determine size: • Importance of test • Testing procedure
Tools/equipment: Measuring tape. Safety:
• WearPersonal protective equipment properly, otherwise it may cause accident. • Labapparatus/equipment should handle carefully. • Improper handling of lab apparatus/equipment may have accident and may have
serious injuries as well as damage of expensive apparatus/equipment.

91
Task Analysis
TASK 4: Carryout water absorption test
Time: 3 ½ hrs Theory: ½ hrs Practical: 3hrs
Performance steps Terminal Performance Objectives
Related Technical Knowledge
1. Collect required tools, equipment and material.
2. Obtain instruction. 3. Dry the specimen in a ventilated
oven at a temperatureof 105 to 115°C till it attains substantiallyconstant mass.
4. Allow the sample to cool the specimen toroom temperature and take weight.
5. Immerse completely dried specimen in clean waterat a temperature of 27 ± 2°C for 24 hours.
6. Remove the specimen and wipe out any traces ofwater with a damp cloth and weigh the specimen.
7. Complete the weighing 3 minutes after the specimen has been removed from water.
8. Prepare report.
Condition (Given): Well-equipped bricktesting lab with brick sample Task (What): Carryout water absorption test. Standards (How well): Water absorption test carried out as per Indian standard 3495-2 (1992).
Water absorption test: • Importance of test • Testing procedure
Tools/equipment: Weighing machine, Ventilated oven, Water tank. Safety:
• WearPersonal protective equipment properly, otherwise it may cause accident. • Labapparatus/equipment should handle carefully. • Improper handling of lab apparatus/equipment may have accident and may have
serious injuries as well as damage of expensive apparatus/equipment.

92
Task Analysis
TASK 5: Carryout compressive strength test
Time: 4 ½ hrs Theory: ½ hrs Practical: 4hrs
Performance steps Terminal Performance Objectives
Related Technical Knowledge
1. Collect required tools, equipment and material.
2. Obtain instruction. Preconditioning 3. Remove unevenness observed in the
bed faces toprovide too smooth and parallel faces by grinding.
4. Immerse in water at room temperature for 21hours.
5. Remove the specimen and drain out any surplus moisture at room temperature.
6. Fill the frog (where provided) and all voids in the bed face flush with cement mortar (1 cement, 1 cleancoarse sand of grade 3 mm and down).
7. Storeunder the damp jute bags for 24 hours followed byimmersion in clean water for 3 days.
8. Removeand wipe out any traces of moisture.
Procedure 9. Place the specimen with flat faces
horizontal andmortar filled face facing upwards between twoplywood sheets each of 3 mm thickness andcarefully centered between plates of the testingmachine.
10. Apply load axially at a uniform rate of 14 N/mm2per minute tillfailure occurs and note the maximum load atfailure.
11. Prepare report.
Condition (Given): Well-equipped bricktesting lab with brick sample. Task (What): Carryout compressive strength test. Standards (How well): Compressive strength test carried out as per Indian standard 3495-1 (1992).
Compressive strength test: • Importance of test • Testing procedure
Tools/equipment: Compressive strength testing machine, Water tank, 3mm thick ply, Trays, Trowel, Measuring scale. Safety:
• WearPersonal protective equipment properly, otherwise it may cause accident. • Labapparatus/equipment should handle carefully. • Improper handling of lab apparatus/equipment may have accident and may have
serious injuries as well as damage of expensive apparatus/equipment.

93
Task Analysis
TASK 6: Carryout efflorescence test
Time: 3 ½ hrs Theory: ½ hrs Practical: 3hrs
Performance steps Terminal Performance Objectives
Related Technical Knowledge
1. Collect required tools, equipment and material.
2. Obtain instruction. 3. Place the end of the bricks in the
dish, the depthof immersion in water being 25 mm.
4. Place the whole arrangement in a warm (for example, 20to 30°C) well ventilated room until all the waterin the dish is absorbed by the specimens and thesurplus water evaporates.
5. Cover the dish containingthe brick with suitable glass cylinder so that excessive evaporation from the dish may notoccur.
6. Place a similar quantityof water in the dish when the water has been absorbed andbricks appear to be dry.
7. Allow it to evaporate asbefore. 8. Examine the bricks for efflorescence
afterthe second evaporation and report the results
9. Prepare report.
Condition (Given): Well-equipped bricktesting lab with brick sample. Task (What): Carryout efflorescence test of given brick. Standards (How well): Efflorescence test carried out as per Indian standard 3495-3 (1992).
Efflorescence test: • Importance of
test • Testing
procedure
Tools/equipment: A shallow flat bottom dish containing sufficientdistilled water to completely saturate the specimens. Safety:
• WearPersonal protective equipment properly, otherwise it may cause accident. • Labapparatus/equipment should handle carefully. • Improper handling of lab apparatus/equipment may have accident and may have
serious injuries as well as damage of expensive apparatus/equipment.

94
Task Analysis
TASK 7: Carryout soundness test
Time: 1 ½ hrs Theory: ½ hrs Practical: 1hrs
Performance steps Terminal Performance Objectives
Related Technical Knowledge
1. Collect required tools, equipment and material.
2. Obtain instruction. 3. Take any two samples of brick. 4. Strike them to produce a sound. 5. Detect the type of sound. 6. Prepare report.
Condition (Given): Well-equipped bricktesting lab with brick sample. Task (What): Carryout soundness test of given brick sample. Standards (How well): The bricks should produce metallic sound while stroking each other.
Soundness test: • Importance of test • Testing procedure
Tools/equipment: Safety:
• WearPersonal protective equipment properly, otherwise it may cause accident. • Labapparatus/equipment should handle carefully. • Improper handling of lab apparatus/equipment may have accident and may have
serious injuries as well as damage of expensive apparatus/equipment.

95
Module 4: Communication & Professionalism Development Time: 2hrs Theory + 4hrs Practical = 6hrs
Description: This module provides basic knowledge and skills related to the communication and professional development.
Objectives: After its completion the trainees will be able to perform communication in a professional wayand develop career in the field of geo-engineering lab technology. Tasks: Communication
1. Prepare message for communication 2. Carry out directverbal communication 3. Carry out nonverbal communication 4. Communicate with Telephone 5. Communicate with letters 6. Communicate with e-mail/internet 7. Communicate with SMS 8. Communicate with clients 9. Communicate with seniors 10. Communicate with juniors 11. Communicate with peers 12. Communicate with related suppliers
Professional Development 1. Maintain professional ethics 2. Develop professional career 3. Consult professional books/journal /manuals/periodicals 4. Participate in professional meetings/seminar/workshop/training. 5. Gain higher education 6. Brows www 7. Form/participate in professional organization
Performance Steps:
Communication:
• Identify the persons to be communicated.
• Greet while visiting or talking in telephone.
• Introduce yourself and explain the objectives of visit.
• Introduce yourself and explain the objectives of calling while communicating
in the telephone.
• Thank them for their time at the end of the conversation.
• Use respected, polite and simple language in oral and written
communication.
• Follow the rules of letter writing for written communication.
Professionalism Development: • Collect information regarding meetings, workshops, seminars. • Organise/participate in meetings, workshops, seminars. • Communicate for meetings, workshops, seminars. • Visit internet site and collect related information. • Identify the venue for exposure visit, communicate to the concern agencies,
get approval for visit and visit in appropriate time. • Make note of important information during the exposure visit, meeting,

96
workshop and seminar. • Read related books, newspapers, catalogues and update yourself on modern
technology. Related Technical Knowledge
Communication
• Meaning of communication.
• Importance of communication.
• Means of communication.
• Tools of communication and methods of their uses.
• Things to be consider while communicating with different level of people.
Professionalism Development
• Introduction of professionalism development • Needs and importance of professionalism development • Methods of professionalism development • Methods of organizing meetings, workshops, seminars, etc. • Things to be considers while organizing meetings, workshops, seminars, etc.
Terminal performance objective:
Used respected, simple and polite language.
Tools, Equipment and Materials:
• Computer, Telephone, Email, Letterhead, Pen, Paper, etc.
Safety/Precautions: • Be careful while selecting words and language in both written and oral
communication because wrong wording and language may harm for people and
organization.

97
Module 5: Field Practice
Time: 0 hrs Theory + 55hrs Practical = 55 hrs Description: This module provides the trainees an opportunity of utilizing the
knowledge and skills learn from in-house training in real world of work. Objectives: After its completion the trainees will be able to:
• Practice the skills learned from in-house training in real field. • Practice new skills which is included in the curriculum but not get opportunity
for practice in in-house training. • Familiarize with real world of work.
Practical areas during field practice: Apply and practice knowledge and skills related to the followings areas;
• Soil Tests • Aggregate Tests • Cement Tests • Concrete Tests • Bitumen Tests • Asphalt Tests • GI Wire Tests • Brick Tests
Guidelines for Field Practice • Select appropriate sites for practical • Make agreement with practical sites if necessary. • Inform about number of student and date of practical in advance. • Divide the students in appropriate group. • Assign students and trainers for practical. • Develop evaluation formats. • Evaluate the performance of the students during the field practice.

98
References: S.N. Name of Books/Journals Authors Publisher
Books
1 Highway Material Testing S.K. Khanna, C.E.G Justo NEM Chand & Bros, Roorkee
2 Highway Engineering S.K. Khanna, C.E.G Justo NEM Chand & Bros, Roorkee
3 Engineering Proporties of Soil and their Measurement
Joseph E Bowles The McGraw-Hill Companies
4 Material Testing Laboratory Manual C.B. Kukreja, K Kishore,
Ravi Chandra Standard Publishers
Distributors
5 Laboratory Manual on Testing of Engineering Materials
Hemant Sood New Age International
Publishers
6 Soil Mechanics and Foundation Engineering
Dr. K. R. Arora Standard Publishers
Distributors
7 Analysis and Design of Substructures Swami Saran Oxford & IBH Publishing Co.
Pvt. Ltd.
8 Soil Engineering Testing, Design and Remediation
Fu Hua Chen Library of Congress Cataloging
in Publication Data
9 Principals of Foundation Engineering Bajra M Das THOMSON
10 Foundation Analysis and Design Joseph E Bowles The McGraw-Hill Companies
11 Advance Foundation Engineering V.N.S. Murthy CBS Publishers and
Distributors
12 Text Book of Foundation Engineering Dr. R.K. Poudel, Ramesh
Neupane
Journals/Codes/Manuals
1 Standard Specifications for Road and Bridges
Ministry of Physical Planning and Works, Department of
Roads 2 Indian Standard Codes of Practice Bureau of Indian Standards
3 AASHTO Standard Specification for Highway Bridges
American Association for State Highway and Transportation Officials
4 Concrete and Highway Engineering Lab
Prof. S. LavanyaPraba Department of Civil Engineering
Rajalakshmi Engineering College
5 Building Materials Laboratory Manual Faculty of Engineering Civil
Engineering Department Islamic University of Gaza
6 Hand Book of Material Testing Indian Railways Institute of Civil
Engineering
7 Laboratory Testing Manual Ministry of Works, The United
Republic of Tanzenia 8 International Building Code International Code Council
9 Quality Assurance Manual National Highway Authority of
India 10 Quality Control Manual Public Work Department, India
11 Soils and Foundation Handbook State Material Office,
Gaineville, Florida
12 Training Course in Geotechnical and Foundation Engineering
US Department of Transport
Federal Highway Administration
13 Paper and Article on Geotechnical Exploration and Testing
M.Sc. Program in Geotechnical
Engineering Institute of Engineering, TU

99
List of Tools and Equipment
S. N. Name of Equipment/Tools Descriptions
Soil Testing Equipment:
1 Hand Operated Extractor for 38mm & 50 mm dia.
For extracting undisturbed of soil sample
2 Speedy Moisture Meter For determining in-situ moisture content
3 Laboratory Electric Oven For conducting moisture content test and
other tests
4 Liquid Limit Device, motorized, with Casagrande grooving
For determining liquid limit
5 Shrinkage Limit Set For determining shrinkage limit
6 Pycnometer For determining specific gravity
7 Sieve Shaker, Motorized, with Built-in Digital Timer
For gradation analysis
8 Compaction Test Apparatus for light compaction
For conducting proctor test 9
Compaction Test Apparatus for heavy compaction
10 Universal Automatic Compactor For conducting proctor/CBR test
11 Laboratory California Bearing Ratio Test For conducting CBR test
12 Laboratory Permeability Apparatus For conducting laboratory permeability
test
13 Swell Test Apparatus For conducting swelling pressure test
14 Automatic Free Fall Hammer for SPT and DCPT Test
For conducting SPT test
15 Sand Pouring Cylinder Apparatus, 100mm dia. For conducting field density test
16 Sand Pouring Cylinder Apparatus Large, 200mm dia.
Concrete Testing Equipment:
1 Digital Compression Testing Machine, Capacity 2000kN
For conducting compressive strength test 2
Analogue Compression Testing Machine, Capacity 50kN
3 Slump Test Apparatus For conducting slump test
4 Flow Table, Motorized For conducting flow test
5 Bulk Density Measures, 10 and 20 liters For conducting bulk density of aggregate
6 Air Entrainment Meter For conducting air content test
7 Concrete Mixer, Pan Type, Capacity 40L For preparing concrete sample
8 Accelerated Curing Tank For storing the concrete sample
9 Vibrating Table For compacting the concrete cube during
casting
Cement Testing Equipment:
1 Automatic Blaine Apparatus For conducting fineness test of Cement
2 Vicat Apparatus For conducting consistency & setting time
tests of cement
3 Le-Chatelier Flask For conducting specific gravity test of cement
4 Automatic/Manual Digi Mortar Mixer For preparing cement mortar sample

100
5 Vibration Machine For compacting the cement mortar cube
during casting
6 Cement Tensile Testing Machine For conducting tensile strength test of
cement Sand, Aggregate and Tile Testing Equipment:
1 Riffle Sample Divider, 14 Slots For preparing aggregate sample for test
2 Riffle Sample Divider, 16 Slots
3 Thickness Gauge For conducting flakiness index test
4 Length Gauge For conducting elongation index test
5 Density Basket For conducting specific gravity & water
absorption tests
6 Cylindrical Metal Measures For conducting bulk density test
7 Crushing Value Apparatus For conducting crushing value test
8 Aggregate Impact Tester For conducting impact value test
9 Los Angeles Abrasion testing machine For conducting Los Angeles abrasion test
Bitumen, Asphalt, Zinc and Brick Testing Equipment:
1 Flash Point (Open) and Fire Point For conducting flash and fire point test
2 Universal Penetrometer For conducting penetration & residue penetration test
3 Bitumen Penetration Kit
4 Specific Gravity Bottle For conducting specific gravity test
5 Glass Distillation Flask For water content test
6 DIGI Modified Marshall Apparatus For conducting Marshall stability test
7 Automatic Compactor for Bituminous Mixes For preparing sample for Marshall stability test 8 Automatic Compactor for Bituminous Mixes
9 Asphalt Mixer For preparing sample for Marshall
stability test
10 Water Bath For storing Marshall mould
11 Ring and Ball Apparatus For conducting softening point test
12 Pavement Core Drilling Machine For conducting core cutting
13 Centrifuge Extractor For conduction bitumen content test
14 Ductility Testing Machine with digital display For conducting ductility test
15 Benkelman Beam with Digital Dial Gauge For conducting flexible pavement deflection test
16 Laboratory Electric Oven For conducting loss on heating test