Embed Size (px)
Citation preview

GenElute™ HP Endotoxin-Free Plasmid Maxiprep Kit
User GuideCatalog Nos.
NA0400
NA0400S
NA0410
sigma.com

Ordering InformationCatalog No. Product Description Pkg Size
NA0400S GenElute HP Endotoxin-Free Plasmid Maxiprep Kit 4 preps
NA0400 GenElute HP Endotoxin-Free Plasmid Maxiprep Kit 10 preps
NA0410 GenElute HP Endotoxin-Free Plasmid Maxiprep Kit 25 preps
Related ProductsCatalog No. Product Description Pkg Size
NA0150 GenElute HP Plasmid Miniprep Kit 70 preps
NA0200S GenElute HP Plasmid Midiprep Kit 4 preps
NA0200 GenElute HP Plasmid Midiprep Kit 25 preps
NA0300S GenElute HP Plasmid Maxiprep Kit 4 preps
NA0300 GenElute HP Plasmid Maxiprep Kit 10 preps
NA0310 GenElute HP Plasmid Maxiprep Kit 25 preps
NA0500 GenElute HP Plasmid Megaprep Kit 5 preps
NA0600 GenElute HP Endotoxin-Free Plasmid Megaprep Kit 5 preps
NA0800 enElute HP Select Plasmid Gigaprep Kit 5 preps
To reorder product call 1-800-325-3010, visit our Web site at sigma-aldrich.com,
or contact your local sales representative.

1
Product Description ..........................................................2
Precautions and Disclaimer ..............................................3
Storage and Stability ........................................................3
Preparation Instructions ...................................................3
Procedure ........................................................................4
DNA Concentration .........................................................7
DNA Quantitation ............................................................7
References .......................................................................7
Troubleshooting Guide .....................................................8
Appendices ....................................................................11
Experienced User Protocol ..............................................13
GenElute HP Endotoxin-Free Plasmid Maxiprep KitTable of Contents

2
Product DescriptionEndotoxins are a common contaminant in plasmid preparations that can reduce transfection efficiencies in endotoxin-sensitive eukaryotic cell lines. The GenElute™ HP Endotoxin-Free Plasmid Maxiprep Kit offers a simple and rapid method for isolating endotoxin-free plasmid DNA from recombinant E. coli cultures. The kit uses a vacuum format with a filter column for the rapid clearing of the bacterial lysate and a silica column for capturing plasmid DNA. Up to 1.2 mg of plasmid DNA with < 0.1 Endotoxin Units/mg can be isolated from an overnight culture grown in Luria Broth (LB) medium in about 40 minutes. Note that the plasmid yield and endotoxin levels will vary depending on the strain, the plasmid, and the culture medium used.An overnight recombinant E. coli culture is harvested by centrifugation and subjected to a modified alkaline-SDS lysis. The lysate is clarified by filtration followed by the addition of a binding solution that has been optimized for endotoxin-free plasmid preparations. The plasmid DNA is then captured on silica, while endotoxins are prevented from adsorbing to the membrane. Two wash steps remove contaminants. Finally, the bound DNA is eluted in endotoxin-free water.The recovered plasmid DNA is predominately in its supercoiled form. Genomic DNA and RNA are below detectable levels by ethidium bromide stained agarose gel electrophoresis. The DNA is ready for immediate use in downstream applications such as transfection, transformation, restriction digestion, ligation, sequencing and PCR.
The GenElute HP Endotoxin-Free Plasmid Maxiprep Kit delivers significant time-savings, overall higher yields and better transfection efficiencies compared to anion-exchange and other methods.
Reagents ProvidedCatalog
No.NA0400S 4 Preps
NA0400 10 Preps
NA0410 25 Preps
Column Preparation Solution C2112 60 ml 225 ml 2 x 225 ml
RNase A Solution R6148 1.5 ml 1.5 ml 2.5 ml
Resuspension Solution R1149 60 ml 150 ml 375 ml
Lysis Solution L1912 60 ml 150 ml 375 ml
Neutralization Solution N7411 60 ml 150 ml 375 ml
Binding Solution B9560* 45 ml 115 ml 280 ml
Wash Solution 1 W0263 60 ml 150 ml 375 ml
Wash Solution 2 W4639 12 ml 30 ml 75 ml
Endotoxin-Free Water 2107 50 ml 50 ml 100 ml
GenElute HP Endotoxin-Free Maxiprep Filter H3538 4 10 25
VacCap R4778 5 10 25
GenElute HP Maxiprep Binding Column G4917 4 10 25
Collection Tubes — 50 ml C4353 8 20 50
* Sigma Life Sciences continually seeks ways to improve our products. Please note that the product code for Binding Solution has changed from B1810 to B9560. This change has been made to reflect an improvement to the manufacturing process. The new manufacturing process results in the same functionality and specifications of Binding Solution.

3
Precautions and Disclaimer The GenElute HP Endotoxin-Free Plasmid Maxiprep Kit is for research use only and is not for drug, household or other uses. Please consult the Material Safety Data Sheet for information regarding hazards and safe handling practices.
Storage and StabilityStore the kit at room temperature. After the RNase A Solution is added to the Resuspension Solution, store at 2–8 °C. The Neutralization Solution can also be stored at 2–8 °C, since it is recommended to use this solution chilled in the protocol.
Preparation Instructions1. Prepare a starter culture Pick a single colony from a freshly streaked plate and
inoculate a starter culture of 3 to 5 ml LB medium. Use the appropriate antibiotic and incubate at 37 °C for approximately 8 hours while shaking at 250–300 rpm. Dilute the starter culture 1:500 to 1:1000 in the appropriate volume of LB medium and incubate at 37 °C for 12 to 16 hours while shaking at 250–300 rpm.
A healthy culture grown in LB will generally reach an absorbance at 600 nm of between 2 and 4. Cultures grown in rich media such as TB are not recommended for use with this kit.
2. Choosing the correct culture volume
Use of 150 ml of culture generally results in good plasmid yields and endotoxin levels. However, the optimal volume of culture to use depends upon the strain, the plasmid, and the density of the culture since the number of bacterial cells can vary greatly between cultures.
Too few cells (low cell mass) will result in low DNA yields and may cause a very fine flocculent after neutralization that could cause clogging during filtration. Conversely, with too many cells (high cell mass) the bacteria may not lyse efficiently and cause poor release of the plasmid DNA or the potential to trap lysate volume in the cell debris during filtration resulting in a lower yield. By following the cell mass calculation, you will ensure maximum plasmid recovery from the overnight culture.
Equipment and Reagents Required But Not Provided • Centrifuge capable of 5000 x g • Centrifuge with a swinging bucket rotor capable of 3000 x g• Vacuum source capable of ;500 mbar. See Appendix 2 for unit conversions.• Vacuum manifold, Catalog No. VM20• Ethanol (95–100%), Catalog Nos. E7148, E7023, or 459836

4
2. Choosing the correct culture volume (cont’d)
For best results, we recommend using a volume of culture based on cell mass. A total cell mass of 200–600 is recommended but a cell mass of 450 is typically optimal. The optimal volume of culture to use can be determined by measuring the absorbance of the overnight culture at 600 nm (A600) and using the formula below:
Volume optimal = 450A600
3. Mix reagents thoroughly Examine the reagents for precipitation. If any reagent forms a precipitate upon storage, warm at 55–65 °C until the precipitate dissolves. Allow the reagent to cool to room temperature before use.
4. Prepare Resuspension Solution/RNase A
Spin the tube of RNase A Solution (R6148) briefly to collect the solution in the bottom of the tube. Add the amount of RNase A Solution listed in the table below to the bottle of Resuspension Solution (R1149). Store at 2–8 °C.
Kit SizeVolume of RNase A
Solution to Add
4 preps 300 µl
10 preps 750 µl
25 preps 1.9 ml
5. Prepare Wash Solution 2 Add the amount of 95–100% ethanol listed in the table below to the bottle of Wash Solution 2 (W4639) prior to initial use. After each use, tightly cap the diluted Wash Solution 2 to prevent the evaporation of the ethanol.
Kit SizeVolume of
Ethanol to Add
4 preps 48 ml
10 preps 120 ml
25 preps 300 ml
6. Chill Neutralization Solution
The Neutralization Solution (N7411) can be stored at 2–8 °C since it should be chilled prior to use.
ProcedureAll steps are carried out at room temperature. When using a vacuum, make certain the vacuum level is equal to or greater than 500 mbar (refer to Appendix 2 for unit conversions).
5
Convenient stopping points
Step 1: The wet bacterial pellet can be frozen at –70 ºC for one month without any detrimental effects to the quality or yield of the plasmid DNA.
Step 2 and step 8: Do not prepare Binding Column in Step 2. Instead perform Steps 1 and 3-8. Now cleared lysate containing Binding Solution can be stored overnight at 2-8 ºC without any detrimental effects to the quality or yield of the plasmid DNA.
When you are ready to continue the plasmid purifications, prepare the Binding Column with Column Preparation Solution (C2112) as described in Step 2, wait 10 minutes, then load the cleared lysate containing Binding Solution to the column and follow the procedure to finish the DNA preparation.
1. Harvest cells
Important Reminder: The optimal volume of culture can be calculated based on cell mass. Refer to Preparation Instructions.
Pellet 150 ml of an overnight culture by centrifugation at 5000 x g for 10 minutes and discard the supernatant.
2. Prepare Binding Column Place a GenElute HP Maxiprep Binding Column onto the Sigma VM20 vacuum manifold. Add 12 ml of Column Preparation Solution to the Binding Column, apply the vacuum and allow it to pass through. Then turn vacuum off until step 9.
3. Resuspend cells
Important Reminder: Verify that RNase A Solution was added to the Resuspension Solution.
Add 12 ml of Resuspension/RNase A Solution to the bacterial pellet and completely resuspend by pipetting up and down, or vortexing.
Incomplete resuspension can result in poor recovery of plasmid DNA.
4. Lyse cells Lyse the resuspended cells by adding 12 ml of Lysis Solution. Immediately mix the contents by gently inverting 6 to 8 times. Let the mixture sit for 3 to 5 minutes until it becomes clear and viscous.
Do not shake or vortex. Harsh mixing will shear genomic DNA and may contaminate the final recovered plasmid DNA.
Do not allow lysis to proceed longer than 5 minutes. Prolonged alkaline lysis may permanently denature the supercoiled plasmid DNA and may render it unsuitable for use in downstream applications.
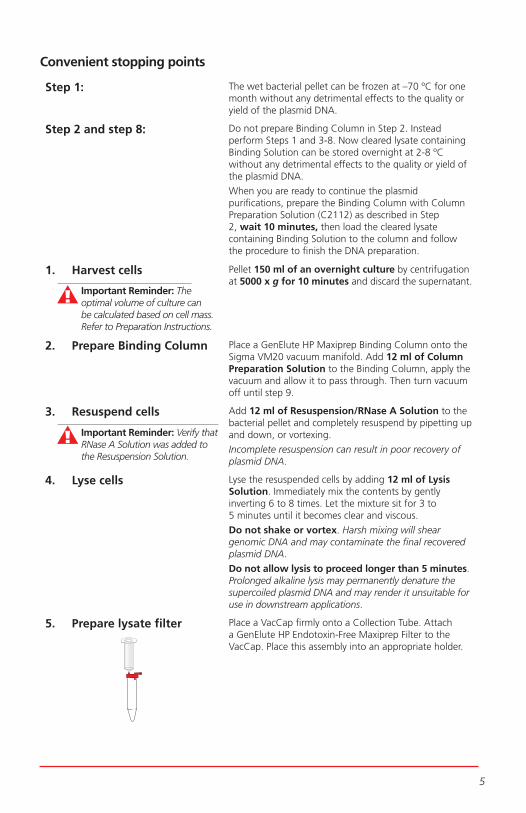
5. Prepare lysate filter Place a VacCap firmly onto a Collection Tube. Attach a GenElute HP Endotoxin-Free Maxiprep Filter to the VacCap. Place this assembly into an appropriate holder.

6
6. Neutralize lysate
Important Reminder: Confirm that Neutralization Solution is chilled to 2–8 °C.
Neutralize the lysed cells from Step 3 by adding 12 ml of chilled Neutralization Solution to the mixture and gently invert 6 to 8 times. Immediately pour the lysate into the filter assembly and incubate for 5 minutes. A white aggregate (cell debris, proteins, lipids, SDS, and chromosomal DNA) will form. Do not add the Binding Solution until the lysate has been filtered in Step 7.
7. Filter lysate
Important Reminder: Do not remove the filter until the vacuum pressure is relieved.
Filter lysate by attaching vacuum source to VacCap and applying vacuum. Allow lysate to filter through for at least 1 minute. Once the lysate has passed through, turn off vacuum and detach the vacuum source from the VacCap.
Some lysate may remain trapped in the white flocculent material. It is not necessary to recover this solution completely.
8. Add Binding Solution Add 9 ml of Binding Solution to the filtered lysate and gently invert 6–8 times to mix.
9. Bind Plasmid DNA
Important Tip: Do not allow the lysate to pass below the surface of the binding material until all the lysate has been added to the column.
VM20 Vacuum Manifold
Transfer the mixture from Step 8 to the prepared Binding Column with the vacuum on. Allow all the lysate to pass through.
The Binding Column will not accommodate the entire volume of lysate, so be careful not to overfill the column. If the column does empty before all the lysate is loaded, the remaining lysate will pass through the column very slowly. This may take several minutes, but will not have an effect on plasmid recovery or endotoxin levels.
10. Apply Wash Solution 1 Add 12 ml of Wash Solution 1 to the column and allow it to pass through.
11. Apply Wash Solution 2
Important Reminder: Verify that ethanol has been added to the bottle of Wash Solution 2.
Add 12 ml of Wash Solution 2 to the column and allow it to pass through.
12. Dry column
Important Reminder: Make certain the vacuum level is greater than or equal to 500 mbar (refer to Appendix 2 for unit conversions)
Following the wash steps, leave the vacuum on for at least 10 minutes to dry the column. If more than 6 columns are on the vacuum manifold, dry for at least 20 minutes.
It is important to completely dry the column to prevent the ethanol contamination and allow efficient elution in the final preparation. Depending on the strength of the vacuum source, it may be necessary to increase the vacuum time.
Remove any Wash Solution remaining on the inside of the column with a Kimpwipes®.

7
13. Elute plasmid DNA Transfer the Binding Column to a clean 50 ml Collection Tube. Add 3 ml of Endotoxin-Free Water to the column. Refer to Elution Options table below to determine which centrifugation speed is appropriate.
For maximum recovery of plasmid: Centrifuge the column/collection tube unit in a swinging bucket rotor at 3000 x g for 5 minutes.
For maximum concentration of plasmid: Centrifuge the column/collection tube unit in a swinging bucket rotor at 1000 x g for 5 minutes.
Centrifugation Speed
Typical Volume Recovered
Relative Yield
Relative Concentration
3000 x g 2.5 ml 100% 100%
1000 x g 1.2 ml 80% 175%
The plasmid DNA is present in the eluate and is ready for immediate use, concentration by precipitation, short-term storage at 2–8 °C or long-term storage at –20 °C.
DNA ConcentrationImportant Reminder: Alcohol precipitation is only necessary if a more concentrated plasmid preparation is desired.
Transfer the eluate to an endotoxin-free (pyrogen-free) centrifuge tube.. Please note that the provided Collection Tubes should not be centrifuged above 5000 x g.
Add 0.1 volumes of 3.0 M Sodium Acetate Buffer Solution, pH 5.2 and 0.7 volumes of isopropanol to the recovered plasmid. Mix well by inversion and centrifuge at ;15,000 x g at 4 °C for 30 minutes. Decant the supernatant, being careful not to disturb the pellet. Rinse the DNA pellet with 1.5 ml of 70% ethanol and centrifuge as before for 10 minutes. Carefully decant the supernatant and air-dry the pellet until the residual ethanol has evaporated. Resuspend the DNA pellet in the desired volume of Endotoxin-Free Water.
DNA QuantitationRecovery and purity of the plasmid DNA may be determined by spectrophotometric analysis. The ratio of absorbance at (A260–A320)/(A280–A320) should be 1.8 to 2.0. The A320 reading corrects for any background absorbance, including that caused by silica fines in the final product. These fines are common in silica-based systems and should not effect most downstream applications. To remove silica fines, spin the elute at 5000 x g (italic g) for 10-15 minutes and recover the supernatant. The size and quality of the DNA may be determined by agarose gel electrophoresis or pulse field gel electrophoresis.
References1. Birnboim, H. C.; Doly, J. A rapid alkaline extraction procedure for screening recombinant plasmid DNA. Nucleic Acids Res., 1979, 7, 1513–1522.
2. Vogelstein, B.; Gillespie, D. Preparative and analytical purification of DNA from agarose. Proc. Natl. Acad. Sci. USA, 1979, 76, 615–619.

8
Troubleshooting Guide
Lysate is not clear after filtration; binding column becomes clogged
Cause — Cells have been stored improperly before use.Solution — If the culture cannot be processed immediately, pellet the cells and store at –70 °C.
Binding Column appears clogged following the addition of the lysate
Cause — The Binding Column was allowed to empty before all the lysate was loaded onto the column.Solution — Do not allow the lysate to pass below the surface of the binding material until all the lysate has been added to the column. If the column does empty before all the lysate is loaded, the remaining lysate will pass through the column very slowly. This may take several minutes but should not have an effect on plasmid recovery or endotoxin levels.
Elution volume recovery is greater than 3 ml
Cause — Binding Column was not dried sufficiently after the second wash step.Solution — Increase the drying time of the column to 20 minutes following the second wash. Vacuum source should attain ;500 mbar (refer to Appendix 2 for unit conversions).
Poor or no plasmid DNA recovery
Cause — Cells overgrown or undergrown.Solution — Confirm cell density by taking absorbance at 600 nm. See Preparation Instructions 2.
Cause — Too many or few cells harvested.Solution — Confirm that an appropriate cell mass was used. See Preparation Instructions 2.
Cause — Starting culture is too old.Solution — Streak a fresh plate from a freezer stock. Pick a single colony and prepare a new culture.
Cause — Plasmid replication is poor.Solution — Confirm that the cells were grown in the appropriate medium with a selective antibiotic under optimized conditions
Cause — Antibiotic activity is insufficient.Solution — Confirm that the appropriate amount of fresh antibiotic was present during growth of culture. Most antibiotics are light sensitive and degrade during long-term storage at 2–8 °C.
Cause — Wash Solution 2 is too concentrated.Solution — Confirm that Wash Solution 2 was diluted with the specified volume of ethanol. Keep the bottle tightly capped between uses to prevent evaporation.

9
Poor or no plasmid DNA recovery
Cause — Alkaline lysis exceeded 5 minutes.Solution — Prolonged alkaline lysis may permanently denature plasmid DNA. Do not allow lysis to exceed 5 minutes.
Cause — Precipitation of cell debris is incomplete.Solution — Thoroughly mix the lysate following the addition of the chilled Neutralization Solution.
Cause — Lysis is incomplete.Solution — Too many cells harvested. See Preparation Instructions 2. Lyse cells 3 to 5 minutes until the mixture becomes clear and viscous.
Cause — Vacuum level is too low.Solution — Vacuum source should attain ;500 mbar (refer to Appendix 2 for unit conversions).
Absorbance readings do not accurately reflect the quantity of plasmid
Cause — The plasmid DNA is contaminated with RNA; RNase A treatment is insufficient.Solution — Confirm that RNase A Solution was added to the Resuspension Solution prior to first use. Store the Resuspension/RNase A Solution at 2–8 °C.
Cause — The plasmid DNA is contaminated with chromosomal DNA.Solution — Do not use cultures that have grown for more than 24 hours or are in the cell death phase. Do not vortex or vigorously shake the cells during or after the lysis reaction.
A260/A280 ratio is too high or low
Cause — The background reading is high.Solution — Subtract background at A320 as described under DNA Quantitation.
Cause — Wash Solution 2 is diluted with ethanol containing impurities.Solution — Check the absorbance of ethanol between 250 and 300 nm. Do not use ethanol with high absorbance. Traces of impurities may remain on the binding column after washing. Impurities may show up in the eluate and may contribute to the absorbance of the final product.
Additional band migrates behind supercoiled plasmid during electrophoresis
Cause — Some of the supercoiled plasmid DNA has become nicked.Solution — Plasmid DNA that has been nicked (covalently opened) will run slower than supercoiled DNA during electrophoresis. A small amount of this species of DNA is common and is suitable for downstream applications.

10
Additional band migrates ahead of supercoiled plasmid during electrophoresis
Cause — Some of the supercoiled plasmid DNA has become permanently denatured.Solution — Do not allow the lysis reaction to proceed longer than 5 minutes. Permanently denatured plasmid DNA will migrate ahead of the supercoiled DNA and may not be suitable for downstream applications.
Poor performance in downstream enzymatic applications
Cause — Purification is incomplete.Solution — Salts in one or more of the solutions may have precipitated. Heat the solution at 65 °C until dissolved. Cool to room temperature prior to use.
Cause — The plasmid DNA is permanently denatured.Solution — Do not allow the lysis reaction to proceed longer than 5 minutes. Prolonged alkaline lysis may permanently denature plasmid DNA.
Cause — DNA concentration is too low.Solution — Precipitate the DNA and resuspend in a desired volume as described under DNA Concentration.
Cause — Ethanol is present in the final elution.Solution — Increase the drying time of the column to 20 minutes following the second wash. Vacuum source should attain ;500 mbar (refer to Appendix 2 for unit conversions).
Cause — High salt concentration in final elution.Solution — Confirm that Wash Solution 2 followed Wash Solution 1. Wash Solution 2 removes residual salt and other impurities from the column. Precipitate the plasmid DNA as described under DNA Concentration.
Related Products Catalog No. Related Products Catalog No.
Kimwipes® Disposable Wipers Z188956 Gel Loading Solution G 2526
LB Broth, Sterile Liquid Media L 2542 DirectLoadTM Wide Range DNA Marker
D 7058
Water, Molecular Biology Reagent
W 4502 Ethidium bromide, aqueous, 10 mg/ml
E 1510
Endotoxin-Free Water W3500 TAE Buffer (10X Concentrate) T 9650
3M Sodium Acetate Buffer Solution, pH 5.2
S 7899 TBE Buffer (10X Concentrate) T 4415
Isopropanol I 9030, I 0398 or I 9516
Escort II Transfection Reagent L 6037
Precast Agarose Gels, 1.0%, 8 well P 5472 Escort V Kit-Enhanced E 1029

11
Appendix 1: Centrifuge Speed Conversion TableAll centrifugation speeds are given in units of gravity (g). Please refer to Table 1 or information on converting g-force to rpm. If centrifuges/rotors for the required g-forces are not available, use the maximum g-force possible and increase the spin time proportionally.
Table 1. Conversion of Centrifugal Force (in units of g) to RPM for Common Rotors
Centrifuge
Rotor
Type*
Radius (cm)
RPM at 3000 x g
RPM at 5000 x g
Beckman Allegra 6
GH-3.8
SB
20.4
3,631
4,688
Allegra 21(R) S4180 SB 16.1 4,081 5,268
Allegra 64F0485 FA 9.0 N/A** N/AF0685 FA 9.7 N/A N/A
TJ-25 TS-5.1-500 SB 19.0 3,756 4,849TA-10-250 FA 13.7 N/A N/A
Rotors for older Beckman centrifuges
JA-10 FA 15.8 N/A N/AJA-14 FA 13.7 N/A N/AJA-20 FA 10.8 N/A N/AJS-13 FA 14.0 N/A N/A
IEC MP4(R)
215 SB 13.0 4,537 5,857224 SB 35.9 2,733 3,528
PR-7000M 966 SB 24.5 3,310 4,274 B22M 877 FA 12.6 N/A N/ASorvall HB-4 SB 14.7 4,277 5,522
HB-6 SB 14.6 4,284 5,531HS-4 SB 17.2 3,948 5,097SH-80 SB 10.1 5,142 6,639GSA FA 14.5 N/A N/A
SA-300 FA 9.7 N/A N/ASA-600 FA 12.9 N/A N/ASE-12 FA 9.3 N/A N/ASL-50T FA 10.7 N/A N/ASS-34 FA 10.7 N/A N/A
*SB = swinging bucket; FA = fixed angle **N/A = not appropriate for application
The correct rpm for unlisted rotors can be calculated using the formula:RPM = √RCF / 1.118 x 10⁻⁵ r
where RCF = required gravitational acceleration (relative centrifugal force) in units of g;
r = radius of the rotor in cm;RPM = the number of revolutions per minute required to achieve
the necessary g-force

12
Appendix 2: Vacuum Pressure Conversion TableAll vacuum pressures are given in millibars (mbar). Please refer to Table 2 for information on converting millibars (mbar) to other pressure units.
Table 2. Conversion of millibars (mbar) to Other Pressure Units
Pressure Unit
500 mb equivalent
Inches of mercury (inch Hg) 14.8Millimeters of mercury (mm Hg) 375Pounds per square inch (psi) 7.25Atmospheres (atm) 0.49Kilopascals (kPa) 50Torrs (Torr) 375

13
Experienced User Protocolr Preparation: See Technical Bulletin for Details • Add RNase A to Resuspension Solution • Add Ethanol to Wash Solution 2 • Chill Neutralization Solution
1 Harvest Bacteriar Pellet 150 ml of an overnight culture at 5000 x g, 10 minutes.
Discard supernatant.
2 Prepare Columnr Place a Maxiprep Binding Column onto the Sigma VM20 vacuum
manifold. Add 12 ml of Column Preparation Solution to the binding column and vacuum through.
3 Resuspend & Lyse Bacteriar Resuspend cells in 12 ml of Resuspension/RNase Solution. Pipet
up and down, or vortex to mix.r Add 12 ml of Lysis Solution and gently invert 6–8 times to mix.
Do not shake or vortex. Allow to clear, 3–5 minutes.
4 Prepare Cleared Lysater Neutralize lysate by adding 12 ml of chilled Neutralization
Solution and gently invert 6–8 times to mix. r Prepare lysate filter by placing a VacCap onto a collection tube
and attaching an Endotoxin-Free Maxiprep Filter to the VacCap. r Immediately pour the lysate into the filter assembly and incubate
for 5 minutes.r Filter lysate by attaching vacuum source to the VacCap and
applying vacuum. r Add 9 ml of Binding Solution to the filtered lysate and gently
invert 6–8 times.
5 Bind Plasmid DNA to Columnr Transfer lysate to the prepared column with the vacuum on.
Do not allow the lysate to pass below the surface of the binding material until all the lysate has been added to the column.
6 Wash to Remove Contaminantsr Add 12 ml of Wash Solution 1 and vacuum through.r Add 12 ml of Wash Solution 2 and vacuum through.r Leave the vacuum on for at least 10 minutes to dry the column.
If more than six columns are on the manifold, dry for at least 20 minutes.
7 Elute Purified Plasmid DNAr Transfer the Binding Column to a collection tube.r Add 3 ml of Endotoxin-Free Water to the Binding Column.r For maximum yield of Plasmid DNA: centrifuge the column/
collection tube unit in a swinging bucket rotor at 3000 x g for 5 minutes.
r For maximum concentration of Plasmid DNA: centrifuge the column/collection tube unit in a swinging bucket rotor at 1000 x g for 5 minutes.

Accelerating Customers’
Success through Innovation and
Leadership in Life Science,
High Technology and Service
01882-5026200079
World Headquarters3050 Spruce St., St. Louis, MO 63103(314) 771-5765sigma-aldrich.com
Order/Customer Service (800) 325-3010 • Fax (800) 325-5052
Technical Service (800) 325-5832 • sigma-aldrich.com/techservice
Development/Bulk Manufacturing Inquiries (800) 244-1173
©2008 Sigma-Aldrich Co. All rights reserved. SIGMA, , SAFC, , SIGMA-ALDRICH, ALDRICH, , FLUKA, , and SUPELCO, are trademarks belonging to Sigma-Aldrich Co. and its affiliate Sigma-Aldrich Biotechnology, L.P. Sigma brand products are sold through Sigma-Aldrich, Inc. Sigma-Aldrich, Inc. warrants that its products conform to the information contained in this and other Sigma-Aldrich publications. Purchaser must determine the suitability of the product(s) for their particular use. Additional terms and conditions may apply. Please see reverse side of the invoice or packing slip. GenElute™, EZMix™, DirectLoad™, SAFC™, and Sigma Advanced Technology™ are trademarks of Sigma-Aldrich Co. and its division Sigma-Aldrich Biotechnology LP.