Embed Size (px)
Citation preview

FUJITSU Software ServerView Suite
Deployment Pack for Microsoft System Center Configuration Manager V4.0
User Guide
February 2018 Edition

Copyright 2018 FUJITSU LIMITED
All hardware and software names used are trademarks of their respective manufacturers.
All rights, including rights of translation, reproduction by printing, copying or similar methods,
in part or in whole, are reserved.
Offenders will be liable for damages.
All rights, including rights created by patent grant or registration of a utility model or design,
are reserved.
Delivery is subject to availability. Right of technical modification reserved.

User Guide 3
Contents
1 Preface .................................................................................................................. 5
2 ServerView Deployment Pack .............................................................................. 7 2.1 About This Guide ................................................................................................... 7 2.2 Target Audience ..................................................................................................... 7 2.3 Safety Notes .......................................................................................................... 7 2.4 Notational Conventions ......................................................................................... 8
3 Deployment Concept ............................................................................................ 9 3.1 Overview................................................................................................................ 9
4 Installing the ServerView Deployment Pack ..................................................... 11 4.1 Getting Started .................................................................................................... 11 4.1.1 Preconditions....................................................................................................... 11 4.1.2 Hints for Driver Packages ..................................................................................... 12 4.1.3 Hints for PRIMERGY System Hardware Configuration ............................................ 12 4.1.4 Hints for Task Sequences and Bare Metal Deployment ......................................... 13 4.1.5 Using Deployment Pack PowerShell Module ........................................................ 13 4.2 Installation .......................................................................................................... 14 4.2.1 Preparation ......................................................................................................... 14 4.2.2 ServerView Deployment Pack ............................................................................... 14 4.2.3 Component List ................................................................................................... 15 4.2.4 File location overview .......................................................................................... 17
5 Fujitsu driver packages ...................................................................................... 19 5.1 General ................................................................................................................ 19 5.2 Building a driver package .................................................................................... 19
6 Import Boot Images ........................................................................................... 21 6.1 Boot Image Preparations ..................................................................................... 21 6.2 Importing Fujitsu boot images ............................................................................. 21 6.3 Custom WinPE images ......................................................................................... 23 6.3.1 Custom WinPE prerequisites ................................................................................ 23 6.3.2 Fujitsu WinPE drivers ........................................................................................... 23
7 Preparing SCCM to configure PRIMERGY Servers ............................................... 25

Contents
4 User Guide
7.1 Import the ServerView Scripting Toolkit ................................................................ 25 7.2 Build the Custom Reboot Package ........................................................................ 26 7.3 Build the Copy SCCM Client Package ..................................................................... 27 7.4 Build the Post Installation Package ...................................................................... 27
8 Task Sequences ................................................................................................... 29 8.1 General ................................................................................................................ 29 8.2 Add an OSD task sequence ................................................................................... 29 8.2.1 Using the profile option ....................................................................................... 30 8.2.2 Finalise the OSD task sequence ............................................................................ 30 8.3 Custom Reboot..................................................................................................... 31 8.3.1 Change or add a Custom Reboot task ................................................................... 32 8.4 Add a RAID configuration task .............................................................................. 33 8.5 Add an iRMC configuration task ........................................................................... 33 8.5.1 Add a custom iRMC configuration task ................................................................. 33 8.6 Add custom configuration tasks ........................................................................... 34 8.7 Add a POST OS Installation task ............................................................................ 35 8.8 Debugging OS Deployment .................................................................................. 36
9 Addendum .......................................................................................................... 37 9.1 Supported PRIMERGY Systems .............................................................................. 37 9.2 Supported Controllers........................................................................................... 37 9.3 Released Utilities Versions ................................................................................... 37 9.4 Supported Operating Systems .............................................................................. 37 9.5 Supported Microsoft SCCM Versions with this ServerView Deployment Pack .......... 38 9.6 Restrictions .......................................................................................................... 38 9.6.1 Restrictions with SCCM 2012 SP1 .......................................................................... 38 9.6.2 Restrictions with SCCM 2012 R2 ........................................................................... 38

User Guide 5
1 Preface
The ServerView Deployment Pack for Microsoft System Center Configuration Manager (SCCM) is
intended to enable users to configure and deploy PRIMERGY servers using Microsoft SCCM.
The pack leverages off the WinPE-based tools provided by the ServerView Scripting Toolkit, and
extends the SCCM with tools and scripts. ServerView Suite Installation DVD is required to
provide up-to-date drivers and WinPE versions to integrate into SCCM. The ServerView
Deployment Pack supports SCCM 2012, SCCM 2012 SP1, SCCM 2012 R2 (at least CU1 is
required), SCCM 2016.
This guide describes the tools and features provided by the ServerView Deployment Pack and
how they can be employed in an MS SCCM environment for PRIMERGY servers.
For more information about Microsoft System Center Configuration Manager please refer to the
documentation at:
https://docs.microsoft.com/en-us/sccm/
The ServerView Deployment Pack contains:
A collection of scripts to integrate the ServerView Scripting Toolkit for PRIMERGY hardware
configuration within Microsoft SCCM
Tools for handling Fujitsu Technology Solutions’ ServerView Suite DVDs and PRIMERGY
Operating System Deployment
Documentation
The ServerView Deployment Pack is located
on the ServerView Suite – Management and Serviceability DVD:
<DVDroot>\start.html
or
on Fujitsu Technology Solutions’ support website
http://download.ts.fujitsu.com/prim_supportcd/start.html
In both cases follow Software Products – ServerView – Integration Solutions – ServerView Deployment Pack for Microsoft SCCM

Preface
6 User Guide
Things you need before getting started:
ServerView Suite V11.12.10 or later
ServerView Scripting Toolkit V4.0 or later.
All packages are located on the ServerView Suite – Management and Serviceability DVD or
on the support website, follow Software Products – ServerView – Deployment Tools – ServerView Scripting Toolkit

User Guide 7
2 ServerView Deployment Pack
2.1 About This Guide
This user guide is intended as a reference for using the ServerView Deployment Pack within
Microsoft System Center Configuration Manager for the deployment of PRIMERGY servers.
2.2 Target Audience
This guide is targeted at experienced administrators who are familiar with the servers of the
PRIMERGY family from Fujitsu Technology Solutions and have a good knowledge of Microsoft
System Center Configuration Manager.
2.3 Safety Notes
Caution!
Improper use of the tools and scripts can result in loss of critical data.
Because of the potential risk of data loss, only experienced individuals should use
the ServerView Deployment Pack. Before using any tools or scripts, a user must take
all necessary precautions to ensure that mission-critical systems remain online if a
failure occurs.

ServerView Deployment Pack
8 User Guide
2.4 Notational Conventions
The following notational conventions are used in this manual:
Typewriter text Indicates elements of the syntax that must be entered exactly as
shown in the ’Syntax’ section.
Italics Indicates variables, arguments or file names
[ ] Indicates an optional entry (an option or argument enclosed in
square brackets may be specified), i.e. the entry is not mandatory.
| Indicates an alternative option (none, one or more of several
options or arguments can be specified).
… Indicates that one or more options or arguments can be specified
several times.
Bold Used for highlighting in the text.
"Quotes" Indicates cross-references to other chapters or manuals.
Warning sign indicating that your health, the correct functioning
of your system, or the security of your data may be at risk if you
ignore the information given at this point.
Indicates additional information, notes and hints.

User Guide 9
3 Deployment Concept
3.1 Overview
The ServerView Deployment Pack is intended to enable users to configure and deploy Fujitsu
Technology Solution’s PRIMERGY servers using Microsoft System Center Configuration Manager.
It depends on and uses the ServerView Scripting Toolkit for tools and scripts to configure
PRIMERGY servers’ hardware.
All necessary MS Windows OS drivers for supported PRIMERGY servers can be imported from
ServerView Suite - Installation DVD and incorporated within SCCM using tools provided with the
ServerView Deployment Pack. Additionally, ServerView Suite - Installation DVD provides ready-
to-use WinPE boot images which can be imported into SCCM using ServerView Deployment
Pack supplied tools. ServerView Suite - Installation DVD also provides the chip-set drivers as a
‘post-installation’ task.
Menu entries and SCCM Property Pages are provided to allow integrating drivers and WinPE
images from ServerView Suite - Installation DVD and to generate all required software packages
for Bare Metal Operating System Deployment. All tools are also provided as command line tools
or PowerShell Cmdlets for use in automated environments.


User Guide 11
4 Installing the ServerView Deployment Pack
4.1 Getting Started
The goal for the ServerView Deployment Pack is to help you deploy Operating Systems to
Fujitsu PRIMERGY servers. Support to this end comes in three levels:
1. Building Driver Packages for PRIMERGY systems on your site.
2. Configuring PRIMERGY hardware using the ServerView Suite – Installation DVD WinPE
images and the tools provided by the ServerView Scripting Toolkit.
3. Providing Task Sequence steps to fully deploy an OS to a Bare Metal PRIMERGY
system.
How this support is used is entirely at your discretion and please do not hesitate to inform us if
you think we have overlooked something. Obviously for all the cases listed above the
ServerView Deployment Pack has to be installed.
4.1.1 Preconditions
To be able to successfully install, configure and fully use the ServerView Deployment Pack, you
will need:
Microsoft System Center Configuration Manager installed and configured
ServerView Suite – Installation DVD V11.12.10 or later for WinPE Images and drivers
The ServerView Scripting Toolkit (provided on the ServerView Suite – Management and
Serviceability DVD) V4.0 or later.
Additional Operating System files are required. See chapter “6.1 Boot Image Preparations”.

Installing the ServerView Deployment Pack
12 User Guide
4.1.2 Hints for Driver Packages
The simplest use of the SVDPSCCM Deployment Pack is to import the drivers required for a
target Operating System running on a particular PRIMERGY server. The generated package can
be used as is in any standard SCCM Windows OS Deployment Task Sequence. The following
steps must be completed:
Install ServerView Deployment Pack; see chapter “4.2.2 ServerView Deployment Pack”
Build necessary OS-specific and PRIMERGY-specific driver packages from ServerView Suite –
Installation DVD; see chapter “7 Preparing SCCM to configure PRIMERGY Servers”
4.1.3 Hints for PRIMERGY System Hardware Configuration
For Hardware configuration of PRIMERGY servers under SCCM, import the appropriate
ServerView Suite – Installation WinPE (SVIM), and ServerView Scripting Toolkit (STK). Create a
new task sequence which uses the imported WinPE as its boot image and add task sequence
steps to configure the RAID controller and set the desired iRMC configuration space variables.
All packages (SVIM WinPE and STK) used must be copied to the required Distribution Point
because the target system will not necessarily have a disk for the SCCM Client to use (for pre-
staging). The task sequence will need to be started with the deployment option “Access content
directly from a distribution point when needed by the running task sequence”. After configuring
the RAID controller the target system must be rebooted before installing an Operating System.
Import WinPE images for deployment from ServerView Suite – Installation DVD V11.12.10
or later; see chapter “6 Import Boot Images”.
Set up ServerView Scripting Toolkit package from ServerView Suite – Installation DVD; see
chapter “7 Preparing SCCM to configure PRIMERGY Servers”.

Installing the ServerView Deployment Pack
User Guide 13
4.1.4 Hints for Task Sequences and Bare Metal Deployment
The SVDPSCCM Deployment Pack provides forms for task sequence steps to configure RAID
Controllers, iRMC configuration space values and post OS install of chipset drivers.
It is also possible to generate a Bare Metal OS Deployment task sequence. The generated task
sequence will need to be associated with a suitable WinPE boot image and adhere to the
restrictions/hints given in the previous two sections. We advise that all steps in the sequence
are checked and/or edited to prove that: any usernames and passwords used are correct; that
the correct packages are listed in steps that use them; and that the Windows and Network
settings match those of the intended environment.
Build necessary OS-specific and PRIMERGY-specific driver packages from ServerView Suite –
Installation DVD; see chapter “7 Preparing SCCM to configure PRIMERGY Servers”
Import WinPE images for deployment from ServerView Suite – Installation DVD V11.12.10
or later; see chapter “6 Import Boot Images”.
Set up ServerView Scripting Toolkit package from ServerView Suite – Management and
Serviceability DVD; see chapter “7 Preparing SCCM to configure PRIMERGY Servers”
Build Custom Reboot Package, Copy SCCM Client Package and Post Install Package; see
chapter “7 Preparing SCCM to configure PRIMERGY Servers”
Create Bare Metal OS Deployment Task Sequence; see chapter “8 Task Sequences”.
4.1.5 Using Deployment Pack PowerShell Module
The SVDPSCCM Deployment Pack provides a PowerShell Module with support for most required
actions. There is also a simple sample script ‘NewSVIMDVD.ps1’ to show how the supplied
cmdlets (See "4.2.3.5 SCCM Powershell Cmdlets") can be used.
Using a PowerShell command prompt with Administrative Rights (needed for
BootImage operations)
Set-Location
<AdminConsoleFolder>\XmlStorage\Extensions\bin\Deployment\Fujitsu\ServerView Suite
Import-Module -Name "PRIMERGYDeploymentPack.psd1"
PowerShell Module does not set up a PSDrive so no Set-Location is needed to use the
Cmdlets
There are no Credentials meaning that the PowerShell must be run on a SiteServer
and have appropriate rights to access SCCM

Installing the ServerView Deployment Pack
14 User Guide
When using either the command line tools or the PowerShell Cmdlets to remove
packages: The tool (or Cmdlet) will first remove the package (if found) from SCCM and
then the package’s Contents. If you do not want the package contents to be removed
please use the package delete functionality (SCCM Admin Console or Remove-
CMPackage Cmdlet) provided by SCCM
4.2 Installation
4.2.1 Preparation
It is recommended that Microsoft System Center Configuration Manager Console should be
closed before the ServerView Deployment Pack is installed.
4.2.2 ServerView Deployment Pack
Note:
Make sure MS System Center Configuration Manager Console is closed.
Caution!
Related Microsoft Windows Server 2016.
For Microsoft Windows Server 2016 to start installation please use following
command in command prompt window: msiexec /i SVDPSCCM.msi.
Launch SVDPSCCM.msi and go through the following installation steps.
4. In the Welcome Screen select the preferred ServerView Deployment Pack language,
and then click “Next”.
5. In the following dialogue read and then select to accept the license agreement and
click “Next”.
6. Start the installation.

Installing the ServerView Deployment Pack
User Guide 15
4.2.3 Component List
The following is a list of parts provided by the SVDPSCCM Deployment Pack
4.2.3.1 SCCM Console Actions
Ribbon entries are added to various SCCM Console nodes to invoke SVDPSCCM Deployment Pack
Actions
4.2.3.2 SCCM Forms
Forms are provided for SVDPSCCM Deployment Pack Actions such as importing PRIMERGY
drivers and editing task sequence steps.
4.2.3.3 SCCM Task Sequence steps
Property pages are provided for SVDPSCCM Deployment Pack Task Sequence steps such as iRMC
setup or Raid controller configuration.
4.2.3.4 SCCM Command Line Tools
Some command line tools are provided on the Site Server to allow scripted operation.
DriverPackage.exe Imports the drivers required for a specific OS from the 'SVS
Installation DVD' and builds a package.
BootImage.exe Imports a single WinPE image from the SVS Installation DVD.
ImportStk.exe Imports the specified ‘SV Scripting Tool Kit’ from the 'SVS
Management and serviceability DVD' and builds a package.
PostInstallPkg.exe Imports the ‘PRIMERGY Support Package’ from the ‘SVS
Installation DVD and builds a package
CustomRebootPkg.exe Builds the ‘Custom Reboot Package’ required by the ‘Bare
Metal Template’ task sequence
CopyClientPkg.exe Builds the 'Copy SCCM Client Package' required by the 'Bare
Metal Template' task sequence
BareMetalTemplate.exe Generates a ‘Bare Metal OS Deployment Task’ sequence

Installing the ServerView Deployment Pack
16 User Guide
4.2.3.5 SCCM Powershell Cmdlets
Some PowerShell Cmdlets are provided on the Site Server to allow PowerShell scripted
operation.
Get-SVDPSCCM
Set-SVDPSCCM
Get Deployment Package properties e.g.
Version, Culture and global DebugLevel.
Culture (one of "en", "de" or "jp") and DebugLevel can be
set. Where DebugLevel:
0 means no logging.
1 (installation default) means log all errors.
2 means log warnings and errors.
3 means log function calls.
4 means verbose.
5 means log everything.
New-SVDriverPackage
Remove-SVDriverPackage
Import the drivers required for a specific OS from the
'SVS Installation DVD' and build a package.
Remove a particular driver package.
New-SVBootImage
Remove-SVBootImage
Import an 'SVS Installation DVD WinPE' image.
Remove a particular image
New-SVScriptingToolKitPackage
Remove-SVScriptingToolKitPackage
Import (or remove) the specified 'SV Scripting Tool Kit'
package.
New-SVCustomRebootPackage
Remove-SVCustomRebootPackage
Build (or remove) the 'Custom Reboot Package' required
by the 'Bare Metal Template' task sequence.
New-SVPostInstallPackage
Remove-SVPostInstallPackage
Import (or remove) the 'PRIMERGY Support Package'.
New-SVCopyClientPackage
Remove-SVCopyClientPackage
Build (or remove) the 'Copy SCCM Client Package'.
New-SVBareMetalTaskSequence
Remove-SVBareMetalTaskSequence
Create (or remove) a Bare Metal Task Sequence.
New-SVSecureStringPassword Generates from plaintext a SecureStringPassword
suitable for storing in OSD_Profile.xml.
Get-SVCredential Generates a PSCredential object from the supplied
OSD_Profile.xml (NetworkAccessAccount).

Installing the ServerView Deployment Pack
User Guide 17
A sample script NewSVIMDVD.ps1 is provided giving a few basic examples showing how to use
some of the Cmdlets. It is by no means definitive and should only be used as a guide. For this
reason the supplied script has not been signed.
4.2.4 File location overview
The following is a list of folders which contain files pertinent to the ServerView Deployment
Pack:
Documentation:
<AdminConsoleFolder>\XmlStorage\Extensions\bin\Deployment\Fujitsu\ServerView Suite\Docs is the folder where ServerView Deployment Pack and other documentation is stored.
Samples:
<AdminConsoleFolder>\XmlStorage\Extensions\bin\Deployment\Fujitsu\ServerView
Suite\Docs\Samples
is the folder where NewSVIMDVD.ps1 PowerShell script is stored.
Log files:
<AdminConsoleFolder>\XmlStorage\Extensions\bin\Deployment\Fujitsu\ServerView Suite\Logs is the folder where ServerView Deployment Pack log files are stored.
Command line tools:
<AdminConsoleFolder>\XmlStorage\Extensions\bin\Deployment\Fujitsu\ServerView Suite is the folder where ServerView Deployment Pack command line tools are installed.
Boot images:
\\<ServerName>\SMS_<SiteCode>\OSD\lib\BootImages\Fujitsu\ Default package contents location where ServerView Deployment Pack boot images are
stored.
Drivers:
\\<ServerName>\SMS_<SiteCode>\OSD\lib\Drivers\Fujitsu\ Default package contents location where ServerView Deployment Pack drivers are stored.
Driver packages:
\\<ServerName>\SMS_<SiteCode>\OSD\lib\DriverPackages\Fujitsu\ Default package contents location where ServerView Deployment Pack driver packages
are stored.

Installing the ServerView Deployment Pack
18 User Guide
Deployment packages:
\\<ServerName>\SMS_<SiteCode>\OSD\lib\Packages\Deployment\Fujitsu\ServerView Suite\ Default package contents location where ServerView Deployment Pack software packages
are stored.
Boot images, drivers, driver packages and deployment packages will be generated when
working with the ServerView Deployment Pack.

User Guide 19
5 Fujitsu driver packages
5.1 General
ServerView Suite - Installation DVD (SVIM) is released on a roughly monthly basis. It contains
all drivers for all supported PRIMERGY servers for all supported operating systems, including
those for WinPE.
5.2 Building a driver package
Have your ServerView Suite - Installation DVD ready.
To build operating-system-specific driver packages or import WinPE drivers follow these steps:
1. In the SCCM Console select ‘Software Library’ and navigate to ‘Operating System’.
2. On the ribbon click on ‘Fujitsu Server Deployment’ – ‘Create Fujitsu PRIMERGY Driver
Packages’.
3. When the import tool asks for the location of the ServerView Suite - Installation DVD,
navigate to the correct drive.
4. When asked, provide the PRIMERGY model and the operating system the driver
package shall be built for.
Note:
Which PRIMERGY models and operating systems are supported depends
upon the version of ServerView Suite - Installation DVD.
5. Adapt the default locations for driver contents and/or driver packages if desired.
Note:
These must be given as UNC paths and accessible from the Site Server.

Fujitsu driver packages
20 User Guide
The tool will then proceed to copy all drivers to a folder on the SCCM server, import those
drivers into SCCM with appropriate categories and build a package from those drivers.
Categories used comprise of the following: PRIMERGY model, the operating system and the
processor architecture. Depending on how many drivers need to be imported this action may
take up to 10 minutes. Any existing drivers will not be re-imported but will be given additional
new categories as required. A file “DriverList.log” is created in the log files directory which lists
the names of drivers that were imported and their associated status message. Only the details
from the last successful import are kept.
The driver packages will be supplied with the PRIMERGY model, the operating system, the
processor architecture and the ServerView Suite - Installation DVD Version for easy
differentiation.
Note:
WinPE drivers will only be imported and categorized since WinPE drivers are not
stored in packages.
Drivers and Driver Packages can also be generated via the command line tool
DriverPackage.exe. See DriverPackage.exe –execute --help for usage information. Alternatively,
use the PowerShell Cmdlet New-SVDriverPackage. Use Get-Help New-SVDriverPackage for
usage information. For importing 64bit WinPE 5 drivers use parameter '-OperatingSystem
"WinPE5x64"'

User Guide 21
6 Import Boot Images
6.1 Boot Image Preparations
The tools used to configure Fujitsu PRIMERGY Server hardware require a few preconditions to be
able to work in WinPE. These preconditions are mostly fulfilled per default with Fujitsu’s own
WinPE versions from ServerView Suite - Installation DVD which are pre-configured to support all
current Fujitsu PRIMERGY servers.
The ServerView Deployment Pack therefore uses ServerView Suite - Installation DVD WinPE
images to configure PRIMERGY servers. This section describes how to import ServerView Suite -
Installation DVD WinPE images into SCCM.
6.2 Importing Fujitsu boot images
Have your ServerView Suite - Installation DVD ready and set up sc.exe in the SVDPSCCM/
TOOLS64 folder. See chapter “6.1 Boot Image Preparations” for details.
Note: SVIM features various WinPE versions to the meet all requirements of the supported OS versions. Depending on the SCCM version the following WinPE versions can be selected to be imported:
SCCM 2012: WinPE3 x86, WinPE3 x64 SCCM 2012 SP1: WinPE4 x64 SCCM 2012 SP1 CU2 and later: WinPE3 x64, WinPE4 x64, WinPE5 x64
To import Fujitsu Boot Images follow these steps:
1. In the SCCM Console select ‘Software Library’ and navigate to ‘Operating System’.
2. On the ribbon click on ‘Fujitsu Server Deployment’ – ‘Create Fujitsu Boot Images’.
3. When the import tool asks for the location of the ServerView Suite - Installation DVD,
navigate to the correct drive.
4. Select one or more WinPE version(s).

Import Boot Images
22 User Guide
5. Adapt the default location for image content if desired. The default file name of the
WinPE image(s) cannot be changed.
The tool will then proceed to adapt the SVIM WinPE image(s) for SCCM and import these boot
image(s) into the SCCM Boot Images node into a folder ‘Fujitsu PRIMERGY Boot Images’. This
action takes about 15 minutes per WinPE image.
The boot images will be supplied with the ServerView Suite - Installation DVD Version to
distinguish between different versions of SVIM WinPE images.
Fujitsu WinPE images can also be imported via the command line tool BootImage.exe. See
BootImage.exe –execute –help for usage information. The command line tool will only import
one boot image at a time.
Alternatively, after importing the PRIMERGYDeployment module, use the PowerShell Cmdlet
'New-SVBootImage'.
Use 'Get-Help New-SVBootImage' for usage information. To import 64bit WinPE 5 image use
the parameter '-OperatingSystem "WinPE5x64"'
Notes: The WinPE images(s) from a particular ServerView Suite - Installation DVD
version can only be imported once. If for any reason the same WinPE needs to be imported again, change the name and package contents location for the already imported boot image (or delete them) before re-importing it.
Different RAID drivers may be required for W2K8, W2K8 R2, W2K12 and W2K12R2 therefore it is important to use the corresponding SVIM WinPE image for the target OS installation. The installation may run to a bluescreen after reboot if the wrong WinPE is used.

Import Boot Images
User Guide 23
6.3 Custom WinPE images
If the required conditions are met in a custom WinPE, there is every chance the tools will work
in this boot image too.
6.3.1 Custom WinPE prerequisites
The following conditions must be met within a custom WinPE which will be used to configure
PRIMERGY hardware.
- WinPE-Scripting-Package installed
- Fujitsu WinPE drivers added. See chapter “6.3.2 Fujitsu WinPE drivers” for details.
6.3.2 Fujitsu WinPE drivers
The ServerView Suite - Installation DVD contains all drivers for all supported PRIMERGY models
and all supported operation system variants including supported WinPE versions. To extract all
the required WinPE drivers follow the instructions in chapter “5 Fujitsu driver packages”.
Then add the appropriate drivers to a custom boot image in the SCCM console.

User Guide 25
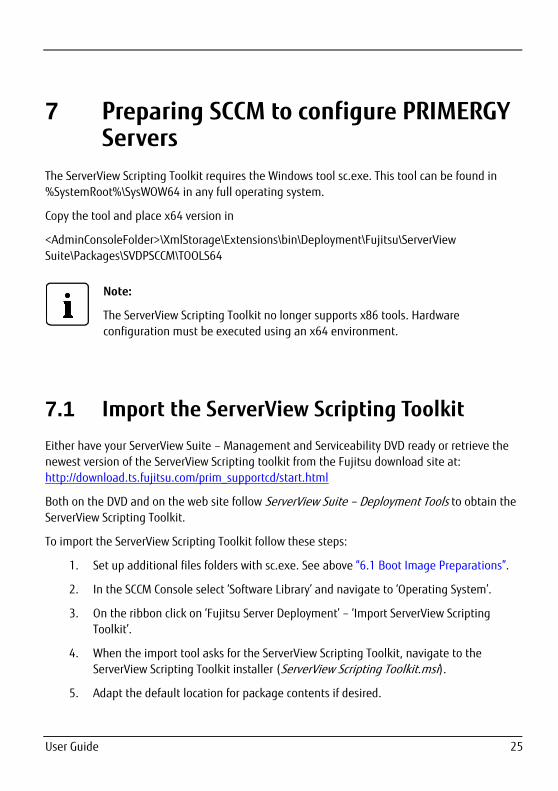
7 Preparing SCCM to configure PRIMERGY Servers
The ServerView Scripting Toolkit requires the Windows tool sc.exe. This tool can be found in
%SystemRoot%\SysWOW64 in any full operating system.
Copy the tool and place x64 version in
<AdminConsoleFolder>\XmlStorage\Extensions\bin\Deployment\Fujitsu\ServerView
Suite\Packages\SVDPSCCM\TOOLS64
Note:
The ServerView Scripting Toolkit no longer supports x86 tools. Hardware
configuration must be executed using an x64 environment.
7.1 Import the ServerView Scripting Toolkit
Either have your ServerView Suite – Management and Serviceability DVD ready or retrieve the
newest version of the ServerView Scripting toolkit from the Fujitsu download site at:
http://download.ts.fujitsu.com/prim_supportcd/start.html
Both on the DVD and on the web site follow ServerView Suite – Deployment Tools to obtain the
ServerView Scripting Toolkit.
To import the ServerView Scripting Toolkit follow these steps:
1. Set up additional files folders with sc.exe. See above “6.1 Boot Image Preparations”.
2. In the SCCM Console select ‘Software Library’ and navigate to ‘Operating System’.
3. On the ribbon click on ‘Fujitsu Server Deployment’ – ‘Import ServerView Scripting
Toolkit’.
4. When the import tool asks for the ServerView Scripting Toolkit, navigate to the
ServerView Scripting Toolkit installer (ServerView Scripting Toolkit.msi).
5. Adapt the default location for package contents if desired.

Preparing SCCM to configure PRIMERGY Servers
26 User Guide
This will import the ServerView Scripting Toolkit and create the STK software packages. The
packages will be supplied with the ServerView Scripting Toolkit’s version and architecture. The
resulting software packages are located in a folder ‘Fujitsu PRIMERGY Server OS Deployment’ in
the ‘Application Management’ – ‘Packages’ section of the ‘Software Library’.
The ServerView Scripting Toolkit can also be imported via the command line tool
ImportSTK.exe. See ImportSTK.exe –execute –help for usage information.
Alternatively, after importing the PRIMERGYDeployment module, use the PowerShell Cmdlet
New-SVScriptingToolkitPackage. Use Get-Help New-SVScriptingToolkitPackage for usage
information.
Notes:
A specific version of the ServerView Scripting Toolkit cannot be imported twice.
When deleting a specific ServerView Scripting Toolkit Package, make sure to delete
the associated package contents as well, otherwise that version of the ServerView
Scripting Toolkit cannot be imported again.
7.2 Build the Custom Reboot Package
To be able to use the custom reboot within the Bare Metal OSD task sequence, the Custom
Reboot Package is required.
To build the package, follow these steps:
1. In the SCCM Console select ‘Software Library’ and navigate to ‘Operating System’.
2. On the ribbon click on ‘Fujitsu Server Deployment’ – ‘Build Reboot Package’.
3. Adapt the default location for package contents if desired.
The resulting software package is located in a folder ‘Fujitsu PRIMERGY Server OS Deployment’
in the ‘Application Management’ – ‘Packages’ section of the ‘Software Library’.
The Custom Reboot Package can also be generated via the command line tool
CustomRebootPkg.exe. See CustomRebootPkg.exe –execute –help for usage information.
Alternatively, after importing the PRIMERGYDeployment module, use the PowerShell Cmdlet
'New-SVCustomRebootPackage'. Use 'Get-Help New-SVCustomRebootPackage' for usage
information.

Preparing SCCM to configure PRIMERGY Servers
User Guide 27
7.3 Build the Copy SCCM Client Package
The standard Microsoft SCCM Client package cannot be amended to be run from a Distribution
Point which makes is unsuitable for use in a Bare Metal OSD task sequence.
To build the package, follow these steps:
1. In the SCCM Console select 'Software Library' and navigate to 'Operating System'.
2. On the ribbon click on 'Fujitsu Server Deployment' - 'Build Copy of Client Package'.
3. Adapt the default package contents location if desired.
The resulting software package is located in a folder 'Fujitsu PRIMERGY Server OS Deployment'
in the 'Application Management' - 'Packages' section of the 'Software Library'.
The Copy SCCM Client Package can also be generated via the command line tool
CopyClientPkg.exe. See CopyClientPkg.exe –execute --help for usage information.
Alternatively, after importing the PRIMERGYDeployment module, use the PowerShell Cmdlet
'New-SVCopyClientPackage'. Use 'Get-Help New-SVCopyClientPackage' for usage information.
7.4 Build the Post Installation Package
To finish the OSD task sequence, a Post Installation Package is also required.
To build the package, follow these steps:
1. In the SCCM Console select ‘Software Library’ and navigate to ‘Operating System’.
2. On the ribbon click on ‘Fujitsu Server Deployment’ – ‘Build Post Installation Package’.
3. When the import tool asks for the location of the ServerView Suite – Installation DVD,
navigate to the correct drive.
4. Adapt the default package contents location if desired.
The resulting software package is located in a folder ‘Fujitsu PRIMERGY Server OS Deployment’
in the ‘Application Management’ – ‘Packages’ section of the ‘Software Library’.
The Post Installation Package can also be generated via the command line tool
PostInstallPkg.exe. See PostInstallPkg.exe –execute --help for usage information.
Alternatively, after importing the PRIMERGYDeployment module, use the PowerShell Cmdlet
'New-SVPostInstallPackage'. Use 'Get-Help New-SVPostInstallPackage' for usage information.


User Guide 29
8 Task Sequences
8.1 General
The ServerView Deployment Pack provides both an Operating System Deployment task
sequence generator and task sequence property pages for additional hardware configuration
tasks.
Notes:
Configuring a brand new server or RAID configuration in general requires the task
sequence to be run directly from the distribution point. All depending packages –
including the boot image – need to be configured to be accessed directly from the
distribution point.
Use the Fujitsu Boot images with any task sequence that configures PRIMERGY server hardware
to be sure all necessary drivers are at hand.
8.2 Add an OSD task sequence
To set up a preconfigured Operation System deployment task sequence follow these steps:
1. In the SCCM Console select ‘Software Library’ and navigate to ‘Operating System’.
2. On the ribbon click on ‘Fujitsu Server Deployment’ – ‘Create Fujitsu PRIMERGY
Deployment Template’.
3. Provide the Network Access Account Details within the form.
An OSD Task Sequence can also be generated via the command line tool
BareMetalTemplate.exe. See BareMetalTemplate.exe –execute –help for usage information.
Alternatively, after importing the PRIMERGYDeployment module, use the Cmdlet 'New-
SVBareMetalTaskSequence'. Use 'Get-Help New-SVBareMetalTaskSequence' for usage
information.

Task Sequences
30 User Guide
The new OSD task sequence can be found in the Task Sequences node. Refresh the pane if
necessary.
Note:
If the necessary Fujitsu Packages have not been built before the Bare Metal Task
Sequence is generated, the associated Task Sequence Steps will be marked with a
red x. Make sure to build the required packages before proceeding. See chapter “7
Preparing SCCM to configure PRIMERGY Servers” for more information.
8.2.1 Using the profile option
It is possible to obviate the need to finalise a generated Bare Metal OSD Task Sequence by
supplying all the required information in a profile.
Some comments are provided in the sample OSD_Profile.xml to help with setting up a profile.
There is a section for general information such as which PRIMERGY server is being targeted.
It is possible to store various passwords (e.g. NetworkAccessAccount) in this file. Use the
NewSVSecureStringPassword cmdlet to generate a suitable string. A second command Get-
SVCredential can be used to generate a PSCredential Object suitable for use in ‘Start-
Bitstransfer’ thereby validating the entries in the OSD_Profile.xml.
There is a section for Packages where the package IDs for all required packages can be defined.
There is a section for Property Sheets where values found on most Property sheets can be set.
The profile is an adjunct to the Bare Metal Task Sequence meaning it cannot be used at this
time to extend or restructure the generated task sequence.
The OSD profile is an XML file and has an associated Schema supplied. It is recommended to
use a schema aware XML editor, or as a minimum an XML aware editor. Warning: Please do not
edit this file using MS Notepad.
8.2.2 Finalise the OSD task sequence
Some adaptions are necessary, before the OSD task sequence can be used:
1. Open the task sequence properties and provide a boot image for the task sequence.
Edit the task sequence and adapt the following steps:

Task Sequences
User Guide 31
2. Check that all hardware configuration task steps are supplied with the correct
ServerView Scripting Toolkit Package.
3. Add more hardware configuration task steps as required.
4. Within the ‘Operating System Deployment ‘group add a valid OS image to the ‘Apply
Operating System Image’ step.
5. Within the ‘Operating System Deployment ‘group add a valid driver package to the
‘Apply Driver Package’ step.
6. Within the ‘Operating System Deployment ‘group add the Config Manager Client
package to the ‘Setup Windows and ConfigMgr’ step.
7. Check that the post installation task step is supplied with the correct Post Installation
Package.
Notes:
It is necessary to reboot the server between RAID configuration and Operation
System Deployment. The reboot can only be executed successfully if the Custom
Reboot account (Network Access Account) has WMI access rights on the Site Server.
The password to the Network Access Account is saved encrypted.
The result of this precaution is that every time a change is made to any of the
Custom Reboot steps, the password must be supplied again and the ‘Apply’
button must be pressed immediately. Otherwise a garbled password will be saved
and the task sequence will fail.
8.3 Custom Reboot
The Custom Reboot feature stores the task sequence progress in a computer-specific WMI
variable called RebootStep on the Site Server and uses this variable to control the task
sequence progress. To read and write this variable full SiteServer WMI access is required.
SCCM always runs the complete task sequence. The actual reboot of the task sequence is
executed at the very end of the task sequence. The RebootStep variable is used to define which
group of the task sequence is to be executed at a given run (see the ‘Options’ tab of the group).
A group is only run if the RebootStep variable has the correct value.
The Custom Reboot feature consists of 3 steps:

Task Sequences
32 User Guide
1. Prepare the Reboot.
This step sets up machine-specific variables on the SiteServer.
RebootStep is incremented each time the Prepare step is run
2. Execute the Reboot.
This step resets the PXE Deployment on the SiteServer.
It must be the last task step within a group.
3. Reset (or Cleanup) the Reboot.
This step removes the machine-specific variables from the SiteServer.
Note:
If a task sequence fails, it is necessary to manually reset or remove the RebootStep
variable for the device on the Site server (see the device properties, tab ‘Variables’)
to be able to restart the task sequence from the beginning for that particular
device.
8.3.1 Change or add a Custom Reboot task
To change a Custom Reboot task edit an existing task sequence and select one of the Custom
Reboot steps. To add a Custom Reboot task click the ‘Add’ in the upper left corner, select ‘Fujitsu
Deployment’ and click on ‘Custom Reboot’. This will add a Custom Reboot task to the task
sequence.
Select whether to prepare or execute or reset the Custom Reboot feature and add a valid
account with WMI access rights on the Site Server and the password. Click ‘Apply’ immediately.
Save the task sequence.
Notes:
The server reboot can only be executed successfully if the Custom Reboot account
(Network Access Account) has WMI access rights on the Site Server. The password to
the Network Access Account is saved encrypted.
The result of this precaution is that every time a change is made to any of the
Custom Reboot steps, the password must be supplied again and the ‘Apply’
button must be pressed immediately. Otherwise the password will be saved
garbled.

Task Sequences
User Guide 33
8.4 Add a RAID configuration task
Edit an existing task sequence, click the ‘Add’ in the upper left corner, select ‘Fujitsu
Deployment’ and click on ‘RAID Controller Setup’. This will add a RAID configuration task step to
the task sequence.
Change the name of the task sequence step for later reference. Select the appropriate
ServerView Scripting Toolkit version from the drop-down-list. Its package ID will be added to the
next field. Select the controller to be configured and add the RAID Type and number of disks to
be used. If the RAID controller does not support FastInit, remove the tick from the box.
Save the task sequence.
8.5 Add an iRMC configuration task
Edit an existing task sequence, click the ‘Add’ in the upper left corner, select ‘Fujitsu
Deployment’ and click on ‘iRMC Comfort Configuration’. This will add an iRMC configuration task
step to the task sequence.
Change the name of the task sequence step for later reference. Select the appropriate
ServerView Scripting Toolkit version from the drop-down-list. Its package ID will be added to the
next field.
Select an iRMC configuration from the list and add the required values to the other fields
(values and types depend on the selected configuration item).
Save the task sequence.
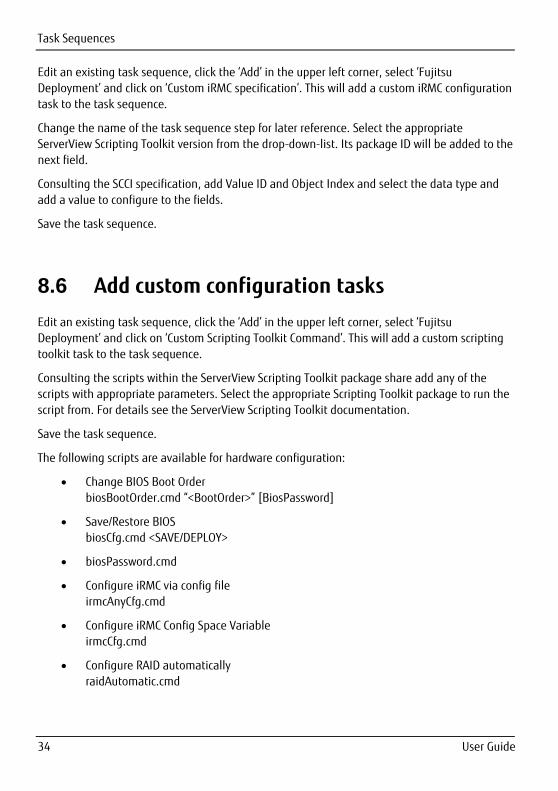
8.5.1 Add a custom iRMC configuration task
At times the iRMC configuration values provided by the comfort configuration task may not be
sufficient to cover a customer’s configuration requirements.
With the custom iRMC configuration task any iRMC configuration value can be configured. This
requires detailed knowledge of the iRMC and SCCI specification. The SCCI specification is part of
the ServerView Scripting Toolkit and can be found here once a specific STK Package has been
imported:
<AdminConsoleFolder>\XmlStorage\Extensions\bin\Deployment\Fujitsu\ServerView Suite\Docs\STK_<Version>.
Task Sequences
34 User Guide
Edit an existing task sequence, click the ‘Add’ in the upper left corner, select ‘Fujitsu
Deployment’ and click on ‘Custom iRMC specification’. This will add a custom iRMC configuration
task to the task sequence.
Change the name of the task sequence step for later reference. Select the appropriate
ServerView Scripting Toolkit version from the drop-down-list. Its package ID will be added to the
next field.
Consulting the SCCI specification, add Value ID and Object Index and select the data type and
add a value to configure to the fields.
Save the task sequence.
8.6 Add custom configuration tasks
Edit an existing task sequence, click the ‘Add’ in the upper left corner, select ‘Fujitsu
Deployment’ and click on ‘Custom Scripting Toolkit Command’. This will add a custom scripting
toolkit task to the task sequence.
Consulting the scripts within the ServerView Scripting Toolkit package share add any of the
scripts with appropriate parameters. Select the appropriate Scripting Toolkit package to run the
script from. For details see the ServerView Scripting Toolkit documentation.
Save the task sequence.
The following scripts are available for hardware configuration:
Change BIOS Boot Order
biosBootOrder.cmd “<BootOrder>” [BiosPassword]
Save/Restore BIOS
biosCfg.cmd <SAVE/DEPLOY>
biosPassword.cmd
Configure iRMC via config file
irmcAnyCfg.cmd
Configure iRMC Config Space Variable
irmcCfg.cmd
Configure RAID automatically
raidAutomatic.cmd

Task Sequences
User Guide 35
Clear RAID configuration
raidClear.cmd <CtrlNo>
Custom-configure RAID
raidCfg.cmd <CtrlNo> <RaidType> <DriveNo> [<YES|NO>]
Restore RAID configuration
raidRestore.cmd
Save RAID configuration
raidSave.cmd
Notes:
Some of these tasks either generate custom data or require custom data. Make sure
that you save this custom data for later use or to make the custom data available
within the ServerView Scripting Toolkit package.
Refer to the scripts directly and STK documentation for details.
8.7 Add a POST OS Installation task
Edit an existing task sequence; click the 'Add' in the upper left corner, select 'Fujitsu
Deployment' and click on 'Build Post Installation Package'. This will add a Post Install task step
to the task sequence.
Change the name of the task sequence step for later reference. Select the appropriate Post
Installation Package from the drop-down-list. Its package ID will be added to the next field.
Note:
Before the Post Installation task step can be invoked the target System has to have
the UNC path check disabled thereby allowing the Post Install script to run.
Save the task sequence.

Task Sequences
36 User Guide
8.8 Debugging OS Deployment
The most important file to debug a failed task sequence is SCCM’s smsts.log file. It can be found
at these locations within WinPE and the OS (as the OSD task sequence progresses the location
changes):
X: \windows\temp\smstslog\smsts.log
X: \smstslog\smsts.log
C: \_SMSTaskSequence\logs\smstslog\smsts.log
C:\Windows\System32\CCM\Logs\smsts.log
To debug the PRIMERGY hardware configuration task sequence steps, refer to the ServerView
Scripting Toolkit documentation and consult these log files:
X: \STK\STATES\<SystemSerialNumber>\LogFile.txt for general STK task debugging
X: \TMP\scu.cfg and X: \STK\HW_PROF\<SystemType>\<SerialNumber>.xmlres
to debug iRMC configuration

User Guide 37
9 Addendum
9.1 Supported PRIMERGY Systems
Supported PRIMERGY systems depend mostly on the ServerView Installation Manager for drivers
and WinPE support and on the ServerView Scripting Toolkit for tool support.
See <AdminConsoleFolder>\XmlStorage\Extensions\bin\Deployment\Fujitsu\ServerView Suite\Docs\STK_<Version>\ServerView Scripting Toolkit Documentation.pdf and ServerView Suite – Management and Serviceability DVD
<DVDroot>\WebUI\htdocs\ServerStart\docs\en\whatsnew.html.
9.2 Supported Controllers
See <ServerViewScriptingToolkitPackageFolder>\TOOLS64\SVRAID\version.txt
9.3 Released Utilities Versions
See <AdminConsoleFolder>\XmlStorage\Extensions\bin\Deployment\Fujitsu\ServerView Suite\Docs\STK_<Version>\ServerView Scripting Toolkit Documentation.pdf.
9.4 Supported Operating Systems
Microsoft Windows 2008 x64
Microsoft Windows 2008 R2
Microsoft Windows 2012
Microsoft Windows 2012 R2
Microsoft Windows 2016

Addendum
38 User Guide
9.5 Supported Microsoft SCCM Versions with this ServerView Deployment Pack
Microsoft SCCM
SCCM 2012
SCCM 2012 SP1
SCCM 2012 R2
Note: At least CU1 is required to be able to use the
Custom Reboot feature.
SCCM 2016
9.6 Restrictions
-
9.6.1 Restrictions with SCCM 2012 SP1
FTS task sequence property pages do not recognize changes within the property pages.
This is a known Microsoft problem with SCCM 2012 SP1.
Result: The ‘Apply’ button remains inactive.
Workaround: Change something else within the task sequence (create and delete,
dummy task, enable/disable a task, etc.) to enable the ‘Apply’ button.
9.6.2 Restrictions with SCCM 2012 R2
SCCM 2012 R2 cannot store computer-specific variables for imported computers.
Result: The Custom Reboot Feature does not work; Fujitsu Bare Metal task sequences can
only execute the hardware configuration group.
Resolution: Install at least SCCM 2012 R2 CU1