Embed Size (px)
Citation preview

PTZOptics SDI Model Firmware Upgrade Instructions
Updated on October 10th, 2018
Note that failure to follow these instructions in entirety can result in a non-operational camera that may not be covered by warranty.Double-check you have the correct firmware for the camera you are currently working onBackup from and restore to the exact same camera and do not share backup files between cameras
Please read through the entire procedure and if you are uncertain of any of these steps, contact PTZOptics prior to beginning the update process.
484-593-2247 (Option 2 for support)
https://help.ptzoptics.com

PREREQUISITESRead this entire document before starting
● PTZOptics firmware file● PTZOptics Upgrade Tool 2.7
Older versions of the tool will cause licensing failures
● PTZOptics G2 / ZCam camera● Windows PC● Live Network w/ DHCP
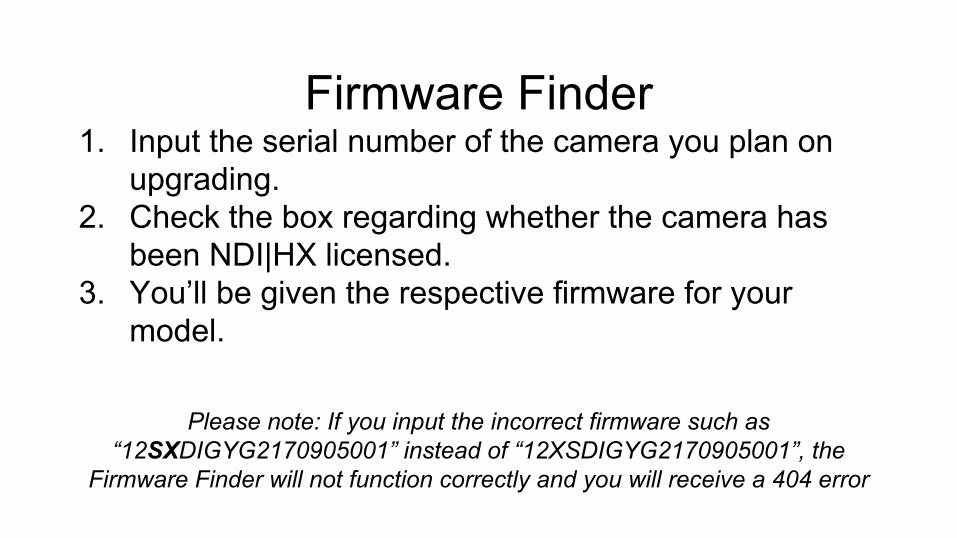
Firmware Finder1. Input the serial number of the camera you plan on
upgrading. 2. Check the box regarding whether the camera has
been NDI|HX licensed.3. You’ll be given the respective firmware for your
model.
Please note: If you input the incorrect firmware such as “12SXDIGYG2170905001” instead of “12XSDIGYG2170905001”, the
Firmware Finder will not function correctly and you will receive a 404 error

Be aware…There are two (2) versions of the PTZOptics firmware for your specific camera.
The 25M version is meant to be used on a camera that DOES NOT CURRENTLY have NDI™ Ready firmware applied; and more importantly that is NOT already NDI™ licensed.
The 25M firmware WILL ERASE any NDI™ license that has already been applied.
The 24M version is meant for a camera that already has an NDI™ license as it will NOT erase the license from an already licensed camera.
You can verify your firmware version (24M vs 25M) by looking at the name of your firmware update file; please see the example for a PT20X-SDI-GY-G2 (PoE) below:
25M: V600S_F2.HI_V6.2.40_25M_20180118.img
24M: V600S_F2.HI_V6.2.40_24M_20180118.img

Launch the PTZOptics “Upgrade Tool” Allow it to discover the PTZOptics camera(s) on your network by clicking the “Search” button
Please take note of the IP Information currently assigned to the camera you will be upgrading as you will need this later in the upgrade process
(IP Address, Net. Mask, Gateway and First DNS)
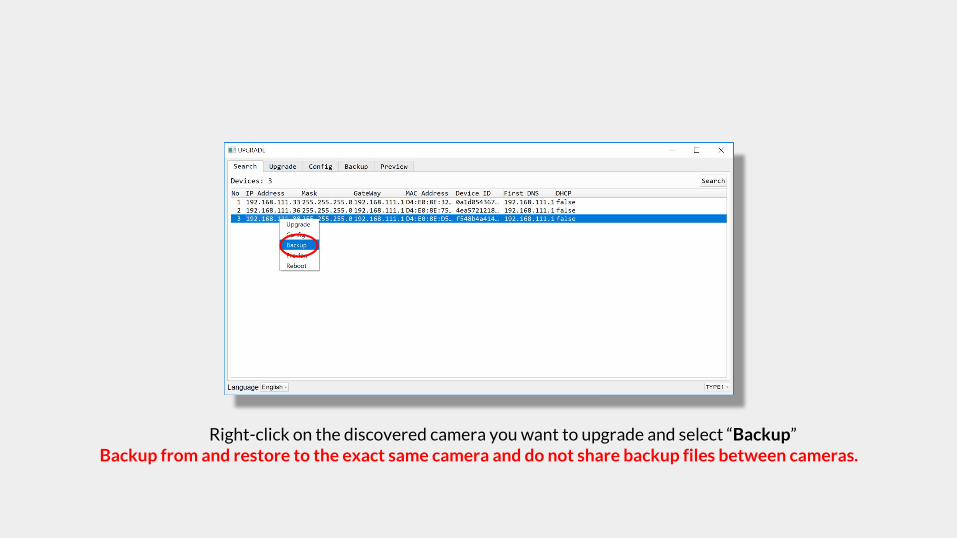
Right-click on the discovered camera you want to upgrade and select “Backup”Backup from and restore to the exact same camera and do not share backup files between cameras.
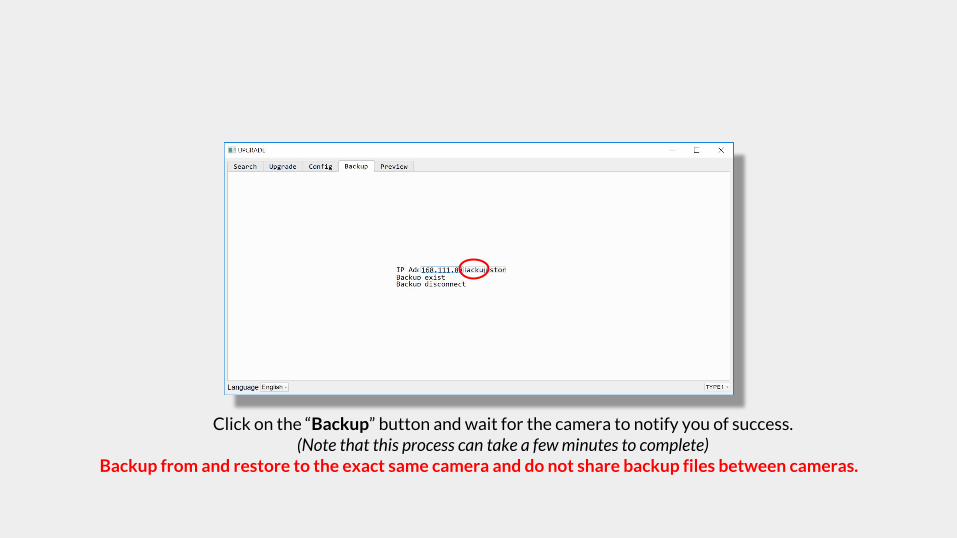
Click on the “Backup” button and wait for the camera to notify you of success. (Note that this process can take a few minutes to complete)
Backup from and restore to the exact same camera and do not share backup files between cameras.

When the “Upgrade Tool” notifies you of “Backup Success” click on the “OK” button. Now navigate back to the “Search” tab.
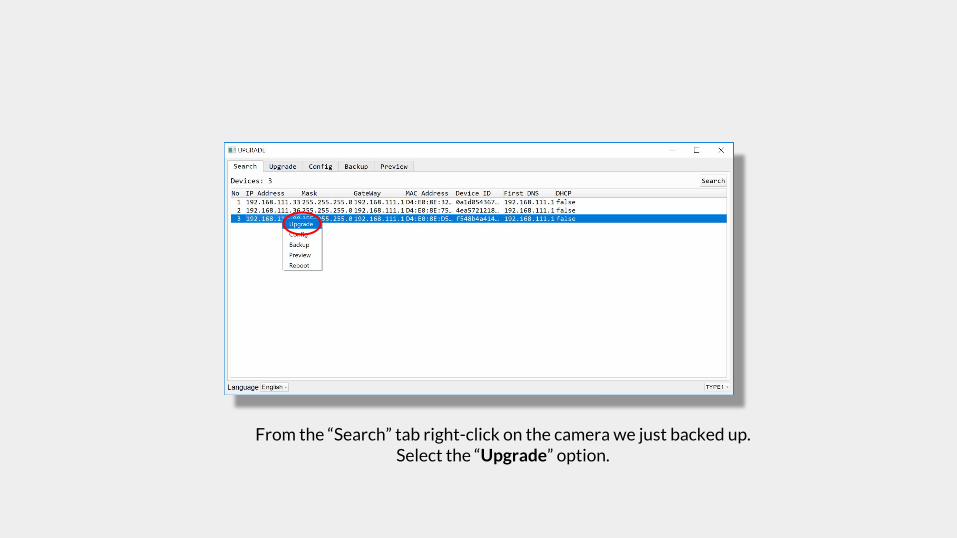
From the “Search” tab right-click on the camera we just backed up. Select the “Upgrade” option.

From the “Upgrade” tab, click on the drop-down for “Type” shown in the top left.

Select the “Type” of “MTD” out of the drop-down menu options.
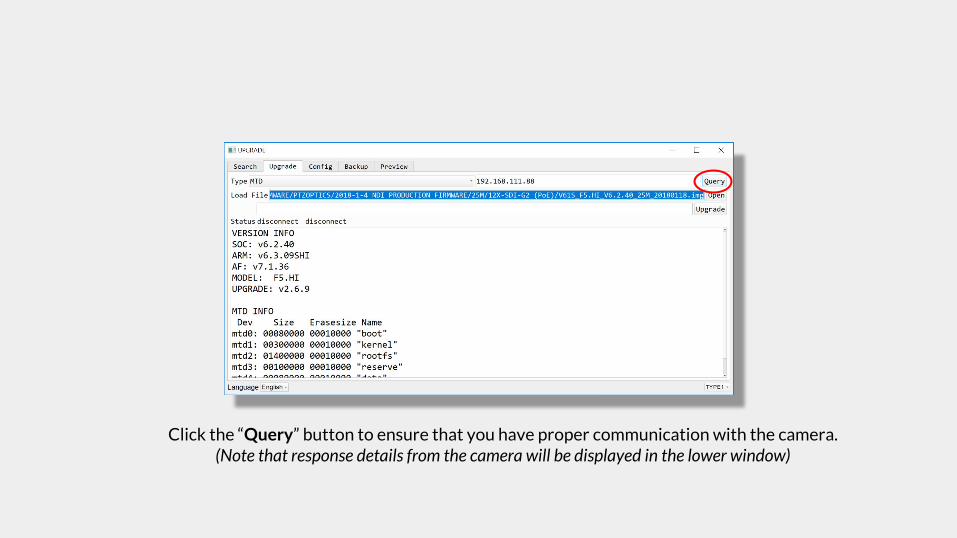
Click the “Query” button to ensure that you have proper communication with the camera. (Note that response details from the camera will be displayed in the lower window)
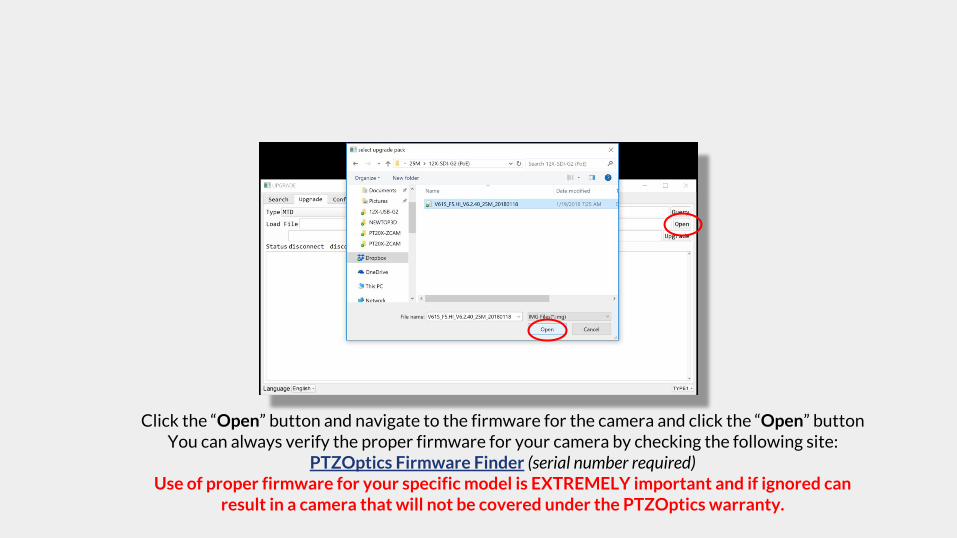
Click the “Open” button and navigate to the firmware for the camera and click the “Open” button You can always verify the proper firmware for your camera by checking the following site:
PTZOptics Firmware Finder (serial number required) Use of proper firmware for your specific model is EXTREMELY important and if ignored can
result in a camera that will not be covered under the PTZOptics warranty.
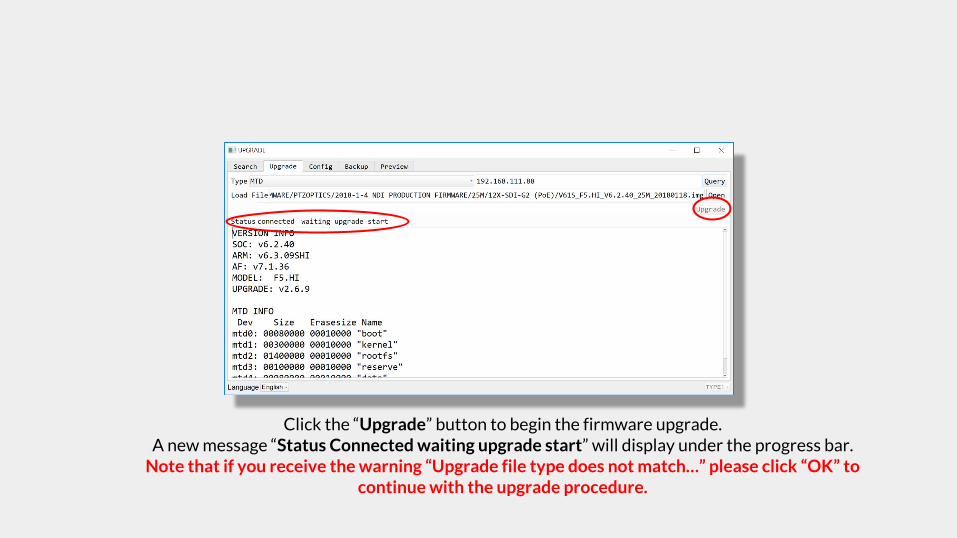
Click the “Upgrade” button to begin the firmware upgrade. A new message “Status Connected waiting upgrade start” will display under the progress bar.
Note that if you receive the warning “Upgrade file type does not match…” please click “OK” to continue with the upgrade procedure.

The “Upgrade Tool” will quickly progress to 85% complete. At this point the “Upgrade Tool” will stay at 85% complete for a few minutes, please be patient.
Please be patient as interrupting this process can damage your camera. Example video of real-time firmware upgrade on YouTube
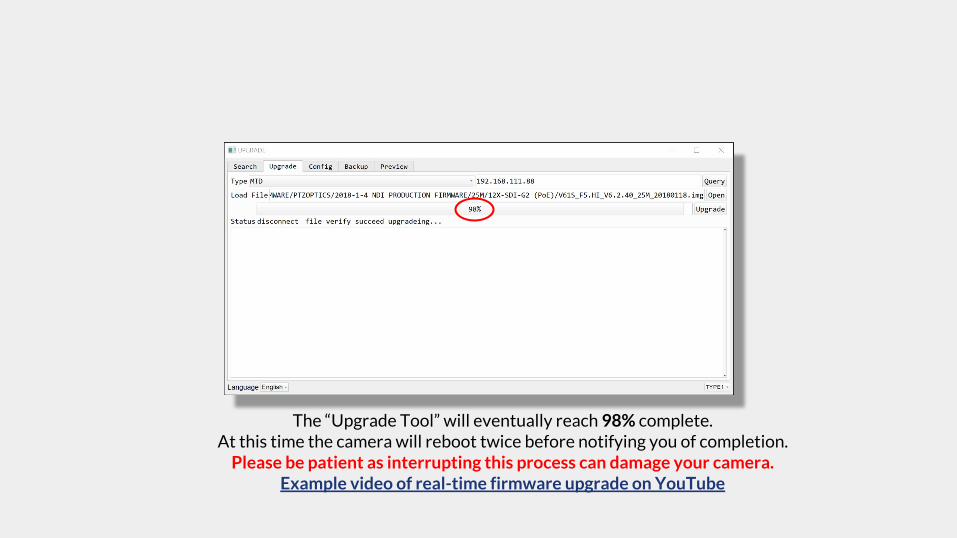
The “Upgrade Tool” will eventually reach 98% complete. At this time the camera will reboot twice before notifying you of completion.
Please be patient as interrupting this process can damage your camera. Example video of real-time firmware upgrade on YouTube
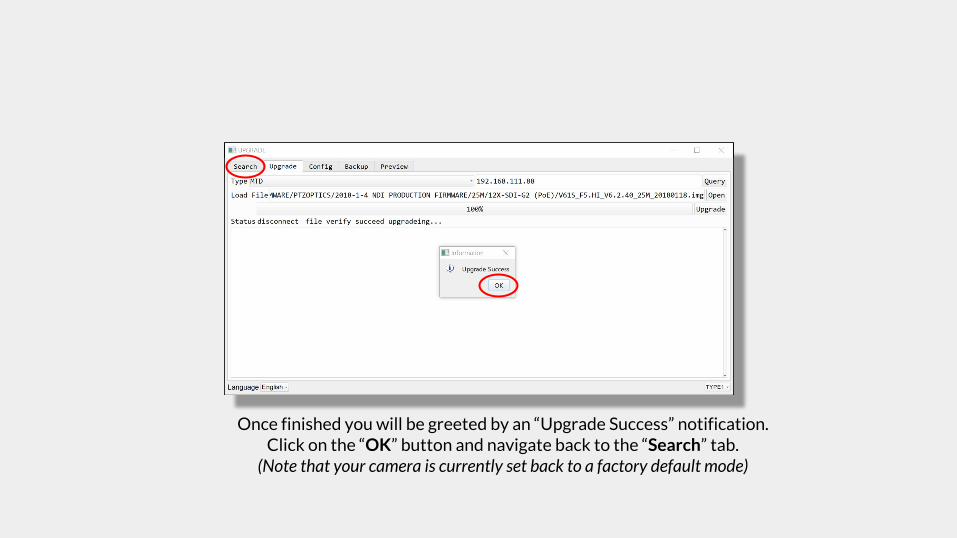
Once finished you will be greeted by an “Upgrade Success” notification. Click on the “OK” button and navigate back to the “Search” tab.
(Note that your camera is currently set back to a factory default mode)
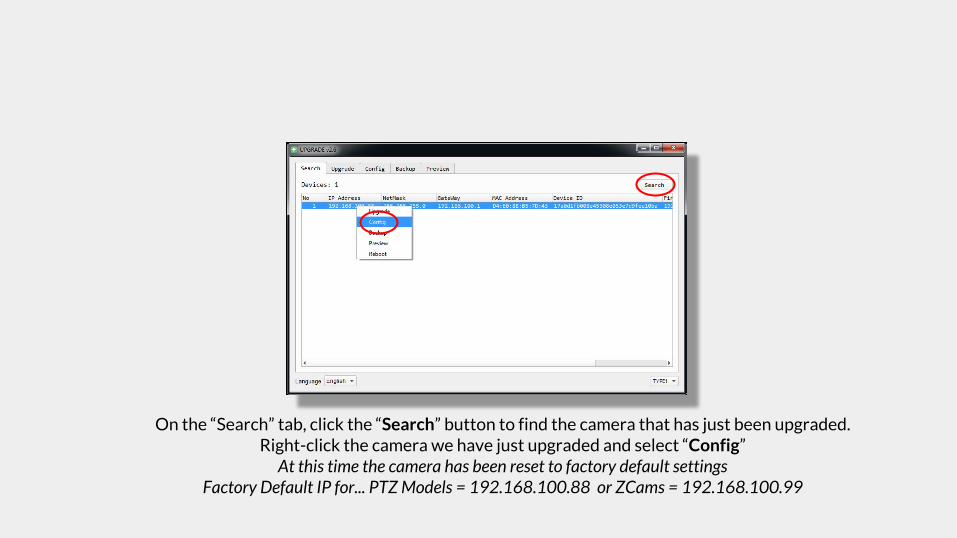
On the “Search” tab, click the “Search” button to find the camera that has just been upgraded. Right-click the camera we have just upgraded and select “Config”
At this time the camera has been reset to factory default settings Factory Default IP for... PTZ Models = 192.168.100.88 or ZCams = 192.168.100.99
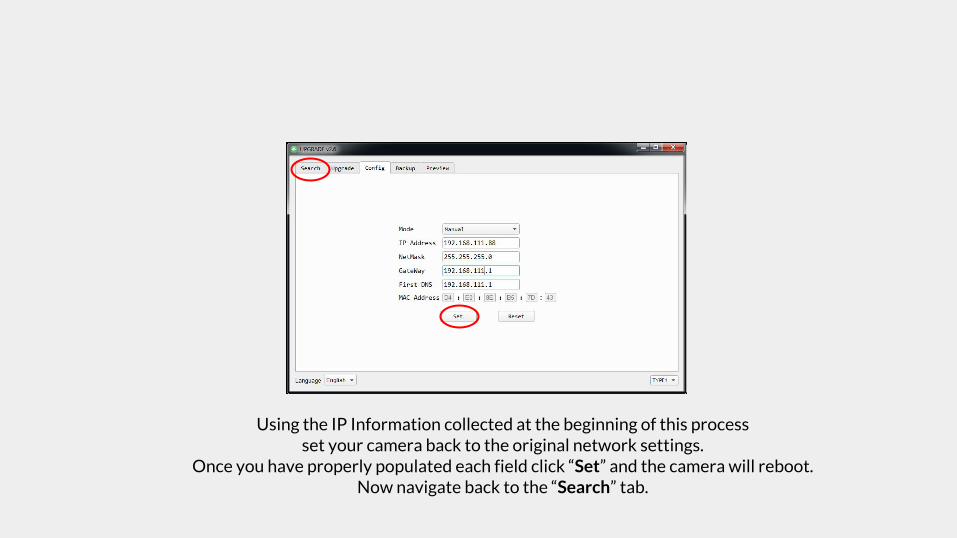
Using the IP Information collected at the beginning of this process set your camera back to the original network settings.
Once you have properly populated each field click “Set” and the camera will reboot. Now navigate back to the “Search” tab.
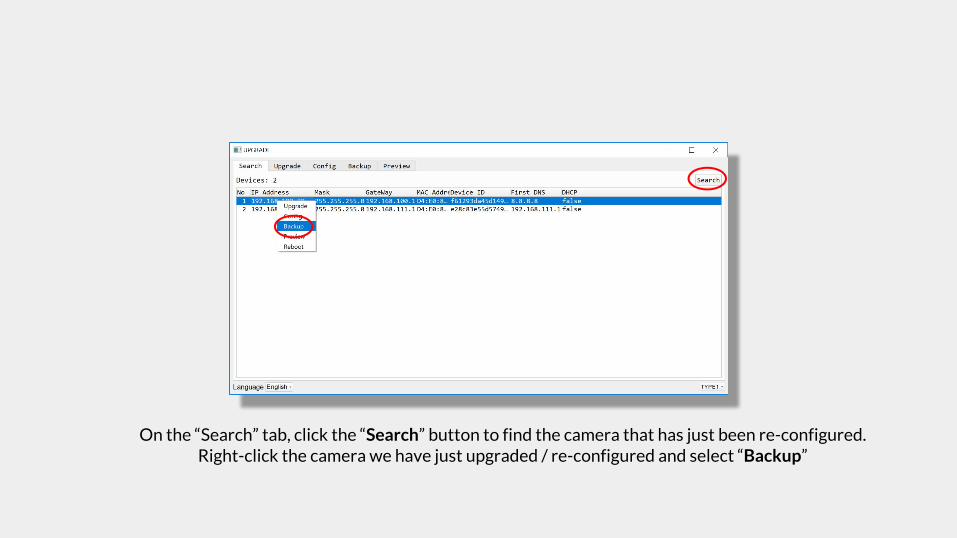
On the “Search” tab, click the “Search” button to find the camera that has just been re-configured. Right-click the camera we have just upgraded / re-configured and select “Backup”
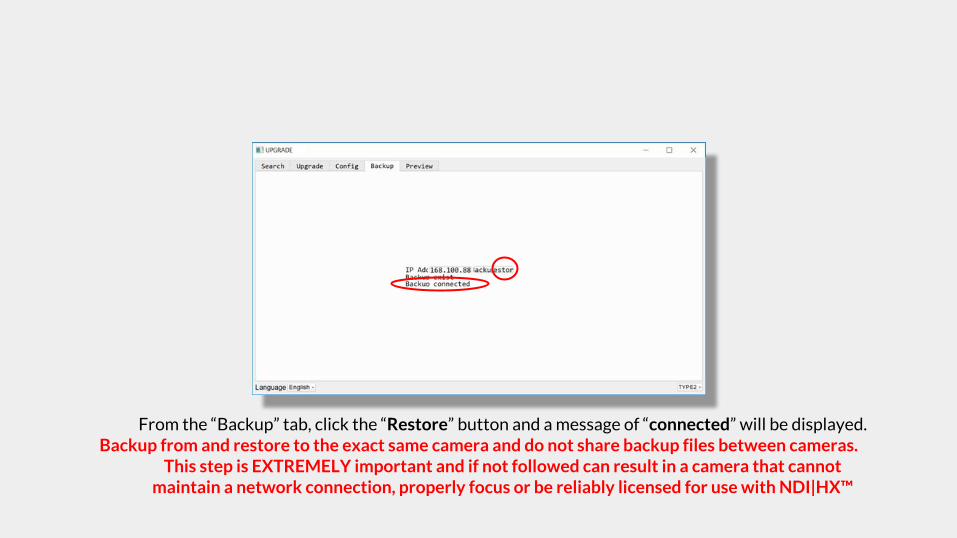
From the “Backup” tab, click the “Restore” button and a message of “connected” will be displayed.Backup from and restore to the exact same camera and do not share backup files between cameras.
This step is EXTREMELY important and if not followed can result in a camera that cannot maintain a network connection, properly focus or be reliably licensed for use with NDI|HX™

As the restoration process proceeds, you will see the status change to “Backup restoring…”
This step is EXTREMELY important and if not followed can result in a camera that cannot maintain a network connection, properly focus or be reliably licensed for use with NDI|HX™
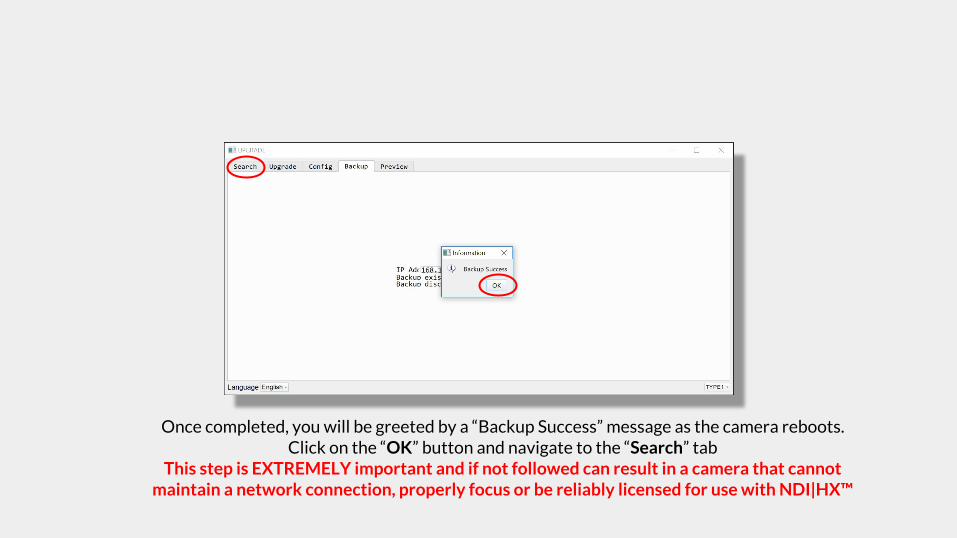
Once completed, you will be greeted by a “Backup Success” message as the camera reboots. Click on the “OK” button and navigate to the “Search” tab
This step is EXTREMELY important and if not followed can result in a camera that cannot maintain a network connection, properly focus or be reliably licensed for use with NDI|HX™

Navigate back to the “Search” tab. Right-click the camera we just completed the restore on and select “Preview”.
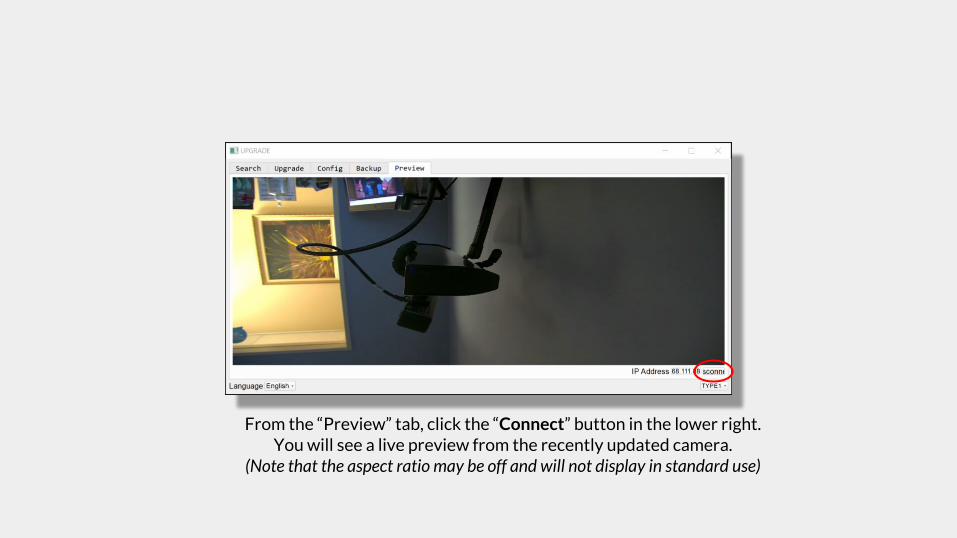
From the “Preview” tab, click the “Connect” button in the lower right. You will see a live preview from the recently updated camera.
(Note that the aspect ratio may be off and will not display in standard use)
CONGRATULATIONS!
You have now successfully upgraded your
PTZOptics camera to the latest and greatest
firmware.
If you experience any issues during this process,
or have further questions, please contact
PTZOptics support for further assistance.
484-593-2247 (Option 2 for support)
https://help.ptzoptics.com