Embed Size (px)
Citation preview

Minnesota Field Guide for
Prepared by Ames Construction, Inc.,
Minnesota Department of Transportation, and WSB & Associates, Inc.
Winter Bridge Construction

1. Introduction / 2
Minnesota Field Guide for Winter Bridge Construction
1. Office of The Legislative Auditor, State of Minnesota, Evaluation Report, State Highways and Bridges, February 2008
1. Introduction
This manual is intended to be used as a field guide to maintaining an environ-mentally compliant bridge construction work site, with emphasis on winter conditions. The content includes:
· Acronyms and Definitions · Working Over Water – Best Man-
agement Practices · Documentation, Paperwork, and
Inspections · Environmental Commitment · Risks, Rules, and Ramifications · References and Resources
The State of Minnesota is home to approximately 5.5 million people and 5 million automobiles, enjoying the use of over 135,000 miles of roads and more than 19,000 bridges. With one of the largest public road systems in the United States, building and maintaining this system is the shared responsibility of state, counties, cities, and townships.1
Minnesota Department of Tranportaion MnDOT projects include the Winona Bridge over the Mississippi River, the St. Croix River Crossing near Stillwater, I-90 Dresbach Bridge over the Mississippi, Lafayette Bridge in St. Paul, Bong Bridge in Superior, and Highway 24 Bridge over the Mississippi in Clearwater.
Bridge construction over open water presents a variety of challenges when it comes to maintaining effective water quality and erosion and sediment control practices. During the winter months, many of the customary erosion and sediment control practices become ineffective, and difficult or even impossible to implement. This field manual is intended to provide insight into, and solutions for, winter weather work on bridge projects.
As environmental regulations and construction practices evolve, always re-member to check current regulations to maintain project compliance.
St. Anthony Falls (35W)
1. Introduction / 3
Minnesota Field Guide for Winter Bridge Construction
Field Guide to Bridge Construction
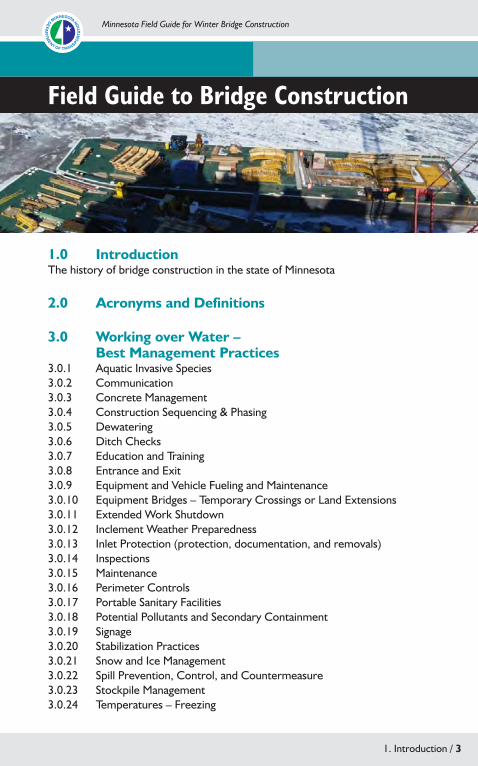
1.0 IntroductionThe history of bridge construction in the state of Minnesota
2.0 Acronyms and Definitions
3.0 Working over Water – Best Management Practices3.0.1 Aquatic Invasive Species3.0.2 Communication3.0.3 Concrete Management3.0.4 Construction Sequencing & Phasing3.0.5 Dewatering3.0.6 Ditch Checks3.0.7 Education and Training3.0.8 Entrance and Exit3.0.9 Equipment and Vehicle Fueling and Maintenance3.0.10 Equipment Bridges – Temporary Crossings or Land Extensions3.0.11 Extended Work Shutdown3.0.12 Inclement Weather Preparedness3.0.13 Inlet Protection (protection, documentation, and removals)3.0.14 Inspections3.0.15 Maintenance3.0.16 Perimeter Controls3.0.17 Portable Sanitary Facilities3.0.18 Potential Pollutants and Secondary Containment3.0.19 Signage3.0.20 Stabilization Practices3.0.21 Snow and Ice Management3.0.22 Spill Prevention, Control, and Countermeasure3.0.23 Stockpile Management3.0.24 Temperatures – Freezing

1. Introduction / 4
3.0.25 Temperatures - Thawing3.0.26 Water Quality Monitoring – Turbidity and pH3.0.27 Winter Preparation and Procedure3.0.28 Work over water (drips, spills, and emergency clean up)
4.0 Documentation, Paperwork, and Inspections
5.0 Environmental Commitment
6.0 Risks, Rules, and Ramifications
7.0 References and Resources
Minnesota Field Guide for Winter Bridge Construction
2. Acronyms and Definitions / 5
Minnesota Field Guide for Winter Bridge Construction
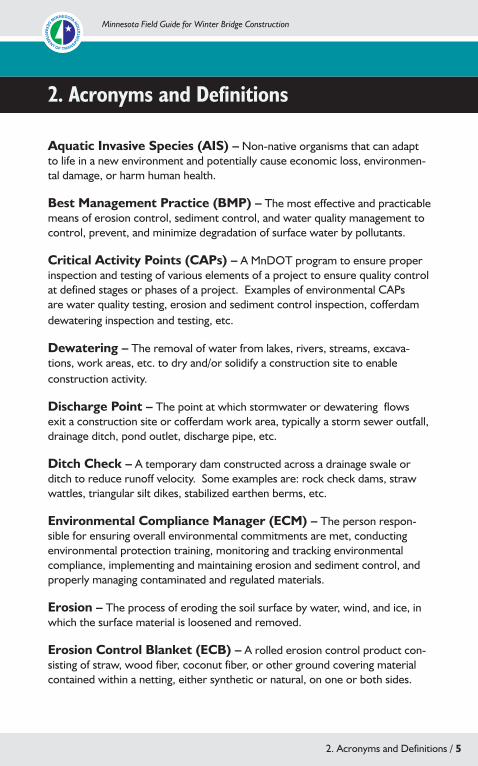
Aquatic Invasive Species (AIS) – Non-native organisms that can adapt to life in a new environment and potentially cause economic loss, environmen-tal damage, or harm human health.
Best Management Practice (BMP) – The most effective and practicable means of erosion control, sediment control, and water quality management to control, prevent, and minimize degradation of surface water by pollutants.
Critical Activity Points (CAPs) – A MnDOT program to ensure proper inspection and testing of various elements of a project to ensure quality control at defined stages or phases of a project. Examples of environmental CAPs are water quality testing, erosion and sediment control inspection, cofferdam dewatering inspection and testing, etc.
Dewatering – The removal of water from lakes, rivers, streams, excava-tions, work areas, etc. to dry and/or solidify a construction site to enable construction activity.
Discharge Point – The point at which stormwater or dewatering flows exit a construction site or cofferdam work area, typically a storm sewer outfall, drainage ditch, pond outlet, discharge pipe, etc.
Ditch Check – A temporary dam constructed across a drainage swale or ditch to reduce runoff velocity. Some examples are: rock check dams, straw wattles, triangular silt dikes, stabilized earthen berms, etc.
Environmental Compliance Manager (ECM) – The person respon-sible for ensuring overall environmental commitments are met, conducting environmental protection training, monitoring and tracking environmental compliance, implementing and maintaining erosion and sediment control, and properly managing contaminated and regulated materials.
Erosion – The process of eroding the soil surface by water, wind, and ice, in which the surface material is loosened and removed.
Erosion Control Blanket (ECB) – A rolled erosion control product con-sisting of straw, wood fiber, coconut fiber, or other ground covering material contained within a netting, either synthetic or natural, on one or both sides.
2. Acronyms and Definitions

2. Acronyms and Definitions / 6
Erosion and Sediment Control (ESC) – The practice of controlling erosion and sediment during the construction process to minimize harmful impacts to environmental resources.
Flocculant – A substance that promotes the clumping of particles in a liquid suspension, especially one used in treating stormwater runoff.
Flocculent – In the context of stormwater management, the collected and attached sediment particles that have created a larger particle known as a floc-culent.
Hazardous Material – Any liquid, powder, or solid material that may significantly contribute to the degradation of water quality. Examples: fuels, curing agents, herbicides, form release oils, hydraulic fluid, portable sanitary station effluent, etc.
Illicit Discharge – Any discharge of stormwater runoff from a construction site that contains a pollutant and is not composed entirely of stormwater.
Infiltration – The percolation of stormwater into the ground or seepage from a water body into a cofferdam work area.
Minnesota Pollution Control Agency (MPCA) – The state agency responsible for administering regulations to protect and improve the environ-ment and enhance human health. In the context of this manual, the MPCA is the regulatory agency for stormwater and water quality protection.
Nephelometric Turbidity Unit (NTU) – The measurement (unit) used to describe turbidity; refers to the way an instrument (a nepholometer) measures how much light is scattered by suspended particles in water. The greater the scattering, the higher the turbidity. Therefore, low NTU values indicate clearer water clarity, while high NTU values indicate cloudier (more turbid) water clarity. NTU water quality discharge limits may exist as part of the MPCA Water Quality Permit.
Polyacrylamide (PAM) – A synthetic resin made by polymerizing acryl-amide. Used in stormwater management as an agent to help settle sediment out of stormwater runoff by creating flocculent.
Pollutant – Any liquid, powder, or solid material that can be mobilized by water or air and creates a negative impact to human health and/or the environ-ment. Examples: sediment, heavy metals (lead, copper, zinc, etc.), nutrients (phosphorus), organics (oil, grease, fertilizers), floatable debris, etc.
Minnesota Field Guide for Winter Bridge Construction

2. Acronyms and Definitions / 7
Sediment Control – Methods employed to prevent sediment from leaving the site. Sediment control practices include silt fences, sediment traps, earth dikes, drainage swales, check dams, subsurface drains, pipe slope drains, storm drain inlet protection, turbidity curtains, and temporary or permanent sedi-mentation basins.
Spill Prevention, Control, and Countermeasure (SPCC) – A written plan intended to instruct workers on a site about means and methods to prevent, control, and clean up spills and leaks from equipment and materials (oil, gas, form release oils, curing compounds, paints, solvents, etc.).
Stormwater – Precipitation runoff, stormwater runoff, snowmelt runoff, and any other surface runoff or drainage of water.
Stormwater Pollution Prevention Plan (SWPPP) – A plan for stormwater discharge that includes erosion prevention measures and sediment controls that, when implemented, will decrease soil erosion on a parcel of land and decrease offsite discharge of pollutants.
Triangular Silt Dike (TSD) – A sediment control device made of foam sewn into a woven geosynthetic fabric, triangular in shape, often used as a ditch check in areas of concentrated flow.
Turbidity – A condition of water quality characterized by the presence of suspended solids and/or organic material. Higher turbidity means cloudier water; lower turbidity means clearer water.
Turbidity Curtain – A manufactured, floating geotextile “curtain” suspended in water by a floating surface component, used to contain turbid water within a disturbed area and to minimize movement of that water to the water body outside of the disturbed area.
Turf Reinforcement Mat (TRM) – A rolled erosion control product similar to an erosion control blanket (ECB), used in areas where greater strength or durability is desired, such as areas of high flow. TRMs are com-posed of non-degradable, or very slow degrading, synthetic netting with a fill material (typically coconut fiber).
Minnesota Field Guide for Winter Bridge Construction

3.0 Working over Water – Best Management Practices / 83.0 Working over Water – Best Management Practices / 8
3.0 Working over Water – Best Management Practices
Minnesota Field Guide for Winter Bridge Construction

3.0.1 Aquatic Invasive Species Management / 9
Minnesota Field Guide for Winter Bridge Construction
Aquatic Invasive Species (AIS) are non-native organisms that can over-whelm native ecology resulting in loss the of native species, cause economic loss, environmental damage, or harm human health.
Per MnDNR regulations, prior to transportation into or out of a work site, or between waterbodies within a project area, all equipment must be free of any aquatic plants, water, and prohibited invasive species. This applies to barges, boats, sheet piling, pumps, hoses, spuds, buckets, temporary fill for workpads (such as riprap), etc. – anything that has been in contact with water. Transport of Aquatic Invasive Species is illegal, and may result in fines or imprisonment, or both.
3.0.1 Aquatic Invasive Species Management

3.0.1 Aquatic Invasive Species Management / 10
1. For equipment in contact with any water for 24 hours or less:
a. Drain all water from equipment
b. Remove all visible aquatic remnants (plants, seeds, animals).
c. Remove all mud & soil
d. Document dates, times for equipment arriving or departing from a work site or water body, and all AIS management activities.
2. For equipment in contact with any water for more than 24 hours:
a. Drain all water from equipment
b. Remove all visible aquatic remnants (plants, seeds, animals).
c. Remove all mud & soil
3. For work in designated infested waters, choose one of the following three:
a. On-site treatment
b. Off-site treatment (requires prior MnDNR approval)
c. Customized alternative (requires prior MnDNR approval)
4. For work in designated infested waters, document dates, times for equip-ment arriving or departing from a work site or water body, and all AIS management activities.
Minnesota Field Guide for Winter Bridge Construction
3.0.1 Aquatic Invasive Species Management / 11
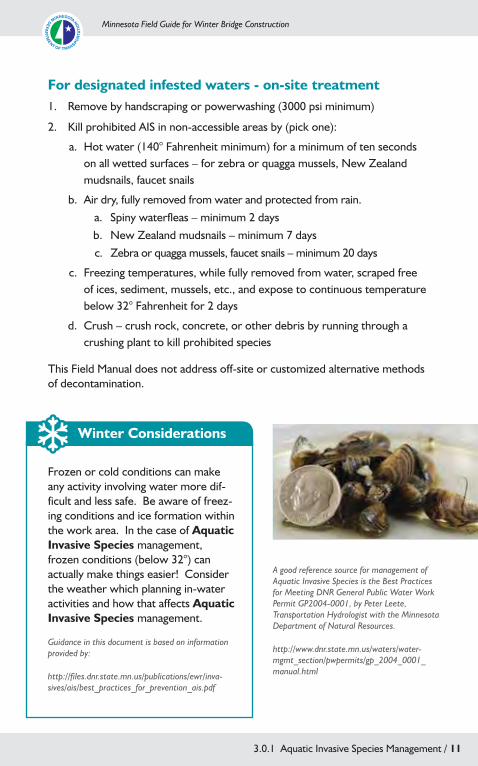
Frozen or cold conditions can make any activity involving water more dif-ficult and less safe. Be aware of freez-ing conditions and ice formation within the work area. In the case of Aquatic Invasive Species management, frozen conditions (below 32°) can actually make things easier! Consider the weather which planning in-water activities and how that affects Aquatic Invasive Species management.
Guidance in this document is based on information provided by:
http://files.dnr.state.mn.us/publications/ewr/inva-sives/ais/best_practices_for_prevention_ais.pdf
Winter Considerations
For designated infested waters - on-site treatment1. Remove by handscraping or powerwashing (3000 psi minimum)
2. Kill prohibited AIS in non-accessible areas by (pick one):
a. Hot water (140° Fahrenheit minimum) for a minimum of ten seconds on all wetted surfaces – for zebra or quagga mussels, New Zealand mudsnails, faucet snails
b. Air dry, fully removed from water and protected from rain.a. Spiny waterfleas – minimum 2 daysb. New Zealand mudsnails – minimum 7 daysc. Zebra or quagga mussels, faucet snails – minimum 20 days
c. Freezing temperatures, while fully removed from water, scraped free of ices, sediment, mussels, etc., and expose to continuous temperature below 32° Fahrenheit for 2 days
d. Crush – crush rock, concrete, or other debris by running through a crushing plant to kill prohibited species
This Field Manual does not address off-site or customized alternative methods of decontamination.
A good reference source for management of Aquatic Invasive Species is the Best Practices for Meeting DNR General Public Water Work Permit GP2004-0001, by Peter Leete, Transportation Hydrologist with the Minnesota Department of Natural Resources.
http://www.dnr.state.mn.us/waters/water-mgmt_section/pwpermits/gp_2004_0001_manual.html
Minnesota Field Guide for Winter Bridge Construction

3.0.2 Communication / 12
Minnesota Field Guide for Winter Bridge Construction
3.0.2 Communication
Communication on a construction site involves the transfer of information, usually between somewhat unfamiliar groups (contractors, subcontractors, trades). Effec-tive communication, together with quality education and training, helps everyone on a construction site work as a team. One benefit of good communication is increased, and easier, compliance with environmental permit requirements. From laborer to foreman, superintendent, and owner, everyone has the right and the responsibility to communicate concerns, problems, ideas, etc.
OwnerOwner · Maintain contact with the project · Discuss schedules, sequencing, problems, and solutions · Know what is currently happening on site – after all, it is your site
Project Managers, Superintendents, and ForemenProject Managers, Superintendents, and Foremen · Track onsite workforce
∙ Who is responsible for safety and environmental training? ∙ Who has reviewed and signed the SWPPP? Who hasn’t? ∙ When is the next erosion and sediment control (ESC) inspection? ∙ When is the ESC contractor doing maintenance?
· Build better communication ∙ Project “kick-off” or pre-construction meetings ∙ Morning “plan of attack” meetings ∙ Weekly “tailgate talks” or five minute training sessions ∙ Weekly or monthly project summary reports ∙ Informal conversation – be on site, be present, be seen, and listen! ∙ Maintain copies of all environmental permits on site and know the
permit requirements. ∙ Make environmental compliance a part of each meeting, including
weekly field status meetings and daily safety talks.
LaborersLaborers · Speak up if you see something wrong. Talk to your supervisor. · Relay specific information about your work as needed. Do you need
specific equipment or materials? · Be a part of the team and a part of the compliance initiative for the site.
“Cha
in o
f Com
man
d”

3.0.3 Concrete Management / 13
Minnesota Field Guide for Winter Bridge Construction
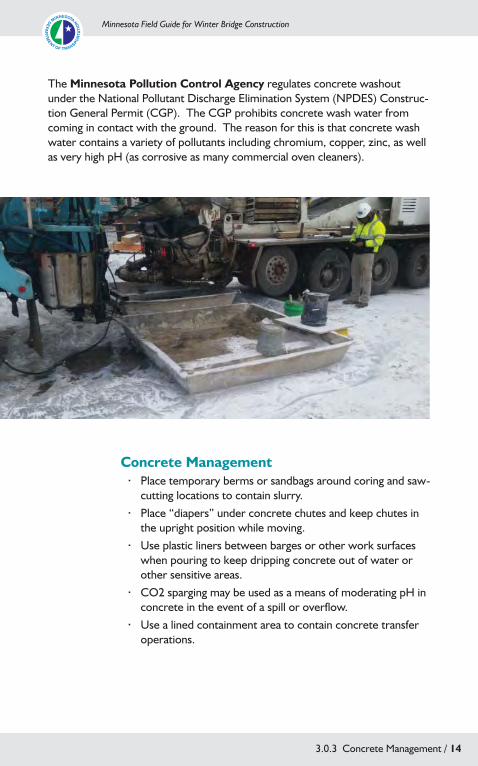
The management of concrete construction methods including pours, disposal of excess concrete, washout and wash-off of equipment, and disposal of wash water associated with concrete work. Concrete contains a variety of toxic metals including strontium, lead, arsenic, and cadmium. In a plastic state, con-crete is a highly corrosive material with a pH value similar to many commercial oven cleaners. Concrete management practices, including concrete washout, are intended to keep concrete and concrete wash water out of surface waters and off of the ground where contaminants may leach into groundwater. Con-crete management practices include pour containment, drip and spill control, and pH moderation. Concrete washout practices include the use of any self-contained, watertight enclosure used to contain and store wash water from concrete trucks, mortar mixers, clamshell concrete buckets, wheelbarrows, grout equipment rinse water, etc. Washout facilities are used to contain all concrete and liquid wash water generated by the construction activity. Liquid and solid washout wastes must be contained in a leak-proof container and cannot contact the ground in any instance, including in areas to be paved, exca-vations, etc. The washout containers should be covered to prevent exposure to rainfall and potential overflow.
3.0.3 Concrete Management
3.0.3 Concrete Management / 14
Concrete Management · Place temporary berms or sandbags around coring and saw-
cutting locations to contain slurry. · Place “diapers” under concrete chutes and keep chutes in
the upright position while moving. · Use plastic liners between barges or other work surfaces
when pouring to keep dripping concrete out of water or other sensitive areas.
· CO2 sparging may be used as a means of moderating pH in concrete in the event of a spill or overflow.
· Use a lined containment area to contain concrete transfer operations.
The Minnesota Pollution Control Agency regulates concrete washout under the National Pollutant Discharge Elimination System (NPDES) Construc-tion General Permit (CGP). The CGP prohibits concrete wash water from coming in contact with the ground. The reason for this is that concrete wash water contains a variety of pollutants including chromium, copper, zinc, as well as very high pH (as corrosive as many commercial oven cleaners).
Minnesota Field Guide for Winter Bridge Construction

3.0.3 Concrete Management / 15
Concrete Washout · Direct all wash water into a leak-proof container or leak-proof, lined pit.
The container or pit must be designed so that no overflows can occur due to inadequate sizing or precipitation.
· Handle washout or cleanout wastes as follows: ∙ Do not dump liquid wastes onto the ground or into the storm sewer. ∙ Do not bury solidified concrete. MPCA allows for the burial of no more
than 0.5 cubic yards of concrete waste (not wash water) on a job site. ∙ Dispose of liquid and solid washout materials appropriately. Examples:
haul solid concrete waste to an appropriate landfill; return wash water to concrete trucks for disposal at the concrete plant.
· Locate any washout or cleanout activities as far away as possible from surface waters, storm sewer inlets or conveyances, wetlands, ponds, etc.
· Locate washout facilities as close as possible to the concrete pour to encourage use.
· Place adequate signage identifying washout facilities.
Winter Considerations
Wash water may freeze, in which case it must be handled as a solid, with the awareness that it will return to a liquid state and must be appropriately contained in preparation for that (watertight containment).
· Provide extra lining for washouts in winter. Plastic liners become more brittle and more easily punctured or torn.
· Watch the weather. Provide extra storage space in the washout containment to accommodate antici-pated snowfall or rain. Empty washouts and dispose of materials in the appropriate manner beforehand. Be prepared!!
· Consider returning wash water to concrete trucks or vacuum trucks at an increased frequency to maintain washout capacity and prevent ice formation within the washout.
Minnesota Field Guide for Winter Bridge Construction

3.0.4 Construction Sequencing & Phasing / 16
Minnesota Field Guide for Winter Bridge Construction
Construction sequencing is closely related to and works with phasing to create a schedule of construction that minimizes the amount and duration of exposed soil areas, thus reducing the risk of an adverse environmental impact.
3.0.4 Construction Sequencing & Phasing
A typical construction sequence may be:
· Installation of perimeter erosion and sediment control measures
· Clearing and grubbing · Installation of stormwater
management system · Rough grading · Utilities · Piers, foundations (substructure) · Vertical work (superstructure) · Final grading · Final landscape · Permanent stabilization

3.0.4 Construction Sequencing & Phasing / 17
Winter Considerations
Winter weather can make an orderly construction sequence into a “one day at a time” plan of attack. The weather can turn with little warning. Planning ahead and keeping a good watch on the weather forecast is criti-cal to successfully sequencing and phasing a compliant project.
· What’s the 10-day forecast? Prepare in advance for snow, sleet, rain, and freezing temperatures.
· Don’t start work in an area of environmental sensitivity if the fore-cast calls for inclement weather.
· Make stabilization, temporary or permanent, priority #1 as much as possible. It is far easier to implement stabilization practices before the storm, subzero temperatures, or thaw.
Construction phasing is the process of planning construction activities. An example of this is streambank restoration projects typically phase construction so that no more of the streambank is exposed at any one time than can be stabilized within 24 hours. Another example is large bridge projects are often phased so that only specific sections of the bridge are under construction at a time.
A few things to keep in mind when planning for construction phasing: · Stormwater management from phase to phase may change/shift · Erosion and sediment control measures may be phase specific – not
whole project specific. · Temporary or permanent stabilization of phases as soon as possible is the
goal. Plan for it! · Consider the impact of each phase on environmentally sensitive areas on
site and adjacent to the site. · Review Best Management Practices for each phase and consider envi-
ronmental Critical Activity Points for each phase.
Minnesota Field Guide for Winter Bridge Construction

3.0.5 Dewatering / 18
Minnesota Field Guide for Winter Bridge Construction
Dewatering is the removal of surface (rivers, lakes, streams) or ground water to dry and/or solidify a construction area to enable construction activity. Water pumped out of cofferdams, excavations, footings and other areas must be treated to minimize the discharge of sediment. Several methods of sediment control for dewatering include:
· Sediment bags · Portable treatment units · Polyacrylamide flocculants · Sediment basins
Sediment bag with straw wattles
Flocculant treatment system with jute netting and erosion control log baffles
Factors to consider in selection of the right dewatering BMP include:
· Volume of water to remove and time frame for removal
· Amount of turbidity expected · Discharge location and protection
needed · Background Nephelometric
Turbidity Units (NTUs) and pH · Environmental permit discharge
limits for NTUs and pH
3.0.5 Dewatering
3.0.5 Dewatering / 19
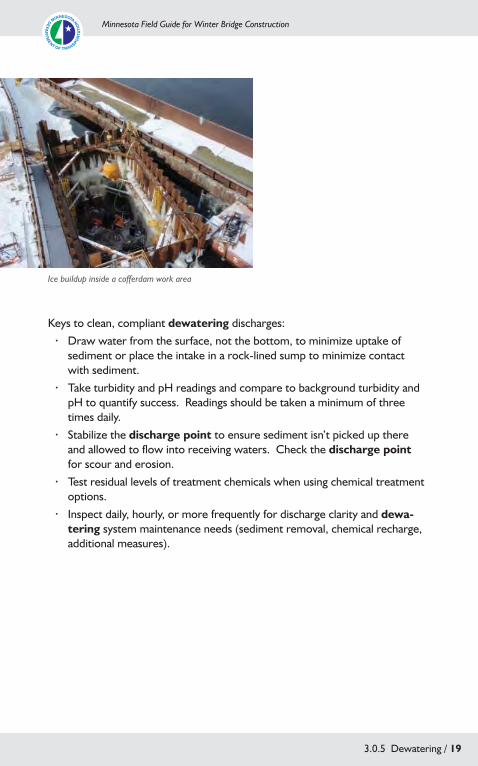
Keys to clean, compliant dewatering discharges: · Draw water from the surface, not the bottom, to minimize uptake of
sediment or place the intake in a rock-lined sump to minimize contact with sediment.
· Take turbidity and pH readings and compare to background turbidity and pH to quantify success. Readings should be taken a minimum of three times daily.
· Stabilize the discharge point to ensure sediment isn’t picked up there and allowed to flow into receiving waters. Check the discharge point for scour and erosion.
· Test residual levels of treatment chemicals when using chemical treatment options.
· Inspect daily, hourly, or more frequently for discharge clarity and dewa-tering system maintenance needs (sediment removal, chemical recharge, additional measures).
Ice buildup inside a cofferdam work area
Minnesota Field Guide for Winter Bridge Construction

3.0.5 Dewatering / 20
Winter Considerations
Dewatering in winter poses challenges that aren’t encountered in warmer weather. Freezing pumps, hoses, bags, and equipment can make dewatering difficult, or even impossible
· Safety first. Dewatering and freezing temperatures is a recipe for ice formation. Be aware of your surroundings and watch for icy surfaces.
· Be prepared for bad weather. Watch the forecast and be ready for snow, sleet, and freezing conditions. When bad weather or freezing conditions are forecast.
· Remove dewatering pumps and hoses and store in a climate controlled location to prevent freezing. Freezing temperatures can quickly destroy pumps, hoses, bags, etc.
· Clear ice and snow accumulations at pump intake locations and at discharge points.
· Remove and store dewatering sediment bags to prevent bags freezing to the ground or other surfaces
· Dewatering of barges must considered capacity, expected snowfall forecast (is there room on the barge for more?), tem-peratures, etc.
· Use insulation blankets and heaters on hoses, tanks, and pumps as needed.
· Have backup equipment on site. Water can freeze in pumps and hoses, rendering them nonfunctional and in barges, possibly leading to sinking.
Minnesota Field Guide for Winter Bridge Construction

3.0.6 Ditch Checks / 21
Minnesota Field Guide for Winter Bridge Construction
3.0.6 Ditch Checks
A ditch check is a temporary dam constructed across a drainage swale or ditch to reduce runoff velocity. Some examples are: rock check dams, straw wattles, triangular silt dikes, stabilized earthen berms, etc.
Factors to consider in selection of the right ditch check BMP include:
· Velocity and volume of water anticipated. High flows may require use of rock instead of straw wattles or coir rolls.
· Accessibility of the location. Is there a need for a more “mobile” ditch check?

3.0.6 Ditch Checks / 22
L= The distance such that points A and B are of equal elevation
Ditch checks are almost as effective at catching drifting snow and ac-cumulating ice as they are at slowing down stormwater runoff. The key to keeping ditch checks functional in winter is keeping an eye on the weather.
· Clean out accumulated snow and ice from behind ditch checks to ensure adequate capacity when they are needed
· Consider installing slightly larger ditch checks for winter use, to allow for some additional capacity for snow and ice accumulation
· Clean sediment from behind ditch checks before the weather turns bad. · Inspect the drainage way and take any necessary actions to
ensure the flow path is stabilized and protected against erosion. · Consider using rock checks if frozen conditions at the time of
installation are expected. Frozen ground may make staking rolled products down impossible.
Keys to installing and maintaining ditch checks:
· Install ditch checks with a “smiley face”. The middle of the check should always be lower than the ends.
· Install ditch checks across the full width of a drainage way to prevent flows from going around the ends of the ditch check.
· Ensure rock checks are installed with smaller stone on the upslope side of the check and larger stone on the downslope. This allows the water to first hit a more “impenetrable” barrier of small stone before flowing over the center and dropping into the larger stone leaving sediment behind.
· For rolled, staked products, stake in an “x” pattern, with the roll pinned to the ground by the bottom of the “x” made by the stakes.
· Stakes should be no further apart than 4 feet on center. · Install ditch checks so that the spacing is correct. The centerpoint
of the top of a ditch check should be level with the centerpoint of the bottom of the next upslope ditch check.
Winter Considerations
Minnesota Field Guide for Winter Bridge Construction

3.0.7 Education and Training / 23
Minnesota Field Guide for Winter Bridge Construction
3.0.7 Education and Training
Both the Minnesota Pollution Control Agency (MPCA) and the Minnesota Department of Transportation (MnDOT) have specific training requirements for personnel designing, installing, maintaining, and inspecting Erosion and Sediment Control measures on site.
MPCA
Who must be trained? · Individuals preparing the SWPPP. · Individuals overseeing implementation of, revision of, and
amendment of the SWPPP · Individuals performing ESC inspections · Individuals performing or supervising the installation, mainte-
nance, and repair of erosion and sediment control mea-sures.
What is the training? · SWPPP Designer: 12-14 hours · Site Manager: 10-12 hours · BMP Installer: 5-8 hours

3.0.7 Education and Training / 24
MnDOT
Who must be trained?
MnDOT projects require a: · Erosion Control Supervisor with a valid Minnesota Construc-
tion Site Management certification, available to the work site within 24 hours of initial disturbance and daily when work is taking place until final stabilization, authorized to represent the contractor on matters pertaining to: ∙ Erosion and Stormwater Management ∙ Work in public waters ∙ NPDES construction stormwater permit compliance
· Certified Installer, at least one, with a valid Minnesota Inspec-tor or Installer Certification at the time of installation, to install or direct installations of erosion and sediment control practices and for the following: ∙ Seeding, sodding, mulching ∙ Silt fence or other perimeter control measures ∙ Erosion Control Blankets (ECB) installation ∙ Hydraulic erosion control product installation ∙ Silt curtain installation ∙ Ditch check installation ∙ Compost installation
Resources for Training
www.erosion.umn.edu
www.envirocert.org
www.cisecinc.org/
Minnesota Field Guide for Winter Bridge Construction

3.0.8 Entrance and Exit – Site Access / 25
Minnesota Field Guide for Winter Bridge Construction
3.0.8 Entrance and Exit – Site Access
Temporary points of access to and from a construction site are a necessary part of the construction process. Tracking of sediment, mud, and/or debris offsite is considered an illicit discharge of pollutants and is prohibited by the MPCA.
Several types of sediment control Best Management Practices are available for use at construction site entrance and exit points, including:
· Aggregate stone (3” size) on top of a suitable geotextile such as Mirafi road fabric.
· Rumble racks · Vehicle rinse stations · Mud mats · Shredded mulch “slash”
3.0.8 Entrance and Exit – Site Access / 26
Winter Considerations
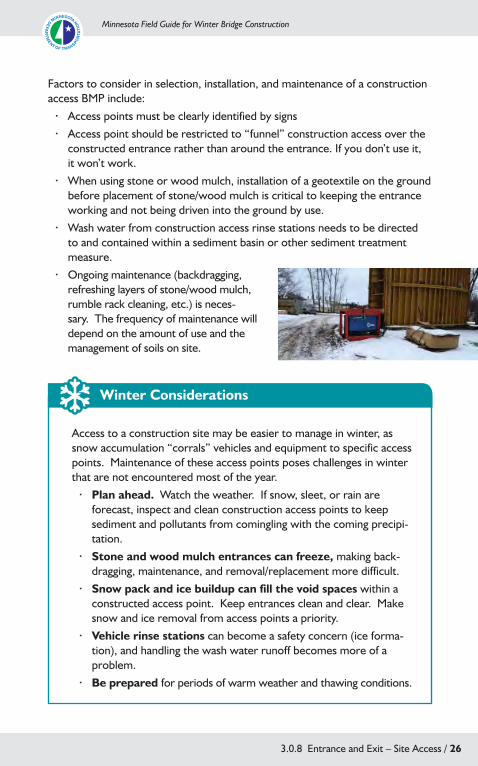
Factors to consider in selection, installation, and maintenance of a construction access BMP include:
· Access points must be clearly identified by signs · Access point should be restricted to “funnel” construction access over the
constructed entrance rather than around the entrance. If you don’t use it, it won’t work.
· When using stone or wood mulch, installation of a geotextile on the ground before placement of stone/wood mulch is critical to keeping the entrance working and not being driven into the ground by use.
· Wash water from construction access rinse stations needs to be directed to and contained within a sediment basin or other sediment treatment measure.
· Ongoing maintenance (backdragging, refreshing layers of stone/wood mulch, rumble rack cleaning, etc.) is neces-sary. The frequency of maintenance will depend on the amount of use and the management of soils on site.
Access to a construction site may be easier to manage in winter, as snow accumulation “corrals” vehicles and equipment to specific access points. Maintenance of these access points poses challenges in winter that are not encountered most of the year.
· Plan ahead. Watch the weather. If snow, sleet, or rain are forecast, inspect and clean construction access points to keep sediment and pollutants from comingling with the coming precipi-tation.
· Stone and wood mulch entrances can freeze, making back-dragging, maintenance, and removal/replacement more difficult.
· Snow pack and ice buildup can fill the void spaces within a constructed access point. Keep entrances clean and clear. Make snow and ice removal from access points a priority.
· Vehicle rinse stations can become a safety concern (ice forma-tion), and handling the wash water runoff becomes more of a problem.
· Be prepared for periods of warm weather and thawing conditions.
Minnesota Field Guide for Winter Bridge Construction

3.0.9 Equipment and Vehicle Fueling and Maintenance / 27
Minnesota Field Guide for Winter Bridge Construction
3.0.9 Equipment and Vehicle Fueling and Maintenance
Vehicle and equipment fueling and maintenance Best Management Practices are intended to minimize the discharge of pollutants due to spills and leaks.
· Vehicle and equipment fueling and maintenance should be done off-site when practical.
· For onsite fueling and maintenance, a designated area must be used, and must: ∙ Have perimeter protection to prevent stormwater run-on, runoff, and
for spill containment. ∙ Use drip pans or absorbent pads during maintenance unless the work is
performed over an impermeable surface in a dedicated area. ∙ Have readily available absorbent spill clean-up materials and spill kits ∙ Be located in an upland area at least fifty (50) feet from any water body
including wetlands, ponds, drainage ways, storm sewer inlets, etc. ∙ Be inspected daily for leaks, spills, maintenance needs, repairs, etc.
· Refueling over water must have a written procedure that includes: ∙ Limiting the amount of fuel present to reduce the impact of spills. ∙ Requiring spill kits to be immediately available. ∙ Immediately deploy an oil boom in the event of a spill.
· Fuel tanks should not be “topped-off.” · Vehicles and equipment should be inspected daily for leaks. Leaks should
be repaired immediately or removed from the site. Inspect equipment for
3.0.9 Equipment and Vehicle Fueling and Maintenance / 28
damaged hoses and leaky gaskets routinely. Repair or replace as needed. · Mobile fueling of construction equipment throughout the site should be
minimized. Whenever practical, equipment should be transported to the designated fueling area. For mobile fueling, the following measures are necessary: ∙ Drip pans must be placed underneath the fueling operation ∙ A spill kit must be readily available, and include absorbents
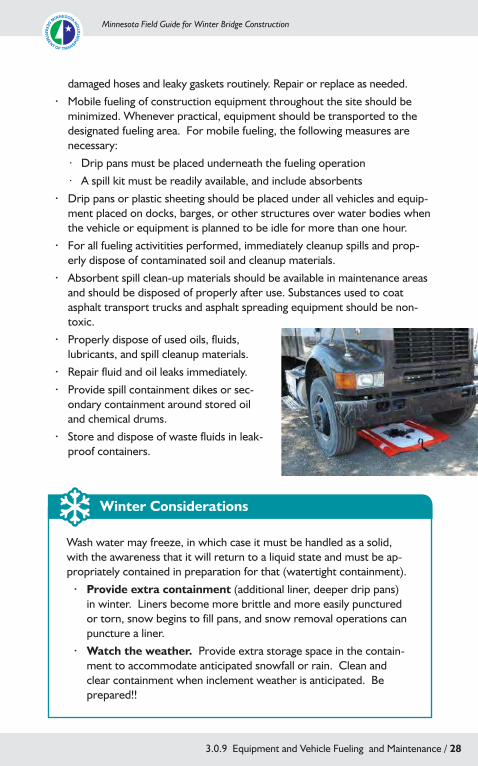
· Drip pans or plastic sheeting should be placed under all vehicles and equip-ment placed on docks, barges, or other structures over water bodies when the vehicle or equipment is planned to be idle for more than one hour.
· For all fueling activitities performed, immediately cleanup spills and prop-erly dispose of contaminated soil and cleanup materials.
· Absorbent spill clean-up materials should be available in maintenance areas and should be disposed of properly after use. Substances used to coat asphalt transport trucks and asphalt spreading equipment should be non-toxic.
· Properly dispose of used oils, fluids, lubricants, and spill cleanup materials.
· Repair fluid and oil leaks immediately. · Provide spill containment dikes or sec-
ondary containment around stored oil and chemical drums.
· Store and dispose of waste fluids in leak-proof containers.
Wash water may freeze, in which case it must be handled as a solid, with the awareness that it will return to a liquid state and must be ap-propriately contained in preparation for that (watertight containment).
· Provide extra containment (additional liner, deeper drip pans) in winter. Liners become more brittle and more easily punctured or torn, snow begins to fill pans, and snow removal operations can puncture a liner.
· Watch the weather. Provide extra storage space in the contain-ment to accommodate anticipated snowfall or rain. Clean and clear containment when inclement weather is anticipated. Be prepared!!
Winter Considerations
Minnesota Field Guide for Winter Bridge Construction

3.0.10 Equipment Bridges and Land Extensions / 29
Minnesota Field Guide for Winter Bridge Construction
3.0.10 Equipment Bridges and Land Extensions
Temporary equipment bridges and land extensions are often needed to access work areas. Ranging from timber matting to steel panels, from stone causeways to modular steel panel bridging, a wide variety of options are available.
· No matter what type of bridge or land extension is used, always check permit requirements (MnDNR, USACE, etc.)
· Temporary bridges and land extensions may increase flooding concerns by obstructing floodwater conveyance.
· Bridges, crossings, and extension require intensive ESC measures – there is no buffer zone between the structure and the protected water resource.
While seasonal fluctuations generally have only minor impacts on temporary bridging, in this manual it is assumed the practices below consider winter season use.
BargesLand extension
Advantages · Provide minimal impact to water resources. · Stable, easily maintained work surface.
Considerations · Monitor for overloading from snow or ice
accumulations. · Provide perimeter controls (2x4 lip, welded
barrier, etc.) to contain work equipment and materials.
· Maintain work area/surface. Sweep or clear before forecasted precipitation.
· Remember to address aquatic invasive species removal requirements.

3.0.10 Equipment Bridges and Land Extensions / 30
Cellular Confinement SystemsLand extension
Advantages · Durable, stable, long-term work surface.
Considerations · Uneven/coarse surface is hard to keep clean
of debris and dirt, snow, and ice. · Relatively significant temporary impact to
water resources. · May require installation of a perimeter cof-
ferdam. · Removal is equipment and labor intensive.
Engineered Soil CausewayLand extension
Advantages · Stable, long-term work surface. · May be configured in almost any shape or
size.
Considerations · Maintaining a work surface free of snow and
ice accumulations is difficult. · Erodible material increases ESC concerns. · Relatively significant temporary impact to
water resources. · Typically requires installation of a perimeter
cofferdam. · Removal is equipment and labor intensive. · Remember to address aquatic invasive
species removal requirements.
Minnesota Field Guide for Winter Bridge Construction
3.0.10 Equipment Bridges and Land Extensions / 31
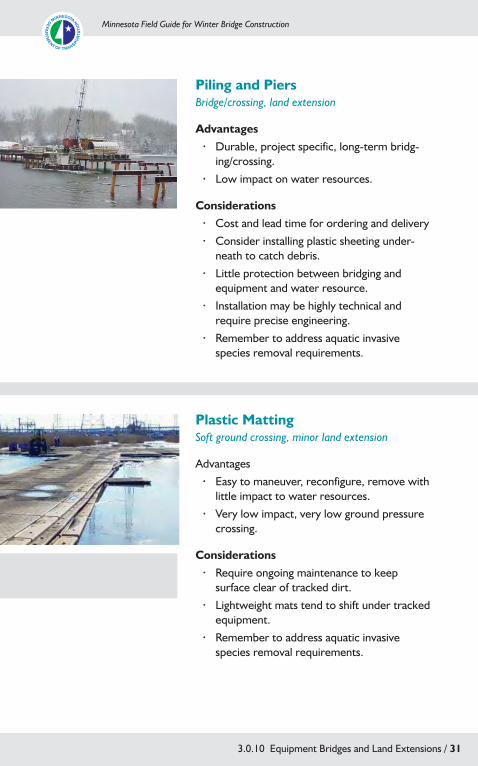
Piling and Piers Bridge/crossing, land extension
Advantages · Durable, project specific, long-term bridg-
ing/crossing. · Low impact on water resources.
Considerations · Cost and lead time for ordering and delivery · Consider installing plastic sheeting under-
neath to catch debris. · Little protection between bridging and
equipment and water resource. · Installation may be highly technical and
require precise engineering. · Remember to address aquatic invasive
species removal requirements.
Plastic Matting Soft ground crossing, minor land extension
Advantages · Easy to maneuver, reconfigure, remove with
little impact to water resources. · Very low impact, very low ground pressure
crossing.
Considerations · Require ongoing maintenance to keep
surface clear of tracked dirt. · Lightweight mats tend to shift under tracked
equipment. · Remember to address aquatic invasive
species removal requirements.
Minnesota Field Guide for Winter Bridge Construction
3.0.10 Equipment Bridges and Land Extensions / 32
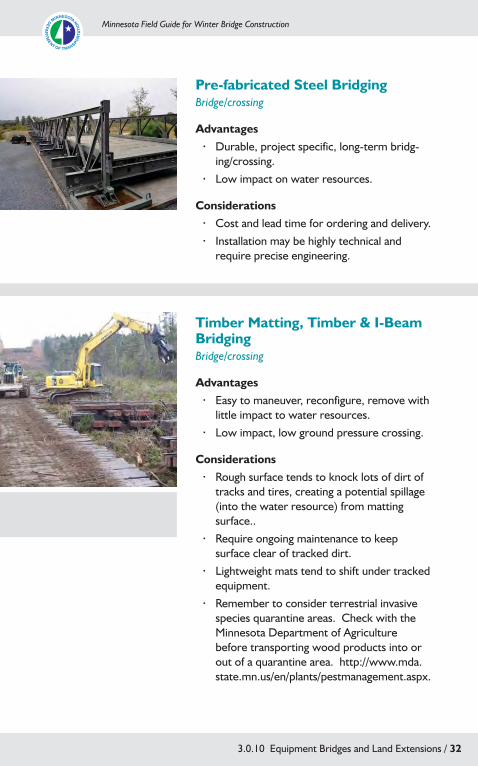
Pre-fabricated Steel Bridging Bridge/crossing
Advantages · Durable, project specific, long-term bridg-
ing/crossing. · Low impact on water resources.
Considerations · Cost and lead time for ordering and delivery. · Installation may be highly technical and
require precise engineering.
Timber Matting, Timber & I-Beam BridgingBridge/crossing
Advantages · Easy to maneuver, reconfigure, remove with
little impact to water resources. · Low impact, low ground pressure crossing.
Considerations · Rough surface tends to knock lots of dirt of
tracks and tires, creating a potential spillage (into the water resource) from matting surface..
· Require ongoing maintenance to keep surface clear of tracked dirt.
· Lightweight mats tend to shift under tracked equipment.
· Remember to consider terrestrial invasive species quarantine areas. Check with the Minnesota Department of Agriculture before transporting wood products into or out of a quarantine area. http://www.mda.state.mn.us/en/plants/pestmanagement.aspx.
Minnesota Field Guide for Winter Bridge Construction

3.0.10 Equipment Bridges and Land Extensions / 33
Bridging, crossings, and land extensions pose unique challenges during the winter months. Freezing temperatures and snow, sleet, and ice make constant monitoring and maintenance of the work area critical.
· Keep bridges, crossings, and land extensions clean and clear of snow, ice, and debris.
· Monitor weather forecast. ∙ Clear work surfaces of snow, ice, and debris before precipita-
tion occurs. ∙ Assess the risk of flooding and obstructing floodwaters. Consider
removing bridging, crossings, and land extensions if flood impacts are predicted.
· Consider that equipment and materials may freeze and become unusable or difficult to move or remove.
· Consider ice-out or ice floes and the potential for damaging or destroying bridging, crossings, and land extensions.
Winter Considerations
Timber Matting & Jersey Barrier CausewayBridge/crossing, land extension
Advantages · Easy to maneuver, reconfigure, and remove
with little impact to water resources · Low impact, low ground pressure crossing
Considerations · Rough surface tends to knock lots of dirt of tracks and tires, creating a
potential spillage (into the water resource) from matting surface. · Require ongoing maintenance to keep surface clear of tracked dirt · Lightweight mats tend to shift under tracked equipment · Remember to consider terrestrial invasive species quarantine areas.
Check with the Minnesota Department of Agriculture before transporting wood products into or out of a quarantine area. http://www.mda.state.mn.us/en/plants/pestmanagement.aspx.
· Be prepared for the possibility of flooding and have a flood response plan in place. At what flood stages should equipment be moved? At what flood stages should equipment and temporary bridging be removed? At what flood stage should the work area be evacuated?
Minnesota Field Guide for Winter Bridge Construction

3.0.11 Extended Work Shutdown / 34
Minnesota Field Guide for Winter Bridge Construction
3.0.11 Extended Work Shutdown
Based on site conditions, impending weather, and/or construction phasing it may be necessary for site work to be shut down for an extended period. During an extended shutdown, it is safe to assume that nobody will be moni-toring the work site for potential problems.
In this manual, it is assumed that an extended shutdown is the result of winter weather and that an extended shut-down is two weeks or more.
First, let’s look at a few steps that should be taken as early as possible, as soon as the likelihood of a winter shutdown is known.
· Delay starting any new stream or road crossings until a plan is in place to secure that work during the shutdown.
· Limit any new site disturbance to areas that can be secured during the shutdown.
· Prepare for conditions before the weather hits. Have a plan in place and initiate that plan as soon as practical.
Second, a few questions need to be answered: · What is the cause of the shutdown? Heavy snowfall? Blizzard conditions?
Subzero temperatures? Icy conditions? · How long will work on site be stopped? · Who is going to monitor the site for erosion and sediment control, cof-
ferdam function, and water quality during the shutdown?

3.0.11 Extended Work Shutdown / 35
Understanding the reason for the shutdown will influence the steps you take to secure the site. In order to ensure that the site is secure and will be in good condition when work restarts, a pre-shutdown site inspection is necessary to verify that:
· All Erosion & Sediment Control (ESC) measures are in good working order. · Secondary containment measures are in place for all equipment and materials. · Stabilization measures are in place on all areas that are able to be stabilized. · Stockpiles are covered and the perimeter containment is in good working
order. · Inspect and repair as necessary all sediment control measures, especially
those adjacent to water bodies. Sediment deposition in water or on ice can be very difficult or impossible to remove.
Steps can be taken to reduce exposure and reduce the possibility of winter weather related problems.
· Remove equipment and materials from the site that can be removed. · Clear snow and ice from equipment, materials, stockpiles, and access
routes to make room for the accumulation of new snow and ice. · Remove inlet protection (replace at the time work restarts) to reduce any
potential for flooding. · Reinforce ESC measures at critical points that might be affected by wind,
snow, or ice.
Finally, ask yourself a few questions as you look at the site, and think about the preparations that have been made to secure the site until work starts again.
· Have I done enough to protect the site and the surroundings for the next few weeks or months?
· Are my preparations strong enough and planned well enough to hold up to strong winds, heavy snow, sleet, ice, etc.?
· When I come back to the site to start work again, am I confident it will be in good condition?
· Will the site be able to handle springtime flood-ing, if it occurs?
Minnesota Field Guide for Winter Bridge Construction
3.0.12 Inclement Weather Preparedness / 36
Minnesota Field Guide for Winter Bridge Construction
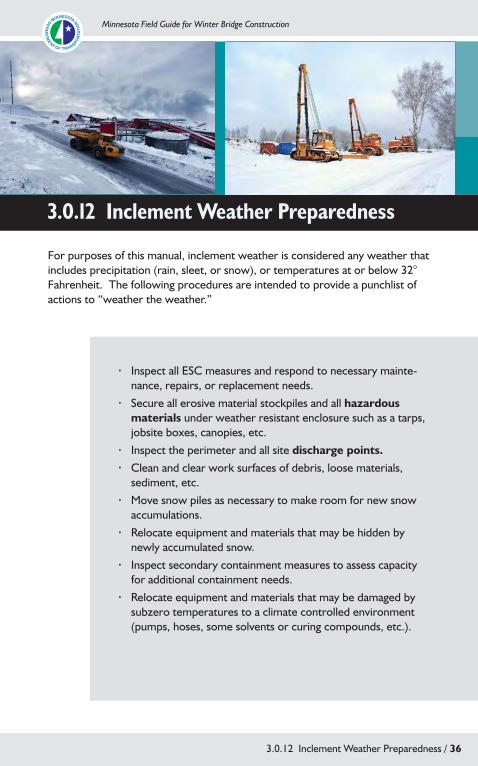
For purposes of this manual, inclement weather is considered any weather that includes precipitation (rain, sleet, or snow), or temperatures at or below 32° Fahrenheit. The following procedures are intended to provide a punchlist of actions to “weather the weather.”
3.0.12 Inclement Weather Preparedness
· Inspect all ESC measures and respond to necessary mainte-nance, repairs, or replacement needs.
· Secure all erosive material stockpiles and all hazardous materials under weather resistant enclosure such as a tarps, jobsite boxes, canopies, etc.
· Inspect the perimeter and all site discharge points. · Clean and clear work surfaces of debris, loose materials,
sediment, etc. · Move snow piles as necessary to make room for new snow
accumulations. · Relocate equipment and materials that may be hidden by
newly accumulated snow. · Inspect secondary containment measures to assess capacity
for additional containment needs. · Relocate equipment and materials that may be damaged by
subzero temperatures to a climate controlled environment (pumps, hoses, some solvents or curing compounds, etc.).

3.0.13 Inlet Protection / 37
Minnesota Field Guide for Winter Bridge Construction
3.0.13 Inlet Protection
Inlet protection is the Best Management Practice of protecting storm sewer inlets by intercepting sediment laden water before it enters the storm sewer. Inlet protection is typically a “high volume” BMP, meaning that it is one of the erosion and sediment control measures that receives a higher volume of stormwater runoff (and sediment) than many others. By its nature, storm sewer inlets are intended to concentrate runoff into a convey-ance. As a result, inlet protection also is a “high maintenance” BMP, meaning that, as high volumes of runoff (and sediment) encounter inlet protection measures, they tend to fill up, be dislodged, and generally wear down. Routine maintenance of inlet protection measures is critical.
3.0.13 Inlet Protection / 38
Factors to consider in selection of the right inlet protection BMP include: · Location- pavement (traveled roadway, parking lot). · Expected volume of runoff. · Necessary useful life of the inlet protection. · Anticipated maintenance frequency. · Depending on project size, there may be hundreds of inlets to keep track
of. An inlet inventory and maintenance plan should be considered to allow for quick assessment of what inlets are installed, protected, operational, dates of maintenance, last inspection, etc.
· Consider the lifespan of inlet protection. A simple fabric wrap might suffice for inlets that are not yet at grade, while inlet baskets would be more appropriate once brought to grade and receiving runoff.
· Scuppers and downdrains are a common form of inlet on bridge projects. How are you planning to protect these types of inlets from sediment impacts and other pollutants? What about erosion control (in this case, energy dissipation) at the discharge point?
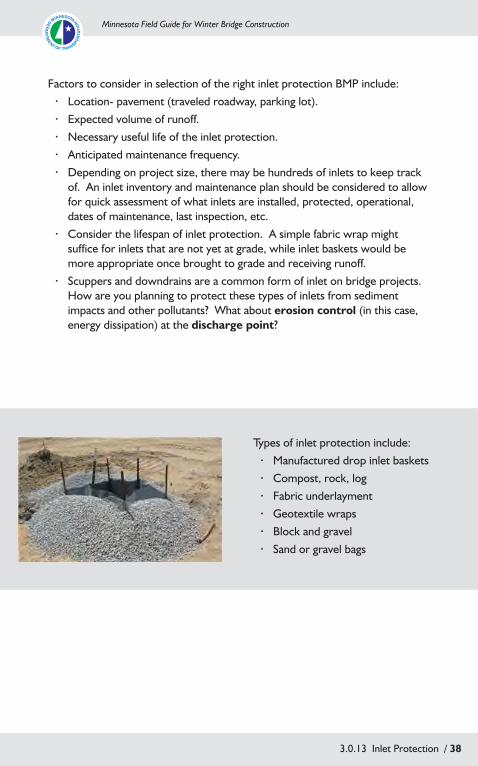
Types of inlet protection include: · Manufactured drop inlet baskets · Compost, rock, log · Fabric underlayment · Geotextile wraps · Block and gravel · Sand or gravel bags
Minnesota Field Guide for Winter Bridge Construction

3.0.13 Inlet Protection / 39
Winter Considerations
The key to keeping inlet protection as an asset and not a liability in winter is keeping an eye on the weather.
· Clean accumulated snow and ice from around inlet protection · When heavy rainfall or flooding is forecast, consider removing
inlet protection from paved surfaces to minimize the risk of flooding the traveled roadway or parking area.
· Maintain inlet protection more frequently during the winter months. As sediment accumulates around/within an inlet protection measure, it is likely to freeze, making removal more difficult.
· MnDOT allows removal of inlet protection during freezing conditions due to the safety concerns of ice accumulation.
Consider inlet protection as it applies to pollution prevention – not just sediment capture. Inlet protection may also serve as a defense against spills, debris and litter, and any number of potential contaminants. With bridge projects in particular, the dis-tance between inlets and receiving waters is often very short, leaving little margin for error and little room for corrective action.
Minnesota Field Guide for Winter Bridge Construction

3.0.14 Inspections / 40
Minnesota Field Guide for Winter Bridge Construction
3.0.14 Inspections
The NPDES Construction General Permit requires inspections be performed: · By a trained person · Every seven calendar days · Within 24 hours after a rainfall event greater than 0.5 inches in 24 hours.
∙ A rain event inspection “resets” the seven calendar day schedule. Example: It rains 0.6 inch Sunday night, post-rain event inspection is done on Monday, the next routine (7 calendar day) inspection will be the next Monday. It rains 0.8 inch three days later on Thursday, inspection is done on Friday, moving the next routine inspection to the next Friday.
∙ What constitutes a 0.5 inch rain? What if it rains 0.4 inch and then stops for six hours, and then rains another 0.4 inch? Any rainfall, cumulative, within any 24 hour period. The example given would be 0.8 inch within 24 hours, requiring an inspection.
· Inspections may be suspended due to frozen ground conditions. Inspec-tions must restart within 24 hours after runoff occurs at the site or 24 hours prior to resuming construction, whichever comes first.

3.0.14 Inspections / 41
Winter Considerations
Inspections should: · Start at points of offsite discharge (storm sewer outlets, drainage swales,
diversions, etc.). · Work upwards from the discharge point(s) to perimeter controls (construc-
tion entrances, silt fence, biorolls, etc.) looking for erosion, signs of sediment deposition, Erosion and Sediment Control (ESC) failures, pollutants, etc.
· Continue upward and inward to the interior ESC site controls (ditch checks, stockpile protection, stabilization practices, etc.).
· Assess the integrity and effectiveness of ESC measures and make recom-mendations for maintenance, repair, replacement, upgrade, etc. based on current site conditions.
· Ask and answer the fundamental question “Is this working or is there something more that needs to be done?”
Inspections must be documented, and include: · Date and time of inspection. · Name of person(s) conducting inspections. · Findings of inspections, including specific location where corrective actions
are needed. · Corrective actions taken (including dates, times, and parties completing
maintenance activities). · Date and amount of all rainfall events greater than 0.5 inches in 24 hours. · A record of all points of stormwater discharge from the project, including
description of discharge.
Winter weather can make inspections seem to have little value at times. It’s all frozen, right? The reality is, winter time is when a project site may be most vulnerable to changing conditions.
· If there is a winter work shutdown, chances are nobody is watch-ing the site and keeping an eye out for Erosion and Sediment Control problems.
· Even if the last three inspections you did felt like walking in the frozen Arctic Circle, changing conditions can happen fast, and our response times for ESC maintenance, repairs, and installation are typically much slower in winter.
Minnesota Field Guide for Winter Bridge Construction

3.0.15 Maintenance / 42
Minnesota Field Guide for Winter Bridge Construction
3.0.15 Maintenance
Winter Considerations
The NPDES Construction General Permit requires maintenance of erosion and sediment control Best Management Practices:
· All perimeter ESC measures must be repaired, replaced, or supplemented when they are found to be nonfunctional or sediment reaches half the height of the device, by the end of the next business day after discovery.
· Temporary or permanent sediment basins must be drained and sediment removed when the sediment depth reaches half the storage volume, within 72 hours of discovery.
· Surface waters, including stormwater conveyances (ditches, swales, diver-sions, storm sewer, etc.) must be cleaned of deltas and sediment deposition and restabilized where maintenance removal results in exposed soil, within 7 calendar days of discovery.
· Sediment tracked offsite from construction access points must be cleaned off paved surfaces within 24 hours of discovery.
Winter weather can make maintenance of Erosion and Sediment Control (ESC) measures difficult, and even impossible. Continued upkeep of ESC measures is critical to keeping a site compliant.
· Frozen ground means no infiltration. Any thaw, snowmelt, or rain event means 100% runoff, greatly increasing the risk of erosion. If ESC measures are not maintained, that increased runoff volume will be untreated, unchecked, and uncontrolled.
· Often, routine maintenance gets overlooked. If it’s all frozen, what’s there to maintain? Before you let the maintenance crew go on winter vacation, realize that blowing and drifting snow knocks down silt fence, buries filter logs, and uncovers bare ground.
· Changing conditions can happen fast, and our response times for ESC maintenance, repairs, and installation are typically much slower in winter.
· Make sure all ESC measures are in good working condition before winter weather hits.

3.0.16 Perimeter Controls / 43
Minnesota Field Guide for Winter Bridge Construction
3.0.16 Perimeter Controls
Perimeter sediment controls are a Best Management Practice that acts as a perimeter containment for keeping sediment on a construction site. Accord-ing to the MPCA, the NPDES Construction General Permit requires perimeter controls:
· On all down gradient perimeters and up-gradient of buffer zones before any land disturbing activities begin.
· To remain in place until final stabilization has been established. · To be effective in keeping sediment on the site.
Factors to consider in selection of the right perimeter control BMP include:
· Volume and velocity of stormwater runoff
· Sheet flow or channelized flow · Area tributary to perimeter control · Slope of up-gradient area · Necessary useful life of the perimeter
control · Types of soils and soil particle sizes
expected to be present on site

3.0.16 Perimeter Controls / 44
Do · Install biorolls, logs, rolls, and sandbags with firm, continuous
ground contact. · For rolled, staked products, stake in an “x” pattern, with the
roll pinned to the ground by the bottom of the “x” made by the stakes.
· Clearly mark the boundary of buffer zones with signs or construction fencing.
· Backfill and compact silt fence trenches to prevent sediment migration under the silt fence.
Don’t · Install silt fence in areas of concentrated flow (ditches, spill-
ways, channels). · Stake rolled, staked products through the center (vampire
staking). · Install straw wattles in high flow channels or ditches. · Use only one size stone for rock checks.
Do’s and Don’ts of perimeter control selection, installation, and maintenance
Types of perimeter controls include: · Biorolls · Buffer zones, permitted and sized
appropriately · Compost berms, logs, and rolls · Ditch checks · Rock logs · Sandbags · Silt fence (regular and super-duty) · Stabilized soil berms · Turbidity curtains · Vegetated berms
Minnesota Field Guide for Winter Bridge Construction

3.0.16 Perimeter Controls / 45
Winter Considerations
Perimeter controls are almost as effective at catching drifting snow and accumulating ice as they are at catching sediment. The key to keeping perimeter controls functional in winter is keeping an eye on the weather.
· Clean accumulated snow and ice from behind perimeter controls to ensure adequate capacity when they are needed
· Clean sediment from behind perimeter controls before the weather turns bad.
· Inspect drainage ways and take any necessary actions to ensure flow paths are stabilized and protected against erosion.
· Consider removing floating turbidity curtains where they may freeze in place. Ice will quickly tear up a curtain, leaving the debris in the water body.
· Consider the selection of BMPs based on maintenance needs. Can your selection be easily repaired if it is frozen in place? Can you put stakes into frozen ground?
· When vertical perimeter controls are not an option, portable, temporary controls such as plastic sheeting draped jersey barriers, plastic barriers, staked plywood sheeting, etc. should be consid-ered. Not doing anything is not an option!
Minnesota Field Guide for Winter Bridge Construction

3.0.17 Portable Sanitary Facilities / 46
Minnesota Field Guide for Winter Bridge Construction
3.0.17 Portable Sanitary Facilities
Winter Considerations
The winter season creates a unique set of conditions for the handling and main-tenance of portable sanitation facilities (PSFs) (portable toilets, port-a-johns, etc.). Most portable PSFs are prone to freezing and damage during the winter months, making use and maintenance more challenging.
A few considerations for preparation and maintenance of portable sanitation facilities include:
· All portable sanitation facilities are required to be “positioned so they are secure and will not be tipped or knocked over”. This means in a sheltered and secure location or staked/tied down.
· Secondary containment is required for all portable sanitation facilities. Many have secondary containment built in, but many do not.
· Consider using a saltwater or an ethylene glycol-free antifreeze (often called “environmentally friendly antifreeze”) to prevent freezing.
· Consider maintenance needs as they relate to snow and ice ac-cumulation, i.e., accessibility for cleanout, moving, removing, and replacement.

3.0.18 Potential Pollutants and Secondary Containment / 47
Minnesota Field Guide for Winter Bridge Construction
· Products and materials that have the potential to leach pollutants must be kept under cover, including: ∙ Building materials ∙ Pesticides, herbicides, insecticides,
fertilizers ∙ Treatment chemicals ∙ Landscape materials ∙ Hazardous materials, including:
3.0.18 Potential Pollutants and Secondary Containment
The Minnesota Pollution Control Agency is the regulatory authority for the National Pollutant Discharge Elimination System permit program in the state of Minnesota. One of the most important, and often misunderstood, components of the NPDES permit is the requirement for secondary containment. The NPDES permit, Section IV.F Pollution Prevention Management Measures states:
∙ Oil, diesel fuel, gasoline ∙ Hydraulic fluids ∙ Paints and solvents
· In addition, hazardous materials must be properly stored in sealed con-tainers. Storage and disposal of hazardous waste or hazardous materials must be in compliance with Minn.R.ch.7045, including secondary contain-ment as applicable.
· Solid waste must be stored, collected, and disposed of properly.
∙ Petroleum-based products ∙ Preservatives, additives ∙ Curing compounds and acids

3.0.18 Potential Pollutants and Secondary Containment / 48
Winter Considerations
One of the biggest challenges to materials management and secondary containment in the winter time is accumulating snow and ice, and winter winds. Steps may be taken to ensure site compliance with management and storage of materials and secondary containment.
· Check secondary containment measures regularly. As snow and/or ice accumulate within the secondary containment, clear/empty the containment (using appropriate disposal methods) to make room for new snow, ice, and water.
· Cleaning out secondary containment measures in frozen state can be challenging. Consider the use of glycol, ice melt, or even moving the secondary containment unit to a warm enclosure to thaw. Remem-ber to dispose of thawed materials appropriately.
· Secure portable toilets with tie-downs and placement in a sheltered area.
· Spill cleanup is much more challenging in the winter. Plan for it, and take steps to increase assurance that spill prevention is being imple-mented to the maximum extent practical.
Refer to earlier sections on 3.0.3 Concrete Management, 3.0.5 De-watering, 3.0.17 Portable Sanitary Facilities, and 3.0.22 SPCC for ad-ditional information.
· Portable toilets must be positioned so that they are secure and will not be tipped or knocked over. This generally means either staked down or including secondary containment measures in a secure location.
· Fueling and maintenance operations must follow the SPCC plan, as appli-cable (required for any site with 1,320 gallons of on-site fuel storage)
· Vehicle and equipment washing must be done in a designated area with runoff contained to a sediment basin or other effective measure.
· Concrete and other washout wastes must not contact the ground.
Minnesota Field Guide for Winter Bridge Construction

3.0.19 Signage / 49
Minnesota Field Guide for Winter Bridge Construction
3.0.19 SignageSigns, signs, everywhere signs. Proper signage on a construction site is as important as it is along a roadway. How would you know for sure where to go or what to do if there were no directions? A variety of methods may be used to convey information on a construction site. Consider that new workers are on site all the time, and they may be unfamiliar with the layout of the site, and location of important elements.
· All permits (federal, state, watershed, municipal, etc.) should be posted in a readily accessible location. Typi-cally, this is done near the primary construction trailer.
· Easily seen, durable, legible signs should be placed at locations to indicate: ∙ Concrete washout areas ∙ Designated garbage and construction debris dumpsters ∙ Stabilized construction access points, both entrances
and exits ∙ Spill kits ∙ Hazardous materials storage areas ∙ Fueling stations ∙ Emergency (medical, fire, police) contact information
· Keep signs legible and clear of snow and ice. Consider how signs will hold up during periods of winter shutdown.
· Consider posting signage identifying areas of thin ice or open water, such as around bridge piers and cofferdam work areas, for snowmobiles if unsafe conditions exist. MnDNR often posts information at http://www.dnr.state.mn.us/watertrails/index.html

3.0.20 Stabilization Practices / 50
Minnesota Field Guide for Winter Bridge Construction
3.0.20 Stabilization Practices
The NPDES Construction General Permit requires stabilization measures to be initiated immediately whenever construction activity has permanently or temporarily ceased on any portion of the site and will not resume within 14 days, with some important exceptions:
· For projects that drain to a designated “impaired” or “special” water, stabiliza-tion measures must be initiated im-mediately and must be completed no more than 7 days after the activity in that portion of the site has temporarily or permanently ceased.
· For public waters that the MnDNR has promulgated “work in water restric-tions” during specified fish spawning time frames, all exposed soils within 200 feet of the water’s edge and draining to these waters must be stabilized within 24 hours during the restriction period.
· All conveyances (ditches, storm sewer outlets, swales, or diversion) that drain water from any portion of the site that are within 200 linear feet of the property edge, or from the point of discharge to any surface water, must be stabilized within 24 hours.
· Erosion Control Blanket
· Sod · Hydromulch · Bonded Fiber Matrix · Hydraulically Applied
Compost · Crimped Straw

3.0.20 Stabilization Practices / 51
10 Rules of Stabilization
1. Consider the following factors for selection of the right BMP: ∙ Slope, runoff volume and velocity, flow characteristic (sheet flow or
concentrated) ∙ Desired longevity (temporary or permanent stabilization) ∙ Access to the area for installation equipment and labor ∙ Access to a water source for successful germination/growth of the
applied vegetation (seed, sod, plugs, etc.)
2. Erosion Control Blanket (ECB), Turf Reinforcement Matting (TRM) or hard armoring practices are the only approved stabilization practice for areas of concentrated flow (ditches, swales, outlets, diversions, etc.)
3. Key-in the perimeter edges of ECB to prevent runoff from going under the blanket and causing erosion.
4. Follow MnDOT or manufacturer’s specifications for stapling of ECB and TRM products. Use whichever is the more stringent.
5. Spray hydromulch and Bonded Fiber Matrix products from at least two op-posing directions to prevent “shadowing” of the applied product.
6. If you can see dirt through an applied hydromulch or BFM, it was applied to thin and not at the required rate per acre.
7. ECB and TRM products should be installed parallel to the direction of water flow.
8. Firm, consistent ground contact is critical to the success of stabilization prac-tice installation. ECB installed over roots, stumps, and rocks is not accept-able. Remember to first have a properly prepared seed bed.
9. Consider soil testing prior to stabilization practice installation, to allow for addition of fertilizers or soil amendments.
10. Anchor tarps or sheeting securely to prevent wind loss.
Minnesota Field Guide for Winter Bridge Construction

3.0.20 Stabilization Practices / 52
A variety of stabilization practices are available, and should be selected based on site conditions, regulatory requirements, availability and installation feasibility, etc.
Erosion Control BlanketNatural fibers (straw, wood, coconut, ) held together with a synthetic or natural netting.
· Consider the surface, slope, runoff in proper selection of blanket
· Key-in perimeter edges and follow manufacturer’s specs for staple pattern and spacing.
SodFast stabilization practice with a relatively high cost
· Consider watering needs and availability or a water source.
Hydromulch or Bonded Fiber Matrix (BFM)Hydromulch is a wood fiber, recycled paper mulch, or a blend of both mixed with water, bonding glues, and typi-cally seed and fertilizer that is sprayed onto the soil surface
· Typical application rates range from 2000 lbs/ac to 3500 lbs/ac.
· 2500 lbs/ac will look like a ¼” thick mat of material with no visible soil beneath.
Bonded Fiber Matrix (BFM) is continuously bonded fibrous material (often wood fiber, or wood fiber and cellulose blend) and typically seed and fertilizer that is sprayed onto the soil surface.
· BFM is typically used as a more robust form of hydro-mulch
· Typical application rates are 3500 lbs/ac to 4000lbs/ac · 4000 lbs/ac will look like a 1/2” thick mat of material
with no visible soil beneath.
Hydraulically Applied CompostOrganic soil amendment that may be applied much the same as hydromulch.
Minnesota Field Guide for Winter Bridge Construction

3.0.20 Stabilization Practices / 53
Winter Considerations
Stabilization practices are greatly affected by winter conditions. Some of the things to consider are:
· Frozen ground makes stapling ECB or TRM products almost impossible · Hydromulch, BFM, and polymer stabilization measures do not
adhere to frozen ground and should not be used if the temperature is expected to be below 32° Fahrenheit within 24 hours before or after application.
· Blown compost or crimped straw may be applied during or directly onto a thin layer of snow. As the compost or straw settles, it will become somewhat stuck to the snowpack.
· MnDOT Standard Specifications allow for: ∙ Dormant seeding after October 20th provided soil temperatures
one inch below the surface are no greater than 40° Fahrenheit. ∙ Dormant sodding may be done between November 1st and soil
freeze-up. ∙ Increased seed rates may be needed during frozen conditions to
offset winter losses.
Crimped StrawSpread/strewn straw applied at a rate of 4000 lbs/ac and disked into the soil surface.
Other stabilization practices: · Tarp or plastic sheeting · Wood fiber “slash” material from clearing operations · Temporary polymer application
Minnesota Field Guide for Winter Bridge Construction

3.0.21 Snow and Ice Management / 54
Minnesota Field Guide for Winter Bridge Construction
3.0.21 Snow and Ice Management
Removal and storage of snow and ice to maintain access to work areas and site safety.
Snow Removal · When snow is forecast, all work areas must
be swept and cleaned of debris or loose equipment/materials and equipment/materi-als appropriately stored.
· Snow must be removed in a manner that does not deposit or cast snow into wetlands, drainage ditches, swales, ponds, or water-bodies.
· Snow removal in areas that have not been swept and cleaned (as described above) before snowfall must be done in a manner that allows the removed snow to be stock-piled in a location that has perimeter pollu-tion prevention measures installed.
· If hazardous materials are spilled on or intermingled with snow, the snow must be removed and placed in watertight contain-ers (lined dumpsters) and disposed of at an approved disposal site.

3.0.21 Snow and Ice Management / 55
Winter Considerations
Be prepared! Knowing the forecast and maintaining a proactive strategy for management of winter conditions, including snow and ice removal and storage, are critical to keeping a compliant and safe work environment.
· Do not use sodium chloride (salt) on barges or other “over the water” surfaces.
· Clean debris, oil, grease, etc. from work surfaces daily to allow for snow removal operations to drop snow into the waterway clean.
· Consider using an ice and water shield or other type surface treat-ment to provide surface grip for work safety.
Snow Storage · Snow that has been removed from work areas and access routes must be
stored in upland locations (i.e., not in wetlands, drainage ditches, swales, ponds, waterbodies, etc.).
· Contaminated snow (snow that has been removed from areas that were not swept and cleaned as described in Snow Removal, above) must be stock-piled in a location that has perimeter pollution prevention measures installed (silt fence, biorolls, compost logs, etc.). Perimeter controls that require staking should not be used if the ground is frozen and staking is not possible.
· A minimum 25 foot buffer between snow stockpiles and adjacent perimeter controls or wetlands, drainage ditches, swales, ponds, waterbodies, etc.
· Snow plowing should be done down to the bottom two inches of snow. The bottom two inches must be removed and stored in an upland location.
Ice Removal / De-Icing · Use of clean sand, salt and/or salt/sand
mix may be used in moderation to de-ice work areas and access routes to maintain site safety.
· Excess sand, salt, or sand/salt mix must be swept up within twenty-four (24) hours and appropriately deposited at an approved disposal location.
Minnesota Field Guide for Winter Bridge Construction

3.0.22 Spill Prevention, Control, and Countermeasure / 56
Minnesota Field Guide for Winter Bridge Construction
Preparedness · Know the details of the Spill Preven-
tion, Containment, and Cleanup plan. · Know where designated spill kits are
in your work area. · Know what your role and responsi-
bilities are in: ∙ Preventative measures. ∙ Responding, containing, and clean-
ing up. · Know who to contact in the event of
a spill, including as necessary: ∙ Project SPCC Manager ∙ Police ∙ Fire/Rescue ∙ National Response Center
· Know what the rules are for reporting to the Minnesota State Duty Officer at 1.800.422.0798. These are: ∙ Any petroleum product spill
greater than five gallons. ∙ Any hazardous material spill of any
quantity. ∙ Any sediment spill that enters a
water of the State of Minnesota.
3.0.22 Spill Prevention, Control, and Countermeasure
Spill Prevention, Control, and Countermeasure (SPCC) is the written procedure for how to prevent, prepare for, and respond to spills. All projects involving 1,320 gallons or more of above ground storage of any material classified as “hazardous” by the NPDES Permit require a site specific SPCC. Accidents happen, so knowing how to react, and having the tools in place to act promptly and effectively, is critical to not letting an accidental spill cause a major problem.
The three primary parts of SPCC are Prevention, Preparedness, and Response
Prevention · Use appropriate contain-
ment methods ∙ Concrete washout ∙ Secondary containment
measures on equip-ment, portable toilets, fuel cans, hammers, pile drivers, etc.
∙ Assign and use designated areas for equipment maintenance and materi-als storage.
· Make sure equipment and materials are safely and se-curely stored under cover and with containment, as applicable.
· Report concerns, leaks, etc. before they become problems.

3.0.22 Spill Prevention, Control, and Countermeasure / 57
ResponseIn the event of a spill, know how to respond if it is a minor or major spill:
Minor is less than five gallons, localized and easily contained, did not reach environmentally sensitive areas, and creates little risk to human health or safety. Response should be:
· Immediately notify the Site SPCC Manager. · Under the SPCC Manager, and using the spill kit or other materials at hand,
contain and cleanup the spilled material. · Dispose of cleanup materials (absorbents, rags, etc.) in labeled containers
for proper disposal. · The Site SPCC Manager must make necessary notifications within 24-hours
of the spill.
Major may be a spill that is five gallons or greater, has spread beyond the local-ized spill area, entered a storm drain or surface waters or wetlands, or poses a hazard to human health and safety. Response should consider:
· Be prepared to immediately leave the work site if it is unsafe to stay. · Immediately notify the Site SPCC Manager. · The Site SPCC Manager must make immediate notifications to applicable
persons or agencies. · Under direction of the Site SPCC Manager, the Spill Response Team will initiate
containment and cleanup as required and as directed by applicable authorities.
Winter Considerations
Freezing temperatures, snow, sleet, and ice can make all three com-ponents of SPCC more challenging. A few of the things that must be factored into a good SPCC during the winter months are:
· Containment methods may freeze or fill with snow, losing capacity. Be prepared to oversize containment to allow for this.
· Containment methods may need to be emptied of snow, ice, or water more frequently. Dispose of materials appropriately.
· Cleanup waste may include snow or ice that has been in contact with a contaminant.
· Freezing temperatures may cause equipment, materials, and surfaces (vacuum trucks, pumps, saturated containment booms) to freeze. Plan ahead, and understand the effects of weather conditions on equipment usability, materials containment, and response actions.
Minnesota Field Guide for Winter Bridge Construction

3.0.23 Stockpile Management / 58
Minnesota Field Guide for Winter Bridge Construction
3.0.23 Stockpile Management
Materials stockpiled on site are categorized as one of four types:
Type 1 - Non-Erodible Non-Contami-nated Stockpiles - materials that are not subject to the forces of erosion by wind or water, and that have not been found to have any contaminants. Examples: rip-rap, boulders, solid concrete.
Type 2 - Erodible Non-Contaminated Stockpiles – materials that are subject to the forces of erosion by wind and water, that have not been found to have any contaminants. Examples: excavated soils, topsoil stockpiles, sand, salt/sand.
Type 3 - Non-Erodible Contaminated Stockpiles – materials that are not subject to the forces of erosion by wind or water, that have been determined to have contaminants. Examples: treated timbers, transite pipe.
Type 4 - Erodible Contaminated Stockpiles – materials that are subject to the forces of erosion by wind and water and that have been found to have contaminants. Examples: excavated soils, sand.
3.0.23 Stockpile Management / 59
Management varies by type as follows:
Type 1 - Non-Erodible Non-Contaminated Stockpiles
· Must be placed in upland locations (outside of wetlands, drainage ways, ponds, waterbodies, etc.).
· May be placed without perimeter controls.
Type 2 - Erodible Non-Contaminated Stockpiles · Must be placed in upland locations (outside of wetlands,
drainage ways, ponds, waterbodies, etc.). · Must have appropriate perimeter controls installed on the
down-gradient side of the stockpile. · Must have appropriate stockpile stabilization installed (tarp,
seed and blanket, hydromulch, etc.).
Type 3 - Non-Erodible Contaminated Stockpiles · Whenever possible, contaminated materials must be docu-
mented and hauled to approved landfill, not stockpiled. · Must be placed in upland locations (outside of wetlands,
drainage ways, ponds, waterbodies, etc.). · Must be placed in a secured location with perimeter pollu-
tion controls. · Must have a plastic sheeting both underneath, and covering,
the entire stockpile.
Type 4 - Erodible Contaminated Stockpiles · Whenever possible, contaminated materials must be docu-
mented and hauled to approved landfill, not stockpiled. · Must be placed in upland locations (outside of wetlands,
drainage ways, ponds, waterbodies, etc.). · Must be placed in a secured location with perimeter pollu-
tion controls. · Must have plastic sheeting both underneath, and covering,
the entire stockpile.
Minnesota Field Guide for Winter Bridge Construction
3.0.23 Stockpile Management / 60
Winter Considerations
Stockpiles may freeze and become unworkable. Plan ahead, consider the upcoming weather conditions.
· Provide extra stockpile space for added material. As mate-rial freezes in place, it is more difficult to move or remove.
· Be prepared with cover/stabilization practices. · Monitor stockpiles during thawing periods. Look for signs
of runoff from snowmelt and/or thaw at downgradient areas.
· Maintain perimeter controls · While options in winter conditions become more limited,
a variety of erosion prevention and sediment control methods and materials are available. ∙ Geotextile cover (i.e., erosion control blanket,
Mirafi, etc.) ∙ Plastic sheeting ∙ Wrapped aggregate berms (sediment control) ∙ Super-duty silt fence (sediment control)
Minnesota Field Guide for Winter Bridge Construction
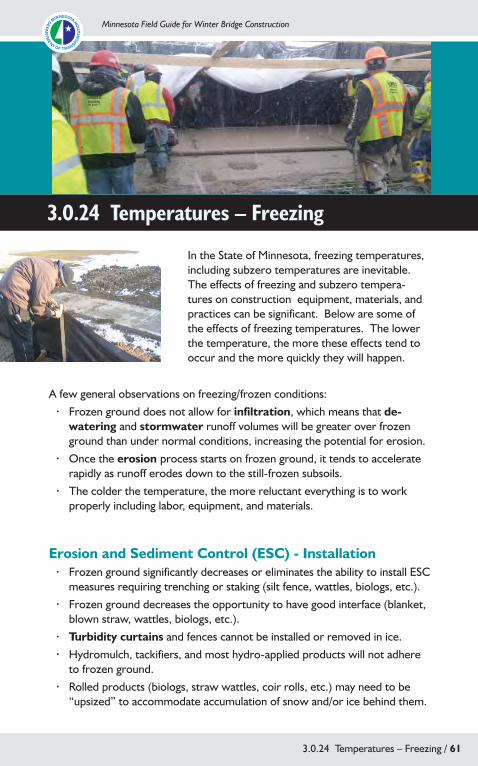
3.0.24 Temperatures – Freezing / 61
Minnesota Field Guide for Winter Bridge Construction
3.0.24 Temperatures – Freezing
In the State of Minnesota, freezing temperatures, including subzero temperatures are inevitable. The effects of freezing and subzero tempera-tures on construction equipment, materials, and practices can be significant. Below are some of the effects of freezing temperatures. The lower the temperature, the more these effects tend to occur and the more quickly they will happen.
A few general observations on freezing/frozen conditions: · Frozen ground does not allow for infiltration, which means that de-
watering and stormwater runoff volumes will be greater over frozen ground than under normal conditions, increasing the potential for erosion.
· Once the erosion process starts on frozen ground, it tends to accelerate rapidly as runoff erodes down to the still-frozen subsoils.
· The colder the temperature, the more reluctant everything is to work properly including labor, equipment, and materials.
Erosion and Sediment Control (ESC) - Installation · Frozen ground significantly decreases or eliminates the ability to install ESC
measures requiring trenching or staking (silt fence, wattles, biologs, etc.). · Frozen ground decreases the opportunity to have good interface (blanket,
blown straw, wattles, biologs, etc.). · Turbidity curtains and fences cannot be installed or removed in ice. · Hydromulch, tackifiers, and most hydro-applied products will not adhere
to frozen ground. · Rolled products (biologs, straw wattles, coir rolls, etc.) may need to be
“upsized” to accommodate accumulation of snow and/or ice behind them.

3.0.24 Temperatures – Freezing / 62
· Silt fence may need increased staking to brace the fencing from increased winter loads (snow and ice accumulation, winter winds).
· Construction entrances may be difficult to install on frozen ground and/or with snow and ice accumulations.
· Inlet protection may freeze rapidly, and be rendered useless. Carefully consider before installing.
Erosion and Sediment Control (ESC) - Maintenance · Drifting snow is frequently caught by ESC measures. These accumula-
tions may knock silt fence down, pile up on and freeze over biorolls, straw wattles, ditch checks, etc. Increased monitoring of drifting snow accumula-tions is required to maintain ESC efficacy.
· Snow and ice accumulations should be removed from construction access points regularly to maintain function and performance.
· Sediment bags can freeze solid, and/or freeze in place. Place bags on a wa-tertight liner to separate dewatering flow leaving the bag from the ground surface beneath the bag.
· Turbidity curtains and fences should be removed prior to freezing weather. Curtains or fences that freeze in place may be torn apart by shift-ing ice.
· Inlet protection may freeze rapidly causing an ice buildup, becoming a safety concern. Consider removing inlet protection during periods of pro-longed temperatures below 32°. The NPDES permit allows for removal of inlet protection “…if a specific safety concern has been identified by the Permittee or the jurisdictional authority. The Permittee must document the need for removal in the SWPPP.”
Equipment and Materials · Dewatering intake, hoses, and pumps may freeze.
∙ Remove dewatering pumps and hoses and store in a climate controlled location to prevent freezing.
∙ Clear ice and snow accumulations at pump intakes and discharges. ∙ Remove and store dewatering sediment bags to prevent bags freezing
to the ground or other surfaces. · Wash water for concrete washout, equipment rinse, etc. may freeze.
Washout and rinse activities must be conducted in approved areas. · Dredged material on barges may freeze, making removal difficult, and
creating overload conditions.
Minnesota Field Guide for Winter Bridge Construction

3.0.25 Temperatures - Thawing / 63
Minnesota Field Guide for Winter Bridge Construction
3.0.25 Temperatures - Thawing
As winter weather conditions fluctuate, freezing and thawing cycles occur. The effects of freezing and thawing on construction equipment, materials, and prac-tices can be significant. Below are some of the effects of thawing temperatures. The higher the temperature, the more these effects tend to occur and the more quickly they will happen.
A few general observations on thawing conditions: · As frost leaves the ground, the soils become saturated leaving little or no
capacity for stormwater infiltration, which means that dewatering and stormwater runoff volumes will be greater than under normal conditions, increasing the potential for erosion.
· Frozen ground does not allow for stormwater infiltration. · Once the erosion process starts on thawing ground, it tends to accelerate rapidly.
Erosion and Sediment Control (ESC) · Thawing ground may cause stakes (silt fence, straw wattles, biologs, etc.)
to come up out of the ground, leaving the ESC measure less secure than desired. One good practice is to inspect ESC measures and carry a hammer along to drive stakes more firmly into the ground.
· Silt fence and rolled products (biologs, straw wattles, coir rolls, etc.) may need restaking to accommodate frost/thaw heave and increased potential for runoff.
· Increased runoff potential may undercut rolled products and silt fence. Poor ground contact or frost heave may leave ESC measures exposed to undercut-ting. Look for gaps at the ground surface interface with ESC measures.
· Dredged material allowed to freeze on barges may thaw and create a runoff concern, increasing the importance of secure perimeter controls.

3.0.25 Temperatures - Thawing / 64
· Thawing temperatures often lead to an increased need for clean-ing of construction site access points, routes, and parking areas.
· Thawing temperatures may lead to the need for reapplication of mulch or hydromulch, and may also provide an opportunity to apply stabilization practices over previously frozen ground.
· Melting snow usually reveals garbage and debris accumulations. Be prepared for an increased need to clean up your work site.
· Think ahead. Thawing temperatures may lead to a need for dewatering.
Winter Considerations
Minnesota Field Guide for Winter Bridge Construction

3.0.26 Water Quality Monitoring – Turbidity and pH / 65
Minnesota Field Guide for Winter Bridge Construction
3.0.26 Water Quality Monitoring – Turbidity and pH
Turbidity is the cloudiness or haziness of a fluid caused by individual particles that are often invisible to the naked eye, similar to smoke in the air. In Minnesota, surface waters turbidity generally ranges from 5 NTU to about 20 NTU. NTU is an abbreviation for Nephelometric Turbidity Units – the standard for measuring turbidity.
pH is a measurement on a numeric scale to specify the acidity or alkalinity of a solution. In Minnesota, surface waters typically have a pH ranging from about 7.0 to about 8.6, which is right about in the middle of the pH scale.
Equipment for monitoring water quality: · Personal Protective Equipment · Gloves · Turbidity/pH meter w/calibration kit · Digital camera · Deionized water for rinsing and
cleaning · Sample collection containers · Sample collection grab stick

3.0.26 Water Quality Monitoring – Turbidity and pH / 66
Winter conditions can make water quality monitoring through turbidity and pH testing challenging. Steps can be taken to be prepared for ice, near freezing water, and generally difficult conditions to make gathering samples and getting accurate readings easier, and more accurate.
· Don’t test water that is near freezing. Let it warm up to an “indoor” temperature first.
· Try and maintain an ice-free location in the water body of concern.
Measurement protocols, step by step:
1. Turbidity/pH meters must be calibrated daily prior to use.
2. Samples should be collected using a clean container that is directly sub-merged in the water body.
3. A background sample should be taken upstream, before pumping, etc. to provide analysis of background turbidity and pH levels.
4. Samples should be taken from a location where the water appears to be mixed, i.e., the entering flow has comingled with the body of water.
5. Follow the manufacturer’s directions for the meter you are using: ∙ Fill test jar to the line. ∙ Handle test jars from the lid as much as possible. ∙ Apply a thin layer of silicone oil on test jar glass before testing. ∙ Don’t shake the test jar. If it has settled, gently turn the jar upside down
and then back to upright. ∙ Properly rinse the test jar when testing is complete.
6. Testing should be done during all dewatering activities: ∙ Before dewatering to get background readings ∙ At the start of dewatering to determine effectiveness of sediment
controls ∙ During dewatering, at least three times daily
7. Documentation: ∙ Calibration dates and times ∙ Sampling locations, dates, and times ∙ Sample test results, dates, and times
Winter Considerations
Minnesota Field Guide for Winter Bridge Construction

3.0.27 Winter Preparation and Procedure / 67
Minnesota Field Guide for Winter Bridge Construction
3.0.27 Winter Preparation and Procedure
Preparation for the winter months is a critical step in maintaining a compliant project. Planning ahead and proactively anticipating and bracing for the inevi-table winter weather is much more easily accomplished than trying to catch up to the weather once it has begun.
· Construction phasing: ∙ Only disturb what must be disturbed ∙ Stabilize disturbed areas as soon as possible to limit the total amount of
exposed ground ∙ Consider the effects of winter weather on the work area.
· Install all perimeter sediment controls before the ground freezes. · Inspect all ESC measures and respond to necessary maintenance, repairs,
or replacement needs. · Secure all erosive material stockpiles and all hazardous materials under
weather resistant enclosures such as a tarps, jobsite boxes, canopies, etc. · Inspect the perimeter and all site discharge points. · Clean and clear work surfaces of debris, loose materials, sediment, etc. · Move snow piles as necessary to make room for new snow accumulations. · Relocate equipment and materials that may get hidden by newly accumu-
lated snow. · Inspect secondary containment measures to assess capacity for additional
containment needs. · Relocate equipment and materials that may be damaged by subzero
temperatures to a climate controlled environment (pumps, hoses, some solvents or curing compounds, etc.).
· Stabilize all disturbed areas as quickly as possible. ∙ Seed and blanket, crimped straw, or hydromulch before frozen ground
conditions. ∙ Blown straw, applied heavy, is an effective stabilization practice during
frozen ground conditions.

3.0.28 Work over Water (Drips, Spills, and Emergency Clean Up) / 68
Minnesota Field Guide for Winter Bridge Construction
3.0.28 Work over Water (Drips, Spills, and Emergency Clean Up)
Working around and over water creates a challenging environment for compli-ance with the Clean Water Act and the NPDES permit program requirements. A variety of drips, drops, leaks, and spills may occur if proper measures aren’t put in place. Examples:
Drips · Concrete dripping off a bucket
swung out over water · Release compound dripping off
an application sprayer · Gasoline dripping off a gas can
after refueling equipment
Drops · Dirt dropping off an excavators
bucket near the shoreline · Equipment and materials ac-
cidentally dropped overboard or off a platform
· Even a hammer dropped over a railing and into the river is an offsite impact.
Leaks · Hydraulic fluid leaking from
equipment · Barge installed concrete
washout with a ripped liner · Overfilled cans, containers, and
sprayers
Spills · Paint, gas, curing compounds
accidentally knocked over · “I didn’t know the lid wasn’t on”
accidents with paints, fuels, and compounds

3.0.28 Work over Water (Drips, Spills, and Emergency Clean Up) / 69
BMPs to minimize drips, drops, leaks, and spills:
· Install a “diaper” underneath concrete buckets and chutes.
· Keep chutes in the “upright” position until the pour is ready to go.
· Install netting around work areas to catch equipment and materials.
· Install a perimeter control (2x4 mount, rubber pellet eels, etc.) around work platforms for contain-ment of spills, leaks, etc.
· Install wood fiber rolls or rubber pellet erosion eels around scuppers on barges, bridges – treat them just like a storm sewer inlet.
· Inspect and clean, wipe, etc. equip-ment as it swings out over water.
· Inspect vehicles and equipment regu-larly for drips and leaks.
· Use secondary containment on equip-ment, materials, tools, vehicles, etc. when working over water (netting, drip trays, perimeter controls, etc.).
Minnesota Field Guide for Winter Bridge Construction

3.0.28 Work over Water (Drips, Spills, and Emergency Clean Up) / 70
Winter Considerations
Be prepared! One of the biggest challenges to working over water in the winter time is accumulating snow and ice, and winter winds. Steps may be taken to ensure the materials, equipment, fuels, compounds, etc. remain with the work, not in the water.
· Check secondary containment measures regularly. As snow and/or ice accumulate within the secondary contain-ment, clear/empty the containment (using appropriate disposal methods) to make room for new snow, ice, and water.
· Check netting for tears, holes, loose attachments. · Secure portable toilets with tie-downs and secondary
containment. · Spill cleanup is much more challenging in the winter. Plan
for it and take steps to increase assurance that spill preven-tion is being implemented to the maximum extent practical.
· Isolation practices for winter containment include: ∙ Rock berms ∙ Slash mulch berms ∙ Sheet piling or trench boxes ∙ Bonded 2”x4” barge deck edging
Minnesota Field Guide for Winter Bridge Construction

4.0 Documentation, Paperwork, and Inspections / 714.0 Documentation, Paperwork, and Inspections / 71
4.0 Documentation, Paperwork, and Inspections
Minnesota Field Guide for Winter Bridge Construction

4.0 Documentation, Paperwork, and Inspections / 72
Minnesota Field Guide for Winter Bridge Construction
4.0 Documentation, Paperwork,
Documentation, paperwork, and inspections are important parts of permit compliance. SWPPP amendments, routine inspections, and documentation are all critical to having a thorough understanding and history of what’s working and what isn’t.
The NPDES Construction General Permit requires inspections be performed: · By a trained person · Every seven calendar days · Within 24 hours after a rainfall event greater than 0.5 inches in 24 hours.
∙ A rain event inspection “resets” the seven calendar day schedule. Example: It rains 0.6 inch Sunday night, post-rain event inspection is done on Monday, the next routine (7 calendar day) inspection will be the next Monday. It rains 0.8 inch three days later on Thursday, inspection is done on Friday, moving the next routine inspection to the next Friday.
∙ What constitutes a 0.5 inch rain? What if it rains 0.4 inch and then stops for six hours, and then rains another 0.4 inch? Any rainfall, cumulative, within any 24 hour period. The example given would be 0.8 inch within 24 hours, requiring an inspection.
Inspections must be documented, and include: · Date and time of inspection · Name of person(s) conducting inspections · Findings of inspections, including specific location where corrective actions
are needed · Corrective actions taken (including dates, times, and parties completing
maintenance activities) · Date and amount of all rainfall events greater than 0.5 inches in 24 hours. · A record of all points of stormwater discharge from the project, including
description of discharge
and Inspections
Documentation, paperwork, and inspections are important parts of permit compliance. SWPPP amendments, routine inspections, and documentation are all critical to having a thorough understanding and history of what’s workingand what isn’t.

4.0 Documentation, Paperwork, and Inspections / 73
The Stormwater Pollution Prevention Plan must be amended when: · There is a change in design, construction, operation, maintenance,
weather, or seasonal condition that has a significant effect on the discharge of pollutants to waters.
· An inspection or investigation that indicates the SWPPP is not effective in eliminating or significantly minimizing the discharge of pollutants.
· The SWPPP is not achieving the general objective of minimizing pollutants in stormwater discharges.
· The MPCA determines the project’s stormwater discharge may cause, have reasonable potential to cause, or contribute to non-attainment of ap-plicable water quality standards.
The NPDES CGP requires that: · The permittee must make the SWPPP, including all certificates, reports,
records, or other information required by the permit available to federal, state, and local officials within 72 hours of request for the duration of the permit and for three years following the Notice of Termination.
The MPCA Water Quality Permit requires that water quality standards be maintained throughout a construction project. Documentation of water quality tests should include:
· Dates and times of tests · Location(s) · Person(s) conducting the test · Background readings · Condition tested (NTU, pH, treatment residuals, etc.)
Minnesota Field Guide for Winter Bridge Construction
5.0 Environmental Commitment / 74
Minnesota Field Guide for Winter Bridge Construction
5.0 Environmental Commitment
In the context of this field manual and Minnesota Department of Transporta-tion (MnDOT) projects, “environmental commitment” means the decision and effort to comply with the requirements of applicable federal, state, and local rules and regulations. Environmental commitment means respecting and following MnDOT policies and standards, helping to foster that commitment in others, and acting as an advocate for environmentally sound construction practices.
Key elements of a good environmental commitment on a construction site are understanding of:
· Who is responsible for compliance · What environmental issues and concerns exist · Why compliance is important · What is your role in environmental compliance · How do you fulfill your role
Good training, strong observation or “situational awareness” skills, and open two-way communication make the foundation of environmental compliance. Some of the methods used to build environmental commitment include:
Train the onsite workforce · Training for everyone, not just ESC installers or inspectors · Tailgate talks – ten minutes on Friday morning to cover a brief training
subject. This could be: ∙ Silt fence – Why shouldn’t I run it over? ∙ Tracking onto the public roadway – Why is that a problem? ∙ Dewatering – It’s just dirt in the water, right?
· Establish a rewards program for attendance at training sessions like: ∙ Golf balls ∙ Free lunch coupons from local establishments ∙ Coffee mugs or thermoses
· Regularly make known and post, opportunities for offsite training, classes, certifications, etc.

5.0 Environmental Commitment / 75
Track onsite workforce · Who is onsite and what are they working on? · Who has attended training sessions and who hasn’t?
∙ Preconstruction meetings ∙ Daily briefings ∙ Tailgate talks
· Who has reviewed and signed the SWPPP? Who hasn’t? · When is the next erosion and sediment control (ESC) inspection? · When is the ESC contractor doing maintenance?
Focus on observation. Use your eyes, ears, and nose to answer these questions:
· Is the site compliant? · Is what we’re doing working? · Is there room for improvement? How? · Do we need to do more, or do something different?
Build better communication · Project “kick-off” or pre-construction meetings · Morning “plan of attack” meetings · Weekly “tailgate talks” or five minute training sessions · Weekly, or monthly, project summary reports
“Am I doing everything I can and should be doing to follow the rules?”
Minnesota Field Guide for Winter Bridge Construction

6.0 Risks and Ramifications / 766.0 Risks and Ramifications / 76
6.0 Risks and Ramifications
Minnesota Field Guide for Winter Bridge Construction

6.0 Risks and Ramifications / 77
Minnesota Field Guide for Winter Bridge Construction
6.0 Risks and Ramifications
Maintaining a compliant site requires work. Sometimes, there is temptation to “look the other way” or be a little bit more relaxed in how Erosion and Sediment Control installation, inspection, and maintenance are performed. It may save a few dollars to skip having a second concrete washout, or save a little time to not bother with compacting the trench after silt fence installation, or put the erosion control blanket staples in a little bit further apart than is required. That type of thinking and behavior creates risk, and can cost much more money in the long run.
Penalties for noncompliance with permit requirements can range from the con-tract’s Erosion and Sediment Control noncompliance penalty to work shut-down (initiated by the project owner) to administrative orders, civil penalties, and even imprisonment (initiated by the permit authority). In a recent year, MPCA issued monetary enforcement actions totaling approximately $500,000. In 2014, the USEPA, in four cases alone, fined $6,250,000 and imprisoned three individuals for a total of 70 months.
Project owner initiated penalties:
· ESC noncompliance contractual penalty (typically $1,000 to $5,000)
· Suspension of work or Stop Work Order
·
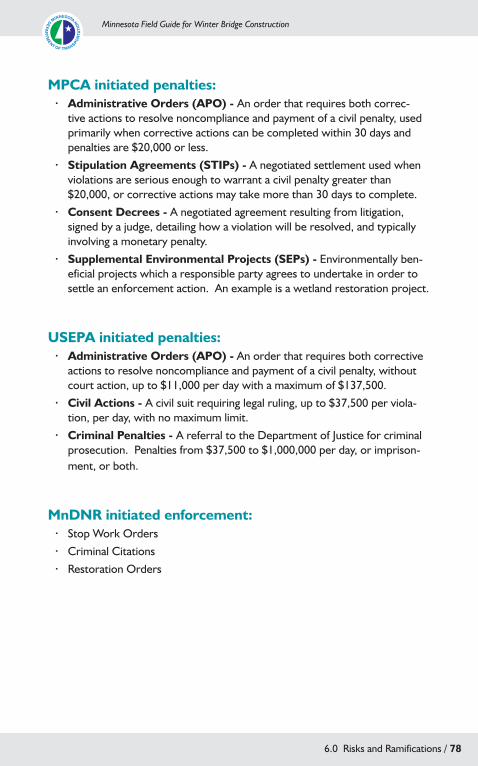
6.0 Risks and Ramifications / 78
MPCA initiated penalties: · Administrative Orders (APO) - An order that requires both correc-
tive actions to resolve noncompliance and payment of a civil penalty, used primarily when corrective actions can be completed within 30 days and penalties are $20,000 or less.
· Stipulation Agreements (STIPs) - A negotiated settlement used when violations are serious enough to warrant a civil penalty greater than $20,000, or corrective actions may take more than 30 days to complete.
· Consent Decrees - A negotiated agreement resulting from litigation, signed by a judge, detailing how a violation will be resolved, and typically involving a monetary penalty.
· Supplemental Environmental Projects (SEPs) - Environmentally ben-eficial projects which a responsible party agrees to undertake in order to settle an enforcement action. An example is a wetland restoration project.
USEPA initiated penalties: · Administrative Orders (APO) - An order that requires both corrective
actions to resolve noncompliance and payment of a civil penalty, without court action, up to $11,000 per day with a maximum of $137,500.
· Civil Actions - A civil suit requiring legal ruling, up to $37,500 per viola-tion, per day, with no maximum limit.
· Criminal Penalties - A referral to the Department of Justice for criminal prosecution. Penalties from $37,500 to $1,000,000 per day, or imprison-ment, or both.
MnDNR initiated enforcement: · Stop Work Orders · Criminal Citations · Restoration Orders
Minnesota Field Guide for Winter Bridge Construction

7.0 References and Resources / 797.0 References and Resources / 79
7.0 References and Resources
Minnesota Field Guide for Winter Bridge Construction

7.0 References and Resources / 80
Minnesota Field Guide for Winter Bridge Construction
7.0 References and Resources
Training
University of Minnesota Stormwater Trainingwww.erosion.umn.edu
Certified Professional in Erosion and Sediment Controlhttp://www.envirocert.org
Certified Inspector of Sediment and Erosion Controlhttp://www.cisecinc.org/
Permits
Minnesota Pollution Control Agency - NPDES Construction General Permithttp://www.pca.state.mn.us/water/stormwater/stormwater-c.html
Minnesota Department of Natural Resources - Public Waters Work Permithttp://www.dnr.state.mn.us/waters/watermgmt_section/pwpermits/require-ments.html
Minnesota Department of Natural Resources - Water Appropriations Permithttp://www.dnr.state.mn.us/waters/watermgmt_section/appropriations/permits.html
Agencies
Minnesota Pollution Control Agency – Stormwater Programhttp://www.pca.state.mn.us/index.php/water/water-types-and-programs/stormwater/index.html
Minnesota Department of Transportationhttp://www.dot.state.mn.us/
Minnesota Department of Natural Resourceshttp://www.dnr.state.mn.us/rlp/index.html
7.0 References and Resources / 81
Minnesota Association of Watershed Districtshttp://www.mnwatershed.org
United States Fish & Wildlife Servicehttp://www.fws.gov/midwest/
United States Army Corps of Engineershttp://www.mvp.usace.army.mil
Resources
Minnesota Stormwater Manualhttp://stormwater.pca.state.mn.us/index.php/Main_Page
Developing a SWPPPhttp://www.pca.state.mn.us/index.php/view-document.html?gid=7423
Minnesota Department of Transportation – Erosion Control Handbookhttp://www.dot.state.mn.us/environment/erosion/pdf/2006mndotecfieldhandbook.pdf
Minnesota Department of Transportation – Standard Specificationshttp://www.dot.state.mn.us/pre-letting/spec/2014/2014-Std-Spec-for-Con-struction.pdf
Minnesota Department of Natural Resources – Invasive Specieshttp://www.dnr.state.mn.us/invasives/aquatic/index.html
Minnesota Department of Natural Resources – Best Practices for Meeting DNR General Public Waters Work Permit GP2004-0001http://www.dnr.state.mn.us/waters/watermgmt_section/pwpermits/gp_2004_0001_manual.html
Minnesota Field Guide for Winter Bridge Construction