Embed Size (px)
Citation preview

Provided By
http://www.MyBinding.com http://www.MyBindingBlog.com
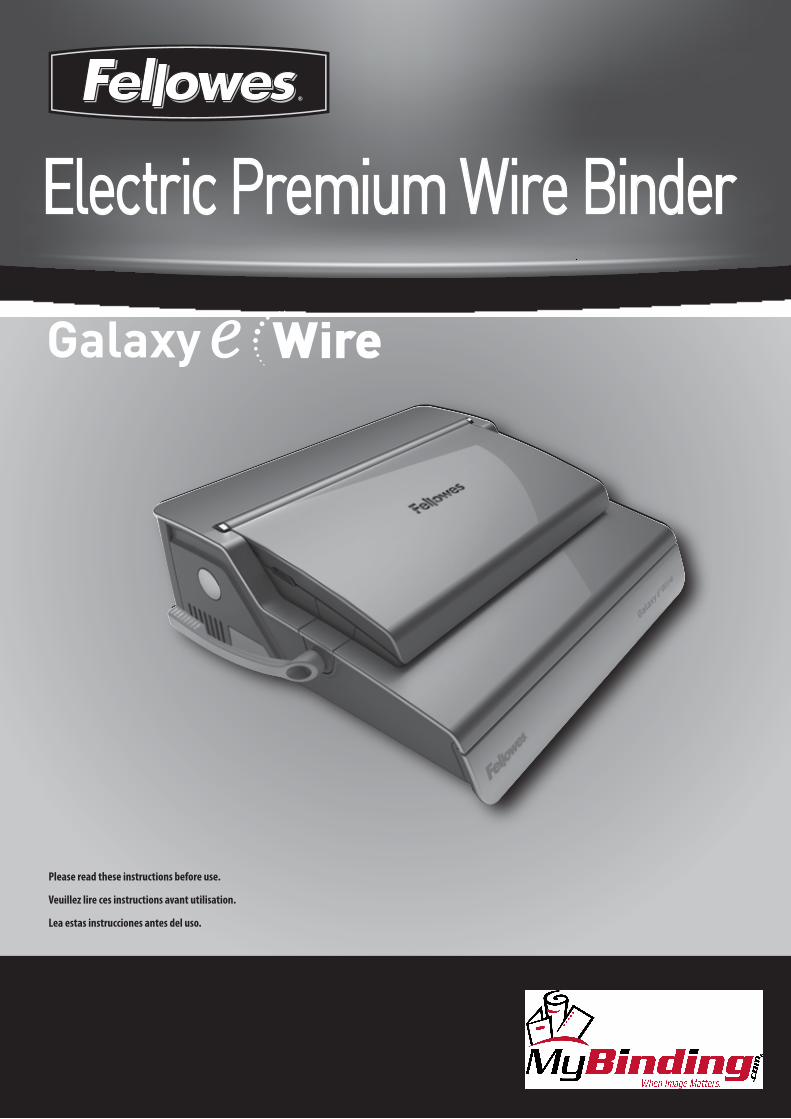
Fellowes Galaxy E Wire Binder
Instruction Manual
fellowes.com
Electric Premium Wire Binder
Please read these instructions before use.
Veuillez lire ces instructions avant utilisation.
Lea estas instrucciones antes del uso.

l Wir
CAPABILITIES
IMPORTANT SAFETY INSTRUCTIONS — Read Before Using!
When punching;
- always ensure the machine is on a stable surface
- test punch scrap sheets and set the machine before punching final documents
- remove staples and other metal articles prior to punching
- never exceed the machines quoted performance
When binding;
Keep the machine away from heat and water sources.
Never attempt to open or otherwise repair the machine.
Plug the machine into an easily accessible socket.
Note - this machine features a thermal cut-out device which activates when the machine is overheated during use. It will automatically reset when the machine is safe to operate.
2
Punching Capacity
Paper sheets 70-80g / 20lb 20 sheet
Transparent Covers100-200 micron / 4-8 mil 3 sheet
200+ micron / 8+ mil 2 sheet
Other Standard Covers
160-270g / 40-60lb 3 sheet
270+g / 60+ lb 2 sheet
Binding Capacity
Max wire comb size 14mm / 9/16”
Max document (80g / 20lb) c. 130 sheet
Technical DataPaper dimensions A4, A5Punching slots 34Fixed 2.5mmSlot pitch 3:1”Adjustable edge guide yes- rotaryWaste tray capacity c. 3000 sheets Voltage 220-240V 50/60 HzMotor wattage 160W 1.0ADuty cycle 30 mins on / 30 mins off Net weight 14 kg / 31 lbDimensions (LxDxH) 20.9” x 17.7” x 6.5” / 530 x 450 x 165mm
Please read before use. Please keep for future reference.
ENGLISH
Wire comb storage and document measure
Document support (lid)
Adjustable edge guide
Document measure and storage tray
Waste tray (dual access)
Wire closing lever
Paper entry
Wheel to adjust edge guide
Dual waste tray
Carry handle
Power on neon
Overload neon
Punch button
Need Help?
Customer Service….www.fellowes.com
Let our experts help you with a solution.
Always call Fellowes before contacting
your place of purchase.
When binding;
- take care, potential pinch point
Wire closing jaws
Selectable lock control

mm inch number of sheets
6mm 1/4” 2-35
8mm 5/16” 36-50
10mm 3/8” 51-61
11mm 7/16” 61-80
12mm 1/2” 81-100
14mm 9/16” 100-130
WIRE COMB DIAMETER & DOCUMENT SIZES
3
Need Help? Customer Service…. www.fellowes.comLet our experts help you with a solution. Always call Fellowes before contacting your place of purchase.
SET UP
1. Ensure the machine is on a stable surface.
1
2. Check waste tray is empty and cor-rectly fitted. The tray can be accessed from the left and right sides. The tray has a ‘burst feature’ that operates when the chip tray is ‘over-full’.
2
3. The machine is supplied with loose power leads. Select the correct lead for appropriate power supply.
3
4. Plug the lead into grounded socket outlet.
4
5. Switch the machine on (located at the rear of the machine).
5
6. Ensure the wire closing lever is pushed backwards.
Wire
6
7. Lift the lid. Check the green power neon is on.
7

ENGLISH
4
Galaxy includes two methods of wire comb closure, for all sizes of wire comb diameters between 6 and 14mm.
1– Visual scale. – ideal for binding single documents.The moving closing jaw includes an easy to read scale
6mm 1/4”8mm 5/16”10mm 3/8”
12mm 1/2”14mm 9/16”
2– Selectable lock control. – ideal for multiple documents of the same sizes.Set the red STOP bar to the preferred position. Turn the control wheel towards MAX or MIN positions as required. The red stop bar moves up and down within the central window.
BEFORE YOU BIND
4
2. Hang the selected wire comb onto wire comb support.
3. Test punch scrap sheets to check edge guide setting.
32
4. Punch sheets in small batches that do not overload the machine or user.
1. Select the correct wire comb diameter using the storage tray guide.
1
STEPS TO BIND – SINGLE DOCUMENT
3. Lift the wire comb upwards off the hooks. Carefully place into the open wire closing jaws. Ensure the wire comb is open and touching the bottom of the mechanism.
3
1. Starting with the rear cover. Load punched sheets directly onto the hanging open wire comb.
2. Punch and hang the front cover. Punch and hang the remaining sheets.
21
4. Lift the wire closing lever forwards. The closing scale guide is on the moving jaw. Close the jaws until the wire gauge shows the size of wire being closed.
4
6mm 1/4”
Max
niMxaM
14mm 9/16”STOP
Min
Max 20 (80gsm)

5
STEPS TO BIND – MULTIPLE DOCUMENTS
1. Test close selected wire comb. Set closure lock as required. Check wire seam closure is complete.
1
4. Lift the wire comb upwards off the hooks. Carefully place into the open wire closing jaws. Ensure the wire comb is open and touching the bottom of the mechanism.
2. Starting with the rear cover. Load punched sheets directly onto the hanging open wire comb.
3. Punch and hang the front cover. Punch and hang the remaining sheets.
FINISHING THE BINDING
1. Check the closed seam. If the seam is not closed correctly, the document can be placed into the jaws and closed again.
2. To hide the seam, turn the rear cover backwards. The front cover is now visible. The seam is hidden inside the document.
1 2
3. Check wire seam closure is complete. Loose binding allows sheet loss. Good closure retains all sheets.
3
5. Lift the wire closing lever. The jaws will close at the pre-selected stop position.
432
5

7
CORRECTING A BOUND DOCUMENT
REMOVAL OF WASTE CLIPPINGS
WORLDWIDE WARRANTYFellowes warrants all parts of the binder to be free of defects in material and workmanship for 2 years from the date of purchase by the original consumer. If any part is found to be defective during warranty period, your sale and exclusive remedy will be repair or replacement, at Fellowes’ option and expense, of the defective part. This warranty does not apply in cases of abuse, mishandling or unauthorised repair. Any implied warranty, including that of merchantability or fitness for particular purpose, is hereby limited in duration to the appropriate
warranty period set forth above. In no event shall Fellowes be liable for any consequential damages attributable to this product. This warranty gives you specific legal rights. You may have other legal rights that vary from this warranty. The duration, terms and conditions of this warranty are valid worldwide, except where different limitations, restrictions or conditions may be required by local law. For more details or to obtain services under this warranty, please contact Fellowes or your dealer.
TROUBLESHOOTING
Problem
No Green power neon
Red standby neon
Cannot close wire comb tightly enough
Damaged hole edges
Waste tray leaks
Punched holes are not central
Machine will not punch
Punch holes are not parallel to edge
Partial hole edges
Sheets fall out of document
Cause
Machine is not switched on
Machine has overloaded when punching
Closing jaws set at too large a diameter
Possibly overloading the machine
Waste tray is not correctly inserted or ‘burst feature’ has activated
Edge guide not set
Blockage
Debris is stuck below dies
Sheets not correctly aligned to punch pattern
Wire comb is not closed enough
Solution
Switch on machine at rear next to plug inlet
Press the punch button. The machine will withdraw the punches and re-set itself. Continue this process until the punch cycle is complete
Revise closure lock setting to suit smaller diameter as required
Punch plastic covers with paper sheets. Reduce number of sheets being punched
Check waste tray is empty and ‘burst feature’ is closed
Adjust edge guide until hole pattern is correct
Check waste tray is empty. Check for blockage to paper entry
Take stiff cardboard and slide into the paper entry. Move the cardboard sideways to release any stray clippings into the waste tray
Adjust edge guide and test punch scrap sheets until correct
Check closure of wire comb. Place into closing mechanism and improve binding closure. Revise closure lock setting to suit smaller diameter as required
Wire binding is a secure binding system. Additional sheets cannot be added unless the document is disassembled and then re-bound.
The waste tray is located under the machine and is accessed from each side. For best results empty the tray regularly. The tray should be emptied after every 50 operations to ensure no blockages occur.
STORAGE
Lower the lid. The Galaxy wire binder is designed to be stored horizontally on the desk.

1789 Norwood Avenue, Itasca, Illinois 60143-1095 • USA • 630-893-1600
us ral a Ca d u sc and ra c apa ska n e gd me ux C na p a a r a S ng r n e S a e
Useful Phone Numbers
2008 Fellowes, Inc. Part No. 403315
Help Line
Australia + 1-800-33-11-77
Canada + 1-800-665-4339
Europe 00-800-1810-1810
México + 1-800-234-1185
United States + 1-800-955-0959
Fellowes
Australia + 61-3-8336-9700
Benelux + 31-(0)-76-523-2090
Canada + 1-905-475-6320
Deutschland + 49-(0)-5131-49770
España + 34-91-748-05-01
France + 33-(0)-1-30-06-86-80
Italia + 39-071-730041
Japan + 81-(0)-3-5496-2401
Korea + 82-2-3462-2884
Malaysia + 60-(0)-35122-1231
Polska + 48-(0)-22-771-47-40
Singapore + 65-6221-3811
United Kingdom + 44-(0)-1302-836836
United States + 1-630-893-1600