Embed Size (px)
Citation preview
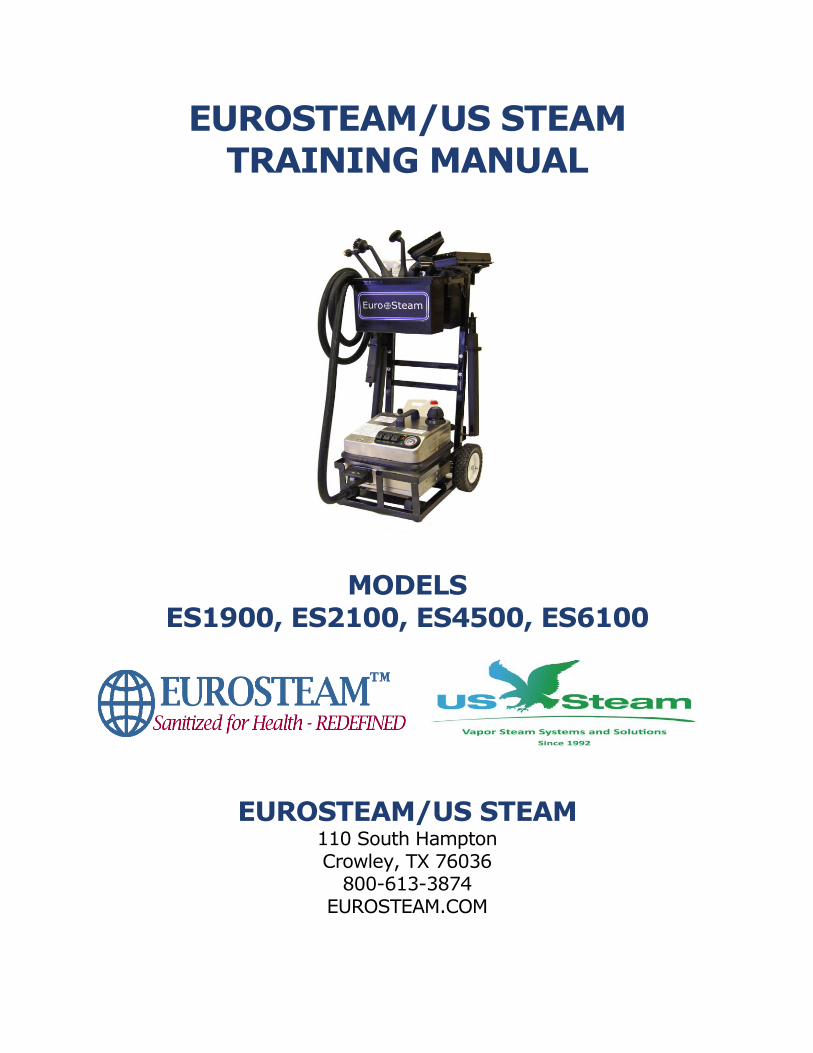
EUROSTEAM/US STEAM TRAINING MANUAL
MODELS
ES1900, ES2100, ES4500, ES6100
EUROSTEAM/US STEAM
110 South Hampton Crowley, TX 76036
800-613-3874 EUROSTEAM.COM

EUROSTEAM/US STEAM SANITIZED FOR HEALTH - REDEFINED
EUROSTEAM TRAINING MANUAL Page 2 of 20
PRECAUTIONS KEEP THESE INSTRUCTIONS Read these instructions carefully before using the appliance and make sure that anyone using the machine is familiar with these instructions and warnings. KEEP FOR YOUR RECORDS. THIS MANUAL MUST BE RETAINED FOR FUTURE REFERENCE. PLEASE READ, UNDERSTAND AND FOLLOW THE INSTRUCTIONS AND WARNINGS CONTAINED IN THIS MANUAL BEFORE USING THIS VAPOR STEAM CLEANER.
DO NOT USE THE STEAM FUNCTION ON DRAYLON, VELVET, LEATHER OR OTHER SENSITIVE FABRICS. In order to reduce the risk of fire, electric shock, personal injury or damage to property, follow these instructions carefully. When using electrical appliances, basic safety precautions should be followed, including the following:
NOTICES
1. Read all instructions before using this steam cleaner. Save these instructions for future reference.
2. View instructional video before operating this steam cleaner.
3. Use of any replacement parts other than authorized Eurosteam parts voids all warranties and can cause bodily injury to the operator and damage equipment. Service performed by anyone other than factory authorized personnel will void warranty.
WARNINGS
1. DO NOT leave the steam cleaner unattended while plugged in. Turn off all controls and unplug the electrical cord when not in use, when moving to another location and before servicing.
2. DO NOT use with a damaged cord or plug. If the steam cleaner is not working as it should, has been dropped, damaged, left outdoors or dropped into water, call for service before using.
3. NEVER attempt to disassemble this product in a way not instructed in this manual.
4. DO NOT handle the plug with wet hands.
5. DO NOT allow this steam cleaner to be used as a toy. DO NOT use near children.
4. DO NOT pull or carry by cord. Keep cord away from heated surfaces.
5. DO NOT use extension cords greater than 25 ft. or cords or outlets with inadequate current carrying capacity (12 - gauge capacity, and must have ground wire capabilities).
6. DO NOT add anything other than clean, drinkable water to the boiler tank (see Water Conditioning Section on p.5 of the Manual).
7. DO NOT add water to boiler while boiler is hot.
8. NEVER unscrew the safety cap while boiler tank is under pressure
9. (See Refill Section on Page 3 of this manual).
10. Keep body away from nozzle or brush steam. Steam can cause burns.
11. ALWAYS set safety switch on hose handle to the forward or locked position when not in use. Not setting safety switch to locked position could result in an injury.
12. ALWAYS test a small area before cleaning a large area on any type of surface to make sure no damage will occur.
13. DO NOT expose machine to freezing temperatures while not in use.
14. DO NOT store gasoline or other flammable vapors and liquids in the vicinity of this or any other appliance.
ELECTRICAL CONNECTIONS The steam cleaner uses 110 Volts and will pull 12.9 Amps when starting. It should be the only appliance plugged into an outlet.
1. Any alteration of electrical cord supply on this steam cleaner will void all warranties.
2. Once electrical hook-up meets requirements, make sure all switches on front of unit are in the off position before plugging unit into electrical outlet.
3. For circuit breaker protection, if possible plug the unit into an outlet isolated from other equipment, or turn the other equipment off while using the steam cleaner — the combined electrical amperage of other equipment and the steam cleaner together may cause a circuit breaker to trip.
4. Always press Switch #1 ( ) to OFF before you unplug the unit.

EUROSTEAM SANITIZED FOR HEALTH - REDEFINED
EUROSTEAM TRAINING MANUAL Page 3 of 20
EUROSTEAM/US STEAM TRAINING MANUAL TABLE OF CONTENTS CONTENT PAGE SECTION I: UNIT INFORMATION….. ………………………………………….……. 4 TOOL USE GUIDE …………………………………………………………………….. 6 SECTION II: APPLICATION TIPS & PRECAUTIONS ……………………………... 9 SECTION III: THE ES4500 OPERATION & MAINTENANCE ……………….…… 13 ES2100 OPERATION…………………………………………………………………. 15 ES1900 OPERATION…………………………………………………………………. 16 ES6100 OPERATION…………………………………………………………………. 17 ES1900, ES2100, ES6100 MAINTENANCE ………………………………………. 18 WARRANTY INFORMATION………………………………………………………… 19
EUROSTEAM/US STEAM SANITIZED FOR HEALTH - REDEFINED
EUROSTEAM TRAINING MANUAL Page 4 of 20
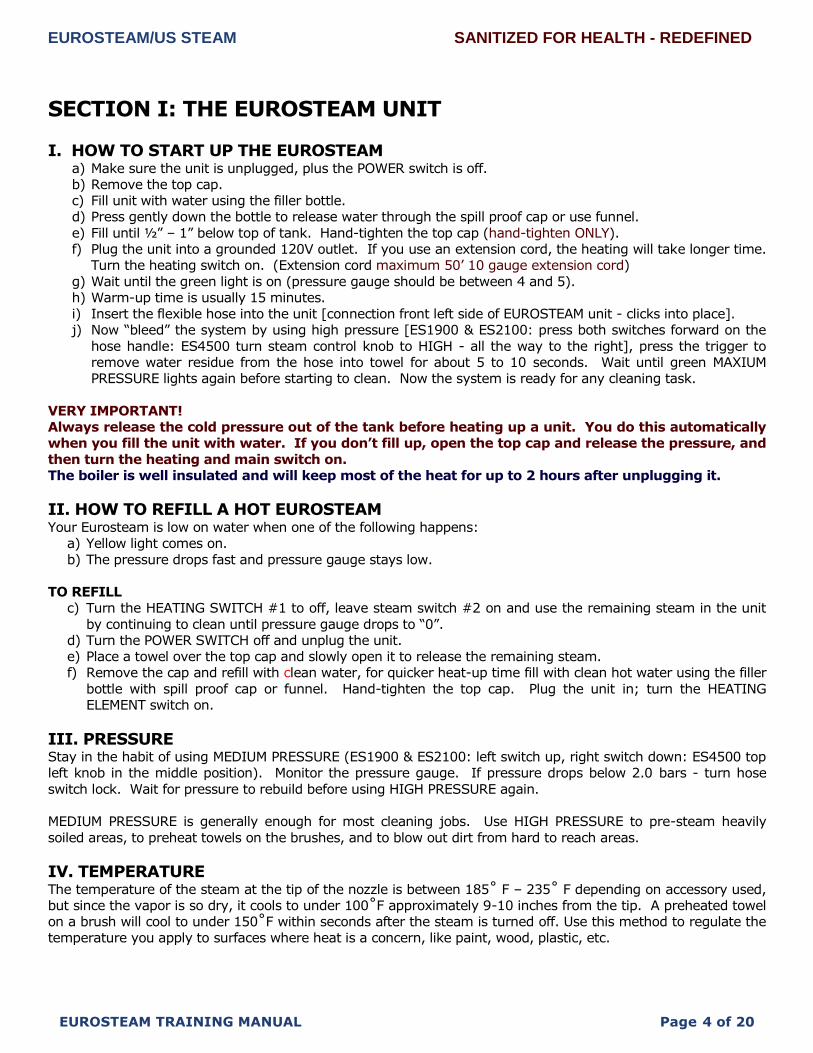
SECTION I: THE EUROSTEAM UNIT I. HOW TO START UP THE EUROSTEAM
a) Make sure the unit is unplugged, plus the POWER switch is off.
b) Remove the top cap.
c) Fill unit with water using the filler bottle.
d) Press gently down the bottle to release water through the spill proof cap or use funnel.
e) Fill until ½‖ – 1‖ below top of tank. Hand-tighten the top cap (hand-tighten ONLY).
f) Plug the unit into a grounded 120V outlet. If you use an extension cord, the heating will take longer time.
Turn the heating switch on. (Extension cord maximum 50’ 10 gauge extension cord)
g) Wait until the green light is on (pressure gauge should be between 4 and 5).
h) Warm-up time is usually 15 minutes.
i) Insert the flexible hose into the unit [connection front left side of EUROSTEAM unit - clicks into place].
j) Now ―bleed‖ the system by using high pressure [ES1900 & ES2100: press both switches forward on the
hose handle: ES4500 turn steam control knob to HIGH - all the way to the right], press the trigger to
remove water residue from the hose into towel for about 5 to 10 seconds. Wait until green MAXIUM
PRESSURE lights again before starting to clean. Now the system is ready for any cleaning task.
VERY IMPORTANT!
Always release the cold pressure out of the tank before heating up a unit. You do this automatically
when you fill the unit with water. If you don’t fill up, open the top cap and release the pressure, and
then turn the heating and main switch on.
The boiler is well insulated and will keep most of the heat for up to 2 hours after unplugging it.
II. HOW TO REFILL A HOT EUROSTEAM Your Eurosteam is low on water when one of the following happens:
a) Yellow light comes on.
b) The pressure drops fast and pressure gauge stays low.
TO REFILL
c) Turn the HEATING SWITCH #1 to off, leave steam switch #2 on and use the remaining steam in the unit
by continuing to clean until pressure gauge drops to ―0‖.
d) Turn the POWER SWITCH off and unplug the unit.
e) Place a towel over the top cap and slowly open it to release the remaining steam.
f) Remove the cap and refill with clean water, for quicker heat-up time fill with clean hot water using the filler
bottle with spill proof cap or funnel. Hand-tighten the top cap. Plug the unit in; turn the HEATING
ELEMENT switch on.
III. PRESSURE Stay in the habit of using MEDIUM PRESSURE (ES1900 & ES2100: left switch up, right switch down: ES4500 top
left knob in the middle position). Monitor the pressure gauge. If pressure drops below 2.0 bars - turn hose
switch lock. Wait for pressure to rebuild before using HIGH PRESSURE again.
MEDIUM PRESSURE is generally enough for most cleaning jobs. Use HIGH PRESSURE to pre-steam heavily
soiled areas, to preheat towels on the brushes, and to blow out dirt from hard to reach areas.
IV. TEMPERATURE The temperature of the steam at the tip of the nozzle is between 185˚ F – 235˚ F depending on accessory used,
but since the vapor is so dry, it cools to under 100˚F approximately 9-10 inches from the tip. A preheated towel
on a brush will cool to under 150˚F within seconds after the steam is turned off. Use this method to regulate the
temperature you apply to surfaces where heat is a concern, like paint, wood, plastic, etc.

EUROSTEAM SANITIZED FOR HEALTH - REDEFINED
EUROSTEAM TRAINING MANUAL Page 5 of 20
V. WORK TECHNIQUES Work from the top down on any project so dirt will not fall on cleaned surfaces. Start with cleaning corners and
other tight areas first with the nozzle and small brushes, working your way up to larger surfaces and brushes.
PRE-STEAM
Get in a habit of pre-steaming a surface if it is heavily soiled. At a 5‖ distance, shoot steam on surface from
all directions for 10 seconds on HIGH PRESSURE. Depending on the size of surface, use nozzle, triangle or
rectangular brush.
SPEED
Let the heat do the work for you! Do not move too quickly, unless surface is sensitive to heat like wood,
paint, wall paper, color, fabric and plastic.
WIPE
Remember to always wipe the area you just cleaned. All surfaces have pores, even glass. The EUROSTEAM
works by the hot steam opening and cleaning deep into the pores. Wipe off dirt immediately before the
surface cools down. Once surface reaches the right temperature soil is released, moisture from the
steam surrounds soil, and at this point the terry towel is your vacuum wipe surface with towel.
OTHER EQUIPMENT
Vacuum: Vacuum floors and other surfaces before steam cleaning.
VI. CHEMICALS
VERY IMPORTANT – NEVER ADD CHEMICALS INTO THE BOILER TANK! It will void the warranty and
could result in malfunction or damage to the system.
NOTE: THE ES4500 has a tank in the back of the unit for EUROSTEAM approved chemicals. Go to
Eurosteam.com for an up-to-date of approved chemicals. At the printing of this document, the
approved chemical additives are:
• SaniShield Anti-Microbial Coating • Goldshield Anti-Microbial Coating • Vapormate
For most of the jobs, you do not need to use chemicals together with the EUROSTEAM system. When you do
use chemicals - avoid harsh, toxic chemicals. We recommend using Eurosteam Vapormate, see Appendix A -
Vapormate Data sheet.
VII. NATURAL CHEMICAL SUBSTITUTES Use Natural Chemical Substitutes to pre-treat surfaces prior to the steam application.
NEVER ADD CHEMICALS INTO THE BOILER TANK! BLEACH Lemon juice is a good bleach, plus it softens hard water deposits and leaves a pleasant smell. Especially effective in bathroom and kitchen areas.
AMMONIA Use a solution of vinegar, salt and water - or use baking soda and water.
GLASS CLEANER
Use white vinegar.
OVEN CLEANER
Scrub with a paste of baking soda, salt and water.
GROUT CLEANER Scrub with a paste of baking soda, salt and water
RUST REMOVER
A paste of lemon juice mixed with salt is a good rust remover.
METAL POLISH Stainless Steel: Use baking soda or plain carbonated water. Copper: Soak in vinegar and salt solution Silver: Soak in 1 quart of warm water containing 1 tsp baking soda, 1tsp salt and a piece of aluminum foil.

EUROSTEAM/US STEAM SANITIZED FOR HEALTH - REDEFINED
EUROSTEAM TRAINING MANUAL Page 6 of 20
TOOL USE GUIDE
TOOL APPLICATIONS
1 HOLE NOZZLE
Use with Medium or High pressure where focused cleaning is needed. Tile grout, refrigerator, dishwasher, toilet bowls, corners, and crevices. Spray area with Vapormate use on Medium or High heat.
1 Hole Nozzle is also used with 1 inch brushes see 1 inch nylon and brass brushes.
1 INCH NYLON BRUSH Attach the 1 hole nozzle to the hose handle and then the brush to the nozzle. Stovetops, refrigerator door moldings, hard to reach corners, toilet bowls, base of toilets, shower crevices and grout, animal and birdcages: Use Vapormate on surface as you clean. Using med/high steam move across surface to be cleaned making sure to cover all areas. Let the heat do the work for you, once the surface reaches the correct temperature dirt will release and be surrounded by the moisture of the steam. Wipe with towel as you clean. GROUT: To clean floor grout attach 2 extensions to hose, attach single hole nozzle with one inch brush to last extension. Start in one corner cleaning a 3 FT to 4 FT square at a time. Spray grout with Vapormate, set steam on Medium to High. Set brush on grout line turn brush at angle as if to blow dirt on tile and push away from you. When pulling back to you turn at opposite angle, 2 times up and 2 times back should clean grout. (excessively dirty grout make take longer to clean)
1 INCH BRASS BRUSH Oven interiors, BBQ grills and other non-scratch surfaces: Use with 1 hole nozzle. Use Vapormate on surface as you clean. Using med/high steam move across surface to be cleaned making sure to cover all areas. Let the heat do the work for you, once the surface reaches the correct temperature dirt will release and be surrounded by the moisture of the steam. Wipe with towel as you clean.
3 HOLE NOZZLE
Use with small triangle brush or 3 inch round brush when multi-directional cleaning action is needed.
3 INCH ROUND BRUSH: Attach the 3 hole nozzle to the hose handle and then the brush to the nozzle. Set the steam dial to medium or high pressure. Stovetops, kitchen countertops, kitchen or bathroom sinks, dishwasher interior, refrigerators, fiberglass or porcelain bathtubs, and glass shower doors: Use Vapormate on surface as you clean. Using med/high steam move across surface to be cleaned making sure to cover all areas. Let the heat do the work for you, once the surface reaches the correct temperature dirt will release and be surrounded by the moisture of the steam. Wipe with towel as you clean.

EUROSTEAM SANITIZED FOR HEALTH - REDEFINED
EUROSTEAM TRAINING MANUAL Page 7 of 20
TOOL APPLICATIONS
SMALL TRIANGULAR BRUSH: Use to get into corners. Attach the 3 hole nozzle to the hose handle and then the brush to the nozzle. Set the steam dial to medium pressure. Stovetops, kitchen countertops, kitchen or bathroom sinks, dishwasher interior, refrigerators, fiberglass or porcelain bathtubs, and glass shower doors: Use Vapormate on surface as you clean. Using med/high steam move across surface to be cleaned making sure to cover all areas. Let the heat do the work for you, once the surface reaches the correct temperature dirt will release and be surrounded by the moisture of the steam. Wipe with towel as you clean.
LARGE TRIANGULAR BRUSH: Use this brush for cleaning hard to reach corners of
floors, under baseboards or wall tiles, mattresses, bed rails, curtains, upholstery,
carpets, small windows, stainless steel, countertops, cabinets, kitchen/bathroom
walls, door fronts, and metal vertical blinds.
NOTE: USE WITH TOWEL ON LOW PRESSURE SETTING TO KILL DUST
MITES, BED BUGS AND SANITIZE MATTRESSES, AS WELL AS OTHER
UPHOLSTERY ITEMS
Use this brush without a clipped on towel for cleaning hard to reach corners of floors, under baseboards or wall tiles, then wipe immediately. Upholstery, carpets, small windows, porcelain bathtubs, refrigerator exterior, countertops, cabinets, walls kitchen or bath door fronts, and metal vertical blinds: Use with towel at low/medium pressure change towel as needed. Mattress Cleaning: Diaper a towel around brush using clips, before connecting to hose turn on steam and bleed hose. Attach large triangle move slow across mattress make sure get all corners and crevasse. Change towel often to keep moisture from soaking mattress. Upholstered items: Use same technique as mattress cleaning. High Heat Sanitizing: Diaper towel around attachment this creates highest amount of heat to sanitize countertops, walls, floor rugs, bathrooms.
Slide on to the bottom of the large rectangular brush to kill dust mites and mold spores in carpets.
EXTENSION WANDS: Use with any nozzle/brush combination to extend reach for
floors, walls and ceilings. Can use up to 3 wands at a time. Two wands come in the
standard package.
WINDOW SQUEEGEE: For windows and glass.
PLUMBERS TOOL: cleaning and sanitizing drains, pipes and sinks
NOTE: USE DANCO WATERPROOF GREASE [FAUCET REPAIR] to lubricate hose nozzle, wands and accessories.
CLEANING OF ACCESSORIES
There are a number of options to clean the accessories. Get in the habit of cleaning brushes BEFORE the dirt
dries on them.
• Use the single hole nozzle clean out brushes using high steam.
• All accessories can be cleaned in the dishwasher, except the flexible hose.

EUROSTEAM/US STEAM SANITIZED FOR HEALTH - REDEFINED
EUROSTEAM TRAINING MANUAL Page 8 of 20
SECTION II: APPLICATION TIPS & PRECAUTIONS IX. DISTILLED WATER We recommend using de-mineralized or distilled water. This eliminates the possibility of creating hard water
stains while you are cleaning and prevents excessive build-up of mineral deposits around the heating element in
the tank. If you use tap water, get into the habit of flushing the tank every second week. (See water
conditioning)
X. MAINTENANCE THE EXTERNAL STAINLESS STEEL CASING
After each use, it is recommended to wipe the EUROSTEAM external with a cleaning cloth and water to keep
it clean of dirt and chemicals. If buildups appear - use the single hole nozzle and a wipe cloth to remove the
dirt and grime. In the case of heavy staining due to caustic chemical usage - use a stainless steel polisher to
restore the finish.
THE BOILER TANK
RINSE THE MINERAL DEPOSITS FROM THE EUROSTEAM TANK AT LEAST ONCE A WEEK. A good way of
monitoring the mineral build up in the tank is by FLUSHING the system. If the water residue from the hose
is discolored on the towel or unit is heating up to slow.
Flush the tank:
• When unit is cold and unplugged, place it over a sink, open top cap, unscrew drain plug on bottom of
unit.
• Use tap water and rinse the tank until the water is clear.
• Replace drain plug hand tighten only.
XI. CIRCUIT BREAKER ALWAYS TURN THE HEATING SWITCH TO OFF BEFORE YOU UNPLUG IT!
If possible, plug the unit into an outlet isolated from other equipment, or turn the other equipment off while
using the EUROSTEAM — the combined effect of other equipment and the EUROSTEAM together may cause a
circuit breaker to trip.
SURFACE CLEANING KITCHEN
COUNTERTOPS
Method 1: Use 3-inch round with 3-hole nozzle in slow, back and forth movements to cover area being
cleaned. Wipe with clean cotton towel.
Method 2: Diaper large triangle brush, heat towel with high pressure 3 to 5 seconds. Turn pressure to low
and clean surface using back and forth movements.
OVEN
MAKE SURE SURFACE IS COOL TO THE TOUCH BEFORE CLEANING!
Begin by misting with EUROSTEAM VAPORMATE. Press stainless steel scrubbing pad onto 3-inch round brush
using medium pressure. Cover entire surface slowly.
NOTE: Always move slowly to allow heat to break away residue that has adhered to the surface being
cleaned. DO NOT SCRUB HEAVILY, AS THIS MAY DAMAGE ENAMEL.
DISHWASHER
Using single-hole nozzle, clean out corners and edges. For light scrubbing, add 1-inch round nylon brush.
For larger surfaces, use 3-inch round or 3-inch triangle with 3-hole nozzle, using back and forth movements
over area being cleaned. Wipe clean with cotton towel.
REFRIGERATOR/FREEZER (clean out all food and trays)

EUROSTEAM SANITIZED FOR HEALTH - REDEFINED
EUROSTEAM TRAINING MANUAL Page 9 of 20
Mist area with EUROSTEAM VAPORMATE Clean door molding with single-hole nozzle. Add 1-inch round
nylon for light scrubbing. Starting from top of refrigerator, use a 3-hole nozzle with 3-inch round or 3-inch
triangle. Clean all areas. Wipe cleaned area with cotton towel as you go.
BATHROOM FAUCET AND FIXTURES
Using the 1-hole nozzle, blow out around faucet and fixture detail areas. Add 1-inch nylon brush for light
scrubbing on chrome or brass fixtures, soap containers, etc.
BATHTUB, FIBERGLASS SHOWER AND BATHTUB INSERTS
Mist area with EUROSTEAM VAPORMATE Using the 1-hole nozzle, blow out detail areas. Add 1-inch nylon
brush for fixtures. Next, using a 3-hole nozzle with 3-inch round or 3-inch triangle brush, start from top with
a light scrubbing action. Wipe cleaned area with cotton towel as you go.
SILICONE SEALANT
Using a 1-hole nozzle, no closer than one-inch, use back and forth movement blowing out debris.
NOTE: DO NOT OVERHEAT SEALANT.
IF MOLD AND MILDEW DOES NOT COME OFF WHILE CLEANING, HEAT WILL KILL THE GROWTH.
GLASS SHOWER DOORS
Mist with EUROSTEAM VAPORMATE. Pre-heat glass with glass attachment, keeping attachment 2 to 3 inches
away. Using 3-inch round or 3-inch triangle brush, start from top of door using light scrubbing action. Wipe
cleaned areas as you go. Work quickly so as to keep heat to a minimum while cleaning.
TOILET
Mist with EUROSTEAM VAPORMATE. Using 3-inch round or 3-inch triangle brush, start from top using light
scrubbing action. Wipe cleaned area as you go.
NOTE: ALWAYS CLEAN 2-FOOT RADIUS OF FLOOR AROUND TOILET TO KILL BACTERIA.
FLOORS
WAXED FLOORS
Use large floor brush and incorporate the 2-inch round brush, if necessary, in corners and tight areas. Spray
EUROSTEAM VAPORMATE lightly on area to be cleaned. Clip a clean cotton towel over the large floor brush.
Apply medium steam and quickly adjust to low steam, cleaning a small area quickly as you go. This should
melt a top layer of wax holding the dirt in the pores of the floor. If the floor is greasy or very dirty, you may
need to repeat this procedure.
UNWAXED VINYL FLOORS
Apply EUROSTEAM VAPORMATE to area to be cleaned. Use the large floor brush with no towel on medium
steam. HINT: Place a rectangle scrubber pad inside the bristles of the large brush. This will agitate the dirt and
grime. Use a back and forth motion. Wipe cleaned area with a cotton towel as you go.
NOTE: DO NOT OVERHEAT ANY KIND OF VINYL, SINCE THIS COULD SOFTEN THE SURFACE AND AFFECT
THE TEXTURE. THIS ALSO APPLIES WHEN USING SMALL BRUSHES TO REMOVE TOUGH SPOTS.
WOOD PARQUET FLOORS
Use large brush with a cotton towel clipped over it and low steam. Move quickly to avoid heat or moisture
buildup in wood. If the floor is greasy or very dirty, spray towel with EUROSTEAM VAPORMATE.
MARBLE FLOORS
Use the same techniques as used for wood parquet floors, keeping heat and moisture off the surface as
much as possible.
NOTE: SOME MARBLE SURFACES CAN DISCOLOR - TEST A SMALL NON-CONSPICUOUS AREA FIRST

EUROSTEAM/US STEAM SANITIZED FOR HEALTH - REDEFINED
EUROSTEAM TRAINING MANUAL Page 10 of 20
CARPETS Always VACUUM carpet first! Always TEST an area for discoloring before cleaning! Some carpets are made with
vegetable dyes, which are not ―set‖ by heat — the color can bleed from heat and moisture.
Man made carpet fibers melt at temperatures 300˚ and above. The heat from the vapor system does not melt
the fibers, but it can change their shape at temperatures 185˚F-250˚F. Use method described in SECTION IV to
regulate the heat!
SPOT CARPET CLEANING
Use single-hole nozzle on high pressure. Blow the steam parallel to the carpet surface, working quickly in a
back and forth motion. Take a towel in your hand and blow the stain into the towel. If any residue remains,
gently wipe area with towel. Repeat until spot is gone.
Do not apply nozzle directly on to the spot — this keeps the heat from exceeding 180˚F- 185˚F, which can
chemically ―set‖ protein-based and food dye stains onto the fibers. Once a stain is set, it is hard to remove.
To remove a set stain treat it first – see below – and then follow up with the above procedure.
Lightly mist the stain with EUROSTEAM VAPORMATE, if not available we offer the following suggestions:
PROTEIN STAIN: Dab with towel dampened with a solution of 1 teaspoon white vinegar
and 1 quart cold water.
FOOD DYE STAIN: Wet stain with a solution of water and lemon juice or white vinegar.
WATER STAIN: First wet the stain with carbonated water, then use triangular brush with 1 towel on
step 1 and wipe.
REOCCURRING STAIN: If a stain comes up again and again, it has a ―reservoir‖ under the padding.
Before removing the stain you have to dry it out first. Press a drying agent such as talcum powder, a
mixture of cornstarch and cornmeal, or clean unscented, uncolored cat litter into the fibers — do not rub.
Let sit for 20 minutes, and then vacuum it out.
SURFACE STAIN: If the stain is only on the surface of the carpet, it can be removed by shooting the
steam against the spot from the side, 1‖-2‖ above surface. Hold a towel on the other side to catch the
residue. This prevents driving the particles deeper into the fibers.
GUM: Same technique as SURFACE STAIN, except use paper towel instead of cotton towel. If the gum
melts too much, let it cool off before trying again.
INDUSTRIAL APPLICATIONS
MAINTENANCE: Use rectangular brush, 2 inches above carpet, and pre-steam on high pressure a 6x6
foot area. The steam causes the dirt and soil particles to loosen their grip on the carpet fibers and opens
up the fibers. Then use the rectangular brush with 2 towels on medium pressure and go over pre-
steamed area with same movements as when you vacuum. Change towels when dirty. Repeat these
steps if necessary. Move on to next area.
DEEP CLEANING: Pre-steam the whole carpet and vacuum again. Follow same steps as maintenance
cleaning. If needed, pre-spray carpet with EUROSTEAM VAPORMATE.
STAIN RESISTANT
THE HEAT FROM THE STEAM CAN REMOVE THE CHEMICALS THAT MAKE THE CARPET STAIN RESISTANT AT
TEMPERATURES BETWEEN 150˚ - 200˚. IF THE CARPET IS HEAVILY SOILED, THE STAIN RESISTANCE IS
ALREADY GONE AND THE CARPET SHOULD BE RE-TREATED AFTER IT IS CLEANED.
Use same technique as Industrial Type carpet, but do not stay on one spot too long.
NON-COLORFAST
Use nozzle 2‖ – 4‖ above carpet on high pressure and shoot steam from the side with quick side-to-side
movements, lengthwise and crosswise. Hold a towel to the side to catch all dirt particles as they blow out of
the carpet. Do not get closer than 2‖ with the nozzle. Fluff up the fibers evenly with a dry towel.
DELICATE CARPETS (Not Recommended for Silk)

EUROSTEAM SANITIZED FOR HEALTH - REDEFINED
EUROSTEAM TRAINING MANUAL Page 11 of 20
Use large rectangular brush with diapered towel. Preheat towels and wipe with no steam. Wait a few
minutes. To dry, use the triangle brush with 1 towel, without steam, and wipe with vertical and diagonal
strokes.
WALLS & CEILINGS NEVER USE BRUSHES WITHOUT A TOWEL ON PAINTED SURFACES!
ALWAYS USE 2 TOWELS ON THE RECTANGULAR BRUSHES!
WALLPAPER
WASHABLE: Use rectangular or triangle brush with one towel. Preheat towels and wipe with no steam or
low pressure. Use smooth, rapid strokes. For spot cleaning, use nozzle on high pressure, 5‖ off surface to
pre-steam spot, wipe immediately with towel.
DEEP CLEANING: If surface is heavily soiled, pre-steam surface or spray the towel with biodegradable soap.
Follow up with a clean towel to remove soap residue. If wallpaper is textured, pre-steam 2‖ off surface.
Wipe with towel. Do not stay on one spot too long.
NON-WASHABLE: Use triangle brush with 1 towel. Preheat towel and wipe with no steam. Move quickly
with smooth strokes. Do not stay on one spot too long.
PAINTED WALLS AND CEILINGS
CAUTION – THE HEAT MAY REMOVE SOME PAINT IF IT IS THIN
OIL PAINT: Use large or triangle brush with 1 towel on low to medium pressure and wipe. Do not stay on
one spot too long. Use extension tubes to reach ceilings.
LATEX PAINT: Use large or triangle brush with 1 towel. Preheat towel and wipe with no steam. Do not
apply pressure. Move quickly with smooth strokes. Or use nozzle on high pressure, 5‖ off surface to pre-
steam spot. Do not get surface too wet. Wipe gently with towel.
TRACKS, MOLDINGS TRACKS: Use 1-hole nozzle with detail brush on medium pressure. Wipe cleansed area immediately with
towel.
MOLDINGS: Use 1‖ nozzle on medium to high pressure. Hold the nozzle in one hand and a towel in the
other hand. Move the nozzle and towel at the same time in one direction, blowing the dirt into the towel.
Hold the nozzle parallel to surface. Move quickly. Wipe with dry towel.
WINDOWS AND WINDOW FRAMES CAUTION!
ALWAYS PREHEAT GLASS WITH THE SQUEEGEE 2-3 INCHES FROM SURFACE BEFORE CLEANING!
DO NOT CLEAN GLASS WHEN TEMPERATURES ARE BELOW FREEZING POINT!
NEVER CLEAN A GLASS THAT HAS A CRACK!
GLASS
MAINTENANCE: Use window squeegee on low to medium pressure and go over window. Turn off steam,
re-squeegee window and wipe excess water from the glass surface
DEEP CLEANING: Use small triangle on low to medium pressure. Then use squeegee or a clean, dry cotton
towel to dry window.
WINDOW FRAME
PAINTED WOOD: Use 1 hole nozzle with detail brush [depending on application - 1‖ round, 3‖ round or 3‖
triangle] on medium pressure. Place 1 towel around the brush and wipe frame.
PLASTICS: Use 1‖ nozzle on medium to high pressure. Hold the nozzle in one hand and a towel in the other
hand. Move the nozzle and towel at the same time in one direction, blowing the dirt into the towel. Hold the
nozzle parallel to surface. Move quickly. Wipe with dry towel.

EUROSTEAM/US STEAM SANITIZED FOR HEALTH - REDEFINED
EUROSTEAM TRAINING MANUAL Page 12 of 20
ALUMINUM: Use brass brush directly on the surface to remove dirt and to polish.
Wipe with towel.
BLINDS
CAUTION!
NOT RECOMMENDED FOR CLOTH BLINDS - DO NOT USE EXCESSIVE HEAT ON VINYL BLINDS!
SLATS
DUSTING: Open blinds and use 1-hole nozzle on medium to high pressure to blow dust onto a wipe cloth or
on the window and wipe clean.
DEEP CLEANING: Close blinds with top of slats facing you. Use triangle brush with one towel on low or
medium pressure. Wipe side-to-side from the top down. To reach the whole slat spread the slats with the
other hand while wiping. Close the blinds from the opposite direction and clean from the bottom up. Keep
changing towels until clean. If needed, pre-spray the blinds with EUROSTEAM VAPORMATE.
STRINGS: Pull the blind all the way up. Wipe the string with a towel wet with EUROSTEAM VAPORMATE.
Pull the string slowly through a detail brush on medium pressure.
DRAPES NOTE: VACUUM DRAPES FIRST!
SHEER, ONE-PLY FABRIC
Use triangle brush with one towel, on low or medium pressure, on one side of the pleat AND use the large
rectangular brush with one towel on the other side, to hold curtain steady. Move both brushes at the same
time from top to bottom at medium speed. The steam will go through the fabric and remove dirt from both
sides simultaneously.
INSULATED, MULTIPLE-LAYERED FABRIC
Same technique as SHEER 9.1, but do not move too slow since the insulation is generally heat sensitive. Go
over surface twice.
FURNITURE
UPHOLSTERY
NOTE: ALWAYS CHECK AREA FOR SCOTCH GUARDING.
Using large triangle brush with diapered towel, heat towel on high 3 to 5 seconds. Clean furniture on low
pressure using back and forth movement. If material seems to be getting too wet, cut steam off. Reheat
towel as needed.
LEATHER: Using 1-hole nozzle, blow out cracks and crevasses. Clean the same as upholstery.
VINYL: Using 1-hole nozzle, blow out cracks and crevasses. Use appropriate brush according to the amount
of surface cleaning and amount of dirt on material.

EUROSTEAM SANITIZED FOR HEALTH - REDEFINED
EUROSTEAM TRAINING MANUAL Page 13 of 20
SECTION III: THE ES4500 - CLEANING AND MAINTENANCE
DRY VAPOR CLEANER, SANITIZER AND ADDITIVE APPLICATION STEAMER The ES4500 delivers the ―next generation‖ cleaning and sanitation solution. It utilizes ―Dry Steam‖ [only 6%
water vapor] to efficiently clean and sanitize. The ES4500’s patent pending technology can apply cleaners,
antimicrobial coatings and eco-friendly sanitation products with steam, enhancing their effectiveness.
THE ES4500 ADDITIVE TANK
STEAM PRESSURE CONTROL KNOB BOILER REFILL CAP
Turn to the right to INCREASE
SWITCH 1: Boiler ON/Off
SWITCH 2: Steam Release ON/Off LOW WATER LIGHT
SWITCH 3: Additive ON/OFF GREEN READY LIGHT
ADDITIVE CONTROL KNOB
Turn right to DECREASE amount
HOSE CONNECTION PRESSURE GUAGE
PREPARING THE ES4500 FOR USE
a) Make sure the unit is unplugged, plus the POWER switch is off.
b) Remove the Water Filler cap.
NOTE: If unit is warm - let pressure gauge go down to ―0‖ and machine cool off before proceeding
c) Remove Water Filler Cap and fill unit with water using the Filler Bottle.
d) Press gently down the bottle to release water through the spill proof cap or use funnel.
e) Fill until ½‖ – 1‖ below top of tank.
f) Hand-tighten the Water Filler Cap (hand-tighten ONLY).
FILLING THE ADDITIVE TANK a) Remove the cap from the additive tank [plastic container on the back of the ES4500]
b) Use the small funnel to fill the Additive Tank with the EUROSTEAM approved additive.
c) Screw the red tank cap on carefully.
d) Insert the feed line into the back of the ES4500, the mono-plug will click into place.
STARTING THE EUROSTEAM UNIT a) Plug the unit into a grounded 120V outlet. If you use an extension cord, the heating will take longer time.
Turn the heating switch on. (Use a maximum 50’ 10 gauge extension cord)
b) Turn Switch 1 - Boiler Switch to ―ON‖ [yellow light will be display when switch is in the ―on‖ position]
c) Wait until the Maximum Pressure Light is on [pressure gauge should be between 4 and 5]
d) Warm-up time is usually 15 minutes.
e) Insert the Steamer Flexible hose into the Hose Connection [connection clicks into place].

EUROSTEAM/US STEAM SANITIZED FOR HEALTH - REDEFINED
EUROSTEAM TRAINING MANUAL Page 14 of 20
f) Turn Switch 2 - Steam Release to ―ON‖ [yellow light will be displayed when switch is in the ―on‖ position]
g) ―Bleed‖ the system by using high pressure; [ES1900 & ES2100: press both switches on the hose handle:
ES4500 turn Pressure Control knob to HIGH - all the way to the right]
h) Press the trigger to remove water residue from the hose into towel for about 5 seconds.
i) Wait until MAXIUM PRESSURE lights again before starting to clean.
j) Now the system is ready for any cleaning task.
k)
COMBINING STEAM/ADDITIVE FUNCTION To combine the additive [in the tank] with the steam,
a) Fill the Additive Tank with the Eurosteam approved additive
b) Place the Red Cap on the Additive Tank and tighten the Cap
c) Turn Switch 3 - Additive Switch to ―ON‖ [yellow light will be displayed when switch is in the ―on‖ position]
d) Adjust the additive flow by turning the Additive Control Knob [turn all the way clockwise is the minimized
position]
e) Adjust the steam flow by turning the Steam Pressure Control Knob [all the way right to the right is the
maximum flow position] - RECOMMEND MEDIUM PRESSURE - 1 ½ TURN
f) Start using the EUROSTEAM to dispensing the additive - if more additive is needed - increase the flow by
turning the Additive Control Knob to the left - increasing the flow to the desired position.
TURNING OFF THE STEAM/ADDITIVE FUNCTION AND RINSING THE ADDITIVE FROM INSIDE THE ES4500 After each use - it is important to rinse the additive from the pump/dispenser tube path. This prevents the
additive from clogging up the dispensing mechanism, not to mention - guarantees the next time the unit is used,
it is ONLY dispensing the desired additive.
a) Unscrew the red cap from the Additive Tank [leave the dispenser hose attached]
b) Place the end of the dispenser cap in a cup of water
c) Turn the Additive Control Knob setting to HIGH [turn all the way to the left]
d) Place the nozzle of the ES4500 in another cup and operate until the cup in the back is empty
e) NOTE: this will flush all the additive from the pump, dispenser tubing and unit.
f) Turn off Switch 3 [Additive], Switch 2 [Pressure] and Switches 1 [Boiler]
FREEING A CLOG IN THE ADDITIVE DISPENSER PATH If the ES4500 is not cleaned - the ADDITIVE DISPENSER PATH can become clogged - the dispenser tubing and
pump. To clear the ES4500 additive dispenser path
a) Make sure ES4500 is ―on‖ and warmed up [pressure gauge is between 4 and 5]
b) ―Bleed‖ the ES4500 by pressing the trigger and letting out the steam for 5 seconds
c) Wait until the MAXIMUM PRESSURE light is on again
d) Remove the mono-plug from the back of the unit
e) Unplug the Black mono-plug at the end of the additive tank - plugged into the ES4500
f) Place the single hole nozzle on the ES4500
g) Place the nozzle in the hole for the mono-plug was plugged into
h) Turn on Switch 3 [Additive Switch]
i) Blow steam into the unit by pull the trigger and letting the ES4500 operate until the pressure is flowing
freely through the Additive Dispenser Path.
EUROSTEAM SANITIZED FOR HEALTH - REDEFINED
EUROSTEAM TRAINING MANUAL Page 15 of 20
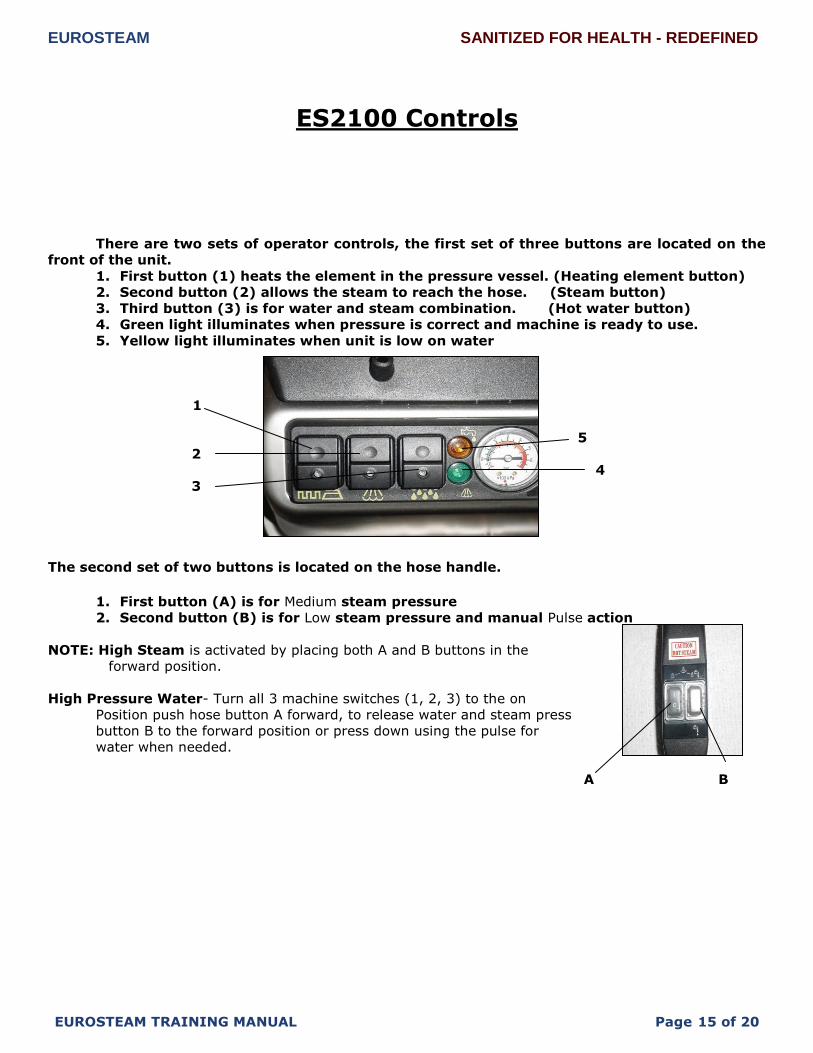
ES2100 Controls
There are two sets of operator controls, the first set of three buttons are located on the
front of the unit.
1. First button (1) heats the element in the pressure vessel. (Heating element button)
2. Second button (2) allows the steam to reach the hose. (Steam button)
3. Third button (3) is for water and steam combination. (Hot water button)
4. Green light illuminates when pressure is correct and machine is ready to use.
5. Yellow light illuminates when unit is low on water
1
5
2
4
3
The second set of two buttons is located on the hose handle.
1. First button (A) is for Medium steam pressure
2. Second button (B) is for Low steam pressure and manual Pulse action
NOTE: High Steam is activated by placing both A and B buttons in the
forward position.
High Pressure Water- Turn all 3 machine switches (1, 2, 3) to the on
Position push hose button A forward, to release water and steam press
button B to the forward position or press down using the pulse for
water when needed.
A B

EUROSTEAM/US STEAM SANITIZED FOR HEALTH - REDEFINED
EUROSTEAM TRAINING MANUAL Page 16 of 20
ES1900 Controls
There are two sets of operator controls, the first set of two buttons are located on the
front of the unit.
6. First button (1) heats the element in the pressure vessel. (Heating element button)
7. Second button (2) allows the steam to reach the hose. (Steam button)
8. Green light (4) illuminates when pressure is correct and machine is ready to use.
9. Yellow light (5) illuminates when unit is low on water
1 5
2
4
The second set of two buttons is located on the hose handle.
3. First button (A) is for Medium steam pressure
4. Second button (B) is for Low steam pressure and manual Pulse action
NOTE: High Steam is activated by placing both A and B buttons in the
forward position.
A B

EUROSTEAM SANITIZED FOR HEALTH - REDEFINED
EUROSTEAM TRAINING MANUAL Page 17 of 20
ES6100 Controls
There are two sets of operator controls, the first set of two buttons are located on the
front of the unit.
10. First button (1) heats the element in the pressure vessel. (Heating element button)
11. Second button (2) allows the steam to reach the hose. (Steam button)
12. Green light (4) illuminates when pressure is correct and machine is ready to use.
13. Yellow light (5) illuminates when unit is low on water, water can be added to the
ES6100 without shutting unit off.
1 5
2
4
ES6100 control for steam is located on top of unit, turn knob to + position for high steam, and
towards – position for low steam. Once desired steam is set red button (A) on hose handle
control release of steam.
A Note: Once the ES6100 cools down water will siphon into the boiler, this may cause unit not to
release steam immediately on next use. If you do not get immediate steam on next heat up:
1- Hold hose handle over sink or drain
2- Press hose buttons to high position
3- Run on high until water stops and steam flows

EUROSTEAM/US STEAM SANITIZED FOR HEALTH - REDEFINED
EUROSTEAM TRAINING MANUAL Page 18 of 20
The ES6100, ES1900, and ES2100 are designed for minimum
maintenance, and no user adjustments should be necessary. Certain parts may need replacement after prolonged use.
If there is a need for service, only Eurosteam service personnel or
authorized Eurosteam service agents should perform the work.
Always use water with a low mineral count that meets the standards outlined in the Water Conditioning section of this manual.
This unit contains no fuses that are accessible by the
operator.
Cleaning:
Make sure unit is cool.
Unscrew drain plug and drain excess water from the tank.
Replace drain plug.
Weekly Cleaning- Add 1 cup CLR ½ quart of water, let sit for 15
minutes. (This method is not recommended for the ES6100)
Un-screw drain plug located on bottom of unit and rinse thoroughly.

EUROSTEAM SANITIZED FOR HEALTH - REDEFINED
EUROSTEAM TRAINING MANUAL Page 19 of 20
US Steam Maintenance And Water Recommendations
Water Conditioning:
It is essential to supply US Steam Systems with clean low mineral content water to help prevent scale
build-up. Even though US Steam Systems are engineered to minimize scale formation, scale development
depends on the hardness of your water and the number of hours the equipment operates.
Most tap water sources are full of minerals, which form scale during operation. It is this scale, which could
lead to early component failure.
We recommend using distilled water, which will provide longer life to the unit, higher steam capacity, and
reduce maintenance requirements.
If you notice a reduction in steam production, check the unit for scale build-up. Heavy scale reduces the
unit’s ability to boil water, and may cause the heating element to overheat and burn out.
Pre-cautions:
1. Never unscrew cap while boiler tank is under pressure. 2. Keep hands away from steam coming out of turbo nozzles, steam can
cause burns. 3. Always protect hands when changing accessories after use.
4. Extension cords must be used at a maximum length of 25ft with 12-gauge capacity, and have ground plug capability.
5. Never unscrew drain plug while water in boiler is hot, or pressure gauge reads over ―0‖.
6. Allow machine to cool before de-scaling tank. 7. Do not add anything other than clean water or CLR into the boiler.
8. Before cleaning outside of unit disconnect electric power supply. Keep water and cleaning solutions out of controls and electrical switches.
9. Use of any replacement parts other than US Steam parts supplied by
US Steam or their authorized business partners voids all warranties and can cause bodily injury to the operator and damage the
equipment. Service performed by anyone other than factory-authorized personnel will void all warranties.
10. Do not expose machine to freezing temperatures.
Weekly Cleaning: Make sure unit is cool. Unscrew drain plug and drain excess water from the tank.
Replace drain plug Add 1 quart of water shake unit to release minerals from element. Remove drain plug
and rinse unit until water is clear of any mineral, replace drains plug. Drain plug has rubber o-ring do not
over tighten.

EUROSTEAM/US STEAM SANITIZED FOR HEALTH - REDEFINED
EUROSTEAM TRAINING MANUAL Page 20 of 20
EUROSTEAM/US STEAM PRODUCT WARRANTY
STANDARD TERMS AND CONDITIONS
TWELVE MONTHS LIMITED WARRANTY
Austin K Inc DBA Eurosteam, US Steam (EUS) warrants that the EUROSTEAM/US STEAM Vapor Steam Systems and Cart (“System”) sold
by the seller (“Seller”) will be free from defects in materials and workmanship for a period of eighteen (12) months from the date EUS receives
the product warranty card, not to exceed Twenty (18) months from the date of sale. Pressure Tank will be covered under warranty for a period of
3 years Thirty six (36) months from the date of sale, from manufactures defects.
TERMS OF LIMITED WARRANTY:
The limited warranty becomes effective upon receipt of the System by Customer; is granted to the initial Customer end user and is transferable,
with notification of new ownership. Any claims under this warranty must be made before the end of the applicable warranty period. During
such period, if EUS determines that a part or System is defective in material or workmanship, EUS, at its option, will provide Customer with a
repaired part or System or replace any part of the System that is covered by the limited warranty. EUS reserves the right to substitute
functionally equivalent new or serviceable reconditioned parts or systems. ESS’s responsibility is limited to repair, replacement, credit or
refund, any of which may be selected by EUS at its sole discretion.
The limited warranty covers only defects arising from normal use and does not include malfunctions or failures arising from: misuse, abuse,
neglect, alteration, mineral build up from neglect, usage not in accordance with user manual and instructions, depletion of Consumables,
accessories, acts of nature or damage caused by repairs where such repairs were made without EUS’s express approval.
The Warranty does not cover defects or damage arising from the disassembly or attempted disassembly of products without EUS approval.
WARRANTY SUPPORT PROCEDURES
If support is required for the System call Eurosteam/US Steam Customer Service at 1-800-613-3874. Have the serial number and proof of
purchase available. A customer service representative will troubleshoot the problem and determine if the product should be returned for further
diagnosis. The customer service representative will advise you if you should ship your machine to a local service center or return it to the
central repair facility. DO NOT SHIP THE SYSTEM OR ANY SYSTEM COMPONENT TO ANY REPAIR FACILITY WITHOUT FIRST
RECEIVING A RETURN AUTHORIZATION NUMBER FROM A EUROSTEAM CUSTOMER SERVICE REPRESENTATIVE.
RETURN PROCEDURES
Prior to shipping the System or a System component to any repair center for warranty service, Customer must contact Eurosteam/US Steam
Customer Service at 1-800-613-3874 to receive a Return Authorization number and specific instructions on how to package and ship the System
to avoid further damage. The Customer Service Representative will provide instructions to drain all water from the boiler tank, pack the System
in original packing material, and ensure that the System wheels are protected so as to minimize potential shipping damage to the System.
Customer is responsible for shipping charges incurred when shipping the System or a System component to an authorized repair center.
Customer is responsible for a 15% restocking fee plus replacement cost for any used parts. Returned units must be shipped in original shipping
container and unused before return credits will be considered by AKI.
LIMITATIONS
EXCEPT AS SET FORTH HEREIN, ENHQ MAKES NO WARRANTIES, EXPRESSED OR IMPLIED, AND DISCLAIM AND NEGATE ALL OTHER
WARRANTIES, INCLUDING WITHOUT LIMITATION, IMPLIED WARRANTIES OF MERCHANTABILITY, FITNESS FOR A PARTICULAR PURPOSE
AND CONFORMITY TO MODELS OR SAMPLES. SOME JURISDICTIONS DO NOT ALLOW LIMITATIONS ON IMPLIED WARRANTIES, SO THESE
LIMITATIONS MAY NOT APPLY TO YOU.
THE WARRANTY SET FORTH HEREIN GIVE YOU SPECIFIC LEGAL RIGHTS, AND YOU MAY HAVE OTHER RIGHTS WHICH VARY FROM STATE TO STATE.
IN NO EVENT SHALL SELLER ENHQ BE LIABLE FOR ANY INDIRECT, SPECIAL, INCIDENTAL, OR CONSEQUENTIAL DAMAGES, SO THE ABOVE
EXCLUSION OR LIMITATION MAY NOT APPLY TO YOU. NO VARIATION OR EXCEPTIONS IN THE TERMS STATED HEREIN CAN BE MADE
GOVERNING LAW, JURISDICTION AND COSTS
These limited warranties are incorporated into and are essential and material provisions of the terms and conditions of sale of seller products to you. All disputes arising out OF OR related to the limited WARRANTY SET forth herein (customer disputes) shall be governed by the laws of the state of Texas. the customer hereby consents to the jurisdiction and venue of the state COURTS of Texas to resolve any and all customer disputes with seller, and THE customer waives all defenses to such jurisdiction and venue including, but not limited TO, any defense based on INCONVENIENT forum. In the event the customer and seller are unable to resolve any customer dispute, and any collection action, suit or other judicial PROCEEDING is commenced, the prevailing party in any such action, suit or judicial proceeding shall be entitled to recover its costs and reasonable attorney’s fees incurred.