Embed Size (px)
Citation preview

Ericom Blaze™
Enhanced Compression and Acceleration of Microsoft Remote Desktop Protocol (RDP)
Administrator’s Manual
Version 8.0

2
Legal Notice
This manual is subject to the following conditions and restrictions:
• This document provides documentation for Ericom Blaze™.
• The proprietary information belonging to Ericom® Software is supplied
solely for the purpose of assisting explicitly and property authorized
users of Ericom Blaze™.
• No part of its contents may be used for any purpose, disclosed to any
person or firm, or reproduced by any means, electronic and
mechanical, without the prior expressed written permission of Ericom®
Software.
• The text and graphics are for the purpose of illustration and reference
only. The specifications on which they are based are subject to change
without notice.
• The software described in this document is furnished under a license
agreement. The software may be used or copied only in accordance
with the terms of that agreement.
• Information in this document is subject to change without notice.
Corporate and individual names, and data used in examples herein are
fictitious unless otherwise noted.
BlzAdminMan20170322JL
Copyright © 1999-2017 Ericom® Software.
Ericom is a registered trademark and Blaze is a trademark, of Ericom®
Software. Other company brands, products and service names, are
trademarks or registered trademarks of their respective holders.

3
Table of Contents
LEGAL NOTICE ................................................................................................... 2
ABOUT THIS DOCUMENT .................................................................................. 4
1. OVERVIEW .................................................................................................. 5
Getting Started in 5 Minutes ........................................................................................................ 6
2. ERICOM ACCESS SERVER ....................................................................... 7
Ericom Access Server Requirements .......................................................................................... 7
Installing Ericom Access Server .................................................................................................. 9
Using Ericom Access Server ..................................................................................................... 10
Extended Session Scripting ....................................................................................................... 16
3. LICENSING OVERVIEW ........................................................................... 18
Evaluation (Demo) Period .......................................................................................................... 18
Licensing Modes ........................................................................................................................ 18
Central Server Configuration ..................................................................................................... 19
4. ERICOM BLAZE CLIENT FOR WINDOWS .............................................. 22
Ericom Blaze Client Requirements ............................................................................................ 22
Installing Ericom Blaze Client .................................................................................................... 22
Using Ericom Blaze Client for Windows .................................................................................... 23
5. VMWARE® VIEW CLIENT MODE ............................................................. 34
Secure Gateway Access ............................................................................................................ 36
6. ERICOM BLAZE CLIENT FOR MAC ........................................................ 37
Using Ericom Blaze Client for Mac ............................................................................................ 37
7. ERICOM BLAZE CLIENT FOR LINUX ..................................................... 40
Using Ericom Blaze Client for Linux........................................................................................... 43
8. UNINSTALLING ERICOM ......................................................................... 45
9. BLAZE AND LOAD BALANCERS ............................................................ 46
10. BLAZE CLIENT COMMAND LINE PARAMETERS .................................. 48
11. TECHNICAL SUPPORT ............................................................................ 51
ABOUT ERICOM ................................................................................................ 56
4
ABOUT THIS DOCUMENT This document provides instructions on how to install and use Ericom Blaze to
accelerate and compress Microsoft Remote Desktop Protocol (RDP)
communication. Follow the instructions in this document and start enjoying
the benefits of Ericom Blaze within minutes!
This guide includes the following information:
• Overview of Ericom Blaze
• Preparation and installation procedures
• Usage instructions
• Troubleshooting and FAQ
This manual assumes that the reader has knowledge of the following:
• Enabling RDP on Windows operating systems
• Firewall configuration
• Web server administration
Important terminology used in this document:
• RDP – Remote Desktop Protocol. A remote display protocol developed
by Microsoft. RDP is a standard component of Microsoft Windows.
• RDP Host – a Windows system that can be remotely accessed using
Microsoft RDP, such as a Terminal Server (RDS Session Host) or
Windows workstation with remote access enabled.
• HTML5 – a new update to the HTML specification. Extends HTML with
new features and functionality for communication, display, etc.
• WebSocket – a bi-directional, full-duplex communication mechanism
introduced in the HTML5 specification.
• SSL – Secure Sockets Layer is a cryptographic protocol that provides
communications security over the Internet.
5
1. OVERVIEW Ericom Blaze provides end-users with an enhanced remote computing
experience on most Wide Area Networks (WAN), such as Satellite, Broadband,
and branch offices. This is achieved by accelerating and compressing the
Microsoft Remote Desktop Protocol (RDP). The results are higher frame rates,
improved response times, and smoother screen updates. Ericom Blaze
performs the following operations:
• Introspects the RDP communication, identifying and compressing
graphical elements such as bitmaps. The quality / compression ratio is
configurable to provide the optimal user experience.
• Identifies key elements, such as the Taskbar and Start Menu, and
compresses them at a high quality level regardless of general quality
settings. This provides a visually high quality remote computing
experience.
• Compresses the entire RDP transmission using a high-performance
bulk compression formula.
• Performs packet shaping to optimize network utilization and to speed
up transmission of data packets.
• Intelligently renders frames so that screens are displayed as single
units rather than as a sequence of blocks.
Ericom Blaze works with any x86 or x64 based host system that supports
RDP, including Windows Terminal Servers, remote physical systems and VDI
based desktops. Ericom Blaze consists of the following components:
• Ericom Access Server
This component is installed on the RDP server/host to compress and
accelerate RDP. The following platforms are supported:
� Windows 2008 – 32 bit and x64
� Windows 2008 R2
� Windows 2012 and R2
� Windows 2016
� Windows 7, 8, and 10 (x64 and 32-bit where applicable)
• Ericom Blaze Client
This client component connects to Access Servers using accelerated
RDP and can also connect to any standard RDP host. The following
platforms are supported:
� Windows Vista, Windows 7 and Windows 8 – 32 bit and x64
� Windows XP x64/32 bit (use the Blaze Client 32 bit installer)

6
� Windows XPe, CE
� Windows 2003 Server and higher – 32 bit and x64
� Linux
� Mac OS X
• Ericom Blaze Mobile Client
This client component connects to Access Servers using accelerated
RDP and can also connect to any standard RDP host. The following
platforms are supported (refer to AccessToGo Manual for full details):
� Apple iOS 5 or higher
� Android OS 2.1 or higher
Getting Started in 5 Minutes
Ericom Blaze is a feature-rich and easy-to-use application. The manual
covers all available features in detail to help customers best configure the
application to fit their environment.
The basic installation will take approximately five minutes and will make a
Windows RDP host (server or workstation) accessible from any device running
a Blaze client (including mobile devices running AccessToGo).
1) Download the Ericom Access Server 3.0 MSI installer from the Ericom
website
2) Run the MSI installer and click Next through all the dialog boxes and then
Finish at the last one
3) Configure (or disable) the Windows Firewall for use with Blaze.
a. Go to the Windows Control Panel and open Windows Firewall
b. Click “Allow Program or Feature …”
c. Click “Allow another program …”
d. Click Browse and navigate to <drive>:\Program Files (x86)\Ericom
Software\Ericom Access Server\AccessServer32.exe
e. Click Add and then OK
4) Download the Ericom Blaze Client MSI installer from the Ericom website
a. If you are connecting from a mobile device, download the
AccessToGo app onto the device.
5) Enter the parameters of the Access Server into the Blaze Client (or
AccessToGo) and press the Connect button to start the connection.

7
2. ERICOM ACCESS SERVER Ericom Access Server provides AccessNow HTML5 access and Blaze RDP
compression and acceleration features. All features are enabled during the
trial period, and each feature is unlocked using an activation key after the
trial period ends. The host may be any Windows system that has RDP access
enabled, such as a Windows Terminal Server or a Windows workstation. The
Access Server uses a customizable port – by default this is port number 8080.
Port 3399 is also enabled for backward compatibility with installations using
older versions of Blaze.
NOTE Ericom Access Server 3.x is not backward compatible with previous versions of Blaze Client 2.x. If you are using an earlier version of Blaze, upgrade all Blaze client and server components to matching version.
The Access Server may be installed on the RDP host or on a dedicated system
to serve as a proxy (sometimes referred to as a “jump” server. It is
recommended to install the Access Server on the RDP host directly. Some
features such as file transfer may only available when the Access Server is
installed on the RDP host itself. The Access Server has a small footprint and
will have minimal impact on the RDP host’s performance and scalability.
Ericom Access Server Requirements
• Windows operating system (7/2008 and higher)
• Incoming RDP connections enabled on the Host OS (e.g. Terminal
Server)
• 80 MB of free Hard-Disk space
• MMX and SSE2 capable CPU
• Firewalls are configured for Access Server traffic 8080 (or 3399) port
The Access Server should be installed on each server/host that requires
accelerated or HTML5 access. Terminal Servers only require one installation
to accelerate all user sessions. Each workstation / desktop (physical or
virtual) requires an installation. It is possible to include Access Server as part
an image that will be deployed using Microsoft® Sysprep or Symantec® Ghost.
Bind Service to All Network Interfaces
In a virtual network environment - it is recommended to bind the Access
Server to use all virtual network interfaces, rather than just one virtual NIC.
Always ensure that the network interface(s) that Access Server is using is
accessible by the desired group of end-users.
8
Host Firewall Configuration
Make sure to allow traffic communication from the end-user device to the
Ericom Access Server host. Firewall configuration may be necessary.
On Windows operating systems, ensure that the Windows Firewall is
configured to allow traffic to the Access Server port (by default 8080). This
port value may be changed using the Access Server Configuration utility.
NOTE Disable the Windows Firewall temporarily to troubleshoot any connectivity issues. If the connection is only successful with the firewall disabled, then there may be a rule that is blocking the Access Server port.
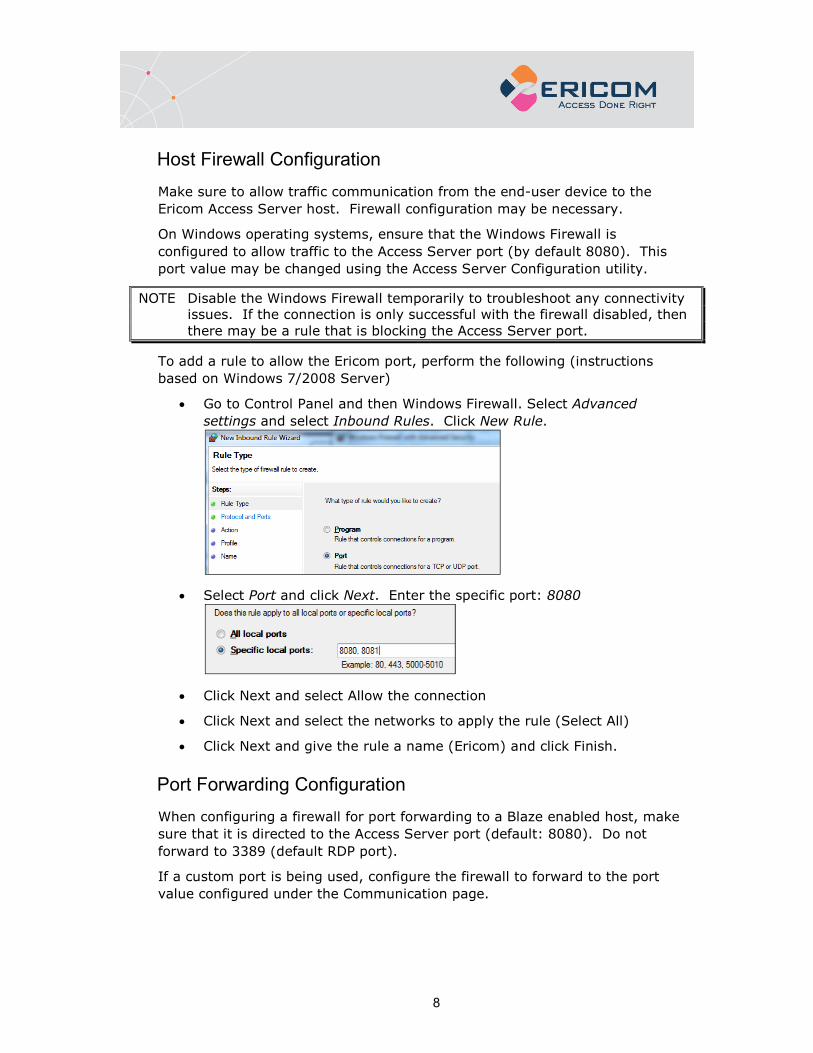
To add a rule to allow the Ericom port, perform the following (instructions
based on Windows 7/2008 Server)
• Go to Control Panel and then Windows Firewall. Select Advanced
settings and select Inbound Rules. Click New Rule.
• Select Port and click Next. Enter the specific port: 8080
• Click Next and select Allow the connection
• Click Next and select the networks to apply the rule (Select All)
• Click Next and give the rule a name (Ericom) and click Finish.
Port Forwarding Configuration
When configuring a firewall for port forwarding to a Blaze enabled host, make
sure that it is directed to the Access Server port (default: 8080). Do not
forward to 3389 (default RDP port).
If a custom port is being used, configure the firewall to forward to the port
value configured under the Communication page.

9
NLA support
Blaze client supports NLA under three conditions:
• Acceleration is enabled
• Username and password are be typed into the appropriate fields
• The checkbox for Always ask for credentials is unchecked
Blaze client in non-accelerated mode does not support NLA.
Installing Ericom Access Server
• Run EricomAccessServer.msi and follow the instructions of the
installation wizard.
• Review and accept the License Agreement.
• Click Install (if prompted, accept the security elevation request). Click
Finish at the last screen to complete the installation
• Verify that the Access Server port is available and accessible to the host
system. Access Server will automatically add the necessary rules to
Windows firewall, however additional firewall configuration may be
necessary on the network.
• Once installed, the Access Server will run as a service on the system.
o The service is configured to run automatically on system
startup.
o If the service is stopped or is unable to listen on its default
ports (8080), the client will not be able to connect to that

10
host. Verify that there are no other applications using the
same port.
o On Windows XP, a system restart (reboot) may be required
after installing the Ericom Access Server.
Access Server can be automatically and silently installed using a management
application such as Microsoft System Center.
• To perform a silent install run: msiexec /I "EricomAccessServer.msi" /q
• EricomAccessServer.msi represents a valid path to the .msi file
• On Windows 7, 8, Windows Server 2008, 2012, and higher this
command may need to be performed with elevated Administrator
credentials.
• Run MSIEXEC without any parameters to view the help dialog.
NOTE Access Server may not be compatible with certain systems where the hostname contains non-English characters.
Using Ericom Access Server
To modify Access Server settings: Go to Start | Programs | Ericom Software |
Access Server Configuration. On systems that do not have a Start menu, the
GUI may be launched using the command line:
<drive>:\Program Files (x86)\Ericom Software\Ericom Access
Server\ServerConfiguration.hta
NOTE Access Server is used by both the AccessNow HTML5 and Blaze RDP Acceleration products.
Access Server Configuration
The Server Configuration console presents a series of tabs that allow the
administrator to configure various settings for the server service. The
Configuration console only works on systems with Microsoft Internet Explorer
7 or later (the console will not launch on systems with IE6 installed).
HINT When installing Access Server on a Terminal Server, it is recommended to hide the Server Configuration application from end users to prevent unexpected changes to the configuration settings.
General
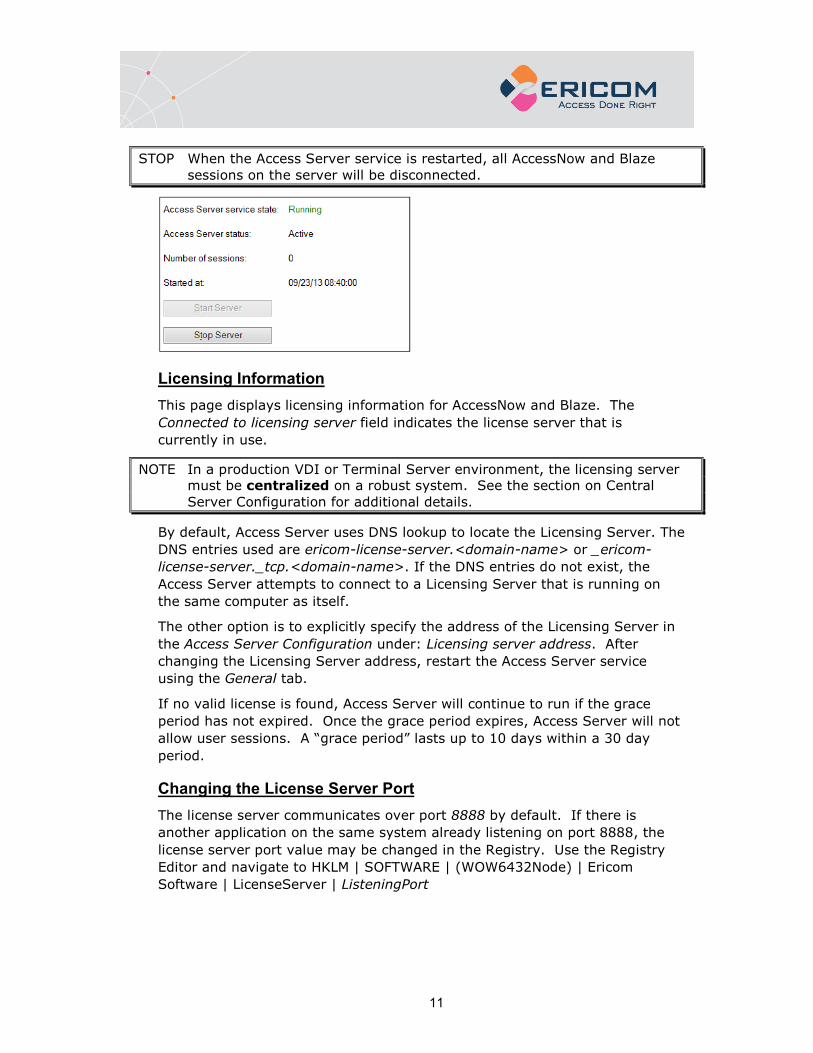
This page provides functions to restart and stop the Access Server service.
For certain configuration changes, a service restart is required. This page
also displays the number of active Blaze sessions to this system.
11
STOP When the Access Server service is restarted, all AccessNow and Blaze sessions on the server will be disconnected.
Licensing Information
This page displays licensing information for AccessNow and Blaze. The
Connected to licensing server field indicates the license server that is
currently in use.
NOTE In a production VDI or Terminal Server environment, the licensing server must be centralized on a robust system. See the section on Central Server Configuration for additional details.
By default, Access Server uses DNS lookup to locate the Licensing Server. The
DNS entries used are ericom-license-server.<domain-name> or _ericom-
license-server._tcp.<domain-name>. If the DNS entries do not exist, the
Access Server attempts to connect to a Licensing Server that is running on
the same computer as itself.
The other option is to explicitly specify the address of the Licensing Server in
the Access Server Configuration under: Licensing server address. After
changing the Licensing Server address, restart the Access Server service
using the General tab.
If no valid license is found, Access Server will continue to run if the grace
period has not expired. Once the grace period expires, Access Server will not
allow user sessions. A “grace period” lasts up to 10 days within a 30 day
period.
Changing the License Server Port
The license server communicates over port 8888 by default. If there is
another application on the same system already listening on port 8888, the
license server port value may be changed in the Registry. Use the Registry
Editor and navigate to HKLM | SOFTWARE | (WOW6432Node) | Ericom
Software | LicenseServer | ListeningPort
12
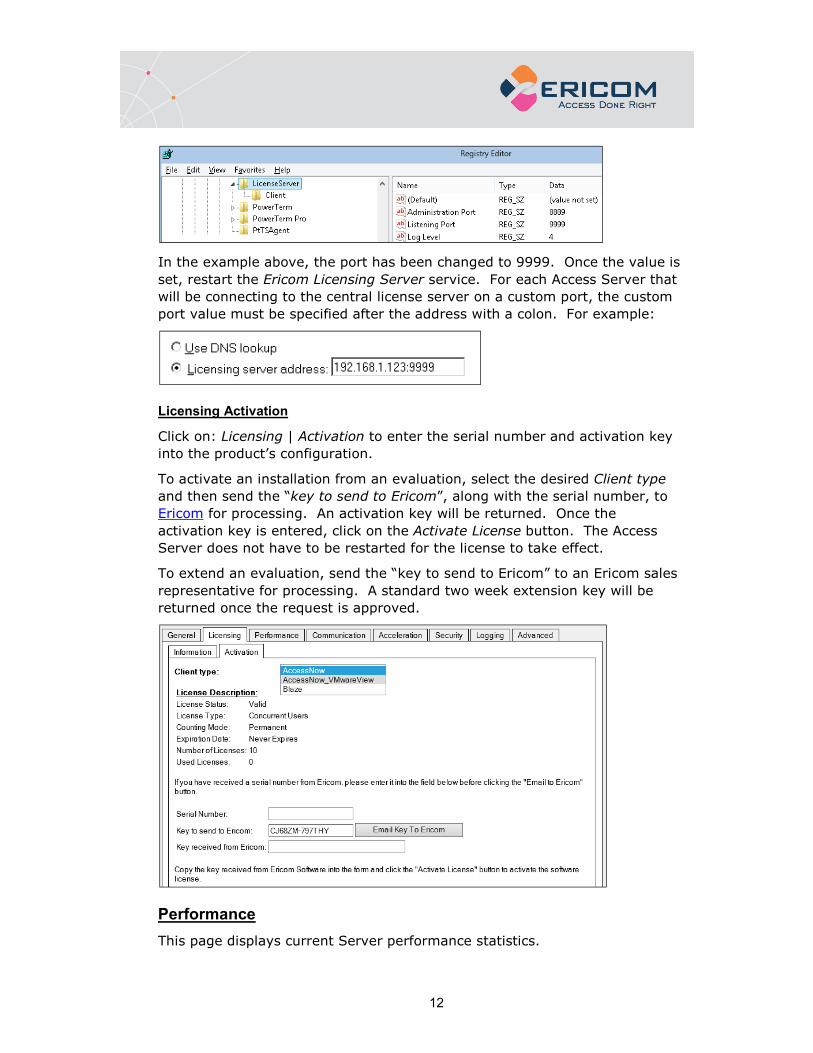
In the example above, the port has been changed to 9999. Once the value is
set, restart the Ericom Licensing Server service. For each Access Server that
will be connecting to the central license server on a custom port, the custom
port value must be specified after the address with a colon. For example:
Licensing Activation
Click on: Licensing | Activation to enter the serial number and activation key
into the product’s configuration.
To activate an installation from an evaluation, select the desired Client type
and then send the “key to send to Ericom”, along with the serial number, to
Ericom for processing. An activation key will be returned. Once the
activation key is entered, click on the Activate License button. The Access
Server does not have to be restarted for the license to take effect.
To extend an evaluation, send the “key to send to Ericom” to an Ericom sales
representative for processing. A standard two week extension key will be
returned once the request is approved.
Performance
This page displays current Server performance statistics.

13
Communication
This page provides functions to change the Access Server listening port and
the address of the host running RDP.
When using a listening port other than the default (8080), the port number
must be explicitly specified in the Access Server address or the Blaze Client
Computer field (e.g., rdpdemo.ericom.com:22).
AccessNow web client:
Blaze Client:
The RDP host address is used when the destination system is not the system
running Access Server. In this scenario, the Access Server is acting as a
gateway proxy between the end user and the destination host system. This
type of configuration is not recommended as it may adversely impact
AccessNow and Blaze performance.
Changes to both settings require a service restart (under General tab).
When running Access server on a machine with multiple network cards,
change the RDP host address from localhost to the IP or DNS address of the
network card that has RDP access to the system.
14
Acceleration
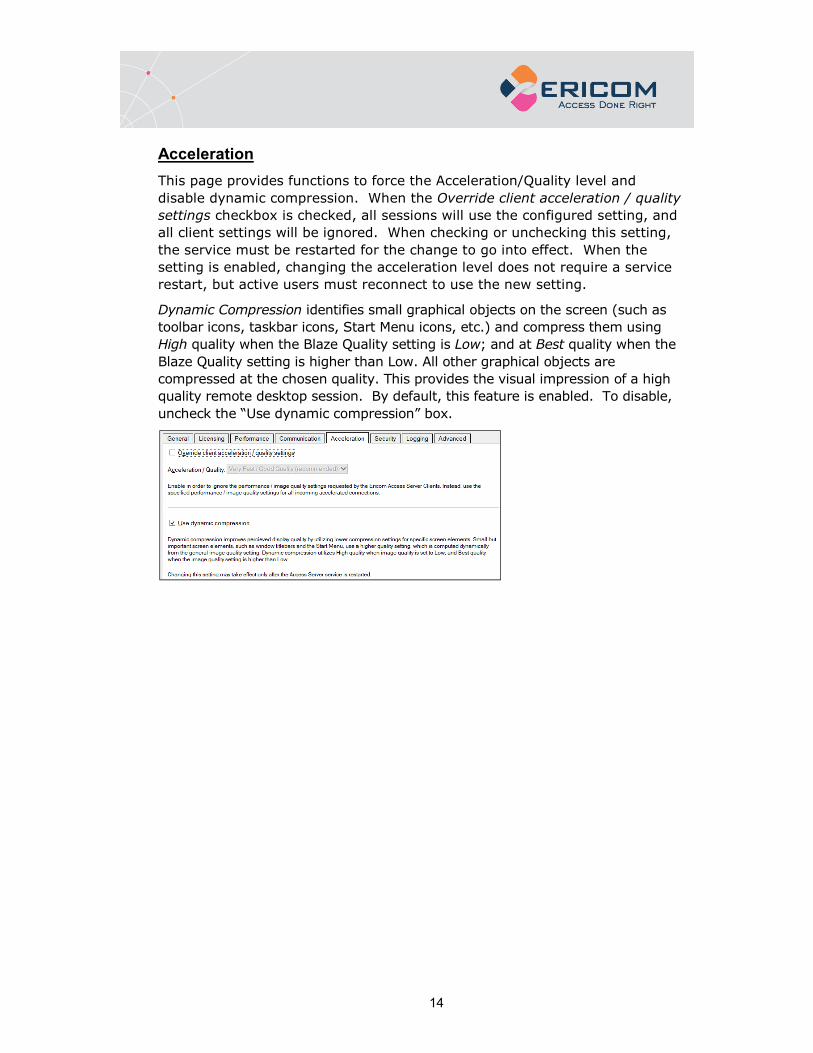
This page provides functions to force the Acceleration/Quality level and
disable dynamic compression. When the Override client acceleration / quality
settings checkbox is checked, all sessions will use the configured setting, and
all client settings will be ignored. When checking or unchecking this setting,
the service must be restarted for the change to go into effect. When the
setting is enabled, changing the acceleration level does not require a service
restart, but active users must reconnect to use the new setting.
Dynamic Compression identifies small graphical objects on the screen (such as
toolbar icons, taskbar icons, Start Menu icons, etc.) and compress them using
High quality when the Blaze Quality setting is Low; and at Best quality when the
Blaze Quality setting is higher than Low. All other graphical objects are
compressed at the chosen quality. This provides the visual impression of a high
quality remote desktop session. By default, this feature is enabled. To disable,
uncheck the “Use dynamic compression” box.
15
Security
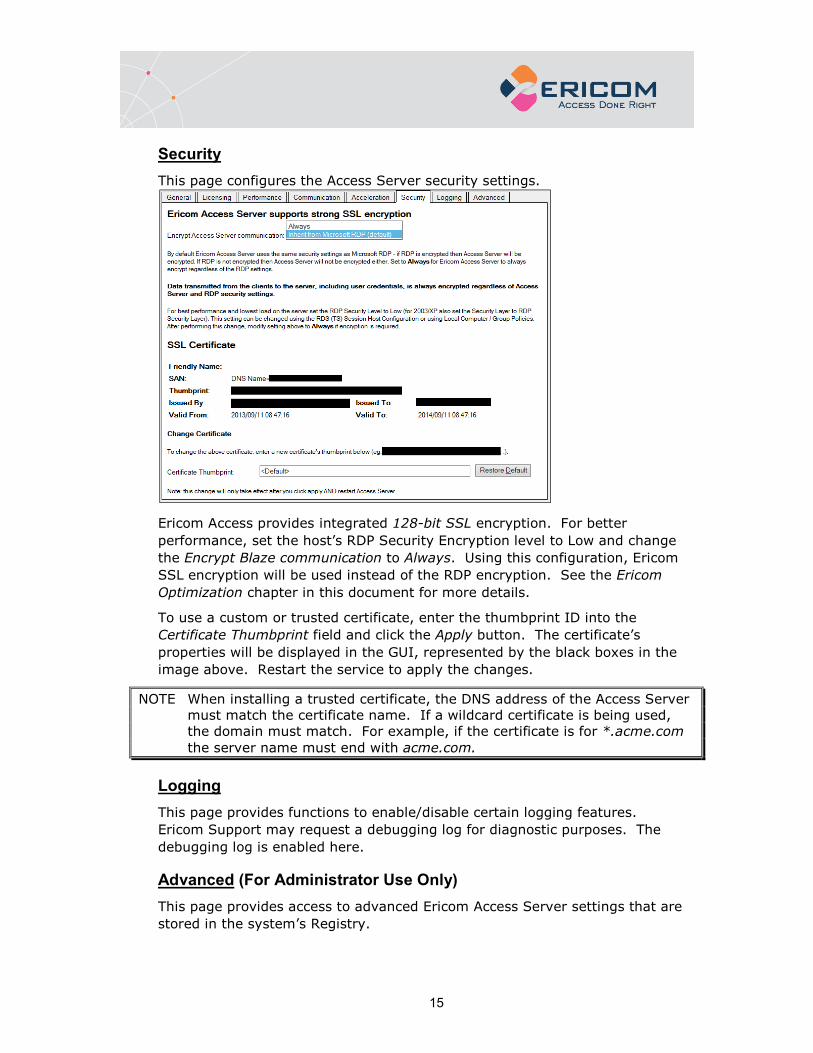
This page configures the Access Server security settings.
Ericom Access provides integrated 128-bit SSL encryption. For better
performance, set the host’s RDP Security Encryption level to Low and change
the Encrypt Blaze communication to Always. Using this configuration, Ericom
SSL encryption will be used instead of the RDP encryption. See the Ericom
Optimization chapter in this document for more details.
To use a custom or trusted certificate, enter the thumbprint ID into the
Certificate Thumbprint field and click the Apply button. The certificate’s
properties will be displayed in the GUI, represented by the black boxes in the
image above. Restart the service to apply the changes.
NOTE When installing a trusted certificate, the DNS address of the Access Server must match the certificate name. If a wildcard certificate is being used, the domain must match. For example, if the certificate is for *.acme.com the server name must end with acme.com.
Logging
This page provides functions to enable/disable certain logging features.
Ericom Support may request a debugging log for diagnostic purposes. The
debugging log is enabled here.
Advanced (For Administrator Use Only)
This page provides access to advanced Ericom Access Server settings that are
stored in the system’s Registry.
16
Export Settings – exports the Access Server Registry key to the user’s home
folder (i.e., My Documents).
Import Settings – imports previously saved Registry settings.
Advanced Configuration – Launches regedit.exe and opens the Access Server
registry keys. By default, only settings that are changed from the default
value are saved into the Registry.
Extended Session Scripting
This product extends Windows built-in scripting capabilities on the RDP host.
This mechanism adds an additional layer of functionality to run certain
commands when sessions start or end, and when they are connected or
disconnected.
Post-Startup Login script (_login)
Create a file named _login with the appropriate extension, for example a
script file called _login.vbs or an executable called _login.exe, and place this
in a folder named scripts under the Access Server installation folder. If this
folder does not exist, create it. This script will execute when a new session
starts, after the TS/RDS session processes the Startup folder.
Pre-Startup Login script (__login)
Similar to _login, __login is executed at session startup, but it is executed
before the TS/RDS session processes the Startup folder.
Session connection script (_connect)
Create a file named _connect with the appropriate extension, and place this in
a folder called scripts under the Access Server installation folder. If this folder
does not exist, create it. This script will execute upon connection into an
existing TS/RDS session.
Session disconnection script (_disconnect)
Create a file named _disconnect with the appropriate extension, and place
this in a folder called scripts under the Access Server installation folder. If this
folder does not exist, create it. This script will execute upon disconnection
from a TS/RDS session.

17
Sample VB Script to create a new file
Set objFileToWrite = CreateObject("Scripting.FileSystemObject").OpenTextFile("newfile.txt",2,true)
objFileToWrite.WriteLine("hello world")
objFileToWrite.Close

18
3. LICENSING OVERVIEW
Evaluation (Demo) Period
Each Access Server installation includes a Licensing Server that is installed on
the same device. By default, the license server includes an evaluation period
of 30 days. During this period, the Licensing Server allows up to 50
Concurrent User licenses. The evaluation period can be extended by
contacting an Ericom sales representative.
Licensing Modes
The Ericom License Server service manages licensing for Ericom AccessNow
and Blaze. Any connection made with an Ericom Blaze Client or AccessNow
HTML5 requires an Ericom license. A single licensing server can manage
licensing for multiple Ericom Access Servers.
There are two modes of licensing:
Concurrent User – Ericom licenses are counted based on the number of active
users that are currently connected to all the Access Servers utilizing the same
Licensing Server. In this licensing mode:
• There is no licensing limit on the number of Ericom sessions that the
same user can open concurrently on a single client device. Only one
license will be consumed regardless of the number of sessions the user
opens on the device.
• The same user opening Blaze sessions concurrently from several
devices will consume the same number of licenses as the number of
devices used.`
• Several users using the same device (i.e. using Fast User Switching)
will take the same number of licenses as the number of users that have
active Blaze sessions
Named User – Ericom licenses are counted based on the number of names
registered that have ever connected to any Access Servers utilizing the same
Licensing Server. In this licensing mode:
• A license is allocated for a name when it is first used by any user
• The license is automatically released after a period of 14 days during
which the name has not been used for running Blaze Clients at all. A
license allocated to a name cannot be released prior to the end of the
14 day period
• The Access Server must be installed on the RDP host (as the TSagent is
also required for this method). If the Access Server is used as a
Gateway, then only the Concurrent license will be available.
19
Central Server Configuration
The Access Server can be configured to use a remote Licensing Server so that
a single pool of licenses may be shared among multiple Access Servers.
For example, a 10 user license would be activated once on a central server.
All Access Servers on the network would then be directed to use the pool of
licenses on the central server. Ericom recommends that in an environment
with more than two RDP hosts (Remote Desktop Servers, Terminal Servers,
VDI, etc.) that a dedicated server be made available to host the licenses to
prevent disruptions and conflicts. Guidelines for the central license server are
as follows:
• The central license server must be hosted on a server that is highly
available so that it can distribute licenses.
• In a VDI environment, do not install the license server on a cloned
desktop or the gold image template. It should be installed on a static
machine that does not experience system changes.
• In a TS/RDS environment with two or more servers, avoid installing the
license server on the Terminal Server if possible.
• Minimize the amount of reboots and disruptions on the server. Apply
updates only during off-peak times.
When no valid license is found, Access Server will continue to run if the grace
period has not expired. Once the grace period expires, Access Server will not
allow user sessions. A “grace period” lasts up to 10 days within a 30 day
period. When there is an issue with the license server, it should be rectified
before the grace period expires.
Implementation
Step 1: Install Access Server on the desired system and activate it (using the
Licensing | Activation tab). Although Access Server will be running, the main
role of this installation is to create a central license server. Enable the
incoming port 8888 on the Windows firewall of this system. Verify that this
port is available over the network between the central license server and the
any Access Servers that will connect to it.
Step 2: Configure all Access Servers to use the central license server address
for licensing. There are two methods to configure the address of the central
license server, see the next section for details.
Step 3: Once the Access Server service starts, it will connect to the
configured central license server to obtain a license when an Ericom
AccessNow or Blaze session is established.

20
There are three methods to use a central license server:
Use DNS Lookup
When using this setting, Access Server will always attempt to find a
centralized Licensing Server before using the local one that was installed
along with it. If a central license server is found and used, the local one will
be ignored. When the Ericom Access Server service starts, it looks for the
central licensing server address (IP or DNS name) in the following order.
1) DNS-SRV Entry
Access Server will look for the Licensing Server address in a DNS-SRV
entry: _ericom-license-server._tcp.<domain>
For example, _ericom-license-server._tcp.ericom.local
2) DNS Entry
If the DNS-SRV record does not exist, Access Server will look for the
Licensing Server address in a DNS entry: ericom-license-server.<domain>
For example, ericom-license-server.ericom.local
3) Localhost
If the DNS entry does not exist, the locally installed Licensing Server will
be used (i.e. localhost will be used as the address of the Licensing
Server).
Manual Entry
The administrator may also explicitly specify the license server that will be
used at the Licensing page in the Access Server Configuration application.

21
Use with PowerTerm™ WebConnect
When the Ericom PowerTerm™ WebConnect broker is used, all licenses are
obtained from the broker. Access Server licensing is ignored; expiration
messages will not apply to brokered connections.

22
4. ERICOM BLAZE CLIENT FOR WINDOWS The Ericom Blaze Client connects to a Blaze enabled host running Ericom
Access Server.
NOTE Ericom Blaze Client may not be backward compatible with earlier versions. If you are using an earlier version of Blaze, please upgrade all Blaze client and server components to the same version for the best results.
Ericom Blaze Client Requirements
The Ericom Blaze client is installed on the user’s devices.
• See section 1 for a list of supported platforms
• 30 MB of free Hard-Disk space
• MMX capable CPU
Installing Ericom Blaze Client
• The Blaze installer may overwrite any previous installations.
• Run Ericom Blaze Client.msi.
• Review and accept the License Agreement. Click Next.
• Click Next to associate .rdp files to use the Blaze Client. The .blaze
extension will be automatically added to the system. When double
clicking on an associated configuration file, the Blaze Client will be
launched with the file’s settings.
HINT To auto-connect a Blaze session using a .rdp file created with the RDP Client (MSTSC.exe), the .rdp file must be saved using the Blaze client first. Launching a .rdp file before it is saved using the Blaze client will open the Blaze client user interface. Simply save the .rdp file using the Blaze client (all settings will be maintained) and it will auto-connect when launched in the future.
23
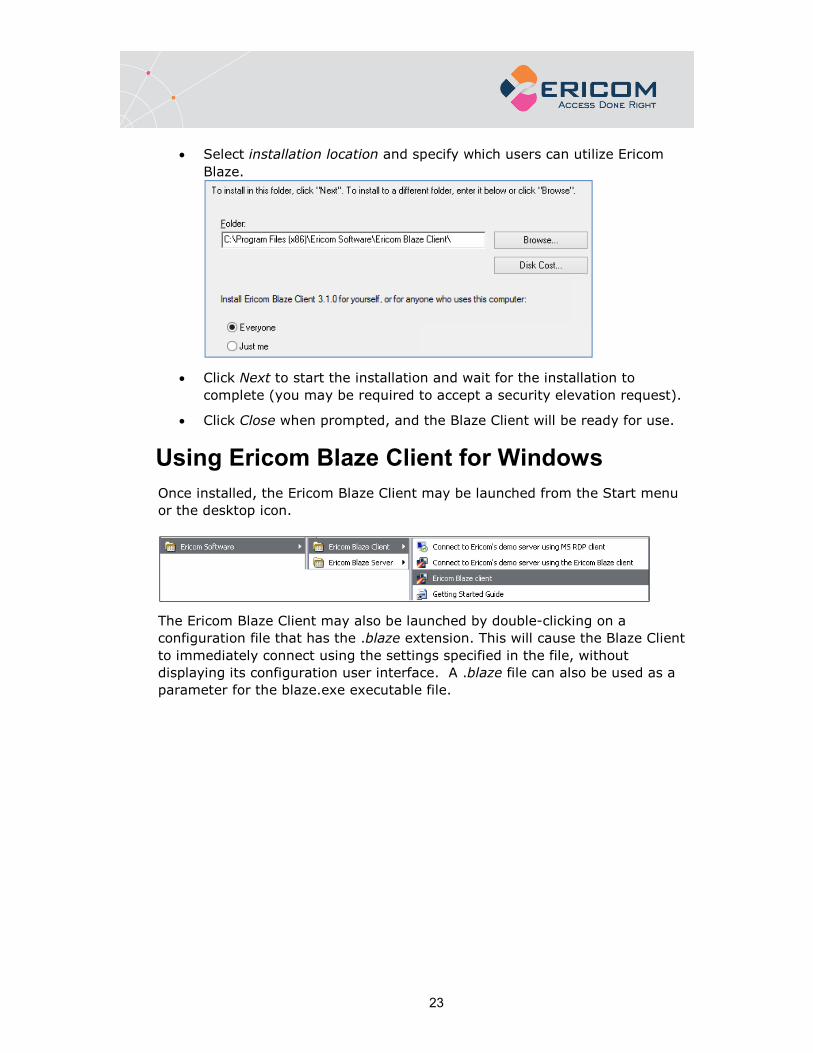
• Select installation location and specify which users can utilize Ericom
Blaze.
• Click Next to start the installation and wait for the installation to
complete (you may be required to accept a security elevation request).
• Click Close when prompted, and the Blaze Client will be ready for use.
Using Ericom Blaze Client for Windows
Once installed, the Ericom Blaze Client may be launched from the Start menu
or the desktop icon.
The Ericom Blaze Client may also be launched by double-clicking on a
configuration file that has the .blaze extension. This will cause the Blaze Client
to immediately connect using the settings specified in the file, without
displaying its configuration user interface. A .blaze file can also be used as a
parameter for the blaze.exe executable file.

24
General Configuration
Computer – enter the address of the host that is running the Ericom Access
Server, or any standard RDP host (host name or IP address). By default, if the
port number is not specified, then port 8080 will be used for Blaze accelerated
connections, and port 3389 for regular RDP.
To specify a different port number, add “:<port number>” to the end of the
address. Example using port 23: rdpdemo.ericom.com:23
User name/Password (optional fields) – enter credentials to login to the
destination host. Provide both to circumvent the host’s login dialog.
Enable Enhanced RDP Compression and Acceleration – Uncheck this box
to disable compression and acceleration. When disabled, RDP will be used.
Ericom Blaze Acceleration / Quality Settings
• Lossless – Lossless compression
• Moderate/Highest – Almost perfect quality (minimal lossy
compression). Appropriate when close-to-exact image rendering is
required.

25
• Good/Very High – Minimal image quality loss.
• Fast/High – Slightly less quality, slightly greater acceleration than
Best.
• Very Fast/Good – Balanced quality and performance, ideal for most
cases.
• Fastest/Fair – Lower quality but better performance. Appropriate
when bandwidth is limited, especially when using graphic intensive
applications.
Connection Settings:
• Save – Save settings to the file from which they were read. If setting
were not read from a file then the behavior is the same as Save As (see
below)
• Save As – Save settings to a new .blaze file. It is also possible to save
to a file that has the .rdp extension
• Open – Read settings from an existing .blaze file. It is also possible to
load settings from a file that has the .rdp extension
Accessing previous configurations:
• Settings for all successful past sessions are automatically preserved for
reuse.
• To use previous configurations, click on the drop-down arrow icon to
the right of the Computer name. The sessions are displayed in order of
use, with the most recently used session appearing at the top, as
shown:
Click the Connect button once all parameters are set to begin the Ericom
Blaze session.

26
Display Configuration
Display Configuration – Specify the screen size of the Ericom Blaze session.
Full screen sessions will cover the entire local screen(s).
Choose monitors to use for the remote session
• Use my current monitor – Blaze session only opens on the current
monitor (where the Blaze dialog appears).
• Use all my monitors – Blaze session opens using all monitors.
When connecting to Windows 7, 8, Server 2008 R2 or higher the RDP
Multimon feature is used to create virtual monitors in the remote session
that exactly match the local monitors.
When connecting to earlier versions of Windows, multi-monitor spanning is
used to create a single remote monitor that covers all local monitors,
similar to MSTSC.exe’s /span flag. Regardless of how many monitors are
being used, the maximum desktop resolution will be 4096x2048. In this
mode, Ericom Blaze will automatically adjust size and position of windows
so that they are properly displayed within the monitors. For example,
maximized application windows will only cover its primary monitor.
• Span all my monitors – Blaze session opens using all monitors.
Multi-monitor spanning creates a single remote monitor that covers all local
monitors. This feature is implemented for all operating systems.

27
• Monitor X – Blaze session opens on the monitor identified as X (X
denotes the numeric identifier of the monitor).
Smart resize
The Smart resize feature will automatically re-proportion the session display
when the window size is changed. The original aspect ratio is maintained. No
scroll bars will be displayed.
Display the connection bar when I use full screen
The Blaze full screen connection bar has three modes:
• Yes – The connection bar is available and starts in auto-hide mode
(default). Can be changed to Pinned mode.
• Yes (Pinned) – The connection bar is available and starts in pinned
mode. Can be unpinned to change to auto-hide mode.
• No – No connection bar is available. This is useful for kiosks and thin
clients environments.
Colors – Specify the color depth for the Ericom Blaze session.
Display the connection bar – Uncheck this box to hide the Ericom Blaze
RDP bar that appears at the top of the RDP window in full screen mode.
Local Resources Configuration
Remote Audio (sound) – Specify the audio settings for the Ericom Blaze
session.
NOTE Connections with limited bandwidth or high latency may degrade audio quality.
Keyboard – Specify the Windows key combinations configuration.
Local devices and resources Clipboard redirection – enables text and
image clipboard redirection. File copy and paste is not supported.
Local devices and resources Printers (native) – enables standard RDP
printing redirection. In order to use standard RDP printer redirection, the
printer driver must be installed on the host and the client
Local devices and resources Printers (universal) – enables the built-in
universal print driver. See next section for details on the universal printer.
Click “More devices …” to specify mapping of local disks on the remote host.
It is possible to map special folders: My Documents and Desktop for the local
user; and enable mapping of plugged in drives while the session is active.

28
3rd party add-ins – enables the use of 32-bit third-party RDP add-ins (i.e.
universal printing redirection support). Blaze only supports 32-bit based add-
ins, x64-based third-party components are not supported (for example:
triCerat’s x64 Screwdrivers client). On x64 systems, use the 32-bit version of
the add-in.
If the third party add-in is not installed properly on the client system, the
selection for it will not appear in the Blaze client. Contact Ericom
([email protected]) for more information on supported third-party solutions.
Built-in Universal Printing
Ericom Blaze includes support for universal printing. The built in universal
printer is based on Postscript and will redirect remotely executed print jobs to
local printers. To enable the universal printer, check the Printers (universal
driver) option.
In the Blaze RDP session, the redirected printers will appear alongside any
local printers configured on the remote desktop. Redirected printers will have
the symbol “[PS]” along with the computer name in its label.

29
NOTE Since a generic HP Postscript driver is used to process the print jobs, certain printer specific functions may not be available (i.e. duplex printing). To support printer specific features, consider using a third-party print solution or standard RDP printing (by loading the printer driver(s) on the RDP host).
To print to a redirected printer, simply select the desired printer when the
application’s Print dialog appears.
Universal Printing with Windows 8 or 2012 RDP Hosts
The HP Universal PS Printer driver is required in order to support universal
printing with Windows 8, 2012, 2012R2, and higher operating systems.
Download the appropriate driver for your operating system from the HP
website.
After installing the HP Universal PS Driver, launch the Blaze client. Go to the
Local Resources dialog box and check Printers (universal driver) and Use HP
Universal PS Printer Driver.
The Ericom printer will appear at the next user login (if printing is enabled for
the session). Any instances of the HP Universal Printer may now be deleted
from the Windows Printers menu as the driver is now present on the RDP host
system.
NOTE The HP Universal PS Printer driver may be used for Windows 2008, 2008R2, and Windows 7 operating systems as a second option. If the default universal driver does not print accurately, try the HP driver.
30
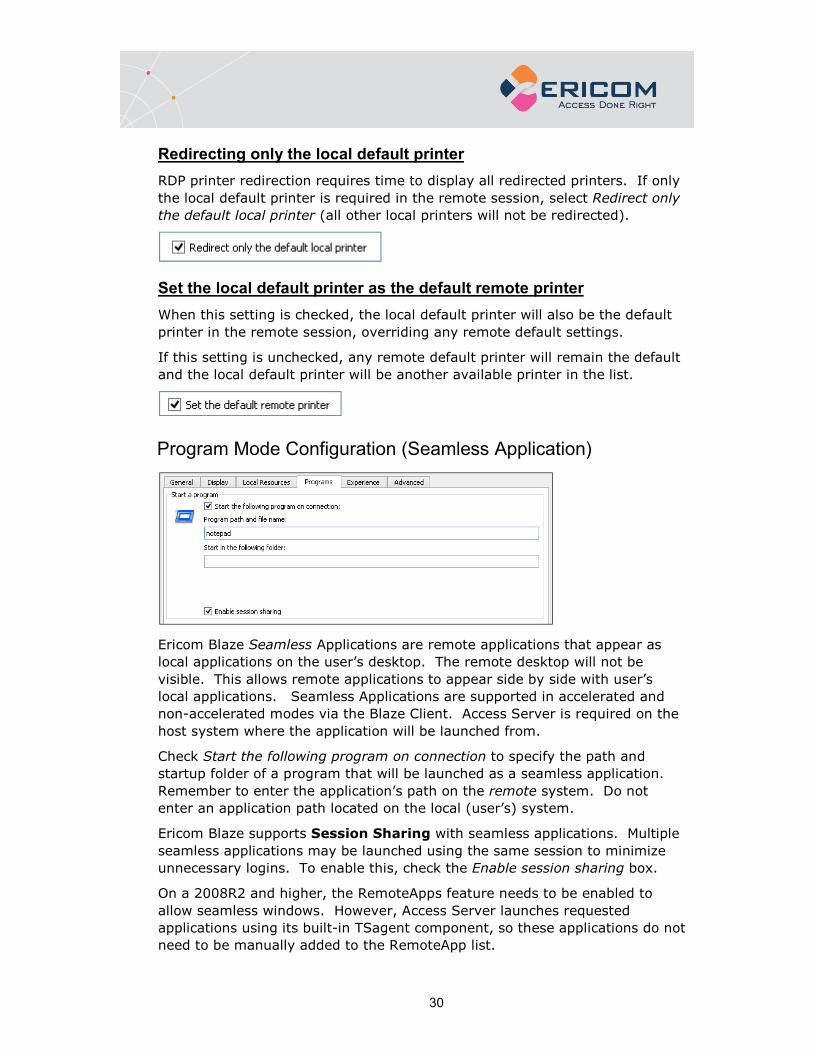
Redirecting only the local default printer
RDP printer redirection requires time to display all redirected printers. If only
the local default printer is required in the remote session, select Redirect only
the default local printer (all other local printers will not be redirected).
Set the local default printer as the default remote printer
When this setting is checked, the local default printer will also be the default
printer in the remote session, overriding any remote default settings.
If this setting is unchecked, any remote default printer will remain the default
and the local default printer will be another available printer in the list.
Program Mode Configuration (Seamless Application)
Ericom Blaze Seamless Applications are remote applications that appear as
local applications on the user’s desktop. The remote desktop will not be
visible. This allows remote applications to appear side by side with user’s
local applications. Seamless Applications are supported in accelerated and
non-accelerated modes via the Blaze Client. Access Server is required on the
host system where the application will be launched from.
Check Start the following program on connection to specify the path and
startup folder of a program that will be launched as a seamless application.
Remember to enter the application’s path on the remote system. Do not
enter an application path located on the local (user’s) system.
Ericom Blaze supports Session Sharing with seamless applications. Multiple
seamless applications may be launched using the same session to minimize
unnecessary logins. To enable this, check the Enable session sharing box.
On a 2008R2 and higher, the RemoteApps feature needs to be enabled to
allow seamless windows. However, Access Server launches requested
applications using its built-in TSagent component, so these applications do not
need to be manually added to the RemoteApp list.
31
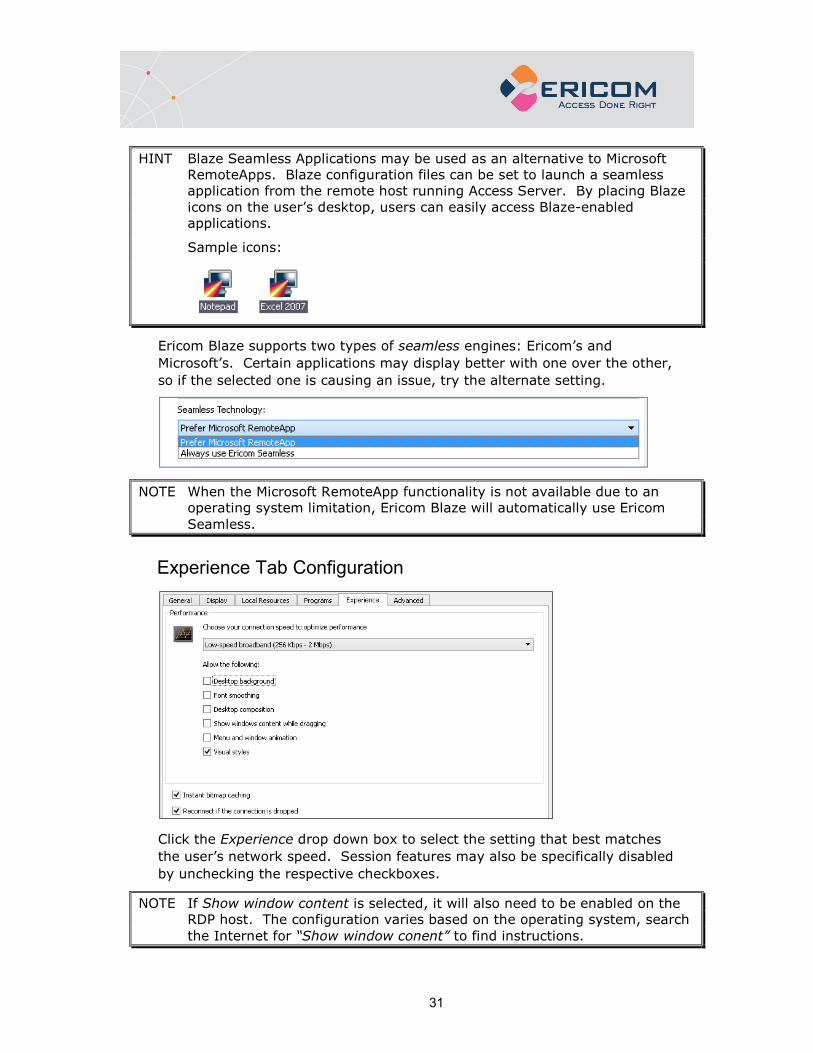
HINT Blaze Seamless Applications may be used as an alternative to Microsoft RemoteApps. Blaze configuration files can be set to launch a seamless application from the remote host running Access Server. By placing Blaze icons on the user’s desktop, users can easily access Blaze-enabled applications.
Sample icons:
Ericom Blaze supports two types of seamless engines: Ericom’s and
Microsoft’s. Certain applications may display better with one over the other,
so if the selected one is causing an issue, try the alternate setting.
NOTE When the Microsoft RemoteApp functionality is not available due to an operating system limitation, Ericom Blaze will automatically use Ericom Seamless.
Experience Tab Configuration
Click the Experience drop down box to select the setting that best matches
the user’s network speed. Session features may also be specifically disabled
by unchecking the respective checkboxes.
NOTE If Show window content is selected, it will also need to be enabled on the RDP host. The configuration varies based on the operating system, search the Internet for “Show window conent” to find instructions.

32
• Instant Bitmap Caching – This allows bitmaps to be cached for best
performance. Uncheck this setting when connecting to an RDP host
that also has Microsoft RemoteFX enabled.
• Reconnect if the connection is dropped – This enables a session to
reconnect automatically when the Blaze session is interrupted by a
network outage.
Advanced Tab Configuration
Ericom Secure Gateway
If the Ericom Secure Gateway will be used in the user’s connection - check the
box Connect using Ericom Secure Gateway. Enter the address of the Ericom
Secure Gateway server. If no port is explicitly specified, the default 443 is
used. To specify a custom port, enter ‘:’ and the port value after the address,
as show in the example below. Refer the Ericom Secure Gateway manual for
information on installing and configuring the Ericom Secure Gateway.
A user account is required to login to the Secure Gateway; this can be
manually entered or passed from the credentials stored in the Blaze client.
Access Server as a Gateway
The Access Server may act as a gateway proxy to an RDP host. This is
beneficial for situations where third-party components cannot be installed on
the RDP host.
When the Access Server gateway is enabled, enter a value for Computer
address that is recognizable by Access Server (not from the end-user’s
machine). This address should be reachable via ping and telnet commands
from the Access Server system.

33
When Access Server is used as a Gateway, it becomes a point of failure for
multiple users. Ensure that enough resources are allocated to the system
running Access Server and consider adding a second server for redundancy.
HINT To minimize performance loss in Gateway mode, keep the latency between the Access Server and RDP host to a minimum.
Local Cursor Options
To enable the local cursor, edit the .blaze file using a text editor and add one
of the following to the end of the file:
1. "null cursor:s:cross"
This will show the crosshair cursor
2. "null cursor:s:arrow"
This will show the standard local arrow cursor
3. "null cursor:s:png"
This will use the “null_cursor.png” file that is located in the blaze.exe
directory. This image must be 32x32 pixels and up to 32 bit colors and with
alpha (0 = transparent, 255 = fully opaque).
4. "null cursor:s:bmp"
This will use two B&W bitmaps: null_cursor.bmp and null_cursor_map.bmp.
The cursor bitmap (B) and mask (M) bits are combined like this:
B=1 and M=1 gives black.
B=0 and M=1 gives white.
B=0 and M=0 gives transparent.
B=1 and M=0 gives an XOR'd result under Windows, undefined results on all
other platforms
NOTE: Once this setting is manually added to the .blaze file, do not save new settings on top of it. Any new save operation will overwrite this setting and it will have to be manually re-added.
34
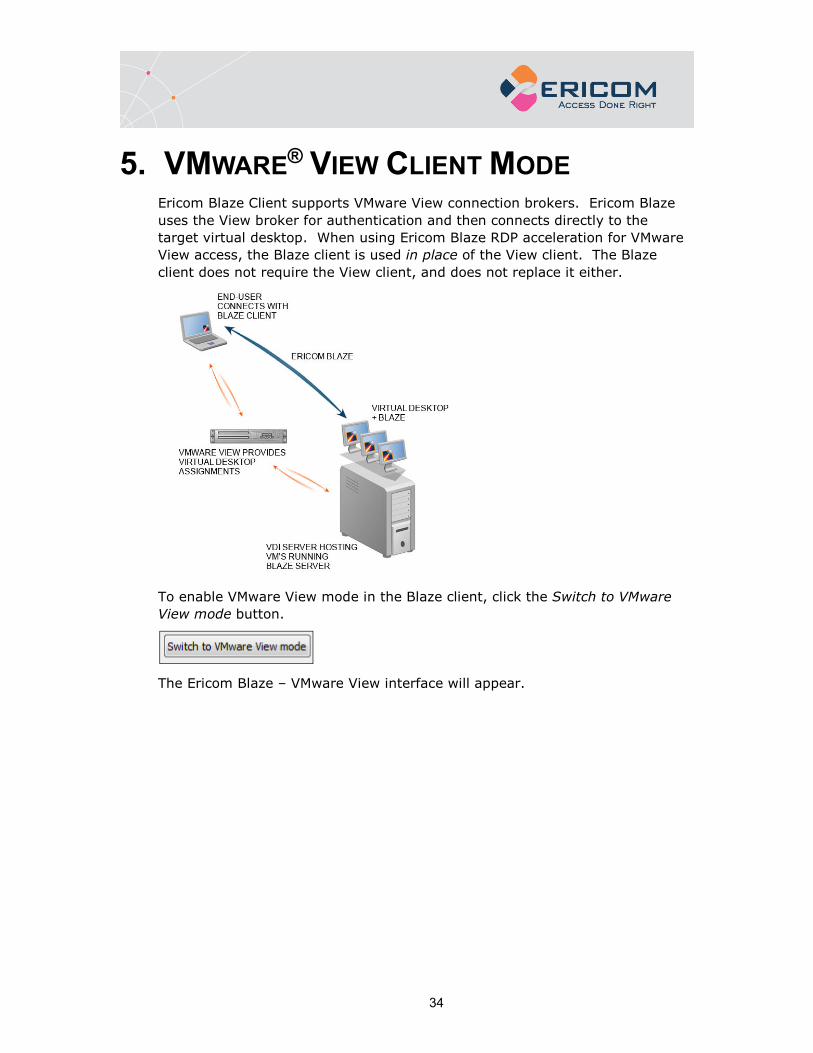
5. VMWARE® VIEW CLIENT MODE Ericom Blaze Client supports VMware View connection brokers. Ericom Blaze
uses the View broker for authentication and then connects directly to the
target virtual desktop. When using Ericom Blaze RDP acceleration for VMware
View access, the Blaze client is used in place of the View client. The Blaze
client does not require the View client, and does not replace it either.
To enable VMware View mode in the Blaze client, click the Switch to VMware
View mode button.
The Ericom Blaze – VMware View interface will appear.

35
Enable SSL if it is required by your VMware View connection broker.
Enter the address of the VMware View server in the Computer field and click
Connect.
The next dialog will prompt the user for credentials.
Once authenticated, the Blaze client will display a list of desktops available via
the View broker to the user.

36
Configure any Blaze settings as desired and click the Connect button to
connect to the selected desktop.
NOTE The Blaze client does not support PCoIP. The Ericom Blaze client and Blaze protocol functions independently from the View client and PCoIP protocol.
Secure Gateway Access
If the Ericom Secure Gateway will be used - check the box Connect using
Ericom Secure Gateway. Enter the address of the Ericom Secure Gateway
server. If no port is explicitly specified, the default 443 is used. To specify a
port, enter ‘:’ and the port value after the address, as show in the example
below. In the example above, the Secure Gateway has an address of
secgate.acme.com; since no port is specified 443 is automatically used.

37
6. ERICOM BLAZE CLIENT FOR MAC
Installation Prerequisites
• Mac OS X 10.9 or higher
• 30 MB of free hard-disk space
• MMX capable CPU
Installing Ericom Blaze Client for Mac
To launch the Ericom Blaze Client for Mac, run installer and follow the
instructions contained in the installation wizard.
Using Ericom Blaze Client for Mac
To launch the Ericom Blaze Client run the blaze executable or the shortcut.
In Blaze Client 2.5 and higher, the .blaze extension is associated to the Blaze
Client. Simply double-click on any .blaze configuration file and the Blaze
Client will launch using the configured settings.
Review the chapter on the Blaze Client for the Windows platform for
instructions on the proper usage of core features. The content of this section
covers the differences in functionality between the Windows and Mac version
of the Blaze client.
Using a PC Keyboard
When using a physical Windows based keyboard, go to the Blaze Client’s Local
Resources tab and check the setting Using a PC Keyboard.

38
When this setting is checked, certain Mac to Windows key mappings will be
disabled. The Control and Windows keys will work natively as expected.
When this setting is unchecked, the default Mac keyboard emulation is used.
The Control (CTRL) key operates as the Windows key and the Command key
operates as the Windows Control (CTRL) key.
Drive Mapping
To access the drive mapping options, go to Local Resources and go to the
More devices dialog. The drive mapping dialog provides three options:
• Select My Documents to map the home directory
• Select Desktop to map the desktop directory
• Select Media to map the /media directory. This directory is used for
mounting files systems on removable media like CD-ROM drives, floppy
disks, and Zip drives

39
Printer Redirection
Printer redirection for Mac clients only supports postscript printers. In
addition, the HP PS Universal driver must be installed on the Windows RDP
host (refer to the Built-in Universal Printing section in this manual for details).
Reverse Scroll Wheel
On certain Macs, the scroll wheel will operate in the reverse direction. To
change the current direction of the scroll wheel, select the Reverse Scroll
Wheel setting under the Local Resources tab.
Blaze Client File Menu
Ericom Blaze Client for Mac provides a File menu to execute additional
functions: open a New Connection, and send various Windows related key
combinations.
To access the File menu in Full Screen mode, move the mouse to the upper
left hand corner of the screen. The Mac toolbar will appear along with the File
menu selection.
Blaze Title bar
In Blaze Mac 7.6 and higher, the original yellow Blaze title bar has been
discontinued in favor of the operating system native title bar. The ability to
pin the title bar is no longer available.
When Blaze Mac connects using 'Use all my monitors' mode, the restore
button will be unavailable in the title bar.

40
7. ERICOM BLAZE CLIENT FOR LINUX
Installing Ericom Blaze Client for Linux 7.x (64-bit)
These are the installation pre-requisites:
• Ubuntu 14.04 LTS
• MMX capable CPU
• The following dependencies:
sudo apt-get install libqt5x11extras5
sudo apt-get install libqt5printsupport5
sudo apt-get install libqt5serialport5
sudo apt-get install libqt5multimedia5-plugins
A deb installer for Debian based Linux distributions is available. Run the
following command to install it:
dpkg –i ericom-blaze-client_x64.deb
The application will be installed in the /opt/ericom/ericom-blaze-client/
directory. Run “./blaze” from this directory to launch the application.
Installing Ericom Blaze Client for Linux 3.x (32-bit)
These are the installation pre-requisites:
• Most current Linux distributions, such as Red Hat, Fedora, Suse and Ubuntu.
Requires Linux kernel 2.6 and above.
• 20 MB of free hard-disk space
• MMX capable CPU
• The following X11 libraries must be installed prior to using Blaze:
Xcursor, Xrandr, and Xinerama
There are different types of installers for Ericom Blaze Client for Linux:
• rpm for most Linux distributions such as Red Hat / Fedora / Suse
• deb for Debian based Linux distributions such as Ubuntu and HP® ThinConnect
• Graphical installer that is compatible with most Linux environments and can be
used by root and by other users
• Blaze.tar.gz archive containing all the files – this is appropriate for installation on
Linux Thin Clients
To install using rpm enter the following command:

41
rpm –I Ericom-Blaze-Client.rpm
To install using deb double-click on the file Ericom-Blaze-Client.deb
The deb version can also be installed running the command:
dpkg –i Ericom-Blaze-Client.deb
NOTE When installing the Blaze deb package on Linux thin clients, a software installation tool is may be required by the thin client vendor.
42
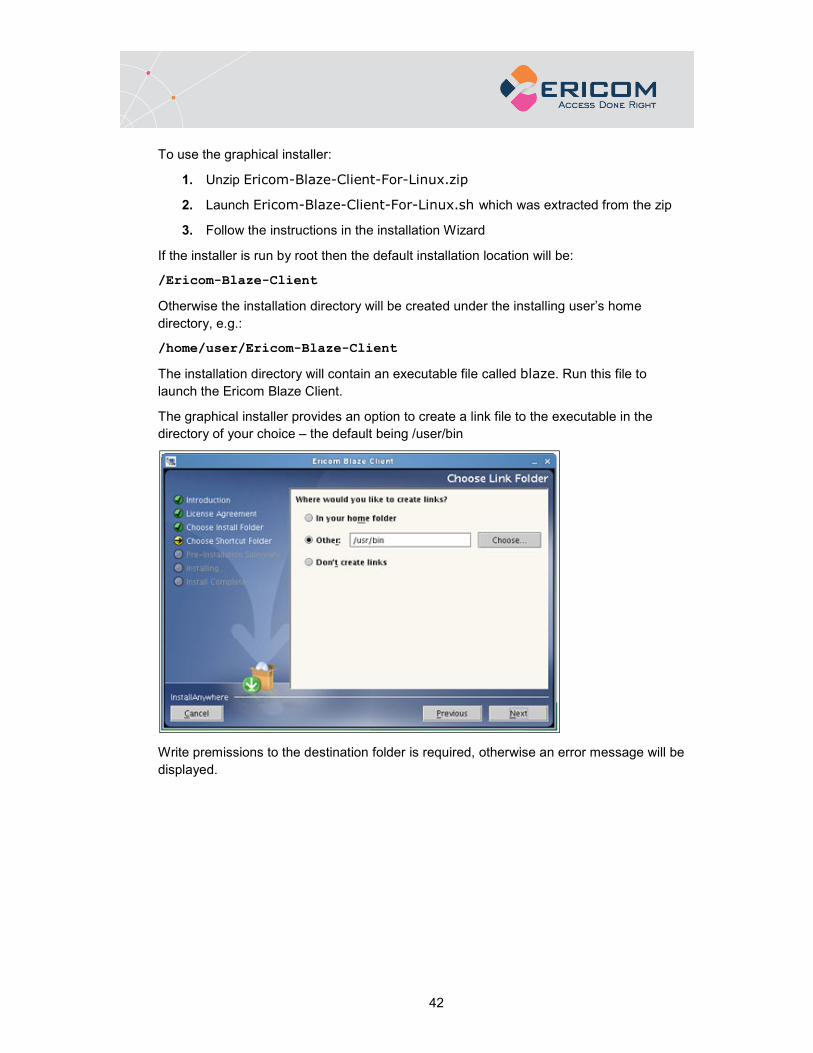
To use the graphical installer:
1. Unzip Ericom-Blaze-Client-For-Linux.zip
2. Launch Ericom-Blaze-Client-For-Linux.sh which was extracted from the zip
3. Follow the instructions in the installation Wizard
If the installer is run by root then the default installation location will be:
/Ericom-Blaze-Client
Otherwise the installation directory will be created under the installing user’s home
directory, e.g.:
/home/user/Ericom-Blaze-Client
The installation directory will contain an executable file called blaze. Run this file to
launch the Ericom Blaze Client.
The graphical installer provides an option to create a link file to the executable in the
directory of your choice – the default being /user/bin
Write premissions to the destination folder is required, otherwise an error message will be
displayed.

43
Using Ericom Blaze Client for Linux
To launch the Ericom Blaze Client run the blaze executable or the link. A
connection Wizard is displayed that is the same as on the Windows platform –
see Blaze Client for Windows Chapter for details. The executable is located in
the directory /opt/Ericom-Blaze-Client.
Review the chapter on the Blaze Client for the Windows platform for
instructions on the proper usage of core features. The content of this section
covers the differences in functionality between the Windows and Mac version
of the Blaze client.
Drive Mapping
The drive mapping dialog provides three options:
• Select My Documents to map the home directory
• Select Desktop to map the desktop directory
• Select Media to map the /media directory. This directory is used for
mounting files systems on removable media like CD-ROM drives, floppy
disks, and Zip drives
Once the Blaze Linux client is connected to the Windows session, the drive will
appear in the Computer list:

44
Printer Redirection
Printer redirection for Linux clients only supports postscript printers. The
following printer driver must be installed on the Windows RDP host:
• On 32-bit systems (x86) install HP Universal Print Driver for Windows
PostScript
• On 64-bit systems (x64) install HP Universal Print Driver for Windows
PostScript x64
To enable printing, click on the Local Resources tab and check Printers and
Use HP Universal PS Driver
45
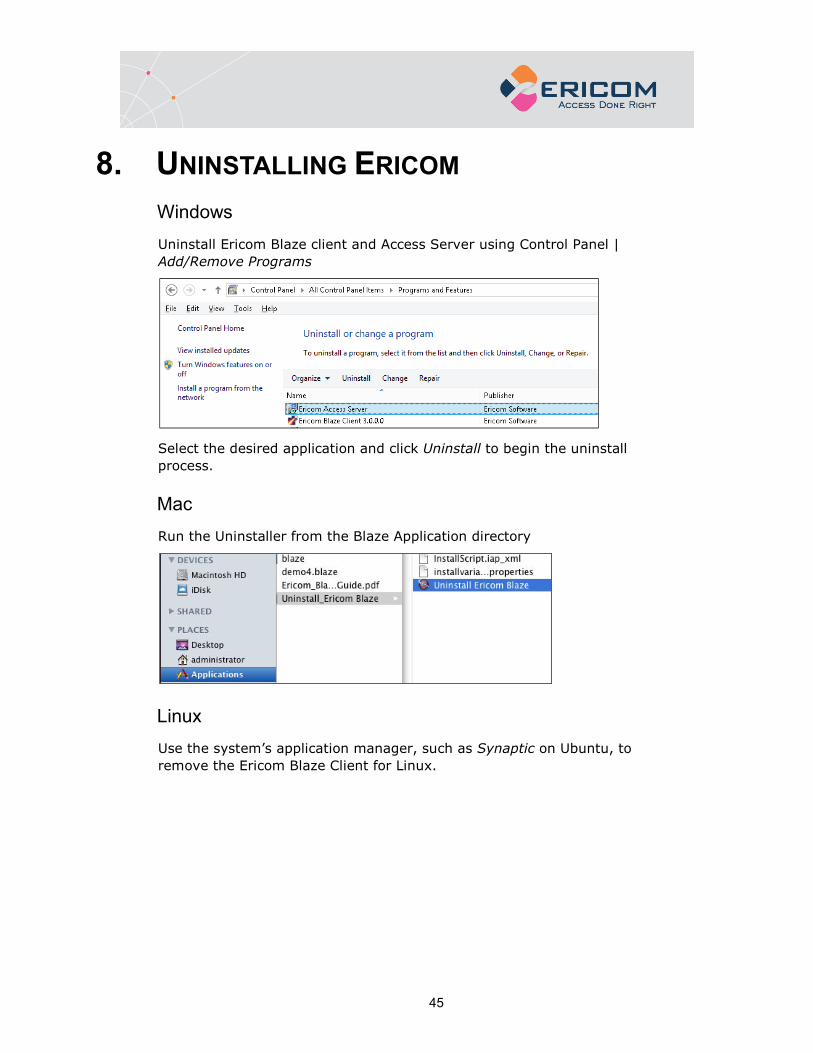
8. UNINSTALLING ERICOM
Windows
Uninstall Ericom Blaze client and Access Server using Control Panel |
Add/Remove Programs
Select the desired application and click Uninstall to begin the uninstall
process.
Mac
Run the Uninstaller from the Blaze Application directory
Linux
Use the system’s application manager, such as Synaptic on Ubuntu, to
remove the Ericom Blaze Client for Linux.

46
9. BLAZE AND LOAD BALANCERS Larger application and desktop hosted deployments will require multiple RDP
host servers. The Ericom PowerTerm™ WebConnect connection broker is
recommended to handle larger loads and evenly distribute users across a
large base of Terminal Servers. However, third-party Terminal Server aware
load balancers (i.e. Microsoft Windows 2008 R2 Remote Desktop Connection
Broker or 2X Load Balancer) may also be used.
To use Blaze with a load balanced RDP farm, install Access Server on a
powerful dedicated server. Using a x64 server and x64 Access Server is
strongly recommended for this. Open the Access Server port (e.g. 8080)
inbound into the server and the RDP port (e.g. 3389) outbound.
Configure Ericom Blaze clients to connect to the address of the Access Server.
Access Server will forward communication onto the load balancer. The
connection between the Access Server, load balancer, and RDP hosts must be
in very close proximity, with minimal latency, to ensure good performance.
This diagram illustrates how Ericom Blaze works with a load balancer:

47
The system running Ericom Access Server must be equipped with enough
memory to handle the total number of active users.
NOTE When using the Access Server as a gateway, Ericom recommends using the x64 version on a powerful server (minimum two CPU cores and four gigabytes of RAM).

48
10. BLAZE CLIENT COMMAND LINE
PARAMETERS Blaze.exe [options]
/option:<value>
/option:<default-value|other-value|yet-another-value>
boolean can be any of: true, false, yes, no, on, off, 1, 0
Example:
Blaze /bpp:32 /f /connection-bar:yes /audio:off /drive:C /drive:desktop
/printer:*,3 /clipboard:1 /v:somehost
Options:
/v:server[:port] - RDP Server hostname
/u:[<domain>\]<user> or <user>[@<domain>]
/p:<password>
/d:<domain>
/admin - Admin (or console) session
/multimon:<use|span|#> - Use, Span multiple monitors or use specific monitor
/w:<width> - Remote Desktop width
/h:<height> - Remote Desktop height
/size:<width>x<height> - Remote Desktop screen size
/f - Fullscreen mode
/bpp:<depth> Session bpp (color depth)
/shell:<alternate shell>
/shell-dir:<alternate shell working directory>

49
/jpeg-quality:<percentage> 0 = Not accelerated, 100 = lossless, 1-99 jpeg
quality
/true-lossless-type:2 /image-quality:100: set true lossless compression
/connection-bar:<yes|no|pinned> connection bar mode (full screen only)
/use-esg:<off|on> use ericom secure gateway
/esg-creds-mode:<separate|gw|rdp> - ericom secure gateway credentials mode
/g:<gateway>[:port] - Gateway Hostname
/gu:[<domain>\]<user> or <user>[@<domain>] - Gateway username
/gp:<password> - Gateway password
/gd:<domain> - Gateway domain
/access-server:<server>[:port] - Access Server hostname
/use-scancodes:<on|off> Convert Unicode to Scancodes
/remote-show-window:<|+|_> - default: regular, '+': maximized, '_': minimized
/xtea-password:<password> - XTEA password encryption
/disable-reconnect:<off|on> - disable session reconnect
/session-name:<name> connection name
/null-cursor-shape:<default|blank|cross|arrow|bmp|png> null cursor shape
/reverse-mouse-wheel reverse mouse wheel
/kbd:0x<layout id> or <layout name> - Keyboard layout
/kbd-subtype:<subtype id> - Keyboard subtype
/kbd-fn-key:<function key count> - Keyboard function key count
/workarea:Use available work area
/monitors:<*|0,1,2...> - Select monitors to use
/addins:<*|specific dll> - '*' = all addins
/audio:<play-on-client|play-on-server|off> - Audio output mode
/network:<none|modem|low-speed-broadband|satellite|high-speed-
broadband|wan|lan> - Network connection type

50
/drive:<*|C|D..|dynamic|desktop|docs> - Redirect drives '*' = all, 'C' =
C:\, dynamic =drives that I connect later
/clipboard:<off|on> - Redirect clipboard
/printer<*.1|2|3> - Redirect printer , 1 = native, 2 = universal, 3 = both
/uprinter-use-hp:<off|on> - Universal printing use HP driver
/uprinter-driver:<name> - Universal printing driver
/fonts:<off|on> - Smooth fonts (ClearType)
/aero:<off|on> - Desktop composition
/window-drag:<off|on> - Full window drag
/menu-anims:<off|on> - Menu animations
/wallpaper:<on|off> - Wallpaper
/cache-waiting-list:<on|off> Use cache waiting list
/fast-path:<on|off> fast-path input/output
51
11. TECHNICAL SUPPORT Release notes for current and prior versions may be found on the Ericom
website’s download page.
This section provides suggestions for troubleshooting common configuration
problems.
Question: Is there a public demo server to see Ericom Blaze in action without
being required to configure an appropriate RDP host?
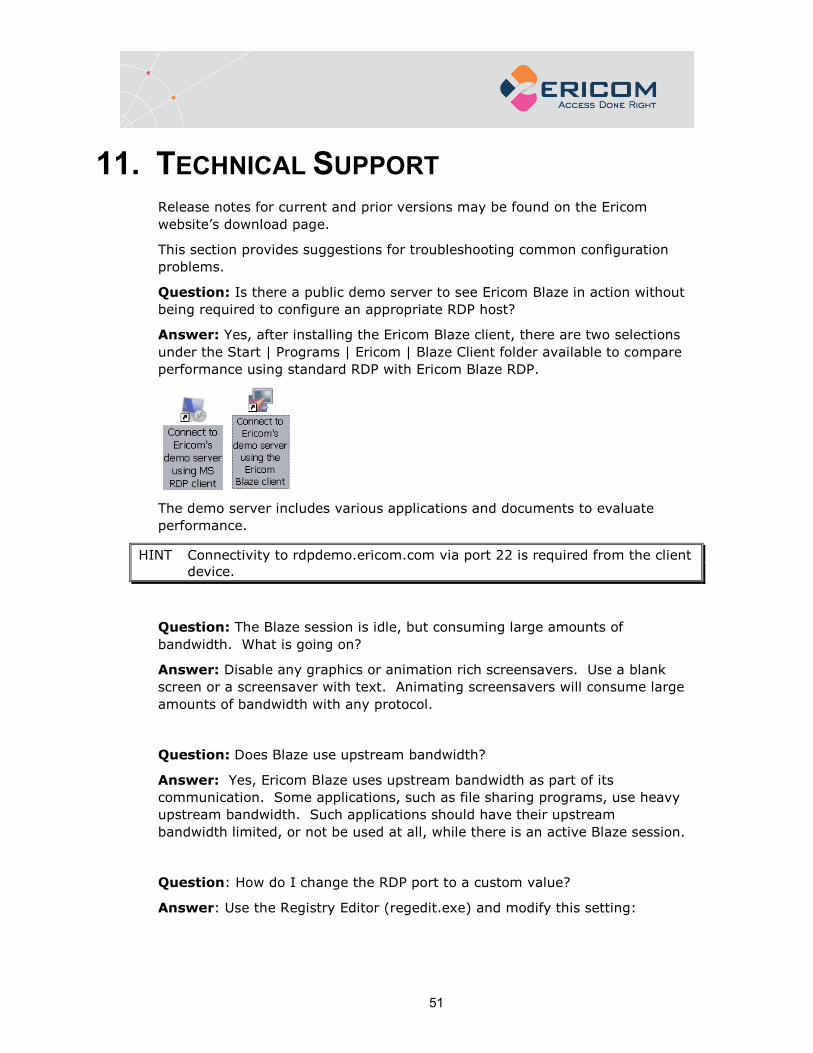
Answer: Yes, after installing the Ericom Blaze client, there are two selections
under the Start | Programs | Ericom | Blaze Client folder available to compare
performance using standard RDP with Ericom Blaze RDP.
The demo server includes various applications and documents to evaluate
performance.
HINT Connectivity to rdpdemo.ericom.com via port 22 is required from the client device.
Question: The Blaze session is idle, but consuming large amounts of
bandwidth. What is going on?
Answer: Disable any graphics or animation rich screensavers. Use a blank
screen or a screensaver with text. Animating screensavers will consume large
amounts of bandwidth with any protocol.
Question: Does Blaze use upstream bandwidth?
Answer: Yes, Ericom Blaze uses upstream bandwidth as part of its
communication. Some applications, such as file sharing programs, use heavy
upstream bandwidth. Such applications should have their upstream
bandwidth limited, or not be used at all, while there is an active Blaze session.
Question: How do I change the RDP port to a custom value?
Answer: Use the Registry Editor (regedit.exe) and modify this setting:
52
HKEY_LOCAL_MACHINE\System\CurrentControlSet\Control\TerminalServer
\WinStations\RDP-Tcp\PortNumber
Enter the desired port value. The Access Server will automatically recognize
this setting.
Question: Why do I received an “Unable to connect to Ericom Access Server”
message?
Answer: The Ericom Access Server is not running or is unreachable.
• Use ping to verify that the server (i.e., testserver) is reachable.
• Verify that the host/server firewall allows Ericom Blaze traffic (by
default, 8080).
• Check the server’s Task Manager to ensure that AccessServer is
running (since it is running as a service, you will need the configure
Task Manager to show processes for all users).
Question: When I launch the Blaze Client with RDP Acceleration enabled I
see the splash screen and then nothing happens – what’s going on?
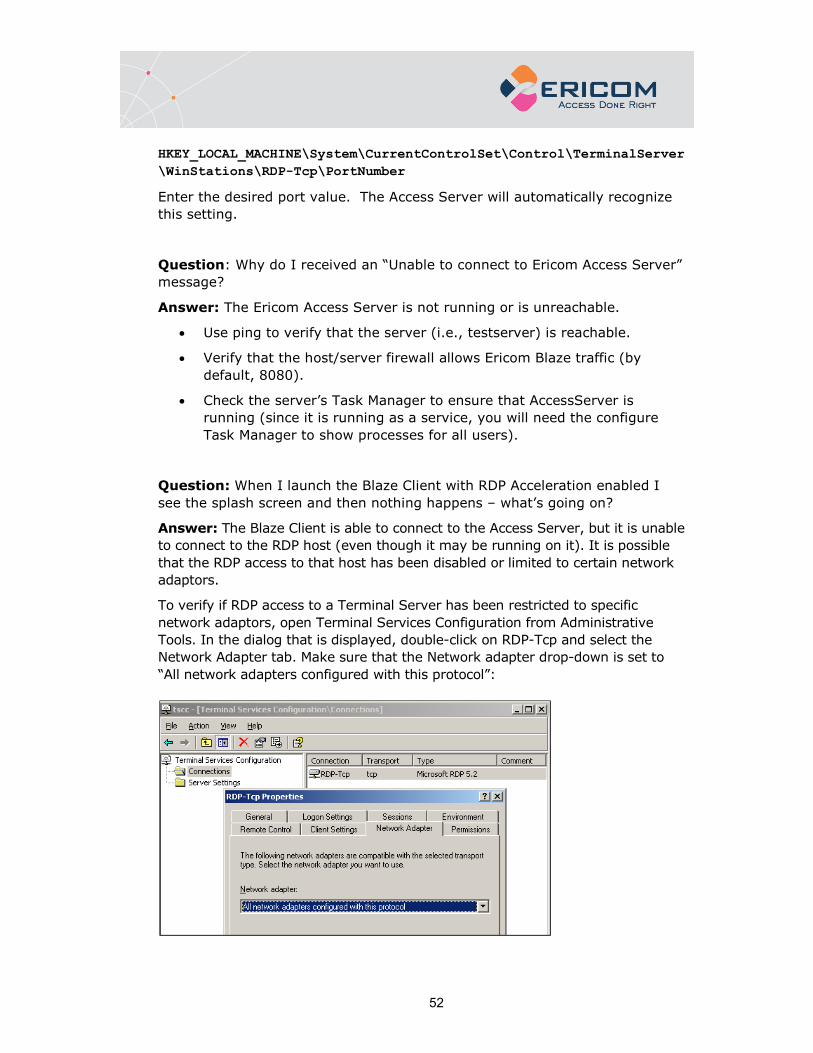
Answer: The Blaze Client is able to connect to the Access Server, but it is unable
to connect to the RDP host (even though it may be running on it). It is possible
that the RDP access to that host has been disabled or limited to certain network
adaptors.
To verify if RDP access to a Terminal Server has been restricted to specific
network adaptors, open Terminal Services Configuration from Administrative
Tools. In the dialog that is displayed, double-click on RDP-Tcp and select the
Network Adapter tab. Make sure that the Network adapter drop-down is set to
“All network adapters configured with this protocol”:

53
Question: How much acceleration can I expect to see with Blaze? Does
Blaze accelerate text?
Answer: This will depend on your network type and display content. Blaze
will accelerate the RDP session up to 20 times. You will see the most benefit
when connecting over a restricted network (with high latency, low bandwidth
or both), such as an aircard. If you are connecting over a LAN with no
network restrictions, there may not be noticeable improvements.
If your session consists of mostly text (i.e., editing email) or monochromatic
images (i.e., black and white images) the acceleration will also be reduced
compared to a graphics rich application (i.e., Google Maps in Satellite mode).
Question: Does Ericom Blaze support WYSE S10/V10 thin OS devices?
Answer: The best way to provide Blaze access for WYSE thin OS devices is to
use Access Server as a gateway. To implement this, do the following:
Setup a new (local) Terminal Server at the location where the WYSE terminals
are running. Install Blaze on the local TS.
Connect to the local TS with the WYSE terminals (fast LAN connection) using
RDP, then run Blaze Client to connect to the remote system (over the slow
network connection).

54
Question: What is the best way to configure many machines running Access
Server?
Answer: Use Group Policy to modify the Access Server registry settings. The
registry keys are accessed via the Access Server Configuration application -
under the Advanced page.
Question: Why is time-zone redirection not working?
Answer: Enable time zone synchronization on the RDP host. This may be
done via the Group Policy Editor, as seen below:
Question: How do I configure Ericom Blaze for use with Windows Azure?
Answer: Perform the following steps to use Blaze with Azure:
• Create a Windows 2012/2016 Server
• In the management portal, click on the machine and then click on
EndPoints.
• Add a new endpoint for TCP over port 8080 (this is like a firewall
outside of the Windows firewall.)
• On the Blaze client, connect to: AzureServerName.cloudapp.net:8080
Question: I cannot connect and see a TermDD error in the Event Viewer:
The RDP protocol component X.224 detected an error in the protocol stream
and has disconnected the client.
Answer: Access Server requires access to native RDP to be enabled on the
RDP host. For this reason, do not change the RDP Security Layer to SSL.
Leave the setting on RDP Security Layer and using the built-in AccessNow SSL
encryption or Secure Gateway, to add SSL encryption.

55
Question: How do I ask for technical assistance?
Answer: Email [email protected] and provide the following information:
• Which version of Ericom Blaze are you using ?
• What type of system/operating system are you connecting to (host)?
(e.g., Windows 2012 server) 32 or 64 bit? Is RDP enabled?
• What type of system/operating system are you connecting from
(client)?
(e.g., Windows 8) 32 or 64 bit?
• Is port 8080 enabled on the host (is the firewall configured with an
exception)?
• What error messages are being displayed?
• What type of applications are you using with Blaze?
Graphical, text, or both?
• How many people/machines/hosts are having this problem (1, all, etc)?

56
About Ericom
Ericom Software is a leading global provider of Application Access,
Virtualization and RDP Acceleration Solutions. Since 1993, Ericom has been
helping users access enterprise mission-critical applications running on a
broad range of Microsoft Windows Terminal Servers, Virtual Desktops, legacy
hosts and other systems. Ericom has offices in the United States, United
Kingdom and EMEA. Ericom also has an extensive network of distributors and
partners throughout North America, Europe, Asia and the Far East. Our
expanding customer base is more than 30 thousand strong, with over 7
million installations. For more information about Ericom and its products,
please visit http://www.ericom.com
For more information on our products and services, contact us at the location
nearest to you.
And visit our web site: http://www.ericom.com
North America Western Europe International
Ericom Software Inc. Ericom Software (UK) Ltd. Ericom Software Ltd. 231 Herbert Avenue, Bldg. #4 11a Victoria Square 8 Hamarpeh Street Closter, NJ 07624 USA Droitwich, Worcestershire Har Hotzvim Technology Park Tel +1 (201) 767 2210 WR9 8DE United Kingdom Jerusalem 91450 Israel Fax +1 (201) 767 2205 Tel +44 (0) 845 644 3597 Tel +972 (2) 591 1700 Toll-free 1 (888) 769 7876 Fax +44 (0) 845 644 3598 Fax +972 (2) 571 4737 Email [email protected] Email [email protected] Email [email protected]