Embed Size (px)
Citation preview

Elite Engineering Catch Can Install
LS3 Corvette Engine Installation
Tools Needed:
• Flat Head Screwdriver • 6mm Allen Wrench • Razor Knife • Pliers/Vise Grips • 1/8” Allen Wrench
Parts Supplied with Catch Can Installation Instructions:
1. Disconnect negative side of battery to avoid any potential electrical problems. 2. Locate and Remove the Passenger’s Side Oil Filler Cap and Fuel Rail Cover

3. Shown with Passenger’s Side Fuel Rail Cover removed

4. To allow more clearance, disconnect the (3) wiring harnesses shown
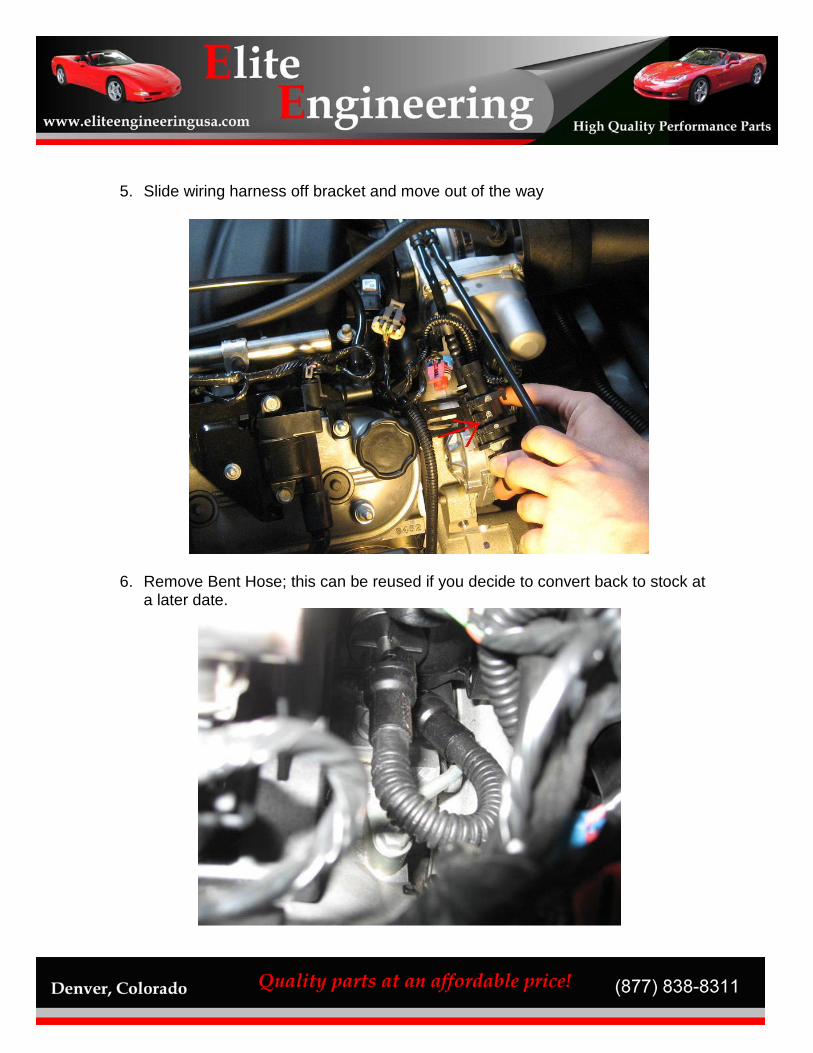
5. Slide wiring harness off bracket and move out of the way
6. Remove Bent Hose; this can be reused if you decide to convert back to stock at a later date.
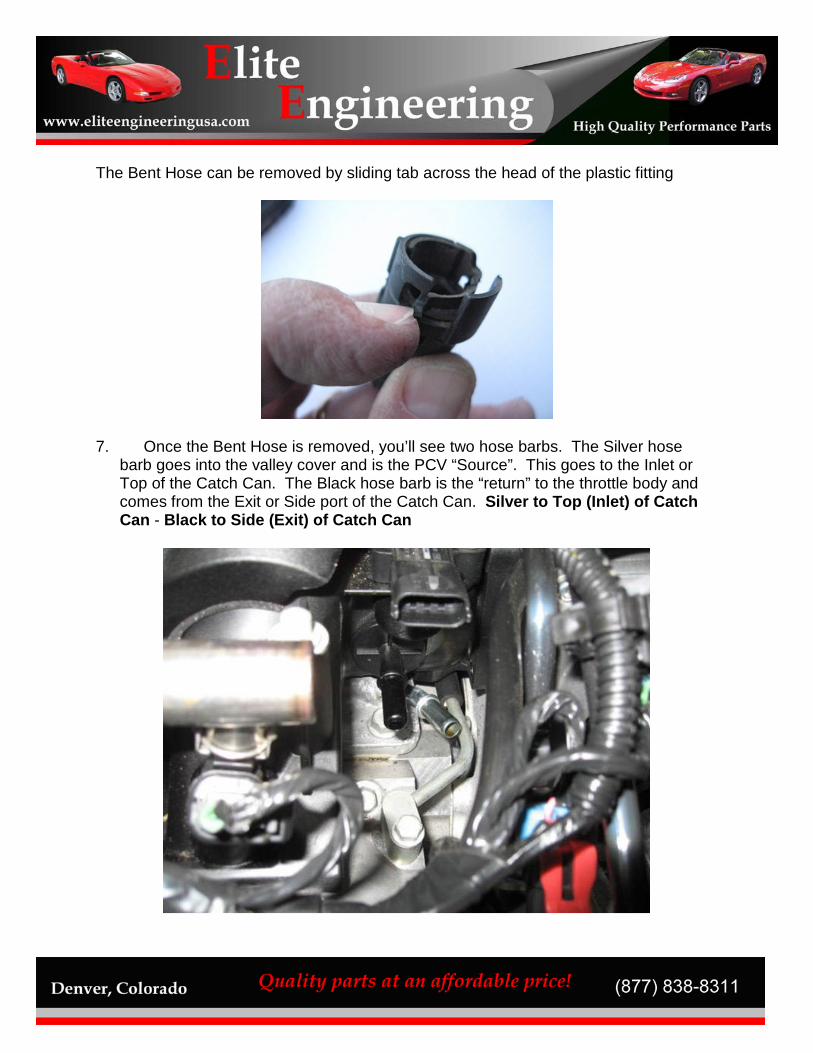
The Bent Hose can be removed by sliding tab across the head of the plastic fitting
7. Once the Bent Hose is removed, you’ll see two hose barbs. The Silver hose
barb goes into the valley cover and is the PCV “Source”. This goes to the Inlet or Top of the Catch Can. The Black hose barb is the “return” to the throttle body and comes from the Exit or Side port of the Catch Can. Silver to Top (Inlet) of Catch Can - Black to Side (Exit) of Catch Can

Mounting the Catch Can
8. Now it’s time to mount the Catch Can. Locate the “L” shaped bracket, Hex Bolt, Aluminum Spacer, and Lock Washer. Your bracket might be Silver in Color.
9. To mount the Catch Can, first you’ll need to unplug this wire clip from the upper threaded hole
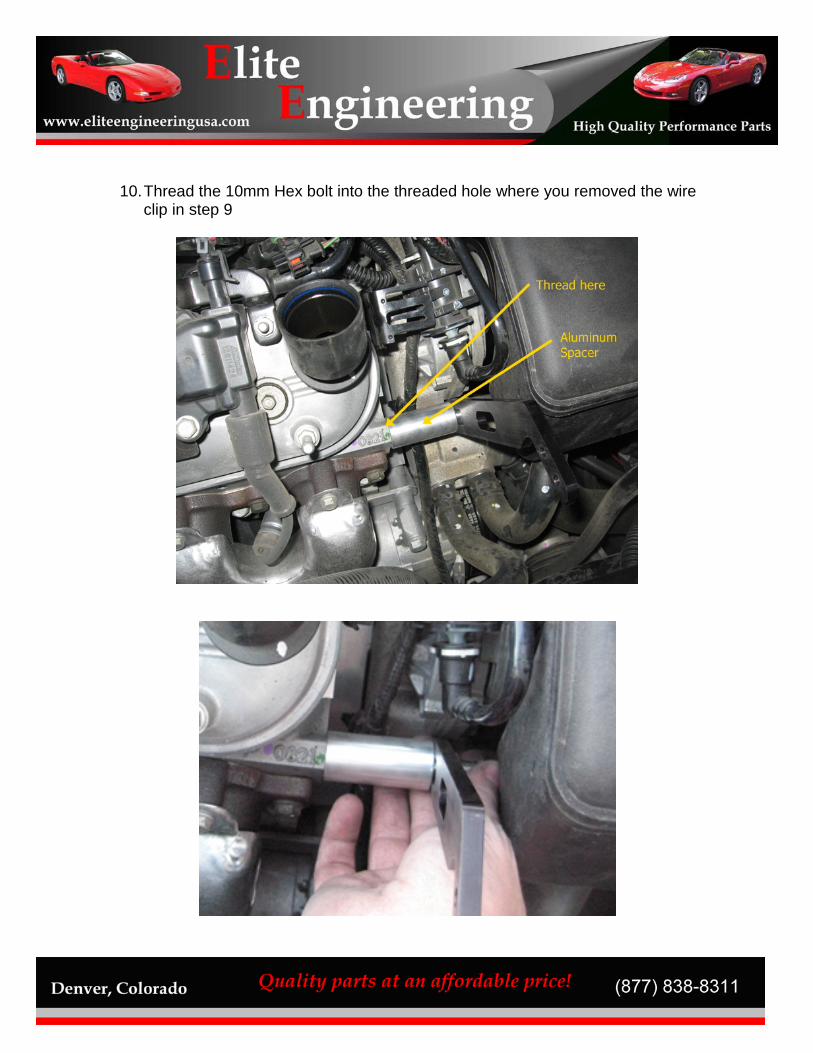
10. Thread the 10mm Hex bolt into the threaded hole where you removed the wire clip in step 9

Be sure to note, the Top of the Catch Can is the Inlet, the Side Hose Barb is the Exit Connection
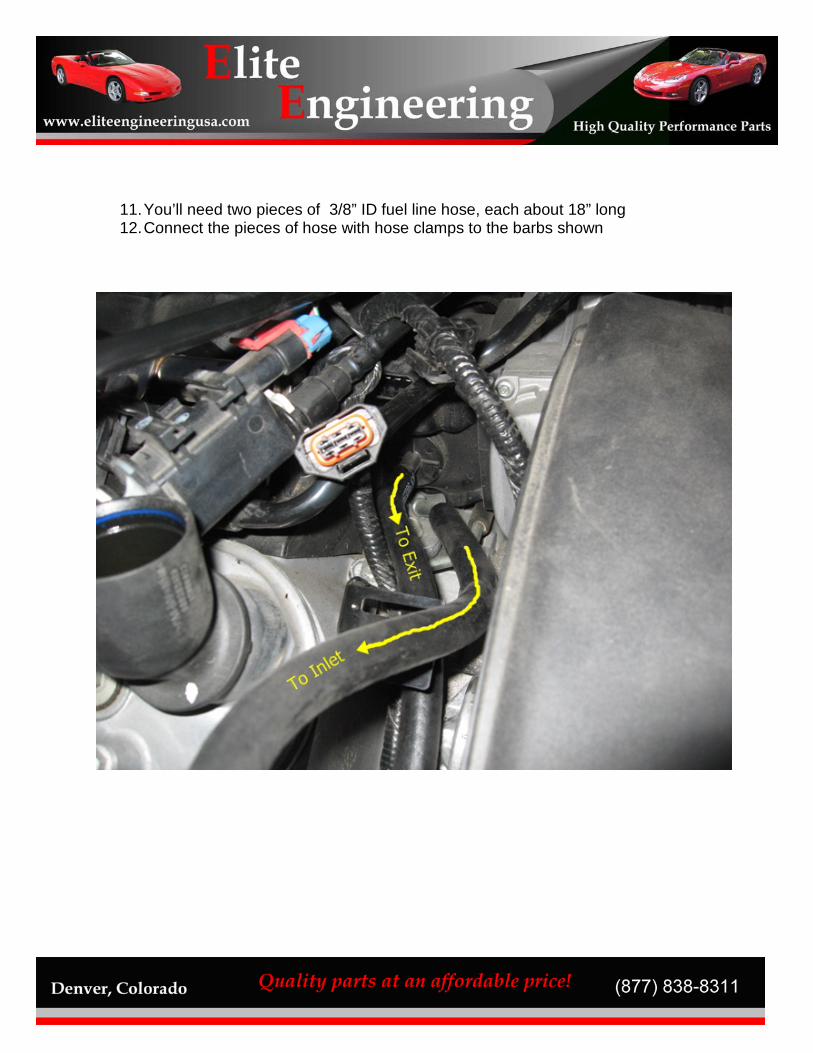
11. You’ll need two pieces of 3/8” ID fuel line hose, each about 18” long 12. Connect the pieces of hose with hose clamps to the barbs shown
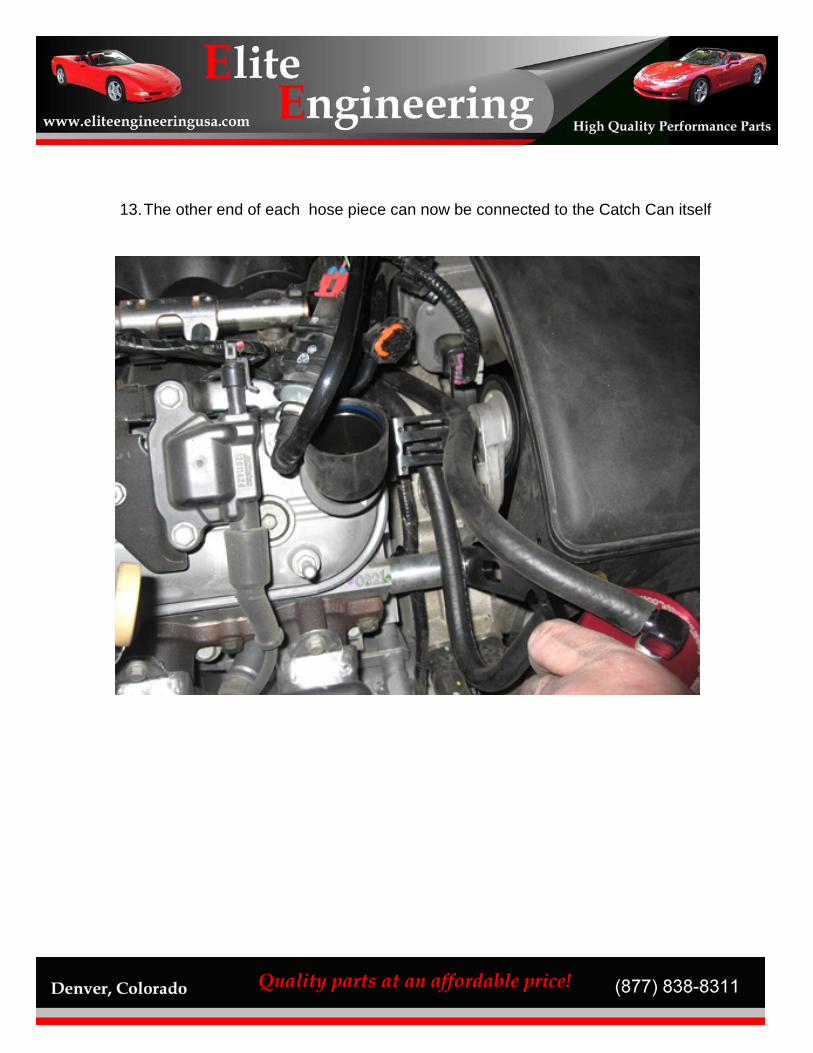
13. The other end of each hose piece can now be connected to the Catch Can itself
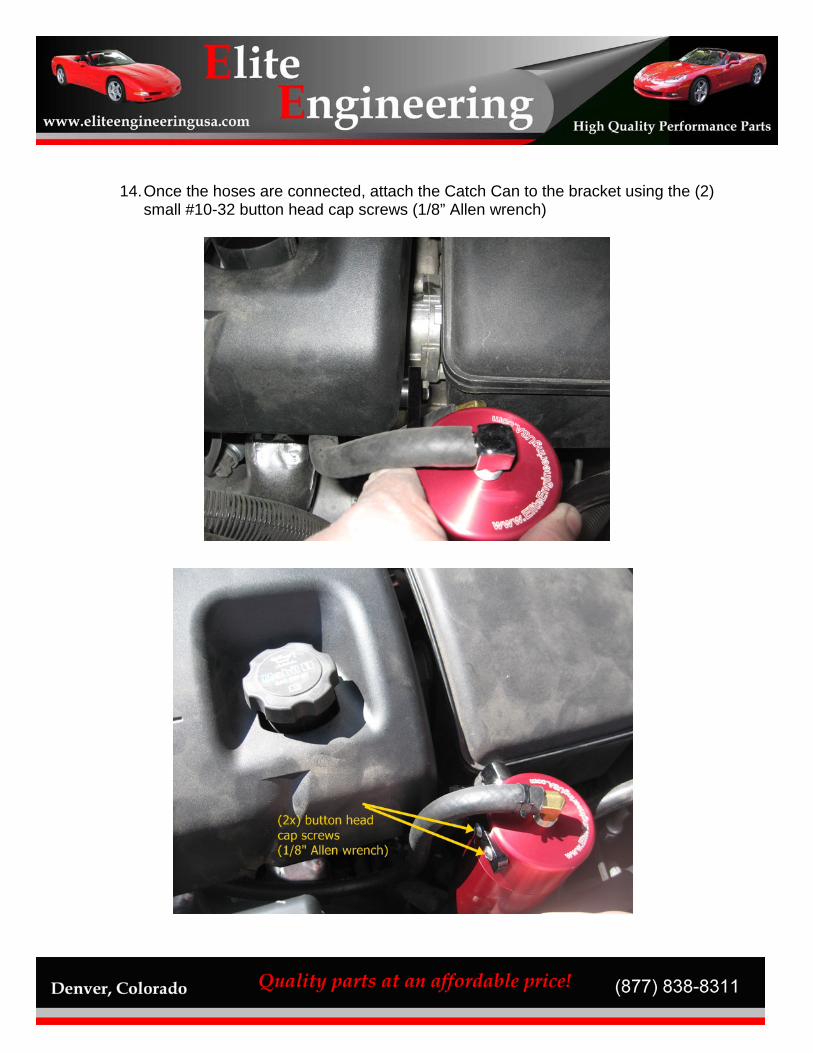
14. Once the hoses are connected, attach the Catch Can to the bracket using the (2) small #10-32 button head cap screws (1/8” Allen wrench)

15. Before putting the Fuel Rail Cover back on, be sure to go back and reconnect all
wiring harnesses that were removed in Step 4.
16. Here’s a picture of the finished installation on an LS3
17. The Catch Can should be serviced by unthreading the Catch Can bottom and removing any captured oil. On the LS3 application and installation, it may be easier to remove the (2) small #10-32 button head allen screws to gain full access to empty the Catch Can.