Embed Size (px)
Citation preview

www.tech4learning.com 877-834-5453[ 1 ]
Elementary Science Resource Kit
Elementary Science Resource KitIntegrating Creative Technology Tools intoYour Science Program
www.tech4learning.com 877-834-5453[ 2 ]
Elementary Science Resource KitEngage Primary Students in Science p1
Creative work with technology tools, like Pixie and Wixie, can help you get primary students to embrace the inquiry process while developing essential skills for future science learning. Simple activities you do together can teach and assess student understanding of the five senses, animal classification, and life cycles, helping you address specific standards from kindergarten to second grade. You can further develop learners’ observation, problem-solving, and critical thinking skills with student-created projects that incorporate painting, diagramming, writing, storytelling, narration, and more.
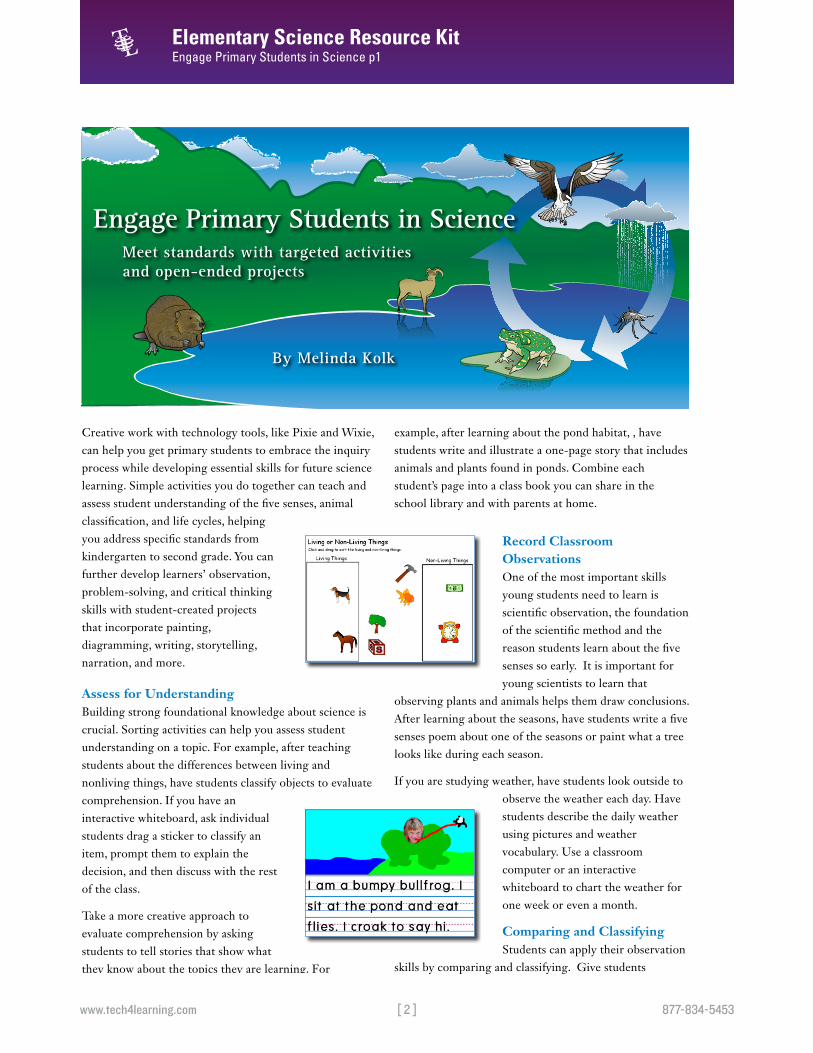
Assess for UnderstandingBuilding strong foundational knowledge about science is crucial. Sorting activities can help you assess student understanding on a topic. For example, after teaching students about the differences between living and nonliving things, have students classify objects to evaluate comprehension. If you have an interactive whiteboard, ask individual students drag a sticker to classify an item, prompt them to explain the decision, and then discuss with the rest of the class.
Take a more creative approach to evaluate comprehension by asking students to tell stories that show what they know about the topics they are learning. For
the creative educator
Engage Primary Students in ScienceMeet standards with targeted activities and open-ended projects
By Melinda Kolk
example, after learning about the pond habitat, , have students write and illustrate a one-page story that includes animals and plants found in ponds. Combine each student’s page into a class book you can share in the school library and with parents at home.
Record Classroom ObservationsOne of the most important skills young students need to learn is scientific observation, the foundation of the scientific method and the reason students learn about the five senses so early. It is important for young scientists to learn that
observing plants and animals helps them draw conclusions. After learning about the seasons, have students write a five senses poem about one of the seasons or paint what a tree looks like during each season.
If you are studying weather, have students look outside to observe the weather each day. Have students describe the daily weather using pictures and weather vocabulary. Use a classroom computer or an interactive whiteboard to chart the weather for one week or even a month.
Comparing and ClassifyingStudents can apply their observation
skills by comparing and classifying. Give students
www.tech4learning.com 877-834-5453[ 3 ]
Elementary Science Resource KitEngage Primary Students in Science p2
the creative educator
multiple objects and then ask them to use their five senses to identify how they are different and how they are alike and then sort them into groups. Then ask them to group them together and share the “rules” they used to sort. Identifying similarities and differences is one of the nine instructional strategies found to improve student achievement in Robert Marzano, Debra Pickering, and Jane Pollock’s Classroom Instruction that Works.
Another fun way to have students write and create to identify similarities and differences is through the creation of an If… But Report. For example, students can compare different types of animals or weather by writing sentences that begin with “If I were” to describe the first object, followed by “But I would not” to describe the second topic.
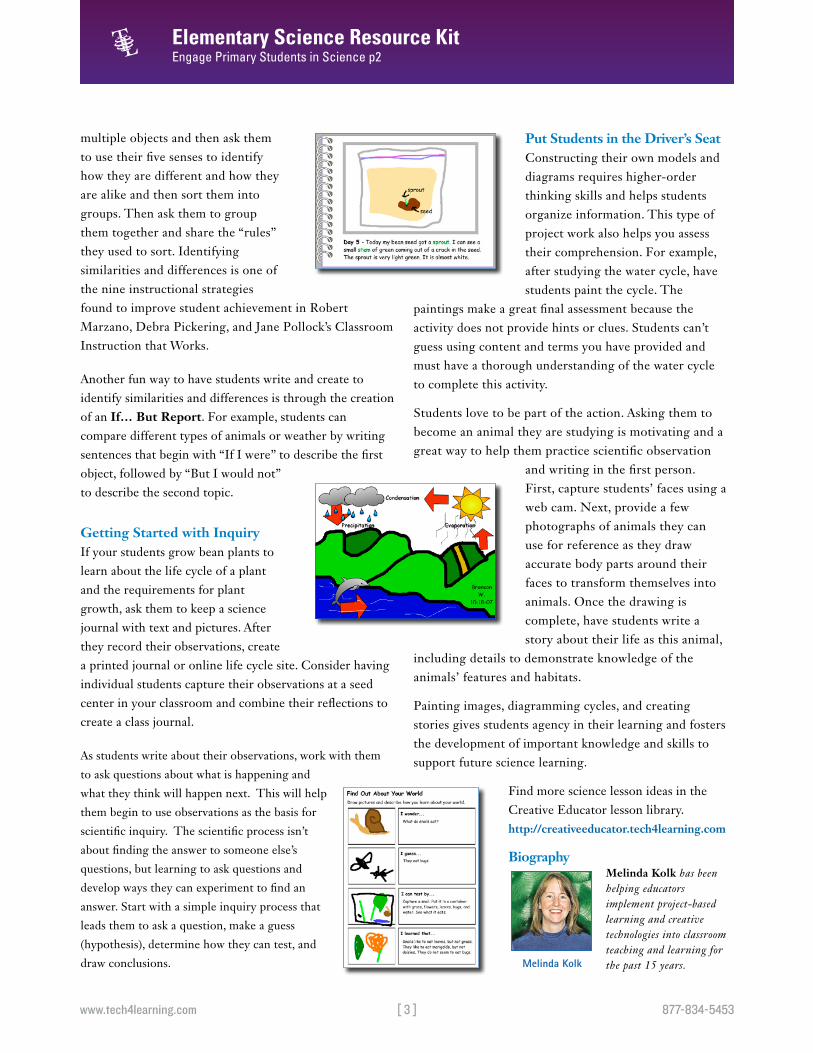
Getting Started with InquiryIf your students grow bean plants to learn about the life cycle of a plant and the requirements for plant growth, ask them to keep a science journal with text and pictures. After they record their observations, create a printed journal or online life cycle site. Consider having individual students capture their observations at a seed center in your classroom and combine their reflections to create a class journal.
As students write about their observations, work with them
to ask questions about what is happening and
what they think will happen next. This will help
them begin to use observations as the basis for
scientific inquiry. The scientific process isn’t
about finding the answer to someone else’s
questions, but learning to ask questions and
develop ways they can experiment to find an
answer. Start with a simple inquiry process that
leads them to ask a question, make a guess
(hypothesis), determine how they can test, and
draw conclusions.
Put Students in the Driver’s SeatConstructing their own models and diagrams requires higher-order thinking skills and helps students organize information. This type of project work also helps you assess their comprehension. For example, after studying the water cycle, have students paint the cycle. The
paintings make a great final assessment because the activity does not provide hints or clues. Students can’t guess using content and terms you have provided and must have a thorough understanding of the water cycle to complete this activity.
Students love to be part of the action. Asking them to become an animal they are studying is motivating and a great way to help them practice scientific observation
and writing in the first person. First, capture students’ faces using a web cam. Next, provide a few photographs of animals they can use for reference as they draw accurate body parts around their faces to transform themselves into animals. Once the drawing is complete, have students write a story about their life as this animal,
including details to demonstrate knowledge of the animals’ features and habitats.
Painting images, diagramming cycles, and creating stories gives students agency in their learning and fosters the development of important knowledge and skills to support future science learning.
Find more science lesson ideas in the Creative Educator lesson library. http://creativeeducator.tech4learning.com
Biography Melinda Kolk has been helping educators implement project-based learning and creative technologies into classroom teaching and learning for the past 15 years.Melinda Kolk

www.tech4learning.com 877-834-5453[ 4 ]
Elementary Science Resource KitSupporting Science Learning with Clay Animation p1
25the creative educator
Clay animation is a motivating process you can use to engage students as they explore and grapple with complex scientific topics. Science education is designed to provide students with the skills to become independent inquirers about the natural world. The National Academy of Science encourages teachers to use collaboration as a tool so that students participate in the sharing of data and development of group reports. They also suggest that students should be given opportunities to make presentations of their work and “engage with their classmates in explaining, clarifying, and justifying what they have learned.” Clay animation is perfect for supporting this learning environment!
Make Science Processes TangibleFirst of all, clay animation helps make many science processes and concepts tangible. In What Works in Classroom Instruction, Marzano explains that humans store knowledge in linguistic and visual form. For concepts that are hard to explain in writing, creating non-linguistic representations with clay animations can help students explore and remember information. Because science topics range from very small things like atomic particles to very large structures like the solar system, it is difficult to explore many concepts in a tangible way. Clay animation allows for hands-on manipulation and the creation of physical models, helping students analyze scientific structures and processes like cell division and plate tectonics.
Improve Thinking SkillsWhile students are motivated by creating their final animation products, it is the process of making clay animation, including writing, brainstorming, planning, sequencing, team work, and management, where the real learning takes place. As they plan their clay animation to demonstrate a science process, such as plant growth, students must use logical thinking skills to sequence the steps. Critical thinking skills are required to analyze the process and determine what factors are necessary for each step in the process and movement from one step to the next. As students create the clay animation, they must evaluate the information and work together to determine the most effective way to demonstrate the concept or process they are animating.
Collaboration is a necessary component of successful classroom clay animation. Consider, for example a project on cell division. If each team attempts to animate
the entire process of cell division, due to time constraints, the resulting animations might not include all of the essential information and details. On the other hand, if each team were to animate one phase in the process, the entire class could combine their animations into one presentation. The whole class will still need to look at the entire process to determine what colors and shapes to use. This ensures that models display cell structures like the nucleus and cell walls consistiently throughour the animation. Each team would also have to work with the team before it and after it to ensure that no part of the cell division process was missed.
Students at Bauer Elementary in Hudsonville, Michigan create a clay animation as the culminating assessment of a unit on plant and animal life cycles.
Supporting ScienceLearning with Clay Animation
by Melinda Kolk

www.tech4learning.com 877-834-5453[ 5 ]
Elementary Science Resource KitSupporting Science Learning with Clay Animation p2
26 the creative educator
The students choose which life cycle they want to work on, and form groups to make clay animations to demonstrate their understanding. Teacher Julie Myrmel shares, “Not only do they delve deeper into the progression of the life cycles, they get to showcase their artistic side, learn how to compromise as a member of a group, and work on a project they really care about. The element of fun, and the strong sense of ownership of the project, brings out the best in them.”
Engaging ALL LearnersEngaging the intelligences of all students in a classroom is part of what makes clay animation so motivating. Students have seen clay animations on television, and even
though they are using animations to represent concepts in science, this makes the project more relevant to their lives. Creating an animation that will be viewed by other students in their class, students in other classes if they are shown at a school assembly, or students around the world if they are shared online, reinforces that the work our students are doing in the classroom is valuable and important.
Julie Myrmel also loves how clay animation engages all of the learners in her classroom:
“One of my favorite parts of working with these projects is that the kids who
are often the leaders are the same ones that struggle with more traditional
class work. So, instead of being the one who has to HAVE help, they are the
experts the other kids go to, and they’re the ones GIVING the help. The
look on their faces as they’re sought out as pros by their peers is priceless.”
Anne Truger, of Lake County, Illinois, works with students who have behavioral and learning issues. She can’t reach her students without projects that are motivating. When using clay animation, she found that her students were “more engaged...than I had seen all year. Students gave up study halls, lunch, and even came in early to work on the projects!”
This visual approach to learning also supports the multiple intelligences students use to learn in the classroom. Clay animation provides an opportunity to reach the variety of learners in your class. The parts of a clay animation production help all learners strengthen the different intelligences as they complete their project. Making a clay character engages the bodily-kinesthetic intelligence; writing the story or script engages the linguistic intelligence. Working in a team engages the interpersonal intelligence. Creating an animated production engages the spatial intelligence, and organizing and sequencing the frames and tasks engages the logical-mathematical intelligence.
Assessing for UnderstandingThe process of creating a clay animation also provides multiple opportunities for assessing understanding. With many traditional forms of assessment, students can recall enough rote information to guess a multiple choice question correctly or parrot back an exact definition without understanding what it means. Creating a clay animation provides many opportunities for you to assess for understanding. Lania Ho, of Barrington, Illinois, asked her students to create clay animations that demonstrated
Curriculum Connections A Better Unit Assessment
“Last year I attended
a technology confer-
ence where I was
introduced to clay
animation. At this
conference, I won a
clay animation kit to
use in my classroom. I was extremely excited
to implement it into my 8th grade science
class. I thought of numerous ways I could use
the kit and I finally decided to use it as an
assessment tool after their Physics unit. I
thought it would be a fun way to close the
unit and students could really apply their
knowledge in a fun and creative way.
They were assigned to illustrate any physics
concept that they learned during the unit.
They chose who they wanted to work with and
decided on their topic. I was not sure how to
manage this project, but everything fell into
place. I teach 150 students and I worked with
each group to make sure they were satisfied
with their final product. The students were so
actively engaged in the project, there were no
management issues. This project was new to
the students and it was new to me. I learned
the software with them as we edited their
work. I have learned so much about clay ani-
mation and I know I will learn more every year
with a new group of students.
I knew that I was incredibly enthusiastic about
the project, but I had no idea how the stu-
dents would respond. It was to my surprise
that I received 100% positive feedback from
the students. This is a fun way to teach any
subject and it is a great way to differentiate
and work with all levels. Some of the com-
ments I received from the students included:
“It was amazing!”, “It was a good hands on
project that can really help you visualize sci-
ence.”, “It was a large step away from text
books which was nice.”
Lania Ho

www.tech4learning.com 877-834-5453[ 6 ]
Elementary Science Resource KitSupporting Science Learning with Clay Animation p3
27the creative educator
a real-life situation to explain physics concepts they were learning. When students used a martial arts fight to demonstrate Newton’s Third Law of Motion – every action has an equal and opposite reaction - the questioning and planning during the process provided an opportunity to ask questions and identify misconceptions. In this instance, making sure that the students understood that while the action, one character hitting another, was obvious, the reaction was not the other character falling down.
Jean Trusedell, of Decatur, Indiana, used clay animation for a germ unit. Her students created animations that showed how viruses and bacteria attack our cells, how medicine might affect the germ and kill it, and how the cells could be protected. While building the animation, they had to discuss their ideas with their teammates as well as explain their ideas to her. “The greatest part of using clay animation is that the kids are always having to explain the process as they go, and I can constantly assess their progress. Asking them to visualize the cellular level is always difficult; the clay animation process helped make that possible,” she shares.
Making the Investment WorthwhileThe process of clay animation involves a significant time investment. Although there are ways to simplify projects and the process, you would not want to use clay animation to teach every topic in your science curriculum. You can ensure that the time investment is worthwhile by choosing your topics carefully and structuring the process to meet your classroom needs. Using clay animation to explore a difficult topic helps provide multiple opportunities to catch misconceptions, while providing students many opportunities to analyze content. If student teams create animations on many different topics at the end of the unit, sharing the finished animations is a great way to revisit concepts at the end of a unit and review for an upcoming assessment.
Remember, the learning during a clay animation project occurs during the process. Sandra Smits, of Hudsonville, Michigan, explains, “When they were done with the project, they really had a strong understanding of the life cycle because they spent so much time planning it out and talking about the steps involved to make it all work.” The visual format and popular medium appeal to students who might not otherwise engage in the content or be willing to struggle through difficult concepts. Clay animation projects require students to think, not simply recall facts and information. Jean Trusedell sums this up nicely: “Clay animation requires my students to delve deeper into their higher level thinking skills. Rather than learning that is rote, clay animation requires my students to synthesize the facts and turn that knowledge into a new understanding and THEN demonstrate their new understandings to others.”
ReferencesMarzano, R.J., Pickering, D.J. & Pollock, J.E. (2001). Classroom Instruction that Works: Research-based Strategies for Increasing Student Achievement. Alexandria, VA: Association for Supervision and Curriculum Development.
National Committee on Science Education Standards and Assessment, National Research Council. (1995) National Science Education Standards. Washington, DC: National Academy Press.
BiographyMelinda Kolk is the
author of Teaching
with Clay Animation
and has been helping
educators integrate
successful clay
animation projects in
their classrooms for over eight years.
Melinda Kolk

www.tech4learning.com 877-834-5453[ 7 ]
Elementary Science Resource KitSample Storyboard
Storyboard Portrait
www.tech4learning.com/frames © 2011Frames_Workshop_Storyboard_Portrait:01.07.14.11
Storyboard
A storyboard is a combination of outlines and visual sketches that map out the contents and direction of your
story. Use this storyboard to show what will happen in each scene of your animation. A scene can be made up
of multiple frames.

www.tech4learning.com 877-834-5453[ 8 ]
Elementary Science Resource KitSample Rubric
A rubric can help you assess the final project as well as the process along the way. Before students begin, share your expectations for completed projects, as well as explain the work to be performed during the project-building process.
Presentation style including, eye contact, voice, and appearance
No eye contact. Low, soft, or monotone voice. Script reading. Appearance is too casual or sloppy. Posture is slouched.
Some eye contact. Voice is soft or monotone. Appearance is casual, but neat. Presenter rocks back and forth.
Some eye contact, but only in one direction. Voice is steady and clear. Presenter shows some facial expression, uses appropriate gestures, and knows the content well. Presenter is dressed up and has good posture.
Eye contact moves among the audience. Presenter is confident, expressive, and know their content. They are dressed up or in appropriate costume. They have good posture, are mobile, and use facial expressions and gestures to make their point.
Storyboarding and planning
Did not utilize storyboard during process or storyboard is incomplete.
Basic storyboard. Does not answer essential question. Referred to storyboard during project building process.
Strong storyboard that answers the essential question. Storyboard used as a guideline for project development.
Fully developed storyboard that answers the question and is organized in coherent pieces. Used storyboard extensively during project development for goal-setting, organization
Quality of Design.
Is it visually pleasing, original, creative, or organized?
Quality is weak. There is no evidence of logical flow or use of new ideas. No visual impact.
Random presentation of material with little attention paid to quality.
Media used demonstrates adequate and clear sequencing of material using creative graphics.
Media shows superior evidence of continuity. There is a logical intuitive sequence of information.
Project meets its purpose and skillfully answers the question posed.
Subject knowledge is not evident. Information is confusing. Does not answer the essential question.
Some subject knowledge is evident. Some information is confusing. Question is stated but not clearly answered.
Subject knowledge is evident in much of the product. Information is clear, appropriate, and correct. Essential question is answered.
Project has gone above and beyond. All information is clear, appropriate and correct. Essential question is clearly answered. Subject knowledge is evident throughout.
Criteria Novice Apprentice Proficient Distinguished

www.tech4learning.com 877-834-5453[ 9 ]
Elementary Science Resource KitAnimal Riddles p1
1 the creative educator
Identifiers
Grade Level2–3
SubjectLanguage Arts and Science
Duration2 class periods
ObjectiveStudents will write riddles as they learn about animals.
DescriptionStudents will research an animal and create a riddle to showcase their knowledge and engage other students in the natural world.
ApplicationPixie™ and Wixie™
Process
Authentic Task Kids love jokes and riddles! Your class will create a series of riddles that other students can use to learn about animals.
EngageIn this lesson, students will complete research about an animal and demonstrate their knowledge about the animal by creating riddles in Pixie.
Introduce your students to animal riddles by reading ABC Animal Riddles (rhyming verse) by Susan Joyce or If Not for the Cat (haiku) by Jack Prelutsky.
These books will engage your students in the process and demonstrate various ways that riddles can be written.
Discuss the riddles you have read with your students: You might ask:
• What was your favorite riddle? Why?
• What clues helped you figure out the answer?
• What types of words did the author use?
• What makes a good riddle?
As a class, explore the steps at the Read, Write, Think website for Riddle Writing which includes great ideas for finding descriptive words, using a thesaurus, and writing in perspective.
Let your students know that they will be creating their own animal riddles. Each student will choose an animal and create two pages in Pixie for the riddle.
Page 1 will be the riddle. An example might look like this:
I have beautiful black spots. I am a carnivore. I live on the savanna. I am the fastest land animal on the planet.
Page 2 will be an illustration of the animal.
Brainstorm a list of different animals with the entire class. Depending on your current science focus, you may want to narrow your brainstorm to types of animals, such as mammals, or animals that live in a particular habitat like the desert.
Students should choose one animal from the list and write down what they already know about the animal using a cluster map or other graphic organizer.
In order to formulate the riddle, students will write clues based on the following questions:
• What does this animal look like?
• Where does it live?
• What does it eat?
• What makes it unique?
Give students time in the library or online to research the answers to these questions. Students should add their research notes to their existing cluster organizer.
Create When their research is complete, students should write a draft of the riddle. The riddle should contain four sentences:
• Sentence 1: how the animal looks
• Sentence 2: what the animal eats
• Sentence 3: where the animal can be found
• Sentence 4: a unique fact or distinguishing
characteristic
Students should work in Pixie to create their riddle pages. Use the Text tool to add the text of the riddle to page 1 and use the Options panel to adjust the size and font. Use the paint tools to illustrate the animal.
If they have time, students can record their voice reading the riddle on page 1 and add illustrations or images that support the words in the riddle.
Students can print their two–page Pixie project as a table tent or greeting card. You can also collect all students’ files into one folder, combine them into one file in Pixie with each riddle followed by its illustrated answer, and export the project as HTML or a movie.
Animal Riddles
www.tech4learning.com 877-834-5453[ 10 ]
Elementary Science Resource KitAnimal Riddles p2
2the creative educator
Steps for StudentsCreate an Animal Riddle in Pixie®
Students can use Pixie to create an animal riddle.
1. Open Pixie.
2. Click the New button on the toolbar to create a second page.
3. Click the Text button to add text to page 1.
4. Use the Options panel to modify text.
5. Use the Paint tools to illustrate page 2.
6. If you choose to use clip art, click on the Stickers tab to locate images for your animal.
7. To use an image downloaded from the Internet, click on the Stickers tab, click the Browse for a file button, navigate to the image, and click the Open button.
8. Click the Save button for both Pixie pages.
9. Click the Print button to print the project pages.
Steps for TeachersCombine your student work into one file.
1. Gather all student pages into one folder.
2. Open Pixie.
3. Click the Project button and select Import Pages.
4. Navigate and select the Animal Riddle of choice.
5. Repeat these steps until all projects have been imported.
6. Once all pages have been imported, click the Project button and select Export.
7. Choose Movie to make a video of the riddles.
8. Choose HTML to make an online storybook of the riddles.
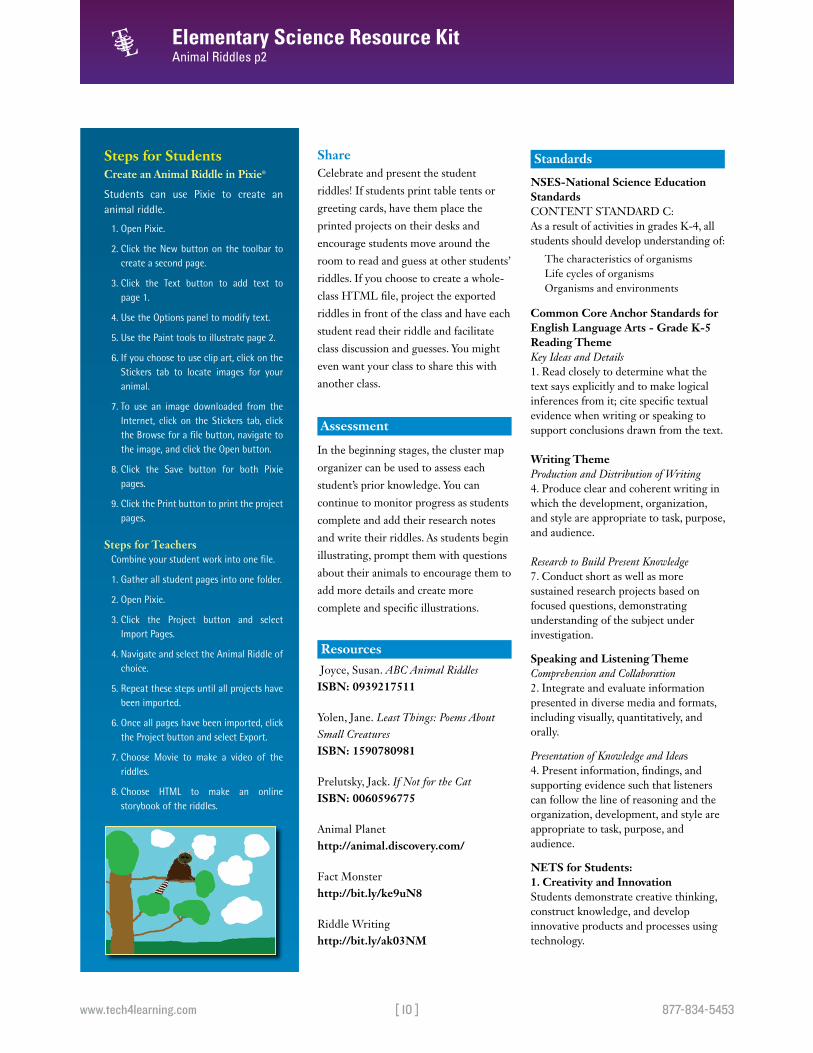
ShareCelebrate and present the student
riddles! If students print table tents or
greeting cards, have them place the
printed projects on their desks and
encourage students move around the
room to read and guess at other students’
riddles. If you choose to create a whole-
class HTML file, project the exported
riddles in front of the class and have each
student read their riddle and facilitate
class discussion and guesses. You might
even want your class to share this with
another class.
Assessment
In the beginning stages, the cluster map
organizer can be used to assess each
student’s prior knowledge. You can
continue to monitor progress as students
complete and add their research notes
and write their riddles. As students begin
illustrating, prompt them with questions
about their animals to encourage them to
add more details and create more
complete and specific illustrations.
Resources
Joyce, Susan. ABC Animal Riddles ISBN: 0939217511
Yolen, Jane. Least Things: Poems About Small Creatures ISBN: 1590780981
Prelutsky, Jack. If Not for the Cat ISBN: 0060596775
Animal Planet http://animal.discovery.com/
Fact Monster http://bit.ly/ke9uN8
Riddle Writing http://bit.ly/ak03NM
Standards
NSES-National Science Education Standards CONTENT STANDARD C: As a result of activities in grades K-4, all students should develop understanding of:
The characteristics of organisms Life cycles of organisms Organisms and environments
Common Core Anchor Standards for English Language Arts - Grade K-5 Reading Theme Key Ideas and Details 1. Read closely to determine what the text says explicitly and to make logical inferences from it; cite specific textual evidence when writing or speaking to support conclusions drawn from the text. Writing Theme Production and Distribution of Writing 4. Produce clear and coherent writing in which the development, organization, and style are appropriate to task, purpose, and audience. Research to Build Present Knowledge 7. Conduct short as well as more sustained research projects based on focused questions, demonstrating understanding of the subject under investigation.
Speaking and Listening Theme Comprehension and Collaboration 2. Integrate and evaluate information presented in diverse media and formats, including visually, quantitatively, and orally.
Presentation of Knowledge and Ideas 4. Present information, findings, and supporting evidence such that listeners can follow the line of reasoning and the organization, development, and style are appropriate to task, purpose, and audience.
NETS for Students:1. Creativity and InnovationStudents demonstrate creative thinking, construct knowledge, and develop innovative products and processes using technology.

www.tech4learning.com 877-834-5453[ 11 ]
Elementary Science Resource KitVisit Our Solar System Lesson p1
the creative educator
customers choose which planet they want to visit.
EngageStep 1: IntroductionComplete a KWL chart with your students to activate their prior knowledge about the planets. You might want to read various books or plays about space, such as The Magic School Bus Visits the Solar System, to get students interested in the topic. Show your students different images of planets (you can find planet images in Pics4Learning). Discuss basic facts about each one.
Step 2: Online ResearchTell the students that they have been chosen to create an interactive brochure for a visit to one of the planets. On this space tour, the students will have to answer the following questions about their planet:
1. What is the planet’s distance from the sun?
2. What is the diameter of the planet?
3. Does the planet have any moons? If so, name them.
4. What is the atmosphere like on this planet?
5. Are there any unusual features about this planet?
Have students use library books and online resources to find answers to these
Identifiers
Grade Level4-5
SubjectLanguage Arts, Science
Duration1 week
ObjectiveStudents will learn about the planets through the eyes of the first students allowed to travel in space.
DescriptionStudents will learn about the planets as they create a sample travel journal that explains what it would be like to visit one of the planets.
ApplicationPixie™ , Wixie™, and Share®
Process
Authentic TaskSpace Tours Unlimited would like to begin offering tours to the planets. They have trained astronauts who can take people on tours of a planet aboard the Cosmos2020, the most advanced shuttle to ever launch into space. To generate business, they have asked your class to help them create an interactive presentation that will help new
questions. There are several online resources listed in the Resources area.
CreateStep 3: Project WorkOnce the students have completed the Planet Worksheet, they are ready to begin creating their Planetary Tour as seen through the eyes of the first tourists in space. Students will use Share to present their tour and describe the things that tourists would see during a visit to this planet. Students can use their research to help them choose information for their project and a storyboard to help them organize their ideas.
ShareStep 4: Present the ProjectHave students present their planetary tour to the rest of the class or at a school assembly. This will help everyone learn more about the planets. You may even want to have students vote for their favorite tour.
You could also turn this into a community event by making it a travel trade show. Have each student share their tour at a planet station. Audience members can watch each tour to get an idea of which planet they would like to visit. You could also issue tickets for each tour so students and community members can choose which planet they would like to visit.
Assessment
Assess your students’ prior knowledge about the solar system as you work together to complete a KWL chart. You could ask them what
Visit Our Solar SystemVisit Our Solar SystemVisit Our Solar SystemVisit Our Solar System

www.tech4learning.com 877-834-5453[ 12 ]
Elementary Science Resource KitVisit Our Solar System Lesson p2
Steps for StudentsCreating an Interactive Tour in Share™
You can use Share to create an interactive presentation with text, pictures, sounds, movies, music, and more.
1. Launch Share.
2. You will see a blank first page.
3. Go to the Options panel and choose a new color for your background.
4. On the Tool Palette click the Text Object. You will see the text options. Choose options for your text box.
5. Click inside the box and type a title for your tour.
6. Go to the Library tab and choose Clip Art or images from Pics4Learning to add to your page.
7. Click and drag the graphic to position it on your page. Click and drag the handles around the image to resize it.
8. Go to the Tool Palette and choose New Page. Repeat the steps above to add text and graphics to each page.
9. To add a link to another page, go to the Library tab and open the Buttons folder.
10. Continue adding, designing, and linking pages until your tour is complete.
11. Go to the File menu and choose Save As. Use the Save in/Where pulldown menu to choose a place to save the file, type a name in the File Name/Save as field, and click the Save button.
12. Click the Publish button on the Tool Palette, choose HTML. Use the Save in/Where pull-down menu to choose a place to save the web page, give the file a name in the File Name/Save as field, and click the Save button.
the creative educator
they know about each planet, the sun, and the moon individually to elicit more detail. Their answers will give you insight into their current comprehension. For example, a student might share that Mercury is very hot. You might respond with a question asking what they know about the temperature on Neptune. This will help lead into understanding that the distance from the sun is a factor influencing the environment on each planet.
Student answers to research questions about the planets can give you insight into comprehension, but may also simply be an indication of a student’s ability to conduct online and print research. Engaging students in discussion about the information they have found will help you catch misconceptions and better assess understanding before project work begins.
Engage students by asking lots of questions as they are working on their itinerary and tour. You can assess their Share project for accuracy of facts and their comprehension of what impact distance from the sun, atmosphere, and other planetary features would have on the humans visiting the planet.
Resources
Cole, Joanne and Degan, Bruce. (1992) Magic School Bus Lost in the Solar System. Scholastic. ISBN: 0590414291
Mitton, Jacqueline. (1991) Discovering the Planets. Troll Communications. ISBN: 0816721319
Simon, Seymour. (2002) Destination Space. Harper Collins. ISBN: 0688162908
Nasa-Welcome to the Planetshttp://pds.jpl.nasa.gov/planets/welcome.htm
A Virtual Journey to the Universehttp://library.thinkquest.org/28327/
Standards
NSTA-National Science Education Content Standards
Content Standard D:As a result of their activities in grades 5-8, all students should develop an understanding of:
• Structure of the earth system
• Earth’s history
• Earth in the solar system
Common Core Anchor Standards for
English Language Arts - Grade 4-5
Writing StandardsText Types and Purposes3. Write narratives to develop real or imagined experiences or events using effective technique, well-chosen details, and well-structured event sequences.
Production and Distribution of Writing 4. Produce clear and coherent writing in which the development, organization, and style are appropriate to task, purpose, and audience.
6. Use technology, including the Internet, to produce and publish writing and to interact and collaborate with others
Research to Build and Present Knowledge7. Conduct short as well as more sustained research projects based on focused questions, demonstrating understanding of the subject under investigation.
NETS 3-5 Performance Standards:1. Use keyboards and other common input and output devices (including adaptive devices when necessary) efficiently and effectively. (1)
4. Use general purpose productivity tools and peripherals to support personal productivity, remediate skill deficits, and facilitate learning throughout the curriculum. (3)

www.tech4learning.com 877-834-5453[ 13 ]
Elementary Science Resource KitEureka! I’ve Got an Idea Lesson p1
the creative educator
science to solve practical problems. The result is usually an invention, a new product or a process that makes life better. In this project, your class will create a Web site to showcase advancements in everyday life made by famous, and some not-so-famous, inventors.
Engage What would life be like without inventions? Because students are surrounded by technology, begin by focusing on inventions they use every day. Then, encourage students to think of inventions that are not related to computers. After brainstorming several inventions, ask students to describe how their lives might be different without them.
Share with your students some common tools like pencils, scissors, and paper clips. The modern pencil was invented in 1564 with the discovery of graphite. We do not know who invented scissors! Ancient Egyptians probably came up with the idea, which was modified by the Romans into the form we have today. The paper clip was not invented until 1899, only a year before the 20th century!
This process is designed to generate curiosity in your students about the origin and inventors of products they use every day. You may want to read E. L. Konigsburg’s Samuel Todd’s Book of
Identifiers
Grade Level 3–4
SubjectScience
Duration2 weeks
ObjectiveStudents will learn about the value of scientific thinking as they learn about inventions and practice research and writing skills to create a Web site about an inventor.
DescriptionStudents will work in collaborative groups to research an inventor and the historical, economic, and scientific impacts of their invention. Student teams will showcase their work as a Web site of information and resources.
ApplicationPixie™ , Wixie™, and Share®
Process
Authentic TaskTechnology is all around us, and not only in cell phones, computers, and MP3 players. Technology is the application of
Inventions. Depending on the age of your students, you may want to share this unique video about life without basic inventions: http://www.videojug.com/film/how-to-live-without-basic-inventions. Let your students know that they will create Web sites that celebrate common inventions and some not-so-common inventors.
Assign an inventor to each student, or let the students choose an inventor they wish to research.
For example:American Inventors Jonas SalkIsaac Merritt SingerThomas EdisonAlexander Graham BellSamuel MorseJerome Lemelson
African American InventorsGeorge Washington CarverElijah Mc CoyLewis LatimerGeorge CrumCharles DrewPhilip DowingGarrett Augustus Morgan
Women Inventors Ruth WalkfieldMary AndersenVirginia ApgarJosephine GaresBessie Nesmith
Have students research basic who, what, when, where, and how information about their inventors. Their research should also help them describe the historical, social, economic, and scientific impacts of the inventions. To help students better understand events that help shaped each inventor’s perspective, have each student create a timeline of significant events in their inventor’s life.
Create Let students know that they will transform their research into a Web site about the inventor. You may want to give students guidance on what information
Eureka! I’ve Got an Idea!

www.tech4learning.com 877-834-5453[ 14 ]
Elementary Science Resource KitEureka! I’ve Got an Idea Lesson p2
Steps for StudentsMake a Web Site in Share Students can use Share to create a Web
site with text and original artwork.
1. Open Share.
2. Click the Text tool on the tool palette
to add text.
3. Double-click the box to add text.
4. Click the Library tab and Browse for a
file to locate an image of your
invention or inventor saved on your
computer.
5. Click the New Page button on the
toolbar to add more pages to your site.
6. Click the Library tab. Double-click the
Buttons folder to add navigation to
your site.
7. Click the Save button on the toolbar.
Choose where you want to save your
file and click the Save button.
8. Click the Show button on the tool palette
to test the navigation on your site.
9. Click the Publish button on the toolbar
and select HTML. Choose where you
want to publish your site and click the
Save button.
the creative educator
they should include on each page of their project, such as:
Page 1: Title
Page 2: About the Inventor
Page 3: About the Invention
Page 4: A Description of Life Without the Invention
Page 5: A Description of How This Invention Impacted History
Share Upload all of the sites to the same location and create a menu page that links to each inventor site. You may also want to place this resource in a school media center or advertise some fun facts students learned on your school’s news program or audio announcements.Ask each student to share the highlights from their research with the rest of the class. Ask students to share both basic information and how they think the inventions changed society and impacted history.
Assessment
As you brainstorm life without inventions, you can assess students’ prior knowledge. You will be able to evaluate their note-taking, summarizing, and information literacy skills as they research information for their sites.
Their site and oral presentation will also help you assess their understanding of the impact of each inventor’s invention.
Resources
Bender, Lionel. Eyewitness Books: Invention New York, NY: Alfred A. Knopf, 1991. ISBN: 0756610753.
Konigsburg, E. L. Samuel Todd’s Book of Inventions. ISBN: 0689832028.
Lambert, David. Great Discoveries and Inventions. ISBN: 0816010625.
Invent Now http://www.invent.org/
Zoom Inventors and Inventions http://www.zoomschool.com/inventors/
About.com: Famous Inventors http://bit.ly/famous_inventions
Standards Common Core Anchor Standards for
English Language Arts - Grade 5-12
Writing StandardsText Types and Purposes2.Write informative/explanatory texts to examine and convey complex ideas and information clearly and accurately through the effective selection, organization, and analysis of content.
Production and Distribution of Writing 4. Produce clear and coherent writing in which the development, organization, and style are appropriate to task, purpose, and audience.
6. Use technology, including the Internet, to produce and publish writing and to interact and collaborate with others
Research to Build and Present Knowledge 7. Conduct short as well as more sustained research projects based on focused questions, demonstrating understanding of the subject under investigation.
Speaking and Listening Standards Presentation of Knowledge and Ideas 5. Make strategic use of digital media and visual displays of data to express information and enhance understanding of presentations.
NCSS—Time, Continuity, and ChangeStudents compare and contrast different stories of accounts about past events, people, places, or situations, identifying how they contribute to our understanding of the past.
NETS for Students1. Creativity and Innovation 2. Communication and Collaboration 3. Research and Information Fluency

www.tech4learning.com 877-834-5453[ 15 ]
Elementary Science Resource KitDon’t Let the Earth Down Lesson p1
the creative educator
difficult process. Using their incredible powers of persuasion, and the techniques of persuasive writing, have students craft a public service announcement that educates citizens on environmental issues. They should make their announcement powerful enough to persuade people to change their behavior to lessen a negative impact or increase a positive impact on the environment.
EngageAs a class, brainstorm a list of things worth conserving. You may want to focus on a threatened area, like the rainforest, or look for problems your students can solve in their own communities, like waste reduction or clean water.
Have individual students choose an issue that is important to them and formulate a thesis or debatable statement about the issue. Have them research information about the issue and then review and organize their materials. Since facts are a great way to support a compelling argument, students may want to organize their facts using a fact vs. opinion graphic organizer. Students also need to determine which research information supports their argument and which information contradicts it. Once they have identified arguments against their thesis, have them develop counter arguments they can incorporate into their essays.
Identifiers
Grade Level5–8
SubjectLanguage Arts, Science, Social Studies
Duration2 weeks
ObjectiveStudents will write persuasively on a conservation issue.
DescriptionStudents will create a public service announcement for a conservation issue they feel strongly about. They will write a persuasive essay and transform this argument into a public service announcement
ApplicationFrames™ , Pixie™ , and Wixie™
Process
Authentic Task The Earth needs your help! While pollution has decreased in many places, we are still releasing tons of toxins into the air and water every day. Access to clean drinking water is decreasing, and landfills are filling up quickly. One and one-half acres of rainforest are lost every second.
Balancing the demands of a growing population, a high standard of living, and a healthy environment is a delicate and
Students should now write a first draft of the essay, trying to get all their ideas down in logical order. When the first draft is finished, have them print and edit their work, making changes to improve the essay. This would be a great time to have students review one another’s work.
Share examples of public service announcements you find on television or online.
Which ones do the students like? Why?
Which ones make the most compelling
arguments? Why?
Most public service announcements are between 10 and 60 seconds long. Ask students how much of their essay they can they read in ten seconds. How are they going to need to think differently to make their argument in a PSA? Work as a class to brainstorm nonverbal strategies for making a compelling PSA.
Create Let students know they will be working on a team with other students exploring their issue to create a 30–second public service announcement. Group the students together and have them begin their work by reading their arguments to the rest of their team members.
Working as a team, ask students to identify the best arguments in each essay and brainstorm how they could share those ideas in a short PSA. Have them list the stories, facts, and ideas they think will be helpful in making an argument in their public service announcement.
Have each team complete a vision for their project to define their argument, identify their audience, refine their goal, and choose an idea to pursue. Each team should then refine their vision and begin developing a storyboard to serve as the map for the PSA design.
Don’t Let the Earth
Down

www.tech4learning.com 877-834-5453[ 16 ]
Elementary Science Resource KitDon’t Let the Earth Down Lesson p2
the creative educator
Steps for StudentsCreating PSAs in Frames™
Students begin building their PSA by gathering the media resources needed. They may want to use a digital camera or Pics4Learning to gather images for their PSAs.
1. Launch Frames.
2. Click the New blank frame button on
the toolbar to add more frames.
3. Click the Library button to add clip
art, photos, or images you have
collected.
4. Click the Tools button to use drawing
tools to create your own illustrations.
5. Click the Clone button on the toolbar
to duplicate frames. Make changes to
the objects on the frames to create
animation.
6. Click the Text tool on the Tools panel
to add text. Use the handles and
Format options to change how the
text looks.
7. Click the Record tool on the Tools
panel to add narration.
8. Select a frame or group of frames and
adjust the Duration slider on the
Tools panel to change the timing.
9. Click the Save button on the toolbar
to save the file.
10. Click the Project button and choose
Export to create an animated movie
to share.
Teams should begin by gathering the media resources needed for their PSA. Teams may choose to work on each stage of the development process together or assign roles, such as researcher, editor, graphic artist, and director, to divide up the tasks. Have students use the tools in Frames to develop their PSA.
ShareHave teams share their PSAs with the class while talking about the collaborative process it took to create the PSA. You might choose to share the PSAs on your school web site, or present them during morning announcements. You may also be to share the PSAs with your local access television station to help educate the community.
Assessment
The fact vs. opinion organizer, vision, and storyboard will give insight to the direction teams are heading with their project. Assessing these items and observing the collaborative process before students begin working in Frames may help ensure the successful completion of the PSA. You may want to have students keep a project journal or write daily reflections, as it will be impossible to hear every student’s comments during the process. The final PSA will help you assess their understanding of the issue as well as their ability to persuade viewers using multimedia.
Resources
Chiras, Daniel D., John P. Reganold, and Oliver S. Owen. Natural Resource Conservation: Management for a Sustainable Future ISBN: 0130333980
Botkin, Daniel B. and Edward A. Keller. Environmental Science: Earth as a Living
Planet
ISBN: 0471389145
Daily, Gretchen C. Nature’s Services: Societal Dependence on Natural Ecosystems. ISBN: 1559634766
Standards
Common Core Anchor Standards for English Language Arts - Grade 5-12Writing Standards Text Types and Purposes1. Write arguments to support claims in
an analysis of substantive topics or texts, using valid reasoning and relevant and sufficient evidence
2. Write informative/explanatory texts to examine and convey complex ideas and information clearly and accurately through the effective selection, organization, and analysis of content.
Production and Distribution of Writing 4. Produce clear and coherent writing in
which the development, organization, and style are appropriate to task, purpose, and audience.
6. Use technology, including the Internet, to produce and publish writing and to interact and collaborate with others
Speaking and Listening StandardsPresentation of Knowledge and Ideas5. Make strategic use of digital media
and visual displays of data to express information and enhance
understanding of presentations.
NSES - National Science Education StandardsCONTENT STANDARD F: As a result of activities in grades 5 - 8 , all students should develop understanding of:
• Personal health • Populations, resources, and
environments
• Natural hazards • Risks and benefits • Science and technology in society

www.tech4learning.com 877-834-5453[ 17 ]
Elementary Science Resource KitTake a Tour of a Biome Lesson p1
the creative educator
Engage Step 1: Introduction Complete a Biomes KWHL chart as a class to get students thinking about biomes that exist around the world, activate prior knowledge, and assess what students already know about biomes. Then, using online resources, introduce students to the different biomes. If you have access to the unitedstreaming movie library, you may also want to show a movie about the biomes.
Once students have a strong under-standing about biomes, group students into teams of 3-4. Assign each team the task of creating a travel web site for a tour through a different biome.
Step 2: Online Research Have student teams research the following questions about their biome:
1. Where does the biome exist?
2. What plants and animals live in the biome?
3. What is the climate like in the biome?
4. What food chains exist in the biome?
5. What landforms exist in the biome?
6. What places of interest are found in
this biome?
7. What makes this biome interesting to
visit?
Identifiers
Grade Level4-6
SubjectLanguage Arts, Science
Duration1 week
ObjectiveStudents learn about the five biomes: aquatic, desert, forest, grassland, and tundra.
DescriptionStudents learn about the five biomes through as they create a travel brochure.
ApplicationPixie™ , Wixie™, and Share®
Process
Authentic Task Airline prices have been dropping lately, causing people to take more vacations. The owner of Journey4Less, a local travel agency, wants to offer special biome vacation packages. The owner has asked for your help to create an informational web site brochure for a vacation to one of the biomes.
CreateStep 3: Project Work Students will use Share as a web authoring tool to create a web site advertising a tour of their biome. Students should use the biomes category in Pics4Learning as a resource for adding pictures to their project. The biome web site created in Share must include:
1. A map of where this biome exists.
2. Landforms that exist in the biome.
3. Student-drawn pictures.
4. Information about the biome’s climate.
5. Examples of food chains which exist within the biome.
6. What places should a visitor be sure to see?
7. Information about why people should
visit your biome.
Students can use a storyboard to organize their ideas before creating their web site.
Students should build their information into a Share project. Then, publish the project as HTML or an interactive PDF.
Share Step 4: Present the Project Have the students present their tours to parents and community members to encourage them to take their vacations in a specific biome!
Take a Tour of a BiomeTake a Tour of a BiomeTake a Tour of a Biome

www.tech4learning.com 877-834-5453[ 18 ]
Elementary Science Resource KitTake a Tour of a Biome Lesson p2
Steps for StudentsMarket Your Tour in Share™
When your tour itinerary is complete, use Share to create the marketing web site. Make sure that the site has a title page, navigation, interesting backgrounds, as well as text that provides information about your biome.
1. Launch Share.
2. Click the Text tool on the Tool Palette. Add a title to your first page.
3. Click the New Page button on the Tool Palette to add more pages.
4. Click the Library tab to add graphics to a page.
5. In the Library, you can add graphics from the Clip Art or Pics4Learning library or click the Browse Files button to add an image you have painted, taken with a digital camera, or downloaded from online.
6. In the Buttons folder in the Library tab choose a navigational button to add to the page.
7. Go to the Library tab and choose to add sounds, movies, and other actions to your tour.
8. Go to the File menu and choose Save As. Use the Save in/Where pulldown menu to choose a place to save the file, type a name in the File Name/Save as field, and click the Save button.
9. Click the Publish button on the Tool Palette, choose HTML. Use the Save in/Where pull-down menu to choose a place to save the web page, give the file a name in the File Name/Save as field, and click the Save button.
the creative educator
Assessment
The students will research their biome of choice for their web site.
The students will synthesize their knowledge based upon their online research to create the informational web site. This web site must include various facts about the particular biome, including a persuasive argument as to why tourists should visit their biome.
Resources
Whitfield, Philip and Moore, Peter, Cox, Barry. (2003) Biomes and Habitats. Macmillan. ISBN: 0028656334.
Johnson, Rebecca and Saroff Phyllis. (2001) A Walk in the Tundra (Biomes of North America). Carolrhoda Books. ISBN: 1575055260 .
Kalman, Bobbie. (1998) What is a Biome? Crabtree Publishing. ISBN: 086505875X .
Lindeen, Carol and Smith-Saunder Gail. (2003) Life in a Desert (Pebble Plus: Living in a Biome). Capstone Press. ISBN: 0736833994. World Biomes www.ucmp.berkeley.edu/glossary/gloss5/biome/
Mission: Biomes earthobservatory.nasa.gov/Laboratory/Biome/
Standards NSES-National Science Standards CONTENT STANDARD C As a result of their activities in grades 5-8, all students should develop understanding of:
Structure and function in living systems Reproduction and heredity Regulation and behavior Populations and ecosystems Diversity and adaptations of organisms
CONTENT STANDARD C As a result of activities in grades K-4, all students should develop understanding of:
The characteristics of organisms Life cycles of organisms
Organisms and environments
Common Core Anchor Standards for English Language Arts - K-5 WritingResearch to Build and Present Knowledge 7. Conduct short as well as more sustained research projects based on focused questions, demonstrating understanding of the subject under investigation.
Speaking and ListeningComprehension and Collaboration 2. Integrate and evaluate information presented in diverse media and formats, including visually, quantitatively, and orally.
Presentation of Knowledge and Ideas 4. Present information, findings, and supporting evidence such that listeners can follow the line of reasoning and the organization, development, and style are appropriate to task, purpose, and audience.
NETS 3-5 Performance Standards: 1. Use keyboards and other common input and output devices (including adaptive devices when necessary) efficiently and effectively. (1)
4. Use general purpose productivity tools and peripherals to support personal productivity, remediate skill deficits, and facilitate learning throughout the curriculum. (3)
5. Use technology tools (e.g., multimedia authoring, presentation, Web tools, digital cameras, scanners) for individual and collaborative writing, communication, and publishing activities to create knowledge products for audiences inside and outside the classroom. (3, 4)

www.tech4learning.com 877-834-5453[ 19 ]
Elementary Science Resource KitSoil- Diary of a Worm Comic p1
home to creatures and plants that are important to the Earth’s health.
Create a campaign to stop the paving and preserve the soil. Design media products, including pamphlets, comics, and videos, to educate students, parents, teachers, administrators, and the community about the benefits of soil and alternative solutions to paving, such as greenways and gardens. Use your media products to share a media campaign to stop the paving!
EngageThere are many types of soil, each with its own unique characteristics and benefits for the ecosystem in which it is found. Bring different types of soil into your classroom as well as investigate different types of soil found around your school and community. Discuss the characteristics of each type of soil and document with pictures, descriptive words and research of uses, including the pros and cons of using specific soils for different purposes.
Students should be able to answer:
1. What is soil?
2. What are the layers of soil?
3. What plants and animals depend on soil?
4. How do we depend on those plants and animals?
5. What are the benefits of soil?
Identifiers
Grade Level3–5
SubjectScience and Language Arts
Duration1 week
ObjectiveStudents will learn about layers, components, and inhabitants of soil.
DescriptionStudents will investigate different types of soil. Using Diary of a Worm as inspiration, they will use Pixie or Wixie to create a media campaign to educate others about the layers, components, and inhabitants of soil and explain why soil is beneficial.
ApplicationPixie® or Wixie®
Process
Authentic TaskWhen In a move to reduce landscaping budgets and keep their yards and businesses cleaner, many people are paving over areas of dirt around their homes and stores. Fortunately, you know that dirt is more than just dirt - it’s soil,
Read Doreen Cronin’s Diary of a Worm. Ask students to explain the benefits of soil and what role a worm plays in the ecosystem. Discuss the practice of paving over “dirt” to save money.
1. What would be the result of the paving over the dirt?
2. What alternatives used will make the “dirt” more valuable for everyone?
Discuss ways students could educate others about the benefits of soil, such as stories, brochures, public service announcements, or comics.
CreateLet students know they will be responsible for educating others about the benefits of soil. Form small teams of students and have them list the stories, facts, and ideas they think will be helpful in making a successful argument. Teams should review their notes, complete additional research, and develop a plan for the product they will create to educate others.
Have teams share their proposals with the rest of the class. This allows all teams to benefit from all students’ thorough research, powerful facts, and creative ideas. Ask each team to choose one or two core arguments and begin determine how their team might best make the case to support their position, developing products such as presentations, bumper stickers, posters, public service announcements, children’s stories, brochures, or comics.
Students can use Pixie to develop their materials. Student work should be saved,
SoilDiary of a Worm Comic
the creative educator

www.tech4learning.com 877-834-5453[ 20 ]
Elementary Science Resource Kit
exported, printed, and published so that it can be shared with others.
ShareHave students present their information to other students at school during an assembly or at a booth on the playground or in the cafeteria.
You might choose to share PSAs on your school web site or present them during morning announcements. You may also be to share the PSAs on your local access television station to help educate the community. Post student videos and web sites to your school web server or to a video sharing community for wider distribution. Brochures can be printed and distributed at local coffee shops and garden stores.
You could also turn this project into a parent night or community event by hosting a “Don’t Pave It!” trade show. Have teams make presentations and share their resources at different booths and make-and-take events.
Assessment
You can begin to evaluate students’ content knowledge during the initial investigations of soil and from discussions about Diary of a Worm and the paving problem. Ask questions about their research and arguments to evaluate comprehension and understanding. Engaging students in discussion about the information they have found will help you identify misconceptions and better assess understanding before project work begins.
The final presentations and media products will help you evaluate how well students are able to apply knowledge and information to communicate an idea and craft written and visual arguments.
Resources
Cronin, Doreen. Diary of a Worm. ISBN: 043969745X
Rosinsky, Natalie. Soil: Dirt: The Scoop on Soil. ISBN: 1404803319
Bial, Raymond. A Handful of Dirt. ISBN: 0802786987
Dirt! The Movie. ASIN: B00366E1AK
Harcourt School Publishers, Science Up Close: Soil Horizons www.harcourtschool.com/activity/science_up_close/309/deploy/interface.html
Fact Monster: Soil www.factmonster.com/dk/encyclopedia/soil.html
Discovery Education: The Dirt on Soil http://school.discoveryeducation.com/schooladventures/soil
StandardsCommon Core Anchor Standards for English Language Arts - Grade K-5 Reading Theme Key Ideas and Details 1. Read closely to determine what the text says explicitly and to make logical inferences from it; cite specific textual evidence when writing or speaking to support conclusions drawn from the text. Writing Theme Text Type and Purpose 2. Write informative/explanatory texts to examine and convey complex ideas and information clearly and accurately through the effective selection, organization, and analysis of content.
the creative educator
Research to Build Present Knowledge 7. Conduct short as well as more sustained
research projects based on focused questions, demonstrating understanding of the subject under investigation.
Speaking and Listening Theme Comprehension and Collaboration 2. Integrate and evaluate information
presented in diverse media and formats, including visually, quantitatively, and orally.
Presentation of Knowledge and Ideas 4. Present information, findings, and
supporting evidence such that listeners can follow the line of reasoning and the organization, development, and style are appropriate to task, purpose, and audience.
NSES - National Science Education Standards: Physical Science CONTENT STANDARD B: As a result of the activities in grades K-4, all students should develop an understanding of • Properties of objects and materials Earth and Space Science Content Standard D As a result of their activities in grades K-4, all students should develop an understanding of • Properties of earth material
NETS for Students: 1. Creativity and Innovation
Students demonstrate creative thinking, construct knowledge, and develop innovative products and processes using technology.
2. Communication and Collaboration: Students use digital media and environments to communicate and work collaboratively, including at a distance, to support individual learning and contribute to the learning of others.
Soil- Diary of a Worm Comic p2
ESRK_2.042413