Embed Size (px)
Citation preview

ELEMENTARY SCIENCE PROGRAMELEMENTARY SCIENCE PROGRAMELEMENTARY SCIENCE PROGRAMELEMENTARY SCIENCE PROGRAM MATH, SCIENCE & TECHNOLOGY EDUCATIONMATH, SCIENCE & TECHNOLOGY EDUCATIONMATH, SCIENCE & TECHNOLOGY EDUCATIONMATH, SCIENCE & TECHNOLOGY EDUCATION
A Collection of Learning Experiences onA Collection of Learning Experiences onA Collection of Learning Experiences onA Collection of Learning Experiences on
ELECTRICAL CIRCUITSELECTRICAL CIRCUITSELECTRICAL CIRCUITSELECTRICAL CIRCUITS Revised August 2008Revised August 2008Revised August 2008Revised August 2008
Electrical Circuits Student Activity Book
Name__________________________________________________________ This learning experience activity book is yours to keep. Please put your name on it now. This activity book should contain your observations of and results from your experiments. When performing experiments, ask your teacher for any additional materials you may need.

1
TABLE OF CONTENTSTABLE OF CONTENTSTABLE OF CONTENTSTABLE OF CONTENTS Activity Sheet for L.E. #2 - Simple Circuit with a Bulb, a Battery and Wires 2-5 Activity Sheet for L.E. #3 - The Bulb as Part of a Circuit 6-9 Activity Sheet for L.E. #4 - Battery and Bulb Holders 10 Activity Sheet for L.E. #5 - Schematic Diagrams 11-13 Activity Sheet for L.E. #6 - Brightness Meter 14-15 Activity Sheet for L.E. #7 - Series Circuit 16-17 Activity Sheet for L.E. #8 - Parallel Circuit 18-19 Activity Sheet for L.E. #9 - Batteries Wired in Parallel and in Series 20-23 Activity Sheet for L.E. #10 – Switches 24-26 Activity Sheet for L.E. #11 - Solid Conductors and Insulators 27-28 Extension Activity Sheet for L.E. #12 - Buzzers 29 Extension Activity Sheet for L.E. #13 - Hidden Circuits Card 30-31 Extension Activity Sheet for L.E. #14 - Comparing Filaments 32-34 Extension Activity Sheet for L.E. #15 - Introduction to Resistance 35-36 Extension Activity Sheet for L.E. #16 - Solid Conductors and Non conductors 37-38 Extension Activity Sheet for L.E. #17 - Magnetism and Electricity 39-41 Electrical Circuits Student Assessment 42-47 Student Self Assessment 42 Glossary 43-46

2
Activity Activity Activity Activity Sheet for Learning Experience #2Sheet for Learning Experience #2Sheet for Learning Experience #2Sheet for Learning Experience #2 Name______________________Name______________________Name______________________Name______________________
SIMPLE CIRCUITS WITH SIMPLE CIRCUITS WITH SIMPLE CIRCUITS WITH SIMPLE CIRCUITS WITH A A A A BULB, BULB, BULB, BULB, A A A A BATTERBATTERBATTERBATTERYYYY AND AND AND AND WIRES WIRES WIRES WIRES
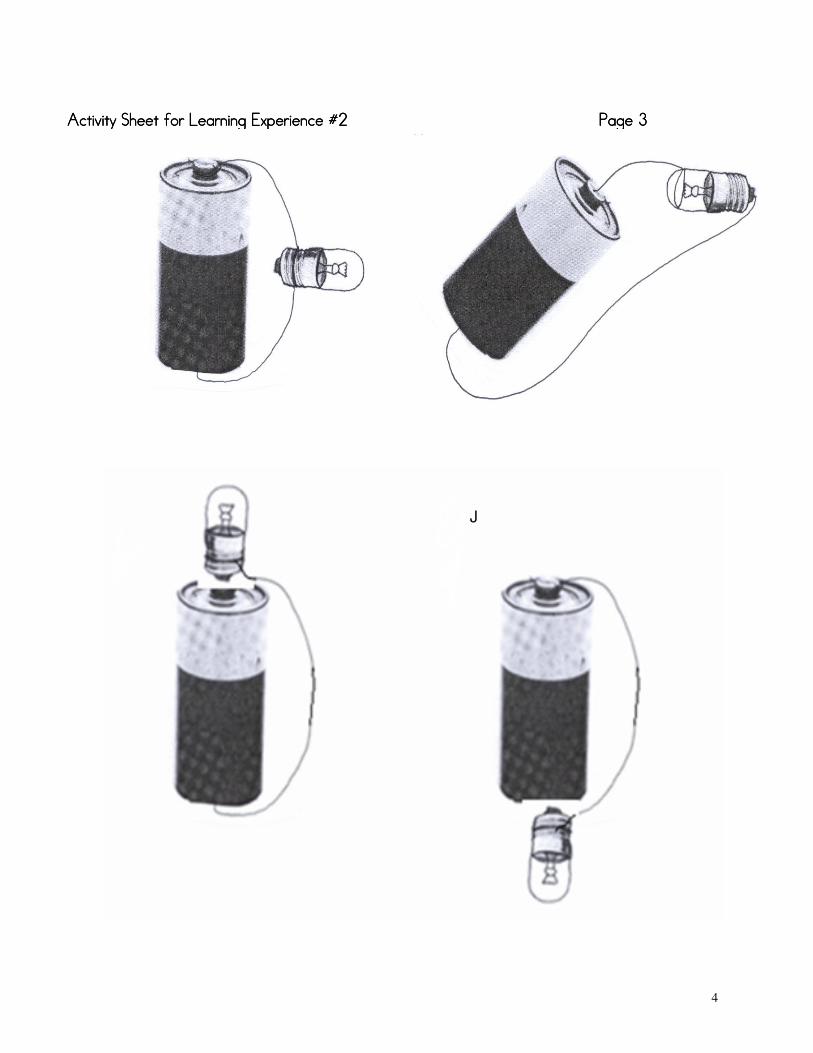
Materials: Electrical Circuits Student Activity Book 2 15 cm. pieces of #20 bare copper wire #48 bulb “D” battery 1. Examine diagrams A-J on the next two pages. Predict whether the circuit will be complete, and record your prediction on the chart below.
2. Your teacher, with a helper, will demonstrate the arrangements to test your predictions. Record their results on the chart below.
PPPPREDICTION CHARTREDICTION CHARTREDICTION CHARTREDICTION CHART
Prediction Test Circuit Bulb will light Results
Yes No Yes No A
B
C
D
E
F
G
H
I
J

3
Activity Sheet for Learning Experience #Activity Sheet for Learning Experience #Activity Sheet for Learning Experience #Activity Sheet for Learning Experience #2222 Page 3 Page 3 Page 3 Page 3
Activity Sheet for Learning Experience #2Activity Sheet for Learning Experience #2Activity Sheet for Learning Experience #2Activity Sheet for Learning Experience #2 Page 2 Page 2 Page 2 Page 2
4
J
Activity Sheet for LeaActivity Sheet for LeaActivity Sheet for LeaActivity Sheet for Learning Experienrning Experienrning Experienrning Experience #2ce #2ce #2ce #2 Page 3 Page 3 Page 3 Page 3

5
Activity Sheet for Learning Experience #2Activity Sheet for Learning Experience #2Activity Sheet for Learning Experience #2Activity Sheet for Learning Experience #2 Page 4 Page 4 Page 4 Page 4
3. What makes the bulb light?3. What makes the bulb light?3. What makes the bulb light?3. What makes the bulb light?
You may already understand an electrical circuit, or this may seem like magic to you. Give what your teacher demonstrated some thought. Why do you think the bulb in the diagram lights?
Battery

6
Activity Sheet for Learning Experience #3Activity Sheet for Learning Experience #3Activity Sheet for Learning Experience #3Activity Sheet for Learning Experience #3 Name______________________Name______________________Name______________________Name______________________
THE BULB AS PART OF A CIRCUITTHE BULB AS PART OF A CIRCUITTHE BULB AS PART OF A CIRCUITTHE BULB AS PART OF A CIRCUIT
Session 1Session 1Session 1Session 1:::: Materials: Electrical Circuits Student Activity Book #48 bulb #41 bulb 2 bulb holders Triple-lens magnifier 4 15 cm. pieces of #20 bare copper wire 2 “D” batteries 2 assembled battery holders Red pencil/pen*
*provided by teacher
1. Label the following parts of the bulb on the picture below: gas, bulb, filament, support wire, glass bead, side terminal, base terminal, insulator, solder (between side terminal and base terminal).
2. Use a red pencil or pen to trace the flow of electricity through the bulb, by using arrows
on your drawings.

7
Activity Sheet for Learning Experience #3Activity Sheet for Learning Experience #3Activity Sheet for Learning Experience #3Activity Sheet for Learning Experience #3 Page 2 Page 2 Page 2 Page 2
3. Look at the picture below. Think about where the wires should be placed on the bulb to make the bulb light. Look at your diagram in question #1. Use your materials, and construct the circuit and actually make the bulb light. Explain where you placed the wires and why you placed them there.
_______________________________________________________________________________
_______________________________________________________________________________
_______________________________________________________________________________
4. What happens if you reverse the position of wires “X” and “Y”? Explain why this occurs.
_______________________________________________________________________________
_______________________________________________________________________________
_______________________________________________________________________________

8
AcAcAcActivity Sheet for Learnintivity Sheet for Learnintivity Sheet for Learnintivity Sheet for Learning Experience #3g Experience #3g Experience #3g Experience #3 Page 3 Page 3 Page 3 Page 3
Session 2:Session 2:Session 2:Session 2: MAKING A LEMON BATTERY CELLMAKING A LEMON BATTERY CELLMAKING A LEMON BATTERY CELLMAKING A LEMON BATTERY CELL
Your teacherYour teacherYour teacherYour teacher,,,, with the help of one or two students with the help of one or two students with the help of one or two students with the help of one or two students,,,, will construct a battery made from a will construct a battery made from a will construct a battery made from a will construct a battery made from a
largelargelargelarge,,,, juicy lemon, a galvanized nail and a copper penny. juicy lemon, a galvanized nail and a copper penny. juicy lemon, a galvanized nail and a copper penny. juicy lemon, a galvanized nail and a copper penny. 1. Draw a picture of the lemon battery cell that your teacher has constructed. Label the (-) negative electrode (nail) and the (+) positive electrode (penny).

9
Activity Sheet for LearninActivity Sheet for LearninActivity Sheet for LearninActivity Sheet for Learning Experience #3g Experience #3g Experience #3g Experience #3 Page 4 Page 4 Page 4 Page 4 Session Session Session Session 3:3:3:3:
WHAT’S POLARITYWHAT’S POLARITYWHAT’S POLARITYWHAT’S POLARITY????
Materials: Electrical Circuits Student Activity Book 2 “D” batteries 2 assembled battery holders Bulb holder #48 bulb 3 15 cm. pieces of #20 bare copper wire
1. Study circuits A and B above. How are they different?
________________________________________________________________________________
________________________________________________________________________________
2. In which circuit, A or B, do you think the bulb will light? Write your prediction, and explain
why you made this prediction. ________________________________________________________________________________
________________________________________________________________________________
3. Construct both circuits. In which circuit did the bulb light? ___________________________ 4. State the rule that should always be followed when connecting batteries in series. ________________________________________________________________________________
________________________________________________________________________________
Circuit A Circuit B
+ - + - + - - +

10
Activity Sheet for Learning Experience #Activity Sheet for Learning Experience #Activity Sheet for Learning Experience #Activity Sheet for Learning Experience #4444 Name______________________Name______________________Name______________________Name______________________
BATTERY AND BULB HOLDERSBATTERY AND BULB HOLDERSBATTERY AND BULB HOLDERSBATTERY AND BULB HOLDERS
Materials: Electrical Circuits Student Activity Book 2 15 cm. pieces of #20 bare copper wire Bulb holder 4 Fahnestock clips #48 bulb 2 #82 rubber bands 2 “D” batteries Small storage box (shoe box)*
*provided by teacher or students
Make a battery holder as shown in the diagrams below. You will need one rubberband and two Fahnestock clips for each battery holder.
Place the holder around a battery so that a Fahnestock clip touches each end terminal of the battery. If you squeeze the open ends of the Fahnestock clip, you can slide the end of a wire under the small loop that is exposed. Two pieces of wire can be “joined” together using a Fahnestock clip by placing both wires in the loop.
Put one end of a piece of wire in each Fahnestock clip on the battery holder. Then place the other ends of those wires in the Fahnestock clips that are mounted on the bulb holder. Does the bulb light?
Mounting Hole
Spring to hold wire in loop (Push down here)
Loop
Fahnestock ClipFahnestock ClipFahnestock ClipFahnestock Clip

11
Activity Sheet for Learning Experience #Activity Sheet for Learning Experience #Activity Sheet for Learning Experience #Activity Sheet for Learning Experience #5555 Name______________________Name______________________Name______________________Name______________________
SCHEMATIC DIAGRAMS SCHEMATIC DIAGRAMS SCHEMATIC DIAGRAMS SCHEMATIC DIAGRAMS
In the box below are the symbols that are widely known and used in drawing schematic diagrams of electrical circuits:
The circuits pictured on the top are represented by the corresponding schematic diagrams on the bottom:
Positive Terminal (+)
Negative Terminal (-)
Schematic Diagram SymbolsSchematic Diagram SymbolsSchematic Diagram SymbolsSchematic Diagram Symbols Battery: Bulb: Switch: Positive Terminal: Negative Terminal: Resistance: Fuse: Wire: Test Point: Wires Joined: Wires crossed but not joined:
Bulb #48
Positive Terminal Negative Terminal
#48
#48
#48
#48

12
Activity ShActivity ShActivity ShActivity Sheet for Learning Experience #eet for Learning Experience #eet for Learning Experience #eet for Learning Experience #5555 Page 2 Page 2 Page 2 Page 2 Pictured below are six complete electrical circuits. On another sheet of paper, draw the schematic diagram for each circuit. 1. 2. 3. 4. 5. 6.

13
Activity Sheet for Learning Experience #5 Page 3 7. Read the schematic diagrams below. Construct the circuits shown below using batteries, bulbs, battery holders and bulb holders. Remember to now use schematic diagrams whenever you draw a circuit in this activity book. 8. Will the bulb light if you construct the circuit below? Why or why not? ________________________________________________ ________________________________________________ ________________________________________________
A B C

14
Activity Sheet for Learning Experience #Activity Sheet for Learning Experience #Activity Sheet for Learning Experience #Activity Sheet for Learning Experience #6666 Name______________________Name______________________Name______________________Name______________________
BRIGHTNESS METERBRIGHTNESS METERBRIGHTNESS METERBRIGHTNESS METER Materials: Electrical Circuits Student Activity Book 3 “D” batteries 3 #82 rubberbands Bulb holder 6 Fahnestock clips #48 bulb Stapler* 2 15 cm. pieces of #20 bare copper wire Scotch tape* Metric rulers* Scissors* White duplicating paper (15 x 28 cm. or 8.5 x 11 in.)*
*provided by teacher
1. Cut 10 strips of white duplicating paper 5 cm. wide and ranging in length from 2 to 20 centimeters. Each piece of duplicating paper should be 2 cm. longer than the one preceding it. Piece #1 should be 20 cm. long, piece #2 should be 18 cm. long, etc. (See diagram below.)
2. Write the metric size on each section near the bottom edge of each strip.
3. Put the strips in a pile according to length with the shortest one on top. Staple or tape the strips together at the left edge.
10 9
8
7
6
5
4 3 2
1
5 x 20 cm.
5 x 16 cm.
5 x 14 cm.
5 x 12 cm.
5 x 10 cm.
15 x 18 cm.
5 x 8 cm.
5 x 6 cm.
5 x 4 cm.
5 x 2
Staple
15
ActiviActiviActiviActivity Sheet for Learning Experience #ty Sheet for Learning Experience #ty Sheet for Learning Experience #ty Sheet for Learning Experience #6666 Page 2Page 2Page 2Page 2
4. How to use the brightness meterHow to use the brightness meterHow to use the brightness meterHow to use the brightness meter: • Place the number “1” on the brightness meter over the lighted bulb. • Keep moving the numbers over the bulb until you can no longer see the light from the
bulb through the paper. • When you reach that number, the number before it should be recorded as the
brightness of the bulb because it was the last place on the brightness meter that the bulb could shine through.
(Example: 7 - can see the bulb, 8 – can see the bulb, 9 – cannot see the bulb. Brightness of the bulb = 8)
5. Construct a complete circuit with one battery and one bulb. Place the brightness meter over the bulb, and measure the brightness of the bulb. What is the rating of this bulb on the brightness meter? _____________________________________
6. Construct a complete circuit using two batteries and one bulb. Now that you have added
another battery, what do you predict the bulb’s brightness will be?
________________________________________________________________________________ Why did you make this prediction? _________________________________________________ ________________________________________________________________________________
Use the brightness meter to measure the brightness of the bulb. What is the actual brightness of this bulb on the brightness meter? _____________________
7. Construct a complete circuit using three batteries and one bulb. What do you predict the bulb’s brightness will be? ________________________________
Why did you make this prediction? _________________________________________________
________________________________________________________________________________
Use the brightness meter to measure the brightness of the bulb. What is the actual brightness rating of this bulb on the brightness meter? ________________
8. What is the relationship between the number of batteries and the brightness of the bulb? __________________________________________________________________________
________________________________________________________________________________ Keep this brightness meter in your storage container for use in future learning experiences.Keep this brightness meter in your storage container for use in future learning experiences.Keep this brightness meter in your storage container for use in future learning experiences.Keep this brightness meter in your storage container for use in future learning experiences.

16
Activity Sheet for Learning Experience #Activity Sheet for Learning Experience #Activity Sheet for Learning Experience #Activity Sheet for Learning Experience #7777 Name______________________Name______________________Name______________________Name______________________
SERIES CIRCSERIES CIRCSERIES CIRCSERIES CIRCUITUITUITUIT Materials: Electrical Circuits Student Activity Book “D” battery 3 #48 bulbs 3 bulb holders Assembled battery holder 4 15 cm. pieces of #20 bare copper wire (as needed) 1. Construct a complete circuit with a battery and a bulb.
2. Using another wire, add a second bulb as shown on the picture below.
3. What did you notice happened to the first bulb when the second bulb was added? ________________________________________________________________________________
________________________________________________________________________________
4. Look carefully at how the series circuit is set up. Write a prediction of what you think will happen if you unscrew one of the bulbs.
________________________________________________________________________________
________________________________________________________________________________
Why did you make this prediction? _________________________________________________
________________________________________________________________________________
5. Unscrew bulb “X”. Describe what happens to bulb “Y”. ________________________________________________________________________________
________________________________________________________________________________
6. Tighten bulb “X”, and unscrew bulb “Y”. Describe what happens to bulb “X”. ________________________________________________________________________________
________________________________________________________________________________

17
Activity Sheet for Learning Experience #Activity Sheet for Learning Experience #Activity Sheet for Learning Experience #Activity Sheet for Learning Experience #7777 Page 2Page 2Page 2Page 2
7. Add a third bulb to your series circuit. What happens to the brightness of the bulbs each time another bulb is added to the series? Use your brightness meter to help you.
________________________________________________________________________________
________________________________________________________________________________ 8. Draw a schematic diagram of the circuit you constructed with three bulbs.

18
Activity Activity Activity Activity Sheet for Learning Experience #Sheet for Learning Experience #Sheet for Learning Experience #Sheet for Learning Experience #8888 Name______________________Name______________________Name______________________Name______________________
PARALLEL CIRCUITPARALLEL CIRCUITPARALLEL CIRCUITPARALLEL CIRCUIT
Materials: Electrical Circuits Student Activity Book “D” battery 3 #48 bulbs Assembled battery holder 3 bulb holders 6 15 cm. pieces of #20 bare copper wire
1. Construct a complete circuit with one battery and one bulb.
2. Using another two wires, add a second bulb as shown on the picture below
3. What do you notice happened to the first bulb when the second bulb was added? ________________________________________________________________________________
________________________________________________________________________________
4. Look carefully at how a parallel circuit is set up. Write a prediction of what you think will happen if you unscrew one of the bulbs in the parallel circuit.
________________________________________________________________________________
________________________________________________________________________________
Why did you make this prediction? _________________________________________________
________________________________________________________________________________ 5. Unscrew bulb “X”. Describe what happens to bulb “Y”.
________________________________________________________________________________
________________________________________________________________________________
6. Tighten bulb “X” and unscrew bulb “Y”. Describe what happens to bulb “X”. ________________________________________________________________________________
________________________________________________________________________________
X Y
19
Activity Sheet for Learning Experience #Activity Sheet for Learning Experience #Activity Sheet for Learning Experience #Activity Sheet for Learning Experience #8888 Page 2Page 2Page 2Page 2
8. Pair up with another team of two students. Create a parallel circuit using one battery and both groups’ sets of bulbs. How many bulbs did you light? Was the brightness of the bulbs affected when you added more bulbs? Why or why not?
________________________________________________________________________________
________________________________________________________________________________
________________________________________________________________________________
________________________________________________________________________________
7.

20
Activity Sheet for Learning Experience #Activity Sheet for Learning Experience #Activity Sheet for Learning Experience #Activity Sheet for Learning Experience #9999 Name______________________Name______________________Name______________________Name______________________
BATTERIES WIRED IN PARALLEL AND IN SERIESBATTERIES WIRED IN PARALLEL AND IN SERIESBATTERIES WIRED IN PARALLEL AND IN SERIESBATTERIES WIRED IN PARALLEL AND IN SERIES
Materials: Electrical Circuits Student Activity Book 3 “D” batteries 2 #48 bulbs 3 assembled battery holders 2 bulb holders 6 15 cm. pieces of #20 bare copper wire
1. Construct a complete circuit with one battery and one bulb.
2. Measure the brightness of the bulb with your brightness meter. What is the bulb’s brightness? __________________________________________________________________
3. Construct the circuit below. Are these batteries in series or parallel?__________________
How can you tell? _____________________________________________________________
_____________________________________________________________________________
4. Use the brightness meter to test the brightness of this bulb. Is the bulb brighter than it was with one battery? _____________________________________________________________
________________________________________________________________________________
5. If you added a third battery to this circuit in series, what do you think would happen to the brightness of the bulb? ________________________________________________________
________________________________________________________________________________
Why do you think this? ___________________________________________________________
________________________________________________________________________________
6. Add a third battery to this circuit. Describe what happens to the bulb as this battery is added to this circuit in series and why you think the bulb is acting in this way.
________________________________________________________________________________
________________________________________________________________________________

21
Activity Activity Activity Activity Sheet for Learning Experience #9Sheet for Learning Experience #9Sheet for Learning Experience #9Sheet for Learning Experience #9 Page 2 Page 2 Page 2 Page 2 7. Construct another complete circuit with one battery and one bulb. Record again what the
brightness of the bulb is using your brightness meter.
8. Look at the pictures below, are the batteries in the picture in series or parallel?____________________________________________________________________
How can you tell? _____________________________________________________________
____________________________________________________________________________________
Construct the circuit in #8. Is the bulb brighter with two batteries than it was with one battery?_______________________________________________
9. Add oneoneoneone more battery to this circuit in parallel. Describe what happens to the bulb as one more battery is added to this circuit in parallel and why you think the bulb is acting this way. _____________________________________________________________________________
____________________________________________________________________________________________
____________________________________________________________________________________________
Extension:Extension:Extension:Extension: 10. Look back at the activity sheet for Learning Experience 5 – Schematic Diagrams and
discuss which circuits are in parallel? ______________________________________________ Which are in series? __________________________________________________________ Which are combined?_________________________________________________________
11. Look at the pictures on page 3 of this activity (the next page). Indicate your predicted brightness for each bulb labeled “1” in the pictures.
Brightness scale: O = Does not light L = Low (1-3 on brightness meter) M = Medium (4-7 on brightness meter) H = High (8-10 on brightness meter)
The bulb brightness for Challenge A = Medium.

22
Find the actual brightness of the bulb after making your prediction.
A A A A BrightnessBrightnessBrightnessBrightness
Prediction Actual ________ _______
B B B B BrightnessBrightnessBrightnessBrightness
Prediction Actual ________ _______
C C C C BrightnessBrightnessBrightnessBrightness
Prediction Actual ________ _______
D D D D BrightnessBrightnessBrightnessBrightness
Prediction Actual ________ _______
Notes:
E E E E BrightnessBrightnessBrightnessBrightness
Prediction Actual ________ _______
F F F F BrightnessBrightnessBrightnessBrightness
Prediction Actual ___________ _________
Notes: Notes:
Notes:
Notes: Notes:
Activity Sheet for Learning Experience #9Activity Sheet for Learning Experience #9Activity Sheet for Learning Experience #9Activity Sheet for Learning Experience #9 Page 3 Page 3 Page 3 Page 3

23
G G G G BrightnessBrightnessBrightnessBrightness
Prediction Actual _______ _______
Notes:
Activity Sheet for Learning Experience #9Activity Sheet for Learning Experience #9Activity Sheet for Learning Experience #9Activity Sheet for Learning Experience #9 Page 4 Page 4 Page 4 Page 4

24
Activity Sheet for Learning Experience #1Activity Sheet for Learning Experience #1Activity Sheet for Learning Experience #1Activity Sheet for Learning Experience #10000 Name_Name_Name_Name_____________________________________________________________________________________
SWITCHESSWITCHESSWITCHESSWITCHES Materials: Electrical Circuits Student Activity Book 3 15 cm. pieces of #20 bare copper wire #48 bulb “D” battery Assembled battery holder 2 paper fasteners Paper clip 3 x 5” index card* Colored pen/pencil*
*provided by teacher
1. Place the paper clip in the center of the index card. With a pencil, make a mark at each end of the paper clip
2. Use the tip of a pencil to punch small holes where the two dots are. 3. Put a paper fastener in each hole. One paper fastener should go on the inside of the
paper clip. Paper fastener 4. Flip the card over and flatten the prongs of the paper fasteners.
Paper fastener prongs Back of card
Tape the prongs down to the card. Be sure the prongs do not touch one another.
25
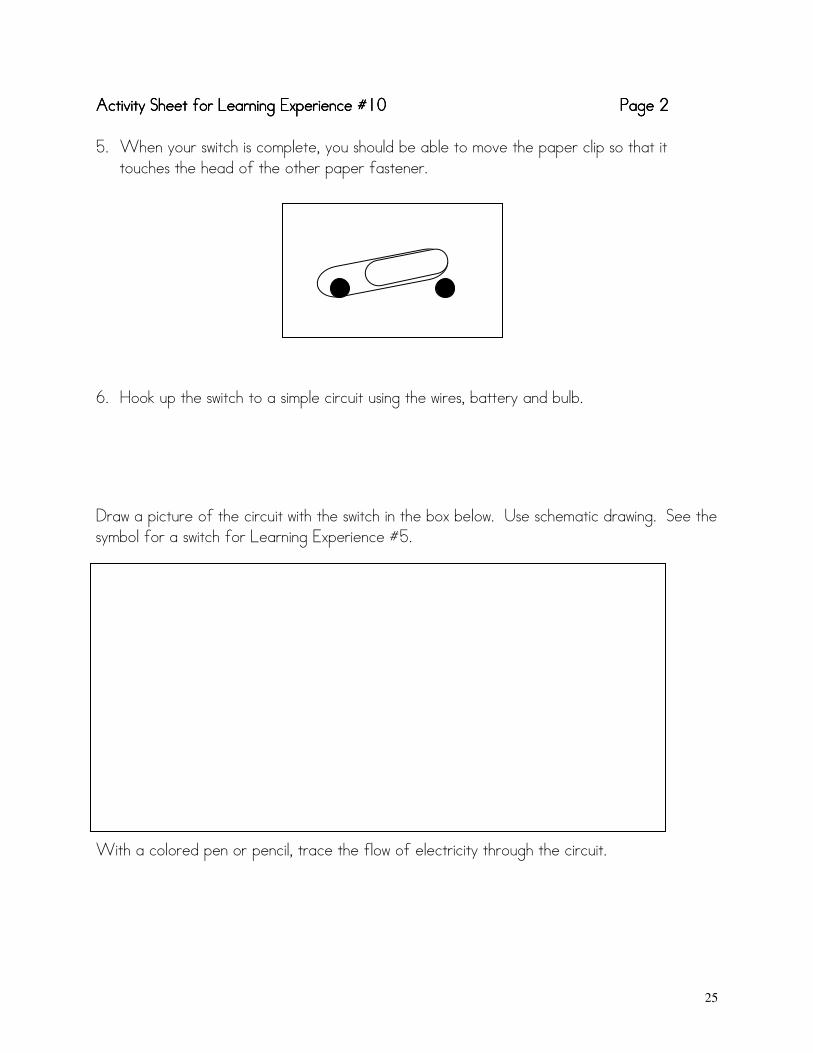
AAAActivity Sheet for Learning Experience #1ctivity Sheet for Learning Experience #1ctivity Sheet for Learning Experience #1ctivity Sheet for Learning Experience #10000 Page 2 Page 2 Page 2 Page 2 5. When your switch is complete, you should be able to move the paper clip so that it
touches the head of the other paper fastener. 6. Hook up the switch to a simple circuit using the wires, battery and bulb. Draw a picture of the circuit with the switch in the box below. Use schematic drawing. See the symbol for a switch for Learning Experience #5. With a colored pen or pencil, trace the flow of electricity through the circuit.

26
Activity Sheet for Learning Experience #10Activity Sheet for Learning Experience #10Activity Sheet for Learning Experience #10Activity Sheet for Learning Experience #10 Page 3 Page 3 Page 3 Page 3 When you use the switch to turn on the light bulb, are you closing the circuit? Explain why you think it would be called a “closed” circuit.
________________________________________________________________________________
________________________________________________________________________________
________________________________________________________________________________ When you “open” a switch, what happens to the circuit?
________________________________________________________________________________
________________________________________________________________________________
________________________________________________________________________________

27
Activity Sheet for Learning Experience #11Activity Sheet for Learning Experience #11Activity Sheet for Learning Experience #11Activity Sheet for Learning Experience #11 Name______________________Name______________________Name______________________Name______________________
SOLID CONDUCTORS AND INSULATORSSOLID CONDUCTORS AND INSULATORSSOLID CONDUCTORS AND INSULATORSSOLID CONDUCTORS AND INSULATORS
Materials: Electrical Circuits Student Activity Book 3 15 cm. pieces of #20 bare copper wire #48 bulb Bulb holder “D” battery Assembled battery holder 2 Fahnestock clips Variety of solids such as pencils, erasers, paper clips, clay, scissors, crayons, etc.*
*provided by teacher
Create a circuit tester like the one pictured in the diagram below. “X” “Y”
1. Touch wire “X” and wire “Y” together to make a complete circuit. Does the bulb light? _________ (If the bulb does not light, problem solve with your partner to figure out why the bulb is not lighting.)
2. Choose 10 different objects in your classroom to test to see if they conduct electricity. Predict whether or not you think the object will conduct electricity. (In other words, if you place the wires from the circuit tester on the object, the bulb will light.) Record your predictions on the chart on Page 2 of this activity sheet.
3. Use the circuit tester to test the materials in your classroom to see if they conduct electricity or do not conduct electricity. Touch wire “X” to one side of the object and wire “Y” to the other side of the object. Record if the bulb lights on the chart below. If the bulb lights, the object is a conductor of electricity. If the bulb does not light, it is a non-conductor or an insulator.
Record whether the object is a conductor or non-conductor on the chart on Page 2 of this activity sheet.
Fahnestock clip Fahnestock clip

28
Objects Prediction
Will the bulb light? (yes or no)
Actual Result Did the bulb light? (yes or no)
Is the object a conductor or non-conductor?
What material is the object made of?
1.
2.
3.
4.
5.
6.
7.
8.
9.
10.
4. What materials are the objects that conduct electricity made of?
________________________________________________________________________________
________________________________________________________________________________ 5. What materials are the objects that did not conduct electricity made of?
________________________________________________________________________________
________________________________________________________________________________ 6. Name three other objects that you did not test that you predict would conduct electricity based on your results from this learning experience.
________________________________________________________________________________ ________________________________________________________________________________
Activity Sheet for Learning Experience #11Activity Sheet for Learning Experience #11Activity Sheet for Learning Experience #11Activity Sheet for Learning Experience #11 Page 2 Page 2 Page 2 Page 2

29
Extension ActivityExtension ActivityExtension ActivityExtension Activity Activity Sheet for Learning Experience #12Activity Sheet for Learning Experience #12Activity Sheet for Learning Experience #12Activity Sheet for Learning Experience #12 Name______________________Name______________________Name______________________Name______________________
BUZZERSBUZZERSBUZZERSBUZZERS Materials: Electrical Circuits Student Activity Book 2 15 cm. pieces of #20 bare copper wire 2 “D” batteries 2 assembled battery holders Buzzer Switch (students made in Learning Experience #13) • Place the battery holder on the battery, and attach the red wire from the buzzer to the
battery holder at the positive terminal. Attach one end of one piece of bare copper wire to the negative terminal of the battery and the other end to the switch.
• Attach the black wire on the buzzer to the switch. • Move the paper clip to the “closed” position to sound the buzzer. Describe what happens.
_______________________________________________________________________________
_______________________________________________________________________________
_______________________________________________________________________________
Predict what will happen if you connected another battery to the buzzer. _______________________________________________________________________________ _______________________________________________________________________________ Place another battery in a holder, and hold the two batteries together end to end. Now attach the wires of the buzzer to the ends of the batteries. Did the buzzer sound change? Explain.
________________________________________________________________________________
________________________________________________________________________________
________________________________________________________________________________

30
Extension ActivityExtension ActivityExtension ActivityExtension Activity Activity Sheet for Learning Experience #13Activity Sheet for Learning Experience #13Activity Sheet for Learning Experience #13Activity Sheet for Learning Experience #13 Name______________________Name______________________Name______________________Name______________________
HIDDEN CIRCUITS CARDHIDDEN CIRCUITS CARDHIDDEN CIRCUITS CARDHIDDEN CIRCUITS CARD
Materials: Electrical Circuits Student Activity Book “D” battery #48 bulb Assembled battery holder Bulb holder Hidden circuits card Scissors* 3 15 cm. pieces of #20 bare copper wire Hole punch*
*provided by teacher
1. Construct the circuit tester shown below.
2. Construct the hidden circuit connections with aluminum foil. The aluminum foil conducts
electricity. Connect the foil strips between the numbers on the inside of your card. Attach the aluminum foil to the card with tape. Be careful not to cover the entire piece of foil. See the example in figure 1 below. Make your hidden circuits different from the one shown in figure 1. You will be switching circuit folders with other students. They will be trying to find your hidden circuits!
3. Be sure you place a piece of aluminum foil over the hole for each number, even if the foil does not lead to another letter in the folder.
4. Close the cover on the circuit folder. Use the circuit tester to check the hidden circuits. Place the wires on the holes covered with aluminum foil. If your bulb lights, you found a path. If you cross strips of aluminum foil, place a piece of tape between the pieces of foil so the person that tests your card does not get an inaccurate reading.
If your hidden circuit looked you would draw the hidden like the one above……. circuit like this.
1 2 3 4 5 6 7 8
1 2 3 4 5 6 7 8
Figure 1 Figure 2

31
Extension Activity Sheet for Learning Experience #13Extension Activity Sheet for Learning Experience #13Extension Activity Sheet for Learning Experience #13Extension Activity Sheet for Learning Experience #13 Page 2 Page 2 Page 2 Page 2 5. Exchange your circuit folder with another student, and test their hidden circuits. Draw lines
showing paths you identify for each circuit folder you tested in the first box below. Don’t peak! Repeat this exchange three more times.
1 2 3 4
5 6 7 8
1 2 3 4
5 6 7 8
1 2 3 4
2 6 7 8
1 2 3 4
5 6 7 8
32
Extension ActivityExtension ActivityExtension ActivityExtension Activity Activity Sheet for Learning Experience #1Activity Sheet for Learning Experience #1Activity Sheet for Learning Experience #1Activity Sheet for Learning Experience #14444 Name______________________Name______________________Name______________________Name______________________
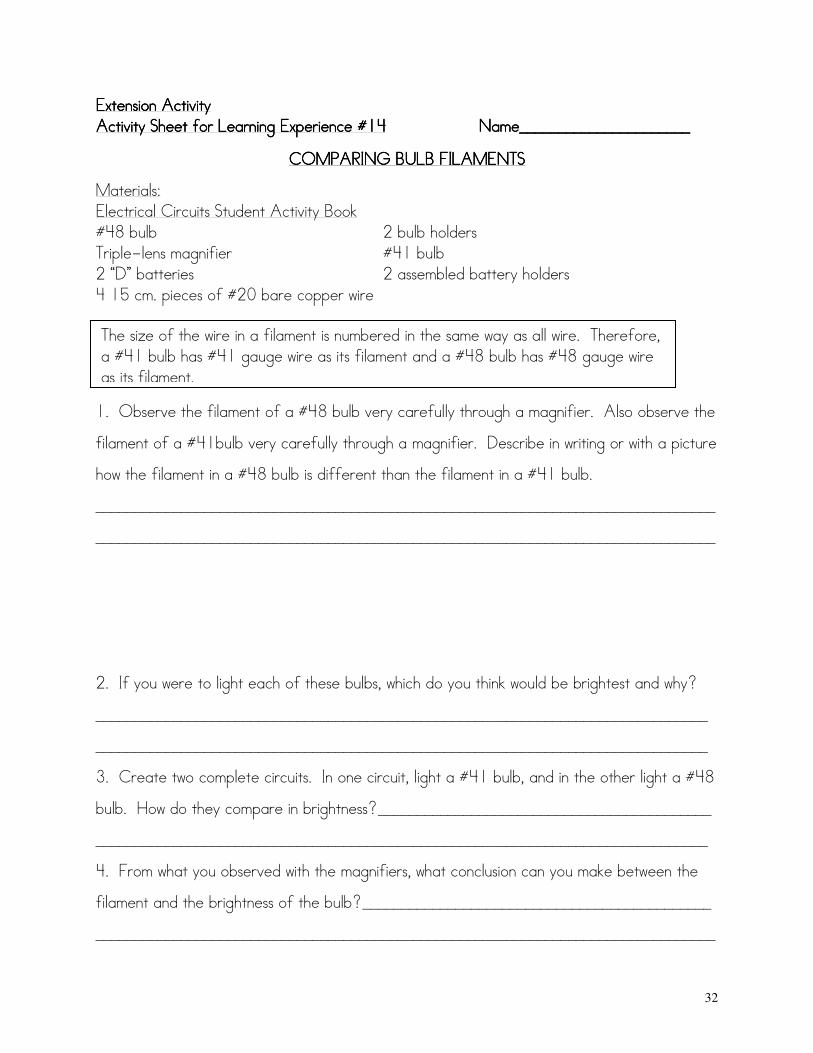
COMPARING COMPARING COMPARING COMPARING BULB BULB BULB BULB FILAMENTSFILAMENTSFILAMENTSFILAMENTS
Materials: Electrical Circuits Student Activity Book #48 bulb 2 bulb holders Triple-lens magnifier #41 bulb 2 “D” batteries 2 assembled battery holders 4 15 cm. pieces of #20 bare copper wire
1. Observe the filament of a #48 bulb very carefully through a magnifier. Also observe the
filament of a #41bulb very carefully through a magnifier. Describe in writing or with a picture
how the filament in a #48 bulb is different than the filament in a #41 bulb.
________________________________________________________________________________
________________________________________________________________________________
2. If you were to light each of these bulbs, which do you think would be brightest and why?
_______________________________________________________________________________
_______________________________________________________________________________
3. Create two complete circuits. In one circuit, light a #41 bulb, and in the other light a #48
bulb. How do they compare in brightness?___________________________________________
_______________________________________________________________________________
4. From what you observed with the magnifiers, what conclusion can you make between the
filament and the brightness of the bulb?_____________________________________________
________________________________________________________________________________
The size of the wire in a filament is numbered in the same way as all wire. Therefore, a #41 bulb has #41 gauge wire as its filament and a #48 bulb has #48 gauge wire as its filament.

33
Extension Activity Sheet for Learning Experience #14 Extension Activity Sheet for Learning Experience #14 Extension Activity Sheet for Learning Experience #14 Extension Activity Sheet for Learning Experience #14 Page 2Page 2Page 2Page 2
#48 #41 5. Construct the series circuit above. Explain what you observe. ________________________________________________________________________________ ________________________________________________________________________________ 6. How does this differ from the series circuit you made with two #48 bulbs in Learning
Experience 7? _______________________________________________________________ ________________________________________________________________________________ ________________________________________________________________________________ 7. Reverse the #41 and #48 bulbs, and record what happens. _________________________ _______________________________________________________________________________ _______________________________________________________________________________ 8. Why do you think these results are occurring? ___________________________________ _______________________________________________________________________________ _______________________________________________________________________________ 9. If you were to set up a parallel circuit with a #48 and a #41 bulb, what do you think would
happen? ___________________________________________________________________ _______________________________________________________________________________

34
Extension Activity Sheet for Learning Experience #14 Extension Activity Sheet for Learning Experience #14 Extension Activity Sheet for Learning Experience #14 Extension Activity Sheet for Learning Experience #14 Page 3Page 3Page 3Page 3 10. Set up a parallel circuit with a #41 bulb and a #48 bulb. Describe what happens. ______________________________________________________________________________ ______________________________________________________________________________ ______________________________________________________________________________ 11. Are your results different than the series circuit with a #41 and #48 bulb? Explain. ______________________________________________________________________________ ______________________________________________________________________________ ______________________________________________________________________________

35
Extension ActivityExtension ActivityExtension ActivityExtension Activity Activity Sheet for Learning Experience #1Activity Sheet for Learning Experience #1Activity Sheet for Learning Experience #1Activity Sheet for Learning Experience #15555 Name____________________Name____________________Name____________________Name____________________
INTRODUCTION TO RESISTANCEINTRODUCTION TO RESISTANCEINTRODUCTION TO RESISTANCEINTRODUCTION TO RESISTANCE
1. Which hose will conduct more water? Explain why? ________________________________________________________________________________ ________________________________________________________________________________
Thin Wire Thick Wire
2. Which wire will conduct more electricity? Explain Why? _______________________________________________________________________________ _______________________________________________________________________________ When a material limits the amount of electricity that can pass through it, it has resistanceresistanceresistanceresistance. All materials that conduct electricity have some resistance. Wires used in circuitsWires used in circuitsWires used in circuitsWires used in circuits Gauge wireGauge wireGauge wireGauge wire Copper wire used in the electrical circuits kit.
#20
Wires used in circuits in houses/schools. #14 Wires used in circuits in refrigerators. #12 Wires used in circuits in electric stoves. #8 The higher the gauge wire number, the thinner the wire. Copper wire is the most commonly used wire because it has a low resistance to the flow of electricity. Nichrome wire has more resistance to electricity than copper wire.
Fire Hose
Regular Hose

36
Extension Extension Extension Extension Activity Sheet for Learning Experience #1Activity Sheet for Learning Experience #1Activity Sheet for Learning Experience #1Activity Sheet for Learning Experience #15555 Page 2 Page 2 Page 2 Page 2 3. Which nichrome wire, #26 (thick) or #32 (thin), will conduct electricity the best? Explain your answer. ________________________________________________________________________________ ________________________________________________________________________________ ________________________________________________________________________________ ________________________________________________________________________________
4. Which conducts electricity better, a long piece of Nichrome wire or a short piece of Nichrome wire? Explain.
________________________________________________________________________________ ________________________________________________________________________________ ________________________________________________________________________________ ________________________________________________________________________________
5. Nichrome wire is more resistant to the flow of electricity than copper wire. If enough electricity goes through the nichrome wire, the nichrome wire will get hot and turn red. Name some appliances found in the home that use nichrome wire.
________________________________________________________________________________ ________________________________________________________________________________ ________________________________________________________________________________ ________________________________________________________________________________
6. Look up the word rheostat rheostat rheostat rheostat in a dictionary. Where do you have a rheostat in your home or car?
________________________________________________________________________________ ________________________________________________________________________________

37
ExtensionExtensionExtensionExtension Activity Activity Activity Activity Activity Sheet for Learning Experience #16Activity Sheet for Learning Experience #16Activity Sheet for Learning Experience #16Activity Sheet for Learning Experience #16 Name______________________Name______________________Name______________________Name______________________
LIQUID CONDUCTORS & NON CONDUCTORSLIQUID CONDUCTORS & NON CONDUCTORSLIQUID CONDUCTORS & NON CONDUCTORSLIQUID CONDUCTORS & NON CONDUCTORS
Materials: Electrical Circuit Student Activity Book 4 “D” batteries Bulb holder 4 assembled battery holders #41 bulb Teaspoon salt, sugar, baking soda, vinegar 5 medicine cups 2 Fahnestock clips Toothpick 3 15 cm. pieces #20 bare copper wire Warm water* 3 5 cm. pieces #20 bare copper wire (to hook batteries together) “X” “Y”
1. Construct a circuit tester like the one pictured above. Attach one Fahnestock clip to test point “X” and one Fahnestock clip to test point “Y”.
2. Touch Fahnestock clip “X” and Fahnestock “Y” together to make it a complete circuit.
Does the bulb light? (If it does not light, problem solve with your partner to figure out why the bulb is not lighting.)
3. Look at the liquids listed on the chart on the next page. If the Fahnestock clips are
placed in the liquids, which liquid would light the bulb? Predict which liquids will or will not conduct electricity. Record your predictions on the chart below.
4. Fill one medicine cup with water and another with vinegar. Solutions are made by first
filling the three remaining medicine cups with warm water. Add one level teaspoon of salt to the warm water gradually, then one level teaspoon of sugar to another cup, and then one level teaspoon of baking soda to the last.
5. Test to see if the five liquids or solutions conduct electricity by placing the Fahnestock clip “X” and Fahnestock clip “Y” into the liquid. Be careful to keep the clips close to each other (about 5 mm.) but not touching. (For best results, the flat sides of the Fahnestock clips should face each other.)
Fahnestock clip
Fahnestock clip
Wire to bulb

38
Extension Extension Extension Extension Activity Sheet for Learning ExperActivity Sheet for Learning ExperActivity Sheet for Learning ExperActivity Sheet for Learning Experience #16ience #16ience #16ience #16 P P P Page 2age 2age 2age 2
LiquidsLiquidsLiquidsLiquids PredictionPredictionPredictionPrediction Actual ResultActual ResultActual ResultActual Result Will the liquid conduct
electricity? (yes or no) Did the liquid conduct electricity?
(yes or no)
Plain water Vinegar Salt solution (salt & water) Sugar solution (sugar & water) Baking soda solution (water & baking soda)
6. Look carefully at your results. What conclusions can you make about the solutions that
conduct electricity and solutions that do not conduct electricity?
________________________________________________________________________________
________________________________________________________________________________
________________________________________________________________________________ 7. Name three other liquids you did not test that you predict would conduct electricity based
on your results from this learning experience.
________________________________________________________________________________
________________________________________________________________________________
________________________________________________________________________________

39
ExtensionExtensionExtensionExtension Activity Activity Activity Activity Activity Sheet for Learning Experience #1Activity Sheet for Learning Experience #1Activity Sheet for Learning Experience #1Activity Sheet for Learning Experience #17777 Name_________Name_________Name_________Name_____________________________________________________________
MAGNETISM AND ELECTRICITYMAGNETISM AND ELECTRICITYMAGNETISM AND ELECTRICITYMAGNETISM AND ELECTRICITY Materials: Electrical Circuits Student Activity Book Test objects (iron nail, aluminum nail, gram centimeter cube, glass marble) 2 bar magnets Compass “D” battery Assembled battery holder 30 cm. piece of #20 enameled copper wire
Place your two magnets upright on your desk and facing one another, as shown below.
1. What happens to the first magnet when you move the second magnet closer to it?
_______________________________________________________________________________
_______________________________________________________________________________
2. Turn the first magnet so the two north poles are next to each other. Then move it closer to the second magnet. Describe what happens.
_______________________________________________________________________________
_______________________________________________________________________________
3. The ends of a magnet are called polespolespolespoles. What happens to the magnets when two “opposite” poles come close to each other?
_______________________________________________________________________________
_______________________________________________________________________________ 4. How is that different or similar to when two “like” poles come close to each other? _______________________________________________________________________________
_______________________________________________________________________________
N S N S
N S N S

40
Extension Extension Extension Extension Activity Sheet for Learning Experience #1Activity Sheet for Learning Experience #1Activity Sheet for Learning Experience #1Activity Sheet for Learning Experience #17777 Page 2Page 2Page 2Page 2 5. Test to see which of the four objects are attracted to the magnet. Place an “X” in the
correct box below. Choose four items from your desk to see if they are attracted to a magnet. Write their names on the chart below, and record your results.
ObjectObjectObjectObject Attracted to magnetAttracted to magnetAttracted to magnetAttracted to magnet???? Yes No
1. iron nail
2. aluminum nail
3. gram centimeter cube
4. glass marble
5.
6.
7.
8.
6. What conclusions can you make about what material magnets are attracted to based on your data above. _____________________________________________________________
________________________________________________________________________________
Extension Extension Extension Extension ---- Session 2Session 2Session 2Session 2 Place the compass on your desk, and observe how the needle comes to the rest in a specific
direction. Pick up your magnet, and move it back and forth over the compass. 7. Describe what happens to the compass needle when the magnet is moved back and forth
over the compass.
_______________________________________________________________________________
_______________________________________________________________________________

41
Extension Extension Extension Extension Activity SActivity SActivity SActivity Sheet for Learning Experience #17heet for Learning Experience #17heet for Learning Experience #17heet for Learning Experience #17 Page 3 Page 3 Page 3 Page 3 Coil up the 30 cm. of #20 enameled copper wire as shown below. Sand the ends of the enameled wire 1 cm. from the end.
8. Hold the ends of the wire in your hand and describe what happens to the compass needle
when the wire is moved back and forth over the compass.
________________________________________________________________________________
________________________________________________________________________________ Connect the ends of the wire to the battery. Move the coiled wire back and forth over the compass at rest. 9. Describe what happens to the compass needle when the magnet is moved back and forth
over the compass.
_______________________________________________________________________________
_______________________________________________________________________________ 10. What conclusions can you make about the wire with the electrical current or electrons
running through it based on your results?
_______________________________________________________________________________
_______________________________________________________________________________

42
ELECTRICAL CIRCUITSELECTRICAL CIRCUITSELECTRICAL CIRCUITSELECTRICAL CIRCUITS STUDENT SELFSTUDENT SELFSTUDENT SELFSTUDENT SELF----ASSESASSESASSESASSESSMENTSMENTSMENTSMENT
Name:__________________________________
1. What do you now know about electrical circuits that you didn’t know before?
________________________________________________________________________________
________________________________________________________________________________
What do you now know about magnets that you did not know before?
________________________________________________________________________________
________________________________________________________________________________
2. How do you think you and your partner(s) worked together? Give some examples.
________________________________________________________________________________
________________________________________________________________________________
3. What learning experiences did you enjoy? Explain why did you liked them.
________________________________________________________________________________
________________________________________________________________________________
4. Were there any learning experiences in the unit you didn’t understand or that confused you? Explain your answer.
________________________________________________________________________________
________________________________________________________________________________
5. Take another look at your activity sheets and science notebook. Describe how well you think you recorded your observations and ideas.
________________________________________________________________________________
________________________________________________________________________________
6. How did your work in this unit affect your attitude toward science? ________________________________________________________________________________
________________________________________________________________________________

43
GLOSSARYGLOSSARYGLOSSARYGLOSSARY Battery: a combination of cells that create opposing poles resulting in the
ability to create an electrical current. Brightness: radiation of light. Bulb: an incandescent electric lamp. Buzzer: a signaling apparatus that produces a buzzing sound due to an
electrical current and electromagnet. Closed circuit: a complete circuit, electricity is flowing.
Circuit : a circuit is a complete or partial path through which an
electrical current may flow. Compass: an instrument used for determining direction by a freely rotating
magnetized needle that shows magnetic north. Composition: the material that an object is made of. Conductor: materials through which energy, such as electricity moves rapidly. Connect: to band or link together. Contact: a junction of electric conductors. Copper: metallic element that is used as a conductor of electricity. Current: the movement or flow of an electric charge. Diameter: the width or thickness of a circular figure or object. Electron: a negatively charged particle in an atom. Energy: the capacity for doing work and overcoming
resistance. Filament: the fine metal wire (usually made of tungsten) in a light bulb that
glows when heated by an electric current.
44
Function: the purpose for which something is designed or exists. Fuse: a strip of easily melted metal, usually set in a plug, placed in a
circuit as a safeguard; if the current becomes too strong, the metal melts, breaking the circuit.
Glass bead: support wires of a bulb are placed in this bead for stability. Insulated: to cover with non conducting material to prevent or reduce the
transfer of electricity, heat, or sound. Insulator: any kind of matter that does not carry electricity well or at all
(glass, plastic, rubber) used to hold electricity in metal wires. Interaction: act on upon another. Length: the linear extent of anything as measured form end to end. Liquid: the state of matter that takes the shape of its container, feels
wet, and takes up definite space (not solid or gaseous). Magnetic Field: the space around a magnet that has the ability to attract
another magnet. Material: the substance of which a thing is made. Meter: an instrument used to measure quantity, distance, etc. Negative: charges with electricity caused by an excess of electrons. Non-conductor: materials through which electricity cannot pass. Nichrome: a material used to make wire that is composed of nickel and
chrome. Observe: to become aware of an object or when by using any of the
senses to identify properties. Open circuit: an incomplete or broken circuit, the electricity stops flowing.

45
Parallel circuit: the arrangement of electrical devices where all positive terminals are joined to one conductor and all negative ones to another conductor so that there is more than one path for the electricity to follow. If one bulb fails to function, the other bulbs will stay lit.
Path: a route along which something moves. Polarity: the quality or condition in a body which exhibits opposite powers
in opposite direction. Poles: the ends of a magnet, usually labeled north and south. Positive: charged with electricity caused by a lack of electrons. Prediction: an educated guess. Property: an essential or distinctive trait or characteristic of a living or non
living thing.
Resistance: the opposition offered by a material to the steady flow of electric current.
Rheostat: an adjustable resistor used for controlling the current in a circuit, as in dimming lights.
Schematic: a symbolic representation of all parts of a system. Series circuit: a series circuit is a circuit which all parts are connected end to
end so there is only one path through which electricity can flow. Short circuit: a closed circuit of electricity that is formed with a wire and a
power source such as a battery; a circuit that bypasses the main circuit and takes a “shortcut” back to the power source.
Solution: a homogenous mixture of two substances.
Strategy: a detailed plan for reaching a goal.
Support wire: wires in a bulb that holds the filament in place.
Switch : a device for making or breaking a connection in an

46
electrical circuit or for altering the connection in a circuit. Symbols: letters, numbers, or drawings that represent meaningful concepts
or ideas.
System: a group of interacting objects. Terminal: terminals are the points on the battery and bulb which must be
touched in order to make a complete circuit. Variable: a part of an experiment that can change values.
Voltage: the measurement of electrical pressure that flows through a wire.
Watts: a unit of electric power, equal to the power in a circuit in which one ampere flows across a potential difference of one volt.


![[1] l.e. partners eb 5 brochure dv1.1](https://img.dokumen.tips/doc/110x75/5594af481a28ab01588b4598/1-le-partners-eb-5-brochure-dv11.jpg)