Embed Size (px)
Citation preview

임베디드시스템개론: Arduino 활용
Lecture #3: Button Input & FND Control
2015. 3. 23 by 김 영 주

강의 목차
디지털 입력
Button switch 입력
Button Debounce
7-Segment FND : 직접 제어
7-Segment FND : IC 제어
2

디지털 입력 : Switch 입력 (1)
실습 목표
아두이노 디지털 입력 처리 실습
digitalRead()
스위치 입력 처리 이해
3
디지털 입력 : Switch 입력 (2)
사전 지식
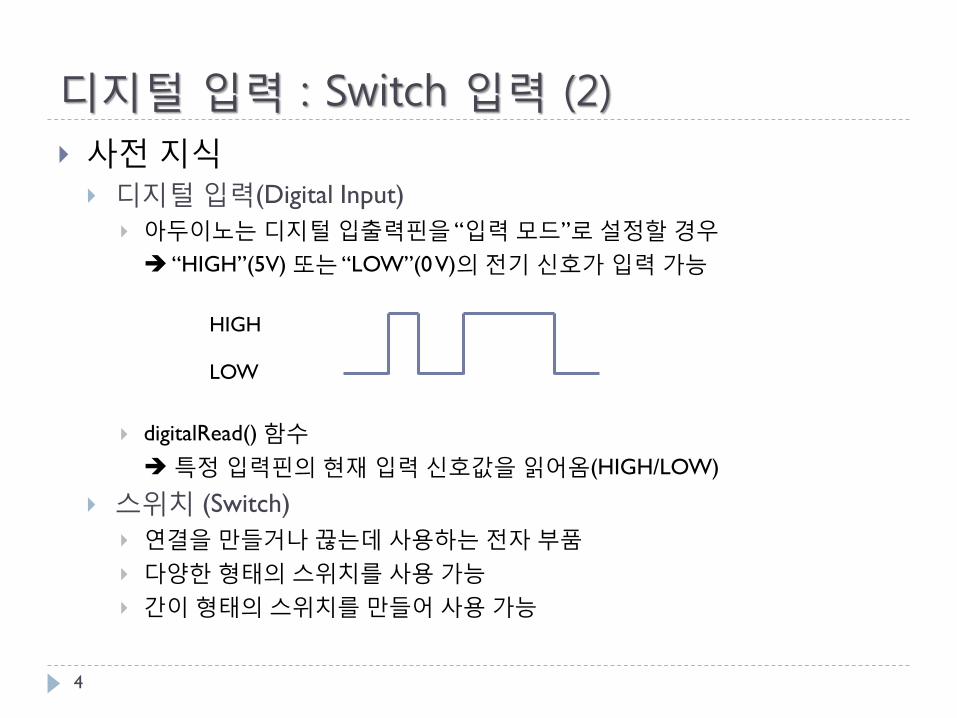
디지털 입력(Digital Input)
아두이노는 디지털 입출력핀을 “입력 모드”로 설정할 경우
“HIGH”(5V) 또는 “LOW”(0 V)의 전기 신호가 입력 가능
digitalRead() 함수
특정 입력핀의 현재 입력 신호값을 읽어옴(HIGH/LOW)
스위치 (Switch)
연결을 만들거나 끊는데 사용하는 전자 부품
다양한 형태의 스위치를 사용 가능
간이 형태의 스위치를 만들어 사용 가능
4
HIGH
LOW

디지털 입력 : Switch 입력 (3)
사전 지식 : 스위치 종류
5
Knife Switch
Toggle Switch
Penny Switch
Magnetic Hexadecimal Tilt Lever
Button Switch
디지털 입력 : Switch 입력 (4)
사전 지식
스위치 연결
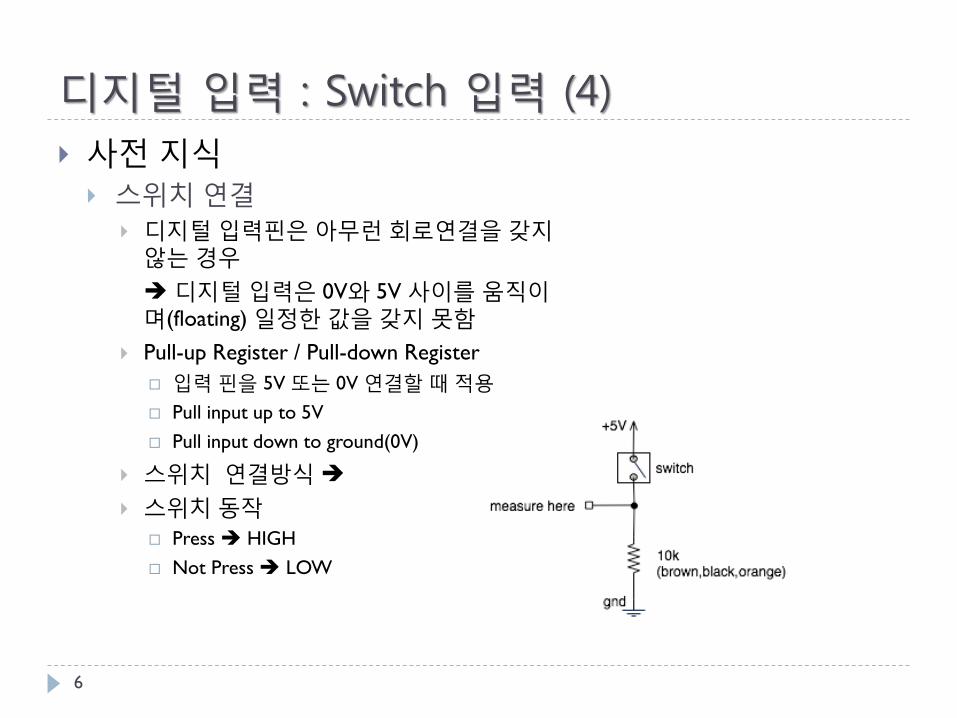
디지털 입력핀은 아무런 회로연결을 갖지않는 경우
디지털 입력은 0V와 5V 사이를 움직이며(floating) 일정한 값을 갖지 못함
Pull-up Register / Pull-down Register
입력 핀을 5V 또는 0V 연결할 때 적용
Pull input up to 5V
Pull input down to ground(0V)
스위치 연결방식
스위치 동작
Press HIGH
Not Press LOW
6

[참고] 저항 컬러코드 식별법 (1)
7

[참고] 저항 컬러코드 식별법 (2)
8

디지털 입력 : Switch 입력 (5)
회로도 및 회로 구성
9
회로 연결회로도

디지털 입력 : Switch 입력 (6)
아누이노 프로그램 : Button Input
10
int btnPin = 22;
Int ledPin = 9;
int btnState;
void setup()
{
pinMode(ledPin, OUTPUT);
pinMode(btnPin, INPUT);
}
void loop()
{
btnState = digitalRead(btnPin);
if (btnState == HIGH) {
digitalWrite(ledPin, HIGH);
} else {
digitalWrite(ledPin, HIGH);
}
}

디지털 입력 : Switch 입력 (7)
Button Bounce 현상
버튼을 누르거나 땔 때에 일시적으로 전압이 불안해지는 현상
Button Debounce
Button bounce를 제거하는 동작
H/W 해결책 – capacity 활용
S/W 해결책 – 버튼 입력 상태가 바뀔 때에 약간의 지연을 허용
11

디지털 입력 : Switch 입력 (8)
아누이노 프로그램 : Button Debounce
12
int btnPin = 22;
Int ledPin = 9;
Int lastBtnState = LOW;
long lastDebounceTime = 0;
long debounceDelay = 50;
void setup()
{
pinMode(ledPin, OUTPUT);
pinMode(btnPin, INPUT);
}
void loop()
{
int reading = digitalRead(btnPin);
if (reading != lastBtnState) {
lastDebounceTime = millis();
}
if (millis()-lastDebounceTime
> debounceDelay) {
lastBtnState = reading;
}
digitalWrite(ledPin, lastBtnState);
}

디지털 입력 : Switch 입력 (9)
Debounce 라이브러리 (1)
Arduino 플랫폼에서 button debounce 라이브러리를 제공하였으나 현재는 지원하지 않음
Bounce2 Library – open-source library
https://github.com/thomasfredericks/Bounce2
설치:
Bounce2-master.zip 파일 다운로드 및 압축 해제
압축 해제된 폴더의 이름을 “bounce2”로 변경
“bounce2” 폴더를 $(HOME)/Arduino/libraries 폴더로 이동
Arduino IDE를 재실행
13

디지털 입력 : Switch 입력 (10)
Debounce 라이브러리 (2)
14
#include <bounce2.h> // 아두이노 스케치/라이브러리 추가 메뉴에 추가
int btnPin = 22;
int ledPin = 9;
Bounce debouncer = new Bounce();
void setup()
{
pinMode(ledPin, OUTPUT);
pinMode(btnPin, INPUT);
debouncer.attach(btnPin);
debouncer.interval(5);
}
void loop()
{
debouncer.update();
digitalWrite(ledPin, debouncer.read());
}
7-Segment FND 출력 (1)
실습 목표
FND 장치를 이용하여 16진수(10진수) 출력
MCU를 이용하여 FND 장치 제어 방법 학습
15

7-Segment FND 출력 (2)
사전 지식
7-Segment FND
8개의 LED로 1자리 숫자를 출력
종류
Common-Anode FND
Common-Cathode FND
10진수 출력
16

7-Segment FND 출력 (3)
사전 지식
7-Segment FND
16진수 출력
17

7-Segment FND 출력 (4)
회로도
18
7 6 4 2 1 9 10 5

7-Segment FND 출력 (5)
회로 연결
19
7-Segment FND 출력 (6)
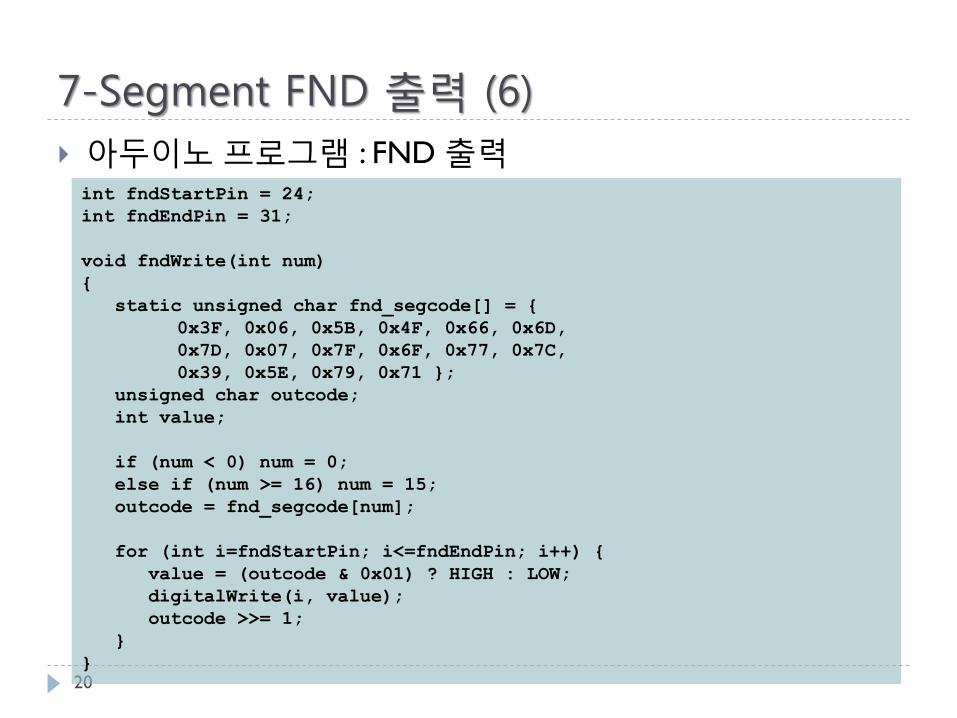
아두이노 프로그램 : FND 출력
20
int fndStartPin = 24;
int fndEndPin = 31;
void fndWrite(int num)
{
static unsigned char fnd_segcode[] = {
0x3F, 0x06, 0x5B, 0x4F, 0x66, 0x6D,
0x7D, 0x07, 0x7F, 0x6F, 0x77, 0x7C,
0x39, 0x5E, 0x79, 0x71 };
unsigned char outcode;
int value;
if (num < 0) num = 0;
else if (num >= 16) num = 15;
outcode = fnd_segcode[num];
for (int i=fndStartPin; i<=fndEndPin; i++) {
value = (outcode & 0x01) ? HIGH : LOW;
digitalWrite(i, value);
outcode >>= 1;
}
}

7-Segment FND 출력 (7)
아두이노 프로그램 : FND 출력
21
void setup()
{
for (int i=fndStartPin; i<=fndEndPin; i++)
pinMode(i, OUTPUT);
}
void loop()
{
for (int num=0; num<16; num++) {
fndWrite(num);
delay(1000);
}
}
7-Segment FND 출력 (8)
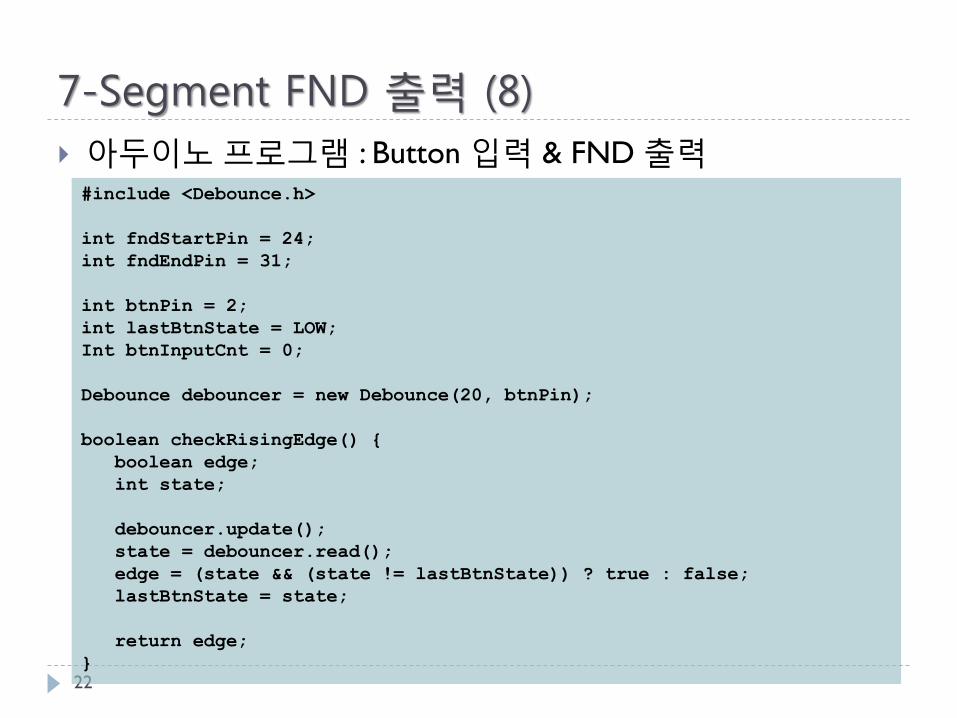
아두이노 프로그램 : Button 입력 & FND 출력
22
#include <Debounce.h>
int fndStartPin = 24;
int fndEndPin = 31;
int btnPin = 2;
int lastBtnState = LOW;
Int btnInputCnt = 0;
Debounce debouncer = new Debounce(20, btnPin);
boolean checkRisingEdge() {
boolean edge;
int state;
debouncer.update();
state = debouncer.read();
edge = (state && (state != lastBtnState)) ? true : false;
lastBtnState = state;
return edge;
}

7-Segment FND 출력 (9)
아두이노 프로그램 : Button 입력 & FND 출력
23
void fndWrite(int num)
{
static unsigned char fnd_segcode[] = {
0x3F, 0x06, 0x5B, 0x4F, 0x66, 0x6D,
0x7D, 0x07, 0x7F, 0x6F, 0x77, 0x7C,
0x39, 0x5E, 0x79, 0x71 };
unsigned char outcode;
int value;
if (num < 0) num = 0;
else if (num >= 16) num = 15;
outcode = fnd_segcode[num];
for (int i=fndStartPin; i<=fndEndPin; i++) {
value = (outcode & 0x01) ? HIGH : LOW;
digitalWrite(i, value);
outcode >>= 1;
}
}

7-Segment FND 출력 (10)
아두이노 프로그램 : Button 입력 & FND 출력
24
void setup()
{
for (int i=fndStartPin; i<=fndEndPin; i++)
pinMode(i, OUTPUT);
fndWrite(btnInputCnt);
}
void loop()
{
if (checkRisingEdge()) {
if (++btnInputCnt > 15)
btnInputCnt = 0;
fndWrite(btnInputCnt);
}
}
버튼입력신호의rising edge에 동기화하여 카운터값을 증가시킴

전용 IC를 이용한 FND 출력 (1)
실습 목표
전용 제어 IC를 이용하여 FND 장치 제어 방법 학습
I/O 전용 IC를 사용함으로써 MCU의 제어 동작과 관련하여 입출력 핀 및제어 프로그램을 줄일 수 있음
25
MCU Blackbox
BCD
code
Control
signal

전용 IC를 이용한 FND 출력 (2)
사전 지식
FND I/O IC : HEF4511BP
IC 데이터쉬트 참조
BCD to 7-segment latch/decoder/driver
26
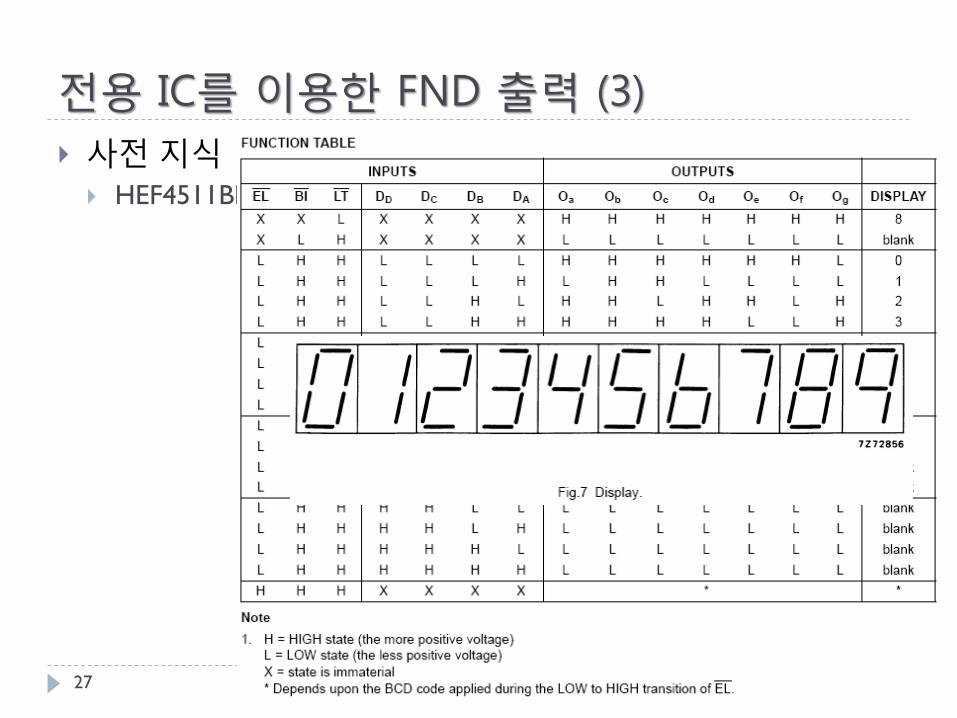
전용 IC를 이용한 FND 출력 (3)
사전 지식
HEF4511BP
27

전용 IC를 이용한 FND 출력 (4)
사전 지식
HEF4511BP
28
제어신호 타이밍:

전용 IC를 이용한 FND 출력 (5)
회로도
29

전용 IC를 이용한 FND 출력 (6)
회로 연결
30

전용 IC를 이용한 FND 출력 (7)
아두이노 프로그램 : HEF4511BP 제어
31
#include <Debounce.h>
int fndnELPin = 22;
int fndBCDStartPin = 23;
int fndBCDEndPin = 26;
int btnPin = 2;
int lastBtnState = LOW;
Int btnInputCnt = 0;
Debounce debouncer = new Debounce(20, btnPin);
boolean checkRisingEdge() {
boolean edge;
int state;
debouncer.update();
state = debouncer.read();
edge = (state && (state != lastBtnState)) ? true : false;
lastBtnState = state;
return edge;
}

전용 IC를 이용한 FND 출력 (8)
아두이노 프로그램 : HEF4511BP 제어
32
void fndWrite(int bcd)
{
if (bcd < 0) bcd = 0;
else if (bcd >= 10) bcd = 9;
bcd &= 0x0f;
digitalWrite(fndnELPin, LOW);
for (int i=fndBCDStartPin; i<=fndBCDEndPin; i++) {
digitalWrite(i, (bcd & 0x08) ? HIGH : LOW);
bcd <<= 1;
}
digitalWrite(fndnELPin, LOW);
asm(“nop”); asm(“nop”); asm(“nop”);
digitalWrite(fndnELPin, HIGH);
}

전용 IC를 이용한 FND 출력 (9)
아두이노 프로그램 : HEF4511BP 제어
33
void setup()
{
pinMode(fndnELPin, OUTPUT);
for (int i=fndBCDStartPin; i<=fndBCDEndPin; i++)
pinMode(i, OUTPUT);
fndWrite(btnInputCnt);
}
void loop()
{
if (checkRisingEdge()) {
if (++btnInputCnt > 15)
btnInputCnt = 0;
fndWrite(btnInputCnt);
}
}

과제물
과제 내용 데이터시트 FND2-204D.pdf에서 제시된 3자리 FND 장치를 구현하여라.
1초 단위로 카운팅하여 0~999까지의 값을 2자리 FND 장치에 출력하는 프로그램을 작성하여라.
카운팅 동작은 반복적으로 수행하도록 하며, Timer 라이브러리를 이용하여 구현하여라.
되도록 제어 신호 수를 줄일 수 있도록 설계를 제안하여라.
제출물 회로도
프로그램 소스
실행 예(사진)
제출일 차주 수업 시간
34


![ch10 그래프 [호환 모드] - silla.ac.krmclab.silla.ac.kr/lecture/201401/ds/ds_lecture_08.pdf · 2014-05-18 · 3 그래프(graph) 선형 자료구조나 트리 자료구조로](https://img.dokumen.tips/doc/110x75/5e3891b651dcba61644e14d8/ch10-ee-eeoe-sillaac-2014-05-18-3-eegraph-.jpg)


![ch08 큐 [호환 모드] - silla.ac.krmclab.silla.ac.kr/lecture/201401/ds/ds_lecture_06.pdf · 2014-05-18 · 14 큐의 삭제 알고리즘 •가장앞에있는원소를삭제해야하므로](https://img.dokumen.tips/doc/110x75/5e764e08e253d6611e688805/ch08-eeoe-sillaac-2014-05-18-14-oe-oeee.jpg)