Embed Size (px)
Citation preview
Easy 2 Needle Baby Bootiesby Libilou Creations
I would like to thank my testers: Kara Mooney, Elizabeth Horn, and Jess Boutayeb.
Pattern Level: Beginner
Sizes Micro-Premie (Premie, Newborn, 6 months, 12 months)
Materials: Size 6 (4 mm) needles or size needed to obtain gauge.1 oz DK weight yarn. I used Red Heart TLC Baby in Lime. 1 oz is VERY generous. (if making these for a hospital donation, use a non-allergenic, washable yarn like cotton or acrylic) 2 stitch markersyarn needle
Gauge: 5 stitches per inch and 5 garter stitch bumps per inch (this is 10 rows of garter stitch, but it easier to measure by counting the garter stitch bumps)
My abbreviations: k = knit p = purl K2tog = Knit 2 together sm = slip marker from left needle to
right needle yo = yarn over
sts = stitches
Cast on: 16 (20, 24, 30, 38) Leave about a 12 inch yarn tail, for sewing up the back seam later.
Row 1: K5 (6, 8, 10, 13) place marker, p1, knit 4 (6, 6, 8, 10), place marker, p1, k5 (6, 8, 10, 13) Row 2: K1 (1, 2, 2, 3) k2tog, yo, k to last 3 (3, 4, 4, 5) sts, yo, k2tog, k to end.Row 3: K to marker, sm, p1, k to marker, sm, p1, k to end.Row 4: K all sts
Repeat these 4 rows 2 (3, 4, 5, 5) more times (for a total of 3 (4, 5, 6, 6) “eyelet” holes on each side). Last time, end with row 3.
Next section:
Row 5: Bind off 2 (2, 3, 4, 5) sts, k to end.
Row 6: Bind off 2 (2, 3, 4, 5) sts, k to marker, sm, p1, k to marker, sm, p1, k to end. (You now have 12 (16, 18, 22, 28) sts.
Row 7: Knit across
Row 8: K to marker, sm, p1, k to marker, sm, p1, k to end.
Repeat rows 7 and 8 until piece measures 2 (2.5, 3.25, 4, 5) inches from cast on edge.
Row 9: K2tog all the way across
Row 10: K
Row 11: K2tog all the way across. If number is uneven, just k the last st. End with 3 (4, 5, 6, 7) sts. Do not bind off.
Cut yarn, leaving a 12 inch tail, thread onto a yarnneedle and pull yarn through remaining stitches on needle and pull tight fold in half length wise with tails at either end (it will look like a little boat and crease at the pearl lines). Using needle, stitch from finishing tail (toe) up to bound off stitches (cuff) (this is the bootie instep) . Weave in yarn and cut.
Thread beginning yarn tail onto needle and sew up back seem, weave in yarn and cut.
Make a tie, using finger crochet, pulling stitches tight. Weave into eyelets, so that it comes “out” the front 2 and tie a pretty bow.
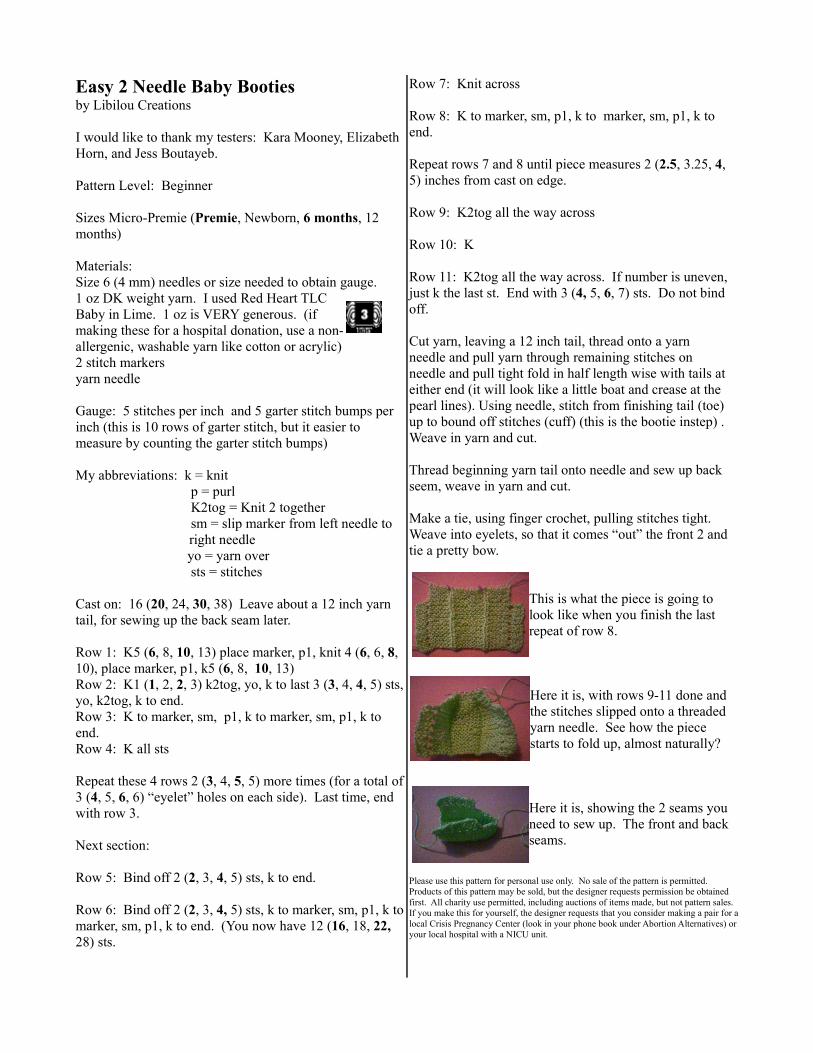
This is what the piece is going to look like when you finish the last repeat of row 8.
Here it is, with rows 9-11 done and the stitches slipped onto a threaded yarn needle. See how the piece starts to fold up, almost naturally?
Here it is, showing the 2 seams you need to sew up. The front and back seams.
Please use this pattern for personal use only. No sale of the pattern is permitted. Products of this pattern may be sold, but the designer requests permission be obtained first. All charity use permitted, including auctions of items made, but not pattern sales. If you make this for yourself, the designer requests that you consider making a pair for a local Crisis Pregnancy Center (look in your phone book under Abortion Alternatives) or your local hospital with a NICU unit.


![Animal Baby Booties[1]](https://img.dokumen.tips/doc/110x75/5500d7d44a795974588b468c/animal-baby-booties1.jpg)