Embed Size (px)
Citation preview

EAL3 Evaluated Configuration Guide for Red Hat EnterpriseLinux
Klaus Weidner<[email protected]>
June 29, 2004; v1.2

atsec is a trademark of atsec GmbH
IBM, IBM logo, BladeCenter, eServer, iSeries, OS/400, PowerPC, POWER3, POWER4, POWER4+, pSeries, S390,xSeries, zSeries, zArchitecture, and z/VM are trademarks or registered trademarks of International Business MachinesCorporation in the United States, other countries, or both.
Intel and Pentium are trademarks of Intel Corporation in the United States, other countries, or both.
Java and all Java-based products are trademarks of Sun Microsystems, Inc., in the United States, other countries, orboth.
Linux is a registered trademark of Linus Torvalds.
UNIX is a registered trademark of The Open Group in the United States and other countries.
This document is provided AS IS with no express or implied warranties. Use the information in this document at yourown risk.
This document may be reproduced or distributed in any form without prior permission provided the copyright noticeis retained on all copies. Modified versions of this document may be freely distributed provided that they are clearlyidentified as such, and this copyright is included intact.
Copyright (c) 2003, 2004 by atsec GmbH, and IBM Corporation or its wholly owned subsidiaries.
2
Contents
1 Introduction 51.1 Purpose of this document . . . . . . . . . . . . . . . . . . . . . . . . . . . . . . . . . . . . . . . . . 51.2 How to use this document . . . . . . . . . . . . . . . . . . . . . . . . . . . . . . . . . . . . . . . . . 51.3 What is a CC compliant system? . . . . . . . . . . . . . . . . . . . . . . . . . . . . . . . . . . . . . 5
1.3.1 Hardware requirements . . . . . . . . . . . . . . . . . . . . . . . . . . . . . . . . . . . . . . 61.3.2 Software requirements . . . . . . . . . . . . . . . . . . . . . . . . . . . . . . . . . . . . . . 61.3.3 Environmental requirements . . . . . . . . . . . . . . . . . . . . . . . . . . . . . . . . . . . 61.3.4 Operational requirements . . . . . . . . . . . . . . . . . . . . . . . . . . . . . . . . . . . . . 6
1.4 Requirements for the system’s environment . . . . . . . . . . . . . . . . . . . . . . . . . . . . . . . 61.5 Requirements for the system’s users . . . . . . . . . . . . . . . . . . . . . . . . . . . . . . . . . . . 71.6 Overview of the system’s security functions . . . . . . . . . . . . . . . . . . . . . . . . . . . . . . . 8
1.6.1 Identification and authentication . . . . . . . . . . . . . . . . . . . . . . . . . . . . . . . . . 81.6.2 Audit . . . . . . . . . . . . . . . . . . . . . . . . . . . . . . . . . . . . . . . . . . . . . . . 81.6.3 Discretionary access control . . . . . . . . . . . . . . . . . . . . . . . . . . . . . . . . . . . 81.6.4 Object reuse . . . . . . . . . . . . . . . . . . . . . . . . . . . . . . . . . . . . . . . . . . . 81.6.5 Security management and system protection . . . . . . . . . . . . . . . . . . . . . . . . . . . 81.6.6 Secure communication . . . . . . . . . . . . . . . . . . . . . . . . . . . . . . . . . . . . . . 8
1.7 Overview of security relevant events . . . . . . . . . . . . . . . . . . . . . . . . . . . . . . . . . . . 9
2 Installation 92.1 Supported hardware . . . . . . . . . . . . . . . . . . . . . . . . . . . . . . . . . . . . . . . . . . . . 92.2 Selection of install options and packages . . . . . . . . . . . . . . . . . . . . . . . . . . . . . . . . . 10
3 Secure initial system configuration 123.1 Creating additional user accounts for administrators . . . . . . . . . . . . . . . . . . . . . . . . . . . 133.2 Installing required updates . . . . . . . . . . . . . . . . . . . . . . . . . . . . . . . . . . . . . . . . 133.3 Automated configuration of the system . . . . . . . . . . . . . . . . . . . . . . . . . . . . . . . . . . 153.4 Configuring filesystem parameters . . . . . . . . . . . . . . . . . . . . . . . . . . . . . . . . . . . . 163.5 Add and remove packages . . . . . . . . . . . . . . . . . . . . . . . . . . . . . . . . . . . . . . . . 163.6 Disable services . . . . . . . . . . . . . . . . . . . . . . . . . . . . . . . . . . . . . . . . . . . . . . 203.7 Remove SUID/SGID root settings from binaries . . . . . . . . . . . . . . . . . . . . . . . . . . . . . 203.8 Update permissions for ’su’ . . . . . . . . . . . . . . . . . . . . . . . . . . . . . . . . . . . . . . . . 213.9 Disable root login over the network . . . . . . . . . . . . . . . . . . . . . . . . . . . . . . . . . . . 213.10 Setting up SSH . . . . . . . . . . . . . . . . . . . . . . . . . . . . . . . . . . . . . . . . . . . . . . 223.11 Setting up xinetd . . . . . . . . . . . . . . . . . . . . . . . . . . . . . . . . . . . . . . . . . . . . . 233.12 Setting up FTP . . . . . . . . . . . . . . . . . . . . . . . . . . . . . . . . . . . . . . . . . . . . . . 233.13 Setting up Postfix . . . . . . . . . . . . . . . . . . . . . . . . . . . . . . . . . . . . . . . . . . . . . 243.14 Setting up the audit subsystem . . . . . . . . . . . . . . . . . . . . . . . . . . . . . . . . . . . . . . 24
3.14.1 Installing the packages needed for auditing . . . . . . . . . . . . . . . . . . . . . . . . . . . 243.14.2 Setting up the audit configuration files . . . . . . . . . . . . . . . . . . . . . . . . . . . . . . 253.14.3 Startingauditd at boot as a system service . . . . . . . . . . . . . . . . . . . . . . . . . . 253.14.4 Startingauditd in fail-secure mode frominit (OPTIONAL) . . . . . . . . . . . . . . . . 25
3.15 Introduction to Pluggable Authentication Module (PAM) configuration . . . . . . . . . . . . . . . . . 263.16 Required Pluggable Authentication Module (PAM) configuration . . . . . . . . . . . . . . . . . . . . 27
3.16.1 /etc/pam.d/system-auth . . . . . . . . . . . . . . . . . . . . . . . . . . . . . . . . . . . . . . 273.16.2 /etc/pam.d/login . . . . . . . . . . . . . . . . . . . . . . . . . . . . . . . . . . . . . . . . . 283.16.3 /etc/pam.d/other . . . . . . . . . . . . . . . . . . . . . . . . . . . . . . . . . . . . . . . . . 293.16.4 /etc/pam.d/sshd . . . . . . . . . . . . . . . . . . . . . . . . . . . . . . . . . . . . . . . . . . 293.16.5 /etc/pam.d/su . . . . . . . . . . . . . . . . . . . . . . . . . . . . . . . . . . . . . . . . . . . 303.16.6 /etc/pam.d/vsftpd . . . . . . . . . . . . . . . . . . . . . . . . . . . . . . . . . . . . . . . . . 30
3.17 Configuring default account properties . . . . . . . . . . . . . . . . . . . . . . . . . . . . . . . . . . 313.18 Configuring the boot loader . . . . . . . . . . . . . . . . . . . . . . . . . . . . . . . . . . . . . . . . 32
3

3.18.1 GRUB boot loader configuration . . . . . . . . . . . . . . . . . . . . . . . . . . . . . . . . . 323.18.2 Yaboot boot loader configuration . . . . . . . . . . . . . . . . . . . . . . . . . . . . . . . . . 333.18.3 ZIPL boot loader configuration . . . . . . . . . . . . . . . . . . . . . . . . . . . . . . . . . . 333.18.4 iSeries kernel slots . . . . . . . . . . . . . . . . . . . . . . . . . . . . . . . . . . . . . . . . 34
3.19 Reboot and initial network connection . . . . . . . . . . . . . . . . . . . . . . . . . . . . . . . . . . 34
4 System operation 344.1 System startup, shutdown and crash recovery . . . . . . . . . . . . . . . . . . . . . . . . . . . . . . 354.2 Backup and restore . . . . . . . . . . . . . . . . . . . . . . . . . . . . . . . . . . . . . . . . . . . . 354.3 Gaining superuser access . . . . . . . . . . . . . . . . . . . . . . . . . . . . . . . . . . . . . . . . . 364.4 Installation of additional software . . . . . . . . . . . . . . . . . . . . . . . . . . . . . . . . . . . . 364.5 Scheduling processes using cron and at . . . . . . . . . . . . . . . . . . . . . . . . . . . . . . . . . . 374.6 Mounting filesystems . . . . . . . . . . . . . . . . . . . . . . . . . . . . . . . . . . . . . . . . . . . 384.7 Managing user accounts . . . . . . . . . . . . . . . . . . . . . . . . . . . . . . . . . . . . . . . . . 394.8 Using serial terminals . . . . . . . . . . . . . . . . . . . . . . . . . . . . . . . . . . . . . . . . . . . 414.9 SYSV shared memory and IPC objects . . . . . . . . . . . . . . . . . . . . . . . . . . . . . . . . . . 414.10 Configuring secure network connections withstunnel . . . . . . . . . . . . . . . . . . . . . . . . . . 41
4.10.1 Introduction . . . . . . . . . . . . . . . . . . . . . . . . . . . . . . . . . . . . . . . . . . . . 414.10.2 Creating an externally signed certificate . . . . . . . . . . . . . . . . . . . . . . . . . . . . . 424.10.3 Creating a self-signed certificate . . . . . . . . . . . . . . . . . . . . . . . . . . . . . . . . . 444.10.4 Activating the tunnel . . . . . . . . . . . . . . . . . . . . . . . . . . . . . . . . . . . . . . . 454.10.5 Using the tunnel . . . . . . . . . . . . . . . . . . . . . . . . . . . . . . . . . . . . . . . . . 464.10.6 Example 1: Secure SMTP delivery . . . . . . . . . . . . . . . . . . . . . . . . . . . . . . . . 464.10.7 Example 2: Simple web server . . . . . . . . . . . . . . . . . . . . . . . . . . . . . . . . . . 474.10.8 Example 1: system status view . . . . . . . . . . . . . . . . . . . . . . . . . . . . . . . . . . 47
4.11 The Abstract Machine Testing Utility (AMTU) . . . . . . . . . . . . . . . . . . . . . . . . . . . . . 484.12 Setting the system time and date . . . . . . . . . . . . . . . . . . . . . . . . . . . . . . . . . . . . . 49
5 Monitoring, Logging & Audit 495.1 Reviewing the system configuration . . . . . . . . . . . . . . . . . . . . . . . . . . . . . . . . . . . 495.2 System logging and accounting . . . . . . . . . . . . . . . . . . . . . . . . . . . . . . . . . . . . . . 505.3 Configuring the audit subsystem . . . . . . . . . . . . . . . . . . . . . . . . . . . . . . . . . . . . . 51
5.3.1 Intended usage of the audit subsystem . . . . . . . . . . . . . . . . . . . . . . . . . . . . . . 515.3.2 Selecting the events to be audited . . . . . . . . . . . . . . . . . . . . . . . . . . . . . . . . 515.3.3 Reading and searching the audit records . . . . . . . . . . . . . . . . . . . . . . . . . . . . . 525.3.4 Starting and stopping the audit subsystem . . . . . . . . . . . . . . . . . . . . . . . . . . . . 525.3.5 Storage of audit records . . . . . . . . . . . . . . . . . . . . . . . . . . . . . . . . . . . . . 535.3.6 Reliability of audit data . . . . . . . . . . . . . . . . . . . . . . . . . . . . . . . . . . . . . . 53
5.4 System configuration variables in/etc/sysconfig. . . . . . . . . . . . . . . . . . . . . . . . . . . . . 53
6 Security guidelines for users 546.1 Online Documentation . . . . . . . . . . . . . . . . . . . . . . . . . . . . . . . . . . . . . . . . . . 546.2 Authentication . . . . . . . . . . . . . . . . . . . . . . . . . . . . . . . . . . . . . . . . . . . . . . . 546.3 Password policy . . . . . . . . . . . . . . . . . . . . . . . . . . . . . . . . . . . . . . . . . . . . . . 556.4 Access control for files and directories . . . . . . . . . . . . . . . . . . . . . . . . . . . . . . . . . . 566.5 Data import / export . . . . . . . . . . . . . . . . . . . . . . . . . . . . . . . . . . . . . . . . . . . . 57
7 Appendix 577.1 Online Documentation . . . . . . . . . . . . . . . . . . . . . . . . . . . . . . . . . . . . . . . . . . 577.2 Literature . . . . . . . . . . . . . . . . . . . . . . . . . . . . . . . . . . . . . . . . . . . . . . . . . 587.3 The file/etc/audit/audit.conf . . . . . . . . . . . . . . . . . . . . . . . . . . . . . . . . . 587.4 The file/etc/audit/filter.conf . . . . . . . . . . . . . . . . . . . . . . . . . . . . . . . . 607.5 The file/etc/audit/filesets.conf . . . . . . . . . . . . . . . . . . . . . . . . . . . . . . . 68
4

1 INTRODUCTION 5
1 Introduction
1.1 Purpose of this document
The Red Hat Enterprise Linux (RHEL) distribution is designed to provide a secure and reliable operating system fora variety of purposes. Because security requirements obviously depend on the applications and environment, it is notpossible to simply certify that the system is ”secure”, a more precise definition is needed.
The Common Criteria (CC) provides a widely recognized methodology for security certifications. A CC evaluation isfundamentally a two-step process, consisting of defining the ”security target” which describes the features that are tobe evaluated, and then testing and verifying that the system actually implements these features with a sufficient levelof assurance.
This document is a security guide that explains how to set up the evaluated configuration, and provides informationto administrators and ordinary users to ensure secure operation of the system. It is intended to be self-contained inaddressing the most important issues at a high level, and refers to other existing documentation where more details areneeded.
The document primarily addresses administrators, but the section ”Security guidelines for users” is intended forordinary users of the system as well as administrators.
Knowledge of the Common Criteria is not required for readers of this document.
1.2 How to use this document
The key words ”MUST”, ”MUST NOT”, ”REQUIRED”, ”SHALL”, ”SHALL NOT”, ”SHOULD”, ”SHOULD NOT”,”RECOMMENDED”, ”MAY”, and ”OPTIONAL” in this document are to be interpreted as described in RFC 2119<http://www.ietf.org/rfc/rfc2119.txt>.
Note that the terms ”SHOULD” and ”SHOULD NOT” are avoided in this document. Requirements are either absolute(and marked with MUST and equivalent terms), or entirely optional (in the sense of not affecting required securityfunctions) and marked with RECOMMENDED, MAY or OPTIONAL.
If you follow the requirements in this document when setting up and using the system, your configuration will matchthe evaluated configuration. Certain configuration options are marked as OPTIONAL and you MAY modify them asneeded, but you MUST NOT make other changes, because they will make the system fail to match the evaluatedconfiguration.
Of course, you MUST always use common sense. This document is not a formal specification, and legitimate reasonsmay exist to modify the system setup in ways not described here if that is necessary for the system to fulfill its intendedpurpose. Specifically, applying security patches released by the vendor is strongly RECOMMENDED even though thatwill cause a deviation from the evaluated configuration.
In cases where the requirements and recommendations in this document conflict with those in other sources (such asthe online documentation), the information in this Configuration Guide has higher precedence. You MUST follow thesteps described here to reach the evaluated configuration, even if other documentation describes different methods.
The usual convention is used in this guide when referring to manual pages that are included in the software distribution.For example, the notationls(1) means that running theman -S 1 ls command will display the manual page for thels command from section one of the installed documentation. In most cases, the-S flag and the section number maybe omitted from the command, they are only needed if pages with the same name exist in different sections,
1.3 What is a CC compliant system?
A system can be considered to be ”CC compliant” if it matches an evaluated and certified configuration. Thisimplies various requirements concerning hardware and software, as well as requirements concerning the operatingenvironment, users, and the ongoing operating procedures.

1 INTRODUCTION 6
Strictly speaking, an evaluation according to the CC represents the results of investigation of the security properties ofthe target system according to defined guidelines. It should not be considered as a guarantee for fitness for any specificpurpose, but should provide help in deciding the suitability of the system considering how well the intended use fitsthe described capabilities. It is intended to provide a level of assurance about the security functions that have beenexamined by a neutral third party.
1.3.1 Hardware requirements
The hardware MUST be the one of the following IBM systems:
IBM xSeries 335 - AS and WS
IBM pSeries 630 - AS only
IBM iSeries 825 type 9406 (OS/400 V5R2 LPAR ) - AS only
IBM zSeries 900 (within VM 4.3 logical partition) - AS only
IBM eServer 325 (AMD64 Opteron) - AS only
Running the certified software on other similar hardware may result in an equivalent security level, but the certificationdoes not apply if the hardware is different from that used for the testing processes during the evaluation.
1.3.2 Software requirements
The software MUST match the evaluated configuration. In the case of an operating system, this also requires that theinstalled kernel, system, and application software are the same. The documentation (including this guide) will specifypermitted variations, such as modifying certain configuration files and settings, and installing software that does nothave the capability to affect the security of the system (typically those that do not require ’root’ privileges).
1.3.3 Environmental requirements
Stated requirements concerning the operating environment MUST be met. Typical requirements include a securelocation for the hardware (protected from physical access by unauthorized persons), as well as restrictions concerningpermitted network connections.
1.3.4 Operational requirements
The operation of the system MUST be in agreement with defined organizational security policies, to ensure that actionsby administrators and users do not undermine the system’s security.
1.4 Requirements for the system’s environment
The security target covers one or more systems running RHEL, networked in a non-hostile network, with awell-managed and non-hostile user community. It is not intended to address the needs of an Internet-connected server,or the case where services are to be provided to potentially hostile users.
You MUST set up the server (or servers) in a physically secure environment, where they are protected from theft andmanipulation by unauthorized persons.

1 INTRODUCTION 7
You MUST ensure that all connections to peripheral devices and all network connections are protected againsttampering, tapping and other modifications. Using the secured protocols SSHv2 or SSLv3 is considered sufficientprotection for network connections. All other connections must remain completely within the physically secure serverenvironment.
All components in the network such as routers, switches, and hubs that are used for communication are assumed topass the user data reliably and without modification. Translations on protocols elements (such as NAT) are allowed aslong as those modifications do not lead to a situation where information is routed to somebody other than the intendedrecipient system.
Be aware that information passed to another system leaves the control of the sending system, and the protection ofthis information against unauthorized access needs to be enforced by the receiving system. If an organization wantsto implement a consistent security policy covering multiple systems on a network, organizational procedures MUSTensure that all those systems can be trusted and are configured with compatible security configurations enforcing anorganization wide security policy. How to do this is beyond the scope of this Configuration Guide. If you set up acommunication link to a system outside your control, please keep in mind that you will not be able to enforce anysecurity policy for any information you pass to such a system over the communication link or in other ways (forexample, by using removable storage media).
Every person that has the ability to perform administrative actions by switching to root has full control over the systemand could, either by accident or deliberately, undermine the security of the system and bring it into an insecure state.This Configuration Guide provides the basic guidance how to set up and operate the system securely, but is not intendedto be the sole information required for a system administrator to learn how to operate Linux securely.
It is assumed, within this Configuration Guide, that administrators who use this guide have a good knowledge andunderstanding of operating security principles in general and of Linux administrative commands and configurationoptions in particular. We strongly advise that an organization that wants to operate the system in the evaluatedconfiguration nevertheless have their administrators trained in operating system security principles and RHEL securityfunctions, properties, and configuration.
Every organization needs to trust their system administrators not to deliberately undermine the security of the system.Although the evaluated configuration includes audit functions that can be used to make users accountable for theiractions, an administrator is able to stop the audit subsystem and reconfigure it such that his actions no longerget audited. Well trained and trustworthy administrators are a key element for the secure operation of the system.This Configuration Guide provides the additional information a system administrator should obey when installing,configuring and operating the system in compliance with the requirements defined in the Security Target for theCommon Criteria evaluation.
1.5 Requirements for the system’s users
The security target addresses the security needs of cooperating users in a benign environment, who will use the systemresponsibly to fulfill their tasks.
Note that system availability isnot addressed in this evaluation, and a malicious user could disable a server throughresource exhaustion or similar methods.
The requirements for users specifically include:
• User accounts MUST be assigned only to those users with a need to access the data protected by the system, andwho MUST be sufficiently trustworthy not to abuse those privileges. For example, the system cannot preventdata from being intentionally redistributed to unauthorized third parties by an authorized user.
• All users of the system MUST be sufficiently skilled to understand the security implications of their actions, andMUST understand and follow the requirements listed in section§6 ”Security guidelines for users” of this guide.Appropriate training MUST be available to ensure this.
It is part of your responsibility as a system administrator to verify that these requirements are met, and to be availableto users if they need your help in maintaining the security of their data.

1 INTRODUCTION 8
1.6 Overview of the system’s security functions
This section summarizes the security functions that were covered by the evaluation. Please refer to the appropriatesections for information on configuring, using and managing these functions.
1.6.1 Identification and authentication
Pluggable Authentication Module (PAM)
Sections§3.15 ”Introduction to Pluggable Authentication Module (PAM) configuration”,§3.16 ”RequiredPluggable Authentication Module (PAM) configuration” of this guide; and the documentation in/usr/share/doc/pam*/and thepam(8) man page.
OpenSSH
Section§3.10 ”Setting up SSH” of this guide; and thesshd(8), ssh(1), sshdconfig(5) man pages.
vsftpd
Section§3.12 ”Setting up FTP” of this guide; and thevsftpd(8), vsftpd.conf(5) man pages.
su
Sections§3.8 ”Update permissions for ’su’”,§4.3 ”Gaining superuser access” of this guide; and thesu(8) manpage.
1.6.2 Audit
Sections§3.14 ”Setting up the audit subsystem” and§5.3 ”Configuring the audit subsystem” of this guide; and thelaus(7) man page, whose ”SEE ALSO” section points to the remaining LAuS man pages.
1.6.3 Discretionary access control
Sections§6.4 ”Access control for files and directories” and§4.9 ”SYSV shared memory and IPC objects” of this guide.
1.6.4 Object reuse
See the RHEL High Level Design document, the kernel automatically ensures that new objects (disk files, memory,IPC) do not contain any traces of previous contents.
1.6.5 Security management and system protection
Chapters§4 ”System operation” and§5 ”Monitoring, Logging & Audit”.
1.6.6 Secure communication
Section§4.10 ”Configuring secure network connections withstunnel” of this guide; and thestunnel(1) man page.
Section§3.10 ”Setting up SSH” of this guide; and thesshd(8), ssh(1), andsshdconfig(5) man pages.

2 INSTALLATION 9
1.7 Overview of security relevant events
The audit subsystem is intended to be the central interface for collecting and viewing the record of security relevantevents. The events being monitored by default in the evaluated configuration include:
• All authentication done through the PAM library, including the identity and location (where available) of theuser and the success or failure result.
• Use ofsu(8) to change identity. All actions done as part of asusession are marked in the audit record with theoriginal user’s login user ID.
• Adding, changing, or deleting users or groups.
• Changes and change attempts to the contents of security critical files.
• Changes to the access permissions or ownership of any files or IPC objects.
• Binding network ports and accepting connections.
Please refer to section§5 ”Monitoring, Logging & Audit” for more information.
2 Installation
The evaluation covers a fresh installation of RHEL AS or WS, Version 3 Update 2, on one of the supported hardwareplatforms as defined in section§1.3.1 ”Hardware requirements” of this guide.
On the platforms that support virtualization (VM) or secure logical partitioning (LPAR), other operating systemsMAY be installed and active at the same time as the evaluated configuration. This is if (and only if) the VM or LPARconfiguration ensures that the other operating systems cannot access data belonging to the evaluated configuration orotherwise interfere with its operation. Setting up this type of configuration is considered to be part of the operatingenvironment and is not addressed in this guide.
On the other platforms, the evaluated configuration MUST be the only operating system installed on the server.
2.1 Supported hardware
You MAY attach the following peripherals without invalidating the evaluation results. Other hardware MUST NOT beinstalled in or attached to the system.
• Any storage devices and backup devices supported by the operating system (this includes hard disks, CD-ROMdrives and tape drives).
• All Ethernet and Token Ring network adapters supported by the operating system. Modems, ISDN and otherWAN adapters are not part of the evaluated environment.
• Any printers supported by the operating system.
• Operator console consisting of a keyboard, video monitor, and optionally mouse. Additionally, you MAYdirectly attach supported serial terminals (see section§4.8 ”Using serial terminals” of this guide), butnotmodems, ISDN cards, or other remote access terminals.
Hot-pluggable hardware that depends on the dynamic loading of kernel modules isnot supported. Examples of suchunsupported hardware are USB and, IEEE1394/FireWire peripherals.

2 INSTALLATION 10
2.2 Selection of install options and packages
This section describes the detailed steps to be performed when installing the RHEL operating system on the targetserver.
All settings listed here are REQUIRED unless specifically declared otherwise.
1. It is RECOMMENDED that you disconnect all network connections until the post-install system configuration isfinished. You MAY use a network if required for the installation (for example, zSeries hosts are usually installedusing NFS, because they do not have a CD drive). If you do use a network, you MUST ensure that this networkis secure, for example by directly connecting the new system to a standalone NFS server with no other networkconnections.
2. You MUST download the ISO images from the RedHat Network on a separate Internet-connected computer,and either burn CD-Rs from them, or make the contents available on a NFS file server. The download locationhttps://rhn.redhat.com/network/software/downloadisos full.pxt contains links to the platform-specific images.
You MUST useRed Hat Enterprise Linux 3 Update 2, eitherAS (Advanced Server) orWS (Workstation).Make sure that you are using the appropriate version for your platform:
xSeries i386 AS or WSeServer 325 x86_64 ASpSeries ppc ASiSeries ppc ASzSeries s390 AS
You MUST verify that the MD5 checksums of the image files are correct. Runmd5sum *.iso to view thechecksums for the downloaded images, and compare them with those shown in this list:
Red Hat Enterprise Linux 3 AS (i386) Update 2Binary Disc 1 139M 240a6a59d7f2f1c4bb2d017016e46f5cBinary Disc 2 619M a45ce3753d0c9a599d4533c8ba4339d2Binary Disc 3 633M 5bc126d663e681f874a15f55e05c070fBinary Disc 4 168M 158f58ae5e1307415185e0b4863b40e4
Red Hat Enterprise Linux 3 WS (i386) Update 2Binary Disc 1 131M 211692ca8fac5894f4f98d1a744f4c27Binary Disc 2 619M a45ce3753d0c9a599d4533c8ba4339d2Binary Disc 3 633M 5bc126d663e681f874a15f55e05c070fBinary Disc 4 168M 158f58ae5e1307415185e0b4863b40e4
Red Hat Enterprise Linux 3 AS (X86_64) Update 2Binary Disc 1 142M 32f28eb619907faca2a94bb8e7658daeBinary Disc 2 625M 2919142a9f3bb46572815bdb327baddcBinary Disc 3 637M be55fc8e56d3f1eb53d87f46f97b063bBinary Disc 4 204M 2d7530d57c5c407bb2d820361a48bb18
Red Hat Enterprise Linux 3 AS (ppc) Update 2Binary Disc 1 172M 5ed53761d9dfb69568cb7077a9f85f0eBinary Disc 2 619M d75085869102710c9803603d55c669afBinary Disc 3 638M ab819d81efced28099e3f6ebcf38de52Binary Disc 4 39M 4089bad2a99ab560cf55ad88e40309da

2 INSTALLATION 11
Red Hat Enterprise Linux 3 AS (s390) Update 2Binary Disc 1 130M df70a9aaa1a457306360c7d31ba74711Binary Disc 2 623M 6d6b3a93d38cfadc1553687bfa05387aBinary Disc 3 513M b046f680a279479e3d9d63c53ffcdb42Binary Disc 4 376K 2a220f9dc346075c6037e73a40e657f0
3. Launch the installer program contained on the CD-ROM. The details of how to do this depend on the hardwareplatform, please refer to the installation guide that is part of the printed manual accompanying the CD.
For example:
• xSeries, eServer 325 (Opteron), pSeries: Insert the first CD and boot from CD-ROM.
• zSeries, iSeries: Details depend on the operation mode (VM, LPAR or native). The process generallyinvolves copying the installer onto the server and launching the installer using the host’s managementinterface.
4. You MAY choose text-mode installation instead of the default graphical installation by enteringlinux textat the boot prompt.
You MAY also use a serial console to do a text-mode installation. To do so, connect a serial terminal (or acomputer with terminal emulator software; such a computer MUST be appropriately secure) to the server’sserial port, and boot from the RHEL CD. When the boot prompt is shown on the serial console, enterlinuxtext console=ttyS0 (use the appropriate name of the serial device if not using ttyS0) and pressENTERto start the installation.
5. Running the CDmedia testfor all installation CDs is RECOMMENDED.
6. When the ”Welcome” screen appears, pressNext.
7. Language Selection: chooseEnglish (English) to ensure that the messages shown during the installation matchthose described in this guide.
8. Keyboard Configuration: You MAY change theU.S. Englishsetting to match your keyboard.
9. Mouse Configuration: You MAY change theMouse Selectionif the autodetected values are not appropriate,including choosing ”No mouse” and using the keyboard only.
10. Disk Partitioning Setup. UseManual partition with Disk Druid to set up the partitions. For CAPP-compliantauditing, you MUST set up a separate partition for the directory/var/log/.
• Set up the REQUIRED/ (root) and/var/log partitions, and as many additional mounted partitions asappropriate./var/log REQUIRES at least 100 MB of space in order to be able to install and launch theaudit system, but this does not include the additional space needed for saved audit logs, please refer tosection§5.3 ”Configuring the audit subsystem” of this guide for more information.It is RECOMMENDED to also use separate partitions for/var, /homeand /tmp. Some configurations(recognized automatically by the installation program) need a separate/bootpartition. The following tableshows a RECOMMENDED partitioning scheme together with minimum sizes for the partitions. Usingmore space is RECOMMENDED:
/boot 75 MB/ 1200 MB/tmp 200 MB/home 100 MB/var 384 MB/var/log 100 MB needed for install, >>1GB for use
• All mounted partions MUST be of typeext3andformatted.
• Configuring a swap partition at least as large as the installed RAM is RECOMMENDED.
3 SECURE INITIAL SYSTEM CONFIGURATION 12
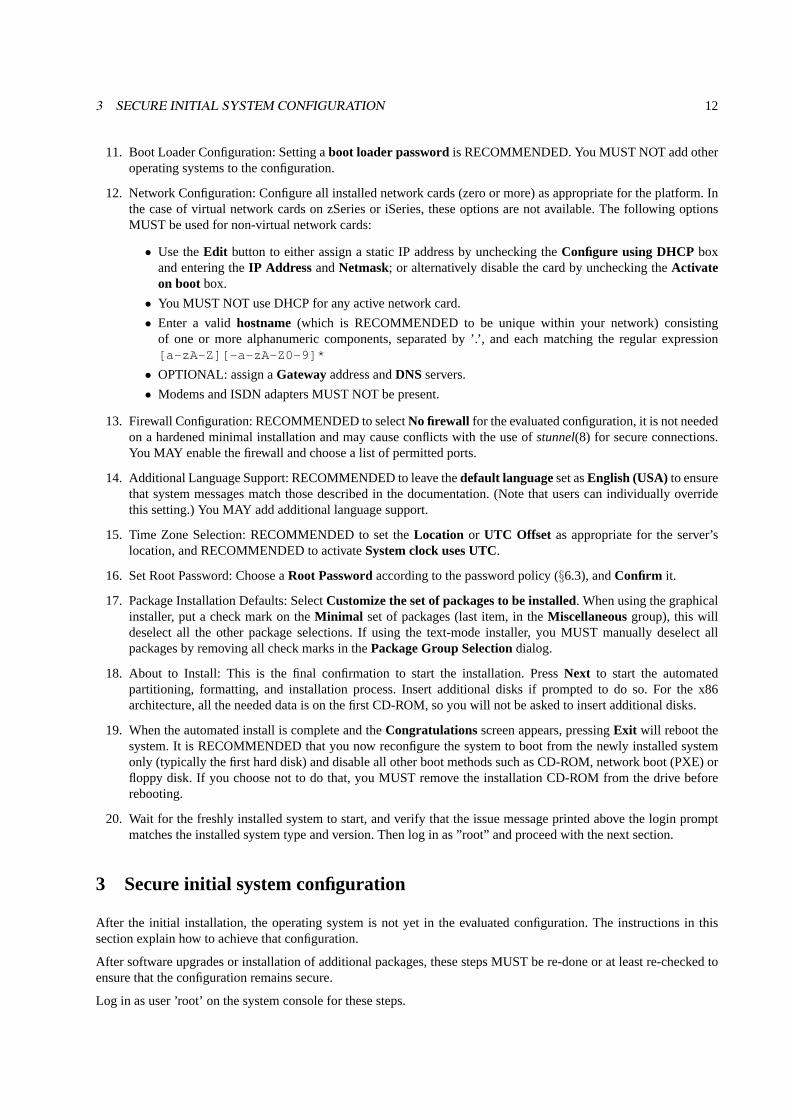
11. Boot Loader Configuration: Setting aboot loader passwordis RECOMMENDED. You MUST NOT add otheroperating systems to the configuration.
12. Network Configuration: Configure all installed network cards (zero or more) as appropriate for the platform. Inthe case of virtual network cards on zSeries or iSeries, these options are not available. The following optionsMUST be used for non-virtual network cards:
• Use theEdit button to either assign a static IP address by unchecking theConfigure using DHCP boxand entering theIP Address andNetmask; or alternatively disable the card by unchecking theActivateon bootbox.
• You MUST NOT use DHCP for any active network card.
• Enter a validhostname (which is RECOMMENDED to be unique within your network) consistingof one or more alphanumeric components, separated by ’.’, and each matching the regular expression[a-zA-Z][-a-zA-Z0-9]*
• OPTIONAL: assign aGatewayaddress andDNSservers.
• Modems and ISDN adapters MUST NOT be present.
13. Firewall Configuration: RECOMMENDED to selectNo firewall for the evaluated configuration, it is not neededon a hardened minimal installation and may cause conflicts with the use ofstunnel(8) for secure connections.You MAY enable the firewall and choose a list of permitted ports.
14. Additional Language Support: RECOMMENDED to leave thedefault languageset asEnglish (USA) to ensurethat system messages match those described in the documentation. (Note that users can individually overridethis setting.) You MAY add additional language support.
15. Time Zone Selection: RECOMMENDED to set theLocation or UTC Offset as appropriate for the server’slocation, and RECOMMENDED to activateSystem clock uses UTC.
16. Set Root Password: Choose aRoot Passwordaccording to the password policy (§6.3), andConfirm it.
17. Package Installation Defaults: SelectCustomize the set of packages to be installed. When using the graphicalinstaller, put a check mark on theMinimal set of packages (last item, in theMiscellaneousgroup), this willdeselect all the other package selections. If using the text-mode installer, you MUST manually deselect allpackages by removing all check marks in thePackage Group Selectiondialog.
18. About to Install: This is the final confirmation to start the installation. PressNext to start the automatedpartitioning, formatting, and installation process. Insert additional disks if prompted to do so. For the x86architecture, all the needed data is on the first CD-ROM, so you will not be asked to insert additional disks.
19. When the automated install is complete and theCongratulations screen appears, pressingExit will reboot thesystem. It is RECOMMENDED that you now reconfigure the system to boot from the newly installed systemonly (typically the first hard disk) and disable all other boot methods such as CD-ROM, network boot (PXE) orfloppy disk. If you choose not to do that, you MUST remove the installation CD-ROM from the drive beforerebooting.
20. Wait for the freshly installed system to start, and verify that the issue message printed above the login promptmatches the installed system type and version. Then log in as ”root” and proceed with the next section.
3 Secure initial system configuration
After the initial installation, the operating system is not yet in the evaluated configuration. The instructions in thissection explain how to achieve that configuration.
After software upgrades or installation of additional packages, these steps MUST be re-done or at least re-checked toensure that the configuration remains secure.
Log in as user ’root’ on the system console for these steps.

3 SECURE INITIAL SYSTEM CONFIGURATION 13
3.1 Creating additional user accounts for administrators
The evaluated configuration disables direct ”root” login over the network. All system administrators MUST log inusing a non-root individual user ID, then use thesu(8) command to gain superuser privileges for administrative tasks.This requires membership in the ’wheel’ group of trusted users.
You MUST define at least one non-root user account with theuseradd(8) command, and add this user account to the’wheel’ group. Note that the enhanced password quality checking mechanisms and the password expiry settings ofthe evaluated configuration are not active yet. You must manually set the password properties in accordance with thepassword policy.
Here is an example of creating an additional user account:
useradd -m -c "John Doe" -G wheel jdoepasswd jdoechage -m 1 -M 60 -W 7 jdoe
Please refer to sections§4.7 ”Managing user accounts” and§6.3 ”Password policy” of this guide for more informationon creating user accounts.
3.2 Installing required updates
You need to download several additional packages not included in Update 2 to set up the evaluated configuration. Thepackages are available at the following location:
ftp://partners.redhat.com/EAL3_RHEL3/U2/
Download the RPMs using an Internet-connected computer, and transfer the RPMs to the system being installed.
You MUST select the appropriate RPM packages for your architecture. The 64bit architectures support execution ofboth 64bit and 32bit binaries.
xSeries (i386)
This is a 32bit-only platform. Use*.i686.rpm variants of packages if available,*.i386.rpm or *.noarch.rpmotherwise.
eSeries 325 (Opteron/x8664)
This system uses a 64bit kernel and 64bit userspace programs, and also supports running 32bit programs. Usethe *.x86 64.rpm or *.noarch.rpm variants of packages. You may OPTIONALLY install the*.i386.rpm or*.i686.rpm variants of libraries (package names containing-libs or -devel) in addition to the 64bit versions.
iSeries or pSeries (ppc/ppc64)
These systems use a 64bit kernel, but the installed userspace programs are the 32bit variants. They supportrunning 64bit programs as well. There are separate kernels available for the iSeries and pSeries patforms,useppc64iseries.rpmor ppc64pseriesas appropriate. Use the*.ppc64.rpm variants oflaus and laus-libs,*.ppc.rpm or *.noarch.rpm for everything else. You may OPTIONALLY install the*.ppc64.rpm variants oflibraries (package names containing-libs or -devel) in addition to the 32bit versions, and the*.ppc.rpm versionof laus-libsin addition to the default 64bit version.
zSeries (s390)
The evaluated configuration uses a 31bit kernel running 31bit userspace programs. Install the*.s390.rpmor *.noarch.rpm variants only. Use of 64bit packages (*.s390x.rpm) is NOT supported in the evaluatedconfiguration.

3 SECURE INITIAL SYSTEM CONFIGURATION 14
The active kernel MUST be one of the listedkernelor kernel-smppackages. It is RECOMMENDED that you uninstallunused kernel packages, such as the uniprocessor kernel on a SMP machine. The development libraries (*-devel*)and additional non-default word size libraries as explained above are OPTIONAL. All other packages listed here areREQUIRED. You MUST verify the MD5 sums against the following list:
### i386954a3c754a5f8929560dba65d99c5baf amtu-0.1-5RHEL.i386.rpm34edf418f9e2dc80e681b6ca38cb854a at-3.1.8-48.ent.i386.rpm00744d4d35e23b78fc6deb49a187c951
kernel-2.4.21-15.0.2.EL.peterm.eal.3.i686.rpm827f8140f520ff4677bbde524edd6e69
kernel-smp-2.4.21-15.0.2.EL.peterm.eal.3.i686.rpmcd31e226ffc751e4a490c4c46716c0b6
kernel-source-2.4.21-15.0.2.EL.peterm.eal.3.i386.rpm942d4e9687cc229ee7866e0810294ed9 laus-0.1-62RHEL3.i386.rpm79ac3ab71e1917cc464dc2f3b1b9edd1 laus-devel-0.1-62RHEL3.i386.rpm58e5e19bf98d287576ad7d0c50d3ff74 laus-libs-0.1-62RHEL3.i386.rpm6789218233e890ce2c5005ce70abea99 passwd-0.68-3.1.i386.rpmcd62831bd278541bac99f13edf3a93f9 shadow-utils-4.0.3-20.03.i386.rpmaf2f1ff1abb97e16b92b51b89ed69212 vixie-cron-3.0.1-75.i386.rpm
### iSeries4a638c42ea65b2ba1eae1c82b837e375 amtu-0.1-5RHEL.ppc.rpm63935344db78a3e7173549fe4f7f57ef at-3.1.8-48.ent.ppc.rpm1d33d4613000f63c29426b8d82dc6560
kernel-2.4.21-15.0.2.EL.peterm.eal.3.ppc64iseries.rpmb54313d999396e92627b6d33c7c51058
kernel-source-2.4.21-15.0.2.EL.peterm.eal.3.ppc64.rpm8f17734994b40665c02f77f1d19ae9d5 laus-0.1-62RHEL3.ppc64.rpmc6129b9d09330794a5f329acff7def6e laus-devel-0.1-62RHEL3.ppc.rpm91c6217ba1d27dbefee33452f31423d6 laus-devel-0.1-62RHEL3.ppc64.rpm2db58f704ade9835b55077a7537546a5 laus-libs-0.1-62RHEL3.ppc.rpm86dc0501ba9e8942010678806aea9e8c laus-libs-0.1-62RHEL3.ppc64.rpm1b1203051fe38a4c7d6714948b7cf348 passwd-0.68-3.1.ppc.rpme7edac75f05e107df39b82ade751f26f shadow-utils-4.0.3-20.03.ppc.rpm38bbec2cb8070032130a69d352dc70dd vixie-cron-3.0.1-75.ppc.rpm
### pSeries4a638c42ea65b2ba1eae1c82b837e375 amtu-0.1-5RHEL.ppc.rpm63935344db78a3e7173549fe4f7f57ef at-3.1.8-48.ent.ppc.rpm519d8724bdd022cc18465b8323b8e5c9
kernel-2.4.21-15.0.2.EL.peterm.eal.3.ppc64pseries.rpmb54313d999396e92627b6d33c7c51058
kernel-source-2.4.21-15.0.2.EL.peterm.eal.3.ppc64.rpm8f17734994b40665c02f77f1d19ae9d5 laus-0.1-62RHEL3.ppc64.rpmc6129b9d09330794a5f329acff7def6e laus-devel-0.1-62RHEL3.ppc.rpm91c6217ba1d27dbefee33452f31423d6 laus-devel-0.1-62RHEL3.ppc64.rpm2db58f704ade9835b55077a7537546a5 laus-libs-0.1-62RHEL3.ppc.rpm86dc0501ba9e8942010678806aea9e8c laus-libs-0.1-62RHEL3.ppc64.rpm1b1203051fe38a4c7d6714948b7cf348 passwd-0.68-3.1.ppc.rpme7edac75f05e107df39b82ade751f26f shadow-utils-4.0.3-20.03.ppc.rpm38bbec2cb8070032130a69d352dc70dd vixie-cron-3.0.1-75.ppc.rpm
### s390

3 SECURE INITIAL SYSTEM CONFIGURATION 15
4480b7c15f8a734544a0670d8e38f48e amtu-0.1-5RHEL.s390.rpm491ca763be4d1d72bd8b1f9482063623 at-3.1.8-48.ent.s390.rpmd96c577a3391feb227018d65f3c114b4
kernel-2.4.21-15.0.2.EL.peterm.eal.3.s390.rpm4bf34cc066affc96937af09cdc7d6bfe
kernel-source-2.4.21-15.0.2.EL.peterm.eal.3.s390.rpm73de7e7a4a57b15f9feaf81d62f41a9f laus-0.1-62RHEL3.s390.rpm298b8ae4714d9fbca2c279452a13a0ee laus-devel-0.1-62RHEL3.s390.rpmce7cb4b2bb5789992889047794dbb70d laus-libs-0.1-62RHEL3.s390.rpmbf1c3950d090d33386e9ef7f2e4f91c7 passwd-0.68-3.1.s390.rpm074298576ec409b7923509a12983442a shadow-utils-4.0.3-20.03.s390.rpmb2feeb0dd26a9c791cc342066357bc0b vixie-cron-3.0.1-75.s390.rpm
### x86_641ba34f27a2392f251417c3d4aeed5abc amtu-0.1-5RHEL.x86_64.rpmc7ca492b0266ae83f92f09a6d4b94ab0 at-3.1.8-48.ent.x86_64.rpm77836e69f9cc29e1220dae6e3d3e42e0
kernel-2.4.21-15.0.2.EL.peterm.eal.3.x86_64.rpm8f4b4f77243e68dfba2feee8c37f6631
kernel-smp-2.4.21-15.0.2.EL.peterm.eal.3.x86_64.rpmb9bcb2fe3030052aafad5988d1945802
kernel-source-2.4.21-15.0.2.EL.peterm.eal.3.x86_64.rpm59d191b83642cd3642d173f4041b6d66 laus-0.1-62RHEL3.x86_64.rpm79ac3ab71e1917cc464dc2f3b1b9edd1 laus-devel-0.1-62RHEL3.i386.rpm5538d44c8fe6da06ce02d0c787c58eec laus-devel-0.1-62RHEL3.x86_64.rpm58e5e19bf98d287576ad7d0c50d3ff74 laus-libs-0.1-62RHEL3.i386.rpm276582e5f9eea630400b32003cbfcfdc laus-libs-0.1-62RHEL3.x86_64.rpm932c7d5e07e3a172f0248ab06d405410 passwd-0.68-3.1.x86_64.rpm8cbdcdf09a6945a09ca8f7255f4cbbdb shadow-utils-4.0.3-20.03.x86_64.rpm14ce77fd0c0def8147ec109b152deae9 vixie-cron-3.0.1-75.x86_64.rpm
When using the automated configuration, copy these RPM files into the directory/root/rpms/ of the system beinginstalled, the installer will then handle the upgrade automatically. You MUST download the current version of theeal3-certificationRPM package to use the automated configuration as described in the next section.
If installing manually, use therpm(8) command to install and upgrade the downloaded packages:
rpm -Uvh *.rpm
3.3 Automated configuration of the system
The eal3-certificationpackage SHOULD be installed initially to achieve the evaluated configuration. This RPMpackage contains EAL3 specific configuration files, and the script/etc/audit/rhel-eal3.bashthat sets up the evaluatedconfiguration.
It is RECOMMENDED that you use therhel-eal3.bash script to reset the configuration to its initial state afterany updates, but you MAY also perform the steps listed here manually.
Install the certification RPM with the following command:
rpm -Uvh eal3-certification*.rpm
Run the following command to view a summary of the supported options:

3 SECURE INITIAL SYSTEM CONFIGURATION 16
/etc/audit/rhel-eal3.bash -h
It is RECOMMENDED that you uninstall all unused kernel packages, such as the uniprocessor kernel on a SMPmachine, before running the script. The script will upgrade the installed kernel package(s) to the required version, andif you have multiple packages, the wrong one might be activated due to the upgrade order. You MAY also manuallyupgrade the kernel package (and test it) before running the script.
You will need to specify a directory containing the required update packages (this is/root/rpms/by default), and alsoa directory or media containing the RHEL3 Update2 RPM packages. Specify these with the--rpm-path parameter,with the update packages listed first. For example:
/etc/audit/rhel-eal3.bash --rpm-path ’/root/rpms /mnt/cd*’
If the RHEL3 Update2 RPM packages are stored on an NFS file server instead of on CD-R media, specify the pathto the RPMS directory as in the following example, using the appropriate path to the mounted directory instead of/mnt/SERVER/U2/:
/etc/audit/rhel-eal3.bash \--rpm-path ’/root/rpms /mnt/SERVER/U2/RedHat/RPMS/’
You MAY also add the--add-optional flag to automatically install optional packages (useful for testing).
You MAY use the-a flag to automate the install and have it run without prompting. This is intended for people whoare familiar with the process; if running it for the first time you SHOULD let it run interactively and verify the actionsas described in this guide.
You MUST answer all questions asked by the script that are not marked as ”optional” withy to achieve the evaluatedconfiguration.
WARNING : Therhel-eal3.bash script will reboot the system as the final step in the process, as described in themanual instructions in section§3.19 ”Reboot and initial network connection” of this guide. On zSeries, it will run thezipl boot configuration tool (with no arguments) before rebooting.
If the script has completed successfully, the remaining steps in this chapter were done automatically; you MAY skipahead to section§4 ”System operation” of this guide.
3.4 Configuring filesystem parameters
You MUST add the mount optionacl in the file /etc/fstabfor all ext3 file systems. You MAY also add the optionuser xattr . Multiple options are separated with commas (not ”comma space”), for exampleacl,user xattr .
Edit /etc/fstaband replace thedefaults option specification (fourth column) withacl for all file systems withtypeext3 (third column). Then, runmount MOUNTPOINT-o remount for each of the mount points (secondcolumn).
For more information, please refer to section§4.6 ”Mounting filesystems” of this guide.
3.5 Add and remove packages
The minimal system that was initially installed does not contain all packages required for the evaluated configuration,and some of the initially installed packages need to be removed.
In the following lists, the suffix/cross indicates a package using the non-default word size. For example, the default”glibc” package on Opteron is namedglibc-*.x86 64.rpm, while ”glibc/cross” refers toglibc-*.i686.rpm. Please referto section§3.2 ”Installing required updates” for more information. The following table shows the mappings:

3 SECURE INITIAL SYSTEM CONFIGURATION 17
# Architecture default /crossxSeries i386 or i686 [not applicable]iSeries, pSeries ppc ppc64eServer 325 x86_64 i386 or i686zSeries (31bit) s390 [not applicable]
The evaluated configuration consists of exactly the following packages:
One or both of the following kernel packages:
kernelkernel-smp
Packages installed on all architectures:
acl amtu ash aspell at attr authconfig autofs basesystem bashbc beecrypt bind-utils binutils bzip2 bzip2-libs chkconfigcomps coreutils cpio cpp cracklib cracklib-dicts crontabs cupscups-libs curl cvs cyrus-sasl cyrus-sasl-gssapi cyrus-sasl-md5cyrus-sasl-plain db4 dev devlabel dhclient dialog diffutilsdos2unix dosfstools dump e2fsprogs ed eject elfutilselfutils-libelf elinks ethtool expat fbset file filesystemfindutils finger fontconfig freetype ftp gawk gdbm gettextglib glib2 glibc glibc-common glibc-headers glibc-kernheadersgmp gnupg gpm grep groff gzip hdparm hesiod hotplug htmlviewhwdata info initscripts iproute ipsec-tools iptablesiptables-ipv6 iputils irda-utils isdn4k-utils jfsutils jwhoiskbd kernel kernel-utils krb5-libs krb5-workstation krbafskrbafs-utils kudzu laus laus-libs less lftp lha libacl libattrlibcap libgcc libgcj libjpeg libpng libstdc++ libtermcaplibtiff libtool-libs libuser libwvstreams libxml2 lockdevlogrotate logwatch losetup lslk lsof lvm m4 mailcap mailx makeMAKEDEV man man-pages mdadm mgetty mingetty minicom mkinitrdmktemp modutils mount mtools mtr mt-st nano nc ncompressncurses netconfig netdump netpbm netpbm-progs net-tools newtnfs-utils nscd nss_ldap ntsysv openldap opensshopenssh-clients openssh-server openssl pam pam_krb5pam_passwdqc pam_smb parted passwd patch pax pciutils pcrepdksh perl perl-DateManip perl-Filter perl-HTML-Parserperl-HTML-Tagset perl-libwww-perl perl-URI pinfo popt portmappostfix ppp prelink procmail procps psacct psmisc pspellpyOpenSSL python python-optik pyxf86config quota raidtoolsrdate rdist readline redhat-config-mouseredhat-config-network-tui redhat-config-securitylevel-tuiredhat-logos redhat-lsb redhat-menus redhat-release rhnlibrhpl rmt rootfiles rpm rpmdb-redhat rpm-python rp-pppoe rshrsync schedutils sed setarch setserial setup setuptoolshadow-utils sharutils slang slocate specspo star stunnel sudosymlinks sysklogd sysreport SysVinit talk tar tcl tcp_wrapperstcpdump tcsh telnet termcap tetex tetex-fonts tetex-latex tftptime tk tmpwatch traceroute tzdata unix2dos unzip up2dateusbutils usermode utempter util-linux vconfig vim-commonvim-minimal vixie-cron wget which wireless-tools words

3 SECURE INITIAL SYSTEM CONFIGURATION 18
wvdial XFree86-libs XFree86-libs-data XFree86-Mesa-libGLxinetd ypbind yp-tools zip zlib
additional package on AS (not available on WS):
vsftpd
additional packages on x86 (xSeries):
apmd eject fbset grub hdparm kbd kernel-pcmcia-cs laus minicommkbootdisk pyxf86config redhat-config-mouse rp-pppoe setserialsyslinux usbutils wireless-tools
additional packages on x86_64 (eServer 325 (Opteron)):
eject fbset grub hdparm kbd laus minicom pyxf86configredhat-config-mouse rp-pppoe setserial syslinux usbutilswireless-tools
additional packages on ppc (pSeries) and ppc (iSeries):
eject fbset hdparm kbd laus-libs/cross laus/cross minicomppc64-utils pyxf86config redhat-config-mouse rp-pppoesetserial usbutils wireless-tools yaboot
additional packages on s390 (zSeries):
laus s390utils
In addition to these packages, certain additional software from the RHEL CDs MAY be installed without invalidatingthe evaluated configuration. The rules described in section§4.4 ”Installation of additional software” of this guideMUST be followed to ensure that the security requirements are not violated.
The following packages are examples of tolerated packages that MAY be added to the system according to these rules.Note that the software contained in these packages is not intended to be used with ’root’ privileges, but the presenceof the packages does not invalidate the evaluated configuration. Therhel-eal3.bash script does not removethese packages if they are installed on the system, and MAY be used to install them automatically by specifying the--add-optional parameter to the command line. The example OPTIONAL packages are:
autoconf automake bison cracklib/cross db4/crosseal3-certification-doc expect expect-devel flex gcc gcc-c++glib/cross glibc-devel glibc-devel/cross glibc/crosskernel-source/any krb5-devel laus-devel laus-devel/crosslaus-libs/cross libacl/cross libattr-devel libattr/crosslibgcc/cross libstdc++-devel libstdc++-devel/crosslibstdc++/cross netpbm netpbm-progs openldap-clientsopenssl-devel pam-devel pam-devel/cross perl-Digest-HMACperl-Digest-SHA1 rpm-build strace tetex tetex-fontstetex-latex texinfo zlib-devel zlib-devel/cross zlib/cross

3 SECURE INITIAL SYSTEM CONFIGURATION 19
The next steps involve installing selected packages from the distribution CD-ROMs. Due to dependency issues, theRECOMMENDED method is to first copy all needed RPMs to a temporary directory, and then installing them all inone step usingrpm -Uvh *.rpm .
The rhel-eal3.bashscript handles the package selection and installation automatically, and will prompt for theinstallation media as necessary. After installation, the package selection is again verified, and the script will indicatewhich packages are still missing or the wrong version. In this case, verify that the needed RPM packages are availablein the locations specified, and that they are the correct versions and for the correct architecture.
If you are performing this step manually, first create a temporary directory to store the RPM files:
mkdir /root/rpms
Copy all the missing package files to that directory. This step is very time consuming when done manually, theRECOMMENDED method is to use therhel-eal3.bashscript to do this automatically. The following shows an exampleof the manual method, this needs to be repeated until all missing packages are copied:
# Get list of currently installed packagesrpm -qa | sort | less
# Search for one of the missing packagesfind /mnt/cd* -name ’vsftpd*’
# Copy missing packages from the installation mediacp /mnt/cdrom/RedHat/RPMS/vsftpd-1.2.0-4.i386.rpm /root/rpms/
# Repeat these steps for the other missing packages[...]
Once the packages are all copied, install them all in one step with the following single command:
# Install all packagesrpm -Uvh /root/rpms/*.rpm
This MAY result in the following expected warning and error messages that are harmless:
warning: user bhcompile does not exist - using rootwarning: group bhcompile does not exist - using rooterror: %postun(laus-0.1-54RHEL3) scriptlet failed, exit status 255
Any other errors or warnings indicate that the installation is invalid and needs to be redone.
Now you can remove the temporary directory with the following command:
rm -rf /root/rpms

3 SECURE INITIAL SYSTEM CONFIGURATION 20
3.6 Disable services
Note: The system runlevel as specified in the ’initdefault’ entry in/etc/inittabMUST remain at the default setting of’3’ for these steps to be valid.
The following services are REQUIRED for runlevel 3:
atd # the ’at’ daemonaudit # the audit daemoncrond # vixie-cronirqbalance # configures SMP IRQ balancingkudzu # new device discoverynetwork # network interface configurationrandom # random numberssyslog # system logging
The following services are OPTIONAL for runlevel 3:
cups # print subsystemgpm # console mouse managementmdmonitor # software raid monitoringpostfix # SMTP MTArawdevices # Raw partition management (eg. for Oracle)sshd # Secure Shellvsftpd # FTP serverxinetd # Internet Services
You MUST ensure that all REQUIRED services are active. You MAY enable or disable services from the OPTIONALlist as suitable for your configuration. All other services MUST be deactivated.
Usechkconfig SERVICENAME offto disable a service, andchkconfig SERVICENAME onto enable it. The followingcommand lists the active services:
chkconfig --list | grep "3:on" | sort
Make sure that the audit subsystem is activated. Ifauditd is not running, all logins are automatically disabled in theevaluated configuration as required by CAPP.
3.7 Remove SUID/SGID root settings from binaries
Use of the SUID bit on binaries (to run with root privileges, a.k.a. ”setuid bit”) MUST be limited to those shown inthe following list:
/bin/ping/bin/su/usr/bin/at/usr/bin/chage/usr/bin/chfn/usr/bin/chsh/usr/bin/crontab/usr/bin/gpasswd/usr/bin/newgrp/usr/bin/passwd
3 SECURE INITIAL SYSTEM CONFIGURATION 21
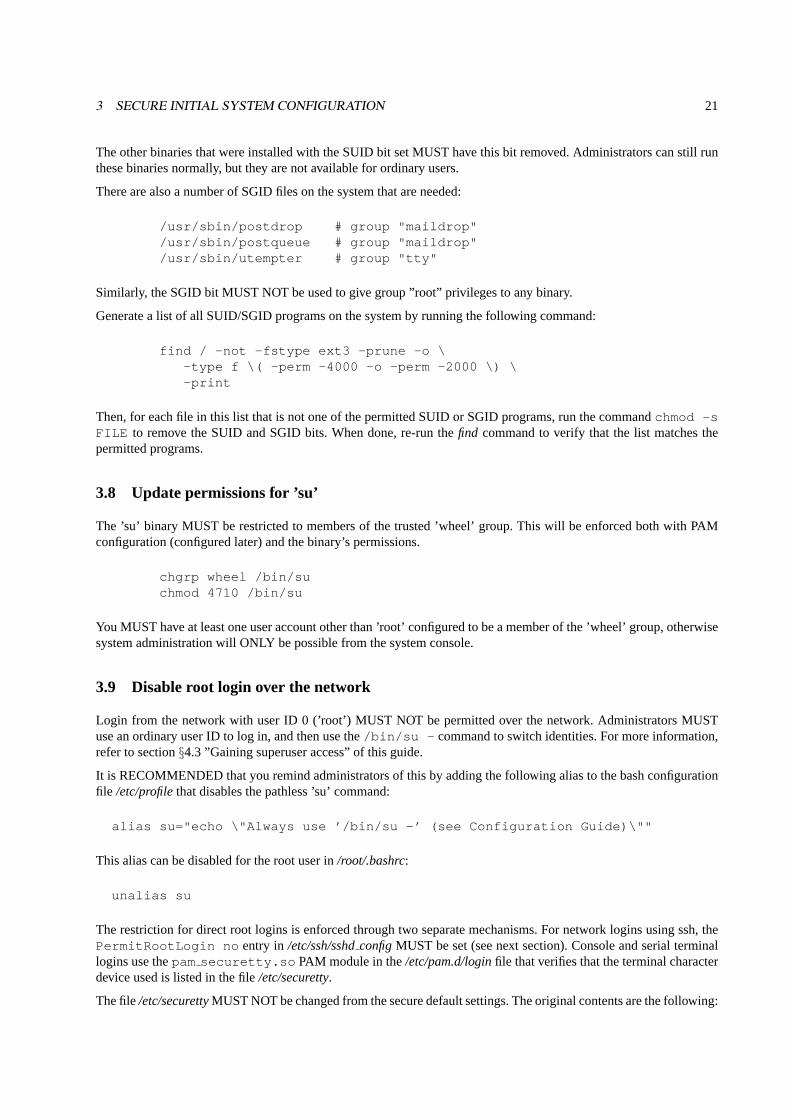
The other binaries that were installed with the SUID bit set MUST have this bit removed. Administrators can still runthese binaries normally, but they are not available for ordinary users.
There are also a number of SGID files on the system that are needed:
/usr/sbin/postdrop # group "maildrop"/usr/sbin/postqueue # group "maildrop"/usr/sbin/utempter # group "tty"
Similarly, the SGID bit MUST NOT be used to give group ”root” privileges to any binary.
Generate a list of all SUID/SGID programs on the system by running the following command:
find / -not -fstype ext3 -prune -o \-type f \( -perm -4000 -o -perm -2000 \) \-print
Then, for each file in this list that is not one of the permitted SUID or SGID programs, run the commandchmod -sFILE to remove the SUID and SGID bits. When done, re-run thefind command to verify that the list matches thepermitted programs.
3.8 Update permissions for ’su’
The ’su’ binary MUST be restricted to members of the trusted ’wheel’ group. This will be enforced both with PAMconfiguration (configured later) and the binary’s permissions.
chgrp wheel /bin/suchmod 4710 /bin/su
You MUST have at least one user account other than ’root’ configured to be a member of the ’wheel’ group, otherwisesystem administration will ONLY be possible from the system console.
3.9 Disable root login over the network
Login from the network with user ID 0 (’root’) MUST NOT be permitted over the network. Administrators MUSTuse an ordinary user ID to log in, and then use the/bin/su - command to switch identities. For more information,refer to section§4.3 ”Gaining superuser access” of this guide.
It is RECOMMENDED that you remind administrators of this by adding the following alias to the bash configurationfile /etc/profilethat disables the pathless ’su’ command:
alias su="echo \"Always use ’/bin/su -’ (see Configuration Guide)\""
This alias can be disabled for the root user in/root/.bashrc:
unalias su
The restriction for direct root logins is enforced through two separate mechanisms. For network logins using ssh, thePermitRootLogin no entry in /etc/ssh/sshdconfigMUST be set (see next section). Console and serial terminallogins use thepam securetty.so PAM module in the/etc/pam.d/loginfile that verifies that the terminal characterdevice used is listed in the file/etc/securetty.
The file/etc/securettyMUST NOT be changed from the secure default settings. The original contents are the following:

3 SECURE INITIAL SYSTEM CONFIGURATION 22
consolevc/1vc/2vc/3vc/4vc/5vc/6vc/7vc/8vc/9vc/10vc/11tty1tty2tty3tty4tty5tty6tty7tty8tty9tty10tty11
3.10 Setting up SSH
SSH protocol version 1 MUST be disabled. It has known security deficiencies.
The ssh client MUST NOT be set up SUID root (the SUID bit was removed in the post-install configuration). Thisprevents the use of some authentication methods normally supported by OpenSSH, but does not affect the evaluatedconfiguration that uses password authentication exclusively.
The SSH Server MUST be configured to reject attempts to log in as root.
The permitted authentication mechanisms are per-user (nonempty) passwords and per-user DSS public keyauthentication. All other authentication methods MUST be disabled.
The settingPAMAuthenticationViaKbdInt MUST be disabled, since this would otherwise circumvent thedisabled root logins over the network.
This results in the following option set for the SSH daemon that MUST be set in /etc/ssh/sshdconfig:
Protocol 2Ciphers 3des-cbcSyslogFacility AUTHPRIVPermitRootLogin noRSAAuthentication noPubkeyAuthentication noIgnoreRhosts yesRhostsRSAAuthentication noHostbasedAuthentication noPasswordAuthentication yesPermitEmptyPasswords noChallengeResponseAuthentication noKerberosAuthentication no
3 SECURE INITIAL SYSTEM CONFIGURATION 23
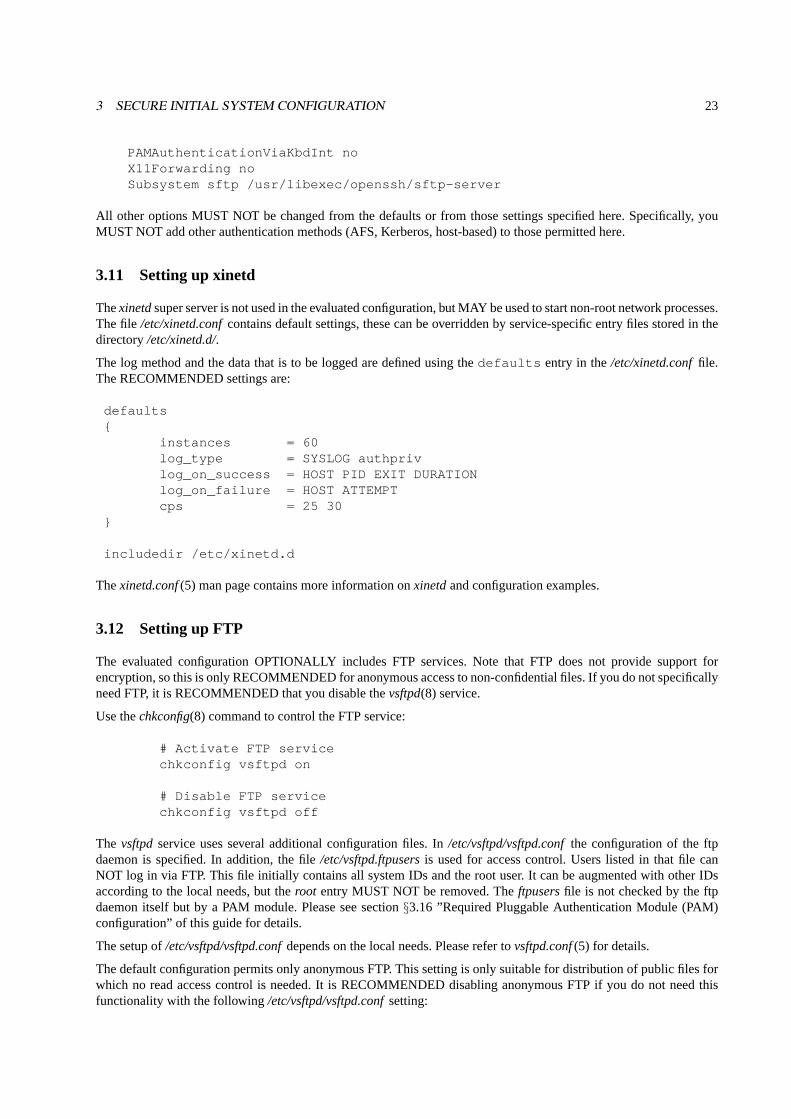
PAMAuthenticationViaKbdInt noX11Forwarding noSubsystem sftp /usr/libexec/openssh/sftp-server
All other options MUST NOT be changed from the defaults or from those settings specified here. Specifically, youMUST NOT add other authentication methods (AFS, Kerberos, host-based) to those permitted here.
3.11 Setting up xinetd
Thexinetdsuper server is not used in the evaluated configuration, but MAY be used to start non-root network processes.The file /etc/xinetd.confcontains default settings, these can be overridden by service-specific entry files stored in thedirectory/etc/xinetd.d/.
The log method and the data that is to be logged are defined using thedefaults entry in the/etc/xinetd.conffile.The RECOMMENDED settings are:
defaults{
instances = 60log_type = SYSLOG authprivlog_on_success = HOST PID EXIT DURATIONlog_on_failure = HOST ATTEMPTcps = 25 30
}
includedir /etc/xinetd.d
Thexinetd.conf(5) man page contains more information onxinetdand configuration examples.
3.12 Setting up FTP
The evaluated configuration OPTIONALLY includes FTP services. Note that FTP does not provide support forencryption, so this is only RECOMMENDED for anonymous access to non-confidential files. If you do not specificallyneed FTP, it is RECOMMENDED that you disable thevsftpd(8) service.
Use thechkconfig(8) command to control the FTP service:
# Activate FTP servicechkconfig vsftpd on
# Disable FTP servicechkconfig vsftpd off
The vsftpdservice uses several additional configuration files. In/etc/vsftpd/vsftpd.confthe configuration of the ftpdaemon is specified. In addition, the file/etc/vsftpd.ftpusersis used for access control. Users listed in that file canNOT log in via FTP. This file initially contains all system IDs and the root user. It can be augmented with other IDsaccording to the local needs, but theroot entry MUST NOT be removed. Theftpusersfile is not checked by the ftpdaemon itself but by a PAM module. Please see section§3.16 ”Required Pluggable Authentication Module (PAM)configuration” of this guide for details.
The setup of/etc/vsftpd/vsftpd.confdepends on the local needs. Please refer tovsftpd.conf(5) for details.
The default configuration permits only anonymous FTP. This setting is only suitable for distribution of public files forwhich no read access control is needed. It is RECOMMENDED disabling anonymous FTP if you do not need thisfunctionality with the following/etc/vsftpd/vsftpd.confsetting:

3 SECURE INITIAL SYSTEM CONFIGURATION 24
anonymous_enable=NO
You MAY enable FTP authentication for local user accounts. The corresponding setting in/etc/vsftpd/vsftpd.confis:
local_enable=YES
It is RECOMMENDED to use the more secure alternativessftp(1) orscp(1) to copy files among users, and to use FTPonly for legacy applications that do not support this alternative.
3.13 Setting up Postfix
The default settings of the postfix MTA are in accordance with the EAL3 requirements. An alias MUST be set upfor root in /etc/aliases, as postfix will not deliver mail while running with UID 0. Specify one or more user names ofadministrators to whom mail addressed toroot will be forwarded.
Please seepostfix(1), master(8), and the documentation in/usr/share/doc/postfix*/for details.
3.14 Setting up the audit subsystem
This section describes only the initial setup and default configuration of the audit subsystem. Please refer to section§5.3 ”Configuring the audit subsystem” of this guide for information about how it works and what changes MAY bemade to the configuration.
Since failures in the audit subsystem may result in an unusable system, ensure that the audit subsystem is properlyactivated:
# Create the audit device if necessaryls -l /dev/auditmknod -m 600 /dev/audit c 10 224
# ensure that auditd gets launchedchkconfig audit on
3.14.1 Installing the packages needed for auditing
The required packages have already been installed in the previous step described in section§3.2 ”Installing requiredupdates” of this guide. This section describes the further changes that need to be made to reach the initial state of theevaluated configuration.
The audit subsystem consists of the following packages:
kernel-*
The kernels include the audit modifications, including the driverdrivers/audit/*and the required hooks in therest of the kernel.
laus, laus-libs
Contains the userspace Linux Auditing Subsystem (LAuS) programs includingauditd(8), aucat(8) andaugrep(8), the liblaus.so shared library, the/etc/rc.d/init.d/audit startup script, the configuration in/etc/sysctl.conf, the /lib/security/pam laus.so PAM module and the corresponding man pages. Thecorresponding development libraries and headers are in thelaus-develRPM, which is not installed as part of theevaluated configuration.
at, cron, shadow-utils
These packages contain audit-enabled versions of the trusted programs, which will generate audit records forsecurity relevant events.
3 SECURE INITIAL SYSTEM CONFIGURATION 25
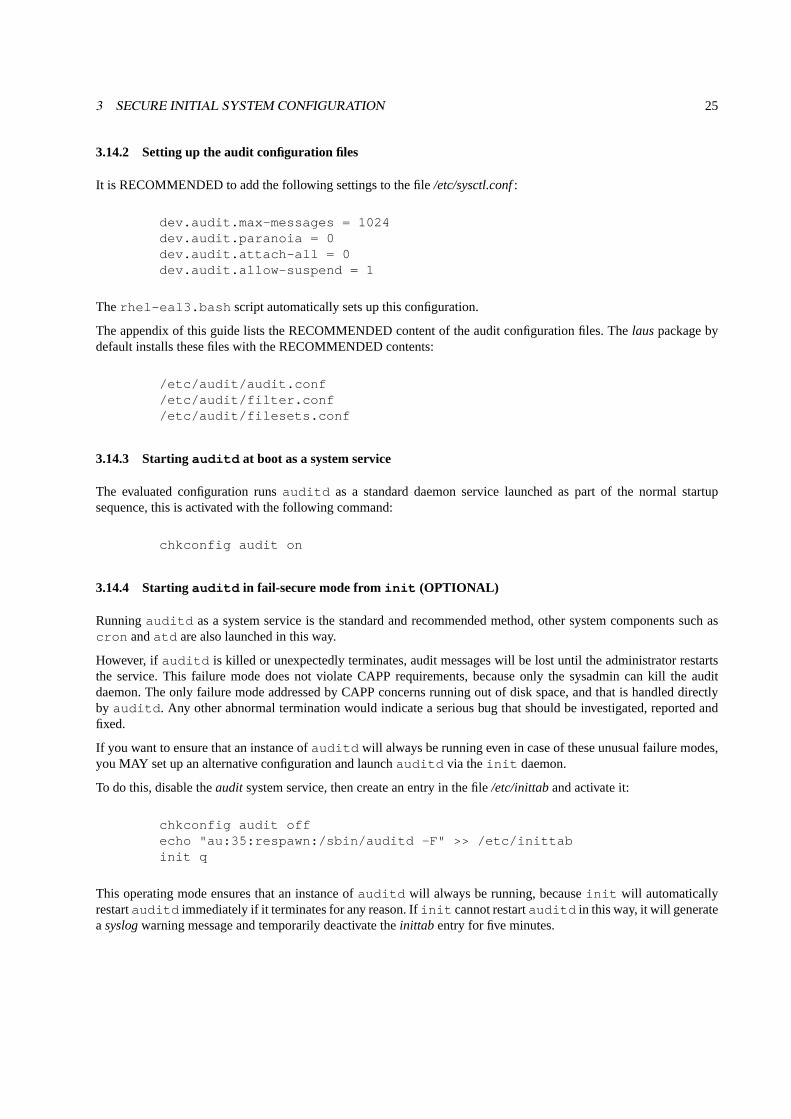
3.14.2 Setting up the audit configuration files
It is RECOMMENDED to add the following settings to the file/etc/sysctl.conf:
dev.audit.max-messages = 1024dev.audit.paranoia = 0dev.audit.attach-all = 0dev.audit.allow-suspend = 1
Therhel-eal3.bash script automatically sets up this configuration.
The appendix of this guide lists the RECOMMENDED content of the audit configuration files. Thelauspackage bydefault installs these files with the RECOMMENDED contents:
/etc/audit/audit.conf/etc/audit/filter.conf/etc/audit/filesets.conf
3.14.3 Startingauditd at boot as a system service
The evaluated configuration runsauditd as a standard daemon service launched as part of the normal startupsequence, this is activated with the following command:
chkconfig audit on
3.14.4 Startingauditd in fail-secure mode from init (OPTIONAL)
Runningauditd as a system service is the standard and recommended method, other system components such ascron andatd are also launched in this way.
However, ifauditd is killed or unexpectedly terminates, audit messages will be lost until the administrator restartsthe service. This failure mode does not violate CAPP requirements, because only the sysadmin can kill the auditdaemon. The only failure mode addressed by CAPP concerns running out of disk space, and that is handled directlyby auditd . Any other abnormal termination would indicate a serious bug that should be investigated, reported andfixed.
If you want to ensure that an instance ofauditd will always be running even in case of these unusual failure modes,you MAY set up an alternative configuration and launchauditd via theinit daemon.
To do this, disable theaudit system service, then create an entry in the file/etc/inittaband activate it:
chkconfig audit offecho "au:35:respawn:/sbin/auditd -F" >> /etc/inittabinit q
This operating mode ensures that an instance ofauditd will always be running, becauseinit will automaticallyrestartauditd immediately if it terminates for any reason. Ifinit cannot restartauditd in this way, it will generateasyslogwarning message and temporarily deactivate theinittab entry for five minutes.
3 SECURE INITIAL SYSTEM CONFIGURATION 26
3.15 Introduction to Pluggable Authentication Module (PAM) configuration
The PAM subsystem is responsible for maintaining passwords and other authentication data. Because this is asecurity-critical system, understanding how it works is very important. In addition to thepam(8) manual page,full documentation is available in/usr/share/doc/pam-*/txts/and includes”The Linux-PAM System Administrator’sGuide” (pam.txt) as well as information for writing PAM applications and modules. Detailed information aboutmodules is available in/usr/share/doc/pam-*/txts/README.pam* as well as manual pages for individual modules,such aspamstack(8).
The PAM configuration is stored in the/etc/pam.d/directory. Note that the documentation refers to a file/etc/pam.confthat is not used by RHEL (PAM was compiled to ignore this file if the/etc/pam.d/directory exists).
Each service (application) that uses PAM for authentication uses aservice-nameto determine its configuration. storedin the/etc/pam.d/SERVICENAMEfile. The specialservice-nameOTHER(case insensitive) is used for default settingsif there are no specific settings.
The configuration file for the service contains one entry for each module, in the format:
module-type control-flag module-path args
Comments MAY be used extending from ’#’ to the end of the line, and entries MAY be split over multiple lines usinga backslash at the end of a line as a continuation character.
Themodule-typedefines the type of action being done. This can be one of four types:
auth
Authenticates users (determines that they are who they claim to be). It can also assign credentials, for exampleadditional group memberships beyond those specified through/etc/passwdand /etc/groups. This additionalfunctionality MUST NOT be used.
account
Account management not related to authentication, it can also restrict access based on time of day, availablesystem resources or the location of the user (network address or system console).
session
Manages resources associated with a service by running specified code at the start and end of the session. Typicalusage includes logging and accounting, and initialization such as auto mounting a home directory.
password
Used for updating the password (or other authentication token), for example when using thepasswd(1) utility tochange it.
The control-flagspecifies the action that will be taken based on the success or failure of an individual module. Themodules are stacked (executed in sequence), and thecontrol-flagsdetermine which final result (success or failure) willbe returned, thereby specifying the relative importance of the modules.
Stacked modules are executed in the order specified in the configuration file.
Thecontrol-flagcan be specified as either a single keyword, or alternatively with a more elaborate syntax that allowsgreater control. RHEL uses only the single keyword syntax by default.
The following keywords control how a module affects the result of the authentication attempt:
required
If this module returns a failure code, the entire stack will return failure. The failure will be reported to theapplication or user only after all other modules in the stack have been run, to prevent leakage of information (forexample, ask for a password even if the entered username is not valid).

3 SECURE INITIAL SYSTEM CONFIGURATION 27
requisite
Same asrequired, but return failure immediately not executing the other modules in the stack. Can be used toprevent a user from entering a password over an insecure connection.
sufficient
Return success immediately if no previousrequired modules in the stack have returned failure. Do not executesucceeding modules.
optional
The return code of this module is ignored, except if all other modules in the stack return an indeterminate result(PAM IGNORE).
Themodule-pathspecifies the filename of the module to be run (relative to the directory/lib/security/, and the optionalargsare passed to the module - refer to the module’s documentation for supported options.
3.16 Required Pluggable Authentication Module (PAM) configuration
You MUST restrict authentication to services that are explicitly specified. The ’other’ fallback MUST be disabledby specifying thepamdeny.somodule for eachmodule-typein the ’other’ configuration. This ensures that accessdecisions within the PAM system are handled only by the service specific PAM configuration.
Note that RHEL uses thepamstack(8) module to unify commonly used configuration options within single files,rather than having redundant information in multiple files. You MUST verify that the shared settings are applicable toservices that usepamstack, and keep in mind that a change to the shared file will affect several services.
You MUST add thepamwheel.somodule to the ’auth’moduletypeconfiguration for the ’su’ service to restrict use ofsu(1) to members of the ’wheel’ group.
You MUST add thepamtally.somodule to theauth andaccount moduletypeconfigurations oflogin, sshdandvsftpd. This ensures that accounts are disabled after several failed login attempts.Thepamtally.somodule is used intheauth stack to increment a counter in the file/var/log/lastlog, and in theaccount stack to either deny login aftertoo many failed attempts, or to reset the counter to zero after successful authentication. The evaluated configurationuses a lockout after six failed attempts, corresponding to the settingdeny=6 , you MAY decrease the number forstricter enforcement. Be aware that this can be used in denial-of-service attacks to lock out legitimate users. Pleaserefer to section§4.7 ”Managing user accounts” of this guide for more information.
You MUST use thepampasswdqc.sopassword quality checking module to ensure that users will not useeasily-guessable passwords.
The system supports many other PAM modules apart from the ones shown here. In general, you MAY add PAMmodules that add additional restrictions. You MUST NOT weaken the restrictions through configuration changes ofthe modules shown here or via additional modules. Also, you MUST NOT add PAM modules that provide additionalprivileges to users (such as thepamconsole.somodule).
You MUST NOT run theauthconfig(8) tool to modify the authentication configuration.
Following are the pam configuration files:
3.16.1 /etc/pam.d/system-auth
This file contains common settings that are shared by multiple services using authentication. Thepampasswdqc.somodule is configured to enforce the minimum password length of 8 characters. Note that thepampasswdqc.somoduleis not part of a default installation, it was added previously as described in section§3.5 ”Add and remove packages”of this guide.
Thepamtally module MUST be used to block the user after 5 failed login attempts.

3 SECURE INITIAL SYSTEM CONFIGURATION 28
The rememberoption topamunix.soprevents users from reusing old passwords. Hashes of old passwords are storedin the file /etc/security/opasswd. Note that this file MUST exist, otherwise users cannot change passwords. Use thefollowing commands to create it:
touch /etc/security/opasswdchmod 600 /etc/security/opasswd
The file/etc/pam.d/system-authMUST be set up with the following content:
#%PAM-1.0## This file is auto-generated.# User changes will be destroyed the next time authconfig is run.## ... so don’t run authconfig## pam.d/system-auth - PAM master configuration for EAL3/CAPP compliance# see the Evaluated Configuration Guide for more info#
auth required pam_tally.so onerr=fail no_magic_rootauth required pam_env.soauth required pam_unix.so likeauth nullok
account required pam_unix.soaccount required pam_tally.so deny=5 reset no_magic_root
password required pam_passwdqc.so min=disabled,disabled,16,12,8 \random=42
password required pam_unix.so nullok use_authtok md5 \shadow remember=7
session required pam_limits.sosession required pam_unix.so
3.16.2 /etc/pam.d/login
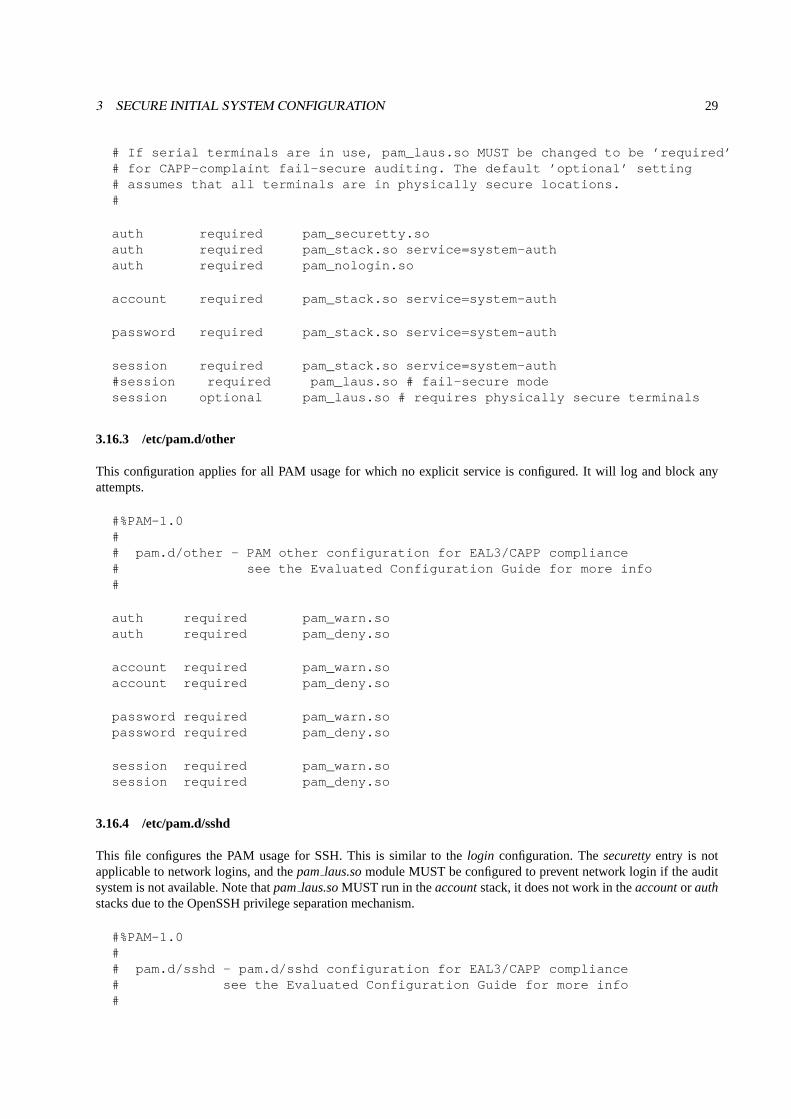
This file configures the behavior of thelogin program. It allows root login only for terminals configured in/etc/securetty. If the file /etc/nologinis present, then only root can log in.
The pamlaus.somodule is by default configured to beoptional instead ofrequired , which assumes that allterminals available for login are in physically secure locations and accessible only for authorized administrators. Thispermits administrators to log in on the console even if the audit subsystem is not available. If any serial terminals areattached and available for arbitrary users, you MUST specify thepamlaus.somodule to berequired to ensure theCAPP-compliant fail-secure operating mode that disables login if audit is not working. Please refer to section§4.8”Using serial terminals” of this guide for more information.
#%PAM-1.0## pam.d/login - PAM login configuration for EAL3/CAPP certification# see the Evaluated Configuration Guide for more info#
3 SECURE INITIAL SYSTEM CONFIGURATION 29
# If serial terminals are in use, pam_laus.so MUST be changed to be ’required’# for CAPP-complaint fail-secure auditing. The default ’optional’ setting# assumes that all terminals are in physically secure locations.#
auth required pam_securetty.soauth required pam_stack.so service=system-authauth required pam_nologin.so
account required pam_stack.so service=system-auth
password required pam_stack.so service=system-auth
session required pam_stack.so service=system-auth#session required pam_laus.so # fail-secure modesession optional pam_laus.so # requires physically secure terminals
3.16.3 /etc/pam.d/other
This configuration applies for all PAM usage for which no explicit service is configured. It will log and block anyattempts.
#%PAM-1.0## pam.d/other - PAM other configuration for EAL3/CAPP compliance# see the Evaluated Configuration Guide for more info#
auth required pam_warn.soauth required pam_deny.so
account required pam_warn.soaccount required pam_deny.so
password required pam_warn.sopassword required pam_deny.so
session required pam_warn.sosession required pam_deny.so
3.16.4 /etc/pam.d/sshd
This file configures the PAM usage for SSH. This is similar to thelogin configuration. Thesecurettyentry is notapplicable to network logins, and thepamlaus.somodule MUST be configured to prevent network login if the auditsystem is not available. Note thatpamlaus.soMUST run in theaccountstack, it does not work in theaccountor authstacks due to the OpenSSH privilege separation mechanism.
#%PAM-1.0## pam.d/sshd - pam.d/sshd configuration for EAL3/CAPP compliance# see the Evaluated Configuration Guide for more info#

3 SECURE INITIAL SYSTEM CONFIGURATION 30
auth required pam_stack.so service=system-authauth required pam_nologin.so
account required pam_stack.so service=system-authaccount required pam_laus.so detach
password required pam_stack.so service=system-auth
session required pam_stack.so service=system-auth
3.16.5 /etc/pam.d/su
This file configures the behavior of the ’su’ command. Only users in the trusted ’wheel’ group can use it to become’root’, as configured with thepamwheelmodule.
#%PAM-1.0## pam.d/su - PAM su configuration from EAL3/CAPP compliance# see the Evaluated Configuration Guide for more info#
auth sufficient pam_rootok.soauth required pam_wheel.so use_uidauth required pam_stack.so service=system-auth
account required pam_stack.so service=system-auth
password required pam_deny.so
session required pam_stack.so service=system-authsession optional pam_xauth.so
The passwordbranch is disabled because forcing the root user to change the root password is not desired for thisprogram,
3.16.6 /etc/pam.d/vsftpd
This file configures the authentication for the FTP daemon. With the listfile module, users listed in/etc/vsftpd.ftpusersare denied FTP access to the system. Note that the setting is relevant only for authentication of incoming connections,and does not prevent local users from using theftp(1) client to access other machines on the network.
#%PAM-1.0## pam.d/vsftpd - vsftpd configuration for EAL3/CAPP compliance# see the Evaluated Configuration Guide for more info
auth required pam_listfile.so item=user sense=deny \file=/etc/vsftpd.ftpusers onerr=succeed
auth required pam_stack.so service=system-authauth required pam_shells.so

3 SECURE INITIAL SYSTEM CONFIGURATION 31
account required pam_stack.so service=system-authaccount required pam_laus.so detach
password required pam_deny.so
session required pam_stack.so service=system-auth
pamdeny.sois used in thepassword stack because the FTP protocol has no provisions for changing passwords.
3.17 Configuring default account properties
The file /etc/login.defsdefines settings that will be used by user management tools such asuseradd(8). The file is notused during the authentication process itself.
The password aging settings defined in this file are used when creating users and when changing passwords, and storedin the user’s/etc/shadowentry. Note that only the/etc/shadowentries are considered during authentication, so changesin /etc/login.defswill not retroactively change the settings for existing users.
ThePASSMIN LEN setting has no effect in the evaluated configuration, the relevant settings are instead configuredusing themin= parameter topampasswdqc.soin the/etc/pam.d/system-authfile.
# Directory where mailboxes reside, _or_ name of file, relative to the# home directory. If you _do_ define both, MAIL_DIR takes precedence.# QMAIL_DIR is for Qmail## The setting is used only when creating or deleting users, and has# no effect on the mail delivery system. MAY be changed as required.##QMAIL_DIR Maildir#MAIL_FILE .mailMAIL_DIR /var/spool/mail
# Password aging controls:## PASS_MAX_DAYS Maximum number of days a password may be used.# PASS_MIN_DAYS Minimum number of days allowed between password changes.# PASS_MIN_LEN Minimum acceptable password length.# PASS_WARN_AGE Number of days warning given before a password expires.#PASS_MAX_DAYS 60 # MAY be changed, must be <= 60PASS_MIN_DAYS 1 # MAY be changed, 0 < PASS_MIN_DAYS < PASS_MAX_DAYSPASS_WARN_AGE 7 # MAY be changedPASS_MIN_LEN 5 # no effect in the evaluated configuration
## Min/max values for automatic uid selection in useradd## MAY be changed, 100 < UID_MIN < UID_MAX < 65535#UID_MIN 500UID_MAX 60000

3 SECURE INITIAL SYSTEM CONFIGURATION 32
## Min/max values for automatic gid selection in groupadd## MAY be changed, 100 < GID_MIN < GID_MAX < 65535#GID_MIN 500GID_MAX 60000
## If defined, this command is run when removing a user.# It should remove any at/cron/print jobs etc. owned by# the user to be removed (passed as the first argument).## MAY be activated as described in the "Managing user accounts"# section of the ECG.##USERDEL_CMD /usr/sbin/userdel_local
## If useradd should create home directories for users by default# On RH systems, we do. This option is ORed with the -m flag on# useradd command line.## MAY be changed.#CREATE_HOME yes
3.18 Configuring the boot loader
You MUST set up the server in a secure location where it is protected from unauthorized access. Even though thatis sufficient to protect the boot process, it is RECOMMENDED to configure the following additional protectionmechanisms:
• Ensure that the installed system boots exclusively from the disk partition containing RHEL, and not from floppydisks, USB drives, CD-ROMs, network adapters, or other devices.
• Ensure that this setting cannot be modified, for example by using a BootProm/BIOS password to protect accessto the configuration.
3.18.1 GRUB boot loader configuration
The GRUB boot loader is used on the xSeries and eServer 325 (Opteron) platforms. It is highly configurable, andpermits flexible modifications at boot time through a special-purpose command line interface. Please refer to thegrub(8) man page or runinfo grub for more information.
• Use thepassword command in/boot/grub/menu.lstto prevent unauthorized use of the boot loader interface.Using md5 encoded passwords is RECOMMENDED, run the commandgrub-md5-cryptto generate the encodedversion of a password.
• Protect all menu entries other than the default RHEL boot with thelock option, so that the boot loaderwill prompt for a password when the user attempts to boot from other media (such as a floppy) or sets othernon-default options for the boot process. To implement this, add a line containing just the keywordlock afterthetitle entry in the/boot/grub/menu.lstfile.

3 SECURE INITIAL SYSTEM CONFIGURATION 33
• Remove group and world read permissions from the grub configuration file if it contains a password by runningthe following command:
chmod 600 /boot/grub/menu.lst
All changes to the configuration take effect automatically on the next boot, there is no need to re-run an activationprogram.
The following example of the/boot/grub/menu.lstconfiguration file shows RECOMMENDED settings:
default=0timeout=10splashimage=(hd0,0)/boot/grub/splash.xpm.gzpassword --md5 $1$O471l/$H/JW2MYeugX6Y1h3v.1Iz0title Red Hat Enterprise Linux AS (2.4.21-15.EL)
lockroot (hd0,0)kernel /boot/vmlinuz-2.4.21-15.EL ro root=LABEL=/initrd /boot/initrd-2.4.21-15.EL.img
Note that the configuration shown here might not be exactly the configuration used on the installed system, dependingon the kernel options needed for the hardware.
3.18.2 Yaboot boot loader configuration
Yaboot is used on the pSeries machines, it is an OpenFirmware-based boot loader, and can be reconfigured at boottime from a specialized command line.
Yaboot and GRUB are very similar, both support MD5-encrypted passwords specified in the configuration file.
You need to re-run theybin(8) tool when you have modified the configuration file, this is however not necessary if youreplace a kernel and keep all path names unchanged.
Please refer to theyaboot.conf(5) andybin(8) manual pages and the yaboot HOWTO for more information:
http://penguinppc.org/projects/yaboot/doc/yaboot-howto.shtml
3.18.3 ZIPL boot loader configuration
The ZIPL boot loader is used on the zSeries mainframe when the system is set up using the VM virtualization layer.In this context, ”booting” refers to the initial program load (IPL) done from the CP command prompt, which affectsonly a single specific Linux instance (a.k.a. ”partition”, which refers to the running system and not the disk partitionin this context).
Configuration of the VM system is beyond the scope of this document. You MUST ensure that the configurationsettings and virtual devices used are only accessible to the authorized administrators. Do NOT use unencrypted 3270sessions for console access on insecure networks.
ZIPL writes a boot record on the virtual disk (DASD) used by this Linux instance, this boot record then proceeds to loadand run the Linux kernel itself. Thezipl command must be re-run after any kernel or boot argument modifications.Please refer to thezipl(8) man page for more information.
The following example shows a typical/etc/zipl.conffile:

4 SYSTEM OPERATION 34
[defaultboot]default=ipl
[ipl]target=/boot/ziplimage=/boot/kernel/imageramdisk=/boot/initrdparameters="dasd=0200 root=/dev/dasda1"
3.18.4 iSeries kernel slots
Similar to zSeries, the iSeries hosts use an initial program load (IPL) system to load and initialize a virtual Linuxinstance. There is no boot loader program on the Linux side, the host platform’s boot loader is configured throughdevice drivers accessed via virtual files in the/proc/ file system.
The system supports multiple kernel slots. Usually, slot A contains the production kernel, and slot B is reserved forexperimental kernels. The default boot image is selected via the/proc/iSeries/mf/sidevirtual file.
The kernel slot may contain either just a plain kernel (file name ”vmlinux” or similar), or a combined kernel plus initialroot disk (file name ”vmlinitrd” or similar). Use the combined kernel+initrd if available to ensure that all necessarymodules will be available for booting.
There are usually several different kernels and/or kernel+initrd files in/boot/, be careful to use the right file based onthe version number information contained in the file name.
Here is a sample session to copy an image to kernel slot B, and activate it:
dd if=/boot/vmlinitrd of=/proc/iSeries/mf/B/vmlinux bs=4kcat /proc/cmdline > /proc/iSeries/mf/B/cmdlineecho "B" > /proc/iSeries/mf/side
For more information, please refer to:
http://www-1.ibm.com/servers/eserver/iseries/linux/tech_faq.html
3.19 Reboot and initial network connection
After all the changes described in this chapter have been done, you MUST reboot the system to ensure that all unwantedtasks are stopped, and that the running kernel, modules and applications all correspond to the evaluated configuration.
Please make sure that the boot loader is configured correctly for your platform. On zSeries, remember to run thezipl(8)tool to write the boot record.
The system will then match the evaluated configuration. The server MAY then be connected to a secure network asdescribed above.
4 System operation
To ensure that the systems remains in a secure state, special care MUST be taken during system operation.
4 SYSTEM OPERATION 35
4.1 System startup, shutdown and crash recovery
Use theshutdown(8), halt(8) or reboot(8) programs as needed to shut down or reboot the system.
When powered on (or on initial program load of the logical partition on a host system), the system will boot into theRHEL operating system. If necessary (for example after a crash), a filesystem check will be performed automatically.In rare cases manual intervention is necessary, please refer to thee2fsck(8) anddebugfs(8) documentation for detailsin this case.
In case a nonstandard boot process is needed (such as booting from floppy disk or CD-ROM to replace a defective harddrive), interaction with the boot loader and/or the host’s management system can be used to modify the boot procedurefor recovery.
For example, on xSeries you can use the following grub commands to launch a shell directly from the kernel, bypassingthe normal init/login mechanism:
# view the current grub configurationgrub> cat (hd0,1)/boot/grub/menu.lst
# manually enter the modified settingsgrub> kernel (hd0,1)/boot/vmlinuz root=/dev/sda1 init=/bin/shgrub> initrd (hd0,1)/boot/initrdgrub> boot
Please refer to the relevant documentation of the boot loader, as well as the RHEL administrator guide, for moreinformation.
4.2 Backup and restore
Whenever you make changes to security-critical files, you MAY need to be able to track the changes made and revertto previous versions, but this is not required for compliance with the evaluated configuration.
The star(1) archiver is RECOMMENDED for backups of complete directory contents, please refer to section§6.5”Data import / export” of this guide. Regular backups of the following files and directories (on removable media suchas tapes or CD-R, or on a separate host) are RECOMMENDED:
/etc//var/spool/cron//var/spool/at/
Depending on your site’s audit requirements, also include the contents of/var/log/ in the backup plan. In that case, theautomatic daily log file rotation needs to be disabled or synchronized with the backup mechanism, refer to sections§5.2 ”System logging and accounting” and§5.3 ”Configuring the audit subsystem” of this guide for more information.
You MUST protect the backup media from unauthorized access, because the copied data does not have the accesscontrol mechanisms of the original file system. Among other critical data, it contains the secret keys used by theSSHandstunnelservers, as well as the/etc/shadowpassword database. Store the backup media at least as securely as theserver itself.
A RECOMMENDED method to track changes is to use a version control system. RCS is easy to set up becauseit does not require setting up a central repository for the changes, and you can use shell scripting to automate thechange tracking. RCS is not included in the evaluated configuration, seercsintro(1) in the rcs RPM package for moreinformation. Alternatively, you can create manually create backup copies of the files and/or copy them to other serversusingscp(1).

4 SYSTEM OPERATION 36
4.3 Gaining superuser access
System administration tasks require superuser privileges. Since directly logging on over the network as user ’root’ isdisabled, you MUST first authenticate using an unprivileged user ID, and then use thesu command to switch identities.Note that you MUST NOT use the ’root’ rights for anything other than those administrative tasks that require theseprivileges, all other tasks MUST be done using your normal (non-root) user ID.
You MUST use exactly the followingsu(1) command line to gain superuser access:
/bin/su -
This ensures that the correct binary is executed irrespective of PATH settings or shell aliases, and that the root shellstarts with a clean environment not contaminated with the starting user’s settings. This is necessary because the.profileshell configuration and other similar files are writable for the unprivileged ID, which would allow an attacker to easilyelevate privileges to root if able to subvert these settings.
Administrators MUST NOT add any directory to the root user’s PATH that are writable for anyone other than ’root’,and similarly MUST NOT use or execute any scripts, binaries or configuration files that are writable for anyone otherthan ’root’, or where any containing directory is writable for a user other than ’root’.
4.4 Installation of additional software
Additional software packages MAY be installed as needed, provided that they do not conflict with the securityrequirements.
Any additional software added is not intended to be used with superuser privileges. The administrator MUST use onlythose programs that are part of the original evaluated configuration for administration tasks, except if the administratorhas independently ensured that use of the additional software is not a security risk.
Administrators MAY add scripts to automate tasks as long as those only depend on and run programs that are part ofthe evaluated configuration.
The security requirements for additional software are:
• Kernel modules other than those provided as part of the evaluated configuration MUST NOT be installed orloaded. You MUST NOT load thetux kernel module (the in-kernel web server is not supported). You MUSTNOT add support for non-ELF binary formats or foreign binary format emulation that circumvents system callauditing. You MUST NOT activate knfsd or export NFS file systems.
• Device special nodes MUST NOT be added to the system.
• SUID root or SGID root programs MUST NOT be added to the system. Programs which use the SUID or SGIDbits to run with identities other than ’root’ MAY be added.
• The content, permissions, and ownership of all existing filesystem objects (including directories and devicenodes) that are part of the evaluated configuration MUST NOT be modified. Files and directories MAY beadded to existing directories provided that this does not violate any other requirement.
• Programs automatically launched with ’root’ privileges MUST NOT be added to the system. Exception:processes thatimmediatelyand permanentlyswitch to a non privileged identity on launch are permitted,for example by usingsu USERID -c LAUNCH COMMANDin the startup file, or alternatively by using thesetgroups(2), setgid(2) andsetuid(2) system calls in a binary. (seteuid(2) etc. are insufficient.)
Automatic launch mechanisms are:
– Entries in/etc/inittab
– Executable files or links in/etc/rc.d/init.d/and its subdirectories

4 SYSTEM OPERATION 37
– Entries in/etc/xinetd.conf
– Scheduled jobs usingcron (including entries in/etc/cron*files) orat
Examples of programs that usually do not conflict with these requirements and MAY be installed are compilers,interpreters, network services running with non-root rights, and similar programs. The requirements listed aboveMUST be verified in each specific case.
4.5 Scheduling processes using cron and at
The cron(8) program schedules programs for execution at regular intervals. Entries can be modified using thecrontab(1) program - the file format is documented in thecrontab(5) manual page.
You MUST follow the rules specified for installation of additional programs for all entries that will be executed by the’root’ user. Use non-root crontab entries in all cases where ’root’ privileges are not absolutely necessary.
Theat(1) andbatch(1) programs execute a command line at a specific single point of time. The same rules apply asfor jobs scheduled viacron(8). Useatq(1) andatrm(1) to manage the scheduled jobs.
Errors in the non interactive jobs executed bycron and at are reported in the system log files in/var/log/, andadditionally via e-mail to the user who scheduled it.
Permission for users to schedule jobs withcron andat is controlled through the followingallow anddenyfiles:
/etc/at.allow/etc/at.deny/etc/cron.allow/etc/cron.deny
Theallow file has precedence if it exists, then only those users whose usernames are listed in it are permitted to use theservice. If it does not exist, thedenyfile is used instead and all users who arenot listed in that file can use the service.Note that the contents of these files are only relevant when the scheduling commands are executed, and changes haveno effect on already scheduled commands.
In the RHEL distribution, theallow files do not exist, anddenyfiles are used to prevent system-internal IDs and/orguest users from using these services. By default, the evaluated configuration permits everybody to usecronandat.
It is RECOMMENDED to restrict the use ofcron andat to human users and disallow system accounts from usingthese mechanisms. For example, the following commands add all system accounts other than root to thedenyfiles:
awk -F: ’{if ($3>0 && $3<100) print $1}’ /etc/passwd >/etc/at.denychmod 600 /etc/at.denycp /etc/at.deny /etc/cron.deny
Administrators MAY schedule jobs that will be run with the privileges of a specified user by editing the file/etc/crontabwith an appropriate username in the sixth field. Entries in/etc/crontabare not restricted by the contents of theallowanddenyfiles.
You MAY create/etc/at.allowand/or/etc/cron.allowfiles to explicitly list users who are permitted to use these services.If you do create these files, they MUST be owned by the user ’root’ and have file permissions 0600 (no access for groupor others).

4 SYSTEM OPERATION 38
4.6 Mounting filesystems
If any filesystems need to be mounted in addition to those set up at installation time, appropriate mount options MUSTbe used to ensure that mounting the filesystem does not introduce capabilities that could violate the security policy.
A new file system can be integrated as part of the evaluated configuration, for example by installing an additional harddisk, under the following conditions:
• The device is protected against theft or manipulation in the same way as the server itself, for example by beinginstalled inside the server.
• One or more new, empty, file systems in EXT3 format are created on it.
• The file systems are mounted using theacl option, for example with the following setting in the/etc/fstabfile:
/dev/sdc1 /home2 ext3 acl 1 2
Existing files and directories MAY then be moved onto the new file systems.
• If a device containing a file system is ever removed from the system, the device MUST be stored within thesecure server facility, or alternatively MUST be destroyed in a way that the data on it is reliably erased.
Alternatively, media MAY be accessed without integrating them into the evaluated configuration, for exampleCD-ROMs.
The following mount options MUST be used if the filesystems contain data that is not part of the evaluatedconfiguration:
ro,nodev,nosuid
Adding thenoexecmount option to avoid accidental execution of files or scripts on additional mounted filesystems isRECOMMENDED.
Note that these settings do not completely protect against malicious code and data, you MUST also verify that thedata originates from a trustworthy source and does not compromise the server’s security. Specifically, be aware of thefollowing issues:
• Even unprivileged programs and scripts can contain malicious code that uses the calling user’s rights inunintended ways, such as corrupting the user’s data, introducing trojan horses in the system, attacking othermachines on the network, revealing confidential documents, or sending unsolicited commercial e-mail (”spam”).
• Data on the additional filesystem MUST have appropriate access rights to prevent disclosure to or modificationby unauthorized users. Be aware that imported data may have been created using user names and permissionsthat do not match your system’s security policies.
• You MUST NOT write data on removable file systems such as floppy disks, since it cannot be adequatelyprotected by the system’s access control mechanisms after being removed from the system. Please refer tosection§4.2 ”Backup and restore” of this guide for more information regarding non-filesystem-based backup.
Each new file system MUST be mounted on an empty directory that is not used for any other purpose. It isRECOMMENDED using subdirectories of/mnt for temporary disk and removeable storage media mounts.
For example:
# mount /dev/cdrom /mnt/cdrom -t iso9660 -o ro,nodev,nosuid,noexec

4 SYSTEM OPERATION 39
You MAY also add an equivalent configuration to/etc/fstab, for example:
/dev/cdrom /mnt/cdrom iso9660 ro,noauto,nodev,nosuid,noexec 0 0
You MUST NOT include theuserflag, ordinary users are not permitted to mount filesystems. This is also enforced bythe deletion of the SUID bit on themountcommand.
4.7 Managing user accounts
Use theuseradd(8) command to create new user accounts, then use thepasswd(1) command to assign an initialpassword for the user. Alteratively, if the user is present when the account is created, permit them to choose their ownpassword. Refer to the manual pages foruseradd(8) andpasswd(1) for more information.
If you assign an initial password for a new user, you MUST transfer this initial password in a secure way to the user,ensuring that no third party gets the information. For example, you can tell the password to a user personally knownto you. If this is not possible, you MAY send the password in written form in a sealed letter. This applies also whenyou set a new password for a user in case the user has forgotten the password or it has expired. You need to advisethe user that he MUST change this initial password when he first logs into the system and select his own password inaccordance with the rules defined in section§6.3 ”Password policy” of this guide.
You MUST NOT use the-p option touseradd(8), specifying a password in that way would bypass the passwordquality checking mechanism.
The temporary password set by the administrator MUST be changed by the user as soon as possible. Use thechage(8)command with the-d option to set the last password change date to a value where the user will be reminded to changethe password. The RECOMMENDED value is based on the settings in/etc/login.defsand is equivalent to today’s dateplus PASSWARN AGE minus PASSMAX DAYS.
Example:
useradd -m -c "John Doe" jdoepasswd jdoechage -d $(date +%F -d "53 days ago") jdoe
The -m option touseradd(8) creates a home directory for the user based on a copy of the contents of the/etc/skel/directory. Note that you MAY modify some default configuration settings for users, such as the defaultumask(2)setting or time zone, by editing the corresponding global configuration files:
/etc/profile/etc/bashrc/etc/csh.cshrc
If necessary, you MAY reset the user’s password to a known value usingpasswd USER, and entering the newpassword. You cannot recover the previously used password, since the hash function used is not reversible.
You MAY use theusermod(8) command to change a user’s properties. For example, if you want to add the user ’jdoe’to thewheelgroup, you could use the following:
# List the groups the user is currently a member of:groups jdoe
# Add the additional groupusermod -G $(su jdoe -c groups | sed ’s/ /,/g’),wheel jdoe

4 SYSTEM OPERATION 40
Users MAY be locked out (disabled) usingpasswd -l USER, and re-enabled usingpasswd -u USER.
The pamtally.so PAM module enforces automatic lockout after excessive failed authentication attempts,as described in section§3.16 ”Required Pluggable Authentication Module (PAM) configuration” of thisguide. Use the programpamtally to view and reset the counter if necessary, as documented in the file/usr/share/doc/pam-*/txts/README.pamtally. Note that thepamtally mechanism does notprevent passwordguessing attacks, it only preventsuseof the account after such an attack has been detected. Therefore, you MUSTassign a new password for the user before reactivating an account. For example:
# view the current counter valuepam_tally --user jdoe
# set new password, and reset the counterpasswd jdoepam_tally --user jdoe --reset
The chage(1) utility MAY be used to view and modify the expiry settings for user accounts. Unprivileged users areable to view but not modify their own expiry settings.
Theuserdel(8) utility removes the user account from the system, but does not remove files outside the home directory(and the mail spool file), or kill processes belonging to this user. Usekill (or reboot the system) andfind to do somanually if necessary, for example:
# Which user to delete?U=jdoe
# Lock user account, but don’t remove it yetpasswd -l $U
# Kill all user processes, repeat if needed (or reboot)kill -9 ‘ps -la --User $U|awk ’{print $4}’‘
# Recursively remove all files and directories belonging to user# (Careful - this may delete files belonging to others if they# are stored in a directory owned by this user.)find / -depth \( ! -fstype ext3 -prune -false \) \
-o -user $U -exec rm -rf {} \;
# Remove cron and at jobscrontab -u $U -rfind /var/spool/at -user $U -exec rm {} \;
# Now delete the accountuserdel $U
If you need to create additional groups or modify existing groups, use thegroupadd(8), groupmod(8) andgroupdel(8)commands.
Group passwords are NOT supported in the evaluated configuration, and have been disabled by removing the SUIDbit from thenewgrp(8) program. You MUST NOT re-enable this feature and MUST NOT usepasswd(1) with the-gswitch or thegpasswd(1) command to set group passwords.

4 SYSTEM OPERATION 41
4.8 Using serial terminals
You MAY attach serial terminals to the system. They are activated by adding an entry in the file/etc/inittabfor eachserial terminal that causesinit(8) to launch anagetty(8) process to monitor the serial line.agettyrunslogin(1) to handleuser authentication and set up the user’s session.
If you use serial terminals and require the CAPP-compliant fail-safe audit mode, you MUST ensure that the file/etc/pam.d/loginis configured torequire the pamlaus.somodule in thesession stack. Please refer to section§3.16.2 ”/etc/pam.d/login” of this guide for more information about the needed PAM configuration.
For example, adding the following line to/etc/inittab activates a VT102-compatible serial terminal on serial port/dev/ttyS1, communicating at 19200 bits/s:
S1:3:respawn:/sbin/agetty 19200 ttyS1 vt102
The first field MUST be an unique identifier for the entry (typically the last characters of the device name). Pleaserefer to theagetty(8) andinittab(5) man pages for further information about the format of entries.
You MUST reinitialize theinit daemon after any changes to/etc/inittabby running the following command:
init q
4.9 SYSV shared memory and IPC objects
The system supports SYSV-compatible shared memory, IPC objects, and message queues. If programs fail to releaseresources they have used (for example, due to a crash), the administrator MAY use theipcs(8) utility to list informationabout them, andipcrm(8) to force deletion of unneeded objects. Note that these resources are also released when thesystem is rebooted.
For additional information, please refer to themsgctl(2), msgget(2), msgrcv(2), msgsnd(2), semctl(2), semget(2),semop(2), shmat(2), shmctl(2), shmdt(2), shmget(2) andftok(3) manual pages.
4.10 Configuring secure network connections withstunnel
4.10.1 Introduction
Thestunnelprogram is a flexible and secure solution for setting up encrypted network connections, enabling the use ofstrong encryption even for applications that are not able to use encryption natively.stunneluses the OpenSSL libraryfor its encryption functions, and the correspondingopenssl(1) command line tool for key management.
Stunnel has three main operating modes:
• Accept incoming SSL-encrypted TCP connections, and run a specific program to handle the request.
This is similar to howxinetd launches programs, and any program compatible withxinetdcan also be used forthis purpose. It must read and write the communication data on thestdinandstdoutfile descriptors and stay inthe foreground.stunnelalso supports switching user and group IDs before launching the program.
• Open a SSL connection to a remote SSL-capable TCP server, and copy data to and fromstdinandstdout.
• Bind a TCP port to accept incoming unencrypted connections, and forward data using SSL to a prespecifiedremote server.

4 SYSTEM OPERATION 42
The following diagram shows a sample usage scenario:
+-----------+ +-----------+| | | || | encrypted data stream | || stunnel=+==================================+=stunnel || |\ //|| ||-----------| \ local / |-----------||1024 | \ local plain- / | 1024|| | \ plain- text \ | || | / text data \ | || | / data stream \ | || ||/ stream \_=Client || Server=+*- | || | | || | | |+-----------+ +-----------+TCP ports TCP ports
In this scenario, neither the client nor the server have administrator privileges, they are running as normal userprocesses. Also, the client and server do not support encryption directly.
stunnelmakes a secure communication channel available for the client and server. On the client,stunnelis acceptingconnections on TCP port 82. The client connects to this port on the local machine using normal unencrypted TCP,stunnelaccepts the connection, and opens a new TCP connection to thestunnelserver running on the remote machine.Thestunnelinstances use cryptographic certificates to ensure that the data stream has not been intercepted or tamperedwith, and then the remotestunnelopens a third TCP connection to the server, which is again a local unencryptedconnection.
Any data sent by either the client or server is accepted by the correspondingstunnelinstance, encrypted, sent to theotherstunnel, decrypted and finally forwarded to the receiving program. This way, no modifications are required tothe client and server.
To set up a secure connection compliant with the evaluated configuration, you MUST start thestunnelserver(s) withadministrator rights, and you MUST use a TCP port in the administrator-reserved range 1-1023 to accept incomingconnections. A corresponding client which connects to the server MAY be started by any user, not just administrators.
stunnelMAY also be used by non-administratorive users to receive encrypted connections on ports in the range1024-65536. This is permitted, but it is outside of the scope of the evaluated configuration and not considered tobe a trusted connection.
Any network servers and clients other than the trusted programs described in this guide (stunnel, sshd, vsftpd, postfixand cupsd) MUST be run using non-administrator normal user identities. Programs run fromstunnelMUST beswitched to a non-root user ID by using thesetuidand setgidparameters in the/etc/stunnel/*.confconfigurationfiles.
It is RECOMMENDED configuring any such servers to accept connections only from machine-local clients, eitherby binding only thelocalhostIP address 127.0.0.1, or by software filtering inside the application. This ensures thatthe only encrypted connections are possible over the network. Details on how to do this depend on the software beingused and are beyond the scope of this guide.
Please refer to thestunnel(8) andopenssl(1) man pages for more information.
4.10.2 Creating an externally signed certificate
It is strongly RECOMMENDED that you have your server’s certificate signed by an established Certificate Authority(CA), which acts as a trusted third party to vouch for the certificate’s authenticity for clients. Please refer to the

4 SYSTEM OPERATION 43
openssl(1) andreq(1) man pages for instructions on how to generate and use a certificate signing request.
Create the server’s private key and a certificate signing request (CSR) with the following commands:
touch /etc/stunnel/stunnel.pem
chmod 400 /etc/stunnel/stunnel.pem
openssl req -newkey rsa:1024 -nodes \-keyout /etc/stunnel/stunnel.pem -out /etc/stunnel/stunnel.csr
You will be prompted for the information that will be contained in the certificate. Most important is the ”CommonName”, because the connecting clients will check if the hostname in the certificate matches the server they were tryingto connect to. If they do not match, the connection will be refused, to prevent a ’man-in-the-middle’ attack.
Here is a sample interaction:
Generating a 1024 bit RSA private key..........++++++.......++++++writing new private key to ’/etc/stunnel/stunnel.pem’-----You are about to be asked to enter information that will be incorporatedinto your certificate request.What you are about to enter is what is called a Distinguished Name or a DN.There are quite a few fields but you can leave some blankFor some fields there will be a default value,If you enter ’.’, the field will be left blank.-----Country Name (2 letter code) [PL]:USState or Province Name (full name) [Some-State]:TXLocality Name (eg, city) []:AustinOrganization Name (eg, company) [Stunnel Developers Ltd]:Example Inc.Organizational Unit Name (eg, section) []:Common Name (FQDN of your server) []:www.example.comCommon Name (default) []:localhost
The file /etc/stunnel/stunnel.pemwill contain both the certificate (public key) and also the secret key needed by theserver. The secret key will be used by non-interactive server processes, and cannot be protected with a passphrase. YouMUST protect the secret key from being read by unauthorized users, to ensure that you are protected against someoneimpersonating your server.
Next, send the generated CSR file/etc/stunnel/stunnel.csr(not the private key) to the CA along with whateverauthenticating information they require to verify your identity and your server’s identity. The CA will then generatea signed certificate from the CSR, using a process analogous toopenssl req -x509 -in stunnel.csr-key CA-key.pem -out signed-cert.pem .
When you receive the signed certificate back from the CA, append it to the file/etc/stunnel/stunnel.pemcontaining theprivate key using the following command:
echo >> /etc/stunnel/stunnel.pemcat signed-cert.pem >> /etc/stunnel/stunnel.pem
Make sure that the resulting file contains no extra whitespace or other text in addition to the key and certificate, withone blank line separating the private key and certificate:
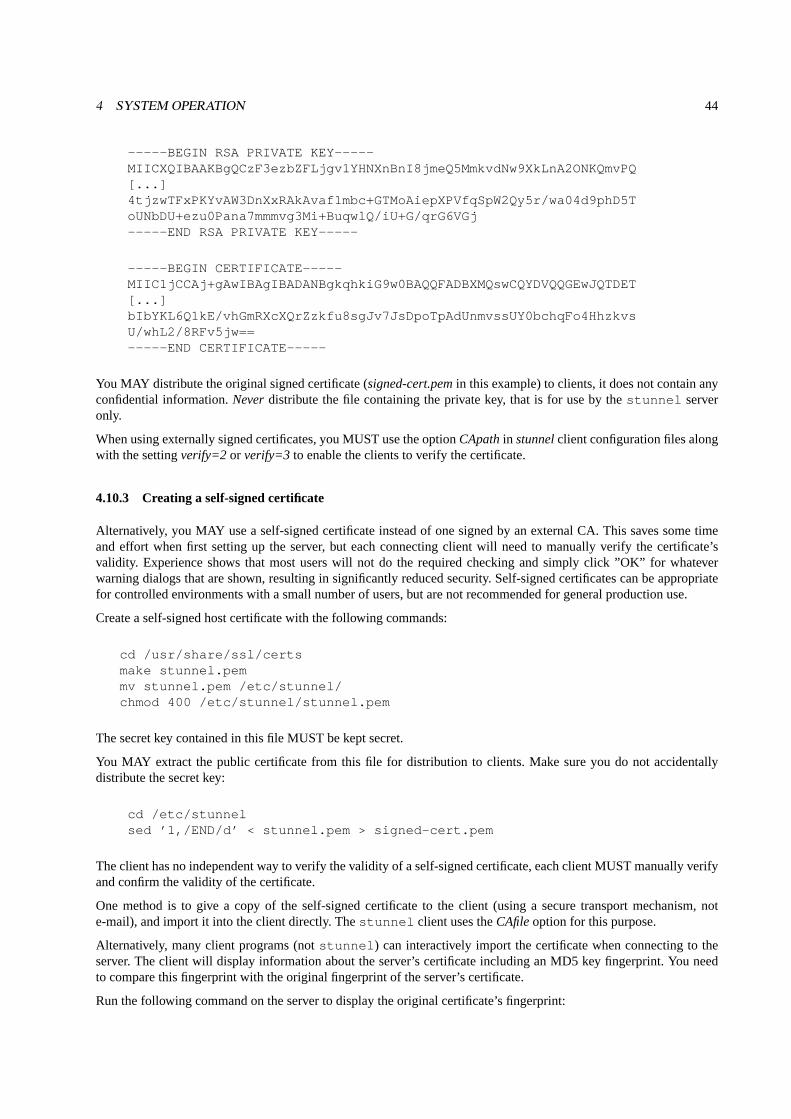
4 SYSTEM OPERATION 44
-----BEGIN RSA PRIVATE KEY-----MIICXQIBAAKBgQCzF3ezbZFLjgv1YHNXnBnI8jmeQ5MmkvdNw9XkLnA2ONKQmvPQ[...]4tjzwTFxPKYvAW3DnXxRAkAvaf1mbc+GTMoAiepXPVfqSpW2Qy5r/wa04d9phD5ToUNbDU+ezu0Pana7mmmvg3Mi+BuqwlQ/iU+G/qrG6VGj-----END RSA PRIVATE KEY-----
-----BEGIN CERTIFICATE-----MIIC1jCCAj+gAwIBAgIBADANBgkqhkiG9w0BAQQFADBXMQswCQYDVQQGEwJQTDET[...]bIbYKL6Q1kE/vhGmRXcXQrZzkfu8sgJv7JsDpoTpAdUnmvssUY0bchqFo4HhzkvsU/whL2/8RFv5jw==-----END CERTIFICATE-----
You MAY distribute the original signed certificate (signed-cert.pemin this example) to clients, it does not contain anyconfidential information.Neverdistribute the file containing the private key, that is for use by thestunnel serveronly.
When using externally signed certificates, you MUST use the optionCApathin stunnelclient configuration files alongwith the settingverify=2 or verify=3 to enable the clients to verify the certificate.
4.10.3 Creating a self-signed certificate
Alternatively, you MAY use a self-signed certificate instead of one signed by an external CA. This saves some timeand effort when first setting up the server, but each connecting client will need to manually verify the certificate’svalidity. Experience shows that most users will not do the required checking and simply click ”OK” for whateverwarning dialogs that are shown, resulting in significantly reduced security. Self-signed certificates can be appropriatefor controlled environments with a small number of users, but are not recommended for general production use.
Create a self-signed host certificate with the following commands:
cd /usr/share/ssl/certsmake stunnel.pemmv stunnel.pem /etc/stunnel/chmod 400 /etc/stunnel/stunnel.pem
The secret key contained in this file MUST be kept secret.
You MAY extract the public certificate from this file for distribution to clients. Make sure you do not accidentallydistribute the secret key:
cd /etc/stunnelsed ’1,/END/d’ < stunnel.pem > signed-cert.pem
The client has no independent way to verify the validity of a self-signed certificate, each client MUST manually verifyand confirm the validity of the certificate.
One method is to give a copy of the self-signed certificate to the client (using a secure transport mechanism, note-mail), and import it into the client directly. Thestunnel client uses theCAfileoption for this purpose.
Alternatively, many client programs (notstunnel ) can interactively import the certificate when connecting to theserver. The client will display information about the server’s certificate including an MD5 key fingerprint. You needto compare this fingerprint with the original fingerprint of the server’s certificate.
Run the following command on the server to display the original certificate’s fingerprint:

4 SYSTEM OPERATION 45
openssl x509 -fingerprint -in /etc/stunnel/stunnel.pem
Most clients will store the certificate for future reference, and will not need to do this verification step on furtherinvocations.
4.10.4 Activating the tunnel
In the evaluated configuration, you MUST use the RC4-SHA cipher suite as defined in the SSL v3 protocol, alsoknown as SSLRSA WITH RC4 128 SHA (SC1.8).
You MUST specify the cipher list in allstunnelclient and server configuration files:
ciphers = RC4-SHA
For a service or tunnel that will only be used temporarily, simply launch thestunnel program from the commandline and specify an appropriate configuration file. The tunnel will be available for multiple clients, but will not bestarted automatically after a reboot. To shut down the tunnel, search for the command line in theps ax processlisting, and use thekill (1) command with the PID shown for thestunnelprocess.
The RECOMMENDED method is to use two separate configuration files, one for server definitions (incomingconnections use SSL), and one for client definitions (outgoing connections use SSL). More complex configurations willrequire additional configuration files containing individual service-specific settings. You MUST use the REQUIREDsettings in allstunnelconfiguration files.
Use the following content for the file/etc/stunnel/stunnel-server.conf:
### /etc/stunnel/stunnel-server.conf## The following settings are REQUIRED for CAPP compliance when used# as a server, see ECG. File names MAY be changed as needed.cert = /etc/stunnel/stunnel.pemciphers = RC4-SHA## User and group ID MUST NOT be "root", but MAY be changed as needed.setuid = nobodysetgid = nobody## The following settings are RECOMMENDEDdebug = 6output = /var/log/stunnel-server.logpid =foreground = yes## Individual service definitions follow
Use the following content for the file/etc/stunnel/stunnel-client.conf:
### /etc/stunnel/stunnel-client.conf## The following settings are REQUIRED for CAPP compliance when used# as a client, see ECG. File names MAY be changed as needed. You# MAY use CApath instead of CAfile for externally signed certificates.CAfile = /etc/stunnel/signed-cert.pem

4 SYSTEM OPERATION 46
ciphers = RC4-SHAclient = yesverify = 2## User and group ID MUST NOT be "root", but MAY be changed as needed.setuid = nobodysetgid = nobody## The following settings are RECOMMENDEDdebug = 6output = /var/log/stunnel-client.logpid =foreground = yes## Individual service definitions follow
The RECOMMENDED launch method forstunnel(8) is via theinit(8) process. This requires adding new entries to/etc/inittab, the tunnels will be re-launched automatically whenever they are terminated, as well as after a reboot. Thefollowing are the RECOMMENDED/etc/inittabentries:
ts:3:respawn:/usr/sbin/stunnel /etc/stunnel/stunnel-server.conftc:3:respawn:/usr/sbin/stunnel /etc/stunnel/stunnel-client.conf
Make sure you use the optionforeground = yes in the configuration file when running from init (otherwiseinit will misinterpret the backgrounded server as having died and will try to restart it immediately, causing a loop),and use theoutput option to redirect the output to a log file.
4.10.5 Using the tunnel
If the client program supports SSL encryption, it will be able to communicate with thestunnelservice directly. Youwill need to verify and accept the server’s certificate if the client cannot recognize it as valid according to its knowncertification authorities.
If the client program does not support SSL directly, you can usestunnel as a client, or indirectly by setting up aproxy that allows the client to connect to an unencrypted local TCP port.
WARNING: The stunnel client doesnot verify the server’s certificate by default. You MUST specify eitherverify = 2 or verify = 3 on the client command line to switch on certificate verification.
You MAY also activate client certificate verification in the server’s configuration file, so that the server can verify theclient’s identity as well.
As described in the previous section, you MUST use the optionciphers = RC4-SHA in the configuration file toensure that the cipher selection supported in the evaluated configuration will be used.
4.10.6 Example 1: Secure SMTP delivery
Normal SMTP e-mail delivery is not encrypted, but most mail clients support the enhanced SMTPS protocol that usesSSL encryption. The protocol itself is unchanged other than being encrypted.
stunnel can easily be used as a proxy to receive SMTPS connections on the standard port expected by clients(465/tcp), and then forward the data to the mail server listening on the SMTP port (25/tcp). The mail serverconfiguration does not need to be modified to support encryption of incoming mail.
To implement SSL support for incoming mail, add the following service definition to the/etc/stunnel/stunnel-server.confconfiguration:

4 SYSTEM OPERATION 47
[inbound_mail]accept = 465connect = 127.0.0.1:25
4.10.7 Example 2: Simple web server
The following shell script acts as a simple web server, reading requests from standard input and writing HTTP/HTMLto standard output:
cat > /usr/local/sbin/webserver_test <<-__EOF__#!/bin/sh# Simple web server, can be run via stunnel or xinetd## read and discard client datadd bs=65536 count=1 >/dev/null 2>&1## Send HTTP headerecho -e "HTTP/1.0 200\r"echo -e "Content-type: text/html\r"echo -e "\r"## Send HTML outputecho "<html>"echo "<h1>Test Page</h1>"dateecho "<h2>Memory usage</h2>"echo "<pre>"freeecho "</pre>"echo "</html>"__EOF__
chmod +x /usr/local/sbin/webserver_test
Add the following entry to the/etc/stunnel/stunnel-server.confconfiguration to make this service available using theencrypted HTTPS protocol:
[webserver_test]accept = 443exec = /usr/local/sbin/webserver_testTIMEOUTclose = 0
Then, use a SSL-capable web browser to connect to port 443:
elinks https://localhost/
4.10.8 Example 1: system status view
This example shows how to combinestunnelclient and server definitions to implement an encrypted tunnel forapplications that do not themselves support encryption.
First, on the server machine, set up astunnelserver definition that accepts SSL connections on TCP port 444, andreports memory usage statistics for the server to connecting clients. Add the following service definition to the/etc/stunnel/stunnel-server.confconfiguration:

4 SYSTEM OPERATION 48
[free]accept = 444exec = /usr/bin/freeexecargs = free
Then, on the client machine, add the following entry to the/etc/stunnel/stunnel-client.confconfiguration, using theserver’s IP address instead of ”127.0.0.1”:
[free]accept = 81connect = 127.0.0.1:444
On the client machine, connect to the localstunnelproxy by running the following command as a normal user:
telnet localhost 81
This will open an unencrypted TCP connection to the client’s local port 81, thenstunnelbuilds an encrypted tunnel tothe server’s port 444 and transfers the decrypted data (in this case, the ”free” output) back to the client. All unencryptedconnections are machine local, and the data transferred over the network is encrypted.
4.11 The Abstract Machine Testing Utility (AMTU)
The security of the operating system depends on correctly functioning hardware. For example, the memory subsystemuses hardware support to ensure that the memory spaces used by different processes are protected from each other.
The Abstract Machine Testing Utility (AMTU) is distributed as an RPM, and was installed previously as described insection§3.5 ”Add and remove packages” of this guide.
To run all supported tests, simply execute theamtu program:
amtu
A successful run is indicated by the following output:
Executing Memory Test...Memory Test SUCCESS!Executing Memory Separation Test...Memory Separation Test SUCCESS!Executing Network I/O Tests...Network I/O Controller Test SUCCESS!Executing I/O Controller - Disk Test...I/O Controller - Disk Test SUCCESS!Executing Supervisor Mode Instructions Test...Privileged Instruction Test SUCCESS!
The program will return a nonzero exit code on failure, which MAY be used to automatically detect failures of thetested systems and take appropriate action.
Please refer to theamtu(8) man page for more details.
5 MONITORING, LOGGING & AUDIT 49
4.12 Setting the system time and date
You MUST verify periodically that the system clock is sufficiently accurate, otherwise log and audit files will containmisleading information. When starting the system, the time and date are copied from the computer’s hardware clockto the kernel’s software clock, and written back to the hardware clock on system shutdown.
All internal dates and times used by the kernel, such as file modification stamps, use universal time (UTC), and do notdepend on the current time zone settings. Userspace utilities usually adjust these values to the currently active timezone for display. Note that text log files will contain ASCII time and date representations in local time, often withoutexplicitly specifying the time zone.
Thedate(1) command displays the current time and date, and can be used by administrators to set the software clock,using the argumentmmddHHMMyyyyto specify the numeric month, day, hour, minute and year respectively. Forexample, the following command sets the clock to May 1st 2004, 1pm in the local time zone:
date 050113002004
The hwclock(8) can query and modify the hardware clock on supported platforms, but is not available in virtualenvironments such as z/VM or LPAR. The typical use is to copy the current value of the software clock to the hardwareclock. Note that the hardware clock MAY be running in either local time or universal time, as indicated by theUTCsetting in the/etc/sysconfig/clockfile. The following command sets the hardware clock to the current time using UTC:
hwclock -u -w
Use the commandtzselect(8) to change the default time zone for the entire system. Note that users MAY individuallyconfigure a different time zone by setting theTZ environment variable appropriately in their shell profile, such as the$HOME/.bashrcfile.
5 Monitoring, Logging & Audit
5.1 Reviewing the system configuration
It is RECOMMENDED that you review the system’s configuration at regular intervals to verify if it still agrees withthe evaluated configuration. This primarily concerns those processes that may run with ’root’ privileges.
The permissions of the device files/dev/*MUST NOT be modified.
In particular, review settings in the following files and directories to ensure that the contents and permissions have notbeen modified:
/etc/at.allow/etc/at.deny/etc/audit/*/etc/cron.allow/etc/cron.d/*/etc/cron.daily/*/etc/cron.deny/etc/cron.hourly/*/etc/cron.monthly/*/etc/cron.weekly/*/etc/crontab/etc/group/etc/gshadow

5 MONITORING, LOGGING & AUDIT 50
/etc/hosts/etc/inittab/etc/ld.so.conf/etc/login.defs/etc/modules.conf/etc/pam.d/*/etc/passwd/etc/rc.d/init.d/*/etc/securetty/etc/security/opasswd/etc/shadow/etc/ssh/ssh_config/etc/ssh/sshd_config/etc/stunnel/*/etc/sysconfig/*/etc/vsftpd.ftpusers/etc/vsftpd/vsftpd.conf/etc/xinetd.conf
/var/log/audit.d/*/var/log/faillog/var/log/lastlog/var/spool/at/*/var/spool/cron/*
Use the commandlastlog to detect unusual patterns of logins.
Also verify the output of the following commands (run as ’root’):
atqcrontab -lfind / \( -perm -4000 -o -perm -2000 \) -lsfind / \( -type f -o -type d -o -type b \) -perm -0002 -ls
find /bin /boot /etc /lib /sbin /usr \! -type l \( ! -uid 0 -o -perm +022 \)
5.2 System logging and accounting
System log messages are stored in the/var/log/ directory tree in plain text format, most are logged through thesyslogd(8) andklogd(8) programs, which MAY be configured via the/etc/syslog.conffile.
The logrotate(8) utility, launched from/etc/cron.daily/logrotate, starts a fresh log file every week or when theyreach a maximum size and automatically removes or archives old log files. You MAY change the configuration files/etc/logrotate.confand/etc/logrotate.d/*as required.
In addition to thesyslogmessages, various other log files and status files are generated in/var/logby other programs:
File Sourceaudit.d Directory for LAuS logsboot.msg Messages from system startuplastlog Last successful log in (see lastlog(8))vsftpd.log Transaction log of the VSFTP daemon
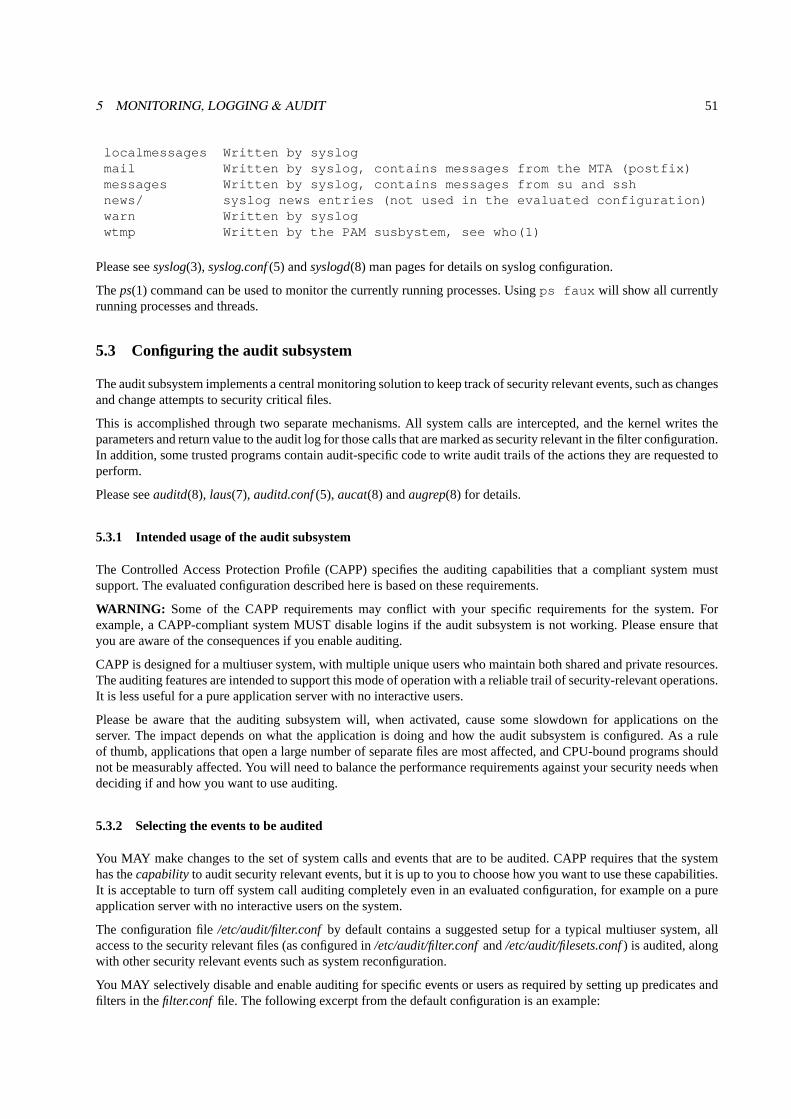
5 MONITORING, LOGGING & AUDIT 51
localmessages Written by syslogmail Written by syslog, contains messages from the MTA (postfix)messages Written by syslog, contains messages from su and sshnews/ syslog news entries (not used in the evaluated configuration)warn Written by syslogwtmp Written by the PAM susbystem, see who(1)
Please seesyslog(3), syslog.conf(5) andsyslogd(8) man pages for details on syslog configuration.
Theps(1) command can be used to monitor the currently running processes. Usingps faux will show all currentlyrunning processes and threads.
5.3 Configuring the audit subsystem
The audit subsystem implements a central monitoring solution to keep track of security relevant events, such as changesand change attempts to security critical files.
This is accomplished through two separate mechanisms. All system calls are intercepted, and the kernel writes theparameters and return value to the audit log for those calls that are marked as security relevant in the filter configuration.In addition, some trusted programs contain audit-specific code to write audit trails of the actions they are requested toperform.
Please seeauditd(8), laus(7), auditd.conf(5), aucat(8) andaugrep(8) for details.
5.3.1 Intended usage of the audit subsystem
The Controlled Access Protection Profile (CAPP) specifies the auditing capabilities that a compliant system mustsupport. The evaluated configuration described here is based on these requirements.
WARNING: Some of the CAPP requirements may conflict with your specific requirements for the system. Forexample, a CAPP-compliant system MUST disable logins if the audit subsystem is not working. Please ensure thatyou are aware of the consequences if you enable auditing.
CAPP is designed for a multiuser system, with multiple unique users who maintain both shared and private resources.The auditing features are intended to support this mode of operation with a reliable trail of security-relevant operations.It is less useful for a pure application server with no interactive users.
Please be aware that the auditing subsystem will, when activated, cause some slowdown for applications on theserver. The impact depends on what the application is doing and how the audit subsystem is configured. As a ruleof thumb, applications that open a large number of separate files are most affected, and CPU-bound programs shouldnot be measurably affected. You will need to balance the performance requirements against your security needs whendeciding if and how you want to use auditing.
5.3.2 Selecting the events to be audited
You MAY make changes to the set of system calls and events that are to be audited. CAPP requires that the systemhas thecapabilityto audit security relevant events, but it is up to you to choose how you want to use these capabilities.It is acceptable to turn off system call auditing completely even in an evaluated configuration, for example on a pureapplication server with no interactive users on the system.
The configuration file/etc/audit/filter.confby default contains a suggested setup for a typical multiuser system, allaccess to the security relevant files (as configured in/etc/audit/filter.confand/etc/audit/filesets.conf) is audited, alongwith other security relevant events such as system reconfiguration.
You MAY selectively disable and enable auditing for specific events or users as required by setting up predicates andfilters in thefilter.conf file. The following excerpt from the default configuration is an example:
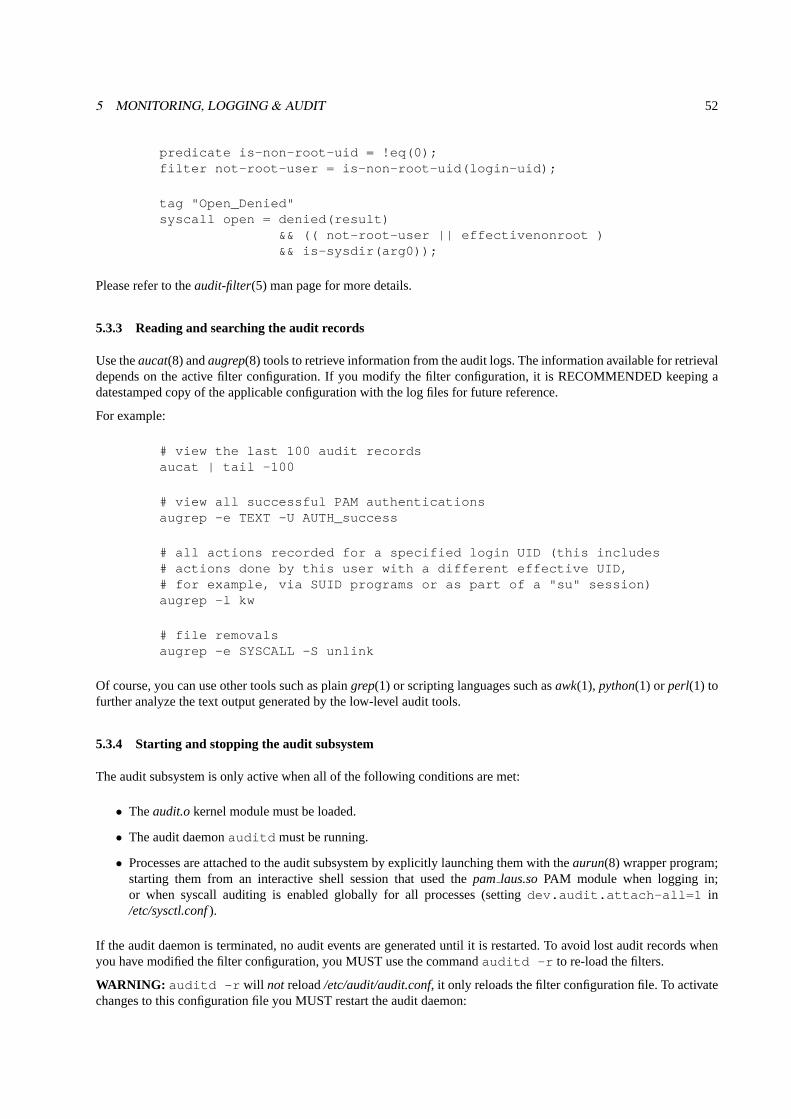
5 MONITORING, LOGGING & AUDIT 52
predicate is-non-root-uid = !eq(0);filter not-root-user = is-non-root-uid(login-uid);
tag "Open_Denied"syscall open = denied(result)
&& (( not-root-user || effectivenonroot )&& is-sysdir(arg0));
Please refer to theaudit-filter(5) man page for more details.
5.3.3 Reading and searching the audit records
Use theaucat(8) andaugrep(8) tools to retrieve information from the audit logs. The information available for retrievaldepends on the active filter configuration. If you modify the filter configuration, it is RECOMMENDED keeping adatestamped copy of the applicable configuration with the log files for future reference.
For example:
# view the last 100 audit recordsaucat | tail -100
# view all successful PAM authenticationsaugrep -e TEXT -U AUTH_success
# all actions recorded for a specified login UID (this includes# actions done by this user with a different effective UID,# for example, via SUID programs or as part of a "su" session)augrep -l kw
# file removalsaugrep -e SYSCALL -S unlink
Of course, you can use other tools such as plaingrep(1) or scripting languages such asawk(1), python(1) orperl(1) tofurther analyze the text output generated by the low-level audit tools.
5.3.4 Starting and stopping the audit subsystem
The audit subsystem is only active when all of the following conditions are met:
• Theaudit.okernel module must be loaded.
• The audit daemonauditd must be running.
• Processes are attached to the audit subsystem by explicitly launching them with theaurun(8) wrapper program;starting them from an interactive shell session that used thepamlaus.soPAM module when logging in;or when syscall auditing is enabled globally for all processes (settingdev.audit.attach-all=1 in/etc/sysctl.conf).
If the audit daemon is terminated, no audit events are generated until it is restarted. To avoid lost audit records whenyou have modified the filter configuration, you MUST use the commandauditd -r to re-load the filters.
WARNING: auditd -r will not reload/etc/audit/audit.conf, it only reloads the filter configuration file. To activatechanges to this configuration file you MUST restart the audit daemon:

5 MONITORING, LOGGING & AUDIT 53
/etc/rc.d/init.d/audit restart
You MUST NOT attempt to reload the configuration by sendingauditd a HUP signal or by running/etc/rc.d/init.d/audit reload , because that will not write the required audit record showing thereconfiguration. You MUST use one of the two restart methods described above.
If the audit module is unloaded withrmmod, all processes are detached permanently from the audit subsystem. Theycan only be re-attached when using theAUDIT ATTACHALL=1 option in/etc/sysconfig/audit.
5.3.5 Storage of audit records
The REQUIRED operating mode for the audit records is ”bin mode” (”bin” as in bucket), using several preallocatedfiles of constant size for the audit records.auditd will write data to the first file until it is filled, then switch to thenext one re-using each one in turn in a round-robin fashion.
Each time a bin is filled,auditd will launch the configured notification program to process the file. The defaultconfiguration saves a copy of each filled file before re-using the storage. If the notification program exits with a failurestatus, for example, due to lack of disk space,auditd will then take the configured action, by default setting themessage queue size to zero and thereby blocking all processes that try to write new records. These audited processeswill sleep untilauditd resumes processing (typically once disk space has been freed by the administrator), then theywill be woken up by the kernel and proceed running normally.
You MAY instead configure round-robin reuse of the files without saving, to keep the disk space used by the audit logsconstant. To do that, remove the ”-S /var/log/audit.d/save.%u” option in/etc/audit/audit.conf. In this configuration,you have access to a fixed amount of historical audit data, but any new events will cyclically overwrite old data. A usercould exploit this mechanism by intentionally generating a large number of irrelevant entries to wipe out the previouslygenerated records. The default configuration uses four files of only 20 MiB size each. You SHOULD increase thesenumbers in/etc/audit/audit.confaccording to available disk space, your organizational requirements, and the system’susage patterns to ensure that a sufficient amount of historic audit data will be saved.
5.3.6 Reliability of audit data
By default, the audit records are written using the normal Linux filesystem buffering, which means that informationmay be lost in a crash because it has not been written to the physical disk yet. Any applications that read the recordswhile the system is running will always get the most current data out of the buffer cache, even if it has not yet beencommitted to disk, so this does not affect normal operation. If you want to ensure that auditd always forces a diskwrite for each record, you MAY set the ”sync = yes;” option in/etc/audit/audit.conf, but be aware that this will resultin significantly reduced performance and high strain on the disk.
The audit record files arenot protected against a malicious administrator, and are not intended for an environmentwhere the administrators are not trustworthy.
5.4 System configuration variables in/etc/sysconfig
The system uses various files in/etc/sysconfigto configure the system. Most files in this directory tree contain variabledefinitions in the form of shell variables that are either read by the rc scripts at system boot time or are evaluated byother commands at runtime. Note that changes will not take effect until the affected service is restarted or the systemis rebooted.

6 SECURITY GUIDELINES FOR USERS 54
6 Security guidelines for users
6.1 Online Documentation
The system provides a large amount of online documentation, usually in text format. Use theman program to readentries in the online manual, for example:
man lsman man
to read information about thels andmancommands respectively. You can search for keywords in the online manualwith theapropos(1) utility, for example:
apropos password
When this guide refers to manual pages, it uses the syntax ENTRY(SECTION), for examplels(1). Usually you do notneed to provide the section number, but if there are several entries in different sections, you can use the optional-Sswitch and pick a specific one.
Some programs provide additional information GNU ’texinfo’ format, use theinfo program to read it, for example:
info diff
Additional information, sorted by software package, can be found in the/usr/share/doc/*/directories. Use theless(1)pager to read it, for example:
/usr/share/doc/bash*/FAQ
Many programs also support a--help , -? or -h switch you can use to get a usage summary of supportedcommand-line parameters.
A collection of How-To documents in HTML format can be found under/usr/share/doc/howto/en/htmlif the optionalhowtoenhpackage is installed.
Please see/usr/share/doc/howto/en/html/Security-HOWTOfor security information. The HTML files can be read withthew3mbrowser.
The RHEL server documentation is also available in electronic form in the directories/usr/share/doc/rhel*.
Note that this Configuration Guide has precedence over other documents in case of conflicting recommendations.
6.2 Authentication
You MUST authenticate (prove your identity) before being permitted to use the system. When the administrator createdyour user account, he or she will have assigned a user name and default password, and provided that information foryou along with instructions how to access the system.
Logging in to the system will usually be done using the Secure Shell (SSH) protocol, alternatively a serial terminalmay be available. Use thessh command to connect to the system unless instructed otherwise by the administrator,for example:

6 SECURITY GUIDELINES FOR USERS 55
Thessh(1) manual page provides more information on available options. If you need to transfer files between systems,use thescp(1) orsftp(1) tools.
If this is the first time you are connecting to the target system, you will be prompted if you want to accept the hostkey. If the administrator has provided a key fingerprint for comparison, verify that they match, otherwise typeyes tocontinue. You MUST immediately change your initially assigned password with thepasswd(1) utility.
You MUST NOT under any circumstances attempt to log in from an insecure device, such as a public terminal or acomputer belonging to a friend. Even if thepersonowning the computer is trustworthy, thecomputermay not be dueto having been infected with malicious code. Always remember that the device you are typing your password intohas the ability to save and re-use your authentication information, so you are in effect giving the computer you areusing the right to do any and all actions in your name. Insecure handling of authentication information is the leadingcause for exploits of otherwise secure systems, and SSH can only protect the information during transit, and offers noprotection at all against an insecure end point.
When you log out from the system and leave the device you have used for access (such as a terminal or a workstationwith terminal emulation), you MUST ensure that you have not left information on the screen or within an internalbuffer that should not be accessible to another user. You should be aware that some terminals also store informationnot displayed on the terminal (such as passwords, or the contents of a scrollback buffer). Nevertheless this informationmay be extractable by the next user unless the terminal buffer has been cleared. Safe options include completelyshutting down the client software used for access, powering down a hardware terminal, or clearing the scrollbackbuffer by switching among virtual terminals in addition to clearing the visible screen area.
If you ever forget your password, contact your administrator who will be able to assign a new password.
You MAY use thechsh(1) andchfn(1) programs to update your login shell and personal information if necessary. Notall settings can be changed this way, contact your administrator if you need to change settings that require additionalprivileges.
6.3 Password policy
All users, including the administrators, MUST ensure that their authentication passwords are strong (hard to guess)and handled with appropriate security precautions. The password policy described here is designed to satisfy therequirements of the evaluated configuration. If your organization already has a password policy defined, youradministrator MAY refer you to that policy if it is equivalently strong.
You MUST change the initial password set by the administrator when you first log into the system. You MUST selectyour own password in accordance with the rules defined here. You MUST also change the password if the administratorhas set a new password, for example if you have forgotten your password and requested the administrator to reset thepassword.
Use thepasswd(1) program to change passwords. It will first prompt you for your old password to confirm youridentity, then for the new password. You need to enter the new password twice, to catch mistyped passwords.
Thepasswd(1) program will automatically perform some checks on your new password to help ensure that it is noteasily guessable, but you MUST nevertheless follow the requirements in this chapter.
Note that the administrators MUST also ensure that their own passwords comply with this password policy, even incases where the automatic checking is not being done, such as when first installing the system.
• Your password MUST be a minimum of 8 characters in length. More than 8 characters MAY be used (it isRECOMMENDED to use more than 8, best is to use passphrases), and all characters are significant.
• Use at least one character each from the following sets for passwords:
Lowercase letters: abcdefghijklmnopqrstuvwxyzUppercase letters: ABCDEFGHIJKLMNOPQRSTUVWXYZDigits: 0123456789Punctuation: !"#$%&’()*+,-./:;<=>?[\]ˆ_‘{|}˜

6 SECURITY GUIDELINES FOR USERS 56
• You MUST NOT base the password on a dictionary word, your real name, login name, or other personal details(such as dates, names of relatives or pets), or names of real people or fictional characters.
• Instead of a password, you MAY use a passphrase consisting of multiple unrelated words (at least three) joinedwith random punctuation characters. Such a passphrase MUST have a length of at least 16 characters.
• You MUST NOT use a simple alphabetic string, palindrome or combinations of adjacent keyboard keys.
• When you choose a new password, it MUST NOT be a simple variation or permutation of a previously usedone.
• You MUST NOT write the password on paper or store it on electronic devices in unprotected form. Storage in asecure location (such as an envelope in a safety deposit box, or encrypted storage on an electronic device) MAYbe acceptable, contact your administrator first to ensure that the protection is strong enough to make passwordrecovery infeasible for the types of attackers the system is intended to protect against.
• The password is for you and you only. A password is like a toothbrush - you do not want to share it with anybody,even your best friend. You MUST NOT disclose your password to anybody else, or permit anybody else to usethe system using your identity.
Note that administrators will never ask you for your password, since they do not need it even if they are requiredto modify settings affecting your user account.
• You MUST NOT use the same password for access to any systems under external administration, includingInternet sites. You MAY however use the same password for accounts on multiple machines within oneadministrative unit, as long as they are all of an equivalent security level and under the control of the sameadministrators.
• You MUST inform the administrator and select a new password if you have reason to believe that your passwordwas accidentally disclosed to a third party.
• If the system notifies you that your password will expire soon or has expired, choose a new one as instructed.Contact your administrator in case of difficulty.
A RECOMMENDED method of generating passwords that fits these criteria while still being easy to memorize is tobase it on letters of words in a sentence (NOT a famous quotation), including capitalization and punctuation and oneor two variations. Example:
"Ask not for whom the bell tolls."=> An4wtbt.
"Password ’P’9tw;ciSd’ too weak; contained in RHEL documentation"=> P’9tw;ciRd
6.4 Access control for files and directories
Linux is a multiuser operating system. You can control which other users will be able to read or modify your filesby setting the Unix permission bits and user/group IDs, or (if more precise control is needed) by using POSIX-styleaccess control lists (ACLs).
Note that the administrators (’root’) are able to override these permissions and access all files on the system. Use ofencryption is RECOMMENDED for additional protection of sensitive data.
The ’umask’ setting controls the permissions of newly created files and directories and specifies the access bits thatwill be removedfrom new objects. Ensure that the setting is appropriate, and never grant write access to others bydefault. The umask MUST include at least the 002 bit (no write access for others), and the RECOMMENDED settingis 027 (read-only and execute access for the group, no access at all for others).

7 APPENDIX 57
Do not set up world-writable areas in the filesystem - if you want to share files in a controlled manner with a fixedgroup of other users (such as a project group), please contact your administrator and request the creation of a usergroup for that purpose.
Always remember thatyou are responsible for the security of the data you create and use. Choose permissions thatmatch the protection goals appropriate for the content, and that correspond to your organization’s security policy.Access to confidential data MUST be on a need-to-know basis, do not make data world-readable unless the informationis intended to be public.
Whenever you start a program or script, it will execute with your access rights. This implies that a malicious programwould be able to read and modify all files that you have access to. Never execute any code that you have receivedfrom untrustworthy sources, and do not run commands that you do not understand. Be aware that manipulations tothe environment a program is run in can also cause security flaws, such as leaking sensitive information. Do notuse the shell variables LDLIBRARY PATH or LD PRELOAD that modify the shared library configuration used bydynamically linked programs.
Programs can be configured to run with the access rights of the program file’s owner and/or group instead of the rightsof the calling user. This is the SUID/SGID mechanism, which utilities such aspasswd(1) use to be able to accesssecurity-critical files. You could also create your own SUID/SGID programs viachmod(1), but DO NOT do thatunless you fully understand the security implications - you would be giving awayyour access privileges to whoeverlaunches the SUID program. Please refer to the ”Secure Programming HOWTO” in the unlikely case that you need tocreate such a program, there you will find explanations of the many aspects that must be considered, such as the risk ofunintended shell escapes, buffer overflows, resource exhaustion attacks and many other factors. Note that SUID rootprograms MUST NOT be added to the evaluated configuration, the only permitted use of the SUID bit is for settingnon-root user IDs.
Please refer to thechmod(1), umask(2), chown(1), chgrp(1), acl(5), getfacl(1), and setfacl(1) manual pages forinformation, or any of the many available books covering Linux security (cf. Appendix ’Literature’), or ask yoursystem administrator for advice.
6.5 Data import / export
The system comes with various tools to archive data (tar, star, cpio). If ACLs are used, then onlystar MUST be usedto handle the files and directories as the other commands do not support ACLs. The options-H=exustar -aclmust beused withstar.
Please see thestar(1) man page for more information.
7 Appendix
7.1 Online Documentation
If there are conflicting recommendations in this guide and in one of the sources listed here, the Configuration Guidehas precedence concerning the evaluated configuration.
”Red Hat Enterprise Linux 3 Installation Guide for the x86, Itanium and AMD64 Architectures”,/usr/share/doc/rhel-ig-x8664-multi-en-3/index.html
”Red Hat Enterprise Linux 3 Installation Guide for the IBM eServer iSeries and IBM eServer pSeries Architectures”,/usr/share/doc/rhel-ig-ppc-multi-en-3/index.html
”Red Hat Enterprise Linux 3 Installation Guide for the IBM S/390 and IBM eServer zSeries Architectures”,/usr/share/doc/rhel-ig-s390-multi-en-3/index.html
”Red Hat Enterprise Linux 3 System Administration Guide”,/usr/share/doc/rhel-sag-en-3/index.html

7 APPENDIX 58
”Red Hat Enterprise Linux 3 Reference Guide”,/usr/share/doc/rhel-rg-en-3/index.html
”Red Hat Enterprise Linux 3 Security Guide”,/usr/share/doc/rhel-sg-en-3/index.html
David A. Wheeler, ”Secure Programming for Linux and Unix HOWTO”,/usr/share/doc/howto/en/htmlsingle/Secure-Programs-HOWTO.html, http://tldp.org/HOWTO/Secure-Programs-HOWTO/
Kevin Fenzi, Dave Wreski, ”Linux Security HOWTO”,/usr/share/doc/howto/en/htmlsingle/Security-HOWTO.html,http://www.linuxsecurity.com/docs/LDP/Security-HOWTO/
7.2 Literature
Ellen Siever, Stephen Spainhour, Stephen Figgins, & Jessica P. Hekman, ”Linux in a Nutshell, 3rd Edition”, O’Reilly2000, ISBN 0596000251
Simson Garfinkel, Gene Spafford, Alan Schwartz, ”Practical Unix & Internet Security, 3rd Edition”, O’Reilly 2003,ISBN 0596003234
Aeleen Frisch, ”Essential System Administration, 3rd Edition”, O’Reilly 2002, ISBN 0596003439
Daniel J. Barrett, Richard Silverman, ”SSH, The Secure Shell: The Definitive Guide”, O’Reilly 2001, ISBN0596000111
David N. Blank-Edelman, ”Perl for System Administration”, O’Reilly 2000, ISBN 1565926099
Shelley Powers, Jerry Peek, Tim O’Reilly, Mike Loukides, ”Unix Power Tools, 3rd Edition”, O’Reilly 2002, ISBN0596003307
W. Richard Stevens, ”Advanced Programming in the UNIX(R) Environment”, Addison-Wesley 1992, ISBN0201563177
Linda Mui, ”When You Can’t Find Your UNIX System Administrator”, O’Reilly 1995, ISBN 1565921046
7.3 The file/etc/audit/audit.conf
# kernel interfacedevice-file = "/dev/audit";
# filter configfilter-config = "/etc/audit/filter.conf";
# Standard output method is bin mode.#output {
mode = bin;num-files = 4;file-size = 20M;file-name = "/var/log/audit.d/bin";notify = "/usr/sbin/audbin -S /var/log/audit.d/save.%u -C";
# The following symlink is created whenever we switch to# a new bin.current = "/var/log/audit";
sync = no;
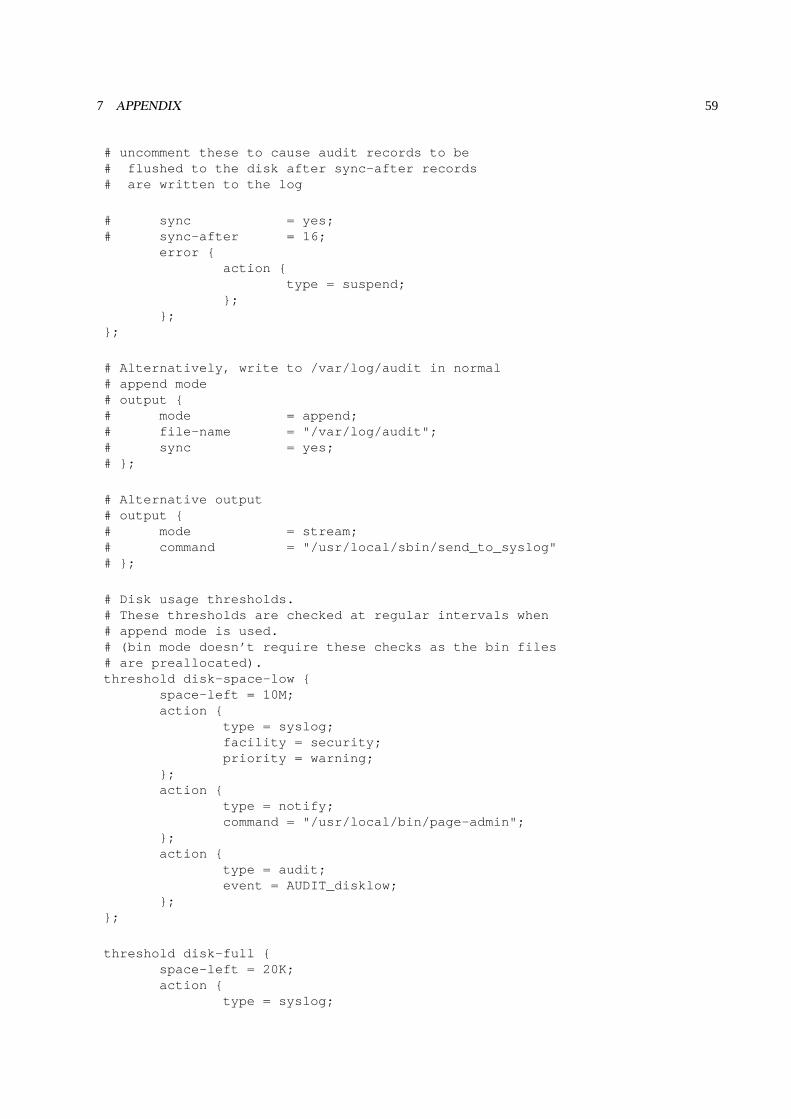
7 APPENDIX 59
# uncomment these to cause audit records to be# flushed to the disk after sync-after records# are written to the log
# sync = yes;# sync-after = 16;
error {action {
type = suspend;};
};};
# Alternatively, write to /var/log/audit in normal# append mode# output {# mode = append;# file-name = "/var/log/audit";# sync = yes;# };
# Alternative output# output {# mode = stream;# command = "/usr/local/sbin/send_to_syslog"# };
# Disk usage thresholds.# These thresholds are checked at regular intervals when# append mode is used.# (bin mode doesn’t require these checks as the bin files# are preallocated).threshold disk-space-low {
space-left = 10M;action {
type = syslog;facility = security;priority = warning;
};action {
type = notify;command = "/usr/local/bin/page-admin";
};action {
type = audit;event = AUDIT_disklow;
};};
threshold disk-full {space-left = 20K;action {
type = syslog;

7 APPENDIX 60
facility = security;priority = crit;
};action {
type = audit;event = AUDIT_diskfull;
};};
7.4 The file/etc/audit/filter.conf
## This is a sample filter.conf file.# Please take a look at filesets.conf first if you# wish to customize what system calls will be logged.## The syntax of this file is described in filter.conf(5).#
## Various primitive predicatespredicate is-null = eq(0);predicate is-negative = lt(0);predicate is-system-uid = lt(100);predicate is-lower-1024 = lt(-1024);
## Predicate to check open(2) mode: true iff# (mode & O_ACCMODE) == O_RDONLYpredicate is-rdonly = mask(O_ACCMODE, O_RDONLY);
## Predicates for testing file type, valid when applied# to a file type argumentpredicate __isreg = mask(S_IFMT, S_IFREG);predicate __isdir = mask(S_IFMT, S_IFDIR);predicate __ischr = mask(S_IFMT, S_IFCHR);predicate __isblk = mask(S_IFMT, S_IFBLK);predicate __issock = mask(S_IFMT, S_IFSOCK);predicate __islnk = mask(S_IFMT, S_IFLNK);predicate s_isreg = __isreg(file-mode);predicate s_isdir = __isdir(file-mode);predicate s_ischr = __ischr(file-mode);predicate s_isblk = __isblk(file-mode);predicate s_issock = __issock(file-mode);predicate s_islnk = __islnk(file-mode);predicate is-tempdir = mask(01777, 01777);predicate is-world-writable = mask(0666, 0666);
## Predicates dealing with process exit codepredicate if-crash-signal =

7 APPENDIX 61
!mask(__WSIGMASK, 0)&& (mask(__WSIGMASK, __WSIGILL) ||
mask(__WSIGMASK, __WSIGABRT) ||mask(__WSIGMASK, __WSIGSEGV) ||mask(__WSIGMASK, __WSIGSTKFLT));
## Predicates for audit-tagspredicate is-o-creat = mask(O_CREAT, O_CREAT);predicate is-ipc-remove = eq(IPC_RMID);predicate is-ipc-setperms = eq(IPC_SET);predicate is-ipc-creat = mask(IPC_CREAT, IPC_CREAT);predicate is-auditdevice = prefix("/dev/audit");predicate is-cmd-set-auditid = eq(AUIOCSETAUDITID);predicate is-cmd-set-loginid = eq(AUIOCLOGIN);
## Misc filtersfilter is-root = is-null(uid);filter is-setuid = is-null(dumpable);filter syscall-failed = is-negative(result);filter syscall-addr-succeed = is-lower-1024(result);predicate is-af-packet = eq(AF_PACKET);predicate is-af-netlink = eq(AF_NETLINK);predicate is-sock-raw = eq(SOCK_RAW);
## Include filesets.#include "filesets.conf";
## "Secret" files should not be read by everyone -# we also log read access to these files#predicate is-secret = prefix(@secret-files);
## All regular files owned by a system uid are deemed sensitive#predicate is-system-file = is-system-uid(file-uid)
&& !prefix("/var")&& !is-world-writable(file-mode);
## Define ioctls we track#set sysconf-ioctls = {
SIOCADDDLCI,SIOCADDMULTI,SIOCADDRT,SIOCBONDCHANGEACTIVE,

7 APPENDIX 62
SIOCBONDENSLAVE,SIOCBONDRELEASE,SIOCBONDSETHWADDR,SIOCDARP,SIOCDELDLCI,SIOCDELMULTI,SIOCDELRT,SIOCDIFADDR,SIOCDRARP,SIOCETHTOOL,SIOCGIFBR,SIOCSARP,SIOCSIFADDR,SIOCSIFBR,SIOCSIFBRDADDR,SIOCSIFDSTADDR,SIOCSIFENCAP,SIOCSIFFLAGS,SIOCSIFHWADDR,SIOCSIFHWBROADCAST,SIOCSIFLINK,SIOCSIFMAP,SIOCSIFMEM,SIOCSIFMETRIC,SIOCSIFMTU,SIOCSIFNAME,SIOCSIFNETMASK,SIOCSIFPFLAGS,SIOCSIFSLAVE,SIOCSIFTXQLEN,SIOCSMIIREG
};predicate is-sysconf-ioctl = eq(@sysconf-ioctls);
## System calls on file names#set file-ops = {
"mkdir", "rmdir", "unlink","chmod","chown", "lchown","chown32", "lchown32",
};
## General system related ops#set system-ops = {
swapon, swapoff,create_module, init_module, delete_module,sethostname, setdomainname,
};
set priv-ops = {

7 APPENDIX 63
"setuid","setuid32","seteuid","seteuid32","setreuid","setreuid32","setresuid","setresuid32","setgid","setgid32","setegid","setegid32","setregid","setregid32","setresgid","setresgid32","setgroups","setgroups32","capset",
};
## Audit-Tags (only syscall related tags are handled here)#
# define sets of syscalls related to audit-tags
# System calls for changing file modesset mode-ops = {
"chmod","fchmod",
};
# System calls for changing file ownerset owner-ops = {
"chown", "lchown","chown32", "lchown32","fchown",
};
# System calls doing file link operationsset link-ops = {
"link", "symlink",};
# System calls for creating device filesset mknod-ops = {
"mknod",};
# System calls for opening a fileset open-ops = {
"open",};

7 APPENDIX 64
# File renamingset rename-ops = {
"rename",};
# File truncationset truncate-ops = {
"truncate", "truncate64","ftruncate", "ftruncate64",
};
# Unlink filesset unlink-ops = {
"unlink",};
# Deletion of directoriesset rmdir-ops = {
"rmdir",};
# Mounting of filesystemsset mount-ops = {
"mount",};
# Unounting of filesystemsset umount-ops = {
"umount","umount2"
};
# Changing user (-role)set userchange-ops = {
"setuid","setuid32","seteuid","seteuid32","setreuid","setreuid32","setresuid","setresuid32",
};
# Execute another programset execute-ops = {
"execve",};
# Set real user-IDset realuid-ops = {
"setuid","setuid32",
};

7 APPENDIX 65
# Set user-IDS in gerneralset setuserids-ops = {
"setuid","setuid32","seteuid","seteuid32","setreuid","setreuid32","setresuid","setresuid32",
};
# Set real group-IDset realgid-ops = {
"setgid","setgid32","setgroups","setgroups32",
};
# Set group-IDs in gerneralset setgroups-ops = {
"setgid","setgid32","setegid","setegid32","setregid","setregid32","setresgid","setresgid32","setgroups","setgroups32",
};
# Set other kind of privileges (capabilities)set privilege-ops = {
"capset",};
# Change system-timeset timechange-ops = {
"adjtimex","stime","settimeofday",
};
# bring sets and tags in conjunction
tag "FILE_mode"syscall @mode-ops = always;
tag "FILE_owner"syscall @owner-ops = always;

7 APPENDIX 66
tag "FILE_link"syscall @link-ops = always;
tag "FILE_mknod"syscall @mknod-ops = always;
tag "FILE_create"syscall open = is-o-creat(arg1);tag "FILE_create"syscall creat = always;
#tag "FILE_open"#syscall @open-ops = always;
tag "FILE_open"syscall @open-ops = (is-system-file(arg0) && !(is-rdonly(arg1)))
|| is-secret(arg0);
tag "FILE_rename"syscall @rename-ops = always;
tag "FILE_truncate"syscall @truncate-ops = always;
tag "FILE_unlink"syscall @unlink-ops = always;
tag "FS_rmdir"syscall @rmdir-ops = always;
tag "FS_mount"syscall @mount-ops = always;
tag "FS_umount"syscall @umount-ops = always;
# I think owner changing doesnt make much sensetag "MSG_owner"syscall msgctl = is-ipc-setperms(arg1);
tag "MSG_mode"syscall msgctl = is-ipc-setperms(arg1);
tag "MSG_delete"syscall msgctl = is-ipc-remove(arg1);
tag "MSG_create"syscall msgget = always;
tag "SEM_owner"syscall semctl = is-ipc-setperms(arg2);
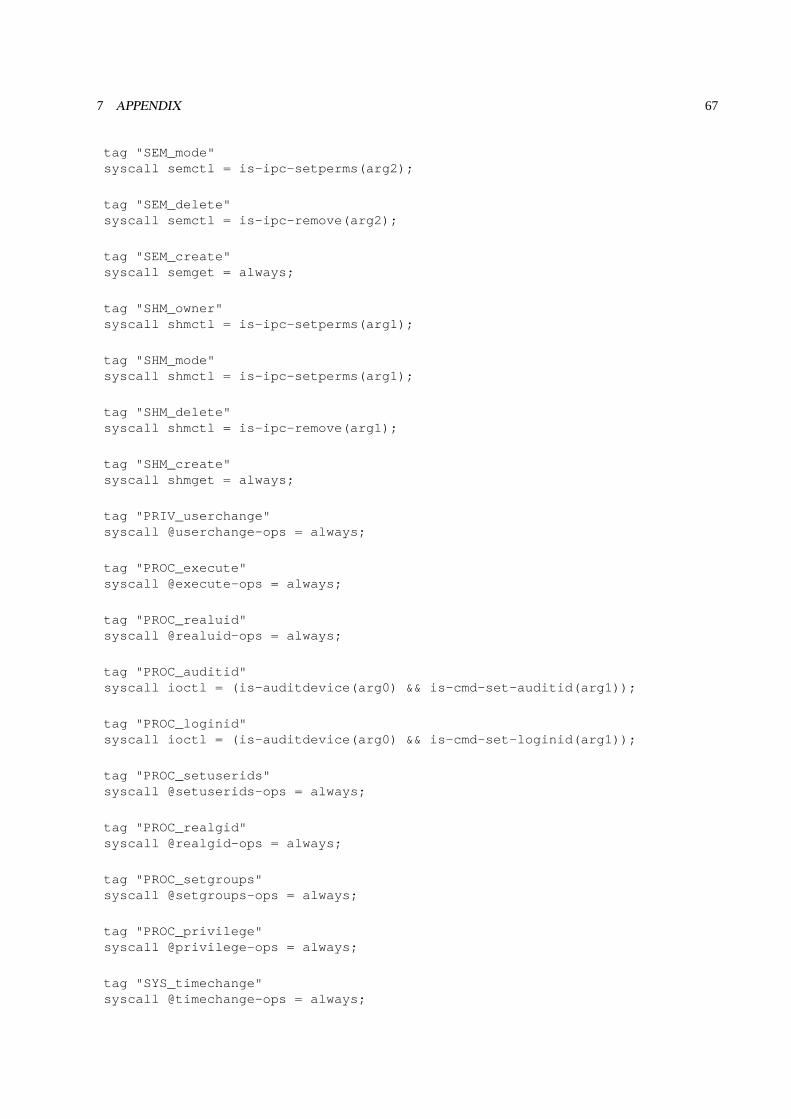
7 APPENDIX 67
tag "SEM_mode"syscall semctl = is-ipc-setperms(arg2);
tag "SEM_delete"syscall semctl = is-ipc-remove(arg2);
tag "SEM_create"syscall semget = always;
tag "SHM_owner"syscall shmctl = is-ipc-setperms(arg1);
tag "SHM_mode"syscall shmctl = is-ipc-setperms(arg1);
tag "SHM_delete"syscall shmctl = is-ipc-remove(arg1);
tag "SHM_create"syscall shmget = always;
tag "PRIV_userchange"syscall @userchange-ops = always;
tag "PROC_execute"syscall @execute-ops = always;
tag "PROC_realuid"syscall @realuid-ops = always;
tag "PROC_auditid"syscall ioctl = (is-auditdevice(arg0) && is-cmd-set-auditid(arg1));
tag "PROC_loginid"syscall ioctl = (is-auditdevice(arg0) && is-cmd-set-loginid(arg1));
tag "PROC_setuserids"syscall @setuserids-ops = always;
tag "PROC_realgid"syscall @realgid-ops = always;
tag "PROC_setgroups"syscall @setgroups-ops = always;
tag "PROC_privilege"syscall @privilege-ops = always;
tag "SYS_timechange"syscall @timechange-ops = always;
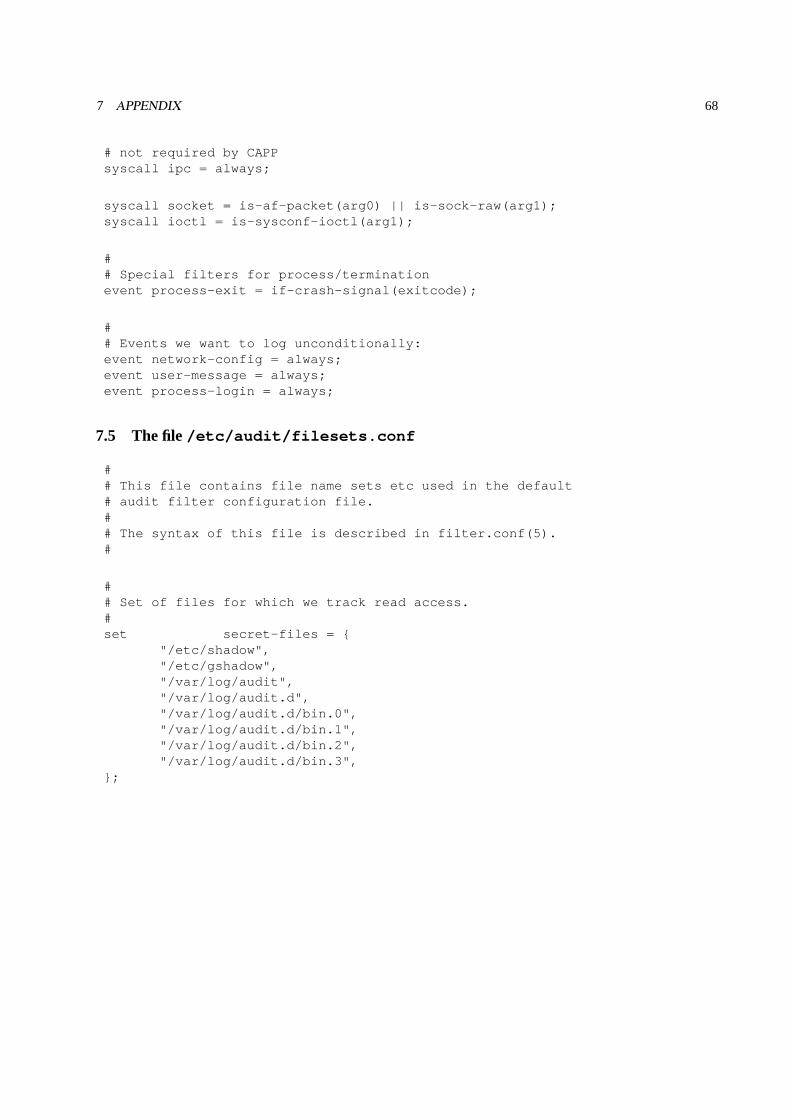
7 APPENDIX 68
# not required by CAPPsyscall ipc = always;
syscall socket = is-af-packet(arg0) || is-sock-raw(arg1);syscall ioctl = is-sysconf-ioctl(arg1);
## Special filters for process/terminationevent process-exit = if-crash-signal(exitcode);
## Events we want to log unconditionally:event network-config = always;event user-message = always;event process-login = always;
7.5 The file/etc/audit/filesets.conf
## This file contains file name sets etc used in the default# audit filter configuration file.## The syntax of this file is described in filter.conf(5).#
## Set of files for which we track read access.#set secret-files = {
"/etc/shadow","/etc/gshadow","/var/log/audit","/var/log/audit.d","/var/log/audit.d/bin.0","/var/log/audit.d/bin.1","/var/log/audit.d/bin.2","/var/log/audit.d/bin.3",
};