Embed Size (px)
Citation preview
This tutorial is provided as a courtesy by ECS Tuning.
Proper service and repair procedures are vital to the safe, reliable operation of all motor vehicles as well as the personal safety of those performing the repairs. Standard safety procedures and precautions (including use of safety goggles and proper tools and equipment) should be followed at all times to eliminate the possibility of personal injury or improper service which could damage the vehicle or compromise its safety.
Although this material has been prepared with the intent to provide reliable information, no warranty (express or implied) is made as to its accuracy or completeness. Neither is any liability assumed for loss or damage resulting from reliance on this material. SPECIFICALLY, NO WARRANTY OF MERCHANTABILITY, FITNESS FOR A PARTICULAR PURPOSE OR ANY OTHER WARRANTY IS MADE OR TO BE IMPLIED WITH RESPECT TO THIS MATERIAL. In no event will ECS Tuning, Incorporated or its affiliates be liable for any damages, direct or indirect, consequential or compensatory, arising out of the use of this material.
Installation Procedures
E36 M3 Headlight Leveling HarnessInstallation Guide

ECS E36 M3 Headlight Leveling Harness Installation Instructions
ECS Tuning 3095 Cleveland-Massillon Rd. Norton, Ohio 44203 Phone 1-800-924-5172 Fax 330-825-4846
Safety first!
When working with your vehicles electrical system; always disconnect the battery! Avoid shorting any circuits, or probing around wires. Failure to follow these safety precautions, and all others, could result in irreversible damage to your vehicles electrical system, failure to start, fire, and/or personal injury.
Before you undertake this installation, it is important that you read the following instructions! Listed below are the necessary tools to complete the job. If the installation of this product seems overwhelming, please contact a qualified installer in your area.
Please note:Wire routing locations provided in these instructions are simply guidelines and you may choose to install the harness differently. Please be sure to exercise care and secure any and all wiring when possible.
Tools Required: Flat Head ScrewdriverPhillips screwdriver T10 torx bit or screwdriver 10mm Socket 8mm socket RatchetWire Cutters Wire Crimpers Work light
E36 M3 Headlight Leveling HarnessInstallation Guide
ECS Tuning 1000 Seville Road, Wadsworth, OH 44281Toll Free: 1.800.924.5172
Local: 330.331.2003
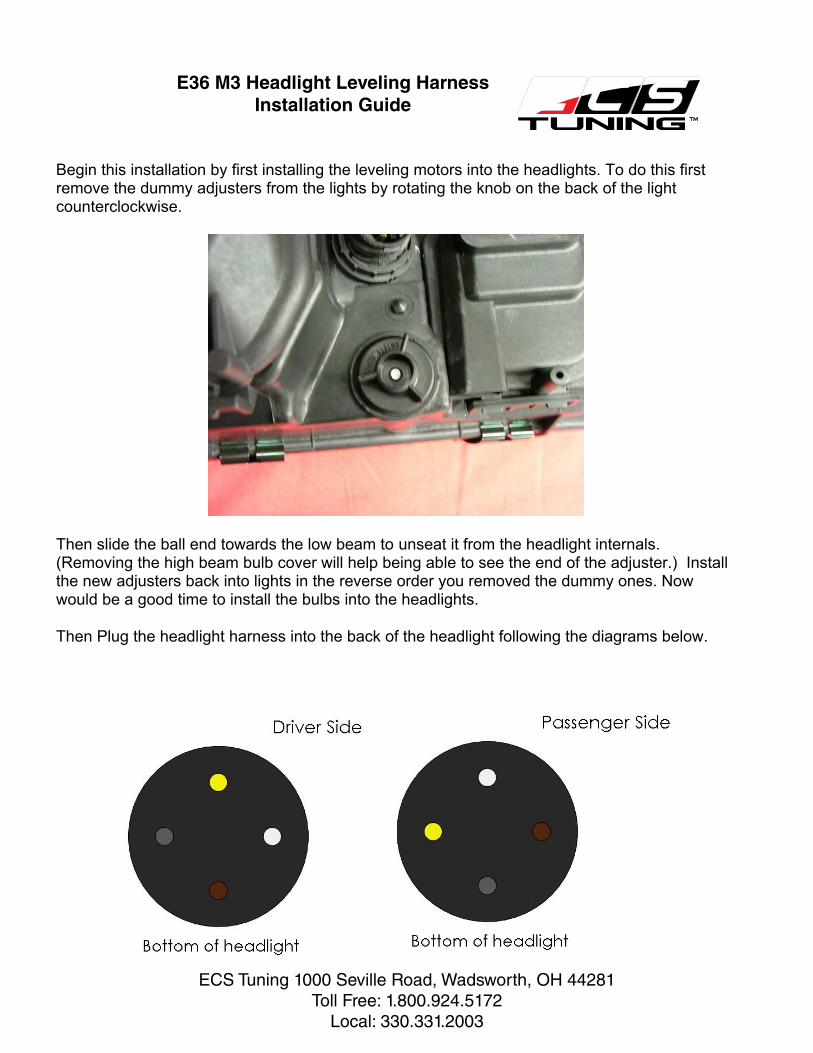
Begin this installation by first installing the leveling motors into the headlights. To do this first remove the dummy adjusters from the lights by rotating the knob on the back of the light counterclockwise.
Then slide the ball end towards the low beam to unseat it from the headlight internals. (Removing the high beam bulb cover will help being able to see the end of the adjuster.) Install the new adjusters back into lights in the reverse order you removed the dummy ones. Now would be a good time to install the bulbs into the headlights.
Then Plug the headlight harness into the back of the headlight following the diagrams below.
E36 M3 Headlight Leveling HarnessInstallation Guide
ECS Tuning 1000 Seville Road, Wadsworth, OH 44281Toll Free: 1.800.924.5172
Local: 330.331.2003
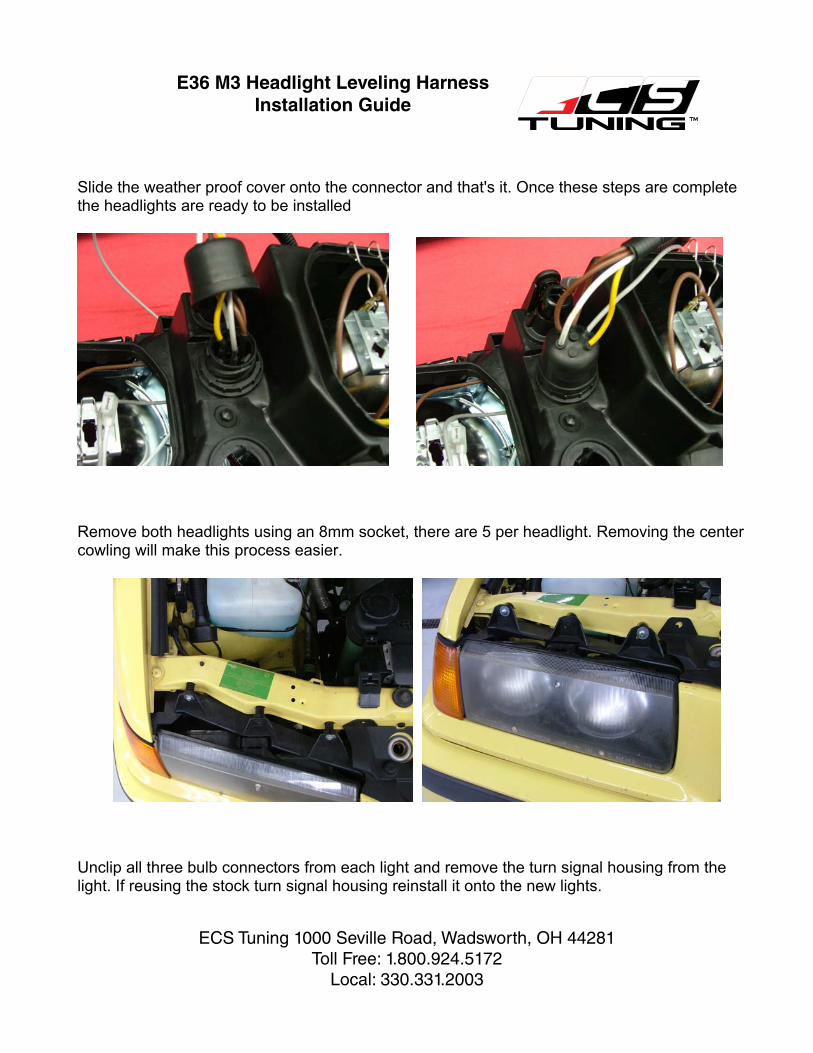
Slide the weather proof cover onto the connector and that's it. Once these steps are complete the headlights are ready to be installed
Remove both headlights using an 8mm socket, there are 5 per headlight. Removing the center cowling will make this process easier.
Unclip all three bulb connectors from each light and remove the turn signal housing from the light. If reusing the stock turn signal housing reinstall it onto the new lights.
E36 M3 Headlight Leveling HarnessInstallation Guide
ECS Tuning 1000 Seville Road, Wadsworth, OH 44281Toll Free: 1.800.924.5172
Local: 330.331.2003
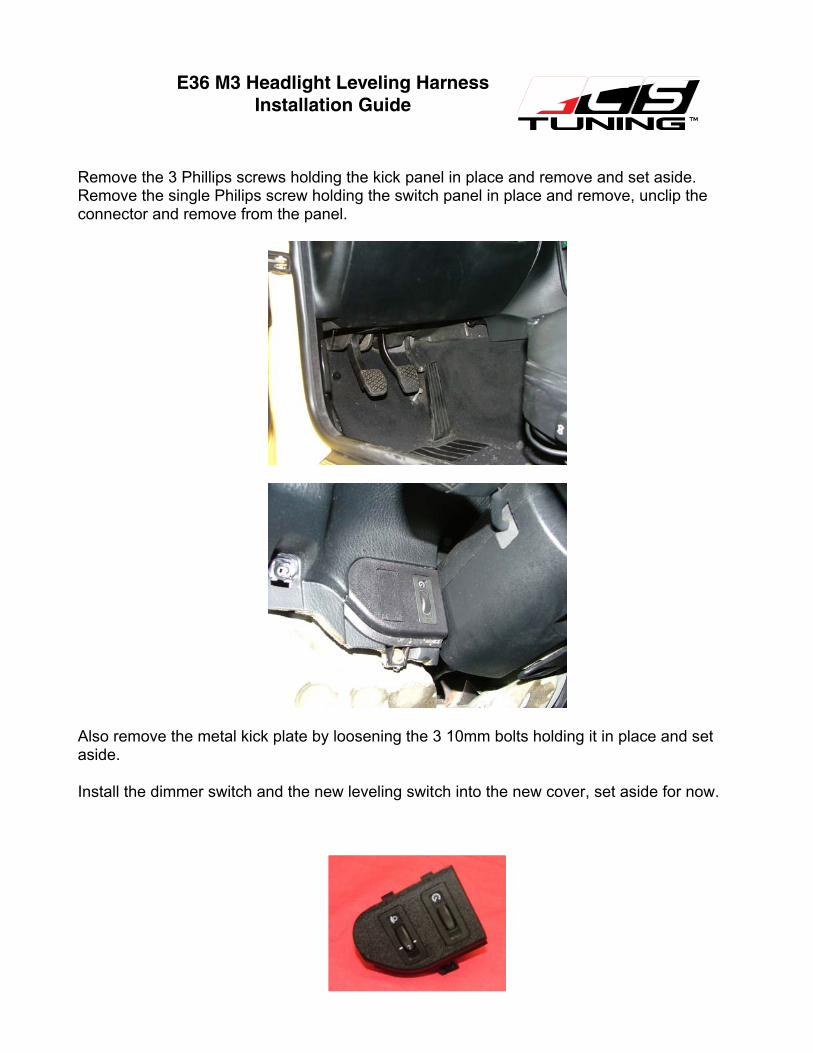
Remove the 3 Phillips screws holding the kick panel in place and remove and set aside. Remove the single Philips screw holding the switch panel in place and remove, unclip the connector and remove from the panel.
Also remove the metal kick plate by loosening the 3 10mm bolts holding it in place and set aside.
Install the dimmer switch and the new leveling switch into the new cover, set aside for now.
E36 M3 Headlight Leveling HarnessInstallation Guide

Remove the fuse/relay box panel and then remove the 4 T10 bolts holding the lower cover in place.
Unscrew the 3 large connectors and unclip the housing from the fuse box by releasing the 2 tabs and pulling upwards about 1/2".
After that release the tab (pull upwards) holding the main harness to gain access to the interior cabin.
Route the end of the new harness with the white four pin connector and the 4 loose wires through this entrance and lay inside the car for now.
E36 M3 Headlight Leveling HarnessInstallation Guide
ECS Tuning 1000 Seville Road, Wadsworth, OH 44281Toll Free: 1.800.924.5172
Local: 330.331.2003
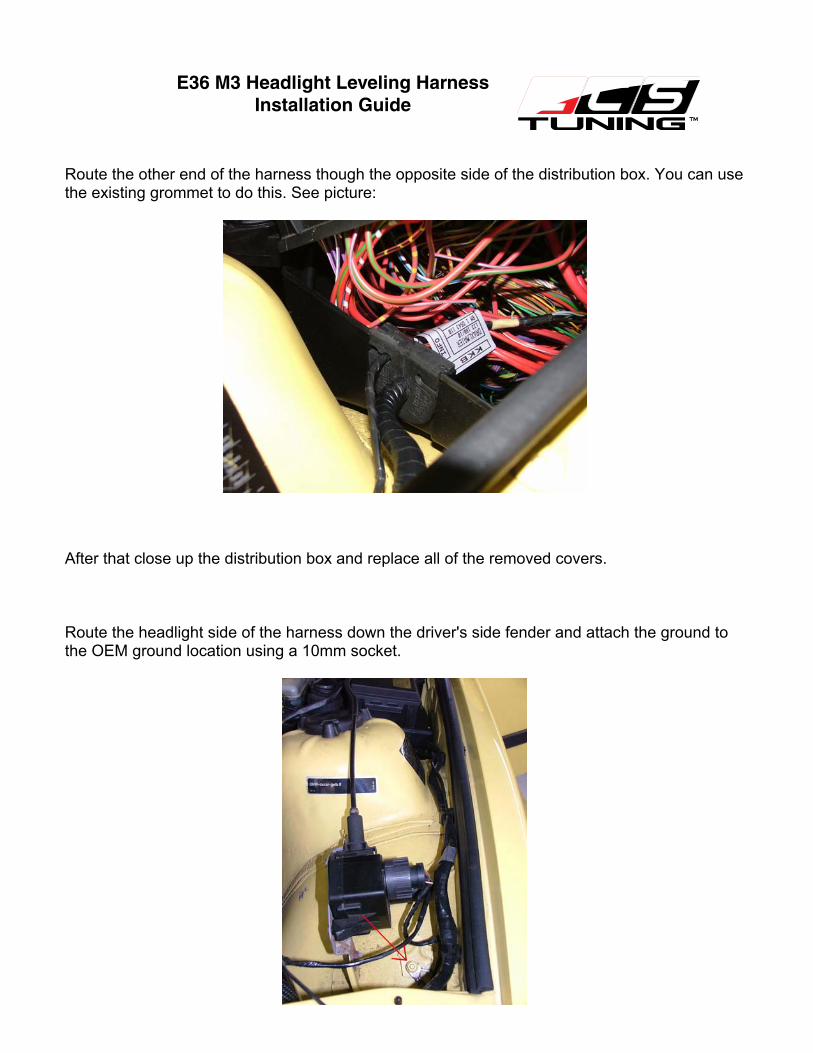
Route the other end of the harness though the opposite side of the distribution box. You can use the existing grommet to do this. See picture:
After that close up the distribution box and replace all of the removed covers.
Route the headlight side of the harness down the driver's side fender and attach the ground to the OEM ground location using a 10mm socket.
E36 M3 Headlight Leveling HarnessInstallation Guide
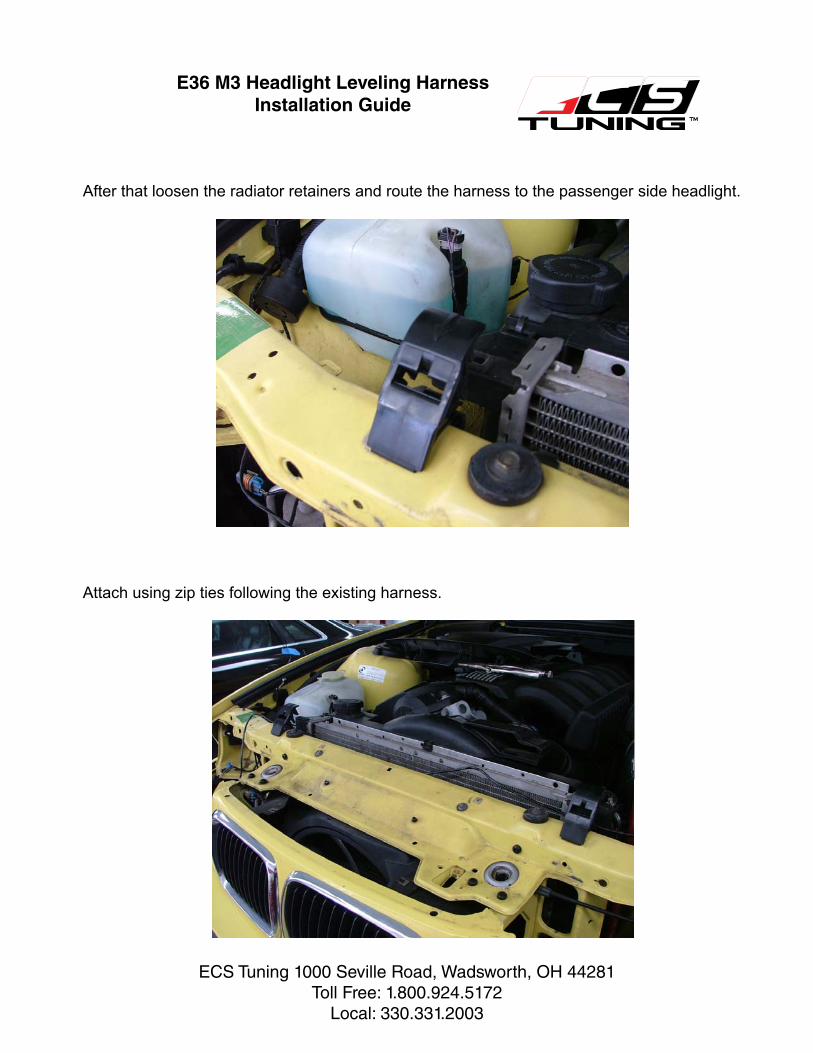
After that loosen the radiator retainers and route the harness to the passenger side headlight.
Attach using zip ties following the existing harness.
E36 M3 Headlight Leveling HarnessInstallation Guide
ECS Tuning 1000 Seville Road, Wadsworth, OH 44281Toll Free: 1.800.924.5172
Local: 330.331.2003
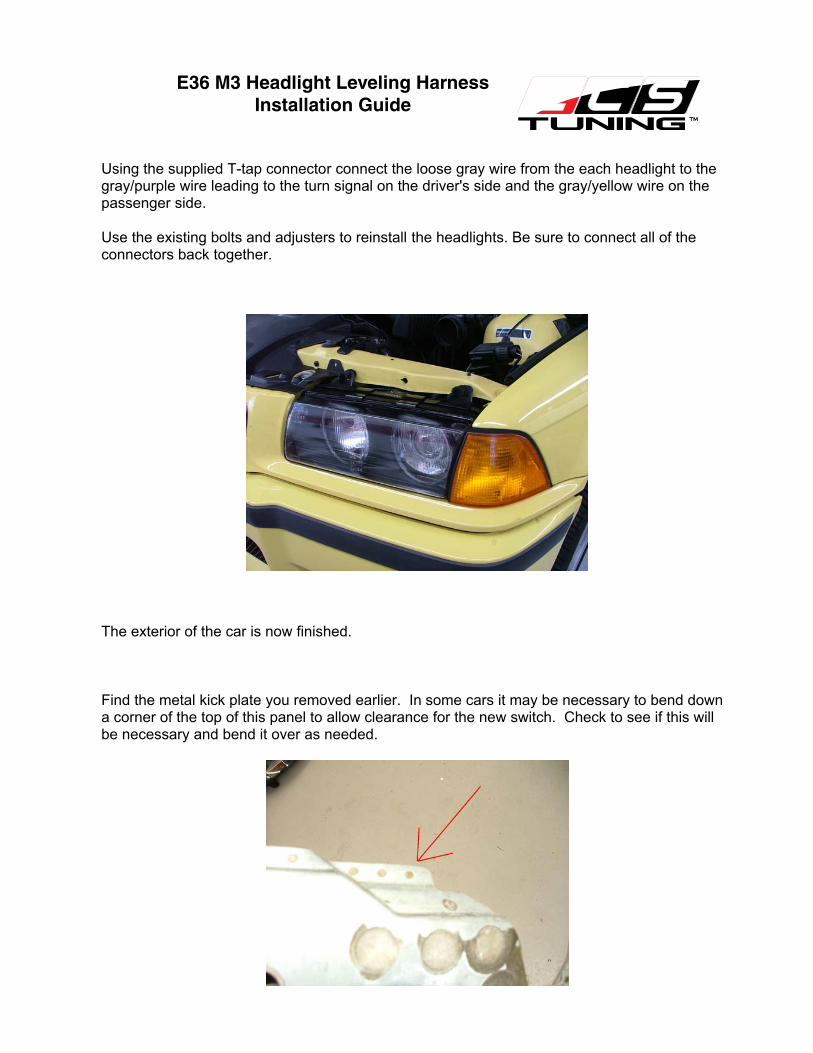
Using the supplied T-tap connector connect the loose gray wire from the each headlight to the gray/purple wire leading to the turn signal on the driver's side and the gray/yellow wire on the passenger side.
Use the existing bolts and adjusters to reinstall the headlights. Be sure to connect all of the connectors back together.
The exterior of the car is now finished.
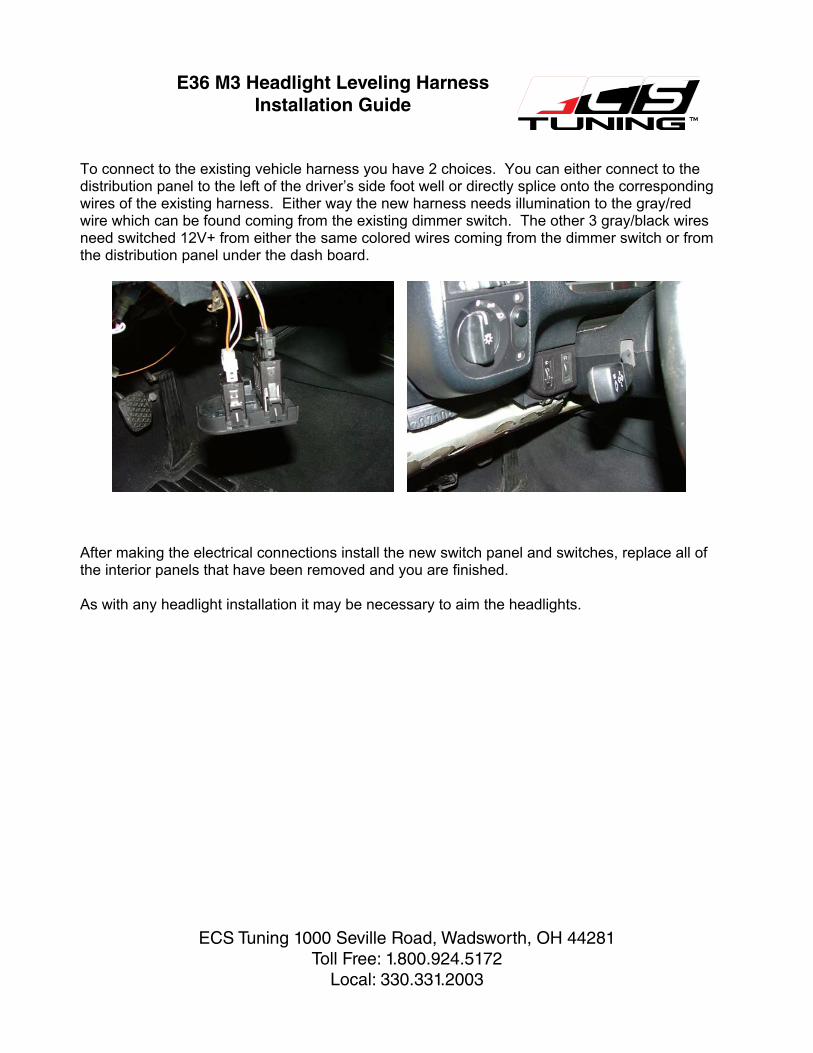
Find the metal kick plate you removed earlier. In some cars it may be necessary to bend down a corner of the top of this panel to allow clearance for the new switch. Check to see if this will be necessary and bend it over as needed.
E36 M3 Headlight Leveling HarnessInstallation Guide
To connect to the existing vehicle harness you have 2 choices. You can either connect to the distribution panel to the left of the driver’s side foot well or directly splice onto the corresponding wires of the existing harness. Either way the new harness needs illumination to the gray/red wire which can be found coming from the existing dimmer switch. The other 3 gray/black wires need switched 12V+ from either the same colored wires coming from the dimmer switch or from the distribution panel under the dash board.
After making the electrical connections install the new switch panel and switches, replace all of the interior panels that have been removed and you are finished.
As with any headlight installation it may be necessary to aim the headlights.
E36 M3 Headlight Leveling HarnessInstallation Guide
ECS Tuning 1000 Seville Road, Wadsworth, OH 44281Toll Free: 1.800.924.5172
Local: 330.331.2003