Embed Size (px)
Citation preview

Lotus iNotes R8.5
User Guide
FOR
Education Bureau
(EDB)
Version: 1.8
October 2014
© The Government of the Hong Kong Special Administrative Region
The contents of this document remain the property of and may not be reproduced in
whole or in part without the express permission of the Government of the HKSAR

Page 2
Amendment History
Change
Number
Revision Description Sections
Affected
Revision
Number
Date
1 First release All 1.0 29th August,
2010
2 Added browser pop-up settings;
General minor amendments and
wordings
4.1, 5.2,
5.3, 6, 6.1,
6.2, 6.3,
6.10, 6.11,
6.12, 6.23
1.1 21st July,
2011
3. Added security related advisory 3.1, 6.18 1.2 7th
September,
2011
4. Minor updates 6.2, 8.1 1.3 February
2012
5. Attachment size limit 6.12 1.4 January
2013
6. Send invalid address 6.3.8 1.5 29th October
2013
7. Setup “Out of Office” 6.19 1.5 28th
November
2013
8 Second Release All 1.6 December
2013
9 Requirement update
- Remove unsupported software
5.2 1.7 May
2014
10 Creating the signature 6.3 1.8 October
2014
Page 3
Table of Contents
1. PURPOSE ..................................................................................................... 4 2. SCOPE ......................................................................................................... 5 3. REFERENCES ................................................................................................ 6
3.1. STANDARDS AND GUIDELINES ............................................................. 6 3.2. OTHER REFERENCES............................................................................ 6
4. SYSTEM SUMMARY ........................................................................................ 7 4.1. OBJECTIVES ....................................................................................... 7 4.2. SYSTEM FUNCTIONS............................................................................ 7
5. ACCESS REQUIREMENTS ................................................................................ 8 5.1. COMPUTER HARDWARE ........................................................................ 8 5.2. COMPUTER SOFTWARE ........................................................................ 8 5.3. MOBILE DEVICES ................................................................................ 8
6. INOTES OPERATING INSTRUCTIONS ............................................................... 9 6.1. Prepare Internet Explorer ..................................................................... 9 6.2. LOGGING IN AND OUT ....................................................................... 11 6.3. CREATE AND SEND MAIL .................................................................... 16 6.4. DRAFT MAIL ..................................................................................... 22 6.5. REQUEST FOR RETURN RECEIPT ......................................................... 22 6.6. READ AND DELETE MAIL .................................................................... 22 6.7. REPLY MAIL ...................................................................................... 26 6.8. FORWARD MAIL ................................................................................ 26 6.9. PRINT MAIL ...................................................................................... 26 6.10. FOLLOW UP MAIL .............................................................................. 27 6.11. BLOCK MAIL FROM SENDER................................................................ 28 6.12. ADD ATTACHMENT ............................................................................. 30 6.13. SAVE ATTACHMENT ........................................................................... 33 6.14. CHANGING INOTES’S PASSWORD ....................................................... 33 6.15. CREATE FOLDER ................................................................................ 33 6.16. MOVE MAIL TO FOLDER ..................................................................... 34 6.17. DELETE FOLDER ................................................................................ 37 6.18. USE ENCRYPTION IN READING AND SENDING MAIL .............................. 38 6.19. SET UP “OUT OF OFFICE" ................................................................... 41 6.20. DELEGATION 44 6.21. SET UP CALENDAR AND SCHEDULING ................................................. 45 6.22. SET UP TO DO LIST ........................................................................... 47 6.23. SET UP CONTACT LIST & SYNCHRONIZE LOCAL ADDRESS BOOK ............ 49 6.24. CHECK MAILBOX SIZE AND QUOTA IN INOTES ..................................... 53 6.25. NOTES CLIENT FEATURES NOT AVAILABLE IN iNotes ............................. 53
7. INOTES ULTRALITE OPERATING INSTRUCTIONS ............................................. 54 7.1. ACCESSING INOTES ULRALITE WITH IPHONE AND IPOD TOUCH ............. 54 7.2. INOTES ULTRALITE MODE LIMITATIONS ............................................... 55
8. APPENDIX .................................................................................................. 56 8.1. RESETTING INTRANET PASSWORD ...................................................... 56
Page 4
1. PURPOSE
iNotes (formerly Domino Web Access, See section 3.2 for more details) is the
webmail version of Lotus Notes R8.5, operational in a web browser.
The document provides necessary information to guide users to access and use their
Notes mail box through iNotes.

Page 5
2. SCOPE
This document covers iNotes and its usage from the end user’s perspective. It is
located at “Information Directory -> E. Information Technology -> 7. Office Systems
User Guide -> Office Systems and Email -> 2. Lotus Notes -> c. iNotes User Guide ".

Page 6
3. REFERENCES
3.1. STANDARDS AND GUIDELINES
Accessibility Programme User Web site http://itginfo.ccgo.hksarg/
iNotes User Help
End User Instructions On Information Technology Security For The
Education Bureau:
https://portal.edb.gov.hk/diweb/education/web/content/info_tech/it_se
curity/End%20user%20instructions%20on%20IT%20security%202013
1127%20final.pdf
3.2. OTHER REFERENCES
Detailed system requirements for Lotus iNotes version 8.5 http://www-
01.ibm.com/support/docview.wss?rs=899&uid=swg27016096
“Domino Web Access”, as it was known in version 6 has now been
renamed to “Lotus iNotes” in version 8.5. http://www-
10.lotus.com/ldd/dominowiki.nsf/dx/Getting_started_Lotus_iNotes_8.5.
1

Page 7
4. SYSTEM SUMMARY
4.1. OBJECTIVES
In order to facilitate electronic communication within the Government network, every
EDB office user will be provided with an iNotes account to access email from outside
the office.
4.2. SYSTEM FUNCTIONS
The system would support common e-mail functions including:
1. Compose, forward, reply, delete mails, including Internet mails, and return receipt;
2. Handle file attachments;
3. Use directory for locating mail recipients;
4. Work with virus scanning tools; and
5. Provide Single Sign-on with EDB Portal (Common Logon System) account and
Windows LAN account.
The system would allow users to communicate with other mail users in the
Government, which includes:
1. Exchange emails with users of other email systems in the same B/D;
2. Share directory information with other email systems in the same B/D;
3. Support the exchange of emails with users across B/Ds under the existing
Government Communication Network (GCN) messaging infrastructure;
4. Comply with the requirements of GCN for email communication across B/Ds:
a. Support the use of existing central GCN facilities for mail exchange and
directory synchronization with other B/Ds;
b. Maintain a single address book to GCN;
c. Use the same address format as existing mail users in either
“<Name>/<Dept>/HKSARG@<Dept>” or “<name>@<dept>.hksarg; and
d. Share the same e-mail address domain as that being used by existing
email systems for mail routings in either Lotus Notes format or SMTP.
Page 8
5. ACCESS REQUIREMENTS
5.1. COMPUTER HARDWARE
Hardware Requirements:
Recommended for better performance -- Pentium IV 2.0 GHz with
512 MB of memory
Minimum requirement -- Pentium III 1 GHz with 256 MB of memory
5.2. COMPUTER SOFTWARE
Client Operating Systems:
Windows Vista
Windows 7
Supported Browsers:
Internet Explorer 7 or later version
*Note: JavaScript and cookies should be enabled in the browsers for
running the iNotes client without error. In addition, Security property
"Do not save encrypted pages to disk" under Advanced options of
Internet Explorer should not be checked.
5.3. MOBILE DEVICES
Supported devices:
Ultralite mode is available for iOS devices with iOS version 2.2.x
or higher
Google Android OS is not supported by IBM for use with the
current version of iNotes. However, it will load in Ultralite mode
with limited functionality.

Page 9
6. INOTES OPERATING INSTRUCTIONS
Users can access iNotes with a workstation that can access the Internet.
6.1. Prepare Internet Explorer
When using Internet Explorer 11, you must enable compatibility mode to use iNotes: 1. Tap or click the Tools button Tools, and then tap or click Compatibility View
settings. 2. Under Add this website, enter the edb.gov.hk and then tap or click Add.
Page 10
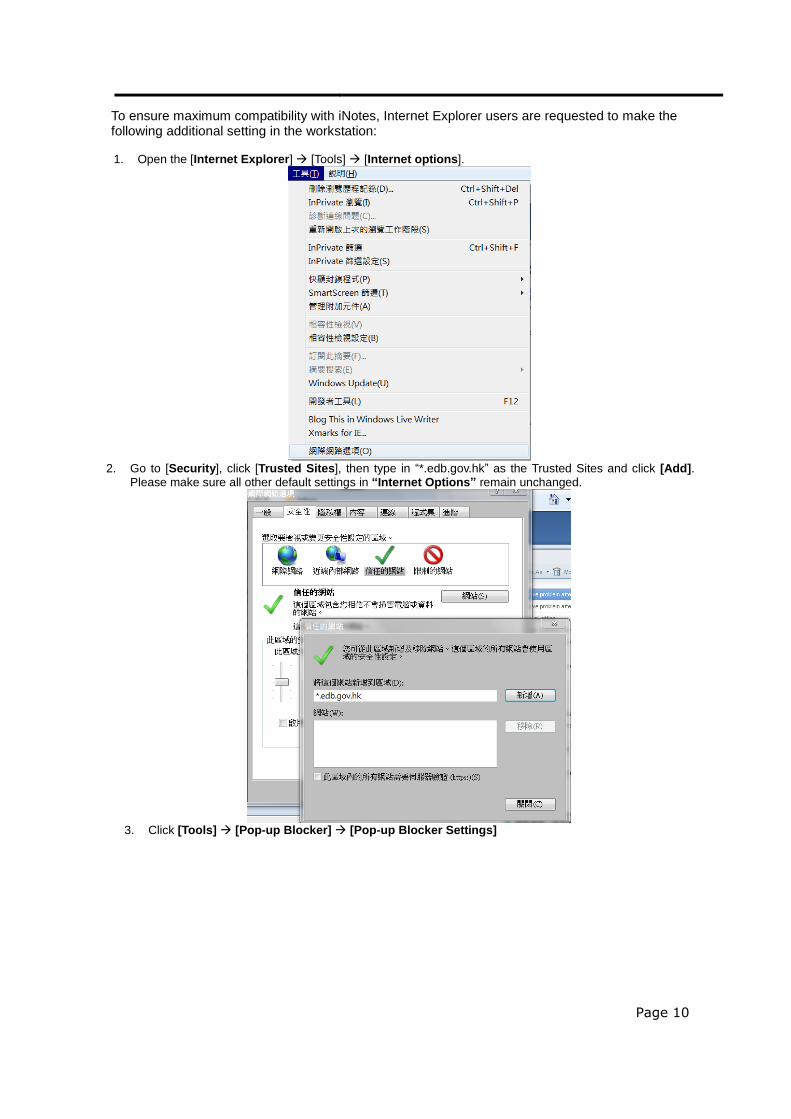
To ensure maximum compatibility with iNotes, Internet Explorer users are requested to make the following additional setting in the workstation:
1. Open the [Internet Explorer] [Tools] [Internet options].
2. Go to [Security], click [Trusted Sites], then type in “*.edb.gov.hk” as the Trusted Sites and click [Add].
Please make sure all other default settings in “Internet Options” remain unchanged.
3. Click [Tools] [Pop-up Blocker] [Pop-up Blocker Settings]
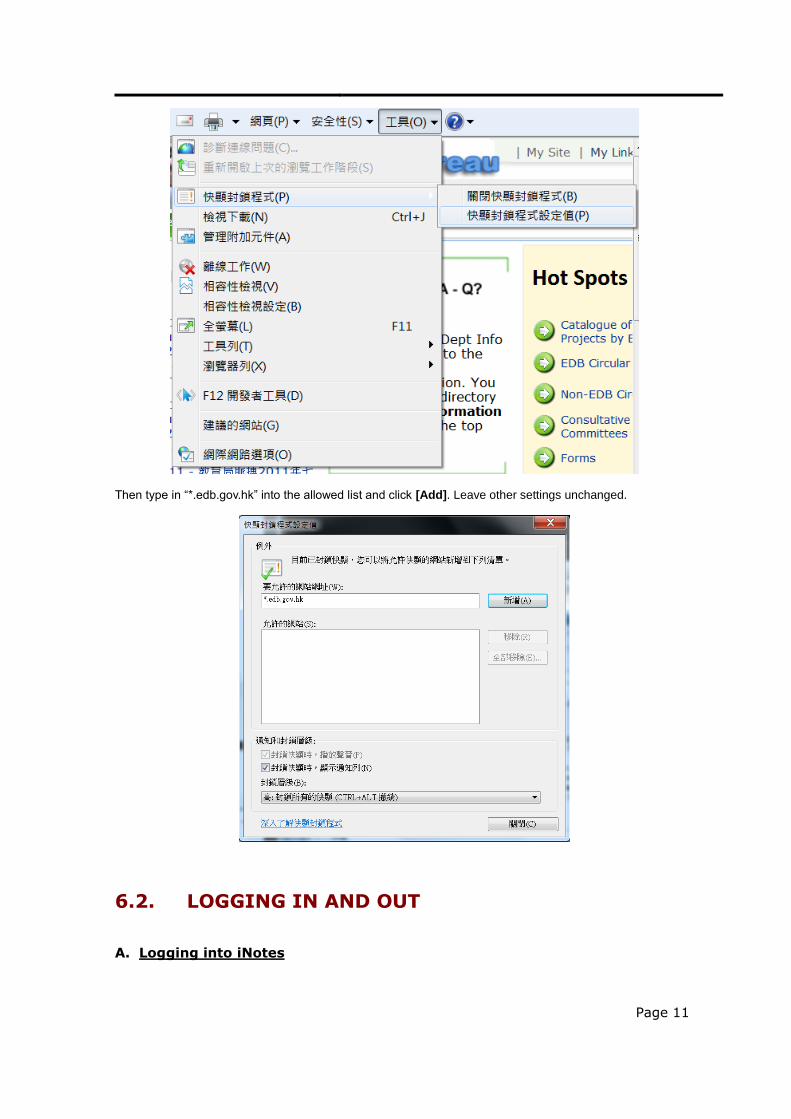
Page 11
Then type in “*.edb.gov.hk” into the allowed list and click [Add]. Leave other settings unchanged.
6.2. LOGGING IN AND OUT
A. Logging into iNotes

Page 12
In order to initialise the Single Sign-on mechanism, you are suggested to change your
Intranet password once before you use your iNotes. The steps are stipulated at
Appendix of this guide. You should re-logon the Intranet to verify the new password
is functioning well after the password is changed and close all open web browsers.
You may then start accessing the iNotes after 30 minutes.
1. Logon EDB Intranet through the Common Logon System on the EDB Portal
Logon Page (https://portal.edb.gov.hk).
2. After logon EDB Intranet, you can access iNotes through [User Services] ->
[Check My Email] -> [Domino Web Access].
3. With the Single Sign-on mechanism enabled, your iNotes mail box should be
shown directly without another logon prompt.

Page 13

Page 14
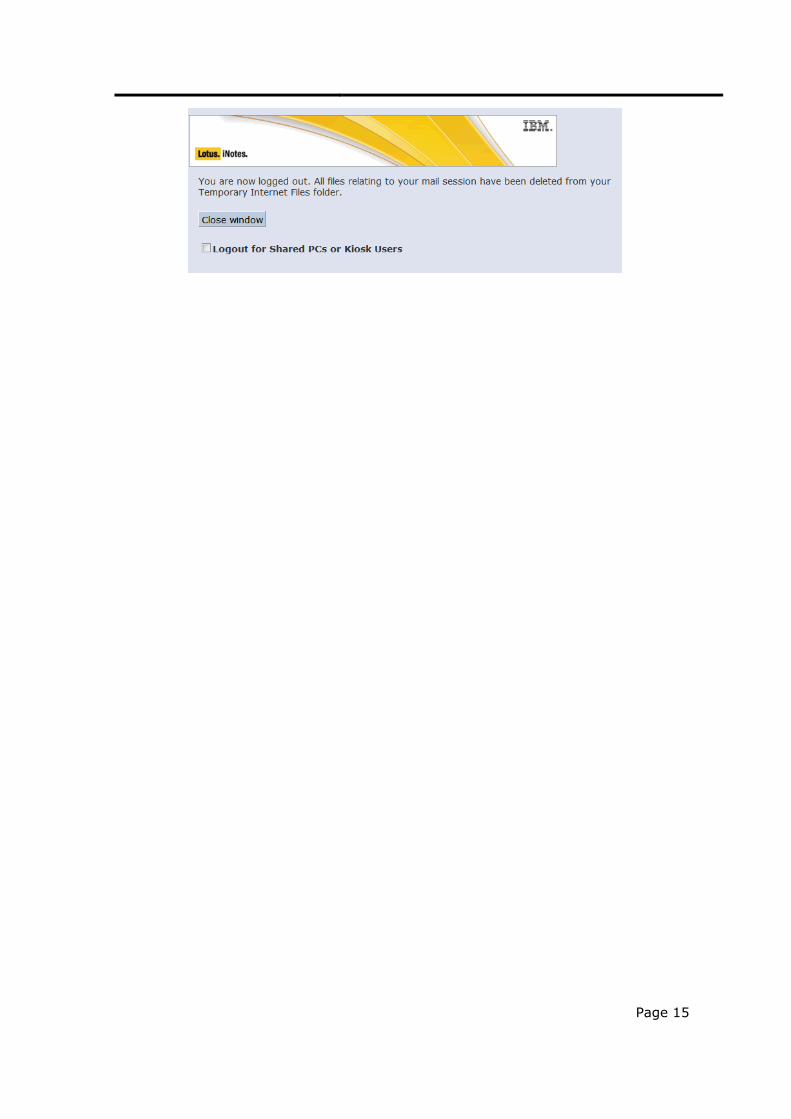
B. Logout iNotes
You should logout iNotes as soon as you complete using it.
1. Click [Logout].
2. On the first use of iNotes, you will be prompted to allow IBM Lotus iNotes 8.5 to
make changes to your machine when logging out. You must verify that the
source of this request belongs to “IBM” and/or “International Business Machines
Corportation”. Then allow this to run in order to enable full functions of iNotes.
a. Once verified as a trusted source, click [Yes] on the User Account Control
(UAC) pops up to complete the installation.
3. Check the box [Logout for Shared PCs or Kiosk Users], especially if you are
using a shared workstation with your iNotes.
Page 15
Page 16
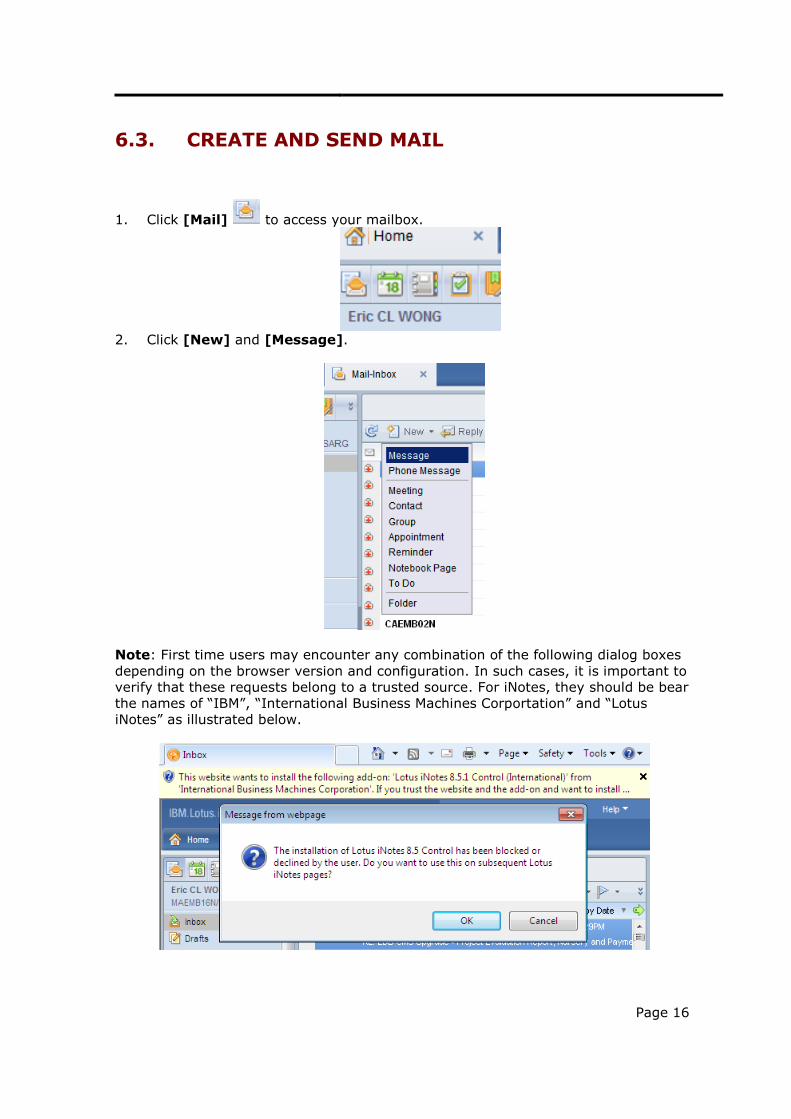
6.3. CREATE AND SEND MAIL
1. Click [Mail] to access your mailbox.
2. Click [New] and [Message].
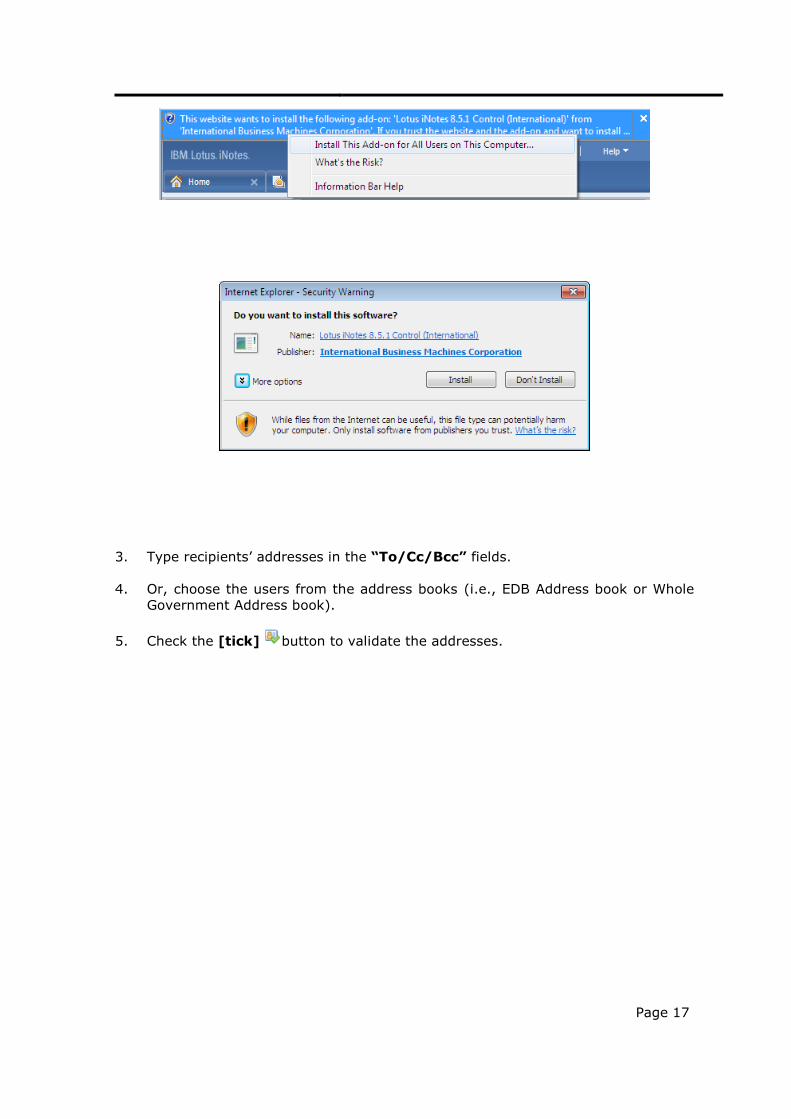
Note: First time users may encounter any combination of the following dialog boxes
depending on the browser version and configuration. In such cases, it is important to
verify that these requests belong to a trusted source. For iNotes, they should be bear
the names of “IBM”, “International Business Machines Corportation” and “Lotus
iNotes” as illustrated below.
Page 17
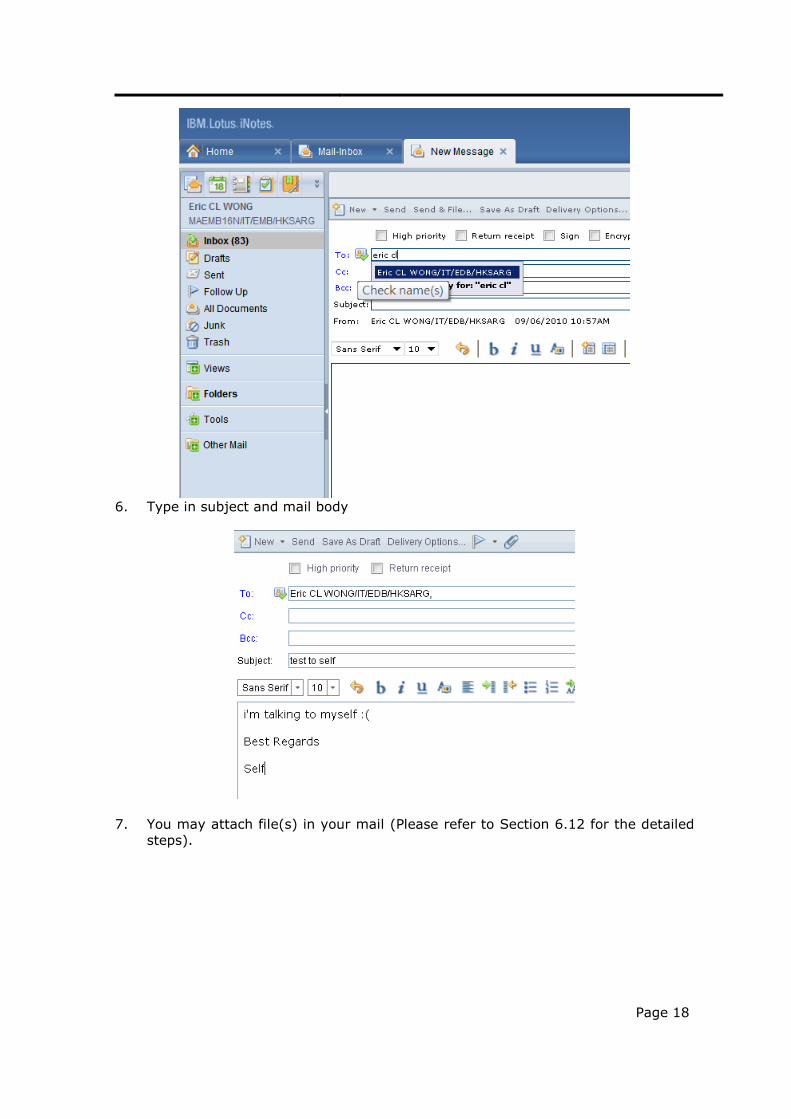
3. Type recipients’ addresses in the “To/Cc/Bcc” fields.
4. Or, choose the users from the address books (i.e., EDB Address book or Whole
Government Address book).
5. Check the [tick] button to validate the addresses.
Page 18
6. Type in subject and mail body
7. You may attach file(s) in your mail (Please refer to Section 6.12 for the detailed
steps).

Page 19
8. Click [Send].
Note: Before you send the mail, you can check the spelling by pressing the circled
icon below:
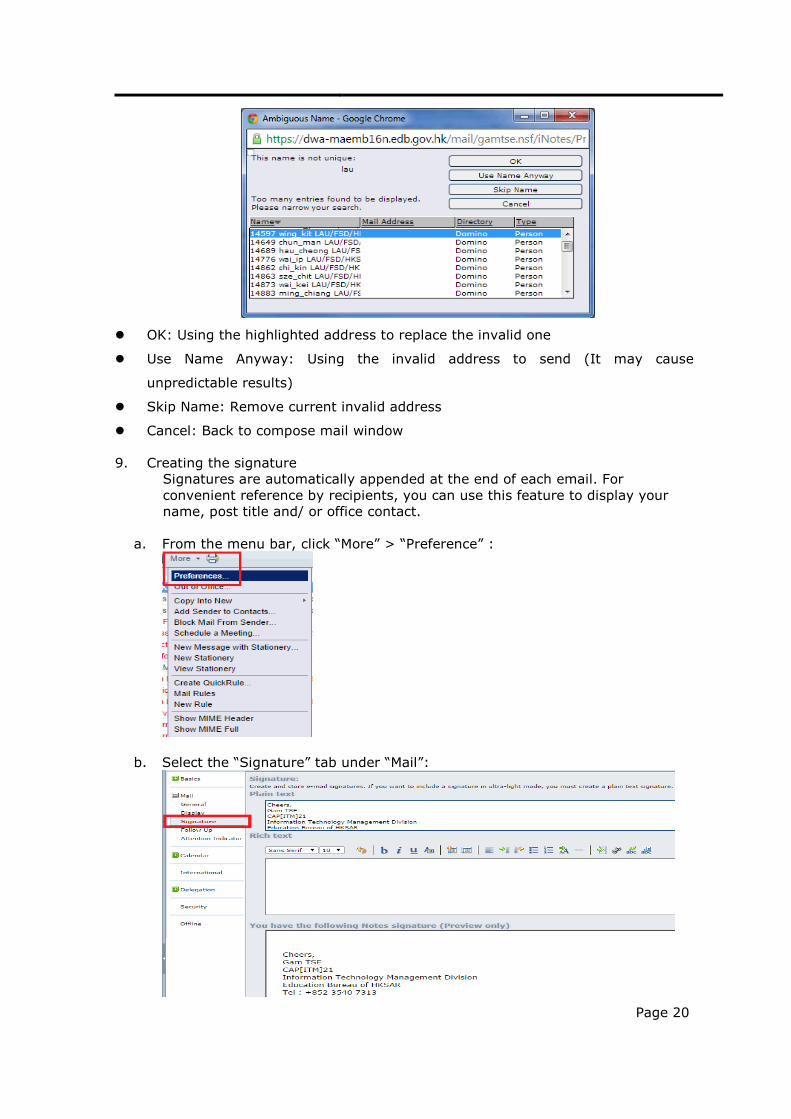
When you are going to send the message to invalid address, a warning message as
below will prompt. Here are four options:
Page 20
OK: Using the highlighted address to replace the invalid one
Use Name Anyway: Using the invalid address to send (It may cause
unpredictable results)
Skip Name: Remove current invalid address
Cancel: Back to compose mail window
9. Creating the signature
Signatures are automatically appended at the end of each email. For
convenient reference by recipients, you can use this feature to display your
name, post title and/ or office contact.
a. From the menu bar, click “More” > “Preference” :
b. Select the “Signature” tab under “Mail”:
Page 21
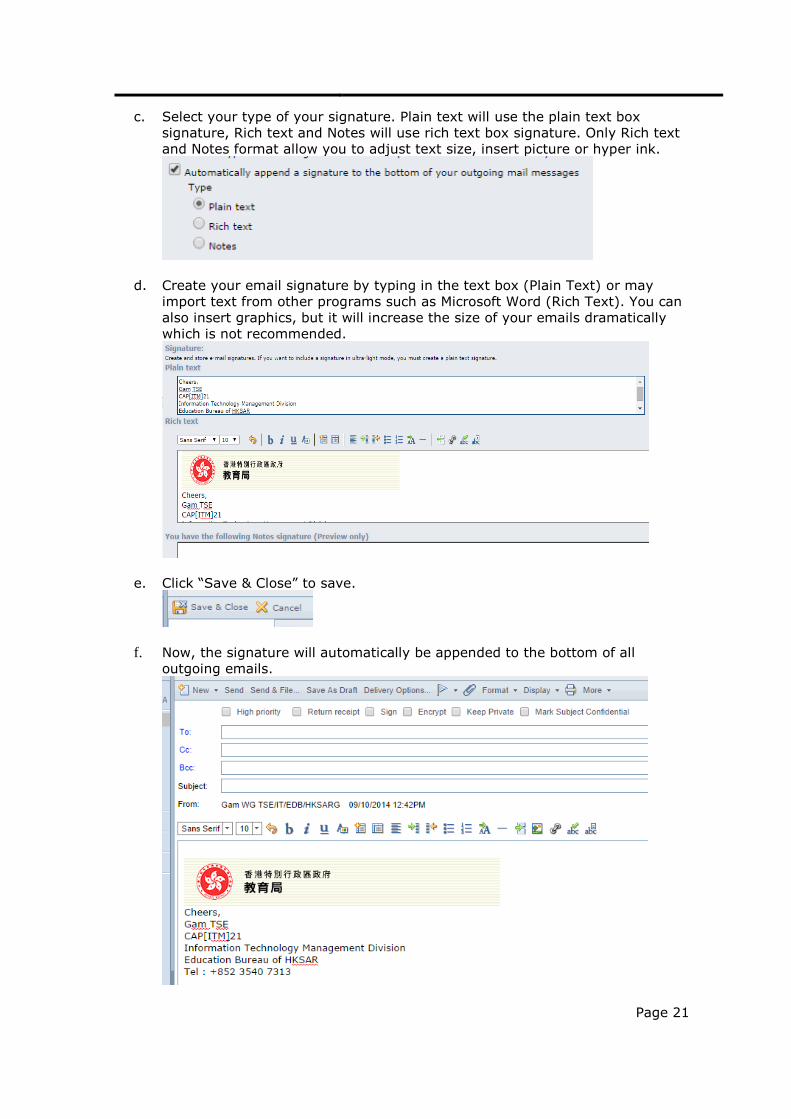
c. Select your type of your signature. Plain text will use the plain text box
signature, Rich text and Notes will use rich text box signature. Only Rich text
and Notes format allow you to adjust text size, insert picture or hyper ink.
d. Create your email signature by typing in the text box (Plain Text) or may
import text from other programs such as Microsoft Word (Rich Text). You can
also insert graphics, but it will increase the size of your emails dramatically
which is not recommended.
e. Click “Save & Close” to save.
f. Now, the signature will automatically be appended to the bottom of all
outgoing emails.
Page 22
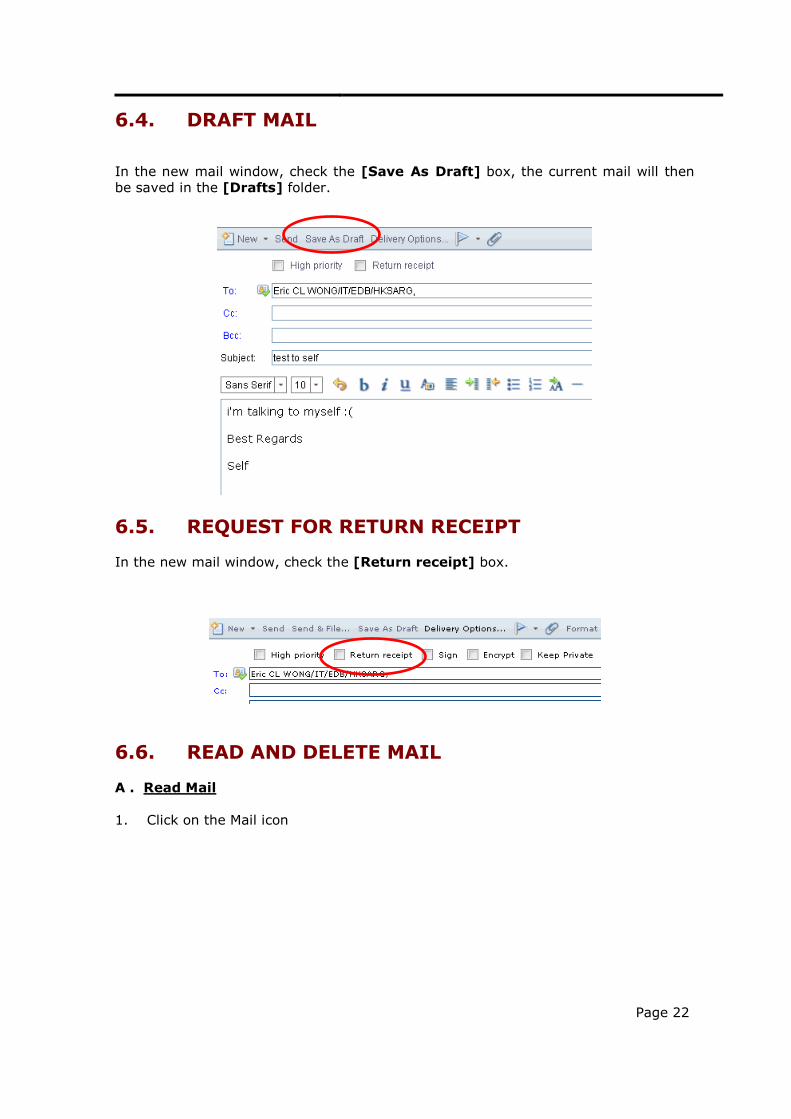
6.4. DRAFT MAIL
In the new mail window, check the [Save As Draft] box, the current mail will then
be saved in the [Drafts] folder.
6.5. REQUEST FOR RETURN RECEIPT
In the new mail window, check the [Return receipt] box.
6.6. READ AND DELETE MAIL
A . Read Mail
1. Click on the Mail icon
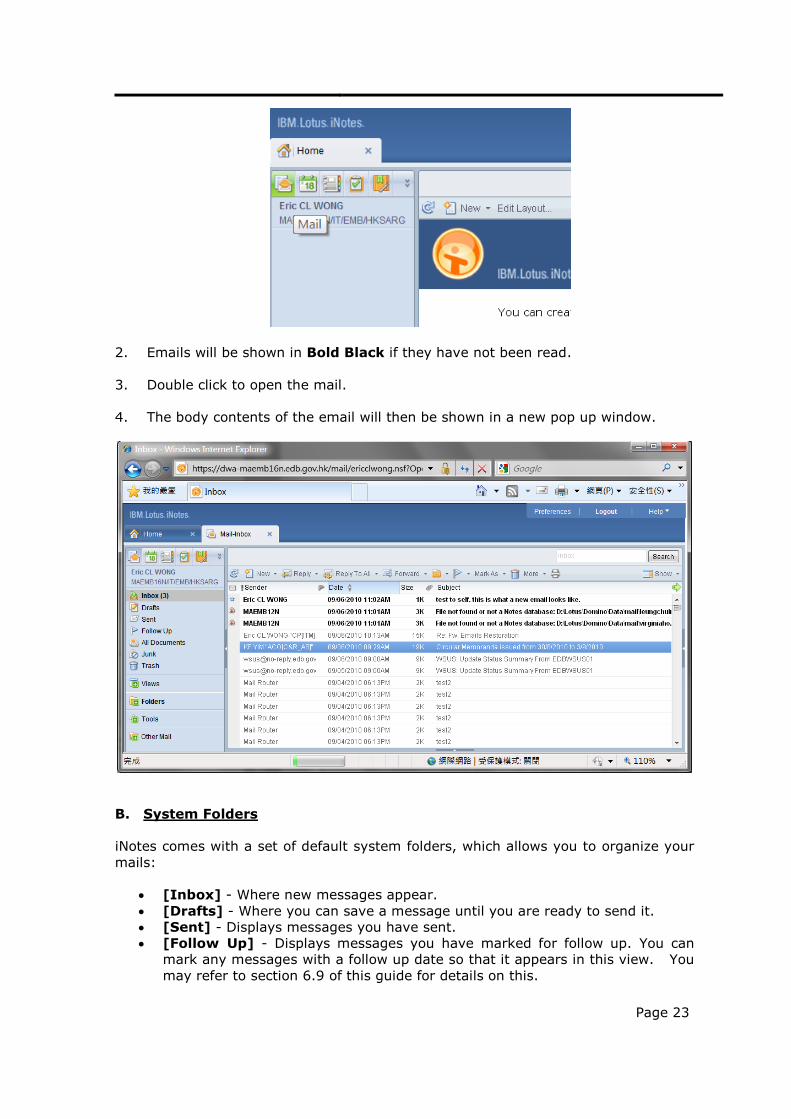
Page 23
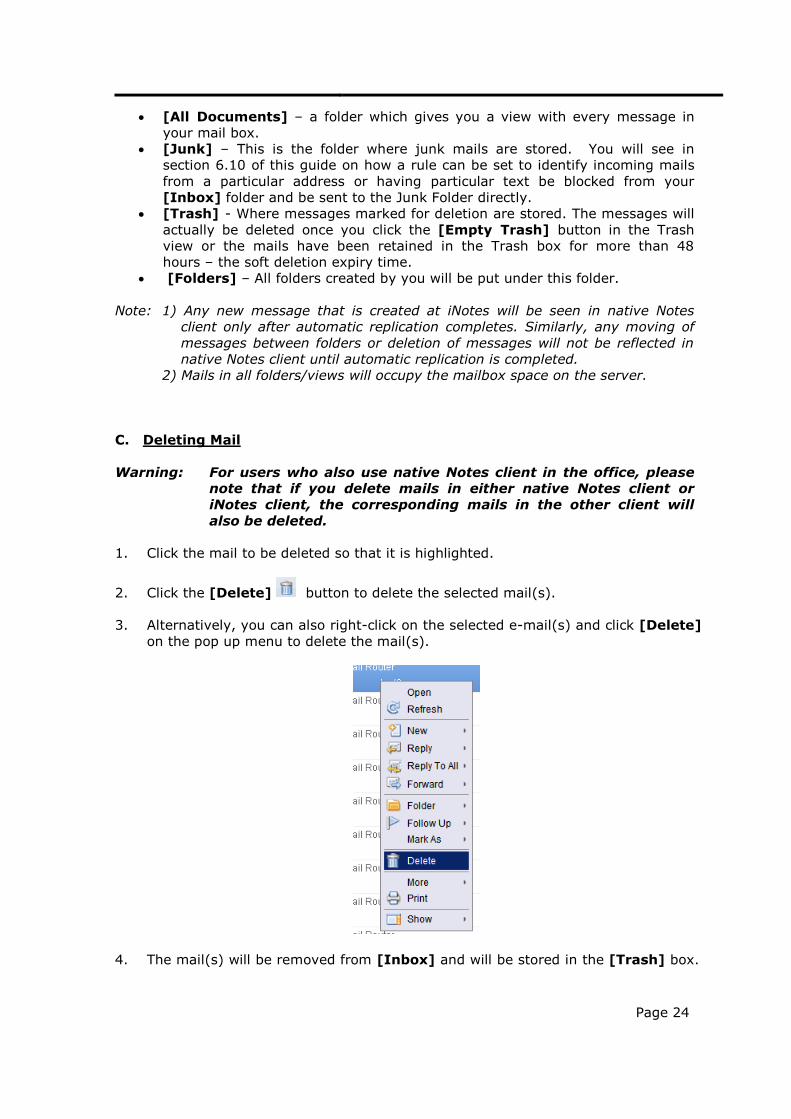
2. Emails will be shown in Bold Black if they have not been read.
3. Double click to open the mail.
4. The body contents of the email will then be shown in a new pop up window.
B. System Folders
iNotes comes with a set of default system folders, which allows you to organize your
mails:
[Inbox] - Where new messages appear.
[Drafts] - Where you can save a message until you are ready to send it.
[Sent] - Displays messages you have sent.
[Follow Up] - Displays messages you have marked for follow up. You can
mark any messages with a follow up date so that it appears in this view. You
may refer to section 6.9 of this guide for details on this.
Page 24
[All Documents] – a folder which gives you a view with every message in
your mail box.
[Junk] – This is the folder where junk mails are stored. You will see in
section 6.10 of this guide on how a rule can be set to identify incoming mails
from a particular address or having particular text be blocked from your
[Inbox] folder and be sent to the Junk Folder directly.
[Trash] - Where messages marked for deletion are stored. The messages will
actually be deleted once you click the [Empty Trash] button in the Trash
view or the mails have been retained in the Trash box for more than 48
hours – the soft deletion expiry time.
[Folders] – All folders created by you will be put under this folder.
Note: 1) Any new message that is created at iNotes will be seen in native Notes
client only after automatic replication completes. Similarly, any moving of
messages between folders or deletion of messages will not be reflected in
native Notes client until automatic replication is completed.
2) Mails in all folders/views will occupy the mailbox space on the server.
C. Deleting Mail
Warning: For users who also use native Notes client in the office, please
note that if you delete mails in either native Notes client or
iNotes client, the corresponding mails in the other client will
also be deleted.
1. Click the mail to be deleted so that it is highlighted.
2. Click the [Delete] button to delete the selected mail(s).
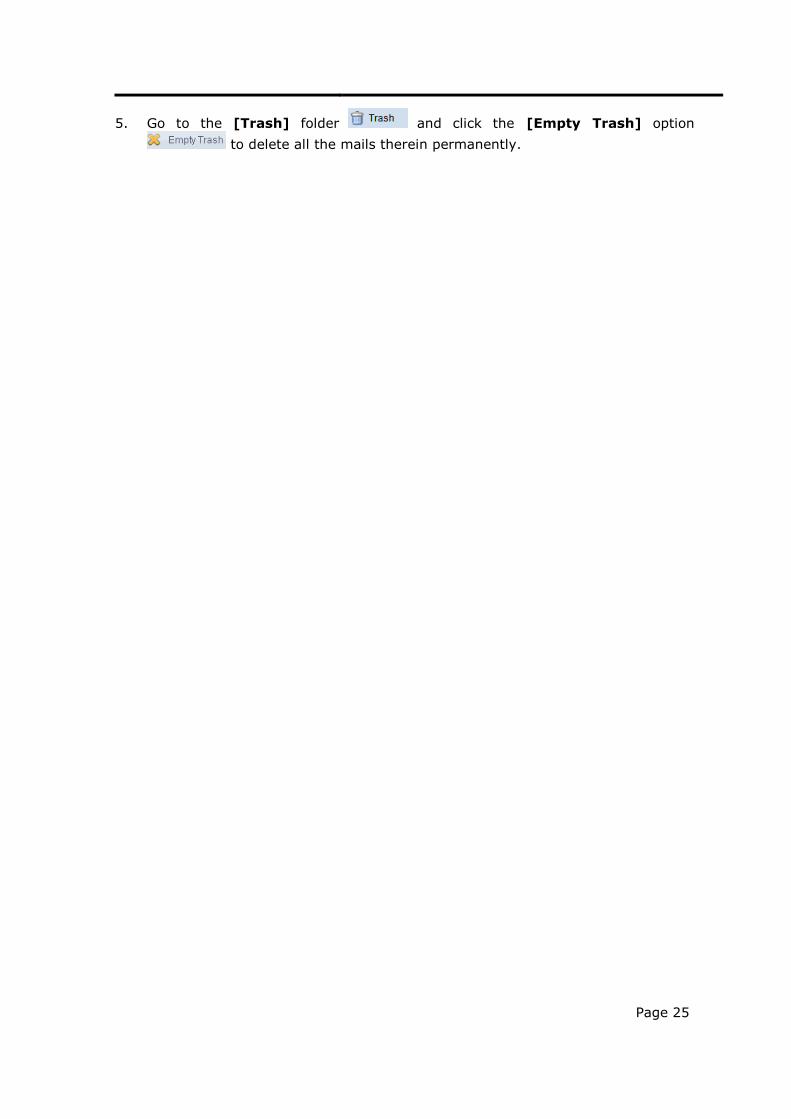
3. Alternatively, you can also right-click on the selected e-mail(s) and click [Delete]
on the pop up menu to delete the mail(s).
4. The mail(s) will be removed from [Inbox] and will be stored in the [Trash] box.
Page 25
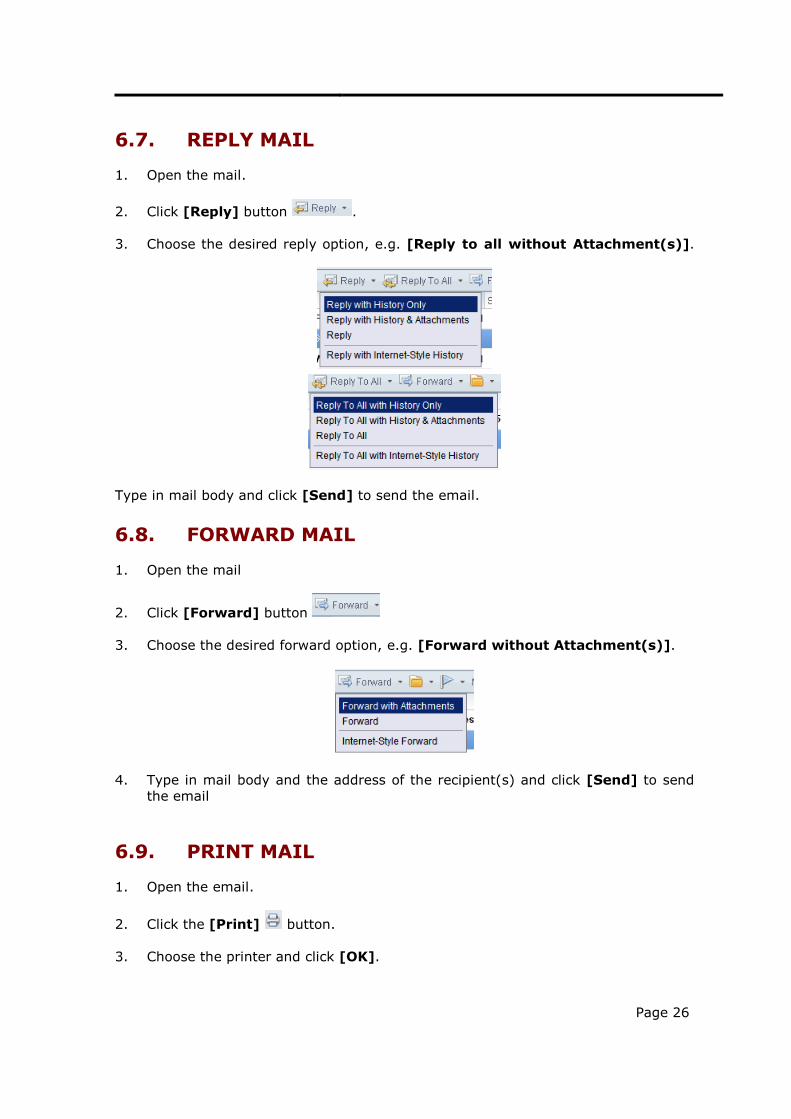
5. Go to the [Trash] folder and click the [Empty Trash] option
to delete all the mails therein permanently.
Page 26
6.7. REPLY MAIL
1. Open the mail.
2. Click [Reply] button .
3. Choose the desired reply option, e.g. [Reply to all without Attachment(s)].
Type in mail body and click [Send] to send the email.
6.8. FORWARD MAIL
1. Open the mail
2. Click [Forward] button
3. Choose the desired forward option, e.g. [Forward without Attachment(s)].
4. Type in mail body and the address of the recipient(s) and click [Send] to send
the email
6.9. PRINT MAIL
1. Open the email.
2. Click the [Print] button.
3. Choose the printer and click [OK].

Page 27
6.10. FOLLOW UP MAIL
1. Right-click on the desired mail to bring up the context menu then click [Follow
Up: Add/Edit Flag].
2. Select the desired priority for the flag, and fill in the fields [Enter a Follow Up
action] and [When to Follow Up], etc., as appropriate. Then click [Save &
Close] to save the setting.
3. After you mark the follow-up flag, the message will show up in the [Follow Up]
folder.

Page 28
4. To remove the flag, right-click the email and click [Follow Up: Remove Flag].
6.11. BLOCK MAIL FROM SENDER
1. Highlight by left clicking on the message you want to block, click [More Block
Mail from Sender…].
Page 29
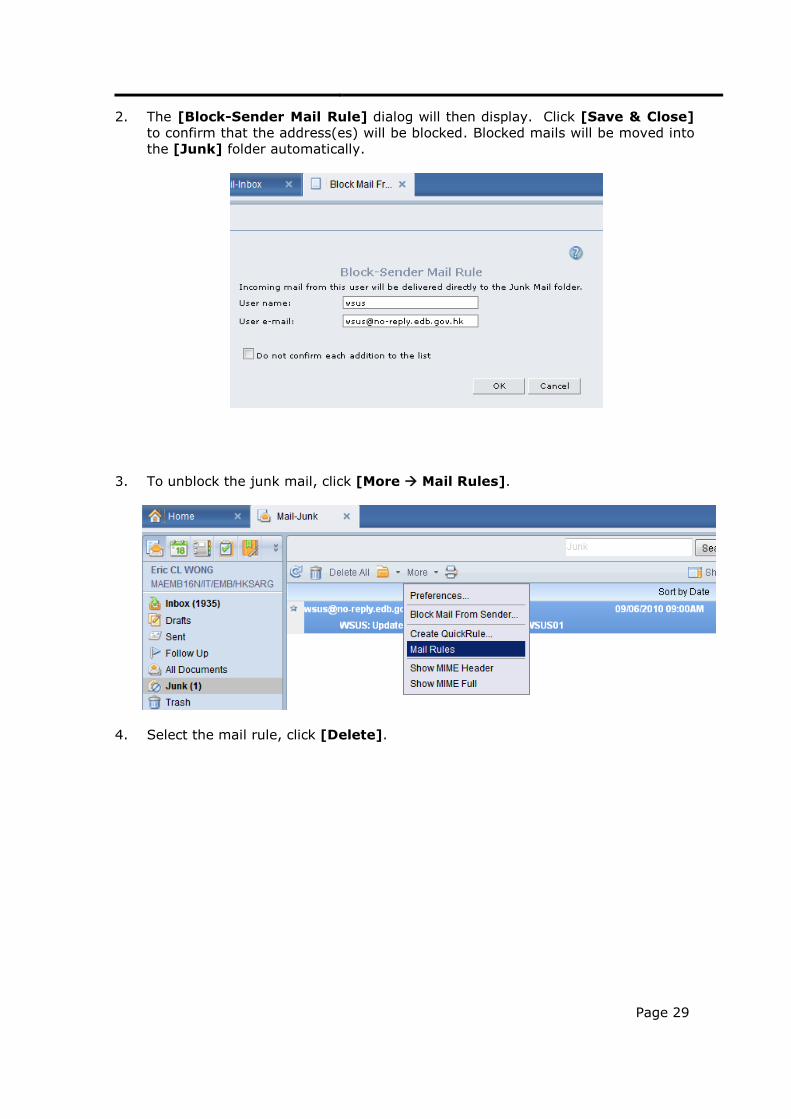
2. The [Block-Sender Mail Rule] dialog will then display. Click [Save & Close]
to confirm that the address(es) will be blocked. Blocked mails will be moved into
the [Junk] folder automatically.
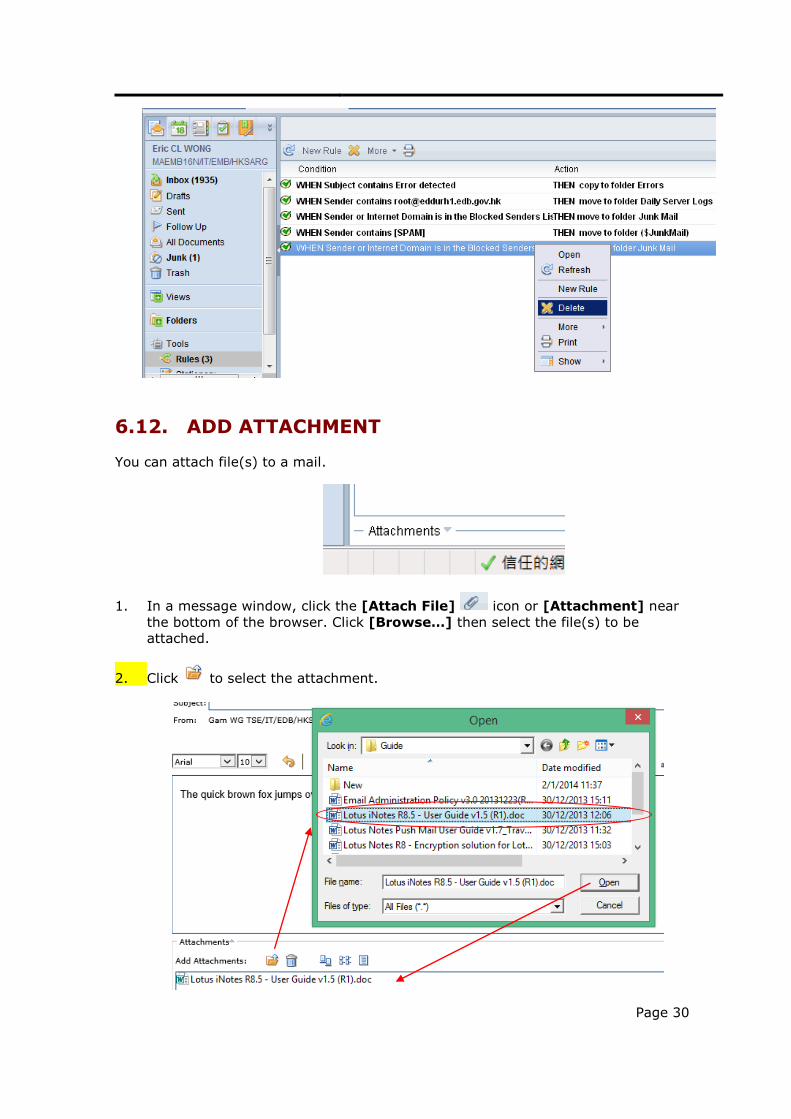
3. To unblock the junk mail, click [More Mail Rules].
4. Select the mail rule, click [Delete].
Page 30
6.12. ADD ATTACHMENT
You can attach file(s) to a mail.
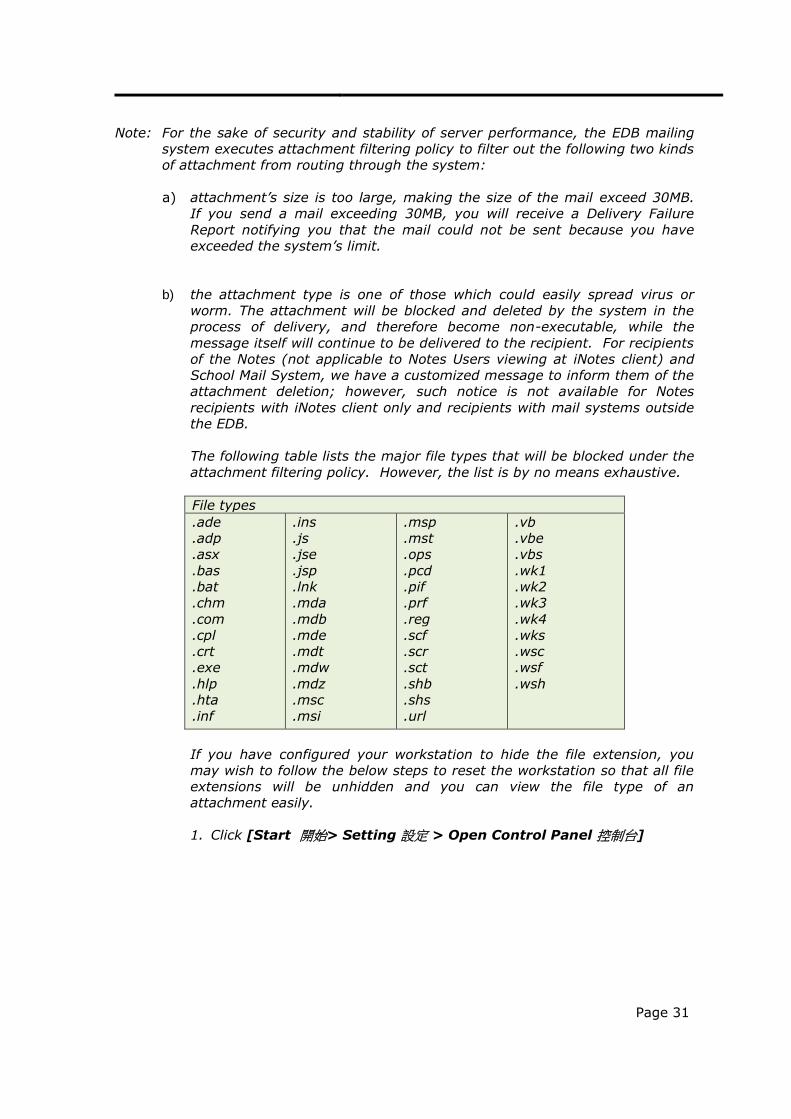
1. In a message window, click the [Attach File] icon or [Attachment] near
the bottom of the browser. Click [Browse…] then select the file(s) to be
attached.
2. Click to select the attachment.
Page 31
Note: For the sake of security and stability of server performance, the EDB mailing
system executes attachment filtering policy to filter out the following two kinds
of attachment from routing through the system:
a) attachment’s size is too large, making the size of the mail exceed 30MB.
If you send a mail exceeding 30MB, you will receive a Delivery Failure
Report notifying you that the mail could not be sent because you have
exceeded the system’s limit.
b) the attachment type is one of those which could easily spread virus or
worm. The attachment will be blocked and deleted by the system in the
process of delivery, and therefore become non-executable, while the
message itself will continue to be delivered to the recipient. For recipients
of the Notes (not applicable to Notes Users viewing at iNotes client) and
School Mail System, we have a customized message to inform them of the
attachment deletion; however, such notice is not available for Notes
recipients with iNotes client only and recipients with mail systems outside
the EDB.
The following table lists the major file types that will be blocked under the
attachment filtering policy. However, the list is by no means exhaustive.
File types
.ade
.adp
.asx
.bas
.bat
.chm
.com
.cpl
.crt
.exe
.hlp
.hta
.inf
.ins
.js
.jse
.jsp
.lnk
.mda
.mdb
.mde
.mdt
.mdw
.mdz
.msc
.msi
.msp
.mst
.ops
.pcd
.pif
.prf
.reg
.scf
.scr
.sct
.shb
.shs
.url
.vb
.vbe
.vbs
.wk1
.wk2
.wk3
.wk4
.wks
.wsc
.wsf
.wsh
If you have configured your workstation to hide the file extension, you
may wish to follow the below steps to reset the workstation so that all file
extensions will be unhidden and you can view the file type of an
attachment easily.
1. Click [Start 開始> Setting 設定 > Open Control Panel 控制台]
Page 32
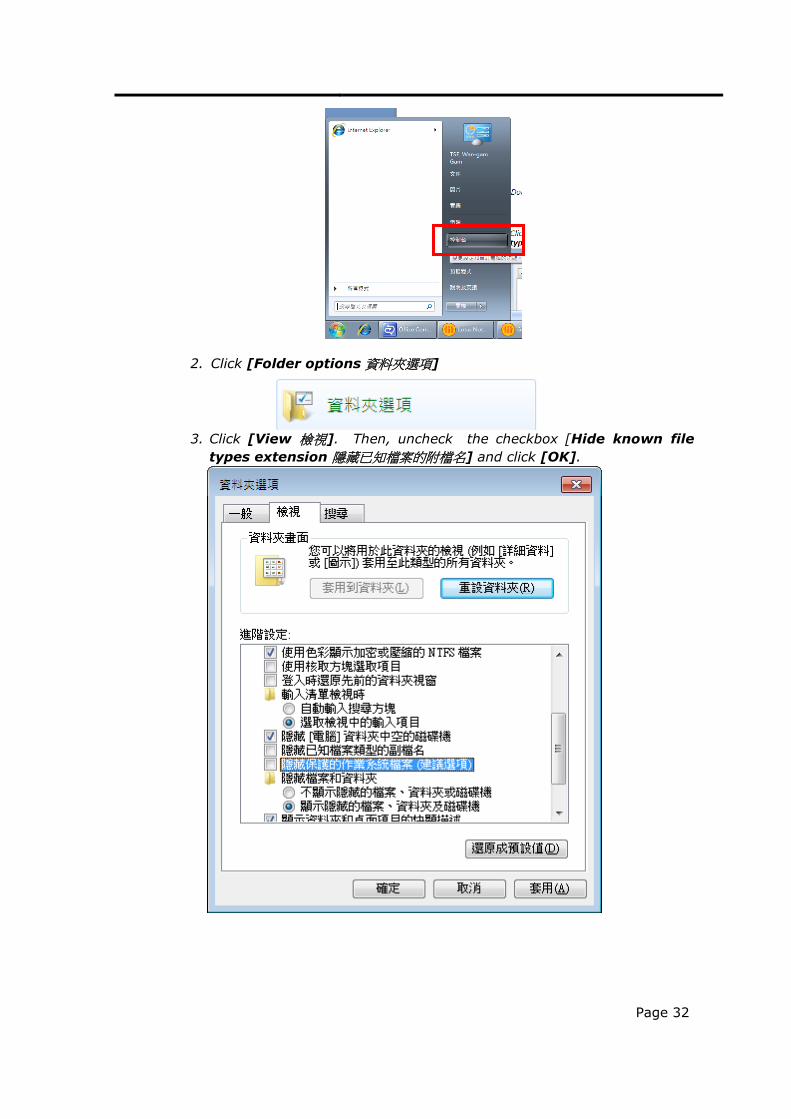
2. Click [Folder options 資料夾選項]
3. Click [View 檢視]. Then, uncheck the checkbox [Hide known file
types extension 隱藏已知檔案的附檔名] and click [OK].
Page 33
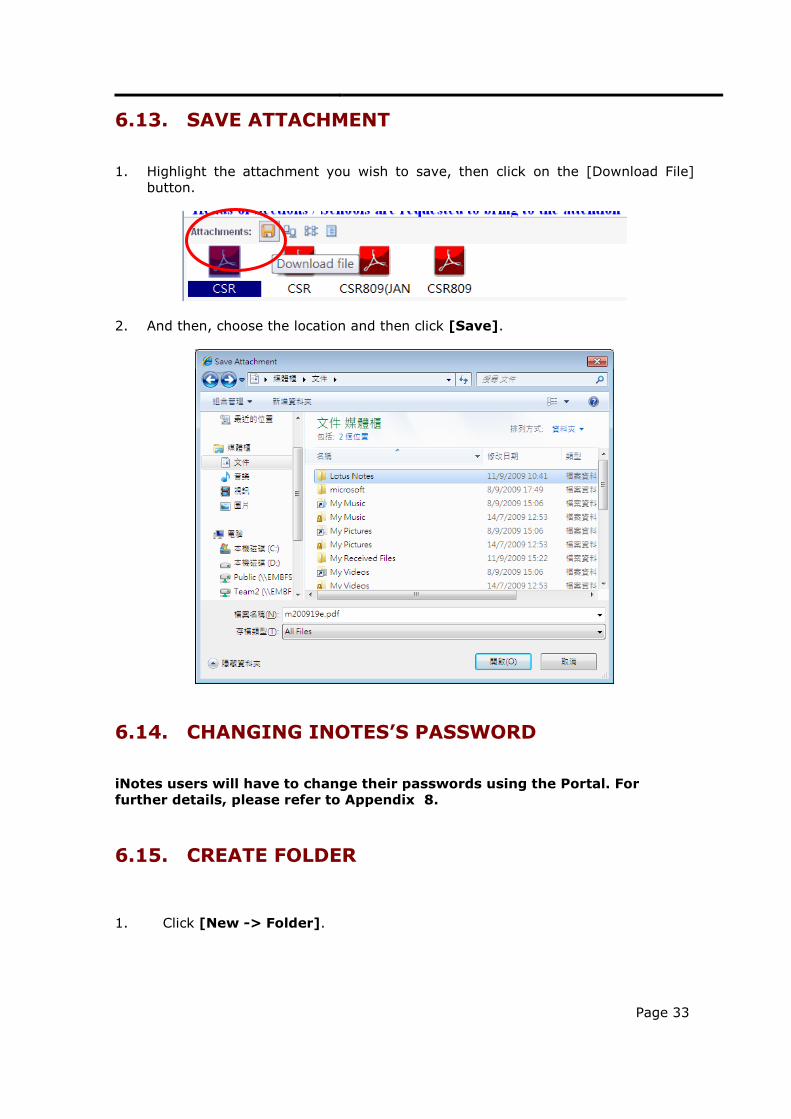
6.13. SAVE ATTACHMENT
1. Highlight the attachment you wish to save, then click on the [Download File]
button.
2. And then, choose the location and then click [Save].
6.14. CHANGING INOTES’S PASSWORD
iNotes users will have to change their passwords using the Portal. For
further details, please refer to Appendix 8.
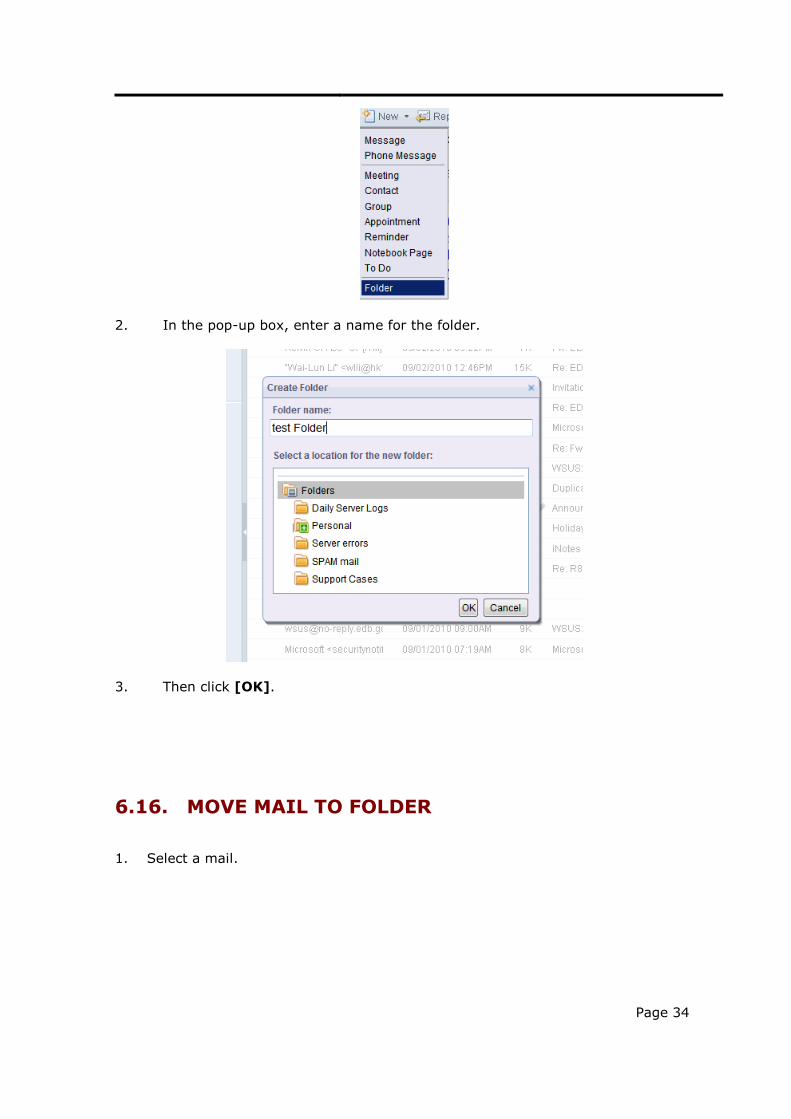
6.15. CREATE FOLDER
1. Click [New -> Folder].
Page 34
2. In the pop-up box, enter a name for the folder.
3. Then click [OK].
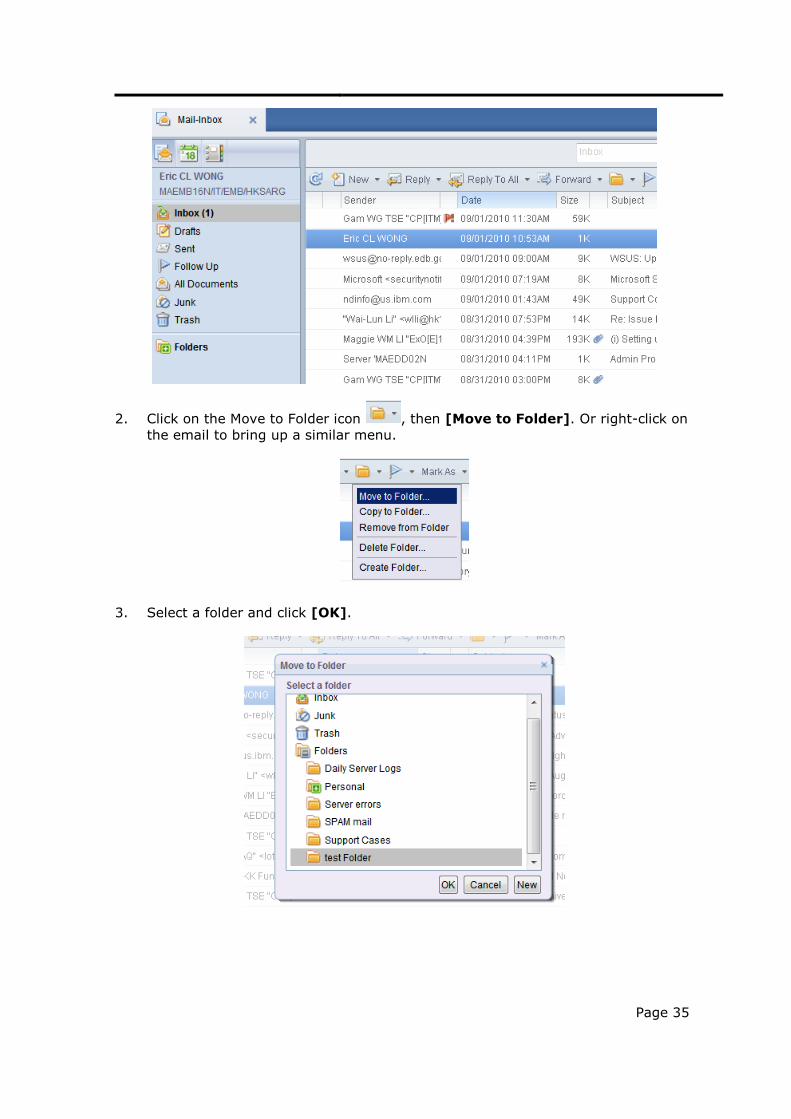
6.16. MOVE MAIL TO FOLDER
1. Select a mail.
Page 35
2. Click on the Move to Folder icon , then [Move to Folder]. Or right-click on
the email to bring up a similar menu.
3. Select a folder and click [OK].
Page 36
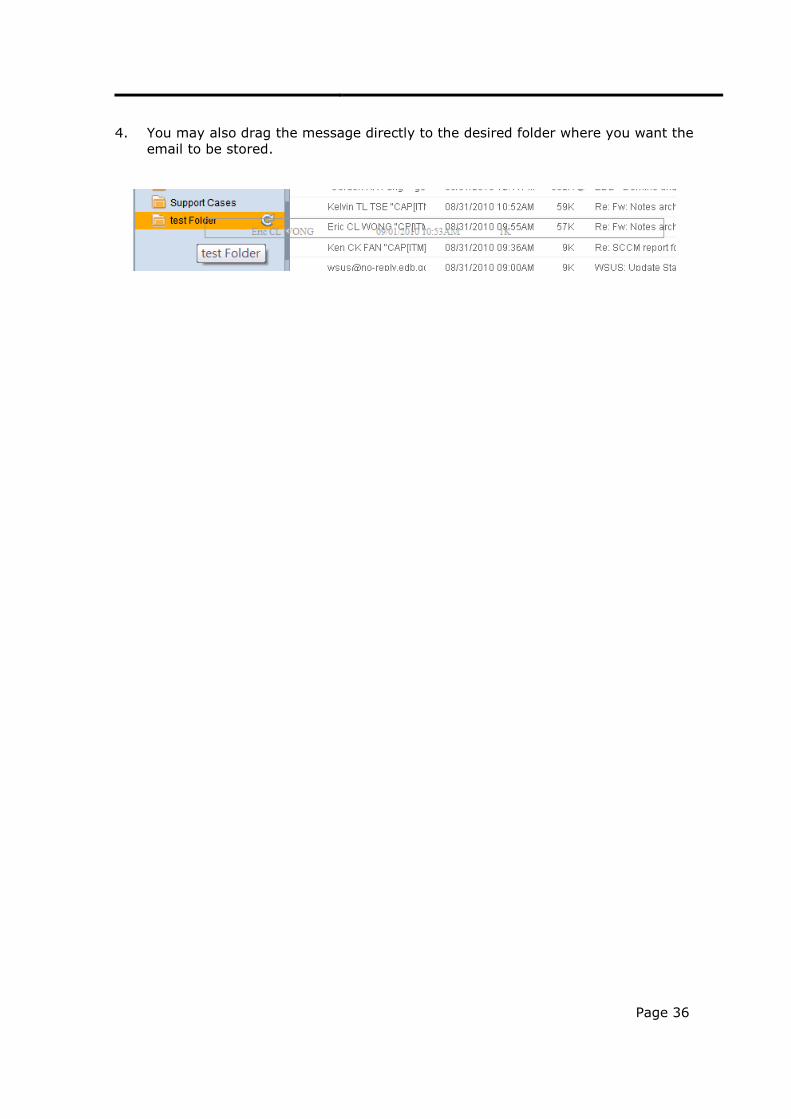
4. You may also drag the message directly to the desired folder where you want the
email to be stored.

Page 37
6.17. DELETE FOLDER
Warning: For users who also use native Notes client in office, please note
that if you delete folders in either native Notes client or iNotes
client, the corresponding folders in the other client will also be
deleted.
1. Right-click the folder you want to delete.
2. Select [Delete] from the pop-up menu.
Page 38
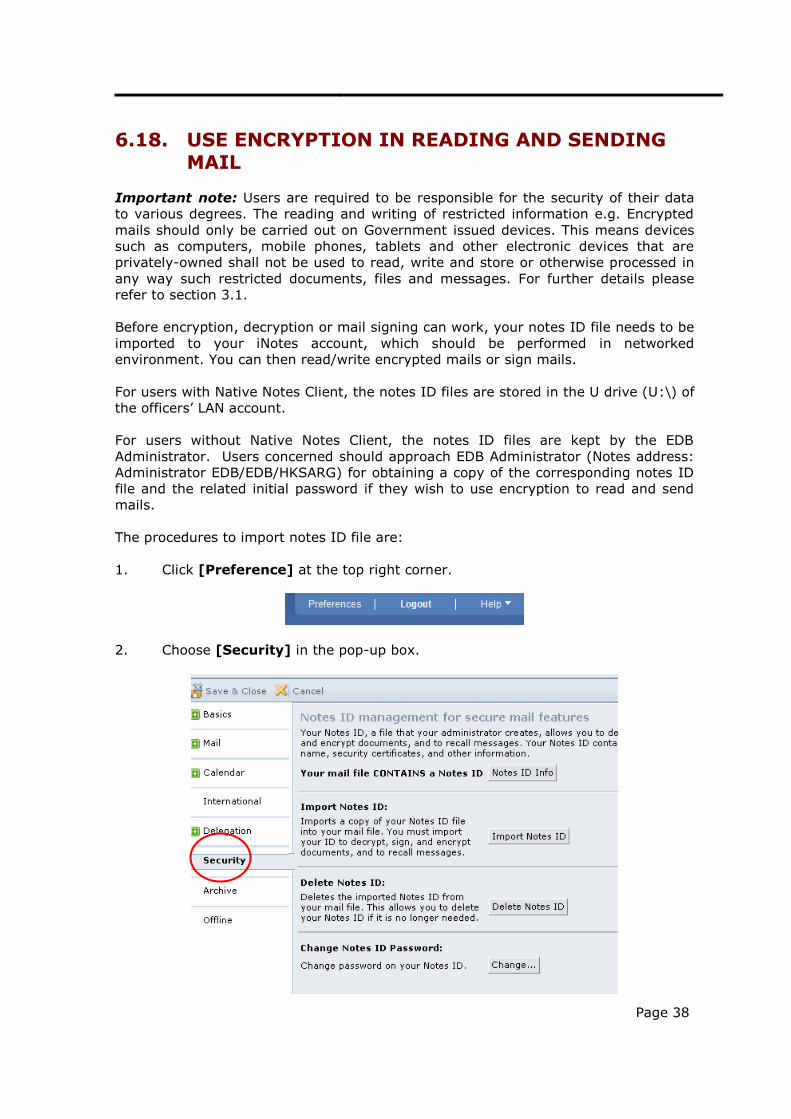
6.18. USE ENCRYPTION IN READING AND SENDING MAIL
Important note: Users are required to be responsible for the security of their data
to various degrees. The reading and writing of restricted information e.g. Encrypted
mails should only be carried out on Government issued devices. This means devices
such as computers, mobile phones, tablets and other electronic devices that are
privately-owned shall not be used to read, write and store or otherwise processed in
any way such restricted documents, files and messages. For further details please
refer to section 3.1.
Before encryption, decryption or mail signing can work, your notes ID file needs to be
imported to your iNotes account, which should be performed in networked
environment. You can then read/write encrypted mails or sign mails.
For users with Native Notes Client, the notes ID files are stored in the U drive (U:\) of
the officers’ LAN account.
For users without Native Notes Client, the notes ID files are kept by the EDB
Administrator. Users concerned should approach EDB Administrator (Notes address:
Administrator EDB/EDB/HKSARG) for obtaining a copy of the corresponding notes ID
file and the related initial password if they wish to use encryption to read and send
mails.
The procedures to import notes ID file are:
1. Click [Preference] at the top right corner.
2. Choose [Security] in the pop-up box.

Page 39
3. Click [Import Notes ID] button.
4. Click [Browse…] button in the pop-up box.
5. Select your ID file and click [Open].
Page 40
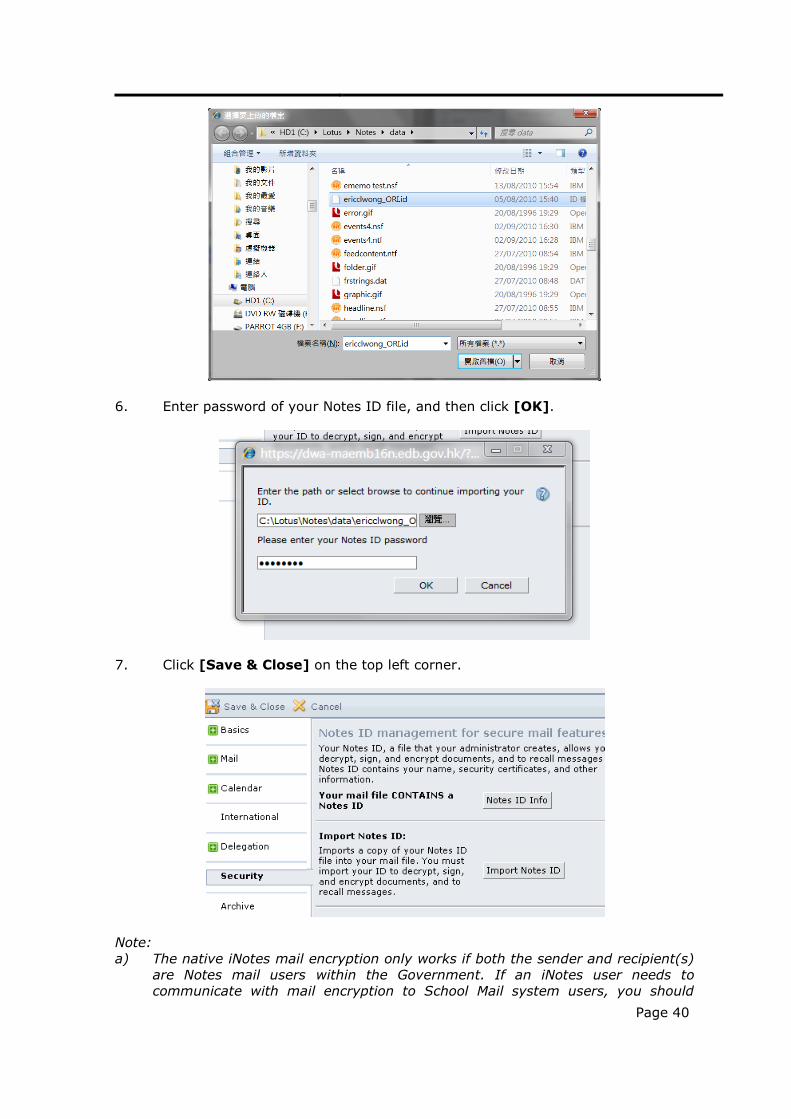
6. Enter password of your Notes ID file, and then click [OK].
7. Click [Save & Close] on the top left corner.
Note:
a) The native iNotes mail encryption only works if both the sender and recipient(s)
are Notes mail users within the Government. If an iNotes user needs to
communicate with mail encryption to School Mail system users, you should

Page 41
approach EDB Administrator (Notes address: Administrator EDB/EDB/HKSARG)
for applying a native Notes client for the necessary mail encryption.
8. Once you have imported your Notes ID file and entered the Notes ID password,
you can read encrypted mails or check the [Encrypt] box to encrypt the mail
when sending mails. You may also check the [Sign] box to sign the mail, if
necessary.
6.19. SET UP “OUT OF OFFICE"
1. Login your Lotus Notes Client and open your mail box.
2. Click the icon [More] and select the option [Out of Office].
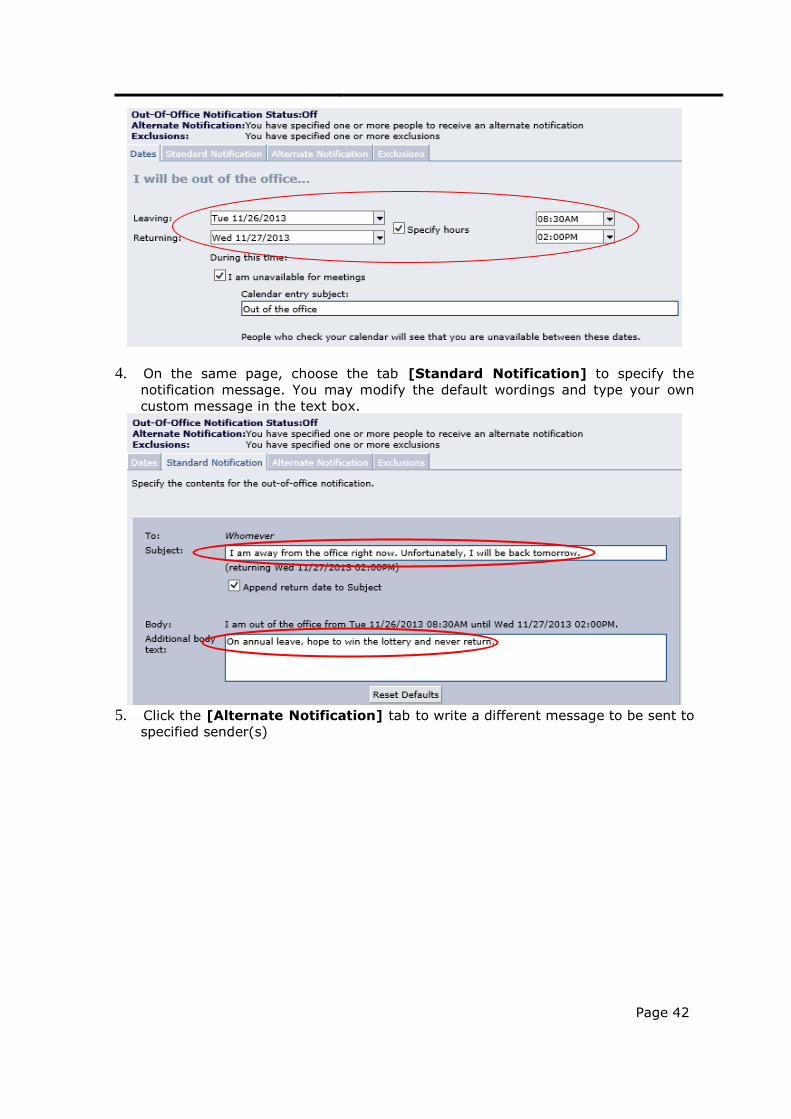
3. The [Out of Office] set up menu will be displayed as follows. Pick the dates
from the Leaving and Returning pull-down menu. You can check the “Specify
hours” box to specify the leaving and returning time.
Page 42
4. On the same page, choose the tab [Standard Notification] to specify the
notification message. You may modify the default wordings and type your own
custom message in the text box.
5. Click the [Alternate Notification] tab to write a different message to be sent to
specified sender(s)
Page 43
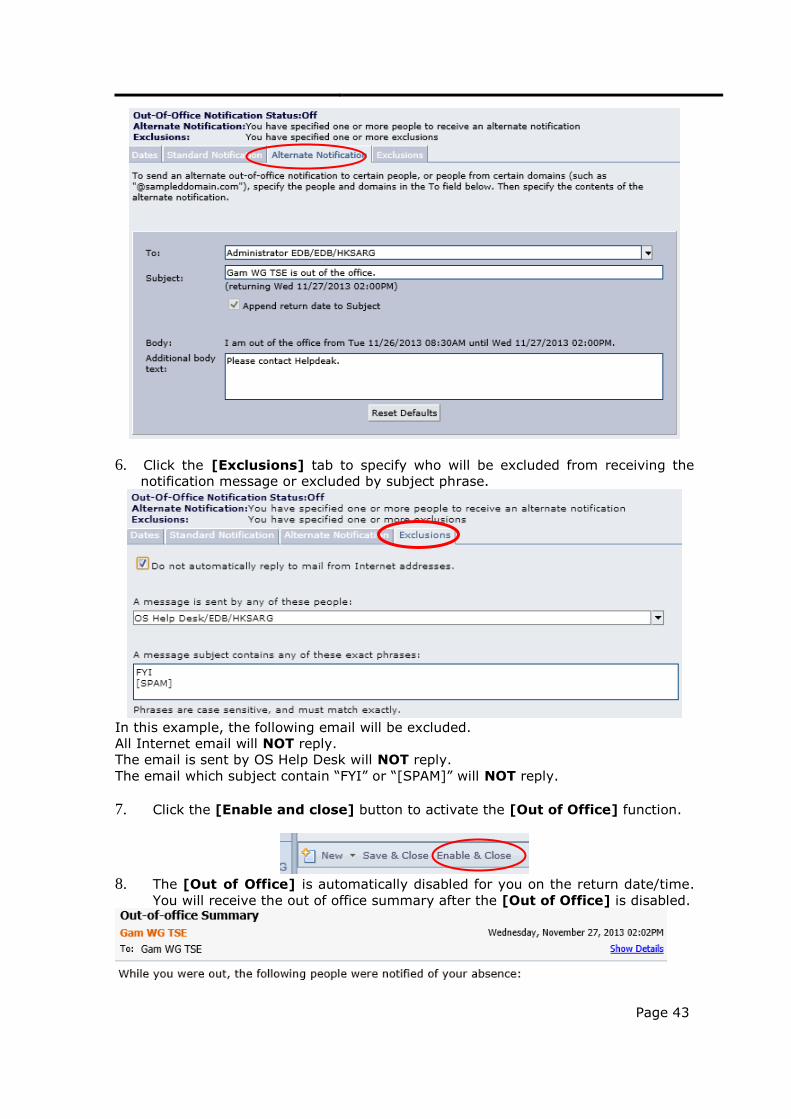
6. Click the [Exclusions] tab to specify who will be excluded from receiving the
notification message or excluded by subject phrase.
In this example, the following email will be excluded.
All Internet email will NOT reply.
The email is sent by OS Help Desk will NOT reply.
The email which subject contain “FYI” or “[SPAM]” will NOT reply.
7. Click the [Enable and close] button to activate the [Out of Office] function.
8. The [Out of Office] is automatically disabled for you on the return date/time.
You will receive the out of office summary after the [Out of Office] is disabled.
Page 44
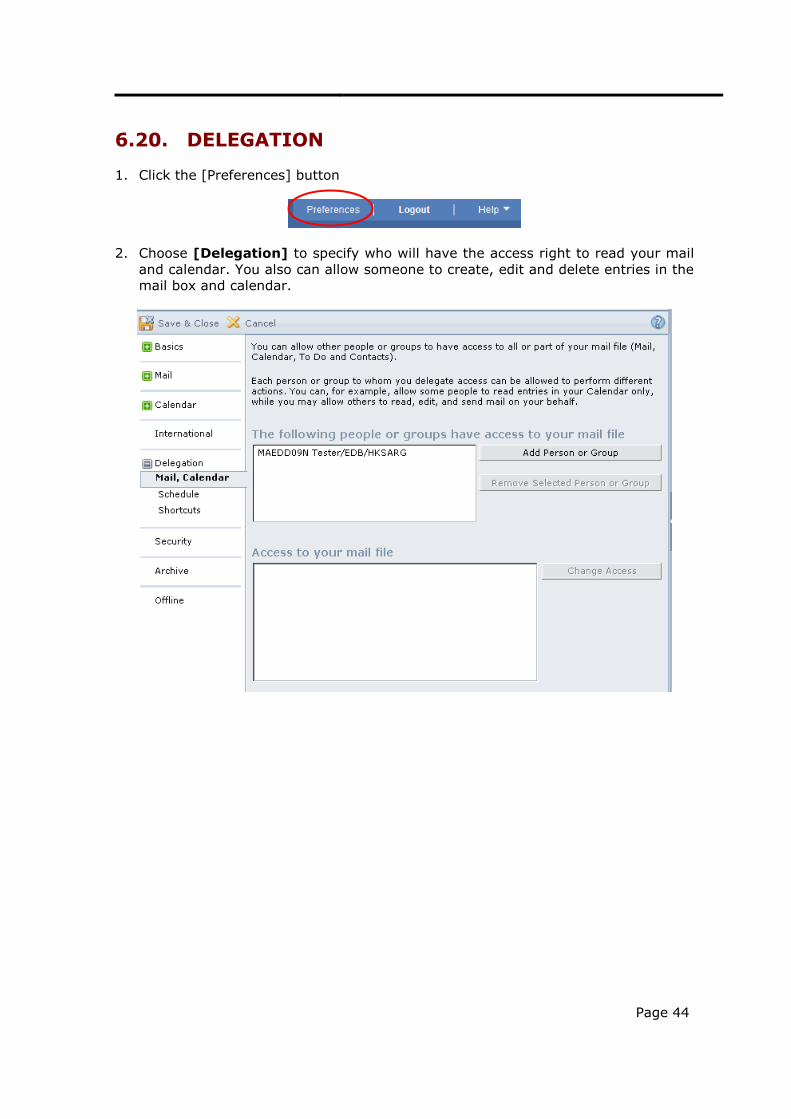
6.20. DELEGATION
1. Click the [Preferences] button
2. Choose [Delegation] to specify who will have the access right to read your mail
and calendar. You also can allow someone to create, edit and delete entries in the
mail box and calendar.
Page 45
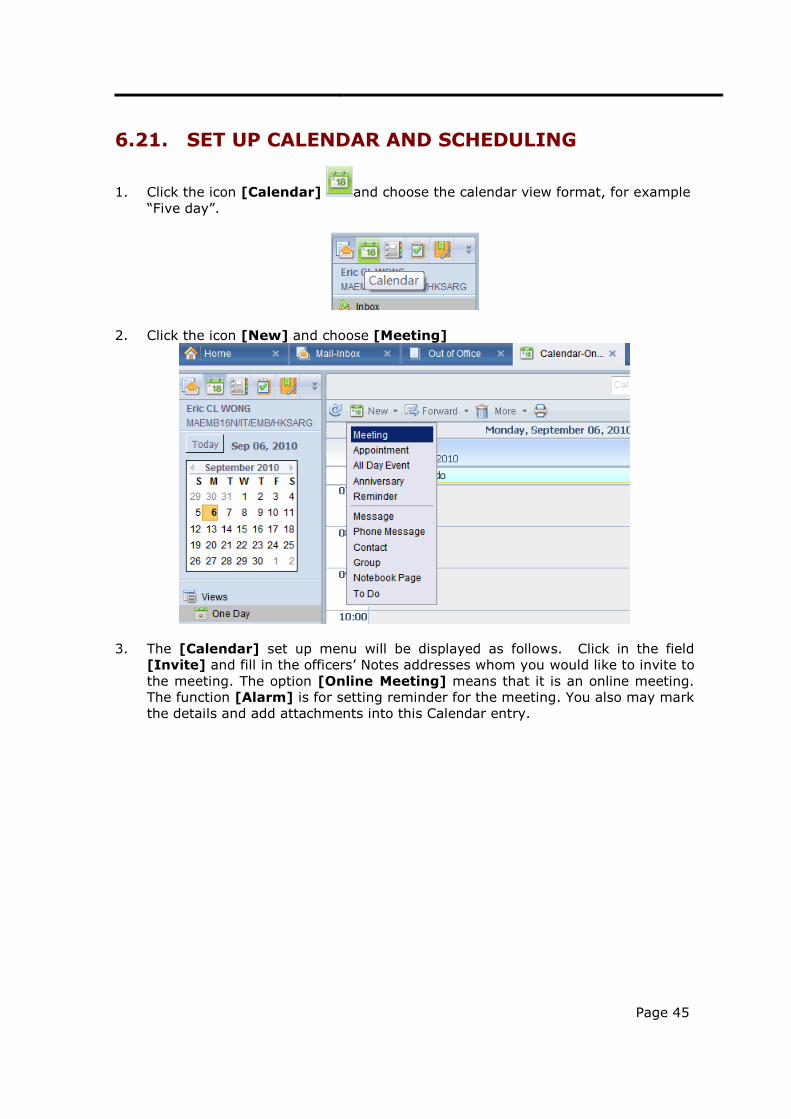
6.21. SET UP CALENDAR AND SCHEDULING
1. Click the icon [Calendar] and choose the calendar view format, for example
“Five day”.
2. Click the icon [New] and choose [Meeting]
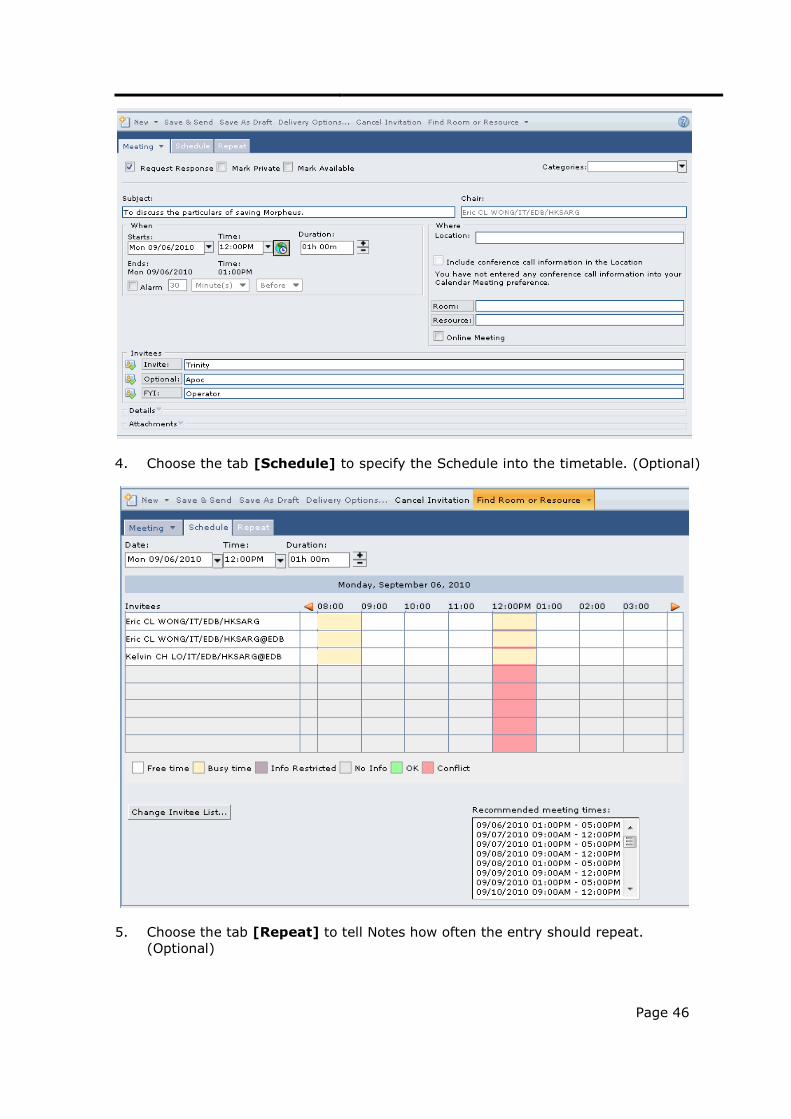
3. The [Calendar] set up menu will be displayed as follows. Click in the field
[Invite] and fill in the officers’ Notes addresses whom you would like to invite to
the meeting. The option [Online Meeting] means that it is an online meeting.
The function [Alarm] is for setting reminder for the meeting. You also may mark
the details and add attachments into this Calendar entry.
Page 46
4. Choose the tab [Schedule] to specify the Schedule into the timetable. (Optional)
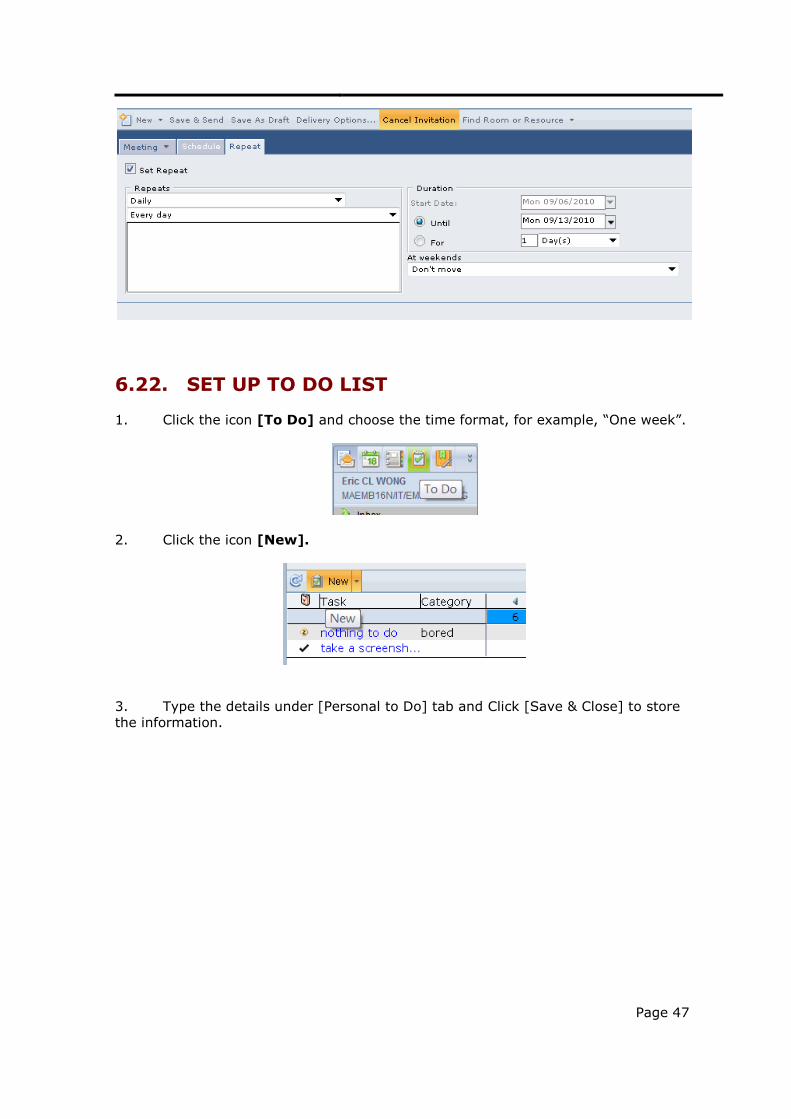
5. Choose the tab [Repeat] to tell Notes how often the entry should repeat.
(Optional)
Page 47
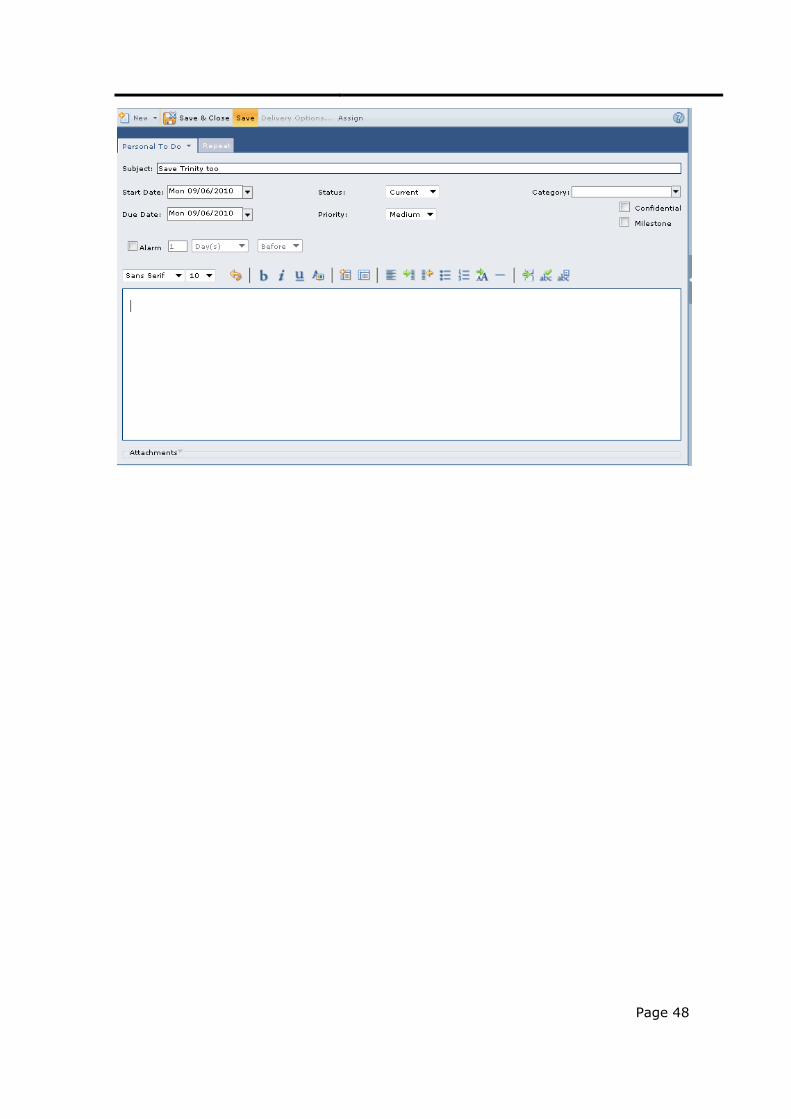
6.22. SET UP TO DO LIST
1. Click the icon [To Do] and choose the time format, for example, “One week”.
2. Click the icon [New].
3. Type the details under [Personal to Do] tab and Click [Save & Close] to store
the information.
Page 48
Page 49
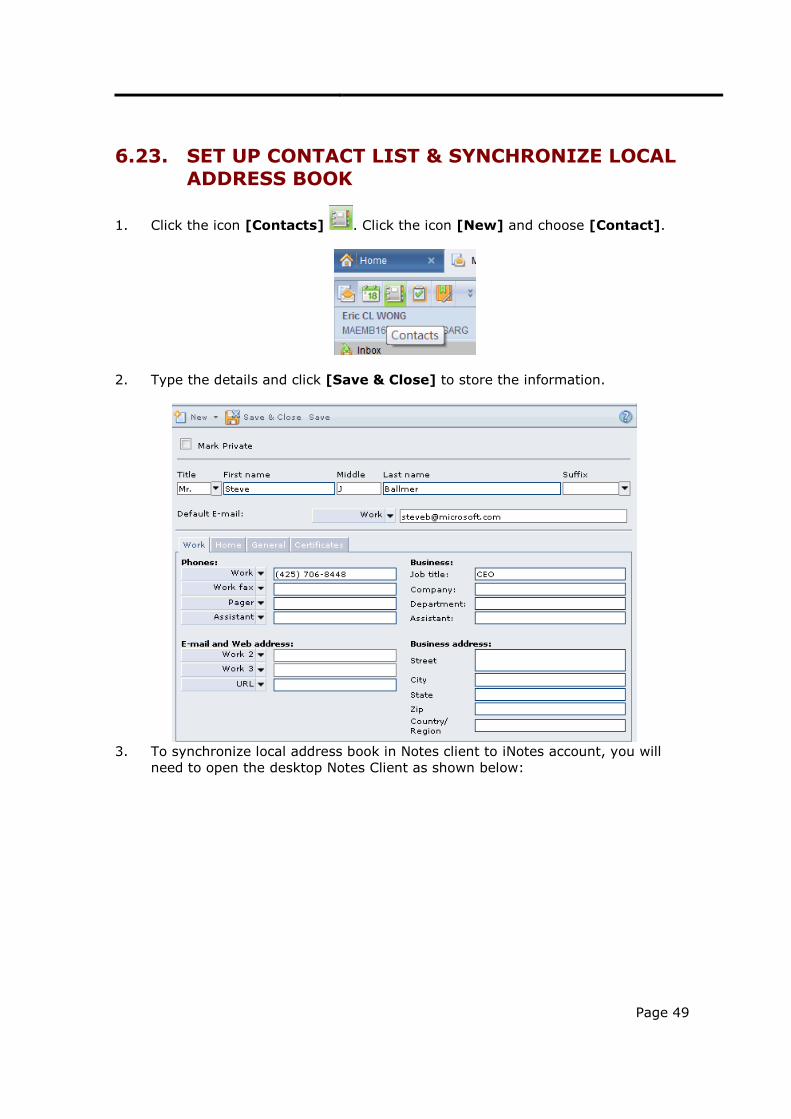
6.23. SET UP CONTACT LIST & SYNCHRONIZE LOCAL ADDRESS BOOK
1. Click the icon [Contacts] . Click the icon [New] and choose [Contact].
2. Type the details and click [Save & Close] to store the information.
3. To synchronize local address book in Notes client to iNotes account, you will
need to open the desktop Notes Client as shown below:
Page 50
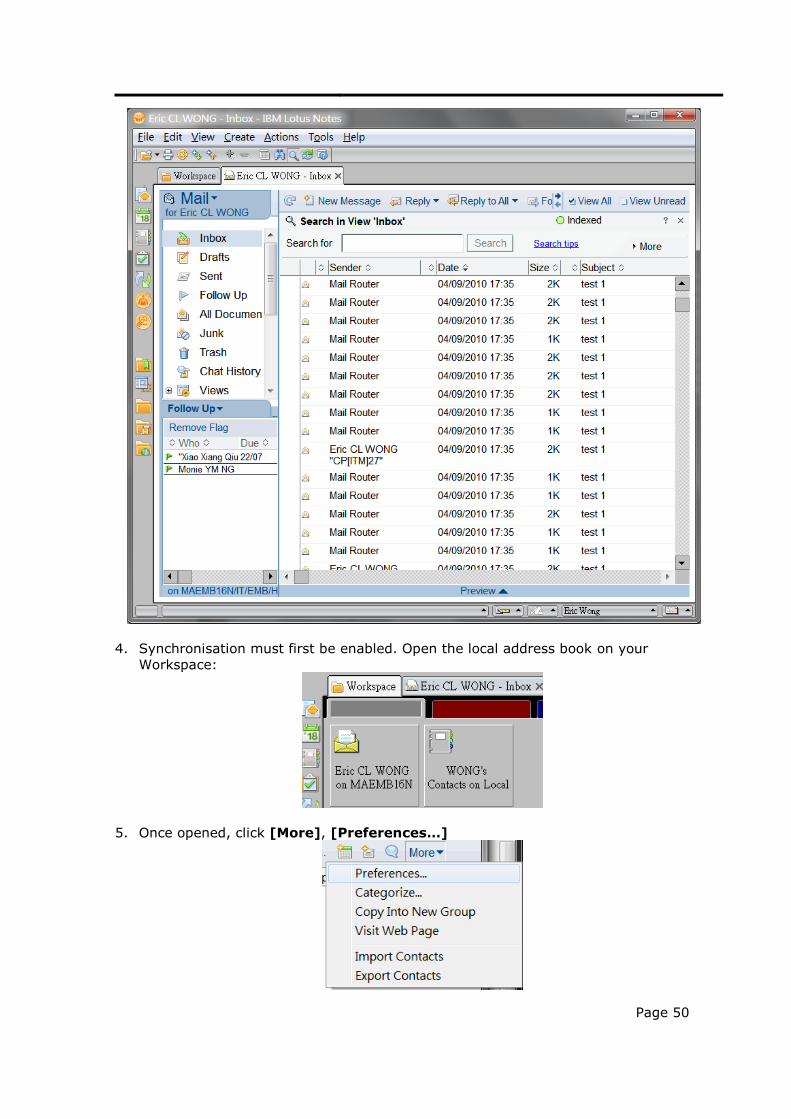
4. Synchronisation must first be enabled. Open the local address book on your
Workspace:
5. Once opened, click [More], [Preferences…]

Page 51
6. In the new dialog box, check [Enable “Synchronize Contacts” on the
Replicator]. Click [OK].
7. Click Tools> Replicate and Sync All.
Page 52
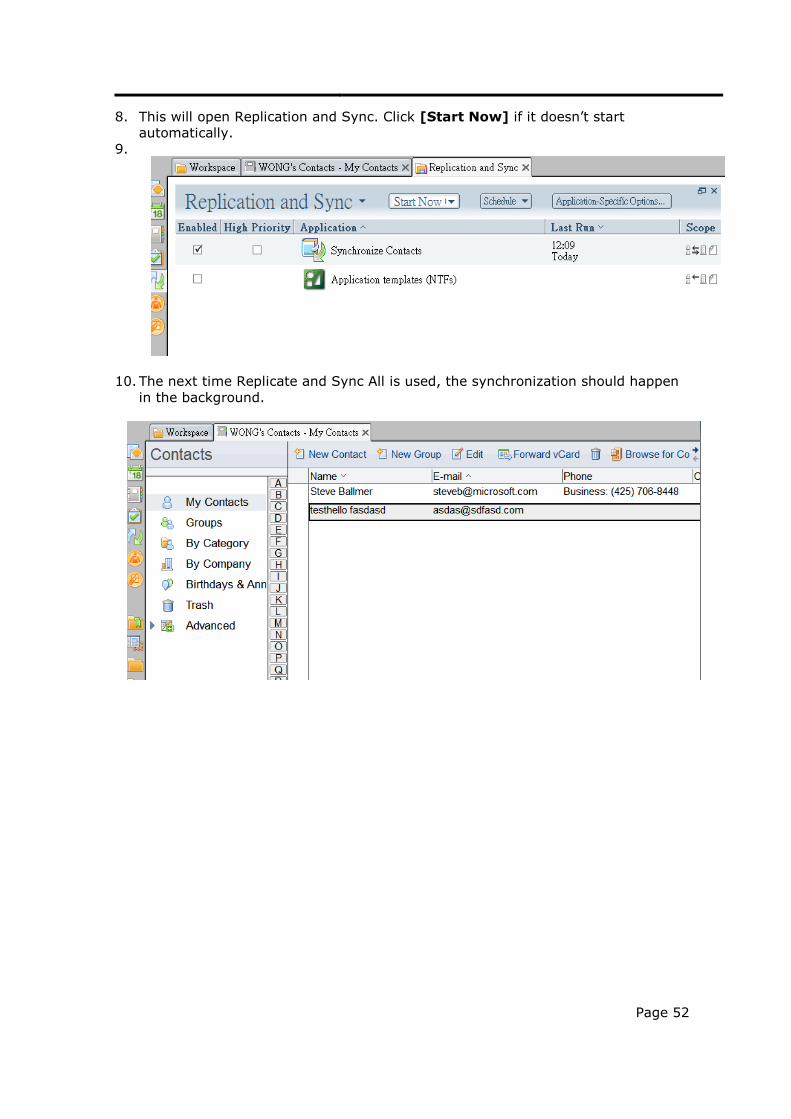
8. This will open Replication and Sync. Click [Start Now] if it doesn’t start
automatically.
9.
10. The next time Replicate and Sync All is used, the synchronization should happen
in the background.
Page 53
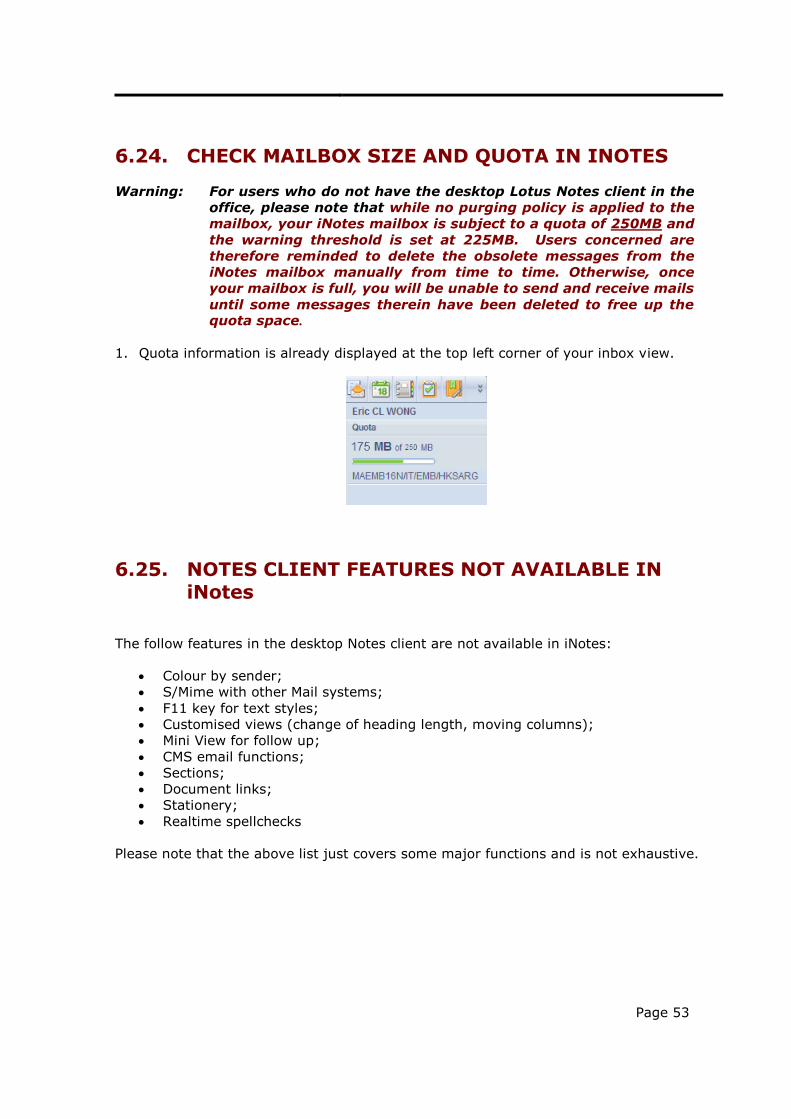
6.24. CHECK MAILBOX SIZE AND QUOTA IN INOTES
Warning: For users who do not have the desktop Lotus Notes client in the
office, please note that while no purging policy is applied to the
mailbox, your iNotes mailbox is subject to a quota of 250MB and
the warning threshold is set at 225MB. Users concerned are
therefore reminded to delete the obsolete messages from the
iNotes mailbox manually from time to time. Otherwise, once
your mailbox is full, you will be unable to send and receive mails
until some messages therein have been deleted to free up the quota space.
1. Quota information is already displayed at the top left corner of your inbox view.
6.25. NOTES CLIENT FEATURES NOT AVAILABLE IN iNotes
The follow features in the desktop Notes client are not available in iNotes:
Colour by sender;
S/Mime with other Mail systems;
F11 key for text styles;
Customised views (change of heading length, moving columns);
Mini View for follow up;
CMS email functions;
Sections;
Document links;
Stationery;
Realtime spellchecks
Please note that the above list just covers some major functions and is not exhaustive.
Page 54
7. INOTES ULTRALITE OPERATING
INSTRUCTIONS
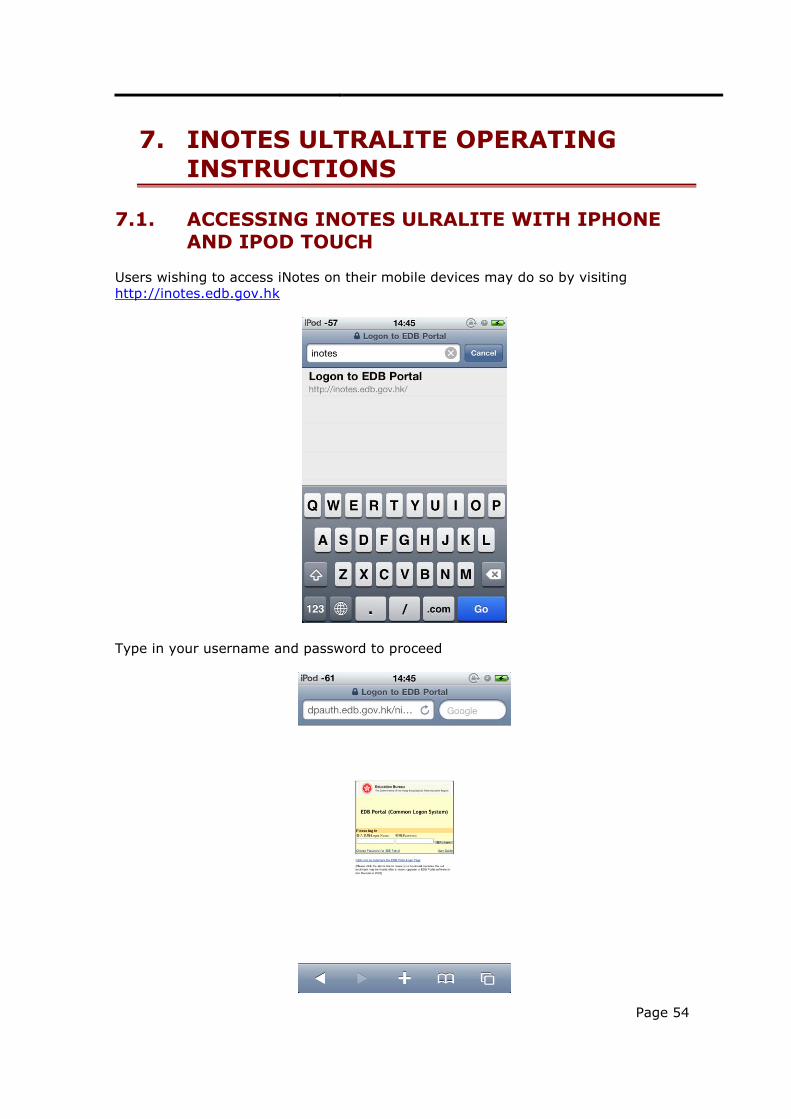
7.1. ACCESSING INOTES ULRALITE WITH IPHONE AND IPOD TOUCH
Users wishing to access iNotes on their mobile devices may do so by visiting
http://inotes.edb.gov.hk
Type in your username and password to proceed
Page 55
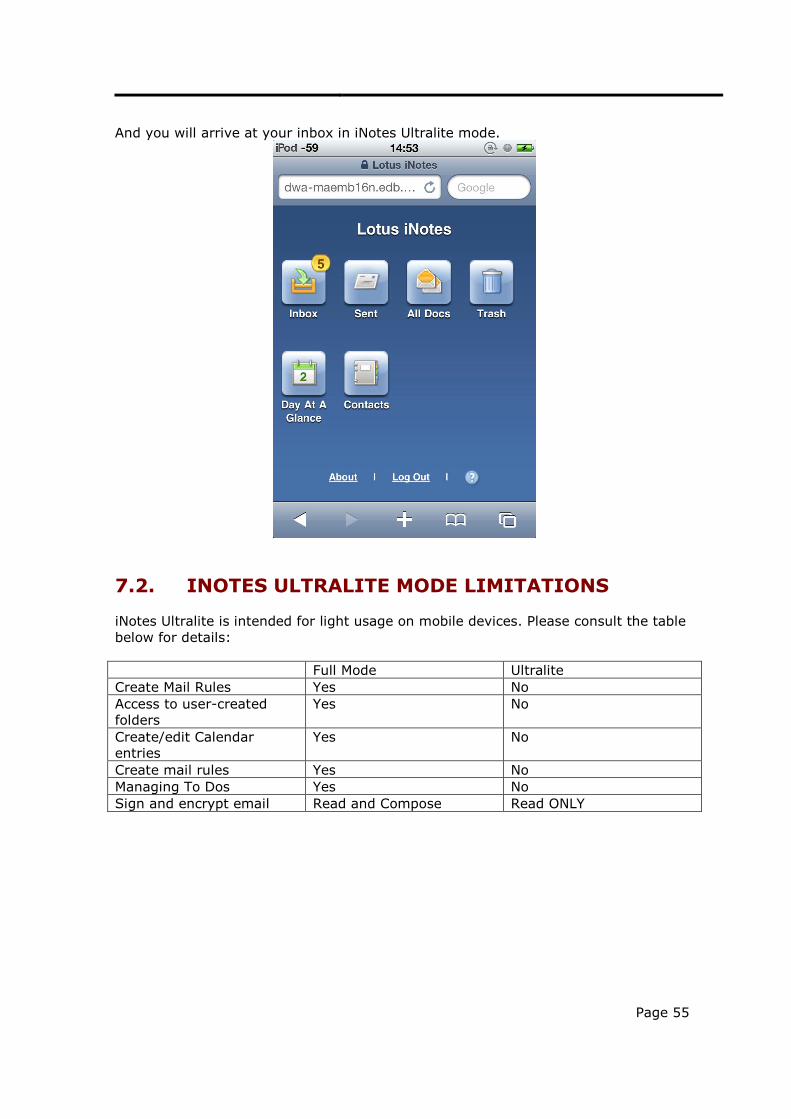
And you will arrive at your inbox in iNotes Ultralite mode.
7.2. INOTES ULTRALITE MODE LIMITATIONS
iNotes Ultralite is intended for light usage on mobile devices. Please consult the table
below for details:
Full Mode Ultralite
Create Mail Rules Yes No
Access to user-created
folders
Yes No
Create/edit Calendar
entries
Yes No
Create mail rules Yes No
Managing To Dos Yes No
Sign and encrypt email Read and Compose Read ONLY
Page 56
8. APPENDIX
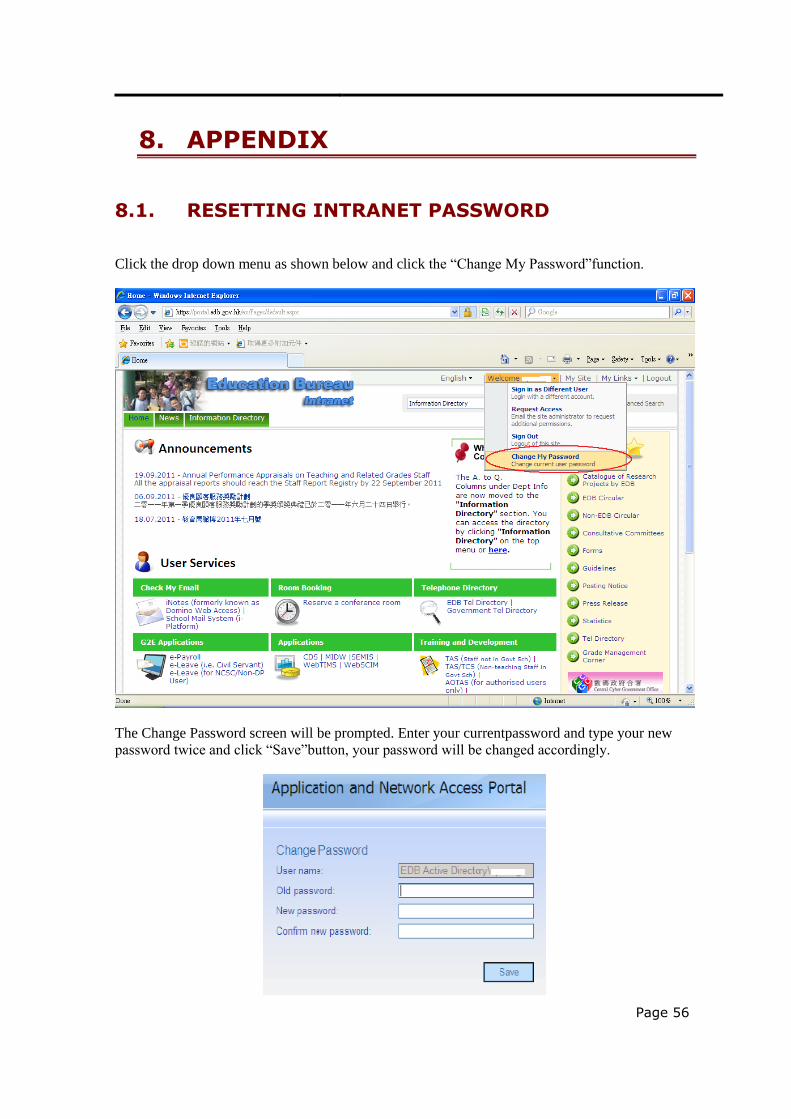
8.1. RESETTING INTRANET PASSWORD
Click the drop down menu as shown below and click the “Change My Password”function.
The Change Password screen will be prompted. Enter your currentpassword and type your new
password twice and click “Save”button, your password will be changed accordingly.
Page 57
-END-