Embed Size (px)
Citation preview

dSpace User Conference
Body Subsystems Test Automation using the
dSPACE Hardware-in-the-Loop setup
Venkata RK Pinnelli
Suresh H
Mohammed Haneefa Kolari
14-Sep-2012

General Motors Testing Environments
Test Environments:
SubSystem Level Validation
System Level Validation
Vehicle Level Validation
Subsystem Level Software Verification
Component Level Validation
Requirements
(Vehicle)
Requirements
(System )
Requirements
( SubSystem )
Component
SW Verification
System
SW Verification
Vehicle
Validation
Subsystem
SW Verification
Requirements
(Component)
Vehicle level
Validation
System level
SW Verification
Component level
SW Verification
Requirements
(Vehicle)
Requirements
(System)
Requirements
( Subsystem )
Component
SW Verification
System
SW Verification
Vehicle
Validation
Subsystem
SW Verification
Requirements
(Component)
Vehicle level
Validation
System level
SW Verification
Component level
SW Verification
Subsystem
SW Verification
Subsystem level
SW Verification
dSPACE HIL Benches

Subsystems within Body Domain
Passive Entry and Passive Start
Power Windows
Power Sunroof Seat Memory & Heating/Cooling
Power Mirrors
Wash/Wipe
Exterior and Interior Lighting
Seat Supervised movements

Tools Used
• Simulation and Automation
– Plant Model – Tools: Matlab / Simulink ToolBoxes
– GM Internal Tool for Real-Time Simulation of GMLAN
– dSPACE Experiment – Tools: dSPACE ControlDesk
– Design of Simulator Boxes – Tools: Microsoft Visio
– Diagnostics – Intrepid / Vector tools
– Test Automation – GM Internal Tool

Requirements
Validation Testing Environment Development
HIL Test Environment Development Process for Subsystems Software Verification
Subsystem Requirements
Analysis
Bench Setup as per requirements
Plant Model Development
dSPACE ControlDesk Experiment
Development
Manual Software Verification
Verification Report
Requirement / Software / Hardware
modification
Hardware Requirements
Analysis
Automated Test Procedure
Develolpment
Automated Software
Verification

dSPACE SW (ControlDesk etc.,)
Internal GM SW Tool Suite
Test Environment Setup
Ho
st P
C
Plant Model Development
HIL Simulator
Compiled Model
Compiled Script
HIL I/O
Cards
Test Report
Test Bench

Hardware Test setup
The Test bench setup is a functional reproduction of a vehicle’s electrical system

HIL Test Setup Progression for Software Verification
Component Level Test Bench
Vehicle Level Test Bench
Subsystem Level (e.g. Body Electronics)
Component Under Test is present on the bench
All ECUs applicable to a Subsystem (e.g. Entry Controls) are present on the bench
All ECUs applicable to a Vehicle are present on the bench

Vehicle Parts on Body Subsystem Test Bench
• Vehicle parts on Body Subsystem test bench include:
• Electronic Control Units applicable to every subsystem
• Actuators, and Loads (e.g. Wiper motor, Head Lamps, Steering columns, Pedals, Window Regulators, Latches)
• Switches (e.g. Ignition, Wiper, Memory, Mirror, Seat, Windows )
Over 100 Vehicle parts

Simulation Environment for Body Subsystem Test Bench
• Relays to simulate/control switches for fault creation
• Signal conditioning circuits to have the required voltage and signal levels for
dSPACE I/O
• Simulation of sensors and actuators
• Fault Insertion circuits for short to Battery / GND and Open scenarios
• Instrumentation of the actual vehicle parts for controlling through dSPACE
• Hardware fixtures to obtain the feedback from the vehicle parts to dSPACE
• Communication panels for High speed CAN, Low speed CAN and LIN along with
standard Diagnostic tools

Body Subsystem Test Bench Control and Feedback Mechanisms
• Instrumented switches for operation and control by dSPACE
• String Potentiometers for position calculations
• Encoders for speed calculations
• High resolution camera for image capturing
• General purpose linear actuators for creating obstructions, moving vehicle parts, operating switches.
• Monitoring the actuator control lines from ECUs through dSPACE
• Monitoring sensor feedback signals to the ECUs through dSPACE
Enables complete test automation for a given subsystem

Bench Setup Overview
ECU
Loads
HIL
Relays / Fuses
Other Modules
Communication panels
Breakout Panel

Wash/Wipe Subsystem - Modules
• Wiper Modules Front and Rear Wiper motors are controlled by the Body Control Module (BCM). Front Wiper motor can operate at Low Speed, High Speed and Intermittent modes based on the switch inputs, where as rear motor has one speed.
• Stalk Switch Hardware Switch inputs are connected to the BCM. Switches are also simulated in plant model to support automation.
• Rain Sensor Module Rain Sensor Module senses the intensity of the rain. It sends this information to BCM. The module is simulated in the plant model.
• Front and Rear Wash Pump: BCM controls wash motors for both Front and Rear.

Wash/Wipe Subsystem – Bench Setup Host PC
BCM
Activation status, position, speed feedback
Front Wiper Control
HIL Simulator
Rear Wiper Fixture
Front Wiper Fixture
LIN Rain Sensor Module
Activation status, position, speed feedback
Rear Wiper Control Stalk Switch Input
Front Wiper Control signal monitor
Rear Wiper Control signal monitor
Other Simulated Inputs
Other Feedback signals
Rain Sensor Signals
Simulated Stalk switch

Wash/Wipe Subsystem – Automation Setup
• Software for Wash/Wipe Subsystem is verified for Front and Rear modules
• Switches are simulated in the plant model
• Rain Sensor module is simulated in the plant model
• Activation status, Speed and Position feedbacks are monitored – Wiper position
Wiper position feedback is monitored using the dSPACE setup. A position sensor is used for measuring the position
– Wiper speed
A speed sensor is used to measure the speed of the motor and the feedback is monitored using the dSPACE setup
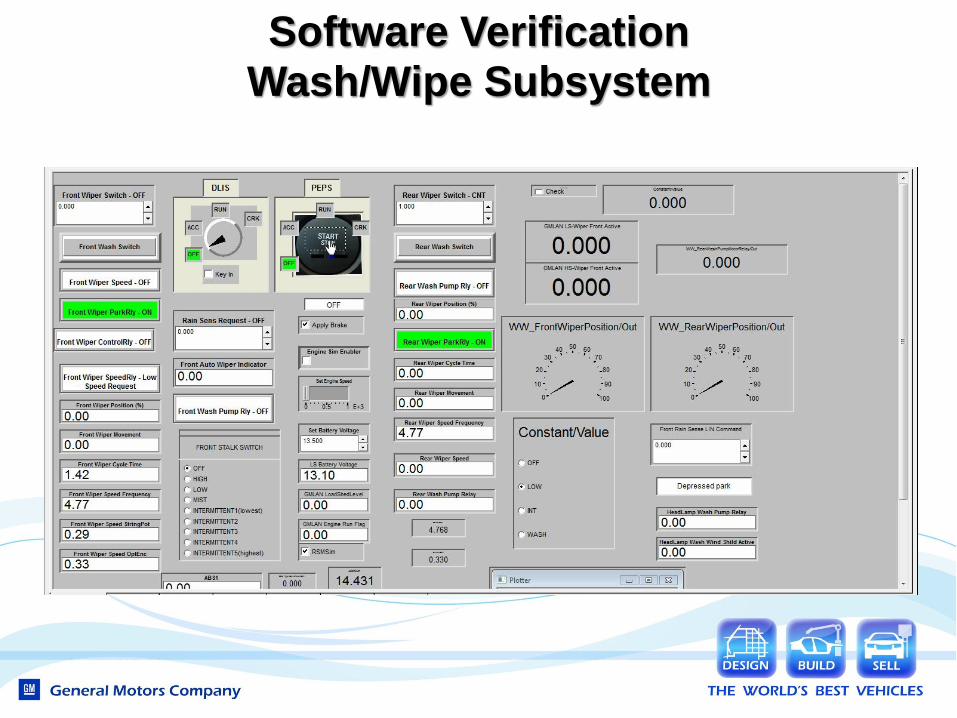
Software Verification
Wash/Wipe Subsystem

Acknowledgements
Mina Khoee-Fard
Engineering Group Manager, General Motors
Tarek Lahdhiri Engineering Specialist,
General Motors
Shubha Channappa Sr. Engineering Manager,
General Motors

Thank You