Embed Size (px)
Citation preview

Building Networks for People
Manual
Wireless Media PlayerD-Link DSM-320
v.1.0

2
Introduction .....................................................................................................3
Package Contents ...........................................................................................4
System Requirements .....................................................................................4
Features & Benefits ........................................................................................5
Front and Back Panels ....................................................................................6
Getting Started ................................................................................................7
Using the Remote Control ...............................................................................7
Using the Onscreen Keyboard ......................................................................10
Installing the Media Server Software ............................................................10
Configuring the Media Server Software ....................................................... 14
Using the Media ServerSoftware ..................................................................16
Hardware Connections..................................................................................18
Network Layout .............................................................................................21
DSM-320 Setup Wizard ................................................................................22
DSM-320 Basics ..........................................................................................25
Setup .............................................................................................................26
Music .............................................................................................................29
Photos ...........................................................................................................34
Videos ...........................................................................................................36
Online Media .................................................................................................38
Search ...........................................................................................................42
FAQs .............................................................................................................43
Troubleshooting ............................................................................................45
Technical Specifications ................................................................................49
Appendix I-Setting Microsoft Windows Power Options .................................51
Appendix 2-Static and Dynamic IP Addresses ..............................................52
Appendix 3-WEP Configuration ....................................................................52
Appendix 4-Ad-Hoc and Infrastructure modes ..............................................52
Glossary ........................................................................................................53
Warranty and Registration ............................................................................56
Technical Support .........................................................................................59
Contents

3
IntroductionD-Link introduces the latest addition to its multimedia family of products: theD-Link MediaLoungeTM DSM-320 Wireless Media Player. The DSM-320unites the network with the home entertainment center, allowing you to share,access, and enjoy digital media, whether it is music, videos, or photos, in thecomfort of your living room.
The DSM-320 features 802.11g technology for transfer speeds up to 54Mbps,giving you maximum throughput for sharing and transferring digital media.Setting up the DSM-320 is simple, and the sleek design makes it a naturaladdition to any home entertainment center. AV jacks on the back panel of theDSM-320 allows direct connection to the TV. Using the included remote control,access media content stored on the PC, browse music files, watch videos, anddisplay photos, all on the TV! In addition, the DSM-320 lets you access onlinemedia content on TV through an existing broadband Internet connection.
The DSM-320 adheres to the Universal Plug-&-Play AV specification, andcomplies with Intel Networked Media Product Requirements (INMPR), allowingit to communicate with other UPnP AV media devices seamlessly.
The DSM-320 supports and streams virtually all audio, video, and image formatsstored on your PC. With support for MP3, WMA and WAV audio files, listen tomusic on the stereo system. Watch stored videos in MPEG1/2/4, AVI, QuickTimeor Xvid format on TV or enjoy slideshows of your favorite photos in JPEG,JPEG2000, TIFF, GIF, BMP or PNG formats. Better yet, it’s easy to access allmedia files through the TV Interface using the remote control included with theDSM-320.
Experience digital media like never before with the MediaLounge DSM-320Wireless Media Player. The DSM-320 includes everything you need to instantlyaccess and play music, videos, and photos using your home entertainmentcenter.

4
Package Contents
D-Link DSM-320 Wireless Media Player
Printed Quick Installation Guide
Installation CD (Contains D-Link Media Server Software, Quick InstallationGuide, and Manual)
Antenna
Ethernet (CAT5-UTP/Straight-Through) Cable
Standard Composite RCA Audio/Video Cable
S-Video Cable
Remote Control with Batteries
System RequirementsTelevision with composite, S-Video, or component video inputs and an audiodevice with composite, coaxial digital or optical digital audio inputs.
Windows XP/2000/Me/98SE.
Minimum to run the Media Server software: PC with 500 MHz processor,128 MB RAM and 20 MB of hard disk space.
A wireless or Ethernet network
CD-ROM drive

5
Features & BenefitsStream media content from a PC to your entertainment center.
Listen to digital music on your stereo system.
View digital photos, slideshows and videos on TV.
Easily connect to your wireless network using 802.11g at up to54Mbps.
802.11b compatible at 11Mbps.
Connect using an Ethernet network cable at up to 100Mbps.
UPnP AV and INMPR compliant for compatibility with othermedia devices.
Support for all popular digital media formats.
Remote controlled TV interface for quick access to your mediacontent.
Experience a world of online media content.
Sit’n click access to your digital media.
Sleek design complements your existing audio/videoequipment.
Optical and coaxial digital audio output.
Component video output.
64- or 128-bit WEP security.
Convenient one-touch access to preset music.
Supports DHCP for easy connection to your home network.
Color coded one-touch shortcut button on the remote, forquick access to music, photos, videos, and online mediacontent.
Built-in screensaver.
Easy setup wizard.

6
Front and Back Panels
Front Panel
PowerButton
Wireless LED -blinks toindicate wirelessactivity.
LAN LED -blinks toindicateactivity on thenetwork.
Back Panel
S-videoconnector
Composite videoconnector
Antenna
OpticalDigital Audio
CoaxialDigitalAudio
Compositeaudio
Componentconnectors
RJ-45EthernetConnector
ResetButton

7
Getting Started
To begin using the DSM-320 Wireless Media Player, you will need:
Using the Remote Control
An existing home network (including a wireless router or arouter with an available Ethernet port)
The DSM-320 Media Server software installed on a PC. Thiscomputer will collect music, photo and video content fromlocal sources (a digital camera for example) and from theInternet (downloaded MP3 music, digital photos or video files.)
The DSM-320 Wireless Media Player connected to yourtelevision and audio system.
The included remote control is the only means by which to configure and controlthe DSM-320.
Information for the Setup Wizard is entered by using the remote control. Theremote is used to enter numbers, letters, special characters and to makeselections from an on-screen keyboard. The on-screen keyboard is activatedby pressing Enter on the remote control whenever the on-screen cursor islocated in a field where text is required.
The following page details the remote control and shows the function of eachbutton.

8
Using the Remote Control
Number andOne-TouchPreset Keys
Use Arrow Keys toMove the Positionof the OnscreenCursor
Press to Navigate tothe Home Screen
Power
Shuffle Music &Photo Slideshows
Music Mode
Photo Mode
Repeat Music &Photo Slideshows
Enter Key
Video Mode
Menu of Optionsfor Current Mode
Setup Menu
Clear Text Entry
Play FunctionsDisplays File Data
Go to Search Page
Online Media Mode
Audio and VideoOutput Selectors
Volume Adjustment Page Up or Down
Mute Sound Go to Previous Page
Enters a “.” (a period,also known as a dot)

9
Using the Remote Control (continued)
Number Keys - Enter numbers where needed, or use the onscreen keyboard.You can use the keys 1-9 to create Music presets. With a music selection highlightedonscreen, press down on a number from 1-9 on the remote control until the icon dis-plays. Press the number of your preset music, anytime the MediaServer is on, to playthe selection.
Arrow keys - Move the onscreen cursor, navigate through media file names, and usefor primary navigation through the interface. Right is forward, left is back.
Home - Navigate to the DSM-320’s home screen.
Power - Turn the DSM-320 ON or OFF.
Shuffle - Shuffle music tracks in a playlist or photos during a slideshow.
Music - Access the Music mode.
Photo - Access the Photo mode.
Repeat - Repeat the current Music or Photo Slideshow selection.
Enter - Make a selection.
Video - Access the Video mode.
Menu - Used to select Radio@AOL Presets.
Setup - Access the Setup menu.
Clear - Delete text.
Play Functions - While viewing and listening to your media, you can use these keysto Stop, Play/Pause, Reverse, Fast Forward, go back (Prev), or go to the next item(Next).
Display - Display information about a file. For instance, view the type of photoand the name, date and other information about the photo.
Search - Enter the Search function.
Online Media - Access the Online media mode.
Audio and Video Out - When you have multiple audio and video output connections,you can select one by clicking on one of these keys.
Volume + - Increase the volume.
Page Up or Down - Press Up to scroll up a page, and press Down to scroll down.
Mute - Turn OFF the audio.
Return - Return to the previous page.
“.” (a period, also known as a dot.)
Volume - - Decrease the volume.

10
Using the On-Screen Keyboard
Whenever you need to enter text, press ENTER on the remote and the onscreenkeyboard will appear.
The keyboard is used for naming your DSM-320 and performing searches formusic, photos or video. To use the keyboard, highlight a character with thearrow buttons on the remote and press ENTER. Highlight and select OK whenyou are finished entering text.
Installing the D-Link Media ServerSoftwareInstall the D-Link Media Server Software on each PC that contains audio, video,or photo files you wish to use with the DSM-320.
To install the software, follow the steps on the next page of this manual.
Note: Before you install the hardware, you must first install thesoftware as shown below.

11
The D-Link Media Server SetupWizard will appear.
Click on D-Link MediaServer Installer andselect the appropriateoperating system.
Click Next
Installing the D-Link Media Server Software(continued)
Click Next
Choose a destination folder oraccept the default location.
If the screen at right does not appear,please double-click My Computer on yourdesktop; right-click on the CD-ROM drive;select Open; double-click autorun.exe.The screen at right will appear.

12
Click Next
Click Next
Choose a start menu folder oraccept the default location.
Select the icons you want created.
Installing the D-Link Media Server Software(continued)
Click Install
Select Create a desktop iconto access the program fromyour desktop.
Select Create a Quick Launchicon to access the programfrom your taskbar.

13
Installing the D-Link Media Server Software(continued)
Check Launch D-LinkMedia Server
Click Finish
The necessary software will becopied to the specified locationson your computer.
After you click Finish, the DSM-320 software will be available as an icon inyour system tray or on your desktop. For any configuration needs, you canaccess the software by clicking on the icon. After the installation is complete,please double-click on the Media Server software icon and begin theconfiguration on the next page.
The D-Link Media Server Software Installation has been completed!

14
After clicking on this iconthe software program, shownhere, will open.
Configuring the D-Link MediaServer Software
The Shared Folders tab iswhere you select the foldersthat contain your audio, video,and photo files.
Select the foldercontaining the files youwish to share
Click OK
Click Add

15
Configuring the D-Link Media Server Software(continued)
The D-Link Media Server Software Configuration has been completed!
Click OK
Repeat the steps until all ofthe folders containing audio,video, and photos you wantto share have been added.
Select all of the file types thatyou wish to share.
Click Apply

16
Using the D-Link Media Server Software
Accessing the Media on your PCsBefore you can access the media on your PC, you must install the D-LinkMedia Server Software. Simply install the included software on each PC whereyou store your music or digital photos. Once the software is installed, the mediaserver icon will appear in your system tray. To configure the D-Link MediaServer, right-click on the icon.
The Media Server software will start whenever you power on your PC. If theD-Link Media Server software is not running, you can access it from the Startmenu on the Windows taskbar. On the Start menu, click All Programs, thenD-Link Media Server, and select D-Link Media Server 1.xx. The server iconwill appear in your system tray.
Stopping the D-Link Media ServerTo stop the D-Link Media Server (and stop sharing your photos and music onyour PC), right-click on the server icon and select Exit from the server menu.
Note: If the D-Link Media Server is not running, your photos, videosand music will not be available on your DSM-320.
DSM-320 System Tray Icon
D-Link Media Server Menu
To open the D-Link MediaServer menu, click theserver icon with your rightmouse button. The servermenu will then display.

17
Using the D-Link Media Server Software (continued)Sharing Media Content in Folders
A dialog will appear with a list ofshared folders.
To add or change the shared folders, clickon the D-Link Media Server icon in thesystem tray or, as in this case, on thedesktop, and select Show Media Server.
The D-Link Media Server will share contentin the selected directory folders. Allsubfolders within a shared folder areshared as well.
Add folders where your music andphotos are stored, or remove folders youno longer wish to share. Depending onthe number of files in your folders, it maytake some time for the player to fully listthe new folder contents.
Sharing a New File while the DSM-320is ON:
If you wish to share a new file while theDSM-320 is in operation, you will needto do the following:Right-click on the folder that contains themedia that you wish to play on the DSM-320. Select Rescan a shared folder.The media in the selected folder will nowbe available. If you do not do this, thefile cannot be accessed by the DSM-320.
C:\Documents and Settings\Chris\My Documents\My MusicC:\Documents and Settings\Chris\My Documents\My Pictures

18
Connecting the DSM-320
Select one of three ways to connect video to your DSM-320:
All audio, video and networking connections are located on the rear panel of theDSM-320.
Plug the supplied yellow videocable into the DSM-320 and thematching opposite end of thecable to your television input.
• Composite Video Connector
Plug the supplied S-video cableinto the S-video connector andthe opposite end into the S-videoconnector on your television.
• S-video Connector
Match the color coded cablesto the matching connectors onthe DSM-320 and into thecomponent video input of yourtelevision.
Note: This cable is not supplied.
• Component Connectors
Video Connections

19
Connecting the DSM-320 (continued)
Audio ConnectionsSelect one of three ways to connect audio to your DSM-320:
Plug the supplied red andwhite connectors into thecolor-coded matching jackson the DSM-320.
Plug the opposite ends tothe matching jacks on yourtelevision or audio/videosystem.
• Composite Audio
Connect an optical audioconnector into the DSM-320and the matching oppositeend of the cable to the audioinput of your audio system.
Note: This cable is notsupplied.
• Optical Digital Audio
Connect a coaxial audioconnector into the DSM-320and the matching oppositeend of the cable to the audioinput of your audio system.
Note: This cable is notsupplied.
• Coaxial Digital Audio

20
Connecting the DSM-320 (continued)Network Connections
Connect the suppliedEthernet cable to thenetwork cable connector,and attach the other end tothe network.
• RJ-45 Ethernet Connector
Select one of two ways to connect a network to your DSM-320:
Attach the supplied antennaby threading it onto theantenna connector. Be surethe antenna is secure and inan upright position.
• Wireless Antenna

21
Network LayoutBelow is a diagram displaying what your network might look like once all of theconnections have been made to the MediaLounge™ DSM-320 Wireless MediaPlayer.

22
The DSM-320 Setup WizardUpon initial startup, the DSM-320 displays the Setup Wizard.
Click Next to begin theDSM-320 Setup Wizard
Step 1 of 6: Type in aname of your choice orselect the default setting.
Click Next to continue
Step 2 of 6: Select the typeof network connection.
If selecting Wired,skip to Step 5 of 6on page 23.
Click Next to continue

23
The DSM-320 Setup Wizard (continued)
Step 3 of 6: For wirelessnetwork connections,select the SSID that isbeing used by yourexisting wireless network.
Step 5 of 6: Yourcurrent networksettings are displayedand can be changedat this point.
Click Next to continue
Step 4 of 6: Yourcurrent wirelesssettings are displayedand can be changedat this point.
Click Next to continue
Note: Please see the Appendix in this manual for an explanation of DHCPand static IP addresses.
Click Next to continue

24
The DSM-320 Setup Wizard (continued)
Your setup is complete!
Step 6 of 6: Select a MediaServer from the list. AMedia Server is any PCrunning the D-Link MediaServer software, or a UPnPAV compliant device on thenetwork.
Click Next to continue
Click Done to finish
Your MediaLounge™ DSM-320 is now ready to streammusic, photo, and videocontent for enjoyment onyour home entertainmentcenter.

25
DSM-320 MenuMenu BasicsThe DSM-320 uses an onscreen menu interface. As you move through themenus, you will use the selection arrows to move up, down, right and left.The highlight bar moves from item to item as you press the selection arrows.In some instances you will need to click Enter to access the pulldown menuwithin an item. You will then see an arrow within the highlighted bar. Thesearrow “hints” help you with menu navigation, and show you the possible pathsyou may take. For example, a down arrow hints that more items are availableif you move the highlight bar down. To move to the next menu screen, use theright arrow. Similarly, use the left arrow to move to the previous screen.
Menu HomeThe menu home screen is the top level menu. From the home screen, you canaccess music, photos, video, and online media. To jump directly to the homescreen, press the Home button on the upper right-hand corner of the remote.

26
Setup
Click Setup on your remotecontrol to access the setupfeatures. Using the arrow keys onyour remote control, scroll downthe list to highlight your selectionthen click Enter or the right arrowto select your choice. You canselect from:Network, Wireless, System,Miscellaneous, Version orWizard.
NetworkConnection: Select Wired orWireless.
If you want to change the configuration of your setup you can press the Setupbutton on the remote control.For an explanation of the terminology used in the Setup function, please seethe Appendix.
Configuration: Select Static orDHCP.A DHCP-enabled routerautomatically assigns IPaddresses to the devices on yournetwork. If you have a DHCP-capable router in your network,select DHCP here.If you do not have a DHCPcapable router, you will select Static and provide the following information:
IP: Enter the IP address of the DSM-320.
Netmask: Enter the subnet mask of the DSM-320.
Gateway: Enter the IP address of the router on your network.
DNS: Enter the IP address of the domain name server.
Press Enter in a text field, to display the onscreen keyboard. You can entertext either by using the onscreen keyboard, or by using the the digits andletters on your remote control.

27
Setup (continued)
WirelessSSID: Enter the SSID or clickSite Survey to select the SSID.
Mode: Select Ad-Hoc orInfrastructure mode.*
WEP: Select Disable, 64-bit, or128-bit WEP.
Key Index: select keys 1-4. Foreach key enter a string of digitsin hexadecimal or ASCII format.
SystemDevice Name: You can nameyour DSM-320 here.
Default Server: Select the PCthat you would like to use asthe default server.
View all Servers: Select toview a list of all the PC’s thatare available to share media onyour network.
System Restart: Restart yourDSM-320 here.
System Reset: Return your DSM-320 to its factory default settings.Note: You will lose your current settings.
*Ad-Hoc is a Peer-to-Peer network that does not contain a router or an accesspoint. An Infrastructure network is one that contains a router or an access point.
28
Setup (continued)
Version
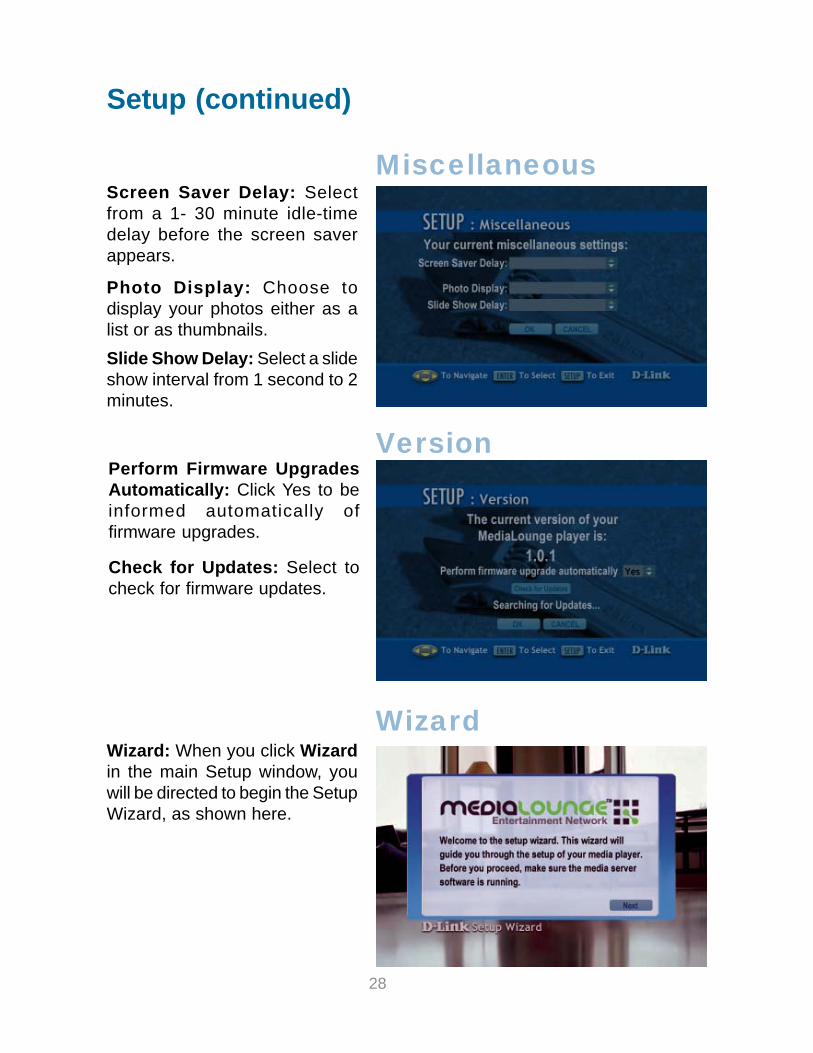
Screen Saver Delay: Selectfrom a 1- 30 minute idle-timedelay before the screen saverappears.
Photo Display: Choose todisplay your photos either as alist or as thumbnails.
Slide Show Delay: Select a slideshow interval from 1 second to 2minutes.
Perform Firmware UpgradesAutomatically: Click Yes to beinformed automatically offirmware upgrades.
Check for Updates: Select tocheck for firmware updates.
Wizard: When you click Wizardin the main Setup window, youwill be directed to begin the SetupWizard, as shown here.
Wizard
Miscellaneous

29
Your music listening experience on the media player depends upon the qualityof your digital music files on your PC. Avoid quality settings below 48kbps asthey are unsupported. For CD quality music, rip your MP3s at 128kbps orhigher, with a sample rate of 44.1kHz.
Music
Music Quality
Supported Music FormatsThe following music file formats are supported:
MPEG 1 and MPEG 2 Audio use the file extension of MP3.
MP3 (up to 192 kbps)MPEG-1,Layer 3 Audio file -The standard Internet music file format, andthe most common.
WMAWindows Media Audio file - Supported by the Microsoft Windows Mediaplayer and some music jukebox programs.
WAV & AIFF (AIFF files must be encoded in PCM format only.)WAV was developed by Microsoft and IBM. WAV sound files end in .wavand are compatible with Windows applications supporting audio.AIFF (Audio Interchange File Format) was developed by Apple Computer,and is the standard audio format for Macintosh computers. It’s extensionsare .AIF or .IEF.

30
Music (continued)
Playing a TrackOnce you enter the music menu, you can view tracks by artist, genre, album,or track name. Use the selection arrows to navigate to the track you wish toplay. Once you have found your track, highlight it and press Enter or press thePlay button on the remote. The track will begin playing on your stereo ortelevision speakers. The All Tracks section contains all of your musictracks...simply scroll or page through the track list to find the desired track.
Organizing Music FilesYour music files can be contained in one directory folder, or organized in severalsubfolders. The DSM-320 automatically organizes your music files by genre,artist, album, and tracks. This information is obtained from the ID3 tags ineach of your music files. The ID3 tag is created for you when you rip (copy)your music from your CD. However, if your music files have incorrect orincomplete tags, the tracks may not appear where they should in your musiccategories.
To play a track startingfrom the main homescreen:
1. Select MUSIC
2. Select All Tracks
3. Highlight a track name.Use the selection arrows, oruse the Page Up and PageDown buttons to quicklymove through the track list.
4. Press Enter or pressPlay.
Select MUSIC; select All Tracks; scroll down to select a track. Press a numberbetween 1-9 on your remote control. If you select the number 1, hold the number1 key down until this icon appears next to your selection. (If you chooseanother number, that number will appear within the icon.) You have completedthe creation of a Preset. Now you can play your selection at any time that theDSM-320 is ON, by pressing the preset number on your remote control.
Creating a Preset

31
Browsing for MusicThere are many ways to browse for a music track. For example, let’s use thefollowing music file:
With Arms Wide Open.mp3Artist: CreedAlbum: Human ClayGenre: Rock/Pop
To browse for this track in the track list:1. Select All Tracks2. Highlight With Arms Wide Open
To browse by artist:1. Select Artists2. Select Creed3. Select Human Clay4. Highlight With Arms Wide Open
To browse by album:1. Select Albums2. Select Human Clay3. Highlight With Arms Wide Open
To browse by genre:1. Select Genres2. Select Rock/Pop3. Select Creed4. Select Human Clay5. Highlight With Arms Wide Open
Music (continued)

32
Music (continued)
The DSM-320 will play tracks from playlists you create on your computer.The media player supports playlists in two standard formats:
Software for playing music on your PC can be used to create playlists.WinAmpTM and Microsoft Windows Media PlayerTM are two examples.
m3u MPEG Playlist File
pls MPEG Playlist File
Creating Music Playlists
Use your favorite music software on your PC to create music playlists. A playlistallows you to specify exactly what tracks to play and in what order to playthem. For example, create a “favorites” playlist and just listen to your favoritetracks. Save the playlist in the industry standard .m3u playlist format.
Controlling Music PlaybackYour DSM-320 works just like a stereo or CD player. Controlling your musicplayback will be an easy and natural experience. Use the remote to Play, Pause,or Stop music. Press the Previous and Next buttons to skip to the previous ornext track, or Reverse or Fast Forward through a song.
Playing a PlaylistTo play all the tracks in a playlist, highlight the playlist name and press the Playbutton. All tracks will be played in the order they appear in the playlist.

33
Music (continued)
Viewing Photos while Music is PlayingYour DSM-320 is capable of displaying photos and playing Preset musicsimultaneously.
At any point during photo viewing, simply press a number on the remote controlthat corresponds with an existing Preset. The appropriate song will beginplaying.
Please see page 30 to find out how to create a Preset.
Shuffle and RepeatOnce you play a group of tracks (for example, a playlist), each track will playin the original order listed.
To repeat a track, click Repeat on the remote controlor select this icon in the interactive screen.
To change the play order of a playlist, press theShuffle button on the Remote Control, or selectthis icon in the interactive screen.
When you select a music track,information about the song willbe displayed, as shown here.

34
Organizing Photo AlbumsUnlike music files, photos contain very little information about their content.Therefore, photos are organized by their filename and by the folder they are in.Each folder will become an album on the player, and all files in the folder willappear in the album.
Many digital cameras will organize your photos into folders when you connectand unload them to your PC. Each time you dock or connect, a new folder iscreated using the current date and time, and all photos are copied into thatfolder.
You can also create your own photo albums. For instance, create a folder inthe My Pictures directory called My Birthday and copy all your birthday photosinto it. Your DSM-320 will show the folder as a photo album named My Birthday.To play a slideshow of the album, highlight it and press the Play button. Toview a list of the photos in the album, highlight it and press the > (right arrow)button.
PhotosSupported Photo FormatsThe following photo file formats are supported:
BMP (non-compressed)Windows bitmap file. Widely used in MicrosoftWindows for pictures and backgrounds.
JPEG (grayscale, RGB, YCbCy)(Does not support CMYK, YCCK.)The JPEG format is the Internet and digital photoformat standard used by most digital cameras.
GIFOlder format still widely available on the internetfor photos, web pages, and clip art.
PNG (Alpha channel only)Portable Network Graphics standard created inresponse to limitations in the GIF file format.
TIFF (RGB)(Does not support CMYK, YMC, YMCK, KCMY)Tagged Image File Format is a raster file format.

35
Similarly, you can give your photos meaningful names by changing the filename.Most digital cameras will number the photos sequentially. For example, renamethe photo IM001059.jpg to My Birthday Cake.jpg. The photo will be namedMy Birthday Cake on your DSM-320.*
You can create as many album folders as you need. Create a folder for theyear, then create folders inside for each of the months, and then folders ineach month for special occasions (birthday, vacation, holidays).
Photos (continued)
Playing a Photo SlideshowTo start playing a photo slideshow, highlight a folder and press the Play button.The first photo will display, and it will be followed by the next photo in thealbum. The slideshow will display all photos in the album, and all photos in anysub-albums. When the end of the photo album is reached, the slideshow willrepeat.
Controlling Photo PlaybackControlling photo playback is very similar to controlling a CD player...instead ofmusic tracks, there are photos. Once you have started a photo slideshow, usethe remote to Play, Pause, or Stop the show. Press the Previous and Nextbuttons to skip to the previous or next photo. To set the slideshow delay time,click Setup on your remote and select Miscellaneous. You can set the slideshow delay at any interval between 1 second and 2 minutes.
Viewing Photo Information
To view information about aphoto, highlight the photoand press the Displaybutton.
*Folder creation and re-naming files must be doneon the PC via standardWindows procedures.

36
VideosSupported Video FormatsThe following video file formats are supported:
MPEG-1 (up to 8Mbps)
MPEG-2 (up to 8Mbps)
MPEG-4 (ASP. - Advanced Simple Profile)
AVI or QT (MPEG4 layer only)
XVID (with MP3 and PCM)
Viewing a VideoOnce you enter the Video menu, you can view your list of videos.
Use the selection arrows to navigate to the video folder you wish to view.Highlight and press Enter to view the video folder.
After you have selected a video folder, scroll down and highlight the video youwish to view and press Enter or press Play to view the video.

37
Videos (continued)
Using the Remote Control with Videos
Enter - Click ENTER to play your highlighted video.
Play/Pause - To pause the video and to resume playing the video.
+ (Volume) - To increase the volume.
- (Volume) - To decrease the volume.
Mute - To silence the audio portion of the video.
FF - To fast forward through the video.
Display - To view the track time; the resolution and the bit rate.
Repeat - To repeat the video after viewing it.

38
Online MediaFrom the main menu, select Online Media.
The screen above will appear. Select AOL Services. This service allows youto listen to online radio. When you select AOL Services, a setup wizard willappear, leading you through the simple steps required to listen to Radio@AOL.

39
Online Media (continued)AOL Services
After selecting AOL Services (as shown on the previous page), you will begiven the option to sign in as an AOL Member, or, if you are not amember, you can enjoy a Free Trial. AOL members will sign in as follows:
For AOL Members:
Click AOL Members - Sign In.
Click OK.
Enter your AOL screenname and password.
As an AOL member, you are now readyto use Radio@AOL or Radio@AOLPresets!
If you click Radio@AOL, thefollowing screen will appear.

40
Online Media (continued)
Radio@AOL
Use the arrow keys on yourremote to scroll up anddown, and across lists, tomake your music selection.Radio@AOL presets can beselected here by pressingthe Menu button on theremote control whenlistening to the desiredstation.
Information about the currentselection will be displayedhere.
Radio@AOL Presets
Click Radio@AOL Presets.
Preset Radio stations areavailable here. Use thearrow keys, on your remotecontrol, to highlight thestation of your choice, or youcan setup your own selectionof stations. (Free trial usersare not able to select theirown presets.)
Switch ScreenName
For AOL Members(continued):

41
Online Media (continued)AOL Services for Non-members
Click Setup to beginyour free trial ofRadio@AOL using yourDSM-320.
Click Free Trial.
Click OK.
You are now ready to begin your freetrial. Please see the previous page foran explanation of your listeningoptions.Non-members have access toRadio@AOL Presets, and can selectfrom five pre-set stations. (AOLmember are able to configure their ownpre-sets.)

42
Search
Searching for Media filesSome music track lists can be very long and therefore tedious to scrollthrough...especially if the song you are looking for is at the bottom of the list.The Page Up and Page Down buttons can help you move more quickly. Youcan also search for a particular song.
You can click the Searchbutton on the remotecontrol. The screen atright will appear.
In the Media Typepulldown menu, selectMusic.In the Search For field,enter the music title youare seeking.Select Search and pressEnter.
Click the Search button on the remote control, and the screen below will appear,allowing you to search for music tracks, videos, or photos. Shown below is anexample of a search for a music track.

43
Frequently Asked Questions
What is D-Link’s DSM-320?
What kind of files are supported by the D-Link’sDSM-320?
Audio - MP3, WMA, WAV, AIFFVideo - MPEG 1, 2, and 4, AVI, QT, XVIDImages - JPEG, PNG, BMP, GIF, TIFF, JPEG2000
What do I need to set up the D-Link’s DSM-320?You must have a Microsoft Windows-based home network inplace, with at least one PC running Microsoft Windows XP/2000/Me/98SE.
Will any software need to be installed on mycomputer?
Yes, the D-Link Media Server Software needs to be installedon a networked Windows-based PC. From this PC, you canchoose the media files to be streamed to your TV.
The DSM-320 is a complete digital entertainment center. Enjoymusic, video, and photo content when and where you want it -in your living room, bedroom, den, or anywhere you have a TV.Once attached to a network, the DSM-320 allows you to accessmedia content, and play it on a big screen televison. Additionalmedia can be accessed online with AOL Services. Enjoy theconvenience of fast, wireless data transmission, and control theaudio and video entertainment on the TV, with the remote control!

44
Frequently Asked Questions (continued)
What operating system do I need to run the serversoftware?
Windows XP/2000/Me/98SE
How does the D-Link DSM-320 get its files frommy computer?
As soon as you have installed the D-Link Media Server Softwareon your PC, the server software will be launched, allowing youto add media files. You may then select folders containing music,photos or videos that you want to play.
Can I access AOL without Media server softwarerunning?
Yes, by pressing the Online Media button on the main menuscreen, you can access AOL.
What about Copy Protection?
Some music files are copy protected and can only be playedon your computer. Copy protected files cannot be played onyour DSM-320. If a file is copy protected, it will not appear inthe DSM-320. If you plan on sharing and playing music files onyour DSM-320, turn copy protection off when ripping your ownCDs to your PC.
Can I use my Universal remote control?
No, the DSM-320 is not compatible with the universal remote.

45
I cannot see the Home Screen when I turn on myDSM-320 player for the first time.
Make sure your TV is displaying the appropriate video source. You mayneed to use the AV Input, Source, Select, or TV/Video button on yourTV or TV remote to change video sources. If you are having troublechanging the video source, refer to the instructions that came with yourTV.
If you did not connect the player directly to your TV, but are insteadpassing the signal through your VCR, make sure your VCR is displayingthe appropriate video source. You may need to use the Input or Sourcebutton on your VCR or VCR’s remote control. Some VCRs only passthe signal through when they are turned off. If you are having troubledisplaying the correct video source, refer to the instructions that camewith your VCR.
Troubleshooting
Make sure cables are connected to the IN jacks on your TV or VCR,not the OUT jacks.
The cables you are using to connect your receiver to your TV or otherequipment may be damaged or defective. Try exchanging the cablesconnected to the receiver with other cables that you know are workingproperly.
Make sure you have firmly attached the power adapter plug to the backof the player. Also, verify the power adapter is plugged into a workingpower outlet and that the outlet is not controlled by a light switch.
46
My remote control isn’t working.
Make sure the batteries are inserted correctly.
Try removing the batteries and reinserting them without touching anybuttons on the remote control.
Replace the batteries with new ones.
Troubleshooting (continued)
I can’t find any of my music, photos, or video.
Make sure your computer is powered on and that it has not enteredstandby mode. Change your computer’s power settings if you wantyour content to always be available.
Make sure the server software is running on your computer. Look forthe media server icon in your system tray. If necessary, start the serversoftware again.
Click on the server icon and select Settings to Verify you are sharingthe correct directories.
Verify the receiver network cable is properly attachedto your network switch, hub or router, and that theswitch, hub or router has power.
If you are using static network addresses, verify thenetwork address and netmask are correct for yournetwork, and that the address is not already in use byanother PC or device.
Make sure the file you are sharing is of a supported fileformat and encoding scheme.

47
Troubleshooting (continued)
I can’t hear any sound when I’m playing music.Make sure the audio cables are properly connected.
If the audio cables are connected to your TV, the TVmust be on to hear any music.
If the audio cables are connected to your stereo, makesure the stereo is on and you have the correct stereoinput source selected. If you are having troubleselecting the correct audio source, refer to theinstructions that came with your stereo.
Some of my MP3 and WMA files don’t appear.
The DSM-320 supports the most common music fileformats. However, there are almost an infinite variety ofbit rates and sample rates. If a file does not appear onthe receiver, it most likely uses an unsupported rate.
The files may be copy protected. To share your files,turn copy protection off when you rip them.
The following MP3 sample rates are supported:4, 8, 16, 22.05, 24, 32, 44.1, 48, 88.2 and 96 kHz.
For best results, rip your MP3 files at 128 kbps orhigher, with a sample rate of 44.1 kHz.

48
Troubleshooting (continued)
To check the bit and sample rates of amusic file, in your PC’s Windows folder,right-click on the filename and selectProperties.
Select the Summary tab and scroll tothe bottom of the list.
The file to the right has a bit rate of 128kbps and a sample rate of 44 kHz.
In most cases, you don’t need to worryabout the sample rate unless you comeacross a file that will not play or appearon your player. Use the above procedureto check the file settings for supportedrates.
Checking the bit and sample rates of a music file.
I created a playlist on my computer, but it doesn’tappear on my media player
Make sure the playlist file is located in a folder sharedby your media player. Copy the playlist to your sharedmusic folder, or click on the media server icon to addor change your folder options.
How do I reset my DSM-320?Under normal circumstances, you should not need toreset your media player. However, to fully reset the mediaplayer, turn the toggle switch on the rear panel to OFF.Wait a few seconds, then toggle the switch to ON.
What version of software do I have?From the main home screen, press the SETUP buttonand select Version. The software version will belisted.

49
Technical SpecificationsNetworkTCP/IP
Media Streaming ProtocolHTTP
Supported Audio Formats:• MP3 up to 192 kbps• WAV & AIFF (PCM only)• WMA• MPEG 1/2 - Audio
Supported Image Formats:• JPEG (Grayscale, RGB, YCbCy only -does not support CMYK, YCCK)• BMP (Non-compressed)• PNG• TIFF (RGB only - does not support CMYK, YMC, YMCK, KCMY)• GIF
Supported Video Formats:• MPEG 1 (up to 8mbps)• MPEG 2 (up to 8mbps)• MPEG 4 (asp- advanced simple profile)• XVID with MP3 and pcm• AVI or QT (MPEG4 layer only)
Audio Playlist Formats:• M3U• PLSOutputs:• RCA audio jacks• RCA video• S-Video• Component Video• Optical Digital Audio• Coax Digital Audio
Network:• 802.11g Wireless• Supports up to 54Mbpstransfer rate• Wired LAN: 10/100MbpsEthernet• DHCP or Static IP Address

50
Technical Specifications (continued)
Security:• Hardware based WEP (WiredEquivalent Privacy)• Up to 128-bit encryptionConfiguration:• UPnP-AV 1.0 Enabled• INMPR CompliantPC System Requirements• Connection to 802.11gwireless or Ethernet network• Windows 98SE, Me, 2000 or XP• 500MHz processor• 128MB memory• 20MB available hard diskspace• Broadband Internet Service(cable or DSL modem) - For online media access and firmware updatesEnvironmental specification• Operating temperature:0°C to 45°C• Storage temperature:-25°C to 55°C• Operating relative humidity:10% to 95% non-condensingWarranty:1 Year

51
Setting Microsoft Windows PowerOptionsIf you want access to your music and photos all the time, make sure to configureyour PC’s power settings. Do not allow your computer to enter a standby powerstate, or you will have to “wake up” your PC to view music or photos on yourDSM-320. However, your monitor can be in a low power state or turned off.
To change your power settings on Windows XP:
To change your power settings on Windows 2000/Me/98SE:
1. Click on start
2. Select Control Panel
3. Select Performance and Maintenance
4. Select Power Options
5. Change both System standby and System hibernates to Never
6. Click OK
1. Click on start
2. Select Settings
3. Select Control Panel
4. Select Power Options
5. Change both System standby and System hibernates to Never
6. Click OK
Appendix 1

52
Appendix 2Static and Dynamic IP AddressesDHCP-capable routers will automatically assign IP addresses to the devices onthe network, using DHCP (Dynamic Host Configuration Protocol) technology.
If you are using a DHCP-capable router in your network, you will not need toassign a static IP address to your DSM-320. However, if you do not have aDHCP-capable router in your network, you will need to assign a static IP ad-dress to your DSM-320. You can do this through the Setup feature on yourremote control.
The IP addresses on your network must be within the same range. For example,if one PC or device has an IP address of 192.168.0.2, the other devices shouldhave IP addresses that are sequential, like 192.168.0.3 and 192.168.0.4.
The subnet mask must be the same for all the computers on the network.
Hexadecimal digits consist of the numbers 0-9 and the letters A-F.
ASCII (American Standard Code for Information Interchange) is a code forrepresenting English letters as numbers from 0-127.
Appendix 3WEP ConfigurationWhen you create WEP keys for security purposes, (as you can through theSetup button on the remote, under Wireless), you may be asked to enter a keyphrase. This phrase will consist of Hexadecimal or ASCII digits, as describedbelow:
Appendix 4Ad-Hoc & InfrastructureAd-Hoc mode means that two PC’s are communicating in a Peer-to-Peernetwork, without a router or an access point.
Infrastructure mode means that two or more devices are in a network witha router or an access point.

53
Glossary
MUSIC
MP3 = Is the file extension for MPEG-1, audio layer 3. Layer 3 is one ofthree coding schemes (layer 1, layer 2 and layer 3) for the compression ofaudio signals. Layer 3 removes the redundant and irrelevant parts of asound signal, which the human ear does not hear. It uses Modified DiscreteCosine Transform to implement a filter bank, increasing the frequencyresolution 18 times higher than that of layer 2.
WAV = Is the file extension for sound files and was developed by Microsoftand IBM. WAV sound files end with a .wav extension and is compatible withWindows applications supporting audio.
AIFF = Is short for Audio Interchange File Format, an audio format that wasdeveloped by Apple Computer and is the standard audio format forMacintosh computers. AIFF use a .AIF or .IEF extension.
WMA = Is short for Windows Media Audio and is a audio format that wascreated by Microsoft. It is similar to MP3, although WMA can compress at ahigher rate than MP3.
M3U = M3U is a playlist format and is the default playlist format of WinAMPand most other media player software. It allows multiple files to be queued ina program in a specific format.
PLS = A proprietary playlist format used for playing Shoutcast and otheraudio streams.

54
GIF = Pronounced jiff or giff and stands for graphics interchange format, itis a bit-mapped graphics file format. GIF supports color and variousresolutions. It uses data compression, but it is limited to a 256-color palette.
BMP = The standard bit-mapped graphics format used in the Windowsenvironment. By convention, graphics files in the BMP format end with a.BMP extension.
PNG = Short for Portable Network Graphics, is a bit-mapped graphicsformat similar to GIF. In fact, PNG was approved as a standard by the WorldWide Web consortium to replace GIF because GIF uses a patented datacompression scheme. In contrast, PNG is patent and license-free.
TIFF = Acronym for Tagged Image File Format, and is one of the mostwidely supported file formats for storing bit-mapped images on personalcomputers.
TIFF graphics can be any resolution, and they can be black and white, gray-scaled, or color. Files in TIFF format often end with a .tif extension.
PHOTOS
JPG = Short for Joint Photographic Experts Group, and pronounced jay-peg.JPEG is a lossy compression technique for color images. Although it canreduce files sizes to about 5% of their normal size, some detail is lost in thecompression.
JP2 = JP2 is the file extension for the new image format called JPEG2000based on the latest image compression technology.
Glossary (continued)

55
VIDEO
AVI = Short for Audio Video Interleave, the file format for Microsoft’s Videofor Windows standard. See under Video for Windows.
DivX = Is a video format that is MPEG-4 compliant and widely used on theInternet for encoding video files.
MPEG = Short for Moving Picture Experts Group, and pronounced “empeg”.MPEG generally produces better-quality video than competing formats.MPEG achieves high compression rate by storing only the changes from oneframe to another, instead of each entire frame. MPEG uses a type of lossycompression, since some data is removed. However, the reduction in theresulting video quality is minimal. There are three major MPEG standards:MPEG-1, MPEG-2 and MPEG-4.
· The most common implementations of the MPEG-1 standard providea video resolution of 352-by-240 at 30 frames per second (fps).MPEG-1 is used with Video CDs (VCD) and results in video qualityslightly below the quality of a VCR video.
· MPEG-2 offers higher resolution with CD-quality audio. This issufficient for all the major TV standards, including NTSC, and evenHDTV. MPEG-2 is used by DVDs. MPEG-2 compresses a 2 hourvideo into a few gigabytes of data on a single disc.
· MPEG-4 is a video compression standard based on MPEG-1 andMPEG-2. Videos encoded with MPEG-4 technology are considerablysmaller when compared to videos encoded with MPEG-1 or 2.MPEG-4 was standardized in October 1998.
Quicktime = A audio and video compression technology developed by AppleComputer and is widely supported on Macintosh and Windows PCcomputers. The latest Quicktime implementation is MPEG-4 compliant.
XVID = XviD is an ISO MPEG-4 compliant video codec. It’s an open sourceproject which is developed and maintained by many people from all over theworld.
Glossary (continued)

56
Subject to the terms and conditions set forth herein, D-Link Systems, Inc. (“D-Link”) provides this Limitedwarranty for its product only to the person or entity that originally purchased the product from:
• D-Link or its authorized reseller or distributor and• Products purchased and delivered within the fifty states of the United States, the District of Columbia,
U.S. Possessions or Protectorates, U.S. Military Installations, addresses with an APO or FPO.
Limited Warranty: D-Link warrants that the hardware portion of the D-Link products described below willbe free from material defects in workmanship and materials from the date of original retail purchase of theproduct, for the period set forth below applicable to the product type (“Warranty Period”), except asotherwise stated herein.
1-Year Limited Warranty for the Product(s) is defined as follows:
• Hardware (excluding power supplies and fans) One (1) Year• Power Supplies and Fans One (1) Year• Spare parts and spare kits Ninety (90) days
D-Link’s sole obligation shall be to repair or replace the defective Hardware during the Warranty Period atno charge to the original owner or to refund at D-Link’s sole discretion. Such repair or replacement will berendered by D-Link at an Authorized D-Link Service Office. The replacement Hardware need not be newor have an identical make, model or part. D-Link may in its sole discretion replace the defective Hardware(or any part thereof) with any reconditioned product that D-Link reasonably determines is substantiallyequivalent (or superior) in all material respects to the defective Hardware. Repaired or replacementHardware will be warranted for the remainder of the original Warranty Period from the date of originalretail purchase. If a material defect is incapable of correction, or if D-Link determines in its sole discretionthat it is not practical to repair or replace the defective Hardware, the price paid by the original purchaserfor the defective Hardware will be refunded by D-Link upon return to D-Link of the defective Hardware. AllHardware (or part thereof) that is replaced by D-Link, or for which the purchase price is refunded, shallbecome the property of D-Link upon replacement or refund.
Limited Software Warranty: D-Link warrants that the software portion of the product (“Software”) willsubstantially conform to D-Link’s then current functional specifications for the Software, as set forth in theapplicable documentation, from the date of original retail purchase of the Software for a period of ninety(90) days (“Warranty Period”), provided that the Software is properly installed on approved hardware andoperated as contemplated in its documentation. D-Link further warrants that, during the Warranty Period,the magnetic media on which D-Link delivers the Software will be free of physical defects. D-Link’s soleobligation shall be to replace the non-conforming Software (or defective media) with software thatsubstantially conforms to D-Link’s functional specifications for the Software or to refund at D-Link’s solediscretion. Except as otherwise agreed by D-Link in writing, the replacement Software is provided only tothe original licensee, and is subject to the terms and conditions of the license granted by D-Link for theSoftware. Software will be warranted for the remainder of the original Warranty Period from the date ororiginal retail purchase. If a material non-conformance is incapable of correction, or if D-Link determinesin its sole discretion that it is not practical to replace the non-conforming Software, the price paid by theoriginal licensee for the non-conforming Software will be refunded by D-Link; provided that the non-conforming Software (and all copies thereof) is first returned to D-Link. The license granted respectingany Software for which a refund is given automatically terminates.
Non-Applicability of Warranty: The Limited Warranty provided hereunder for hardware and software ofD-Link’s products will not be applied to and does not cover any refurbished product and any productpurchased through the inventory clearance or liquidation sale or other sales in which D-Link, the sellers,or the liquidators expressly disclaim their warranty obligation pertaining to the product and in that case,the product is being sold “As-Is” without any warranty whatsoever including, without limitation, the LimitedWarranty as described herein, notwithstanding anything stated herein to the contrary.
Submitting A Claim: The customer shall return the product to the original purchase point based on itsreturn policy. In case the return policy period has expired and the product is within warranty, the customershall submit a claim to D-Link as outlined below:
• The customer must submit with the product as part of the claim a written description of theHardware defect or Software nonconformance in sufficient detail to allow D-Link to confirm the same.
Warranty and RegistrationUSA only
• The original product owner must obtain a Return Material Authorization (“RMA”) number fromthe Authorized D-Link Service Office and, if requested, provide written proof of purchase of theproduct (such as a copy of the dated purchase invoice for the product) before the warranty service isprovided.

57
• After an RMA number is issued, the defective product must be packaged securely in the originalor other suitable shipping package to ensure that it will not be damaged in transit, and the RMAnumber must be prominently marked on the outside of the package. Do not include any manuals oraccessories in the shipping package. D-Link will only replace the defective portion of the Productand will not ship back any accessories.
• The customer is responsible for all in-bound shipping charges to D-Link. No Cash on Delivery(“COD”) is allowed. Products sent COD will either be rejected by D-Link or become the property of D-Link. Products shall be fully insured by the customer and shipped to D-Link Systems, Inc., 17595Mt. Herrmann, Fountain Valley, CA 92708. D-Link will not be held responsible for any packagesthat are lost in transit to D-Link. The repaired or replaced packages will be shipped to the customervia UPS Ground or any common carrier selected by D-Link, with shipping charges prepaid. Expeditedshipping is available if shipping charges are prepaid by the customer and upon request.
D-Link may reject or return any product that is not packaged and shipped in strict compliance with theforegoing requirements, or for which an RMA number is not visible from the outside of the package. Theproduct owner agrees to pay D-Link’s reasonable handling and return shipping charges for any productthat is not packaged and shipped in accordance with the foregoing requirements, or that is determined byD-Link not to be defective or non-conforming.
What Is Not Covered: This limited warranty provided by D-Link does not cover: Products, if in D-Link’sjudgment, have been subjected to abuse, accident, alteration, modification, tampering, negligence, misuse,faulty installation, lack of reasonable care, repair or service in any way that is not contemplated in thedocumentation for the product, or if the model or serial number has been altered, tampered with, defacedor removed; Initial installation, installation and removal of the product for repair, and shipping costs;Operational adjustments covered in the operating manual for the product, and normal maintenance; Damagethat occurs in shipment, due to act of God, failures due to power surge, and cosmetic damage; Anyhardware, software, firmware or other products or services provided by anyone other than D-Link; Productsthat have been purchased from inventory clearance or liquidation sales or other sales in which D-Link, thesellers, or the liquidators expressly disclaim their warranty obligation pertaining to the product. Repair byanyone other than D-Link or an Authorized D-Link Service Office will void this Warranty.
Disclaimer of Other Warranties: EXCEPT FOR THE LIMITED WARRANTY SPECIFIED HEREIN, THEPRODUCT IS PROVIDED “AS-IS” WITHOUT ANY WARRANTY OF ANY KIND WHATSOEVERINCLUDING, WITHOUT LIMITATION, ANY WARRANTY OF MERCHANTABILITY, FITNESS FOR APARTICULAR PURPOSE AND NON-INFRINGEMENT. IF ANY IMPLIED WARRANTY CANNOT BEDISCLAIMED IN ANY TERRITORY WHERE A PRODUCT IS SOLD, THE DURATION OF SUCH IMPLIEDWARRANTY SHALL BE LIMITED TO NINETY (90) DAYS. EXCEPT AS EXPRESSLY COVERED UNDERTHE LIMITED WARRANTY PROVIDED HEREIN, THE ENTIRE RISK AS TO THE QUALITY, SELECTIONAND PERFORMANCE OF THE PRODUCT IS WITH THE PURCHASER OF THE PRODUCT.
Limitation of Liability: TO THE MAXIMUM EXTENT PERMITTED BY LAW, D-LINK IS NOT LIABLEUNDER ANY CONTRACT, NEGLIGENCE, STRICT LIABILITY OR OTHER LEGAL OR EQUITABLETHEORY FOR ANY LOSS OF USE OF THE PRODUCT, INCONVENIENCE OR DAMAGES OF ANYCHARACTER, WHETHER DIRECT, SPECIAL, INCIDENTAL OR CONSEQUENTIAL (INCLUDING, BUTNOT LIMITED TO, DAMAGES FOR LOSS OF GOODWILL, LOSS OF REVENUE OR PROFIT, WORKSTOPPAGE, COMPUTER FAILURE OR MALFUNCTION, FAILURE OF OTHER EQUIPMENT ORCOMPUTER PROGRAMS TO WHICH D-LINK’S PRODUCT IS CONNECTED WITH, LOSS OFINFORMATION OR DATA CONTAINED IN, STORED ON, OR INTEGRATED WITH ANY PRODUCTRETURNED TO D-LINK FOR WARRANTY SERVICE) RESULTING FROM THE USE OF THE PRODUCT,RELATING TO WARRANTY SERVICE, OR ARISING OUT OF ANY BREACH OF THIS LIMITEDWARRANTY, EVEN IF D-LINK HAS BEEN ADVISED OF THE POSSIBILITY OF SUCH DAMAGES. THESOLE REMEDY FOR A BREACH OF THE FOREGOING LIMITED WARRANTY IS REPAIR,REPLACEMENT OR REFUND OF THE DEFECTIVE OR NON-CONFORMING PRODUCT. THEMAXIMUM LIABILITY OF D-LINK UNDER THIS WARRANTY IS LIMITED TO THE PURCHASE PRICEOF THE PRODUCT COVERED BY THE WARRANTY. THE FOREGOING EXPRESS WRITTENWARRANTIES AND REMEDIES ARE EXCLUSIVE AND ARE IN LIEU OF ANY OTHER WARRANTIESOR REMEDIES, EXPRESS, IMPLIED OR STATUTORYGoverning Law: This Limited Warranty shall be governed by the laws of the State of California. Somestates do not allow exclusion or limitation of incidental or consequential damages, or limitations on howlong an implied warranty lasts, so the foregoing limitations and exclusions may not apply. This limitedwarranty provides specific legal rights and the product owner may also have other rights which vary fromstate to state.
Warranty and RegistrationUSA only (continued)

58
Trademarks: D-Link is a registered trademark of D-Link Systems, Inc. Other trademarks or registeredtrademarks are the property of their respective manufacturers or owners.
Copyright Statement: No part of this publication or documentation accompanying this Product maybe reproduced in any form or by any means or used to make any derivative such as translation,transformation, or adaptation without permission from D-Link Corporation/D-Link Systems, Inc., asstipulated by the United States Copyright Act of 1976. Contents are subject to change without prior
notice. Copyright© 2002 by D-Link Corporation/D-Link Systems, Inc. All rights reserved.
CE Mark Warning: This is a Class B product. In a domestic environment, this product may cause radiointerference, in which case the user may be required to take adequate measures.
FCC Statement: This equipment has been tested and found to comply with the limits for a Class B digitaldevice, pursuant to part 15 of the FCC Rules. These limits are designed to provide reasonable protectionagainst harmful interference in a residential installation. This equipment generates, uses, and can radiateradio frequency energy and, if not installed and used in accordance with the instructions, may causeharmful interference to radio communication. However, there is no guarantee that interference will notoccur in a particular installation. If this equipment does cause harmful interference to radio or televisionreception, which can be determined by turning the equipment off and on, the user is encouraged to try tocorrect the interference by one or more of the following measures:
• Reorient or relocate the receiving antenna.• Increase the separation between the equipment and receiver.• Connect the equipment into an outlet on a circuit different from that to which the receiver is
connected.• Consult the dealer or an experienced radio/TV technician for help.
Warranty and RegistrationUSA only (continued)
For detailed warranty outside the United States, please contact correspondinglocal D-Link office.
Register your D-Link product online at http://support.dlink.com/register
FCC Caution:This device complies with Part 15 of the FCC Rules. Operation is subject to the following twoconditions: (1) This device may not cause harmful interference, and (2) this device must acceptany interference received, including interference that may cause undesired operation.IMPORTANT NOTE:FCC Radiation Exposure Statement:This equipment complies with FCC radiation exposure limits set forth for an uncontrolledenvironment. The antenna(s) used for this equipment must be installed to provide a separationdistance of at least eight inches (20 cm) from all persons.This equipment must not be operated in conjunction with any other antenna.
The manufacturer is not responsible for any radio or TV interference caused by unauthorizedmodifications to this equipment; such modifications could void the user’s authority to operate theequipment.

59
Contacting Technical Support
Technical SupportYou can find software updates and user documentation on the D-Link website.
D-Link provides free technical support for customers within the United States andwithin Canada for the duration of the warranty period on this product.
U.S. and Canadian customers can contact D-Link Technical Support through ourwebsite, or by phone.
Tech Support for customers within the United States:D-Link Technical Support over the Telephone:(877) 453-546524 hours a day, seven days a week.
D-Link Technical Support over the Internet:http://support.dlink.comemail:[email protected]
Tech Support for customers within Canada:D-Link Technical Support over the Telephone:(800) 361-5265Monday to Friday 8:30am to 9:00pm EST
D-Link Technical Support over the Internet:http://support.dlink.caemail:[email protected]
041304


![[Ayako] Sky Girls - 26 - EnD - XVID](https://img.dokumen.tips/doc/110x75/563dbadb550346aa9aa89de0/ayako-sky-girls-26-end-xvid.jpg)
![Nightcrawler. 2014.DVDSCR.ac3.XViD ACAB.[Sharethefiles.com]](https://img.dokumen.tips/doc/110x75/55cf882e55034664618e215e/nightcrawler-2014dvdscrac3xvid-acabsharethefilescom.jpg)


![Aisha - Dvdrip - Xvid - 1cdrip - [Ddr]](https://img.dokumen.tips/doc/110x75/577cd7791a28ab9e789f12d2/aisha-dvdrip-xvid-1cdrip-ddr.jpg)
![Orel I Reshka 9 Sezon 134 Vipusk Saraevo 2014 Xvid Satrip [BFC 134]](https://img.dokumen.tips/doc/110x75/55c37b5abb61eb755e8b4643/orel-i-reshka-9-sezon-134-vipusk-saraevo-2014-xvid-satrip-bfc-134.jpg)


![The Mortal Instruments City of Bones [2013] BRRip XViD [AC3] -ETRG](https://img.dokumen.tips/doc/110x75/577cd5431a28ab9e789a517a/the-mortal-instruments-city-of-bones-2013-brrip-xvid-ac3-etrg.jpg)


![[Ayako] Sky Girls - 11 XVID](https://img.dokumen.tips/doc/110x75/55cf8590550346484b8f7287/ayako-sky-girls-11-xvid.jpg)


![Oh.my.Venus.E07.151207.720p 450p XViD WITH IPOP BarosG LIMO CHAOSrel [DramaFever Version]](https://img.dokumen.tips/doc/110x75/56d6bccc1a28ab30168b8305/ohmyvenuse07151207720p-450p-xvid-with-ipop-barosg-limo-chaosrel-dramafever.jpg)


