Embed Size (px)
Citation preview

1
VOICE&MUSIC
DM-1
Thank you for purchasing the OlympusDigital Voice Recorder DM-1.
Please read these instructions for information about usingthe product correctly and safely.
Keep the instructions handy for future reference.
To ensure successful recordings, we recommend thatyou test the record function and volume before use.
INSTRUCTIONS
EN

2
Do not leave the recorder in hot, humidlocations such as inside a closedautomobile under direct sunlight or onthe beach in the summer.
Do not store the recorder in placesexposed to excessive moisture or dust.
Do not use organic solvents such as alcoholand lacquer thinner to clean the unit.
Do not place the recorder on top of ornear electric appliances such as TVs orrefrigerators.
Avoid sand or dirt. These can causeirreparable damage.
Avoid strong vibrations or shocks. Do not disassemble, repair or modify the
unit yourself. Do not operate the unit while operating
a vehicle (such as a bicycle, motorcycle,or go-cart).
Keep the unit out of the reach of children.
General PrecautionsFor Safe andCorrect UsageBefore using your new recorder, read thismanual carefully to ensure that you knowhow to operate it safely and correctly.Keep this manual in an easily accessiblelocation for future reference.
• The warning symbols indicate importantsafety related information. To protect yourselfand others from personal injury or damage toproperty, it is essential that you always heedthe warnings and information provided.
Using the Online ManualWhen you install the DSS Player 2000 for DM-1 on your PC from the CD-ROM, you can usean online superset version of this instructionsmanual, allowing you to learn more about theDM-1 digital voice recorder.Double-click on the Online Manual shortcut thatwill appear on the desktop once the DSS Playeris installed and open “ONLINE INSTRUCTIONS”to read more about the items listed below.
Uninstall Software ......................................... 21Assigning Folder Names ............................... 34Moving Files Across Folders ......................... 36Window Names (DSS Player) ....................... 44Play a Voice File ........................................... 47Upload Voice Files to the DM-1 .................... 48Send Voice Files with E-mail ......................... 49Window Names (MusicMatch Jukebox) ........ 52Erasing Music Files ....................................... 58Changing the User Equalizer (USER EQ) .... 62System Sounds ............................................. 65Using the DM-1 as a Reader/Writer .............. 71
<Warning regarding data loss>
Recorded content in memory may bedestroyed or erased by operating mistakes,unit malfunction, or during repair work.
It is recommended to back up and saveimportant content to other media such as acomputer hard disk.
3
AC Adapter
Warning
• Do not attempt to disassemble, repair ormodify the AC adapter in any way.
• Keep foreign objects including water,metal, or flammable substances fromgetting inside the product.
• Do not moisten the AC adapter or touchit with a wet hand.
• Do not use the AC adapter in the vicinityof flammable gas (including gasoline,benzine and lacquer thinner).
In case• ... the internal parts of the AC adapter are
exposed because it has been dropped or
Batteries
Warning
• Batteries should never be exposed toflame, heated, short-circuited ordisassembled.
• Do not attempt to recharge alkaline, lithiumor any other non-rechargeable batteries.
• Never use any battery with a torn orcracked outer cover.
• Keep batteries out of the reach of children.• If you notice anything unusual when
using this product such as abnormalnoise, heat, smoke, or a burning odor:1remove the batteries immediately while
being careful not to burn yourself, and;2call your dealer or local Olympus
representative for servicing.
..........................................................................IBM and PC/AT are the trademarks or registered trademarksof International Business Machines Corporation.Microsoft, Windows and Windows Media areregistered trademarks of Microsoft Corporation.Intel and Pentium are registered trademarks ofIntel Corporation.WOW and symbol are trademarks of SRSLabs, Inc.WOW technology is incorporated under licensefrom SRS Labs, Inc.MusicMatch Jukebox is registered trademark ofMusic Match, Inc.Adobe and Acrobat Reader are registeredtrademarks of Adobe Systems Incorporated.Other product and brand names mentionedherein may be the trademarks or registeredtrademarks of their respective owners.
otherwise damaged:• ... the AC adapter is dropped in water, or
if water, metal flammable substances orother foreign objects get inside it:
• ... you notice anything unusual whenusing the AC adapter such as abnormalnoise, heat, smoke, or a burning odor:1 do not touch any of the exposed parts;2 immediately disconnect the power
supply plug from the power outlet, and;3 call your dealer or local Olympus
representative for servicing. Continueduse of the AC adapter under thesecircumstances could result in electricshock, fire or injury.

4
Main Features
The DM-1 provides digital voice recording function and also functions as a digital music playerfunction (→ P.11).
The DM-1 includes the Olympus Voice & Music DM-1 Utility Software, in which the DSS Playersoftware and MusicMatch Jukebox are bundled together.
Connect the included USB cable to your computer for faster transmission speed. Use the DM-1 as a SmartMedia Reader/Writer for fast exchange of other types of data. The large LCD screen with backlight can be easily read in daylight or in the dark.
Main features of the Digital Voice Recorder
The DM-1 supports two recording modes.• You can select SP (Standard Playback) mode or
LP (Long Playback) mode (→ P.26). The included64MB SmartMedia card can store approximately10 hours and 20 minutes* of audio data recordedin SP mode, or approximately 22 hours and 10minutes* of continuous LP mode recording. If youbuy a 128MB SmartMedia card, you can storeup to approximately 44 hours and 40 minutes*of continuous recording on it.* This is the recording time possible for
continuous recording of one file. File names andfile-location information take up some storagespace, so the actual total recording time thatcan be stored will slightly decrease as thenumber of files increases, becoming noticeableif a large number of short recordings are made.(Use the indicated remaining time and recordedtime only as references.)
Can record and play audio files in DSS(Digital Speech Standard) format.• An audio signal converted to digital with high-quality
data compression can be stored in DSS format. The three folders can hold 199 files each,
for a maximum of 597 recordings (→ P.21). You may assign folder names.
• A folder name may consist of up to eightcharacters.
Main features of the Digital Music Player
Can play back music files in MP3 or WMAformat.• You can play back music files in MP3 or WMA
format that you downloaded through the Internetor from audio CDs using the included MusicMatchJukebox.
• With one 64MB SmartMedia card, you can storeapproximately 50 minutes to 2 hours of musicdata. (The total storage time will vary dependingon the bit rate of each music file.)
Uses a multidecoder system (→ P.60). Has built-in WOW (→ P.50-51).
• WOW, a product of sound-compositingtechnology developed by SRS Labs, Inc., isinstalled. WOW produces surround sound withrich bass and sharp, clear sound contours.
You can change the playback equalizersettings (→ P.48).
Recorded files may be moved from onefolder to another.
Has a built-in Variable Control VoiceActuator (VCVA) function (→ P.24-25).
You can insert or delete index marks (→ P.27).• If you insert index marks during recording or
playback, you will later be able to quickly findthe recording you want to hear.

5
Table of Contents
Getting Started
When Using the DM-1 as a Voice Recorder
Using the DM-1 as a Music Player
Features Common to the Voice Recorder and Music Player
Other Information
Managing Files on Your PC
VOICE
Operating Environment ............................. 6SmartMedia ............................................... 7Identification of Parts ................................ 8Inserting Batteries ................................... 10Using the AC Adapter .............................. 11
Switching Between the Voice Recorderand Music Player .............................. 11
Inserting and Ejecting SmartMedia cards ... 12Setting Time/Date ................................... 14Installing Software ................................... 16
Recording ................................................ 21Microphone Sensitivity ............................ 23Using the Variable Control
Voice Actuator (VCVA) ...................... 24Recording Modes .................................... 26
Index Marks ............................................ 27Playing .................................................... 28Erasing .................................................... 30Locking Files ........................................... 32Menu List (VOICE MODE) ...................... 33
Using DSS Player ................................... 34Connecting to Your PC ............................ 36
Running DSS Player ............................... 38Import Voice Files to Your PC ................. 40
Using the DM-1 as a Music Player .......... 42Using MusicMatch Jukebox .................... 42Transferring Music Files to the DM-1 ...... 44Music Playback ....................................... 46
Locking Music Files ................................. 49Increasing the WOW effect ..................... 50Menu List (MUSIC MODE) ...................... 52
Alarm Playback Function ........................ 53Formatting SmartMedia .......................... 55Backlight ................................................. 56
Hold ......................................................... 57Reset ....................................................... 57
Alarm Message List ................................ 58Troubleshooting ...................................... 59Accessories (optional) ............................. 61
Specifications .......................................... 62Technical Assistance and Support .......... 63
MUSIC

6
Op
erating
En
viron
men
t
Operating Environment
PC RequirementsPC: IBM PC/AT compatible PCOperating System: Microsoft Windows 98/ 98SE/ Me /2000 Professional/XP Professional,Home EditionHardware Requirements:Minimum:CPU: Intel Pentium class 200MHz processor or betterRAM: 32MB or moreHard drive space: 70MB or more (plus space for sound data files)Drive: 4x CD-ROM driveSound card : Creative Labs Sound Blaster 16 or 100% compatible sound cardAudio I/O terminals: earphone output or speakerDisplay: SVGA or higher color video display card (minimum resolution 800x600)USB port: One free portBrowser: Microsoft Internet Explorer 4.01 or laterInternet connection
Recommended:CPU: Intel Pentium II class 300MHz MMX or betterRAM: 64 MB or moreHard drive space: 70 MB or moreDrive: 12x CD-ROM driveSound card : Creative Labs Sound Blaster 16 or 100% compatible sound cardAudio I/O terminals: earphone output or speakersCD-Writer (for creating audio CDs)Display: 16-bit color video cardUSB port: One free portHigh-speed Internet connection and Web browser (Microsoft Internet Explorer 5.0 or later)Windows Media player 7 or later
Notes• USB ports are not available on PCs running Windows 95 or that have been upgraded from Windows 95 to any
other OS. An optional PC Card adapter or floppy disk adapter is needed to download audio files to such PCs.• Certain functions, such as remote and direct recording, do not work on PCs that don't have USB ports.• While installing MusicMatch Jukebox, avoid running other applications which are writing to the hard drive
simultaneously with installation. Certain configurations, which cause the operating system to become unstable,such as low memory or multiple open windows, will also affect recording quality.

7
Sm
artMed
iaSmartMedia
What is SmartMedia?SmartMedia is a type of removable IC memorycard. With more memory than a floppy disk,SmartMedia cards facilitate data exchangewith personal computers, and can be used tostore data.
SmartMedia that can be used withthe DM-1If the included 64MB SmartMedia card is notenough, please purchase another SmartMediacard.The following types of SmartMedia cards canbe used with the DM-1.Voltage: 3.3 V or 3VMemory Size: 4MB*, 8MB*, 16MB, 32MB,
64MB, 128MBWhen using the DM-1 as a digital music player,for copyright protection, a SmartMedia cardwithout an ID function cannot be used.* Many of the 4MB and 8MB SmartMedia cards
available in stores do not have the ID function.
Notes• Commercial 5 V SmartMedia cards cannot be used.• When using the DM-1 as a digital voice recorder, a
SmartMedia card without an ID function can beused, since this does not involve copyrightedrecordings.
• Never use SmartMedia cards with products thatare not compliant with the SSFDC Forum*(including certain models of MP3 players).* The SSFDC Forum is a voluntary organization
committed to promoting SmartMedia as a de factostandard in the industry. The DM-1 adheres to aformat recommended by the SSFDC Forum.
Memory Sizes of SmartMedia Cardsand Approximate Recording Times
When using as a voice recorder *
Memory Size SP Mode LP Mode
4MB 30 min. 1 hr. 10 min.
8MB 1 hr. 10 min. 2 hr. 35 min.
16MB 2 hr. 30 min. 5 hr. 20 min.
32MB 5 hr. 05 min. 11 hr. 00 min.
64MB 10 hr. 20 min. 22 hr. 10 min.
128MB 20 hr. 50 min. 44 hr. 40 min.
* Recording time is calculated using a single speechfile recorded continuously. If speech files arerecorded intermittently, recording time may beshorter than indicated.
When using as a music player **
Memory Size Possible recording time
16MB 12 to 30 minutes
32MB 25 to 60 minutes
64MB 50 minutes to 2 hours
128MB 1 hour and 40 minutes to 4 hours
(when the bit rate is between 160 kbps and 64 kbps)
**The possible recording time varies depending onthe bit rate of the music files. For example, a filewith a higher bit rate produces better sound quality;however, the total possible recording time with suchfiles will be shorter.

8
Write-protect SmartMediaA write-protect seal (supplied with SmartMediacard) can be attached to a SmartMedia cardto guard against accidental recording, erasing,and formatting.
Attach the write-protect seal to the write-protectarea to prevent valuable data from beingerased accidentally.Remove the write-protect seal beforerecording or erasing.
Notes• Attach the write-protect seal to the write-protect
area carefully, without letting the seal stick out, lift,or peel.
• Do not use commercial seals.• Write-protect seals cannot be reused.• A dirty write-protect seal may disable the write-
protect feature. Wipe it with a soft, dry cloth.• A SmartMedia card with a write-protect seal
attached to it may not be write-protected whenusing the card with other products.
Write-protectarea
Sm
artMed
ia / Iden
tification
of P
arts
SmartMedia Identification of Parts
1 Built-in microphone*2 FOLDER button*, REPEAT button**3 PLAY button4 FF (Fast Forward) /+ button5 REW (Rewind) /– button6 INDEX button*/ EQ (Equalizer) button**7 ERASE button8 Built-in speaker9 MENU button0 STOP button! REC (Record) button*@ Display (LCD panel)# Record/Play indicator lamp
1
2
3
4
5
6
78
9
0
!
@
#
$ % ^ &
* applicable for Voice recorder** applicable for Music player

9
Iden
tification
of P
arts
$ VOLUME control% Microphone jack*^ SmartMedia slot& Earphone jack* SmartMedia ejection switch( POWER/LOCK switch) MODE switch- MICSENS (Microphone sensitivity)
switch*= HOLD switchq Power jackw PC (USB) terminale Battery cover
w
)-
=q
*(
e
1 Alarm indicator2 Battery indicator3 WOW indicator**4 Folder*5 Recording Date/Time indicator*6 Record mode indicator*7 VCVA(Variable Control Voice
Actuator) indicator*8 Repeat, Random play indicator**9 Current file0 Erase lock indicator! Data, Alarm indicator
Display (LCD Panel)
1
2
4
5
3
6
7
8
9
0
!
* applicable for Voice recorder** applicable for Music player

10
Inserting Batteries
1 Set the POWER/LOCK switch to OFF.
2 Lightly press down on the arrow and slide thebattery cover open.
3 Insert two AAA alkaline batteries, observingthe correct polarity.
4 Close the battery cover completely.
Insertin
g B
atteries
POWER/LOCK
ONOFF
...............................................................................................................................................Notes• Be sure to set the POWER/LOCK switch to OFF position when replacing batteries. Unloading the
batteries while the recorder is recording, erasing or otherwise accessing an audio or a music file maycorrupt the file.
• Be sure to replace both batteries at the same time.• Never mix old and new batteries, or batteries of different types and/or brands.• If it takes longer than 3 minutes to replace dead batteries, the internal rechargeable backup battery will
be exhausted, so you may have to reset the time when you load fresh batteries (→ P.14-15).• Remove the batteries if you are not going to use the recorder for an extended period of time.
Replacing batteriesThe battery indicator on the display changes as the batterieslose power.
→ → →
When appears on the display, replace the batteries assoon as possible.When the batteries are too weak, the recorder shuts downand “BATTERY LOW” appears on the display. AAA alkalinebatteries are recommended.
1
2
3
4An optional Ni-MH Rechargeable Battery from Olympuscan be used for the recorder (→ P.61) . However, the batterylevel may not be indicated correctly when the Ni-MHRechargeabel battery is used.

11
Using the AC AdapterU
sing
the A
C A
dap
ter / Sw
itchin
g B
etween
the Vo
ice Reco
rder an
d M
usic P
layer
Plug the optional AC adapter (Olympus ModelA321 or A322) into household power outlet andconnect the power plug to the recorder’s powerconnector (DC 3 V) as shown in the illustration.Always stop recording before connection.Otherwise it may not be possible to play backthe voice data being recorded.
• Always stop recording before connectionor disconnection.
• When the AC adapter is not in use,disconnect the power supply plug fromthe power outlet.
• Use only the correct power supply voltageas indicated on the adapter.
• Do not use the AC adapter whenconnecting the recorder to the USB port.
Switching Betweenthe Voice Recorderand Music PlayerThe DM-1 has a voice recorder and a musicplayer.
INDEX/EQ
REC
STOP
ASE
MO
DE
MU
SIC
VO
ICE
MENU
INDEX/EQ
REC
STOP
ERASE
Using the MODE switch, choose betweenthe VOICE or MUSIC positions.
VOICE : For recording or playing back voicerecordings.
MUSIC : For listening to music files.
Set the MODE switch to VOICE beforeoperating the DM-1.
Set the MODE switch to MUSIC beforeoperating the DM-1.
Convenient features that can be usedwith both the Voice Recorder andMusic Player.
Meaning of icons in this manual

12
Bottom sideof SmartMediaprojecting fromthe slot
Inserting and Ejecting SmartMedia cards
1 Insert the SmartMedia in the correct direction.Push the SmartMedia card fully into position.
2 Set the POWER/LOCK switch to ON.The display appears.
Inserting SmartMedia cardsInsert the SmartMedia card into the slot as shown below.In
serting
and
Ejectin
g S
martM
edia card
s
1
2POWER/LOCK
ONOFF
MENU
INDEX/EQ
REC
STOP
ERASE
contactarea
...............................................................................................................................................Notes• If an unformatted SmartMedia card is inserted, “FORMAT YES?” will display automatically. Format the
SmartMedia card (→ P.55).• Never use any SmartMedia card other than one that has been formatted on this unit or on a CAMEDIA
series Olympus digital camera (→ P.55).
SmartMedia not insertedfully into the slot
When you set the POWER/LOCKswitch to the ON position, “INSERTCARD” flashes on the display for severalseconds. Pressing any button with noSmartMedia card inserted causes“INSERT CARD” to appear again.Push the SmartMedia card fully intoposition.
SmartMedia inserted fullyinto the slot
When you set the POWER/LOCKswitch to the ON position, “PLEASEWAIT” flashes on the display forseveral seconds.

13
Ejecting SmartMedia cards
1 Set the POWER/LOCK switch toOFF.The display disappears.
2 Raise the SmartMedia ejectionswitch.
·····································································
NoteThe SmartMedia ejection switch will not work if thePOWER/LOCK switch is set to ON.
1
2POWER/LOCK
ONOFF
Insertin
g an
d E
jecting
Sm
artMed
ia cards
Attention• SmartMedia cards are precision devices. Never
force the cards when inserting them, or subjectthem to sharp blows.
• Avoid handling and storing SmartMedia cardsin a hot, damp environment.
• Do not touch the contact area (gold electrodes)of the SmartMedia card with bare hands.If a SmartMedia card gets dirty, wipe it with a soft,dry cloth.
• SmartMedia cards may be vulnerable toelectrostatic data corruption. When carrying aSmartMedia card, put it in its case.Remember to back up data from SmartMedia cardsto a PC or other storage medium from time to time(→ P.40-41).
• Corrupted, lost, or erased data cannot berestored.

14
Setting Time/Date
If you have set the time and date, information as to when an audio or a music file is recorded isstored automatically with that file. The time and date should be set to ease file management tasks.The time and date setting is also needed to perform the alarm playback function (→ P.53-54).
The hour indicator will flash automatically when you load batteries before using therecorder for the first time, or after the recorder hasn't been used for a long time. Proceedfrom step 4.
1 Set the POWER/LOCK switch toON.
2 Press the MENU button.The menu opens (→P.33,52).
3 Press the FF/+ orREW/– button tochoose the Time/Datesetup screen.
4 Press the PLAY button.Time/Date screen appears. The hourindicator flashes, indicating the start ofthe Time/Date setup process.• While you are setting the hour and
minute, each time the FOLDER button ispressed, the time indicator will alternatebetween 12-hour and 24-hour time.Example: 5:45 P.M.
PM 5:45 ←→ 17:45
FF/+ orREW/– button(alters a choice)
PLAY button(accepts a choiceand moves on tothe next item)
STOPbutton
MENU
INDEX/EQ
REC
STOP
ERASE
Settin
g T
ime/D
ate
Time/DateScreen
69
4,5
78
MENUbutton
FOLDERbutton(switching the datadisplayed)
Changing the Time/Date

15
Settin
g T
ime/D
ate
5 Set the hour.1 Press the FF/+ button or REW/–
button to set the hour.2 Press the PLAY button to accept the
hour.
6 Set the minute.1 Press the FF/+ button or REW/–
button to set the minute.2 Press the PLAY button to accept the
minute.
7 Set the year.1 Press the FF/+ button or REW/–
button to set the year.2 Press the PLAY button to accept the
year.• While you are setting the date, each
time the FOLDER button is pressed,the order of the year, month, and daywill change.Example: June 20, 2001
01Y 6M 20D
↓6M 20D 01Y
↓20D 6M 01Y
8 Set the month.1 Press the FF/+ button or REW/–
button to set the month.2 Press the PLAY button to accept the
month.
←
9 Set the date.1 Press the FF/+ button or REW/–
button to set the date.2 Press the PLAY button to accept
the date.
10 Press the STOP button to end.This completes the Time/Date setupprocedure.
·····································································
NoteIf you press the STOP button during the setupoperation, the clock will use the items that were setto that point.

16
Installing Software
Installin
g S
oftw
are
1 Insert Olympus Voice & Music DM-1Utility Software into the CD-ROMdrive.The installation program will startautomatically. Once the program starts,jump to step 4. If it does not, follow theprocedures in steps 2 and 3.
2 Click on the [Start] button andselect [Run].
3 Enter “D:/Setup.exe” in the [Open]field and click on <OK>.This is assuming the CD-ROM is in driveD.
4 The installation LanguageSelection dialog box opens.Click on the desired language to select it.
5 Click on <Next> when theOlympus Voice & Music DM-1Utility Software opening screenappears.
Be sure to confirm the following before installation:• Exit all running applications.• Eject the floppy disk if you are using one.• You will need to input the licence number, so have the license number ID card handy.• If you are running Windows 2000 on a network, you need to log on as an administrator.
6 Confirm the licensing agreement.You must accept the terms of the Licenseagreement to install the Olympus Voice &Music DM-1 Utility. If you accept them,click on <Yes>.
7 Select the installation destinationdirectory.If you wish to select the installationdestination for the Olympus Voice &Music DM-1 Utility Software, click on<Browse> to find the desired installationdestination. If you do not want to changeit, simply click on <Next>.
8 Installation Procedure screen.To install software of your choice select<Custom>. To install both DSS Player andMusicMatch Jukebox, select <Standard>then click on <Next>.If you selected <Standard>, skip to step 10.
Before you connect the USB cable to the DM-1 and your PC, you must first install the software. Inorder to listen to music files, you must have MusicMatch Jukebox installed.

17
Installin
g S
oftw
are
9 Select the software to install.Check the check box for the necessarysoftware, then click on <Next>.
NoteIf the DSS Player and MusicMatch Jukeboxsoftware are already installed, the check boxeswill be checked. If you uncheck the boxes, thesoftware may be deleted.
10 Confirm the start of file copying.Confirm all Current Settings. To acceptthem, click <Next>.
11 If not currently installed on yourPC, install Acrobat Reader.When the Acrobat Reader installationdialog box opens, select Install AdobeAcrobat Reader and click on <Next>.
NoteInstalling Acrobat Reader allows you to viewdetailed operating instructions for DSS Player.
12 Click on <Next> when OlympusDSS Player 2000 for DM-1 Setupappears.If you selected <Custom> and uncheckedDSS Player, skip to step 18.
13 Confirm your acceptance of theterms of the Licensing Agreement.You must accept the terms of theLicensing Agreement to install DSSPlayer. If you accept them, click on <Yes>.
14 Select where to install DSSPlayer.This lets you specify the folder in which toinstall DSS Player. Click on <Browse> tofind the desired installation folder. Toaccept the default folder, click on <Next>.
NoteIf the installation folder does not exist, aconfirmation dialog box opens to get yourpermission to create a folder for thispurpose. Click on <Yes>.
15 Select a program menu folder.You may change the program menufolder to another one, such as [StartUp]. To accept the default folder, clickon <Next>.
16 Authorizing the start of filecopying.Confirm all “Current Settings”. Toaccept them, click on <Next>.
NoteTo change the program menu folder orinstallation folder, click on <Back>.

18
Installin
g S
oftw
are
Installing Software
17 Copy files.Wait until DSS Player is installed onyour PC, then click on <Finish>.
18 Install MusicMatch Jukebox.If you selected <Custom> andunchecked the music utility check box,skip to step 31.
19 Click on <Next> when theWelcome screen appears.
20 Confirm acceptance of the termsof the Licensing Agreement.You must accept the terms of theLicensing Agreement to installMusicMatch Jukebox. If you acceptthem, click on <Yes>.
21 User registration information.A MusicMatch USA user registrationform will appear on the screen.If you have an e-mail address, werecommend that you register online.If not, uncheck the “Recommendedoptions”, type in your name and age,“[email protected]” for the section asking for an e-mail address, and the country you livein. Then click on <Next>.

19
Installin
g S
oftw
are
23 Set the Install Option.If you would like to set up a specialenvironment to meet your needs, check<Custom>. If you don't want to make anychanges, check <Express[recommended]>. Then click on <Next>.If you checked <Express[recommended]>, skip to step 29.
24 Select where to installMusicMatch Jukebox.Click on <Browse> if you want tochange the MusicMatch Jukeboxinstallation folder. To accept the defaultfolder, click on <Next>.
25 Select the folder in which tosave music files.Click on <Browse> if you want tochange where to save your music files.To accept the default folder, click on<Next>.
NoteIf the installation folder does not exist, aconfirmation dialog box opens to get yourpermission to create a folder for thispurpose. Click on <Yes>.
22 Select the Personal MusicRecommendations.If you plan to use the Personal MusicRecommendation, click on <Yes[recommended]>, if not, select <No>,then click on <Next>.Refer to the Personal MusicRecommendation screen for thefeatures and contents.

20
Installing Software
Installin
g S
oftw
are
26 Select a program menu folder.You may change the program menufolder to another one, such as [StartUp]. To accept the default folder, clickon <Next>.
27 MusicMatch Jukebox Shortcuts.It is possible to create shortcuts inthree locations. Check the boxes forany shortcuts you want to create, thenclick on <Next>.
28 File type Registration.Check the appropriate boxes toassociate music files with MusicMatchJukebox, then click on <Next>.Association means to run theapplication that corresponds to thefilename extension.
29 Copy files.Wait until MusicMatch Jukebox isinstalled on your PC.
30 Completing setup.Uncheck “Run MusicMatch Jukeboxnow”, then click on <Finish>.
31 Set up Acrobat Reader.When the Acrobat Reader Setup dialogbox opens, click on <Next>.
32 Select where to install AcrobatReader.Specify the folder in which to installAcrobat Reader. To accept the defaultfolder, click on <Next>.
33 Setup Status.Wait until Acrobat Reader is installedon your PC.
34 Exit Acrobat Reader setup.When the Exit Setup dialog box opens,click on <OK>.
35 Install Shield Wizard complete.You may be requested to restart yourPC when setup is complete. If so,make sure that “Yes, I want to restartmy PC now.” is selected before clickingon <Finish>. Then, when the messageto do so appears, shut your PC off andrestart it.

21
Recording
The recorder provides three folders, A, B, and C, and each message recorded in a folder issaved as a Digital Speech Standard (DSS) file. These three folders can be selectively used todistinguish the kind of recording; for example, folder A might be used to store private information,while folder B might be dedicated to holding business information. Up to 199 messages can berecorded per folder.
1 Press the FOLDER button tochoose a folder.The folder name is displayed forapproximately 2 seconds.
2 Press the REC button to startrecording.The record/play indicator lamp glows red.Aim the microphone at the sound source.
3 Press the STOP button to stoprecording.
Microphone
d Current recordingtime
e Remainingrecording time
d
e
a Current filenumber
b Folder namec Total number of
recorded files inthe folder
a
b
c12
3 MENU
INDEX/EQ
REC
STOP
ERASE
When Using the DM-1 as a Voice RecorderWhen Using the DM-1 as a Voice RecorderVOICE
Reco
rdin
g

22
VOICE
Listening While Audio Is Recorded(Recording Monitor)Insert the earphone into the earphone jack tomonitor what is being recorded. (The volumeis fixed.)
Pause Recording
PausePress the REC button while recording.
“REC PAUSE” will flash on the display.• The recorder stops when it has been left
paused for 10 minutes or longer.
Resume RecordingPress the REC button again.
Recording will resume at the point of
interruption.
Notes• A beep will sound when remaining recording time
reaches 60 seconds, 30 seconds, and 10 secondswhile recording.
• “MEMORY FULL” or “FOLDER FULL” will bedisplayed when the memory or file capacity is full.Delete any unnecessary files before recording anyfurther (→P.30).
• Using the DSS Player, it will be possible to transfervoice files to your computer and store on your harddisk (→P.40-41).
Reco
rdin
g
Recording

23
VOICEM
icrop
ho
ne S
ensitivity
MENU
INDEX/EQ
REC
STOP
ERASE
MIC
SE
NS
CO
NF
DIC
T
Using the MICSENS switch, choosebetween the CONF and DICT positions.
CONF : High-sensitivity mode that recordssounds in all directions.
DICT : Low-sensitivity mode suited fordictation.
·····································································
Notes• If you want to clearly record a speaker, switch to
DICT mode and place the internal microphoneclose (5 to 10 cm) to the speaker.
• If the ambient (background) noise is too loud toget a clear recording even in DICT mode, werecommend that you use an ME-12 singledirectional microphone (sold separately).
MicrophoneSensitivity
Microphone sensitivity is adjustable to meetrecording needs.

24
VOICE
6 2,43,5
1MENU
INDEX/EQ
REC
STOP
ERASE
1 Press the MENU button.The menu opens (→ P.33).
2 Press the FF/+ or REW/– buttonto open the VCVA setup screen.
3 Press the PLAY button.The VCVA setup process begins.
4 Press the FF/+ or REW/– button tochoose between ON and OFF.ON : Will start recording in VCVA mode.OFF: Will resume recording in normal
mode.
5 Press the PLAY button to completethe setup process.
6 Press the STOP button to close themenu.When ON is selected, a VCVA indication willbe displayed on the upper-right corner of thescreen.
When the microphone senses that sounds have reached a preset volume, the built-in VariableControl Voice Actuator (VCVA) starts recording automatically, and stops when the volume drops.Particularly helpful for extended recording, the VCVA not only conserves memory by turning offrecording during silent periods, but also makes playback more efficient and convenient.
Using the Variable Control Voice Actuator (VCVA)
Usin
g th
e Variable C
on
trol Vo
ice Actu
ator (V
CV
A)

25
VOICE
78
MENU
INDEX/EQ
REC
STOP
ERASE
7 Press the REC button to startrecording.When the sound volume is lower than thepreset pause sound level, recordingautomatically pauses after approximately 1second, and “STANDBY VCVA” flashes onthe display. The record/play indicator lampglows when recording starts and flasheswhen recording pauses.
8 Press the FF/+ or REW/– button toadjust the pause sound levelduring recording.The pause sound level can be set to any of15 different values. The higher the value,the higher the sound sensitivity. At thehighest setting, even a small sound willactivate recording.
The VCVA pause sound level can be adjusted according to theambient (background) noise.
To ensure successful recordings, prior testing and adjustmentof the start/stop actuation level is recommended.
................................................................................................
NoteThe start/stop actuation level also varies depending on the selectedmicrophone sensitivity mode (→ P.23).
Usin
g th
e Variable C
on
trol Vo
ice Actu
ator (V
CV
A)

26
VOICER
ecord
ing
Mo
des
1 Press the MENU button.“REC MODE” will be displayed on thescreen (→ P.33).
2 Press the PLAY button.The recording mode setup process begins.
3 Press the FF/+ or REW/– button tochoose between SP and LP.
4 Press the PLAY button to completethe setup process.
5 Press the STOP button to close themenu.
................................................................................................
NoteChoose SP mode for recording meetings or lectures with crisp clarity.
5 32,4
1MENU
INDEX/EQ
REC
STOP
ERASE
Recording Modes
You can choose between two recording modes: SP (Standard Playback) mode and LP (LongPlayback) mode.The included 64MB SmartMedia card holds approximately 10 hours and 20 minutes in SP modeand approximately 22 hours and 10 minutes in LP mode.

27
VOICEIn
dex M
arksIndex Marks
Index marks can be incorporated into a file during recording or playback to make it easy to locateinteresting information. Index marks enable faster access to important information by pressing theFF/+ or REW/– button.
Setting an Index Mark
1 Press the INDEX button duringrecording or playback to set an indexmark.An index mark is set and the index numberappears on the display.
Clearing an Index Mark
1 Play the file with the index mark youwant to clear.
2 Press the FF/+ or REW/– button tochoose the index mark to be cleared.
3 Press the ERASE button while the indexnumber appears for approximately 2seconds on the display.The index mark is erased.
Index numbers are reassigned automatically.
1MENU
INDEX/EQ
REC
STOP
ERASE
21
3MENU
INDEX/EQ
REC
STOP
ERASE
..................................................................................................................................................Notes• Up to 16 index marks can be set in a file. Attempting to set more index marks will cause “INDEX FULL” to
appear on the display.• Index marks cannot be set or cleared in a file stored on a SmartMedia card with a write-protect seal
attached to it (→ P.8).• Index marks cannot be set or cleared in a locked file (→ P.32).

28
VOICEP
laying
Playing
1 Press the FOLDER button tochoose a folder.
2 Press the FF/+ or REW/– button tochoose the file that you want toplay*.The time and date when the file wasrecorded are displayed for approximately2 seconds.
3 Press the PLAY button to startplayback.The record/play indicator lamp glows green.
4 Adjust the VOLUME control to yourliking.
The recorder stops automatically when itfinishes playing each file.
* If you hold the FF/+ or REW/–, files are skipped continuously(continuous skip).
................................................................................................
NotePlayback in Voice mode will be in mono, not stereo.
132
4
MENU
INDEX/EQ
REC
STOP
ERASE
a
b
c
a Recorded timeand date of theselected file
b Elapsed time forthe file beingplayed back
c Total file playtime
MIN MAX

29
VOICEP
laying
Playback Functions
Skip a File While Playing ItPress the FF/+ button while playing a file.
The recorder skips to the beginning of the
next file and starts playing it*.Press the REW/– button while playing a file.
The recorder skips to the beginning of the
current file and starts playing it*.* If an index mark is encountered midway (→ P.27),
playback begins at that position.
Fast PlaybackHold the PLAY button for 1 second or longerwhile playing a file.
The recorder plays back at approximately
50% faster than the normal rate.• After fast playback is canceled, playback
returns to normal rate.
Canceling Fast PlaybackHold the PLAY button for 1 second or longeragain.
Playback returns to normal rate.
Cue (Fast Forward While Playing)
Hold the FF/+ button while playing a file.• The recorder stops when it reaches the end
of the file. Continue pressing the FF/+ buttonto proceed with the cue from the beginningof the next file.
• If an index mark is encountered in the middleof the file, the recorder stops at that point,but will proceed with the cue when the FF/+button is still pressed.
Canceling a Cue
Release the FF/+ button where you want thefile played.Playback begins.
Review (Fast Rewind While Playing)Hold the REW/– button while playing a file.• The recorder stops when it reaches the
beginning of the file. Continue pressing theREW/– button to proceed with the reviewfrom the end of the next file.
• If an index mark is encountered in the middleof the file, the recorder stops at that point,but will proceed with the review if theREW/– button is still pressed.
Canceling the ReviewRelease the REW/– button where you wantthe file played.Playback begins.
Canceling PlaybackPress the PLAY or STOP button.
The file being played will stop midway.

30
VOICEE
rasing
Erasing
Erasing One File at a TimeA selected file can be erased from a folder.
1 Press the FOLDER button tochoose a folder.
2 Press the FF/+ or REW/– button tochoose the file you want to erase.
3 Press the ERASE button.“FILE ERASE?” flashes on the displayfor approximately 8 seconds.
4 Press the ERASE button once morewhen “FILE ERASE?” is flashing.The display lights continuously to indicateerasing has started.
“ERASE OK” is displayed when the file is erased. File numbersare incremented automatically.
·································································································
Notes• If the ERASE button is not pressed within the 8 seconds after “FILE
ERASE?” starts flashing, the DM-1 will revert to stop status.• An erased file cannot be restored.• Locked files cannot be erased (→ P.32).• Files stored on a SmartMedia card with a write-protect seal attached
to it cannot be erased (→ P.8).
1
23,4
MENU
INDEX/EQ
REC
STOP
ERASE
a
a Current folder
b File to be erased
b

31
VOICEE
rasing
Erase All Files from a FolderAll files in a folder can be erased simultaneously, except for locked files (→ P.32).
1 Press the FOLDER button tochoose the folder in which youwant to erase all files.
2 Press the ERASE button for 3seconds or longer.“ALL ERASE?” flashes on the display forapproximately 8 seconds.
3 Press the ERASE button once morewhen “ALL ERASE?” is flashing.The display lights continuously to indicateerasing has started.
“ERASE OK” is displayed when the files are erased. Lockedfiles are reassigned file numbers in ascending order.
................................................................................................
Notes• If the ERASE button is not pressed within the 8 seconds after “ALL
ERASE?” starts flashing, the DM-1 will revert to stop status.• It might take more than 10 seconds to complete erasing tracks. Do not
eject the SmartMedia card before erasing is finished.• Files stored on a SmartMedia card with a write-protect seal attached
to it cannot be erased (→ P.8).
1
2,3MENU
INDEX/EQ
REC
STOP
ERASE
a Folder fromwhich toerase files
a

32
VOICEL
ockin
g F
iles
Locking Files
1 Press the FOLDER button tochoose a folder.
2 Press the FF/+ or REW/– button tochoose the file you want to lock.
3 Press the MENU button.The menu opens (→ P.33).
4 Press the FF/+ or REW/– buttonto open the locking screen.
5 Press the PLAY button.The file locking setup process begins.
6 Press the FF/+ or REW/– button tochoose between ON and OFF.ON : Locks the file and prevents it from
being erased.OFF: Unlocks the file and allows it to be
erased.
7 Press the PLAY button tocomplete the setup process.
8 Press the STOP button to close themenu.
................................................................................................
Notes• The locking function of the DM-1 is different from the read-only function
on your PC.• Any locked files are erased when you format a SmartMedia card.
Locking a file keeps important data from being accidentally erased.Locked files are not erased when you choose to erase all files from a folder (→ P.31).
82,4,6
5,71
3MENU
INDEX/EQ
REC
STOP
ERASEab
a Current folderb File to be locked
c
c Erase lockindicator

33
VOICEM
enu
List (V
OIC
E M
OD
E)
Menu List (VOICE MODE)
Notes• If you press the STOP button, the REC button, or
the MENU button during a menu setup operation,the recorder will stop and apply the items that wereset to that point.
• The recorder will stop if you leave it idle for 3minutes during a menu setup operation, when aselected item is not applied.
REC MODE
Press the MENU button
VCVA
Record mode setting (P.26), selection between SP and LP modes
VCVA setting (P.24), selection between ON (enabled) and OFF (disabled)
LOCK
ALARM
LIGHT
Locking files setting (P.32), selection between ON (locked) and OFF (unlocked)
Alarm playback setting (P.53), selection between ON (enabled) and OFF (disabled)
Backlight setting (P.56), selection between ON (flashing) and OFF (not flashing)
TIME & DATE
FOLDER NAME
FORMAT
BEEP
: Press the FF /+ or
REW/– button
System sounds setting, selection between ON (enabled) and OFF (disabled)
Time/Date setting, in order of hour, minute, year, month and day (P.14)
SmartMedia card formatting (P.55)
Folder naming

34
Usin
g D
SS
Player
By connecting the DM-1 to your PC, you will be able to use DSS Player in the following ways:• To play the voice files from your PC.• You can send voice mail by sending an attached voice file with e-mail.*• You can make backup files of the voice files on the SmartMedia card on your PC, and can later
transfer files on your PC to the DM-1, as necessary.* The e-mail software is not included in this package.
Using DSS Player
Precautions when handling SmartMedia files on your PC
Do NOT format the SmartMedia cardusing your PC. If you do, the DM-1 willnot be able to recognize the SmartMediacard. Only format the cards using eitherthe DM-1 or the Olympus CAMEDIAdigital camera (→P.55).
The folder names that can be set withthe DM-1 or the included DSS Playerare only effective for the DM-1 and DSSPlayer. Note that the default names onMicrosoft Windows' file managementsoftware such as Explorer will bedifferent names.
Managing Files on Your PCManaging Files on Your PC
If you change or move around thefilenames on the SmartMedia using afile-management tool such as Explorer,note that the order of the files maychange and/or you may not be able torecognize the files.
Even if you use your PC and set theSmartMedia card for read only, you willstill be able to read from and write tothe SmartMedia using the DM-1.

35
Usin
g D
SS
Player
1 Once the Online Help screenappears, click on the Contentstab.
2 Double-click on the icon of thedesired topic heading.The title of the topic is displayed.
3 Double-click on the icon of thedesired topic.An explanation of the topic is displayed.
The general operations of DSS Player are discussed below. For more information on menus andoperations, refer to Online Help. You will be able to use Online Help after DSS Player is installed.
Using Online HelpTo open Online Help, do either of the following:• Click on the [Start] button, select <Programs>, then <Olympus DSS Player 2000 for DM-1>, then
click on “DSS Player 2000 for DM-1 Help”.• While DSS Player is running, choose <Contents> from the <Help> menu.• While DSS Player is running, press <F1> on the keyboard.
1 Once the Online Help screenappears, click on the Index tab.A list of keywords by which you cansearch is displayed.
2 Enter text.Matching keywords are locatedautomatically.
3 Choose a topic, then click on<Display>.An explanation of the topic is displayed.
Search by contents Search by keyword
1
2
3
1
2
3

36
Be sure to finish installing DSS Player before connecting the DM-1. If you connect the DM-1before installing DSS Player, the “Add New Hardware Wizard” dialog box will open. If this happens,click on [Cancel] to exit the wizard, then install DSS Player.Once you connect the DM-1 to your PC, the included USB cable will supply the power so you willnot have to use batteries or an AC adapter with the DM-1.
Connecting to Your PC
4Connecting to Your PC
1 Push the SmartMedia all the wayinto the slot (→P.12).
2 Set the DM-1's POWER/LOCKswitch to ON.
3 Deactivate HOLD.
4 Insert end A of the USB cable toyour PC's USB port or USB hub.
5 Confirm that the DM-1 is not inuse before attaching end B of theUSB cable to the PC terminal portof the DM-1.“REMOTE” is displayed on DM-1 if theUSB cable is connected.
Co
nn
ecting
to Yo
ur P
C 5

37
Disconnecting from Your PC
With Windows 98/98 SE
1 Confirm that the record/play indicator lamp on the DM-1 is not flashing.Right-click on the Removable Disk icon in My Computer and select [Eject].
2 Disconnect the USB connecting cable.
With Windows Me/2000
1 Click on the on the task bar located atthe lower-right corner of the screen. Clickon [Stop USB Disk-Drive (E) ].It will read [Stop USB Mass Storage Device-Drive(E)] for Windows 2000. The drive letter will differdepending on the computer being used.
2 When the Safe To Remove Hardware window appears, click on<OK>.
3 Disconnect the USB connecting cable.
·······················································································································································
Notes• NEVER remove the SmartMedia card or disconnect the USB connecting cable while the record/play indicator
lamp is flashing. If you do, the data on the SmartMedia card will be destroyed.• Refer to the user's manual for your PC regarding the USB port or USB hub on your PC.• Be sure that you connect the USB cable either directly to the USB port on your PC or the self-power (AC
adapter connection) USB hub.• Be sure to push the cable connector all the way in. Otherwise, the DM-1 may not operate properly.
Co
nn
ecting
to Yo
ur P
C
1

38
Running DSS Player
1 Start Windows.
2 Connecting the DM-1 to yourPC.For the connection procedure,refer to “Connecting to Your PC”(→P.36).
3 Click on the [Start] button.
4 Point to <Programs>, thenchoose “Olympus DSSPlayer 2000 for DM-1”.
5 Click on the <Olympus DSSPlayer 2000 for DM-1>button.
Before disconnecting the DM-1 fromyour PC, refer to “Disconnecting fromYour PC” (→P.37).
·······················································································································································
NoteYou will not be able to run the included DSS Player 2000 for DM-1 and DSS Player 3.0/3.1/3.5 for DS-150/320at the same time.
It is assumed that the DSS Player has been installed.If you connect the DM-1 before installing DSS Player, the “Add New Hardware Wizard” dialog boxwill open. If this happens, click on [Cancel] to exit the wizard, then install DSS Player.
Ru
nn
ing
DS
S P
layer 3 5
4

39
About automatic startupBy connecting the DM-1 to your PC, you canautomatically start an application.If you have DSS Player installed, it will startup automatically.If you have a music utility installed, regardlessof whether you have DSS Player installed ornot, MusicMatch Jukebox will automaticallystart.
The following three settings can be maderegarding automatic startup.
• Automatically start DSS Player• Automatically start MusicMatch Jukebox• Do not automatically start an application
To change the automatic start setting
Ru
nn
ing
DS
S P
layer
1 Right-click on icon of the TaskBar on the lower right-hand corneron the screen, then click on Selectstartup application.
2 Check the application toautomatically start.The application that you check willautomatically start.If you do not want it to automatically start,uncheck the application.

40
Import Voice Files to Your PC
Importing voice files to your PC from the DM-1 is called downloading. With DSS Player, there arethree ways to download voice files to your PC:
• Download Selected FilesDownload one or several voice files to your PC.
• Download FoldersDownload all the voice files in one folder.
• Download AllClick on the icon and download all the voice files stored in the DM-1 to your PC.
The following is an explanation of “Download Selected Files”. For explanations of “Download Folders”and “Download All”, refer to Online Help.
Download Selected Files
1 Select the folder.From the Device Manager window, select the folder thatcontains the voice file you would like to download. Theillustration shows that Folder A has been selected.
2 Select the voice file.Select the voice file you would like todownload from the voice file list box.To select more than two files, holdeither the <Ctrl> or <Shift> keypressed and select files. Theillustration shows that one voice fileis selected.
Imp
ort V
oice F
iles to Y
ou
r PC
1
2

41
Imp
ort V
oice F
iles to Y
ou
r PC
3 Download the voice file.From the [Download] menu, click on[Download Selected Files].
4 Download complete.Once the transmission screen closesand the record/play indicator lamp onthe DM-1 goes dark, the downloading iscompleted.** In general, it will take more than five seconds
(more than 12 seconds with Windows 2000)after the transmission screen closes beforedownloading is completed.
5 Transmission complete.Before disconnecting the DM-1 from your PC, refer to “Disconnecting from Your PC”(→P.37).
·······················································································································································
Notes• NEVER remove the SmartMedia card or disconnect the USB connecting cable while the record/play indicator
lamp is flashing. If you do, the data on the SmartMedia card will be destroyed.• Depending on the size of the voice file and your PC, it may take longer to download the files.• The downloaded files will be stored in the download tray folder that corresponds to the folder in the DM-1
(Example: A voice file downloaded from Folder A will be stored in download tray on your PC.)• If a voice file already exists on your PC with the same name, date and time recorded, the new file will not be
downloaded.
3

42
MUSICU
sing
the D
M-1 as a M
usic P
layer/ U
sing
Mu
sicMatch
Jukeb
ox
Using the DM-1 as aMusic PlayerThe DM-1 can be used as a music playerto play MP3- or WMA-format music filesdownloaded onto the SmartMedia card. Inorder to download music files on to the DM-1, use the included MusicMatch Jukebox.
About music playback driversIn order to play MP3 or WMA format musicfiles, you will need the music playbackdrivers installed on your SmartMedia card.If for some reason the data on theSmartMedia card are erased or it is the firsttime you are using the SmartMedia card,be sure that the DM-1 is connected to yourPC (→ P.36).
Using MusicMatch JukeboxUsing MusicMatch Jukebox, you can downloadand listen to music CDs or music files downloadedfrom the Internet to your PC on the DM-1.There are many more features. For details, referto MusicMatch Jukebox Online Help or read thePDF file.
About CopyrightsWithout copyright authorization, it is strictlyprohibited to download voice or music files fromthe Internet, to copy and distribute a music CD,or to convert MP3 files for the purpose ofuploading or re-uploading to the Internet or forcommercialization.
Using the DM-1 as a Music PlayerUsing the DM-1 as a Music Player
Music CD
Internet

43
MUSICU
sing
Mu
sicMatch
Jukeb
ox
Windows Media Audio License and Distribution Agreement• You have acquired an item (“DM-1”) that includes software licensed by OLYMPUS from Microsoft Licensing Inc. or its
affiliates (“MS”). Those installed software products of MS origin, as well as associated media, printed materials, and“online” or electronic doumentation (“SOFTWARE”) are protected by copyright laws and international copyright treaties,as well as other intellectual property laws and treaties. The SOFTWARE is licensed, not sold.
* [Approved alternative text if OLYMPUS does not mention MS in the EULA text: “You have acquired an item(“DM-1”) whichincludes software licensed by OLYMPUS from one or more software licensors (“OLYMPUS’s Software Suppliers”). Such softwareproducts, as well as associated media, printed materials, and “online” or electronic documentation (“SOFTWARE”) are protectedby copyright laws and international copyright treaties, as well as other intellectual property laws and treaties.”]
• IF YOU DO NOT AGREE TO THIS END USER LICENSE AGREEMENT (“EULA”), DO NOT USE THE DM-1 OR COPYTHE SOFTWARE. INSTEAD, PROMPTLY CONTACT OLYMPUS FOR INSTRUCTIONS ON RETURN OF THE UNUSEDDM-1(S) FOR A REFUND. ANY USE OF THE SOFTWARE, INCLUDING BUT NOT LIMITED TO USE ON THE DM-1,WILL CONSTITUTE YOUR AGREEMENT TO THIS EULA (OR RATIFICATION OF ANY PREVIOUS CONSENT).
• GRANT OF LICENSE. The SOFTWARE is licensed, not sold. This EULA grants you the following rights to the SOFTWARE: You may use the SOFTWARE only on the “DM-1”.
NOT FAULT TOLERANT. THE SOFTWARE IS NOT FAULT TOLERANT. [OLYMPUS] HAS INDEPENDENTLY DETERMINEDHOW TO USE THE SOFTWARE IN THE “DM-1”, AND MS HAS RELIED UPON [OLYMPUS] TO CONDUCT SUFFICIENTTESTING TO DETERMINE THAT THE SOFTWARE IS SUITABLE FOR SUCH USE.
NO WARRANTIES FOR THE SOFTWARE. THE SOFTWARE is provided “ASIS” and with all faults. THE ENTIRE RISK AS TOSATISFACTORY QUALITY, PERFORMANCE, ACCURACY, AND EFFORT (INCLUDING LACK OF NEGLIGENCE) IS WITHYOU. ALSO, THERE IS NO WARRANTY AGAINST INTERFERENCE WITH YOUR ENJOYMENT OF THE SOFTWARE ORAGAINST INFRINGEMENT. IF YOU HAVE RECEIVED ANY WARRANTIES REGARDING THE “DM-1” OR THE SOFTWARE,THOSE WARRANTIES DO NOT ORIGINATE FROM, AND ARE NOT BINDING ON, MS.
Note on Java Support. The SOFTWARE may contain support for programs written in Java. Java technology is not fault tolerantand is not designed, manufactured, or intended for use or resale as online control equipment in hazardous environmentsrequiring fail-safe performance, such as in the operation of nuclear facilities, aircraft navigation or communication systems,air traffic control, direct life support machines, or weapons systems, in which the failure of Java technology could lead directlyto death, personal injury, or severe physical or environmental damage. Sun Microsystems, Inc. has contractually obligatedMS to make this disclaimer.
No Liability for Certain Damages. EXCEPT AS PROHIBITED BY LAW, MS SHALL HAVE NO LIABILITY FOR ANY INDIRECT,SPECIAL CONSEQUENTIAL OR INCIDENTAL DAMAGES ARISING FROM OR IN CONNECTION WITH THE USE ORPERFORMANCE OF THE SOFTWARE. THIS LIMITATION SHALL APPLY EVEN IF ANY REMEDY FAILS OF ITS ESSENTIALPURPOSE...
Limitations on Reverse Engineering, Decompilation, and Disassembly. You may not reverse engineer, decompile, or disassemblethe SOFTWARE, except and only to the extent that such activity is expressly permitted by applicable law not withstanding thislimitation.
SOFTWARE TRANSFER ALLOWED BUT WITH RESTRICTIONS. You may permanently transfer rights under this EULA only aspart of a permanent sale or transfer of the “DM-1”, and only if the recipient agrees to this EULA. If the SOFTWARE is anupgrade, any transfer must also include all prior versions of the SOFTWARE.
EXPORT RESTRICTIONS. You acknowledge that the SOFTWARE, or any part thereof, or any process or service that is thedirect product of the SOFTWARE(the foregoing collectively referred to as the “Restricted Components”) are of U.S. origin. Youagree to comply with all applicable international and national laws that apply to these products, including the U.S. ExportAdministration Regulations, as well as end-user, end-user and destination restrictions issued by U.S. and other governments.For additional information on exporting Microsoft products, see htt://www.Microsoft.com/exporting/.

44
MUSICTransferring M
usic Files to the DM
-1
1 Start Windows.
2 Connecting the DM-1 to your PC.For the connection procedure, refer to “Connecting to Your PC” (→P.36).Once connection is completed, MusicMatch Jukebox will automatically start up.If you do not want automatic startup, perform the following:1 Click on the [Start] button.2 Select <Programs> then <MusicMatch>.3 Click on <MusicMatch Jukebox>.
3 Double-click on a music file that appears in the My Library window and savein the play list.If the music file begins to play, press the [Stop] button.
4 Click on <Download Playlist to Olympus DM-1> under <Send to Device> ofthe <File> menu.
5 Select a music file that is listed inthe Transfer Possible Filewindow, then click on the<Download to Player> button.Once the transmission screen closesand the record/play indicator lamp onthe DM-1 goes dark, the transferring iscompleted.** In general, it will take more than five seconds
(more than 12 seconds with Windows 2000)after the transmission screen closes beforetransferring is completed.
Transferring Music Files to the DM-1
The procedure is discussed below, under the assumption that the Olympus Voice & Music DM-1Utility Software has already been installed. If you try to access this utility before installation, the “AddNew Hardware Wizard” will appear. Press <Cancel> to exit the wizard, then install the utility.
5

45
MUSICTran
sferring
Mu
sic Files to
the D
M-1
6 Transmission complete.Before disconnecting the DM-1 from your PC, refer to “Disconnecting from Your PC”(→P.37).
Transferring a sample music file to the DM-1
1 Add “If You're Gone (clip).mp3” to the play list from C:\My Documents\My Music.2 Click on <Download Playlist to Olympus DM-1> under <Send to Device> of the <File> menu.3 Select “If You're Gone” and click on <Download to Player>.
If you do not want MusicMatch Jukebox to automatically start, you can change the setting. To doso, refer to “About automatic startup” (→P.39).
·······················································································································································
Notes• NEVER remove the SmartMedia card or disconnect the USB connecting cable while the record/play indicator
lamp is flashing. If you do, the data on the SmartMedia card will be destroyed.• Be sure to use only SmartMedia cards with the ID function.

46
MUSICM
usic P
layback
Music Playback
1 Plug the earphone plug into theEARPHONE jack.
2 Press the FF/+ or REW/– button tochoose the music file that you wantto play*.The filename and the length of the musictrack will be displayed. The display of thetrack length will change to “00M00S” afterapproximately 2 seconds.
3 Press the PLAY button to startplayback.The record/play indicator lamp will flash ingreen, and the title and artist name willscroll on the left side of the screen.Example: If you input TITLE for the titleand ARTIST for the artist name, it will bescrolled as TITLE/ARTIST.
4 Adjust the VOLUME control to yourliking.
The next track will automatically start once the track being playedis finished.
* If you hold the FF/+ or REW/–, files are skipped continuously(continuous skip).
1
32
MENU
INDEX/EQ
REC
STOP
ERASE
4
a
b
c
d
a File beingselected
b Length of the filebeing selected
c Title and artistname of the filebeing played
d Play time of thefile being played
MIN MAX

47
MUSICM
usic P
layback
Notes• The bit rates for playback possible on the DM-1
are 32 kbps to 160 kbps for both the MP3 and WMAformat.
• When playing back a file with a bit rate below 64kbps, the displayed time may not be accurate.
• It is possible to play back files with different bit rates(converting the bit rate within one file); however,the displayed time may not be accurate.
• When using the earphones, do NOT set the volumetoo high. Listening at very high volume may leadto hearing loss.
• It is possible to listen to music without theearphones, using the internal speakers; however,the sound will be in mono, not stereo.
• If neither the title nor artist name was recorded,“UNKNOWN” will be displayed on the screen.
• You may use alphanumerics and symbols exceptfor #, $, @, [, ], \,
_, |, ', ^, , and for the title and
artist names.• You may use alphanumerics and symbols except
for #, $, @, [, ], \, _, |, ', , , and for the filenames.
(Any lowercase letters you use in filenames willappear as capitals.)
• If the filename consists of more than 9 characters,it will be shortened on the display (example:FILEABCDE becomes FILEA~1).
• It is possible to record up to 30 characters each forthe title and artist name.
Playback Functions
Skip a Music File While Playing ItPress the FF/+ button while playing a music file.
The recorder skips to the beginning of thenext track and starts playing it.
Press the REW/– button while playing a music file.
The recorder skips to the beginning of thecurrent track and starts playing it.
Fast Forward
Hold the FF/+ button while playing a music file.Will fast-forward to the end of the track and
stop at the beginning of the next track.
Canceling Fast ForwardRelease the FF/+ button where you want themusic file played.
Playback begins.
Fast RewindHold the REW/– button while playing a music file.
Will rewind to the beginning to the currenttrack and resume playback.
Canceling Fast RewindRelease the REW/– button where you wantthe music file played.
Playback begins.
Canceling PlaybackPress the PLAY or STOP button.
Will stop playing the current track midway.• If the STOP button is pressed while the track
is not being played, the file format and bitrate will be displayed.

48
MUSIC
Various Playback Features
Function Explanation Display indicator
Normal play Will stop after all the tracks been played No indication
Single music repeat play Will play one track repeatedly
All music repeat play Will play all the tracks from first to last continuously
Random repeat play Will continuously play all the tracks in random order
Random play Will stop after all the tracks have been played in random order
• If no action is taken within 2 seconds after the FOLDER/REPEAT button in pressed, the display will revert tothe normal indication.
EqualizerThe equalizer mode is switched in the following order each time the INDEX/EQ (equalizer) buttonis pressed with playback stopped or during playback.
→ FLAT → ROCK → POP→ JAZZ → USER
You can make your own equalizer settings using the user equalizer (USER EQ) function.
• If no action is taken within 2 seconds after the INDEX/EQ button is pressed, the display will revert to the normalindication.
Repeat and Random PlayThe play mode is switched in the following order each time the FOLDER/REPEAT button is pressedwith playback stopped or during playback.
→ Normal play → Single music repeat play → All music repeat play
Random play ← Random repeat play ←
Mu
sic Playb
ack
Music Playback

49
MUSICL
ockin
g M
usic F
iles
71,3,5
4,6
2MENU
INDEX/EQ
REC
STOP
ERASE
Locking Music Files
1 Press the FF/+ or REW/– button tochoose the music file you want tolock.
2 Press the MENU button.The menu opens (→ P.52).
3 Press the FF/+ or REW/– buttonto open the locking screen.
4 Press the PLAY button.The music file locking setup processbegins.
5 Press the FF/+ or REW/– button tochoose between ON and OFF.ON : Locks the music file and prevents it
from being erased.OFF: Unlocks the music file and allows it
to be erased.
6 Press the PLAY button tocomplete the setup process.
7 Press the STOP button to close themenu.
................................................................................................
NoteAny locked music files are erased when you format a SmartMedia card.
Locking a music file keeps important data from being accidentally erased.Locked music files are not erased when you choose to erase all music files.
a File to be locked
a
b
b Erase lockindicator

50
MUSIC
Increasing the WOW effect
The DM-1 has WOW, an audio processing technology that increases sound presence and bassquality. The level of the surround effect (SRS 3D) and the bass effect (TruBass) may be individuallyadjusted through three levels of processing or turned off.
Surround effect (SRS 3D): Increases the sound-expansion effect and sound clarity.Bass effect (TruBass): Enriches the low sounds.
1 Press the MENU button.“WOW effect” will be displayed on thescreen (→ P.52).
2 Press the PLAY button.The surround effect setup process begins(SRS 3D).
3 Press the FF/+ or REW/– button toselect the surround effect level.
Will switch in this order.
4 Press the PLAY button to registeryour setting.The bass effect setup process begins(TruBass).
2,43
1MENU
INDEX/EQ
REC
STOP
ERASE
Increasin
g th
e WO
W effect

51
MUSIC
765
MENU
INDEX/EQ
REC
STOP
ERASE
5 Press the FF/+ or REW/– button toselect the bass effect level.
Will switch in this order.
6 Press the PLAY button to registeryour setting.
7 Press the STOP button to close themenu.If you wish to set other menus, press andhold the PLAY button for more than 1second without pressing the STOP button.
If you wish to change the WOW level while listening to a track,press the MENU button during playback and repeat theprocedure from step 3.
································································································
Notes• Both the surround effect and bass effect are OFF as the WOW default
settings.• If there is no action taken within 8 seconds during the WOW settings
during playback, the DM-1 will revert to normal play.• “ WOW ” will be displayed on the screen if the surround effect or the
bass effect is set.• The WOW effect will be weakened if the bit rate for any music file is
less than 32 kbps.• Depending on the song, the WOW effect will be heightened, and may
sound like noise. If this happens, adjust the WOW effect.
Increasin
g th
e WO
W effect

52
MUSIC
Menu List (MUSIC MODE)
Notes• If you press the STOP button, the REC button, or
the MENU button during a menu setup operation,the recorder will stop and apply the items that wereset to that point.
• The recorder will stop if you leave it idle for 3minutes during a menu setup operation, when aselected item is not applied.
Men
u L
ist (MU
SIC
MO
DE
)
WOW effect
Press the MENU button
USER EQ
LOCK
ALARM
Set the surround effect and bass effect (P.50)
Register your equalizer settings
Locking music files setting (P.49), selection between ON (locked) and OFF (unlocked)
Alarm playback setting (P.53), selection between ON (enabled) and OFF (disabled)
BEEP
TIME&DATE
FORMAT
LIGHT
: Press the FF /+ or
REW/– button
Backlight setting (P.56), selection between ON (flashing) and OFF (not flashing)
System sounds setting, selection between ON (enabled) and OFF (disabled)
Time/Date setting, in order of hour, minute, year, month and day (P.14)
SmartMedia card formatting (P.55)

53
MUSICA
larm P
layback F
un
ction
Features Common to the Voice Recorder and Music PlayerFeatures Common to the Voice Recorder and Music PlayerAlarm Playback Function
1 Set the MODE switch to eitherMUSIC or VOICE.
2 Press the FOLDER button tochoose a folder.If you select VOICE mode, you do notneed to select a folder. → Step 3
3 Press the FF/+ or REW/– button tochoose the file to be played whenthe alarm sounds.
4 Press the MENU button.The menu opens (→ P.33,52).
5 Press the FF/+ or REW/– buttonto open the alarm playback setupscreen.The illustration below shows if a voice filehas been selected for the alarm setting.
6 Press the PLAY button.The alarm playback setup process begins.
7 Press the FF/+ or REW/– button toselect ON.ON: Enables alarm playback.OFF: Disables alarm playback.
The alarm playback function can be set to play a selected file at a pre-set time.
ab
4
62
MENU
INDEX/EQ
REC
STOP
ERASE 3,5,7
a Current folderb File to be
played whenalarm sounds

54
Alarm
Playb
ack Fu
nctio
n
8 Press the PLAY button tocomplete the setup process.The hour indicator flashes.When you choose OFF, the alarmplayback setup process ends, and thealarm indicator disappears. → Step 13
9 Press the FF/+ or REW/– buttonto set the hour.
10 Press the PLAY button to acceptthe hour.The minute indicator flashes.
11 Press the FF/+ or REW/– buttonto set the minute.
12 Press the PLAY button to acceptthe minute.
13 Press the STOP button to closethe menu.
An alarm tone will sound at the scheduled time. Press any buttonwhile the alarm sounds to play the file you associated with the alarm.
13
8,10,12
9,11MENU
INDEX/EQ
REC
STOP
ERASE
.....................................................................................................................................................
Notes• The alarm playback function can be set for only one file at a time.• The alarm will sound at the scheduled time every day unless the alarm playback setting is cleared.• If you wish to change the file for alarm play, first turn the alarm settings OFF, then make any desired new
alarm settings.• The alarm will sound for 5 minutes and then stop.• If you are using the recorder at the scheduled time, the alarm will sound after you’re done.• The alarm will sound at the scheduled time even if the recorder is set to hold. The recorder begins to play the
file associated with the alarm when you press any button.• The alarm playback setting is cleared if the selected file is erased or the SmartMedia card is ejected.• The alarm won’t launch at the scheduled time if the POWER/LOCK switch is set to OFF.
Alarm Playback Function

55
Fo
rmattin
g S
martM
edia
Formatting SmartMedia
1 Press the MENU button.The menu opens (→ P.33,52).
2 Press the FF/+ or REW/– button toopen the FORMAT screen.
3 Press the PLAY button.The formatting process is selected.
4 Press the FF/+ or REW/– button tochoose “YES?”.
5 Press the PLAY button again.Formatting begins and an indicator flasheson the display.
“FORMAT OK” displays when formatting ends.
1
3,52,4
MENU
INDEX/EQ
REC
STOP
ERASE
Formatting prepares SmartMedia cards for recording. SmartMedia cards that have been used onnon-Olympus devices, or that can’t be accessed by this unit, require formatting. The SmartMediacard that comes with this unit and Olympus SmartMedia cards are preformatted and can be usedimmediately following purchase.

56
Never use any SmartMedia cardother than one that has beenformatted with this unit or with aCAMEDIA series Olympus digitalcamera.Other SmartMedia cards may notperform as expected.
Notes• If no action is taken within 8 seconds after step 4,
the menu will revert to the status of step 2.• When a SmartMedia card is formatted, all the stored
data, including locked files, is erased.• A SmartMedia card with a write-protect seal
attached to it cannot be formatted (→ P.8).• If an unformatted SmartMedia card is inserted,
“FORMAT YES?” will display automatically.
Fo
rmattin
g S
martM
edia / B
ackligh
t
The backlight for the DM-1 will be activatedfor approximately 15 seconds each time abutton is pressed. You can select whether ornot you would like to use the backlight.
1 Press the MENU button.The menu opens (→ P.33,52).
2 Press the FF/+ orREW/– buttonto open the backlightsetup screen.
3 Press the PLAY button.The backlight setup process begins.
4 Press the FF/+ or REW/– buttonto choose between ON and OFF.
5 Press the PLAY button tocomplete the setup process.
6 Press the STOP button to closethe menu.
BacklightFormatting SmartMedia

57
Ho
ld / R
esetReset
If the display or the recorder acts strangely,lightly press the reset button in the batterycompartment with the tip of a ballpoint pen ora similar object.
Notes• Do not use a sharp object such as a needle.• The time/date setup process launches
automatically when you press the reset button. Setthe time and date again (→ P.14-15).
• Audio data is not erased when the recorder is reset.
Setting the HOLD switch to theHOLD position.If you set the DM-1 to HOLD status by slidingthe HOLD switch in the direction of the arrow,the current conditions will be preserved, andall buttons and switches except the HOLDswitch will be disabled. This feature is usefulwhen the recorder has to be carried in a bagor pocket.Remember to reset the HOLD switch whenusing the recorder.
Notes• If you set the DM-1 to hold during the Stop mode,
the current time will be displayed. If you press anybutton, the time will flash for about 2 seconds, butthe function of the button is disabled.
• The alarm will sound at the scheduled time even ifthe recorder is set to hold. The recorder begins toplay the file associated with the alarm when youpress any button.
Hold
MENU
INDEX/EQ
REC
STOP
ERASE
HO
LD

58
Alarm
Messag
e List
Alarm Message List
Meaning
Low batterypowerWrite-protected
IncompatibleSmartMediaNo file for playingmusic
SmartMediaejection errorFolder full
Formatting error
Index full
No card
License does notmatchErase-locked
Zero remainingmemory
No file
Unrecordable
File cannot betransferred
Action
Replace with new batteries(→ P.10).Remove the write-protect seal fromthe SmartMedia card and try again(→ P.8).Insert a compatible SmartMedia card(→ P.7).Connect the USB cable to the DM-1and computer (→ P.36).
Reinsert the SmartMedia card.
Erase files that are no longerrequired, or insert anotherSmartMedia card.Reinsert the SmartMedia card andthen reformat it (→ P.55).Erase index marks that are nolonger required (→ P.27).Insert a SmartMedia card(→ P.12).
Copy the sound file to the DM-1using MusicMatch Jukebox (→ P.44).Unlock the file (→ P.32,49).
Erase files that are no longerrequired or insert anotherSmartMedia card.Select another folder.
Back up the data and format theSmartMedia card.
Transfer the file to another folder.
* File names are assigned during recording for file management purposes.
Explanation
Battery power is getting low.
Tried to record to, or erase from, aSmartMedia card with a write-protect seal attached.An incompatible SmartMedia cardwas inserted.There is no music file compatiblefor playback on the SmartMediacard.
The SmartMedia card was ejectedduring an operation.The folder is full of files (maximumof 199 files).
An error was encountered whileformatting.The file is full of index marks(maximum of 16 marks).There is no SmartMedia cardinserted.
The license ID does not match.
Tried to delete a locked file.
The SmartMedia card has noremaining memory.
No files were found in the folder.
There is something wrong with theSmartMedia card.
A file with the same file name*already exists in the destinationfolder.
Message
BATTERY LOW
CARD
CARD ERROR
CONNECT to PC
EJECT ERROR
FOLDER FULL
FORMAT ERROR
INDEX FULL
INSERT CARD
LICENCE MISMATCH
LOCK ON
MEMORY FULL
NO FILE
READONLY
SAME FILE

59
Trou
blesh
oo
ting
Troubleshooting
Probable cause
The batteries are not loaded properly.The batteries are dead.The POWER/LOCK switch is set to OFF.
If none of these suggestions worksThe recorder is in HOLD mode.
The SmartMedia card is not formatted.
The batteries are dead.The SmartMedia card has a write-protect sealattached to it.The SmartMedia card is unformatted.The SmartMedia card does not have enough memory.
The maximum number of files has been reached.MUSIC mode is active.The earphone is connected.
The VOLUME control is set to 0.The file is locked.The SmartMedia card has a write-protect sealattached to it.The recorder was shaken during recording.The recorder was placed near a cell phone orfluorescent lamp while recording or during playback.The microphone sensitivity is too low.
The maximum number of index marks (16) has beenreached.The SmartMedia card has a write-protect sealattached to it.The file is locked.A non-standard AC adapter is being used.
Symptom
Nothingappears onthe display
Won’t start
Unable torecord
No playbacktone heard
Unable toerase
Noise heardduringplaybackRecordinglevel too lowUnable to setindex marks
Won’t workwith ACadapter
Action
Verify polarity is correct.Replace with new batteries.Set the POWER/LOCK switch toON.Reset the recorder (→ P.57).Release the recorder from HOLD(→ P.57).Format the SmartMedia card(→ P.55).Replace with new batteries.Remove the seal.
Format the SmartMedia card.Erase unnecessary files or insertanother SmartMedia card.Check another folder.Set the MODE switch to VOICE.Unplug the earphones to use theinternal speakers.Adjust the VOLUME control.Unlock the file (→ P.32,49).Remove the seal.
–Move the recorder.
Set the microphone sensitivity toCONF mode and try again.Erase unnecessary index marks(→ P.27).Remove the seal.
Unlock the file (→ P.32,49).Use the Olympus A321 (for US,Canada) or A322 (for Europeexcept U.K) AC adapter(Optional).
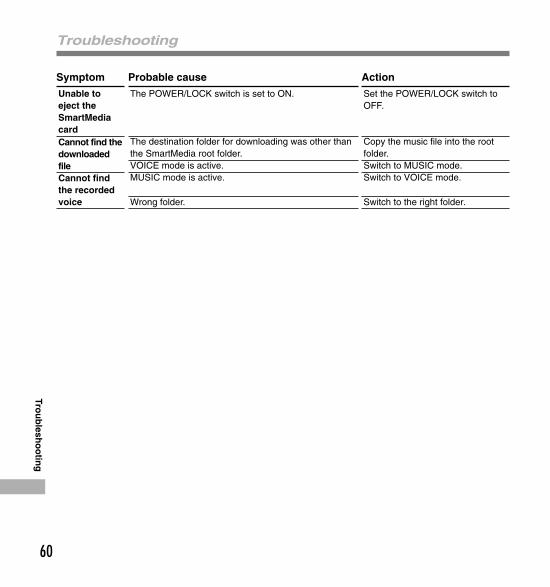
60
Probable cause
The POWER/LOCK switch is set to ON.
The destination folder for downloading was other thanthe SmartMedia root folder.VOICE mode is active.MUSIC mode is active.
Wrong folder.
Symptom
Unable toeject theSmartMediacardCannot find thedownloadedfileCannot findthe recordedvoice
Action
Set the POWER/LOCK switch toOFF.
Copy the music file into the rootfolder.Switch to MUSIC mode.Switch to VOICE mode.
Switch to the right folder.
Troubleshooting
Trou
blesh
oo
ting
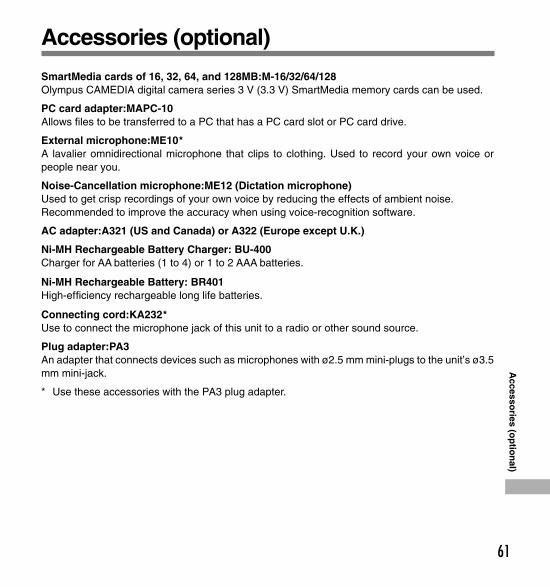
61
Accessories (optional)
SmartMedia cards of 16, 32, 64, and 128MB:M-16/32/64/128Olympus CAMEDIA digital camera series 3 V (3.3 V) SmartMedia memory cards can be used.
PC card adapter:MAPC-10Allows files to be transferred to a PC that has a PC card slot or PC card drive.
External microphone:ME10*A lavalier omnidirectional microphone that clips to clothing. Used to record your own voice orpeople near you.
Noise-Cancellation microphone:ME12 (Dictation microphone)Used to get crisp recordings of your own voice by reducing the effects of ambient noise.Recommended to improve the accuracy when using voice-recognition software.
AC adapter:A321 (US and Canada) or A322 (Europe except U.K.)
Ni-MH Rechargeable Battery Charger: BU-400Charger for AA batteries (1 to 4) or 1 to 2 AAA batteries.
Ni-MH Rechargeable Battery: BR401High-efficiency rechargeable long life batteries.
Connecting cord:KA232*Use to connect the microphone jack of this unit to a radio or other sound source.
Plug adapter:PA3An adapter that connects devices such as microphones with ø2.5 mm mini-plugs to the unit’s ø3.5mm mini-jack.
* Use these accessories with the PA3 plug adapter.
Accesso
ries (op
tion
al)

62
Specifications
For the Digital Voice RecorderRecording format DSS (Digital Speech Standard)Input level –70 dBvSampling frequency
SP mode:12 kHzLP mode: 8 kHz
Overall frequency responseSP mode:300 to 5,000 HzLP mode: 300 to 3,000 Hz
Recording time SP mode:10 hours 20 minutesLP mode: 22 hours 10 minutes(64MB card)
Battery life (Recording) Approx. 11 hours(Playback) Approx. 8 hours(with alkaline batteries, based on ourstandard testing procedure)
For the Digital Music PlayerCompatible data format
WMA, MP3 format(using the multidecoder system)
Sampling frequency44.1 kHz
Frequency band 20 to 20,000 HzPlayback time Bit rate 160 kbps: 50 minutes
Bit rate 128 kbps: 60 minutesBit rate 96 kbps: 84 minutesBit rate 64 kbps: 120 minutes(64MB card / Time may varydepending on the bit rate of themusic data.)
Maximum headphone output5mW + 5mW (at load of 16 Ω)
Battery life Approx. 8 hours(with alkaline batteries, based onour standard testing procedure)
Common specificationsRecording media
SmartMedia cards: 3 or 3.3 V, 4to 128 MB(Any SmartMedia card withoutan ID feature cannot be usedwith the Music Player.)
Card format SSFDC Forum-compliantSmartMedia format
Speaker Built-in ø28 mm round dynamicspeaker
Microphone jack ø3.5 mm mini-jack, impedance2 kΩ
Earphone jack ø3.5 mm mini-jack, impedance16 Ω
Maximum working output (3 V DC)180 mW or more (8 Ω speaker)
Input power requirementRated voltage:3 VBatteries: Two AAA
batteries(LR03 or R03)orTwo Ni-MHrechargeablebatteries
External power supply:AC adapter
External dimensions109.5 x 50.0 x 16.7 mm (withoutprotrusions)
Weight 86 g (including batteries)
* Specifications and design are subject tochange without notice.
* Battery life varies greatly according to typeof batteries used and the conditions of use.
Sp
ecification
s

63
Technical Assistance and SupportThe following are contact information for technical support for Olympus recorders and software only.
Technical Hotline Number in the U.S. and Canada1-888-553-4448
User Support E-mail address in the U.S. and [email protected]
Technical Hotline Number in EuropeToll free number00800 67 10 83 00
available for Austria, Belgium, Denmark, Finland, France, Germany, Italy, Luxemburg,Netherlands, Norway, Portugal, Spain, Sweden, Switzerland, United Kingdom
Charged numbers for the Rest of Europe+49 180 567 1083+49 40 23773 899
User Support E-mail address in [email protected]
MusicMatch Jukebox Customer SupportInternetContact us through the web. We have many forms in place for you to easily reach the correctdepartment.
EmailIf you would like to send us your comments or suggestions for future enhancements, pleaseemail them to us at: [email protected]
Mail (Regular)MusicMatch16935 W Bernardo Dr.Suite 270San Diego, CA 92127USA
Techn
ical Assistan
ce and
Su
pp
ort

Declaration of Conformity
Model Number: DM-1Trade Name: DIGITAL VOICE RECORDERResponsible Party: OLYMPUS AMERICA INC.Address: 2 Corporate Center Drive, Melville, NY 11747-3157, U.S.A.Telephone Number: 800-622-6372
This device Complies with Part 15 of the FCC Rules. Operation is subject to the following twoconditions: (1) This device may not cause harmful interference, and (2) this device must accept anyinterference received, including interference that may cause undesired operation.
Tested To ComplyWith FCC Standards
FOR HOME OR OFFICE USECanadian RFIThis digital apparatus does not exceed the Class B limits for radio noise emissions from digital apparatusas set out in the Radio Interference Regulations of the Canadian Department of Communications.
Cet apparail numerique ne depasse pas limits de Categorie B pour les emissions de gruit radio emanantd’appareils numeriques, tel que prevu dans les Reglements sur l’Interference Radio du DepartmentCanadian des Communications.
“CE” mark indicates that thisproduct complies with theEuropean requirements forsafety, health, environmentand customer protection.
E2-2790-02AP0311
Shinjuku Monolith, 3-1 Nishi-Shinjuku 2-chome, Shinjuku-ku, Tokyo 163-0914, Japan. Tel. 03-3340-2111
Two Corporate Center Drive, Melville, NY 11747-3157, U.S.A. Tel. 1-800-622-6372
(Premises/Goods delivery) Wendenstrasse 14-18, 20097 Hamburg, Germany. Tel. 040-237730(Letters) Postfach 10 49 08. 20034 Hamburg. Germany.
2-8 Honduras Street, London EC1Y 0TX, United Kingdom, Tel. 020-7253-2772http://www.olympus.com
L’indication “CE” signifie que ceproduit est conforme auxexigences concernant la sécurité,la santé, l’environnement et laprotection du consommateur.
Das „CE“ Zeichen bestätigt dieübereinstimmug mit denEuropäischen Bestimmungenfür Betriebssicherheit undUmweltschutz.