Embed Size (px)
Citation preview

1
© NAFED 2016. ALL RIGHTS RESERVED
© NAFED 2016. ALL RIGHTS RESERVED
CARTRIDGE OPERATED FIRE EXTINGUISHERS
A SERVICE GUIDE TO INSPECTION,
MAINTENANCE, RECHARGE
© NAFED 2016. ALL RIGHTS RESERVED
DISCLAIMERS AND
INFORMATION

2
© NAFED 2016. ALL RIGHTS RESERVED
The NAFED Online Fire Extinguisher Service Training Program is a practical training program that must be a supplement to actual hands-on training provided by the service company.
This program was written by NAFED members utilizing their own experiences to provide proper procedures for the servicing and maintenance of portable fire extinguishers.
NAFED strongly suggests that all service personnel procure a copy of NFPA-10, Portable Fire Extinguishers, current edition. This standard is available from the National Fire Protection Association at www.nfpa.org. This is the internationally recognized standard for the selection, maintenance, and testing of portable fire extinguisher equipment. Its content should be familiar to all service personnel in the fire protection equipment industry.
These programs are intended to be a general guide to the servicing of portable fire extinguishers. All service personnel should secure manufacturers’ service manuals for specific types of extinguishers and be familiar with state and local ordinances regarding extinguishers.
© NAFED 2016. ALL RIGHTS RESERVED
It is important that all service personnel follow the manufacturers’ recommended procedures when servicing any type of portable fire equipment. The information and servicing procedures presented in this program have been compiled from educated sources and currently available information.
However, the suggested practices explained in this program generally reflect the minimum maintenance requirements expressed in NFPA-10. Please review the specific requirements of your own authority having jurisdiction, since different jurisdictions require different procedures.
© NAFED 2016. ALL RIGHTS RESERVED
NAFED assumes no liability or responsibility in connection with the information, procedures, and recommendations contained herein and expressly disclaims any liability for damages, compensatory, consequential or other, in contract or in tort, arising out of or related to the use of any information in this program. The information herein is general, and not specific to any manufacturers’ products. It should not be assumed that every acceptable safety procedure or method, precaution, equipment, or device is contained within, or that unusual circumstances may not require further procedures or requirements.
Photographs used in this program are included strictly to illustrate specific training points. Use of these photos does not constitute an endorsement by NAFED of any product or equipment shown.

3
© NAFED 2016. ALL RIGHTS RESERVED
There are multiple brands of cartridge operated fire extinguishers available. The servicing
procedures for all are similar based upon NFPA-10 standard requirements. Refer to the individual
manufacturer’s service manual for details.
© NAFED 2016. ALL RIGHTS RESERVED
While Ansul units are shown in this presentation, they are used for illustration and examples only.
Similar procedures should be followed with any brands as listed in that
brand’s service manual.
NOTES
© NAFED 2016. ALL RIGHTS RESERVED
Throughout this presentation, the term “UL” also refers to CAN/ULC.
The terms “state” or “local” also refer to Canadian provinces or provincial
regulations.
NOTES

4
© NAFED 2016. ALL RIGHTS RESERVED
INSPECTION is a “quick check” that a fire extinguisher is available and will operate, and is designed to give reasonable assurance that the extinguisher is fully charged and will operated as intended.
MAINTENANCE is a thorough examination of the extinguisher and its parts and is designed to give maximum assurance that the unit will operate as intended. This procedure also includes preventative maintenance procedures.
NFPA DEFINITIONS
© NAFED 2016. ALL RIGHTS RESERVED
NFPA 10, currently published edition, is the standard for maintaining and servicing fire extinguishers.
Local regulations, as well as those of the fire marshal, or other authority having jurisdiction (AHJ), shall also be followed.
SAFETY GLASSES AND OTHER REQUIRED PERSONAL PROTECTIVE EQUIPMENT
(PPE) SHALL BE WORN FOR ALL INSPECTION, MAINTENANCE AND
RECHARGE PROCEDURES AT ALL TIMES.
STANDARDS
© NAFED 2016. ALL RIGHTS RESERVED
Cartridge operated extinguishers are not stored pressure units, and
have different components, operating means, inspection and maintenance requirements, etc.
These requirements are also covered under NFPA-10.

5
© NAFED 2016. ALL RIGHTS RESERVED
The cartridge unit may contain any of three common dry chemicals
• ABC Type
• Purple K
• Regular BC
© NAFED 2016. ALL RIGHTS RESERVED
Or any one of the available dry powders for Class D fires Note that Class D powder is suitable for only the specific type of Class D fire intended
© NAFED 2016. ALL RIGHTS RESERVED
TYPICAL COMPONENTS
PHOTO FROM ANSUL

6
© NAFED 2016. ALL RIGHTS RESERVED
UNIT BEING PRESSURIZED
PHOTO FROM ANSUL
© NAFED 2016. ALL RIGHTS RESERVED
HOW IS A CARTRIDGE CONSTRUCTED?
© NAFED 2016. ALL RIGHTS RESERVED
CARTRIDGE COMPONENTS

7
© NAFED 2016. ALL RIGHTS RESERVED
DISCLAIMERS AND
INFORMATION
© NAFED 2016. ALL RIGHTS RESERVED
Located In Its Proper Location And Position?
LOCATION
Mounting Height Correct?
Is It Obstructed…Is The Unit Blocked?
© NAFED 2016. ALL RIGHTS RESERVED
Pick The Unit Up. Check Weight By Hefting. If Any Doubt, Weigh The Unit.
HEFTING

8
© NAFED 2016. ALL RIGHTS RESERVED
CHECK MOUNTING BRACKET
If using a vehicle type bracket, make certain all parts of the bracket are working correctly and the bracket is securely attached
Make sure the mounting bracket is firmly secured and correctly mounted
© NAFED 2016. ALL RIGHTS RESERVED
Broken Seal Means Do A Full Maintenance
CHECK SAFETY SEAL
© NAFED 2016. ALL RIGHTS RESERVED
Note: Throughout this presentation we are using plain yellow seals for clarity. Always
use seals meeting the requirements of NFPA-10.
NFPA-10 requires seals to be listed.
Some AHJ or local jurisdiction also may require dates, certain colors, etc. Check with
your company to determine your specific requirements.

9
© NAFED 2016. ALL RIGHTS RESERVED
CHECK PRESSURE INDICATOR Some models are equipped with a pressure indicator. Verify that this is in the correct position. If not, a full
maintenance is needed.
© NAFED 2016. ALL RIGHTS RESERVED
CHECK OVERALL CONDITION
Check The Overall Condition Of The Unit Looking For Damage, Corrosion, Etc.
© NAFED 2016. ALL RIGHTS RESERVED
CHECK NAMEPLATES FRONT AND REAR
Check Condition Of All Nameplates To Ensure Readability
Pay Attention To The UL Manifest And Condition

10
© NAFED 2016. ALL RIGHTS RESERVED
CHECK UNDERSIDE OF SHELL
Check Underside Of Shell Looking For Dirt, Corrosion Or Damage
© NAFED 2016. ALL RIGHTS RESERVED
CHECK DISCHARGE HOSE CONDITION
Check Condition Of Hose
© NAFED 2016. ALL RIGHTS RESERVED
CHECK OPERATION OF DISCHARGE NOZZLE
Check Operation Of The Discharge Nozzle
Return Nozzle To Holder

11
© NAFED 2016. ALL RIGHTS RESERVED
RETURN UNIT TO SERVICE
Return The Unit To Its Proper Location
Complete The Service Tag And Other Documentation As Required.
© NAFED 2016. ALL RIGHTS RESERVED
Note: States and other jurisdictions may have specific tag formats. They may also
require certain specific pieces of information, such as gross weight, serial
number, etc.
Check with your company for your local regulations
© NAFED 2016. ALL RIGHTS RESERVED
MAINTENANCE OVERVIEW

12
© NAFED 2016. ALL RIGHTS RESERVED
Maintenance will involve all of the steps from an
inspection, plus several other steps and preventative
maintenance actions.
© NAFED 2016. ALL RIGHTS RESERVED
MAINTENANCE – CHECK THE HYDROSTATIC TEST DATE OR DATE OF MANUFACTURE
Different models may have a date in a different location
Check the date of manufacture or if the
unit has been hydrotested
THIS DATE IS 1968
© NAFED 2016. ALL RIGHTS RESERVED
Frequently the unit has been hydrotested
recently. Look for the hydro sticker or
label
MAINTENANCE – CHECK THE HYDROSTATIC TEST DATE OR DATE OF MANUFACTURE
13
© NAFED 2016. ALL RIGHTS RESERVED
HYDROTEST INTERVAL IS 12 YEARS
MAXIMUM FOR THE SHELL
© NAFED 2016. ALL RIGHTS RESERVED
A serious problem with cartridge operated extinguishers mounted outside is corrosion. These are pressure vessels with normally no pressure.
When activated, they go from “zero” pressure to +250 psi instantly.
Shells can fail catastrophically - causing serious injury.
CORROSION
© NAFED 2016. ALL RIGHTS RESERVED
NFPA-10 is very specific on the criteria to FAIL or CONDEMN a fire extinguisher (excerpts) 8.4.2* Examination of Cylinder Condition. Where a fire extinguisher cylinder or shell has one or more of the following conditions, it shall not be hydrostatically tested but shall be condemned or destroyed by the owner or at the owner’s direction:
(2) Where the cylinder threads are worn, corroded, broken, cracked, or nicked
(3) Where corrosion has caused pitting, including pitting under a removable nameplate or name band assembly
(7) Where the depth of a dent exceeds 1⁄10 of the greatest dimension of the dent if not in a weld or exceeds 1⁄4 in. (6 mm) if the dent includes a weld
(8) Where any local or general corrosion, cuts, gouges, or dings have removed more than 10 percent of the minimum cylinder wall thickness
CORROSION

14
© NAFED 2016. ALL RIGHTS RESERVED
With modern drawn cylinders, the wall thickness may actually vary some, making the “10%” or a precision measurement difficult.
Most manufacturers will state that when any of the metal is removed by corrosion, the shell should be condemned.
This means anything greater than simple surface rust or flash corrosion.
CORROSION
© NAFED 2016. ALL RIGHTS RESERVED
Many cartridge units are spun cylinders with a uniform wall thickness. An example is shown below.
Even with this information, if any of the base metal has been removed, it is wise to condemn the shell.
© NAFED 2016. ALL RIGHTS RESERVED
CORROSION

15
© NAFED 2016. ALL RIGHTS RESERVED
CORROSION
© NAFED 2016. ALL RIGHTS RESERVED
Remember to always check for the date of manufacture or hydro and signs of corrosion as the first step in the annual
maintenance procedure.
MAINTENANCE
© NAFED 2016. ALL RIGHTS RESERVED
Pick the unit up.
Check visually and check for weigh by hefting.
Full weight is marked on the nameplate and the unit should be weighed to verify.
MAINTENANCE – THE BEGINNING

16
© NAFED 2016. ALL RIGHTS RESERVED
Break Seal And Remove Hose From Behind Receiver
MAINTENANCE – BREAK THE SEAL
© NAFED 2016. ALL RIGHTS RESERVED
Always check for pressure by pointing the unit in a safe direction and slowly opening the discharge nozzle.
It is common to find small “puffs” of air discharged.
MAINTENANCE – CHECK FOR PRESSURE
© NAFED 2016. ALL RIGHTS RESERVED
Remove The Cartridge Guard And Set Aside Replace Hose Behind Receiver
MAINTENANCE – REMOVE CARTRIDGE GUARD

17
© NAFED 2016. ALL RIGHTS RESERVED
Remove The Cartridge Itself – Noting Direction Of Threads Some Cartridges Have Left Threads, Others Have Right
MAINTENANCE – REMOVE CARTRIDGE ITSELF
© NAFED 2016. ALL RIGHTS RESERVED
Verify seal is intact and that seal complies with manufacturer's manual.
Check threads for damage.
PUNCTURED
INTACT
MEETS MFG MANUAL
Check Condition Of Threads
MAINTENANCE – EXAMINE CARTRIDGE
© NAFED 2016. ALL RIGHTS RESERVED
Verify Weight Of Cartridge
Full Weight Is Stamped On Each Cartridge Allowance Is Made For 10% +/- Of The CO2 Weight
MAINTENANCE – CHECK WEIGHT OF CARTRIDGE AND CAP

18
© NAFED 2016. ALL RIGHTS RESERVED
Place Cap On Cartridge
Put Cartridge In Cover (So It Won’t Roll Away)
MAINTENANCE – PLACE CAP ON CARTRIDGE
© NAFED 2016. ALL RIGHTS RESERVED
SAFETY ALERT
ALWAYS PLACE THE SAFETY CAP ON A
CARTRIDGE WHEN IT IS REMOVED FROM THE
EXTINGUISHER
© NAFED 2016. ALL RIGHTS RESERVED
Check Underside Of Shell Looking For Dirt, Corrosion Or Damage
CHECK UNDERSIDE OF SHELL
19
© NAFED 2016. ALL RIGHTS RESERVED
Invert unit and remove receiver gasket. Clean and lubricate with manufacturer approved lubricant, and reinstall.
Check pin and operation.
MAINTENANCE – CHECK RECEIVER GASKET AND PIN
© NAFED 2016. ALL RIGHTS RESERVED
Note: Always replace damaged or worn parts with correct replacement parts as listed in the manufacturer’s
manual.
Never use tools that could damage fittings, gaskets, etc.
© NAFED 2016. ALL RIGHTS RESERVED
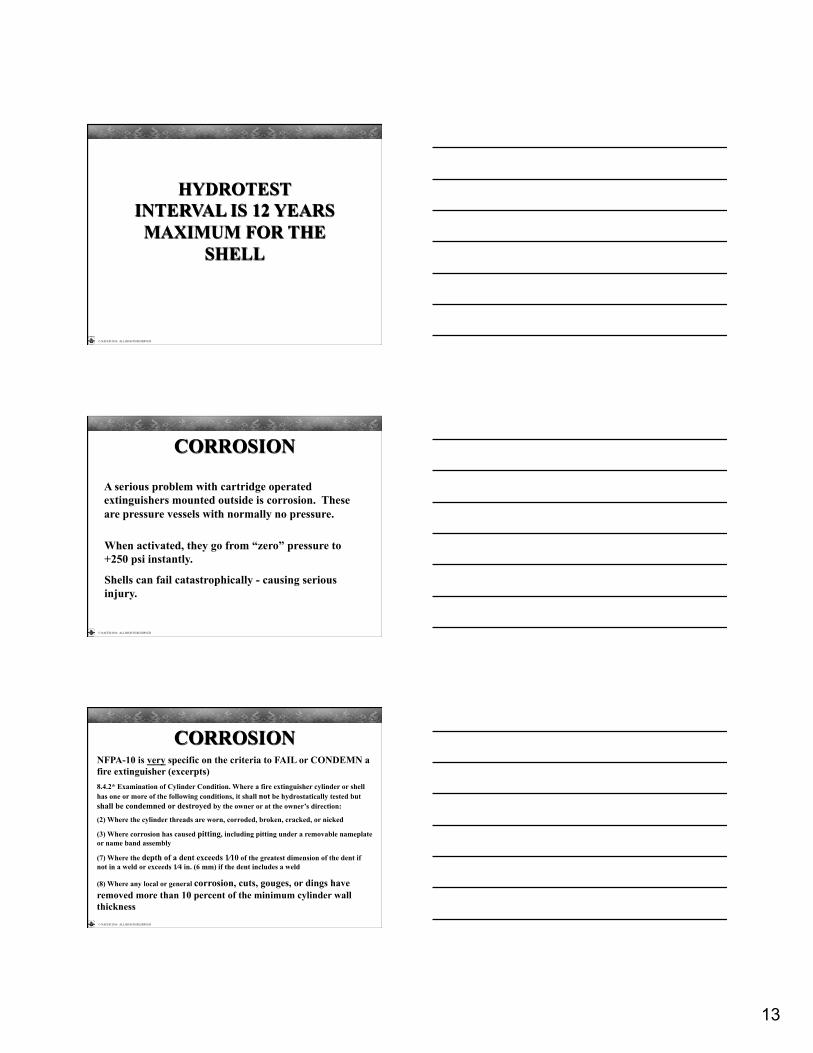
Check Condition Of Hose By Flexing Throughout Length
MAINTENANCE – CHECK HOSE CONDITION
20
© NAFED 2016. ALL RIGHTS RESERVED
ANY CRACKS IN THE HOSE MEANS
REPLACE HOSE
© NAFED 2016. ALL RIGHTS RESERVED
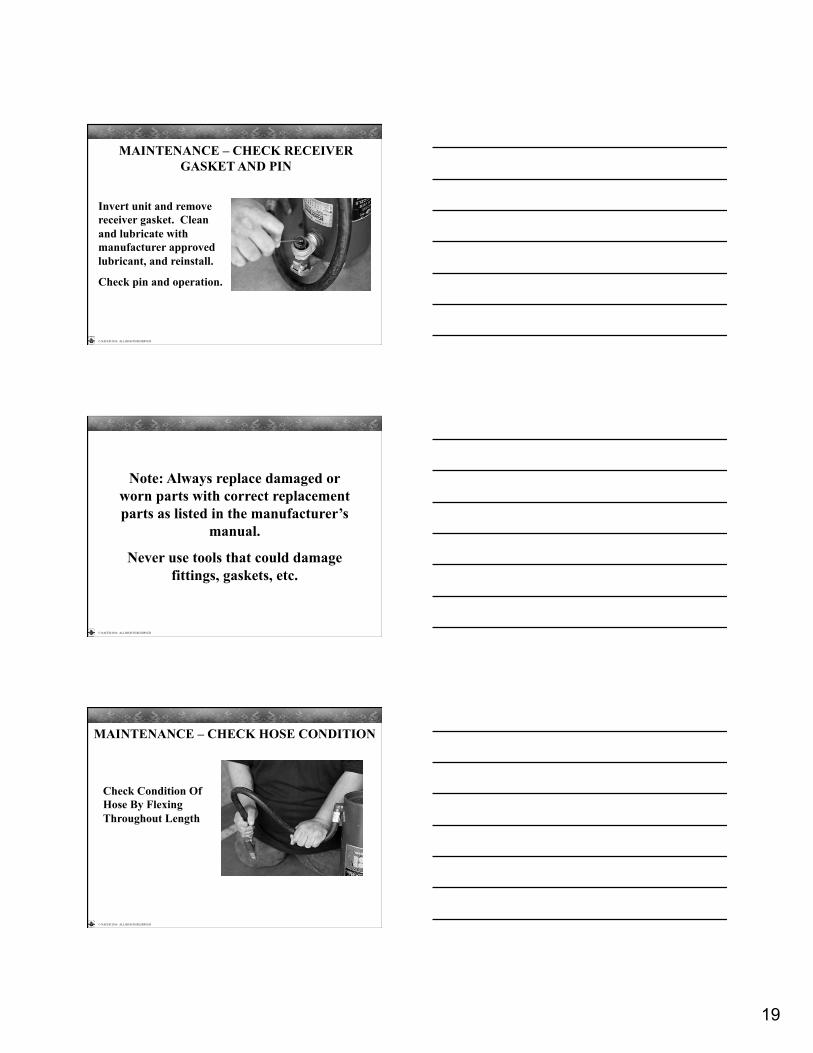
Remove Nozzle Tip
Check For Blockages
Operate Discharge Nozzle
MAINTENANCE – REMOVE NOZZLE TIP (IF EQUIPPED)
© NAFED 2016. ALL RIGHTS RESERVED
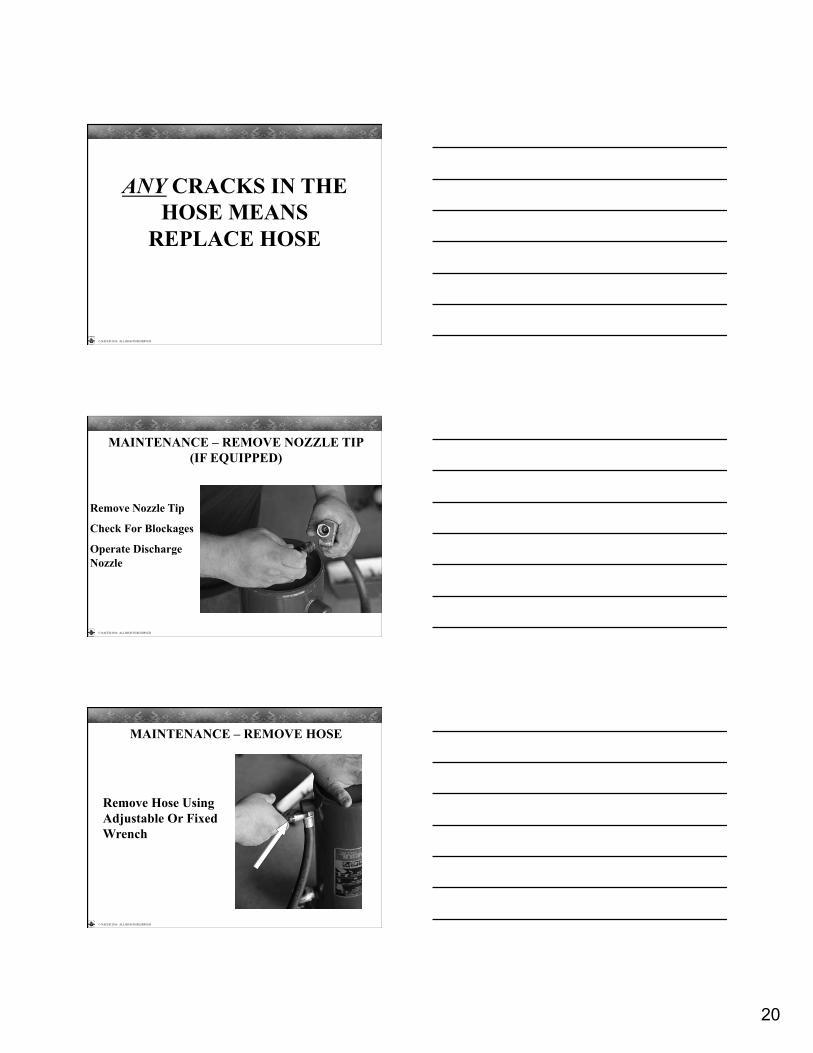
Remove Hose Using Adjustable Or Fixed Wrench
MAINTENANCE – REMOVE HOSE

21
© NAFED 2016. ALL RIGHTS RESERVED
IF THE HOSE IS BLOCKED, YOU
MUST CLEAR THE DRY CHEMICAL OR
REPLACE THE HOSE
© NAFED 2016. ALL RIGHTS RESERVED
Straightening hose and flexing with nozzle open will usually remove any excess dry chemical.
Tapping nozzle on solid surface will also work.
Do not put your mouth on the nozzle
and try to blow through the hose
© NAFED 2016. ALL RIGHTS RESERVED
Remove o-ring and check. Lubricate with the manufacturer’s recommended lubricant.
Reinstall hose with correct bursting disk.
MAINTENANCE – CHECK O-RING AND LUBRICATE

22
© NAFED 2016. ALL RIGHTS RESERVED
Reinstall Hose And Return Unit To A Vertical Position
MAINTENANCE – REPLACE HOSE
© NAFED 2016. ALL RIGHTS RESERVED
A Wrench May Be Needed To Loosen Cap
Never Use A Hammer!
MAINTENANCE – REMOVE FILL CAP
© NAFED 2016. ALL RIGHTS RESERVED
Check Collar Threads
MAINTENANCE – CHECK COLLAR THREADS

23
© NAFED 2016. ALL RIGHTS RESERVED
Check Type And Quality Of Agent
MAINTENANCE – CHECK QUALITY AND TYPE OF AGENT
© NAFED 2016. ALL RIGHTS RESERVED
PACKING VS CAKING
Packing is physical compression that does not change the chemical nature of the agent.
Caking forms hard lumps (rocks) that changes the chemical nature of the agent. When “lumps” are found that will not completely break easily with
your fingers, replace the agent.
If different types of dry chemical are mixed in the shell, replace all agent with correct type
© NAFED 2016. ALL RIGHTS RESERVED
If lumps are found, perform the “drop test”.
6 IN
CH
ES Hold the lump 6 inches above A hard
surface and drop.
If the lump shatters – then the chemical is safe to use.
If the lump does not shatter – remove and replace all of the chemical.
CHECKING “LUMPS”

24
© NAFED 2016. ALL RIGHTS RESERVED
Remove O-ring And Cap Gaskets
Clean And Lube With Manufacturer Recommended
Lubricant
MAINTENANCE – REMOVE O-RING AND CAP GASKET
© NAFED 2016. ALL RIGHTS RESERVED
Check Collar Threads For Damage
MAINTENANCE – CLEAN CAP THREADS AND LUBRICATE
© NAFED 2016. ALL RIGHTS RESERVED
Check Operation Of Indicator Stem – If Equipped
Be Sure To Leave In Correct Position
MAINTENANCE – CHECK COLLAR THREADS

25
© NAFED 2016. ALL RIGHTS RESERVED
Replace The O-ring And Gaskets
MAINTENANCE – REPLACE GASKETS
© NAFED 2016. ALL RIGHTS RESERVED
Clean Shell Collar Threads
MAINTENANCE – CLEAN SHELL COLLAR THREADS
© NAFED 2016. ALL RIGHTS RESERVED
Apply Lubricant To Threads
Install Cap Hand Tight
MAINTENANCE – REINSTALL CAP HAND TIGHT

26
© NAFED 2016. ALL RIGHTS RESERVED
Replace Hose Behind Receiver
MAINTENANCE – REPLACE HOSE BEHIND RECEIVER
© NAFED 2016. ALL RIGHTS RESERVED
Lube Threads And Reinstall Cartridge
Pay Attention To Rotation
MAINTENANCE – REINSTALL CARTRIDGE
© NAFED 2016. ALL RIGHTS RESERVED
Replace Cartridge Guard
Install Nozzle In Holster
MAINTENANCE – REINSTALL CARTRIDGE

27
© NAFED 2016. ALL RIGHTS RESERVED
NFPA-10 Now Requires A Listed Seal
NOTE: YELLOW SEAL SHOWN FOR CLARITY ONLY
MAINTENANCE – RESEAL UNIT
© NAFED 2016. ALL RIGHTS RESERVED
Some cartridge units also have additional safety pin. This should be sealed separately.
MAINTENANCE – REINSTALL PIN IF REQUIRED
© NAFED 2016. ALL RIGHTS RESERVED
Note: Some AHJ require that the seal be dated as well.
Other jurisdictions require the seal match the tag color.
Check with your company for your specific local requirements.

28
© NAFED 2016. ALL RIGHTS RESERVED
Proper and complete documentation is essential.
Various jurisdictions have specific service tag requirements in addition to NFPA-10 requirements.
Service reports can also vary.
Check with your company to determine your local requirements.
MAINTENANCE – TAG AND DOCUMENTATION
© NAFED 2016. ALL RIGHTS RESERVED
RECHARGE OF CARTRIDGE
OPERATED UNITS
© NAFED 2016. ALL RIGHTS RESERVED
Note that there are multiple filling methods that may be used in recharging these extinguishers.
They include:
• Vacu-fill or similar machines
• Direct fill with scoop or funnel
• Shop, vehicle or field recharge
In all cases, units are filled by weight. Refer to the manufacturer’s manuals for details.
FILLING PROCEDURES

29
© NAFED 2016. ALL RIGHTS RESERVED
The use of specialized filling machines and procedures is
covered in detail in the “recharge” presentation
© NAFED 2016. ALL RIGHTS RESERVED
Remember to verify the correct agent to be used by reading the
nameplate
Remaining agent, if checked and found suitable, may be reused
© NAFED 2016. ALL RIGHTS RESERVED
Always Check For Pressure
RECHARGE OF CARTRIDGE OPERATED UNITS

30
© NAFED 2016. ALL RIGHTS RESERVED
Check hydro date (12 yrs) or date of manufacturer and perform a full visual inspection
Remove cartridge and place shipping
cap on cartridge
RECHARGE OF CARTRIDGE OPERATED UNITS
© NAFED 2016. ALL RIGHTS RESERVED
Remove fill cap
Do not use hammer. If difficult to remove, check
again for pressure
Also check threads, etc. And agent condition
RECHARGE OF CARTRIDGE OPERATED UNITS
© NAFED 2016. ALL RIGHTS RESERVED
Ensure hose is cleared, remove, lubricate and install burst disk (if
equipped)
RECHARGE OF CARTRIDGE OPERATED UNITS

31
© NAFED 2016. ALL RIGHTS RESERVED
Cartridge operated units maybe filled with a scoop and funnel.
In all cases, they must be filled by weight according to the nameplate.
RECHARGE OF CARTRIDGE OPERATED UNITS
© NAFED 2016. ALL RIGHTS RESERVED
Check Discharge Indicator
Remember To Check And Lubricate Quad And O-rings
RECHARGE OF CARTRIDGE OPERATED UNITS
© NAFED 2016. ALL RIGHTS RESERVED
Clean Threads
Replace Fill Cap – Hand Tighten Only
Reinstall Hose Behind Guard
Install Nozzle In Holster
RECHARGE OF CARTRIDGE OPERATED UNITS

32
© NAFED 2016. ALL RIGHTS RESERVED
Check Cartridge, Receiver And Threads And Lubricate
Reinstall Cartridge Hand Tight
Install Guard
RECHARGE OF CARTRIDGE OPERATED UNITS
© NAFED 2016. ALL RIGHTS RESERVED
Re-seal With Listed Seal Conforming To All Local Regulations
Attach Completed Service Tag
Wipe Unit Clean
YELLOW SEAL SHOWN FOR CLARITY
RECHARGE OF CARTRIDGE OPERATED UNITS
© NAFED 2016. ALL RIGHTS RESERVED
COMPLETE DOCUMENTATION
This includes service tag, reports, and other paperwork.
Refer to your company for specific details required in your area.
RECHARGE OF CARTRIDGE OPERATED UNITS

33
© NAFED 2016. ALL RIGHTS RESERVED
SPECIAL THANKS TO
Koorsen ® Fire & Security Randy Koorsen
Billy Findley
Danny Brindley
For production assistance and location.
© NAFED 2016. ALL RIGHTS RESERVED
NAFED MEMBERS WHO CONTRIBUTED TO THIS PRESENTATION
Technical Review and Support by…
Jeff Martin, RFPT NAFED Staff
Produced and directed by…
George E. Seymour, CFPS, SET
SPECIAL THANKS TO